Before I start on this post, please allow me to say this: None of the ideas or techniques below originated with me. I picked them up over the years from this and other RC forums. While I don�t remember who first thought them up, I would credit those innovators in a heartbeat if I did.
Even though I selected what I thought was the strongest balsa for the horizontal stabilizer trailing edge, it turned out rather bendy, in my opinion. Combining that with the fact that I added 1.5 ounces of useless weight to the tail to achieve the proper CG, I decided to fabricate and install tail braces.
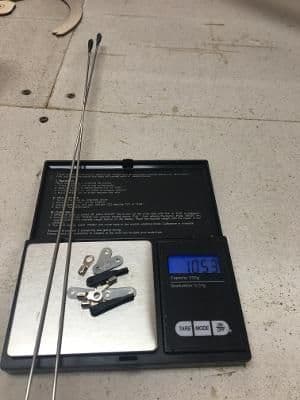
I gathered up some scrap 2-56 threaded pushrods. (You accumulate plenty if you assemble many ARFs for electric rather than gas or glow.) I placed them and other bracing components on a scale and found they weighed only an ounce, less than the easily removeable useless weight under the stab.
The plans showed me where to drill the holes for #2 hardware in the stab and fin. I made a SWAG at the hole placement in the fuselage.
For stab attachment, I used small, steel landing gear straps, bent to the appropriate angles. These I fastened with #2 nuts and bolts through the stab trailing edge.
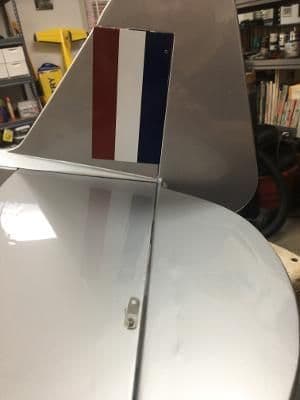 If you look closely, you might be able to see the hole drilled in the fin for brace attachment.
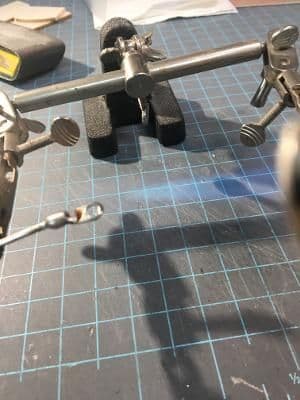
I screwed a clevis to one end of a pushrod and attached the combo to an LG strap. Then I trimmed the rod to fit between the stab and fin. After removing the rod, I silver soldered a small electrical ring terminal on the unthreaded end. After it cooled, I shrunk a black tube around the joint, another technique I picked up reading posts on this and other RC forums.
Once reinstalled onto the model, the brace can be adjusted at the clevis end. I try to snug it up just enough to prevent it from rattling. Any more, and you risk misaligning the tail group that you spent much time trying to get �just right.�
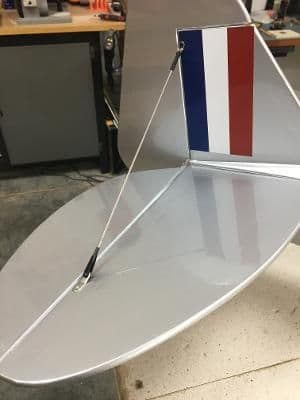 Here's the right upper brace, installed and tensioned.
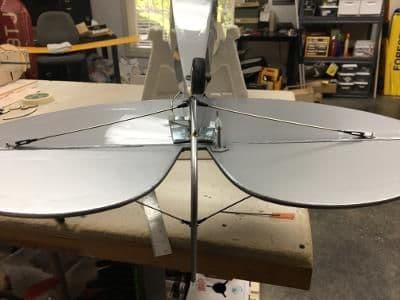 The lower braces in place.
The tail braces contribute much strength and stability to the tail feathers. And I'll be able to remove at least two of those useless 1/2 ounce weights.