Step 2: setting up those blades, you asked for it...maybe not...but still!
well this is the part most people have problems with. this deals with the swash, blades, and really the remaining servos, once set up right this should give you longer much more enjoyable, and easier to fly, flights. this is the first step towards aerobatics, yes that's right aerobatics. If you have those trims anywhere besides the middle, you have limited motion in a direction. this is unacceptable. Once you get to aerobatics this will help you immensly. Also this should help you with hovers, if done right your heli can fly hands off for around 5 seconds. mine is at around 3... still working on it, just havn't taken the time to completely adjust it. :8
ok let's begin.
all servo arms must be at 90 degrees. look here.
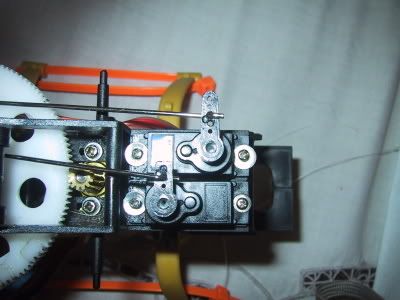
ok as you saw the swash servo arms are at 90 degrees. now, please adjust this ONCE THE CONTROLLER IS ON and neutral in all sliders. now most of the time the swash still isn't level it should look like this
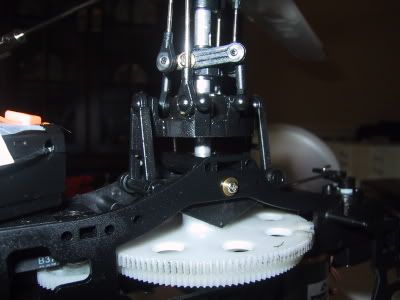
the problem is that the servo arms must be in their spot that was just shown. this creates a problem which is easy to fix. just pop off the ball link on the approprate spot. now take that ball link and untwist it if you need that side higher if lower do the opposite. now for that forward back servo it takes some creative enginering. it doesn't have anything adjustable that attatches to the swash.
look at the one with the large cradle. now to fix this try loosening the servo screws that hold it in place, you can make minor adjustments by scooting it forward and back. if it needs to be a good bit closer, try bending the metal rod a bit until that's fixed.
ok so the swash is level, but those blades aren't and are making it vibrate. to adjust look here
once again it's down to ball links. if you need the blade higher twist it up, and lower tighten. now before you do something stupid and locktite it, which you shouldn't have to do, lets have a look at that pitch servo.
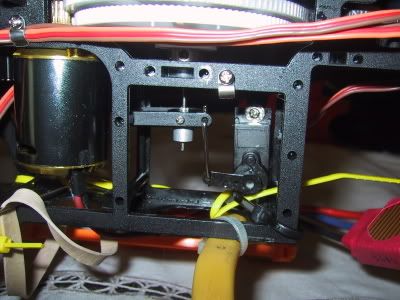
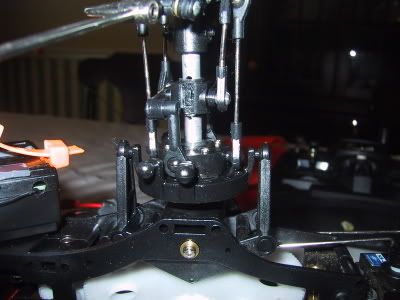
now that's what it should look like. that little plate should be level. I didn't get it in the pic but see that little cylinder coming from the bottom of that pitch plate? that has a allen screw on it as well. now look here at the plastic piece straddling the main shaft.
well once you've loosened that screw on the pitch plate, move that plastic piece until you see the same amount of space on the top and bottom of the hole in which it slides. now being very careful tighten that screw again. don't get frustrated if it's just a tad off the center. to change that hold the blades and clamp down on that little shaft. now holding it tight spin the blades and you should see that plastic straddler move slowly up or down depending upon the direction you're spinning the blades, to tighten and move it down autorotate the blades. to move it up a tad spin so the gear spins the motor.
ok now you've gotten that all fixed up, now the pitch of the blades should be the same. well I've got a pitch measurer, so at center for aerobatics the blades should be 0. well you're not ready for that so at bottom it should be at 0 degrees. at top it should be somewhere around 15 degrees. if you don't have ABS blades you'll want at bottom -2 degrees and at top 15
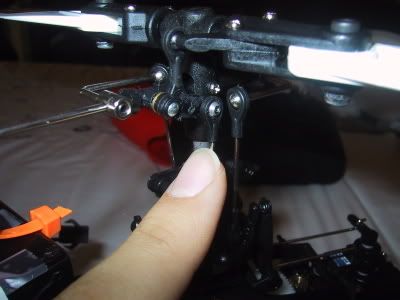
ok now's the reason why I didn't let you locktite those blades.
you're back here again because that's what you use to adjust the pitch of the blades without messing with the plastic straddler. this is easy now because all you have to do is count the num of rotations you do and just repeat on the other side.
ok now just to say it take, a sturdy ruler and stick it imbetween the skids in an open/non outdoors area and weigh it down. now put on that battery and step back after you put different colors on the blade leading edges. now get at blade level and look at the blades as you put the throttle at full. if a blade is higher than the other look at the color and stop the heli. adjust the blade's pitch and repeat until the colors mix and are undistinguishable as the blades follow the same track.
OK your heli should be completely set up for flying. the blades are fine and the tail doesn't wag. vibration should be gone. if not it's time to ballance those blades. remove them from the heli. now take an approprate pole and stick it though the blade holes. now this pole should be tight enough to hold the blades firm so they don't droop. now take that pole and ballance it imbetween two flat objects now take the lowest blade and take a file and remove some of the end. Repeat until the blades stay ballanced. Stick them back on the heli. All vibration should be gone, if not it's probably a slightly unballanced tail, get that done and it should take off with out any vibration. ok there you go. that heli should be still in the air! if not DON'T trim. Pick up the heli. now with the blades facing perpendicular to the tail. if the heli stays level all is well. now make them perpendicular to the tail. If the same happens your heli is ballanced.
AND to finish make sure the flybar is just as long on one side as the other as well as the paddles are the same. You just have to take those tiny set screws and unscrew them, and move the paddles inward until it's stopped. now straighten the blades so the flybar doesn't droop to either side.
WHEW! that's a long post! your heli should be completely able to fly with no vibration AT ALL if there still is some, you probably have a bent shaft, of some pinnion is screwed. It shouldn't be anything adjustable now only a defect in the heli.