hey, I'm going to do another section, I'll help you after this rcrolauk, ok?
FIXING shattered/broken frames *requires a trip to your local hardware store*
here's the part list:
1. JB kwik or JB weld, I prefer quick, it hardens MUCH faster (set time is 4 min, usable in 30min, and dried in four hours) Jb weld will work as well, it's a bit stronger and can take up to 600 degrees F instead of 300 degrees, not an issue (set time is about 10 minutes (with lightbulb within a foot of the joint) usable at four hours and hardened at 10, both types stick to magnets, especally fun with super N50 neodimum iron boron magnets

) it's just inconvenient to hold it until the glue turns to puddy.
2. a sutable
CLEAN piece of 2-3mm thick plastic, preferably black or near black colored, if it's painted it's not accepable, clear and white plastic is no good either, I used the battery cover from a zip zap controler...

(yes, I'm desperate to save some bucks, ok?
3. a file, dremel, sand paper, or bench grinder
4. hands
5. a set of jewlers/ small head phillips screw drivers, jewlers are best.
6. hack saw, or bench/ band saw, bench as in one that runs off an arm that vibrates up and down real fast, NOT a circular saw!
Let's get started shall we?
you crashed hard and broke part of your frame, GET THE BROKEN PEICE!!!
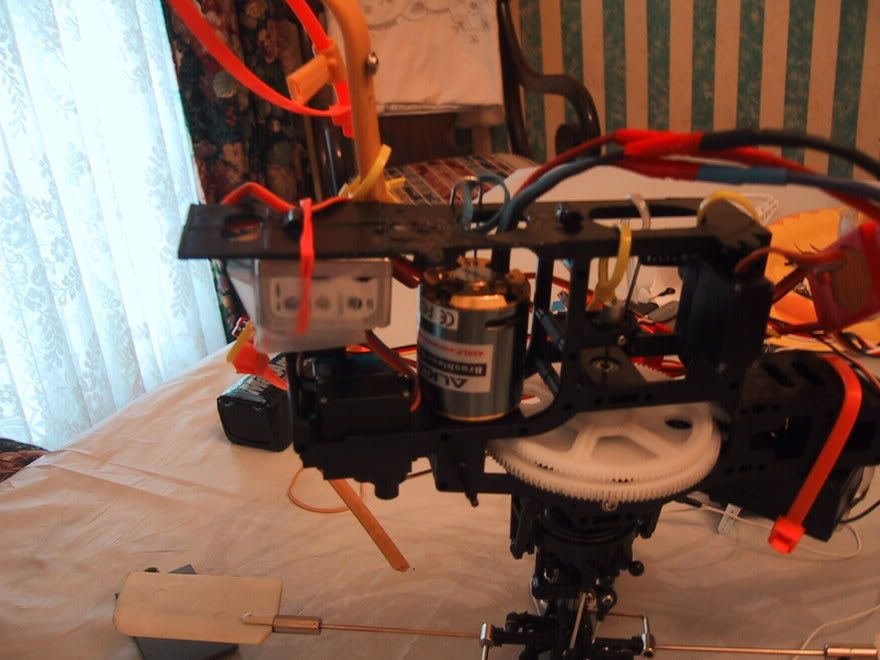
notice that some of the frame is missing, it SHOULD be covering that gyro up, and holding up the servo (check your's if you don't believe me or need visual referance)
"oh gee... now I've got to get a new fr..." stop there, no, you don't. you fix, you save, you keep money till need it.

here's what you do:
step one, if this is a component where SHEAR force will be applied, instead of tension some special steps need to be taken. using the JB kwik glue the peices back together (see the picture, if you look closely you can see the joint, it's infront of where the motor wires come out of the frame)
step two, let 10 minutes elapse, while that is happening, take your peice of plastic and cut it so that it will brace the joint, roughen the surface to be glued with sand paper.
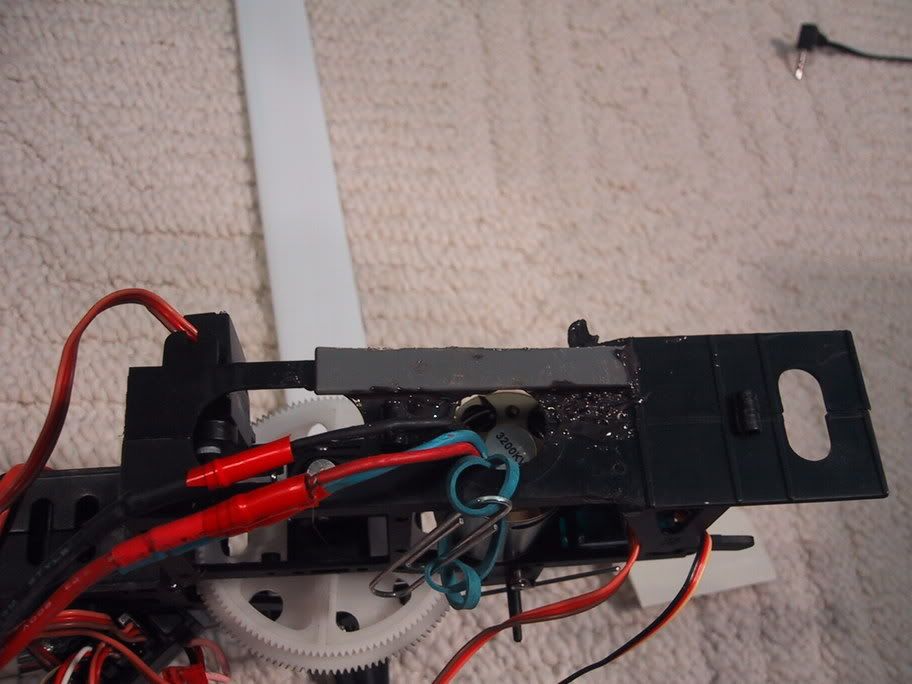
step three, take that peice and glue it down over the joint, use JB LIBERALLY and fill every gap, smush it down untill it won't go any further, wipe away excess glue, and make a nice edge around the peice like you would caulk. *note* this step can be done during the glueing of the original peices, it's MUCH harder, and the stregnth is in the glue and between the peices.
here's what it should look like, position of the peice is different depending on the break
Step one alpha, the peices glued back together are TENSION peices, this is easy, make sure no dirt is where the joint is to be, push glue into the proper place, and stick the peices back togheter, this is EASY, if the location is next to a servo, remove servo first.
here's what that looks like *note* if you couldn't find the missing peice before, you can clearly see it here, note that you CAN use the plastic to fill the gap if you lost the peice.
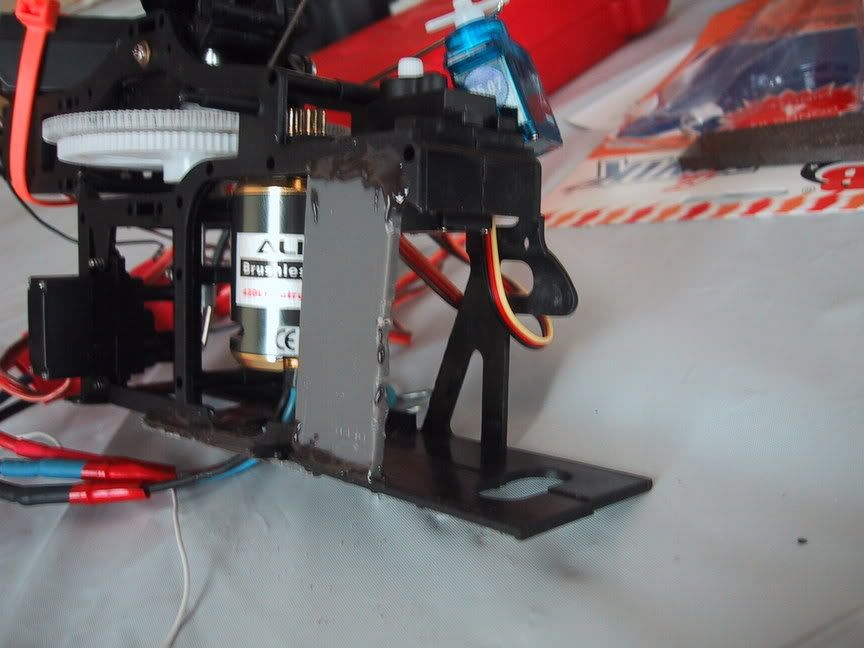
there you go! you've fixed the frame, remember, those skids don't glue well, the plasic is a good example of what type of plastic is NOT acceptable. JB weld is wonderful because it glues to itself just as good as anything else! so, if the joint breaks, sand off some of the glue to make space for fresh glue, and just re-glue.
congrats! you just fixed your frame, please ask questions if you need help, and, if you're stressed by your crash, take a look at the below crash, it's great for lightening up your mood.