D.U.D. Dig Write Up
Well there was a few guys wanting a write up on this. So here you go.
I got this idea from Unholy and Dezfan. D.U.D. =
Dezfan
Unholy
Dig.
What I used for this set up. There is better and more expense stuff to use. But this is what I had laying around and used.
Radio Gear: TQ3
Front Servo: Tower Pro 955mg
Rear Servo: Traxxas 2055
Motors: Axiom 65T
Switch: Refrigerator light switch
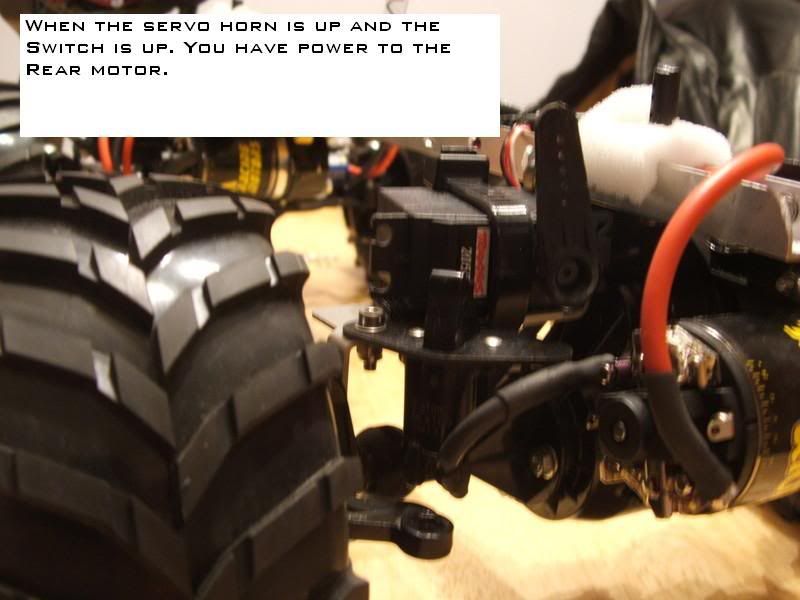
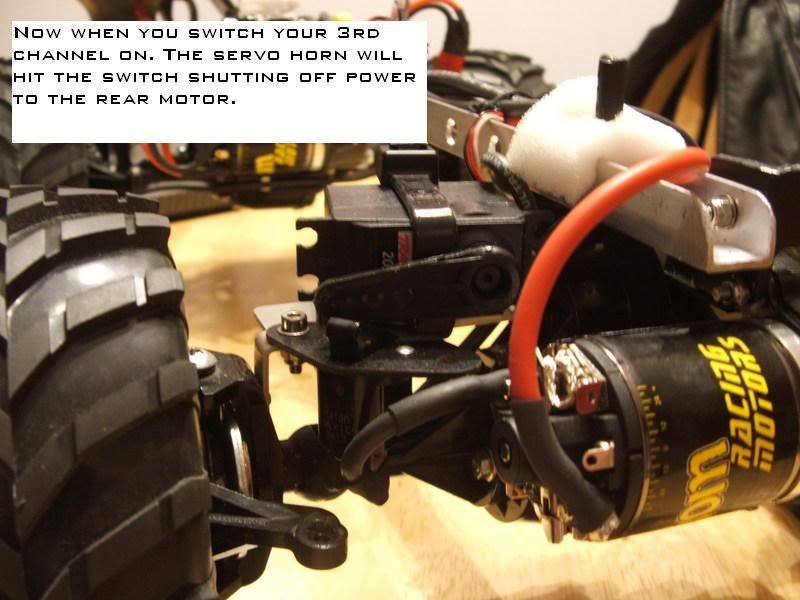
You must use a switch that sends power while in the up position. Then when it’s hit by the 2nd servo it shuts the power off.
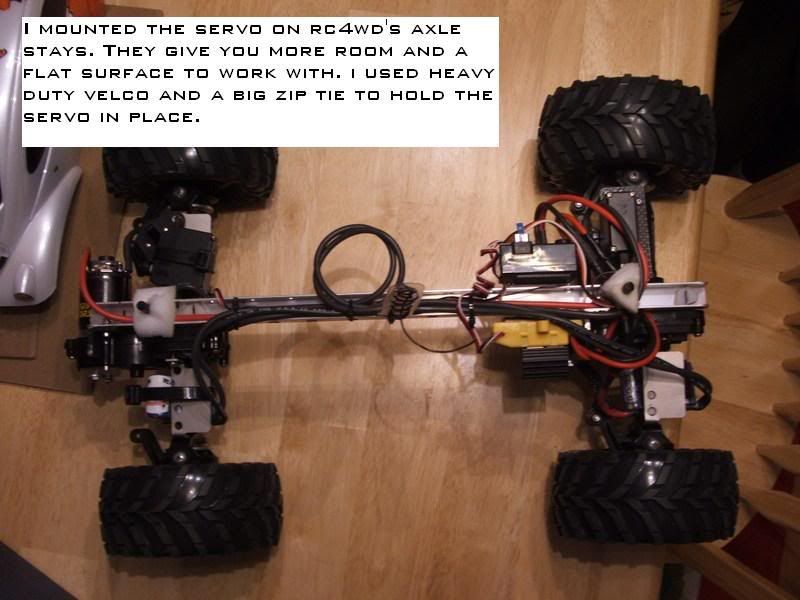
Step One: Mount your 2nd Servo and Switch on the rear axle. Don’t worry about the horn hitting the switch yet. You can adjust that when it’s all done. Just make sure they are close enough so they will make contact. I used one 3mm 1/2in bolt and a lock nut with a nylon insert to mount the switch. The Servo is mounted with Heavy Duty Velcro. The Velcro is from Radio Shack. It has a 20lb pull on it. So it can handle any servo your choose with ease. I then used a bug Zip tie just to make sure it wasn’t going anywhere.
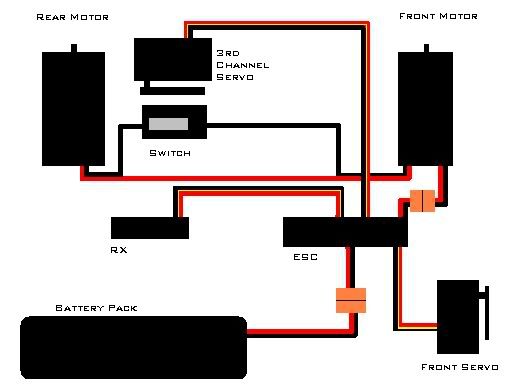
Step Two: Wire up your front motor to the Neg and Pos from your ESC. Your motor should have 4 post on it. So you will have one Neg and one Pos left. Now solder a Pos wire to the Pos post that left and wire that to the rear motors Pos post.
Step Three: Solder a Neg wire to the last Neg post on the front motor and run it to the switch. The switch as 2 post in it. Just choose one and solder the other end of the Neg wire to it. Now solder a short piece to the other post on the switch and to one of rear motors neg’s post.
Step Four: Now hit your 3rd channel button on your radio to test it. Adjust your horn so that it matches up with the button on the switch. I dipped the servo horn in plastic dip to give some grip so it wouldn’t slip off.
Here is a Diagram of how it should be wired up and few close ups of the rear servo and switch mounted up on my rig.
Click on link to watch how the dig works.
http://s124.photobucket.com/albums/p...t=DSCF1950.flv