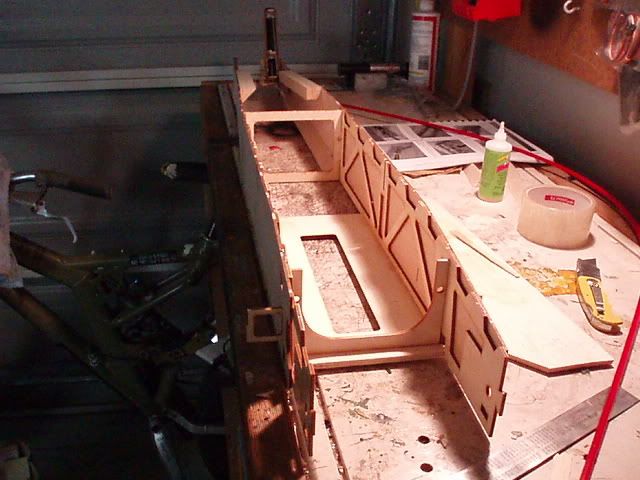
putting the tail fin frame aside for now we move straight into teh fuselage assembly procedure .this is done by pulling out teh the 3 frame side peices for a left and a right side ,again this is easy to do but make sure you have the a side and the b side which is clearly marked ,test fit all parts on a flat building board or work bench now if happy which i was as they fit perfectly CA them along their joints and sit flat ,i actually placed a large book on top of each just to hold it while the glue went off and set ,now find teh ply fuse supports on one of teh 3 ply laser cut sheetss ,did i meantion how much i like laser cut kits lol, place tehm on top of teh fuse sides to check for fit ,there is no specific left or right here so just make sure hte fit is neat ,then mix up some epoxy and spread over the ply doublers and place down on teh balsa fuse sides making sure thta the joints of teh front and rear doubler is neat ,again i placed them on a flat surface and layed a large book on top to keep it straight .
With the sides dry locate the triangle stock thatis required for teh rear of teh fuse and simply follow the directions in the manual ,this is use so that the desired rear fuse shape can be achieved ,as teh apache has a rounded rear fuse but a square front ,all pretty straight forward ,and simple .now we get to the start of the exciting part where we locate teh ply formers and mate the two sides together ,i have a jig made up for this from my sclae fighter days that i can set to the desired width to keep teh fuse square ,again test fit everything and double check teh manual to make sure you have each former in teh correct place ,when you are happy witht eh fit ,CA each former in place ,once set , turn over the fuse and locate the ply fuse bottom , special note here is to make sure you have the bottoom facing the correct way , and james has made this simple by putting an arrow and the words front on teh ply so just locate this and you will be all good ,epoxy htis in place when you are happy with the fit and placement ,turn her back over and you have the start of the main fuse complete ,one of the things i like about this kit is the order in which you construct it , its llike a great book that starts of good but builds with excitement as you get deeper into it so that you dont want to put it down .