ok at this point in teh fabs i was waiting on the rest of the nose parts to trun up so i took a side step and moved on to the canopy ,luckily for me though teh parts arrived from the states in only 4 days , wish out postal service was that good lol.
ok now i have to stress how important it is to be careful while building teh canopy as the parts are fragile until you have it together, so dont do as i did and make it after midnight ,in a cluttered busy work shop ,lol i have 3 lage scale projects on the go at the same time , hey isnt this the normal lol.
SO locate the canopy formers cf1 ,cf2 , cf3 ,then teh canopy sides CGT *2 ,,i decided to cut these out with a sharp blade just to be safe even though teh laser cutting is superb,im th cautious type .now locate the smaller triangle stock and follow the manual and glue teh correct length stock to teh canopy sides on teh line maked .
ok now , on a smooth clean surface (yeah right lol),using CA glue only the first inch of teh sides to the 3 formers to create a box structure ,let teh CA go off and then glue teh tops or teh curved parts of teh canopy sides to the formers , take your time here to produce a straight canopy .
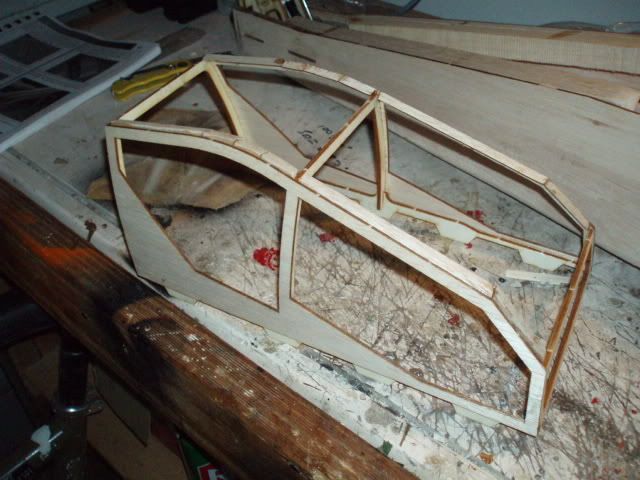
ok next step is to sand the overlapping stock fromthe canopy sdes and top ,then bigin sheeting the canopy ,first of to keep teh canopy true and straight , place it into teh fuse to hod it ,and starting from teh back work forward ,when glueing teh forward sheeting on have it slightly over lap the lats peice so that when you sand it you get a good smooth corner that is not too thin .
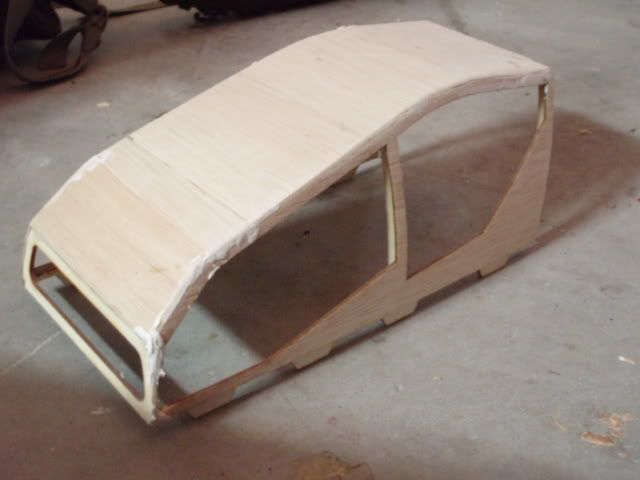

next , using a sanding block , sand the canopy to remove any over hang ,and as meantioned in teh manual apply a small amount of glue to teh inside sheeting along the canopy to help add strength .
things start to look really exciting here as the apache starts to look like it should ,but before we get too excited lets just finsh off the canopy ,by locating teh transmission nose block pieces , glue the 3 together the with teh pics shown in the manual sand to the desired shape ,as the shot below shows
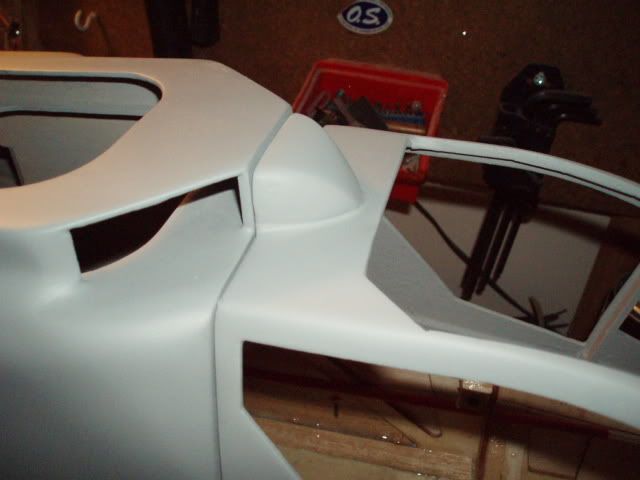
alll thats left now is to locate and copy the templates for teh top canopy cutouts .
what i do in this situation is to photo copy the templates glue with pva and while still wet , use my dremel with a cutting disk and cut out along the lines ,simple no fuss and you cant go wrong
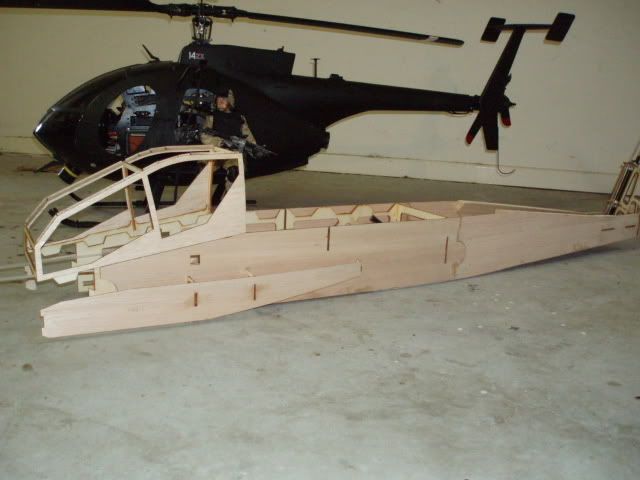
and here she is with teh canopy in place ,and in the back ground is my thundertiger md530 that i converted to a littlebird for size reference