well while waiting for teh rest of the nose to arrive i decided to move onto the transmission bay .
so first , locate teh T-1 sides and the tgt plywood teeth , these are how the fuse is integrated together ,which i discussed earlier , again give each part a light sand and following the instrauctions ,CA the ply teeth to teh sides of teh transmission bay aligning the teeth with teh front and bottom of teh side parts .
next find the ply formers and again glue with CA making sure to keep it all square ,now locate teh top section and glue in place with CA again .from here we cut out the larger trriangle stock to place i teh front either side , this is so we can sand the curve to meet teh canopy ,so first i sand the inside of the triangle stock to match teh front former shape then i sand the curve in teh front of teh transmission bay , there is a line scribed into the former to show you how much to sand , this is where a dremel or bench sander comes into its own other wise get soem 80 grit paper and a sanding block and start shaping .get it close to teh shape marked on the former then you can do teh final shape when its mounted with the canopy .
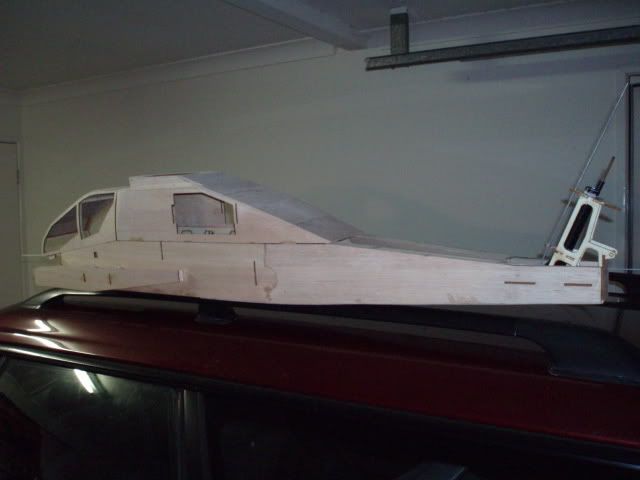
So with that complete we move on to the top deck of the transmision bay ,locate the sides ,DHS and teh top sheet DHT which is actually called the dog house ,CA the sides to teh top sheet then CA to teh ply former that comes out the top at teh front of the transmission bay then CA the sides down to teh transmission bay ,now we sand the back edge of teh complete assembly to the angle of teh rear transmission bay ,now comes the exciting part , place the transmission bay onto the fuse to hold while you sheet it , CA a piece of cut off sheeting to teh rear of the transmission bay to hold it into teh shape of teh fuse for sheeting ,then startingfrom the rear cross sheet forward sand any over hanging sheet to teh sides shape ,now locate some more large triangle stock and glue to teh inside of the rear decking for shaping purposes , ,give a complete sand then mount it back onto teh fuse to see your apache start to come alive , man this is where you can really get excited as this is when your apache comes to life
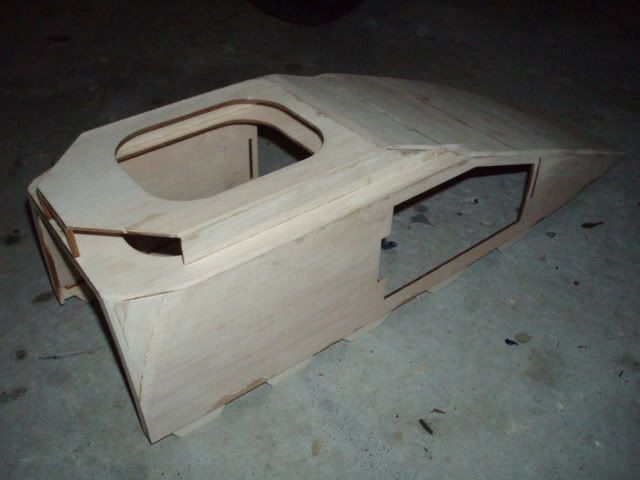
below is the completed transmission bay
now she is starting to come alive and you get to see just how big she is going to be