


Best engine for Howard DGA 12 ?
 10-15-2013 | 04:07 AM
#26
Thread Starter
Member
My Feedback: (11)
Joined: Jun 2013
Posts: 78
Likes: 0
Received 0 Likes
on
0 Posts
From: Columbus, Ga
Bill,
your information is exactly what I needed. I knew the 14mm +/- of clearance was fine with respect to "function". I did not want it to look funny or "pushed out" to far away from the cowl. Scaleman was pleased with the dle 30 which is 162 mm front to back; therefore I went with the dle 35 for power and its actually 2mm shorter @ 160 mm front to back.
As a side note I observed most people placing the prop washer about 1/8th of an inch away from the cowl and it does look nice BUT ive also observed these same planes with some cowl contact.
Let the build begin !
 10-15-2013 | 04:17 AM
#27
Thread Starter
Member
My Feedback: (11)
Joined: Jun 2013
Posts: 78
Likes: 0
Received 0 Likes
on
0 Posts
From: Columbus, Ga
Bill,
your information is exactly what I needed. I knew the 14mm +/- of clearance was fine with respect to "function". I did not want it to look funny or "pushed out" to far away from the cowl. Scaleman was pleased with the dle 30 which is 162 mm front to back; therefore I went with the dle 35 for power and its actually 2mm shorter @ 160 mm front to back.
As a side note I observed most people placing the prop washer about 1/8th of an inch away from the cowl and it does look nice BUT ive also observed these same planes with some cowl contact.
Let the build begin !
your information is exactly what I needed. I knew the 14mm +/- of clearance was fine with respect to "function". I did not want it to look funny or "pushed out" to far away from the cowl. Scaleman was pleased with the dle 30 which is 162 mm front to back; therefore I went with the dle 35 for power and its actually 2mm shorter @ 160 mm front to back.
As a side note I observed most people placing the prop washer about 1/8th of an inch away from the cowl and it does look nice BUT ive also observed these same planes with some cowl contact.
Let the build begin !
10-16-2013 | 04:47 PM
#30

Well the FedEx truck arrived today with a huge box, Man-O-Man what a sweet looking
airplane this one is, all I can say is, if you always wanted one of these you better jump on
it quick before the sale is over with.
airplane this one is, all I can say is, if you always wanted one of these you better jump on
it quick before the sale is over with.
10-17-2013 | 05:04 AM
#31
Thread Starter
Member
My Feedback: (11)
Joined: Jun 2013
Posts: 78
Likes: 0
Received 0 Likes
on
0 Posts
From: Columbus, Ga
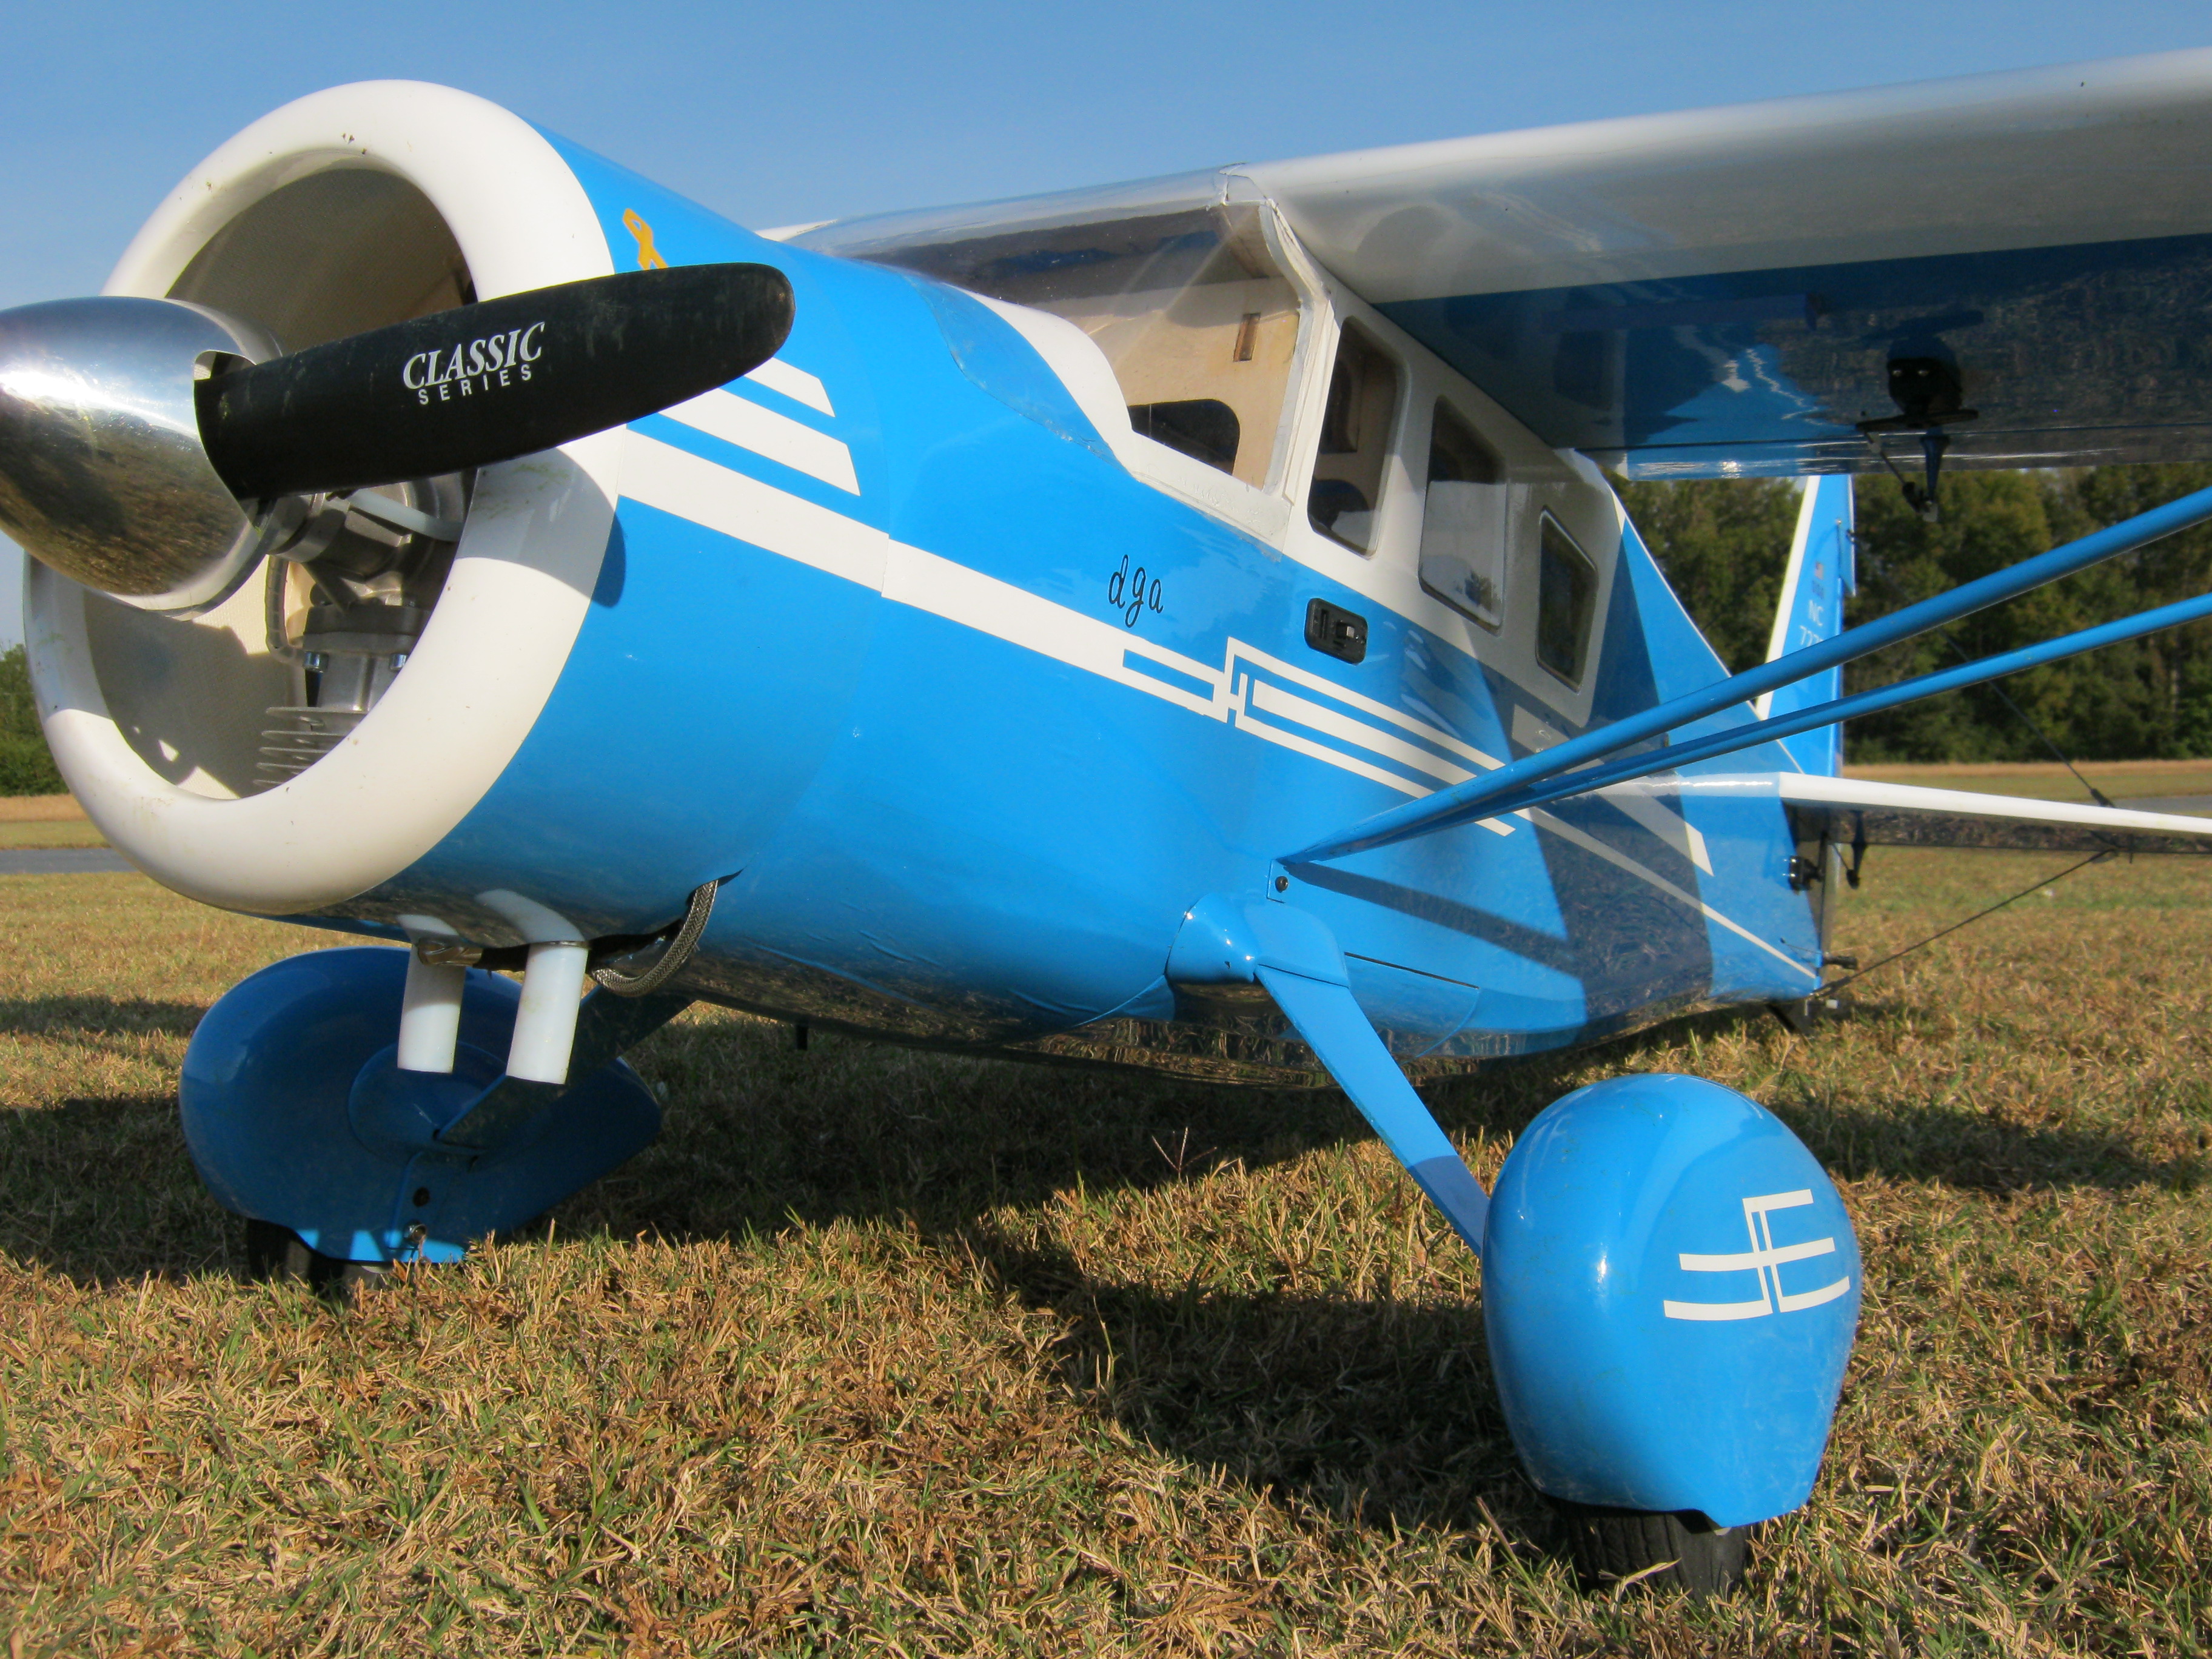
2nd night of building. The wings are finished. the ailerons/flaps are ready and in the neutral position. Everything is going well so far. The stab and rudder attachment was standard. The hardware inclusive with the plane is pretty good. I replaced the standard clevis with Dubro quik links nylon. They are very strong and snug up extremely tight. The metal clevis seem to have a little play after a while and actually stripped a wing support threads on a different plane. The factory tailwheel is adequate; however it was very small. I had a nice wheel that was about twice the size and it will function much better for occasional grass landings. Also the larger tailwheel looks scale.
CAUTION: The PDF warns of an airfoil on the elevator. The flat is down and the airfoil on top. This was extremely difficult to identify. I almost discounted the remark as an error or old instructions from a previous Howard DGA 12. Eventually I was able to see a flight foil and the assembly continued.
This is only my 5 ARF build. The instructions on the PDF download are pretty good. I keep my tablet on the build table for quick ref. and the PDF pics are of great value.
10-18-2013 | 05:02 AM
#32
Thread Starter
Member
My Feedback: (11)
Joined: Jun 2013
Posts: 78
Likes: 0
Received 0 Likes
on
0 Posts
From: Columbus, Ga
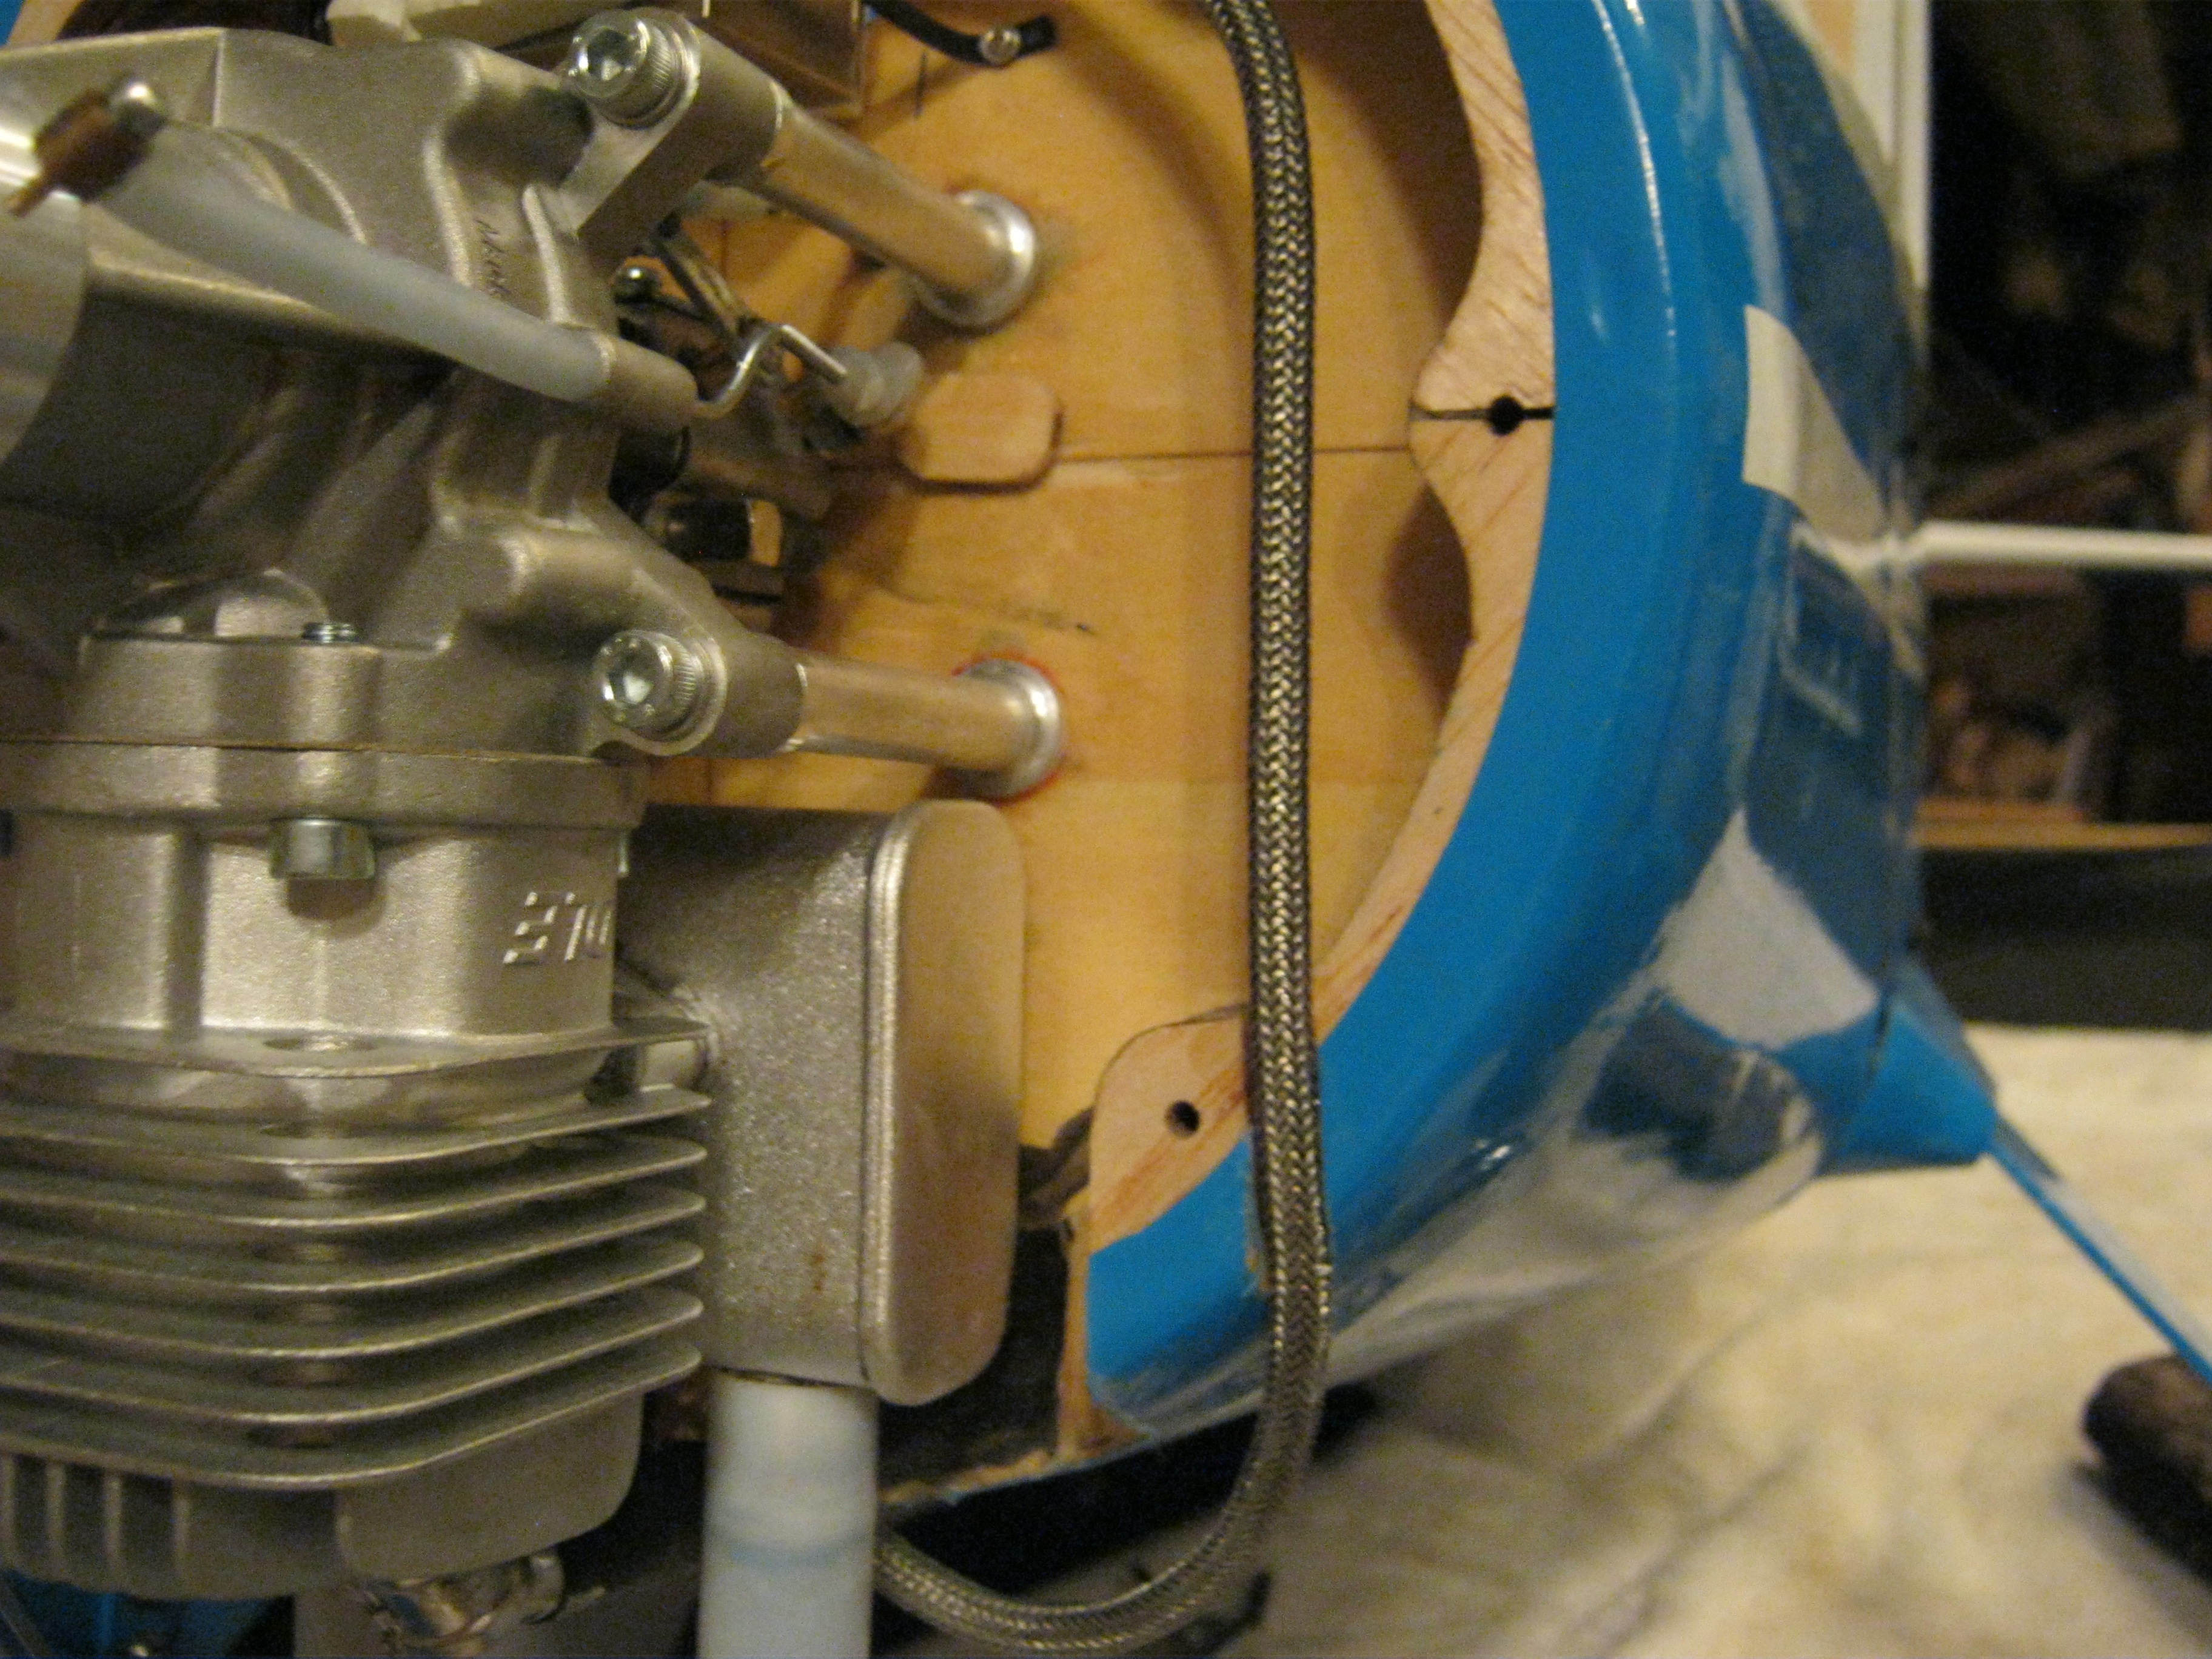
3rd night went well. I mounted the engine without any issues. Kangke has taken the guesswork out of mounting by etching the front firewall with center. The DLE 35 rear carb did not present any issues. the firewall flange had to be trimmed to accomodate the muffler; howerver, the cut was straight......front to rear on both sides about 3/4 inch deep into the fuse cowl flange. The tail wires work fine; however, the wires should be split with a turnbuckle in the center to draw tightness. The Howard comes with 2/56 tail wires and look great black. The only problem is tightening. You have to pull a little bit to have the clevis reach the attachment bracket. This could be resolved with a turnbucke which pulls from both ends. The wing strut hardware and attachment process worked great. The hardware is adequate but you have to pay close attention to the orientation of the hardware so it does not contact your covering.


10-22-2013 | 04:58 AM
#36
Thread Starter
Member
My Feedback: (11)
Joined: Jun 2013
Posts: 78
Likes: 0
Received 0 Likes
on
0 Posts
From: Columbus, Ga
5th day of building off and on....
Its deer season in Georgia so the build has slowed a bit. Last night (Monday) I began the completion of the landing gear. I had to wait on my wheels to come via UPS. The larger tires required wheel pant trims but did not change the beauty of the plane. The sullivan lite tires worked best. The Dubro Big Wheels were a bit wide so they was placed aside for my next adventure.
Over the weekend I fabricated the choke on a servo; however, the rigid pull of the choke was a significant factor to go with a manual choke. The DLE 35 has a "port" on the engine which lines up with the anticipated travel of a manual choke rod. It works great as a guide for a short manual choke. The problem with the manual choke rod was possible vibration. My solution was to "scrunch" some fuel tube down the forward end of the rod and top it off with a quick connect. The quick connect keep the fuel tube scrunched and vibration should be greatly minimized. Also the quick connect works well to reach in and grip.
 .
.
Last night I also mounted the ignition to the firewall. I wanted the ignition very secure so heavy zips were used. There was no place on the firewall to run the zips so I used an old deer stand trick. I split a zip and drill a hole for a servo screw at each end. Attach each non functional end and bring them together as a regular zip tie. This trick works very well with confined spaces and the need for tightness when attachment points do not exist. The trick is very strong.The fuel tank instalation went ok. I used new EVOLUTION gas tubing. Its fairly new to the market and Im giving it a whirl. I placed a fuel port on the fuse in a functional area. My gas filter count at this point is I think 5. I have a felt clunk/filter on the carb line and 2 filters on the fill. My switches for the Rec and Ignition are on both sides of the fuse. Some hide there switches inside which is fine. Im a man of function so the fuse mounted switches are for me. Also each switch has a charging port so I can charge as needed without taking off the roof top.


Its deer season in Georgia so the build has slowed a bit. Last night (Monday) I began the completion of the landing gear. I had to wait on my wheels to come via UPS. The larger tires required wheel pant trims but did not change the beauty of the plane. The sullivan lite tires worked best. The Dubro Big Wheels were a bit wide so they was placed aside for my next adventure.
Over the weekend I fabricated the choke on a servo; however, the rigid pull of the choke was a significant factor to go with a manual choke. The DLE 35 has a "port" on the engine which lines up with the anticipated travel of a manual choke rod. It works great as a guide for a short manual choke. The problem with the manual choke rod was possible vibration. My solution was to "scrunch" some fuel tube down the forward end of the rod and top it off with a quick connect. The quick connect keep the fuel tube scrunched and vibration should be greatly minimized. Also the quick connect works well to reach in and grip.
Last night I also mounted the ignition to the firewall. I wanted the ignition very secure so heavy zips were used. There was no place on the firewall to run the zips so I used an old deer stand trick. I split a zip and drill a hole for a servo screw at each end. Attach each non functional end and bring them together as a regular zip tie. This trick works very well with confined spaces and the need for tightness when attachment points do not exist. The trick is very strong.The fuel tank instalation went ok. I used new EVOLUTION gas tubing. Its fairly new to the market and Im giving it a whirl. I placed a fuel port on the fuse in a functional area. My gas filter count at this point is I think 5. I have a felt clunk/filter on the carb line and 2 filters on the fill. My switches for the Rec and Ignition are on both sides of the fuse. Some hide there switches inside which is fine. Im a man of function so the fuse mounted switches are for me. Also each switch has a charging port so I can charge as needed without taking off the roof top.
10-23-2013 | 04:37 AM
#37
Thread Starter
Member
My Feedback: (11)
Joined: Jun 2013
Posts: 78
Likes: 0
Received 0 Likes
on
0 Posts
From: Columbus, Ga
Im at about day 7 off and on. The plane is finished minus a few odds and ends. Yesterday everything was set to begin placement of the batteries and electronics. The landing gear was finished with 5'' tires. The wheel pants are nice and mount very easy; however the decorative flange pieces at the top of the gear and at the wheel pant are tricky. I used goop to adhere the top decorative flange due to the possibility of having to enter the bottom removeable belly tray.
I cg'ed the plane at this point before placing any moveable parts in the plane. The cg according to kangke is 4.05 back from leading edge. Before placing the wings on the plane I marked my cg point with masking tape. This is much easier to do one wing at a time on the table rather than turning the plane upside down. The plane was "level" so i pushed two batteries forward. As far as the electronics Im working with a 6 channel radio and a 7 channel receiver. The plane has 5 working ports on the receiver and the battery takes #6 so I only had one empty receiver port. I chose to use this empty port for a remote kill switch. Rxel makes a kill switch that is easy to use and has an inclusive LED light to mount which gives you instant feedback on the status. Hopefully I will start the engine tonight or tomorrow and see if any issues arise.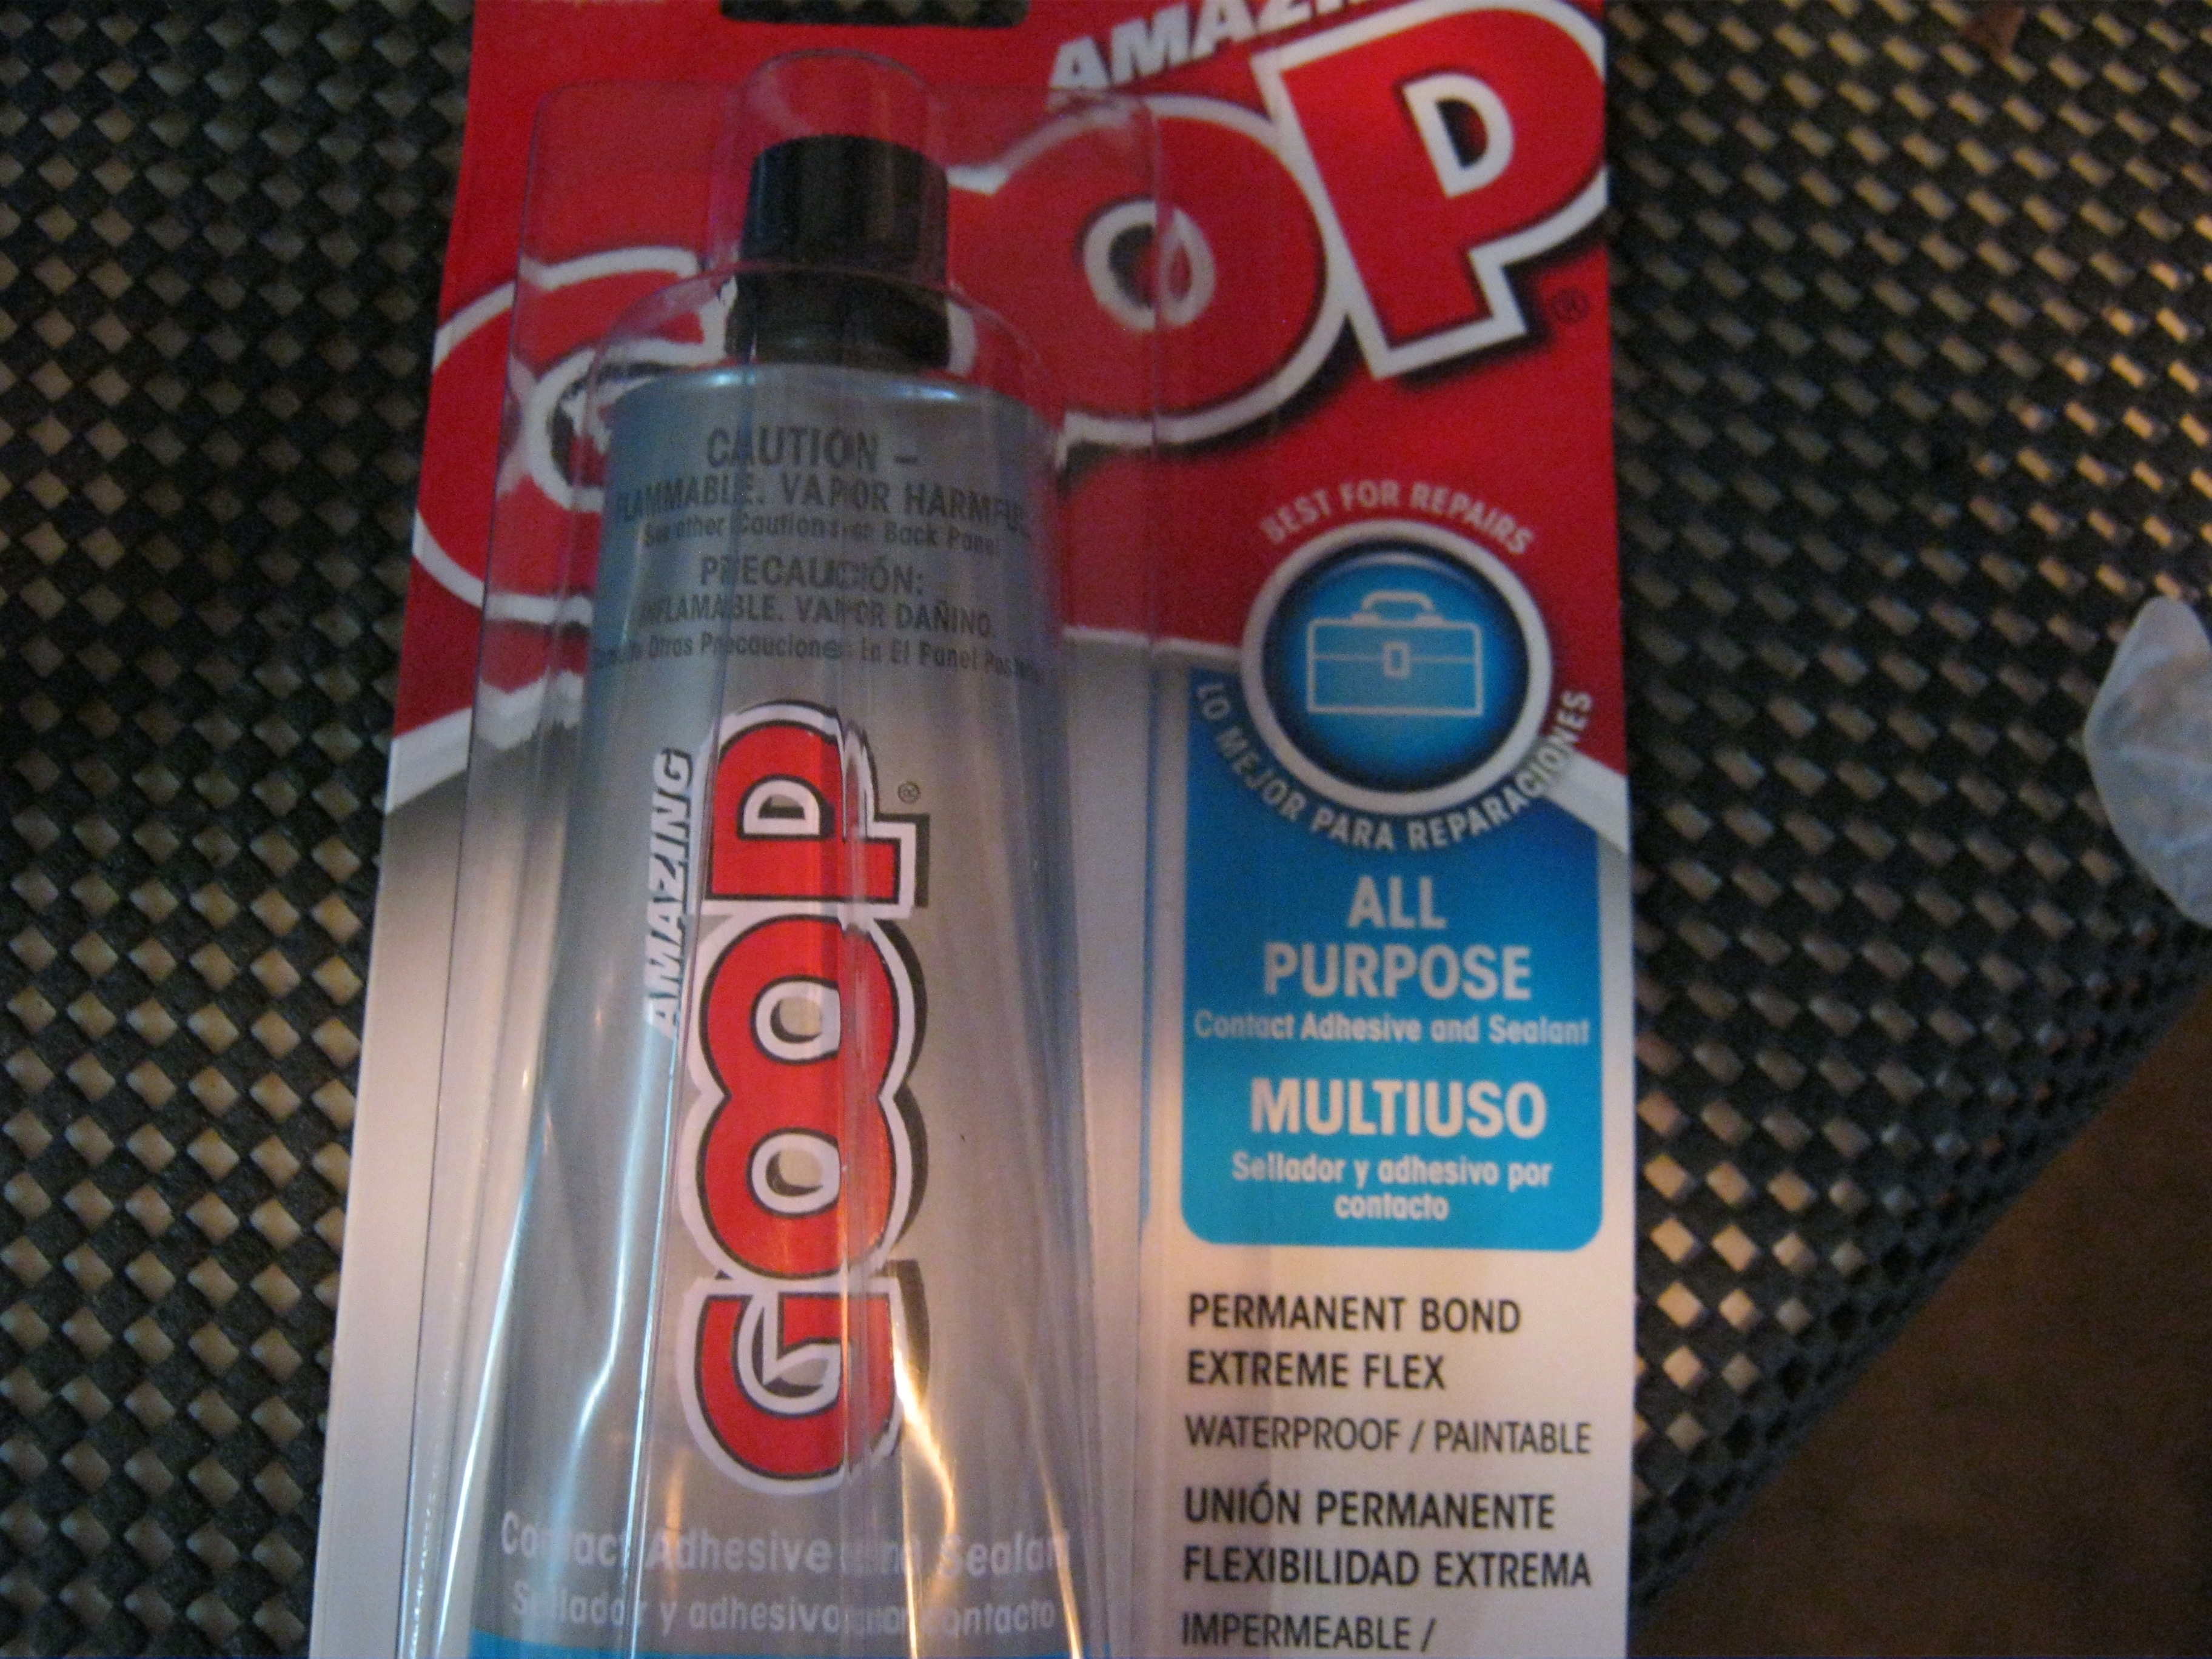
The cg last night was not for flight. It was only to determine an awareness of my battery placement. Prior to cg I placed/taped each part in its position. The prop, nuts, and spinner were hanging off and a lil tape can help hold items temporarily. Remember each part has "weight" so a build cg should include all possible parts to give you a good understanding of build cg.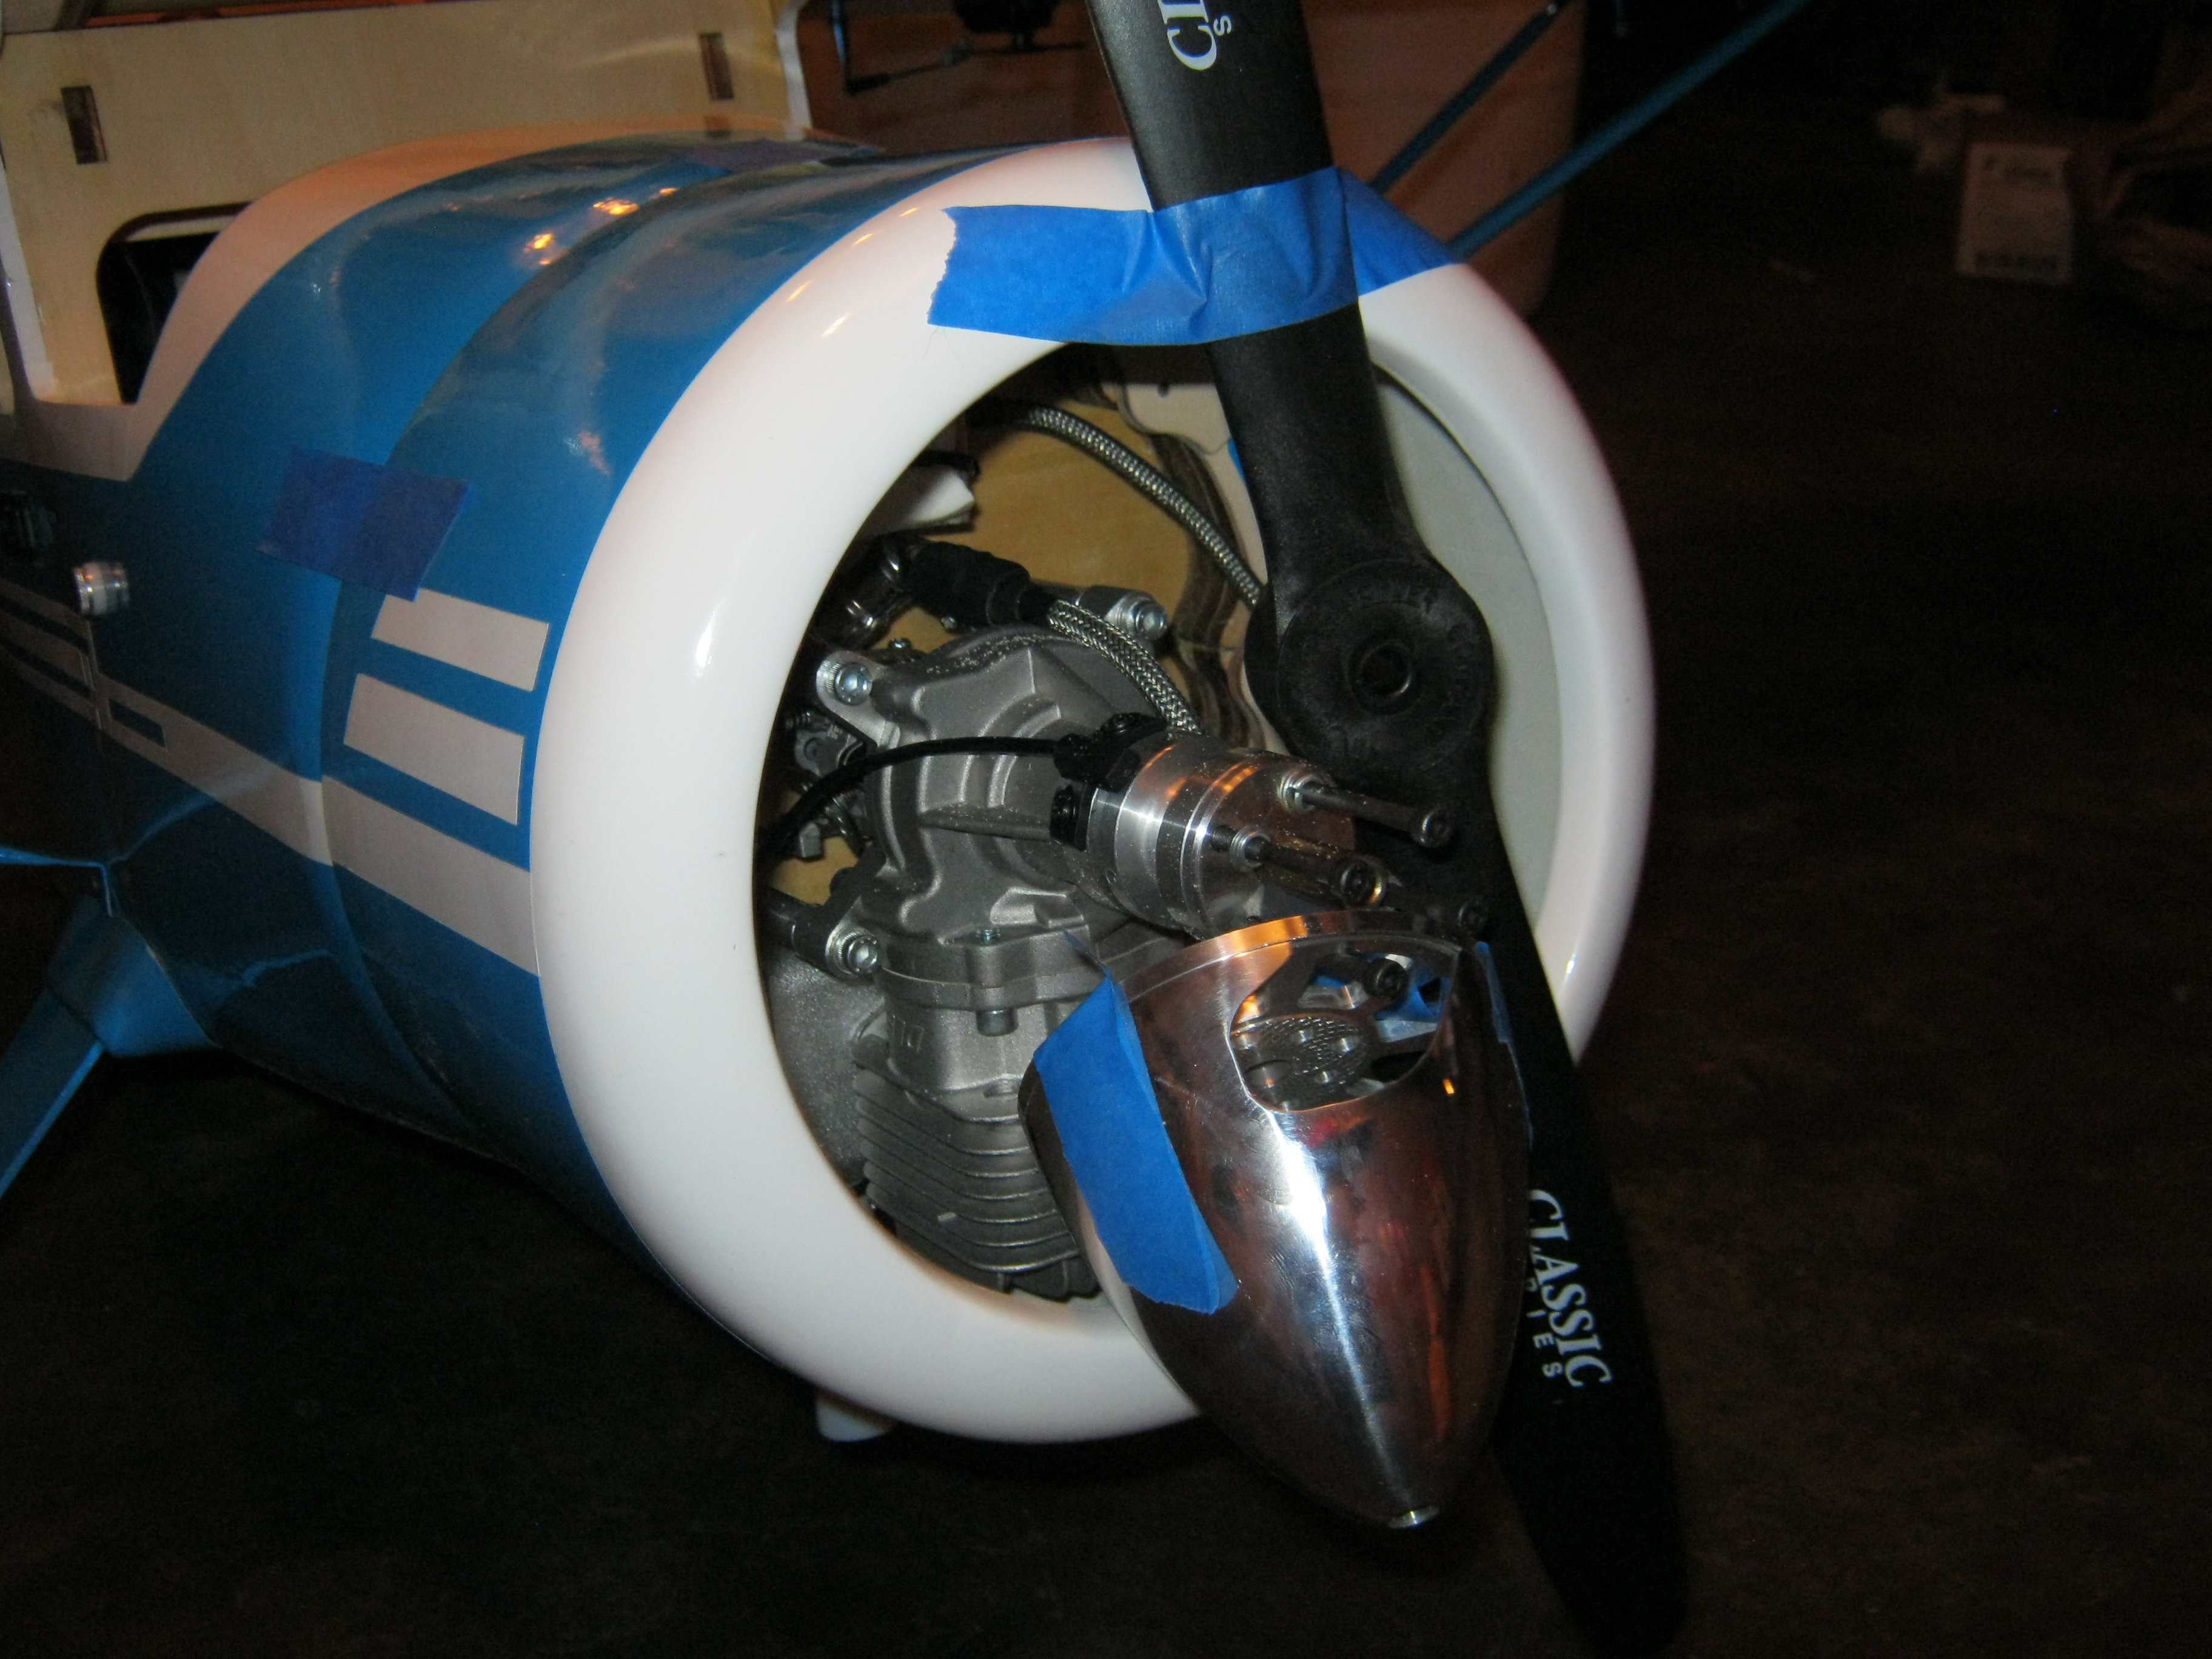
10-23-2013 | 04:26 PM
#38

My Feedback: (23)
Joined: Mar 2011
Posts: 138
Likes: 0
Received 0 Likes
on
0 Posts
From: monroeville, NJ
Teddy that is identical to my set up, I also used 5in tires. I used silicone to hold my gear farings on its flexable and you can take it off if you have to. Im waiting for your test flight. My bird was a little nose heavy and went over on its back on landing no damage so be careful.
10-23-2013 | 07:19 PM
#39
Thread Starter
Member
My Feedback: (11)
Joined: Jun 2013
Posts: 78
Likes: 0
Received 0 Likes
on
0 Posts
From: Columbus, Ga
Nose over on landings? Imnot looking forward to that. I will hopefully apply enough elavator after touchdown to press the tail. Tonight I fired up the new dle 35. Wow what power. windows a partially in this eve as well. This was my first gasser so I was very pleased all went well without gas spewing or electronic failure. I love the remote kill and the lil red light that she is hot. I will post pics tomorrow of my spark plug routing.I
10-24-2013 | 09:13 AM
#40
Thread Starter
Member
My Feedback: (11)
Joined: Jun 2013
Posts: 78
Likes: 0
Received 0 Likes
on
0 Posts
From: Columbus, Ga
Its Thursday and the built is for the most part finished. I have 3 windows and the windscreen to finish tonight. Yesterday afternoon was an experience firing up my first gas engine. I had a neighbor hold the tail section. With eyes and ears in place I pulled the choke and gave the spinner a turn with my starter. The pressure was more than Im use to. After a couple of tries I had the prop spinning but no pop from the carb. I decided to disengage the choke. Next attempt and she fired right up. Subsequent to the initial run I did not find any loose bolts or gas.
The spark plug wire was tricky with respect to the routing. I decided to open a channel or grove the depth of the spark plug wire diameter. The groove was etched to the right of the engine and does not conflict with the seating of the cowl. In the cabin picture you will see to voltwatch battery indicators. I like these and they work well for me. I run each one on a y harness off of the "out side" of the receiver. This way they do no stay on when the plane is not used.
Looking back I see a couple of "next time" changes. I would have painted the firewall flat black prior to assembly. Also I would have painted the interior of the cowl flat black. Perhaps the windows could use a mild tinting of about 25%.
10-24-2013 | 09:26 AM
#41
Thread Starter
Member
My Feedback: (11)
Joined: Jun 2013
Posts: 78
Likes: 0
Received 0 Likes
on
0 Posts
From: Columbus, Ga
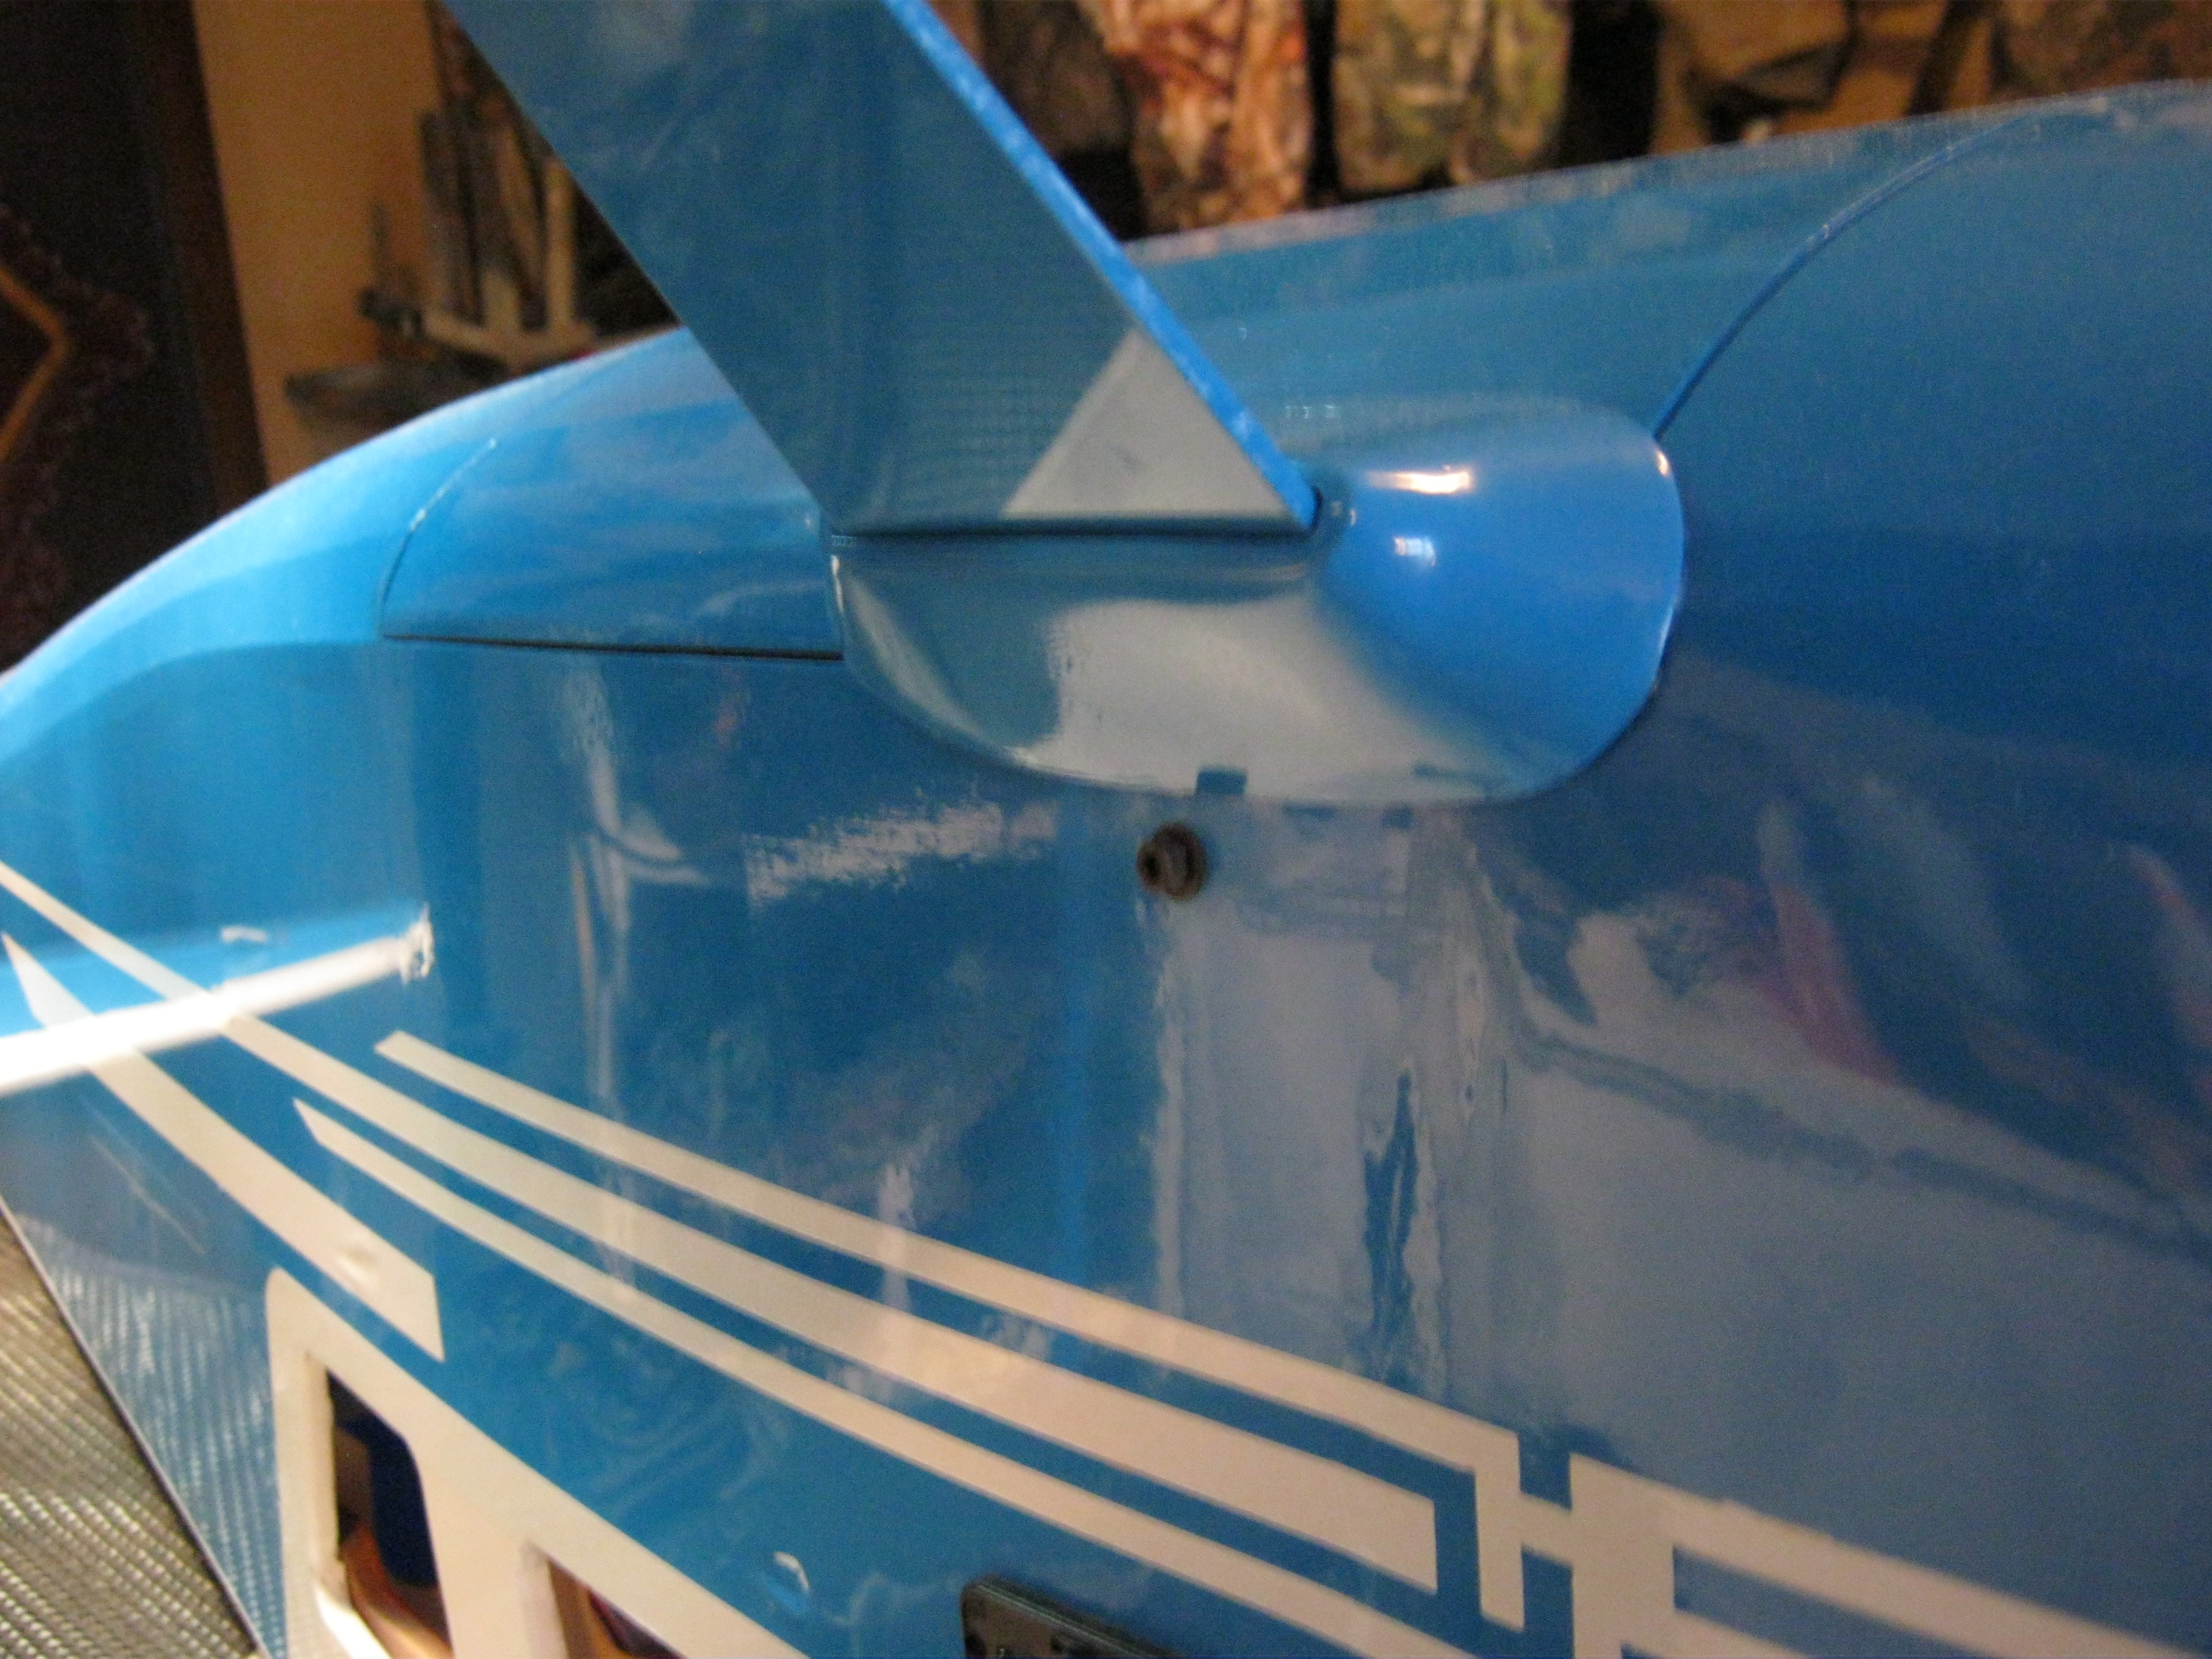
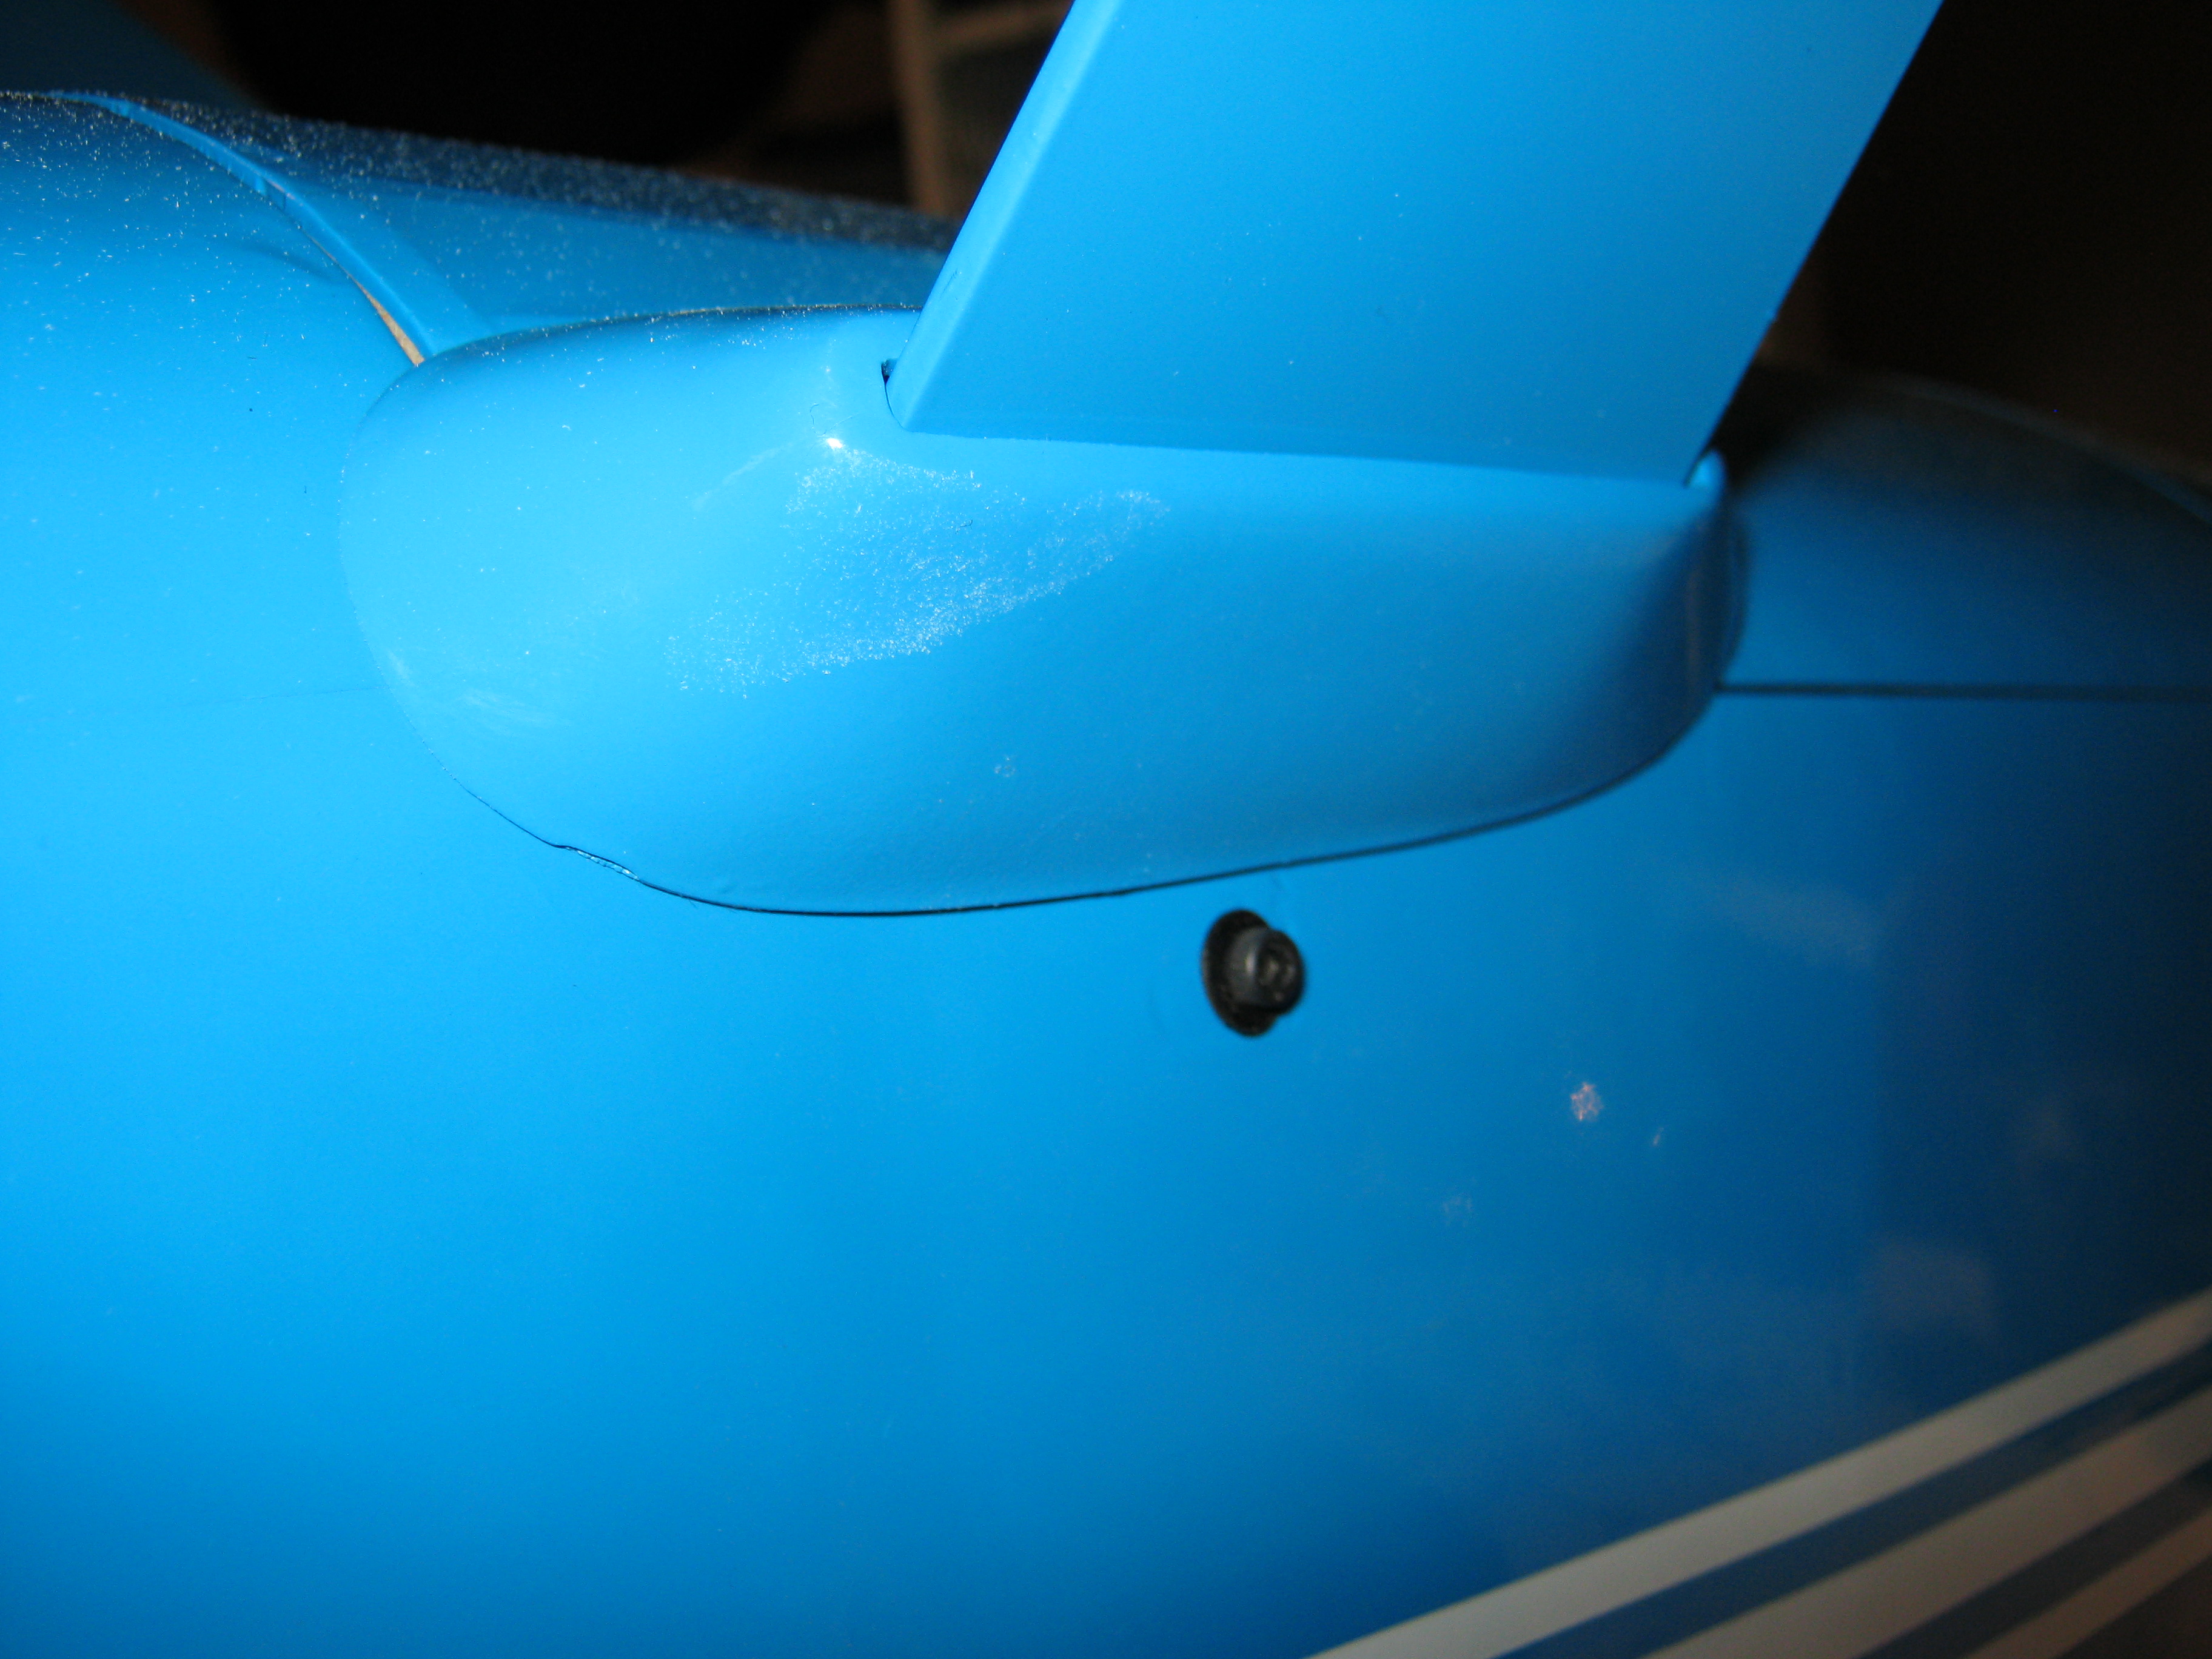
A few pics of last night and the routing of the hot ignition wire from plug.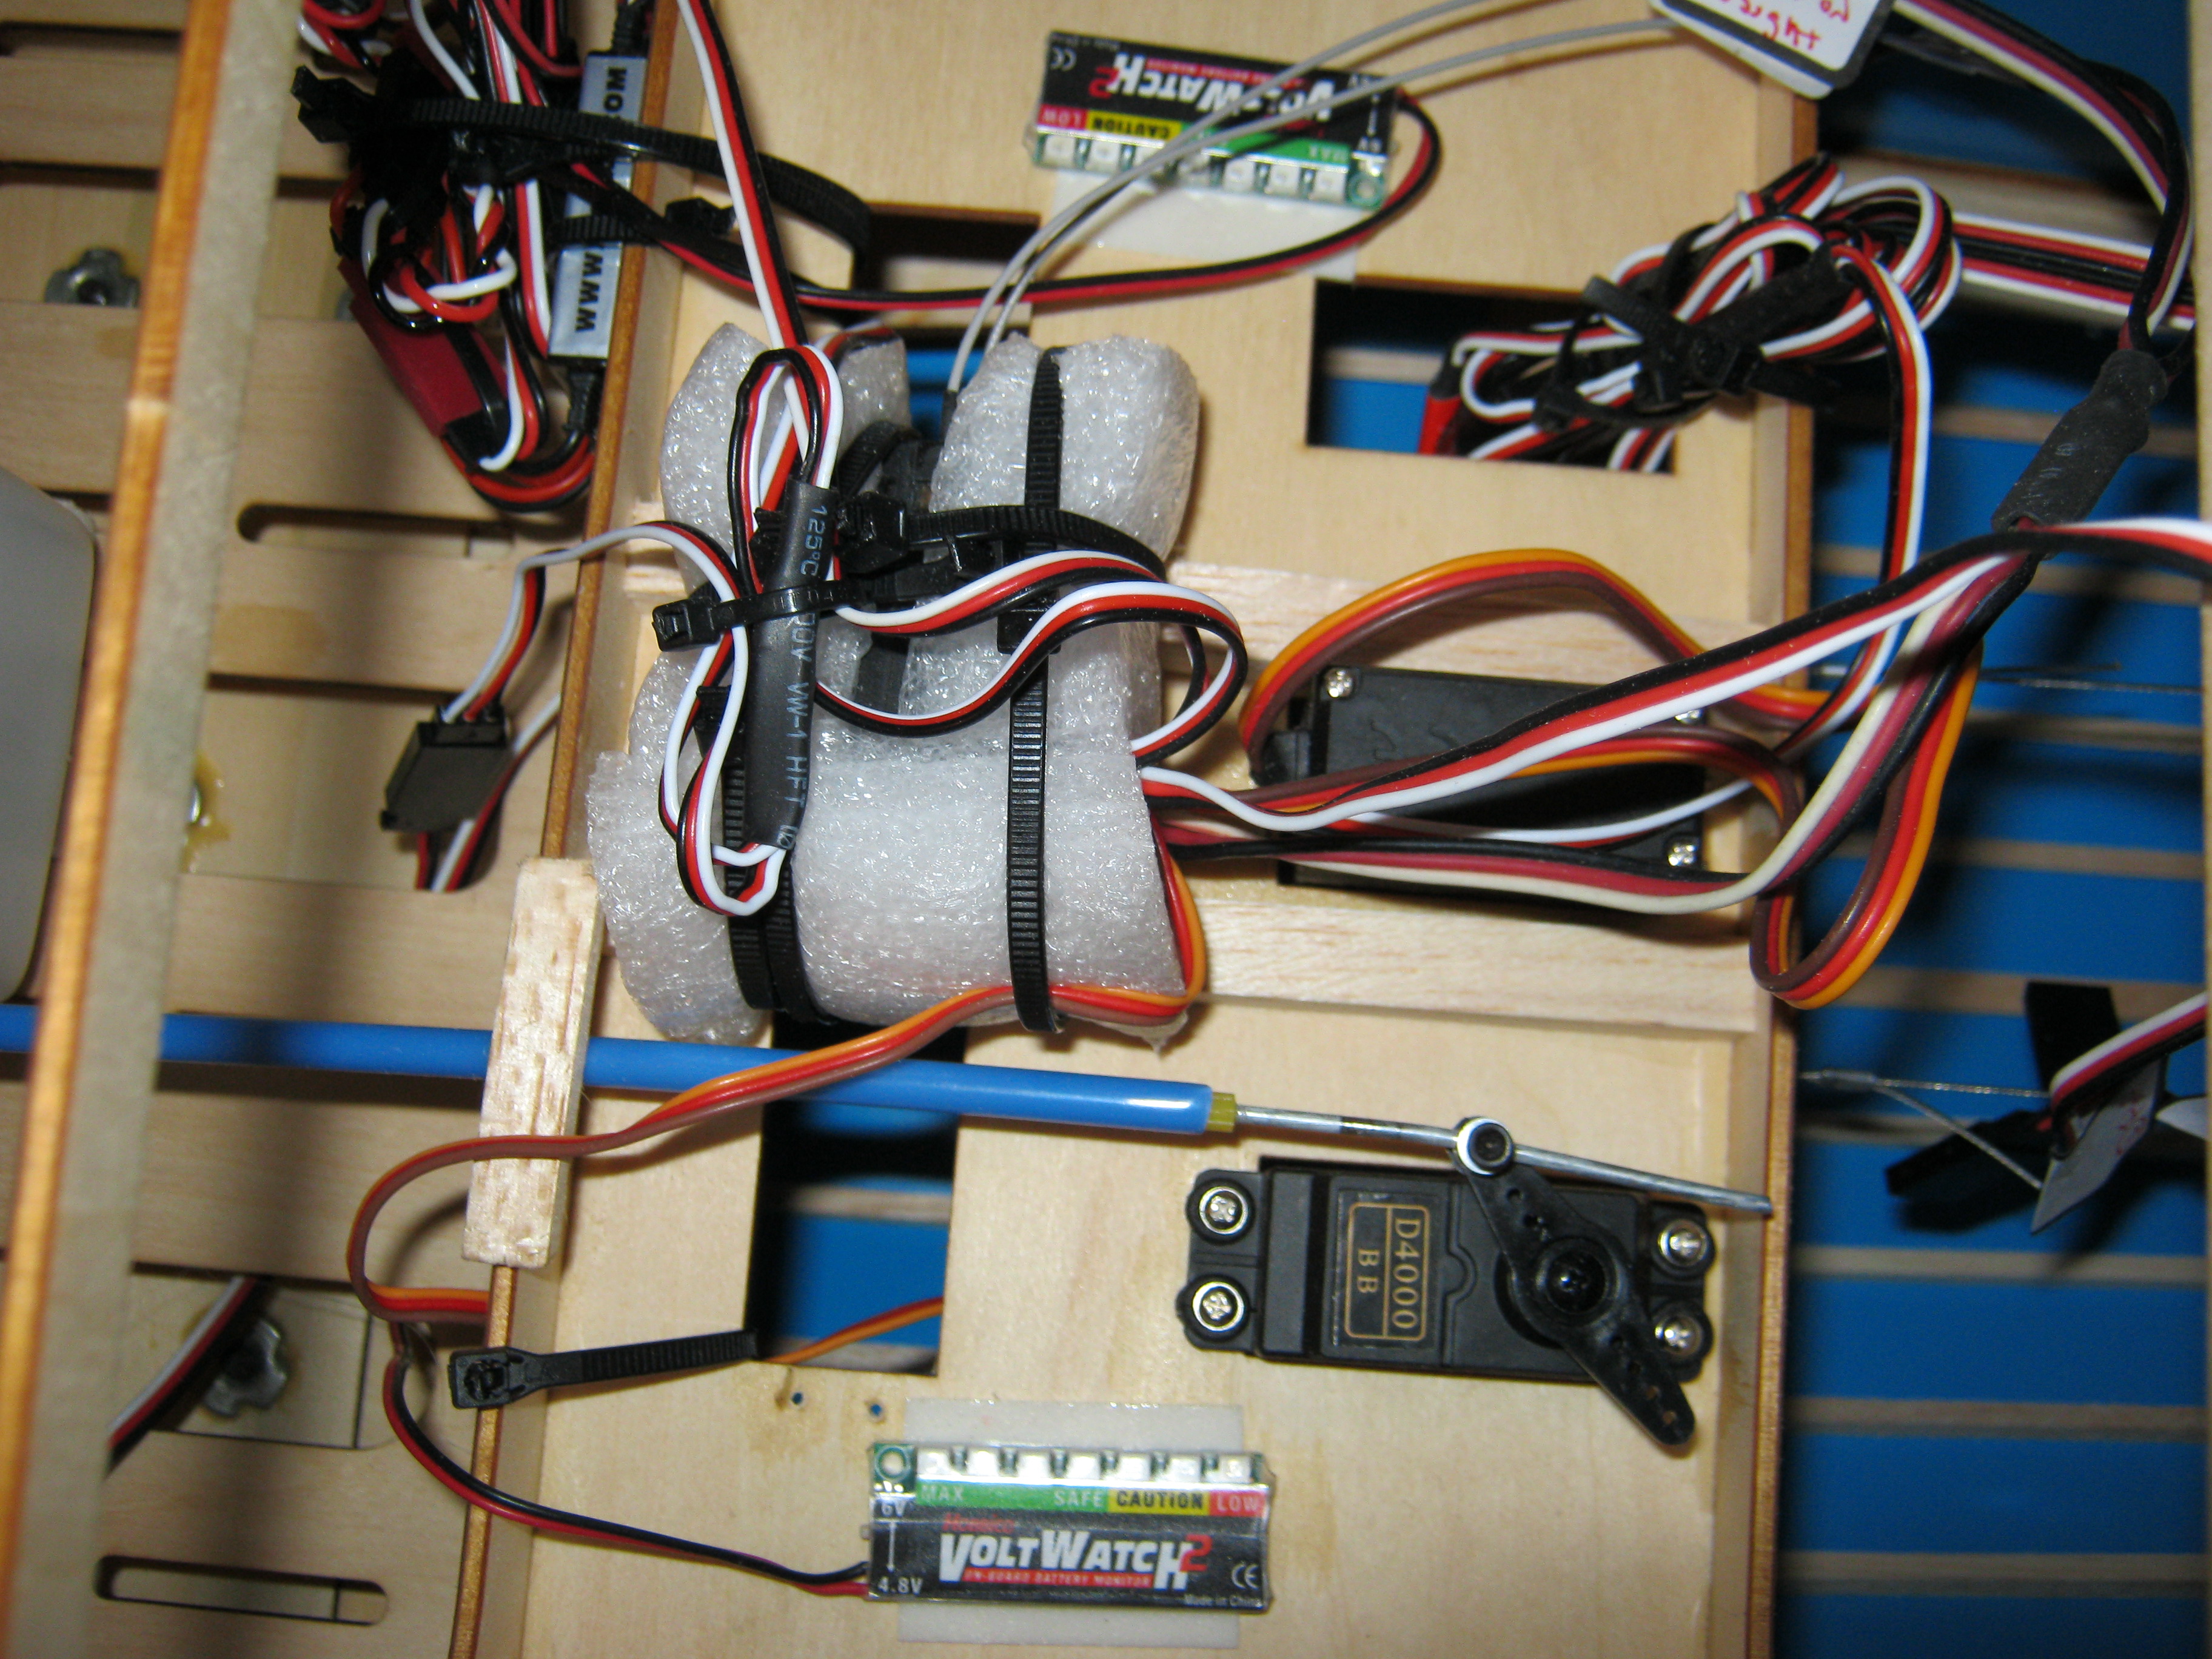
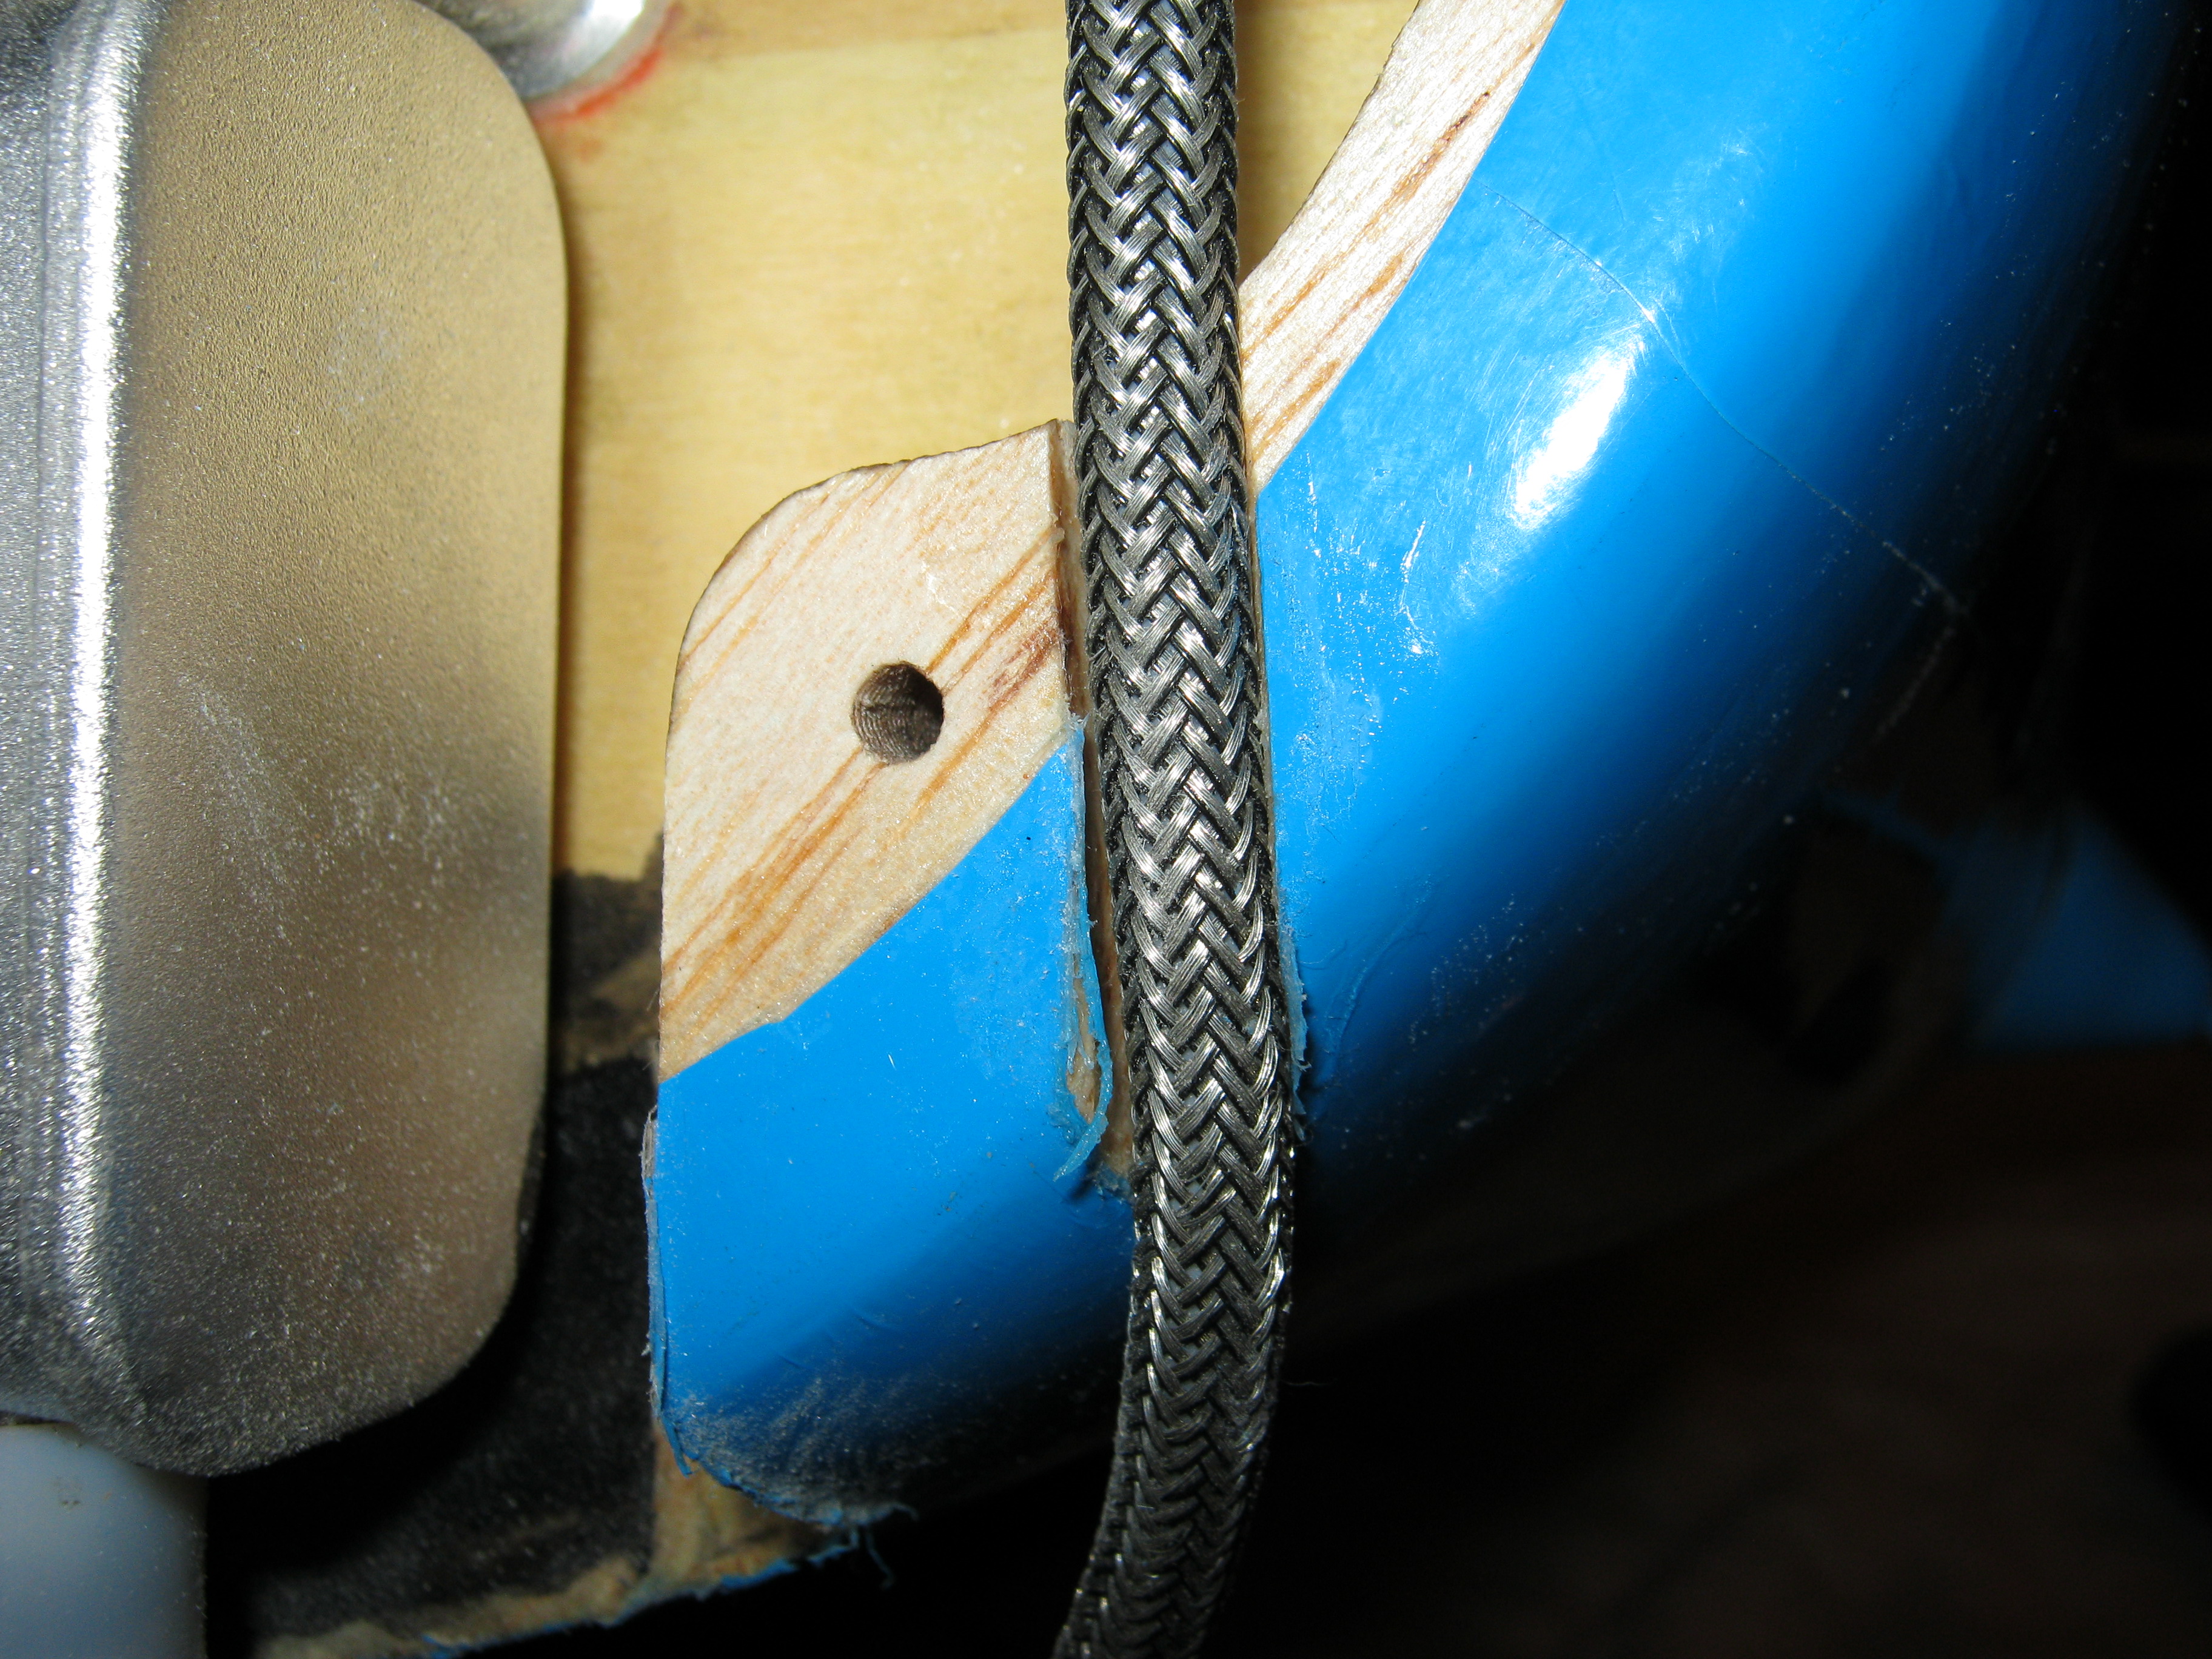

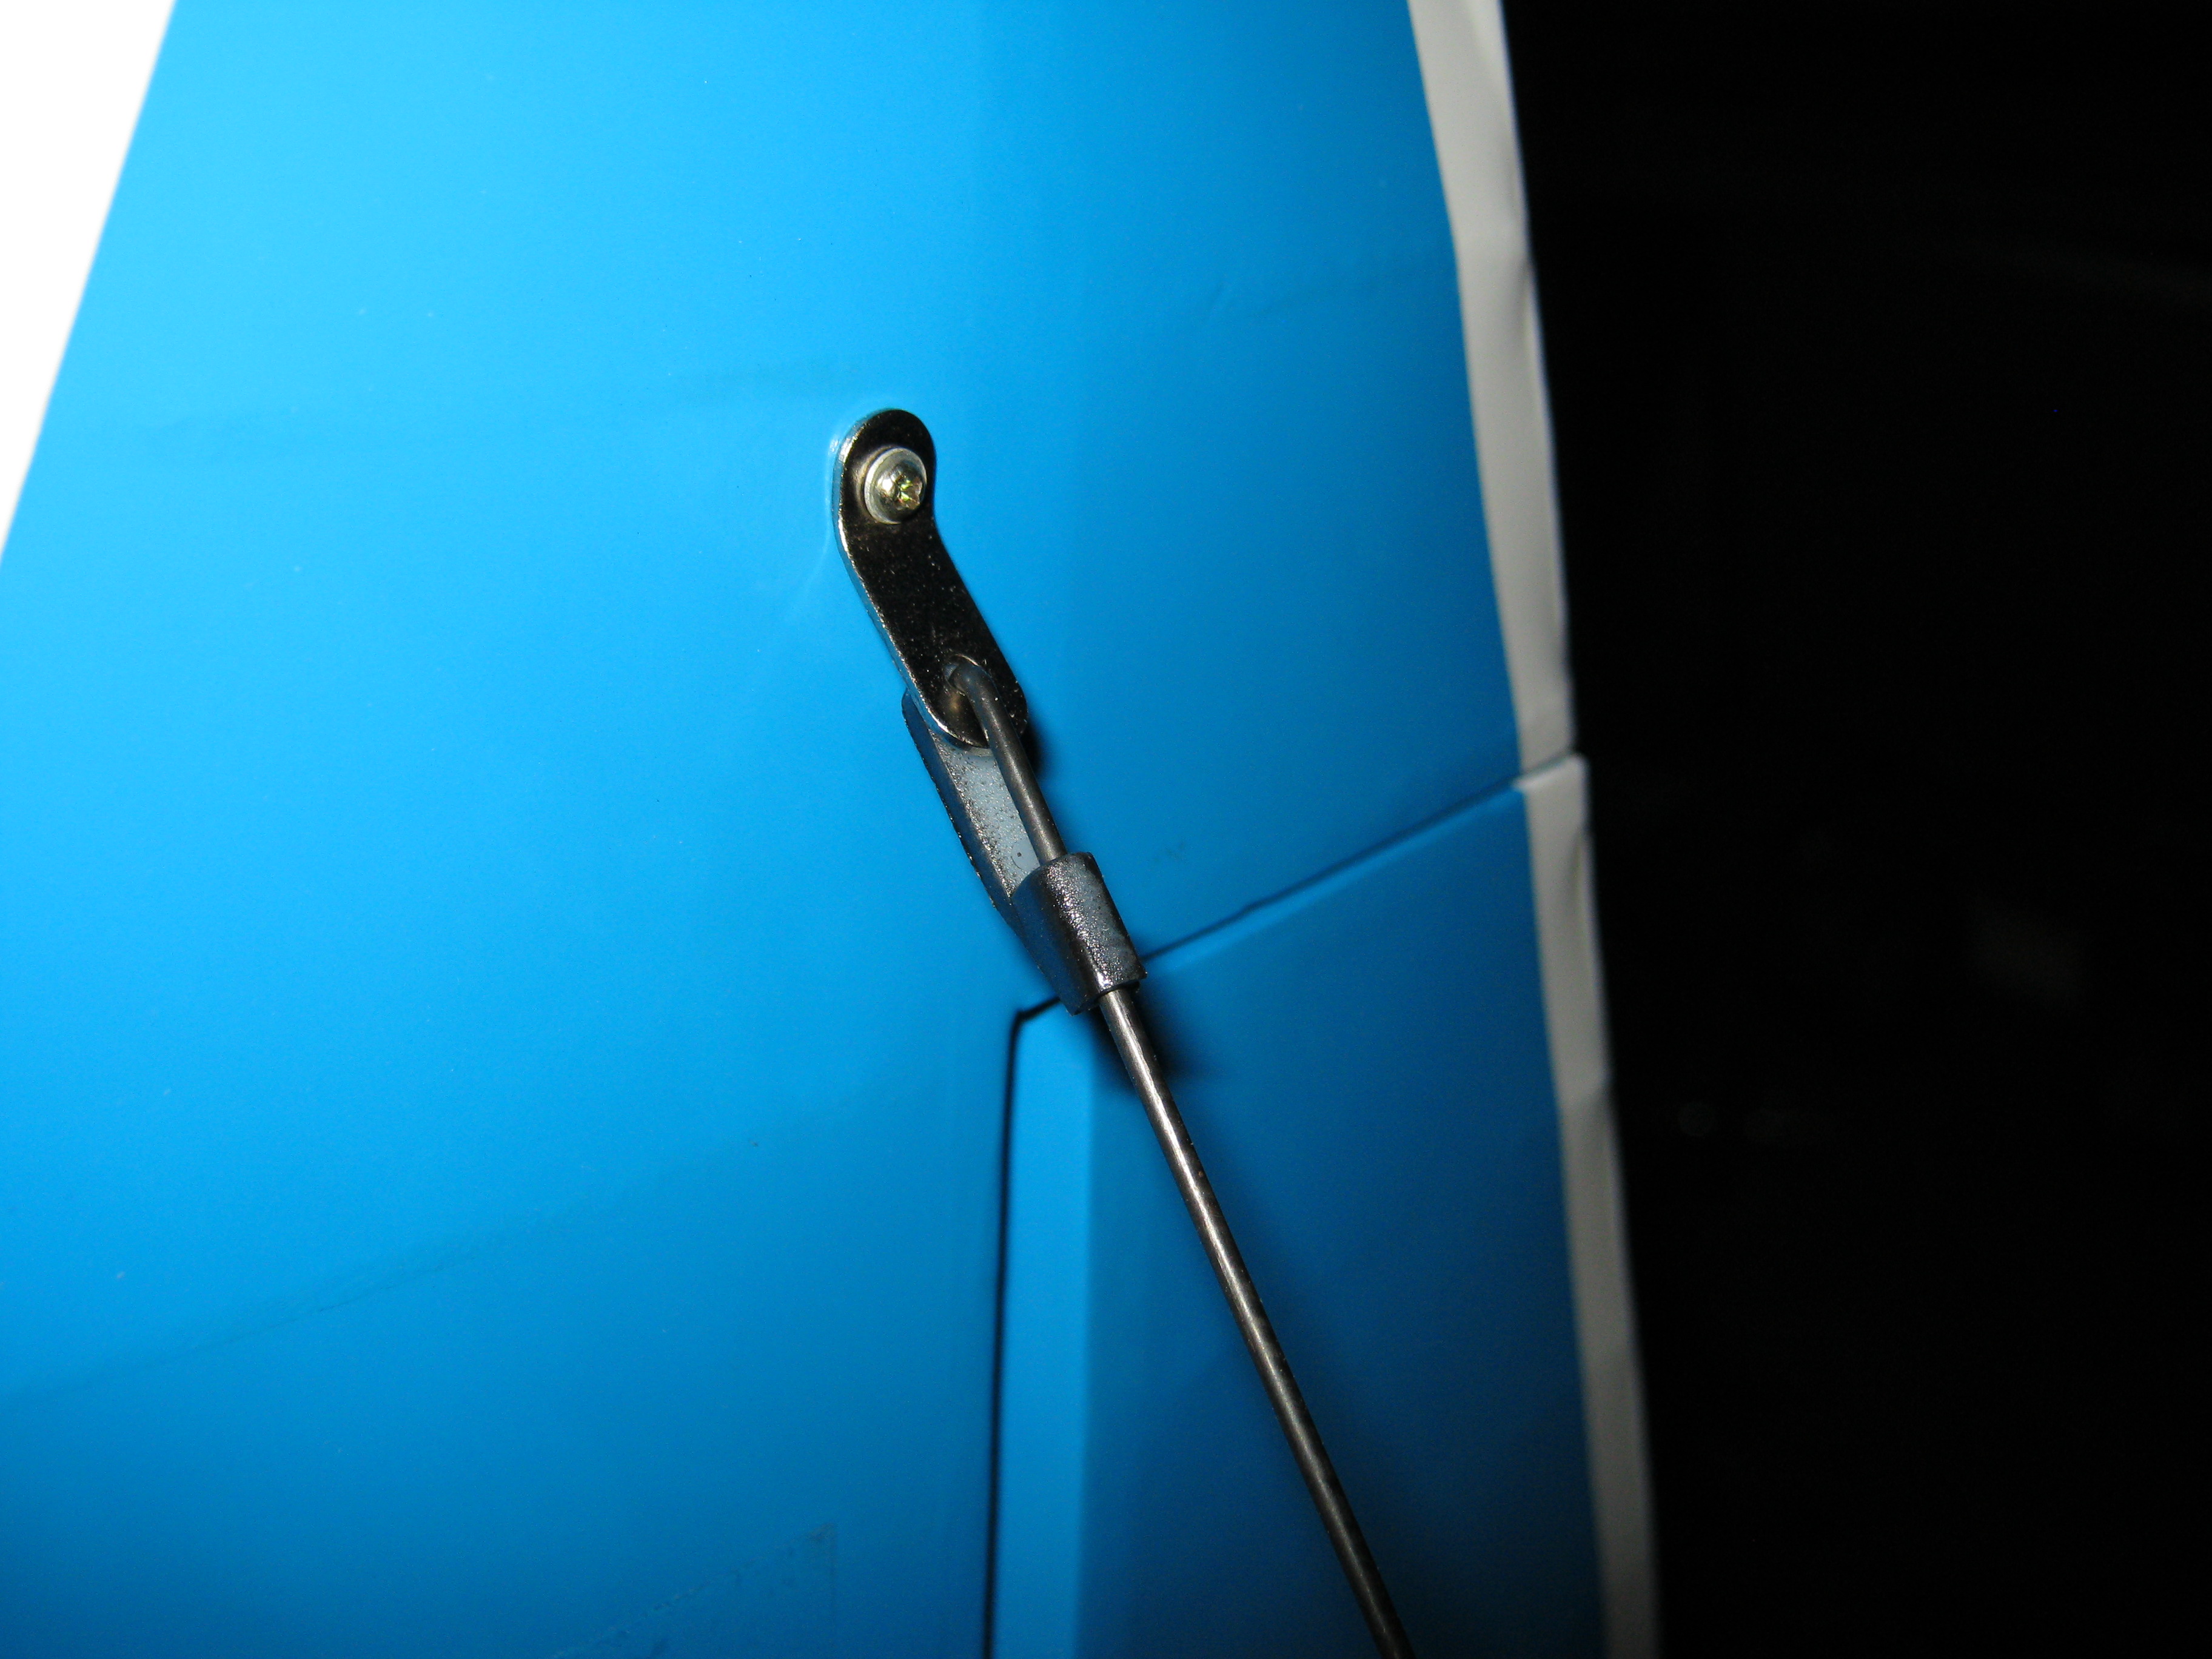 The picture of the quick connect on the stabilizer reflects a paint job. The white quick connect was a distraction and did not match the black wires. A quick blast of flat black and waaaa laaaaa.
10-28-2013 | 07:36 AM
#43
Thread Starter
Member
My Feedback: (11)
Joined: Jun 2013
Posts: 78
Likes: 0
Received 0 Likes
on
0 Posts
From: Columbus, Ga
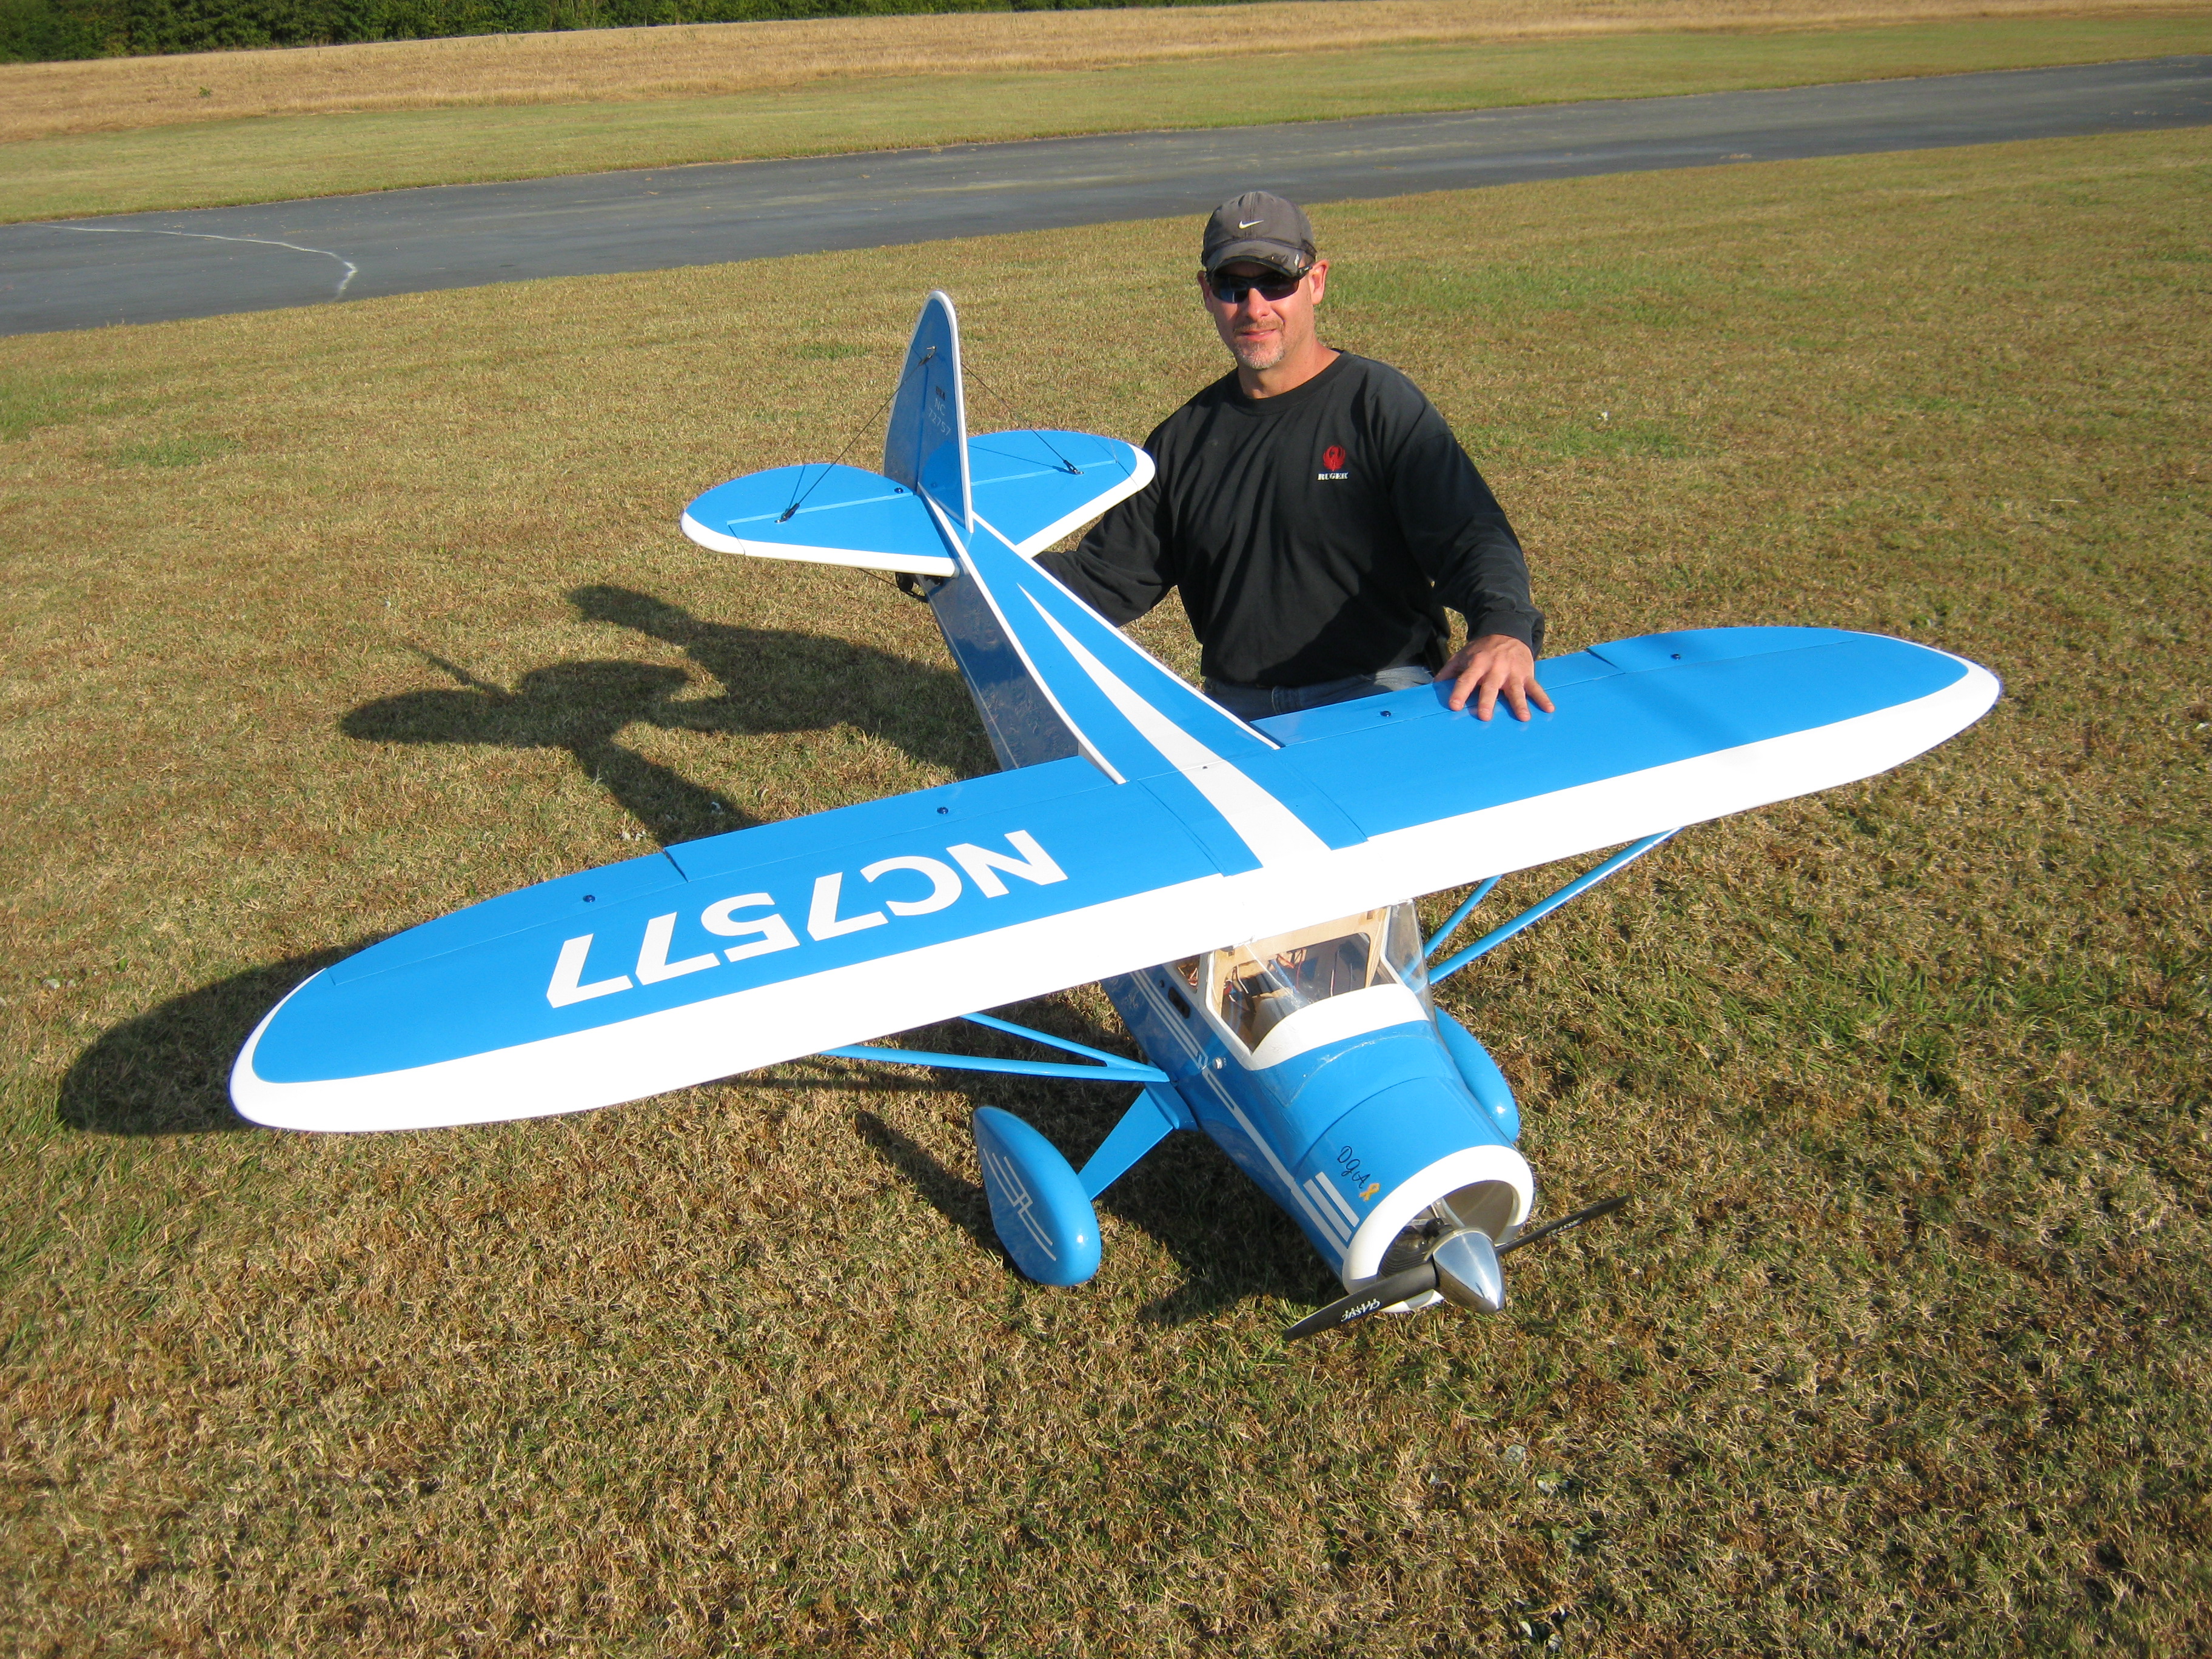
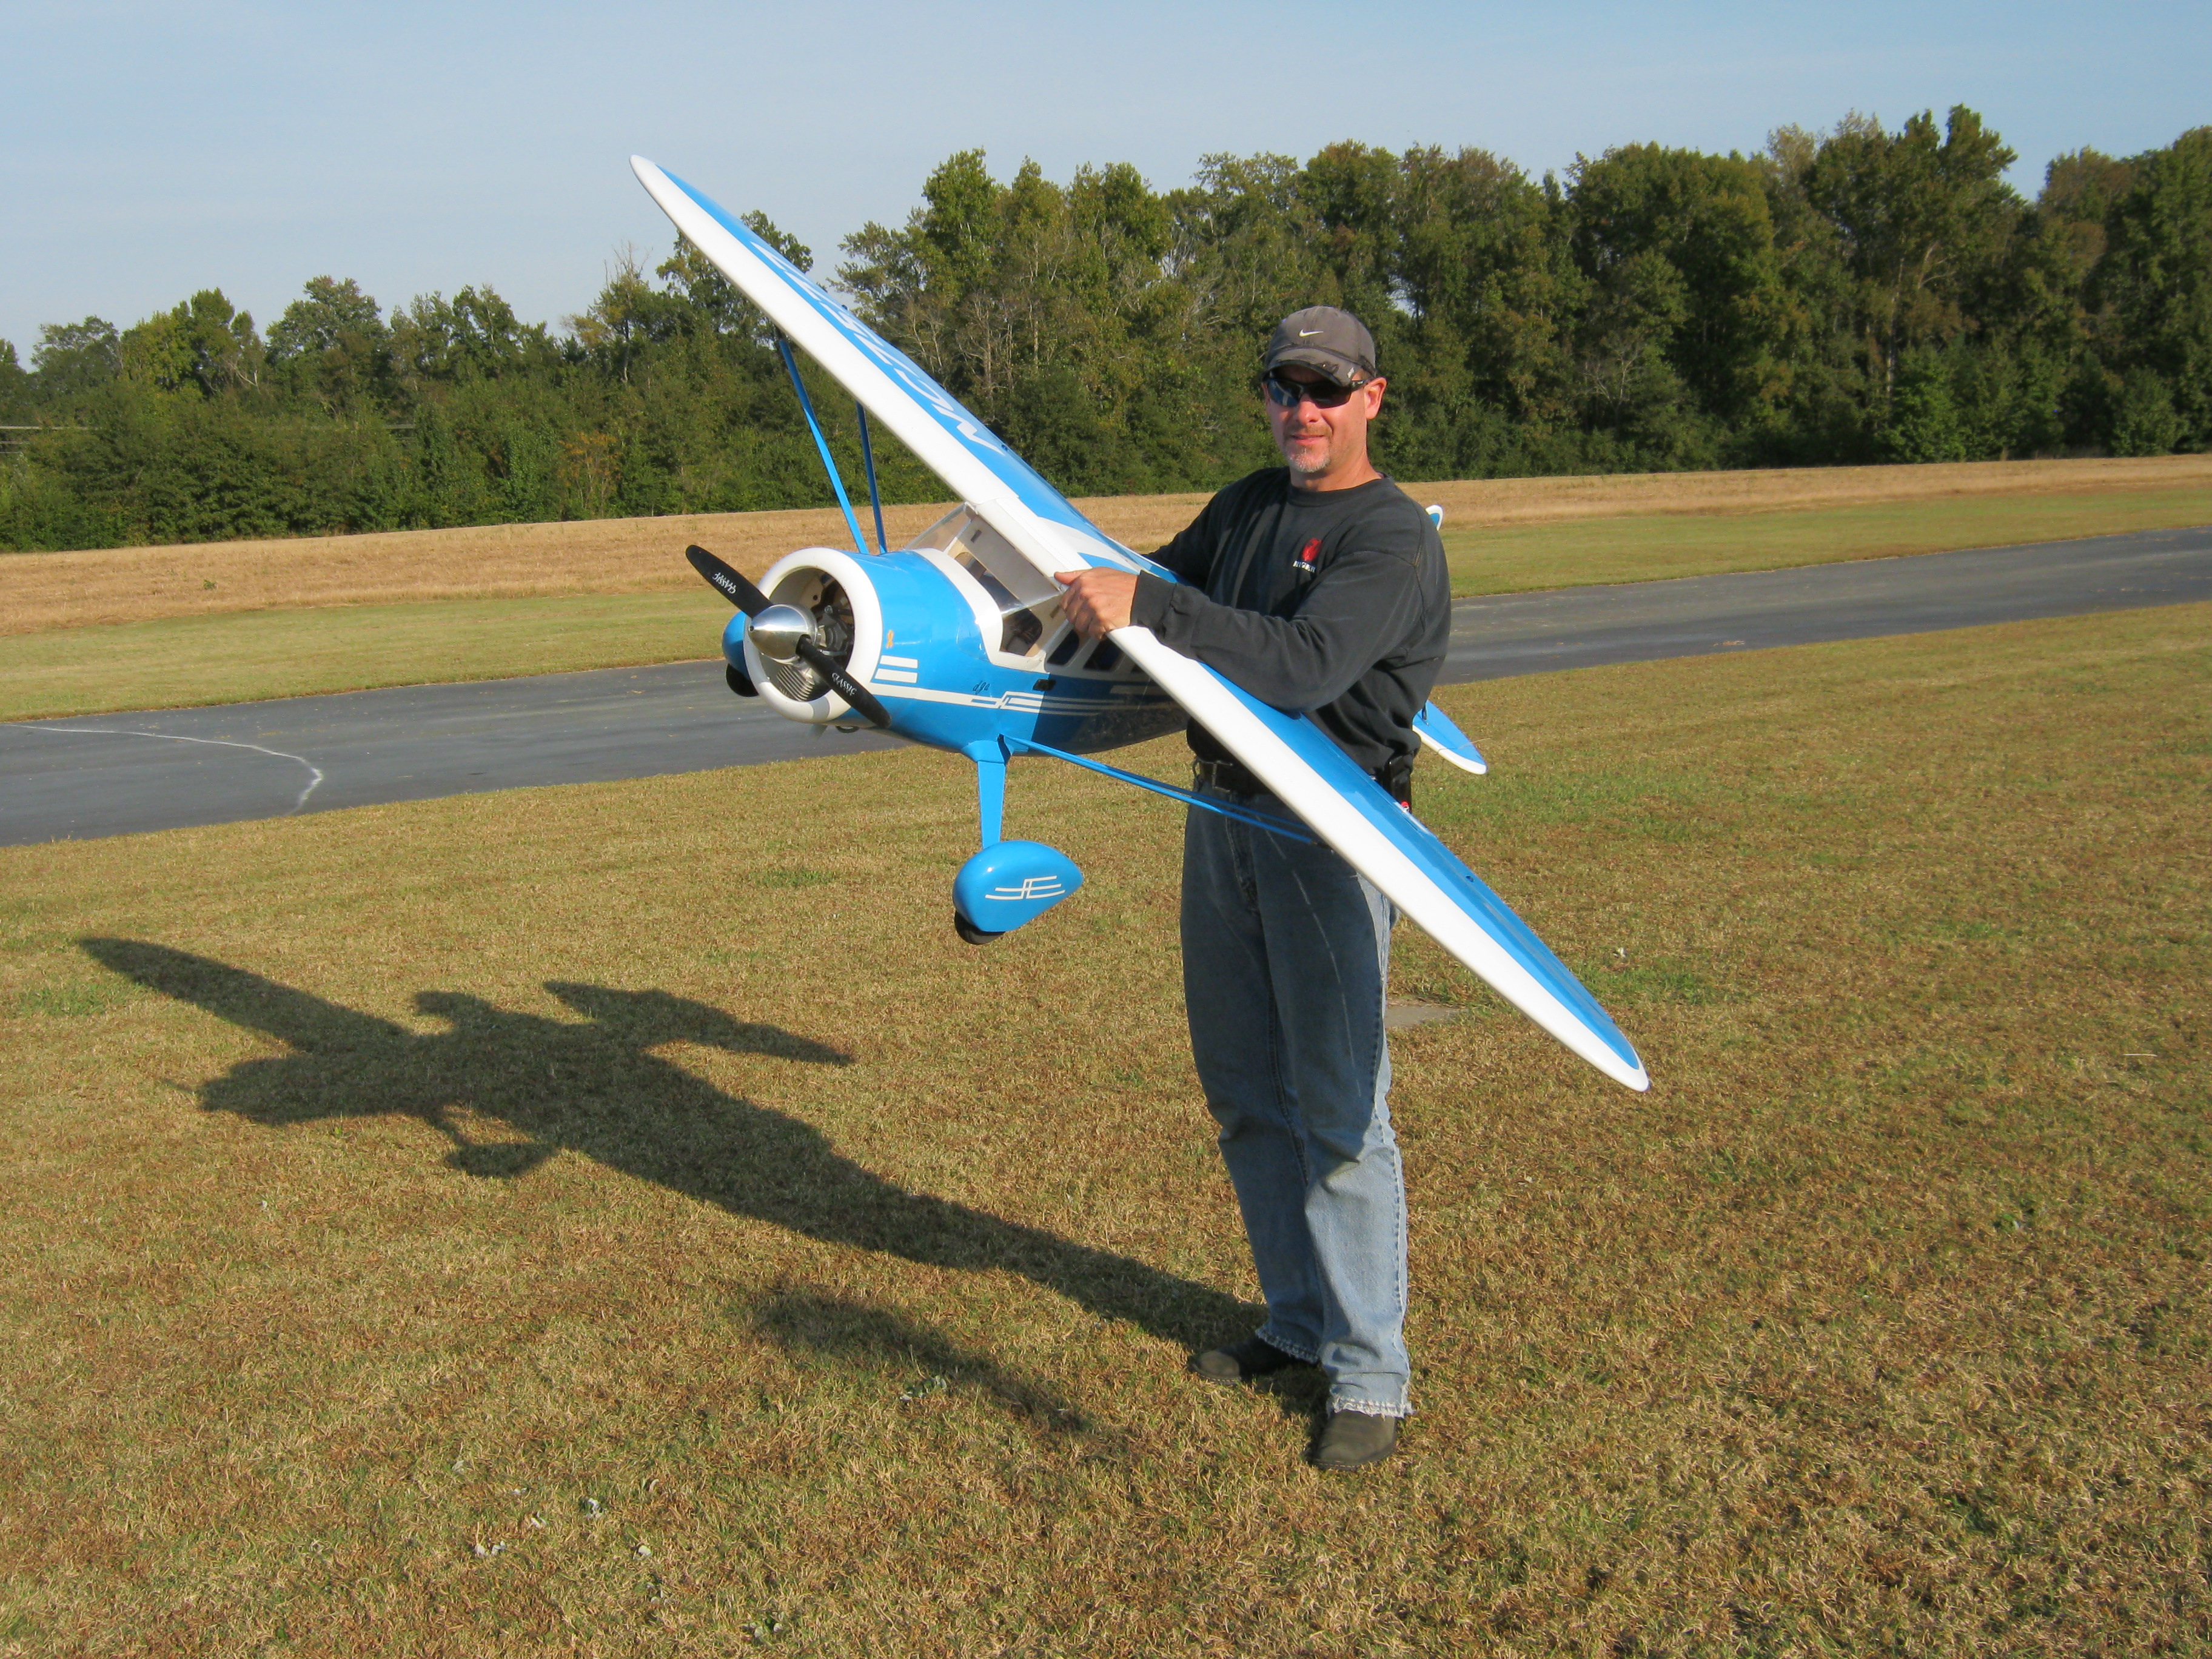
Maiden flight was Sunday the 27th in Dudley, Georgia. Wow I have never been so nervous. My pilot skills are "ok" and I have a good time flying; however, I have a long way to go. I committed to the flight and decided to let her loose. I decided a crash for lack of ground speed would not happen......it was full power or nothing. She tracked good and before I realized it there was loft and rise. Flaps were not utilized this day. After a few minutes in the air and very minimal trims I came in for a landing. I took out a few sweetgum leaves at the end of the runway and got her down safely. You could say a miracle had been witnessed. Second flight was great and the landing greased. WHEW my knees were locked like a virgins legs on prom night ! I checked the plane for loose bolts and issues........found "0". The sweetgum tree left 4 leaves in my cowl and a 10 inch tree top wedged in my strut.
The CG was slight nose down with 4 oz on the nose. I can remove the 4oz once a minimal battery movement is completed.
The Howard is breathtaking. Its a big plane and remember to keep up a lil speed coming in. Better a lil hot than a stall tip wing crash. I had absolutely no hint of a nose over on ground work. I tested her in the grass with full elevator and the tail never bumped up and down. One modification will be a tighter spring assembly on the tailwheel. I found the tailwheel not responding with authority once the rudder is moved. An exageration of the rudder was needed to get adequate tailwheel movement. This wont work for me and its a quick fix. Thanks for looking at my build. I hope it helps someone a lil bit in the future. I am a novice pilot and builder of 5 arf"s so my contribution to a builder's cause is probably minimal.
Teddy Burgess Jr.
Dublin, Ga.
478 484 4879
10-28-2013 | 07:48 AM
#44
Thread Starter
Member
My Feedback: (11)
Joined: Jun 2013
Posts: 78
Likes: 0
Received 0 Likes
on
0 Posts
From: Columbus, Ga
10-28-2013 | 10:58 AM
#45

My Feedback: (13)
Hay Georgiateddy,
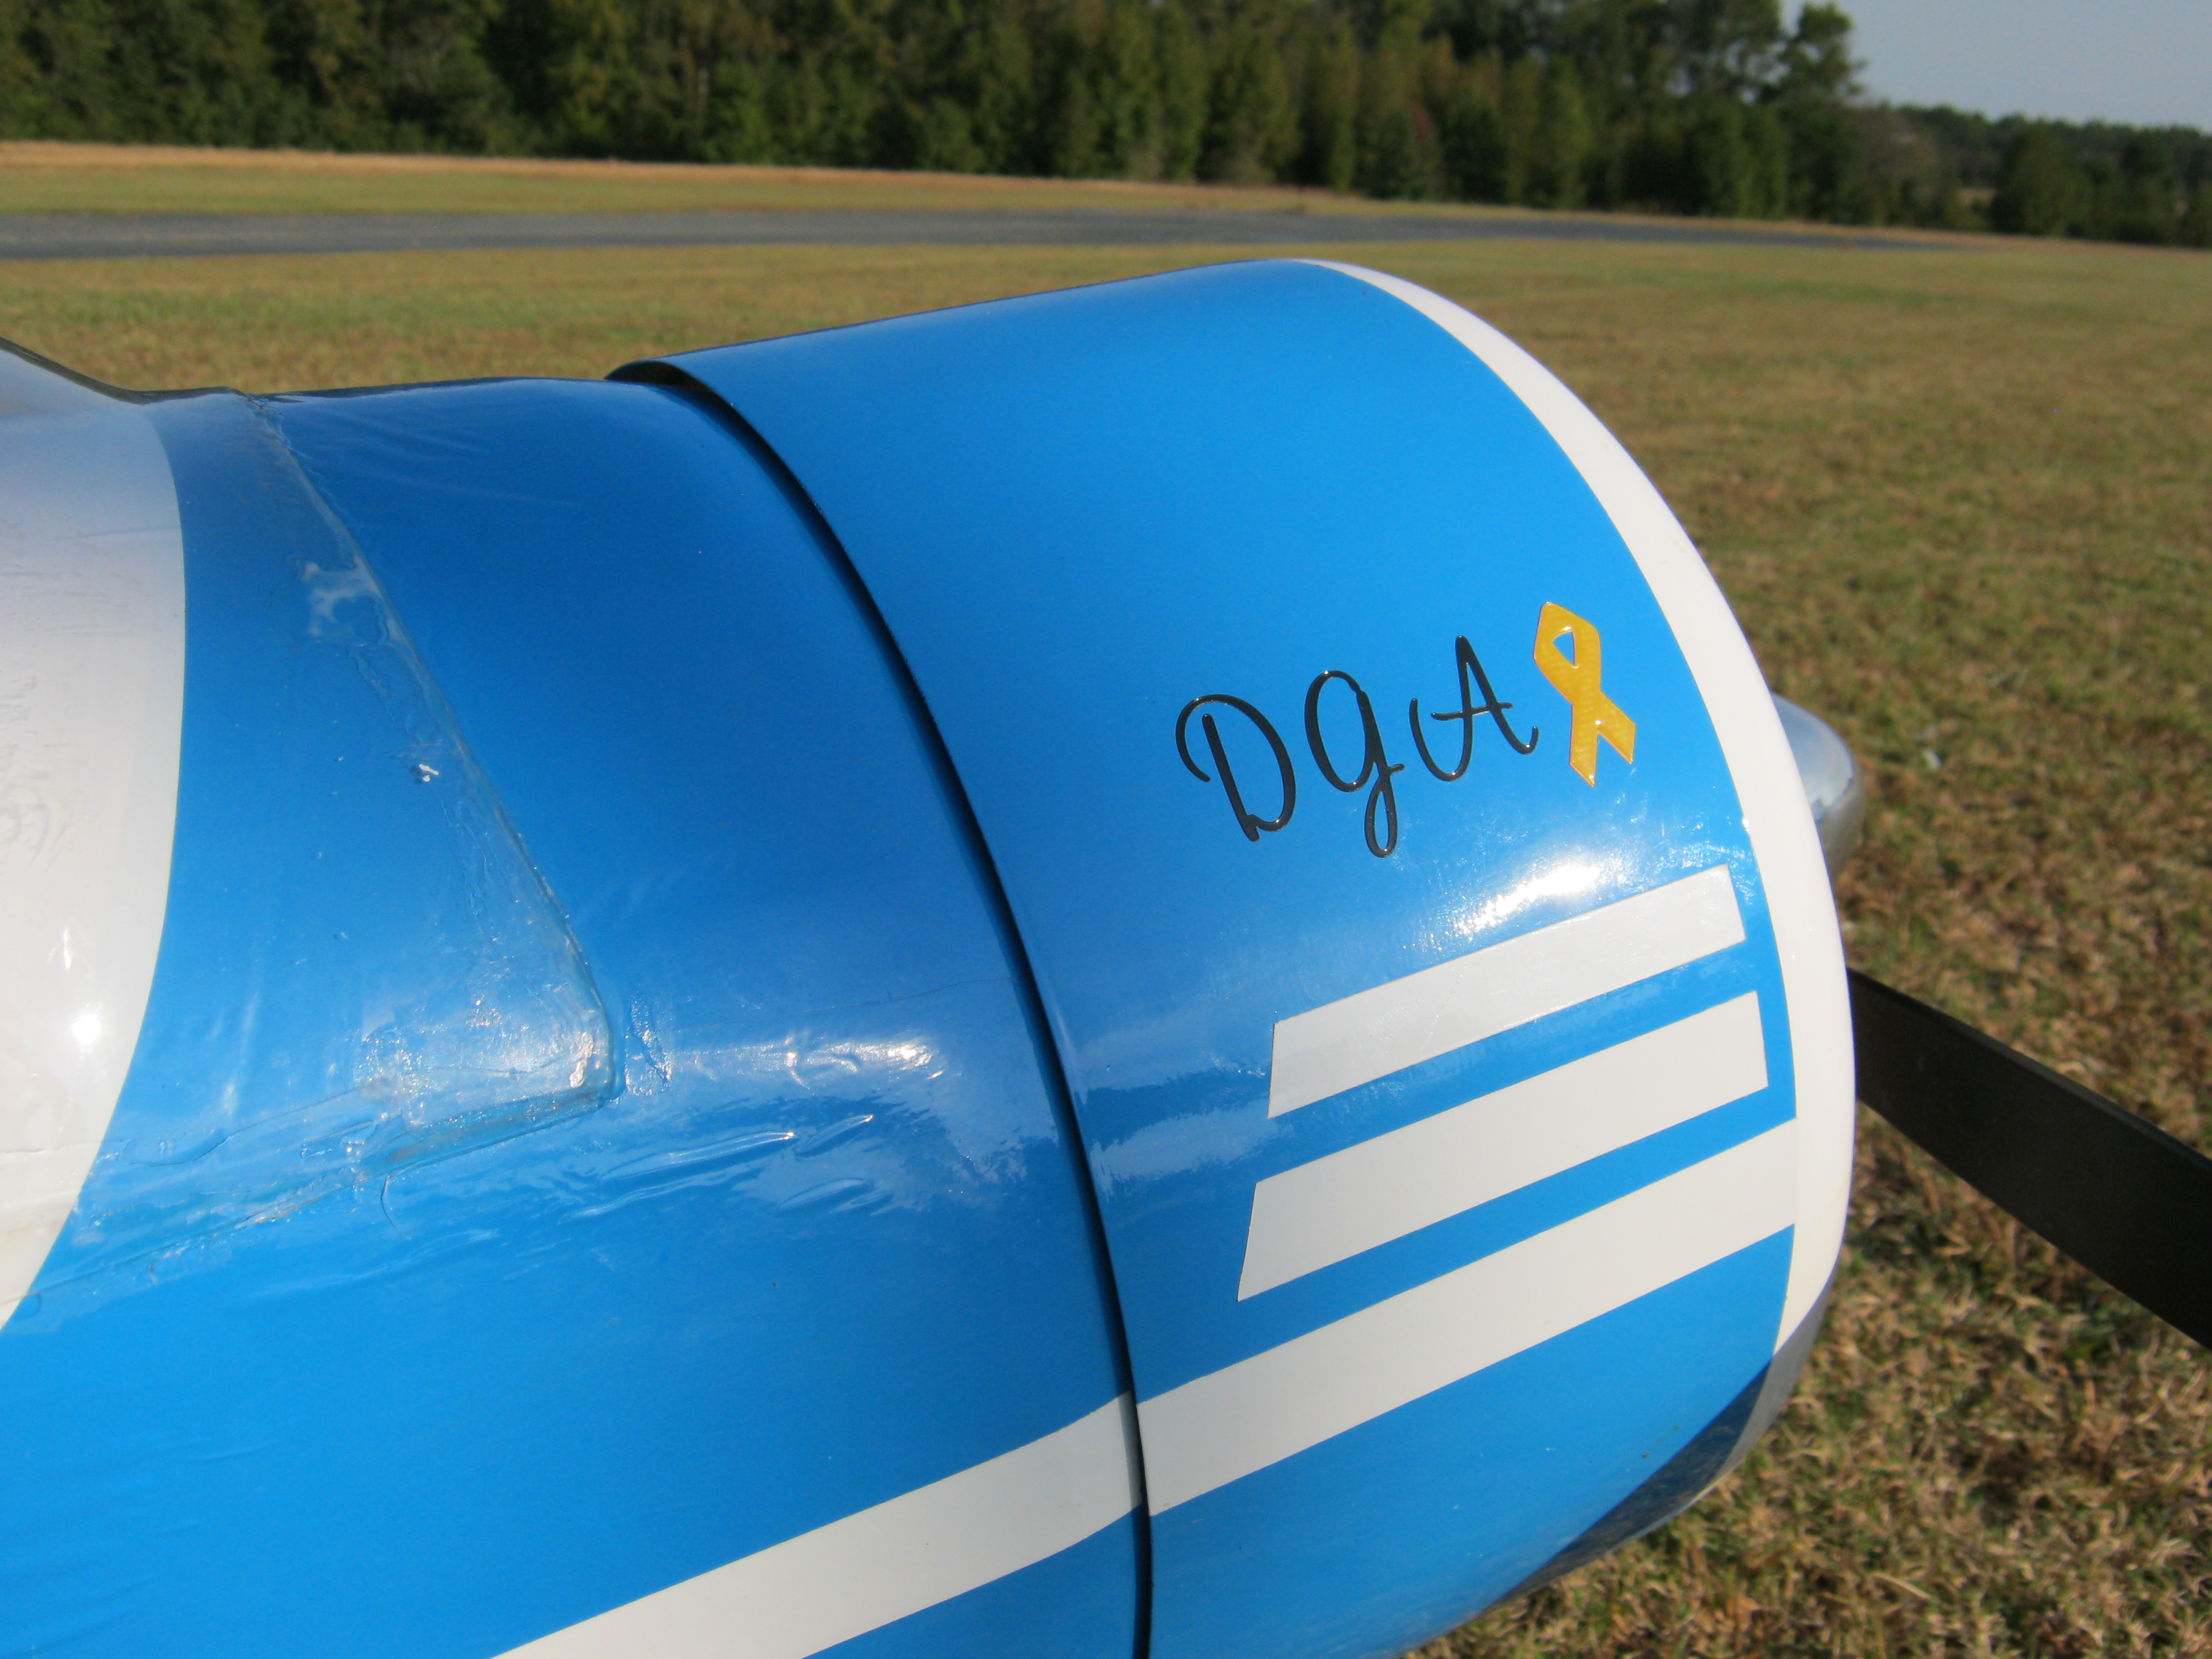
I like what you said...I have a yellow ribbon on both my rigs.
I have been flying a PTE 36R in a ESM F6F and I'm very impressed with the engine. I am using a Master Air Screw 18x10 Symitar wood prop and very pleased with the performance. Great idle (1350~1400) and a transition that is flawless.
Soft Landings Always,
BobbyofMaui
10-28-2013 | 03:15 PM
#46
My Feedback: (23)
Joined: Mar 2011
Posts: 138
Likes: 0
Received 0 Likes
on
0 Posts
From: monroeville, NJ
Great job Teddy I knew you would love it. Don't they fly great? Thanks for the mention of our service men and women we couldn't fly our RC models with out their commitment to the security of our great country.I just bought a hanger9 Super cub stay tuned for my build .
10-28-2013 | 06:45 PM
#47
Thread Starter
Member
My Feedback: (11)
Joined: Jun 2013
Posts: 78
Likes: 0
Received 0 Likes
on
0 Posts
From: Columbus, Ga
Super cub is nice. A fellow flyer brings his out on a regular basis. I always take a seat and watch. They are the bread and butter like Remington Arms.
Teddy
Teddy

 08-16-2015 | 08:36 AM
#50
Senior Member
Joined: Oct 2005
Posts: 850
Likes: 0
Received 0 Likes
on
0 Posts
From: Fresno,
CA
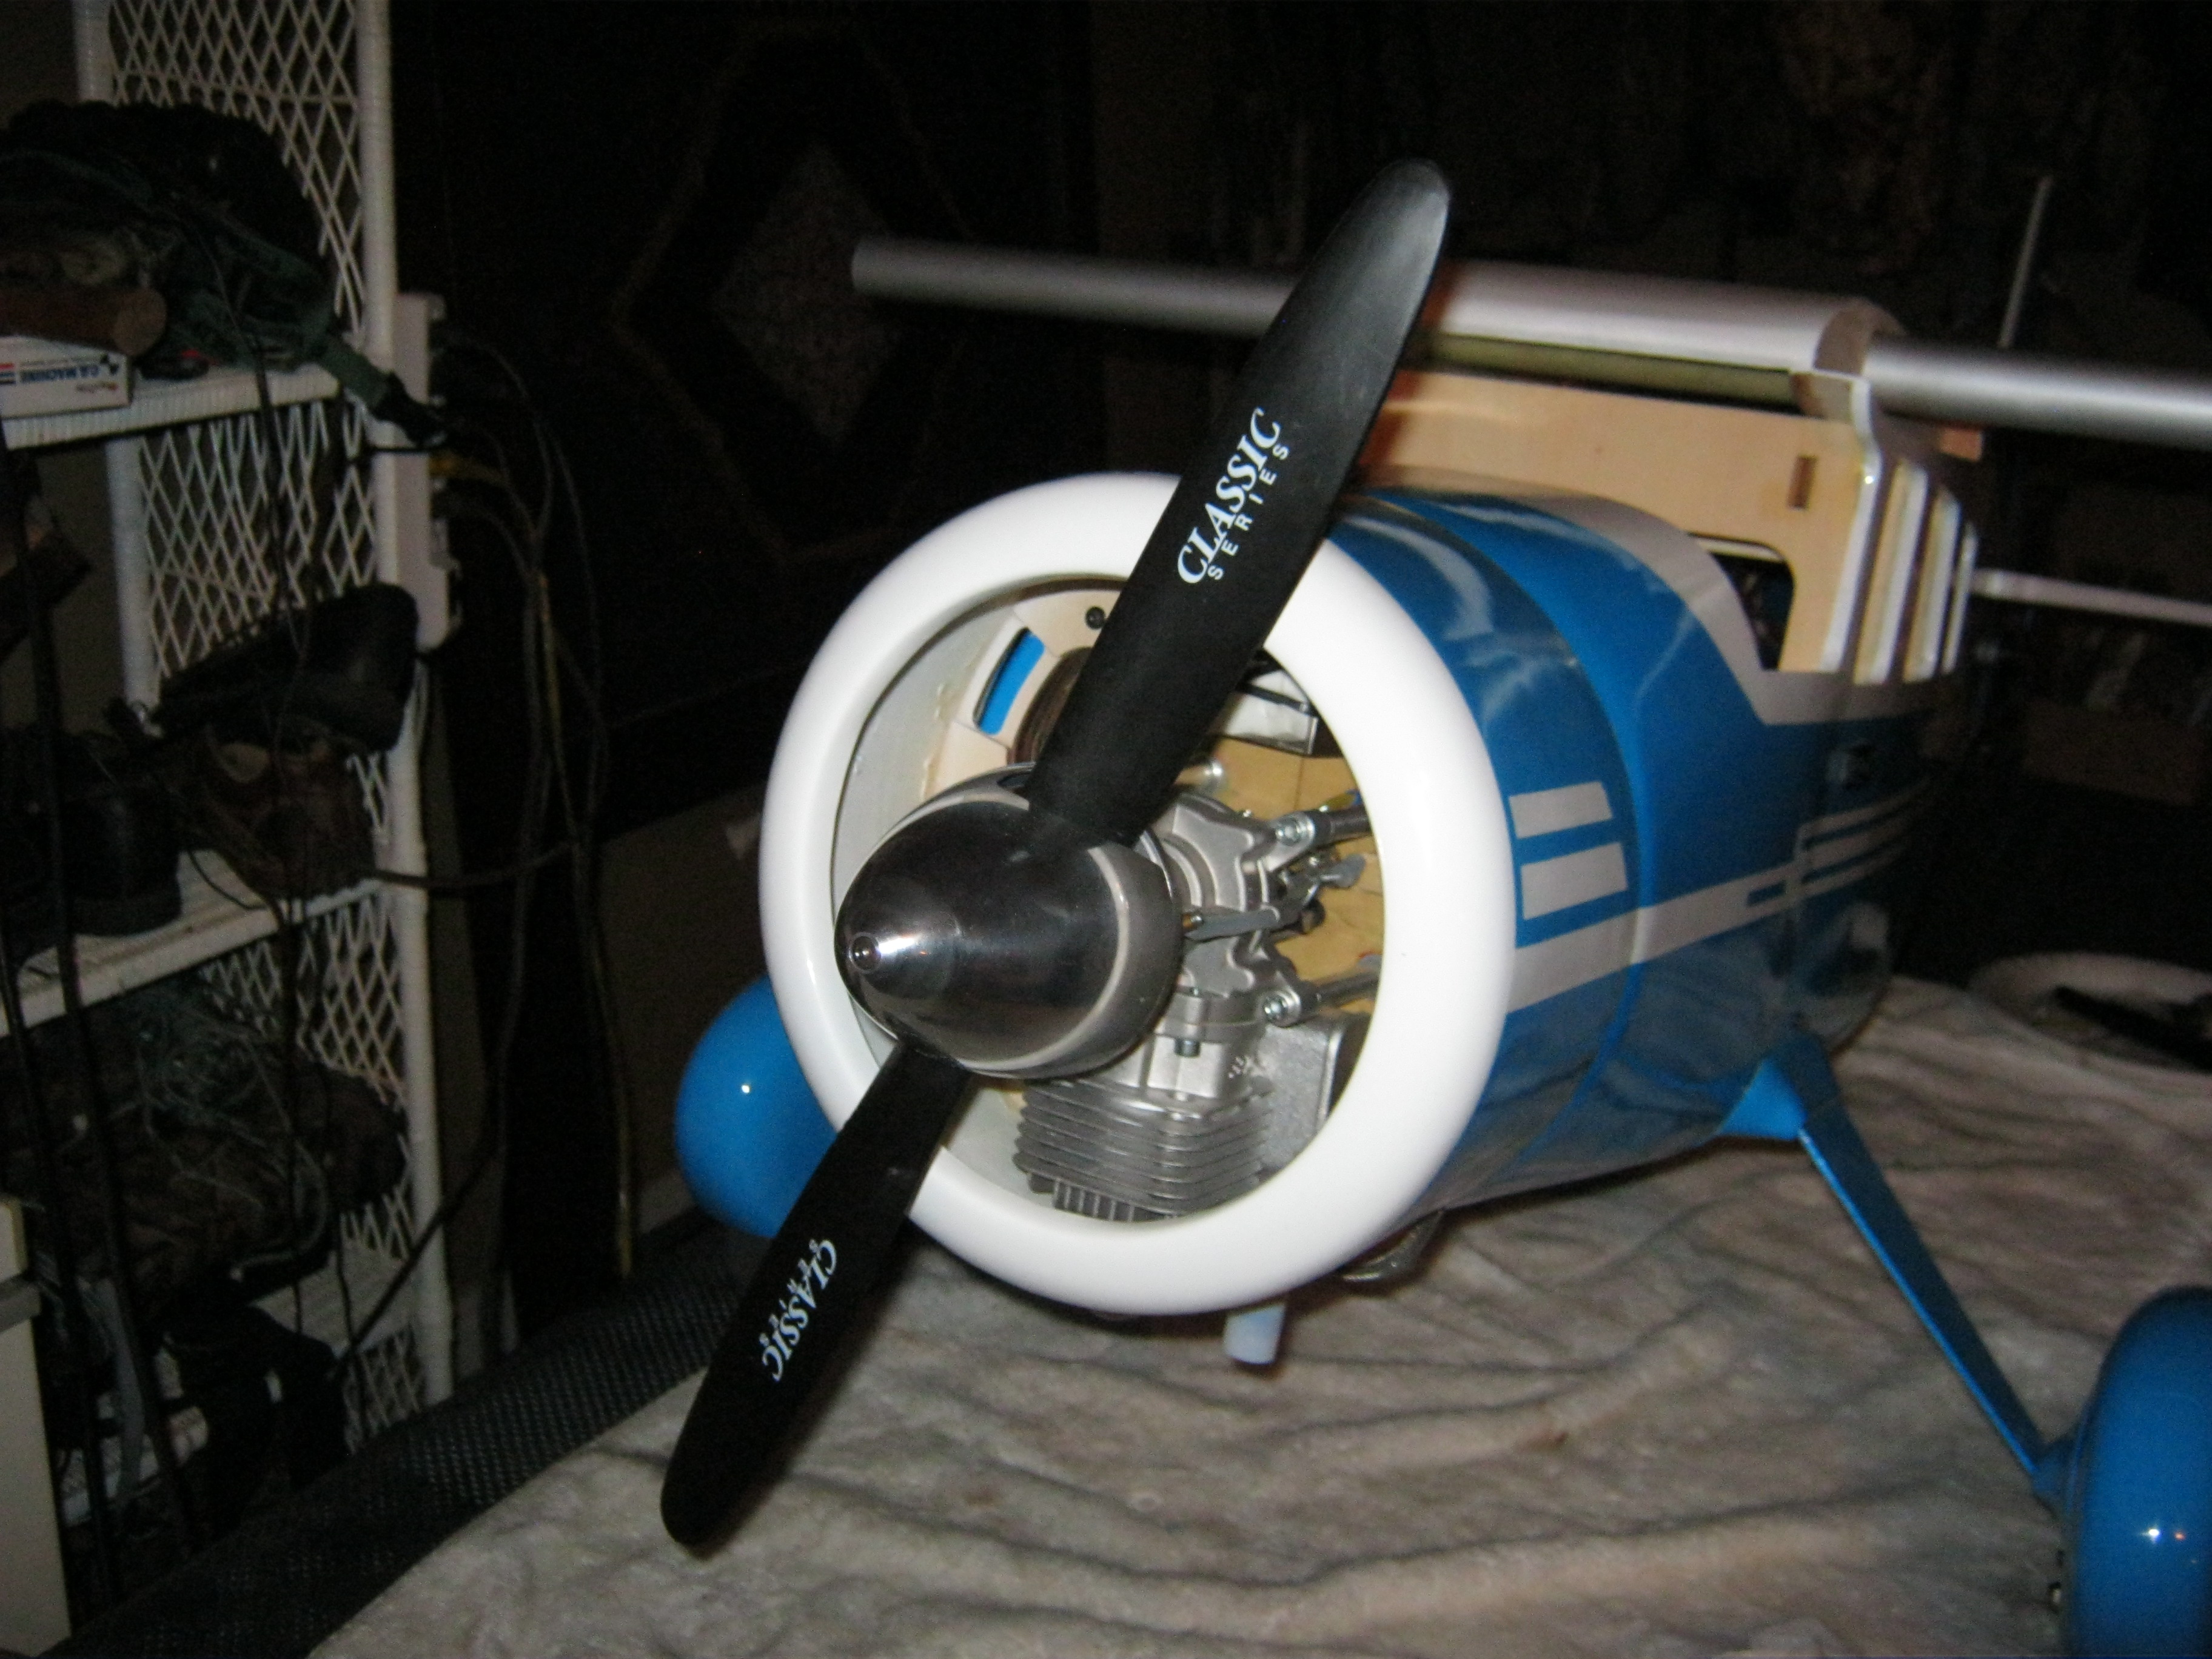
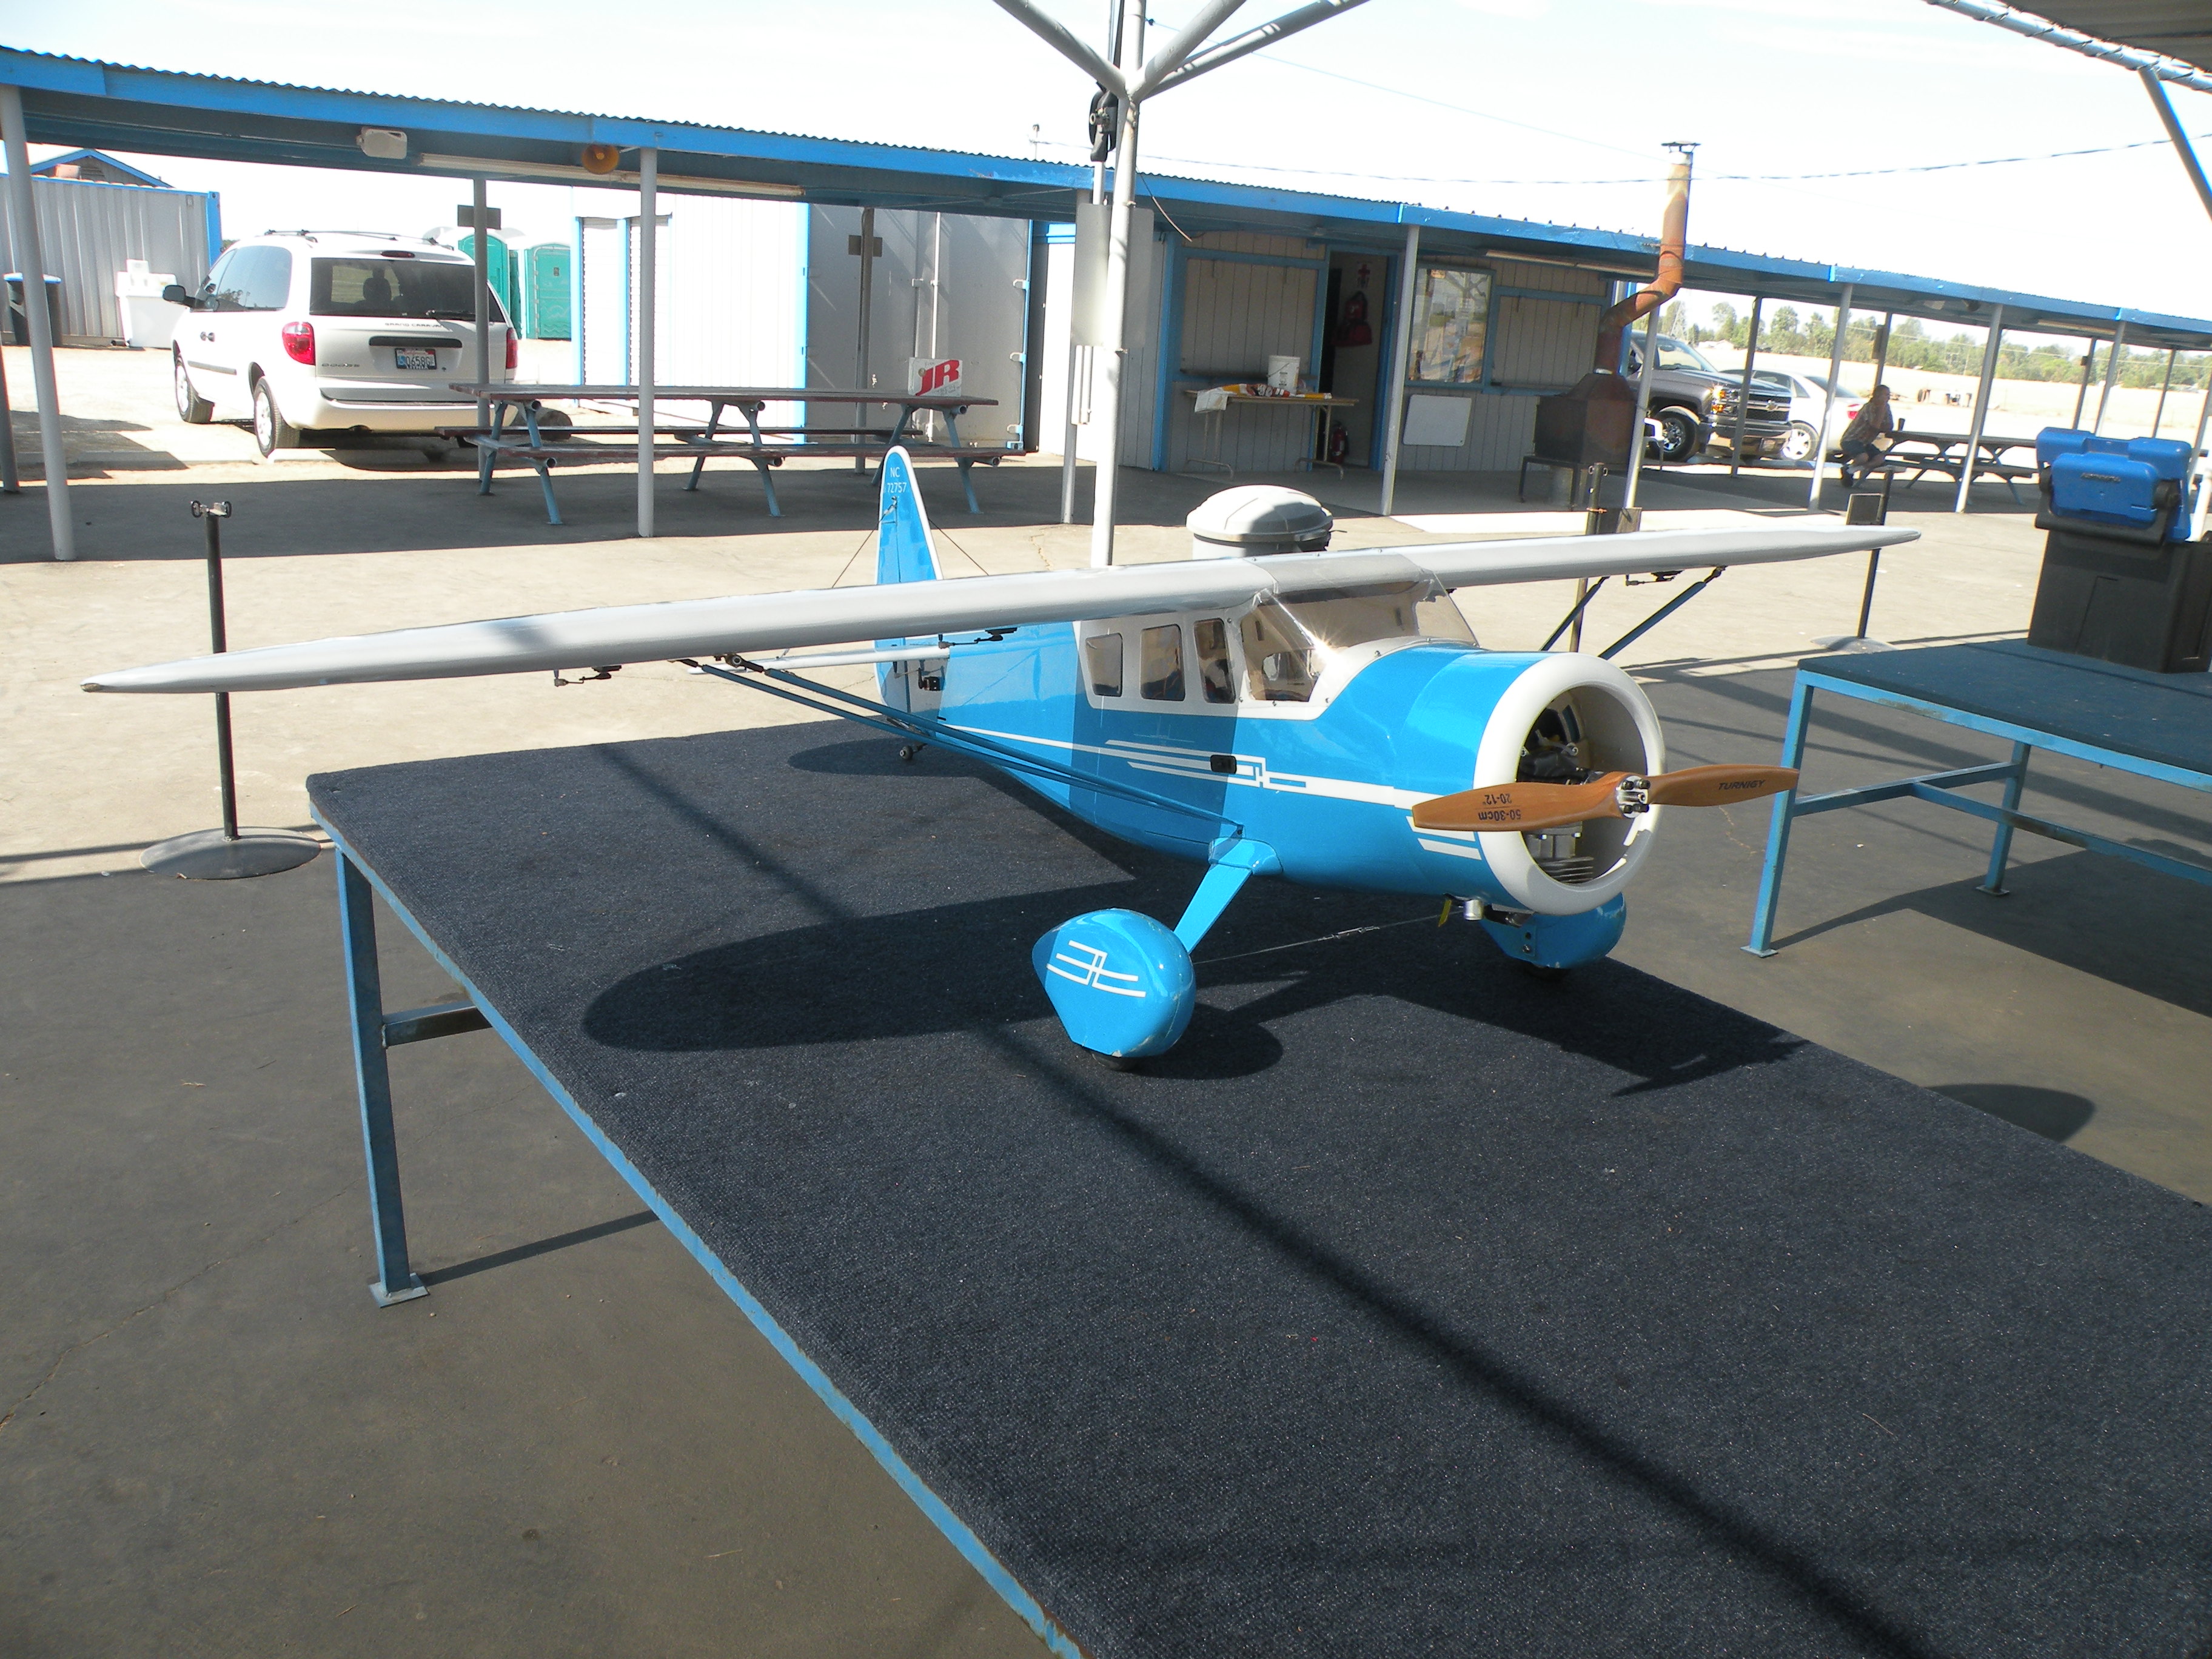
Here are a few pictures of my Howard DGA 12. It was originally powered by a UMS Evolution 7-77 radial engine but is currently powered by a DLE 55RA. The DLE 55RA engine is way too much power, a 35 would be more than enough.


Best wishes and good safe flying.
Heli-NuBee (AKA Roger the radial rabbit)
Best wishes and good safe flying.
Heli-NuBee (AKA Roger the radial rabbit)

