Phoenix HERO 3D Assembly BASH
 11-07-2015 | 08:25 PM
#1

Thread Starter

Back in June, Tower had these planes on sale for $140.00. With promotional discount and free shipping I could get one delivered to the door for about $117.00. The impulse overcame me and I clicked in all the right spots and a week or so later, sure enough the HERO landed at my door.
Well, my assembly will certainly be a bash....As soon as I opened the box and started checking things out a list of things to do (read that change) began to grow. I�ll try to share it all in this thread. I have been picking at this thing for months. So, this assembly will not be a quick one. I am slow.. and I have too many other things to do....
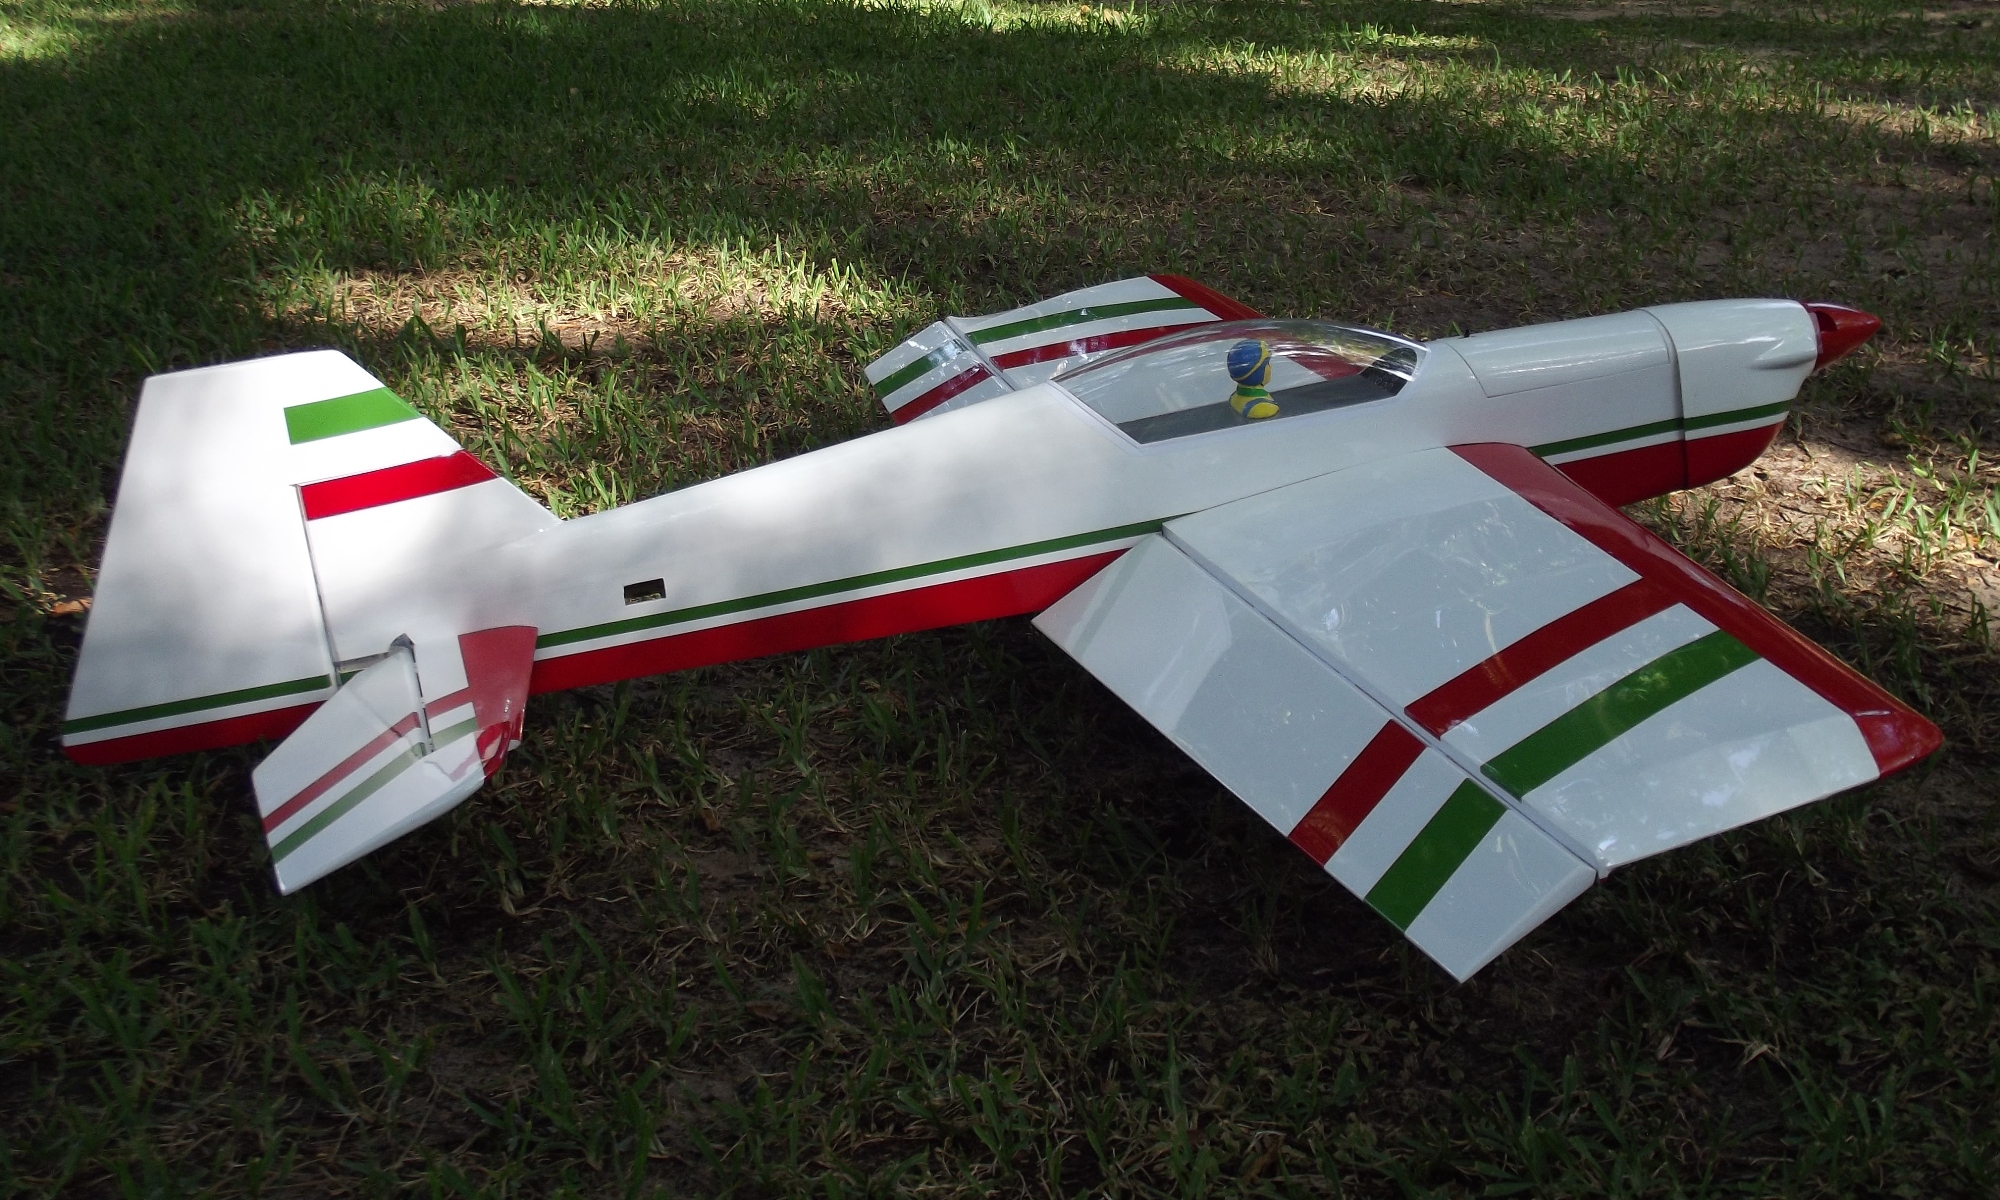
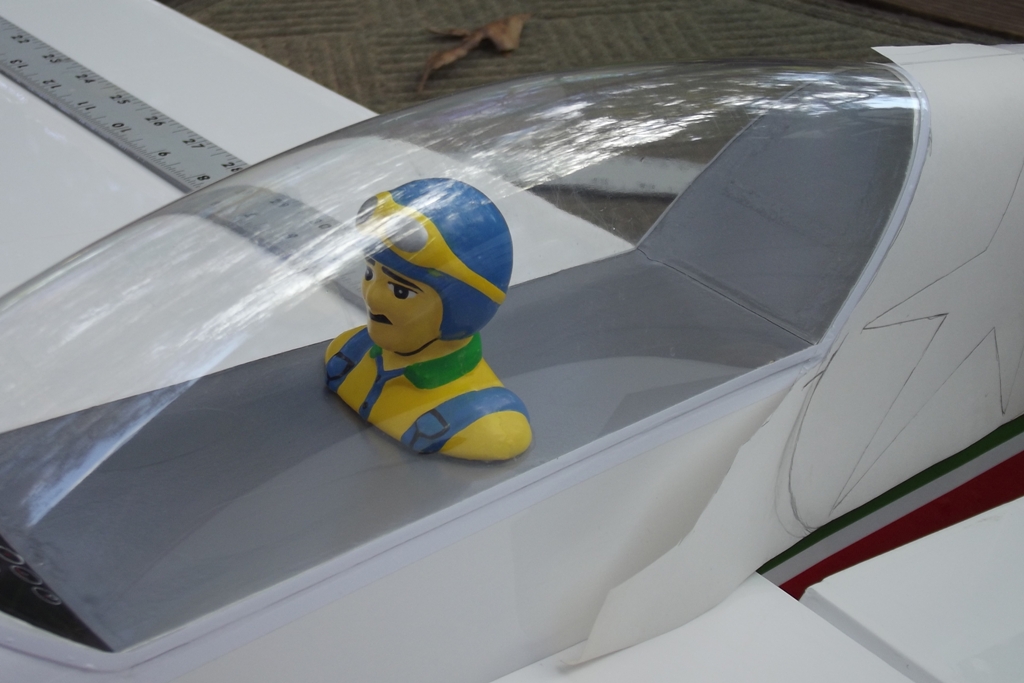
Even before I bought it - the Red, White, and Green did not do it for me. So, I�ll be doing quite a bit to change up the color scheme. Still don�t know what to do with the pink on the bottom of the wing and tail feathers. What is crazy to me, is the factory color scheme completely hides a pretty good looking airplane. We�ll see how mine looks when done. Oh, and the pilot is hideous! He/It will be replaced. Or at least repainted. Still won�t be scale quality but... I can�t stand to look at what came in this thing as a pilot.
I have some issues with the engineering for the fuselage, knowing how I abuse my planes. I�ll go over this in detail when I get there. But the area from the front of the wing to the firewall only has a minimum amount of wood keeping things connected. I will be gluing the �hatch� and add some kind of support/stiffener under the wing. You�ll understand when I get there.
I did the math on the wing area and came up with completely different numbers than what Phoenix claims. Phoenix advertises this airplane to have 58 sq dm (which is equivalent to 899 sq in).... I actually drew up the wing in a cad program and at best this airplane has a wing area (including ailerons) of 838/839 square inches (54 sq dm). This also includes the area covered by the fuselage. They say it should weigh about 5lbs. If so that is still a wing loading of about 13.75 oz sq ft.
I will put a Super Tigre 51 on this plane. Expectation will be 13X4 or 12X6. I use both props on these engines on different planes already. I wanted to put a pipe on it. But with the narrow cowl, inverted is the only way to go. With the headers I have, the pipe would need to go right through the wing. So, an old custom made muffler will go on it.
With my home brew FAI fuel, I get just over 5lbs of thrust with the 13X4 zinger. With that my Phoenix Hero will not be a 3D monster by any stretch of the imagination. But it should go vertical long enough to keep me happy.
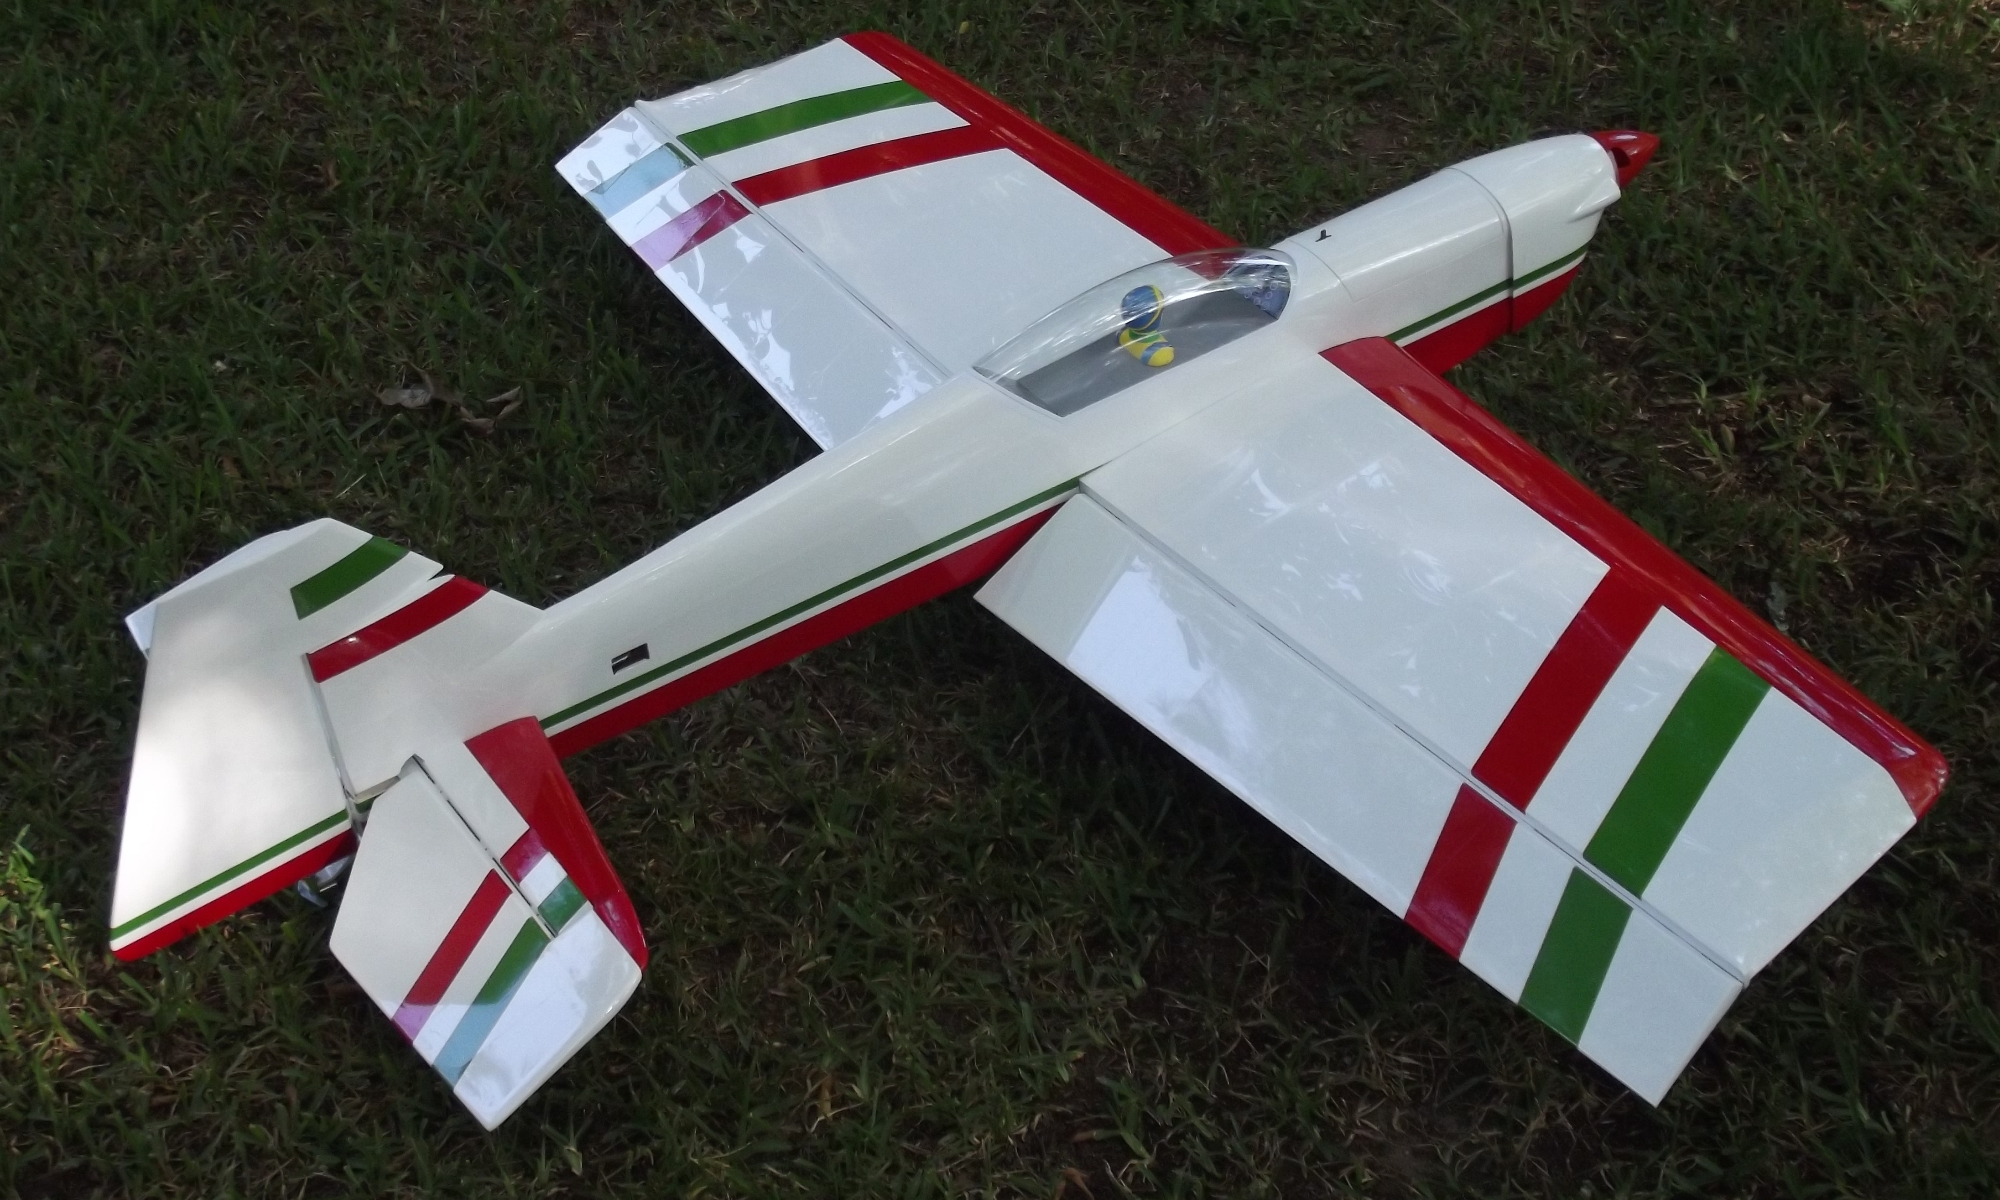
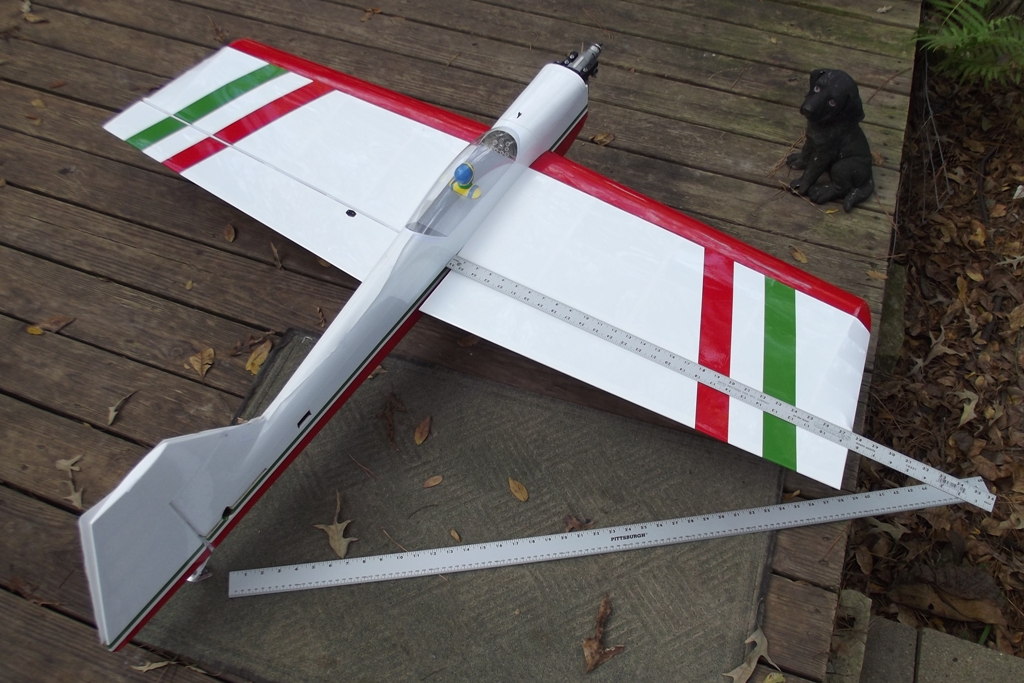
Alright.. So much for all the lead in hoopla..... Here is a few pictures of the plane mocked up.


Well, my assembly will certainly be a bash....As soon as I opened the box and started checking things out a list of things to do (read that change) began to grow. I�ll try to share it all in this thread. I have been picking at this thing for months. So, this assembly will not be a quick one. I am slow.. and I have too many other things to do....
Even before I bought it - the Red, White, and Green did not do it for me. So, I�ll be doing quite a bit to change up the color scheme. Still don�t know what to do with the pink on the bottom of the wing and tail feathers. What is crazy to me, is the factory color scheme completely hides a pretty good looking airplane. We�ll see how mine looks when done. Oh, and the pilot is hideous! He/It will be replaced. Or at least repainted. Still won�t be scale quality but... I can�t stand to look at what came in this thing as a pilot.
I have some issues with the engineering for the fuselage, knowing how I abuse my planes. I�ll go over this in detail when I get there. But the area from the front of the wing to the firewall only has a minimum amount of wood keeping things connected. I will be gluing the �hatch� and add some kind of support/stiffener under the wing. You�ll understand when I get there.
I did the math on the wing area and came up with completely different numbers than what Phoenix claims. Phoenix advertises this airplane to have 58 sq dm (which is equivalent to 899 sq in).... I actually drew up the wing in a cad program and at best this airplane has a wing area (including ailerons) of 838/839 square inches (54 sq dm). This also includes the area covered by the fuselage. They say it should weigh about 5lbs. If so that is still a wing loading of about 13.75 oz sq ft.
I will put a Super Tigre 51 on this plane. Expectation will be 13X4 or 12X6. I use both props on these engines on different planes already. I wanted to put a pipe on it. But with the narrow cowl, inverted is the only way to go. With the headers I have, the pipe would need to go right through the wing. So, an old custom made muffler will go on it.
With my home brew FAI fuel, I get just over 5lbs of thrust with the 13X4 zinger. With that my Phoenix Hero will not be a 3D monster by any stretch of the imagination. But it should go vertical long enough to keep me happy.
Alright.. So much for all the lead in hoopla..... Here is a few pictures of the plane mocked up.
Last edited by RICKSTUBBZ; 11-07-2015 at 08:32 PM.
 11-07-2015 | 08:40 PM
#2
Thread Starter
Here is some of the stuff I have started with and a few pictures to go with..
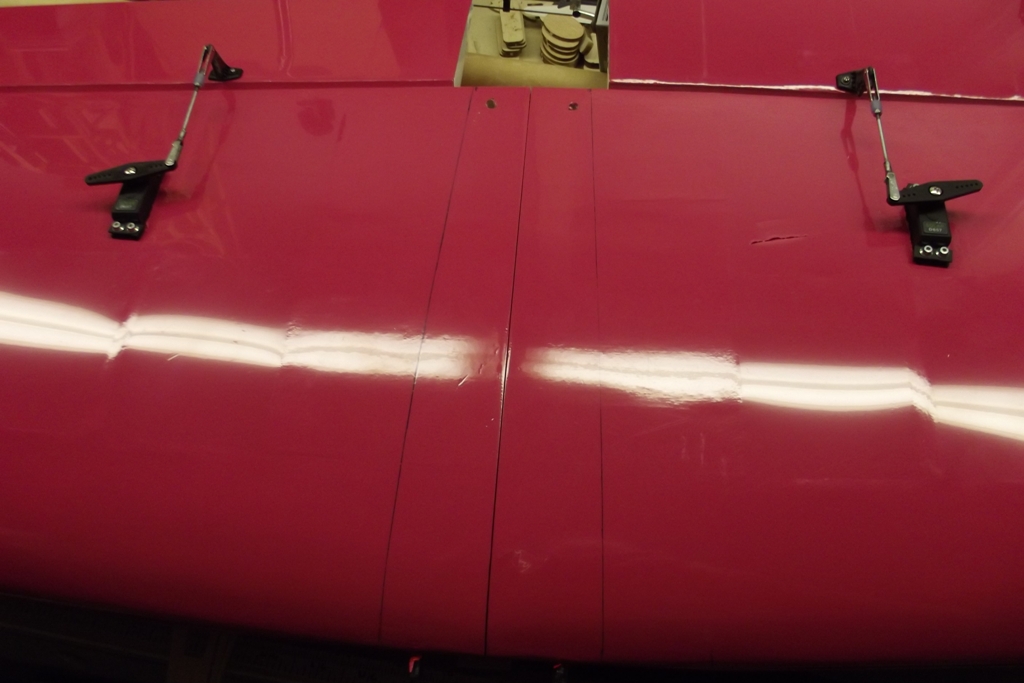
It comes with the wing in two halves but they are to be glued as one. You can see looking down the wing, they have done a nice job keeping the weight down. Also shown is the aluminum tube that supports the center section..


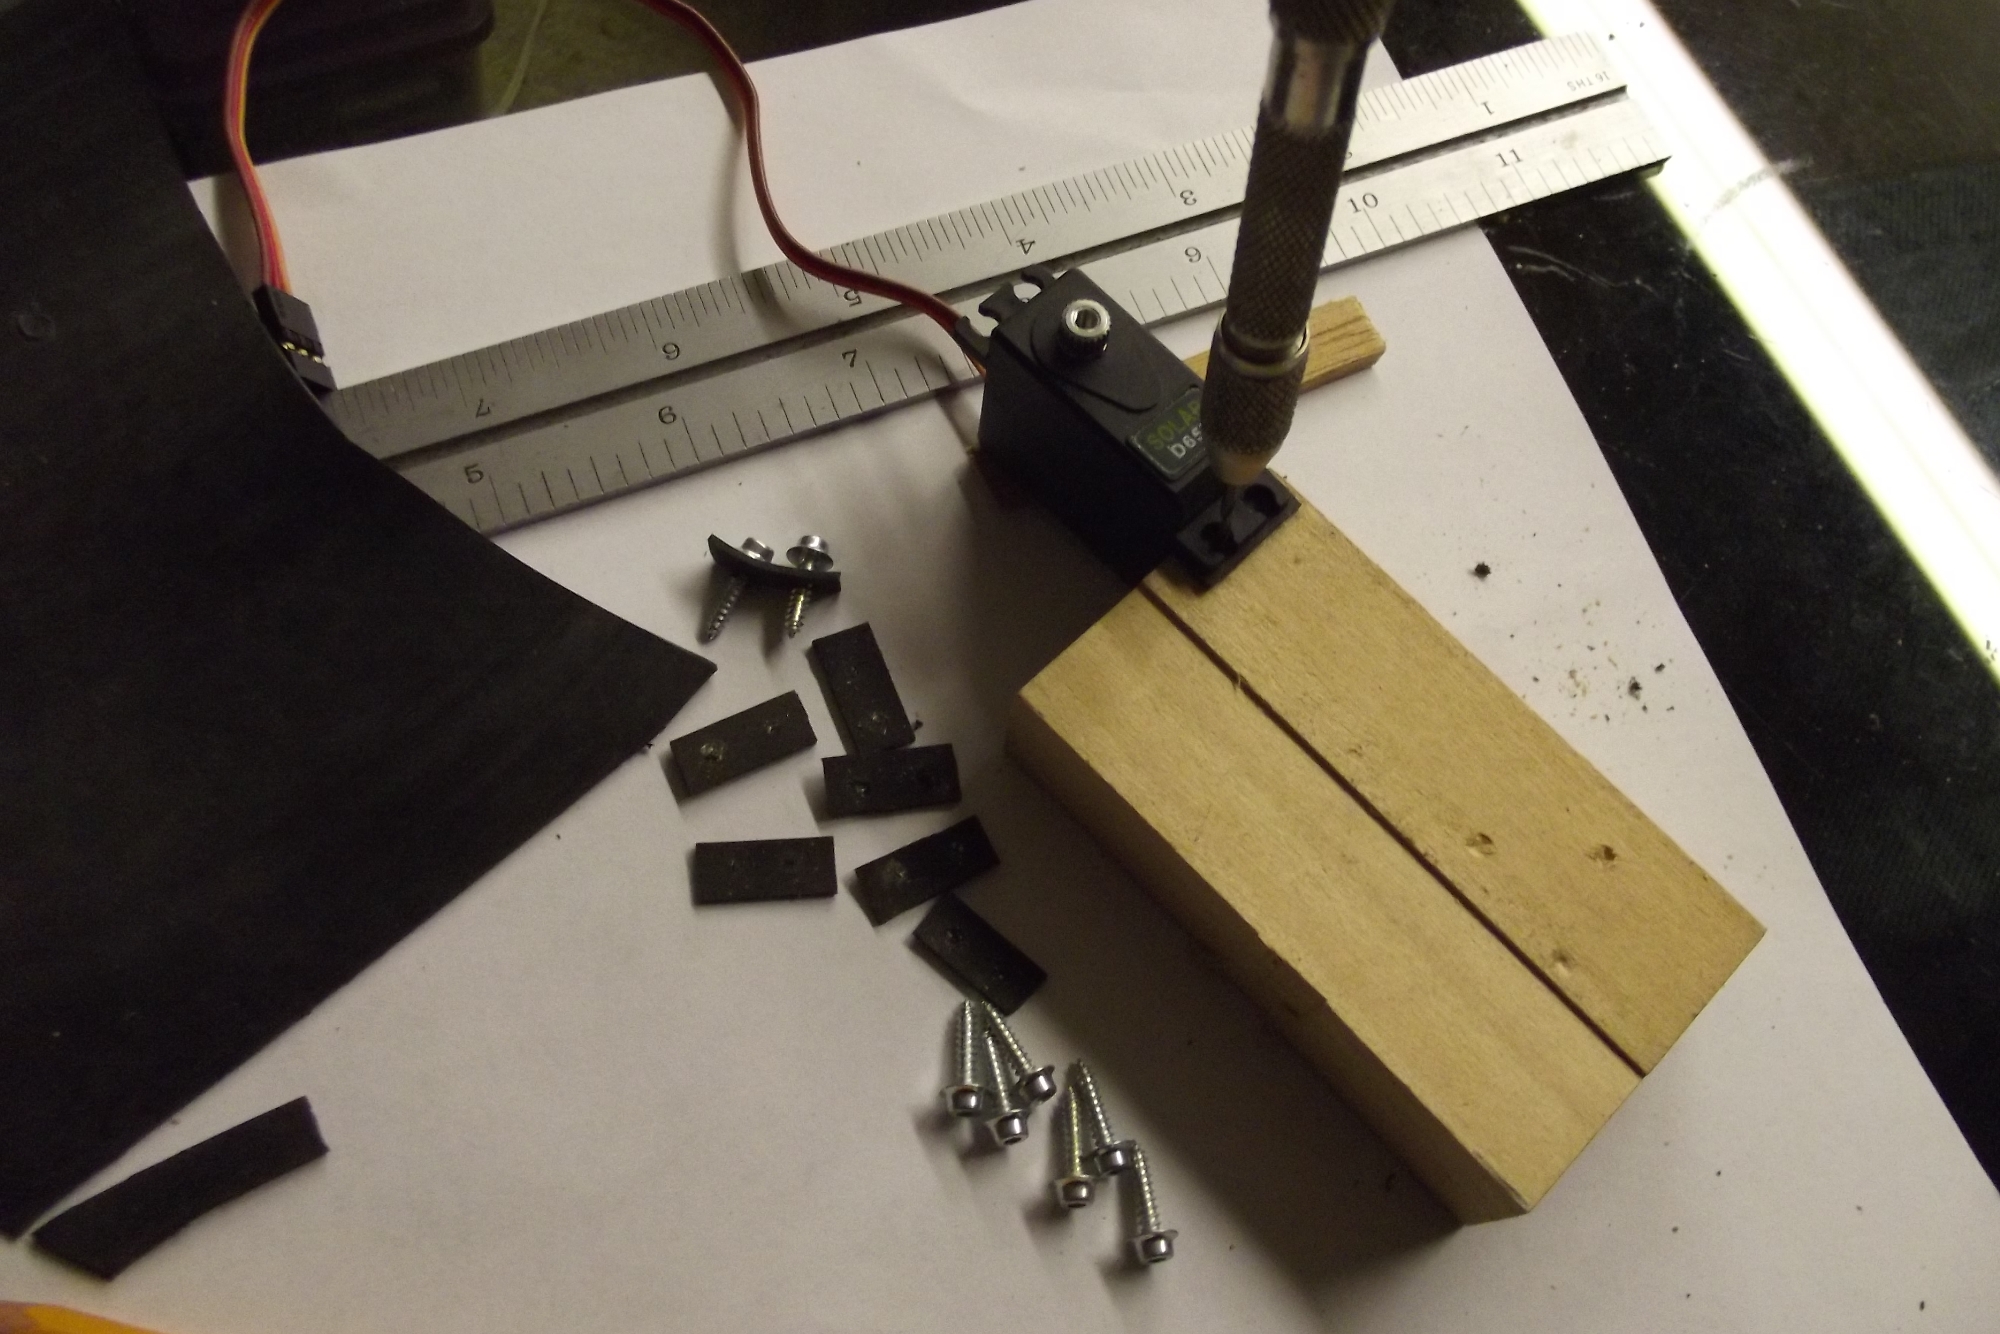
I picked up four of the Solar D657 digital metal geared ball bearing servos. Great deal and quick service from Hobby Partz

I had to resize the servo holes just a bit, and right off the bat, I loose concentration and the file slips and poof...I have poked a hole in the covering. So, I�ll cover it up with something when I add to all that pink.

The Solar�s did not/do not come with mounting grommets. Rather than go dig through all my stuff swiping grommets I decided to just make a �rubber mount�. Using an old inner tube I cut up some slices and with my pin vise - drilled some holes. I have used this method for mounting 9 gram and 5 gram servos to use as throttle servos as well. Mounted the servo in a �rubber sandwich� and carefully tightened without going too tight. Another view of the split in the covering as well.


It comes with the wing in two halves but they are to be glued as one. You can see looking down the wing, they have done a nice job keeping the weight down. Also shown is the aluminum tube that supports the center section..
I picked up four of the Solar D657 digital metal geared ball bearing servos. Great deal and quick service from Hobby Partz
I had to resize the servo holes just a bit, and right off the bat, I loose concentration and the file slips and poof...I have poked a hole in the covering. So, I�ll cover it up with something when I add to all that pink.
The Solar�s did not/do not come with mounting grommets. Rather than go dig through all my stuff swiping grommets I decided to just make a �rubber mount�. Using an old inner tube I cut up some slices and with my pin vise - drilled some holes. I have used this method for mounting 9 gram and 5 gram servos to use as throttle servos as well. Mounted the servo in a �rubber sandwich� and carefully tightened without going too tight. Another view of the split in the covering as well.
11-13-2015 | 04:10 PM
#3
Thread Starter
No “bashing” to speak of yet. In fact all I have done so far is mess with the ailerons. Still working without any glue on the hinges. I’ll be pulling the ailerons back off later when I start working on the covering.
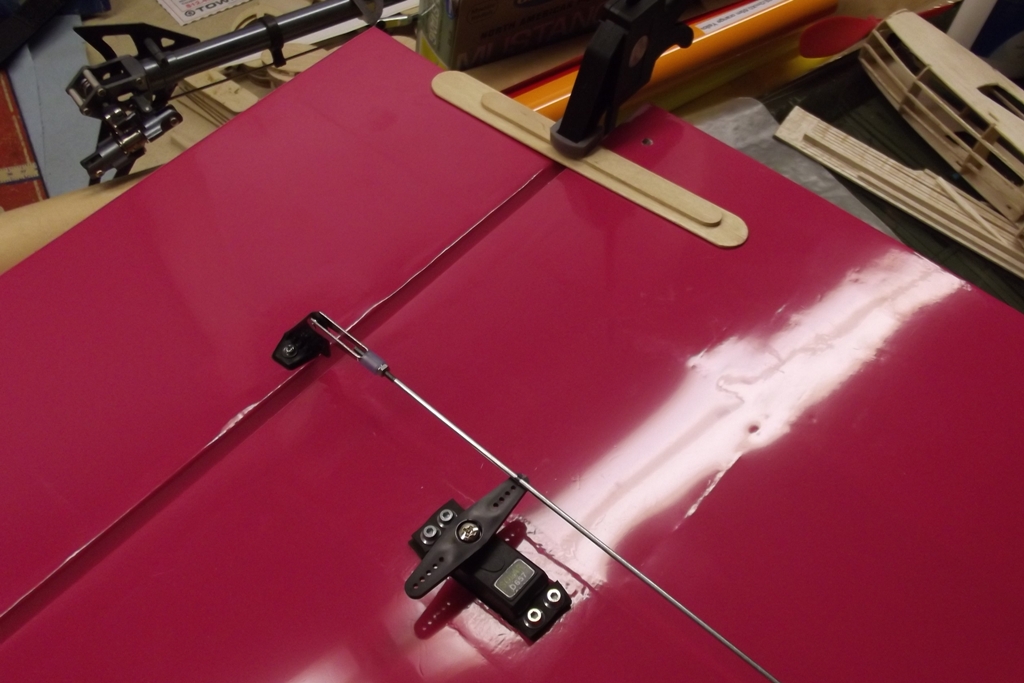
One of the methods I use to hold the ailerons “near center” is to use a small clamp and some popsicle sticks.

Using a square lined up with the hinge line, I marked where the center of the control horn needed to be. Used the “pine vise” to drill the holes for the control horn. The screws that came with this plane for the control horns have really small heads on them and did not come with washers. So, I dug into my stash for some 2-56 flat washers to keep the screws from pulling through the control horn.

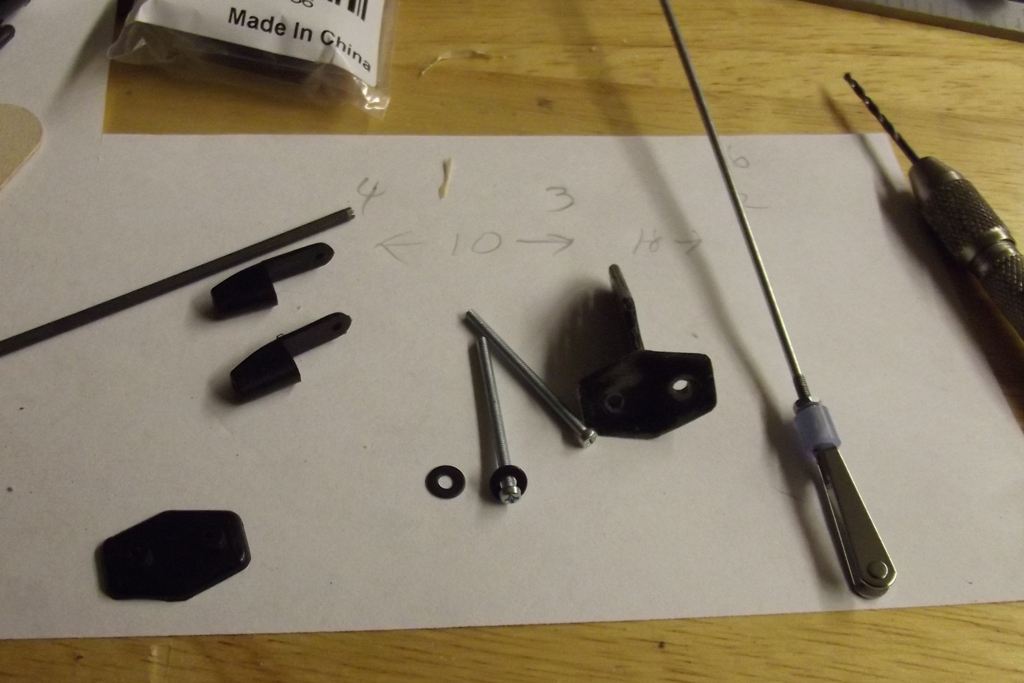
I marked, bent and cut the linkage to use the clip type keepers that came with the kit to attach the control rod to the ailerons. I used my bench vise to bend the wire. Which is very soft and easy to bend. But the inside corner still come out to round. and they did not fit my servo arm in a way for me to be confident.
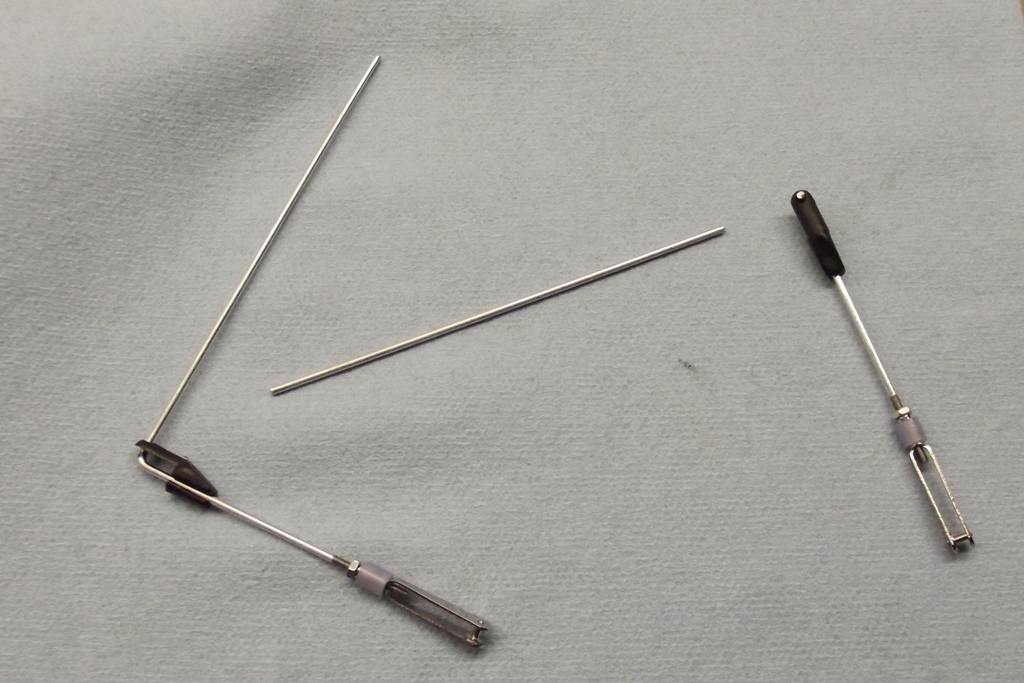
So, I cut the bend off and put on some great planes solder clevises. I used a little of the paste flux to help flow the solder. This is the better way to go anyway.")


One of the methods I use to hold the ailerons “near center” is to use a small clamp and some popsicle sticks.
Using a square lined up with the hinge line, I marked where the center of the control horn needed to be. Used the “pine vise” to drill the holes for the control horn. The screws that came with this plane for the control horns have really small heads on them and did not come with washers. So, I dug into my stash for some 2-56 flat washers to keep the screws from pulling through the control horn.
I marked, bent and cut the linkage to use the clip type keepers that came with the kit to attach the control rod to the ailerons. I used my bench vise to bend the wire. Which is very soft and easy to bend. But the inside corner still come out to round. and they did not fit my servo arm in a way for me to be confident.
So, I cut the bend off and put on some great planes solder clevises. I used a little of the paste flux to help flow the solder. This is the better way to go anyway.
11-14-2015 | 08:29 AM
#4
Thread Starter
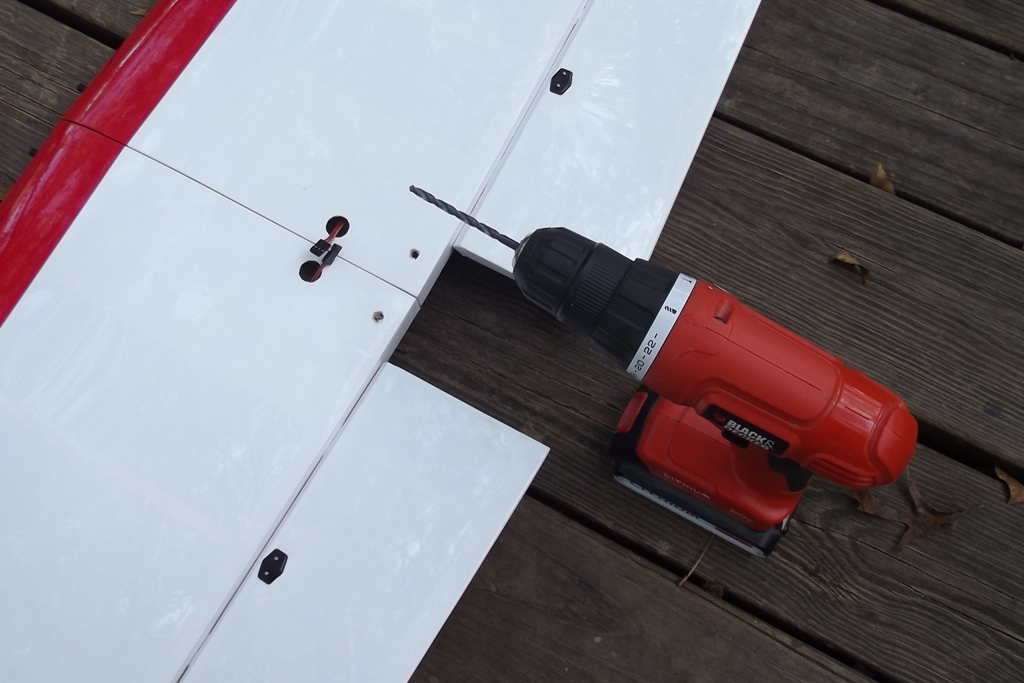
Did some preliminary fitting of the wing to make sure everything is going to line up right. Had to do a little work on the holes in the wing to get everything to fit. Aileron hinges are still not glued nor are the wing halves. I�ll do the both of those once the covering mods are finished on the wings. Harbor freight and some of the dollar stores are great places to pick up the longer scales. Perfect strait edges as well. I was able to get my wife to give me a hand with the measurements. I was surprised that the wing is setting in there within a 1/16�. I usually get pretty picky on alignment stuff. I know they will fly with the wing off buy an 1/8� or more. But they fly better when they are square.
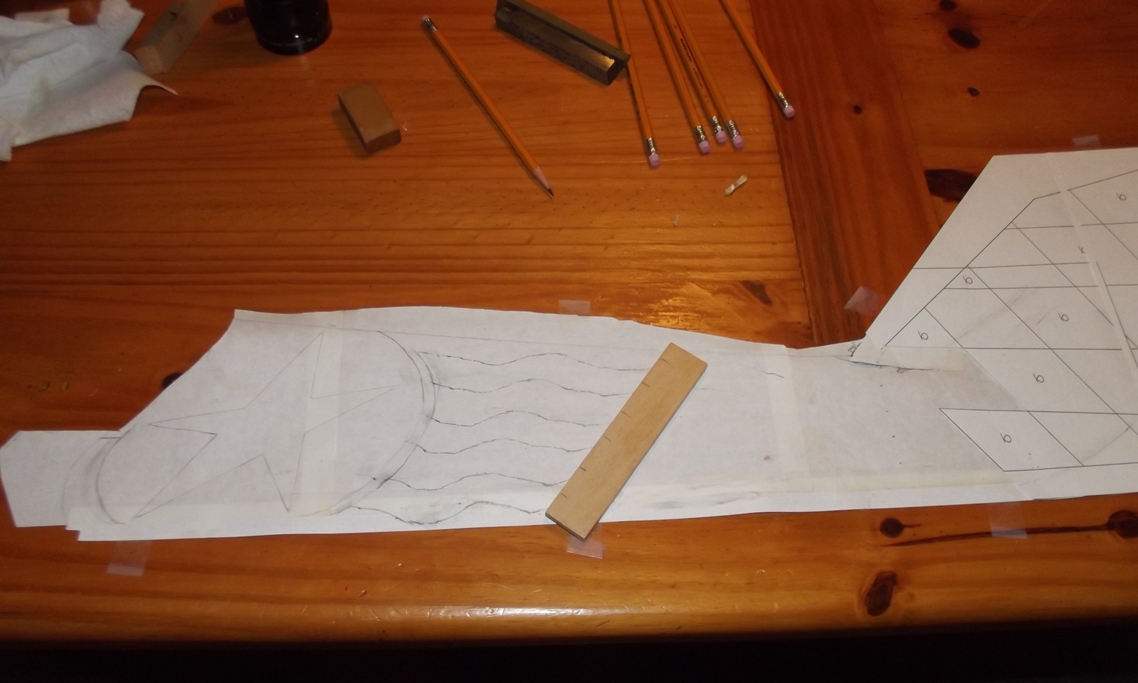
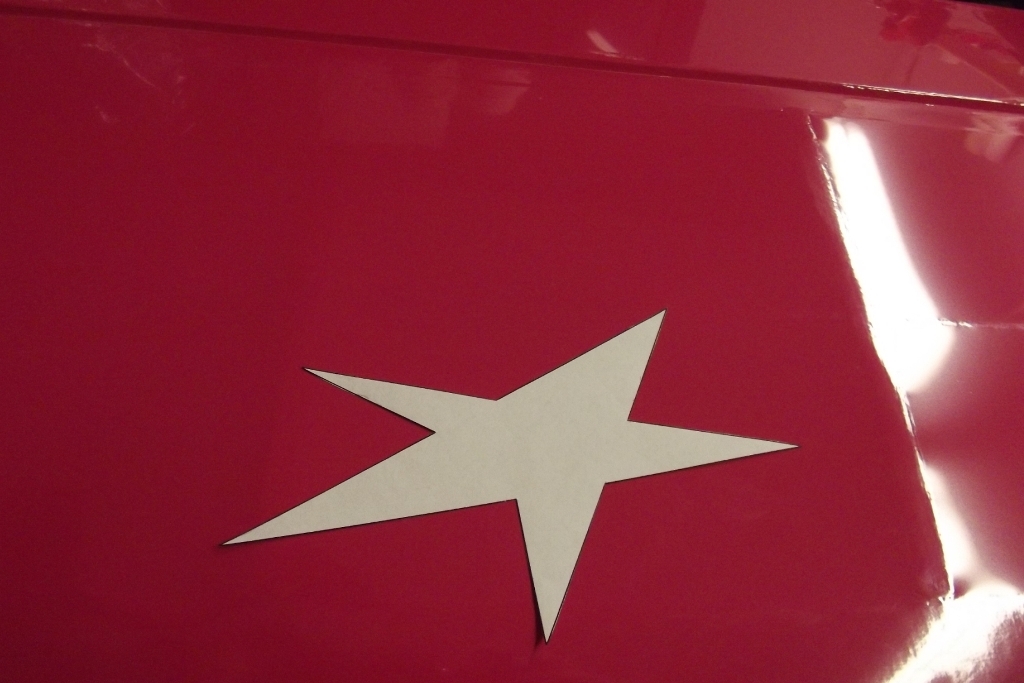
Here you can see the paper pattern I have on the back of the fuse to develop my color scheme. I created the star pattern using a cad program � printed � then transferred to the pattern on the plane. Did I mention what I think of the looks of this pilot?
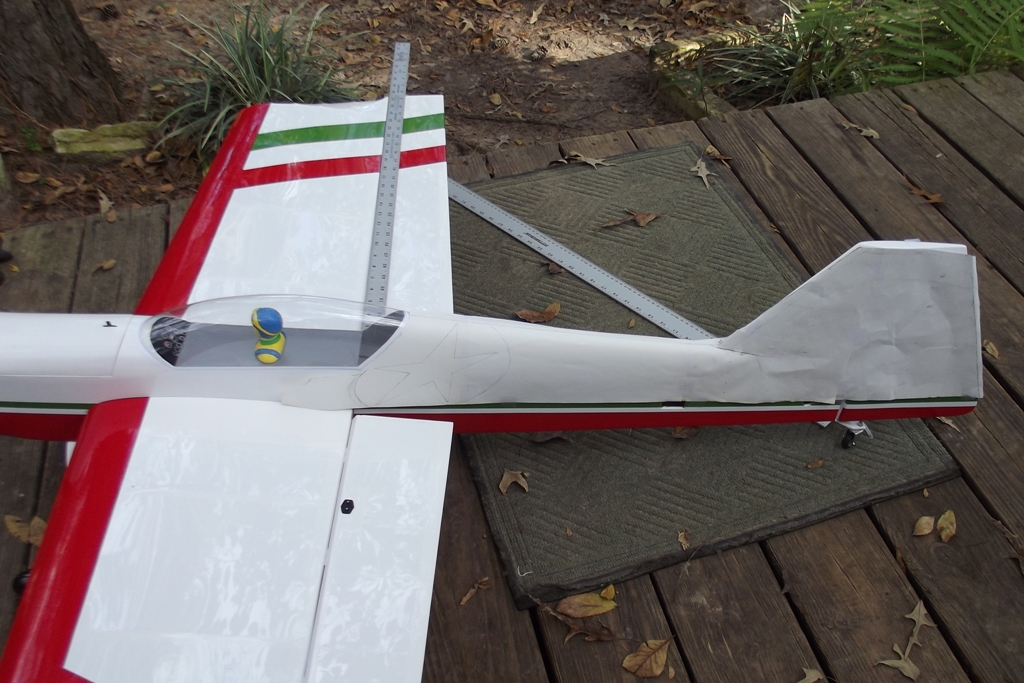
After making sure the wing was close to where it needs to be, I made marks at the edge of the fuse, front and back. Then I used the �belly pan� to complete the lines. I will be removing the covering material almost to the lines a little later.

Here you can see the paper pattern I have on the back of the fuse to develop my color scheme. I created the star pattern using a cad program � printed � then transferred to the pattern on the plane. Did I mention what I think of the looks of this pilot?
After making sure the wing was close to where it needs to be, I made marks at the edge of the fuse, front and back. Then I used the �belly pan� to complete the lines. I will be removing the covering material almost to the lines a little later.
11-23-2015 | 03:34 PM
#5
Thread Starter
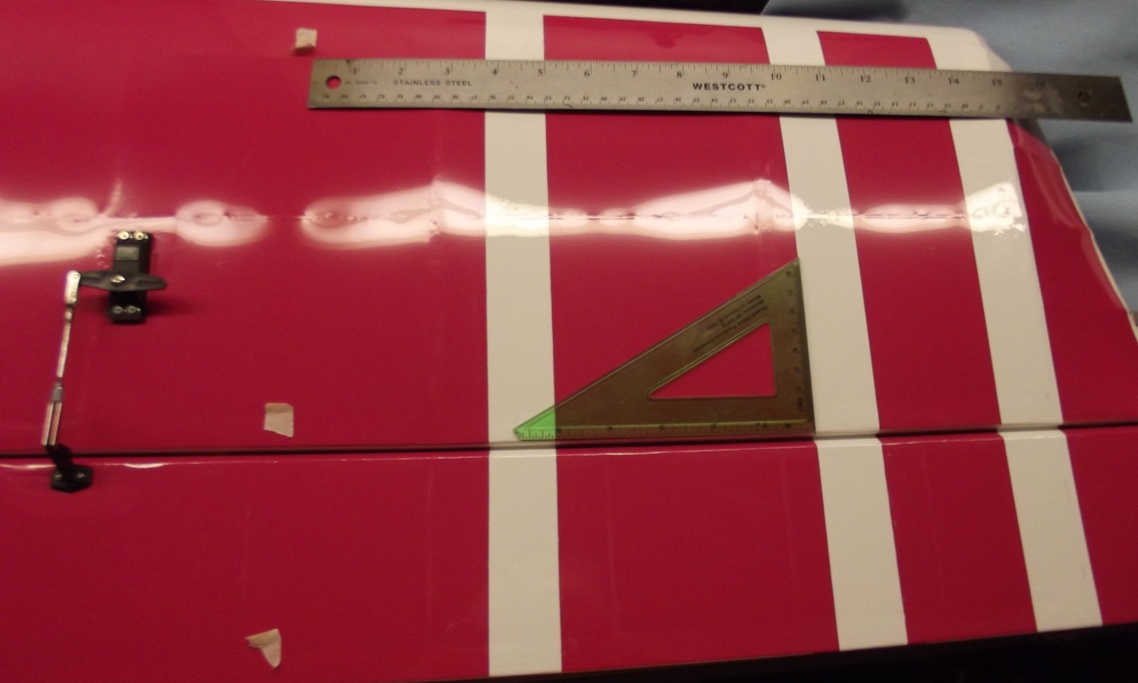
I have done the covering additions to the bottom of the wing. Where I fly, an all red leading edge tends to disappear when you are on final approach for a landing. So I added white to the bottom of the leading edge starting at the center of the leading edge. Decided on some “Invasion Stripes” to add a little character. I am still working with the ailerons not being glued. Pretty much all of this was done with my little trim iron.
The pictures tell most of the story.
I took one of my scales that is 1-1/4” wide and made all the white strips for the invasion strips by cutting down both sides of that scale/ruler. I used little pieces of masking tape to mark where to put the strips. In the process of measuring and marking - I used the plastic square to make sure things were at least close to square with the hinge line. To help wrap the covering material into the hinge area and keep things strait I also used the popsicle stick to push the covering down in the gap while I used the trim iron to get it stuck.
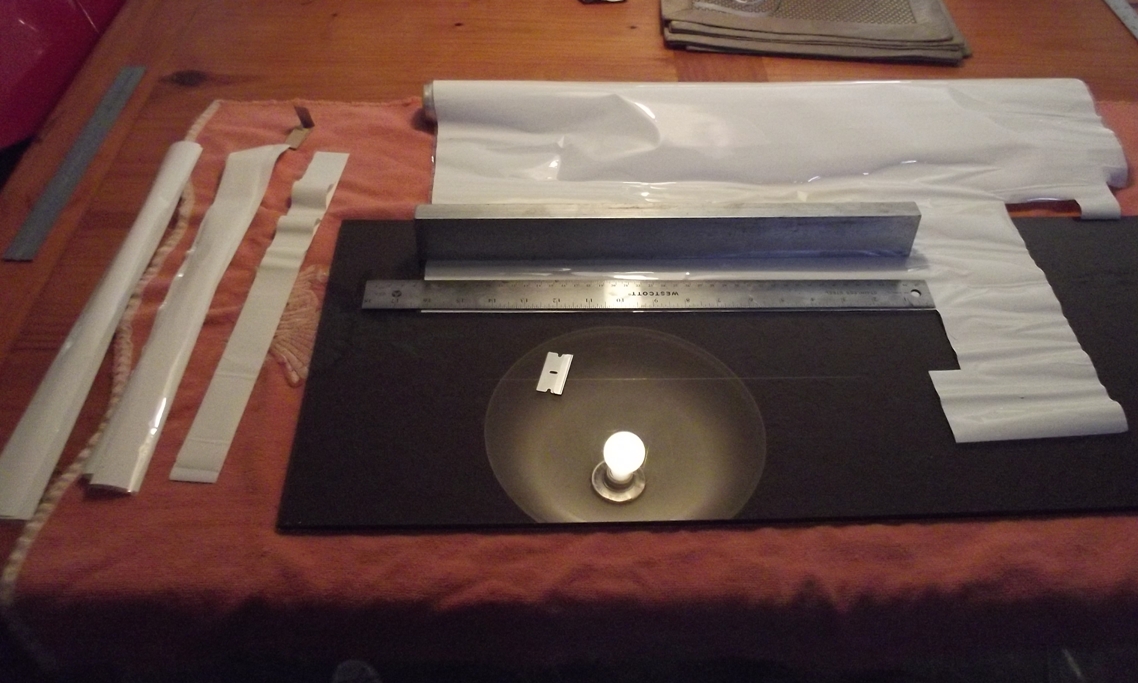
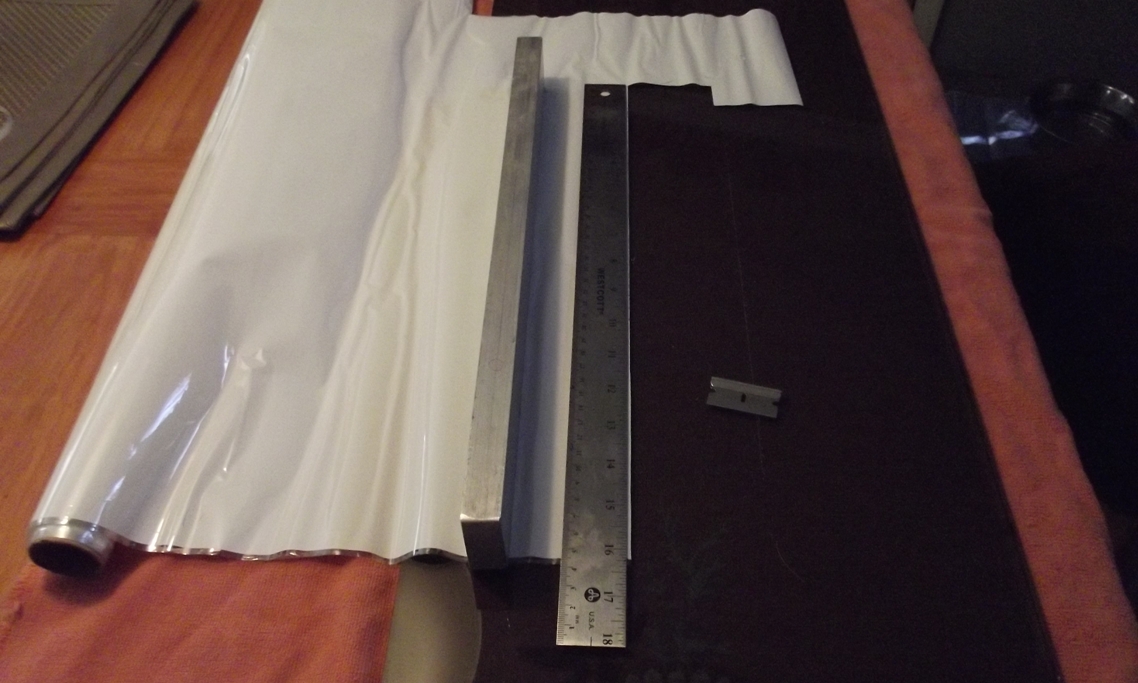

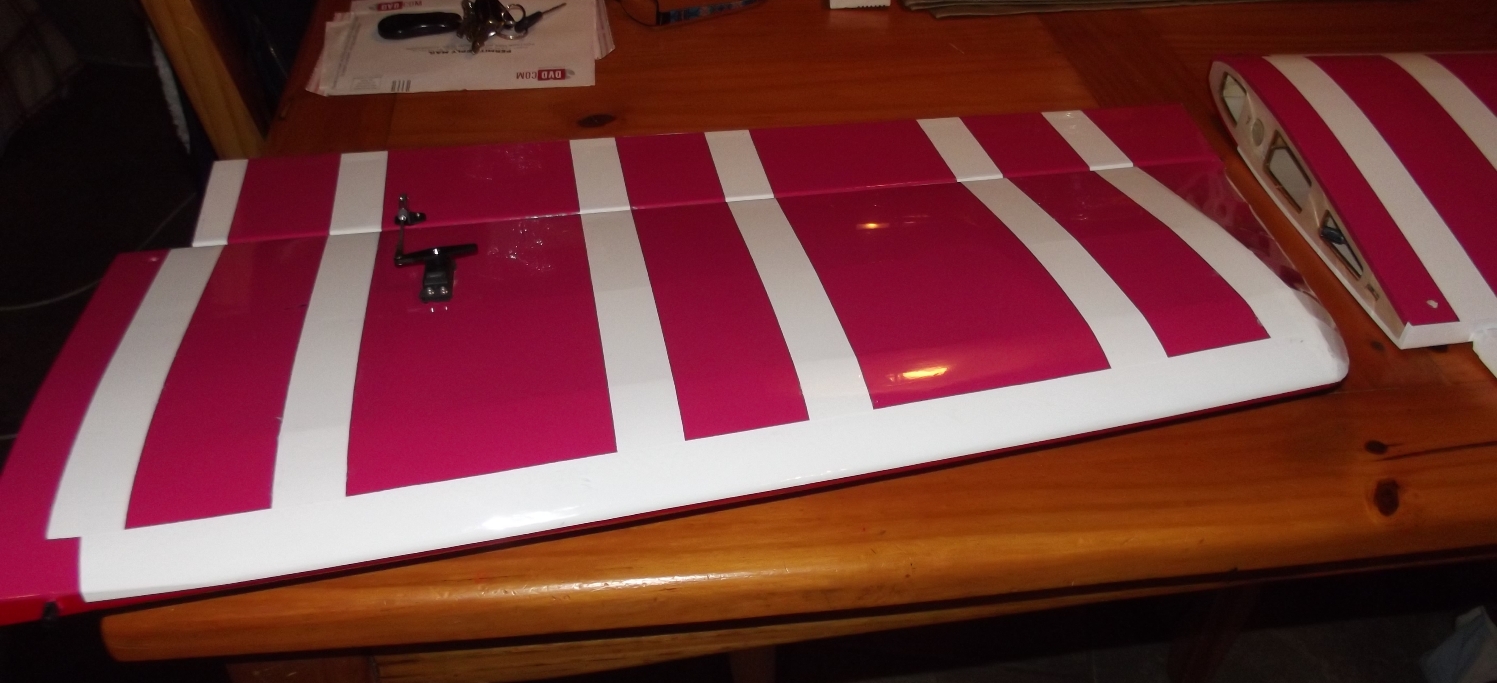

After the white was done, I cut some three inch wide black strips and filled in the middle leaving 1” of white on each side and the “pink” gap between is also 5” I added the light blue just to give it another border. Should be seeable......

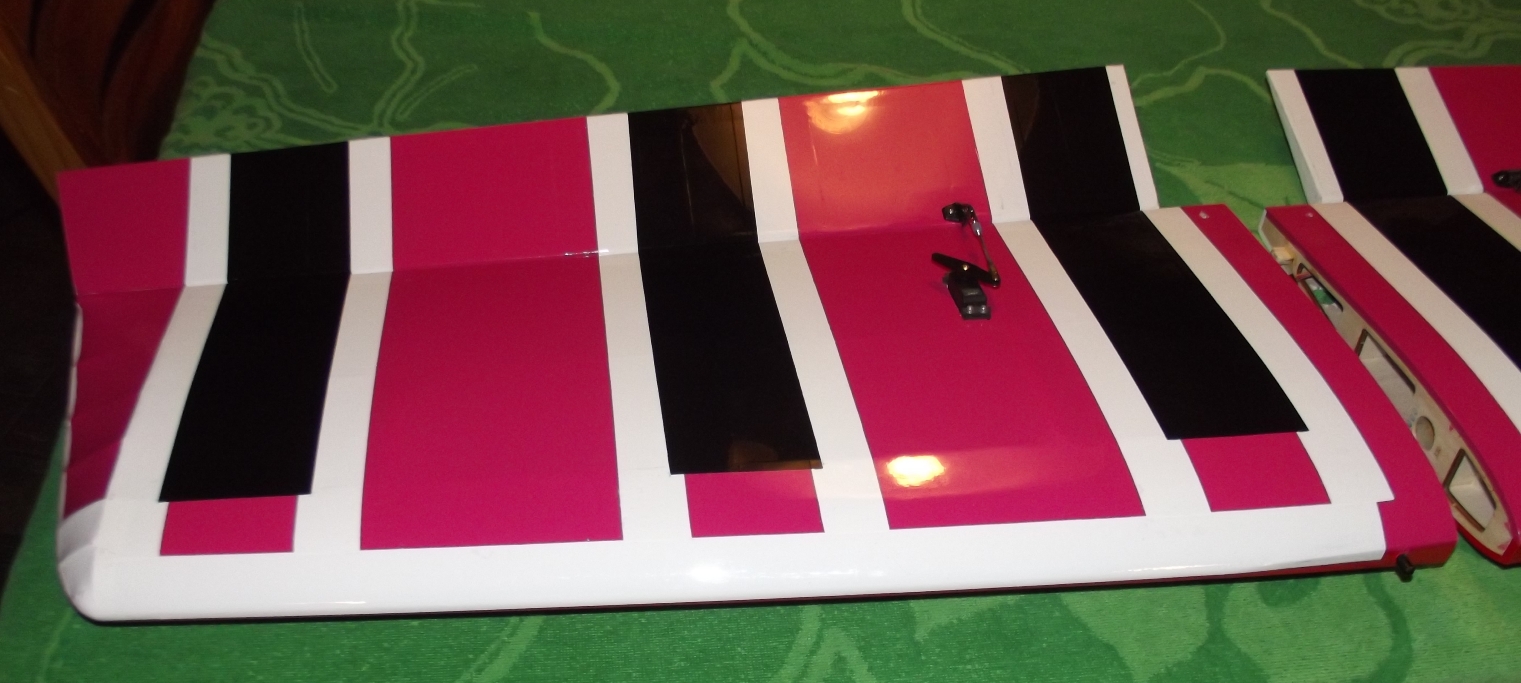
More or less at the end of the leading edge sheeting (at the spar) is where I made the back edge of the blue.


The pictures tell most of the story.
I took one of my scales that is 1-1/4” wide and made all the white strips for the invasion strips by cutting down both sides of that scale/ruler. I used little pieces of masking tape to mark where to put the strips. In the process of measuring and marking - I used the plastic square to make sure things were at least close to square with the hinge line. To help wrap the covering material into the hinge area and keep things strait I also used the popsicle stick to push the covering down in the gap while I used the trim iron to get it stuck.
After the white was done, I cut some three inch wide black strips and filled in the middle leaving 1” of white on each side and the “pink” gap between is also 5” I added the light blue just to give it another border. Should be seeable......
More or less at the end of the leading edge sheeting (at the spar) is where I made the back edge of the blue.
Last edited by RICKSTUBBZ; 11-23-2015 at 03:37 PM.
11-28-2015 | 08:50 AM
#6
Thread Starter
The covering on top of the wing is done. The quality of these pictures sure is not very good. I apologize for that. Hopefully they still help show the process.
I started out creating my �design� on a cad program, printed it out on 8 1/2 X 11 paper and then taped the paper together to make the bigger �pattern�.

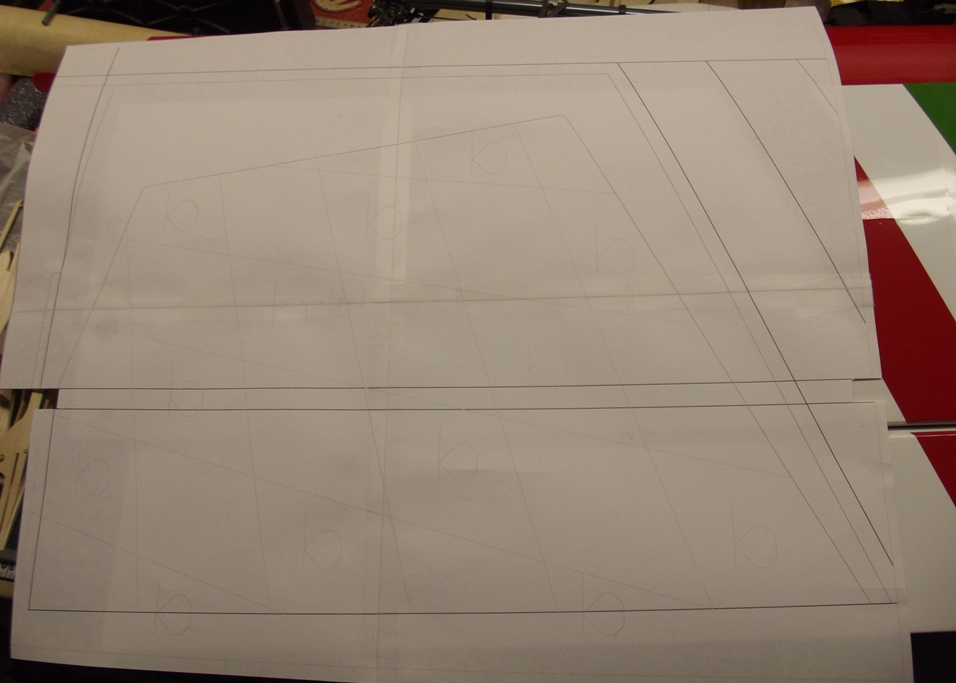
The factory applied red stripes were not in exactly the same place on each wing. So I had to cheat the light blue width and spacing on one wing panel to get things to more or less line up for both sides. Even with that when I got down to the last couple of black squares I had to custom fit the size.
In these three shots I try to show the process I used. One square at a time, I cut out for the right side, then I flip the same pattern and cut a left side piece. Using the �big� overall pattern to help in locating the covering material on the wing. The third picture here showing an example of the overall pattern laying on the wing to locate a square.
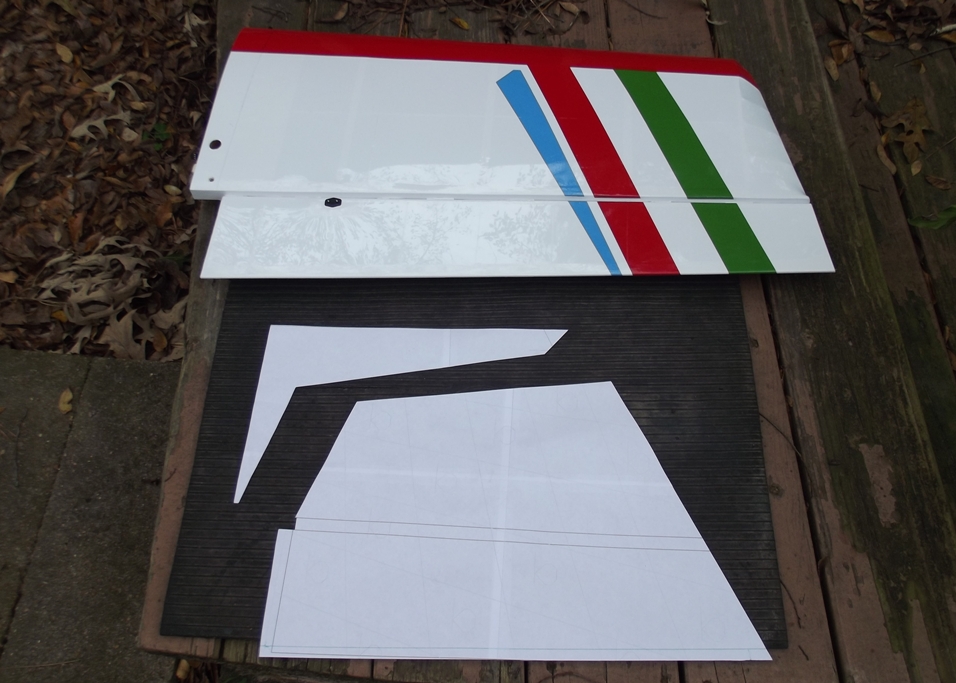


There are plenty of imperfections to be found. I even made a couple mistakes in the original CAD drawing. But instead of going back � redrawing and reprinting, I just improvised... It certainly will not be winning any quality judging contest. But it looks good enough to me and I don�t think any other �HERO�s� will show up at the field looking like mine. Now it�s time to figure out what to do on the fuselage.

I started out creating my �design� on a cad program, printed it out on 8 1/2 X 11 paper and then taped the paper together to make the bigger �pattern�.
The factory applied red stripes were not in exactly the same place on each wing. So I had to cheat the light blue width and spacing on one wing panel to get things to more or less line up for both sides. Even with that when I got down to the last couple of black squares I had to custom fit the size.
In these three shots I try to show the process I used. One square at a time, I cut out for the right side, then I flip the same pattern and cut a left side piece. Using the �big� overall pattern to help in locating the covering material on the wing. The third picture here showing an example of the overall pattern laying on the wing to locate a square.
There are plenty of imperfections to be found. I even made a couple mistakes in the original CAD drawing.
But instead of going back � redrawing and reprinting, I just improvised... It certainly will not be winning any quality judging contest. But it looks good enough to me and I don�t think any other �HERO�s� will show up at the field looking like mine. Now it�s time to figure out what to do on the fuselage.
12-05-2015 | 06:39 AM
#7
Thread Starter
I have been working on the covering pattern for the fuselage. I�ll let the pictures tell most of the story. I experimented with a couple different ways to create my �flag�. Ended up just taking a piece of wood and making pencil marks on it as a guide. I used the wood block to move and angle and mark the stripes as I sketched (connected the dots if you will) until I got toward the rudder.