


Arrow is dead...how to clean OS .46
 09-11-2004 | 05:43 AM
#1
Thread Starter
Senior Member
Joined: Aug 2002
Posts: 868
Likes: 0
Received 0 Likes
on
0 Posts
From: West Middlesex,
PA
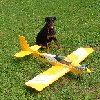
Well, either the RC gods are ticked off or, I seem to be having trouble turning to the right. At our field in order to land, you fly your plane out, bank right and drop speed and altitude above a corn field (the friggin corn is about 8 to 10 feet high). I was practicing landings and upon flying out, dropped the throttle a little and banked right. I wanted to bank without much up elevator because I didn't want to gain altitude. Apparently I banked too steep and the Arrow stalled. Tried to give it full throttle and it just twisted and went into the corn field.
I found it this time (this was 2nd crash into corn field) rather quickly. Upon inspection, the fuse is all busted up and the left half of wing is pretty much toast. So, scratch my 1st plane! The engine has mud on it and where the carb is, mud is in the hole. So, I should take this engine apart and clean it? Is it difficult to do? Never have taken apart an engine before to clean it.
Dave...
I found it this time (this was 2nd crash into corn field) rather quickly. Upon inspection, the fuse is all busted up and the left half of wing is pretty much toast. So, scratch my 1st plane!
The engine has mud on it and where the carb is, mud is in the hole. So, I should take this engine apart and clean it? Is it difficult to do? Never have taken apart an engine before to clean it. Dave...
 09-11-2004 | 08:00 AM
#3
Senior Member
Joined: Jan 2003
Posts: 494
Likes: 0
Received 0 Likes
on
0 Posts
From: Toronto, ON, CANADA
It is surprisingly easy to do, but there are some things to know in advance. Firstly try to turn the prop shaft as little as possible until you have it disassembled (The dirt in the engine can score the liners, etc.).
When you disassemble, you need to remember a few things:
a) How tightly wre all the screws installed
b) The cylinder head can probably go on in two directions (facing forward or back). Make a mark on it so that you re-install it in the same direction later.
c) The piston can probably be installed in two directions (at least with the OS 46FX is can). You want to make sure you install it the same way it came out. On the FX, the Con Rod is not symmetrical front/back. Write down which way the con rod was "facing".
To Disassemble, first hold the whole engine under running water (under a tap). wash off as much dirt from the outside as you can with an old toothbrush.
Remove the carb and dump it in the fuel in the cleaning container. Leave it there.
Remove the back-plate of the engine and dump it in the container.
Remove the cylinder head, find a reference mark so that you can keep it in the correct orientation later. Remove the glow plug and deposit it in the container as well.
Be careful with the gaskets and o-rings you come accross. Just leave them in the container through.
Without removing anything else, rinse out the engines as best as you can.
Then, turn the crank so the piston is at it's lowest point. Then turning the crank to help, pull the cylinder sleeve out of the cylinder. You can get a finger inside into the exhaust port to help. The sleeve will be quite tight, but it will simply pull out of the engine. Also, there is a pin so that it can only fit back in one direction.
With the sleeve out, you will find that you can disconnect the con rod from the crank shaft, and remove the piston/conrod and the crank shaft.
The only things left now are the bearings, and the con-rod connected to the piston. I would not do any more disassembly. You can clean as-is.
Using a toothbrush and fuel, clean everything. Rinse and scrub the bearings in the engine until they turn without any "grittiness".
The carb is "finnicky". I can not get a sense from the AX's manual how to remove the barrel. Typically there is a screw at a funny angle on the carb. (with a spring on it). Unscrew that screw and the whole carb barrel will slide out. There is a spring in there so be careful. Ahhh, gound the exploded view. In your manual, remove screw "5" from page 28. This will release the barrel. You can clean everything without further disassembly.
Again, use fuel and a toothbrush to clean.
Re-assemble in reverse order, making sure the piston and cylinder head get re-installed in the same orientation.
Make sure all screws are tightened to the same degree as they were originally.
gus
09-11-2004 | 10:53 AM
#4
Senior Member
Joined: Apr 2004
Posts: 261
Likes: 0
Received 0 Likes
on
0 Posts
From: MacclesfieldCheshire, UNITED KINGDOM
Nasty crash. However, when you do rebuild it, take that exhaust deflector off. You lose anywhere between 5-20% of power by having it there. If you don't believe me, then start the engine with the deflector on, then go to WOT and listen carefully. Rip off the delfector and hear the rpm pick up. I didn't believe it would make a difference until I went to the flying field and a chap there did as I have just written.
May be picky, and it may make your plane dirty, but that extra rpm may save your rebuilt plane from a stall at the wrong time.
May be picky, and it may make your plane dirty, but that extra rpm may save your rebuilt plane from a stall at the wrong time.
09-12-2004 | 07:37 PM
#5
Senior Member
Joined: Jul 2004
Posts: 319
Likes: 0
Received 0 Likes
on
0 Posts
From: Houston,
TX
That is some good info on engine tear down. Please note on the Evolution 46 engine that the sleeve can be rotated any direction. You may need some new engine gaskets. Just the two aluminun head gaskets and the back plate gasket. If the sleeve is put back wrong you will block off some of the ports. Note the notch on top of the sleeve. It should be pointing directly to the back of the engine. When correctly installed looking through the exhaust port you will note none of the sleeve is showing. Only the middle bar. If the engine hit first and hard, check the crankshaft end to be sure it is not bent. It dosen't take much. If you can see or measure any bend greater than .002" replace the crankshaft. It is only about $20.00. A bent crankshaft can shake your plane to pieces quick.
Good luck with cleaning and rebuilding.
Good luck with cleaning and rebuilding.
09-12-2004 | 07:57 PM
#6

Senior Member
My Feedback: (4)
Gus' info is dead on as usual, but before you go tearing it apart, just wash it good under the faucet, then flush out the carb really good with fuel. Now carefully turn the prop and listen for any Gritty sounds. If you get some, remove the carb and flush out the carb seat and crankcase (Turn the prop until the crankcase opens at the carb seat and flush like crazy) That should do it.
If worse comes to worse, you may have to remove the back plate, but it's pretty rare that any dirt will make it all the way to the cylinder.
BTW, nothing wrong with that Arrow that a little glue won't fix
If worse comes to worse, you may have to remove the back plate, but it's pretty rare that any dirt will make it all the way to the cylinder.
BTW, nothing wrong with that Arrow that a little glue won't fix
09-13-2004 | 05:30 PM
#7
Senior Member
Joined: Apr 2002
Posts: 4,987
Likes: 0
Received 0 Likes
on
0 Posts
From: Laurel, MD,
Aw, that's nothing. You should have seen the divit I dug up this weekend (flew a bunch of rounds of combat).
I use carb cleaner instead of water to flush things out. It can really blast the dirt out of the engine.
You can generally get the engine cleaned out pretty quickly with a little effort. I had one this weekend cleaned and flying again in less than 30min after digging it out of the soft ground.
Gus has it pretty darn well covered, that's for sure.
The only thing I'd actually add is that I take a step-by-step approach, trying to figure out how far the dirt got in the engine. First I pull the carb, and look down in to the engine towards the crank, and up the carb (backwards). Many times the dirt never makes it past the carb barrel. If the carb is off and there is no dirt at all in the area where the carb mounts, I spray off the prop hub area and check to make sure no dirt got in to the front bearing from the front of the engine. If that's clean, I give a gentil turn of the crank. If the crank turns smoothly and feels clean, then I just clean the carb and I'm done. This is the most common situation, and it's what I had to deal with this weekend (twice, actually). I had an impressive hole, but I managed to close the throttle before impact, and that keeps dirt from getting past the carb.
If I do that dirt got past the carb and made it down to the crankshaft, I don't turn the engine until I get the backplate off and look up the crankshaft from behind. Sometimes you'll see dirt inside the crankshaft. I try to spray it out with the carb cleaner jet. I then very carefully look at the rear bearing. Hopefully the dirt didn't make it past the end of the crankshaft. If it did, then you're in for a lot of work, as you really should get the crankshaft out of there, really wash out the bearings, etc. If I see dirt as far back as the rear bearing, then I'll pull the head and check the combustion chamber and spray out the transfer ports as well. It's not common, but I have seen dirt all the way in to the combustion chamber!
09-13-2004 | 06:22 PM
#8

Senior Member
Joined: Sep 2003
Posts: 532
Likes: 0
Received 0 Likes
on
0 Posts
From: Melbourne Victoria, AUSTRALIA
Lucky Armpit,
That Arrow isn`t dead, just relaxing awaiting a rebuild. I`ve repaired a lot worse than that. As Minn Flyer says, just a little glue, balsa and ply and it will be as good as new, and I bet you put more glue on it than it originally had from the ARF factory. Repairing will be great for your building skills.
That Arrow isn`t dead, just relaxing awaiting a rebuild. I`ve repaired a lot worse than that. As Minn Flyer says, just a little glue, balsa and ply and it will be as good as new, and I bet you put more glue on it than it originally had from the ARF factory. Repairing will be great for your building skills.
09-13-2004 | 08:08 PM
#9
Thread Starter
Senior Member
Joined: Aug 2002
Posts: 868
Likes: 0
Received 0 Likes
on
0 Posts
From: West Middlesex,
PA
Japan, I've yanked the engine off it and am gonna use it in something else.
I pulled off the back plate to the engine and did a look see. I don't see any dirt in there and the engine will turn (I didn't hear any squeaks or any grinding sounds). There was a cake of dried mud in carb but I'm pretty sure the throttle was closed. Didn't look like it went in that far. Will take toothbrush to the cooling ribs and give it a scrubbing.
Dave...
09-13-2004 | 11:45 PM
#10
Senior Member
My Feedback: (2)
Joined: Nov 2003
Posts: 1,006
Likes: 0
Received 0 Likes
on
0 Posts
From: Spokane,
WA
How tight and in what pattern do you tourque down the head? My piston makes different noise depending on how much I tighten the head. OS46FX. Seems good just snug?
09-16-2004 | 12:09 PM
#11
Junior Member
Joined: Apr 2004
Posts: 3
Likes: 0
Received 0 Likes
on
0 Posts
From: East Lansing,
MI
Haha, I just did the nose dive into a bean field yesterday. After finally getting the engine running good, the wing snapped in half in midair and nose dived into the dirt. Luckily I had just rebuilt the nose gear mount and bottom of the fuselage really strong with plywood after a crash where I ripped off the firewall below the engine mount. Also have an extra wing so after cleaning up the dirt and getting a new nose gear wire I'll be back on my way to self teaching.


