


Cowl butchering
 04-22-2005 | 09:45 PM
#1
Thread Starter
Senior Member
Joined: Aug 2002
Posts: 868
Likes: 0
Received 0 Likes
on
0 Posts
From: West Middlesex,
PA
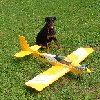
I got a Seagull Space Walker II last week and have it just about finished. Not much to putting it together. Hinges were already pinned in place. I did change to zee bends instead of the quick connects supplied as I don't trust 'em. Any-who, the engine mount comes already attached which is half way between inverted and sideways. I'm using a TT Pro .46 and the muffler end hits the slanted wood part so I had to do some creative cutting. I also had to use a 3/16 inch shim between mount and firewall to give muffler end enough clearance. Then comes the (*^)^&)(& 'ing cowl!!! Cut out a square for the engine head which aint that bad but definetly not show material!!! Then made a hole for the needle valve knob. Naturally, I was off so now I have to make the damn hole larger. Then had to cut bottom of cowl so muffler wouldn't rub against it. Its gonna work but it aint gonna be too pretty. I am also gonna have to seal
with polyurethane the wood part thats slanted under the firewall as this is where the exhaust is at. I can see it get pretty oily with the exhaust exiting. And, since I used a shim, the cowl can't go back fully as the front of it will be smack against the carb. I think I need a beer!!!!
Dave...
with polyurethane the wood part thats slanted under the firewall as this is where the exhaust is at. I can see it get pretty oily with the exhaust exiting. And, since I used a shim, the cowl can't go back fully as the front of it will be smack against the carb. I think I need a beer!!!!
Dave...


 04-23-2005 | 12:17 AM
#3

I'm going to be where you are next week. Assembling the H9 Miss America P-51 with the Keleo exhaust - hehe, talk about first cowl cutting trial by fire  Might as well order a second cowl before I get started!
Might as well order a second cowl before I get started!
04-23-2005 | 02:12 AM
#4
Senior Member
My Feedback: (1)
Joined: Jan 2003
Posts: 114
Likes: 0
Received 0 Likes
on
0 Posts
From: Columbia,
TN
When you get the cowl butchered up enough for everything to fit, order another cowl from Horizon Hobbies and transfer the measurements from the old one to the new. The part no. is SEA2054, for $12.34. I've ordered parts for my Seagull PC-9 and had excellent service and delivery.
Shakes, we have our spring fly-in next weekend (4/30 and 5/1) just down the road from you in Columbia. Come on down, if you get a chance.
Nashcat
Shakes, we have our spring fly-in next weekend (4/30 and 5/1) just down the road from you in Columbia. Come on down, if you get a chance.
Nashcat
 04-23-2005 | 10:36 AM
#7
Senior Member
My Feedback: (1)
I have a couple of suggestions that can save you time, money and AGGREVATION.
Fasten the cowl in place so you know where it has to go.
Remove the cowl and bolt the engine and muffler in place.
Now take some shirt cardboard (the cardboard that comes in new and dry cleaned shirts ) and tape a couple of 3" wide strips to the fuselage so they over hang the engine, muffler and needle valve. Mark the locations on the card board strips. Remove the strips and cut out the holes. Now put the strips back on the plane, aligning them with the various items you cut out for. Tape them about 1" in back of where the cowl fastens on.
Fold the cardboard strips back and remove the engine and muffler.
Put the cowl on and fasten in place.
Pull the strips over the cown and trace the holes on the cowl.
Cut your holes in the cowl.
Put the engine and muffler back on and fit the cowl.
You should be right on, or very close so only some minor relieving would be needed.
To get the muffler further away from the fuselage get a muffler extension.
http://www2.towerhobbies.com/cgi-bin...=++&search3=Go
If you are not sure of the spacing you need, measure between the exhaust bolts on the muffler and match it up to the correct extension.
04-23-2005 | 01:45 PM
#8
Senior Member
My Feedback: (2)
Joined: Jun 2004
Posts: 926
Likes: 0
Received 0 Likes
on
0 Posts
From: salisbury,
MA
thanks for the advice Campy....i have a YS 1.10 going in a Harrier 3D and i was scared about butchering the cowl since i'm no expert either
04-23-2005 | 09:15 PM
#9
Senior Member
My Feedback: (1)
Joined: Jan 2003
Posts: 114
Likes: 0
Received 0 Likes
on
0 Posts
From: Columbia,
TN
Campy,
That's a great set of instructions for marking a cowl. I used the cardboard for several, but now I've found that if you use clear Mylar, instead of cardboard, it's easier to mark the openings for the carb and exhaust. I use the cheap report folders, or whatever they're called, from office supply stores for the clear plastic. I found it much easier to locate carb adjusting screws this way.
Nashcat
04-24-2005 | 07:14 AM
#10


My Feedback: (17)
ORIGINAL: MinnFlyer
That's the same advice my father-in-law gave me regarding his daughter
ORIGINAL: kingwoodbarney
Drink 6 beers and look at it 2 AM. It will look beautiful !
Drink 6 beers and look at it 2 AM. It will look beautiful !
At least he hopes she dosen't.....
Andy


