Community
Search
Notices
Classic RC Pattern Flying Discuss here all pre 1996 RC Pattern Flying in this forum.

Building a Tiporare .40

Thread Tools
 
Search this Thread
 
Old 11-04-2011, 03:59 AM
  #26  
chino_2005
Senior Member
Thread Starter
 
Join Date: Jun 2010
Location: Buenos Aires, ARGENTINA
Posts: 323
Received 0 Likes on 0 Posts
Default RE: Building a Tiporare .40

Hi David!

Yes, I´m using the wood size you recommended me,but not in the lighter side of the scale in ome cases. I´ll sand the wing and stabilizer sheet maybe to 1,2 mm. and 1 mm. respectively.<o></o>

Old 11-04-2011, 04:06 AM
  #27  
chino_2005
Senior Member
Thread Starter
 
Join Date: Jun 2010
Location: Buenos Aires, ARGENTINA
Posts: 323
Received 0 Likes on 0 Posts
Default RE: Building a Tiporare .40

Thank you David! Very interesting notes.<o></o>

Do you think that those two spars that travel to de main landing gear support are necessary in this model?<o></o>

Old 11-04-2011, 05:19 AM
  #28  
cloudancer03
My Feedback: (22)
 
Join Date: Jan 2003
Location: palm harbor, FL
Posts: 2,232
Likes: 0
Received 0 Likes on 0 Posts
Default RE: Building a Tiporare .40

great build! I still love patterns and the tip is among my favorites.love the wing structure.I would love to build this plane with fixed gear given my my flying field limitations.where are these plans available.?
Old 11-04-2011, 05:45 AM
  #29  
chino_2005
Senior Member
Thread Starter
 
Join Date: Jun 2010
Location: Buenos Aires, ARGENTINA
Posts: 323
Received 0 Likes on 0 Posts
Default RE: Building a Tiporare .40

Thank you Cloudancer 03!

You can get the Tiporare plans from this link: http://www.rcuniverse.com/forum/fb.asp?m=7825947

Chino
Old 11-04-2011, 07:02 AM
  #30  
cloudancer03
My Feedback: (22)
 
Join Date: Jan 2003
Location: palm harbor, FL
Posts: 2,232
Likes: 0
Received 0 Likes on 0 Posts
Default RE: Building a Tiporare .40

thanks! I think I'll do just that..I also built a dirtybirdy 40.I could easily build a 60 size but I love the smaller size patterns..
Old 11-04-2011, 07:26 AM
  #31  
doxilia
My Feedback: (3)
 
doxilia's Avatar
 
Join Date: Apr 2008
Location: Montreal, QC, CANADA
Posts: 5,200
Likes: 0
Received 5 Likes on 5 Posts
Default RE: Building a Tiporare .40


ORIGINAL: chino_2005

Thank you David! Very interesting notes. Do you think that those two spars that travel to the main landing gear support are necessary in this model?
Diego,

I was going to ask you whether you planned to put the stub spars in. It's not a bad idea and shouldn't add much weight. They provide some structure to the wing in the retract area.

An alternative would be to add some CF tape on either side of the retract plate to the root - basically the same as balsa stub spars. I would also add some CF tape to the top of the wing. A 10 mm width is more than enough running 3/4 of the wing panel span. Once sheeted and joined, that wing top tape will prevent the wing from bending at all upon landing.

I guess these are "peace of mind" mods. Many a wing has been built simply with the plates like you have them installed and straight forward sheeting. If you plan to cover the wing, I'd add the spars or CF. I you plan to glass and paint it, then I'd omit them except possibly for the wing top CF strip. Any additional weight comes from the epoxy. The CF weight is negligible.

I applied CF tape to a small 40" wing which in retrospect was way overkill; I could have used much less:

http://www.rcuniverse.com/forum/fb.asp?m=8310704

I built my Tipo 60 wing with CF too but being more diligent with its use. One thing's for sure - they turn out to be rock solid!

I would also glass up the wing center section once joined in three sections. 4 oz 2" strip, followed by 2 oz 4" strip, followed by 3/4 oz strip out to the edge of the inner wheel wells. The wells are the "weakest" part of the wing due to the thickness so this is where the stub spars, CF and/or glass come into play. Glass for the top of the wing can go out only to the edge of the fuse. Use dilute laminating epoxy if you can using as little as practically needed.

David.
Old 11-04-2011, 12:46 PM
  #32  
birdman2
My Feedback: (105)
 
birdman2's Avatar
 
Join Date: Mar 2002
Location: St. Charles, IL IL
Posts: 58
Likes: 0
Received 0 Likes on 0 Posts
Default RE: Building a Tiporare .40

Chino,

A suggestion. Much of the weight in a balsa covered foam wing comes from the epoxy. You don't need much epoxy to get the job done.
When I used to sheet foam wings we would apply the epoxy to the foam and then spread it out and scrape much of it off to leave just enough to hold the balsa.
You might try some tests first to see how light you can go with the epoxy. Use a syringe to apply a small bead of the epoxy where needed.

Good luck. You work looks fantastic.

I have a Tiporare 60 that I will be flying this next summer in the Chicago area.

birdman2
Old 11-04-2011, 01:13 PM
  #33  
cloudancer03
My Feedback: (22)
 
Join Date: Jan 2003
Location: palm harbor, FL
Posts: 2,232
Likes: 0
Received 0 Likes on 0 Posts
Default RE: Building a Tiporare .40

given how the wing has a lattice lighting holes in it I was thinking of skinning it with 1/16 balsa and using something like the southern sorgum or 3M adhesive.I am going to skip the retracts on this one although I am wondering if a set of electric retracts would work.I have no idea what kind of retracts are out there these days as I havent used my old robarts in a long time.is there a vendor out there that would make retracts readily available for a 40 sized airplane??I think I want to just keep it simple..

what motor is everyone going to use? and I assume eurka rc would cut the foam wing?
Old 11-04-2011, 01:14 PM
  #34  
cloudancer03
My Feedback: (22)
 
Join Date: Jan 2003
Location: palm harbor, FL
Posts: 2,232
Likes: 0
Received 0 Likes on 0 Posts
Default RE: Building a Tiporare .40

cant wait to see a fin ished bird..
Old 11-04-2011, 02:28 PM
  #35  
doxilia
My Feedback: (3)
 
doxilia's Avatar
 
Join Date: Apr 2008
Location: Montreal, QC, CANADA
Posts: 5,200
Likes: 0
Received 5 Likes on 5 Posts
Default RE: Building a Tiporare .40


ORIGINAL: birdman2

Chino,

A suggestion. Much of the weight in a balsa covered foam wing comes from the epoxy. You don't need much epoxy to get the job done.
Yup! This is the well agreed consensus.

ORIGINAL: birdman2
When I used to sheet foam wings we would apply the epoxy to the foam and then spread it out and scrape much of it off to leave just enough to hold the balsa.
You might try some tests first to see how light you can go with the epoxy. Use a syringe to apply a small bead of the epoxy where needed.
If I may offer a comment on this approach, there is a technique where epoxy is applied in "beads" when foam is "cored" out. The idea is to lay the epoxy in an X pattern that tracks the lattice of the core. Of course, for logical reasons, this can only be done if applying epoxy to foam as it is rather difficult to map the locations back to the sheeting. Having said that, I believe it is more traditional and perhaps "modern" to apply laminating epoxy (24+ hour cure) to the sheeting only rather than the core. The reason is that the foam is not flat so it ends up pooling the epoxy which results in additional weight from the glue. If the sheeting is sealed (some do this others don't) and the epoxy applied to the sheeting the amount of epoxy used in a 40 or 60 size wing is really very small - not more than 1.5 oz for 4 panels of a 60 size wing. More than 50% of the applied epoxy is typically returned to the container when it is spread out with a spatula or card.

I find that applying epoxy to the sheeting is much easier. One can control the glue and it is also easier to apply as the sheets are separate and one can stack the sandwich when the sheets are prepared.

Something to consider...

David.
Old 11-04-2011, 04:59 PM
  #36  
alcarafa
 
alcarafa's Avatar
 
Join Date: Dec 2006
Location: MEXICO, MEXICO
Posts: 786
Likes: 0
Received 0 Likes on 0 Posts
Default RE: Building a Tiporare .40

I've used 3M super 77 adhesive to cover foam wings with balsa, results are amazing good and much lighter than using epoxy .

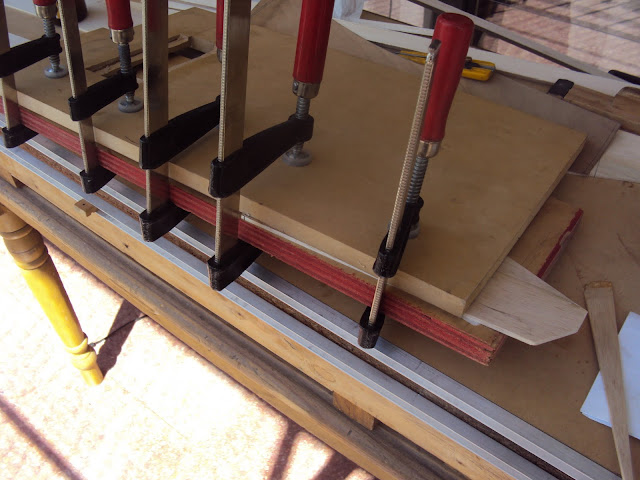
Strenght is equal and maybe better, just spray a generous ammount of SUPER 77 on both surfaces, allow to dry and join both pieces, put some weight over wing and let dry.
Old 11-04-2011, 05:17 PM
  #37  
cloudancer03
My Feedback: (22)
 
Join Date: Jan 2003
Location: palm harbor, FL
Posts: 2,232
Likes: 0
Received 0 Likes on 0 Posts
Default RE: Building a Tiporare .40

I have used 3m77 with no issues.epoxy is probably good too but why add weight and a mess.dave brown products has a product I think called soutern sorgum.or something like that.but the contact spray is simple.but fair warning,you best be sure of when you apply it to the foam .cause you only get one shot.once you make contact thats is it!make sure the balsa sheets edge glued are slightly longer than the wing as you can trim the excess.and then sand the balsa.I have done this with everyplane I ever built using foam cores.never fails.
Old 11-04-2011, 06:22 PM
  #38  
chino_2005
Senior Member
Thread Starter
 
Join Date: Jun 2010
Location: Buenos Aires, ARGENTINA
Posts: 323
Received 0 Likes on 0 Posts
Default RE: Building a Tiporare .40

Thank you for the nice comments and suggestions.<o></o>

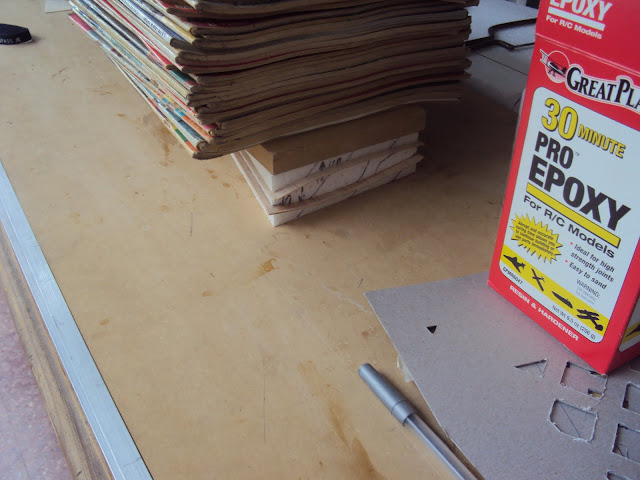
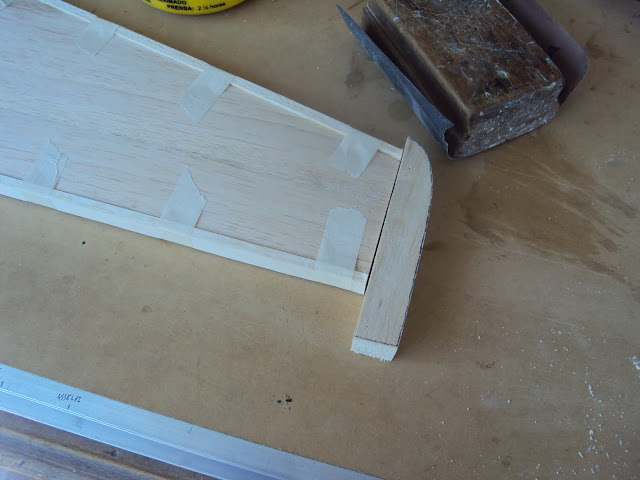
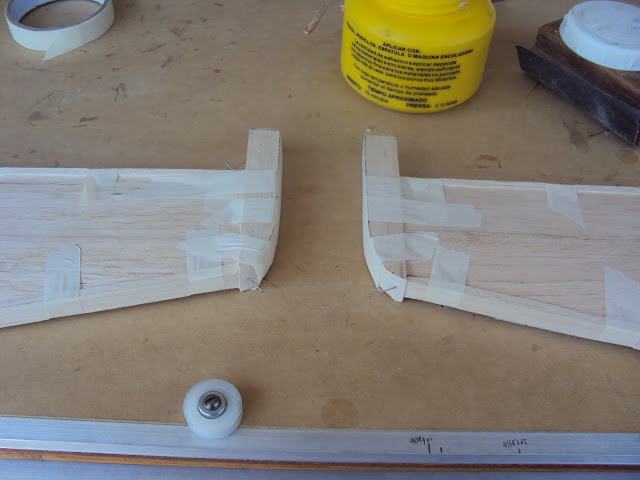
I´ve used Great Planes 30 minutes epoxy and the stab looks very good and light. <o></o>

David, I´ll put the stub spars but I don´t think to use CF.<o></o>


Old 11-05-2011, 12:19 PM
  #39  
cloudancer03
My Feedback: (22)
 
Join Date: Jan 2003
Location: palm harbor, FL
Posts: 2,232
Likes: 0
Received 0 Likes on 0 Posts
Default RE: Building a Tiporare .40

niceeeeeeeeee!I am going to get one started later this month.the pics are very helpful.all these years I never thought to create lighting holes the way you have done it.this has tobe a very light airframe.love your approach and technique..will you use microballons for the wing fillets??
Old 11-05-2011, 12:39 PM
  #40  
chino_2005
Senior Member
Thread Starter
 
Join Date: Jun 2010
Location: Buenos Aires, ARGENTINA
Posts: 323
Received 0 Likes on 0 Posts
Default RE: Building a Tiporare .40

Thank youCloudancer03, I hope to see your build thread.<o></o>

I need to buy somemicroballons first to do that, but I think that I´ll use them. Here inArgentina is difficult to get some materials.<o></o>

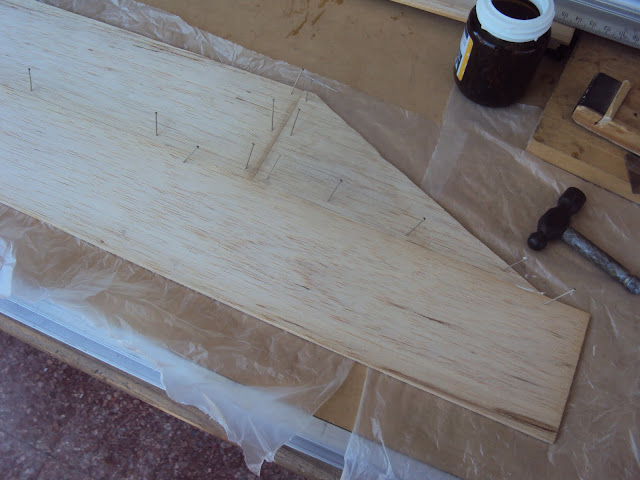
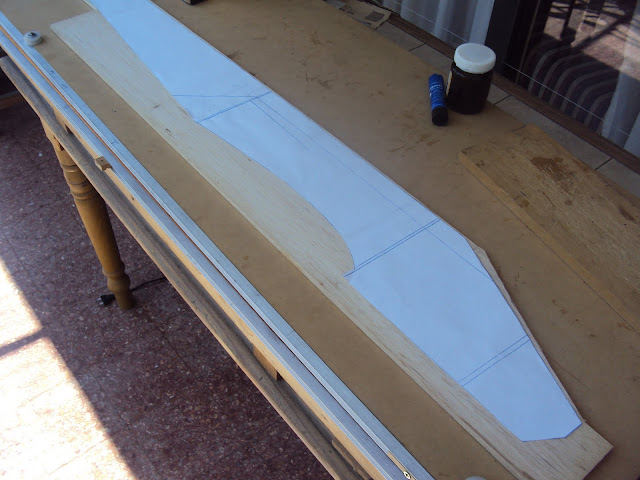
I read about the lighting holes technique in a F3A building book (it is in this forum in PDF), and is the first timeI use it. I am going to see how it works.<o></o>

Regards,<o></o>

Chino<o></o>


Old 11-05-2011, 01:35 PM
  #41  
cloudancer03
My Feedback: (22)
 
Join Date: Jan 2003
Location: palm harbor, FL
Posts: 2,232
Likes: 0
Received 0 Likes on 0 Posts
Default RE: Building a Tiporare .40

the foam wing will be much stronger than the conventional wood build.wood is getting hard to find even up here.I started back building scale and I fly some arf's as well.kits are good but once they get out of production the price goes out of sight so I either get a short kit or just pay ther fiddler and buy the kit.with these pattern types however I build from plans as they are fairly straightfoward and easy.
Old 11-06-2011, 05:04 AM
  #42  
chino_2005
Senior Member
Thread Starter
 
Join Date: Jun 2010
Location: Buenos Aires, ARGENTINA
Posts: 323
Received 0 Likes on 0 Posts
Default RE: Building a Tiporare .40

Yes, I´m agree with you.<o></o>

Old 11-06-2011, 05:21 AM
  #43  
chino_2005
Senior Member
Thread Starter
 
Join Date: Jun 2010
Location: Buenos Aires, ARGENTINA
Posts: 323
Received 0 Likes on 0 Posts
Default RE: Building a Tiporare .40

Some progress with the fuselage sides.<o></o>

Will continue...

Old 11-06-2011, 11:17 AM
  #44  
cloudancer03
My Feedback: (22)
 
Join Date: Jan 2003
Location: palm harbor, FL
Posts: 2,232
Likes: 0
Received 0 Likes on 0 Posts
Default RE: Building a Tiporare .40

lookin'good!
Old 11-06-2011, 11:29 AM
  #45  
boomerik
 
boomerik's Avatar
 
Join Date: Mar 2005
Location: Lissone(MB), ITALY
Posts: 177
Likes: 0
Received 0 Likes on 0 Posts
Default RE: Building a Tiporare .40

coming along very nicely Chino looks good can`t wait to see you put the fuse together and start shaping it (always my favorite part of a build )


Greetz Erik
Old 11-06-2011, 12:34 PM
  #46  
chino_2005
Senior Member
Thread Starter
 
Join Date: Jun 2010
Location: Buenos Aires, ARGENTINA
Posts: 323
Received 0 Likes on 0 Posts
Default RE: Building a Tiporare .40

Thank you! This is my favorite part too.
Old 11-07-2011, 02:10 AM
  #47  
chino_2005
Senior Member
Thread Starter
 
Join Date: Jun 2010
Location: Buenos Aires, ARGENTINA
Posts: 323
Received 0 Likes on 0 Posts
Default RE: Building a Tiporare .40

Working on the stabilizer.
Will continue....
Old 11-07-2011, 04:55 AM
  #48  
cloudancer03
My Feedback: (22)
 
Join Date: Jan 2003
Location: palm harbor, FL
Posts: 2,232
Likes: 0
Received 0 Likes on 0 Posts
Default RE: Building a Tiporare .40

I have observed alot of builds but this is one of the best yet!your pics are informative and very helpful..I look foward to the rest of it.
Old 11-07-2011, 05:05 AM
  #49  
chino_2005
Senior Member
Thread Starter
 
Join Date: Jun 2010
Location: Buenos Aires, ARGENTINA
Posts: 323
Received 0 Likes on 0 Posts
Default RE: Building a Tiporare .40

Thank you for your nice comment!
Chino
Old 11-07-2011, 09:28 AM
  #50  
doxilia
My Feedback: (3)
 
doxilia's Avatar
 
Join Date: Apr 2008
Location: Montreal, QC, CANADA
Posts: 5,200
Likes: 0
Received 5 Likes on 5 Posts
Default RE: Building a Tiporare .40

Diego,

good stuff! I know we talked about it before but if I may make a suggestion, I'd recommend not installing the stab in the fuse until the latter is completely finished, carved and sanded down to 220 grit. I find it is much easier to do the job and verify symmetry without the stab interfering. The stab is the last thing I install permanently once the wing and the fuse are finished, have been squared up and mounted. As I'm sure you already experienced with the Curare, getting an anhedral stab installed and verified in the various axes and dimensions is quite tricky.

She's coming along very nicely!

David.


Contact Us - Archive - Advertising - Cookie Policy - Privacy Statement - Terms of Service -

Copyright © 2024 MH Sub I, LLC dba Internet Brands. All rights reserved. Use of this site indicates your consent to the Terms of Use.