Stevens AeroModel 40A Cap 232
 10-13-2013, 10:38 PM
#1

Thread Starter

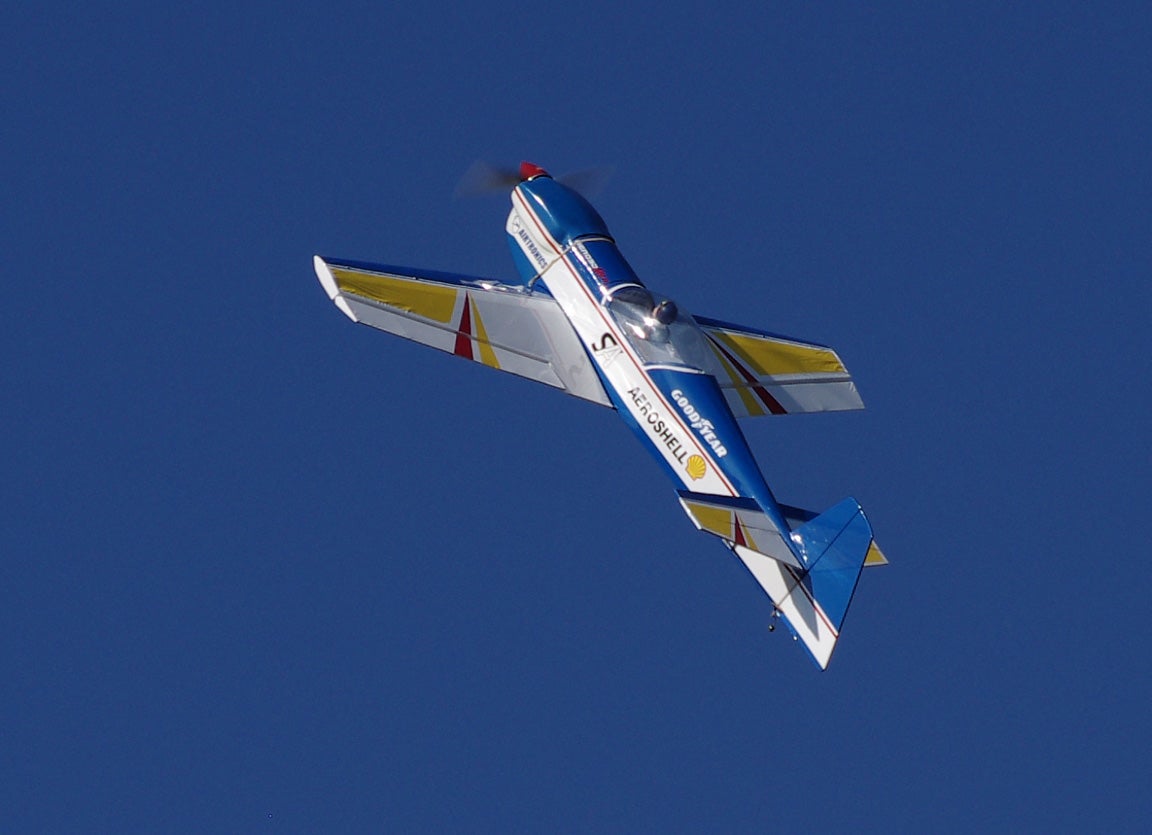
Just acquired this wonderful Cap232 from Mac8 and it is down right a very nice flying machine!
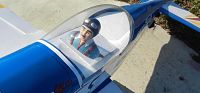
As the new owner, I got plans to install a nice scale pilot figure and do a little house keeping on that dirty Canopy!
Present Power System Setup and other Electronics:
Hacker B40-10L w/4.4:1 planetary gearbox,
Hacker 40 amp ESC,
Ultimate BEC by Kool Flight systems
2 Hitec HS82MG servos in the wing
2 HS-81 servos in tail.
14x7 APC


I am horrified that I never thought to adjust the control surfaces on this fantastic flying Steven's Aero Cap232 with some sort of Dual Rate option and instead I have flown this model with 100% settings or in other words "RAW" mechanical settings and it is NO WONDER I almost CRASHED this model on my first flight not withstanding the WASH-IN Issues.
Summary:
As soon as the Cap232 took off on smooth hard surface at my RC Club while no one else was present, I knew that all the preset adjustments I made on the ground was PERFECT! Of course my good buddy Mark S. (Marked) assisted me over the telephone and gave me suggestions to the adjustments, most especially for the LOW RATE on the Elevator.
As I recall, the take-off roll was performed using the LOW RATE setting at 43% on the Elevator, 80% for Ailerons and 100% for Rudder. It took off super smooth and I allowed it to gain altitude and I was amazed how smooth and relaxing it was to fly this model at these settings. I am sure most of you are surprised at me for being so amazed but, I have never used any Dual Rates or Expo on any of my Models (seat of the pants flying!)
Once the model was up 80 feet up, I did try the High Rate for the Elevator at 78% and it allowed a spirited snap rate and tighter loop but, without any ill effect such as a stall, it was docile moves. Once I got it out of my system, I returned the DR switch to the LOW RATE and it was a dream of a model to tool around low inverted and most especially DEAD STICK landings (two of them today) and into a good 10-MPH head wind down the runway. The model came in very agile and slow while I used the Elevator at LOW RATE setting and it kissed the smooth runway with just fantastic results.
I am finally using some more of my Computer (Spektrum DX7) features and highly important at that for this Cap232.
It is my true belief that I did not CRASH this model in the prior 5 flights because of the super light wing loading it has!!!")
I am a Donkey Rear Opening!!!! :censored:
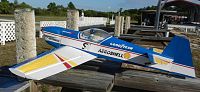
First, a super nice picture of post flight from today!
Battery used, this provides perfect Center-Of-Gravity:
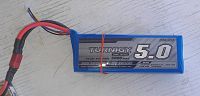
After 7 minutes of flight with mixed throttle and a few take-offs & landings:

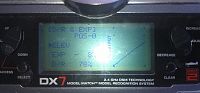
High Rate for Elevator!!!

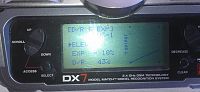
Low Rate for Elevator!!!

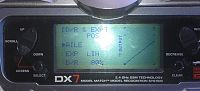
Rudder, Ailerons Dual Rates settings:

As the new owner, I got plans to install a nice scale pilot figure and do a little house keeping on that dirty Canopy!
Present Power System Setup and other Electronics:
Hacker B40-10L w/4.4:1 planetary gearbox,
Hacker 40 amp ESC,
Ultimate BEC by Kool Flight systems
2 Hitec HS82MG servos in the wing
2 HS-81 servos in tail.
14x7 APC
I am horrified that I never thought to adjust the control surfaces on this fantastic flying Steven's Aero Cap232 with some sort of Dual Rate option and instead I have flown this model with 100% settings or in other words "RAW" mechanical settings and it is NO WONDER I almost CRASHED this model on my first flight not withstanding the WASH-IN Issues.
Summary:
As soon as the Cap232 took off on smooth hard surface at my RC Club while no one else was present, I knew that all the preset adjustments I made on the ground was PERFECT! Of course my good buddy Mark S. (Marked) assisted me over the telephone and gave me suggestions to the adjustments, most especially for the LOW RATE on the Elevator.
As I recall, the take-off roll was performed using the LOW RATE setting at 43% on the Elevator, 80% for Ailerons and 100% for Rudder. It took off super smooth and I allowed it to gain altitude and I was amazed how smooth and relaxing it was to fly this model at these settings. I am sure most of you are surprised at me for being so amazed but, I have never used any Dual Rates or Expo on any of my Models (seat of the pants flying!)
Once the model was up 80 feet up, I did try the High Rate for the Elevator at 78% and it allowed a spirited snap rate and tighter loop but, without any ill effect such as a stall, it was docile moves. Once I got it out of my system, I returned the DR switch to the LOW RATE and it was a dream of a model to tool around low inverted and most especially DEAD STICK landings (two of them today) and into a good 10-MPH head wind down the runway. The model came in very agile and slow while I used the Elevator at LOW RATE setting and it kissed the smooth runway with just fantastic results.
I am finally using some more of my Computer (Spektrum DX7) features and highly important at that for this Cap232.
It is my true belief that I did not CRASH this model in the prior 5 flights because of the super light wing loading it has!!!
I am a Donkey Rear Opening!!!!
:censored:First, a super nice picture of post flight from today!
Battery used, this provides perfect Center-Of-Gravity:
After 7 minutes of flight with mixed throttle and a few take-offs & landings:
High Rate for Elevator!!!
Low Rate for Elevator!!!
Rudder, Ailerons Dual Rates settings:
 10-14-2013, 12:40 PM
#2
Thread Starter
Monday, October 14th, 2013
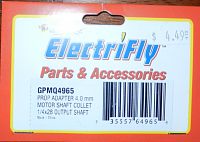
Last night I sought out a better looking Business End (Propeller with Spinner instead of the Ugly Nut). Of course that Compression Collect type Propeller adapter that came with the Model was just too short and it just could not allow a Spinner Back plate as there was just not enough shank threads for the securing nut. I looked and looked in all my hobby drawers and found the Great Planes 4mm Collect type Propeller Adapter that had a longer shank and provided a good amount of threads for the Nut. (Part Number GPMQ4965) The spinner itself is a cheap all plastic from the Great Planes Super Sportster EP model.
FLIGHT SUMMARY (10-14-2013):
I took the SA Cap232 40A out to the RC Club again and by the time I got her out to the taxi way, it got pretty windy and wind direction changed every 5 minutes! I selected the Low Rate setting 43% for Elevator and performed flawlessly.
However, the first flight take-off was okay but, I hear something NOT RIGHT and turned the model around and found the propeller not spinning so, I throttle back to Null (OFF) and it performed the best DEAD STICK landing you can imagine and all down wind!
Well, back at the Setup Table, I found the Hacker Motor separating from the Front Bell Pressure Plate (It is an In-runner). I recall that the smaller HIMAX motors did the same thing. I was not going to Quit and luckily I came prepared with Medium CA and Activator (Hardener) and wasted no time and disassembled the model's propeller, spinner, cowling etc..
What I found was exactly what I saw through the Cowling after I recovered the model at the field after its DEAD STICK landing. The Front Pressure Plate came undone and required some adhesive.
I took a small flat screw driver and cleaned off the surfaces that would need new adhesive (CA) and applied and quickly pushed the two pieces together. I did this with the model slightly angled downward and motor facing me so as NOT to get any CA inside the motor by accident.
Once all was cured, I assembled everything back together and the model flew without any disappointment. I have never felt such a relaxing time with a highly aerobatic model such as this CAP232. I believe the "Super" Light Wing Loading is the key to carefree lazy like maneuvers without the traditional UGLY like manners that we all see on a heavier Glow / Gas Cap232 and perhaps heavier Electric Cap232.
For seven (7) minutes of mixed throttle, I was able to command the model for all kinds of snaps, loops, rolls, hammerheads, Inverted Flight you name it!
I am very satisfied with this project and the looks of my very first CAP232 after applying some ORACAL adhesive Mylar UV resistive trim sheets.
Here are a bunch of POST FLIGHT pictures I like to share!


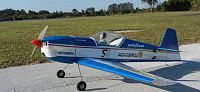


Last night I sought out a better looking Business End (Propeller with Spinner instead of the Ugly Nut). Of course that Compression Collect type Propeller adapter that came with the Model was just too short and it just could not allow a Spinner Back plate as there was just not enough shank threads for the securing nut. I looked and looked in all my hobby drawers and found the Great Planes 4mm Collect type Propeller Adapter that had a longer shank and provided a good amount of threads for the Nut. (Part Number GPMQ4965) The spinner itself is a cheap all plastic from the Great Planes Super Sportster EP model.
FLIGHT SUMMARY (10-14-2013):
I took the SA Cap232 40A out to the RC Club again and by the time I got her out to the taxi way, it got pretty windy and wind direction changed every 5 minutes!
I selected the Low Rate setting 43% for Elevator and performed flawlessly.However, the first flight take-off was okay but, I hear something NOT RIGHT and turned the model around and found the propeller not spinning so, I throttle back to Null (OFF) and it performed the best DEAD STICK landing you can imagine and all down wind!
Well, back at the Setup Table, I found the Hacker Motor separating from the Front Bell Pressure Plate (It is an In-runner). I recall that the smaller HIMAX motors did the same thing. I was not going to Quit and luckily I came prepared with Medium CA and Activator (Hardener) and wasted no time and disassembled the model's propeller, spinner, cowling etc..
What I found was exactly what I saw through the Cowling after I recovered the model at the field after its DEAD STICK landing. The Front Pressure Plate came undone and required some adhesive.
I took a small flat screw driver and cleaned off the surfaces that would need new adhesive (CA) and applied and quickly pushed the two pieces together. I did this with the model slightly angled downward and motor facing me so as NOT to get any CA inside the motor by accident.
Once all was cured, I assembled everything back together and the model flew without any disappointment. I have never felt such a relaxing time with a highly aerobatic model such as this CAP232. I believe the "Super" Light Wing Loading is the key to carefree lazy like maneuvers without the traditional UGLY like manners that we all see on a heavier Glow / Gas Cap232 and perhaps heavier Electric Cap232.
For seven (7) minutes of mixed throttle, I was able to command the model for all kinds of snaps, loops, rolls, hammerheads, Inverted Flight you name it!
I am very satisfied with this project and the looks of my very first CAP232 after applying some ORACAL adhesive Mylar UV resistive trim sheets.
Here are a bunch of POST FLIGHT pictures I like to share!
10-15-2013, 02:03 AM
#3
Thread Starter
Guys,
Took out the last remaining GWS servo from the wing and replaced it with a brand new Hitec HS-82MG as the servo just did not follow the other HS-82MG that I had installed a few days ago.
After I took off the servo, I realized why......the freaking inboard Aileron surface was binding with the wing structure. So, I took off the other side and it was equally the same. I had no idea how I missed this when I replaced the GWS aileron servo that jammed? Needless to say, all Aileron Surfaces work flawlessly and I still went ahead and replaced the servo to make sure no other future issues crop up.
A few pictures and Video:

VIDEO!!!!!!!!!
https://vimeo.com/76941876
Took out the last remaining GWS servo from the wing and replaced it with a brand new Hitec HS-82MG as the servo just did not follow the other HS-82MG that I had installed a few days ago.
After I took off the servo, I realized why......the freaking inboard Aileron surface was binding with the wing structure. So, I took off the other side and it was equally the same.
I had no idea how I missed this when I replaced the GWS aileron servo that jammed? Needless to say, all Aileron Surfaces work flawlessly and I still went ahead and replaced the servo to make sure no other future issues crop up.A few pictures and Video:
VIDEO!!!!!!!!!
https://vimeo.com/76941876
10-15-2013, 11:27 AM
#4
Thread Starter
Tuesday, October 15th, 2013
Well Guys,
After two flights the Frontal End Bell Thrust Plate came off on the Hacker Brushless Inrunner motor again. I guess Medium CA is just too brittle and gave way in Mid-Flight from this morning at the RC Club, however, I was able to reach 4 minutes into the flight until it became DEAD STICK landing material.
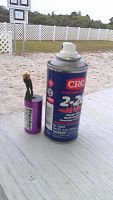
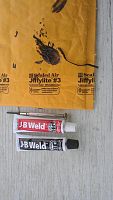
J-B Weld was in my mind when I saw that the Motor came apart and I verified it with a knowledgeable RC Club member that this product is known to provide very good results for what I need. I wasted no time and went to the nearest Hardware Store and bought myself the strongest and highest Temperature resistant Epoxy known as J-B Weld RED label, the one that results in the strongest and permanent bond.

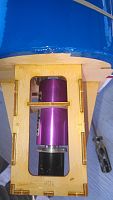
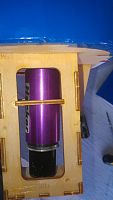
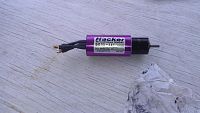
Hacker B40 L10 taken apart to allow for J-B Weld application:
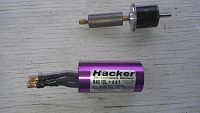
Cleaning the Windings of the Motor Can:
Using a small Flat Screw Driver to clean off the Failed Medium CA from the mating surface:

Sanding lightly the mating surface to get any last reminding CA residue:
Carefully mix the two of equal amounts and applicator must not be metal! That strong Magnet will draw anything of metal to it so, you need to be careful.
It is funny as the J-B Weld instructions say to use an applicator and I like to confess it was my right pinky finger and keeping a paper napkin to clean off the hands at all times!
I am going to allow it to Fully Cure after 15 hours (T-minus and 13 hours and counting! )
My buddy told me that I should give UP on this HACKER Inrunner Brushless with the in-line Gearbox, however, as the model passes you by it sounds great like a 4-Cycle Glow Engine!!! NO WAY will I give up on this Power Setup!
Well Guys,
After two flights the Frontal End Bell Thrust Plate came off on the Hacker Brushless Inrunner motor again. I guess Medium CA is just too brittle and gave way in Mid-Flight from this morning at the RC Club, however, I was able to reach 4 minutes into the flight until it became DEAD STICK landing material.
J-B Weld was in my mind when I saw that the Motor came apart and I verified it with a knowledgeable RC Club member that this product is known to provide very good results for what I need. I wasted no time and went to the nearest Hardware Store and bought myself the strongest and highest Temperature resistant Epoxy known as J-B Weld RED label, the one that results in the strongest and permanent bond.
Hacker B40 L10 taken apart to allow for J-B Weld application:
Cleaning the Windings of the Motor Can:
Using a small Flat Screw Driver to clean off the Failed Medium CA from the mating surface:
Sanding lightly the mating surface to get any last reminding CA residue:
Carefully mix the two of equal amounts and applicator must not be metal! That strong Magnet will draw anything of metal to it so, you need to be careful.
It is funny as the J-B Weld instructions say to use an applicator and I like to confess it was my right pinky finger and keeping a paper napkin to clean off the hands at all times!
I am going to allow it to Fully Cure after 15 hours (T-minus and 13 hours and counting!
)My buddy told me that I should give UP on this HACKER Inrunner Brushless with the in-line Gearbox, however, as the model passes you by it sounds great like a 4-Cycle Glow Engine!!!
NO WAY will I give up on this Power Setup!
10-15-2013, 03:17 PM
#5
Thread Starter
Sunday, October 13th, 2013
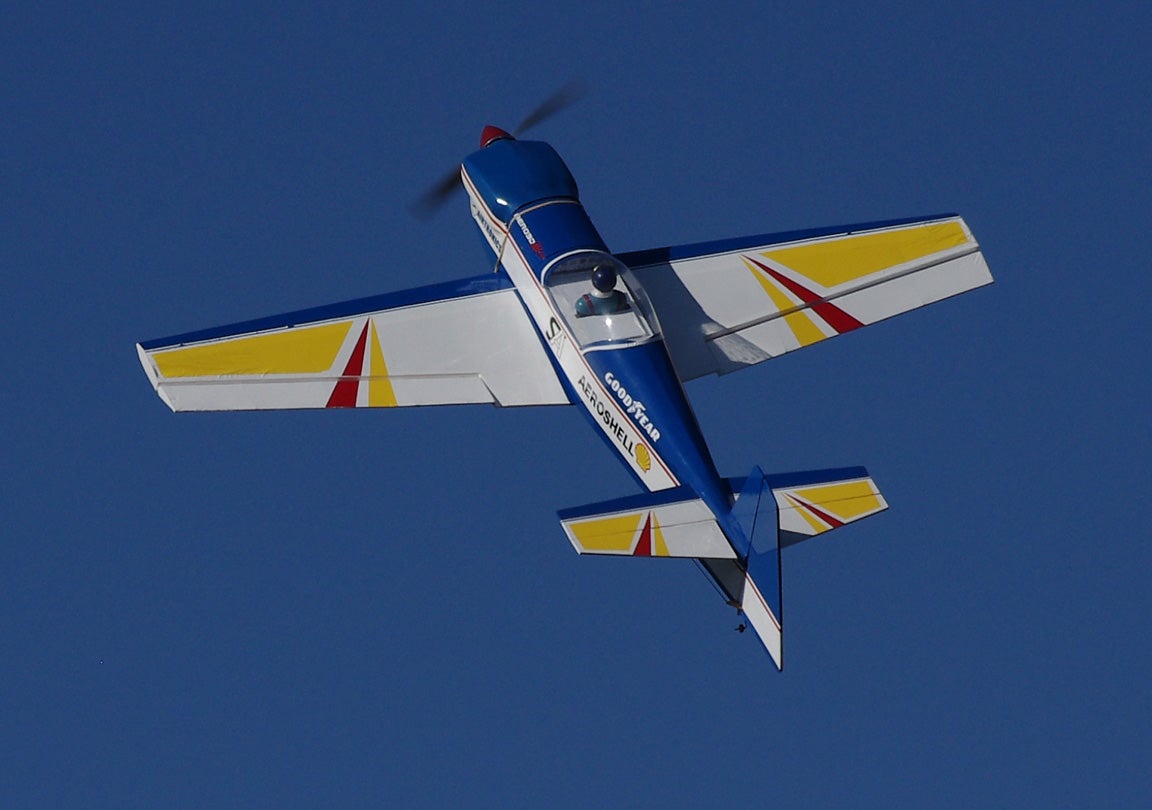
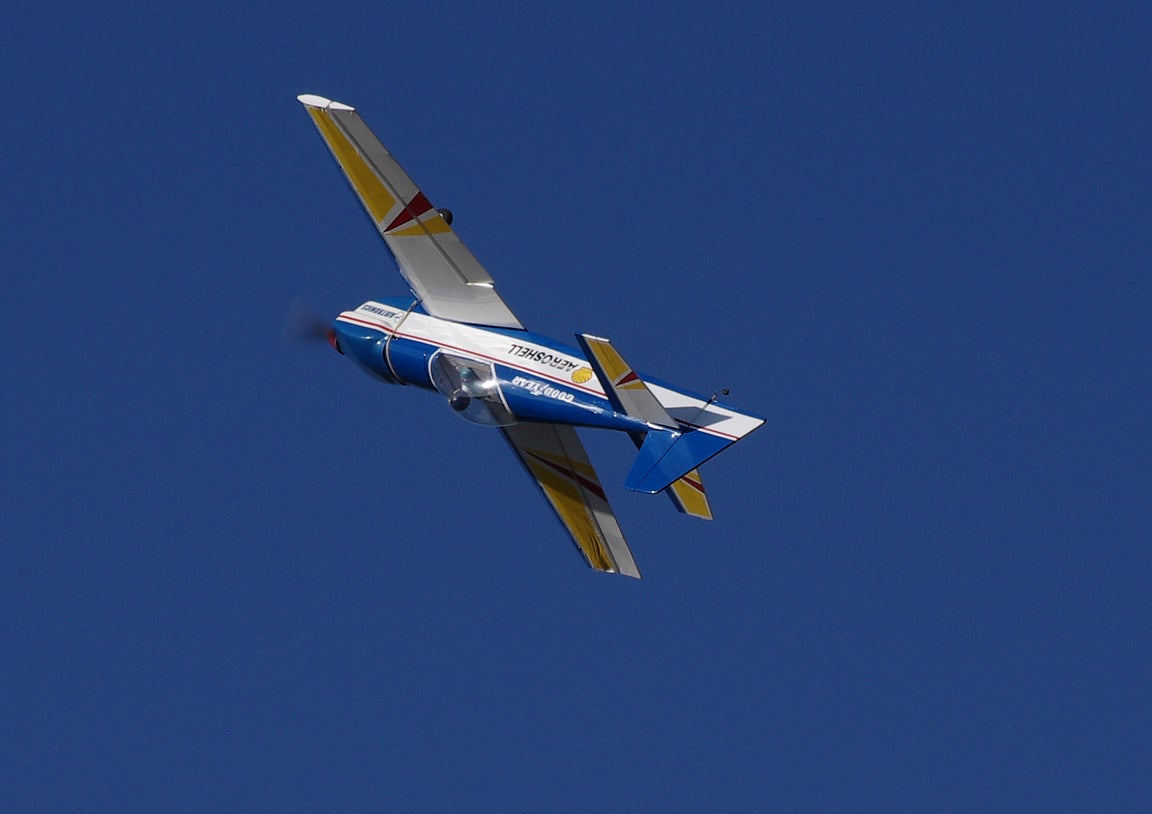
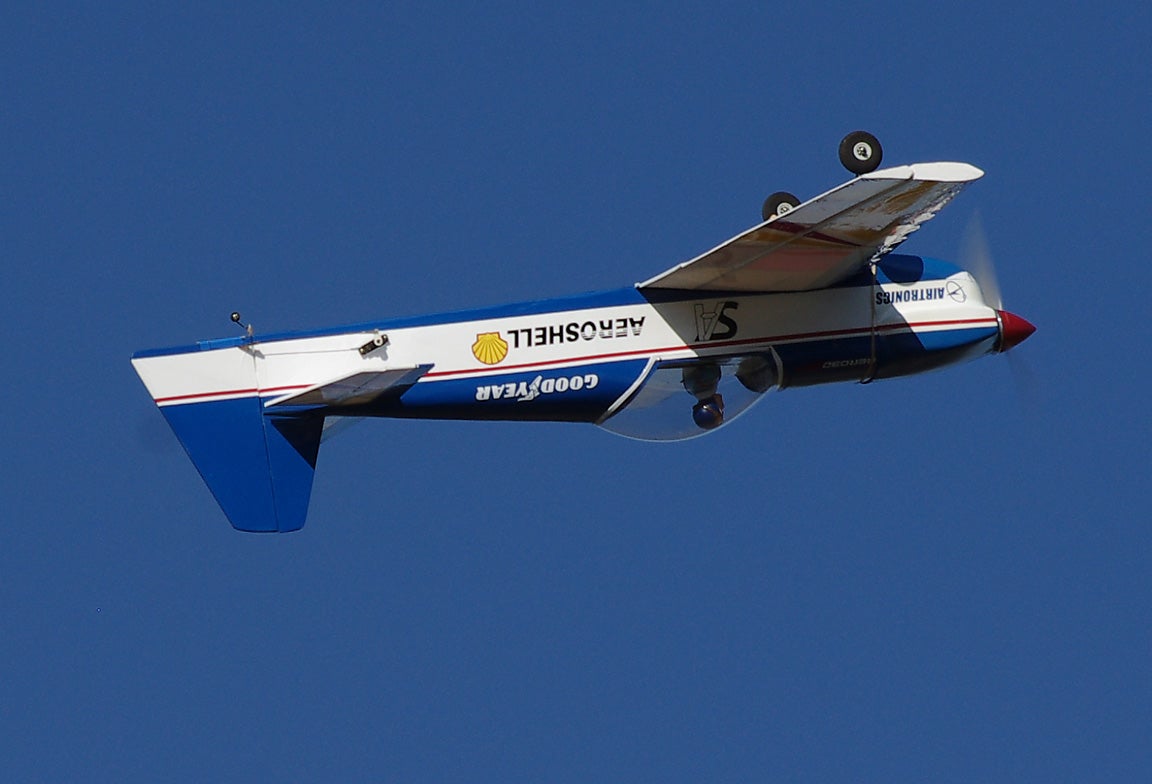
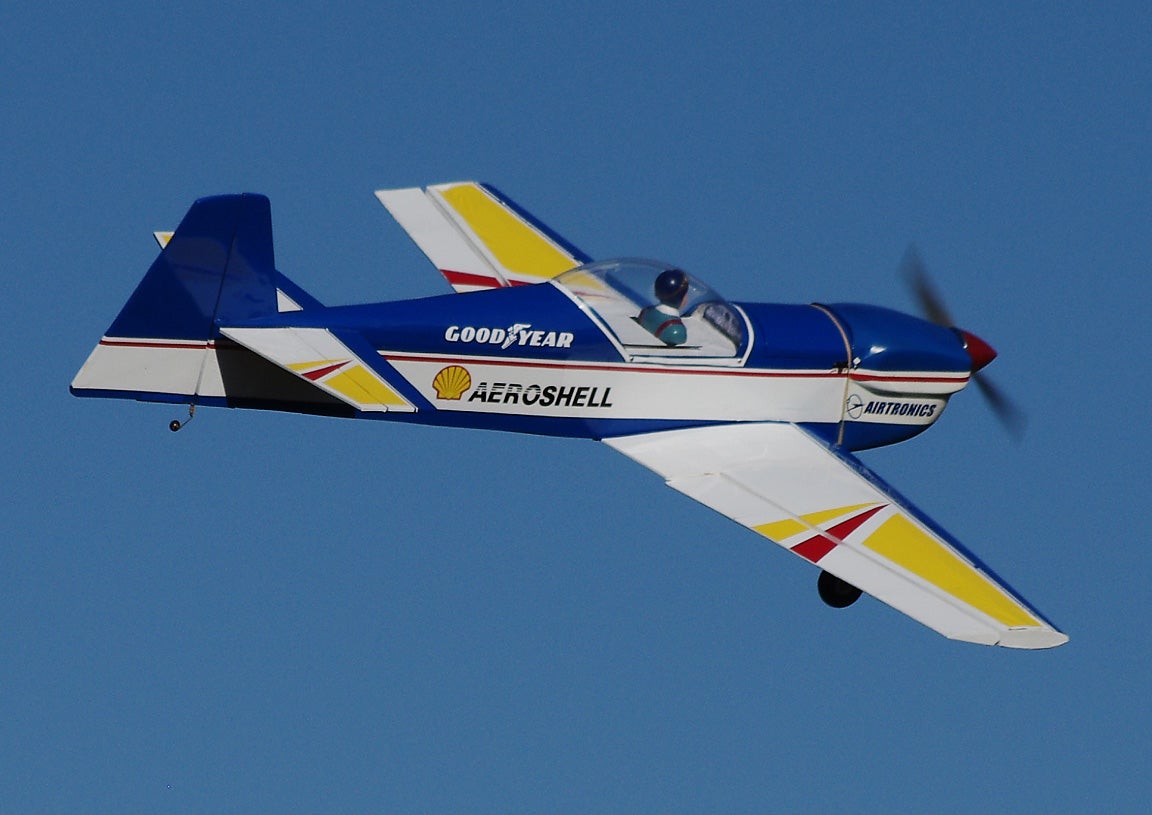
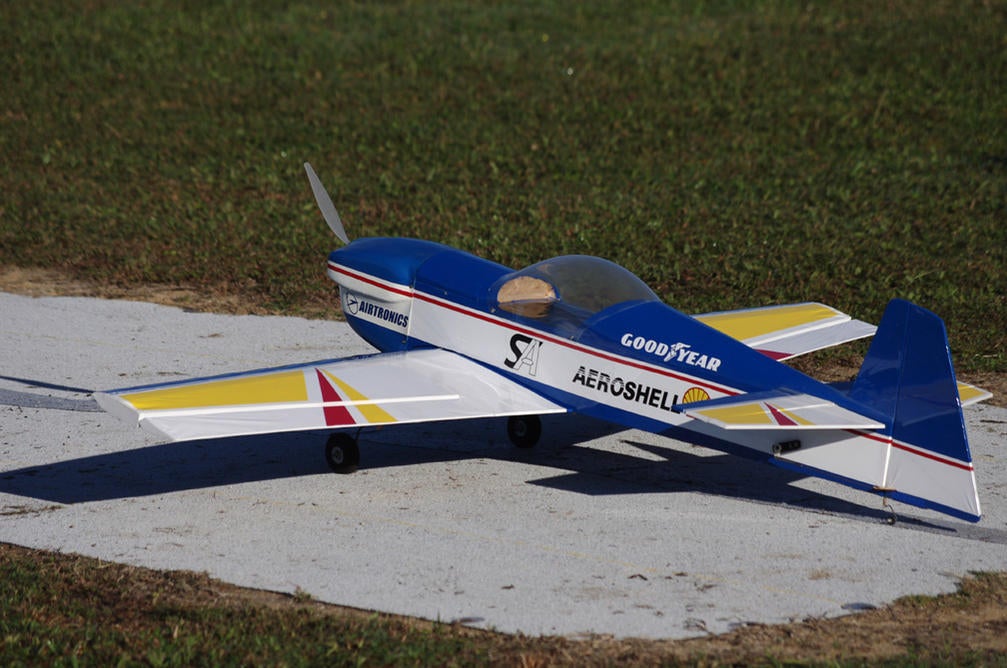
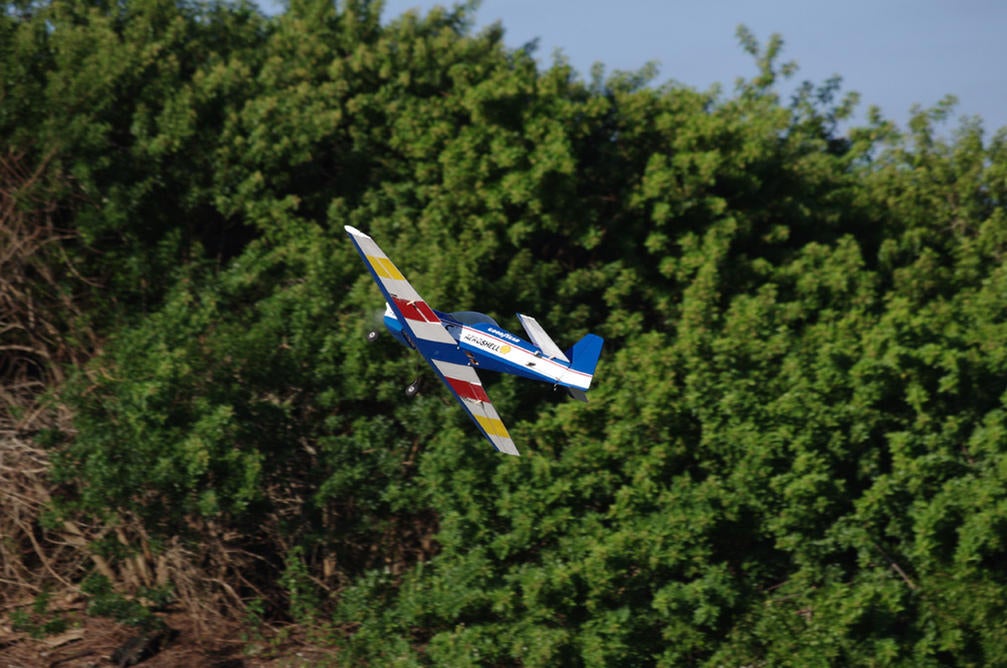
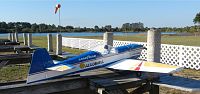
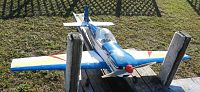
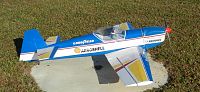
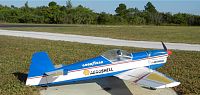
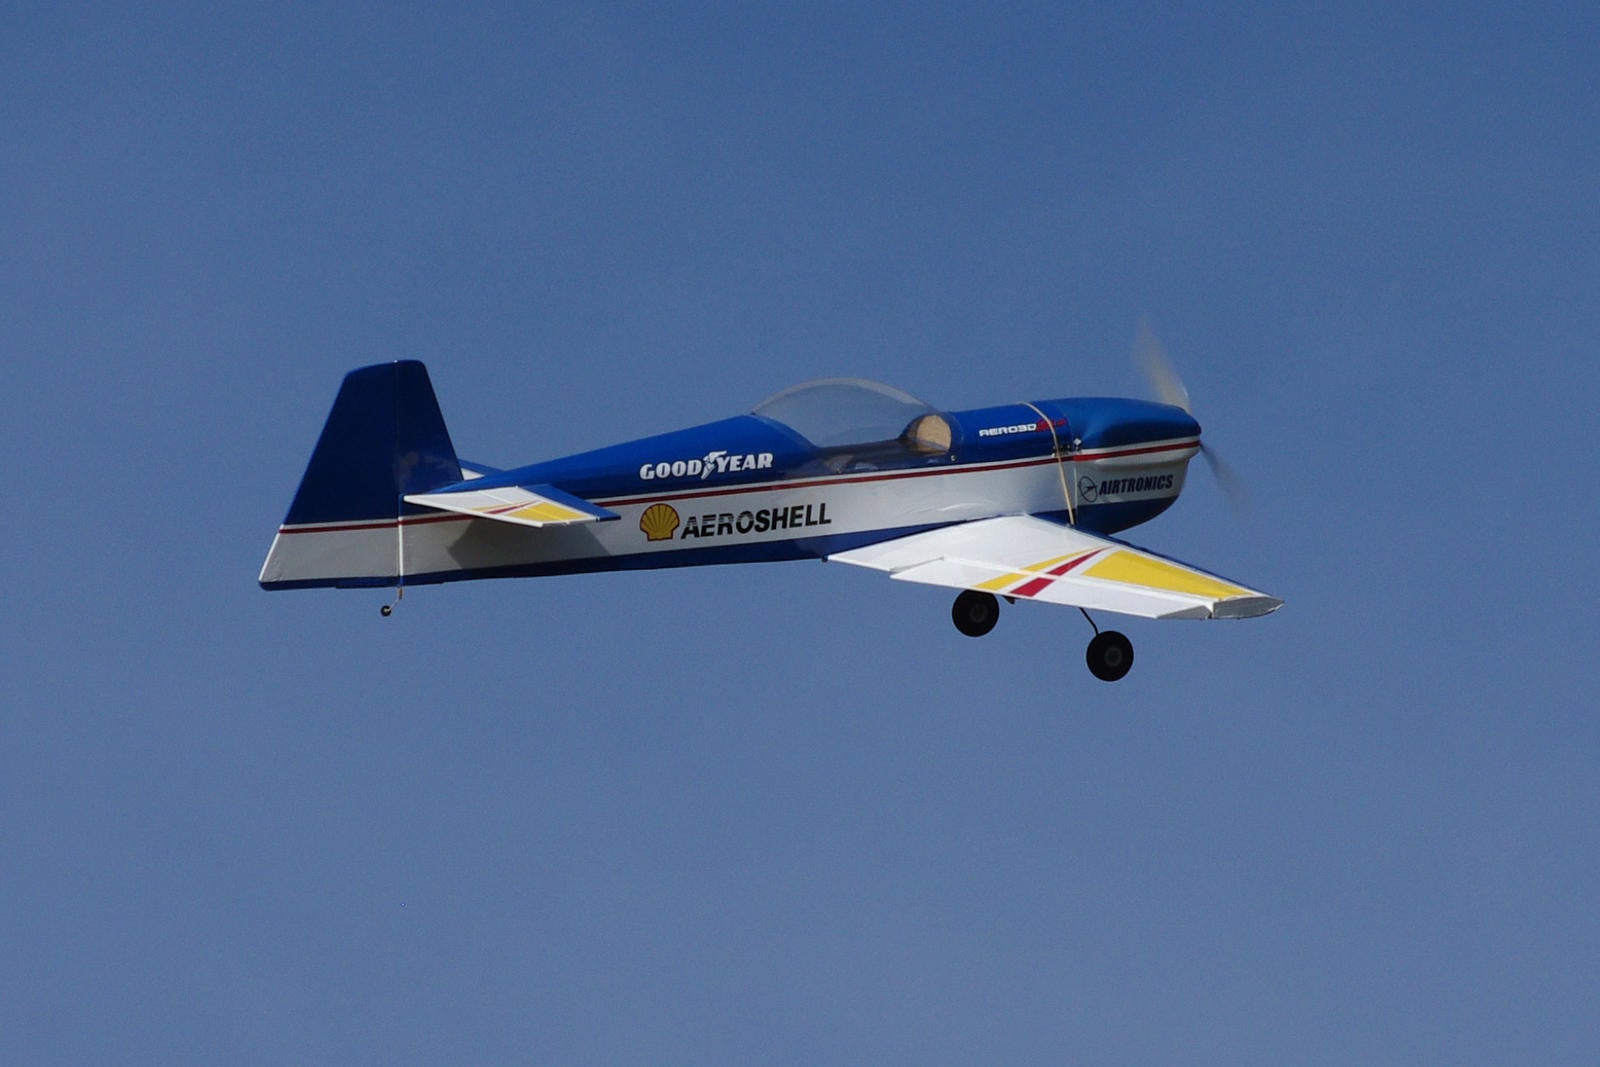
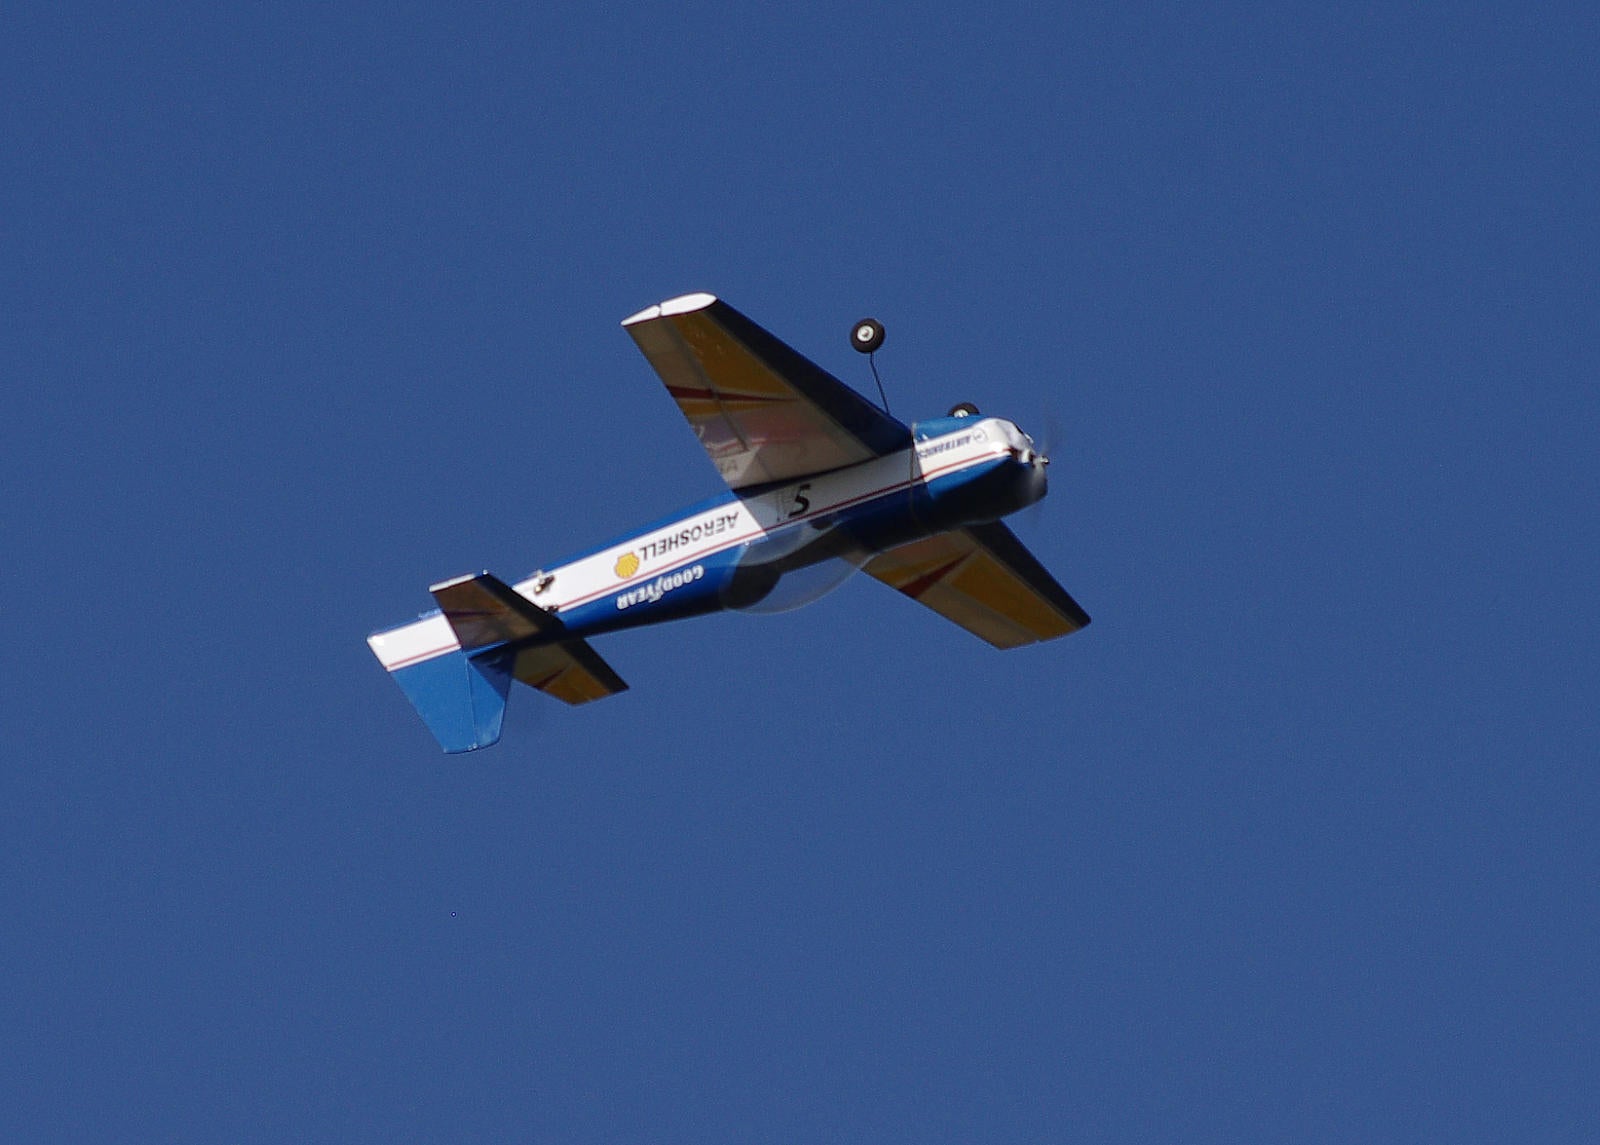
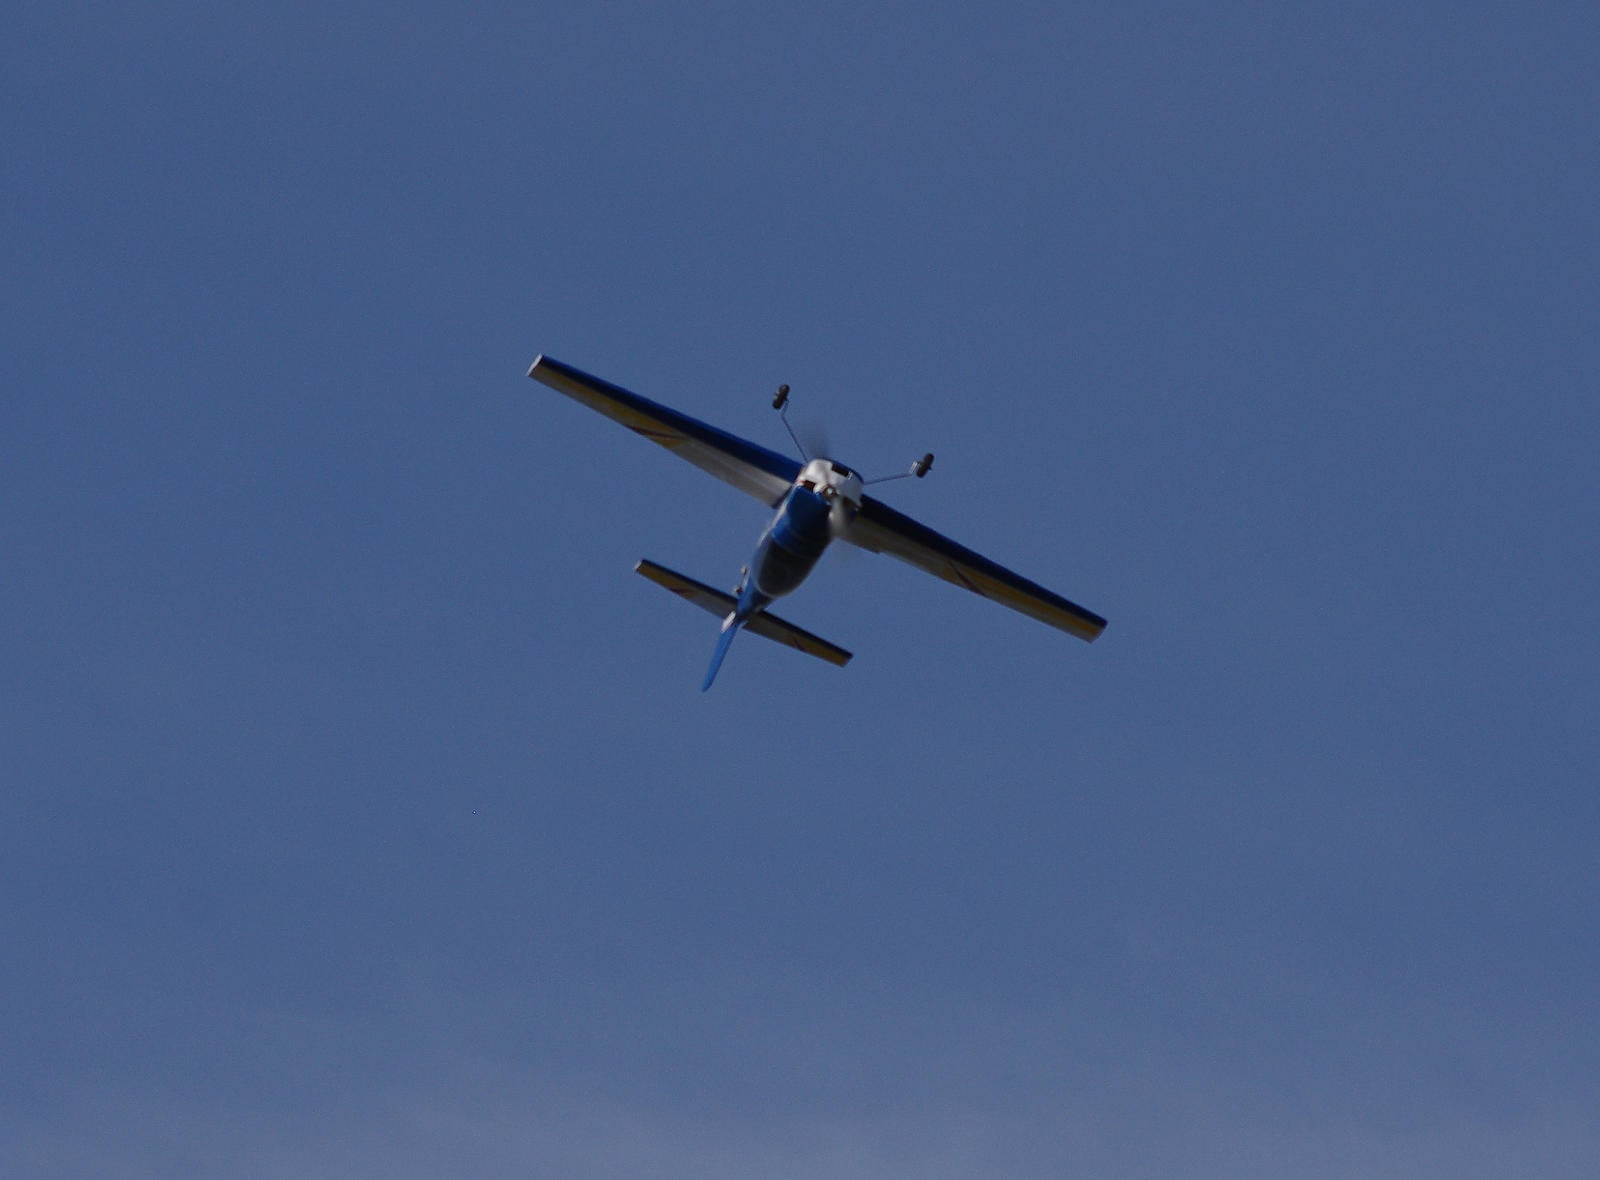
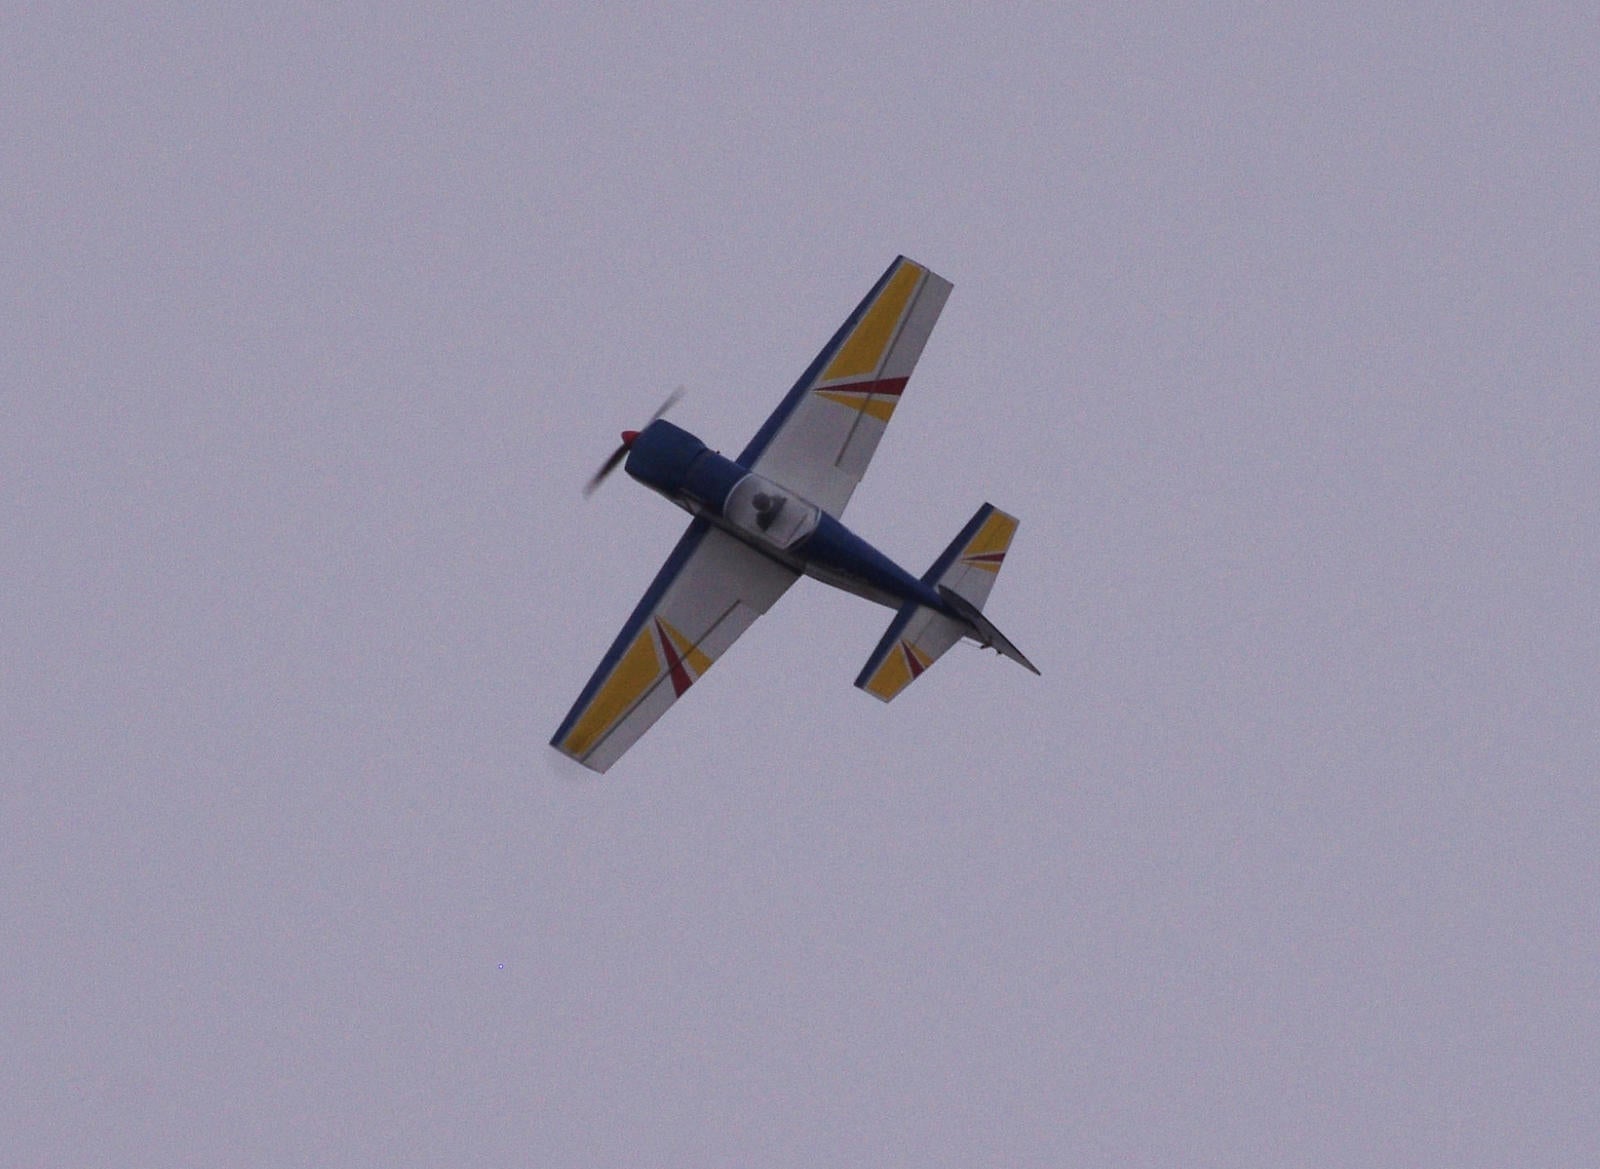
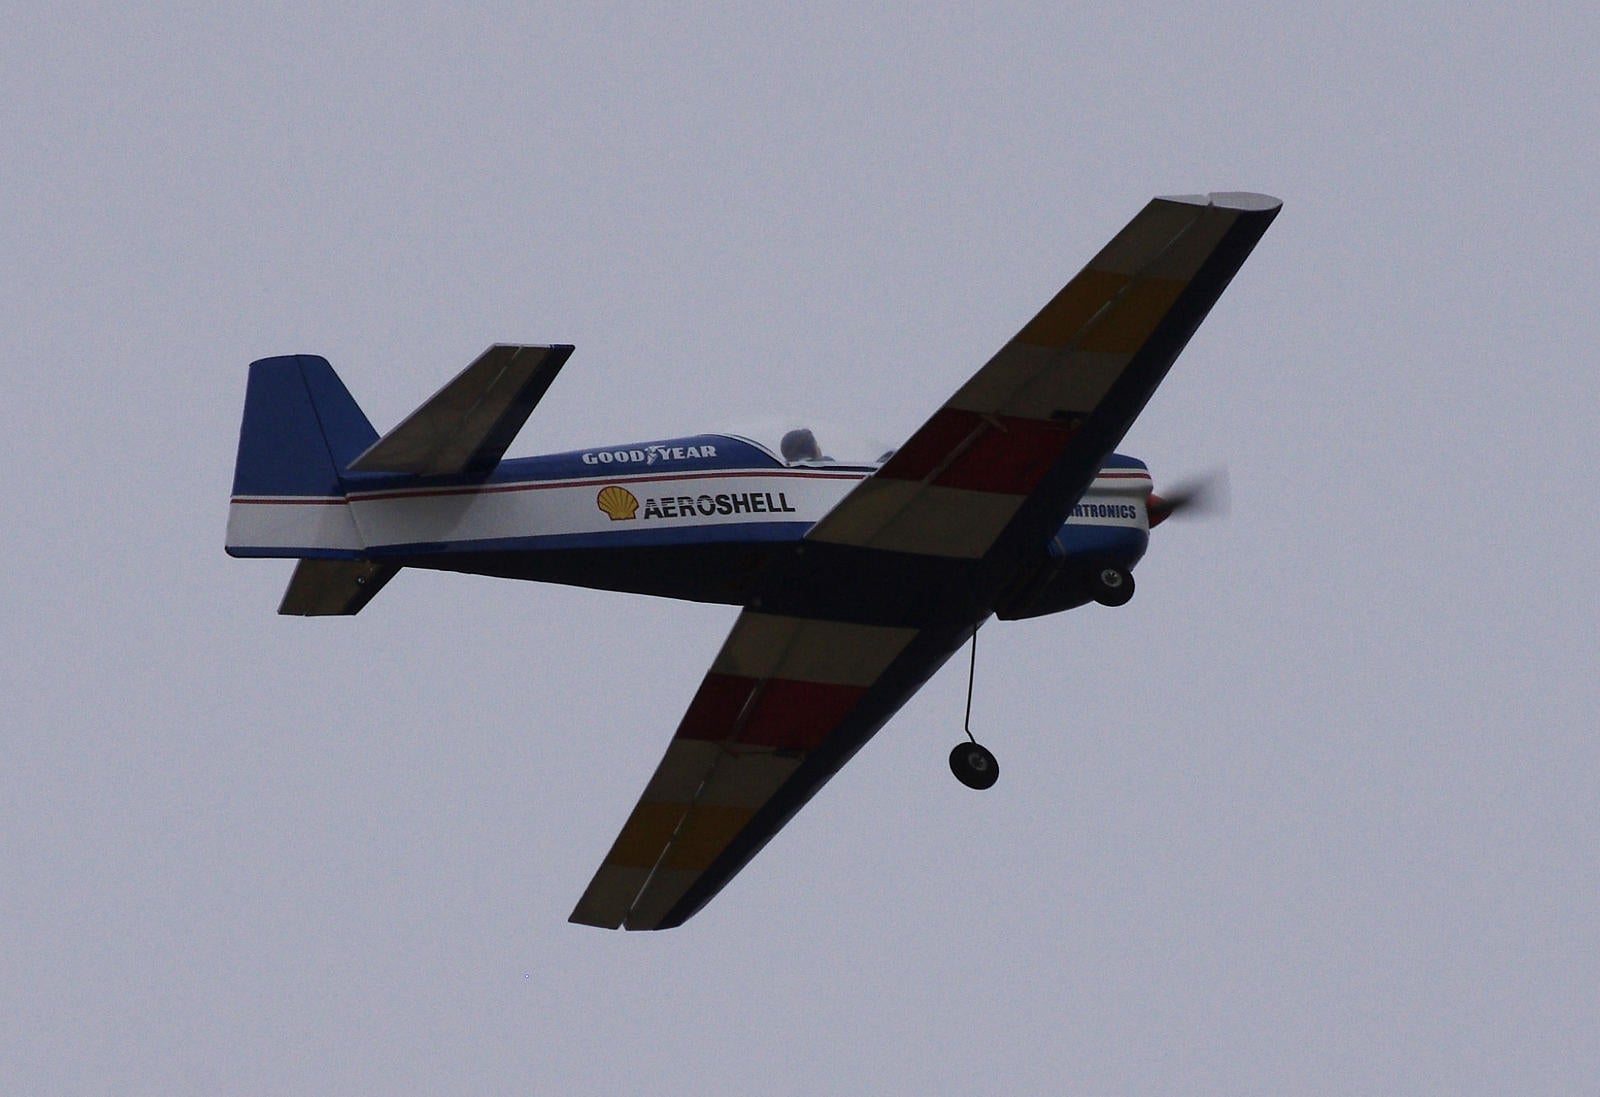
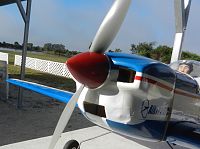
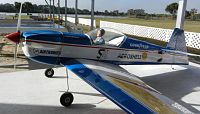
Gerry Rivera took these pictures of my Cap232 before installing the Pilot figure and RED Spinner!


======================================
Tuesday, October 15th, 2013
My good friend Gerry Rivera took some neat pictures considering the heavy FOG conditions we had in Central Florida!


Gerry Rivera took these pictures of my Cap232 before installing the Pilot figure and RED Spinner!
======================================
Tuesday, October 15th, 2013
My good friend Gerry Rivera took some neat pictures considering the heavy FOG conditions we had in Central Florida!
10-15-2013, 07:59 PM
#6
Thread Starter
Okay, got the motor installed back on the model and did a Static Run Test with the Propeller and it even sounds much better and smooth!
That large 14 X 7 propeller lifted almost everything behind the model in my Master Bedroom!!!
I even found a better Spinner that comes with an Aluminum Back Plate!
This project has certainly entertained me and trained me for the unexpected.
I just Love the way this model flys!!
Hoping for clear skys without FOG!!!
10-15-2013, 09:00 PM
#7
Thread Starter
I have yet to measure the AMP Draw of this HACKER B40-10L power system with the 4.4 : 1 ratio gearbox, however, using the Turnigy 3-Cell, 5,000mAH, Lithium Polymer pack the resting Voltage after a typical 7-minute flight with mixed throttle was observed at 11.8 Volts.
I visited the "P-Calc" on-line estimator and was shocked to see that this power system provides an efficiency of upwards in the 90% range.
I am amazed because using that large APC "E" 14 X 7 propeller, I can tool around at slightly above 1/2 throttle.
Here is the estimate at Full Throttle.

I visited the "P-Calc" on-line estimator and was shocked to see that this power system provides an efficiency of upwards in the 90% range.
I am amazed because using that large APC "E" 14 X 7 propeller, I can tool around at slightly above 1/2 throttle.
Here is the estimate at Full Throttle.
10-16-2013, 07:02 AM
#8
Thread Starter
More house keeping (10-16-2013):
Okay guys,
Last night, I dedicated a few hours to look over the Model very carefully and took advise of my Good Buddy (Sky Bro), Gerry (simano) who advised me that the Firewall and motor mount to Firewall bounds.
Well, I did see very good glue between the Motor Mount -to- Firewall, however, I found at least two areas where the FIREWALL was beginning to come apart from the model itself! This was perhaps my hard landing during my very first Flight as the model did land hard and broke propeller.
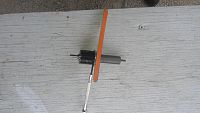
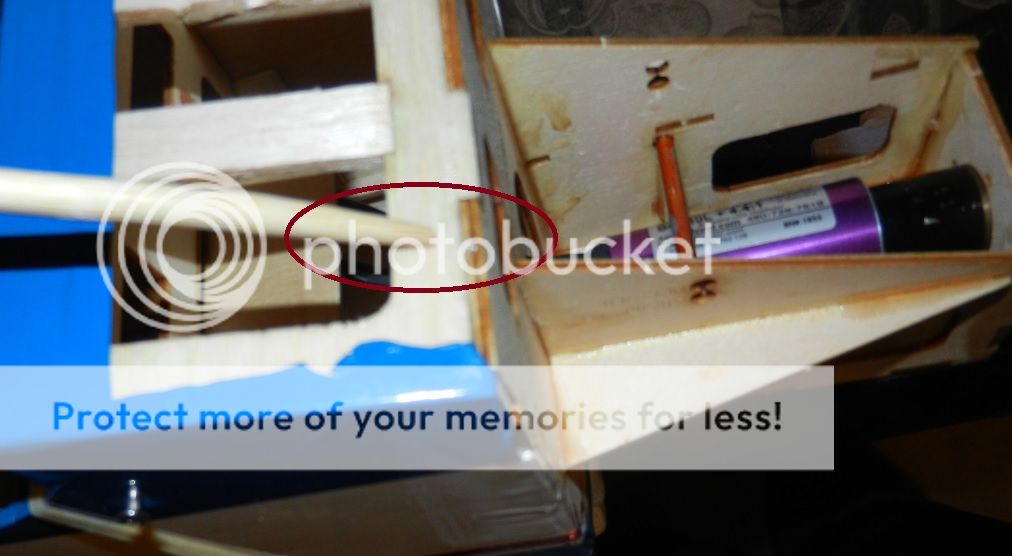
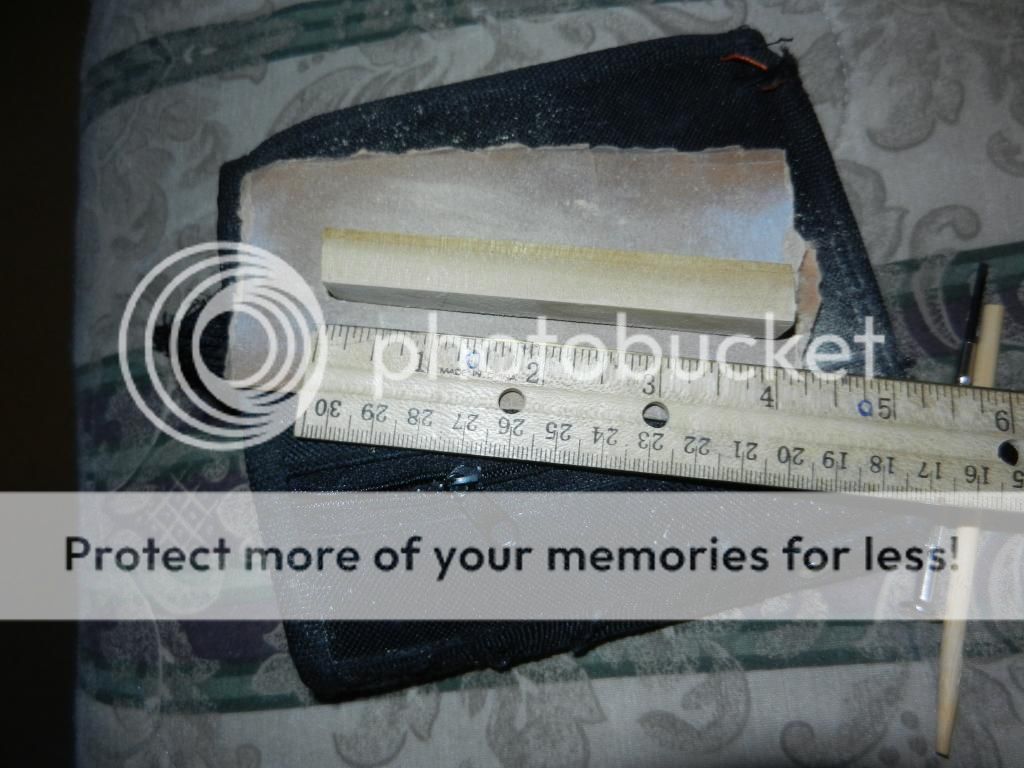
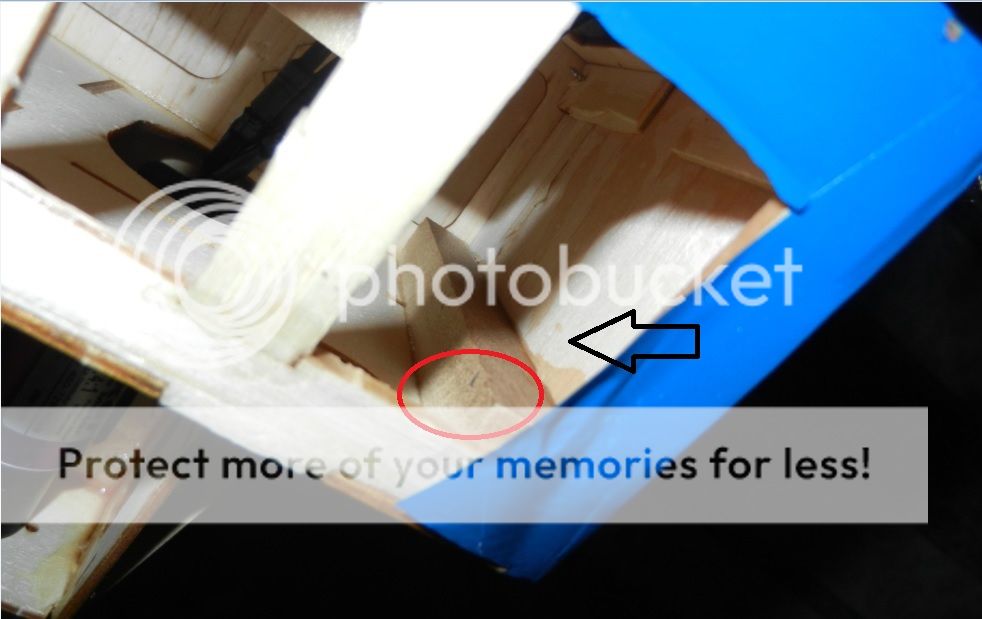
Took out the LARGE STICK (Hardwood) and went to town and re-enforced the FIREWALL as shown in the following pictures and re-applied Glue to those mating surfaces from FIREWALL -to- MODEL structure.


Motor Brace!

The other Side!!

Okay guys,
Last night, I dedicated a few hours to look over the Model very carefully and took advise of my Good Buddy (Sky Bro), Gerry (simano) who advised me that the Firewall and motor mount to Firewall bounds.
Well, I did see very good glue between the Motor Mount -to- Firewall, however, I found at least two areas where the FIREWALL was beginning to come apart from the model itself!
This was perhaps my hard landing during my very first Flight as the model did land hard and broke propeller.Took out the LARGE STICK (Hardwood) and went to town and re-enforced the FIREWALL as shown in the following pictures and re-applied Glue to those mating surfaces from FIREWALL -to- MODEL structure.
Motor Brace!
The other Side!!
Last edited by guapoman2000; 10-16-2013 at 07:08 AM.
10-17-2013, 12:16 PM
#9
Thread Starter
More work on my SA CAP 232 (10-17-2013)
Well guys,
Did lots of work last night again on my Steven's Aero 40A Cap232 and installed some hard wood side Popsicle formers along the inside of the bottom FUSE where the wing mates with the FUSE. I noticed the side wood is "Balsa" and there has been at least two occurrences that the wood has split or crack.
The Airframe is super light and I just don't understand how could the cross bracing between the Formers (FUSE) are done with a rectangular balsa wood without any interlocking, they are just glued in a slot of sorts and at least two of them has detached.
I did not take any pictures as of yet on the latest re-enforcement on the FUSE, however, I still need to install some corner gussets to really give the entire structure a stronger and sound airframe. I don't how this Airframe has survived this amount of time and flown for countless flights without any structure failure. To me at least, it seems to need a little more re-enforcements in critical areas.
To give you all an idea of how Light this 54 inch wing span Cap232 "is" then, take a look at the following pictures!
SUMMARY:
Model without Battery: 42oz.
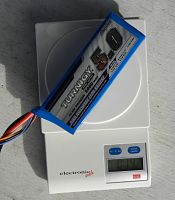
Battery Pack: 14.5oz.
===================================
Total Fully Ready Weight: 56.5 oz. (3.53lbs.)

Better Spinner with Aluminum Back Plate:

Weigh-In with Model and with Battery Installed:

Well guys,
Did lots of work last night again on my Steven's Aero 40A Cap232 and installed some hard wood side Popsicle formers along the inside of the bottom FUSE where the wing mates with the FUSE. I noticed the side wood is "Balsa" and there has been at least two occurrences that the wood has split or crack.
The Airframe is super light and I just don't understand how could the cross bracing between the Formers (FUSE) are done with a rectangular balsa wood without any interlocking, they are just glued in a slot of sorts and at least two of them has detached.
I did not take any pictures as of yet on the latest re-enforcement on the FUSE, however, I still need to install some corner gussets to really give the entire structure a stronger and sound airframe. I don't how this Airframe has survived this amount of time and flown for countless flights without any structure failure. To me at least, it seems to need a little more re-enforcements in critical areas.
To give you all an idea of how Light this 54 inch wing span Cap232 "is" then, take a look at the following pictures!
SUMMARY:
Model without Battery: 42oz.
Battery Pack: 14.5oz.
===================================
Total Fully Ready Weight: 56.5 oz. (3.53lbs.)
Better Spinner with Aluminum Back Plate:
Weigh-In with Model and with Battery Installed:
10-17-2013, 12:21 PM
#10
Thread Starter
RC Flying (10-17-2013):
Just an amazing flight with the repaired HACKER B40-10L (4.4 Gearbox). Like to report that the J-B WELD is holding that Frontal Bell housing of the motor very well and now it sounds much quieter and smooth!
Again, after 7 minutes of nothing more than two clicks above 1/2 throttle, and occasional 3/4 throttle for powerful loops and other maneuvers, the 3-Cell, 5,000mAH 20C, Lithium Polymer battery pack came down cold and measured a resting Voltage of 11.78 Volts so, I could have flown it a little longer.
All systems performed very well and most especially the Elevator at Low Rates (43%) upon landing!
Hoping for better mornings without FLOG!!!
Carlos
10-17-2013, 05:06 PM
#12
Thread Starter
Guys,
Thursday (10-17-2013) had been so nice weather wise that I went out to the RC Club again after work!
Here is the VIDEO capture using my Cowboy Hat!
https://vimeo.com/77182693
Thursday (10-17-2013) had been so nice weather wise that I went out to the RC Club again after work!
Here is the VIDEO capture using my Cowboy Hat!
https://vimeo.com/77182693
10-18-2013, 09:52 AM
#13
Thread Starter
Flight Report: (10-18-2013)
Three wonderful flights were possible this early morning! I just can't believe how well this model performs all Maneuvers!
Today, I tried the Snap Roll. Well, I am new to this 3D stuff so, allow me to explain.....on level flight and (5 mistakes high) I commanded the model to pitch upwards with good amount of power then, I slightly reduced throttle and quickly kicked Right Rudder and FULL UP ELEVATOR! It performed the best Inverted snap rolls you can imagine.
I have Video but, presently need to attend other matters so, it will be later in the early evening that I will be able to post.
Happy Landings!
Last edited by guapoman2000; 10-18-2013 at 09:56 AM.
10-19-2013, 03:18 AM
#14
Thread Starter
Buddy will be showing up at RC Club to Video so, stayed turned for a better Video instead of on top of my Cowboy hat, LOL!
https://vimeo.com/77363848
https://vimeo.com/77363848
Last edited by guapoman2000; 10-20-2013 at 04:06 PM.
10-20-2013, 11:02 AM
#16
Thread Starter
Wow!
Sunday morning turned out to be just an amazing morning to really command my Cap232 with new and different maneuvers. Super Wicked Snaps and Spins!
New Video!
https://vimeo.com/77346252
Sunday morning turned out to be just an amazing morning to really command my Cap232 with new and different maneuvers. Super Wicked Snaps and Spins!
New Video!
https://vimeo.com/77346252
10-20-2013, 02:59 PM
#17
Thread Starter
Sunday morning was incredible as I was perhaps the only one after 10:30am at the RC Club so, I wasted no time and measured the AMP, WATTS, and Under-Load Voltage of the power system.
Results:
1/4 Throttle: 7.52 Amps, 92 Watts, 12.33 Volts
1/2 Throttle: 14.14 Amps, 172 Watts, 12.17 Volts
Full Throttle: 32.82 Amps, 384 Watts, 11.73 Volts
Presently Uploading Video of the Static Measured Session!
Nonetheless, it is pretty close to the P-Calc On-line Estimator:
Results:
1/4 Throttle: 7.52 Amps, 92 Watts, 12.33 Volts
1/2 Throttle: 14.14 Amps, 172 Watts, 12.17 Volts
Full Throttle: 32.82 Amps, 384 Watts, 11.73 Volts
Presently Uploading Video of the Static Measured Session!
Nonetheless, it is pretty close to the P-Calc On-line Estimator:
10-20-2013, 06:09 PM
#19
Thread Starter
Wow!
I am extremely lucky to come across this nice Cap232 as the kit alone is almost $300 US plus shipping! And most importantly, when you open the box its lots of wood!!
For those that do not know.....
Here is the link!
http://www.stevensaero.com/StevensAe...e-Aerobat.html
I am extremely lucky to come across this nice Cap232 as the kit alone is almost $300 US plus shipping! And most importantly, when you open the box its lots of wood!!
For those that do not know.....
Here is the link!
http://www.stevensaero.com/StevensAe...e-Aerobat.html
Last edited by guapoman2000; 10-21-2013 at 04:36 AM.