


Sebart Apollo s
 04-27-2026 | 06:52 PM
#26

My Feedback: (121)
Hey guys,
Did you encounter any difficulties mounting the motor and or motor box?
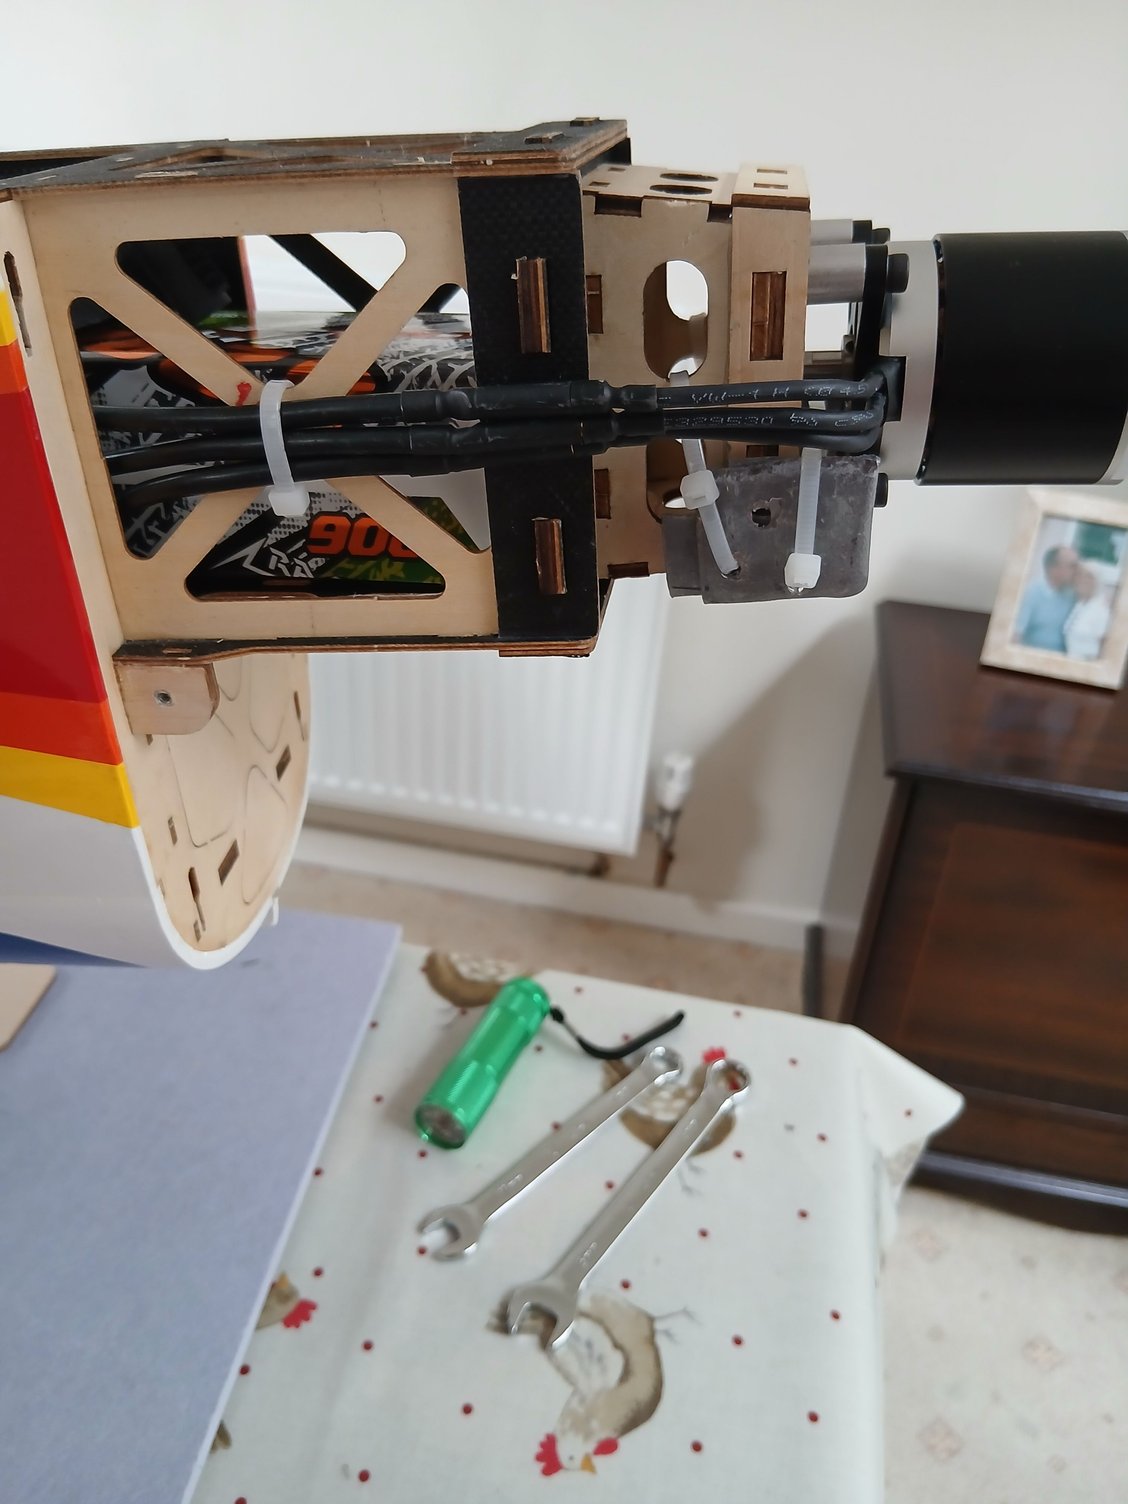
I see no obvious way to screw in the bolts holding the motor box to the fuselage. Neither 450kv motor I have fit the motor box and either will need extensions to get the prop in the correct location.
I hope you�ve had some more good flights on your Apollos.
thanks,
Will
Did you encounter any difficulties mounting the motor and or motor box?
I see no obvious way to screw in the bolts holding the motor box to the fuselage. Neither 450kv motor I have fit the motor box and either will need extensions to get the prop in the correct location.
I hope you�ve had some more good flights on your Apollos.
thanks,
Will
 04-27-2026 | 10:11 PM
#27
Junior Member
Hi Will.
I've had 20 flights now. Just about got the trimming and rates as I like them and, its so straight and enjoyable to fly, its just great.
Getting the motor box on is a right fiddly job.
I used a ball headed hex driver, which goes through the holes where the motor attaches, but, the hex driver is then on an angle and wants to push the bolts at an angle and cross thread them......with patience, 3 hands and a lot of cursing, they bolt home.
you can just get a small ring spanner through the side holes in the motor box to hold a nylock nut while you fasten the motor to the box from the front.
I used long fawceps to hook a washer onto the bolt on the inside of the motor box before doing the same with a nylock nut, then , once on a turn or two, I got a small ring spanner onto thr nut while I tightened the bolts from the front....phew !!!!!!
As I said....it's fiddly, to put it mildly.
I had to use stand offs for the motor, that just added to the fun while attaching the motor......an extra pair of hands is a great help to hold stuff in place.
The prop adapter lined up perfectly for the cowl.
If you have a swear box, you'll be quite well off when you've Finnished 🙈
04-29-2026 | 06:42 AM
#28
My Feedback: (121)


Having used up my monthly allotment of profanity, I decided to ponder the motor box issues. 4conclusions:
1) it is easy to mount the motor to the motor box before the the motor box is attached to the airplane
2) it is almost impossible to mount the motor box to the air plane with the motor already mounted
3) it is a PITA to mount the motor box to the airplane without the motor attached
4) it is much more difficult to mount the motor to the motor box after the motor box is attached to the airplane.
So I decided to go a slightly different route. I screwed the motor box bolts through the T-nuts from the back. They now serve as alignment pins for the motor box. Mounting the motor to the motor box is now much easier as I can access the stop nuts through the hole at the back of the motor box. When I am satisfied with the motor location, I need to replace the current motor stand-offs which are too long, I will glue the motor box to the fuselage.
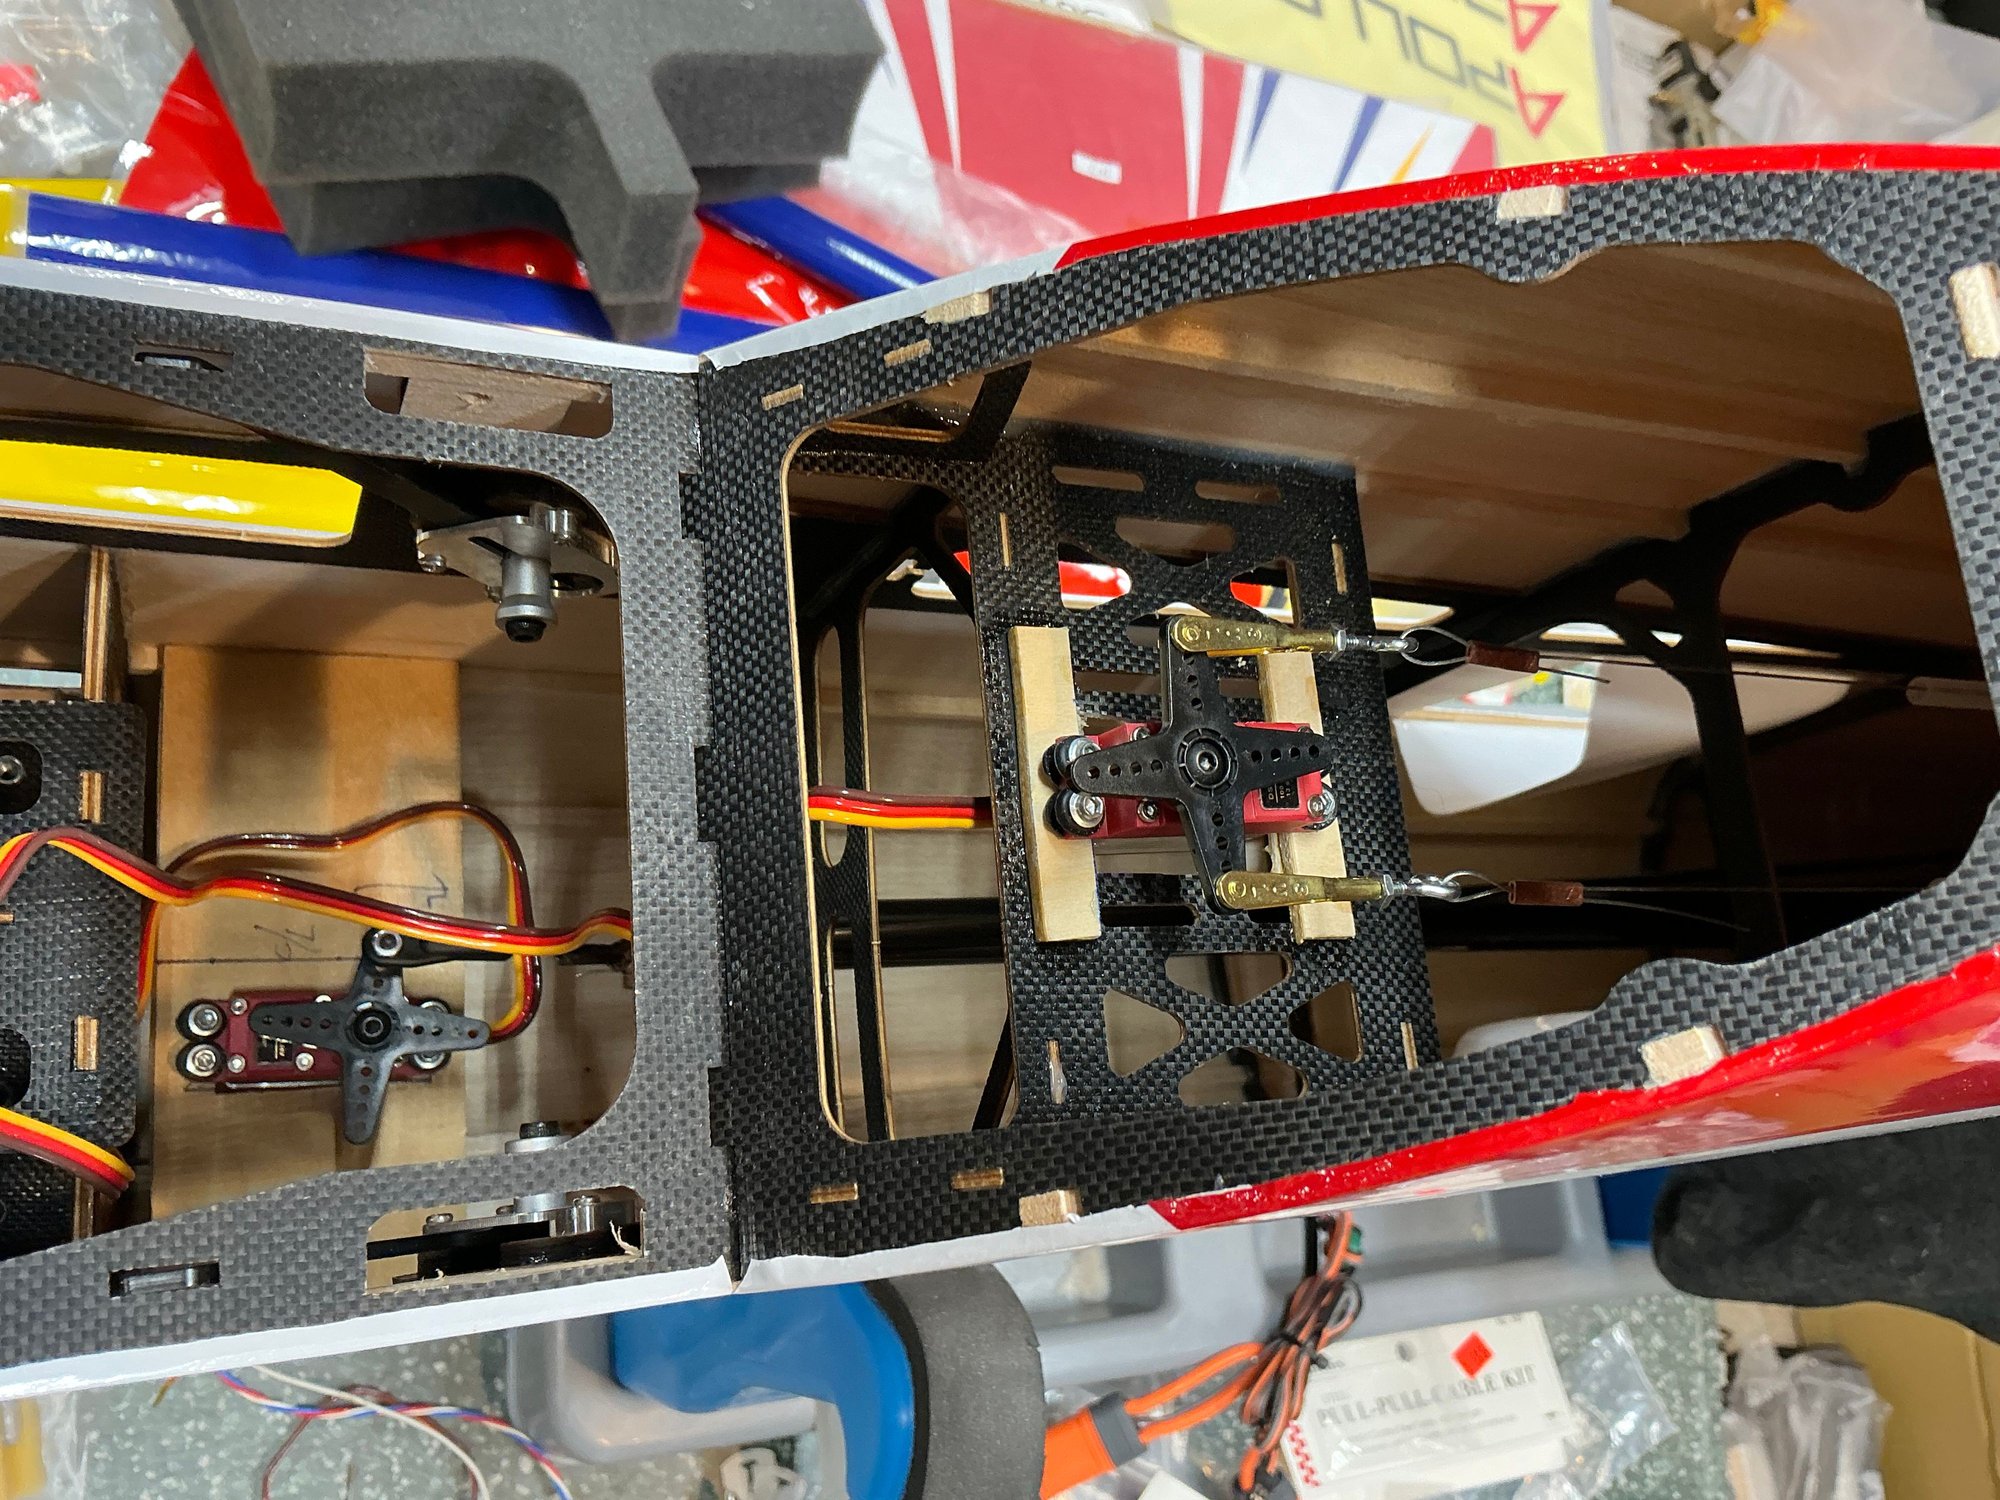
i also posted photos of my modification to the tail servo locations.
04-29-2026 | 06:56 AM
#29
Junior Member
Hi Will.
I like what you've done there...I can see your pull pull rudder arrangement.
How have you done the elevator servo / servos and push rods please.
I'll be really interested to see how little weight....if any you need to balance her.
I might follow your route there.....looks very promising.
Well done 👍
Kev
04-29-2026 | 10:25 AM
#31
My Feedback: (121)
Hi Kev,
Two seperate carbon fiber rods one to each elevator. Joined just before the elevator servo. They sit above the servo lead tube, but everything is black. I’ll try to get a better photo of the servo end.
The motor is an E-Flite power 60, 470kv. The Turnigy motor recommended above is currently out of stock. Hopefully minimal weight required for balance. The final test will be the performance in the air.
-Will
The following users liked this post:
wattsup (04-29-2026)
04-29-2026 | 04:26 PM
#33
My Feedback: (121)
Well, I did a preliminary C/G check today with the wings attached, but no landing gear, T-can or canopy. The motor will also be moving rearward about 10mm. Using a 6S 5000 mah lipo I was able to achieve the proper C/G with the front of the battery about 6cm behind the fuselage former. I am pretty happy as it seems my efforts have paid off. Once I have the Apollo in RTF condition I will report back on the final C/G result and, of course, the actual flight performance.
05-22-2026 | 11:57 AM
#35
Junior Member
I've done a reconfiguration of mine.
I've got some larger batteries, CNHL 6200 6S 90C.
This has allowed me to remove some lead. Now that I only have the one sheet of lead, I've been able to fold it in 3, and therefore move it further forward....right up to the back of the motor.
After some trial and error, it balanced at 155mm from the leading edge of the wing and total weight is down to 4.11kg....approx 9lbs 1oz...I'm pretty happy with that.
Still delighted with the plane, done 35 flights now.
Flying her tomorrow all being well.
05-24-2026 | 06:35 PM
#36
My Feedback: (121)
Hey Kev,
Very nicely done! I really like your balance checker. Is that commercially available? I want one.
Please post a flight report, too.
We’ve been having much needed rain here and my Apollo is still in limbo. I finally got the right motor stand-offs and mounted the motor and ESC only to discover that the motor had been modified for 6mm connectors while the ESC has 4mm connectors. Now I am waiting for connectors….
-Will
05-24-2026 | 08:08 PM
#37
Junior Member
Hi Will.
Yes, its commercially available. I got it on ebay, I'm not sure if you can post commercial links on here, but if you search on Ebay for rc airplane balancer or c of g balancer, it will come up. It comes as a flat, laser cut pack and instructions, you need some glue and a screwdriver.
I've done 44 flights now.
I don't compete, but fly for fun and use a gyro, which helps in our often windy, turbulent location.
It's super smooth and rock steady and feels really locked in. I've about got the coupling spot on.
It's just so straight to fly, slow rolls are super smooth and axial, knife edge passes and circles are a breeze, I'm even getting there with my one roll circle.
It cuts thought the turbuleturbulent air like a knife and glides on and on, so landings need a long glide in
My undercarriage screws kept coming a bit loose so I've used threadlock.
It flys nice and slow on about 2/3 throttle and goes vertical and dead straight upwards on full power.
If this is what a practice f3a model flies like, the full size must be amazing.
You'll be well chuffed Will.
Kev
05-25-2026 | 04:49 PM
#38
My Feedback: (121)
Hi Kev,
Found the balancer and have on order. I started competing in 1973. I retired, temporarily (I thought) in the ‘90s when my kids started getting involved in sports. I have dropped in on an occasional contest as a spectator and it seems more time is spent judging than flying. Now I just fly for me. I still practice the F3A sequences to keep my fantasy of returning to competition alive, but at 68 I may be a bit past my prime. I will always love pattern models as nothing flies as well.
I will report on my impressions of the Apollo when I get some flights.
Will
i hope I am ‘well chuffed’!


