


Blizzard from Corvidae.net
 04-22-2006 | 03:31 PM
#1

Thread Starter
Member
Joined: Jun 2005
Posts: 56
Likes: 0
Received 0 Likes
on
0 Posts
From: Almere, NETHERLANDS
I've chosen the Blizzard .15 as a new project because I'd had a hot MVVS .15 GFR around, waiting for a model as this. I was looking for something quick and with a sleek fiberglass fuse. Now it's really gotten time to begin with building because I had it laying around for over a year. I promised to make a nice building report, and here it is I believe. 
The package arrives
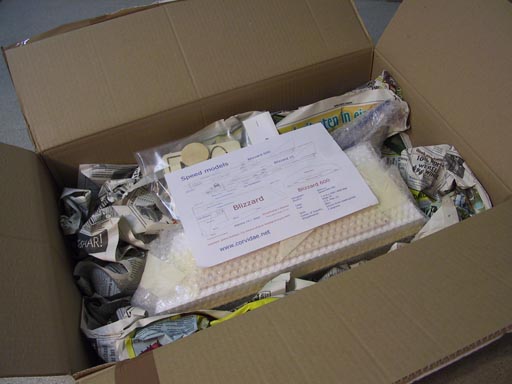
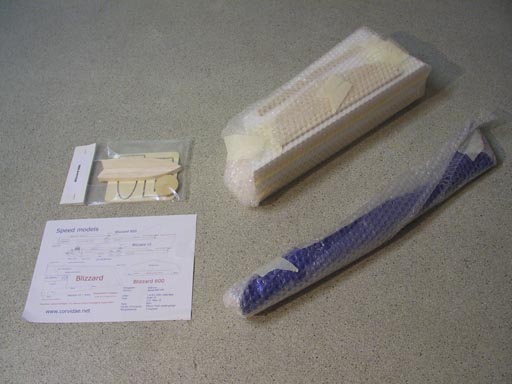
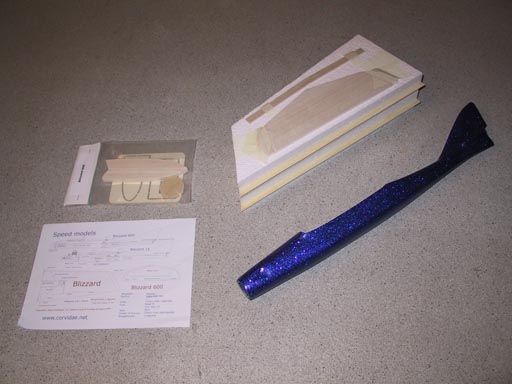
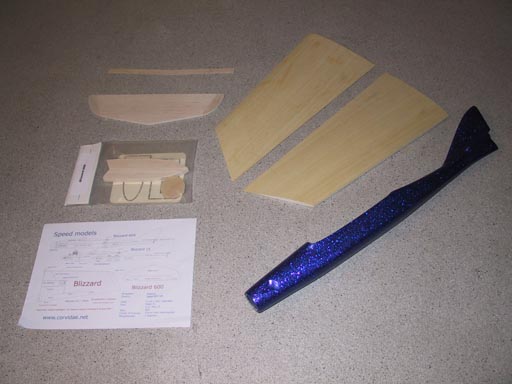
All the components on display. Included is the CNC-pack. Very nice.
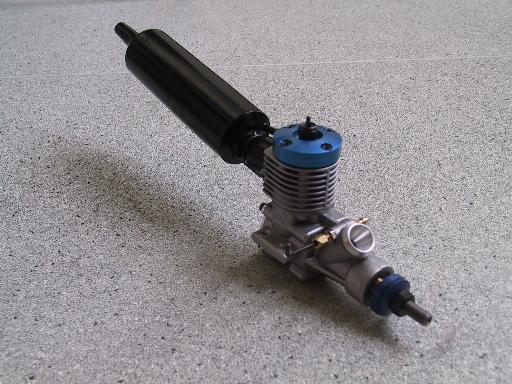
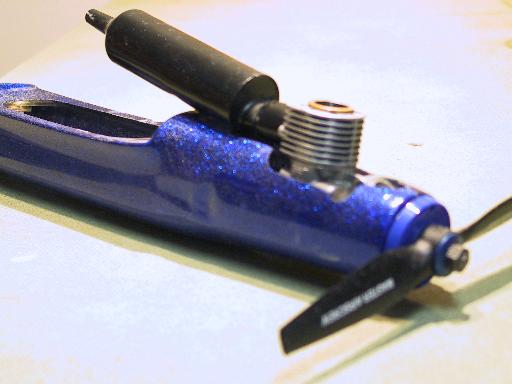
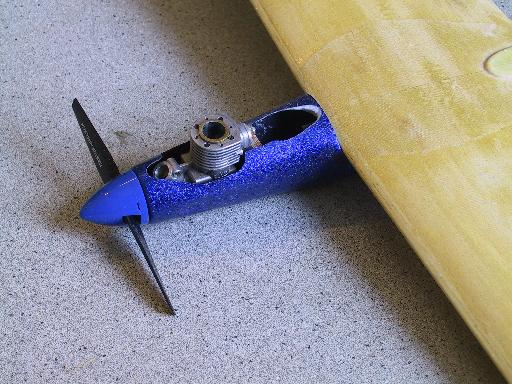
The MVVS .15 GFR with venturi. M+R engine was also an option, especially as you've seen the price. A .15 M+R engine does cost €90,- (about $100,-) in Germany. The M+R is a modified .15 Rossi Fire, which is very hot! But the MVVS was lying around, so there it is. Note the outstanding quality, great value for money. I also like the blue anodized material.
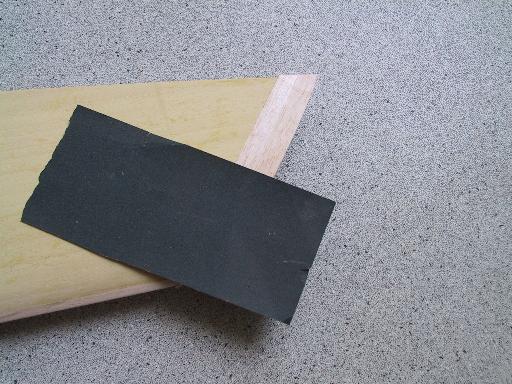
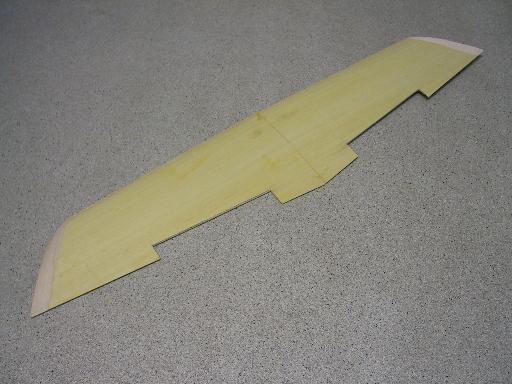
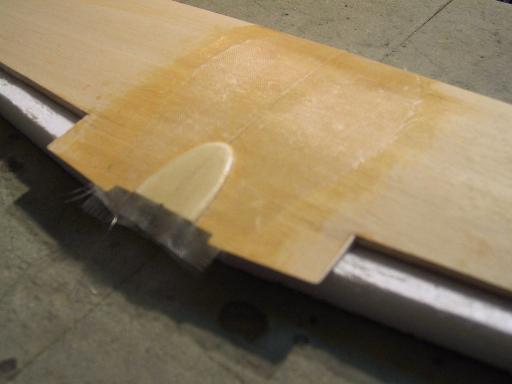
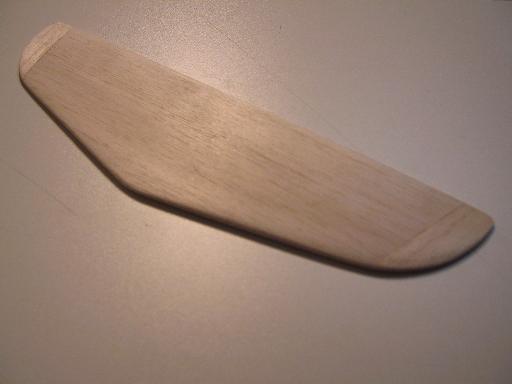
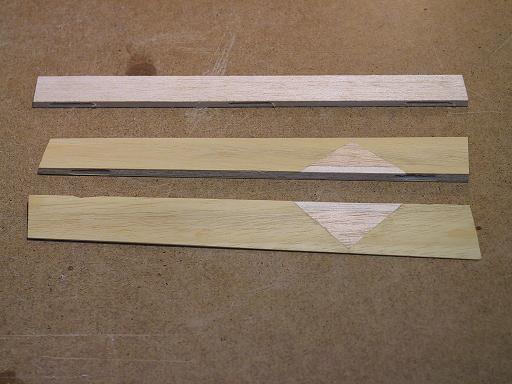
The leading edge and wingtips glued to the wing with D3 glue (for wood, also works well with styropor/foam)
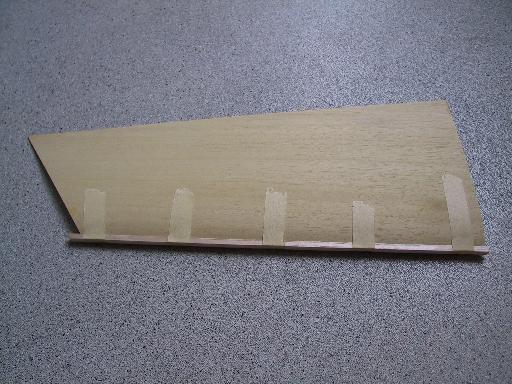
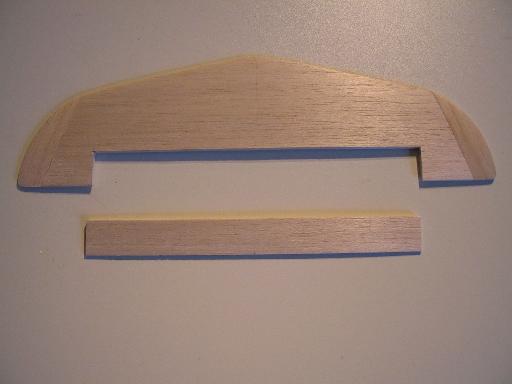
The wingtips are also attached.
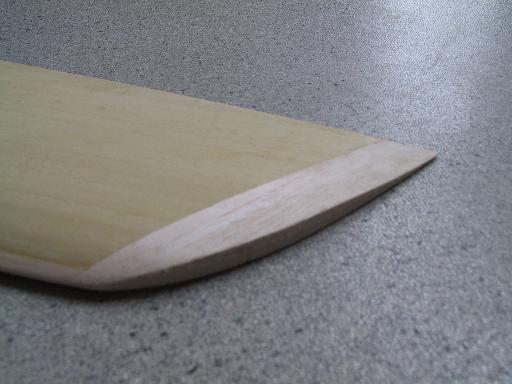
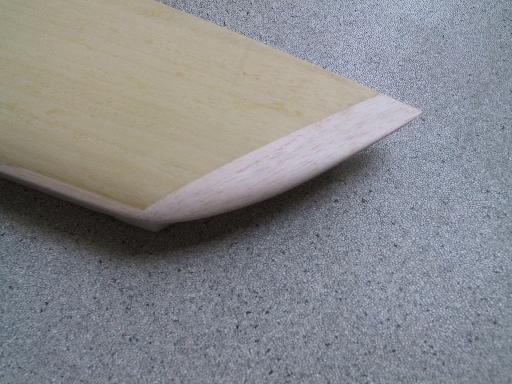
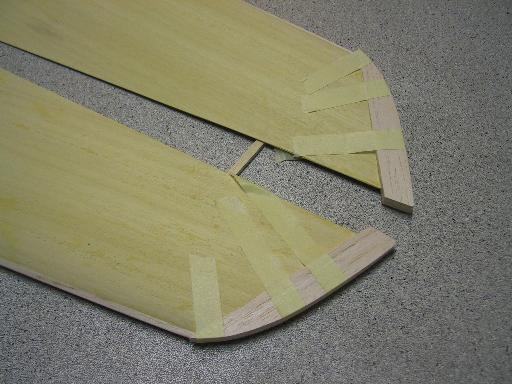
Sanding the wings with a 3° angle for joining together.
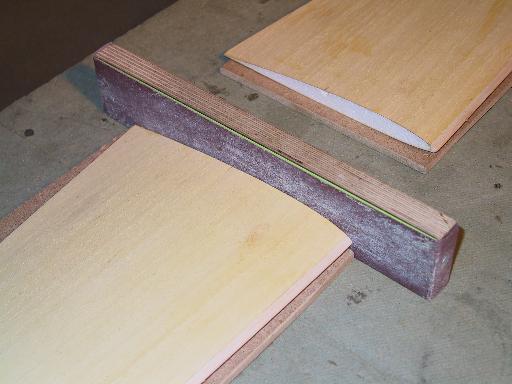
12mm spacing under each wingtip.

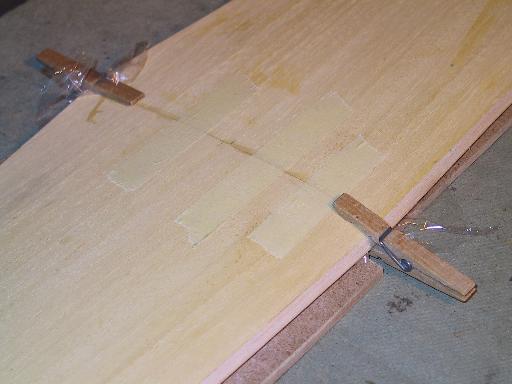
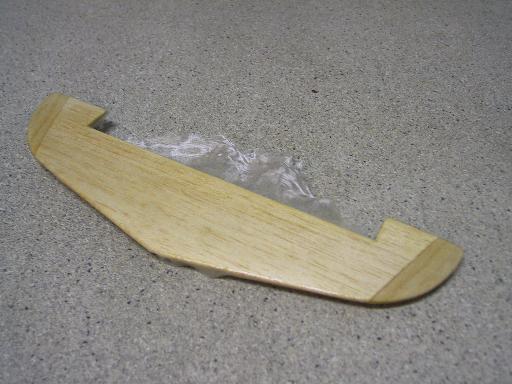
Now waiting until the glue is cured.
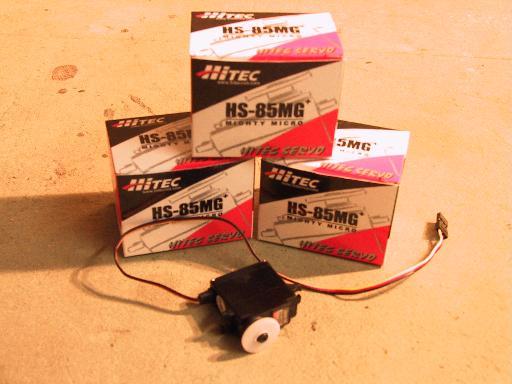
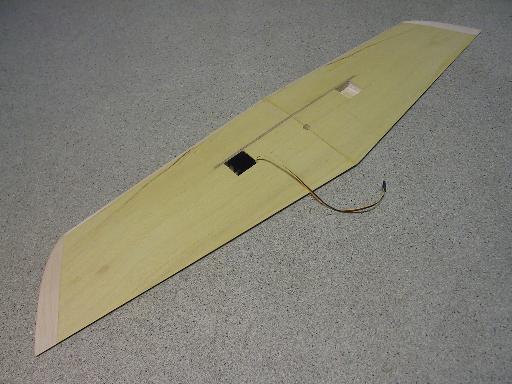
3x Hitec HS-85MG for the Blizzard.
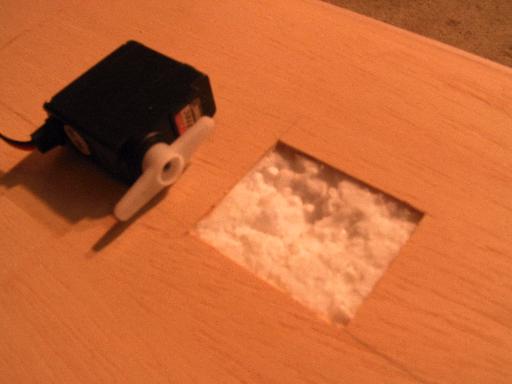
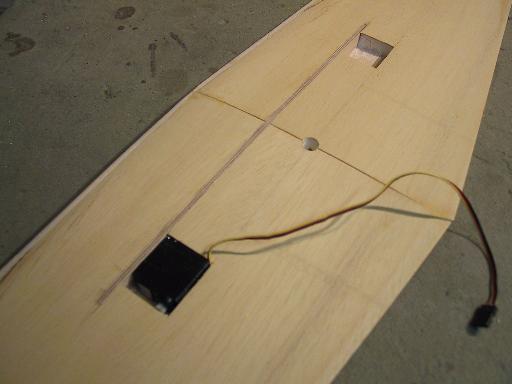
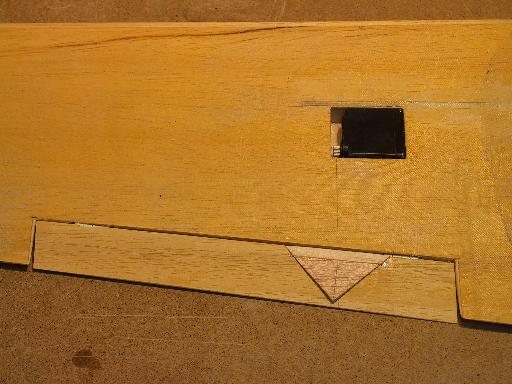
Made a small gap for the servo cables. There's a slot prepared in the foam to make it very easy.
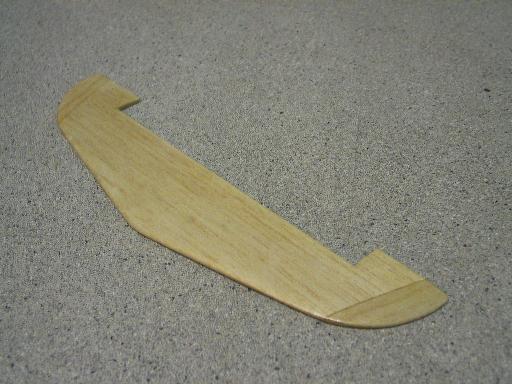
I did cut a gap for the servos. Mounting brackets sawed off to reduce the mounting space.
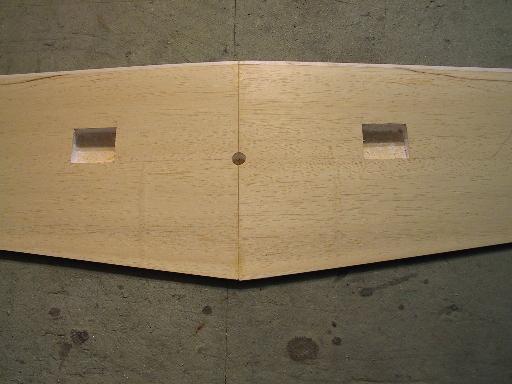
Both gaps are finished.
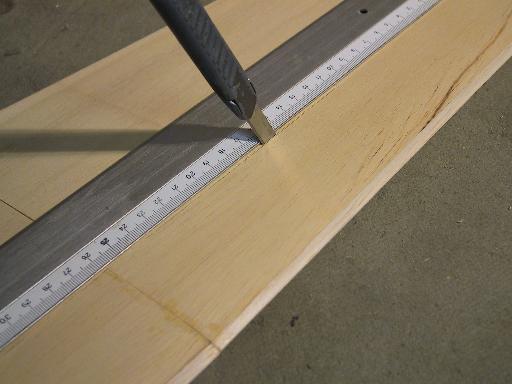
Cut a slot to fit the wing spar.
Removing styropor / foam.
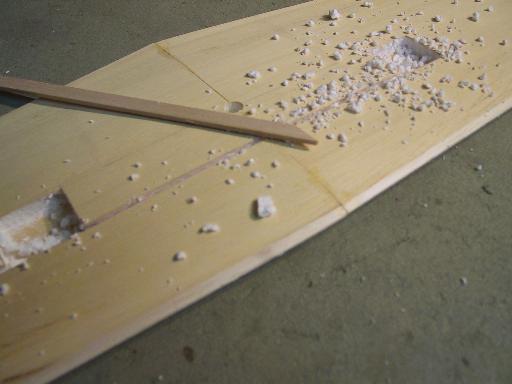
Glued the wing spar into place.
Detail photo.
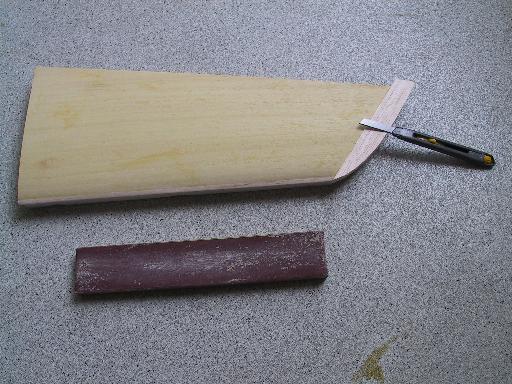
Cut out the ailerons.
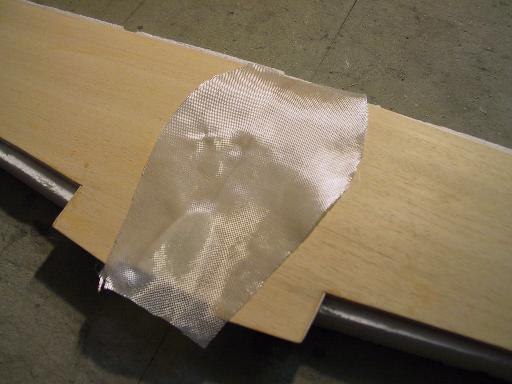
Peace of heavy glass for reinforcement.
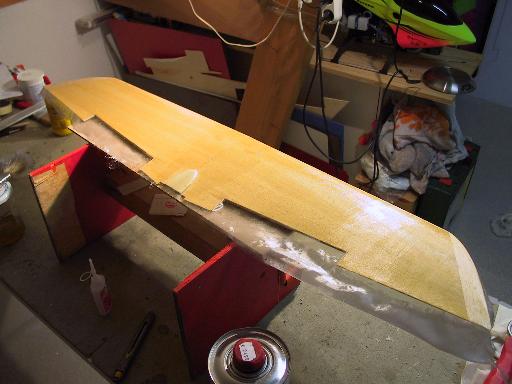
Entirely covered the wing with 25 gram glass. Waiting for the G4 to set in and dry.
Removing unnecessary glass with a peace of sanding paper.
Finish all the edges to give a smooth result.
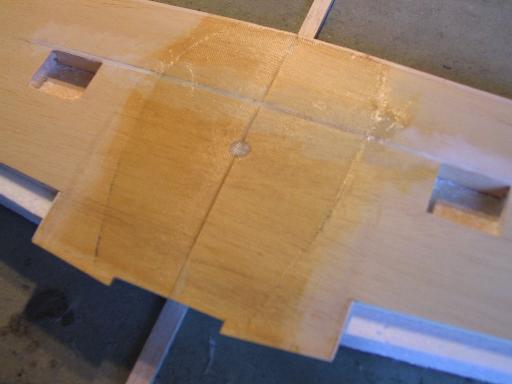
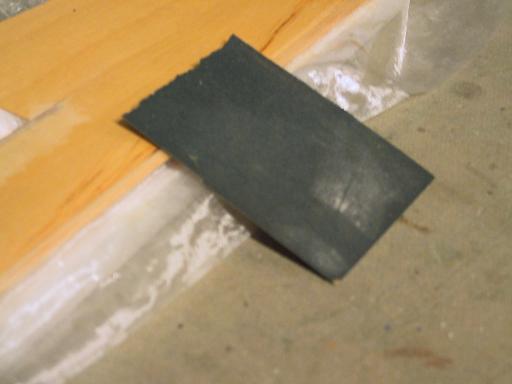
Reinforcing the upper side of the wing.
Wing reinforcement together with a peace of plywood for the wing-bolt.
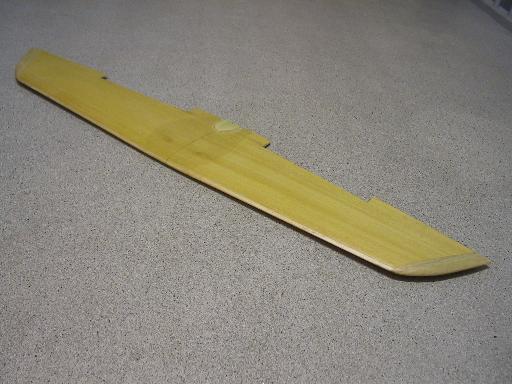
Smooth!
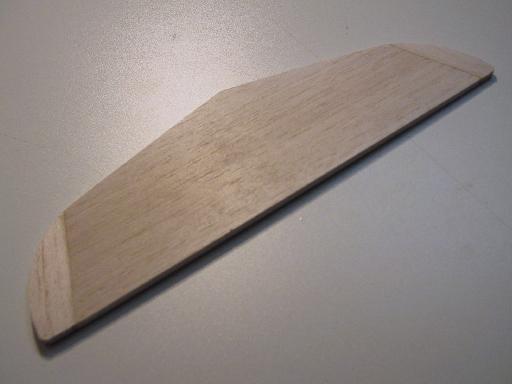
Sanded the stabilizer in shape and covered with glass.
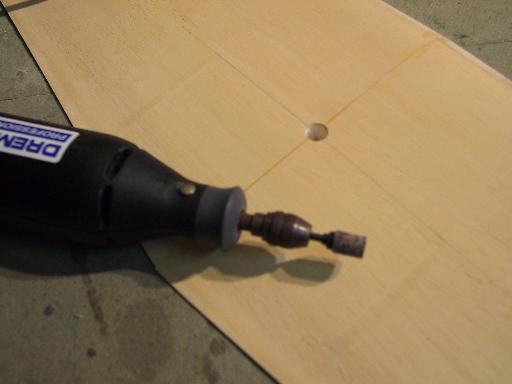
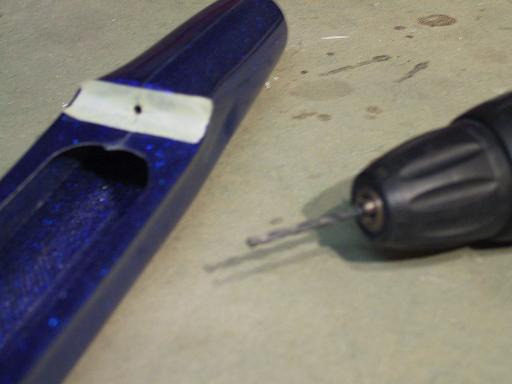
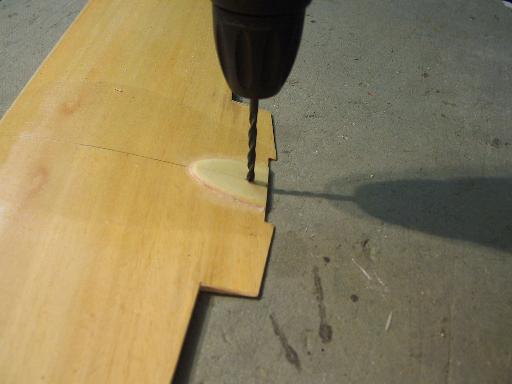
Measured the place for the hole and drilled.
5mm carbon wing dowel glued with epoxy.
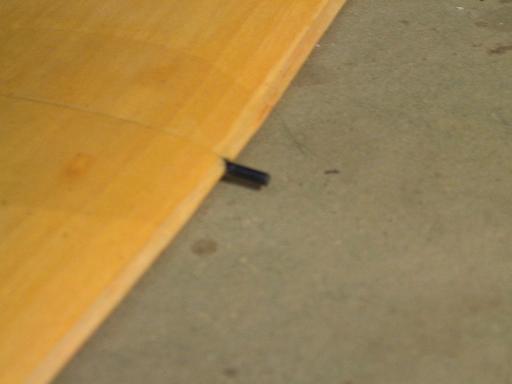
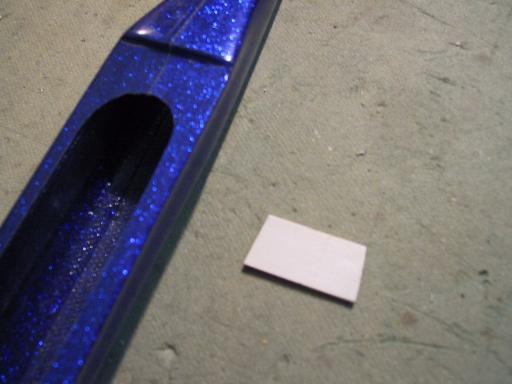
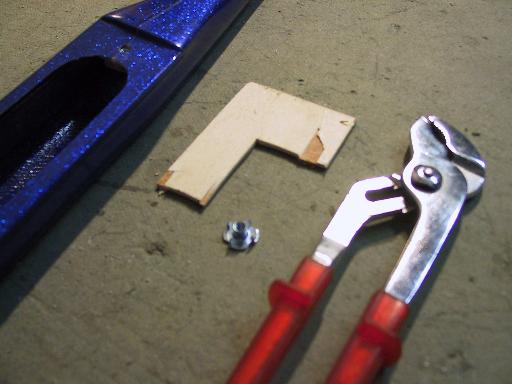
Plate to accommodate the blind nut.
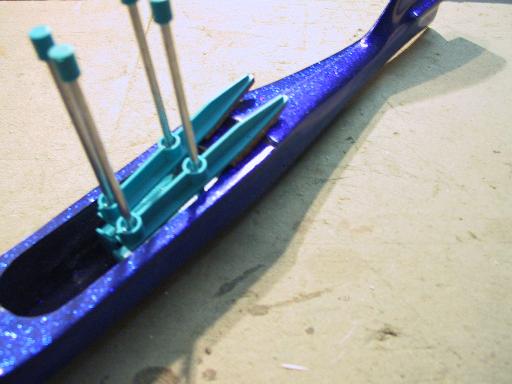
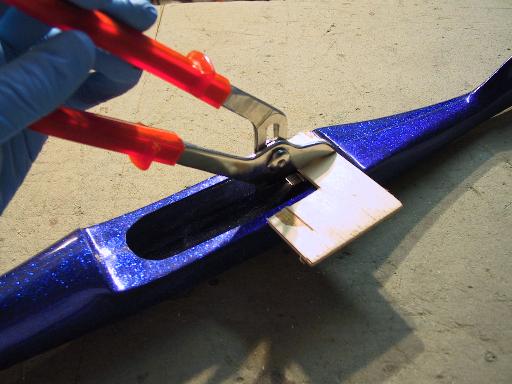
Used a pipe wrench to force the blind nut into the plywood.
Peace of scrap ply to ensure it isn't damaging the fuse.
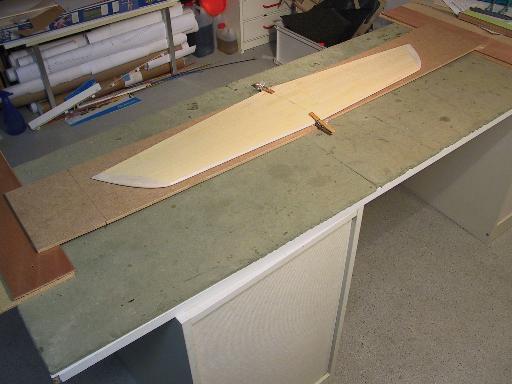
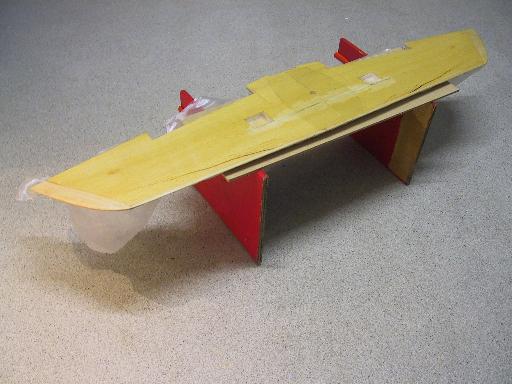
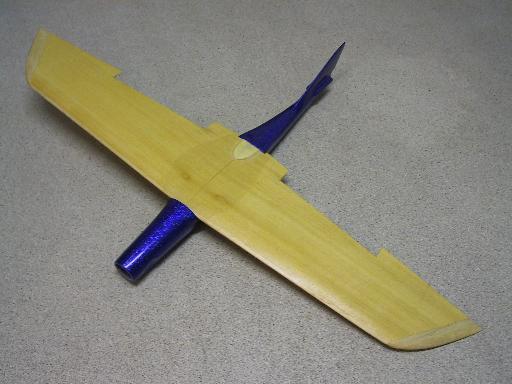
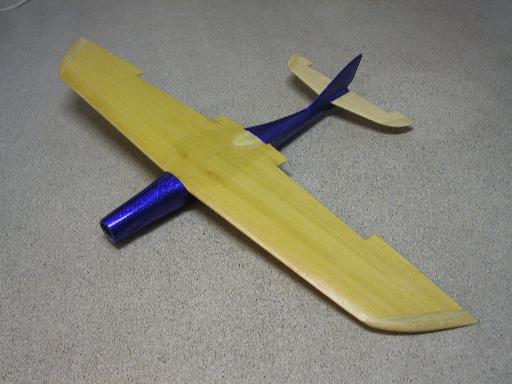
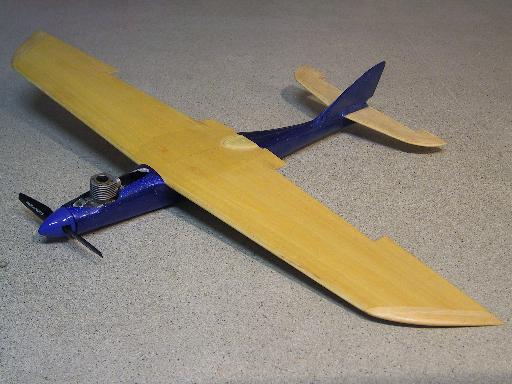
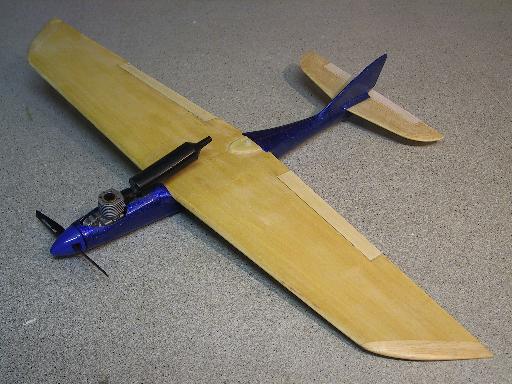
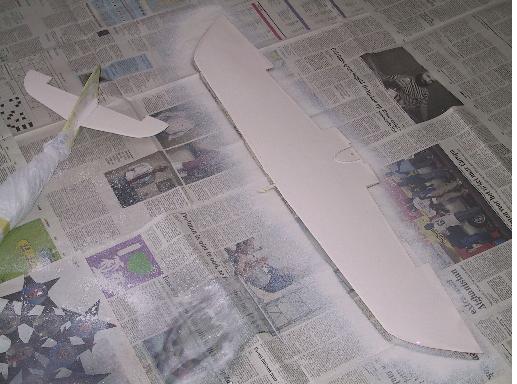
Complete view of the project.
Together with the Stiletto.

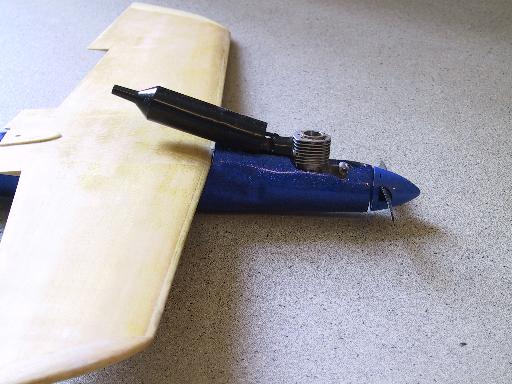
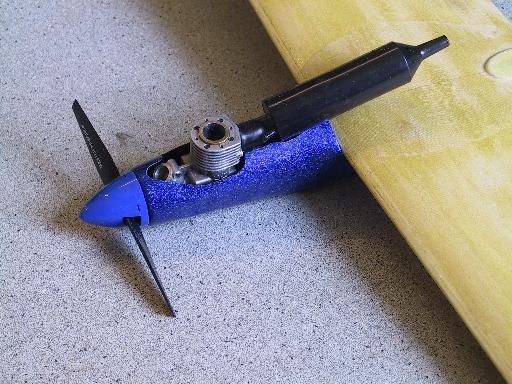
Engine and firewall fixed. Needed to modify the firewall and engine bracket to clear the rear exhaust.
Still quite a lot of space between the wing and exhaust.
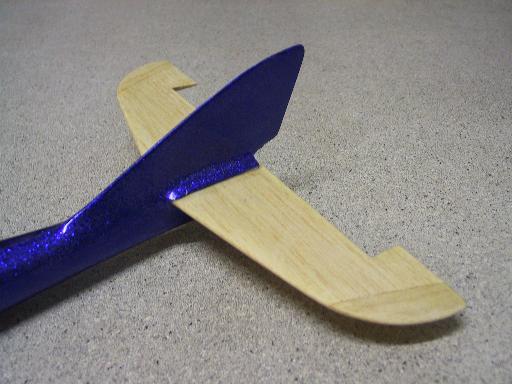
Joins nice.
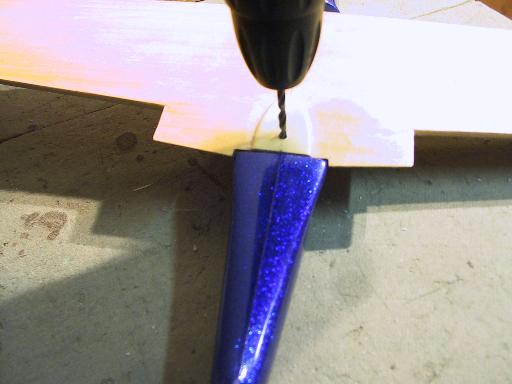
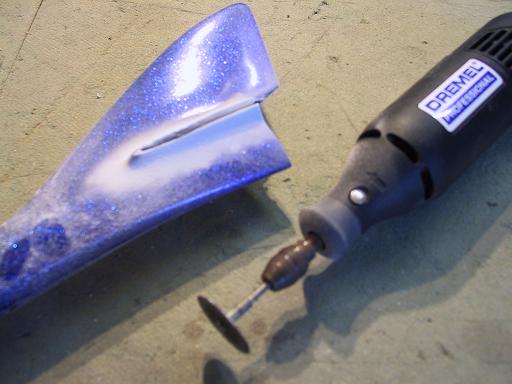
Cutting a gap with the Dremel. Should be all covered up eventually.
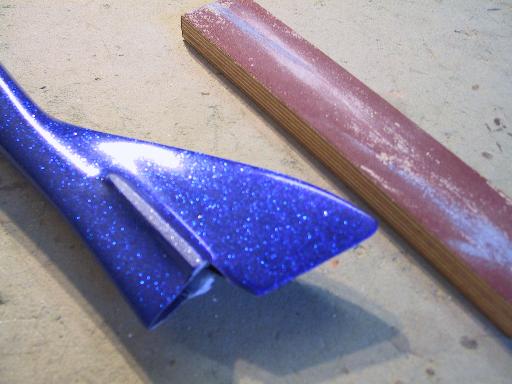
Glas gesopt met 30 minuten epoxy. Heeft ongeveer al de juiste vorm, eventueel later met verfstripper bijwerken.
Soaked glass with 30 minutes epoxy resin. Has almost the right shape, maybe needs to be modified with heat gun.
Added balsa to accommodate the hinges. The PU glue is foaming great as you can see.
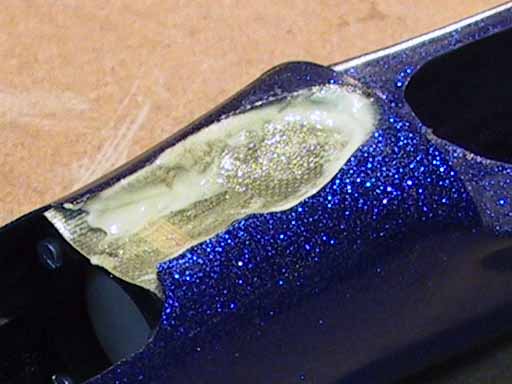
I could modify the epoxy plate that I soaked with my bare hands because it was still soft enough. Forced it into place and glued it with 30 minutes epoxy and micro balloons. Satisfied with the result but needs to be sanded afterwards. I'll paint it with some metalic blue paint.
Peace of hard balsa glued on the aileron to add more strength for the rudderhorn.
Only the control surfaces need to be covered with glass, but the model is almost finished!
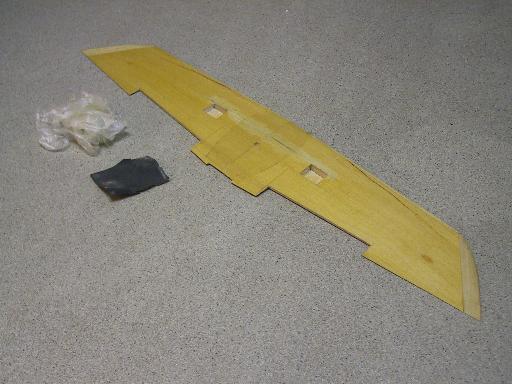
Viewed from the top.
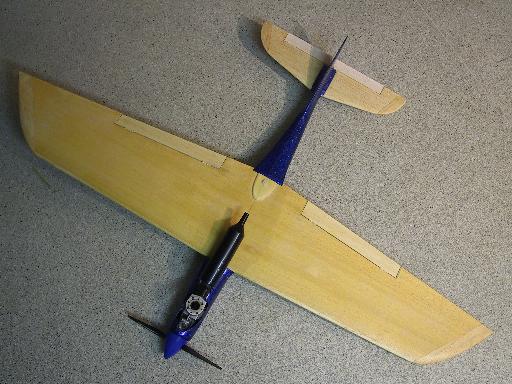
The color scheme I'd had in mind is inspired by a Shockflyer color scheme. I believe it's quite nice because it is very simple and shouldn't be a hard job to paint. I wanted to keep the color scheme simple since I don't have much experience with paint brushing effects. I want to maintain the clear wood instead of the white depron. Should look nice.

Added some glass to the ailerons.
To be continued!
The package arrives
All the components on display. Included is the CNC-pack. Very nice.
The MVVS .15 GFR with venturi. M+R engine was also an option, especially as you've seen the price. A .15 M+R engine does cost €90,- (about $100,-) in Germany. The M+R is a modified .15 Rossi Fire, which is very hot! But the MVVS was lying around, so there it is.
Note the outstanding quality, great value for money. I also like the blue anodized material.The leading edge and wingtips glued to the wing with D3 glue (for wood, also works well with styropor/foam)
The wingtips are also attached.
Sanding the wings with a 3° angle for joining together.
12mm spacing under each wingtip.
Now waiting until the glue is cured.
3x Hitec HS-85MG for the Blizzard.
Made a small gap for the servo cables. There's a slot prepared in the foam to make it very easy.
I did cut a gap for the servos. Mounting brackets sawed off to reduce the mounting space.
Both gaps are finished.
Cut a slot to fit the wing spar.
Removing styropor / foam.
Glued the wing spar into place.
Detail photo.
Cut out the ailerons.
Peace of heavy glass for reinforcement.
Entirely covered the wing with 25 gram glass. Waiting for the G4 to set in and dry.
Removing unnecessary glass with a peace of sanding paper.
Finish all the edges to give a smooth result.
Reinforcing the upper side of the wing.
Wing reinforcement together with a peace of plywood for the wing-bolt.
Smooth!
Sanded the stabilizer in shape and covered with glass.
Measured the place for the hole and drilled.
5mm carbon wing dowel glued with epoxy.
Plate to accommodate the blind nut.
Used a pipe wrench to force the blind nut into the plywood.
Peace of scrap ply to ensure it isn't damaging the fuse.
Complete view of the project.
Together with the Stiletto.
Engine and firewall fixed. Needed to modify the firewall and engine bracket to clear the rear exhaust.
Still quite a lot of space between the wing and exhaust.
Joins nice.
Cutting a gap with the Dremel. Should be all covered up eventually.
Glas gesopt met 30 minuten epoxy. Heeft ongeveer al de juiste vorm, eventueel later met verfstripper bijwerken.
Soaked glass with 30 minutes epoxy resin. Has almost the right shape, maybe needs to be modified with heat gun.
Added balsa to accommodate the hinges. The PU glue is foaming great as you can see.
I could modify the epoxy plate that I soaked with my bare hands because it was still soft enough. Forced it into place and glued it with 30 minutes epoxy and micro balloons. Satisfied with the result but needs to be sanded afterwards. I'll paint it with some metalic blue paint.
Peace of hard balsa glued on the aileron to add more strength for the rudderhorn.
Only the control surfaces need to be covered with glass, but the model is almost finished!
Viewed from the top.
The color scheme I'd had in mind is inspired by a Shockflyer color scheme. I believe it's quite nice because it is very simple and shouldn't be a hard job to paint. I wanted to keep the color scheme simple since I don't have much experience with paint brushing effects. I want to maintain the clear wood instead of the white depron. Should look nice.
Added some glass to the ailerons.
To be continued!
 04-22-2006 | 11:37 PM
#2

Just one question...: why the hell did you pick the MVVS over the Russian Rossi copy? I mean, the little MVVS is great value if you make a cost/power balance... But if you're going for all out speed, you're better off with an engine like the M+R in the long run, because the MVVS simply lacks brute power/rpm capabilities in stock form...
04-23-2006 | 03:23 PM
#3
Thread Starter
Member
Joined: Jun 2005
Posts: 56
Likes: 0
Received 0 Likes
on
0 Posts
From: Almere, NETHERLANDS
Yes I know. But it was lying around here, so I chose the MVVS. Maybe I'll order the M+R later on but first the Blizzard has got to go airborne! All the control surfaces are covered with glass. Only thing resting is spraying paint on the wing and stab.
But it was lying around here, so I chose the MVVS. Maybe I'll order the M+R later on but first the Blizzard has got to go airborne! All the control surfaces are covered with glass. Only thing resting is spraying paint on the wing and stab.
04-24-2006 | 04:11 AM
#5
Thread Starter
Member
Joined: Jun 2005
Posts: 56
Likes: 0
Received 0 Likes
on
0 Posts
From: Almere, NETHERLANDS
04-25-2006 | 06:02 AM
#6
Member
My Feedback: (1)
Joined: Feb 2003
Posts: 81
Likes: 0
Received 0 Likes
on
0 Posts
From: Zagreb, CROATIA (HRVATSKA)
Hello,
Very nice plane !
Why did you removed Cylinder head ?
Did you liked this 2.5 ccm MVVS, is it any god and is it really more poverfull
than standard OS / Magnum 2.5 ccm engines ?
How they made this shiny metallic fuselage, is it gelcoat or paint ?
You should make video of first flight
Kristijan
Very nice plane !
Why did you removed Cylinder head ?
Did you liked this 2.5 ccm MVVS, is it any god and is it really more poverfull
than standard OS / Magnum 2.5 ccm engines ?
How they made this shiny metallic fuselage, is it gelcoat or paint ?
You should make video of first flight
Kristijan
04-25-2006 | 11:48 AM
#7
Thread Starter
Member
Joined: Jun 2005
Posts: 56
Likes: 0
Received 0 Likes
on
0 Posts
From: Almere, NETHERLANDS
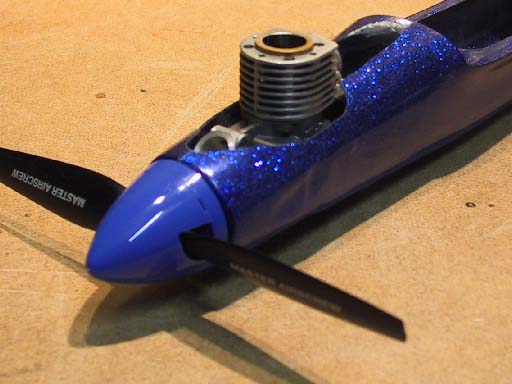
Thanks! I already had the MVVS and I believe it is a good match. Die MVVS has a higher RPM output compared with the OS (I also have the OS .15 CV-A) and Magnum engines, which are more for high torque applications. But beside the higher RPM, I do like the rear exhaust also. Gives a very sleek airframe and reduces drag of course. While building I'd completely stripped the engine to make it easy to fit inside the fuse. It also makes it easier to modify the gap made for the engine and reduces any chance of damaging the blue anodized cylinder head.
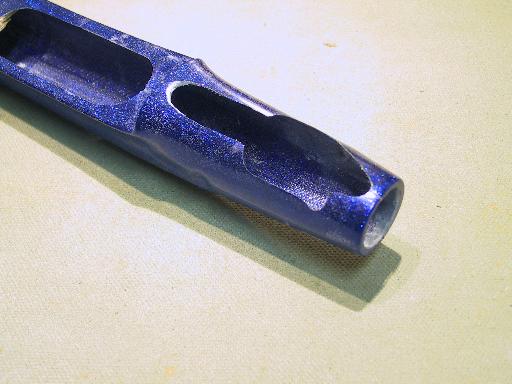
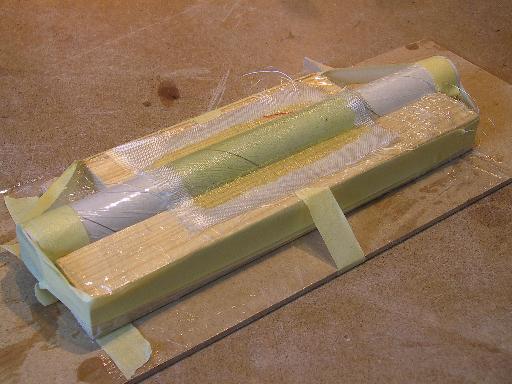
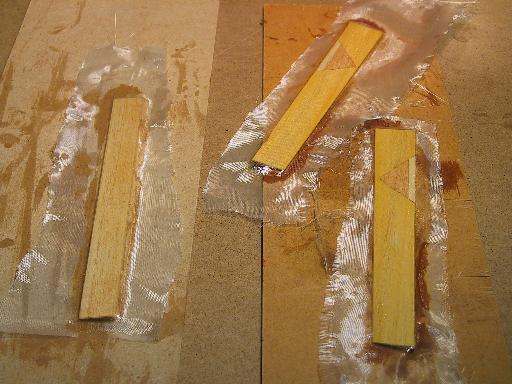
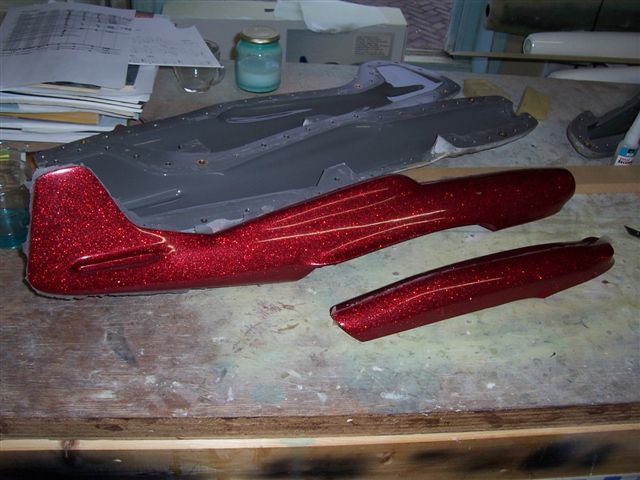
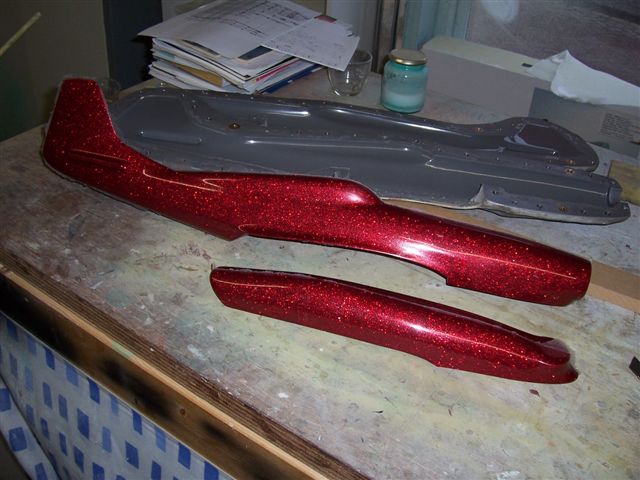
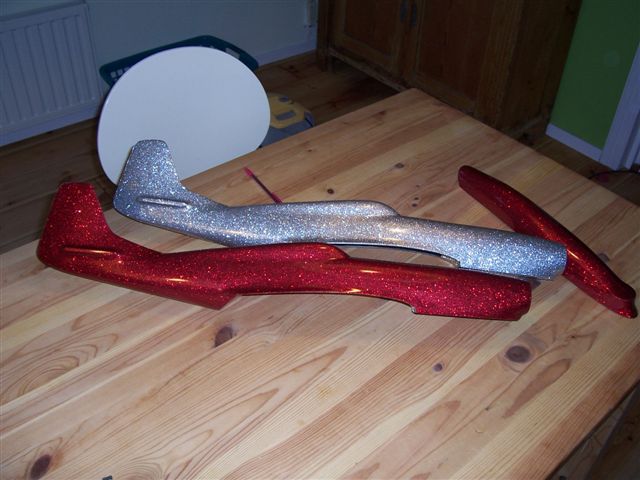
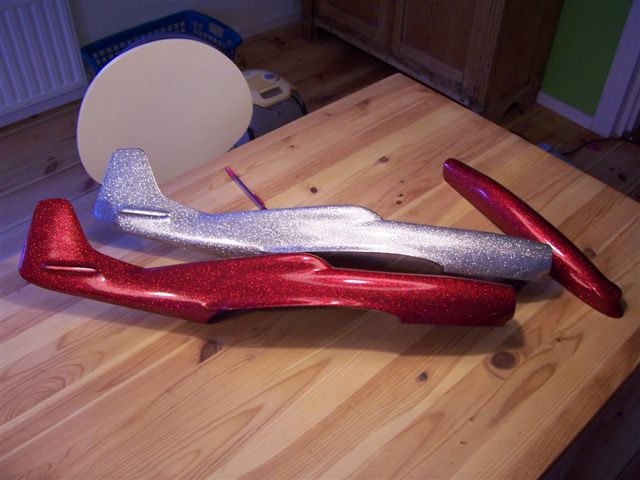
The fuse is quite a piece of art. Underneath you can see how the Stiletto fuse is made, for the Blizzard was the same construction method used. The moulds are sprayed with paint and glitter flocks before adding any epoxy resin and glass. It gives a very nice result as you can see.
I'm not going for the M+R on the short term by the way. The OS 50 SX-H from my Raptor 50 needs to be replaced. It did run to hot, so I'm going to buy the 50 Hyper. And since I need to spread my costs I'll stick with the MVVS.
I already had the MVVS and I believe it is a good match. Die MVVS has a higher RPM output compared with the OS (I also have the OS .15 CV-A) and Magnum engines, which are more for high torque applications. But beside the higher RPM, I do like the rear exhaust also. Gives a very sleek airframe and reduces drag of course. While building I'd completely stripped the engine to make it easy to fit inside the fuse. It also makes it easier to modify the gap made for the engine and reduces any chance of damaging the blue anodized cylinder head.The fuse is quite a piece of art. Underneath you can see how the Stiletto fuse is made, for the Blizzard was the same construction method used. The moulds are sprayed with paint and glitter flocks before adding any epoxy resin and glass. It gives a very nice result as you can see.
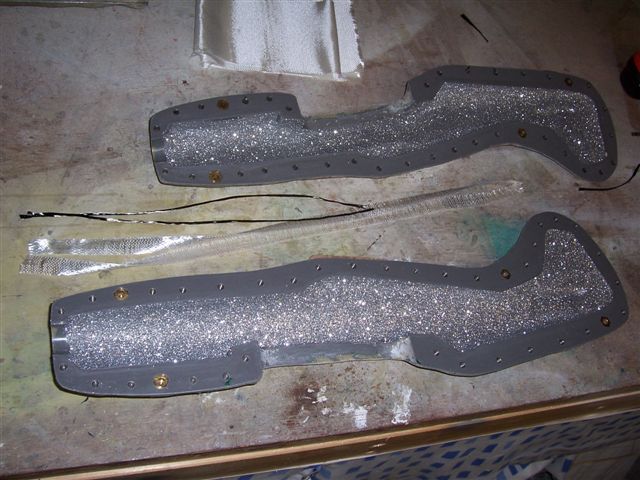
The moulds with paint sprayed, ready to add glass and carbon.
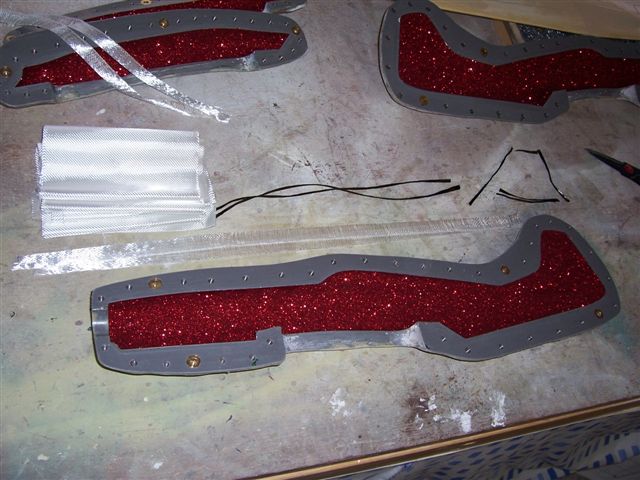
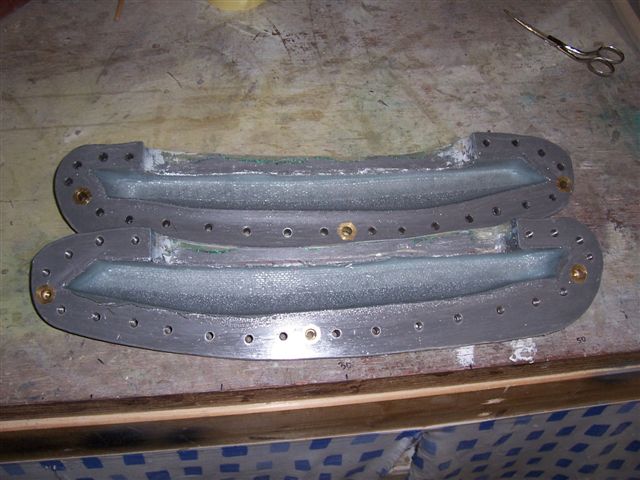
Both sides are soaked in epoxy resin, now the moulds can be closed.

Feels like Christmas, opening the moulds after 24 hours hardening.
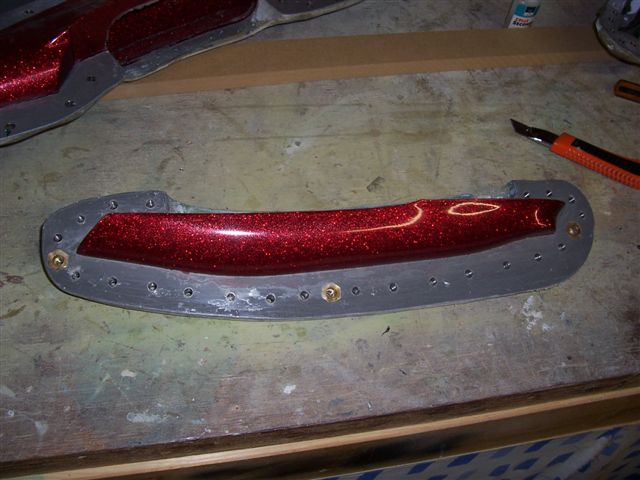
The cowl for the tuned pipe to reduce drag.
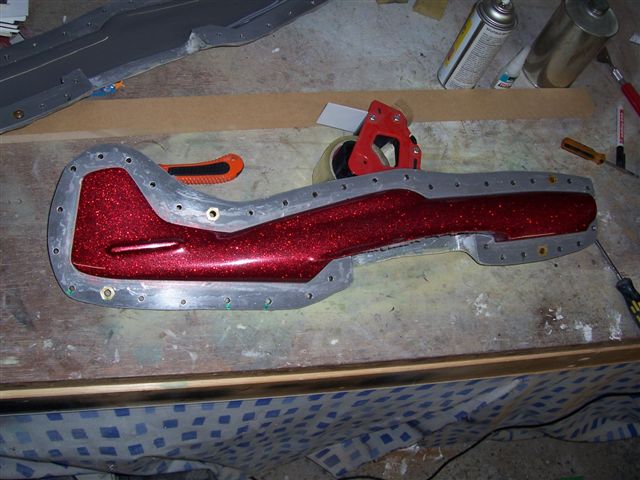
The fuselage is taken out of the template. Edges need to be finished with a Dremel cutter and gets a warm bad of water to remove PVA and wax.
Jorrit's Stiletto. Quite a hell to make with the silver glitter material. After 5 minutes of laminating you lose track of what you're doing.
The next day the epoxy resin is cured.
Both sides are soaked in epoxy resin, now the moulds can be closed.
Feels like Christmas, opening the moulds after 24 hours hardening.
The cowl for the tuned pipe to reduce drag.
The fuselage is taken out of the template. Edges need to be finished with a Dremel cutter and gets a warm bad of water to remove PVA and wax.
Jorrit's Stiletto. Quite a hell to make with the silver glitter material. After 5 minutes of laminating you lose track of what you're doing.
The next day the epoxy resin is cured.
I'm not going for the M+R on the short term by the way. The OS 50 SX-H from my Raptor 50 needs to be replaced. It did run to hot, so I'm going to buy the 50 Hyper. And since I need to spread my costs I'll stick with the MVVS.
04-25-2006 | 12:18 PM
#8
Member
Joined: Nov 2005
Posts: 69
Likes: 0
Received 0 Likes
on
0 Posts
From: Broichweiden, GERMANY
Hello j0rrit,
throw that stinkin' Master Airscrew into the bin and get you a black Graupner Speed Prop 6.5x6.5 To be then shortened to 5.5" in
diameter.
That makes this little MVVS 2.5 really come alive - if you use a full length tuned pipe (MACS 1110 for instance). The stock black magic muffler is too restrictive. The MACS Pipe length between glow plug and biggest part of the pipe should be set about 21 to 23 cm.
You need to widen the MVVS speed venturi carb up to 6 mm of inner diameter.
Presupposition is that you MUST increase engine exhaust timing up to 170 degrees. Then 25 thousand rpm in flight will be no problem. That makes approx 140 mph with your Blizzard airframe...
Regards
slomo
P.S. The conrod of the UCTKAM .15 = MDS .15 Speed Pylon (or M+R .15 engine rpectively) does not feature a bronze bushing on both ends - just to remember that.
throw that stinkin' Master Airscrew into the bin and get you a black Graupner Speed Prop 6.5x6.5
To be then shortened to 5.5" in diameter.
That makes this little MVVS 2.5 really come alive - if you use a full length tuned pipe (MACS 1110 for instance). The stock black magic muffler is too restrictive. The MACS Pipe length between glow plug and biggest part of the pipe should be set about 21 to 23 cm.
You need to widen the MVVS speed venturi carb up to 6 mm of inner diameter.
Presupposition is that you MUST increase engine exhaust timing up to 170 degrees. Then 25 thousand rpm in flight will be no problem. That makes approx 140 mph with your Blizzard airframe...
Regards
slomo
P.S. The conrod of the UCTKAM .15 = MDS .15 Speed Pylon (or M+R .15 engine rpectively) does not feature a bronze bushing on both ends - just to remember that.
04-25-2006 | 01:15 PM
#9
Member
Joined: Nov 2005
Posts: 69
Likes: 0
Received 0 Likes
on
0 Posts
From: Broichweiden, GERMANY
Oh, I forgot to mention that any plastic spinner can be very dangerous at rpms exceeding 18 thousand. Highly recommended are precision CNC machined aluminum spinners by Truturn.com (can be ordered through braeckman.de for instance)
04-26-2006 | 03:20 PM
#10
Thread Starter
Member
Joined: Jun 2005
Posts: 56
Likes: 0
Received 0 Likes
on
0 Posts
From: Almere, NETHERLANDS
The Master Airscrew was only mounted for display purposes. I had an APC prop in mind, but I'll consider using the Graupner speed prop. Thanks for the tip! I've good experiences with the plastic click-on spinners from Carl Goldberg, unless we're exceeding the rpm-limit. I know. Maybe I'll mount an aluminum spinner eventually, but with the stock engine it's no problem. I've ordered two TruTurn 1-3/4" spinners for the Stiletto's though.
I spoke a Line-Control speed race enthusiast last time and he's using the same MVVS as I do. He'd manage to tune it with a easy solution in my opinion. Using a shimmy of 0,5mm under the edge of the cylinder, the timing is adjusted to 162°. The new timing should already be a big improvement. To keep the compression the same you need to remove the 0,5mm from the top of the cylinder head. That's a job I could do with ease at school. In combination with a APC 6,5x6,5 and 6mm venturi (like you advised also) it was quite an improvement. I'll check the internet for a MACS 1110, I'm curious about the possibilities.
I spoke a Line-Control speed race enthusiast last time and he's using the same MVVS as I do. He'd manage to tune it with a easy solution in my opinion. Using a shimmy of 0,5mm under the edge of the cylinder, the timing is adjusted to 162°. The new timing should already be a big improvement. To keep the compression the same you need to remove the 0,5mm from the top of the cylinder head. That's a job I could do with ease at school. In combination with a APC 6,5x6,5 and 6mm venturi (like you advised also) it was quite an improvement. I'll check the internet for a MACS 1110, I'm curious about the possibilities.
04-26-2006 | 04:34 PM
#11
Member
Joined: Nov 2005
Posts: 69
Likes: 0
Received 0 Likes
on
0 Posts
From: Broichweiden, GERMANY
ORIGINAL: j0rrit
I had an APC prop in mind, but I'll consider using the Graupner speed prop.
I had an APC prop in mind, but I'll consider using the Graupner speed prop.
... Using a shimmy of 0,5mm under the edge of the cylinder...
There are many more measures to successfully fine tune the peak rpm of a two stroke engine. But the by far most important one is a matching exhaust ( + liner timing) adjustment. So a correctly set non-muffled full length pipe is a must…
04-26-2006 | 09:36 PM
#12
I messed around a little with an MVVS .15 last year... here are the stock timings I measured on mine:
exhaust 160°
transfers 116°
boost 110°
induction 180° starting 50° ABDC
The head was almost at a whopping 0.5mm [X(]
Slowmo, 0.35mm still seems rather a big gap to me... I was going to go to about 0.20-0.25mm, maybe even less and increase the head volume a little to allow more nitro (don't know about that part yet without more testing). Why do you suggest such a wide squish clearance?
There's definitely room for improvement on this thing.
04-27-2006 | 04:29 AM
#13
Member
Joined: Nov 2005
Posts: 69
Likes: 0
Received 0 Likes
on
0 Posts
From: Broichweiden, GERMANY
Hello Rudeboy,
Yes, I do run considerable smaller head clearance on other 2.5 cc speed engines without problems - using FAI fuel.
ORIGINAL: Rudeboy
Why do you suggest such a wide squish clearance?
Why do you suggest such a wide squish clearance?
Compared to their price these small MVVS engines (2.5 and 3.5 cc) offer great value for the buck. With only little effort you can make them scream - nice for reasonably priced speed planes.
With a fully cowled engine+pipe the Blizzard will be a lot faster!
Regards
slomo
P.S For very satisfying performance of 2.5 to 3.5 cc speed engines, meaning above 35 thousand rpm in-flight, you must use conical glow plugs.
07-12-2006 | 09:44 AM
#14
Thread Starter
Member
Joined: Jun 2005
Posts: 56
Likes: 0
Received 0 Likes
on
0 Posts
From: Almere, NETHERLANDS
Well, the building continues.
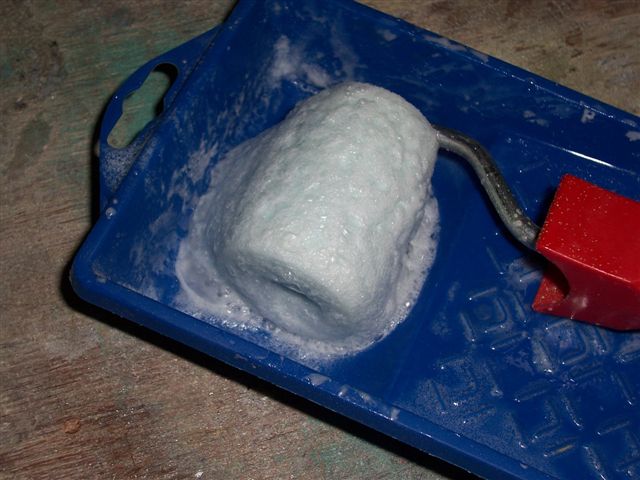
I used a sort of bondo for priming which can be brushed or rolled on. That doesn't give a smooth result, therefore I added some paint thinner and sprayed it on with a spray-canister which can be pressurized.
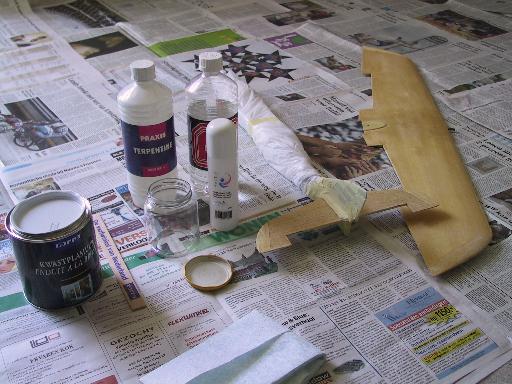
I used a sort of bondo for priming which can be brushed or rolled on. That doesn't give a smooth result, therefore I added some paint thinner and sprayed it on with a spray-canister which can be pressurized.


