


80" Big Stik Resurrection
 02-21-2016, 09:10 PM
#1
Junior Member
Thread Starter
Join Date: Aug 2015
Posts: 22
Likes: 0
Received 0 Likes
on
0 Posts
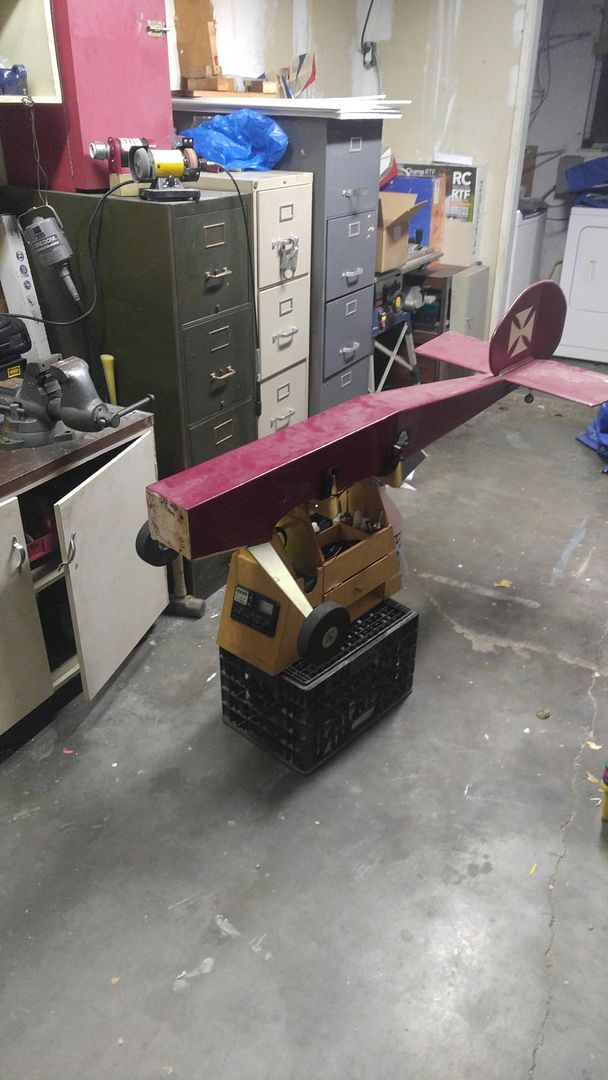
My father built this low wing stick before i was born, it was his everyday flyer. It used to run a Super Tigre 2000, and then it was converted over to a 25cc Homelite chainsaw conversion motor. I have only seen this plane fly once when i was a child, and was always in love with it seeing it hanging in my fathers garage. It has been over 20+ years since it has flown, and its time has COME!
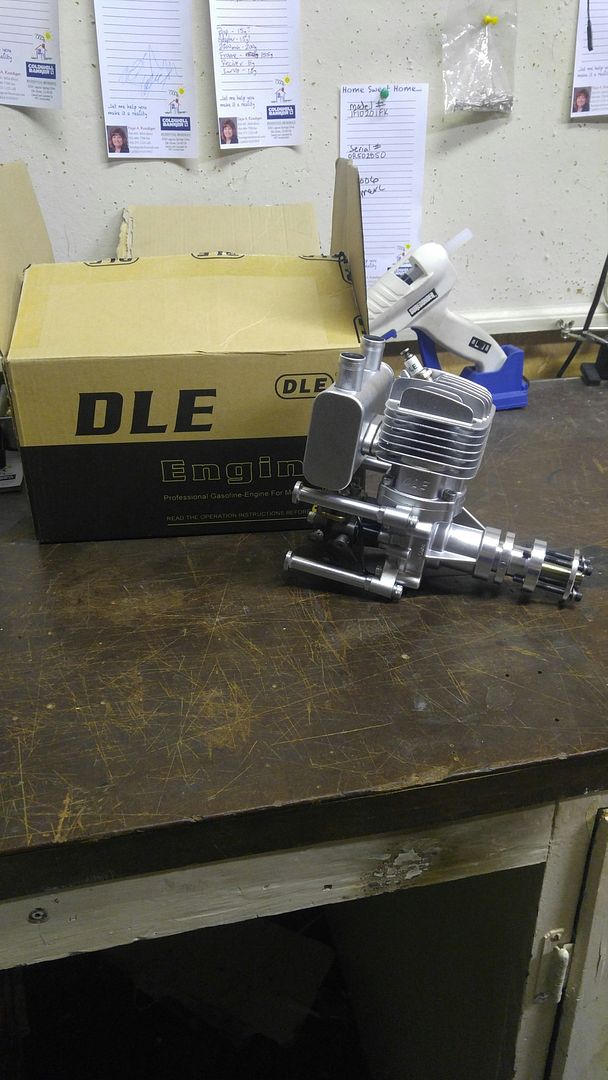
I ordered a brand spanky new DLE 35ra for her, new fuel tank, ignition, dual ignition and Rx batteries, remote kill switch. Pretty much everything my tax return would allow lol. Except new servos, bank ran dry unfortunately... I think the old servos should work alright, im going to try to at least upgrade throttle servo, the servos in it are so slow, i would at least like to have a snappy throttle.
I plan on keeping up the build thread, but im so sh*itty at build threads. Always forget to snap a photo or two when i get in build mode.
 [/quote]
I ordered a brand spanky new DLE 35ra for her, new fuel tank, ignition, dual ignition and Rx batteries, remote kill switch. Pretty much everything my tax return would allow lol. Except new servos, bank ran dry unfortunately... I think the old servos should work alright, im going to try to at least upgrade throttle servo, the servos in it are so slow, i would at least like to have a snappy throttle.
I plan on keeping up the build thread, but im so sh*itty at build threads. Always forget to snap a photo or two when i get in build mode.
[/quote]
 02-21-2016, 09:12 PM
#2
Junior Member
Thread Starter
Join Date: Aug 2015
Posts: 22
Likes: 0
Received 0 Likes
on
0 Posts
Well i had plans on getting the motor mounted tonight once the kiddo was in bed. So i could start planning on where to mount ignition and if im going to be able to mount a 20" prop. but if there is a problem, i am destine to find it lol. I imposed the firewall drill guide provided in manual from tower hobby onto some wax paper and for once in my life double checked before cutting or drilling, and noticed that somehow my printout didnt print in scale. not sure why. So will be getting it printed out at my local place i get plans printed after work tomorrow.
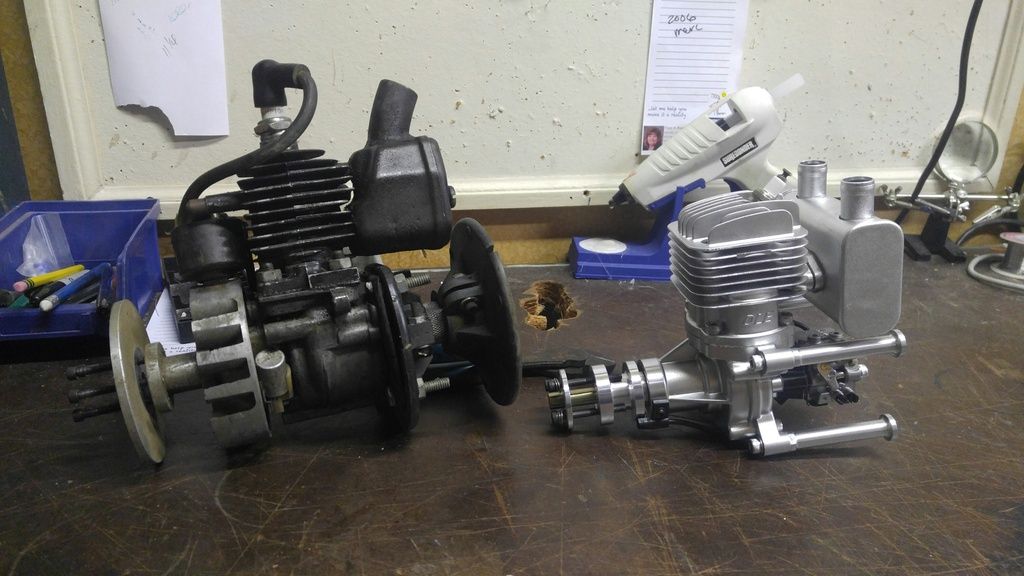
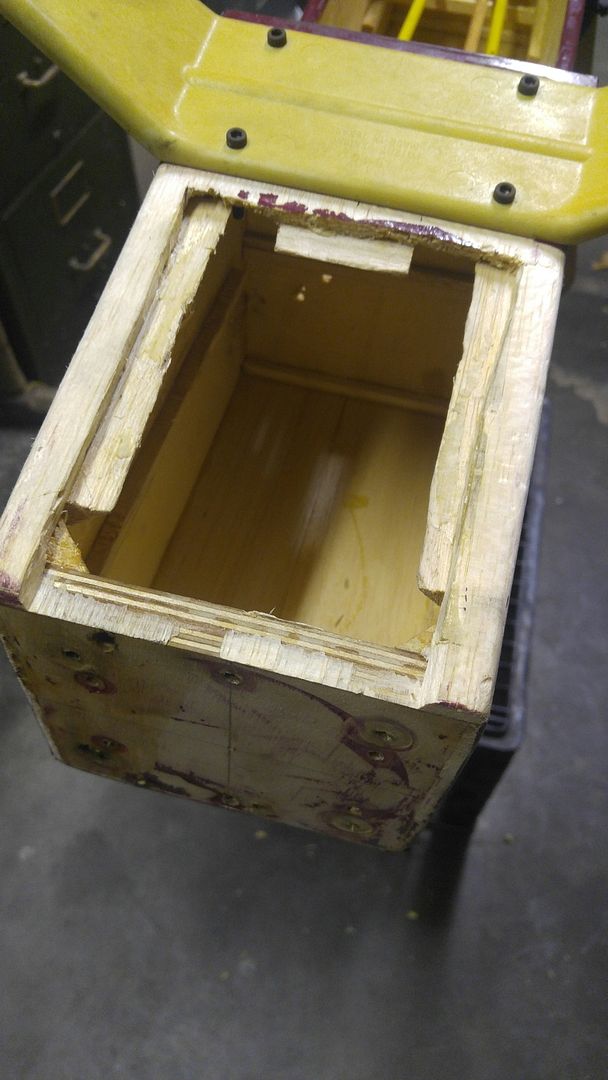
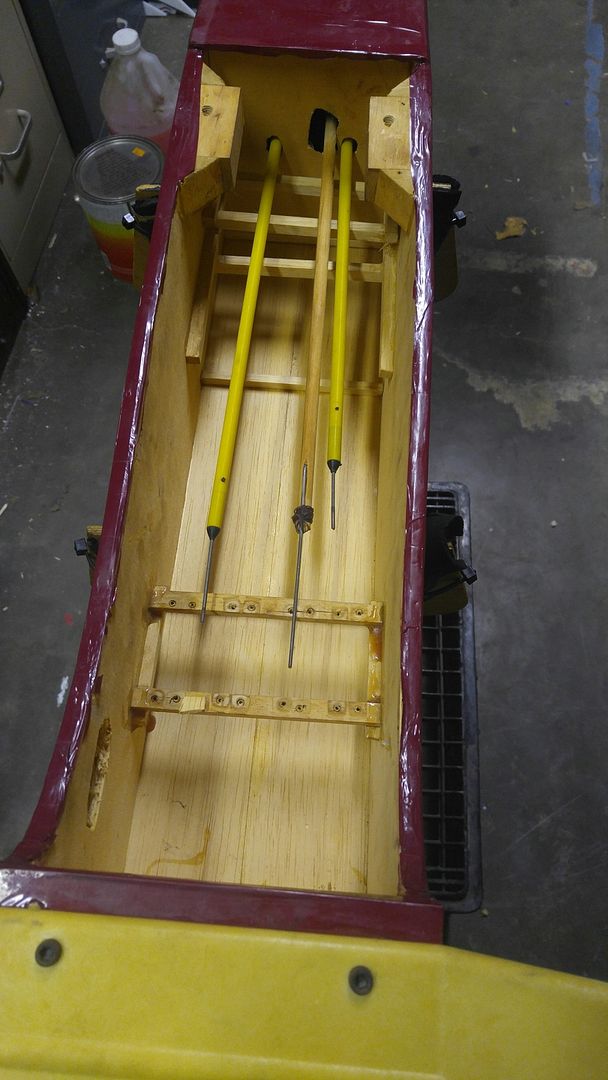
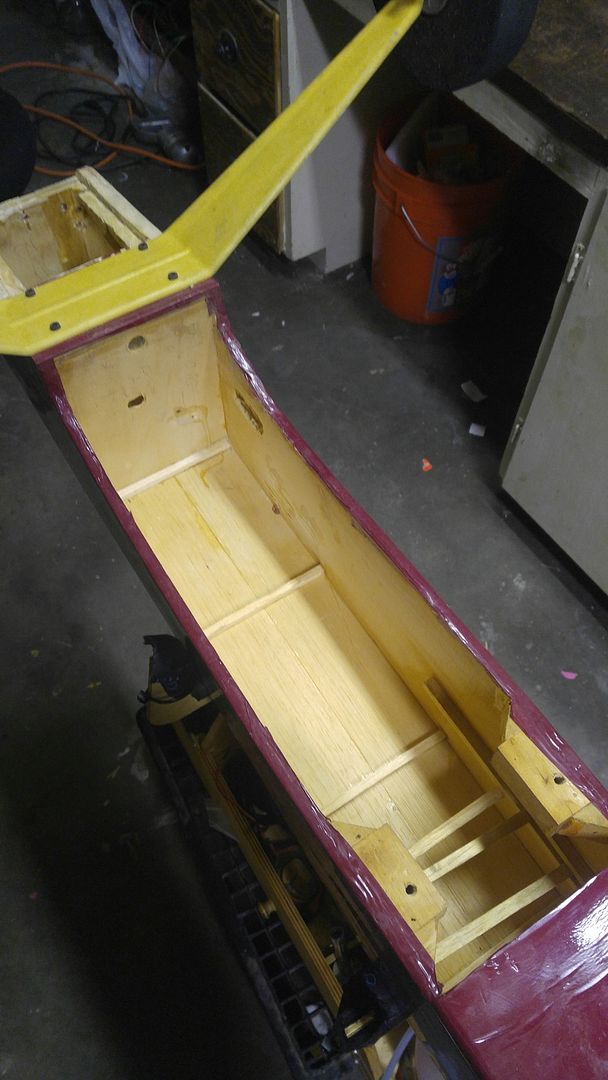
But i was able to get some work done. Cut out the old fuel tank to make room for new 24oz tank. Dont really need 24oz tank, but i could REALLY use the nose weight.. Old motor weighed in at 5lb 7oz, and DLE tips scales at 2lb 6oz. So have quite a few lbs to move and already have ordered fairly large Rx and ignition batts, so rather put in useable weight with fuel then lead.
Also was able to take out the servos and old control rods to make room in fuse for the new hardware. I plan on mounting servos in the fuse itself this time because the old control rod ends had so much flex in them, dispite control rods being fiberglass, the ends flex bad. might add a few oz to the rear, but it will hopefully simplify controls for me.
02-22-2016, 07:54 PM
#3
Junior Member
Thread Starter
Join Date: Aug 2015
Posts: 22
Likes: 0
Received 0 Likes
on
0 Posts
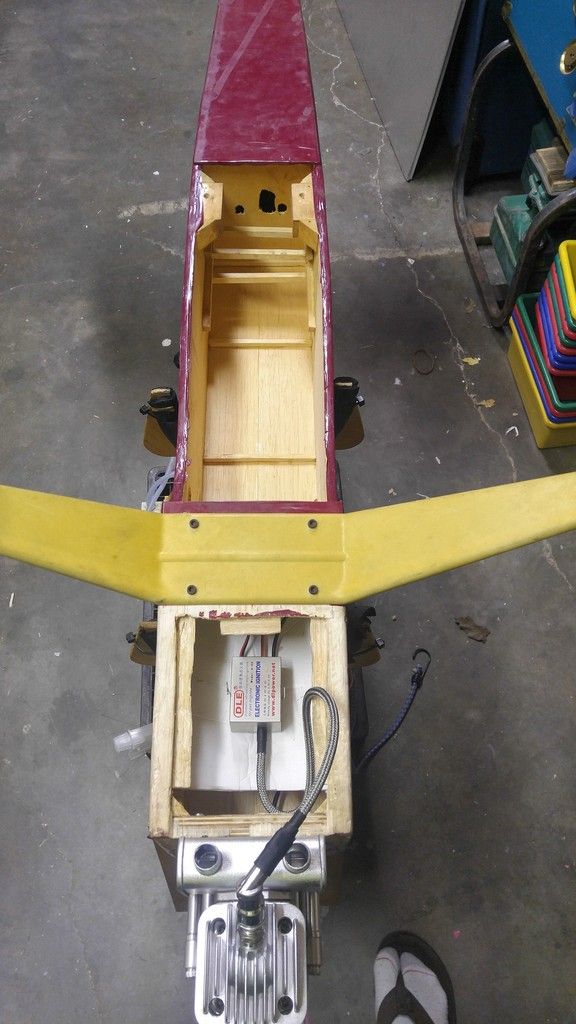
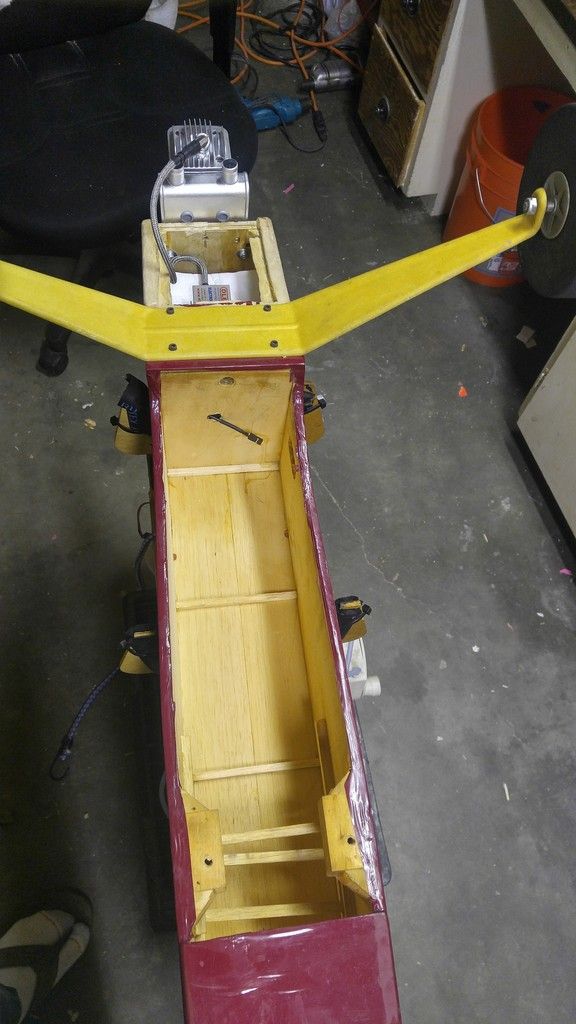
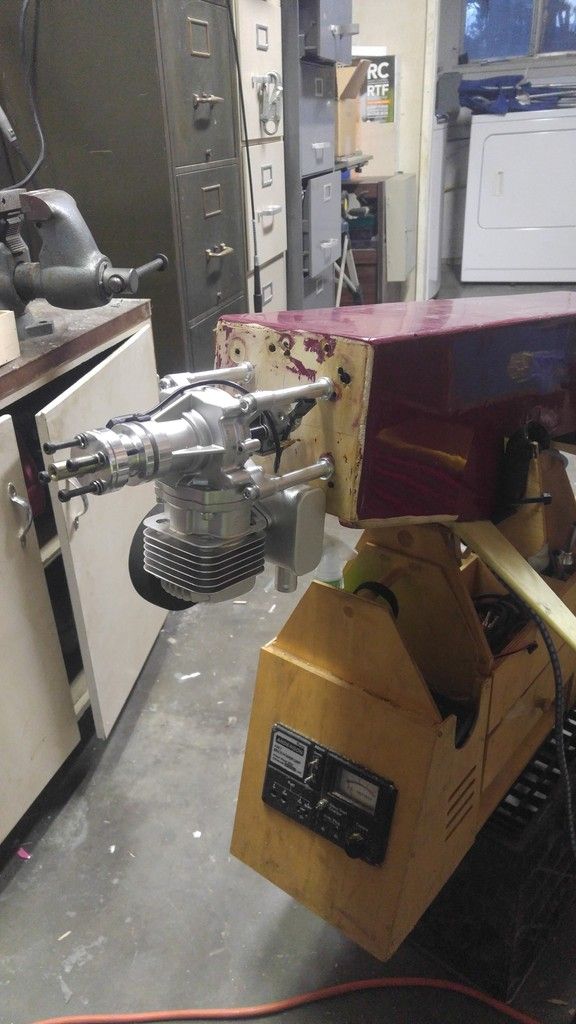
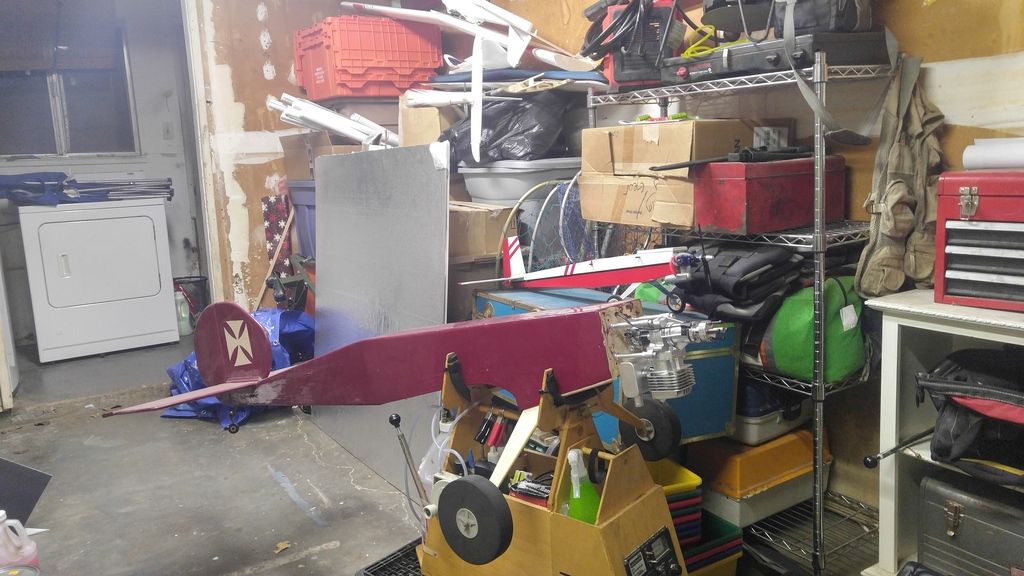
Was able to get motor mounted today after work, gotta say im pretty exited.
Also in continuing the mockup, the only way to get everything in the way i would like is to have a hatch on top and bottom of the fuse. One on the bottom of fuse in the nose where i would like to mount the ignition on the bottom of the fuel tank mounting plate, and another that i would like to cut on the top of the fuse to have access to the fuel tank to be able to repair or replace lines and other fixes.
Does anyone think it will be a problem having two hatches? The firewall is 9/16" thick laminated ply, and the fuse sides are 3/8" ply. and the nose area is reinforced with large tri stock. Im thinking it should be fine, and i dont see a way to do it without 2 hatches anyway. If i mount the ignition on the back of the fore most former, inside the wing saddle area, i would need a hatch on the bottom anyway because dont think i would be able to fish large ignition wire and angled plug boot all the way to the nose anyway.
Here are some pictures from today
Last edited by Bobbyblank; 02-22-2016 at 08:28 PM. Reason: posted about a problem, but was able to solve it ;)

