


Travel Air Model R Mystery Ship scratch build
 01-10-2022, 09:11 PM
#1

Thread Starter
I've been working on this since Feb 2021 and decided to post some stuff because it might give someone else some ideas. A couple of years ago my wife gave me a hallmark Christmas ornament of this plane and it inspired me to look at building. I have plenty of high wing planes and wanted a low wing plane to build. I decided to use a set of plans from Cleveland Models as I have built an Aeronca C3 from their plans that flies great.
It's now Jan 2022 and I am at the painting stages so I should get caught up fast, here goes
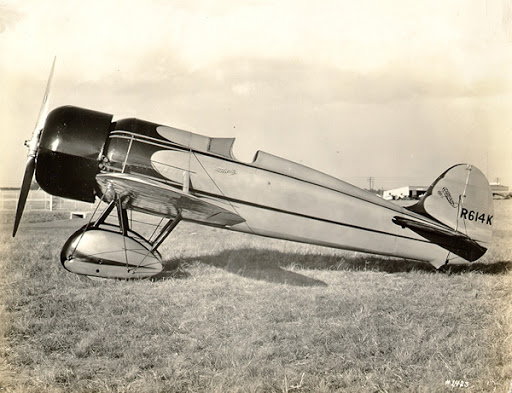
In 1929 this was the first civilian plane to fly faster than the military planes at the Cleveland air races
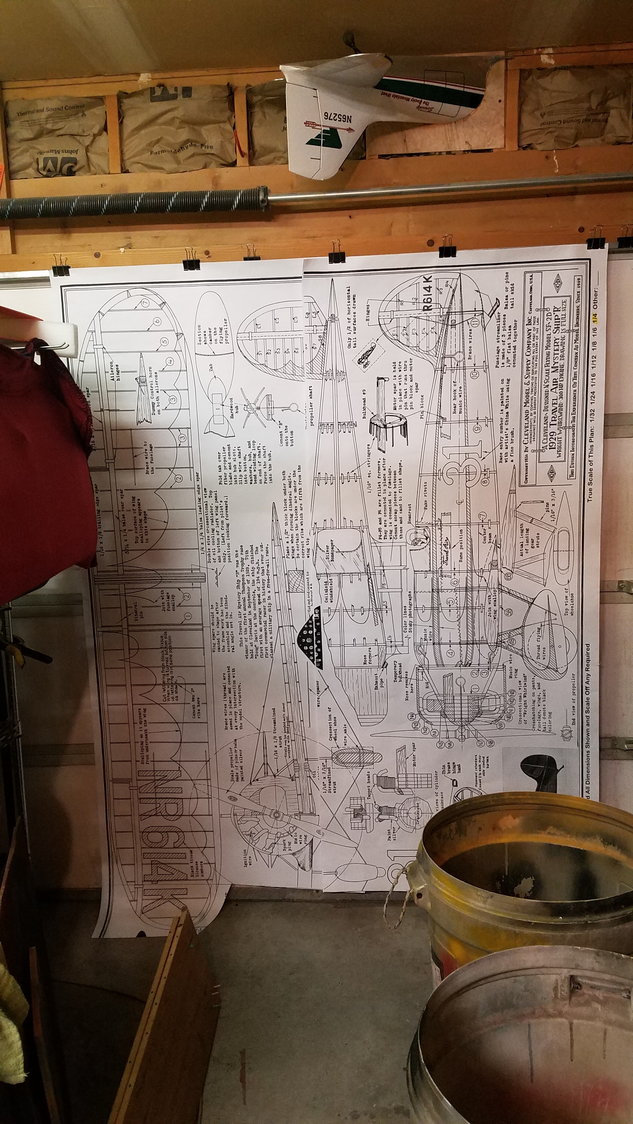
1/4 scale plans hanging on garage door
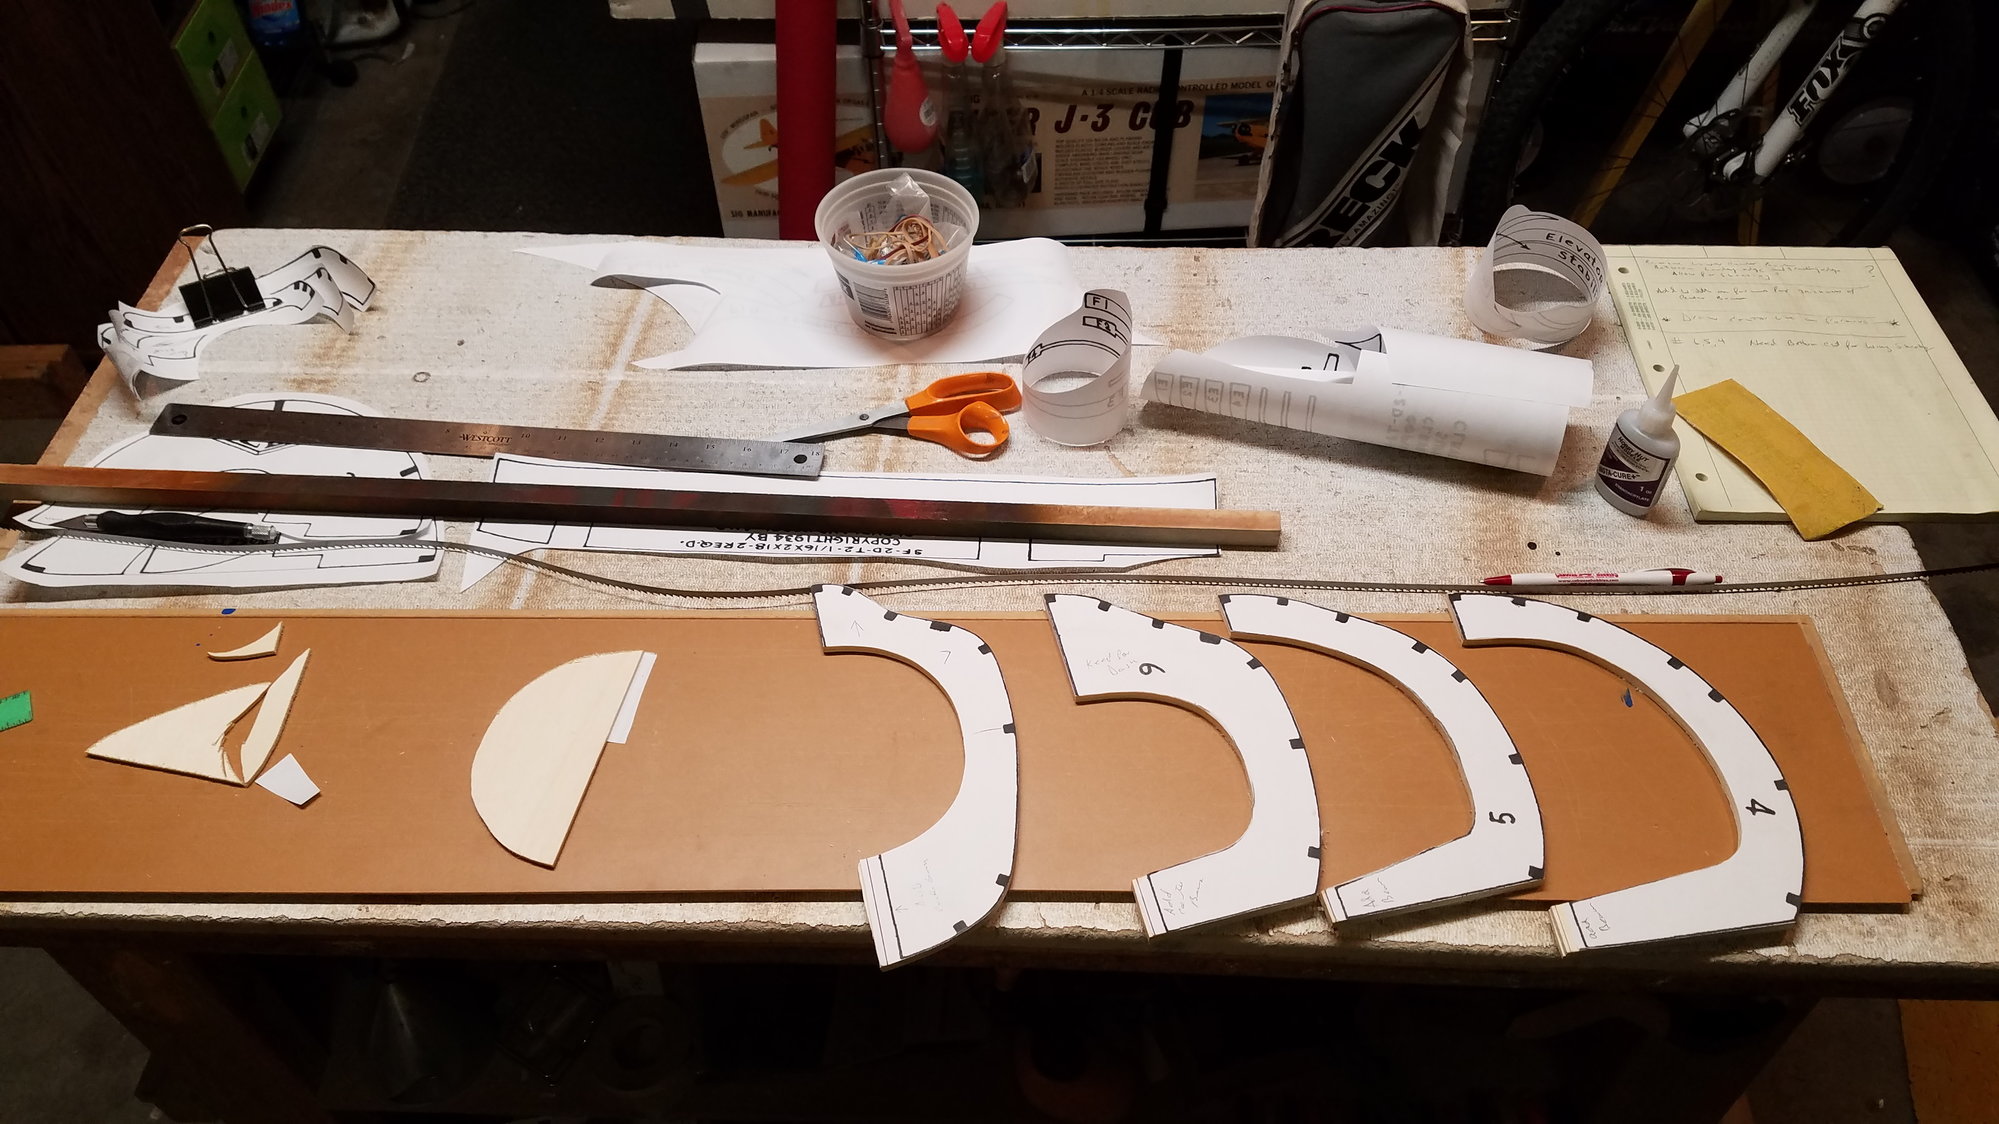
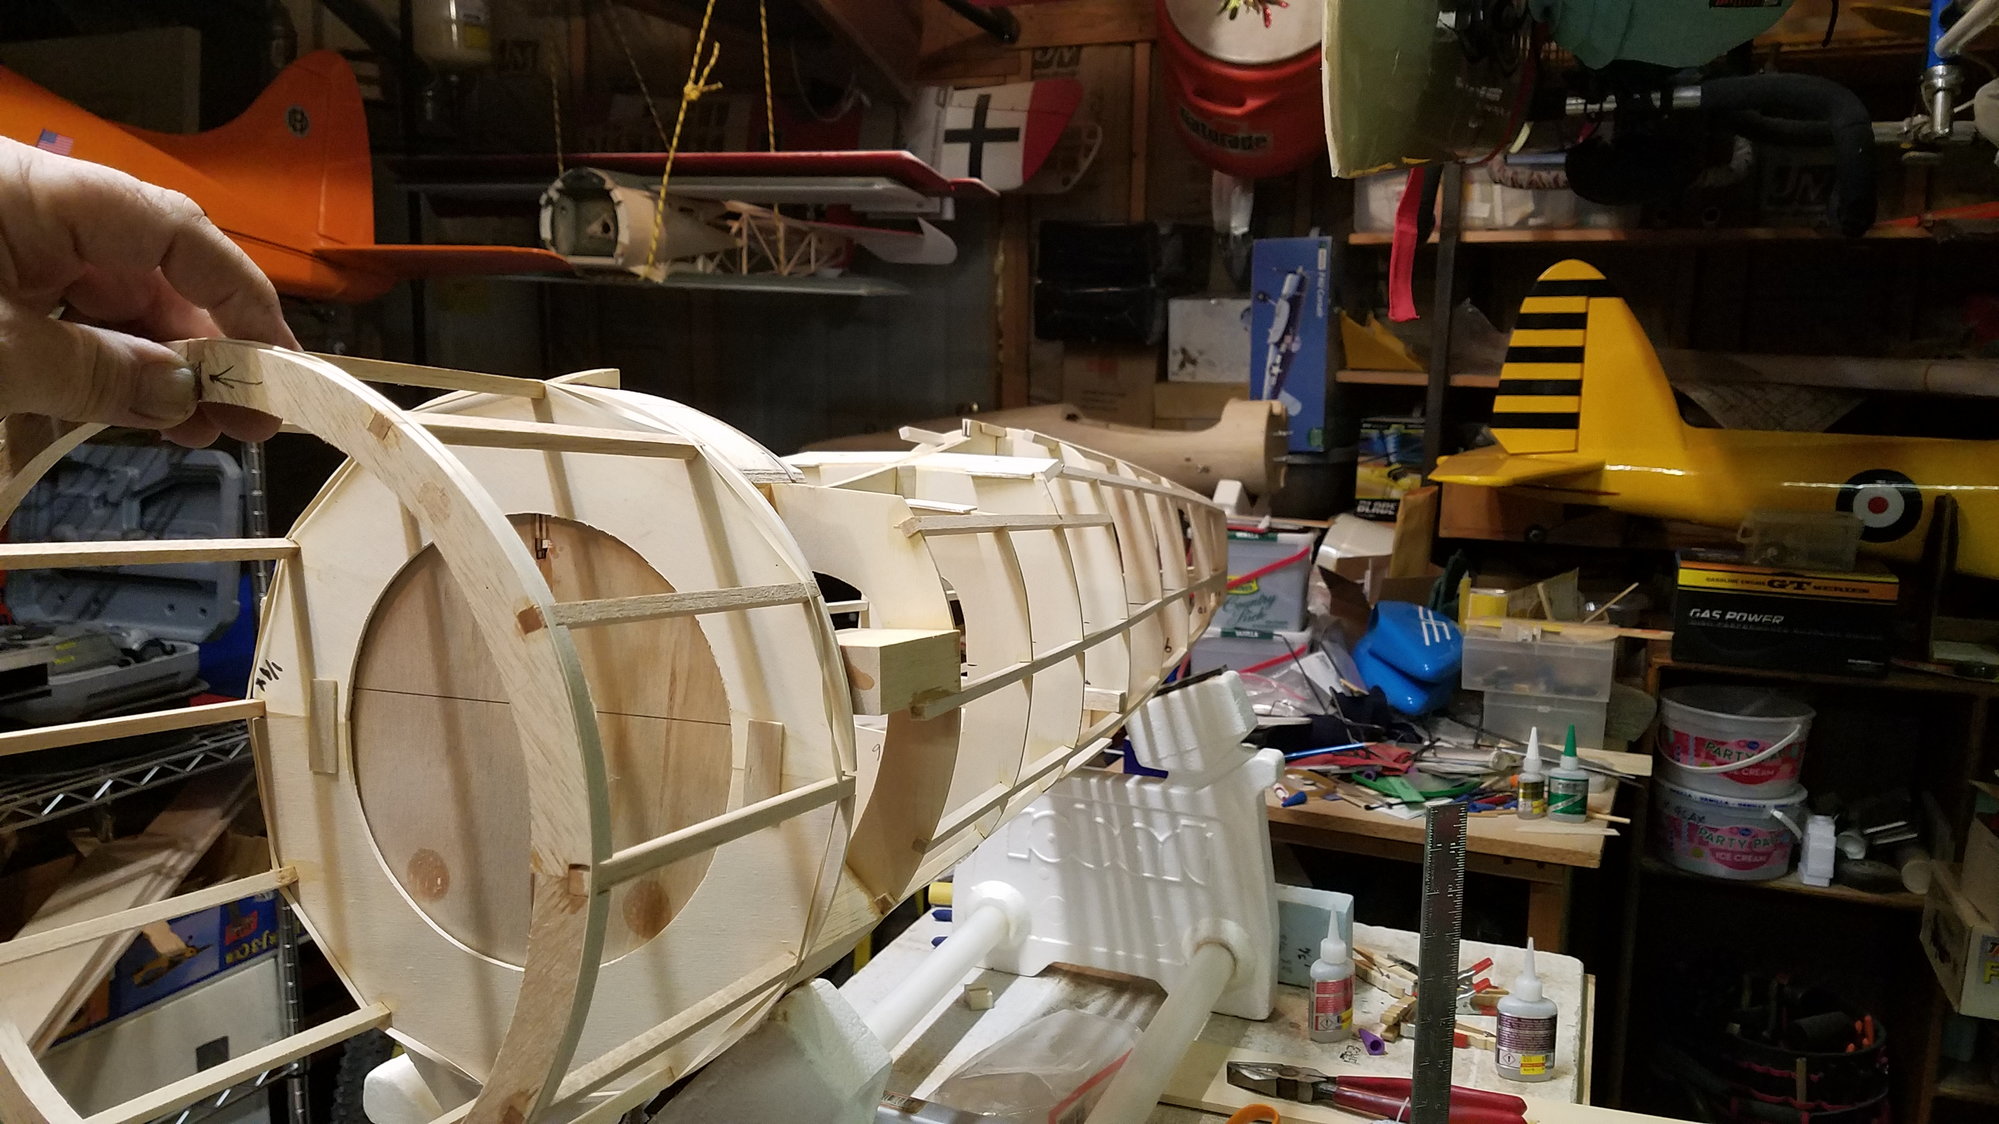
photo copy of former drawings glued on lite ply and balsa formers
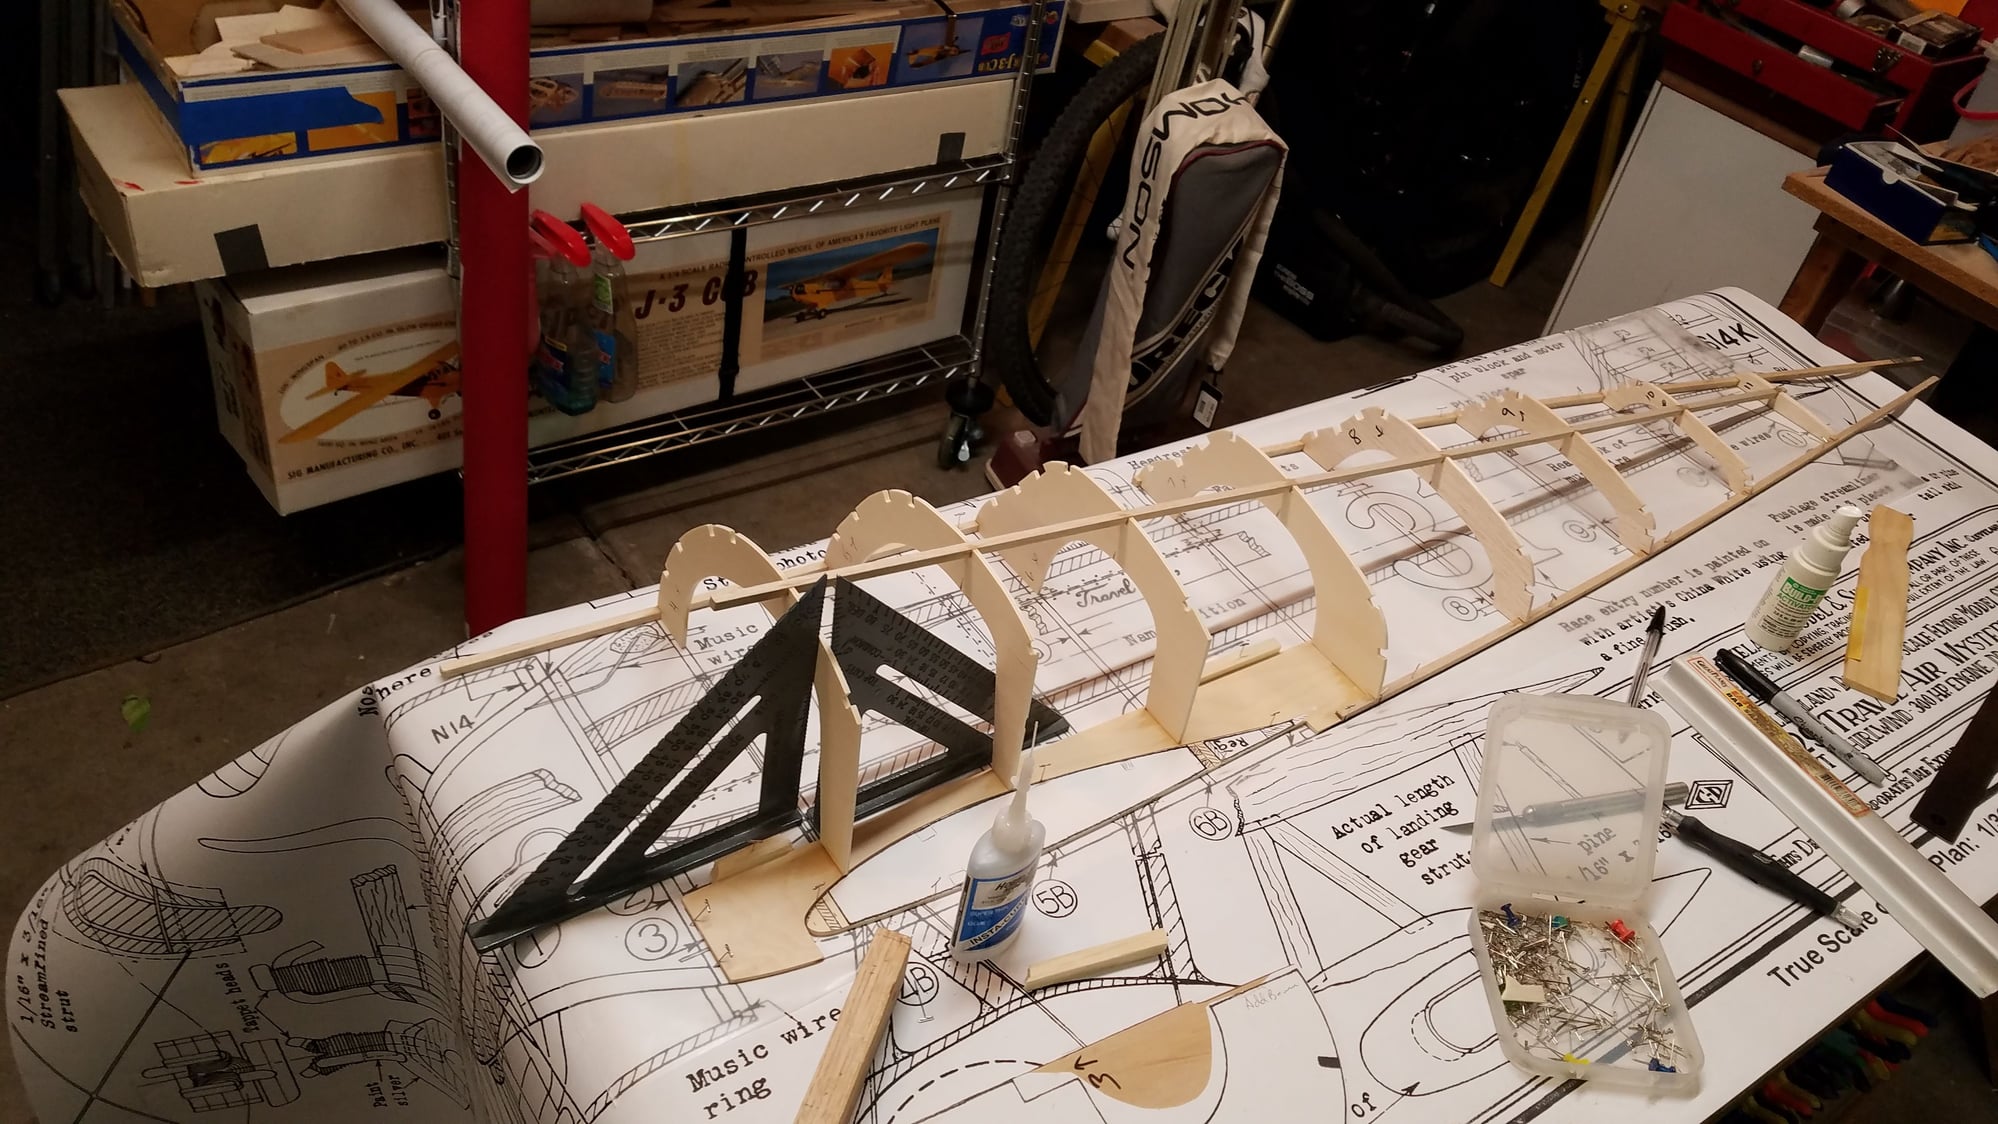
Left side formers glued to top and bottom sticks
2 halves clamped together
side view
It's now Jan 2022 and I am at the painting stages so I should get caught up fast, here goes
In 1929 this was the first civilian plane to fly faster than the military planes at the Cleveland air races
1/4 scale plans hanging on garage door
photo copy of former drawings glued on lite ply and balsa formers
Left side formers glued to top and bottom sticks
2 halves clamped together
side view

 01-10-2022, 09:36 PM
#3
Thread Starter
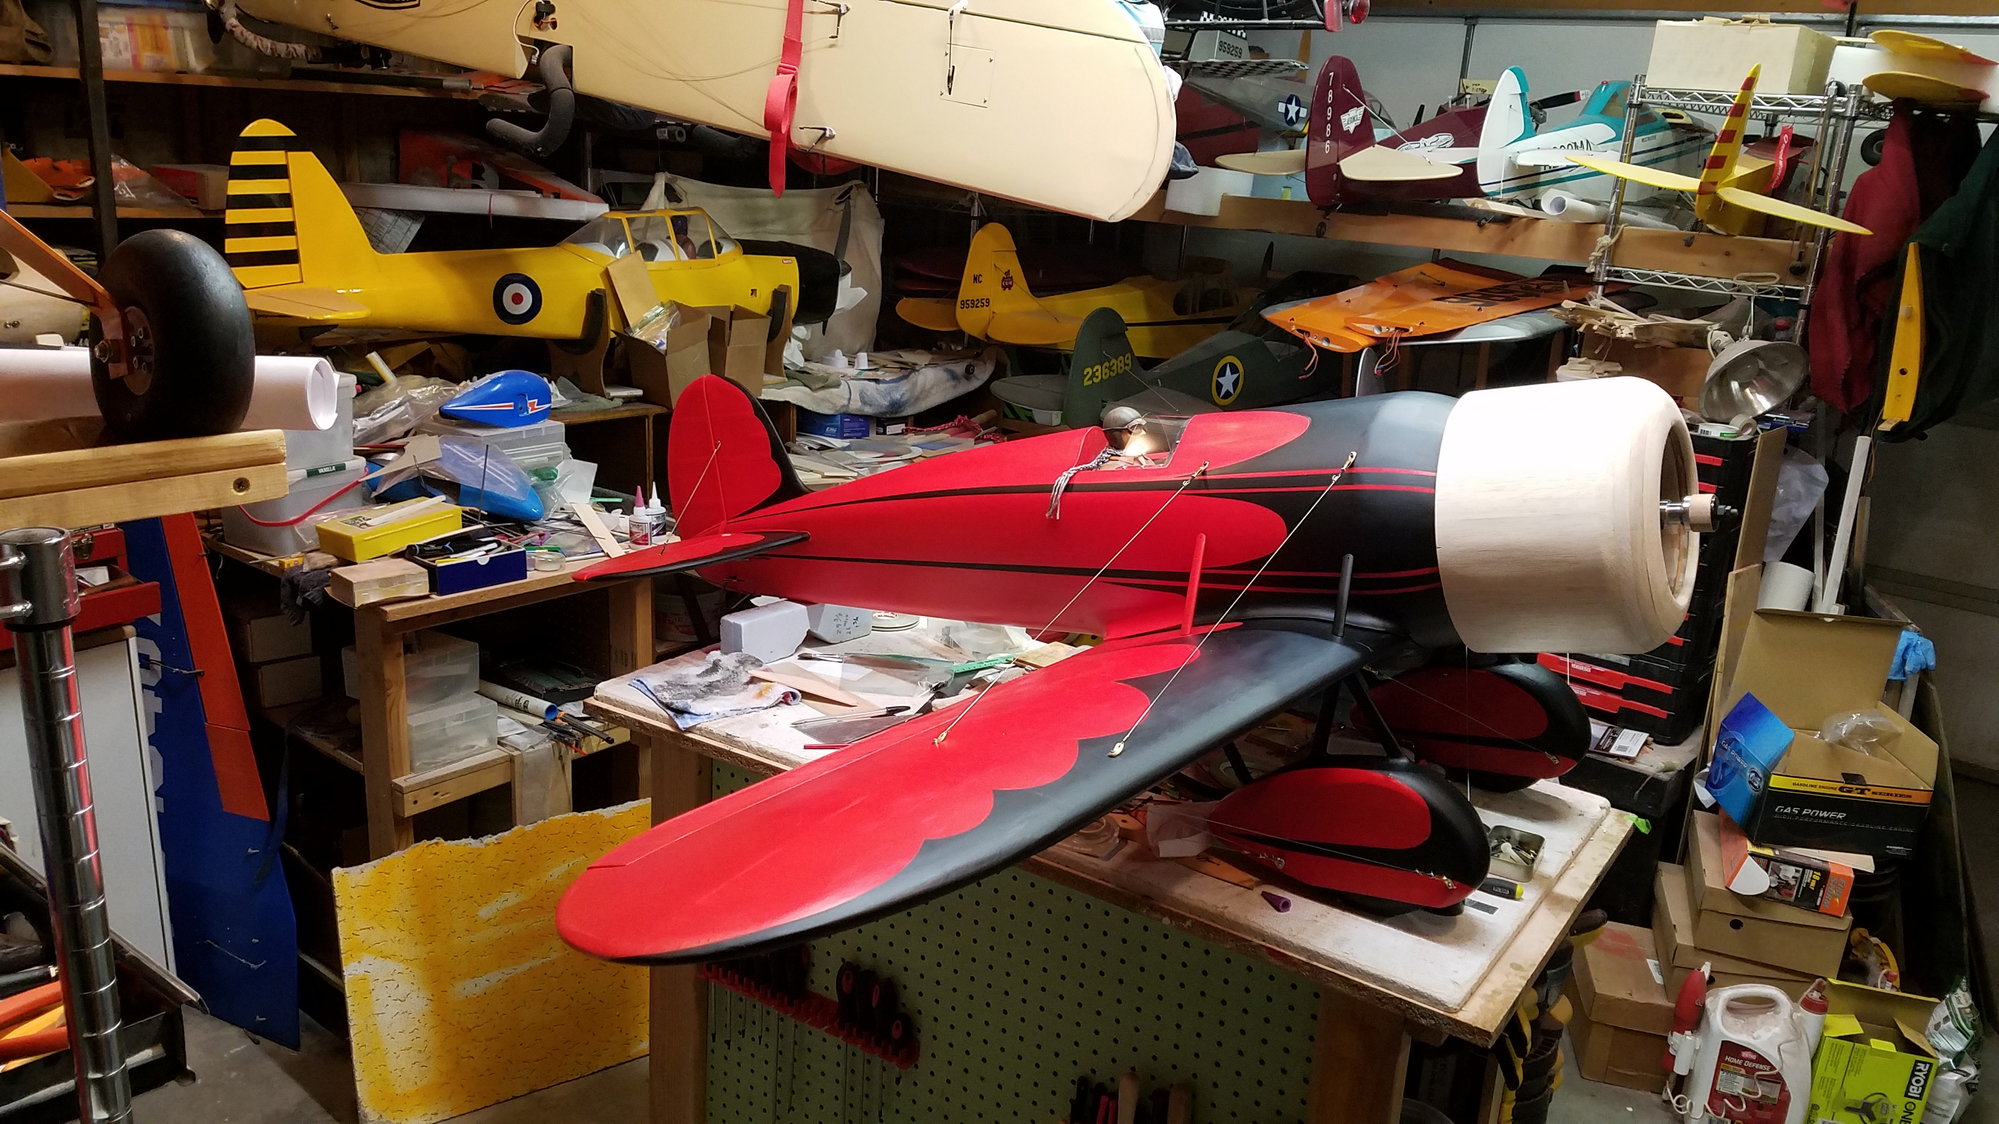
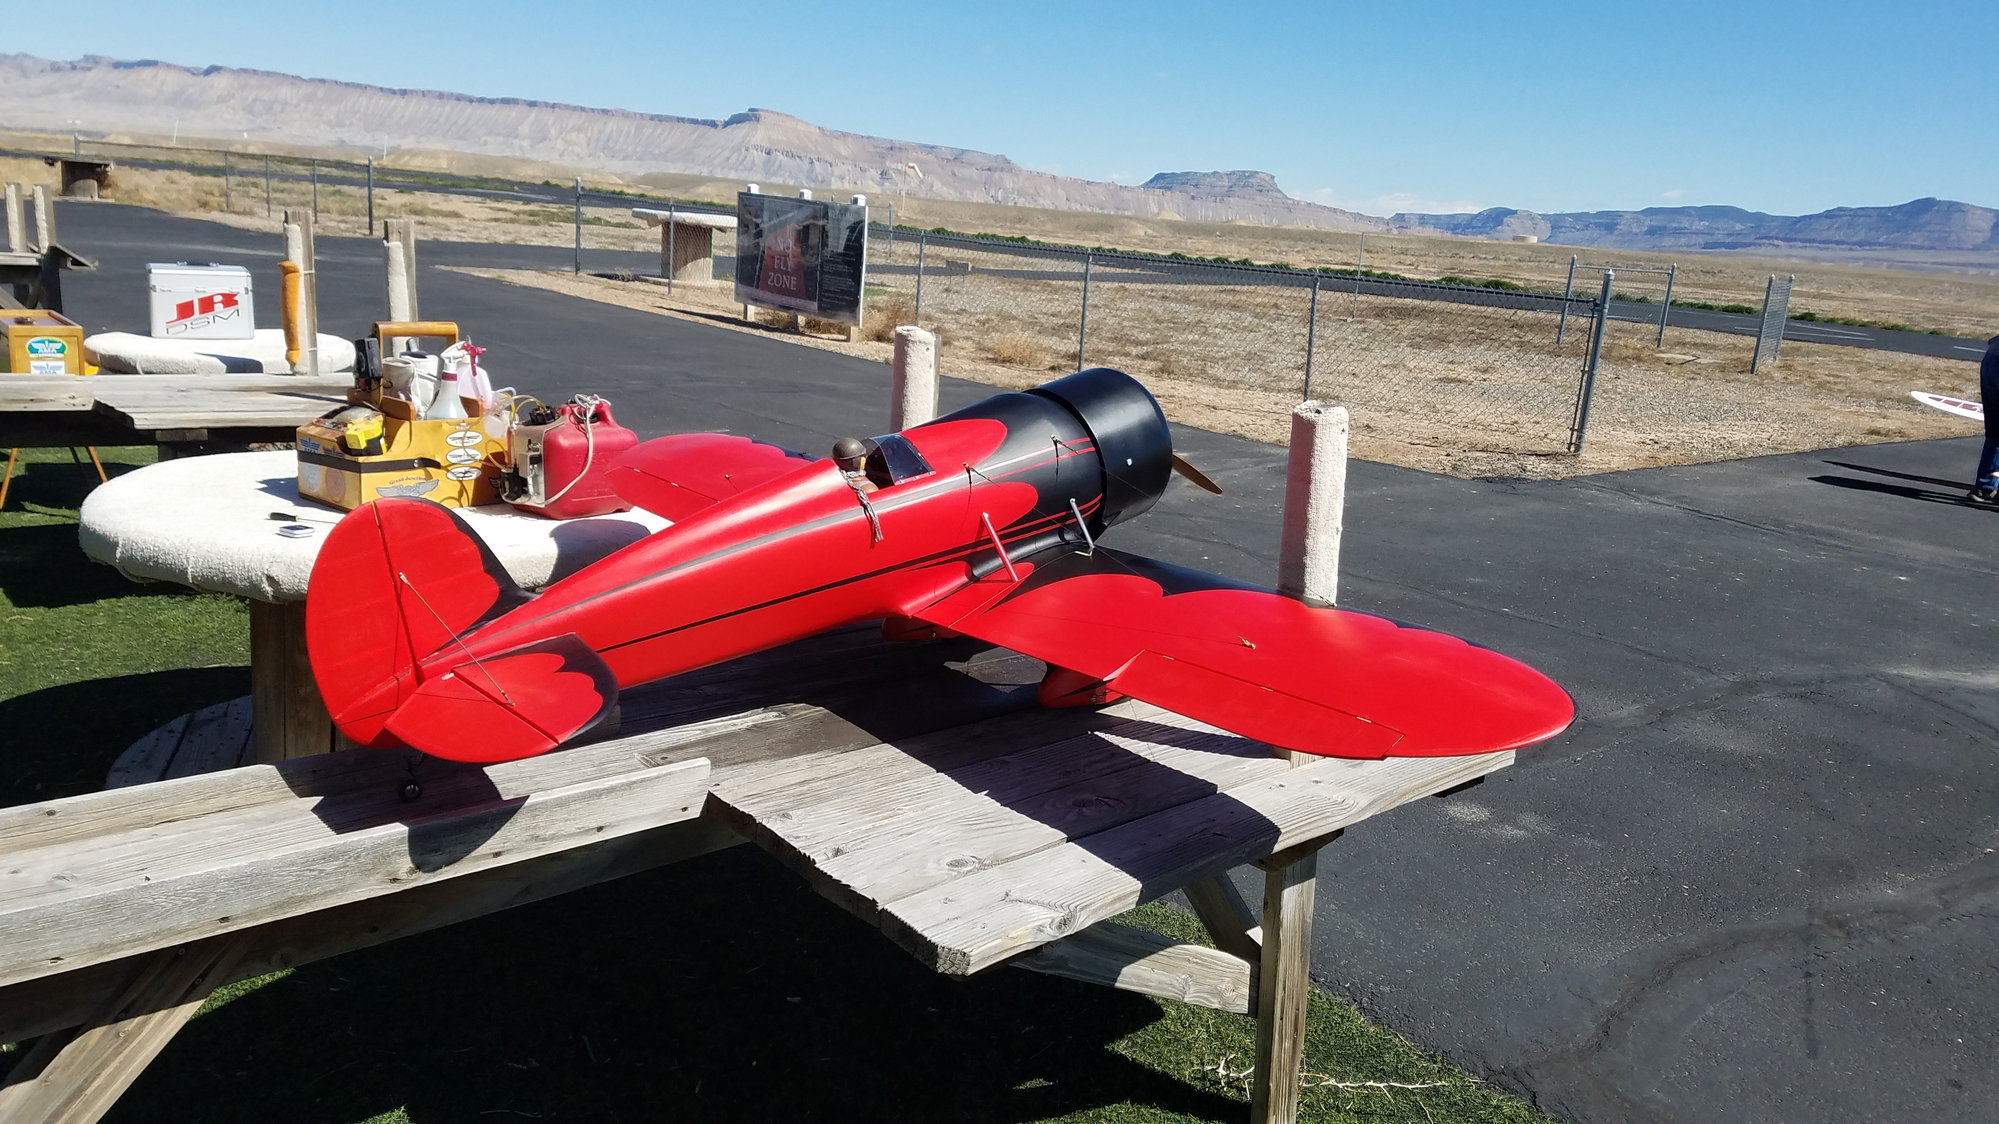
Wingspan is about 86", I will power her with an OS GT33 gas engine. I have this engine on my top flite stinson that weighs 21 lbs and it is over powered. the cowl on this is larger diameter (about 12") so the engine is needed to spin a large enough prop to give me some pull. And it was a race plane! I can always pull the throttle back. I fly the stinson with an 18" prop, manual says I can spin a 20", I tried this on the stinson and it slowed the rpms down a bit but worked fine. I hope to weigh around 15 lbs but haven't weighed it in a while

 01-10-2022, 10:11 PM
#5
Thread Starter
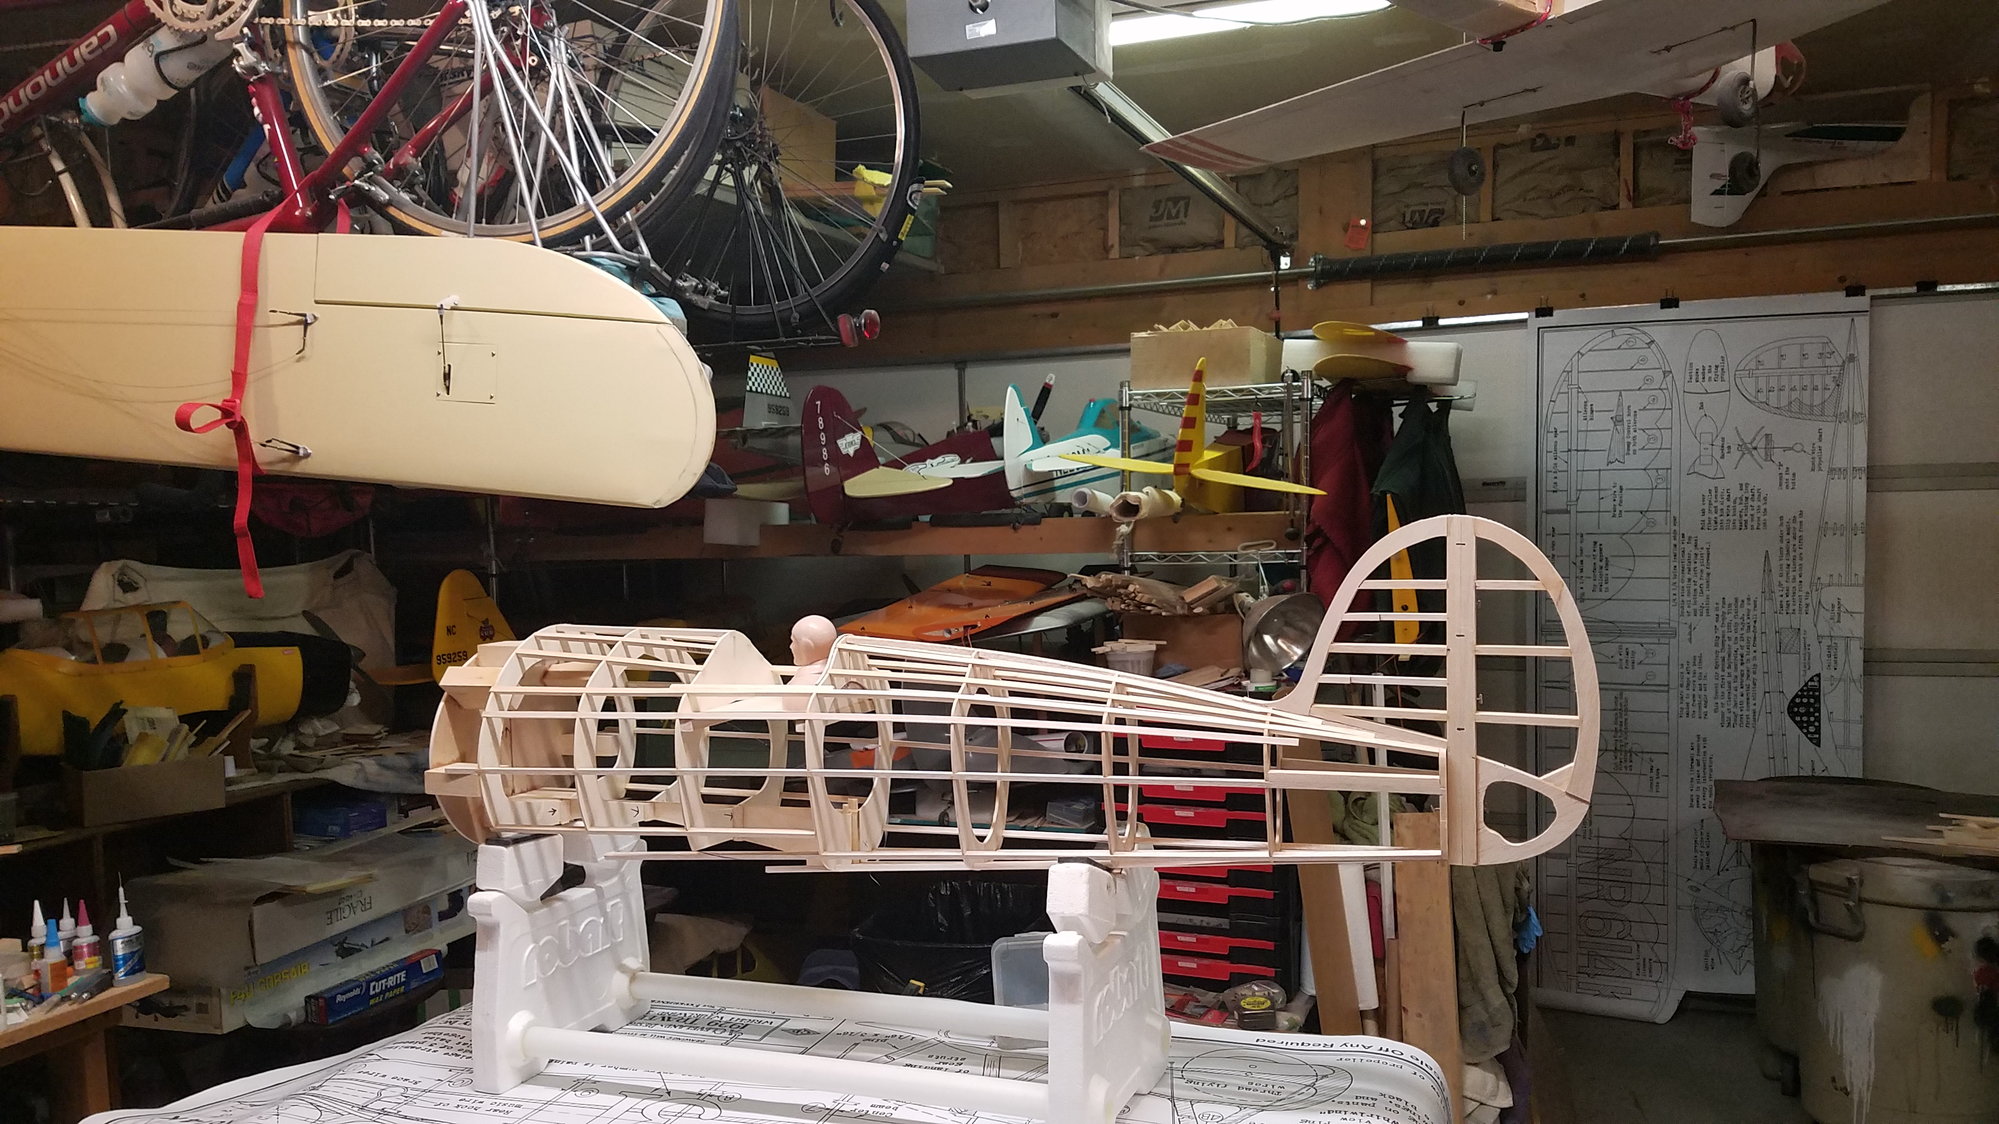
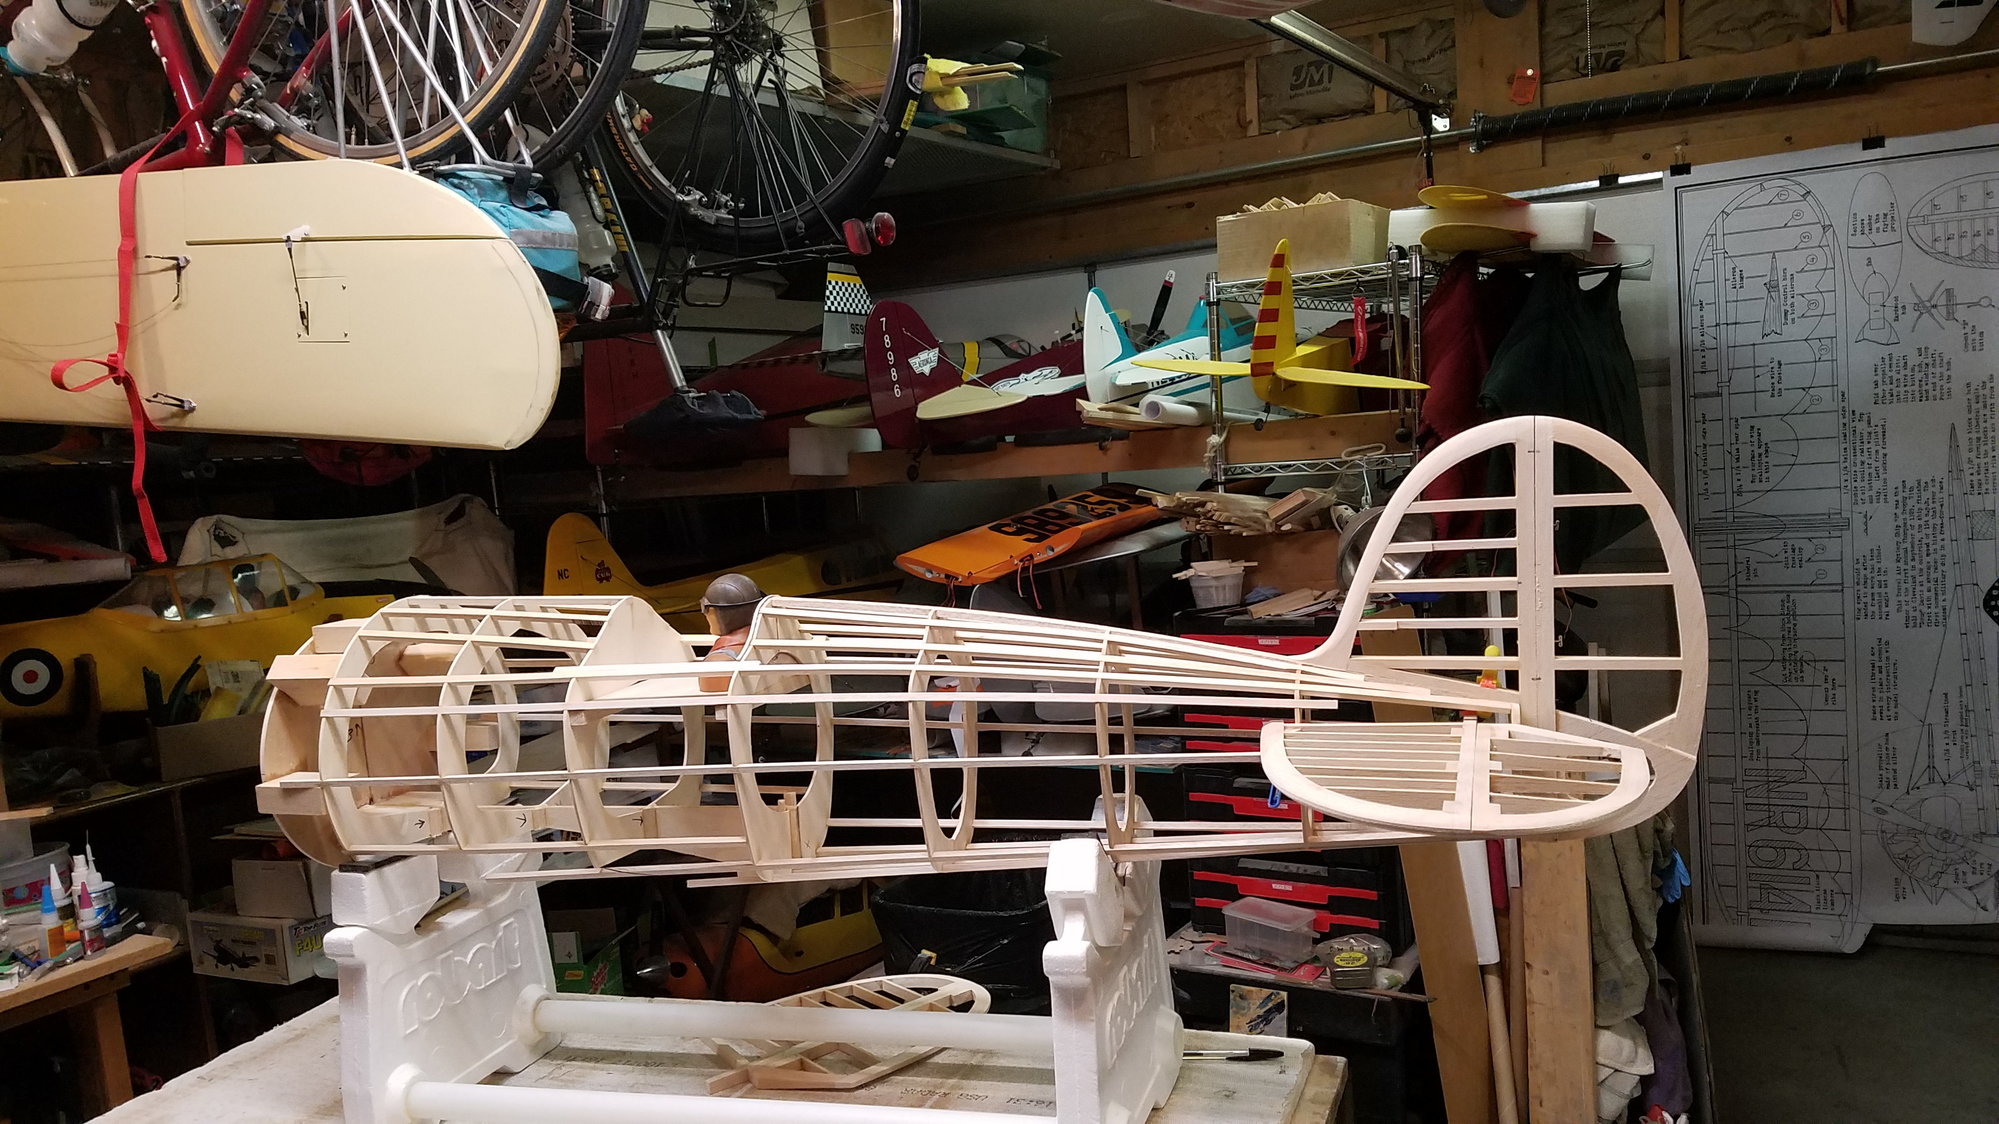
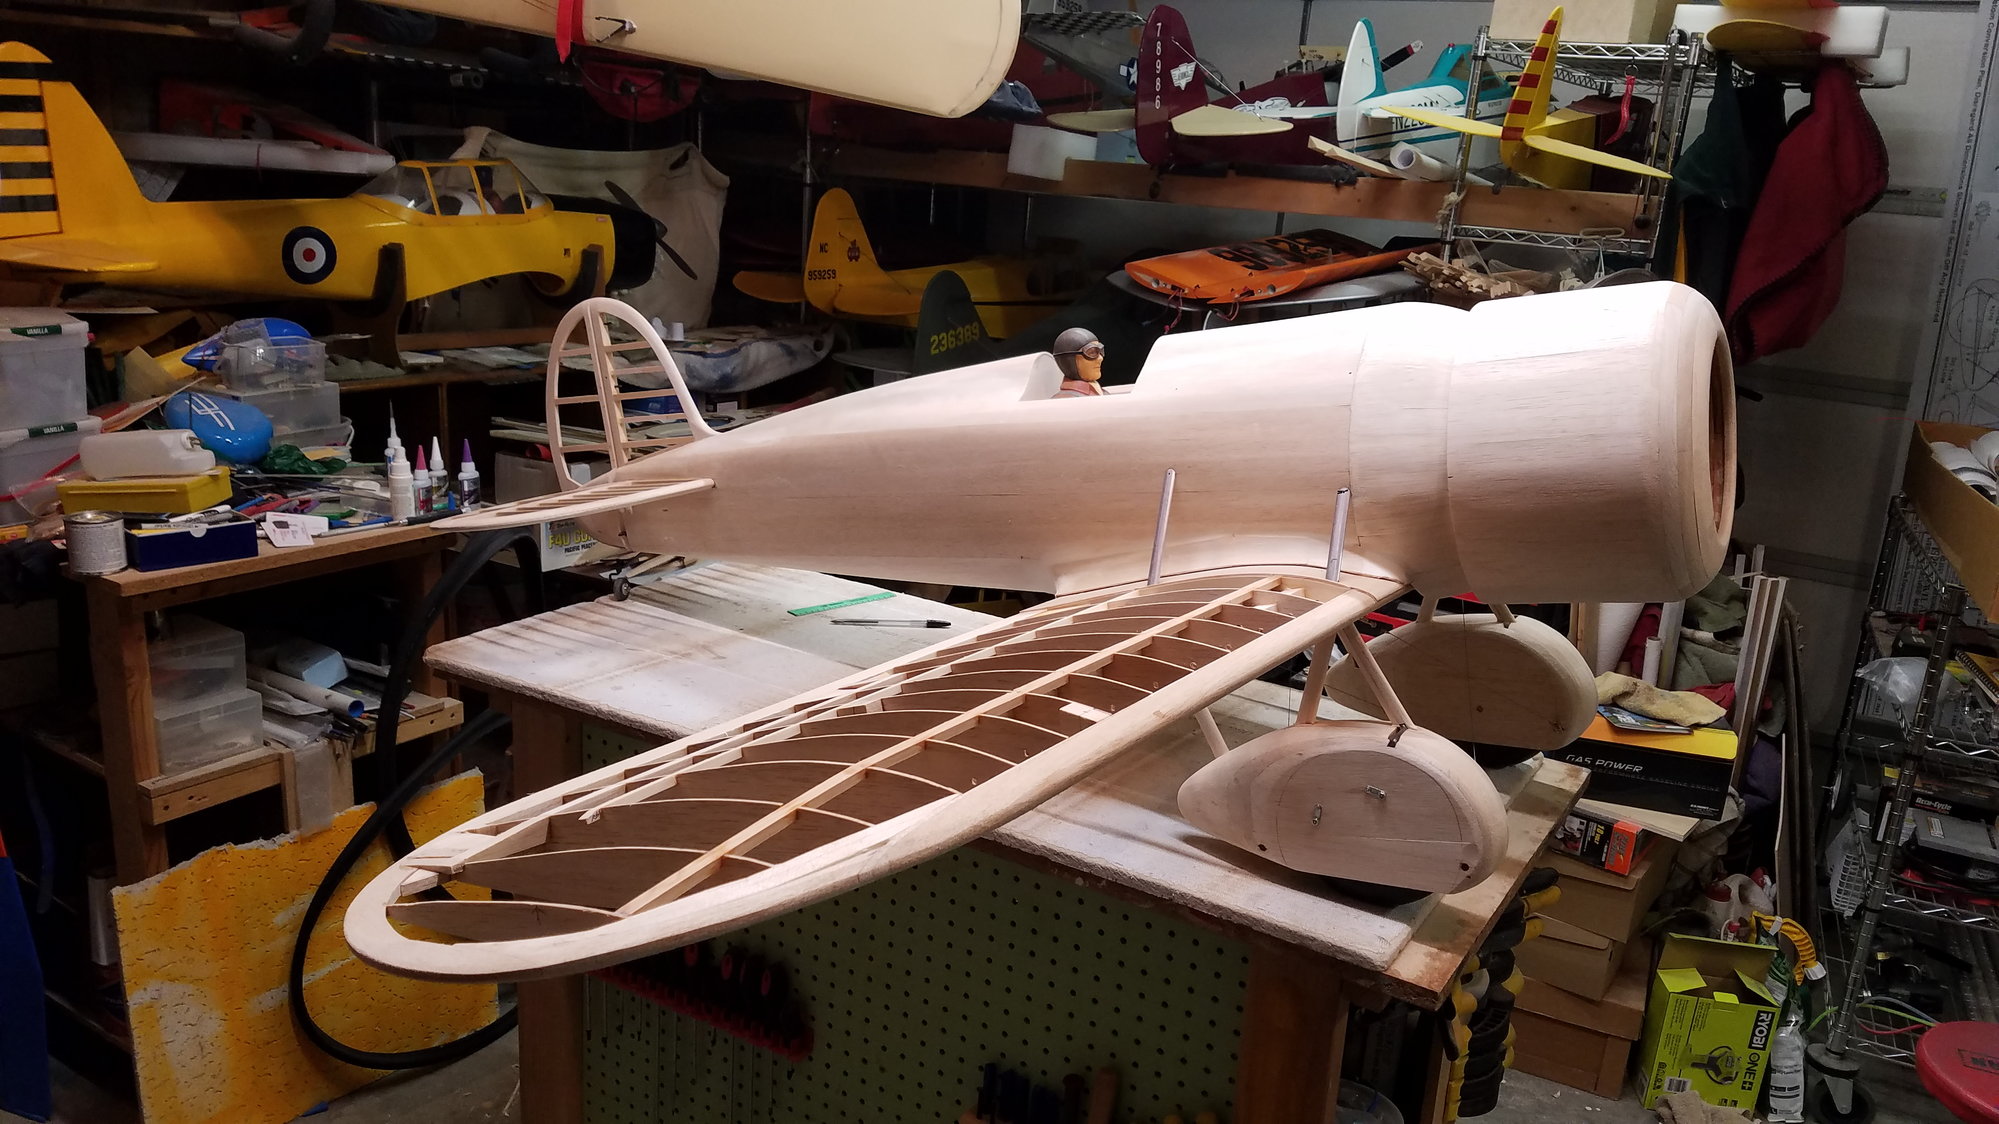
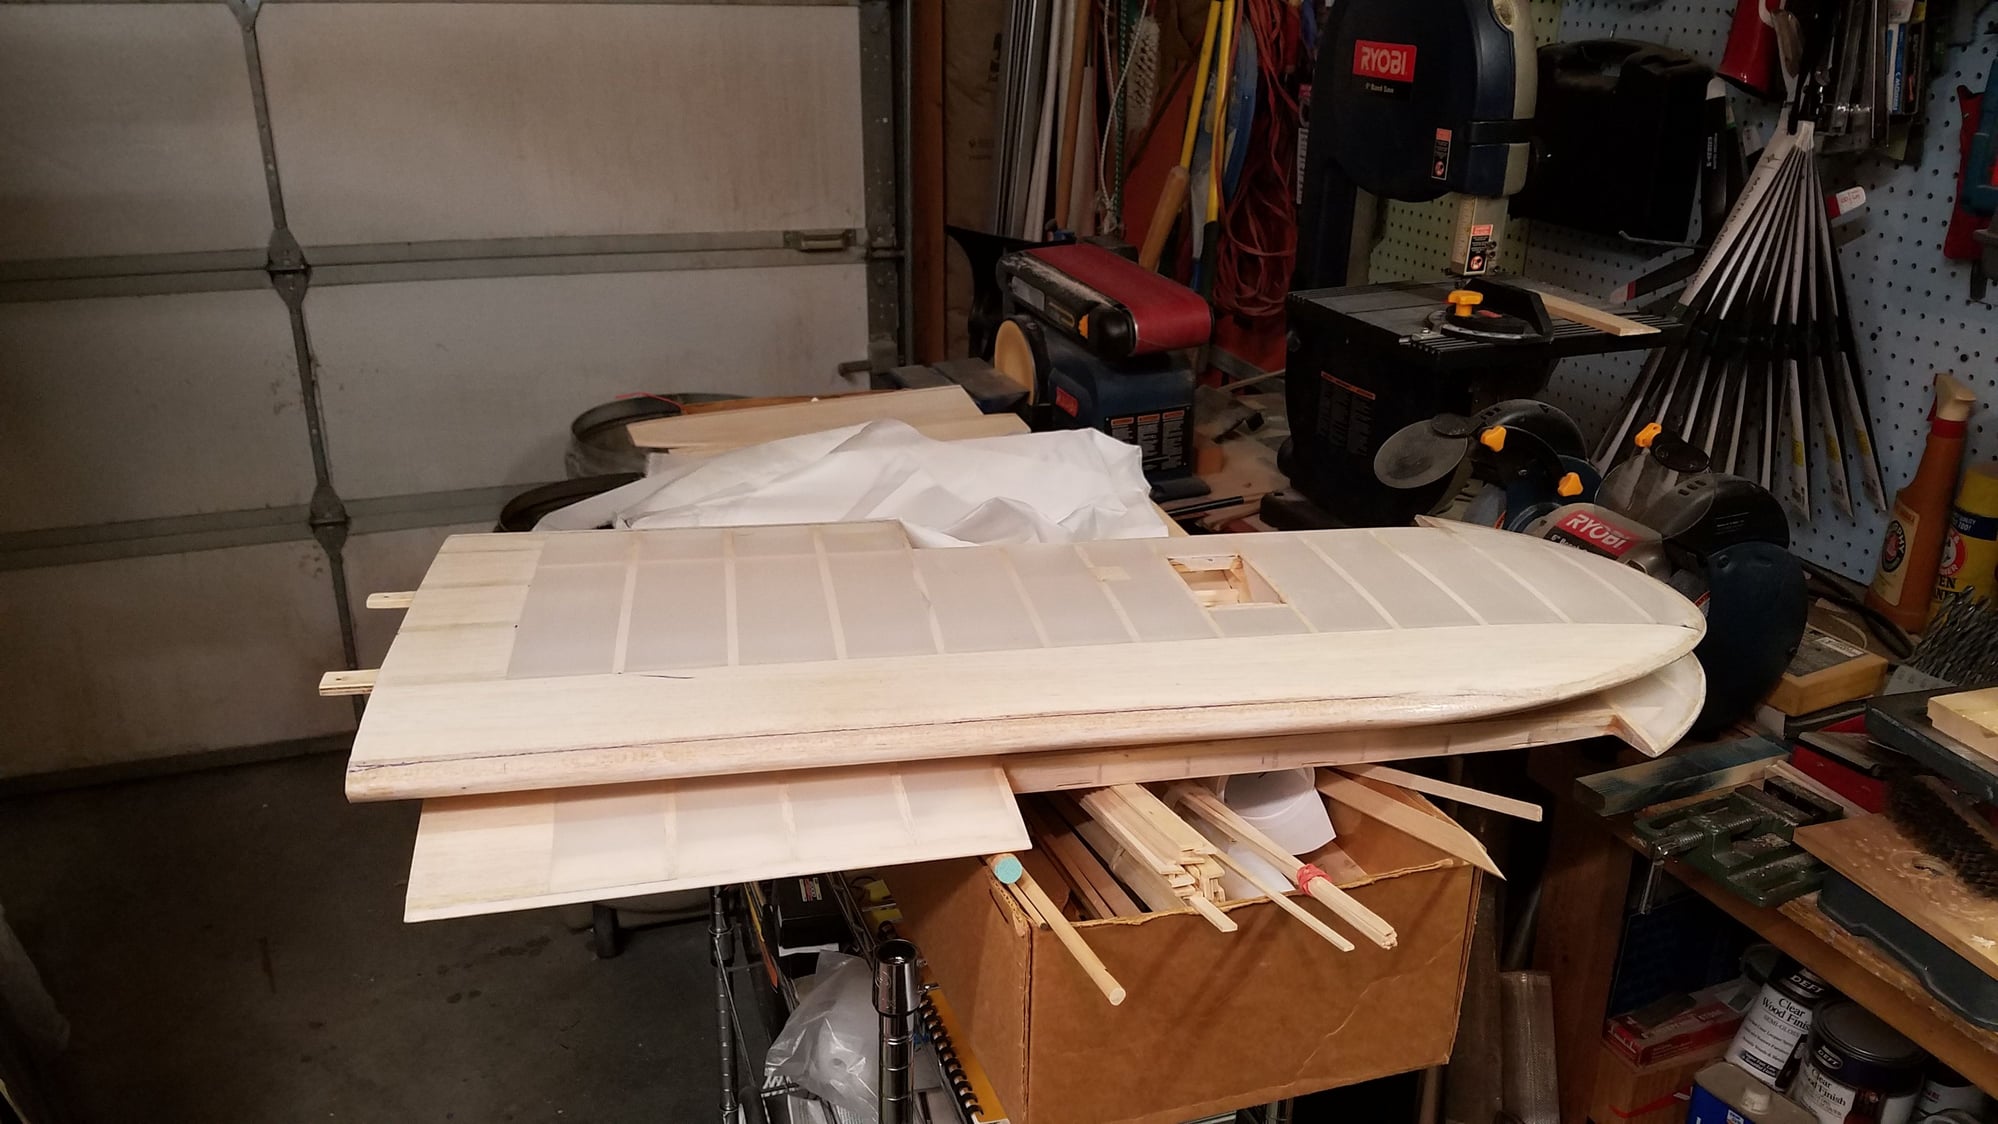
The next major part of the framework is the wing, sorry I didn't take any photos of the preliminary work. I used the plans for the general outline but added spars and sub spars where I thought they looked good. the ribs were shaped using plywood formers stacked together on dowels. this is the basic frame up, sheer webs, landing gear blocks and ailerons will be added later. At this point I wasn't sure if it would be a 1 piece or 3 piece wing so plywood ribs are installed where the joints would go just outside of the landing gear. I also made some carbon dowels from the pushrods that Sig sent with their 1/4 scale Cub kits.
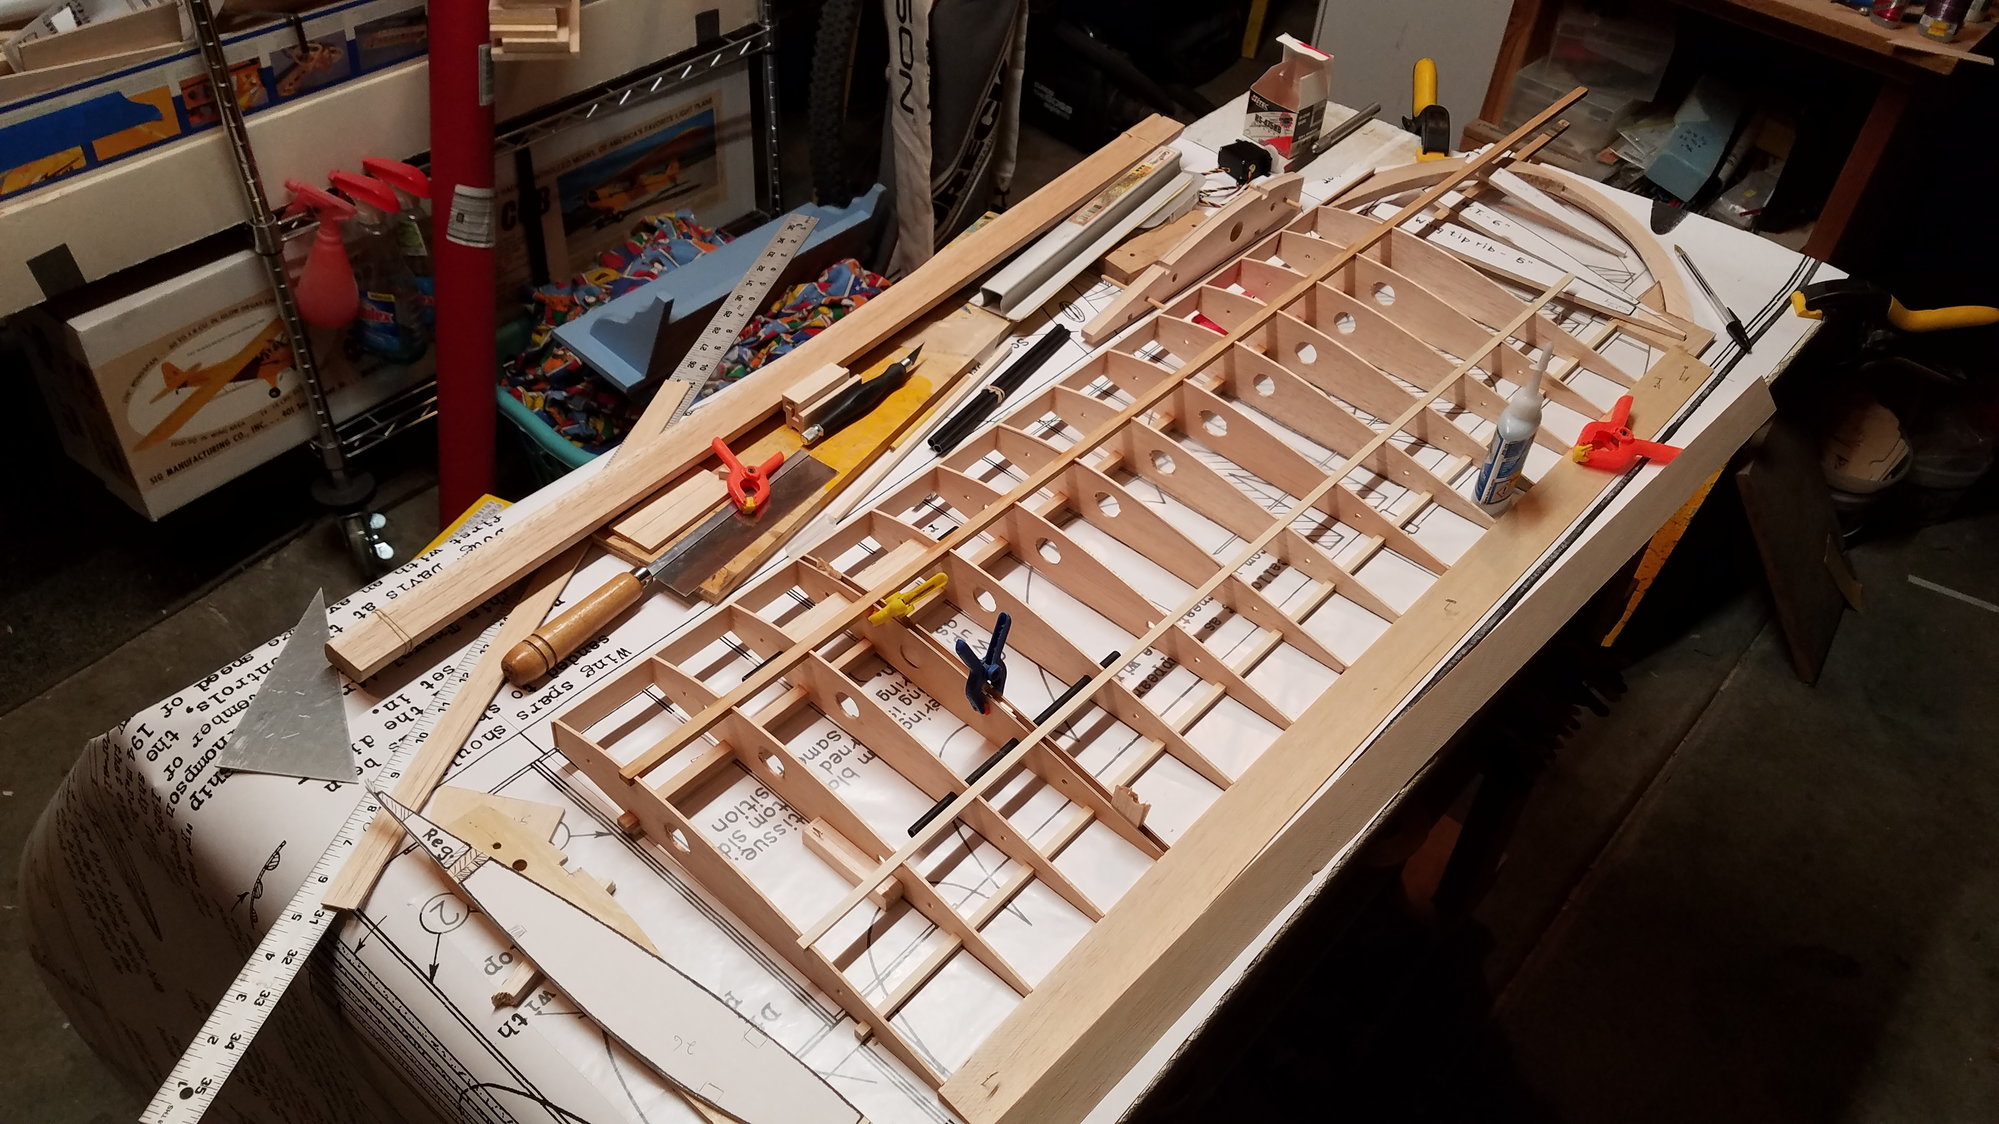
photo shows ply formers, ply ribs at joint, carbon tubes built in, ribs stacked on dowels, and tip ribs. I plan on using 1 servo in each wing for aileron.clamps can be seen holding ply ribs where the wing spars will eventually be cut for 3 piece wing. I decided to use a shaped leading edge to save on some sawdust later.
first mock up.
 01-12-2022, 07:00 PM
#8
Thread Starter
Thanks, are they still building planes there or is the building being used for something else?
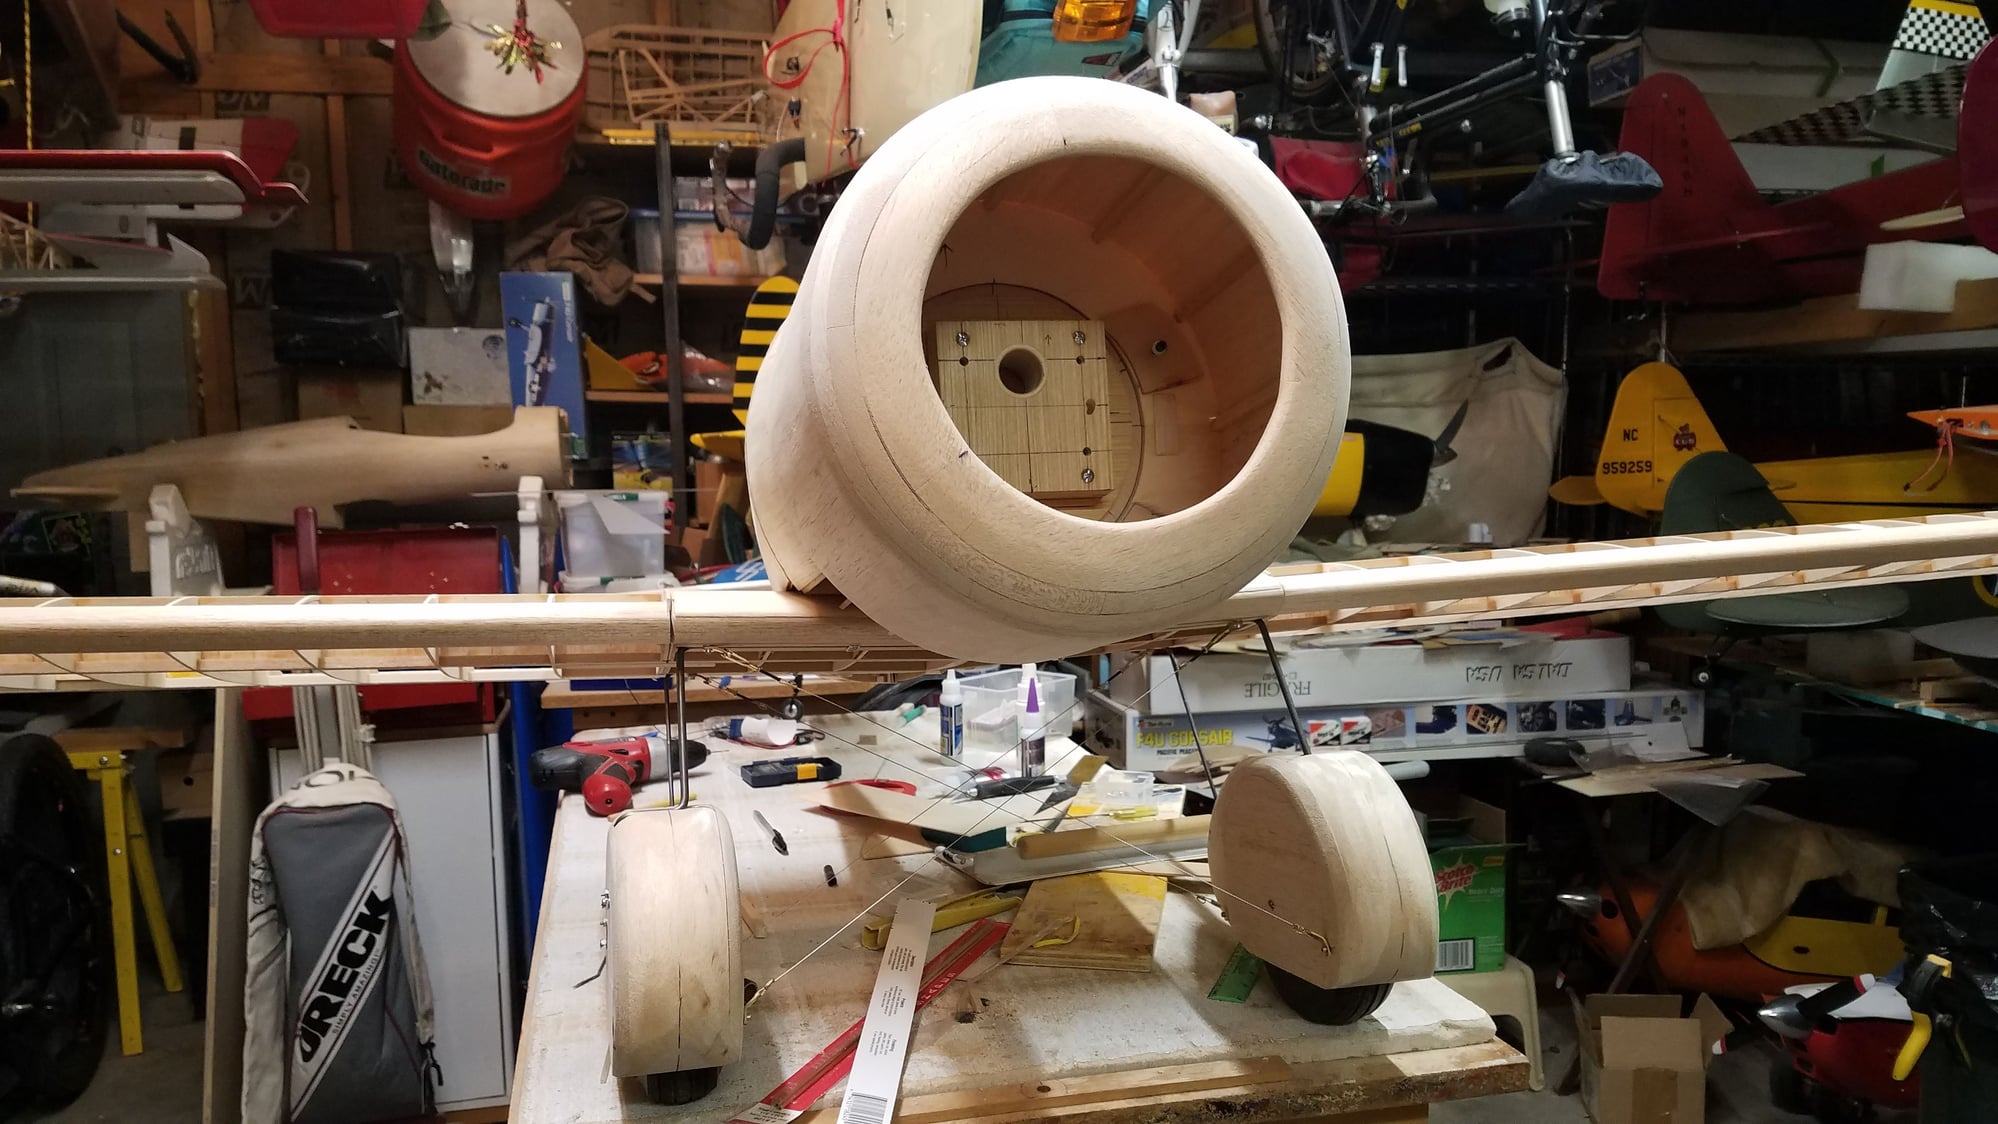
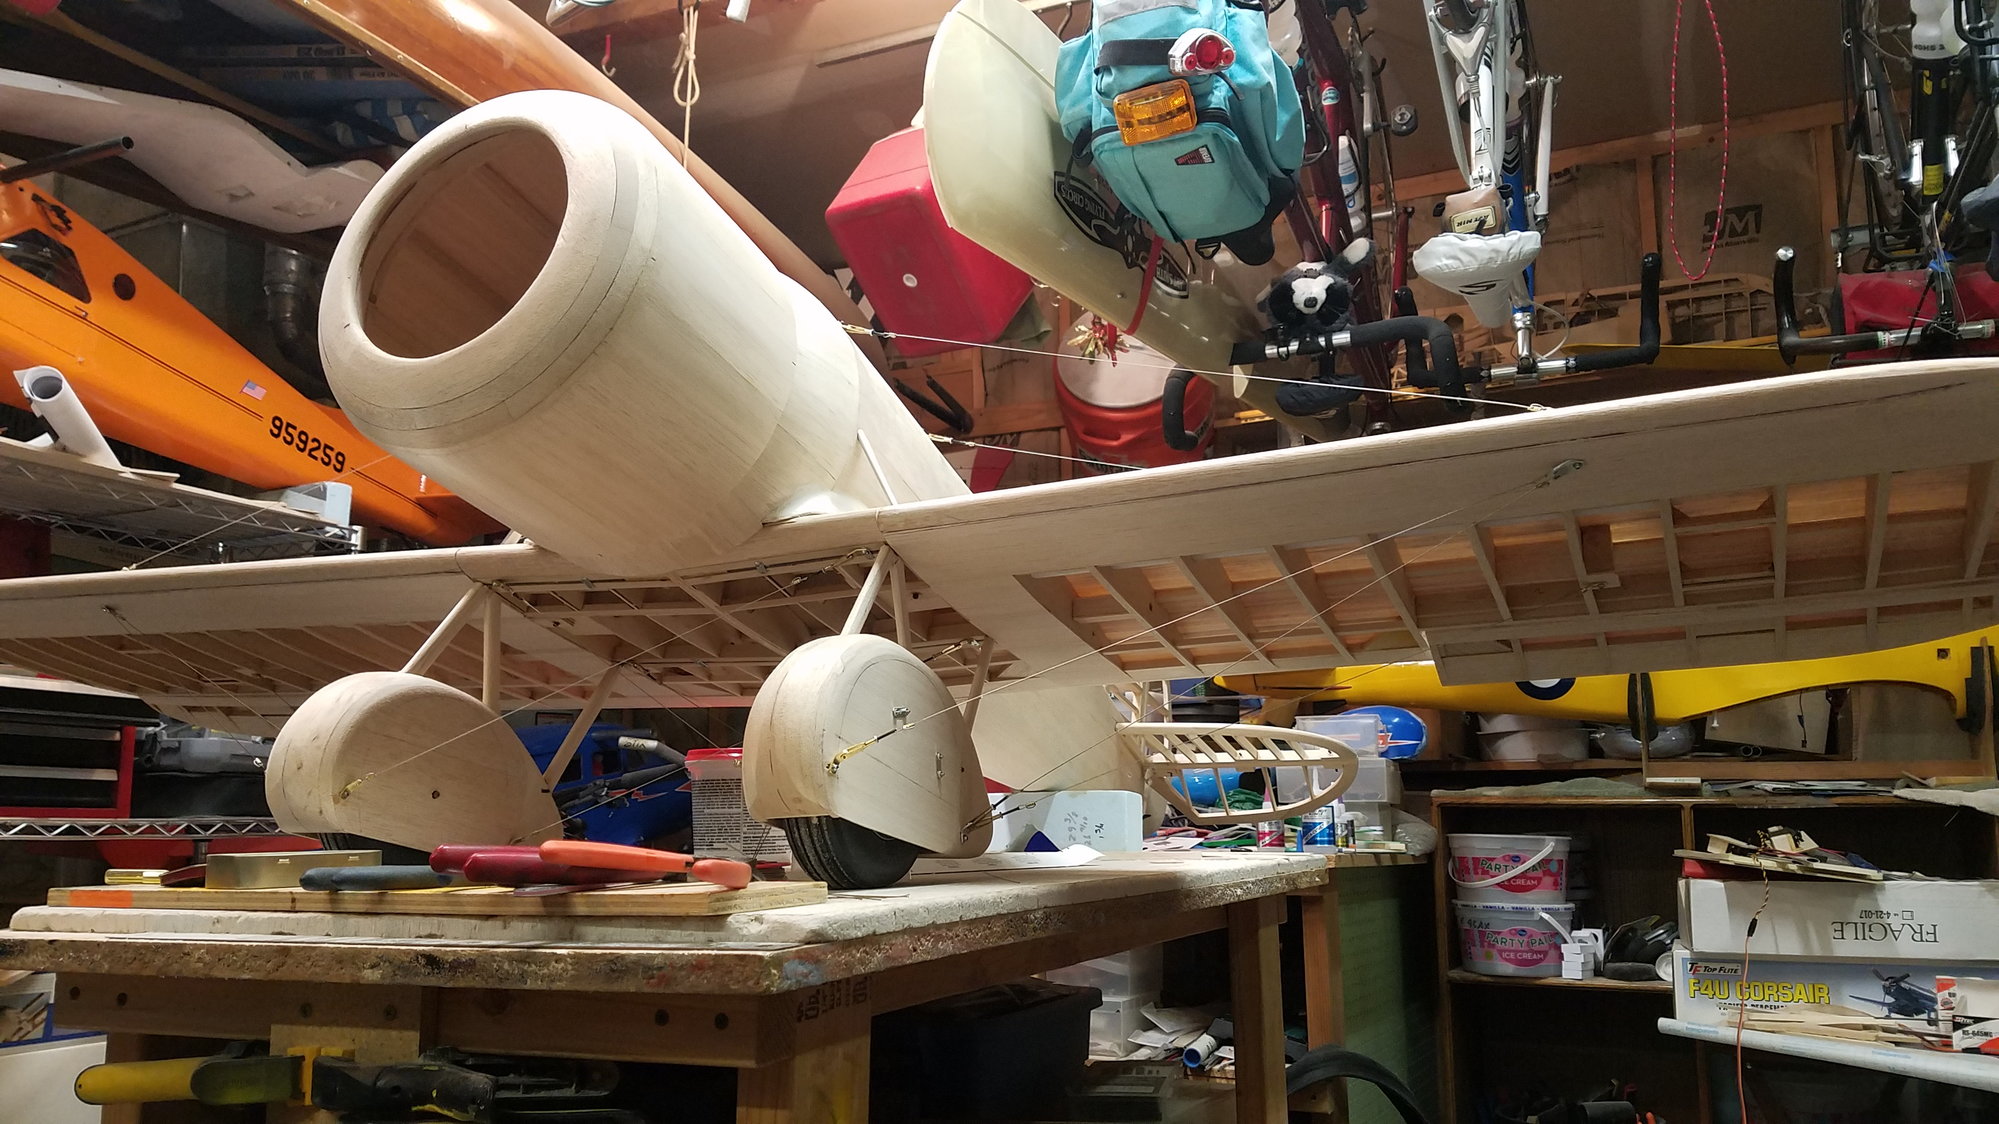
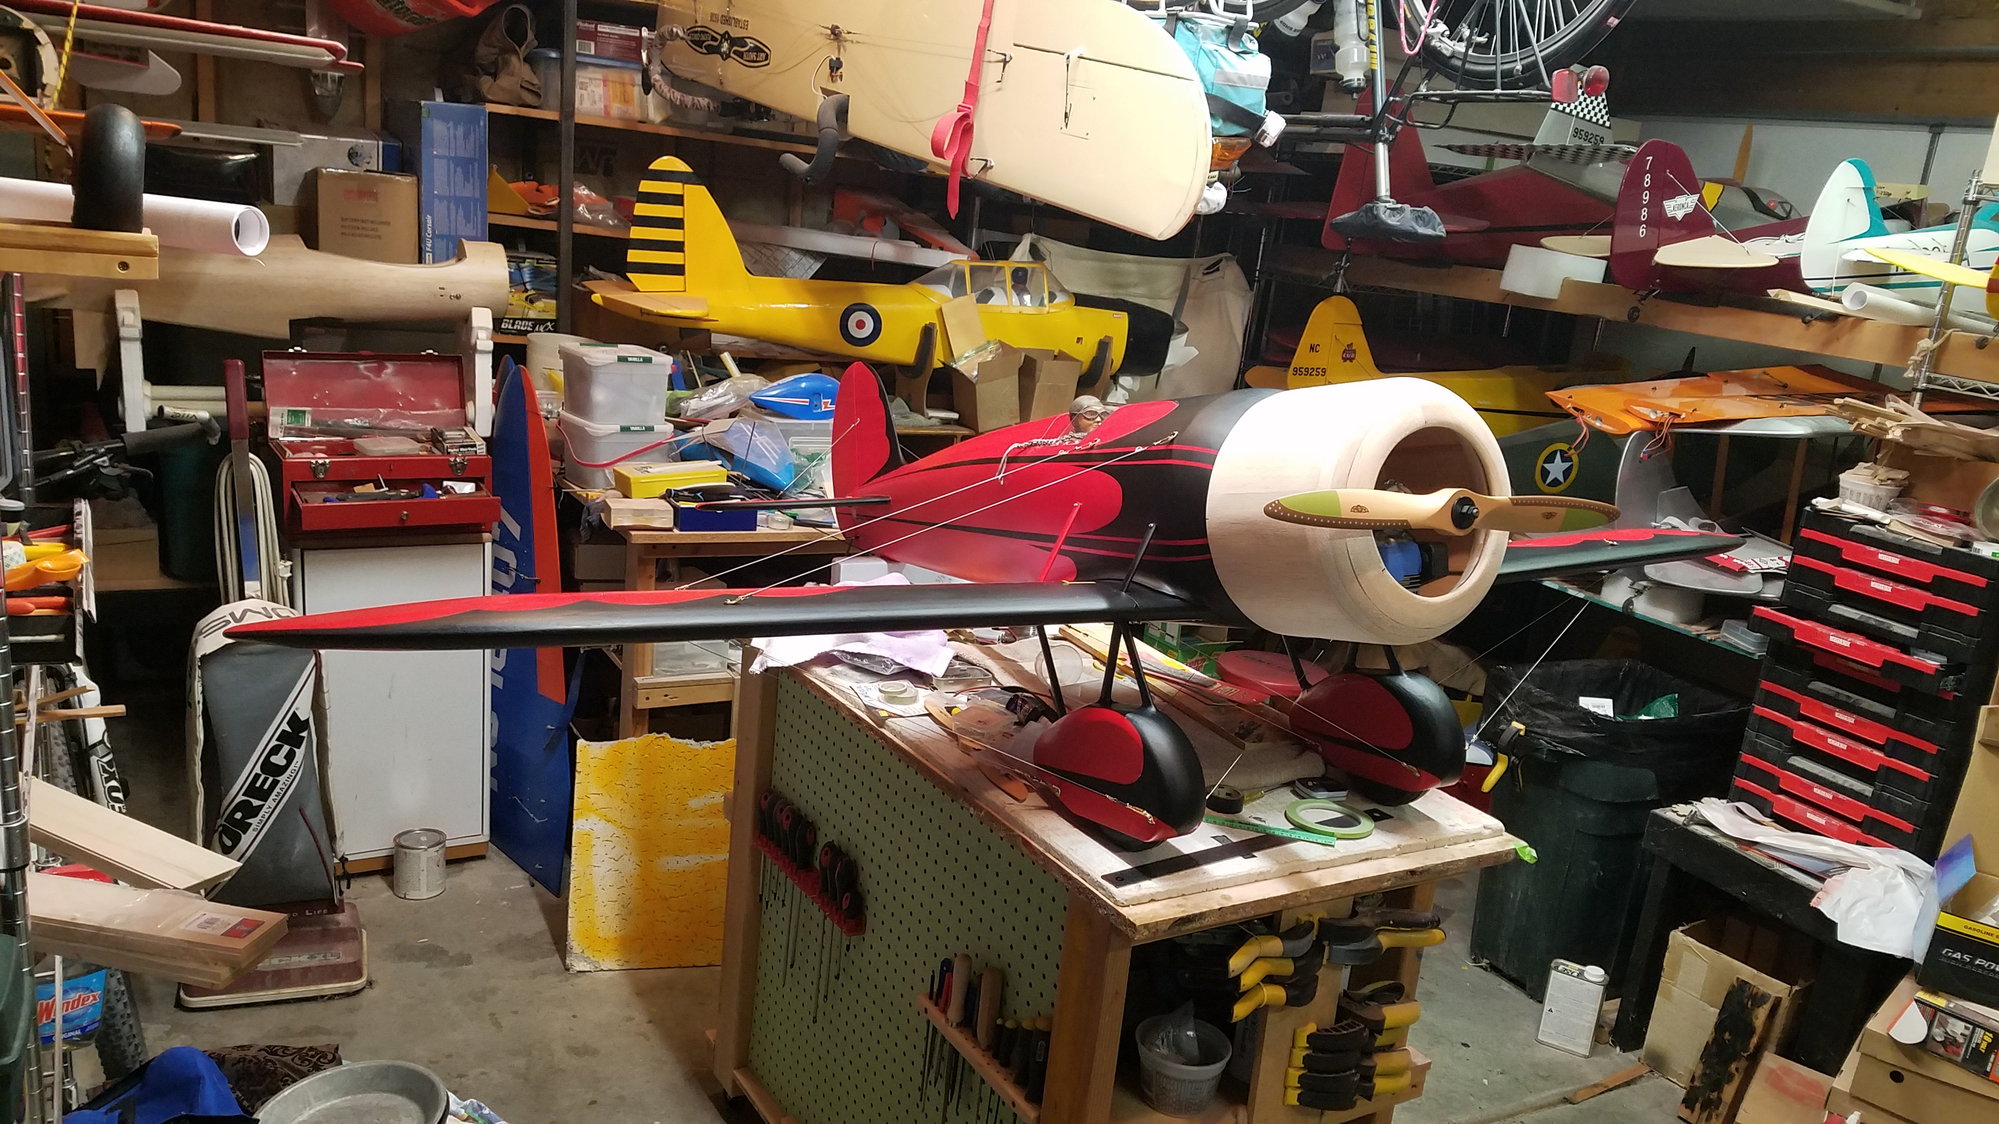
The next step was to figure out the landing gear, I looked at different things and decided to just go with a bent wire gear and use inflatable tires for shock absorption. The wheels are 6" diameter on the plans. I would like to have a narrower tire but don't like foam or vintage because of the way they bounce on landing. since I made the gear and pants I have come up with some other thoughts that could make the pants narrower using sheet instead of wire. down the road I may change the gear, it is just held on with metal straps.
gear bent and soldered together, not perfectly even but the wheels are lined up
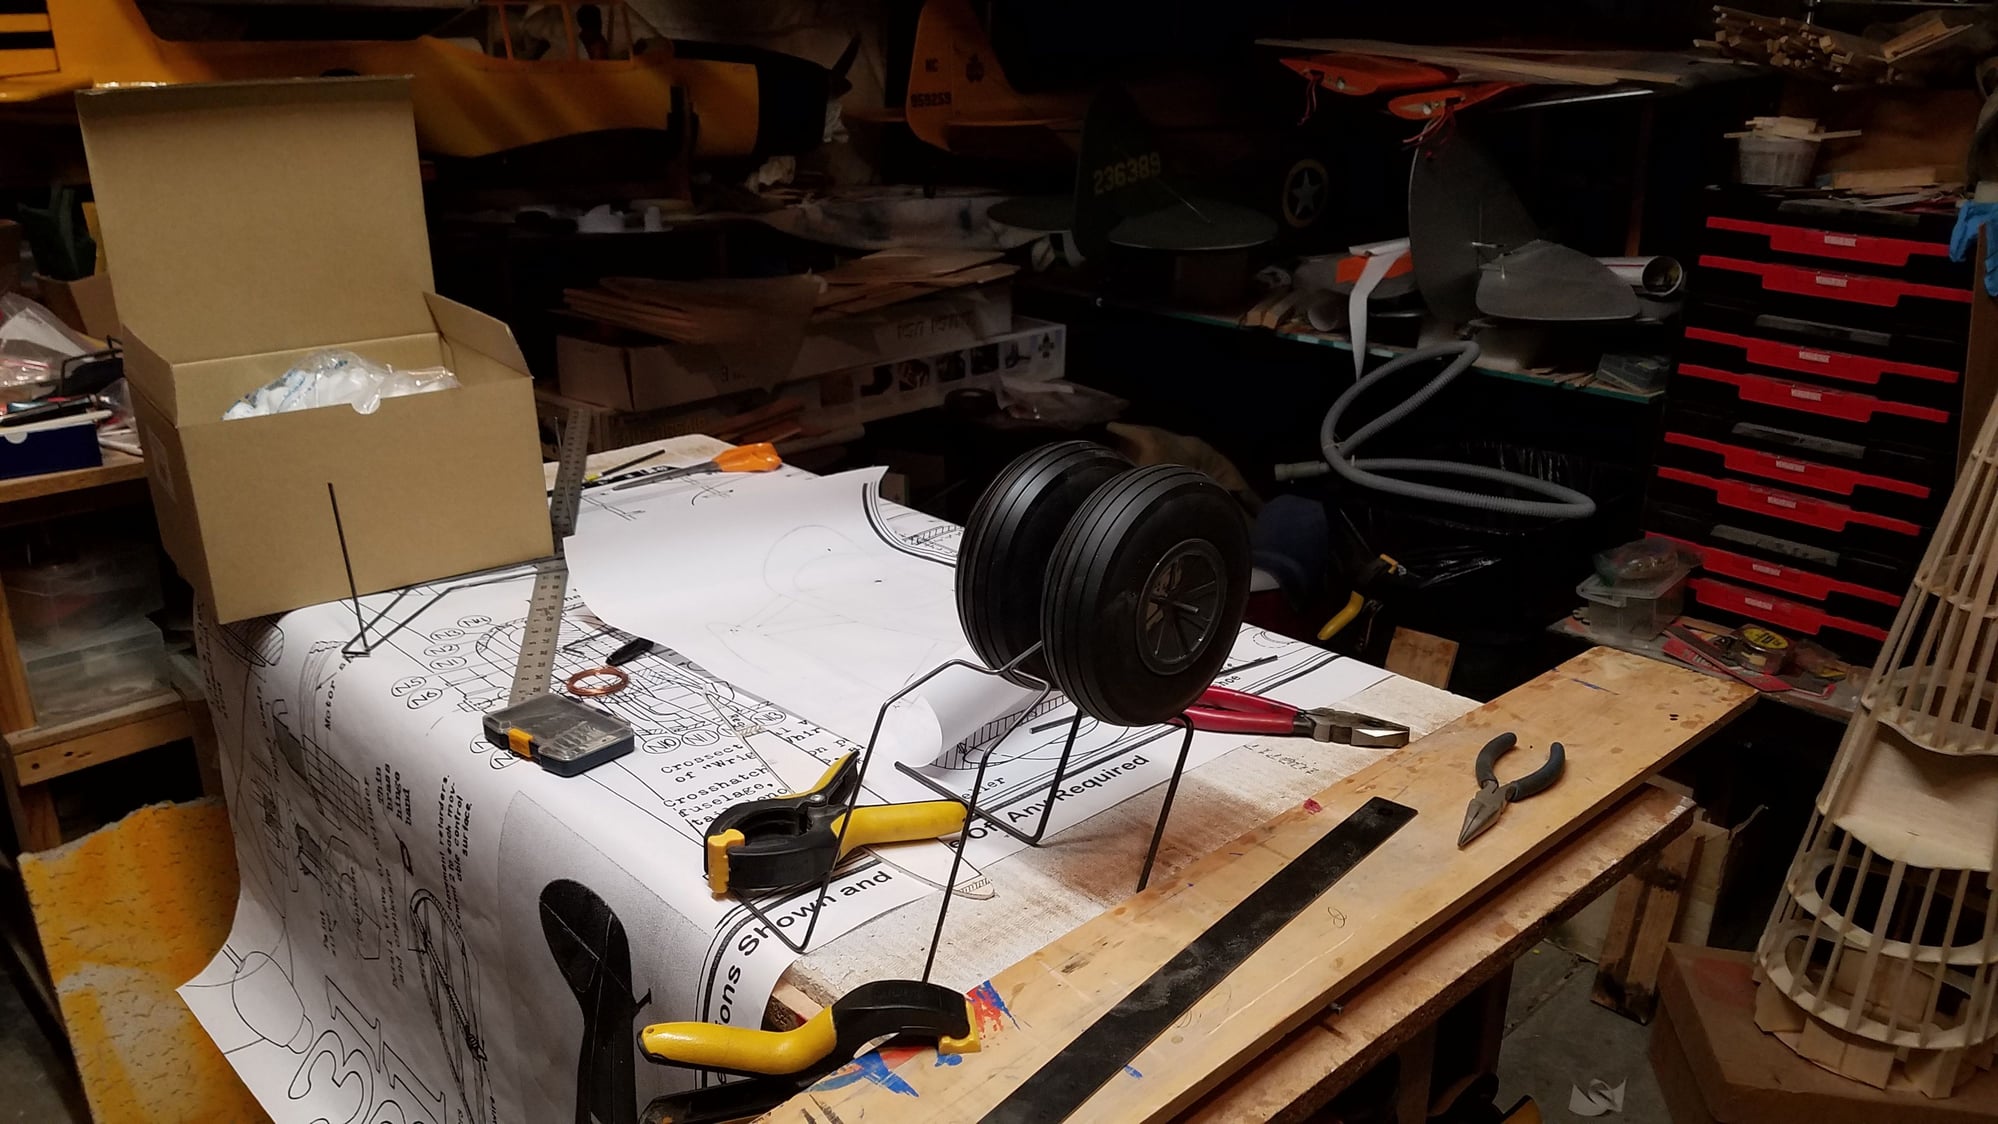
a KS wire bender was used for bending
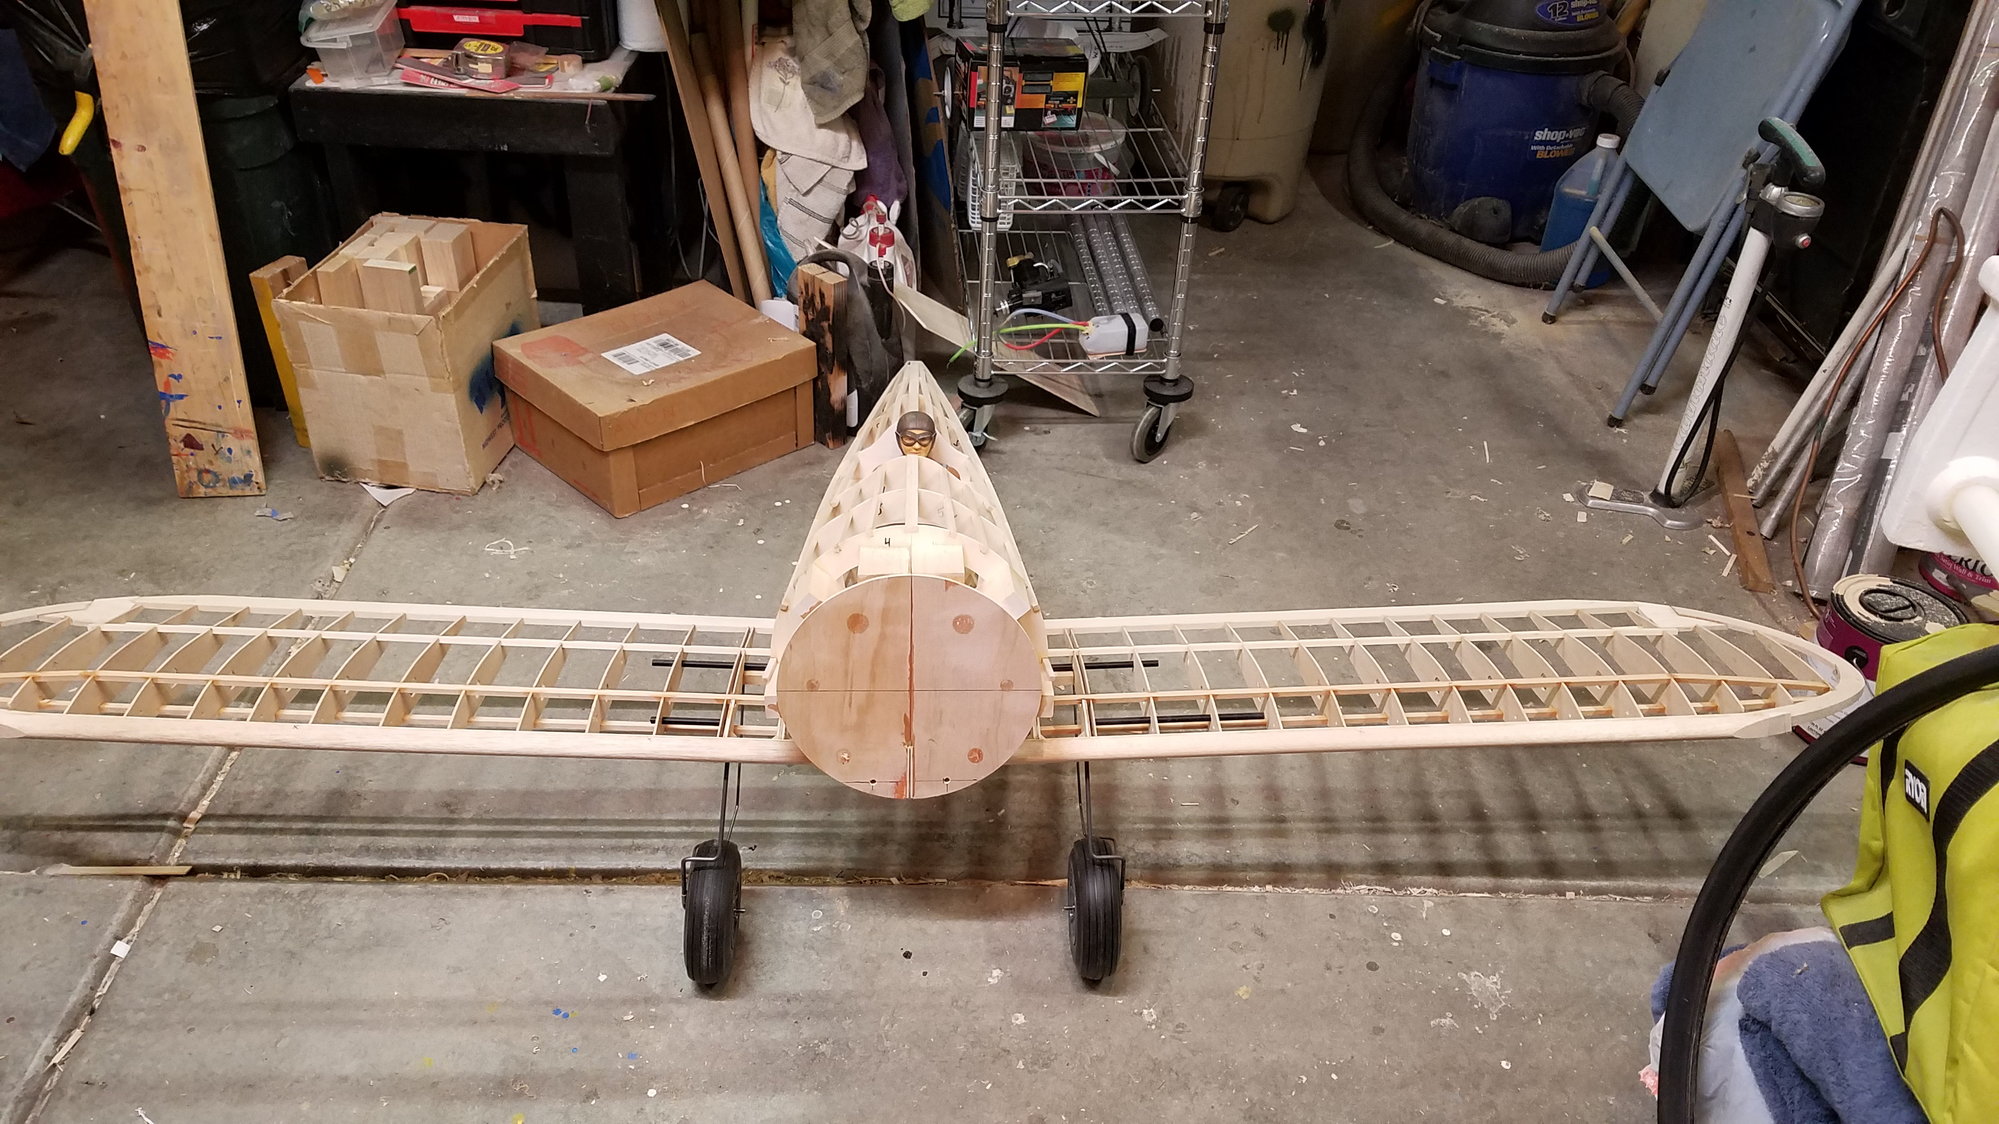
Gear blocks mounted in wing
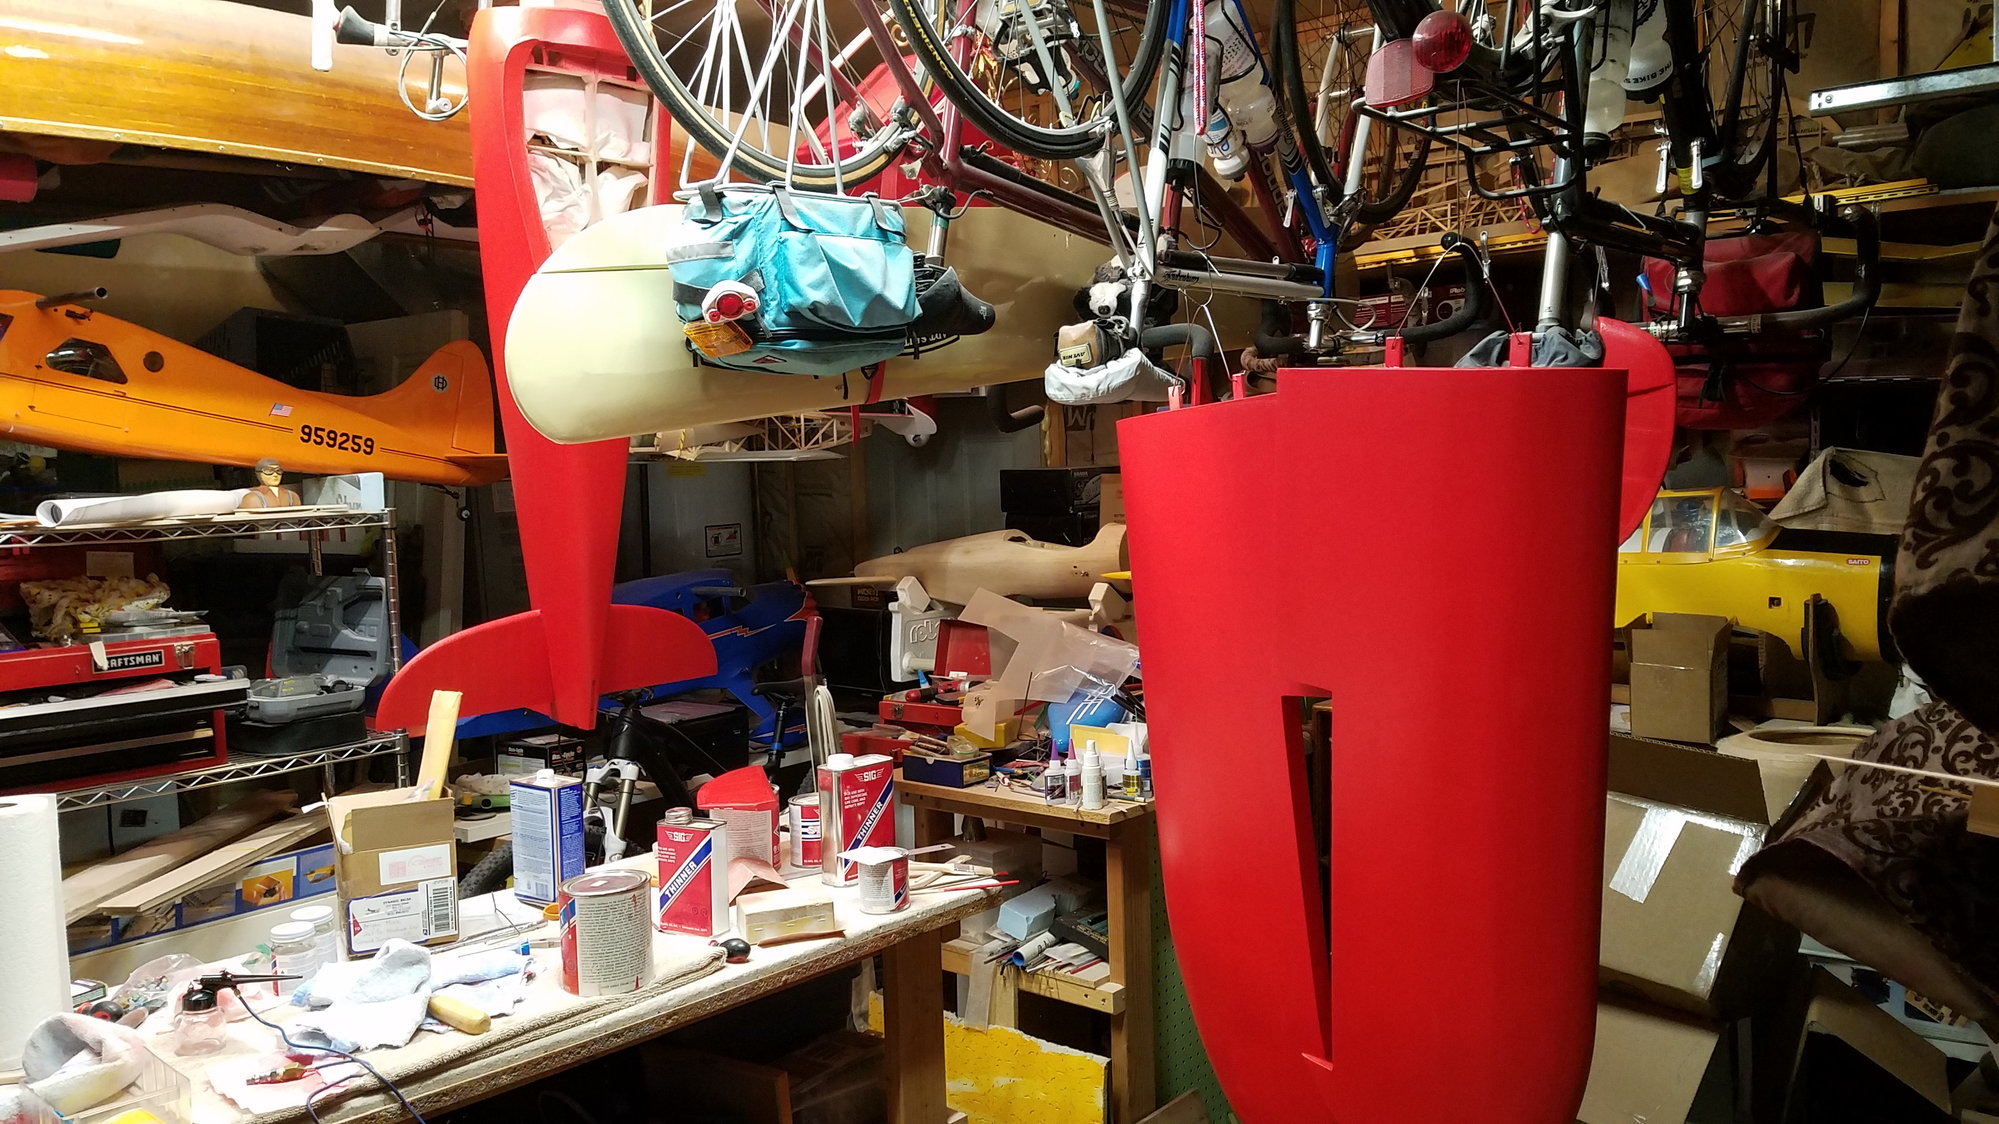
and who couldn't love wheel pants. Balsa block construction with 3/32 sheeting on sides. the inside piece is removable to access wheel collars. dowels run across front and rear to align and create anchor points for flying wires. these will be fiber-glassed later
The next step was to figure out the landing gear, I looked at different things and decided to just go with a bent wire gear and use inflatable tires for shock absorption. The wheels are 6" diameter on the plans. I would like to have a narrower tire but don't like foam or vintage because of the way they bounce on landing. since I made the gear and pants I have come up with some other thoughts that could make the pants narrower using sheet instead of wire. down the road I may change the gear, it is just held on with metal straps.
gear bent and soldered together, not perfectly even but the wheels are lined up
a KS wire bender was used for bending
Gear blocks mounted in wing
and who couldn't love wheel pants. Balsa block construction with 3/32 sheeting on sides. the inside piece is removable to access wheel collars. dowels run across front and rear to align and create anchor points for flying wires. these will be fiber-glassed later
01-13-2022, 09:11 PM
#9
Thread Starter
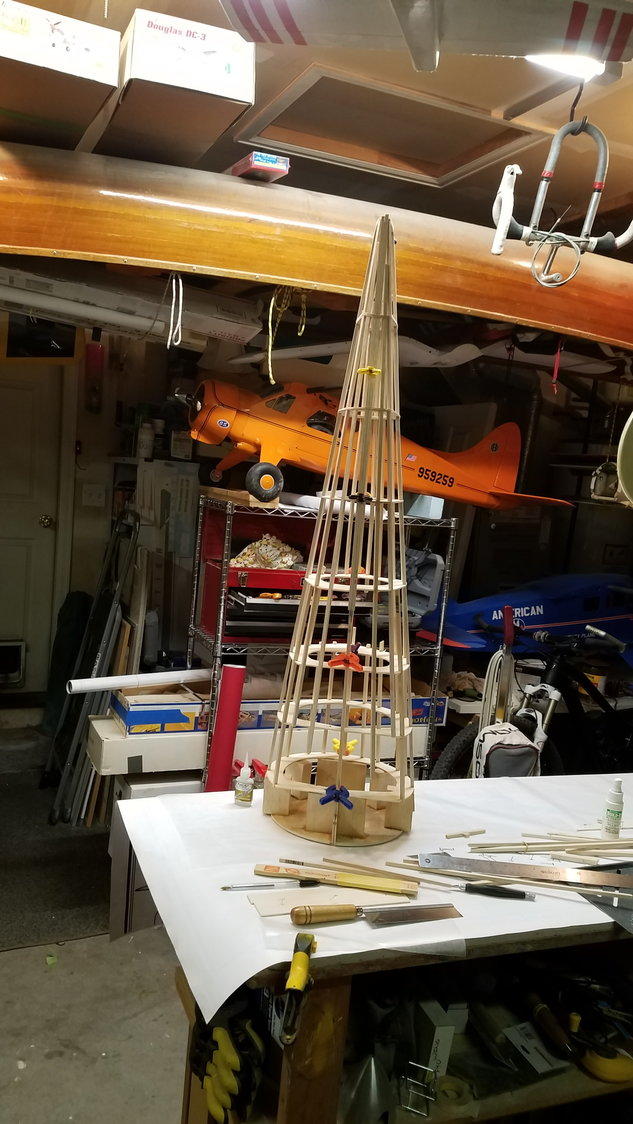
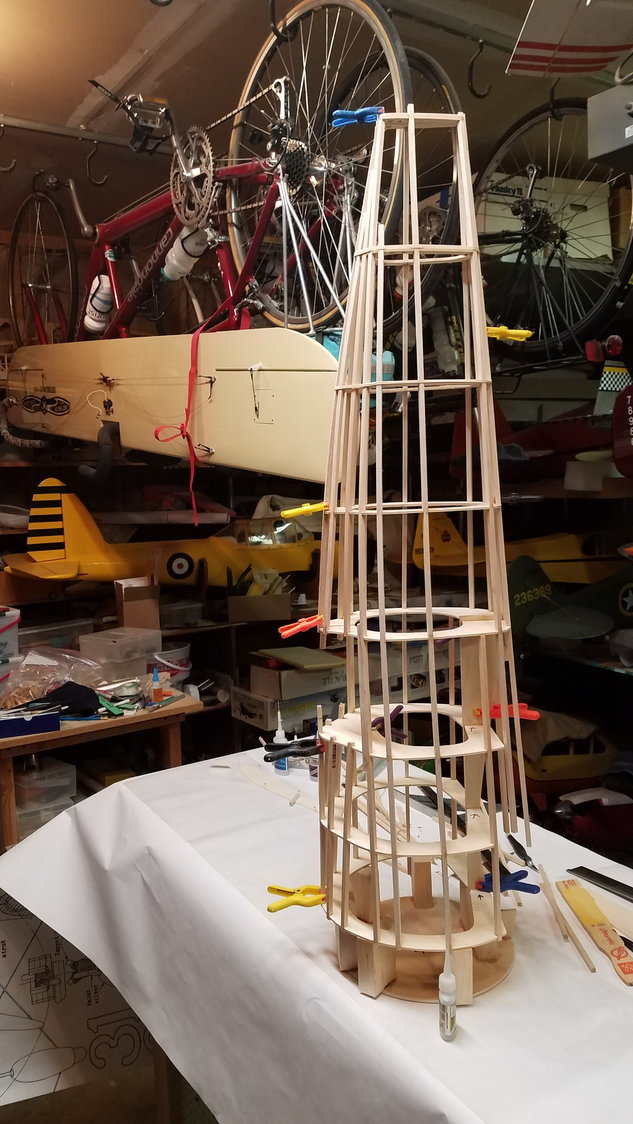
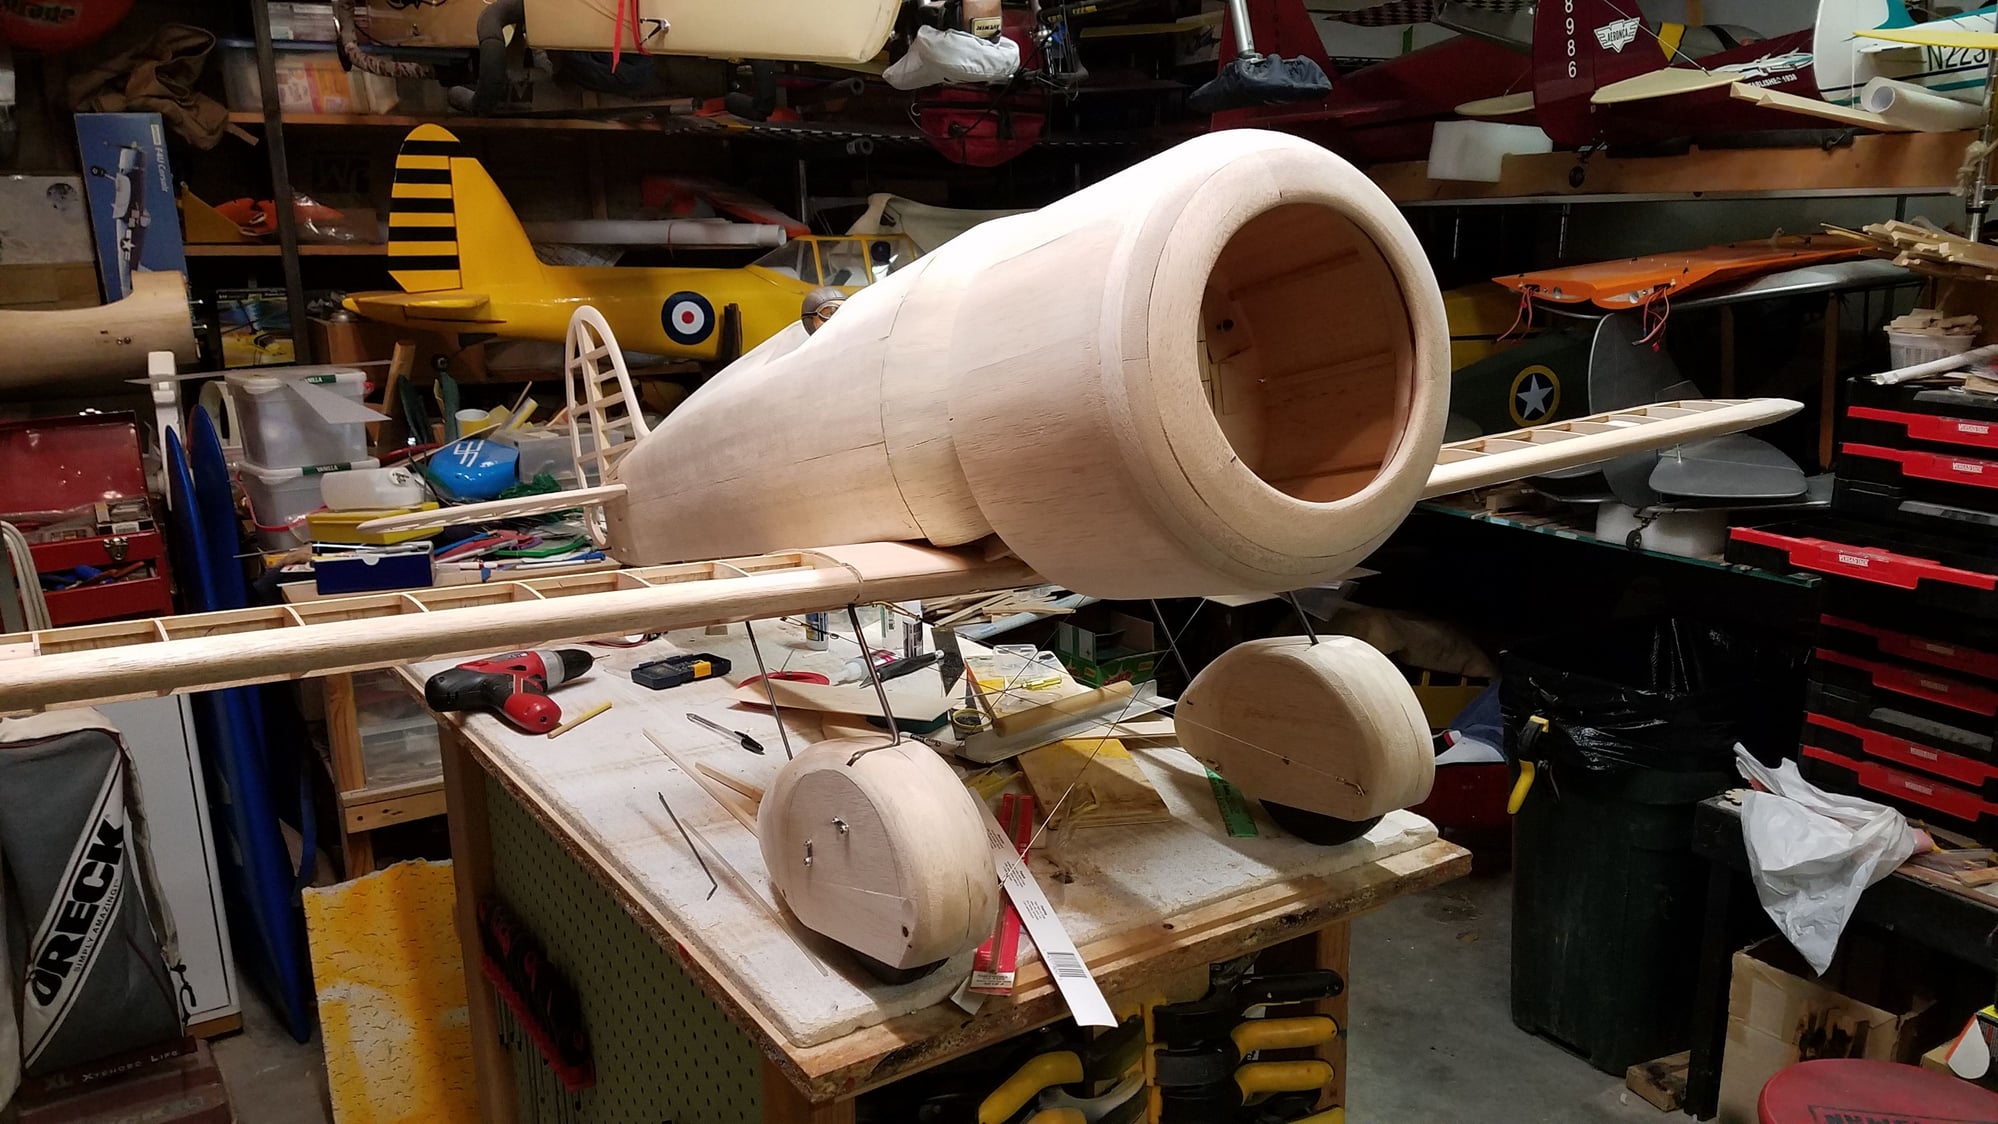
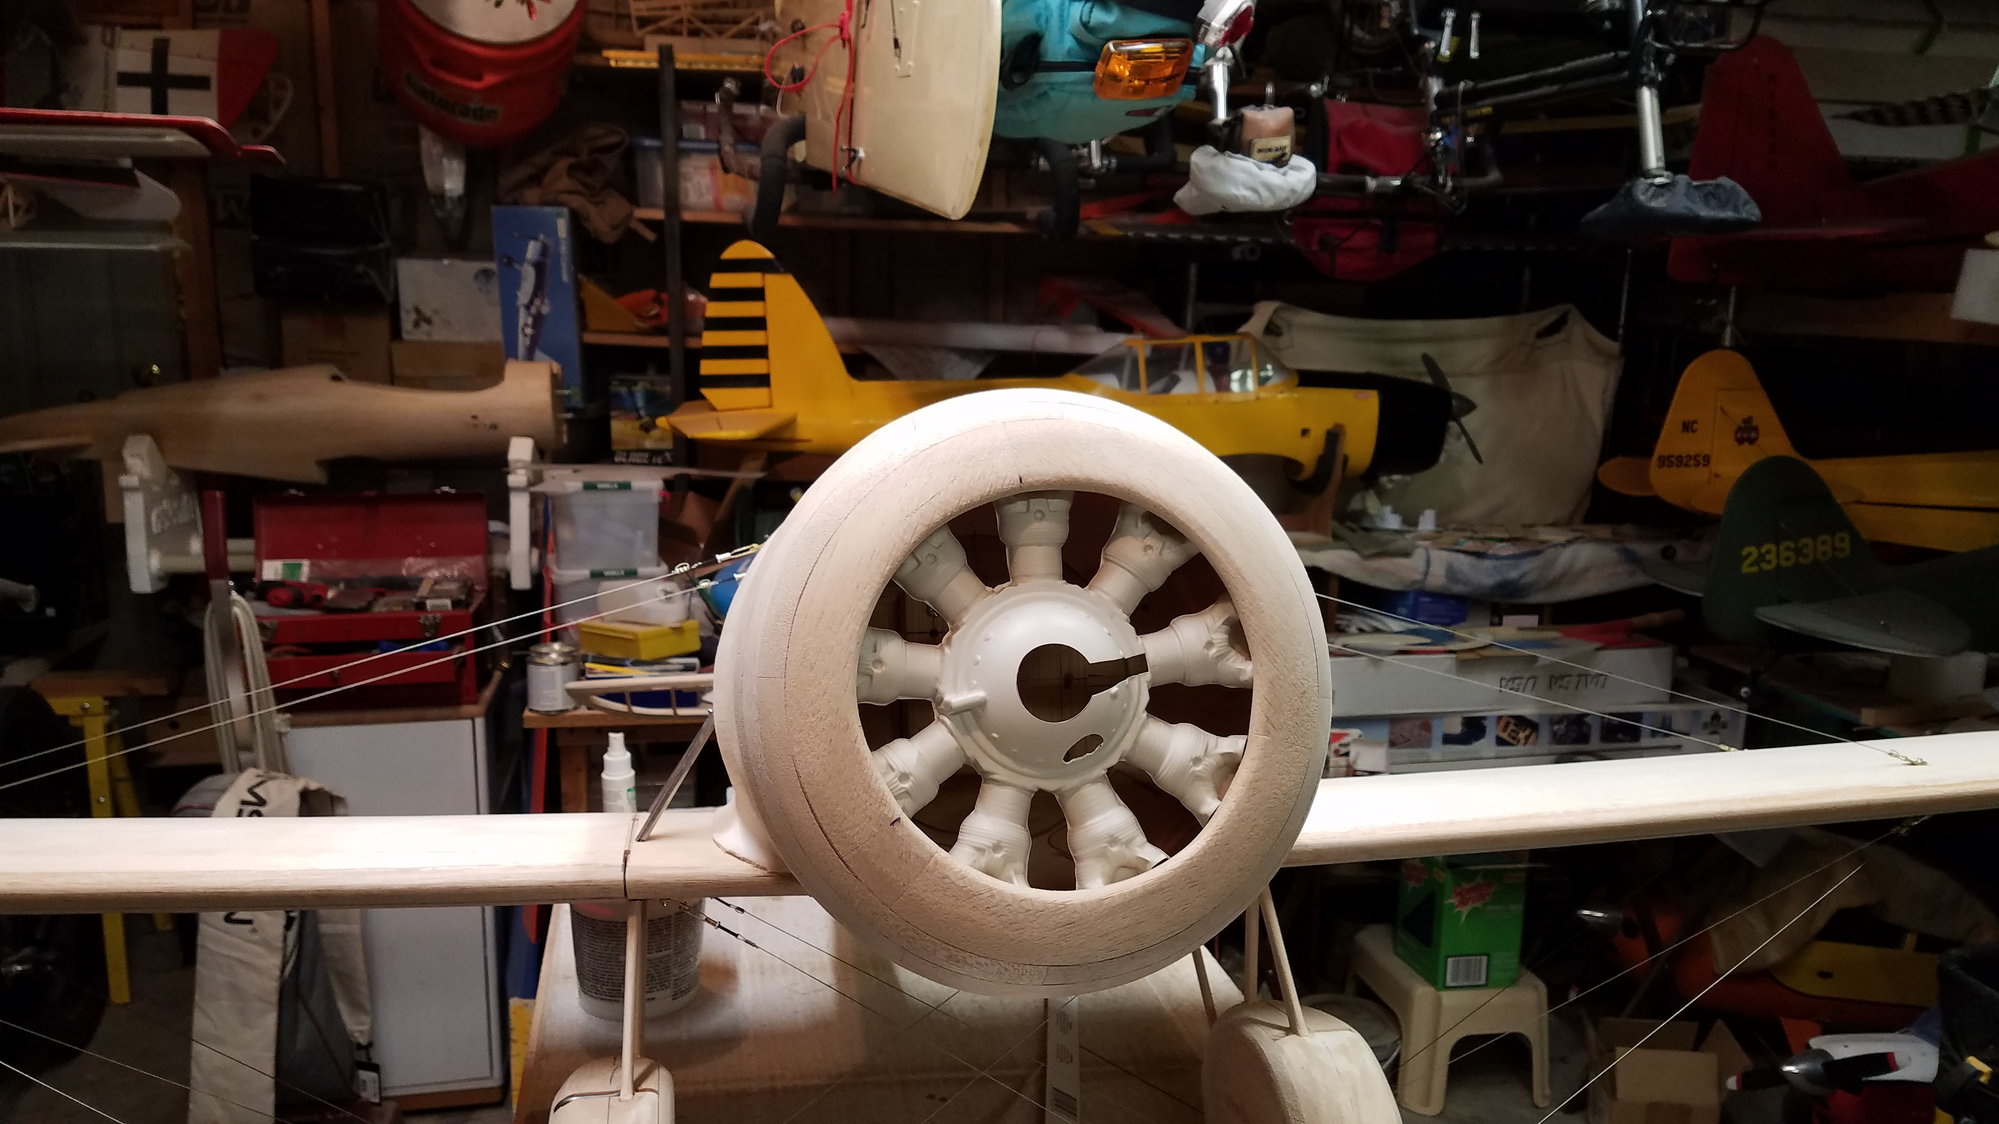
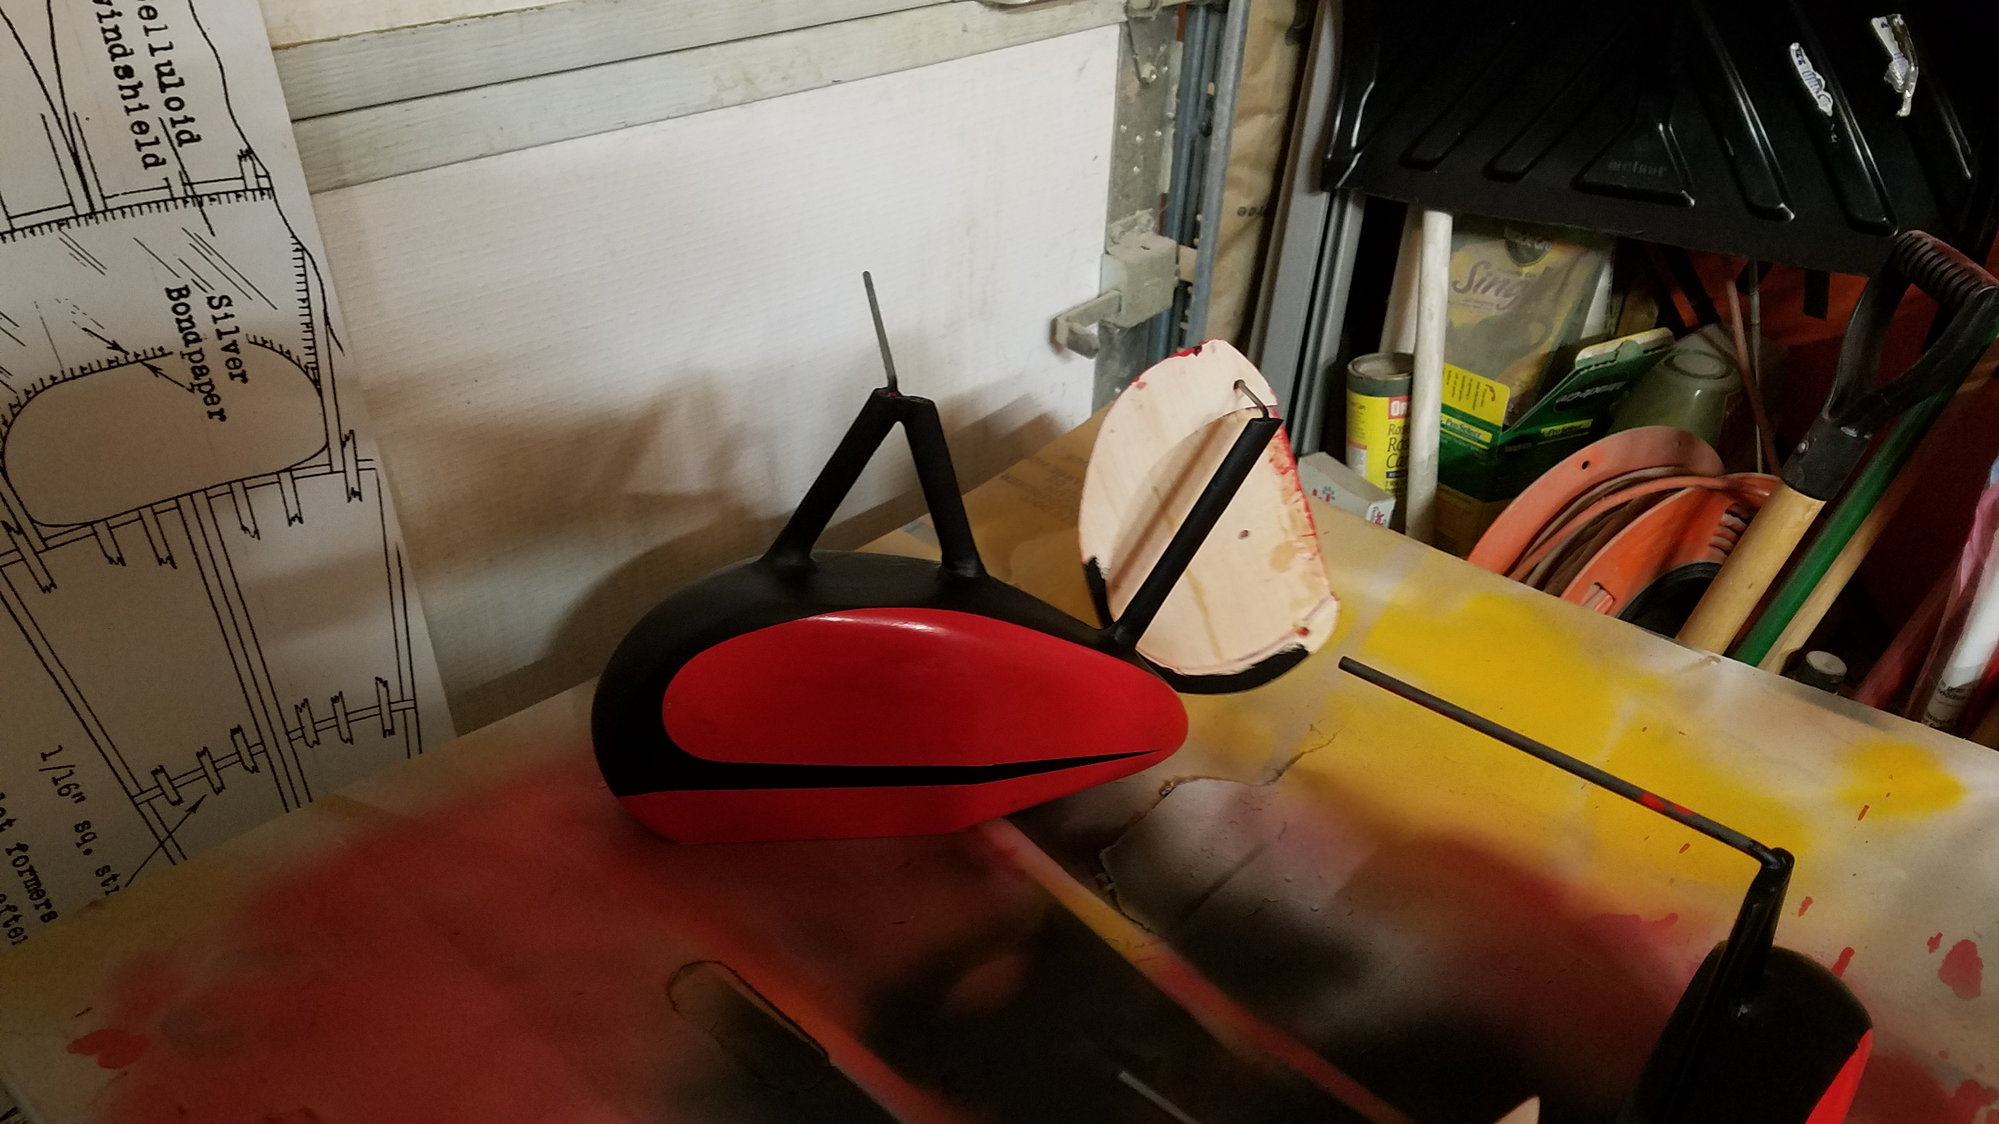
the nose needs a "little" something
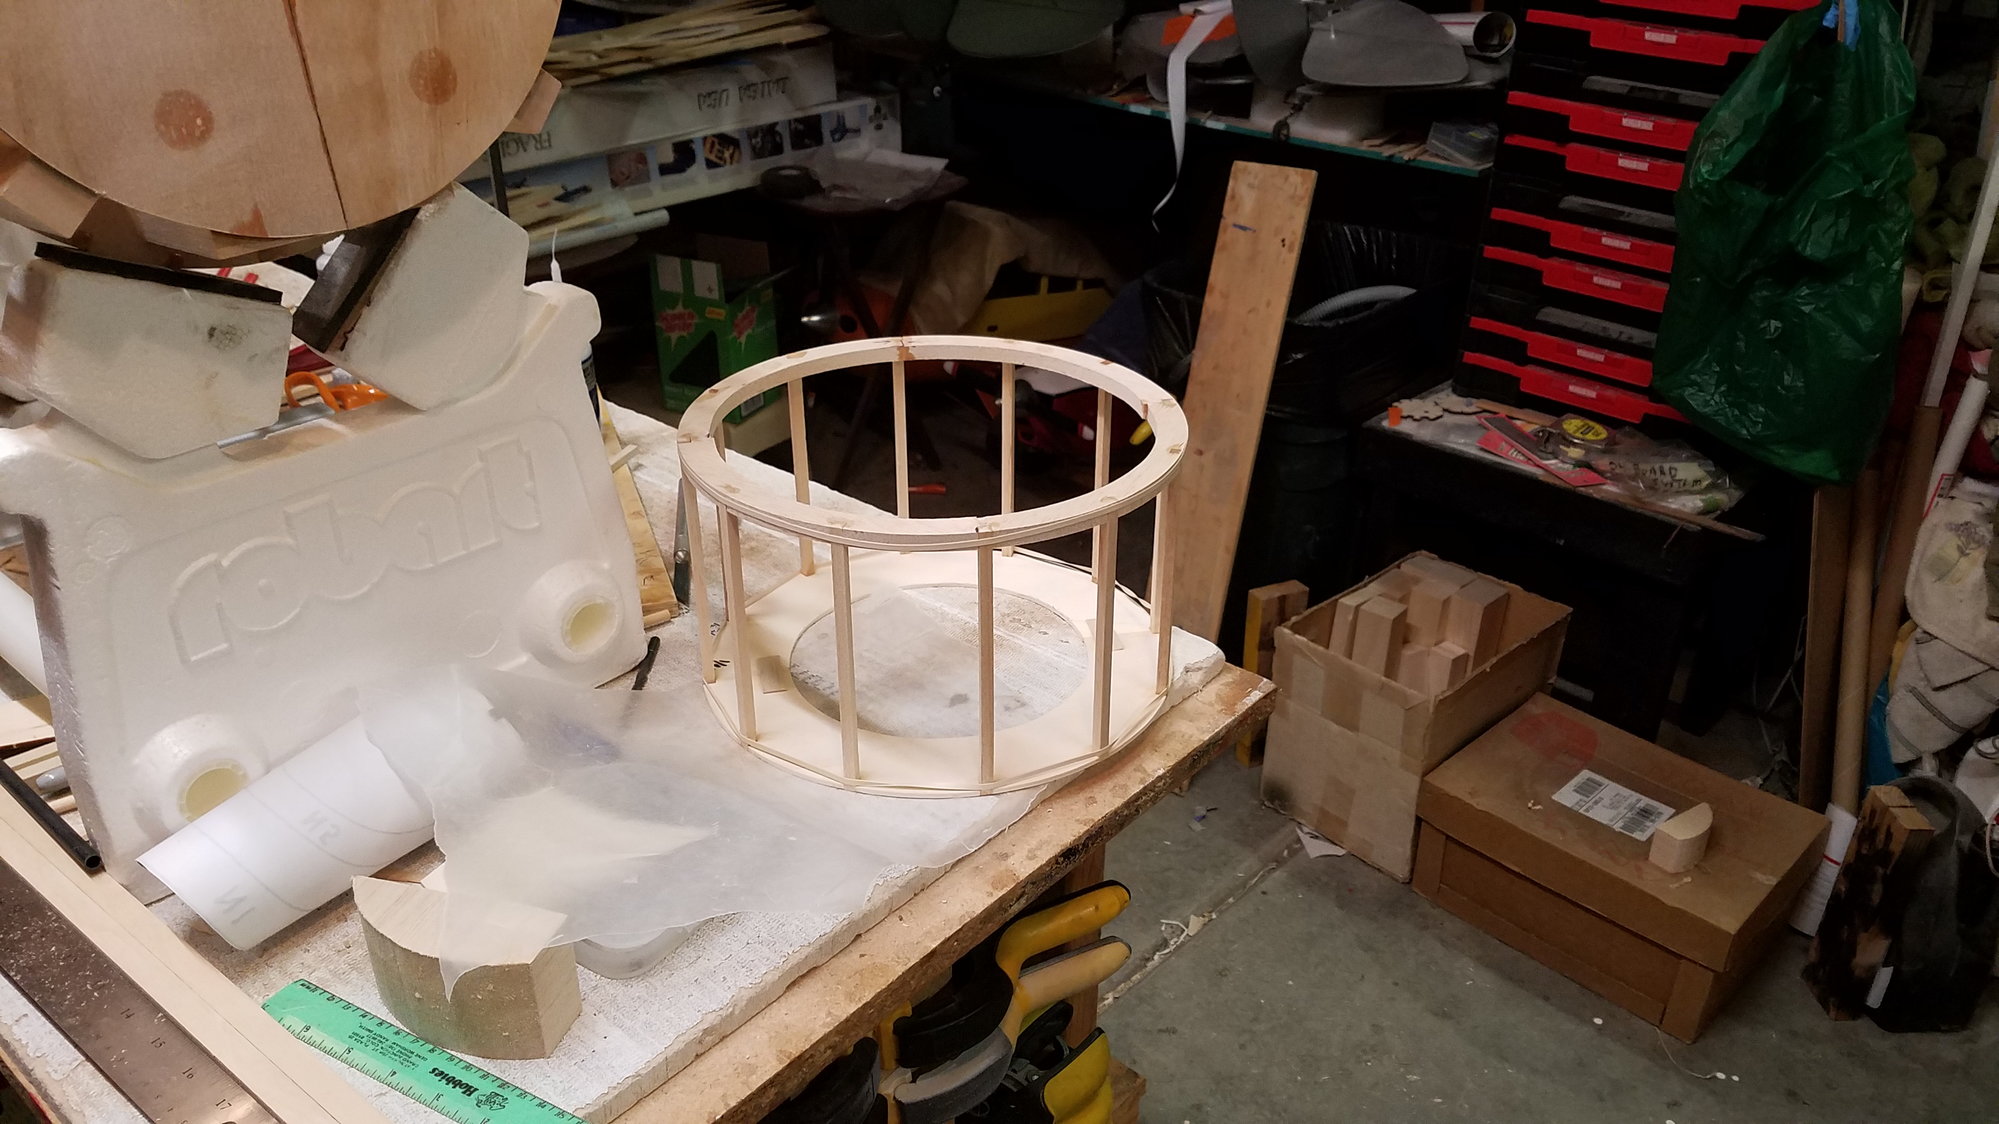
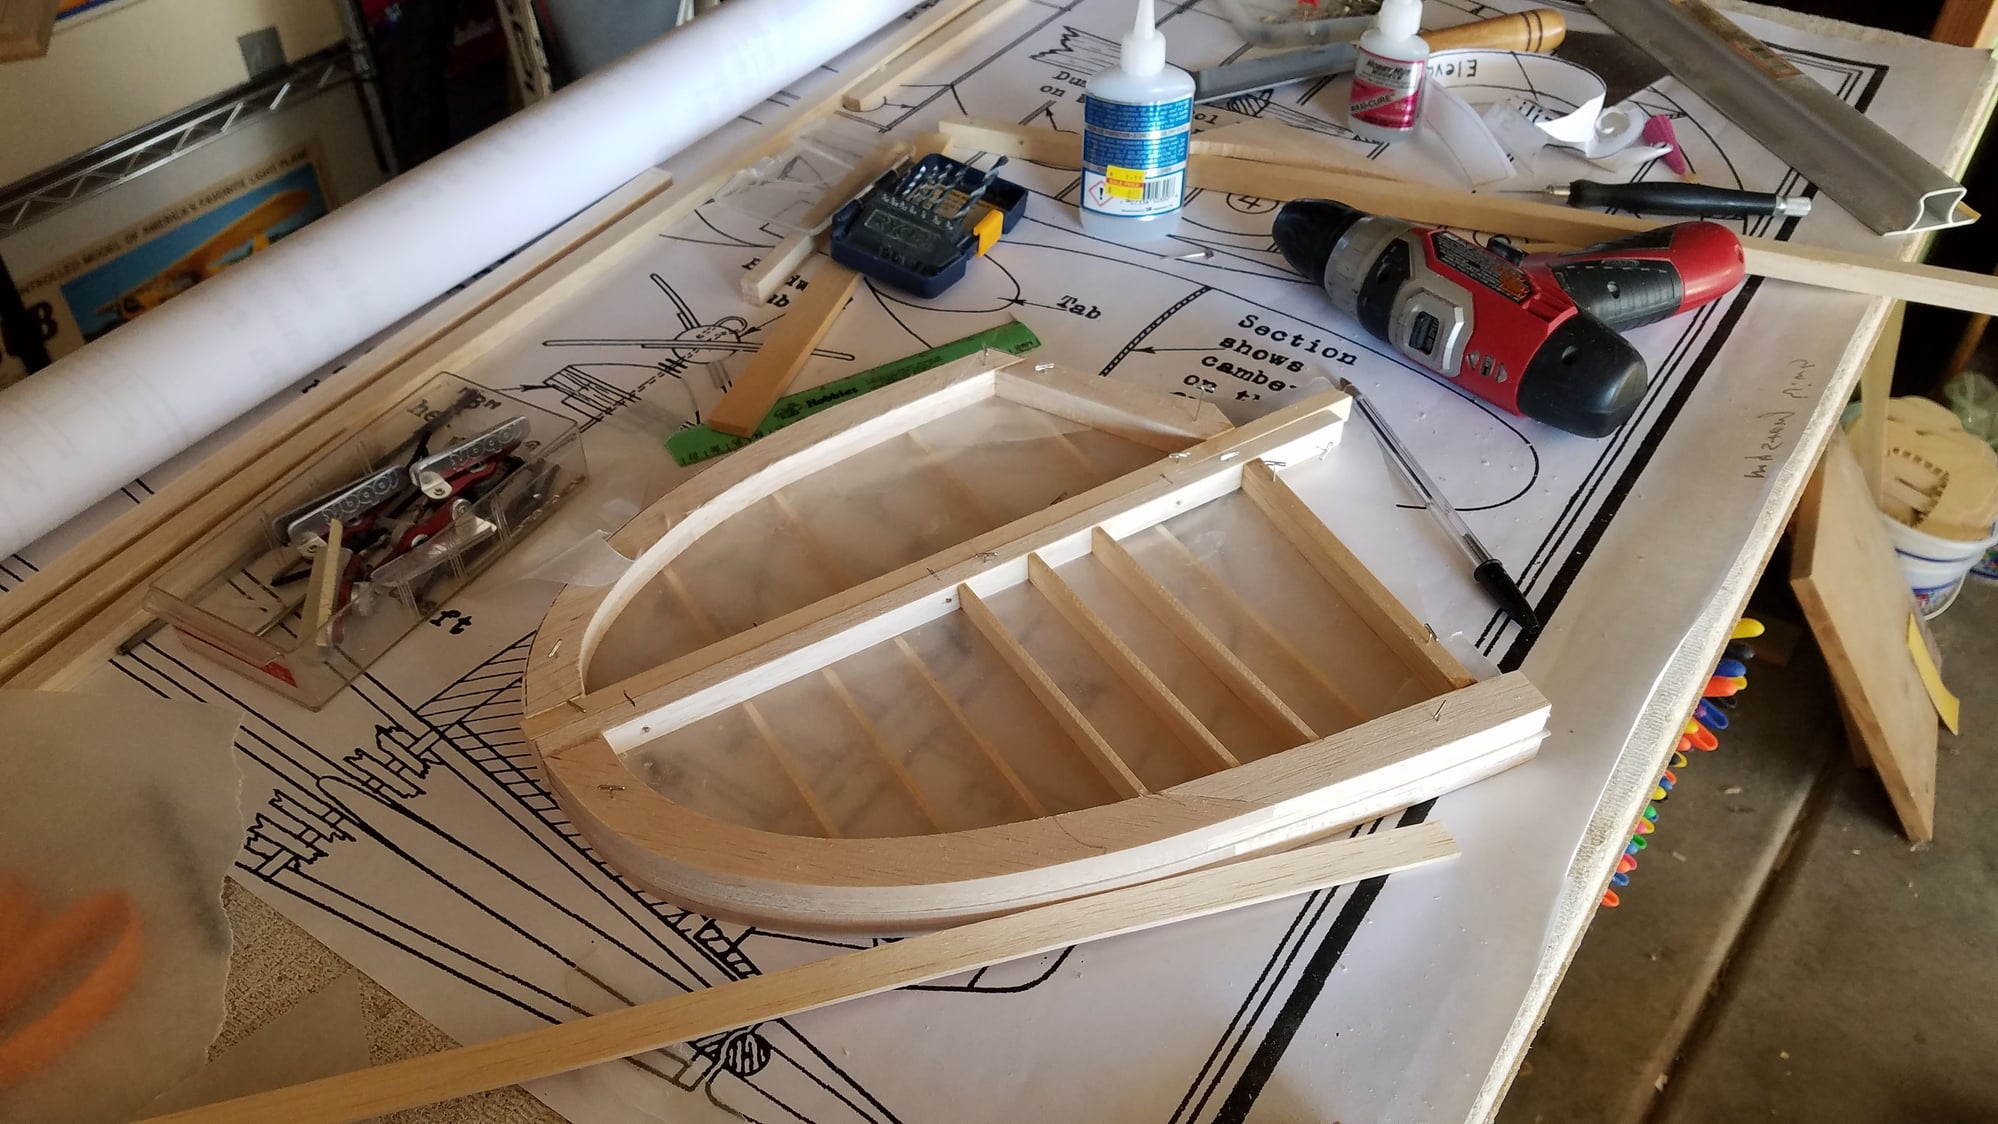
framework for cowl
light ply rear former, balsa front ready for sheating.
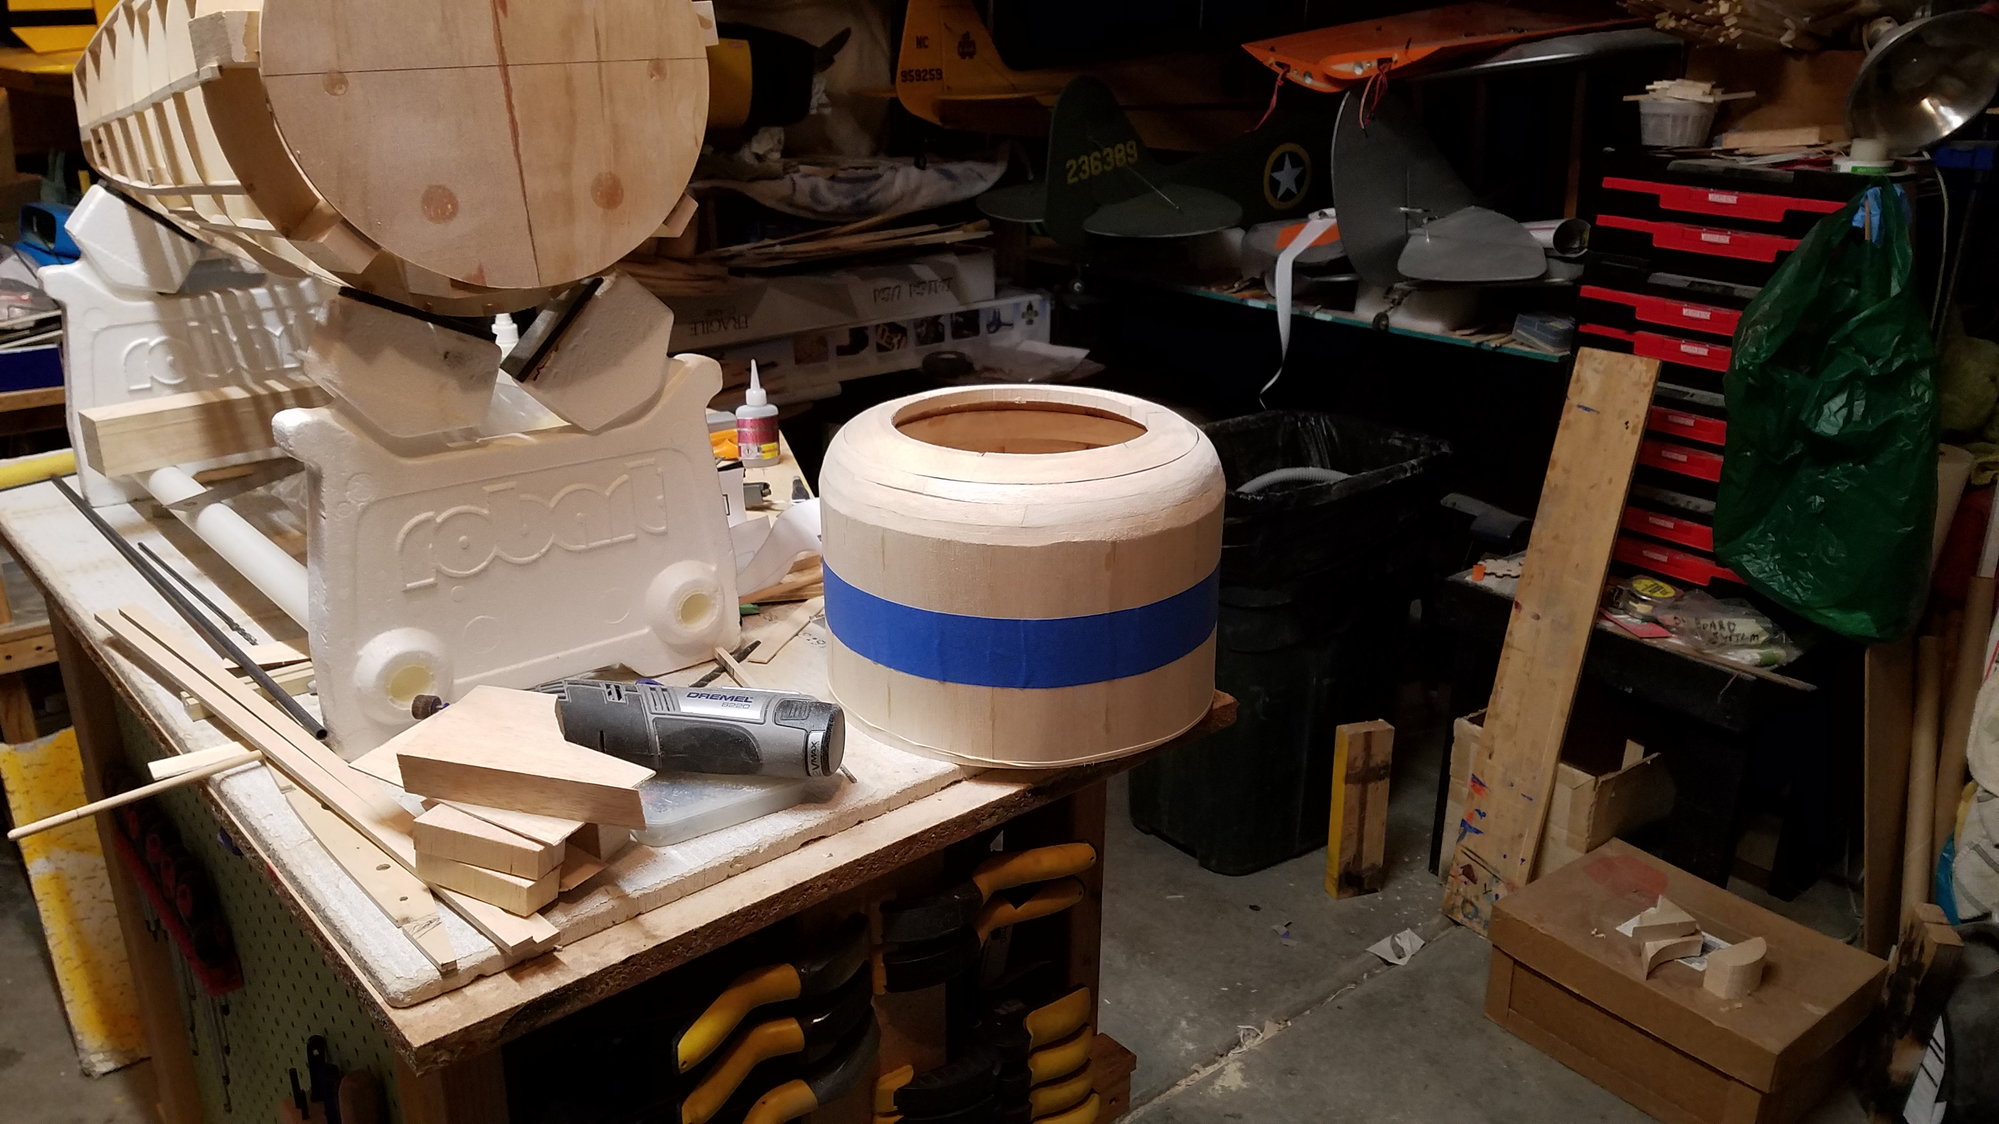
2 layers of 1/16 balsa sheeting over frame, 4 1/2" balsa rings on front rough shaped
getting smoother.
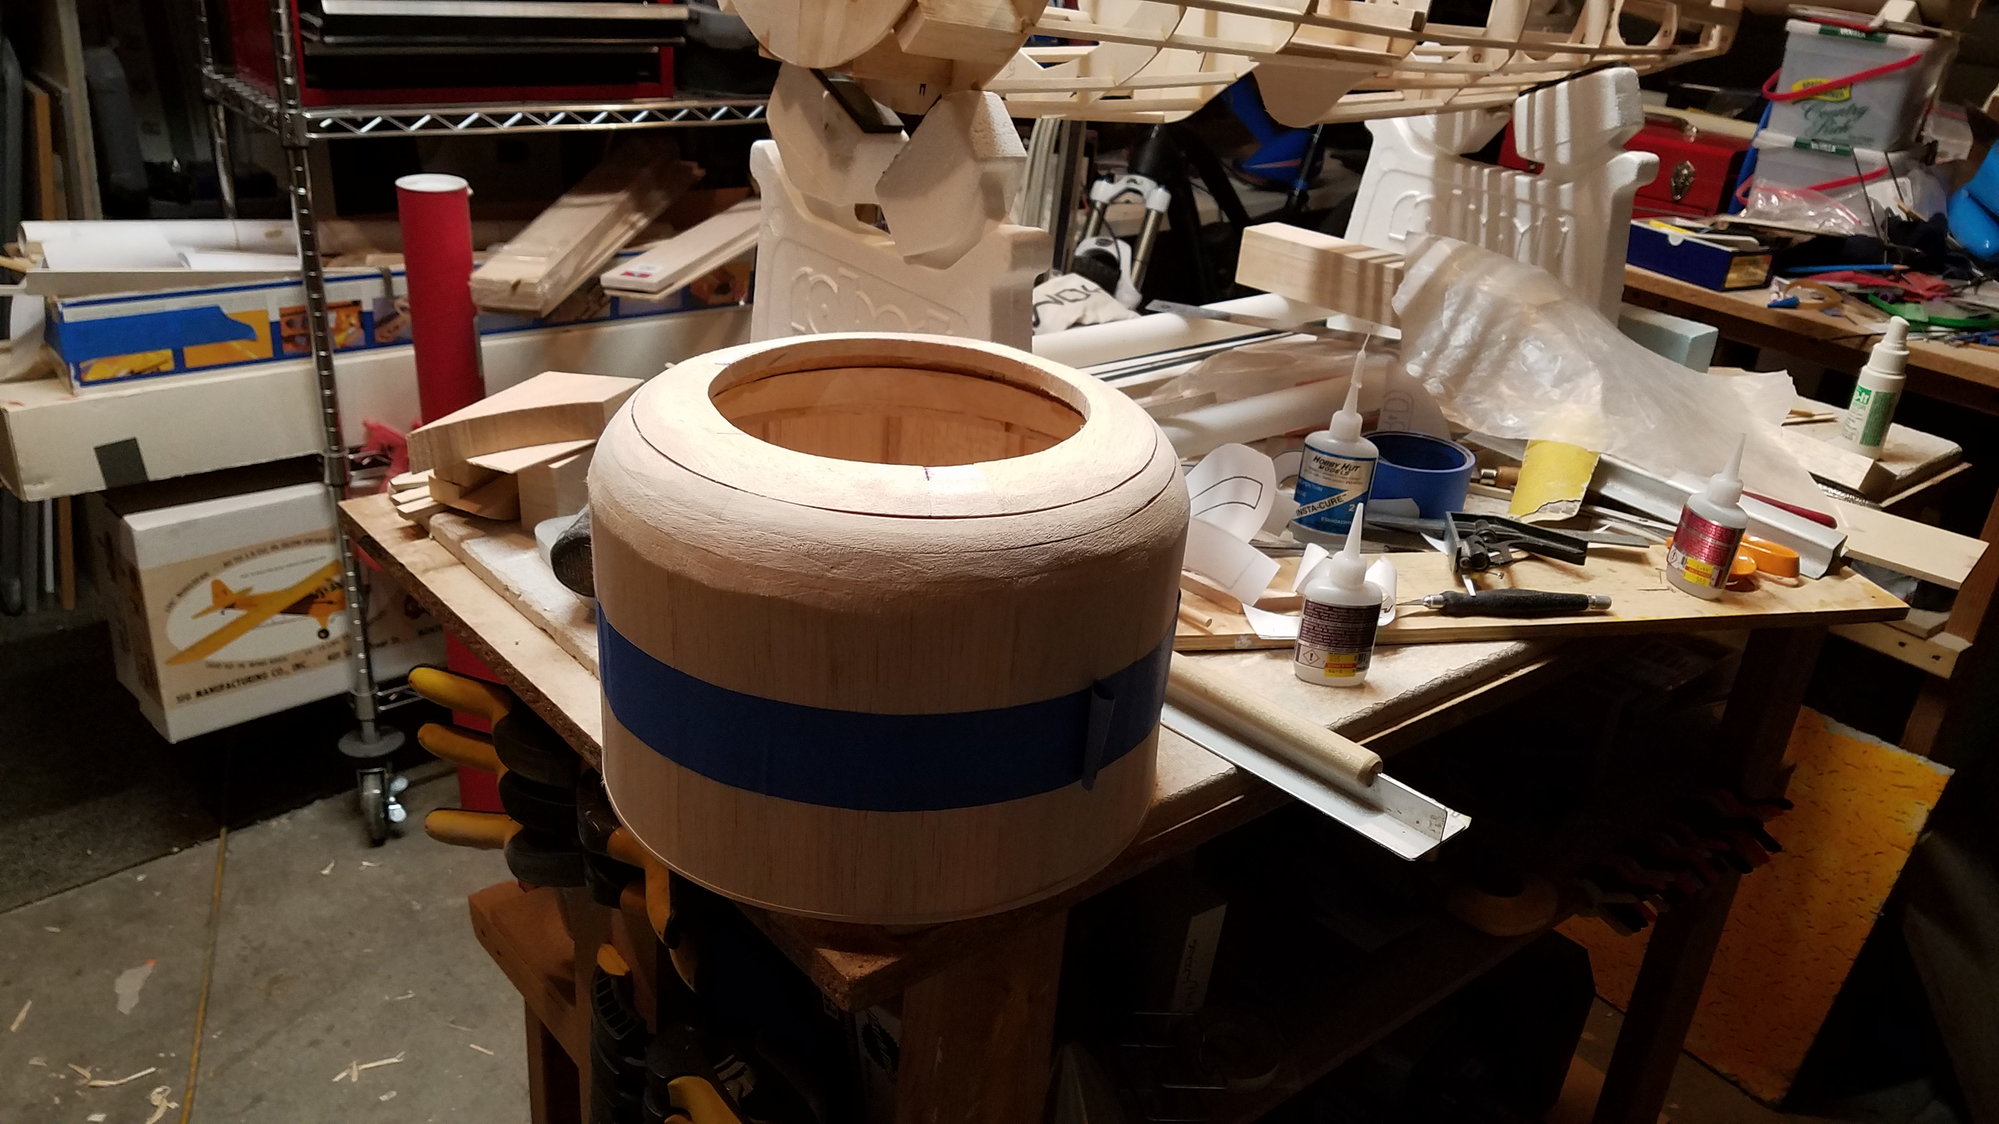
1/16" balsa sheeting formed over front of fuselage between firewall and former, another layer will be added later as well as threaded rod to anchor firewall to fuselage formers. fuel tank support and flying wire mounts can also be seen. Windex used to form wood.
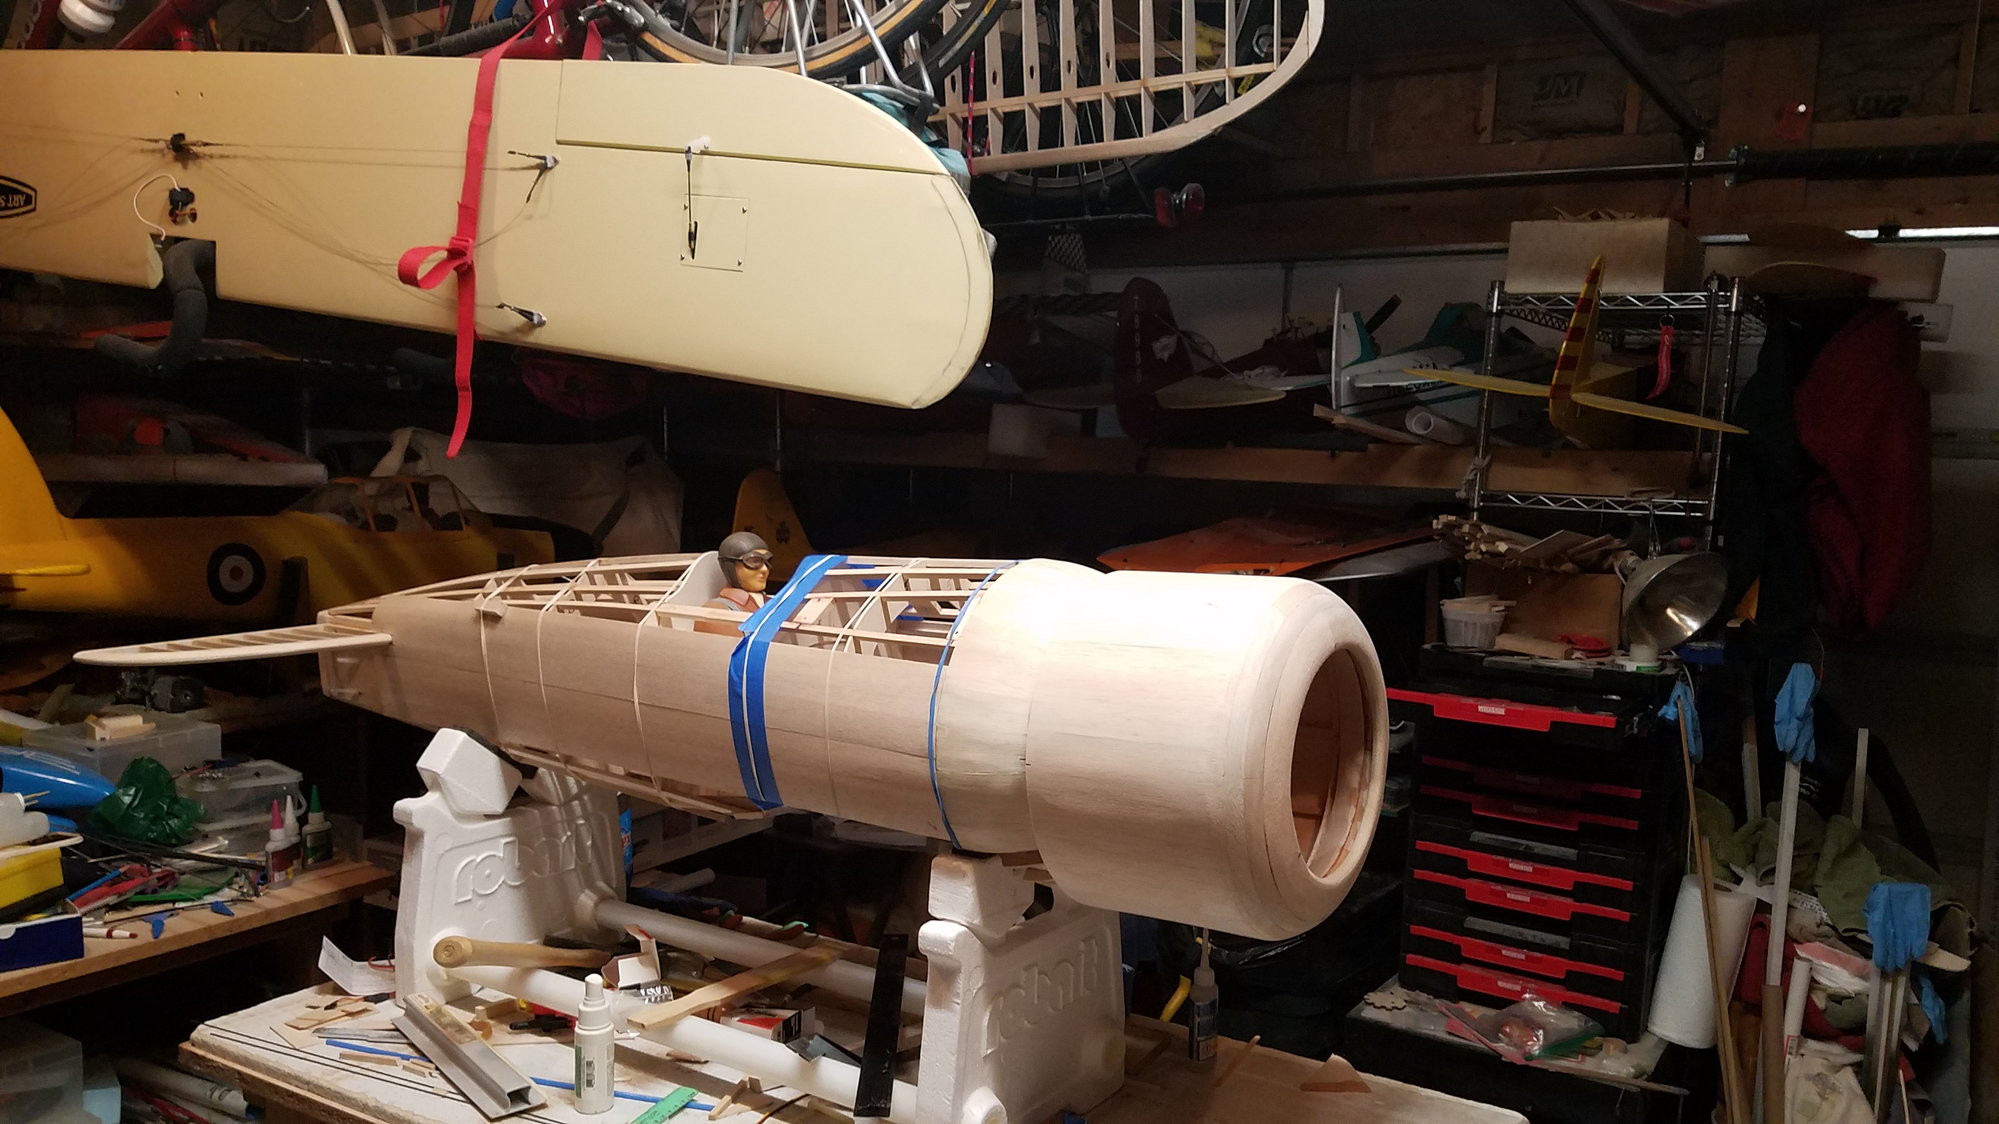
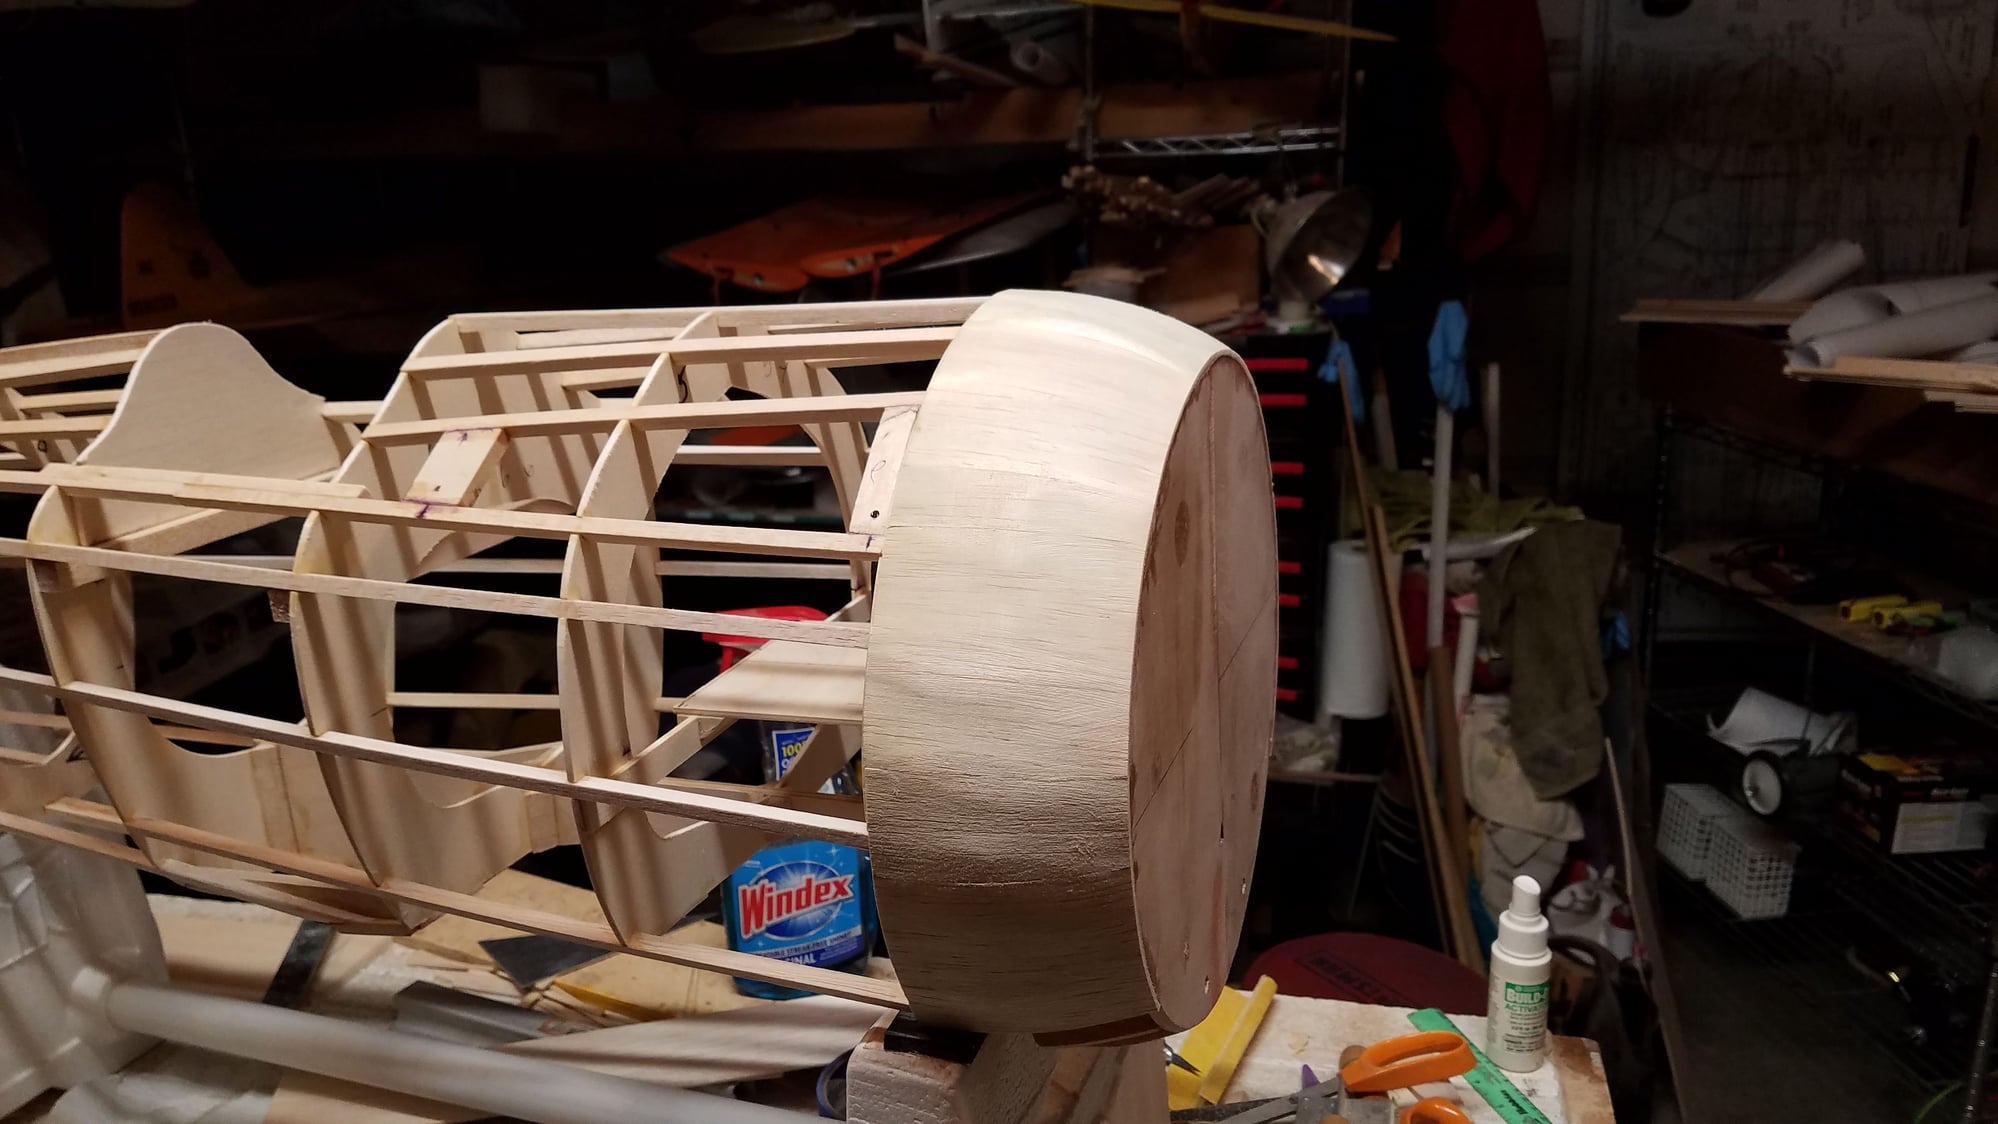
cowl mounted and sheeting started on sides, stabilizer mounted as well.
framework for cowl
light ply rear former, balsa front ready for sheating.
2 layers of 1/16 balsa sheeting over frame, 4 1/2" balsa rings on front rough shaped
getting smoother.
1/16" balsa sheeting formed over front of fuselage between firewall and former, another layer will be added later as well as threaded rod to anchor firewall to fuselage formers. fuel tank support and flying wire mounts can also be seen. Windex used to form wood.
cowl mounted and sheeting started on sides, stabilizer mounted as well.
01-13-2022, 09:35 PM
#10
Thread Starter
and next.
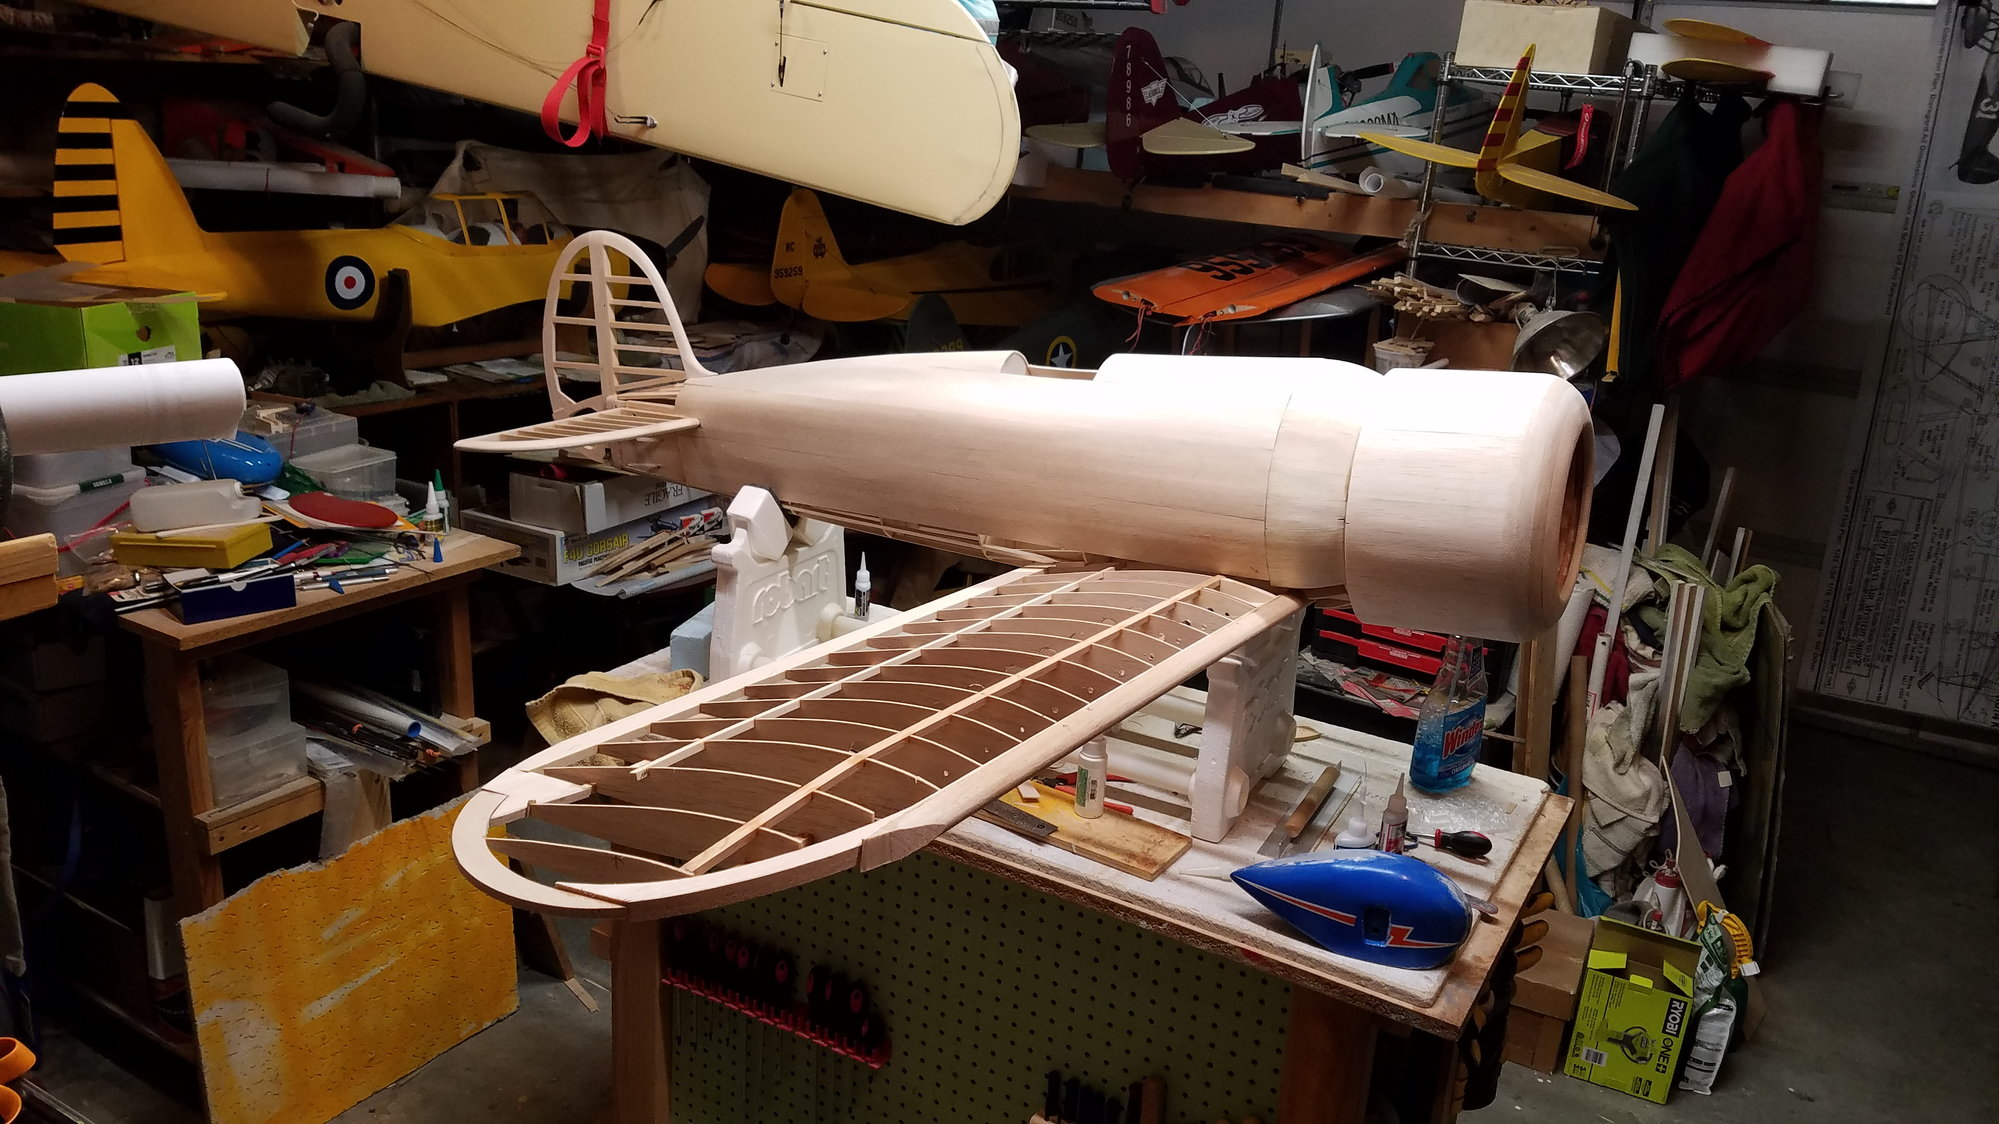
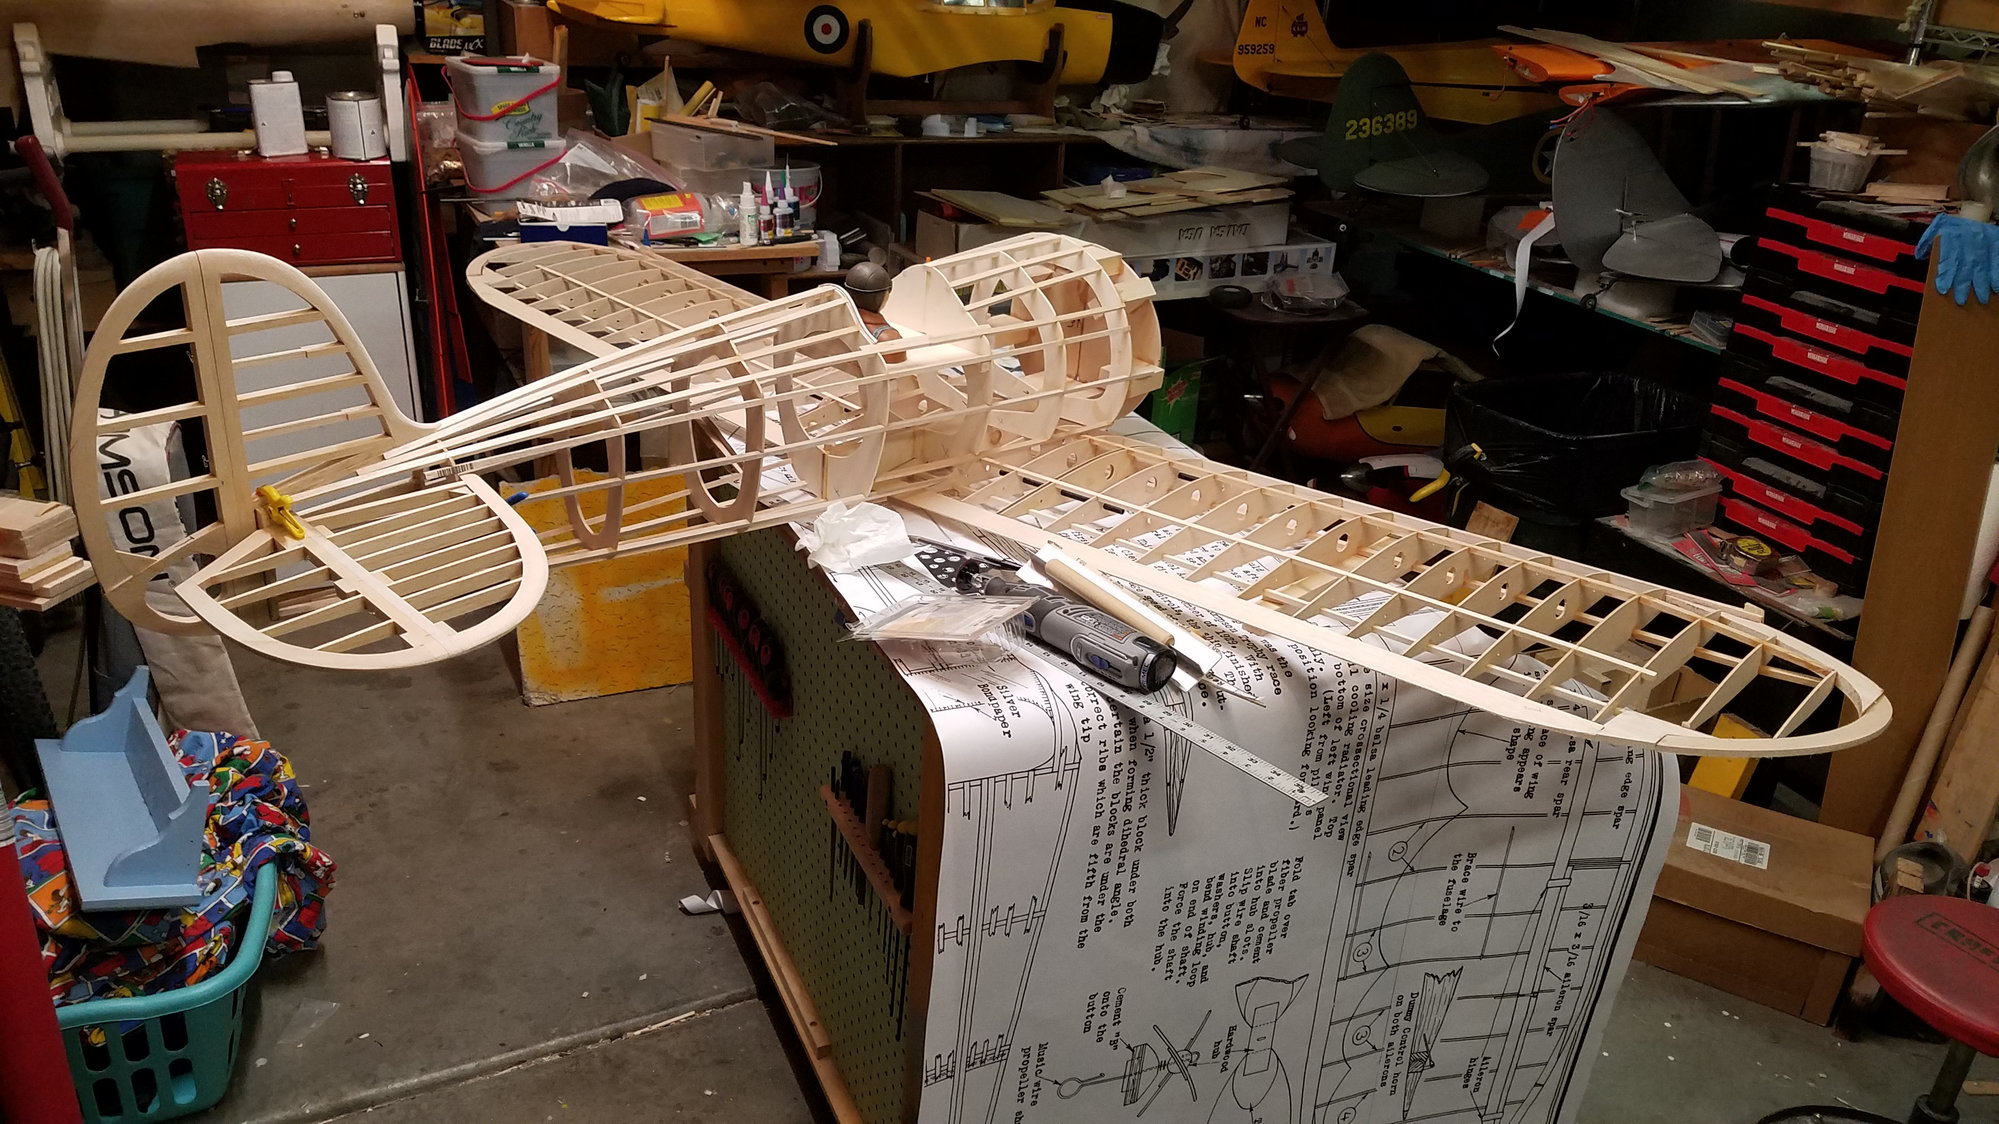
1 piece wing,
3 piece wing,
wing joiner dowel holes and mounting screw plates can be seen before sheeting.
wing plugged together with top center sheeting in place bottom sheeting will come later. Wing will be sheeted on top with 3/32 balsa to create look of plywood sheeted original and cap strips on bottom to save a "little" weight
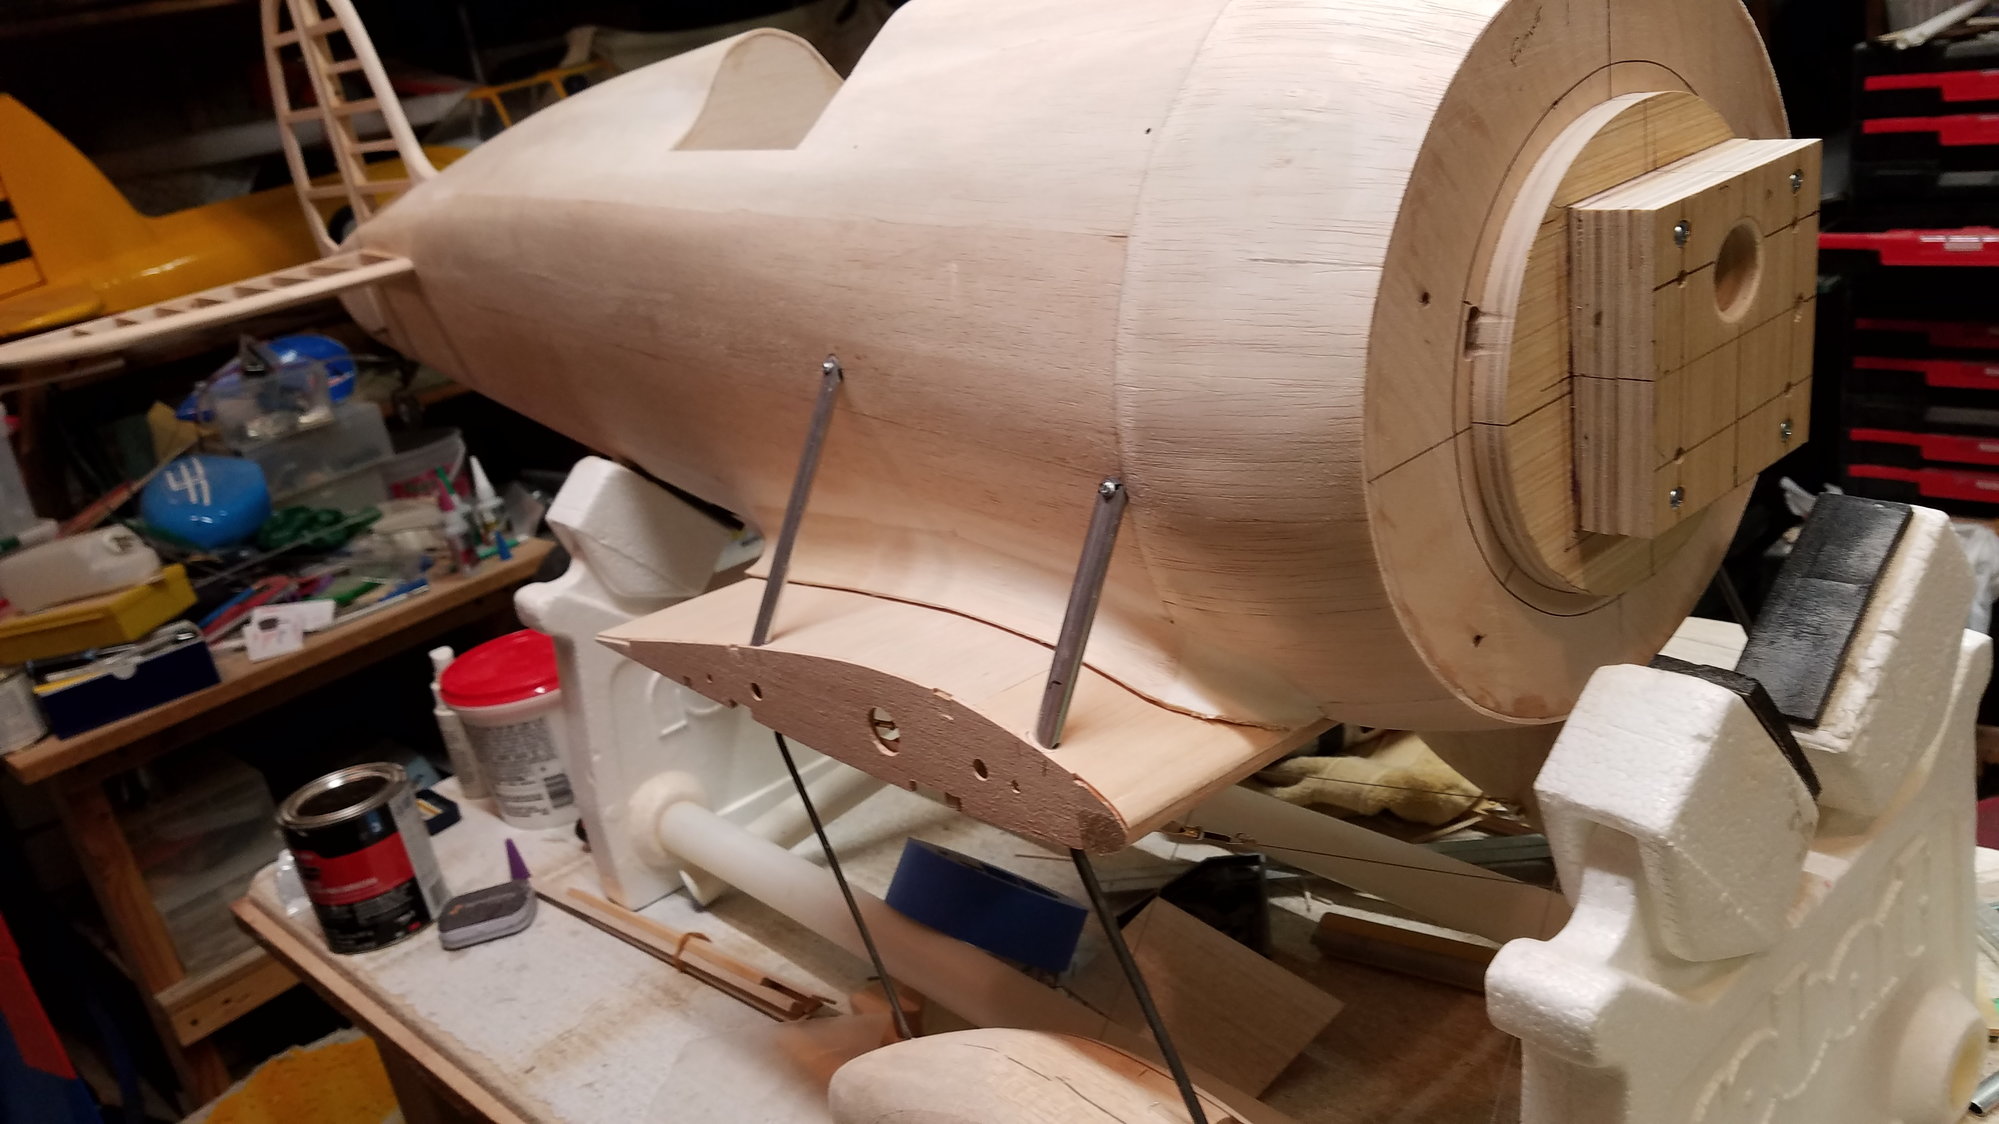
plywood spacers to reinforce firewall and move engine forward to desired location, right and down thrust accounted for and sanded into front plywood block, hole for fuel lines as well.
1 piece wing,
3 piece wing,
wing joiner dowel holes and mounting screw plates can be seen before sheeting.
wing plugged together with top center sheeting in place bottom sheeting will come later. Wing will be sheeted on top with 3/32 balsa to create look of plywood sheeted original and cap strips on bottom to save a "little" weight
plywood spacers to reinforce firewall and move engine forward to desired location, right and down thrust accounted for and sanded into front plywood block, hole for fuel lines as well.
01-14-2022, 09:58 AM
#11
Member
Airplanes are still being made there. The building has been added onto several times, most notably during WW2. Kinda cool to share the same space where Beech, Cessna and Stearman all worked together at one point in aviation history.
Your Mystery Ship is going to turn out great!
Your Mystery Ship is going to turn out great!
01-14-2022, 09:29 PM
#12
Thread Starter
Thanks, I hope it flies as good as the original.
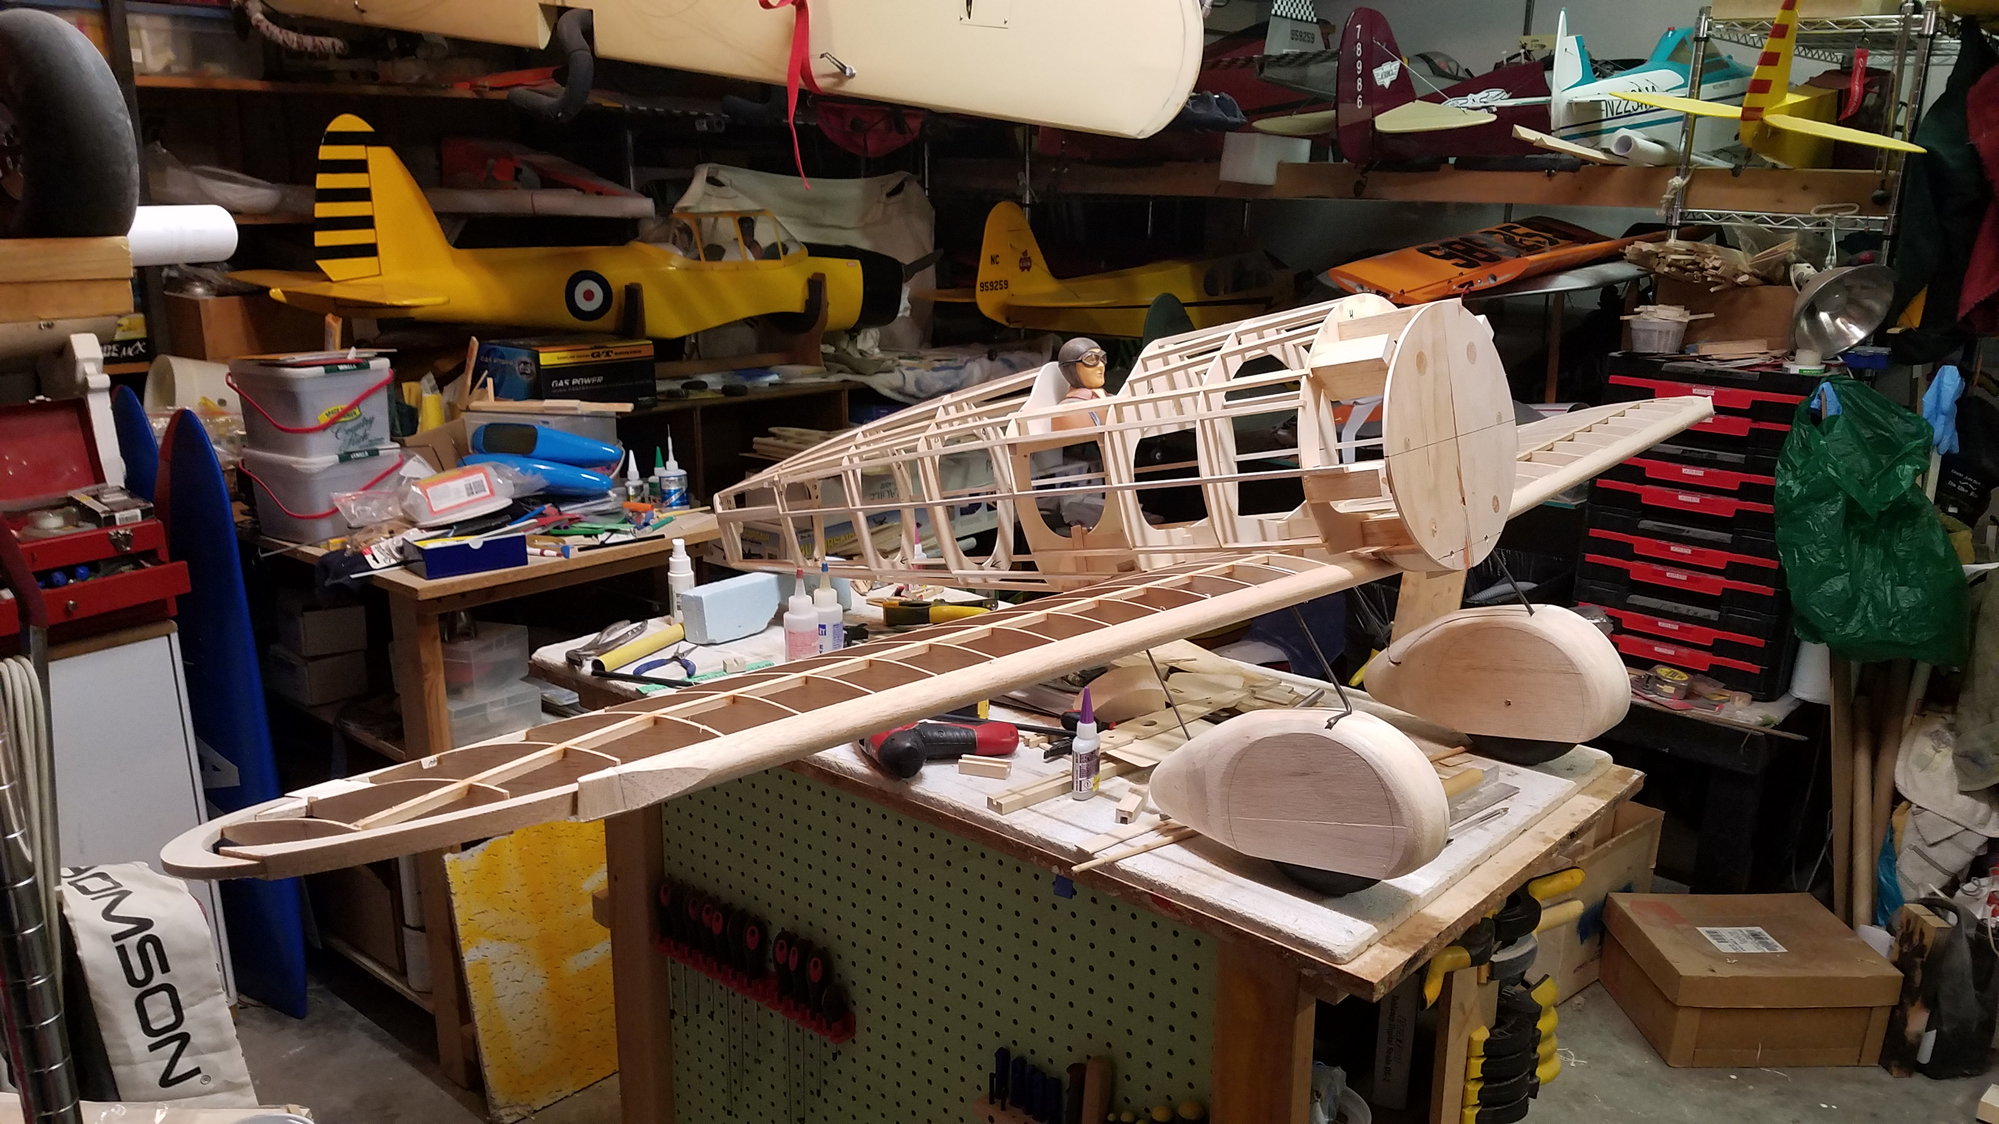
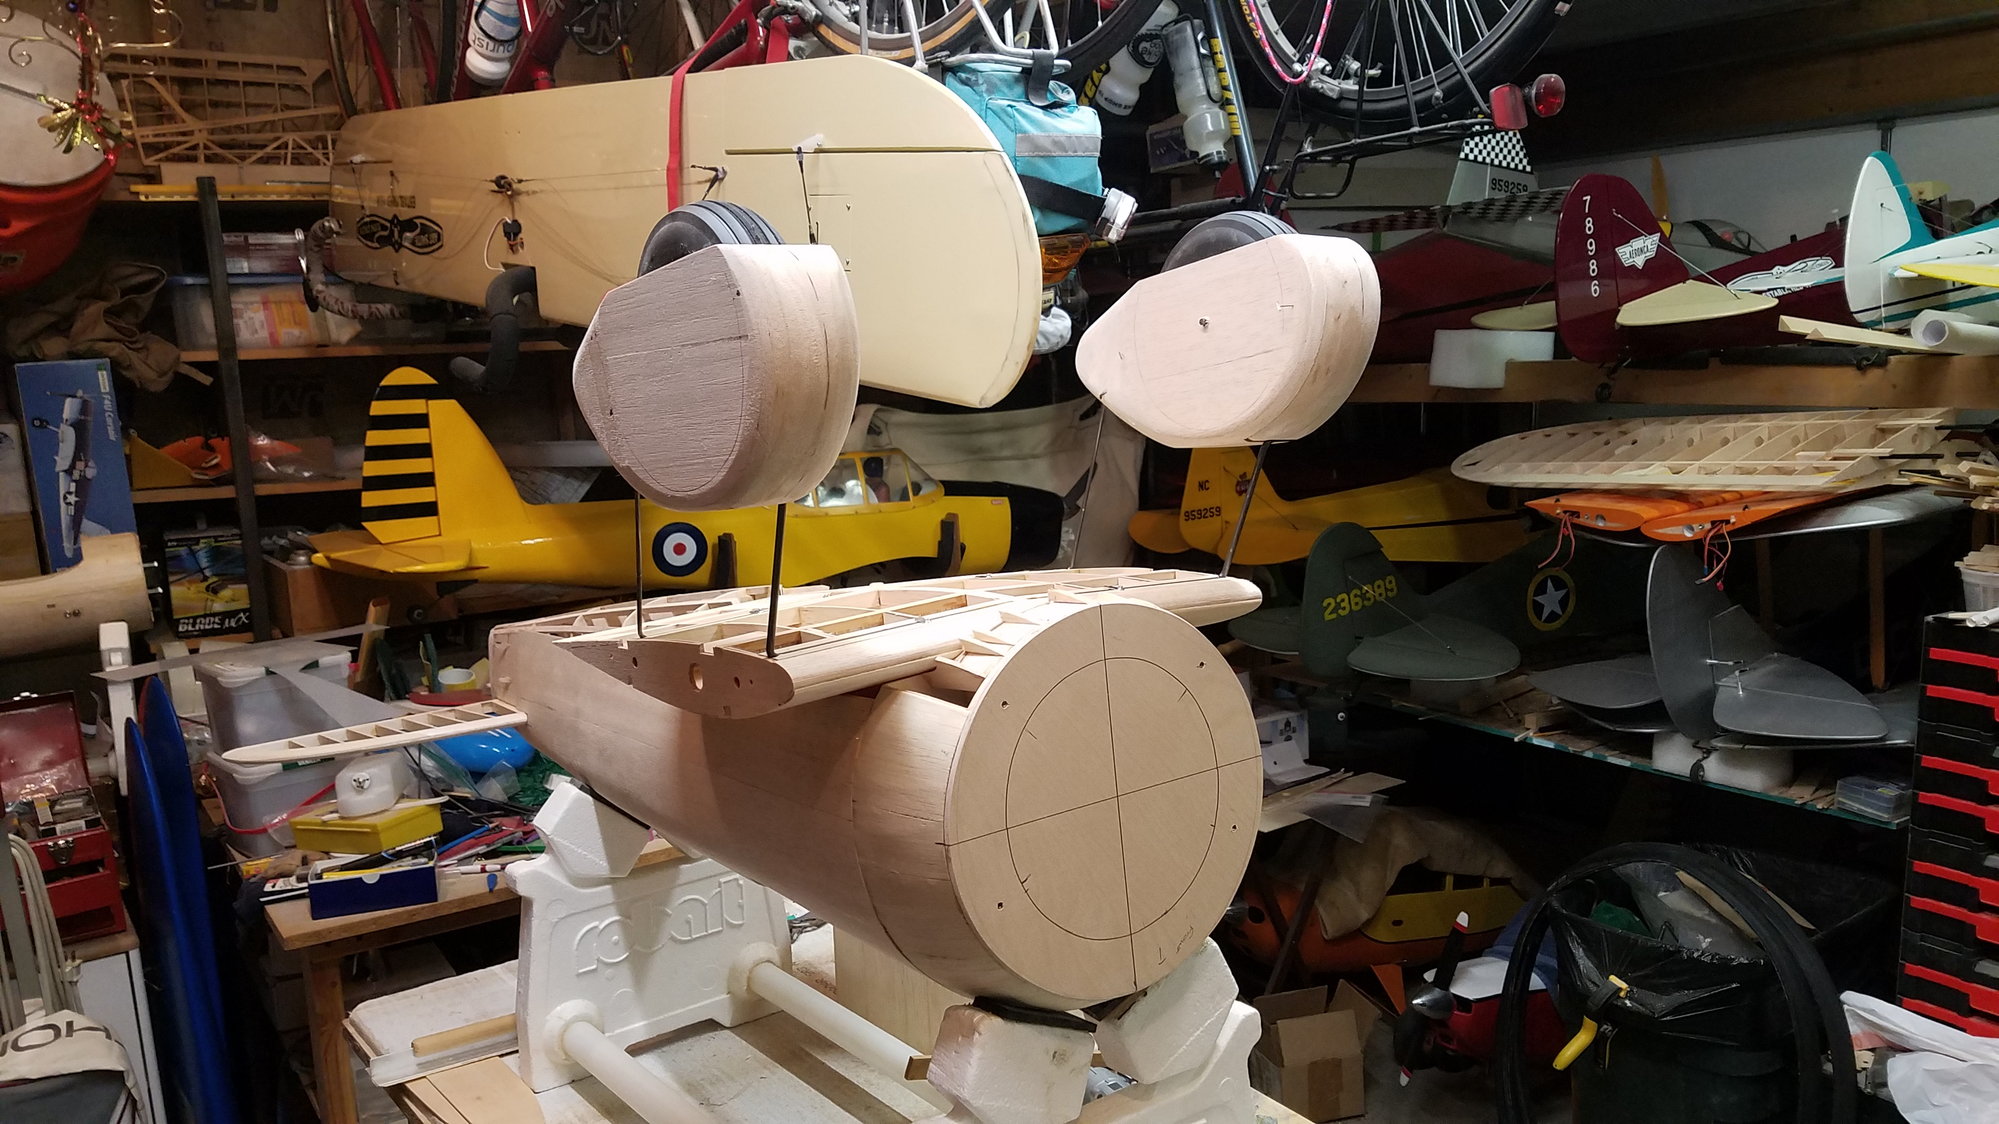
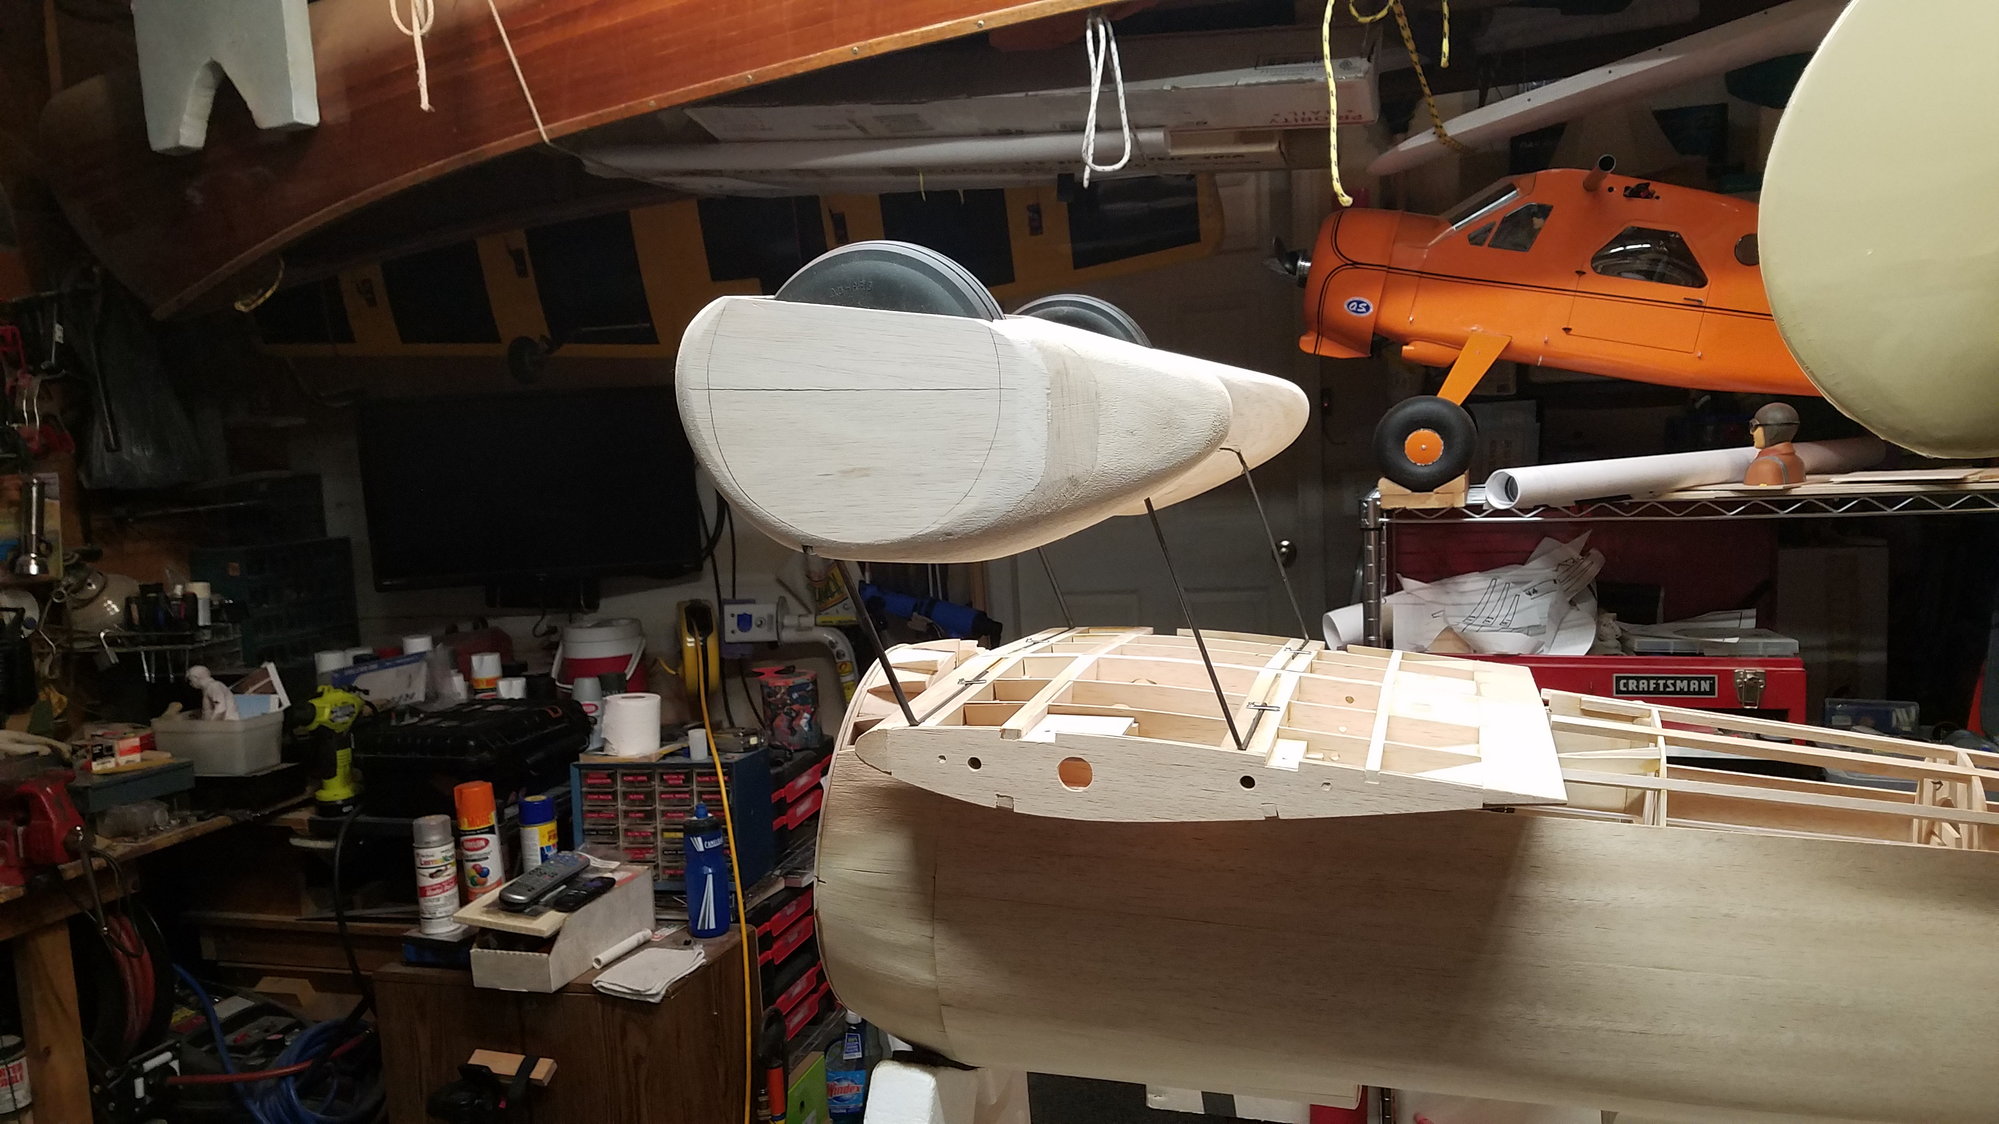
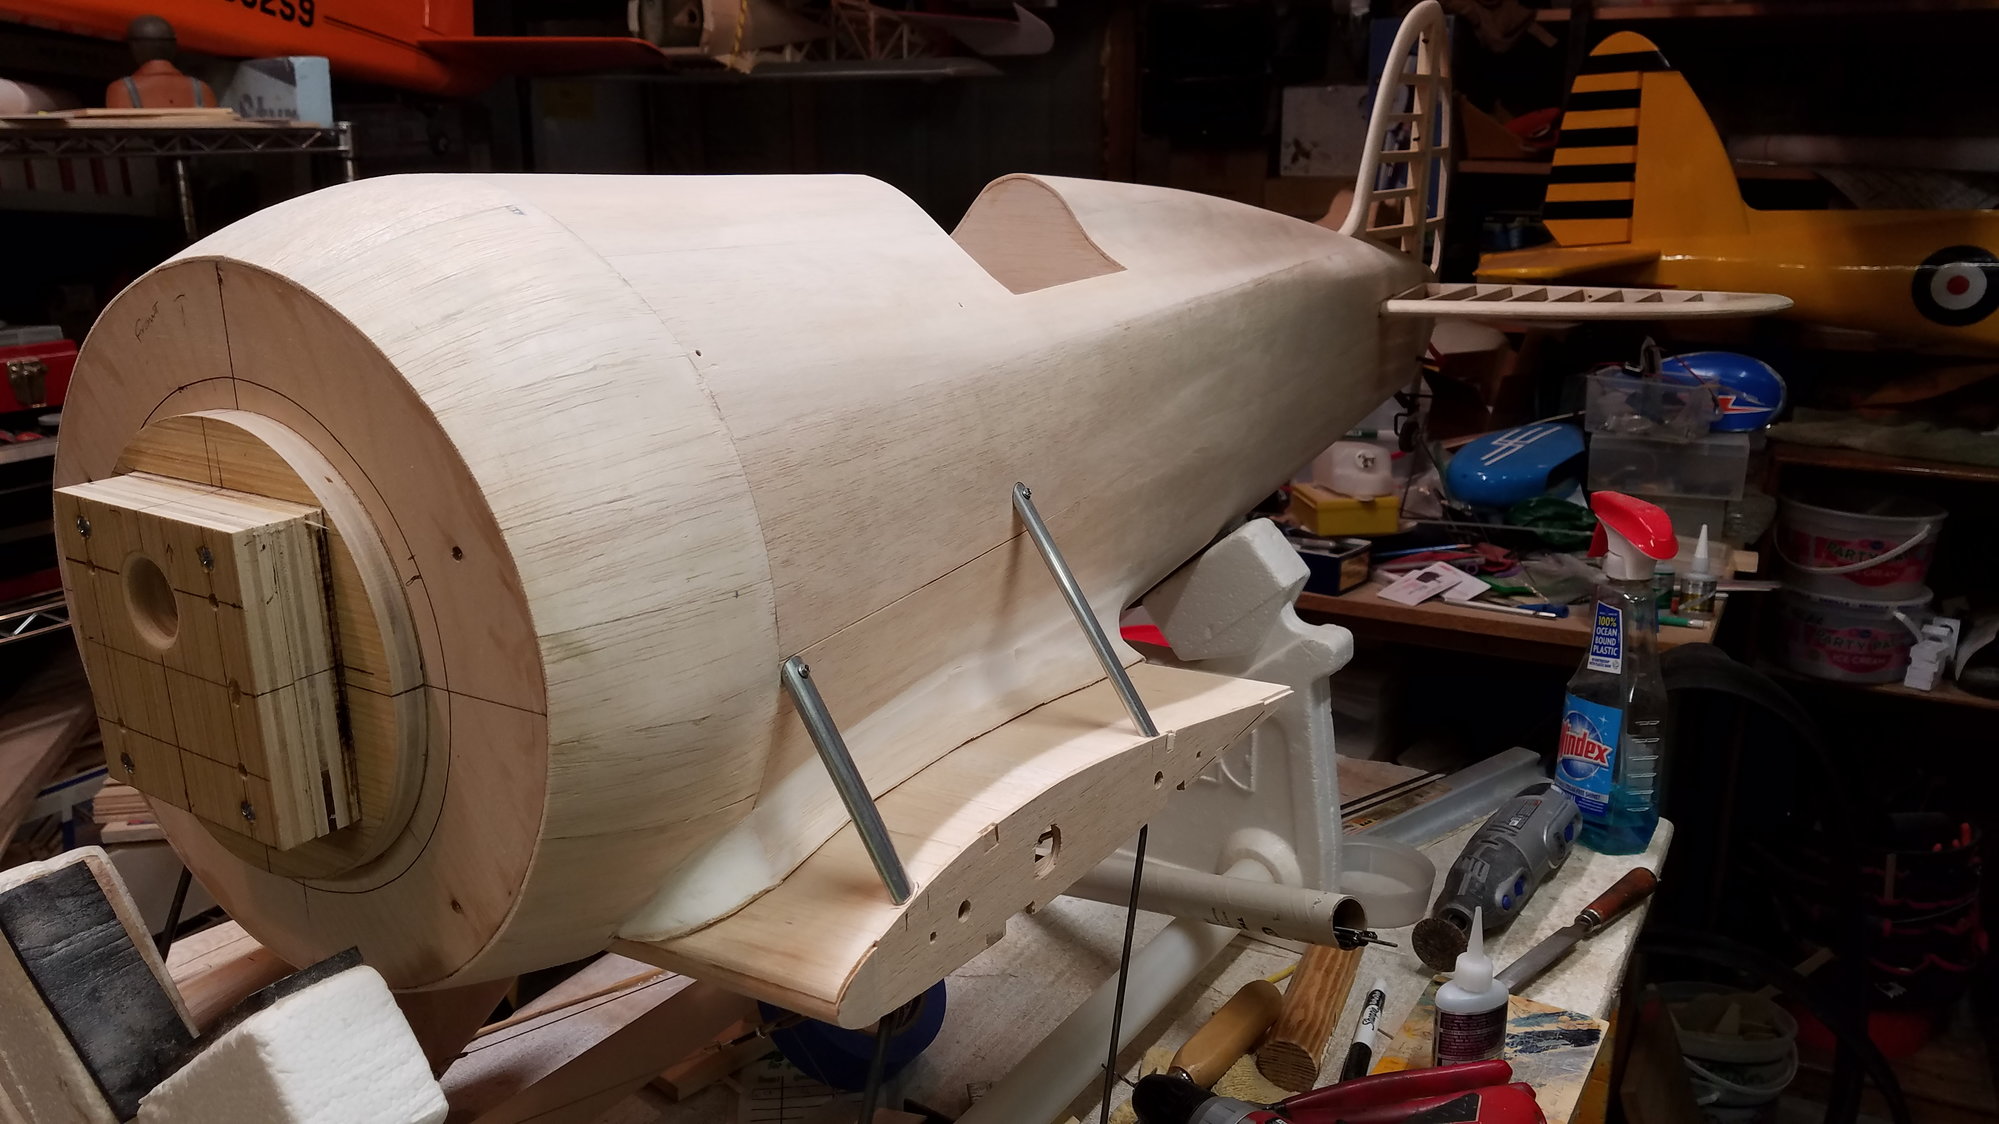
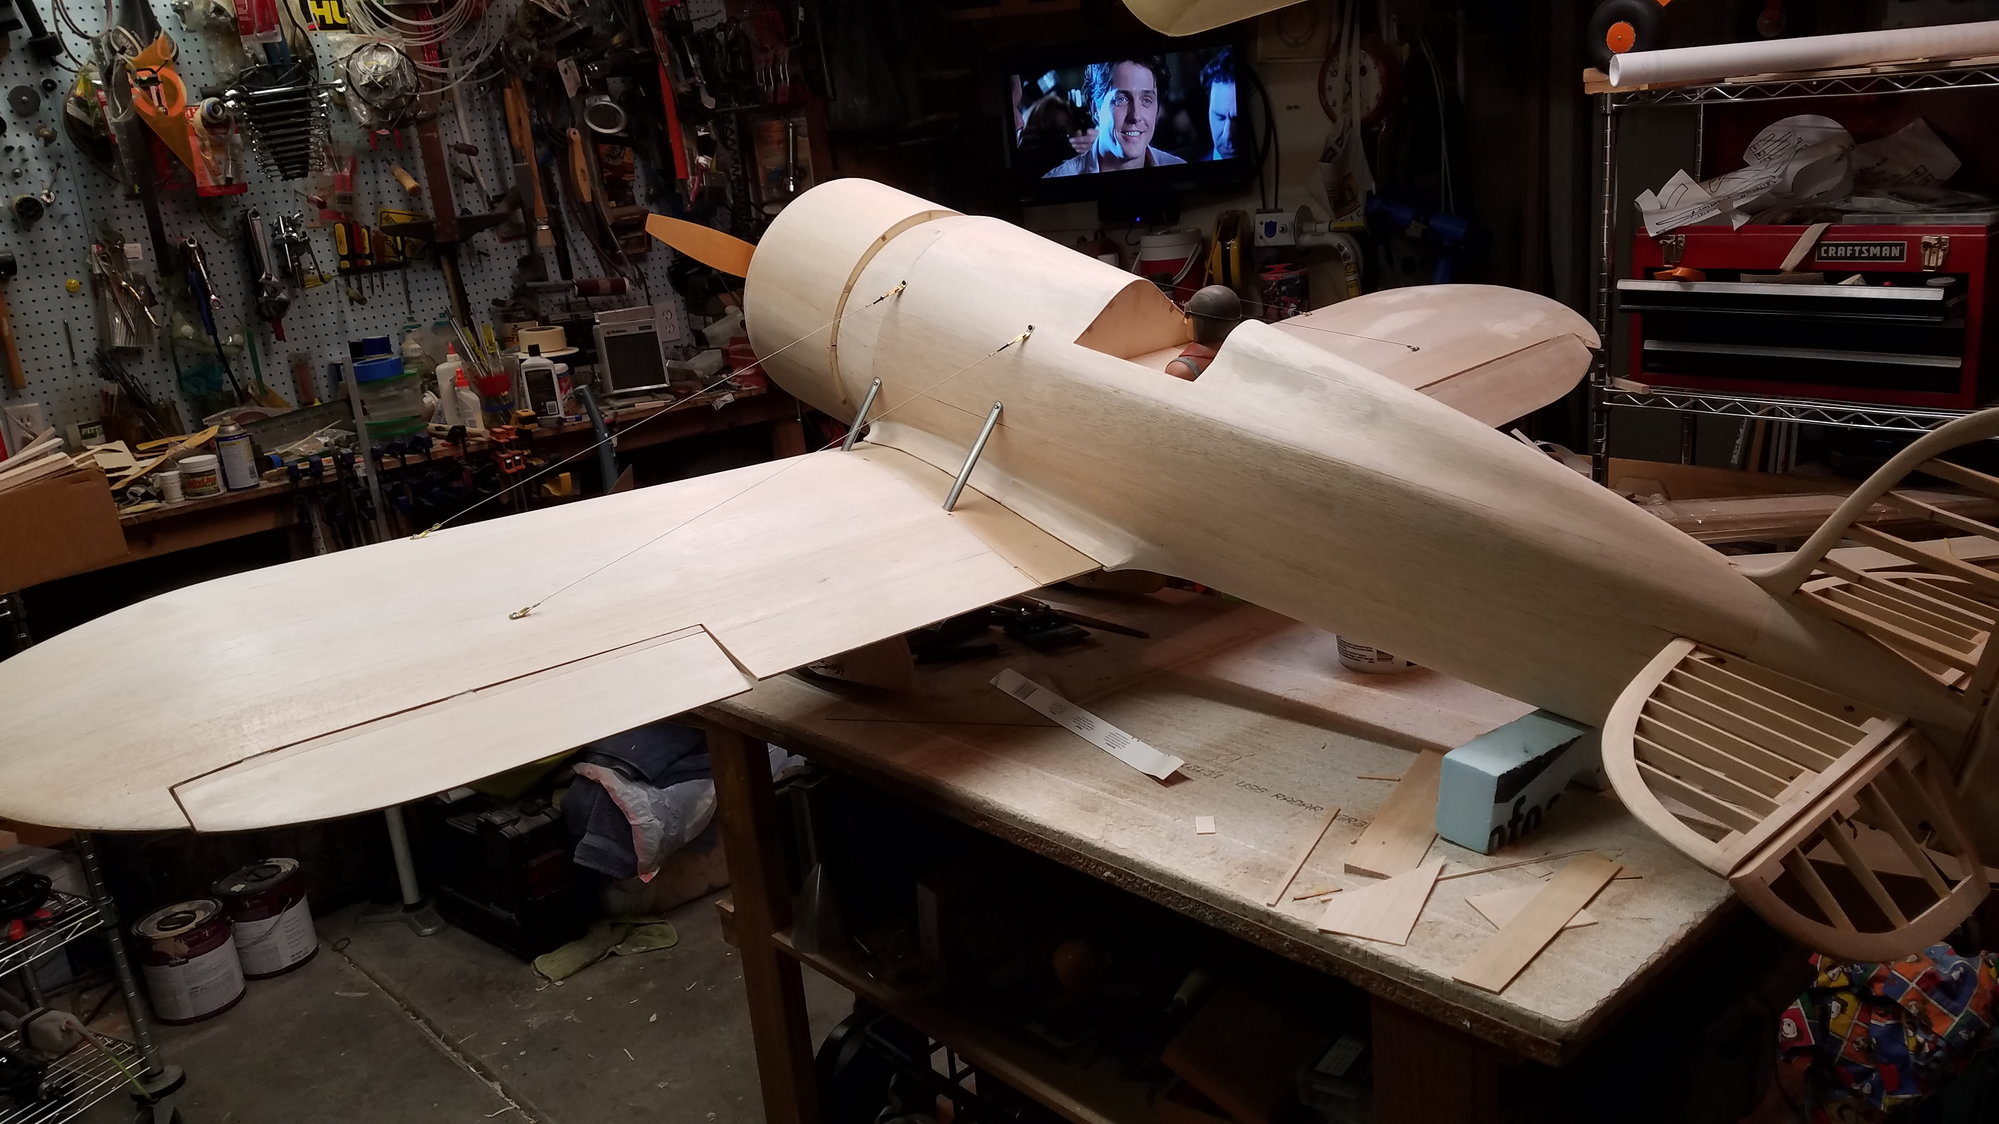
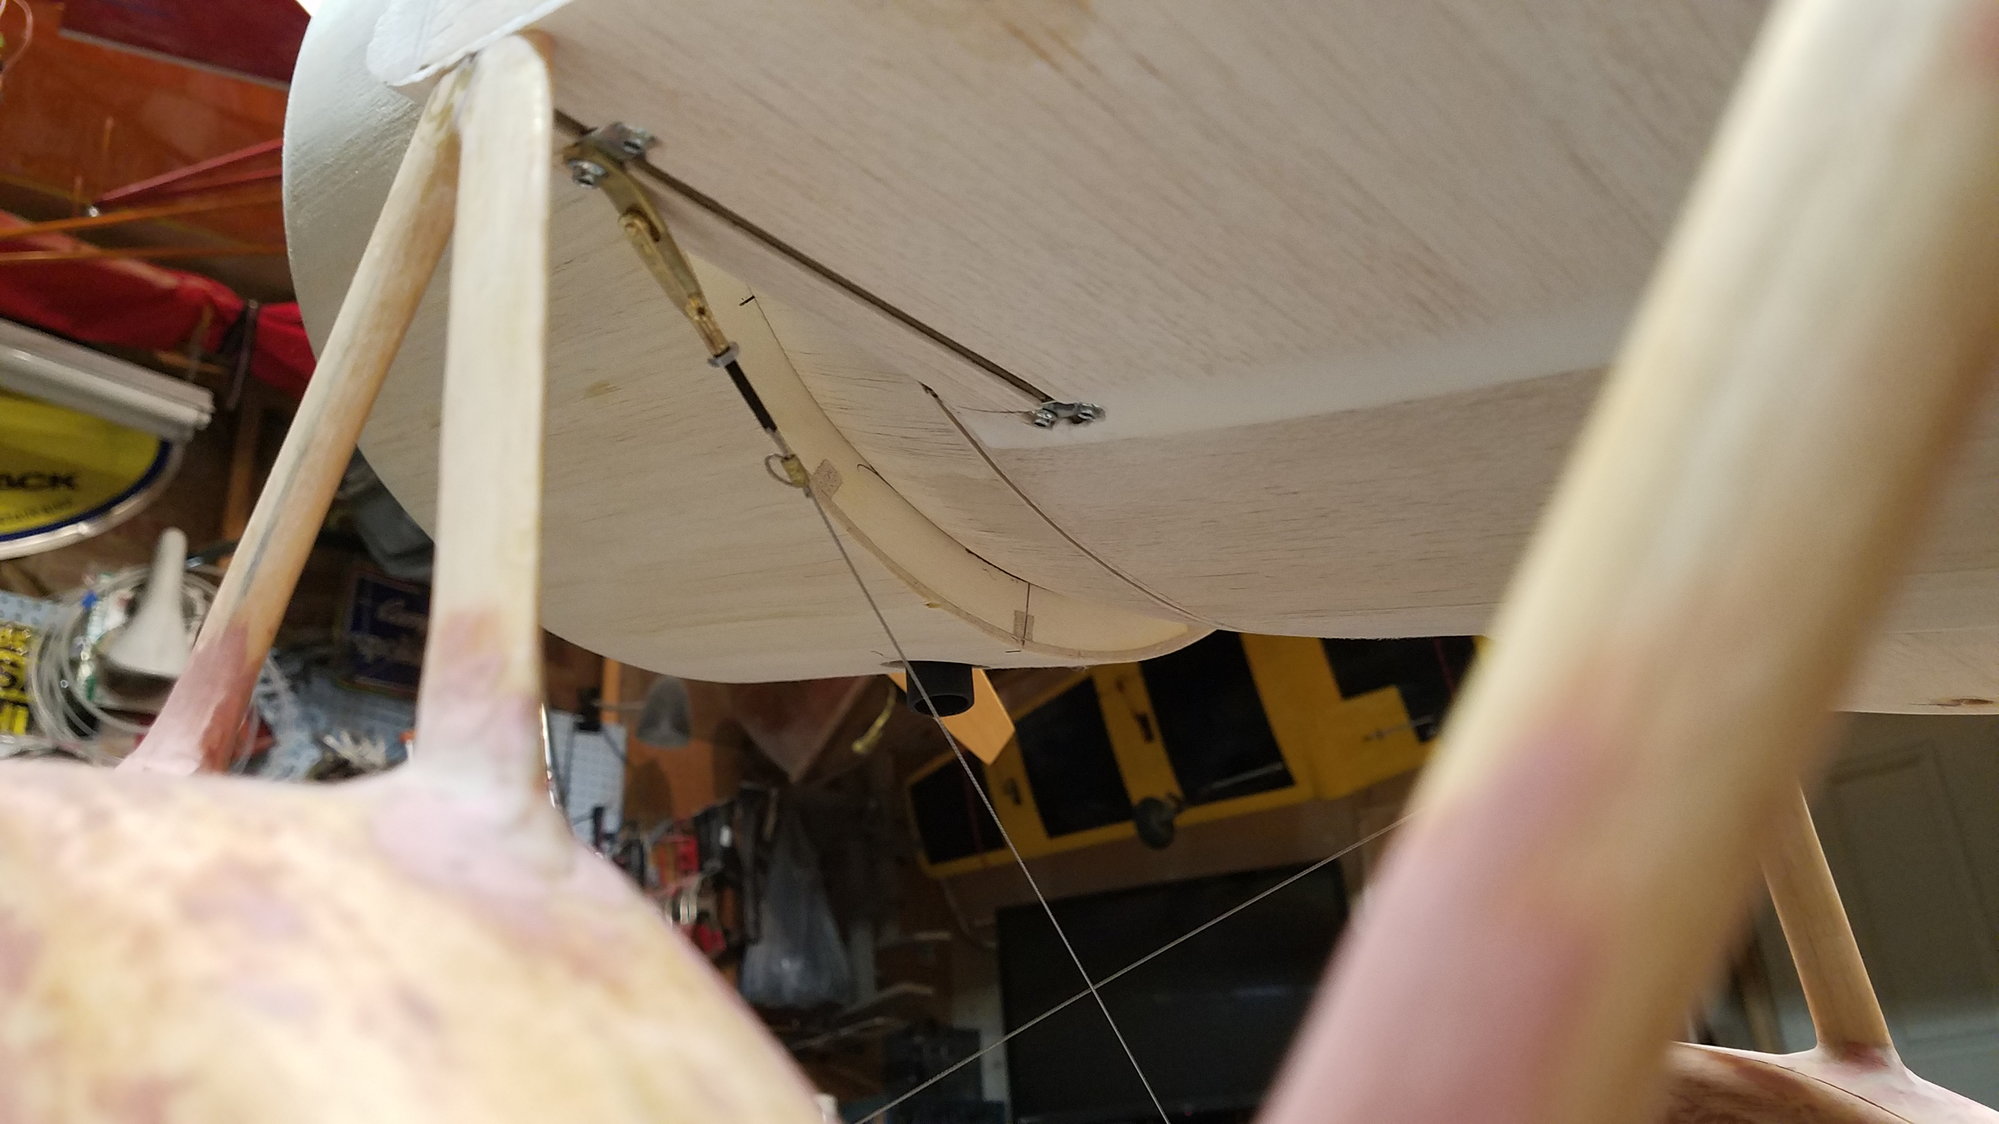
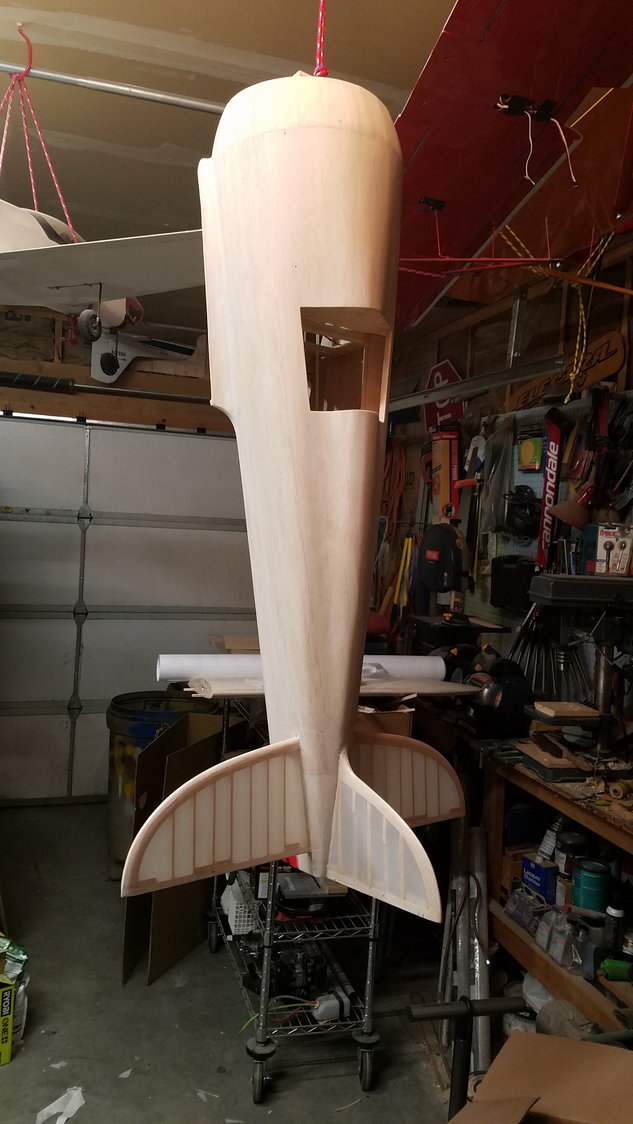
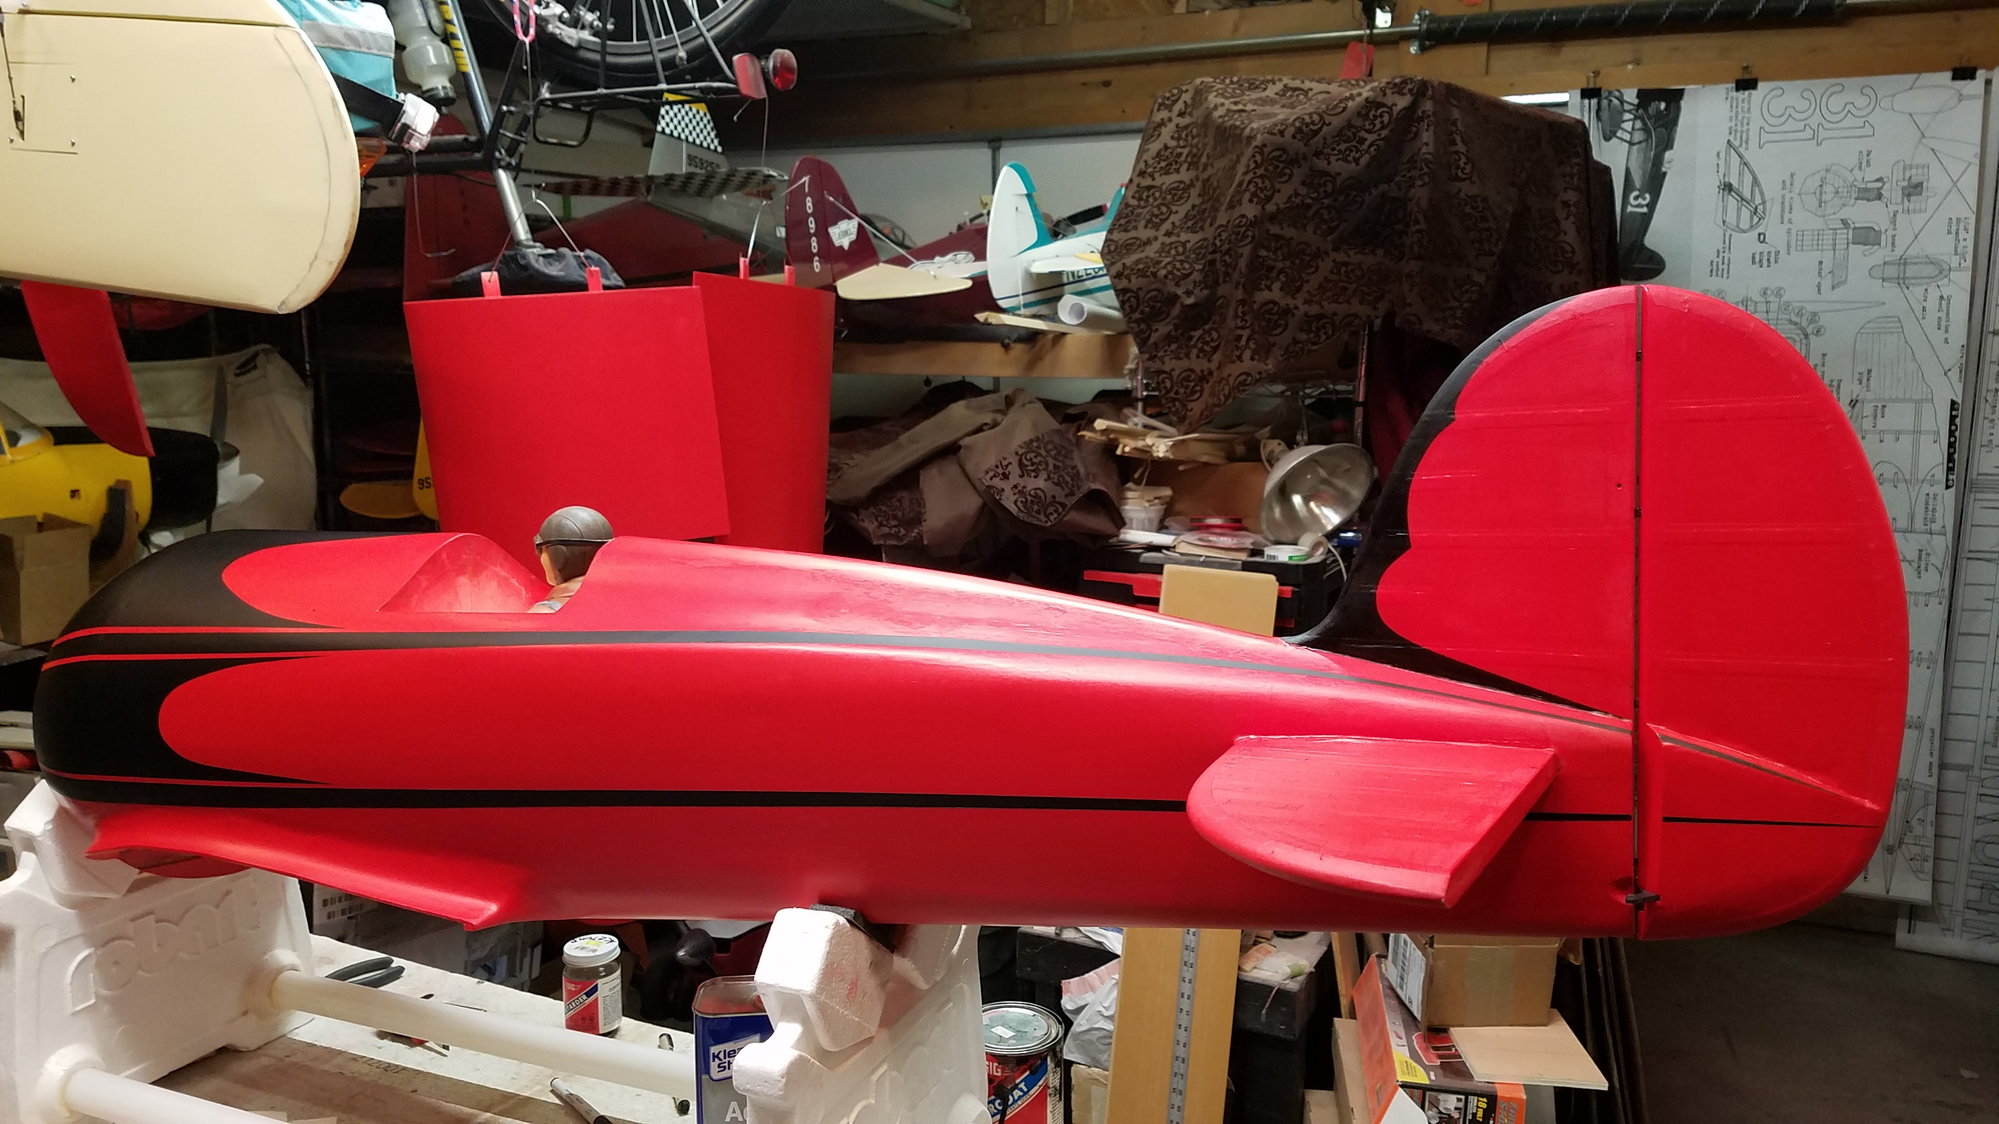
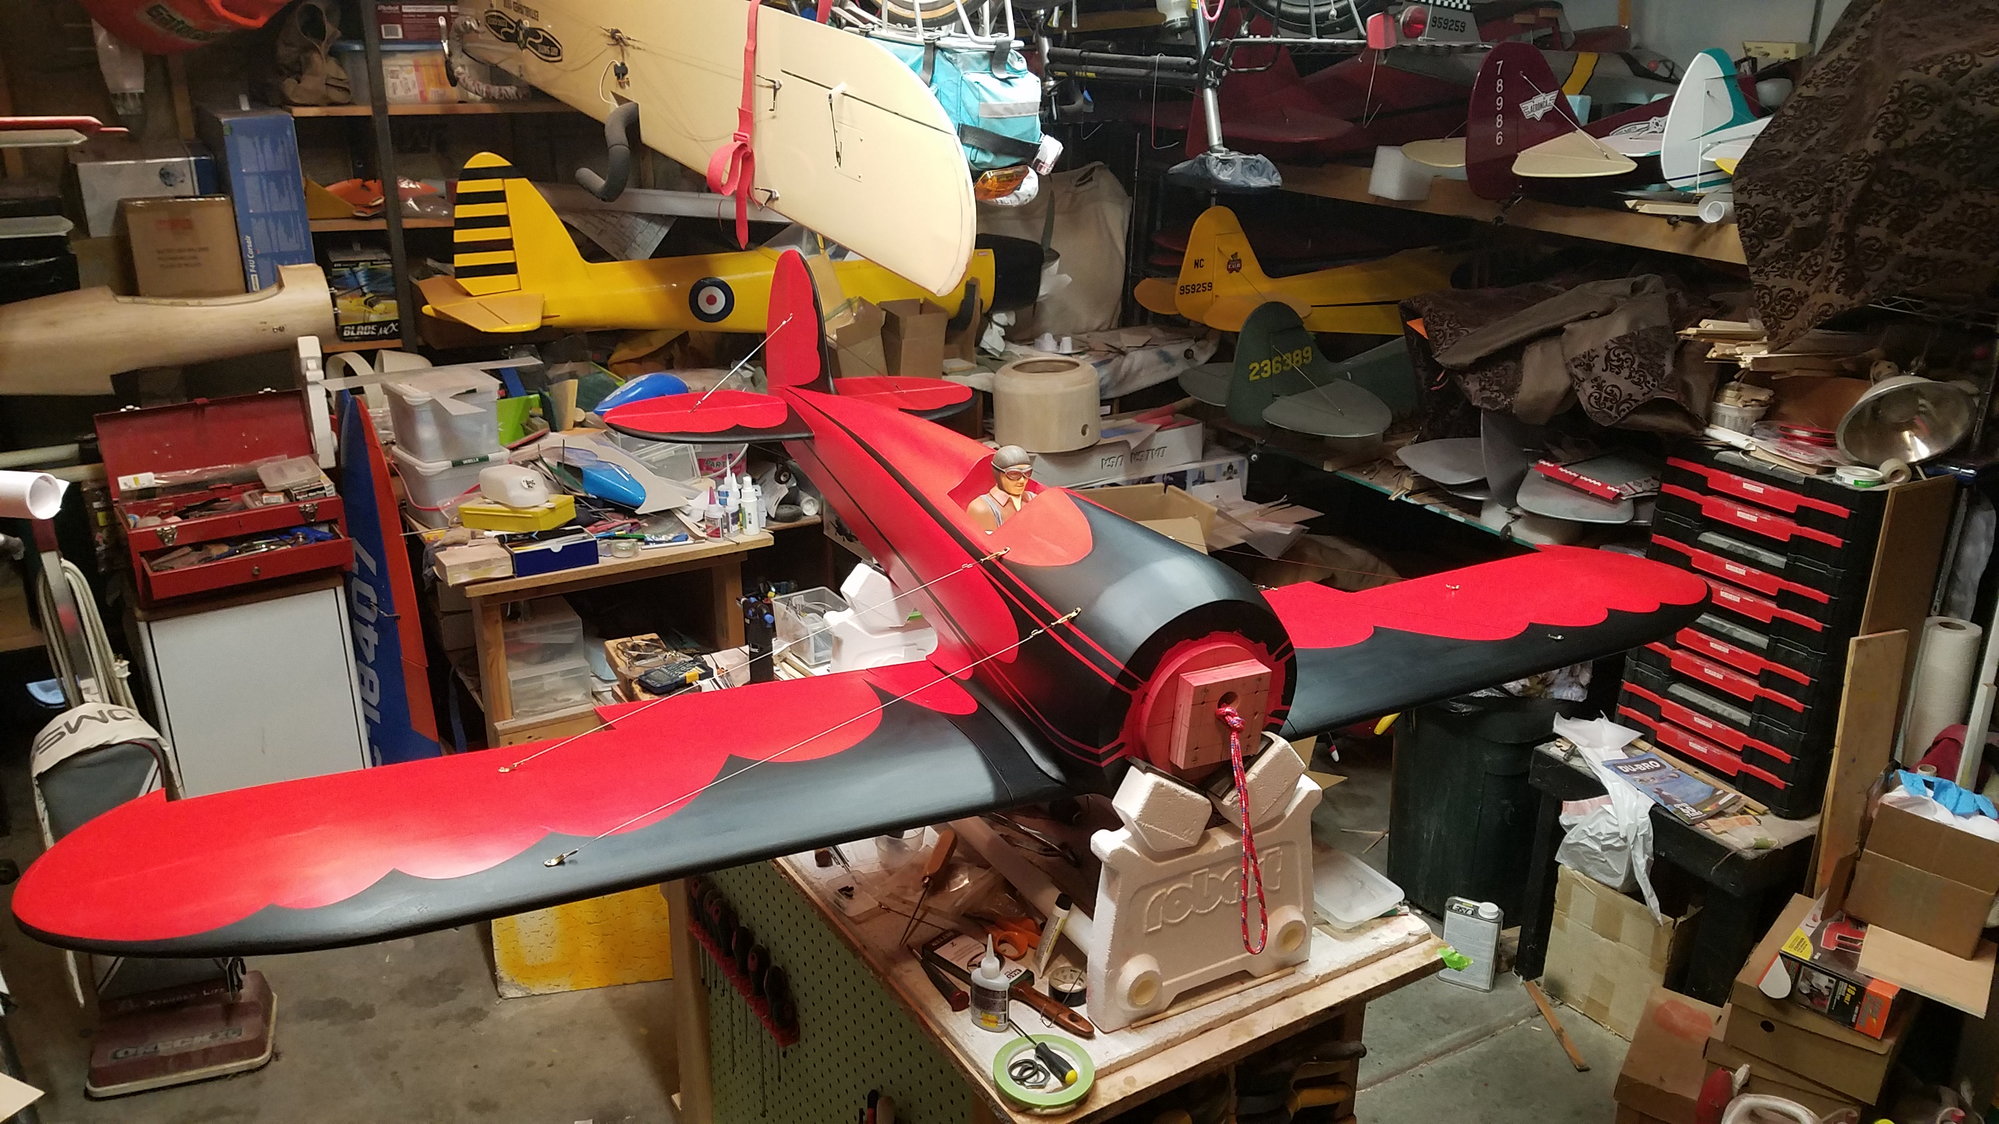
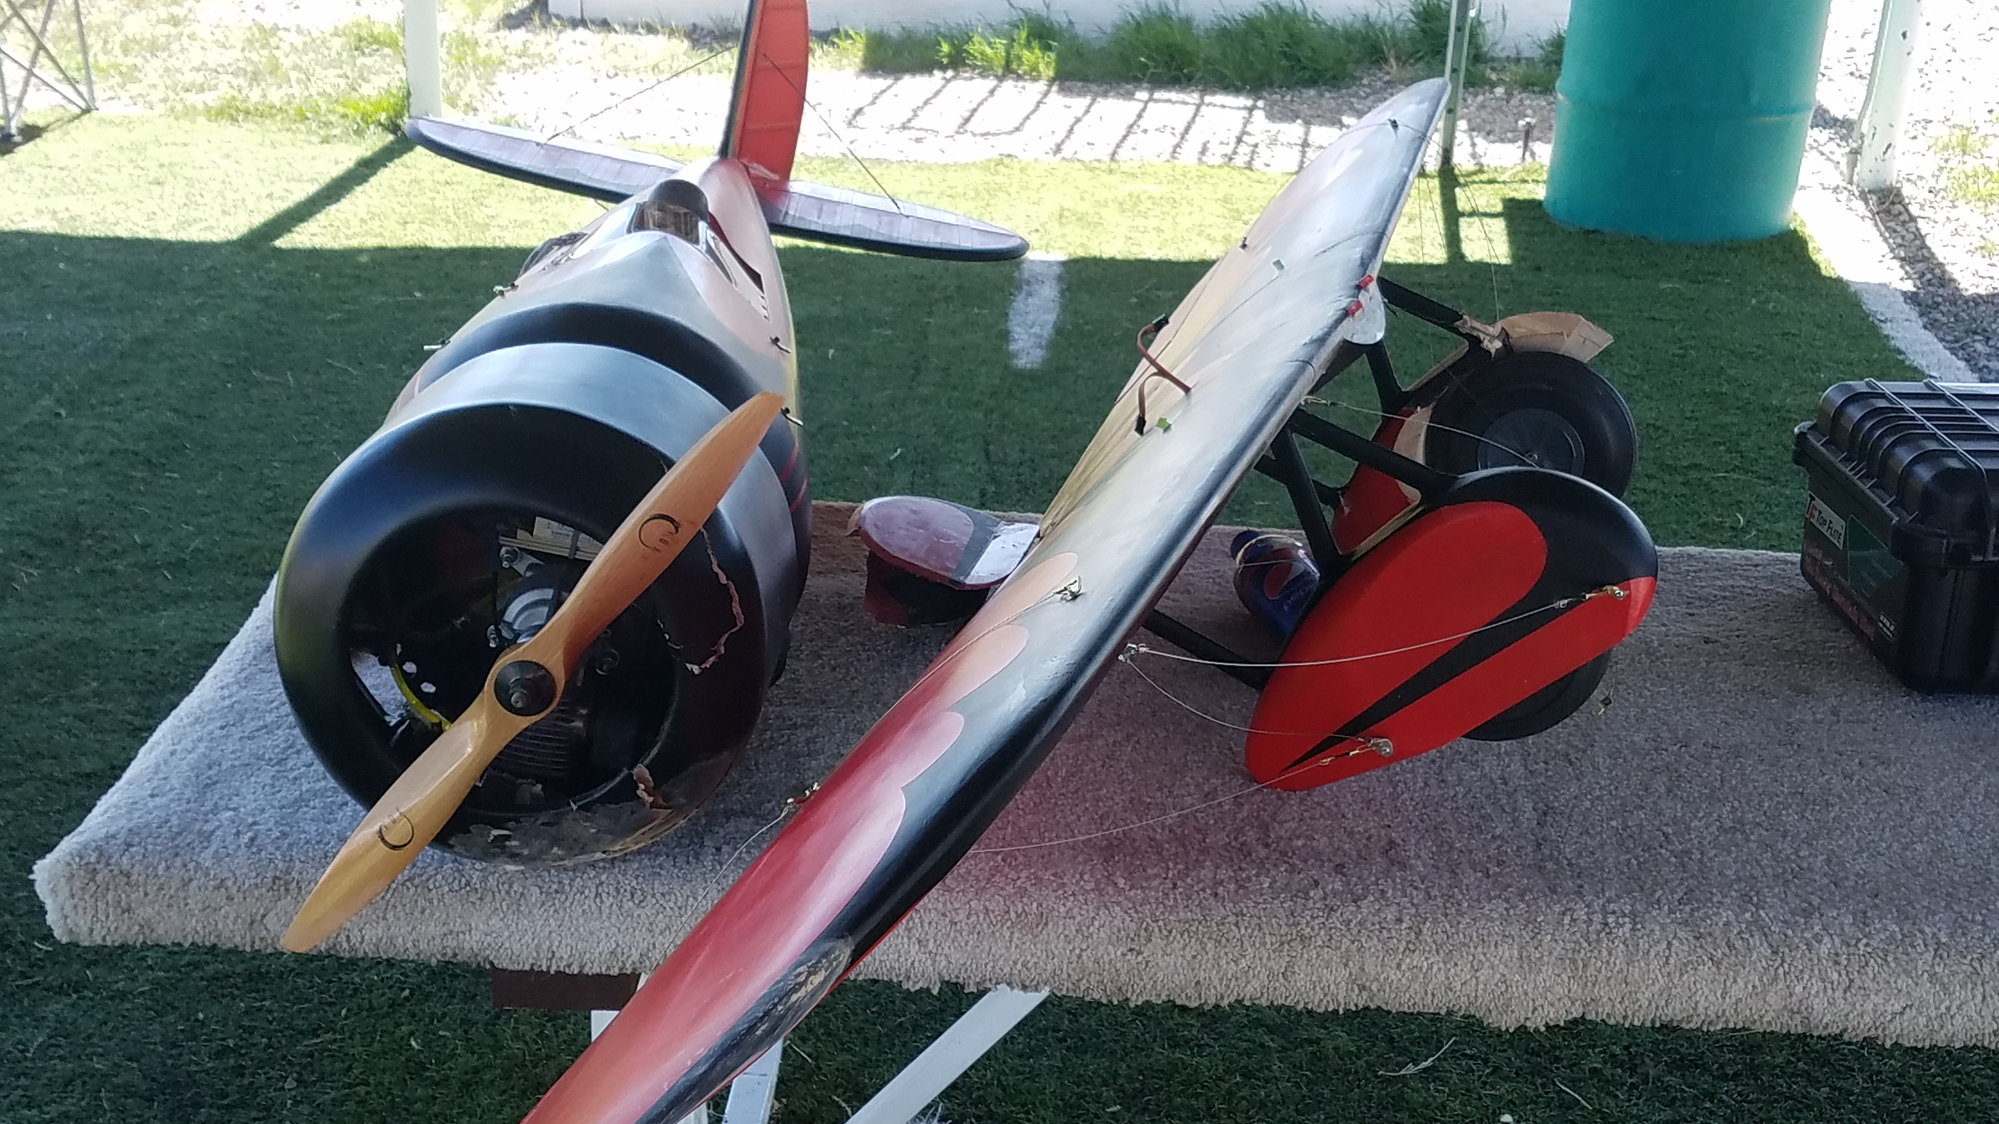
Engine mounting block angle can be seen in layers of ply sanded down, wing braces made from aluminum airfoil shape. wing fillet made, fuselage sheeting finished
the other side
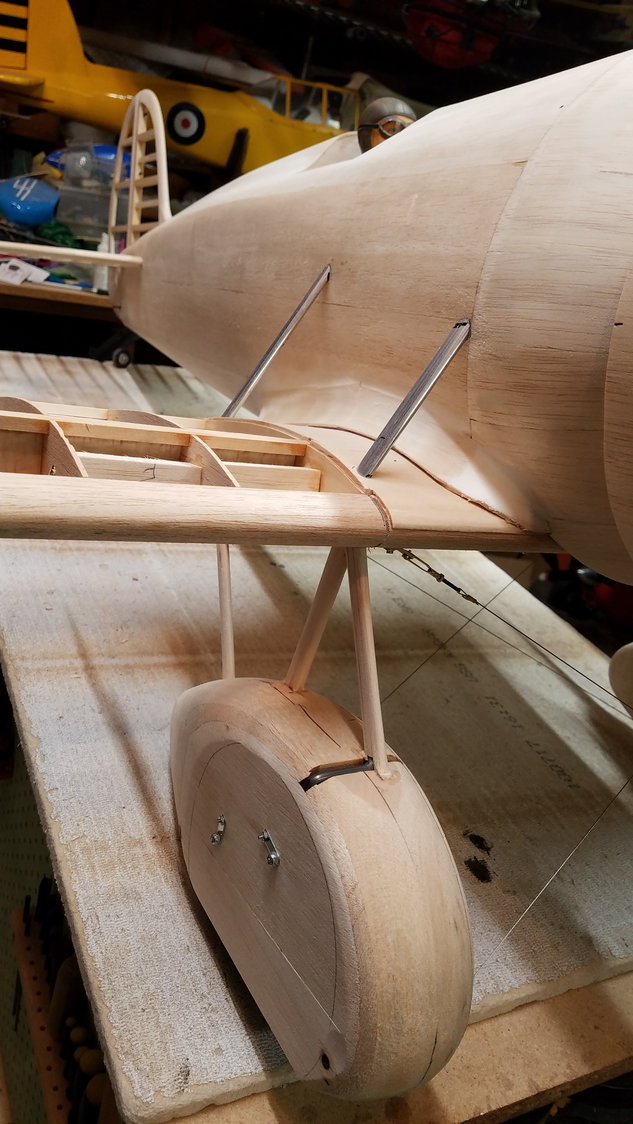
balsa wrap o landing gear wires, these will get fiberglass wrap, wires can be seen between gear.
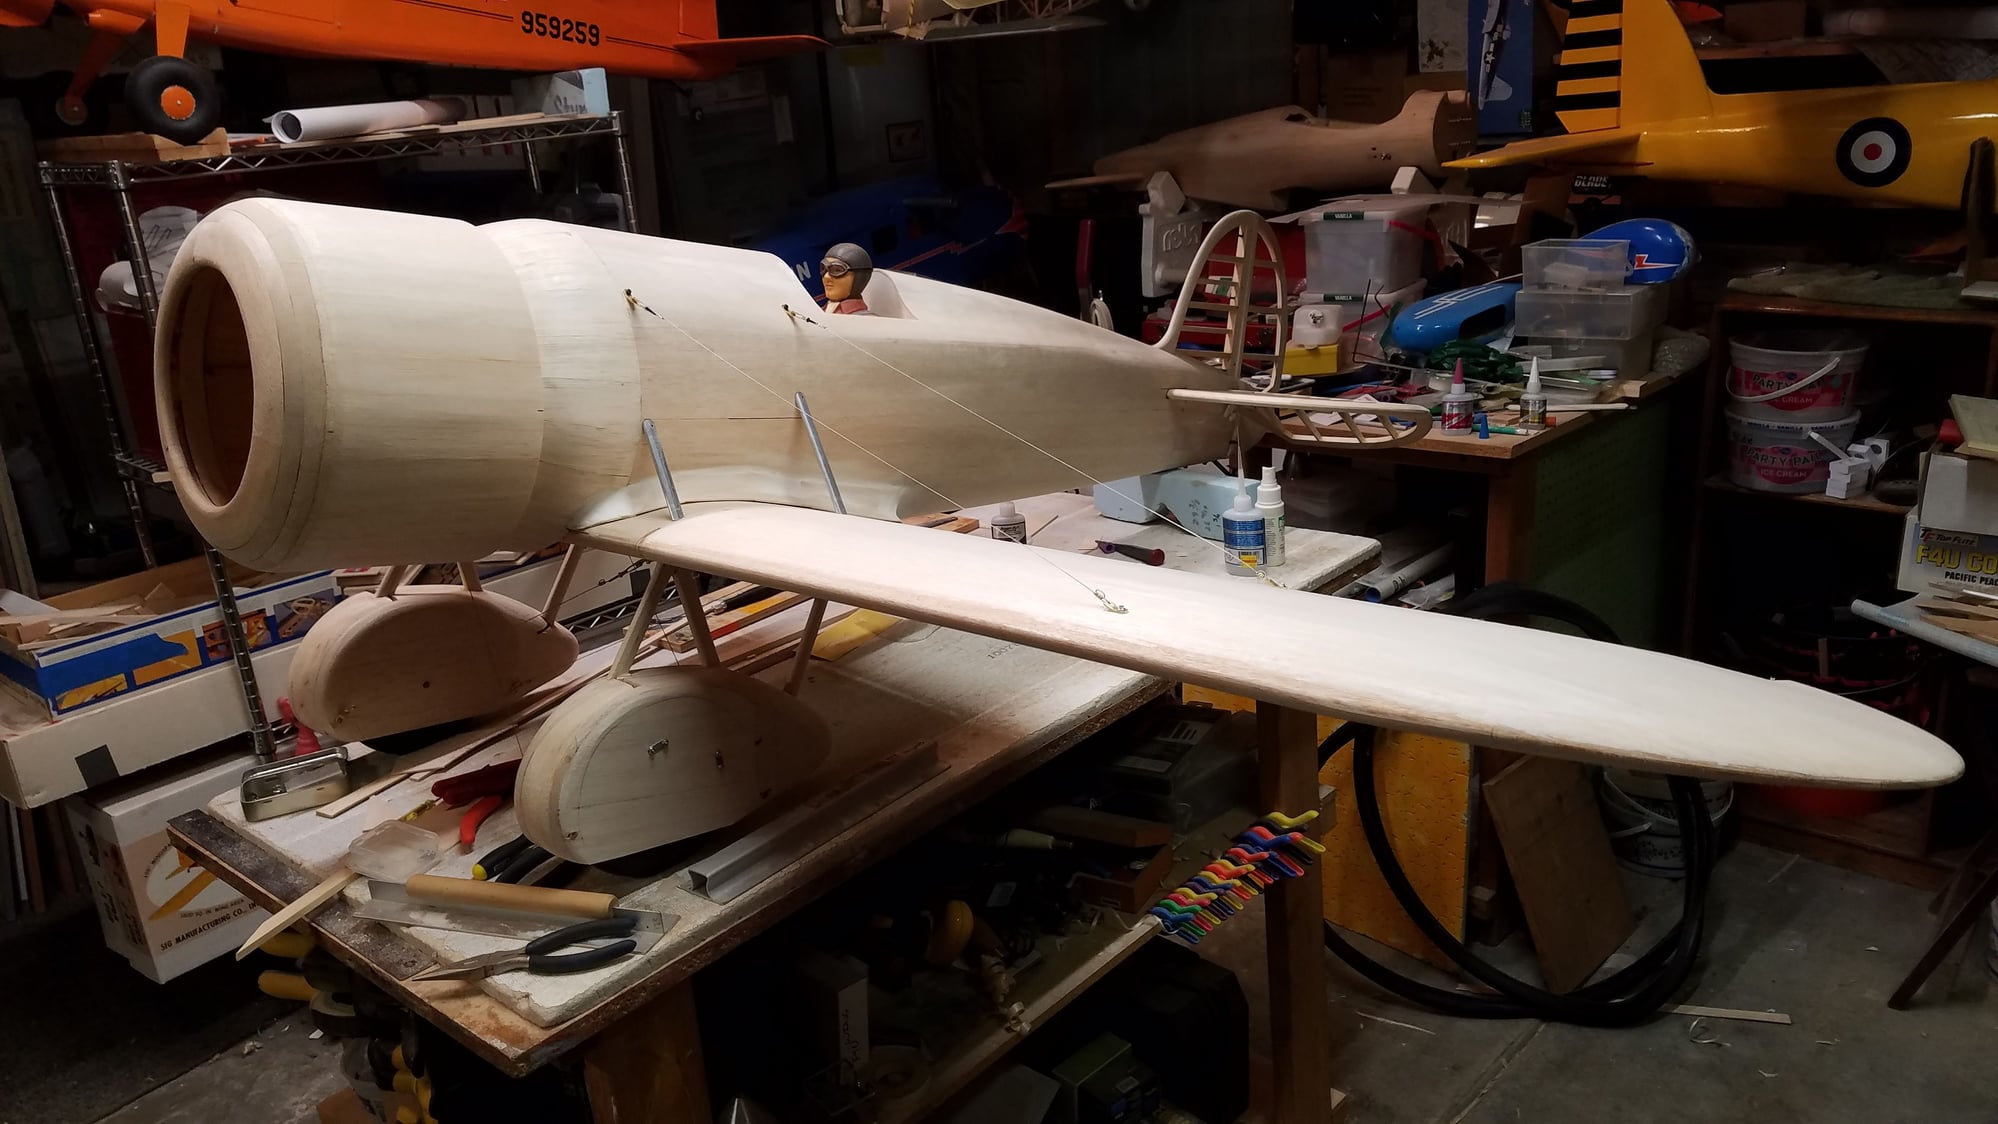
top of wing sheeted and aileron cut out, top flying wires installed
view of wing bottom, sheeting, cap strips and wires installed and anchored to wheel pants
Engine mounting block angle can be seen in layers of ply sanded down, wing braces made from aluminum airfoil shape. wing fillet made, fuselage sheeting finished
the other side
balsa wrap o landing gear wires, these will get fiberglass wrap, wires can be seen between gear.
top of wing sheeted and aileron cut out, top flying wires installed
view of wing bottom, sheeting, cap strips and wires installed and anchored to wheel pants
01-15-2022, 07:32 PM
#13
Thread Starter
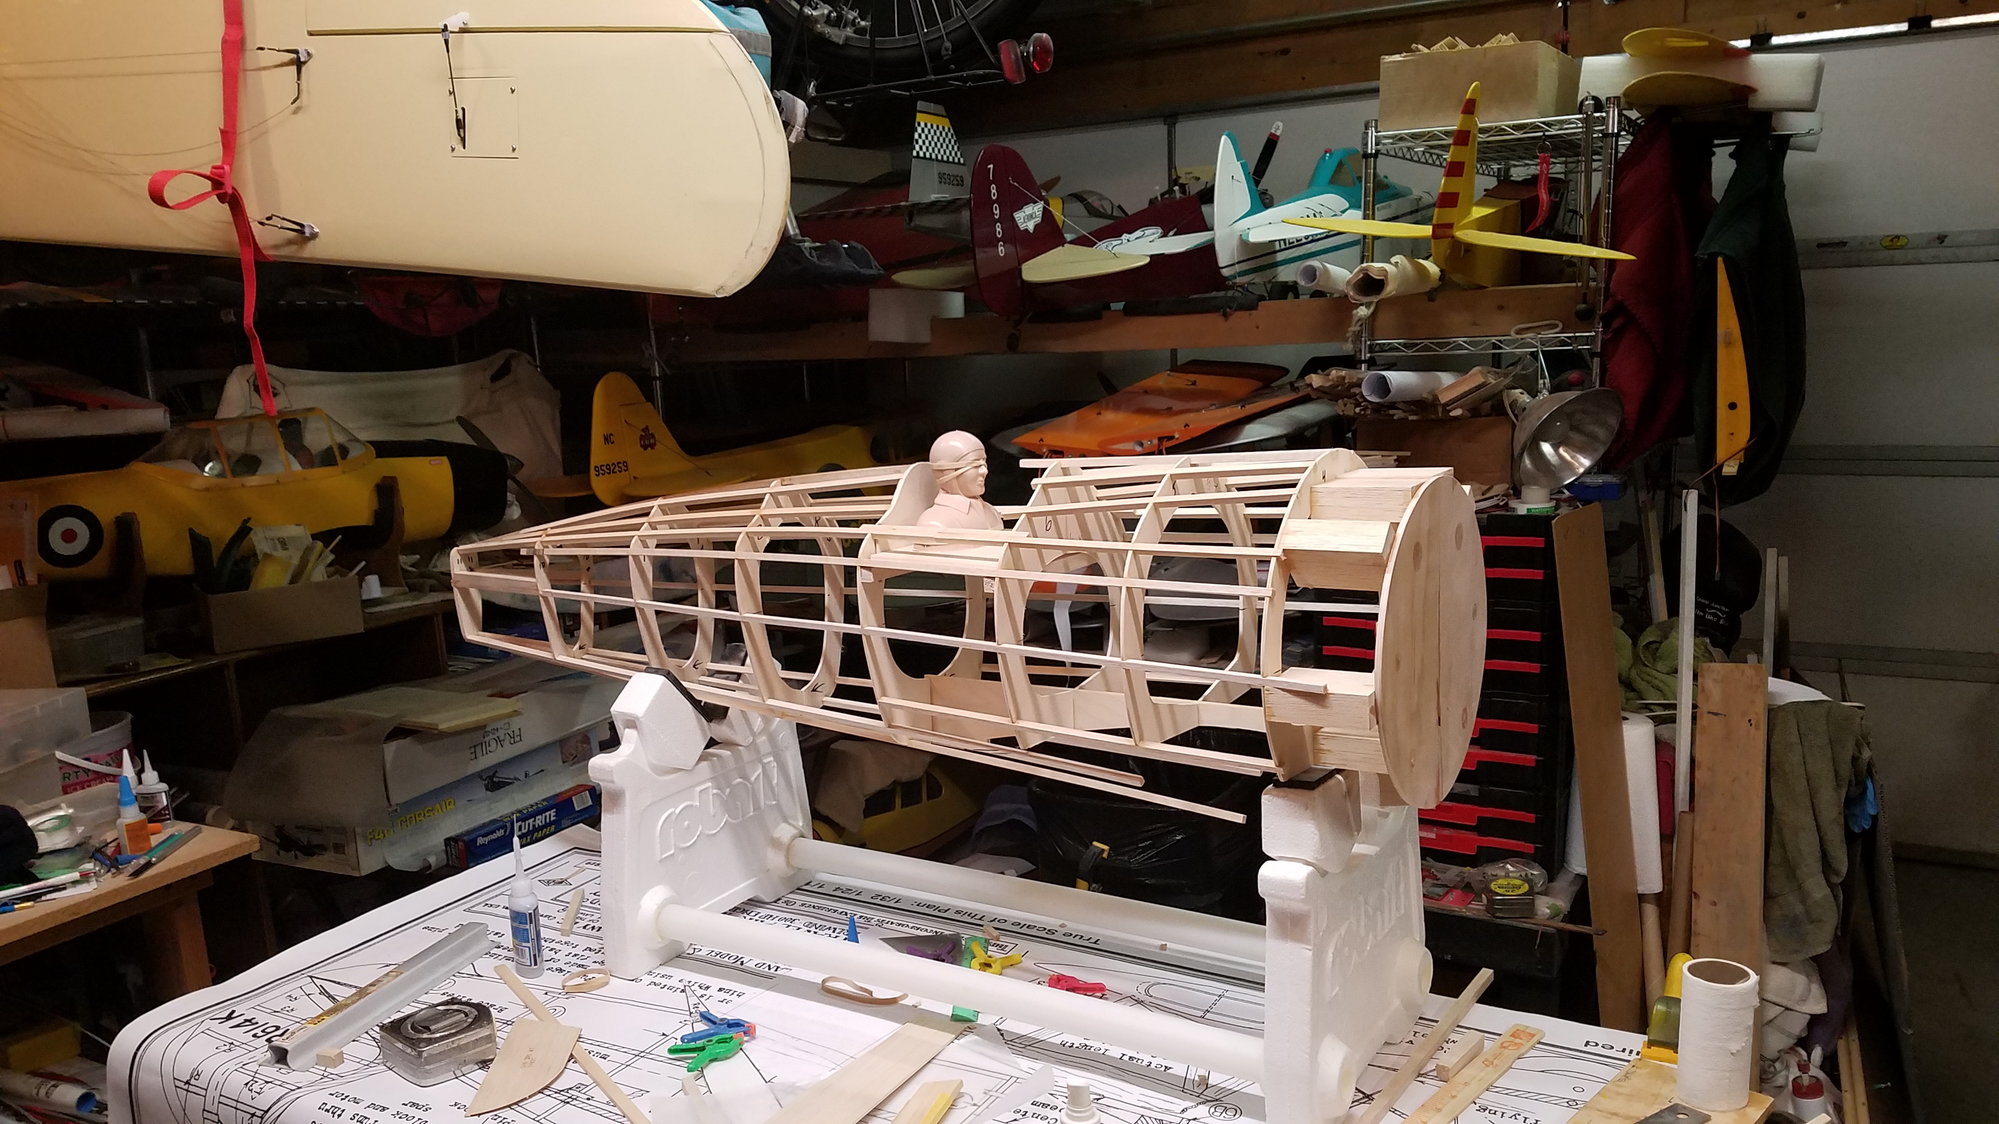
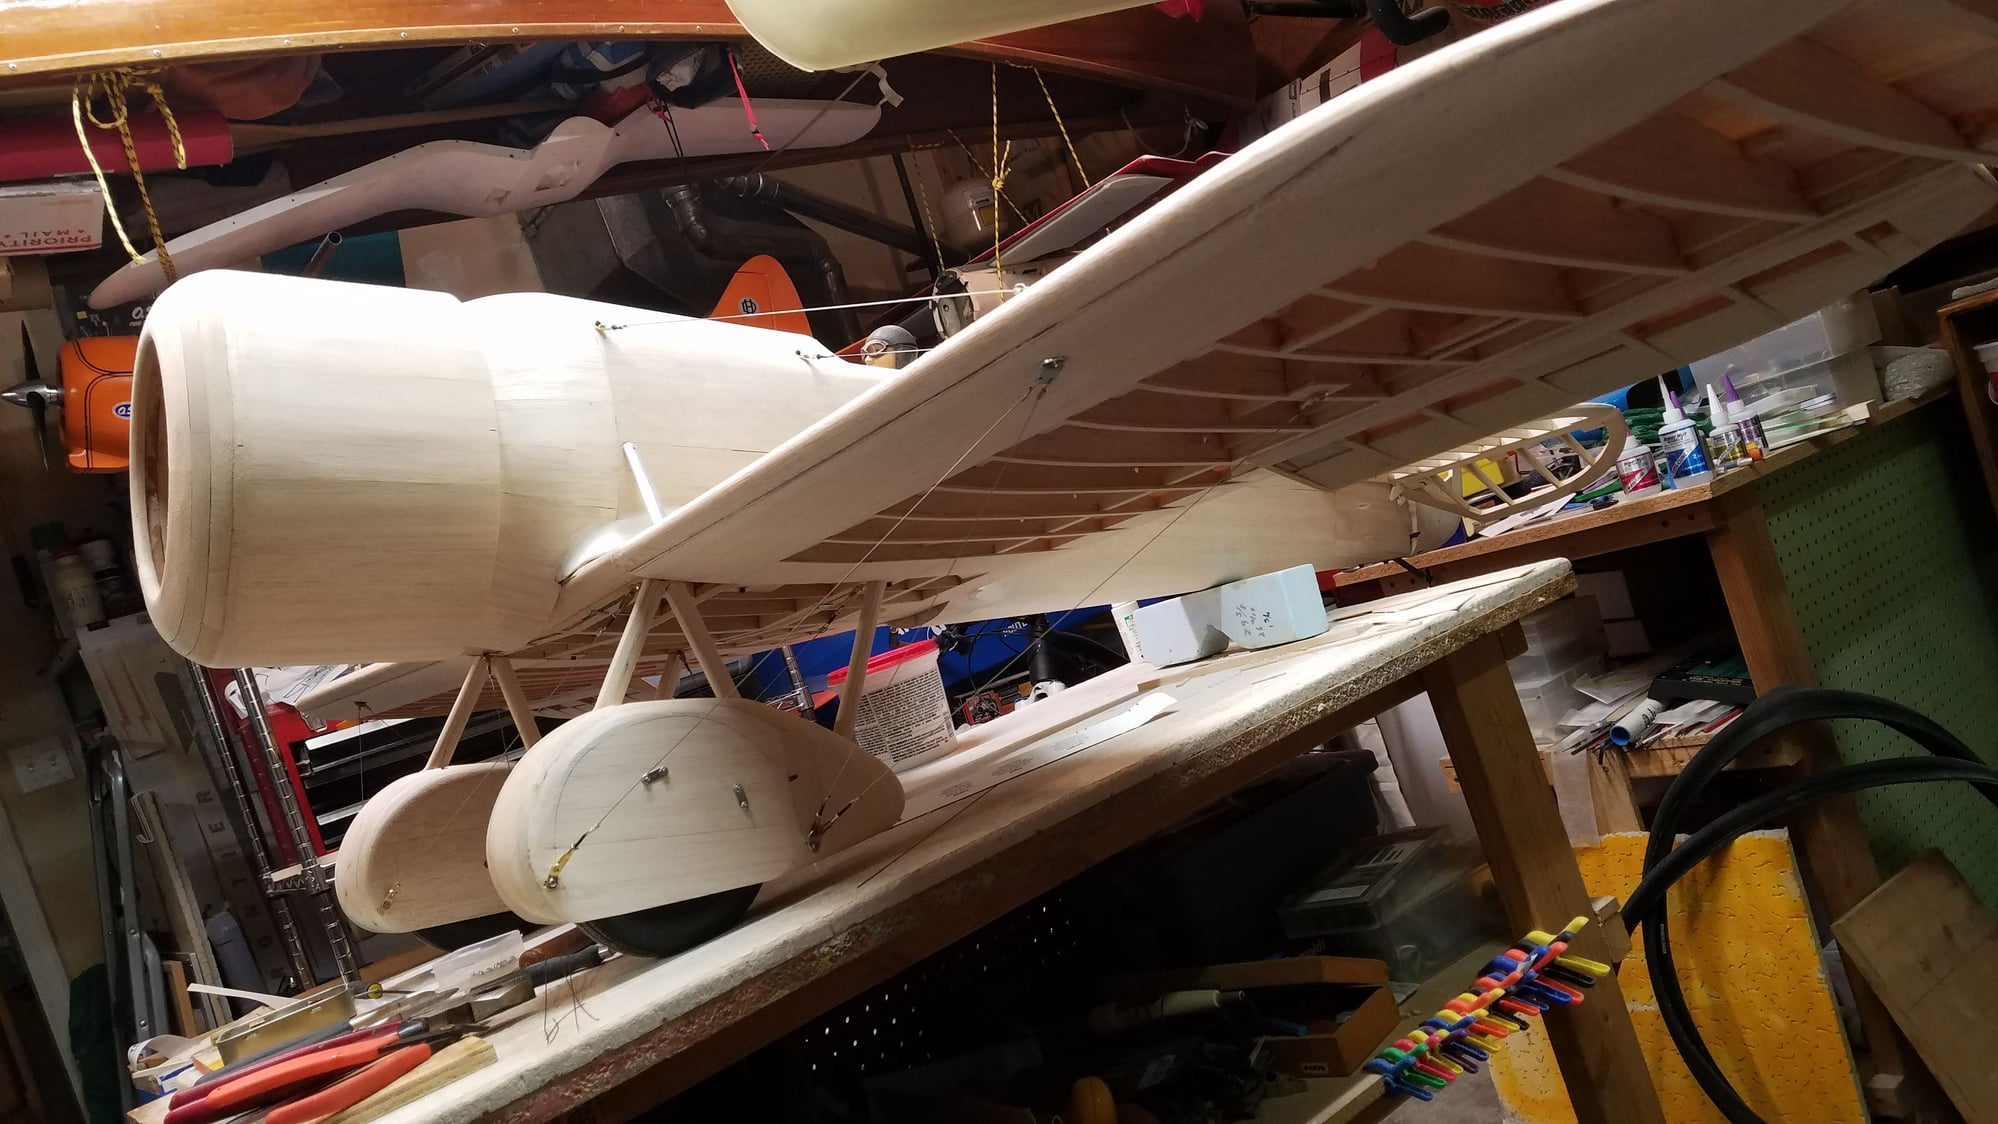
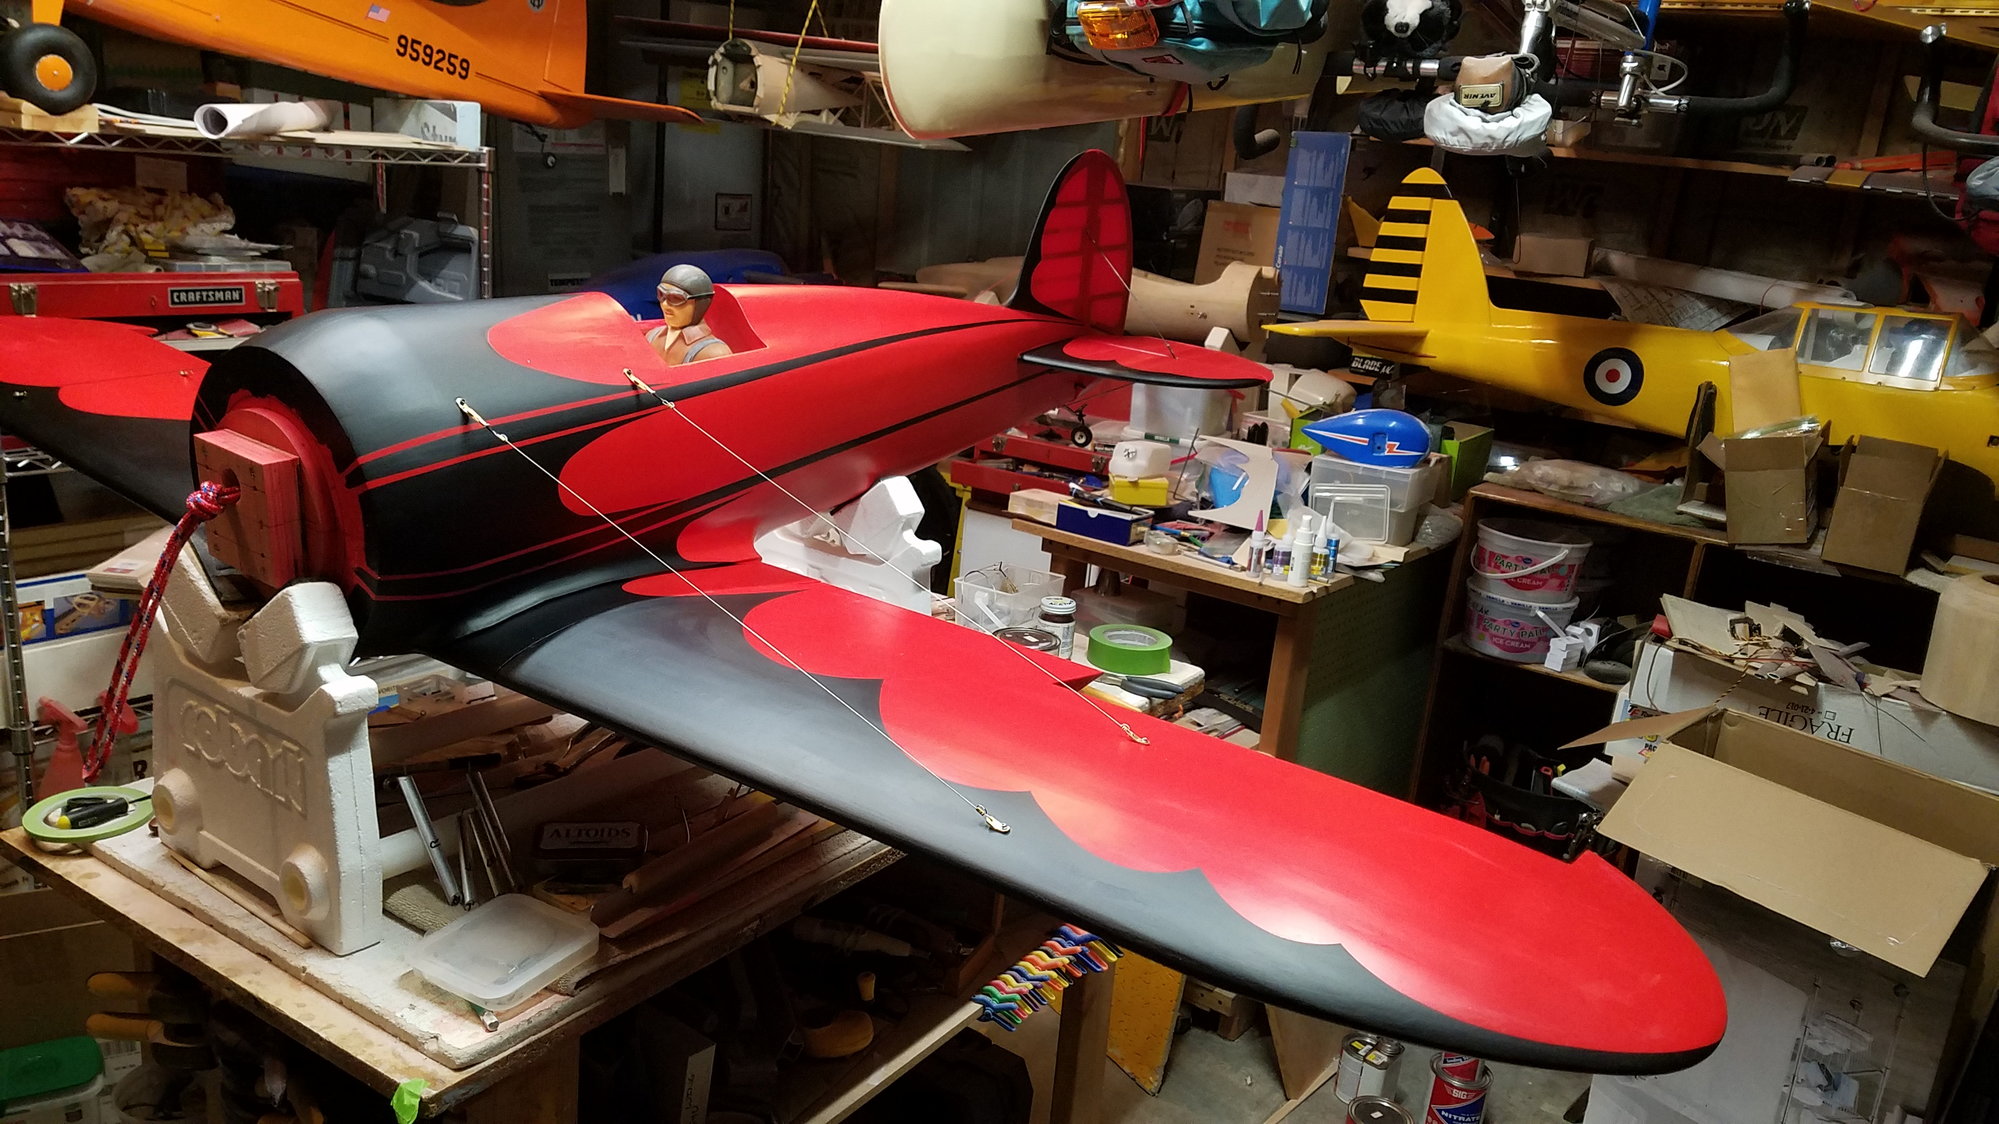
More pictures, seems like this is going faster than the actual building did, but I didn't take any pictures of all the inside stuff, servos, pushrods etc.
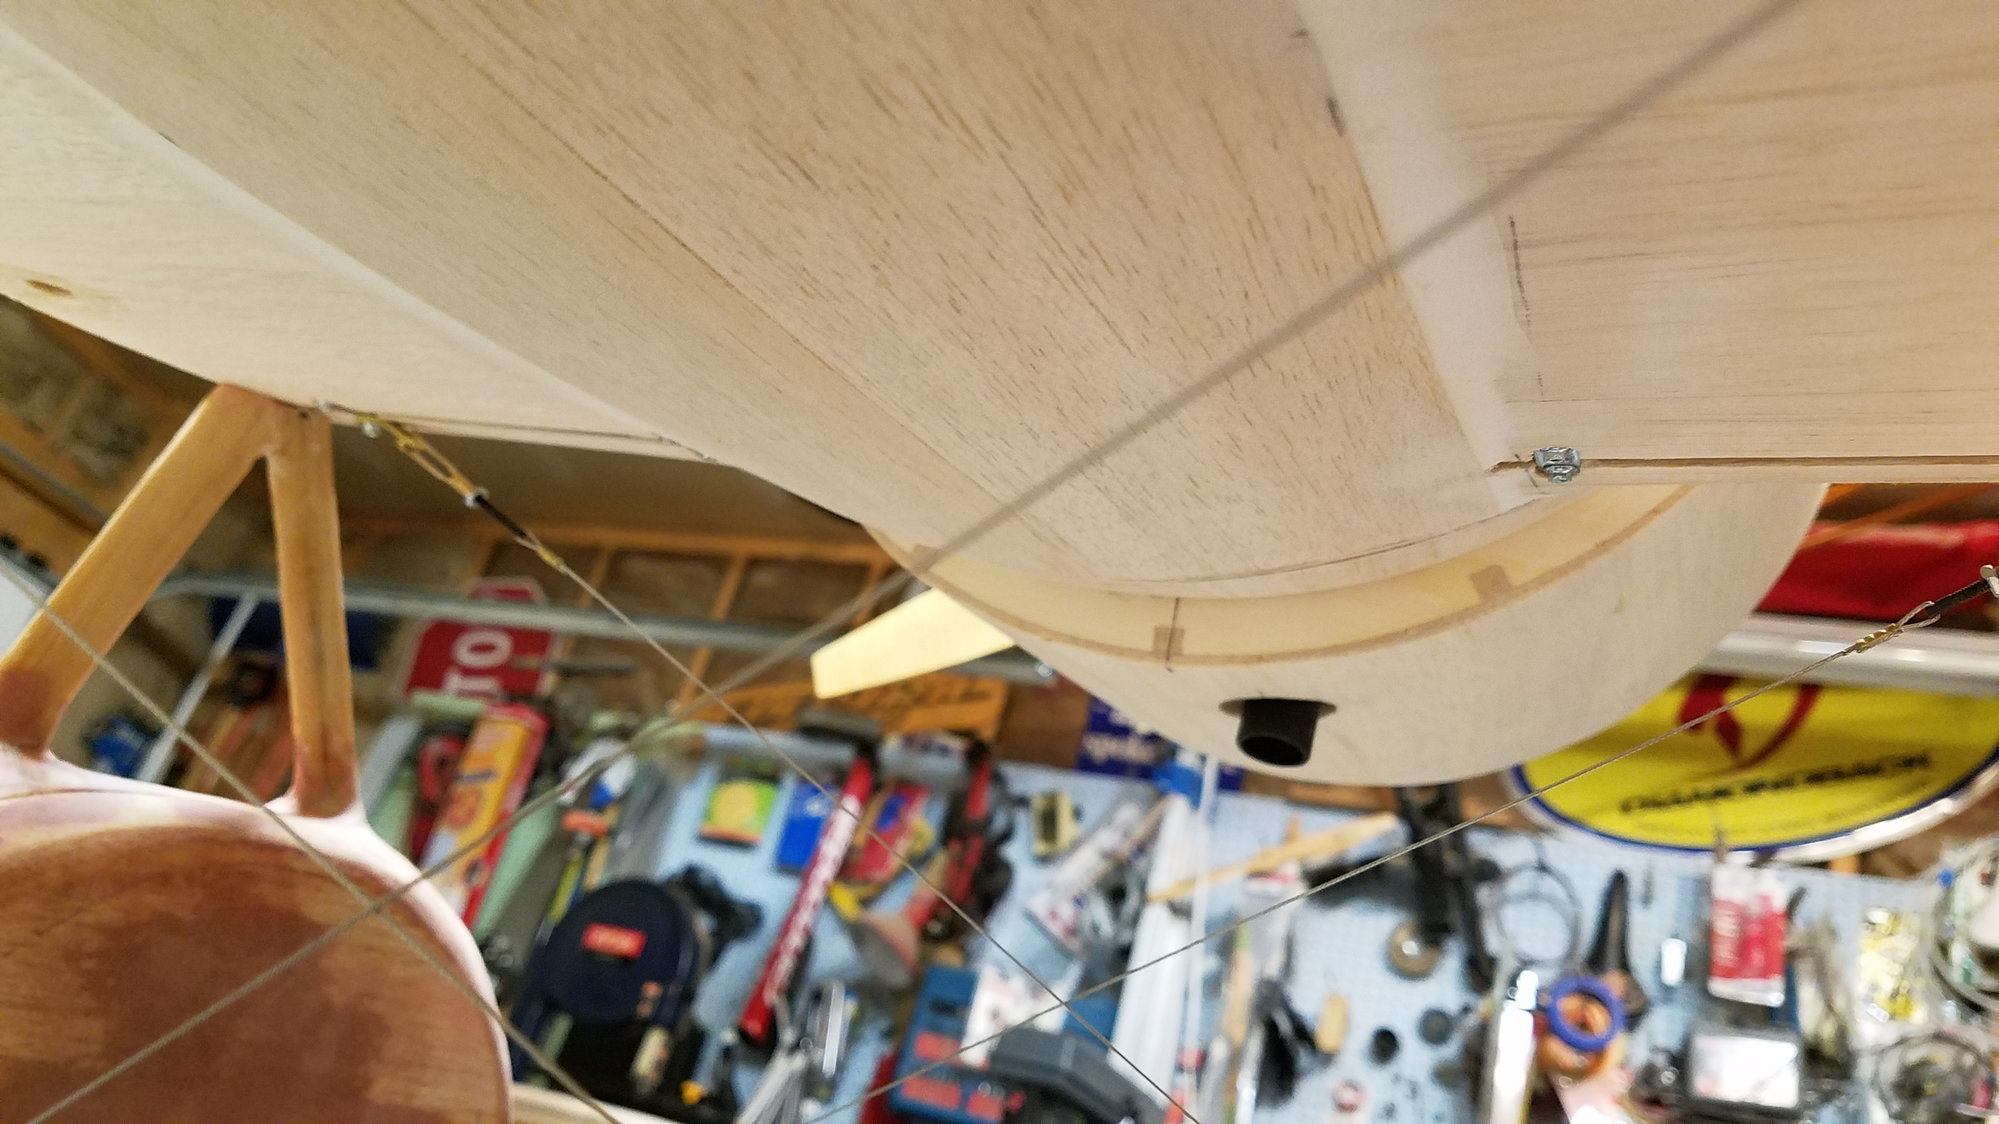
another view of the underside
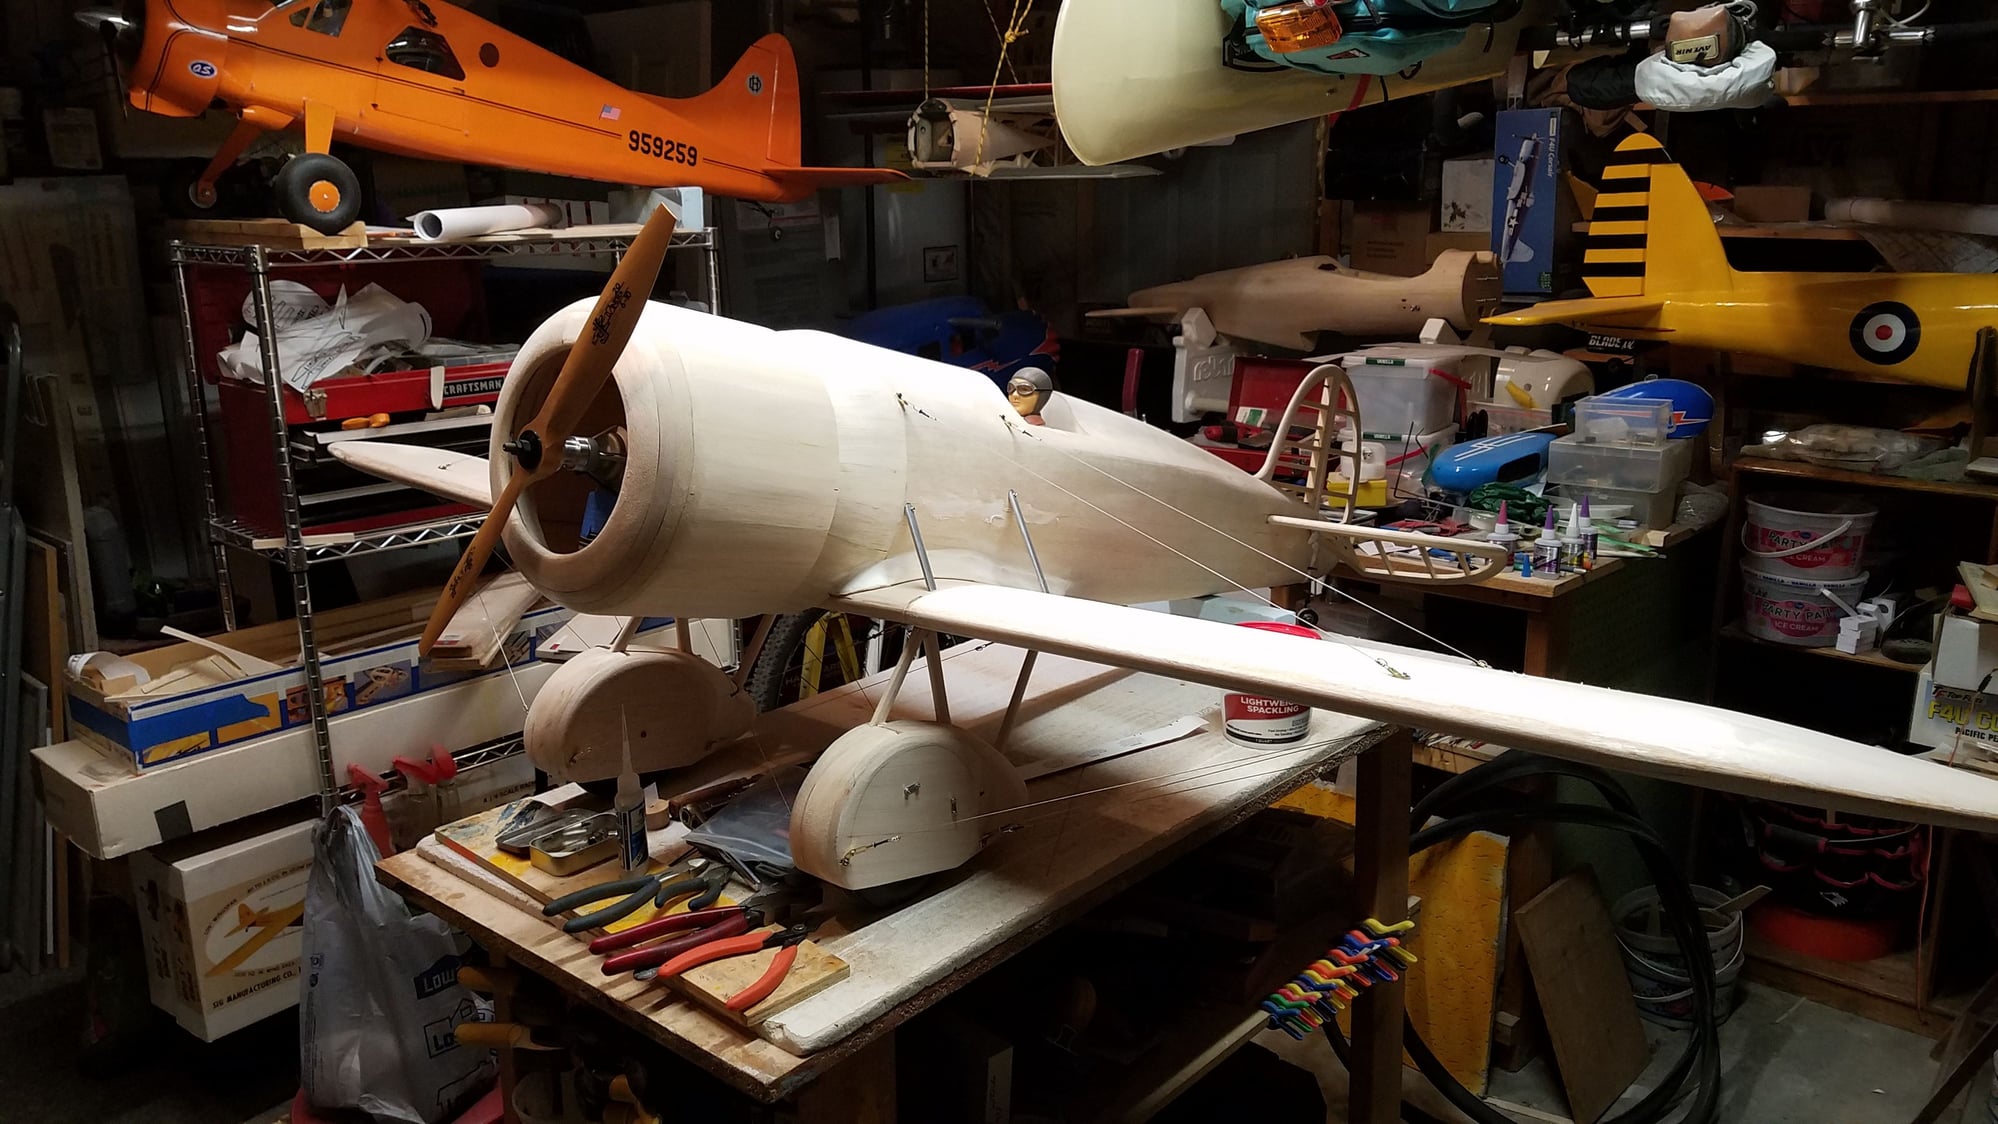
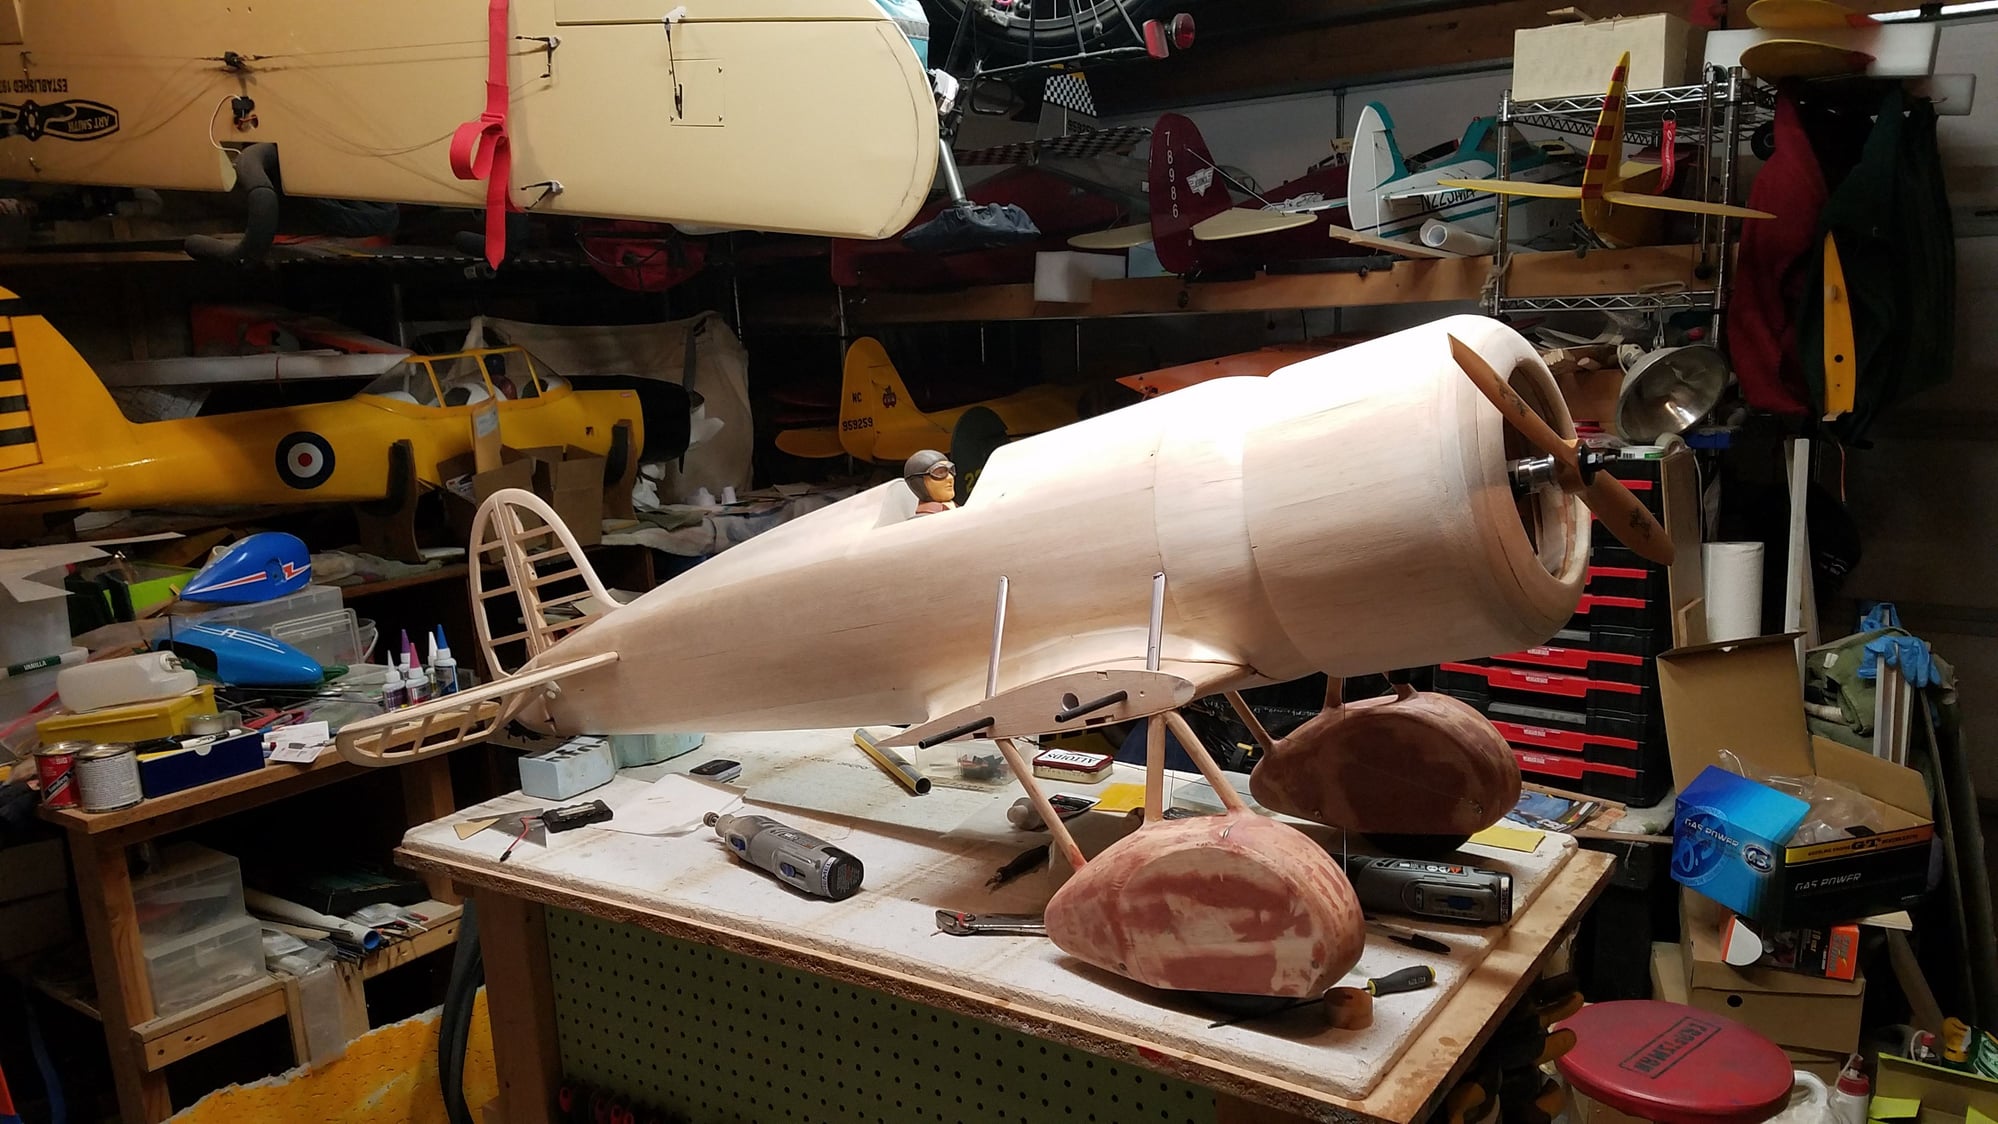
it's going to need a dummy engine, this one belongs to my Stinson, I've been meaning to install it for the last 9 years.
engine mounted in cowl
view showing all the sheeting
underside of center section sheeted, pants glassed
view of belly pan, muffler sticking out bottom of cowl, it still needs to be opened up to allow air flow and then glassed.
another view of the underside
it's going to need a dummy engine, this one belongs to my Stinson, I've been meaning to install it for the last 9 years.
engine mounted in cowl
view showing all the sheeting
underside of center section sheeted, pants glassed
view of belly pan, muffler sticking out bottom of cowl, it still needs to be opened up to allow air flow and then glassed.
01-17-2022, 08:40 PM
#14
Thread Starter
pants glassed and filled with glazing putty
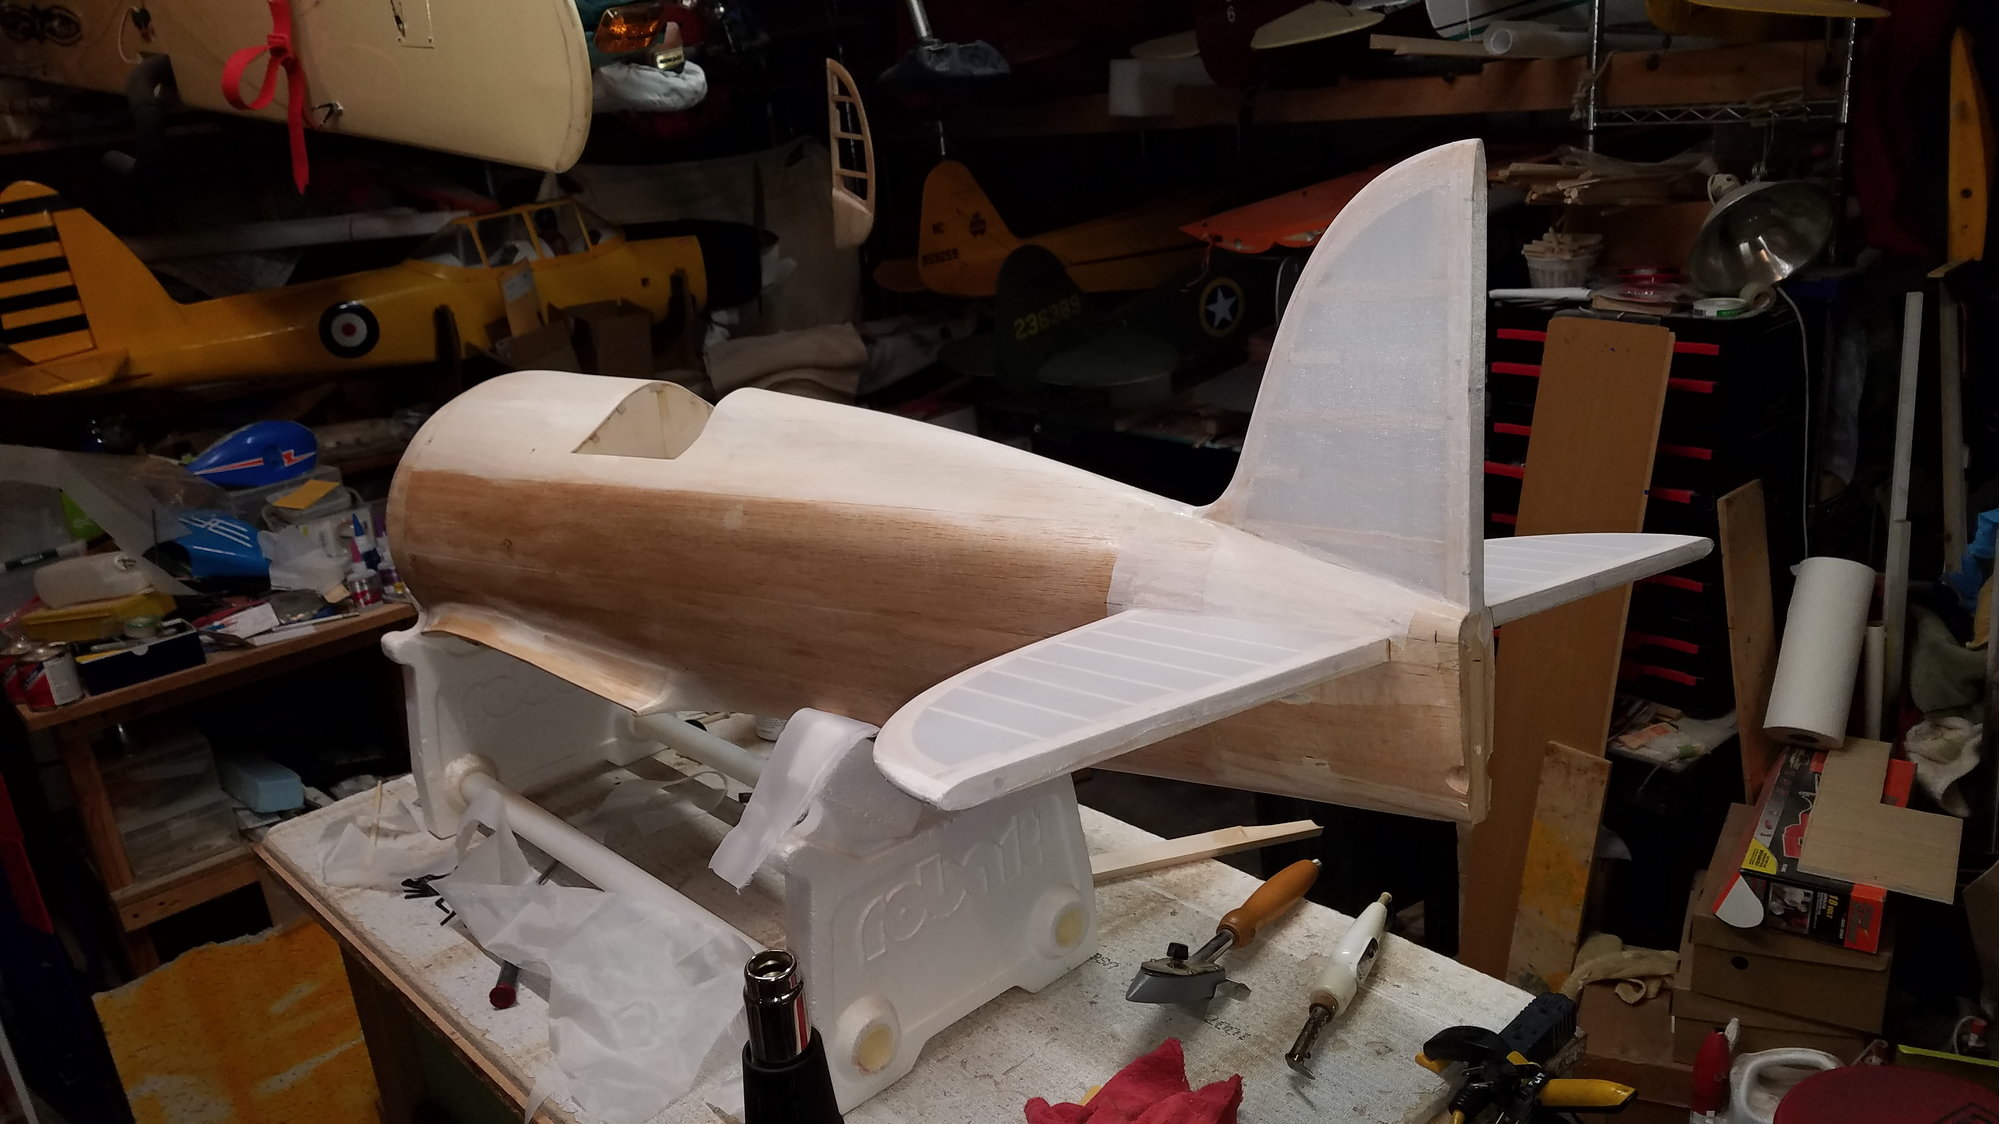
stix it applied and covering started, (Sig Koverall)
bottom of wings covered.
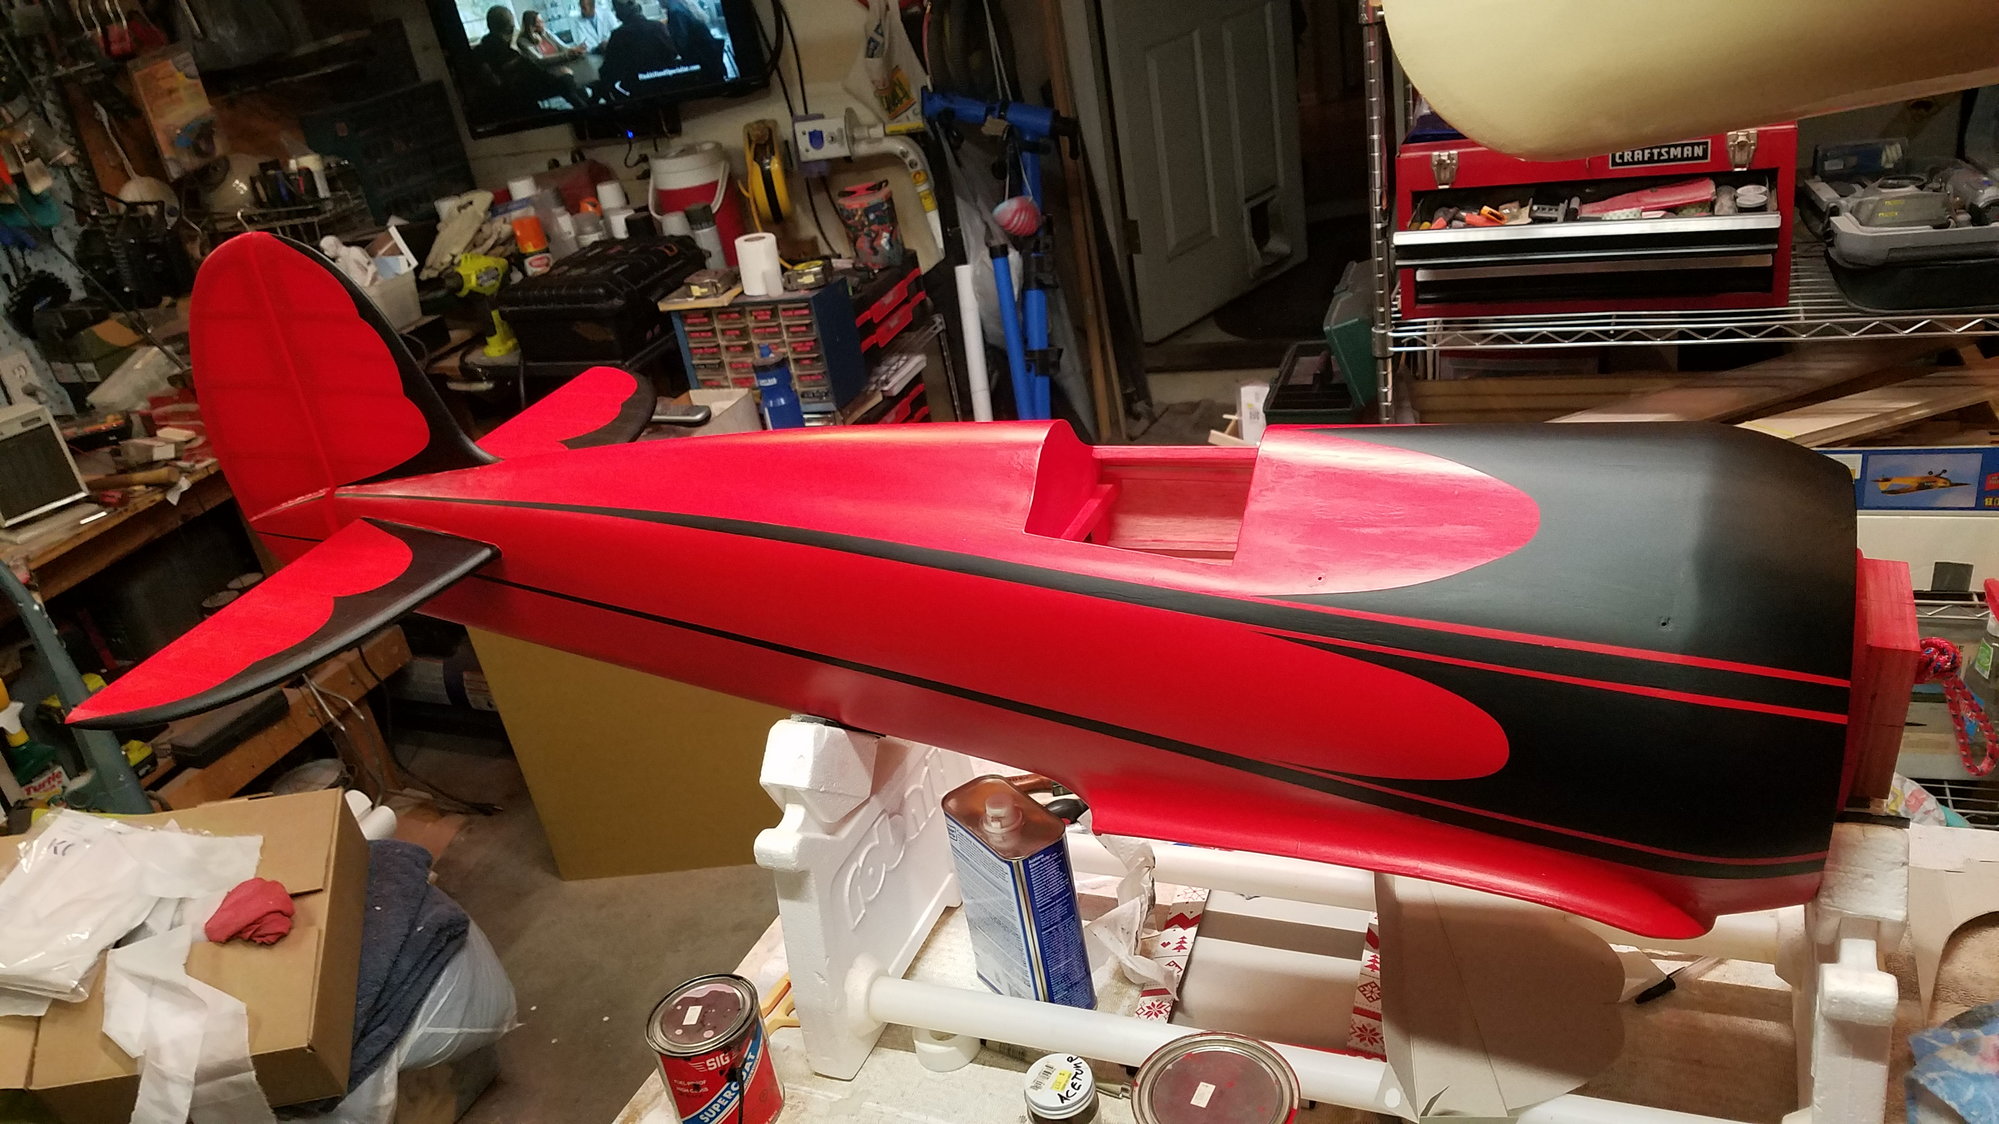
fuselage covered and sanding sealer applied to fill weave to simulate plywood of real plane.
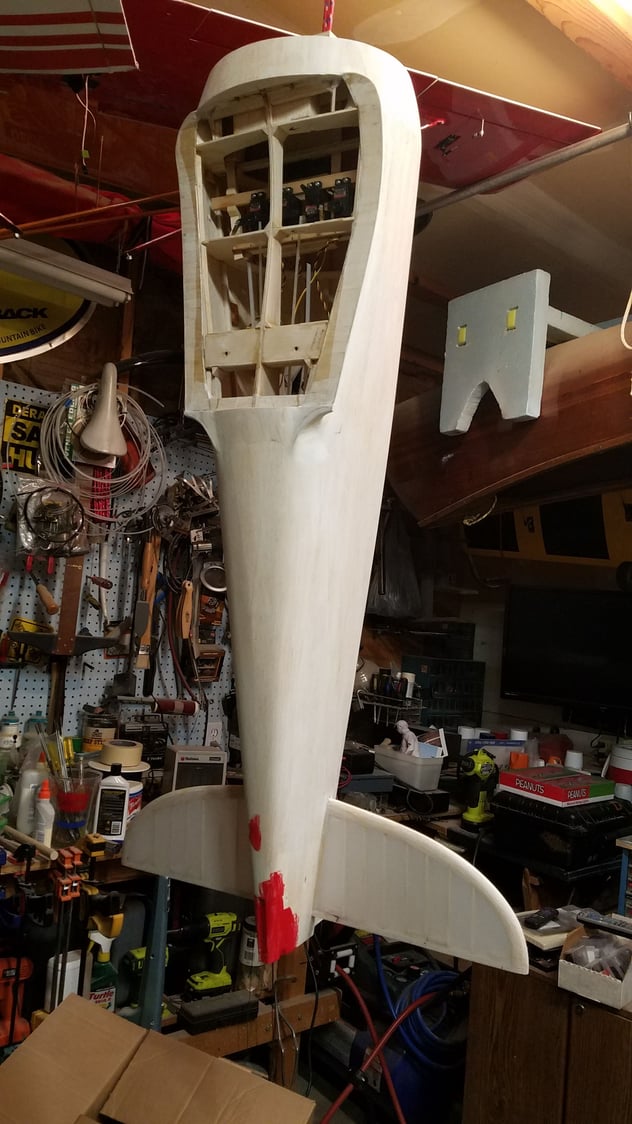
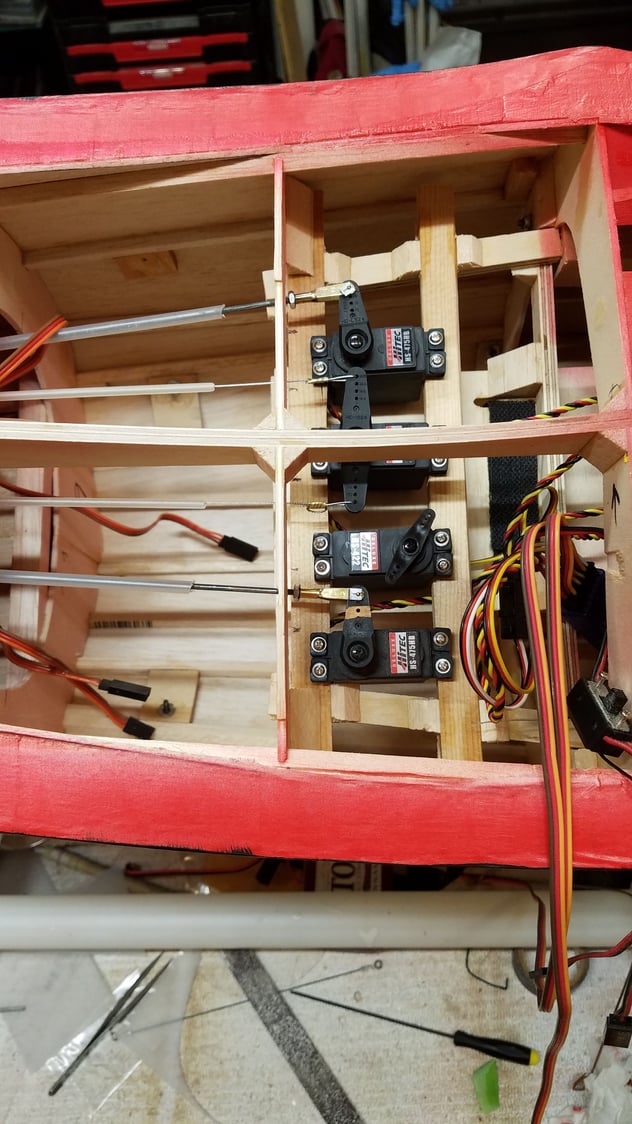
this shot shows the interior of the plane with servos installed near front, there is space for reciever and batteries in front. I am not sure how it will balance yet, I'm thinking at about 25% of wing, and if needed adding tail weight will be easy. I hope that I don't have to add nose weight but if I do there is lots of room up front.
01-22-2022, 06:55 PM
#15
Thread Starter
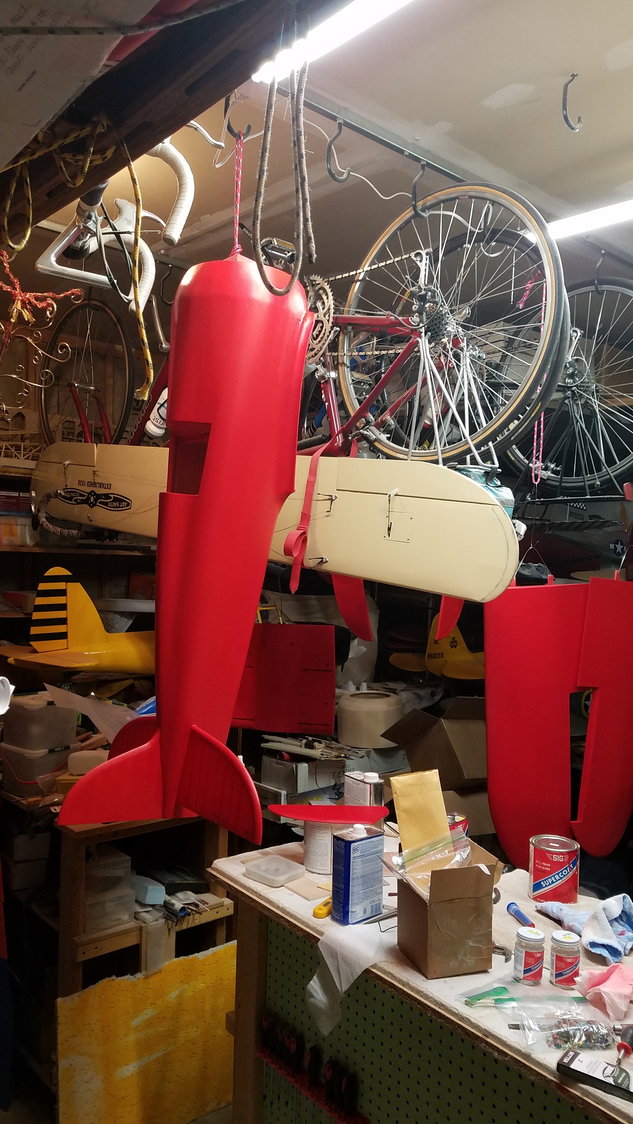
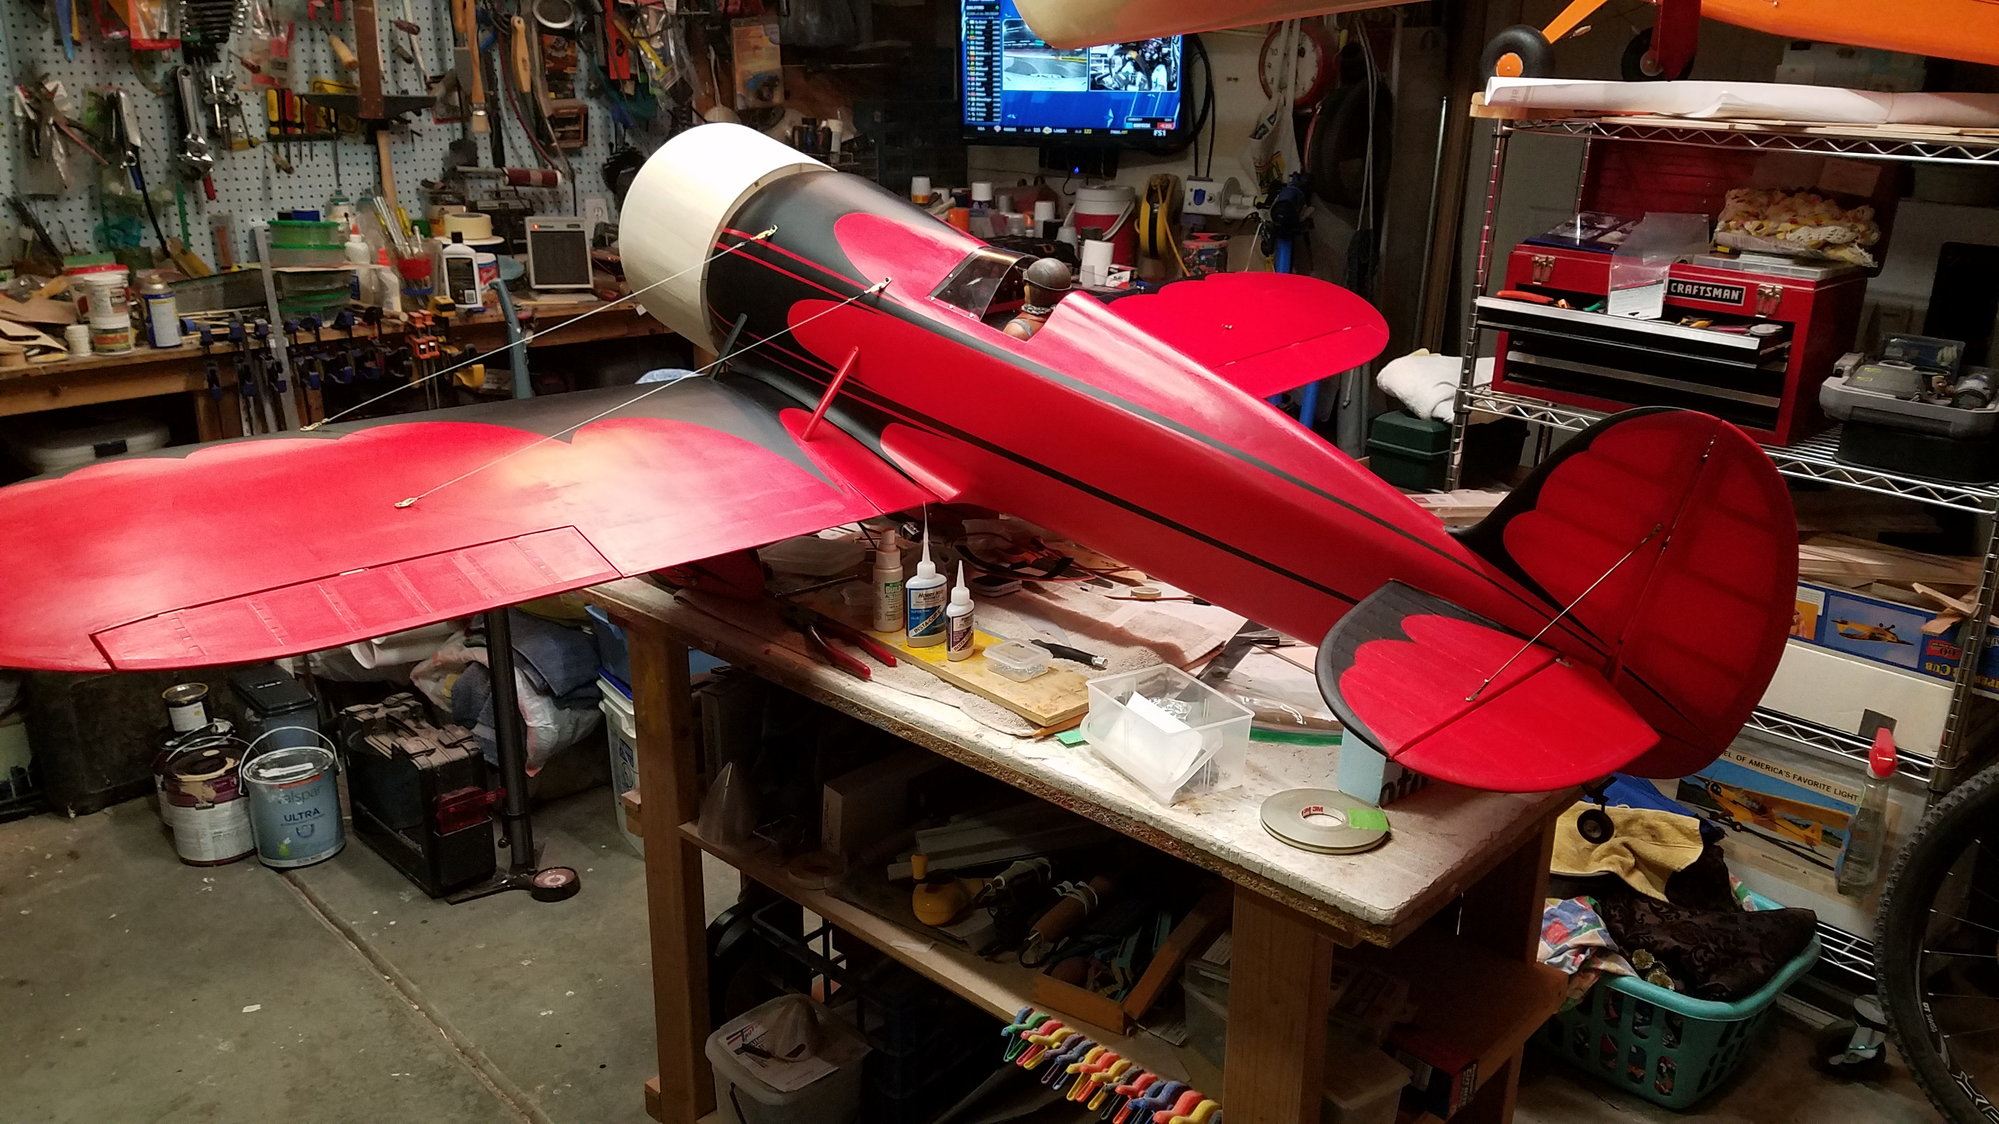
adding red dope, bought this quart in the 1980s for $9.00, thinned it and sprayed with a badger spray gun
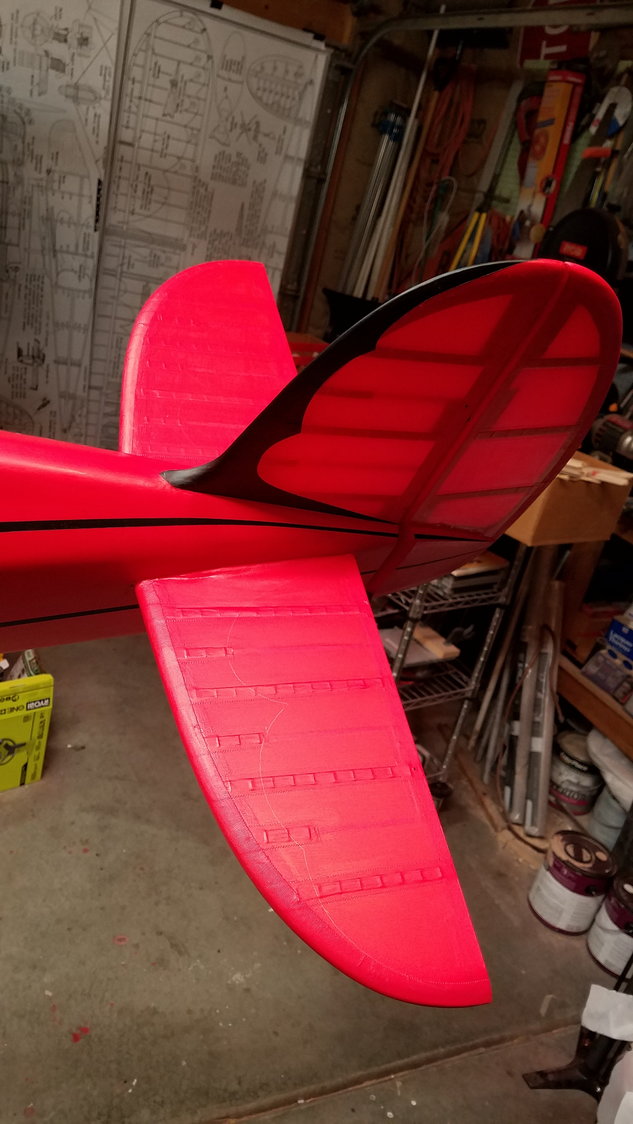
the wings
masked the black and brushed on, this pint of black cost me $5.00 back in the 80s. The dope was leftover from a 1/4 scale Skybolt that crashed on the 2nd flight.
masking lines stenciled on stabilizer
stab painted
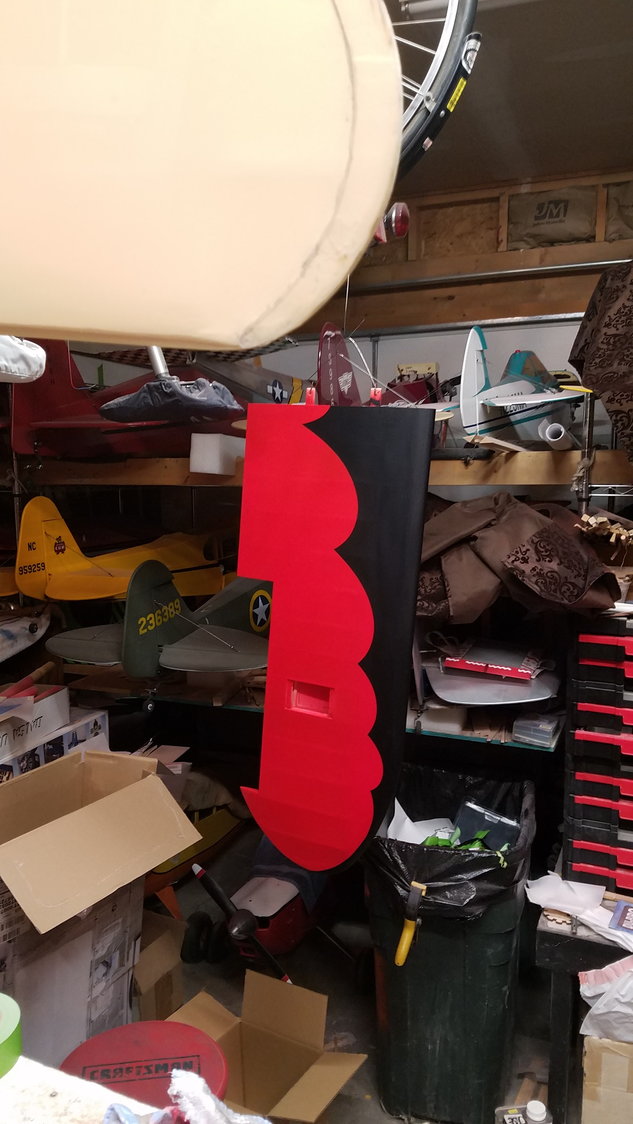
wing scallops were laid out with measurements and french curve
01-26-2022, 10:47 PM
#16
Thread Starter
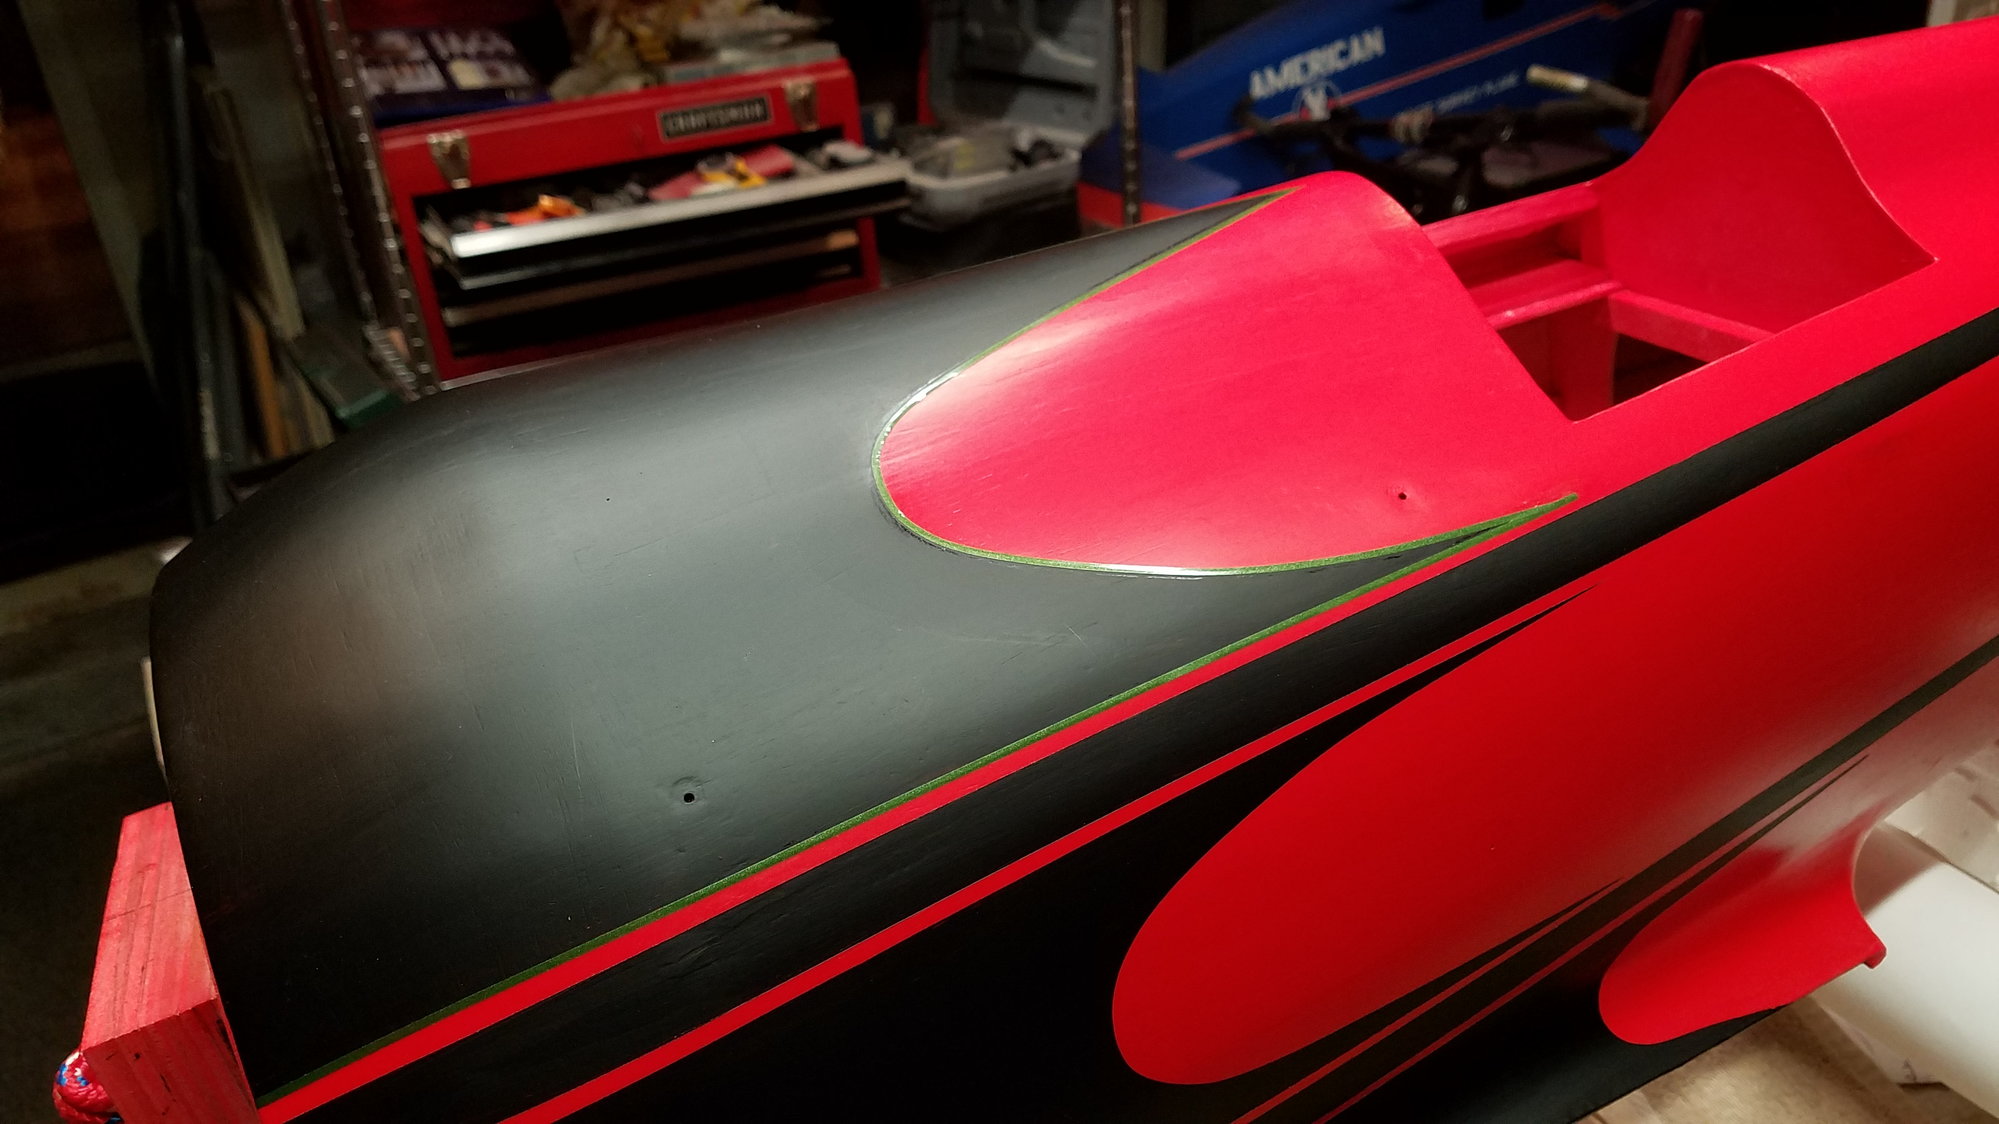
the original has a green trim around the black that I thought about trying to replicate with trim tape, the tape didn't stick down on the curves like I wanted so I may Skip for now and think about some more
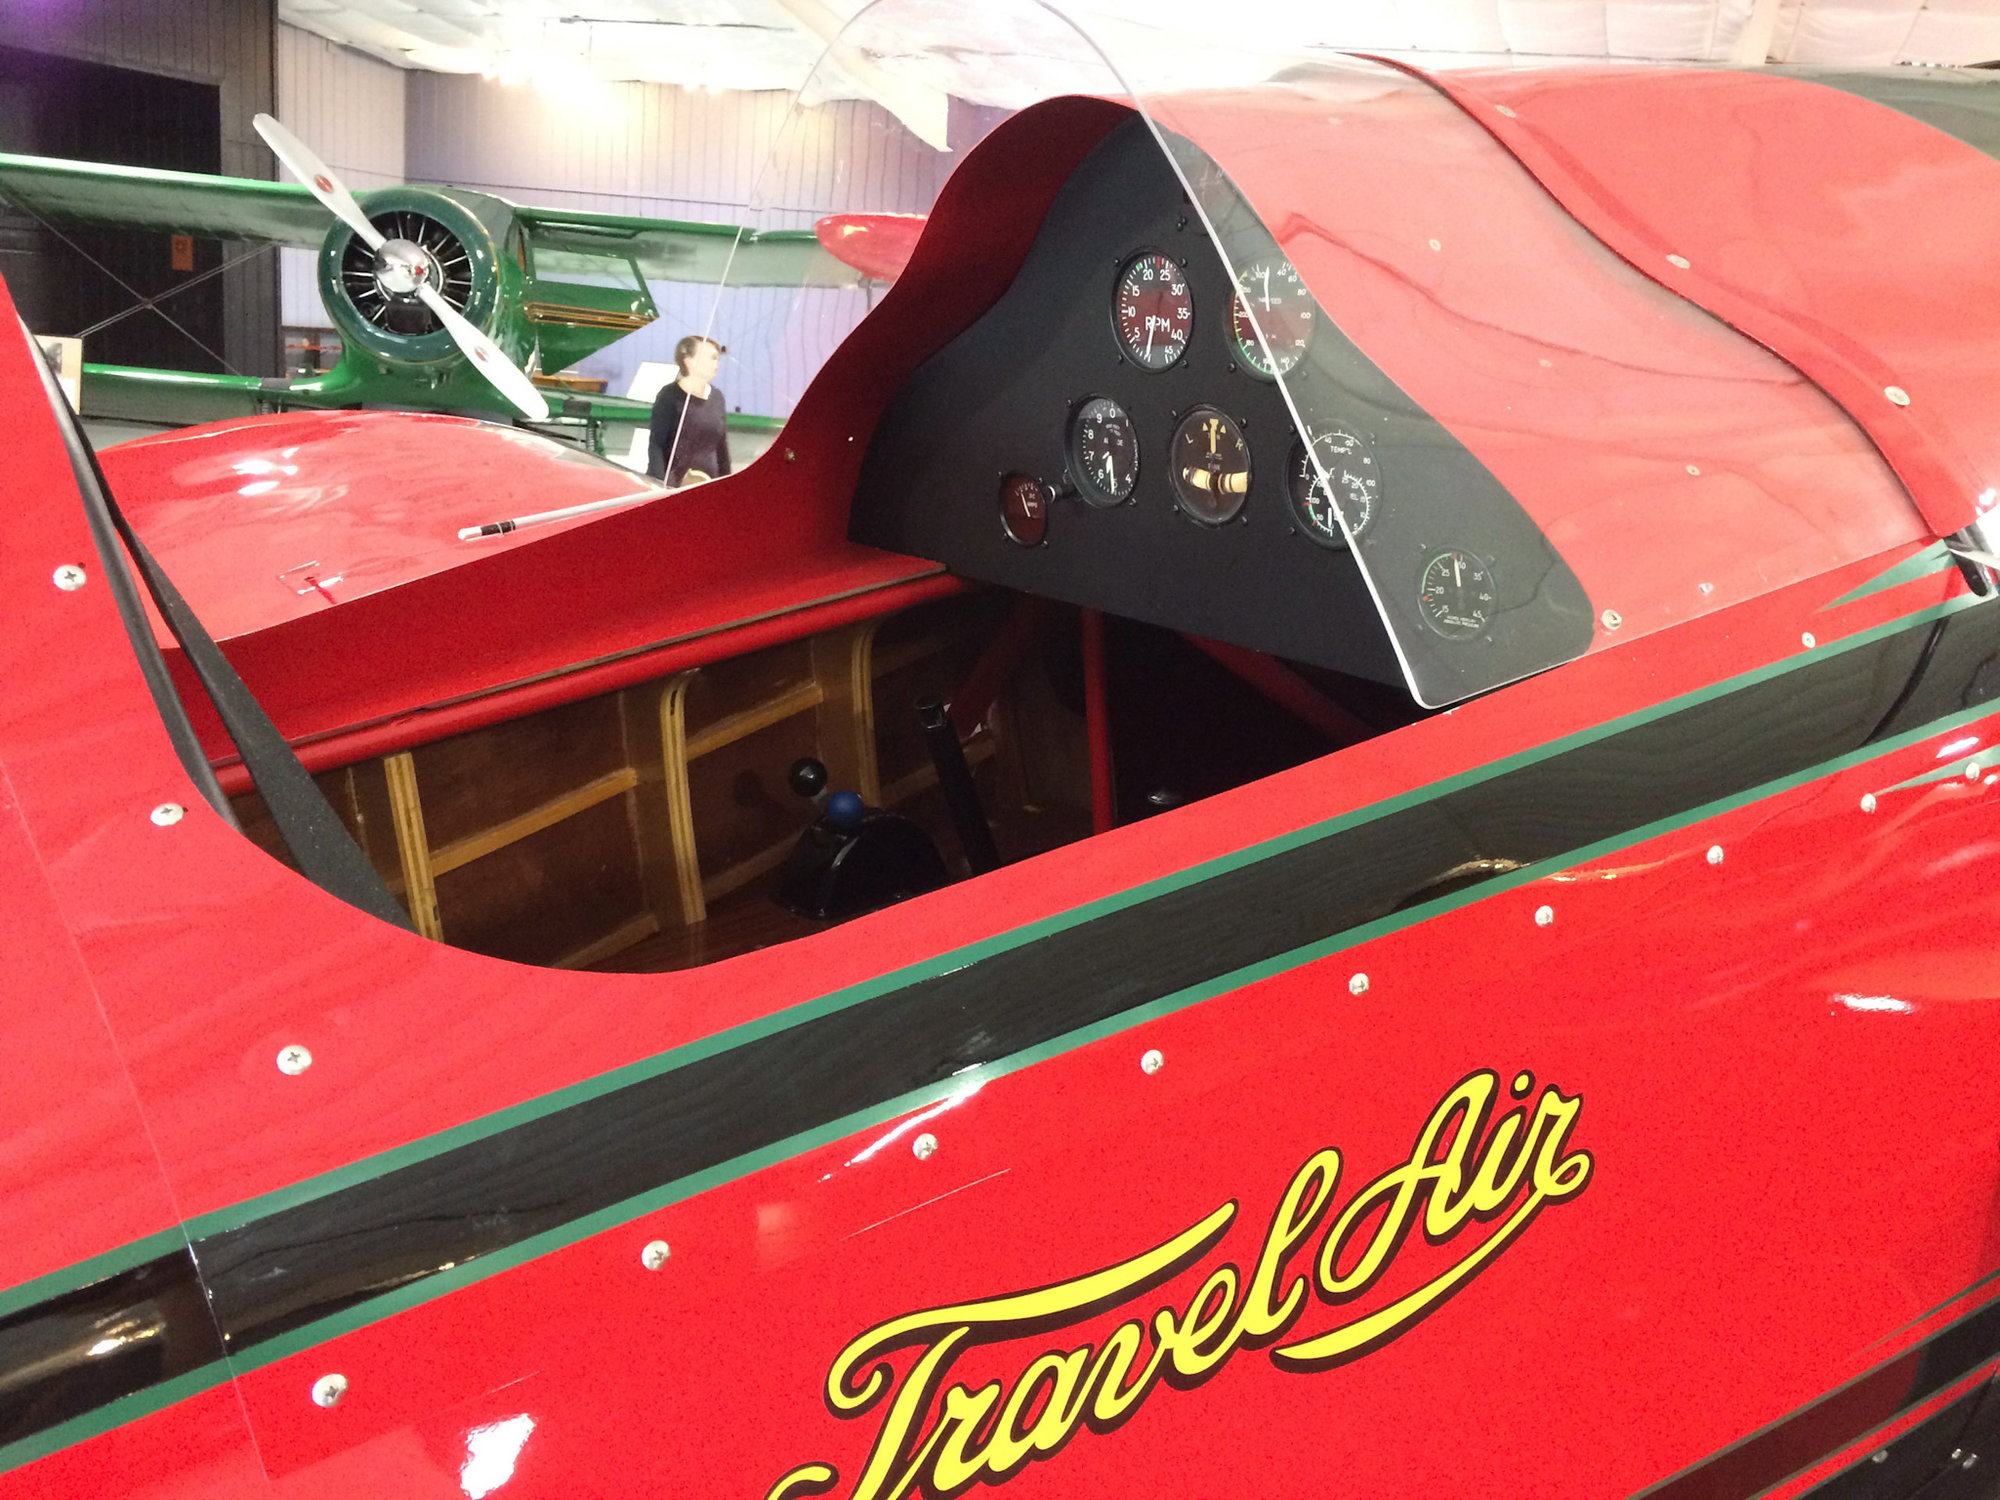
Rebuilt original in beech museum.
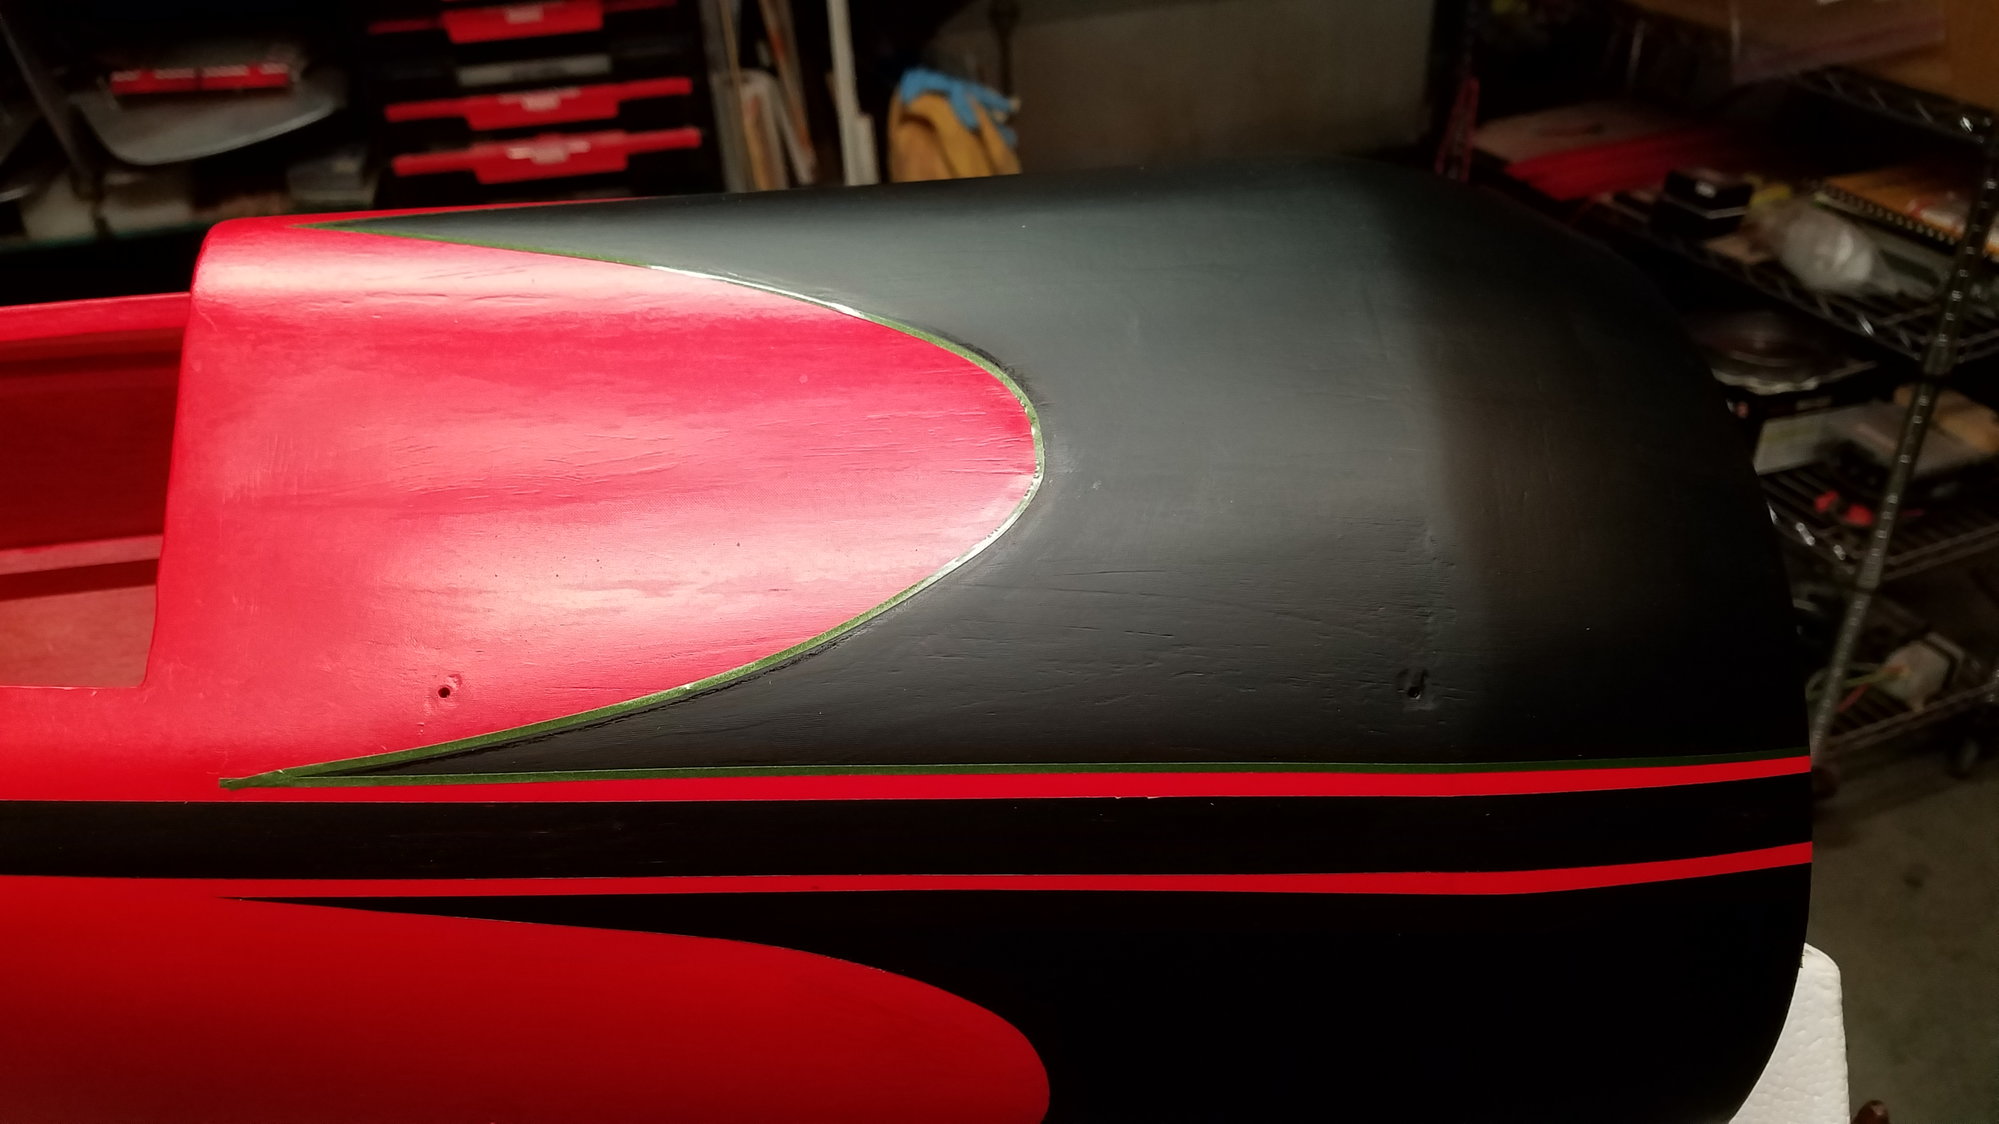
trim did not lay down on curves well
. most of the pictures you don't realize that this is there.
Rebuilt original in beech museum.
trim did not lay down on curves well
. most of the pictures you don't realize that this is there.
01-27-2022, 07:28 PM
#18
Thread Starter
thank you, currently working on gluing hinges and connecting linkages. Still need to finish cowl cutouts and fiber glassing
fuse with wings, upper wires installed
fuse with wings, upper wires installed
02-02-2022, 07:34 PM
#19
Thread Starter
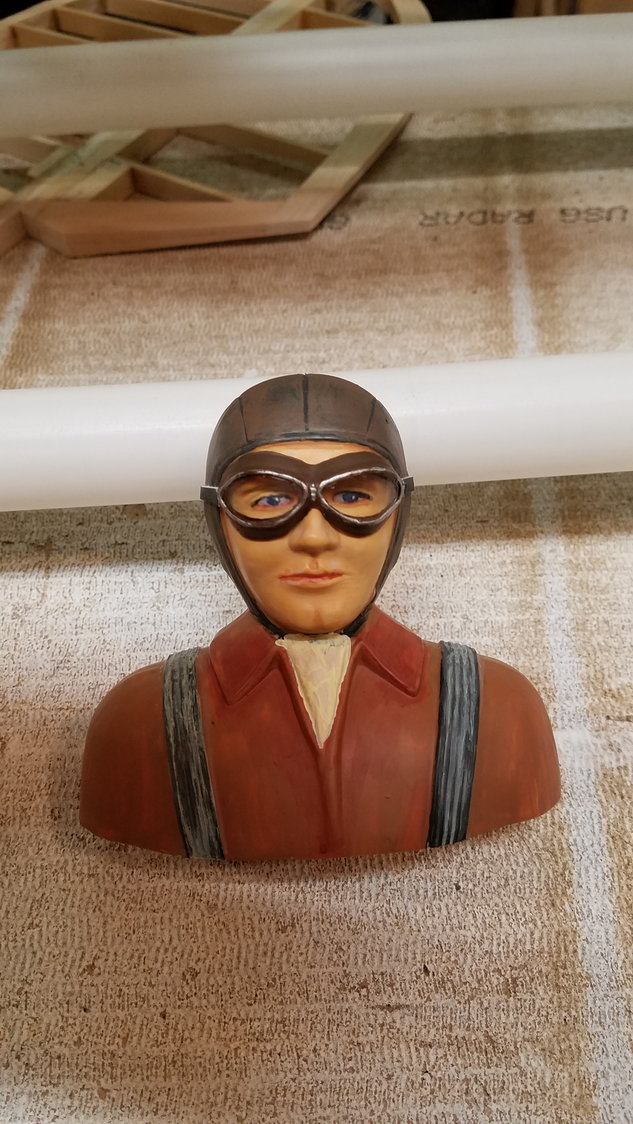
A little work on the cockpit
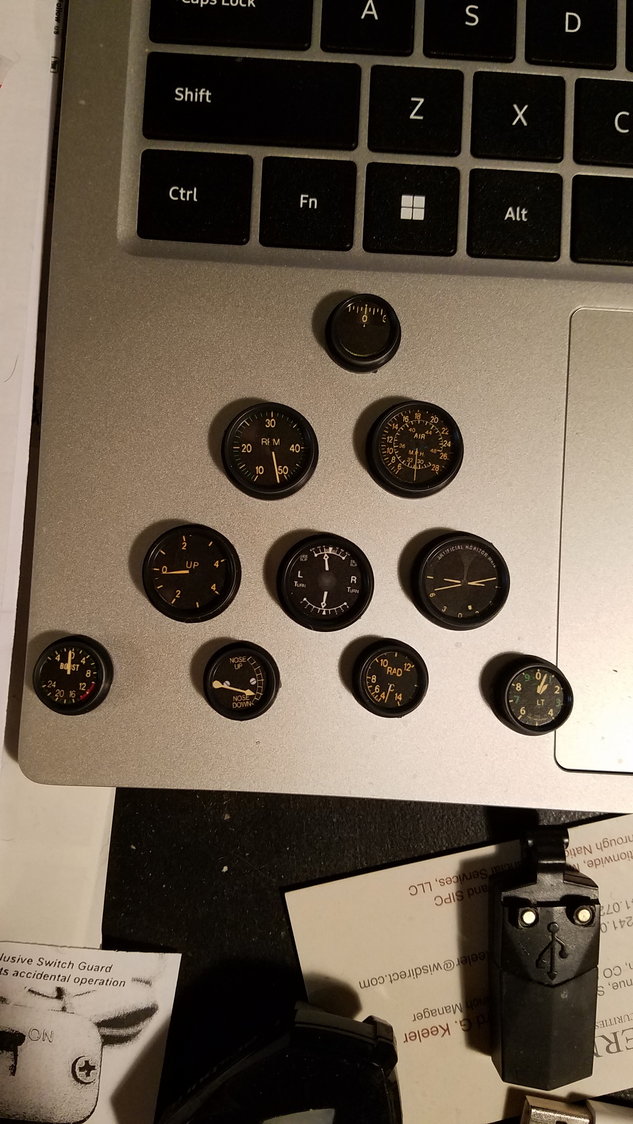
instruments laid out, not correct but should look nice
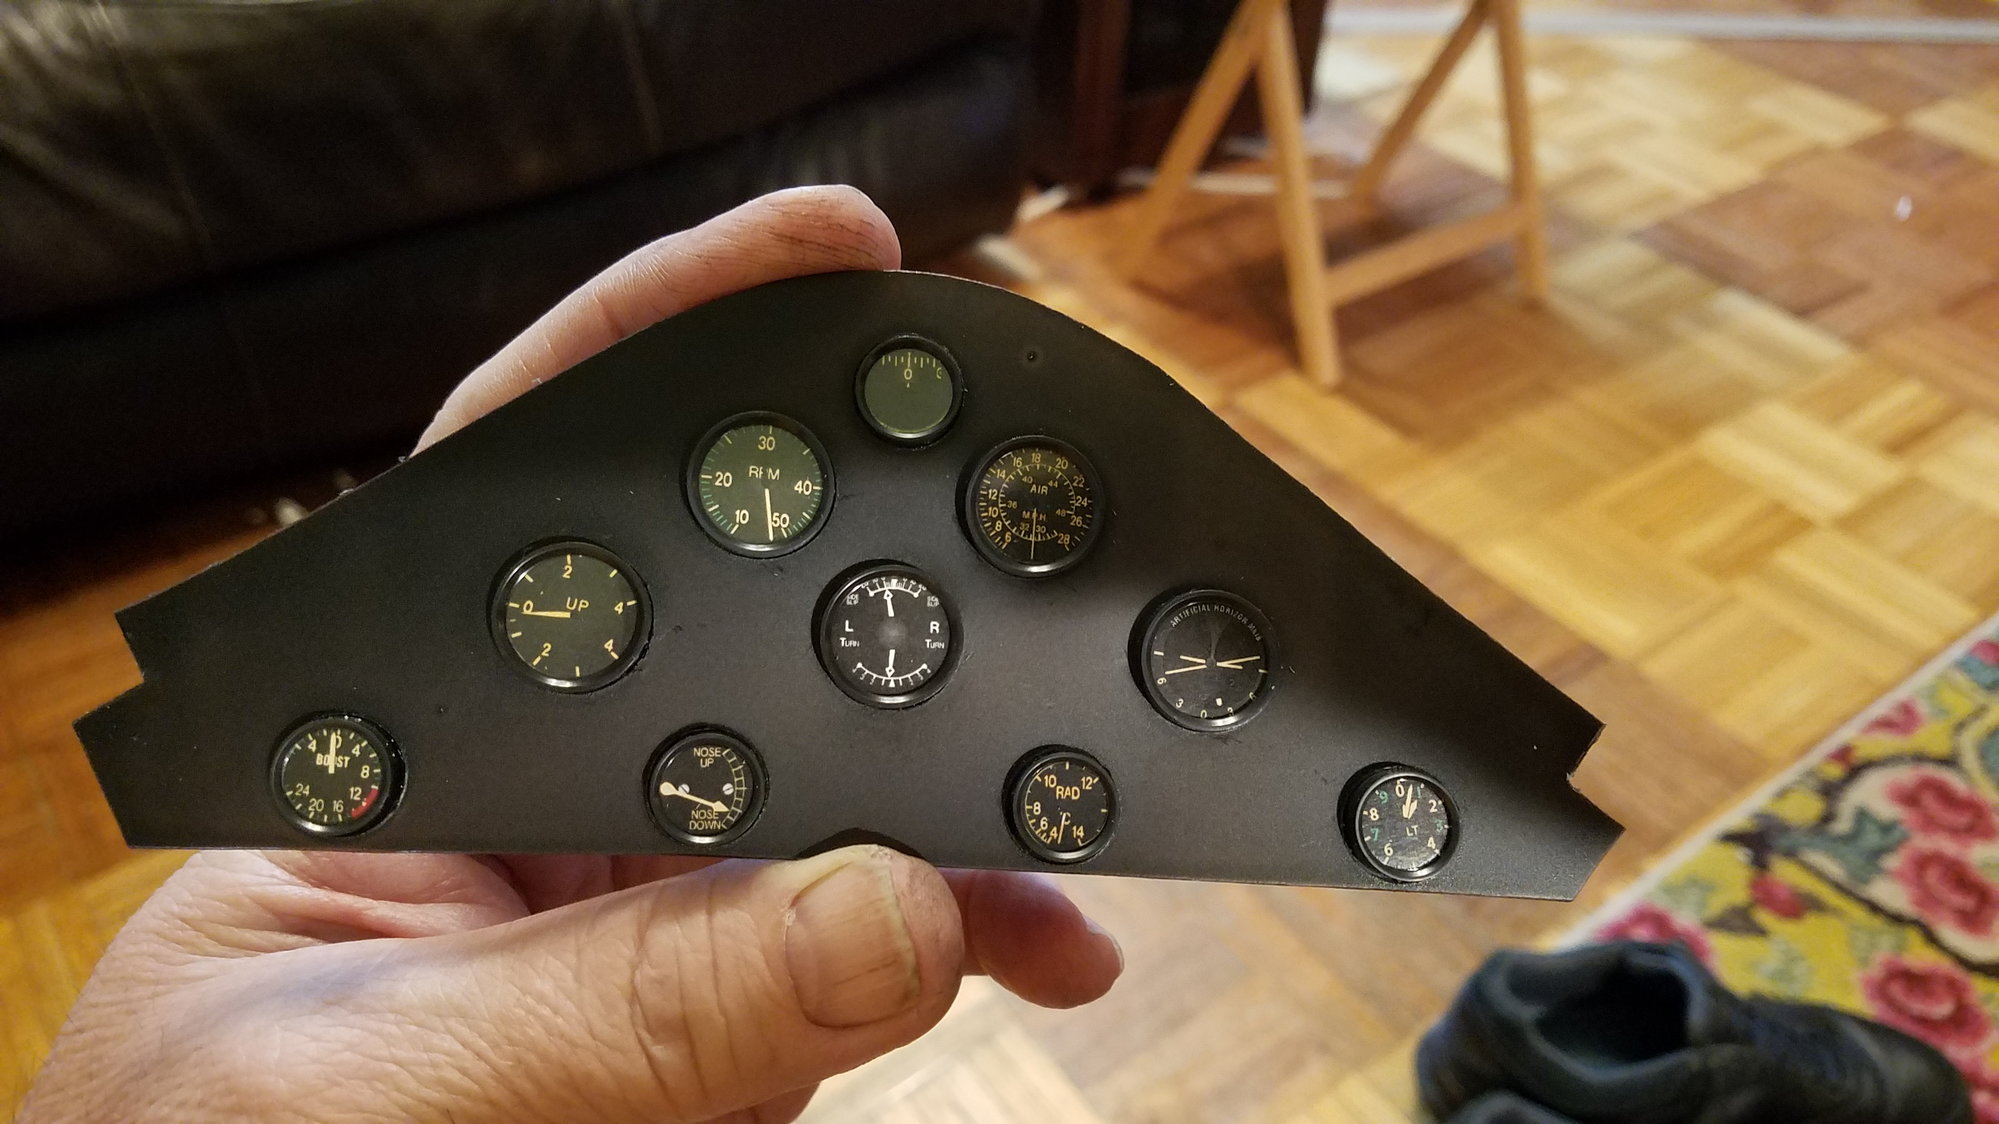
set in plastic
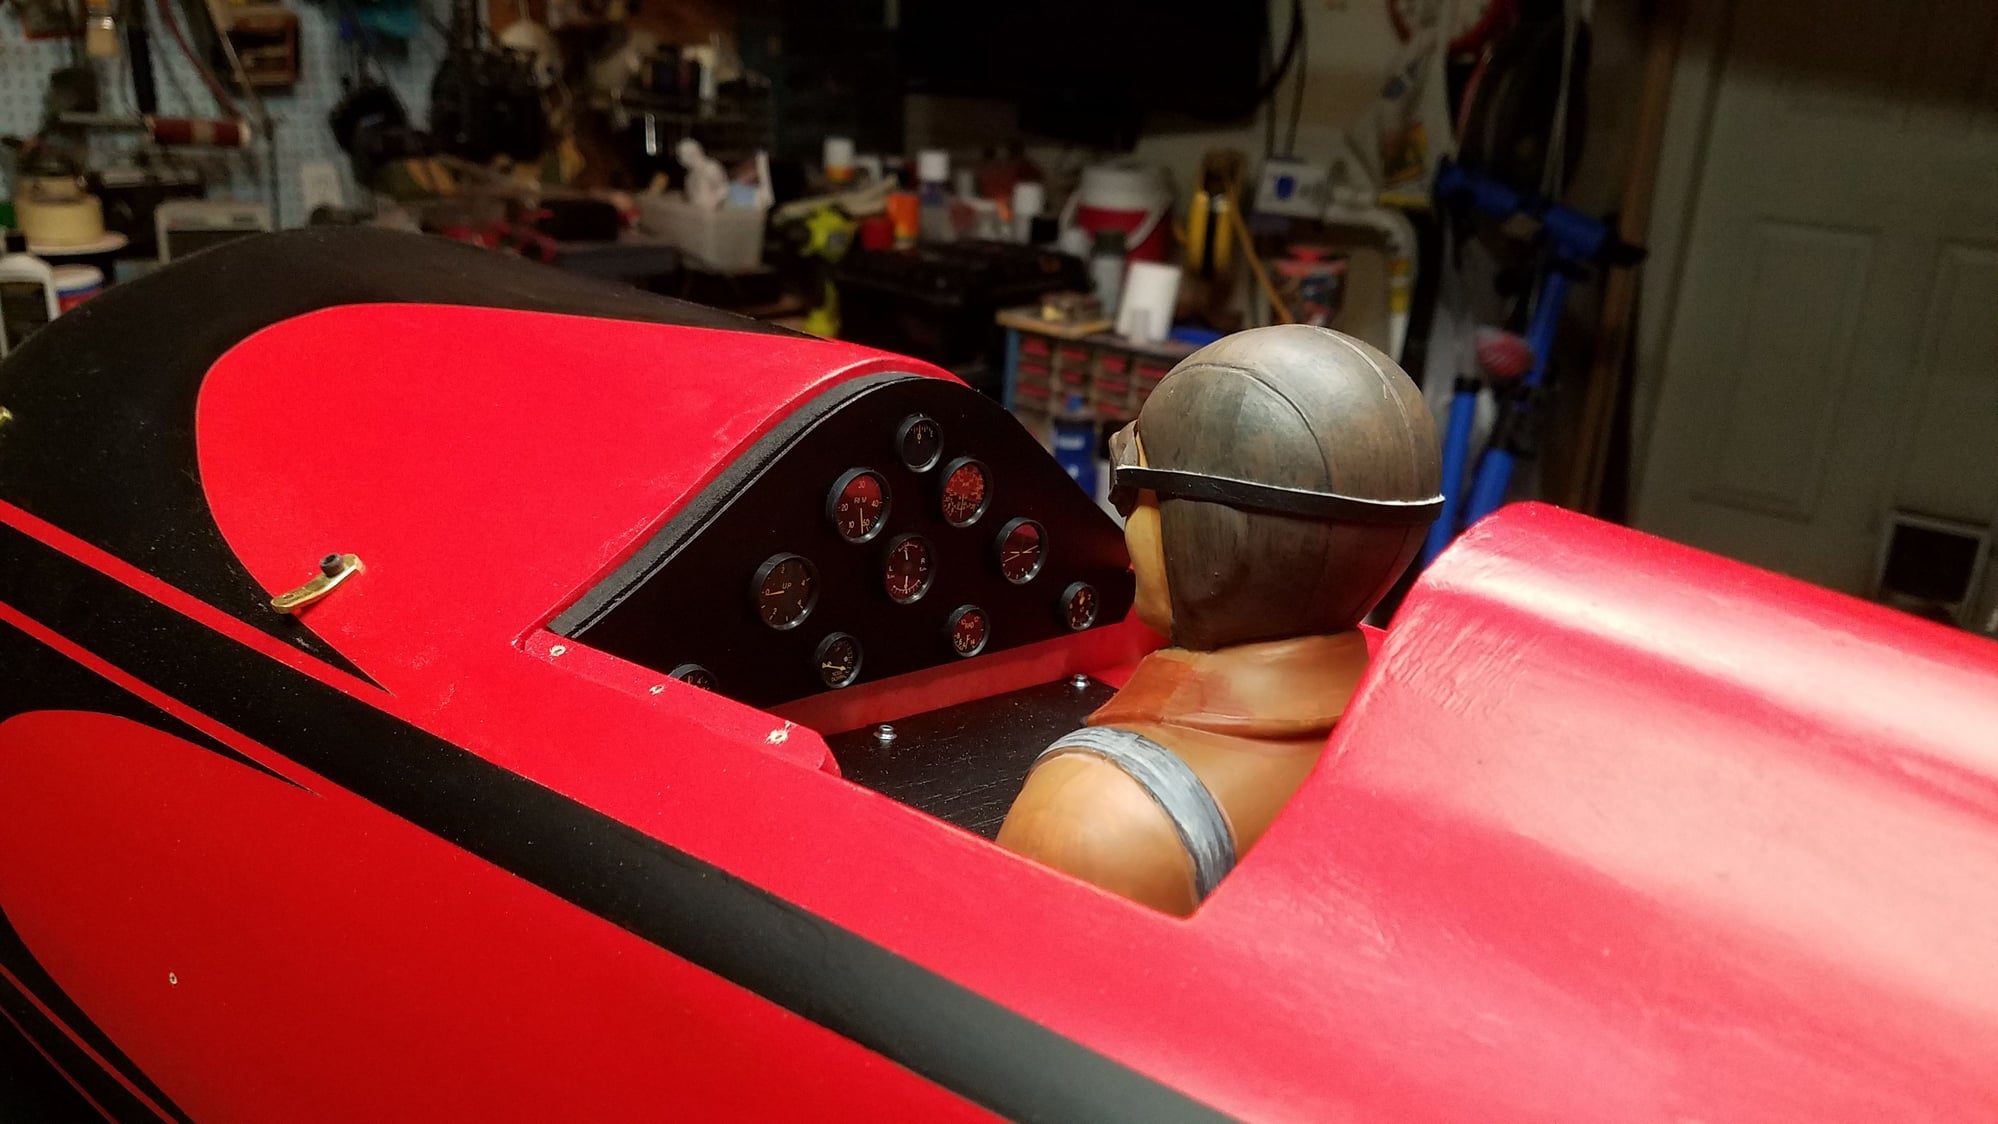
mounted in plane
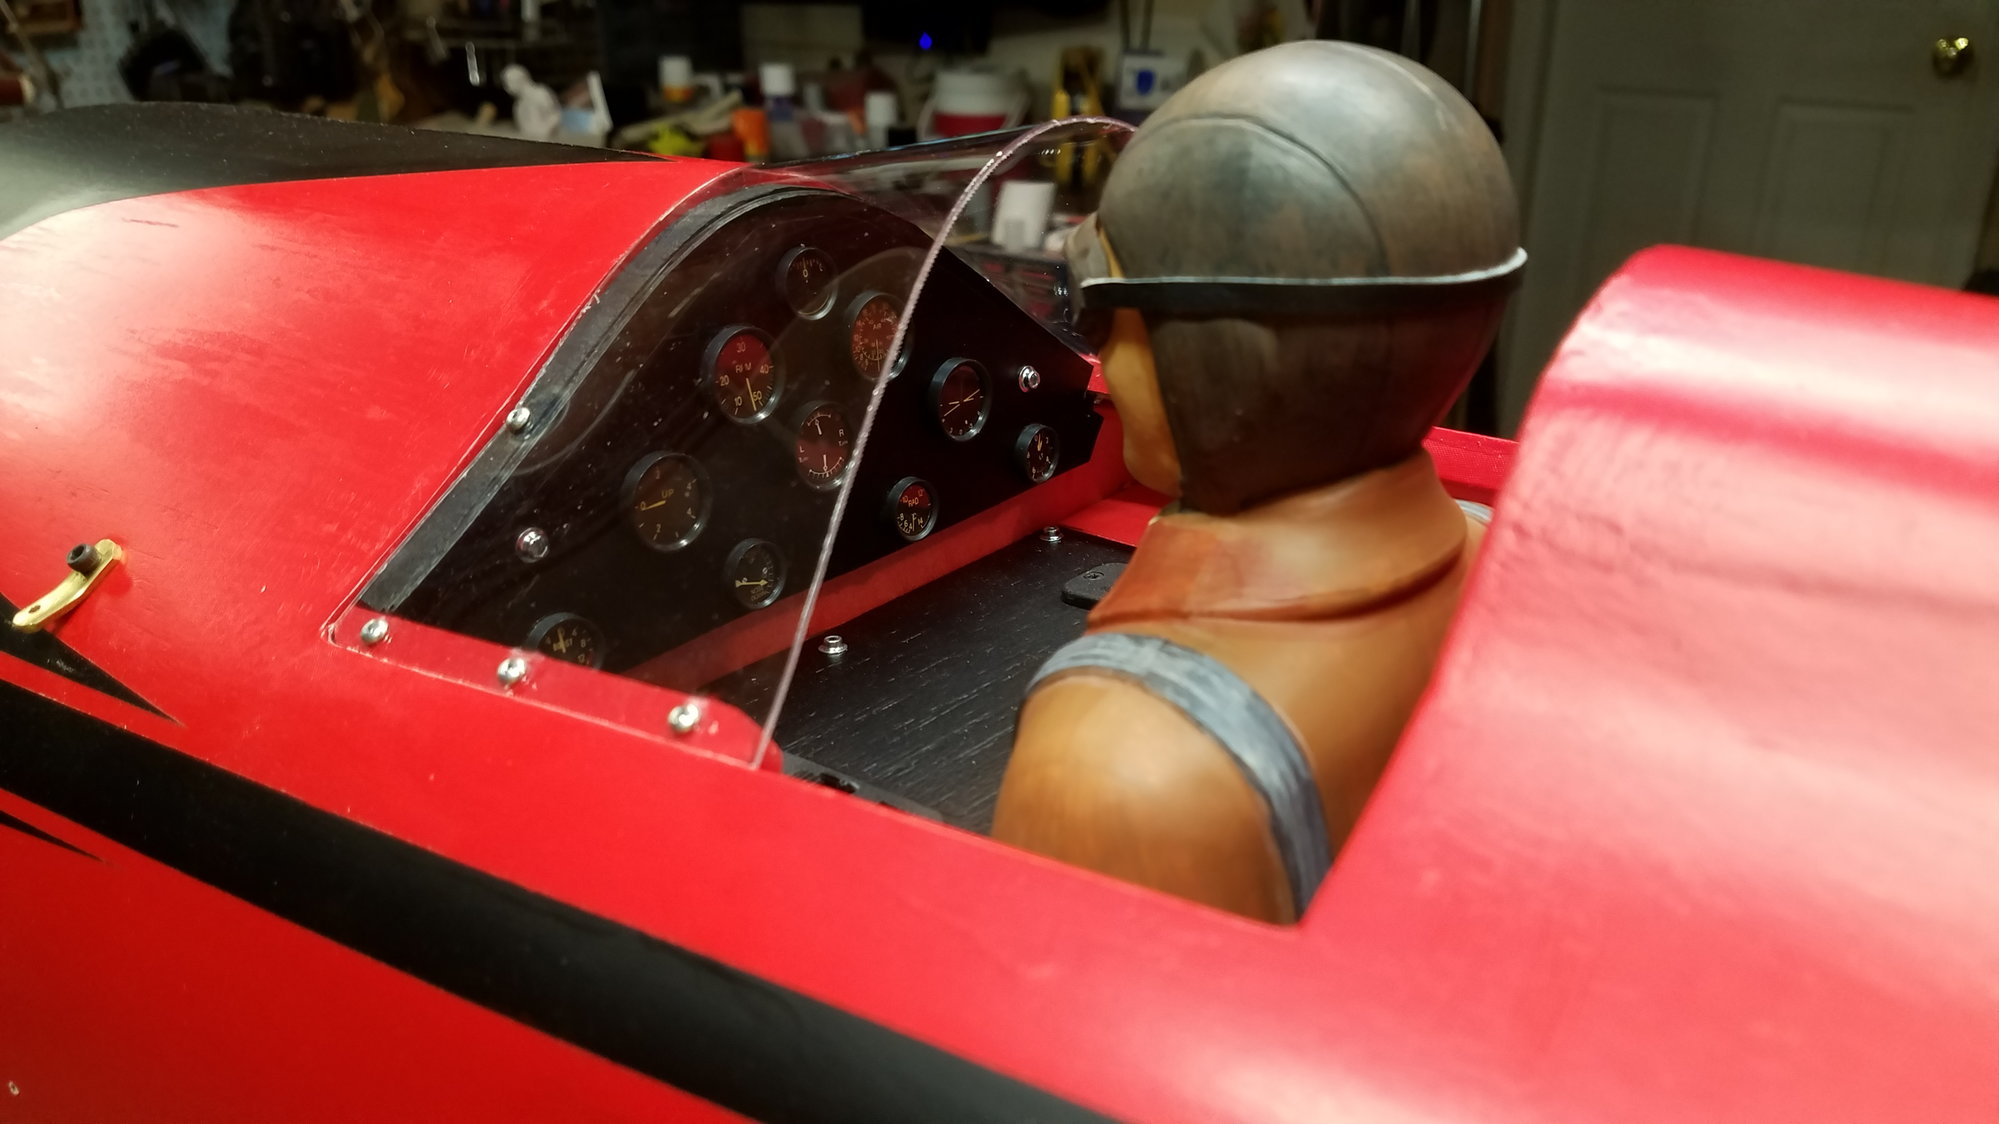
with windshield
My wife knitted him a scarf
instruments laid out, not correct but should look nice
set in plastic
mounted in plane
with windshield
My wife knitted him a scarf
02-06-2022, 01:27 PM
#20
Thread Starter
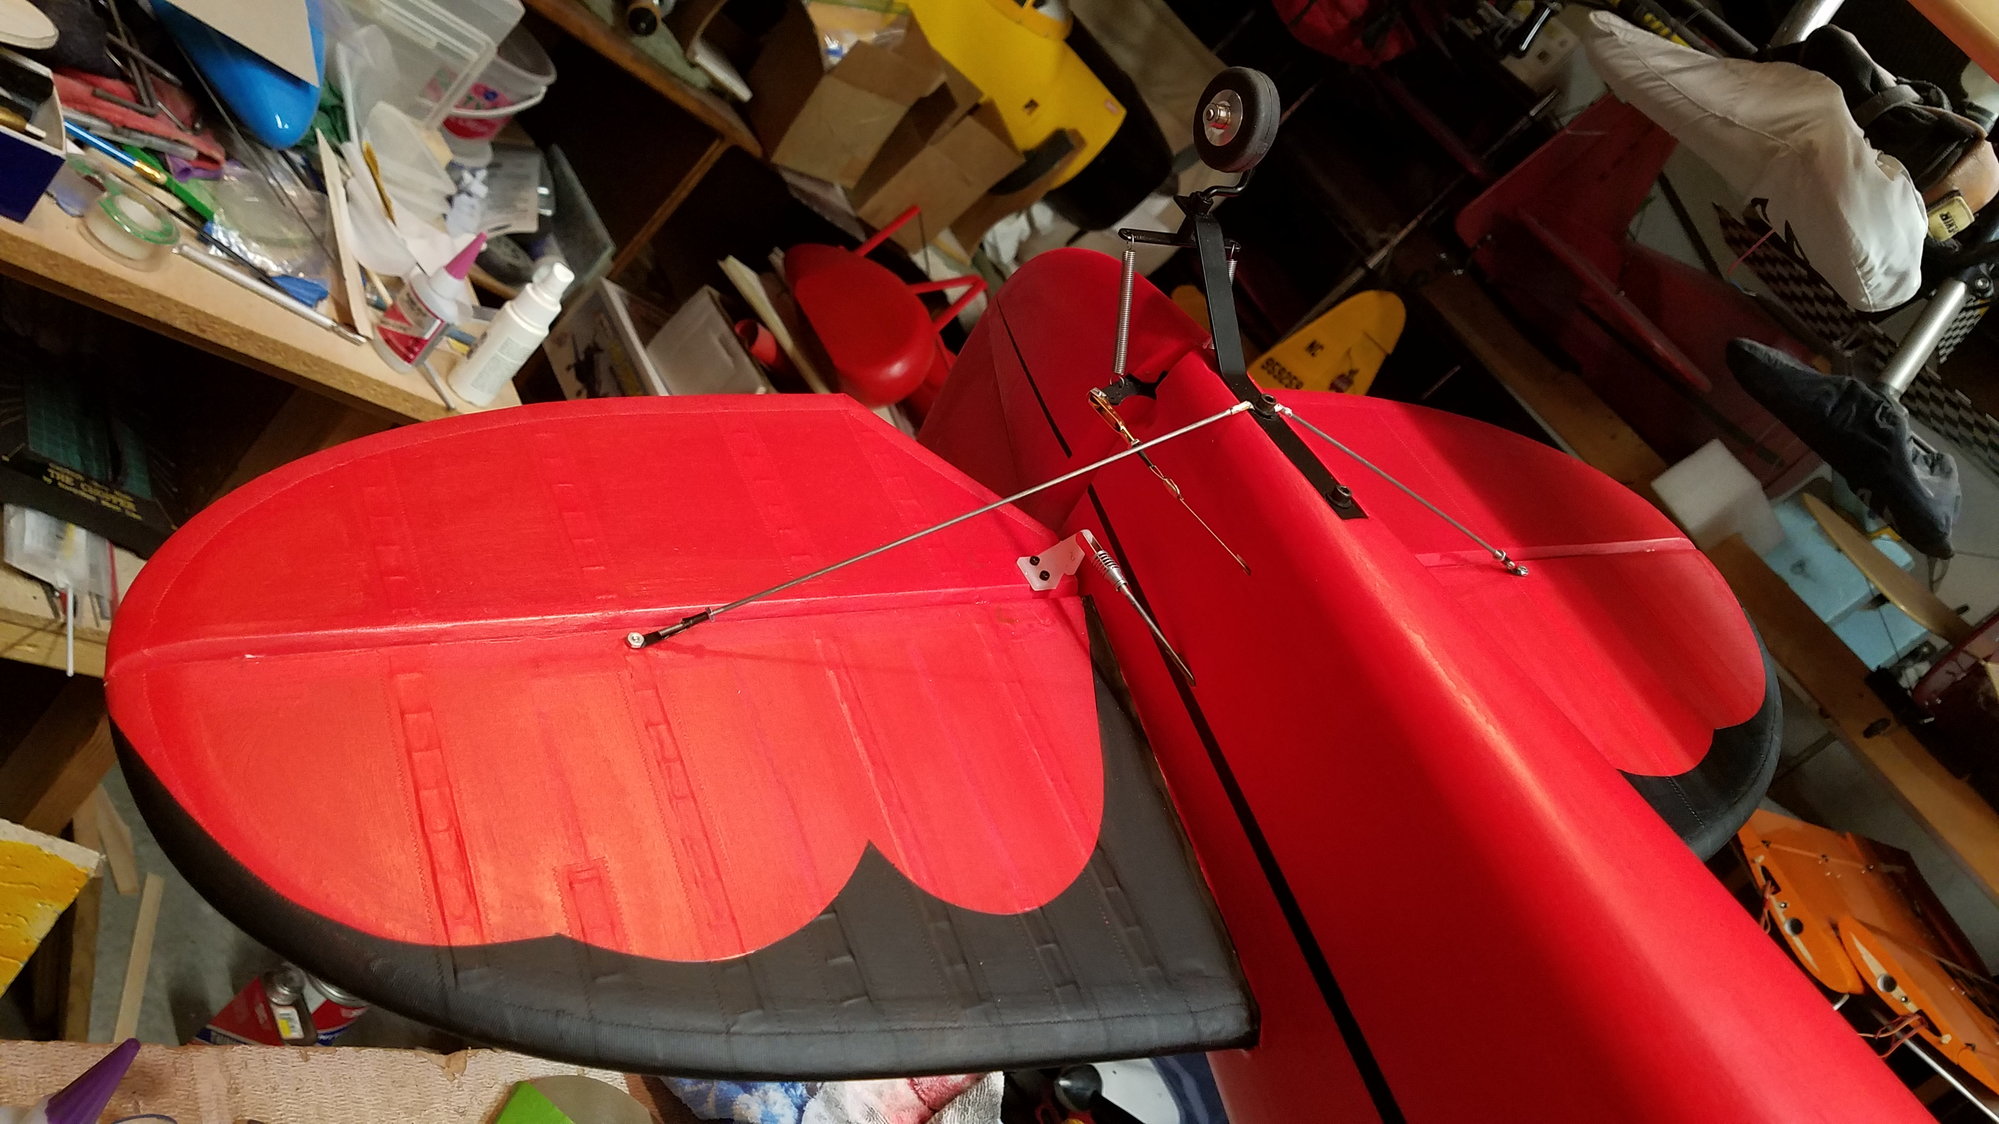
tail braces and tail wheel hooked up
2 elevator and 1 rudder servo hooked up
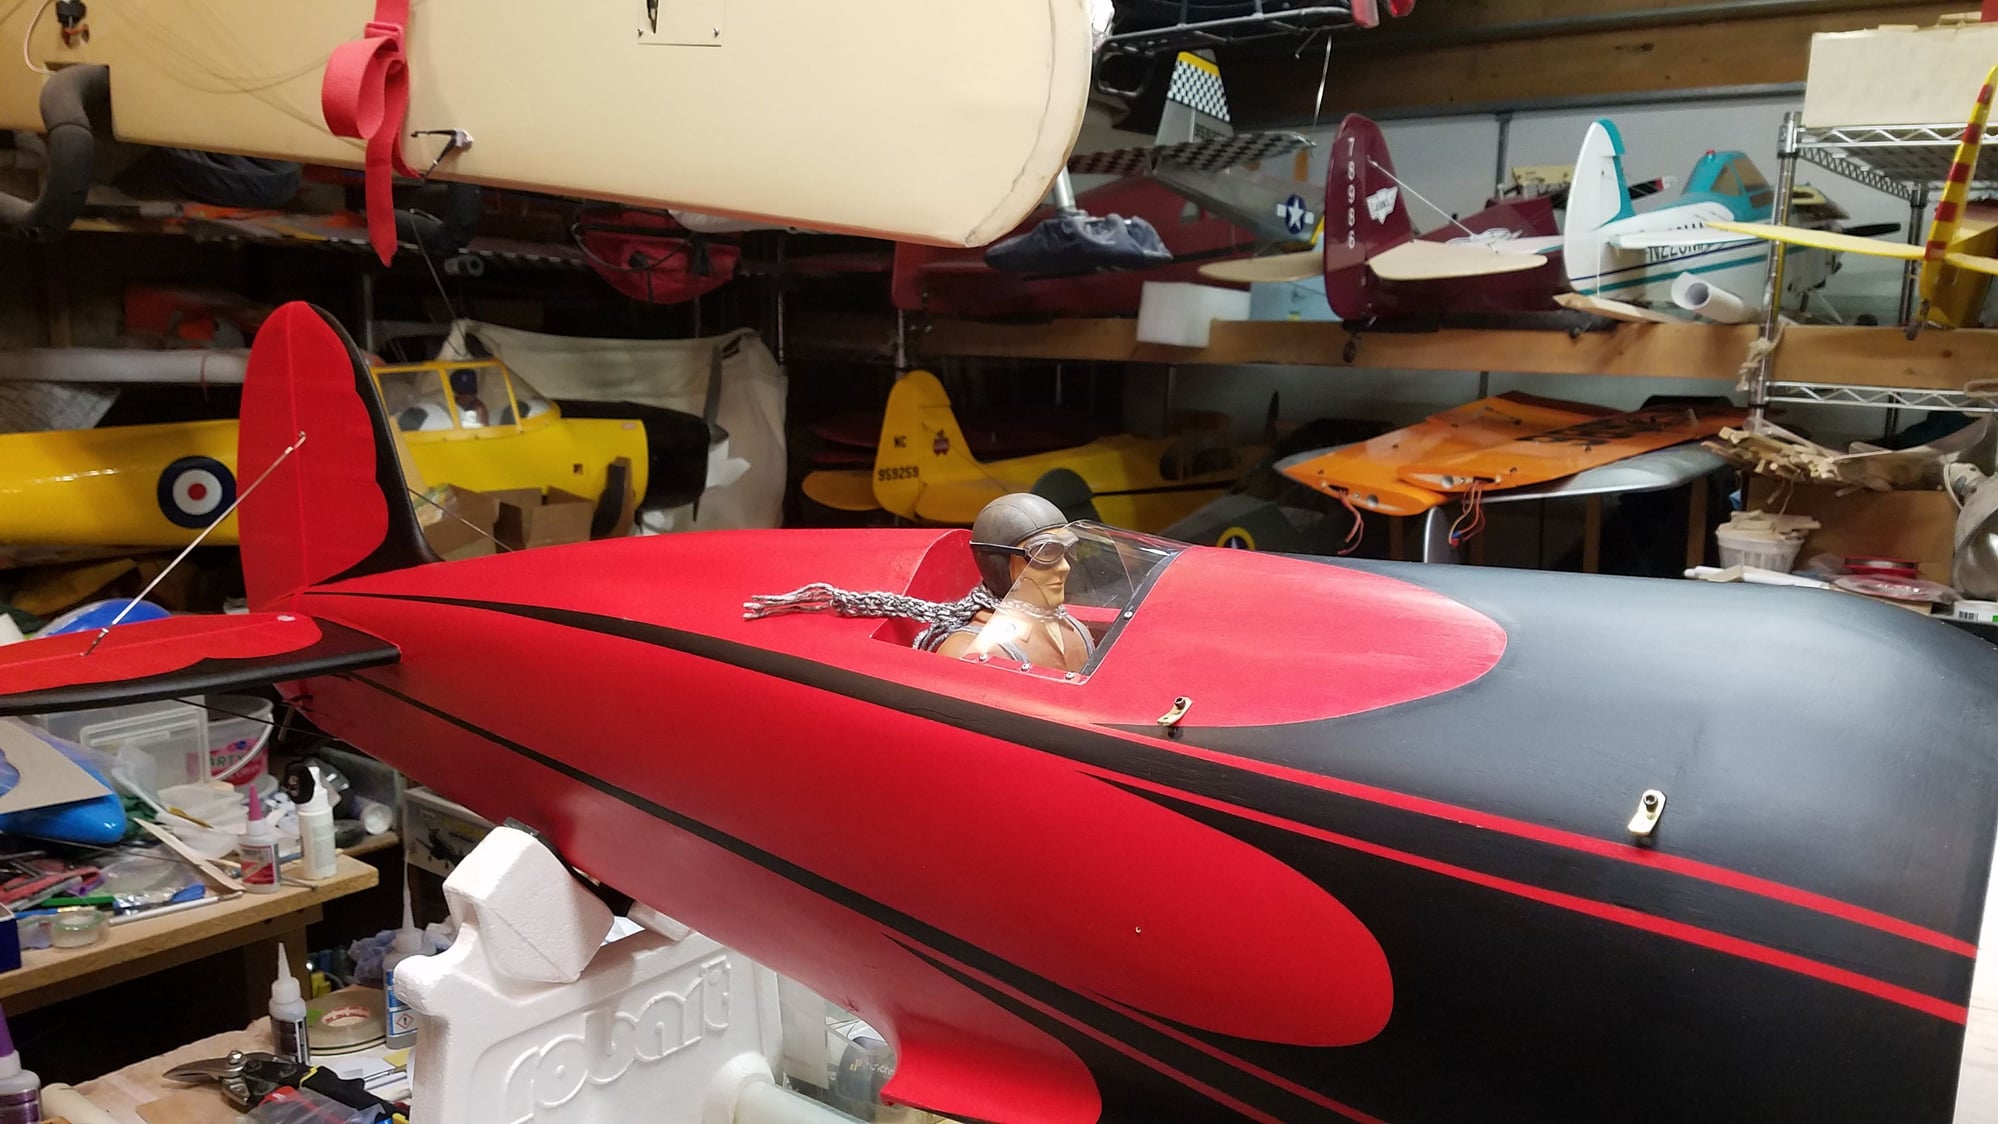
red on wheel pant
masked with black, should have paid more attention when putting red on, covered a lot with black
masking removed showing access covers removed
 02-10-2022, 09:48 PM
#21
Thread Starter
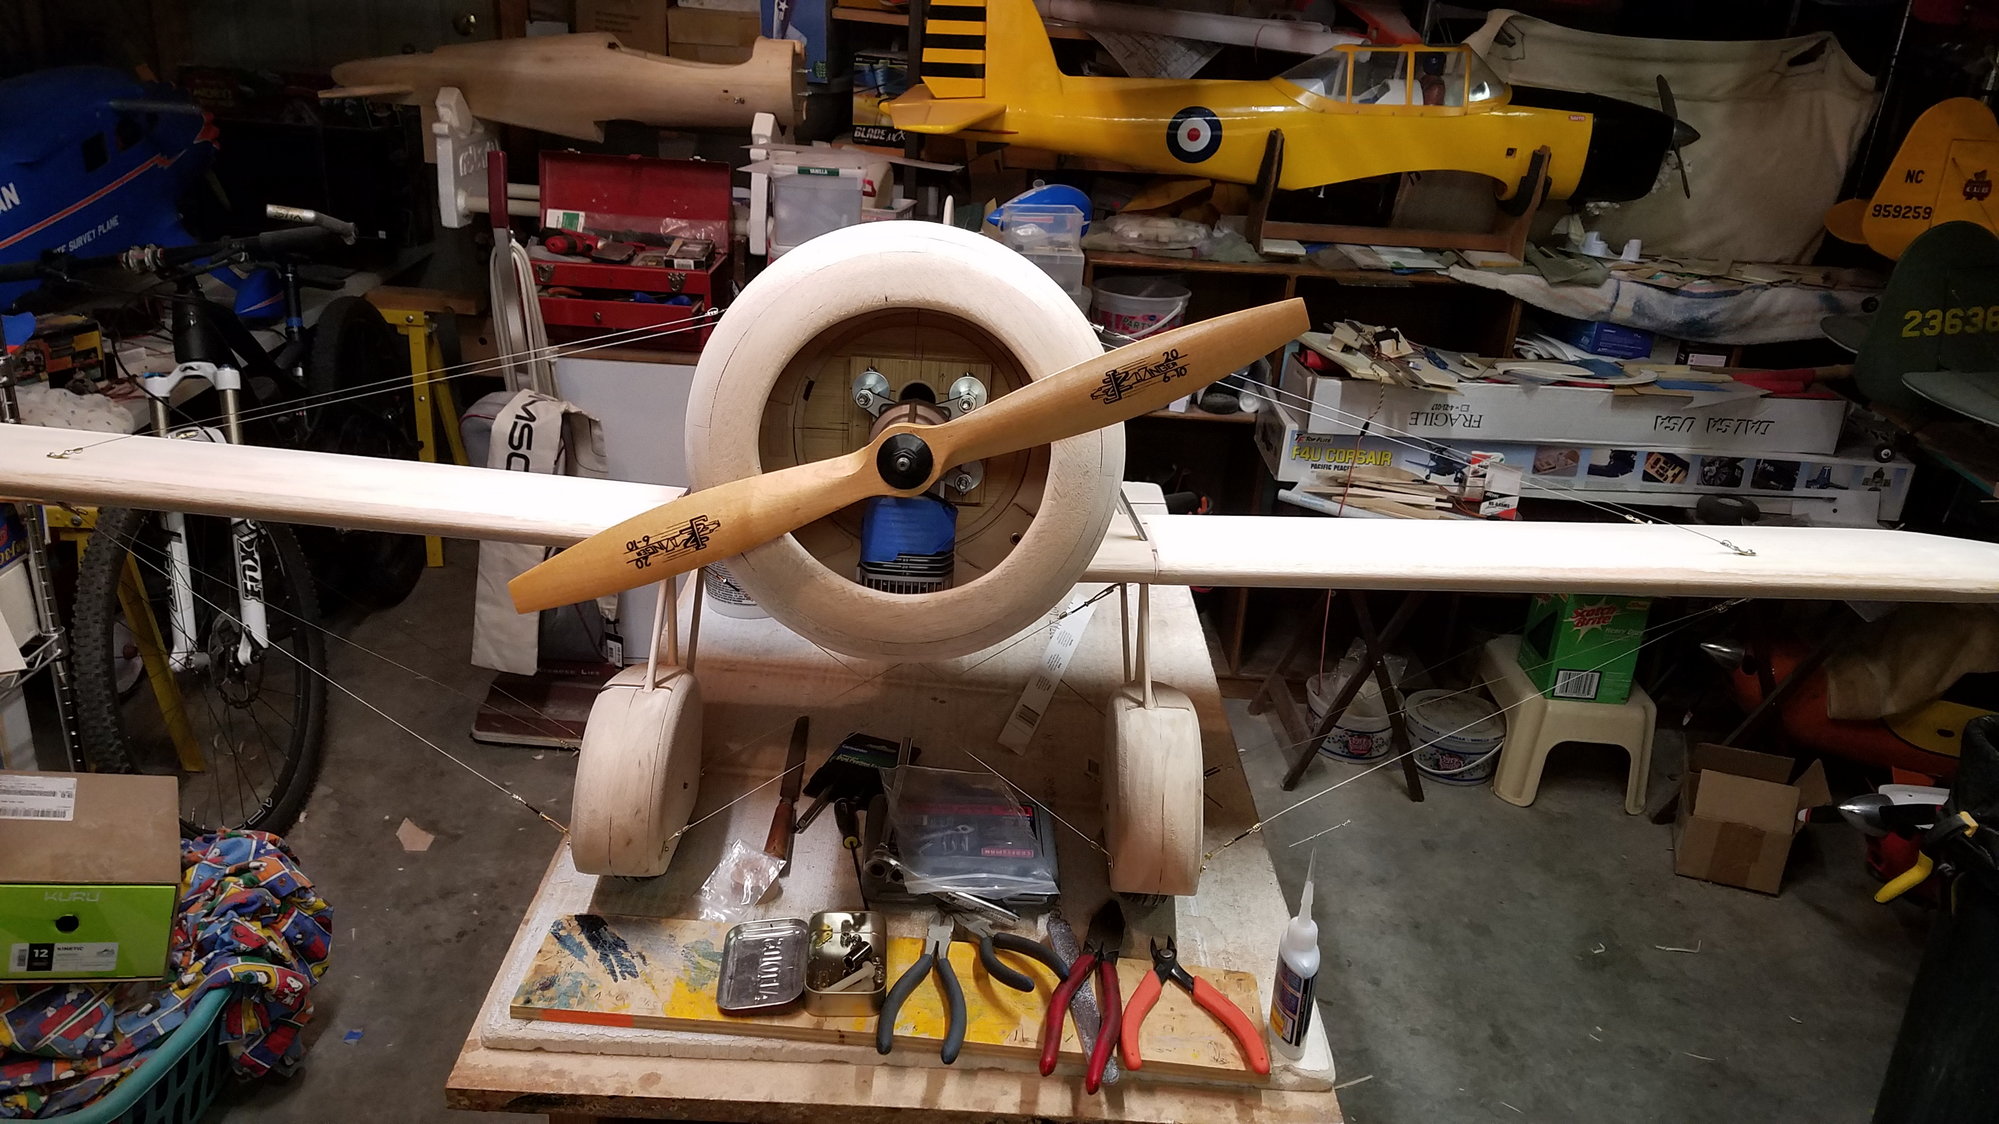
engine mounted using turnbuckles from hardware store for standoffs
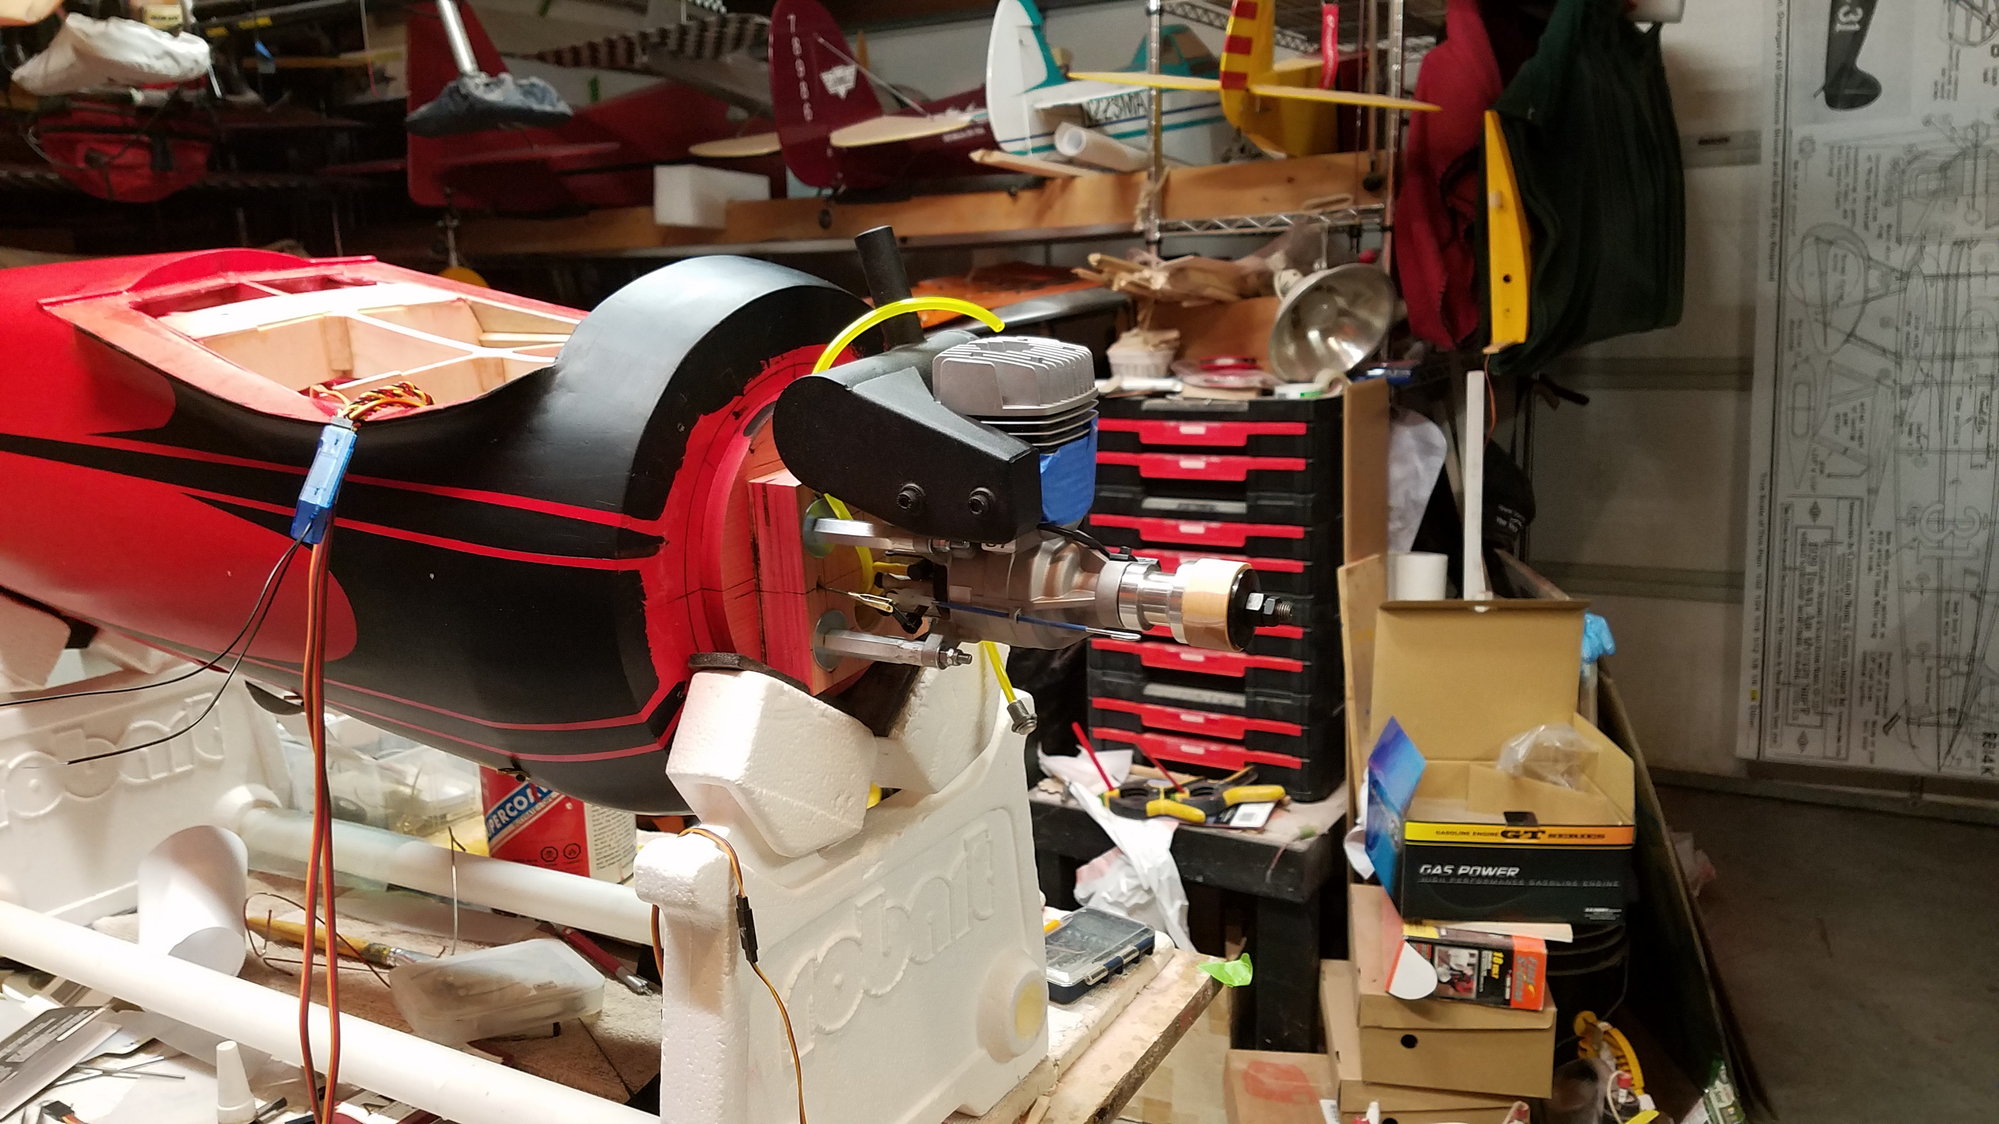
sitting on the wheels
something doesn't look quite finished
with falcon civilian 20" prop
 04-11-2022, 08:38 PM
#22
Thread Starter
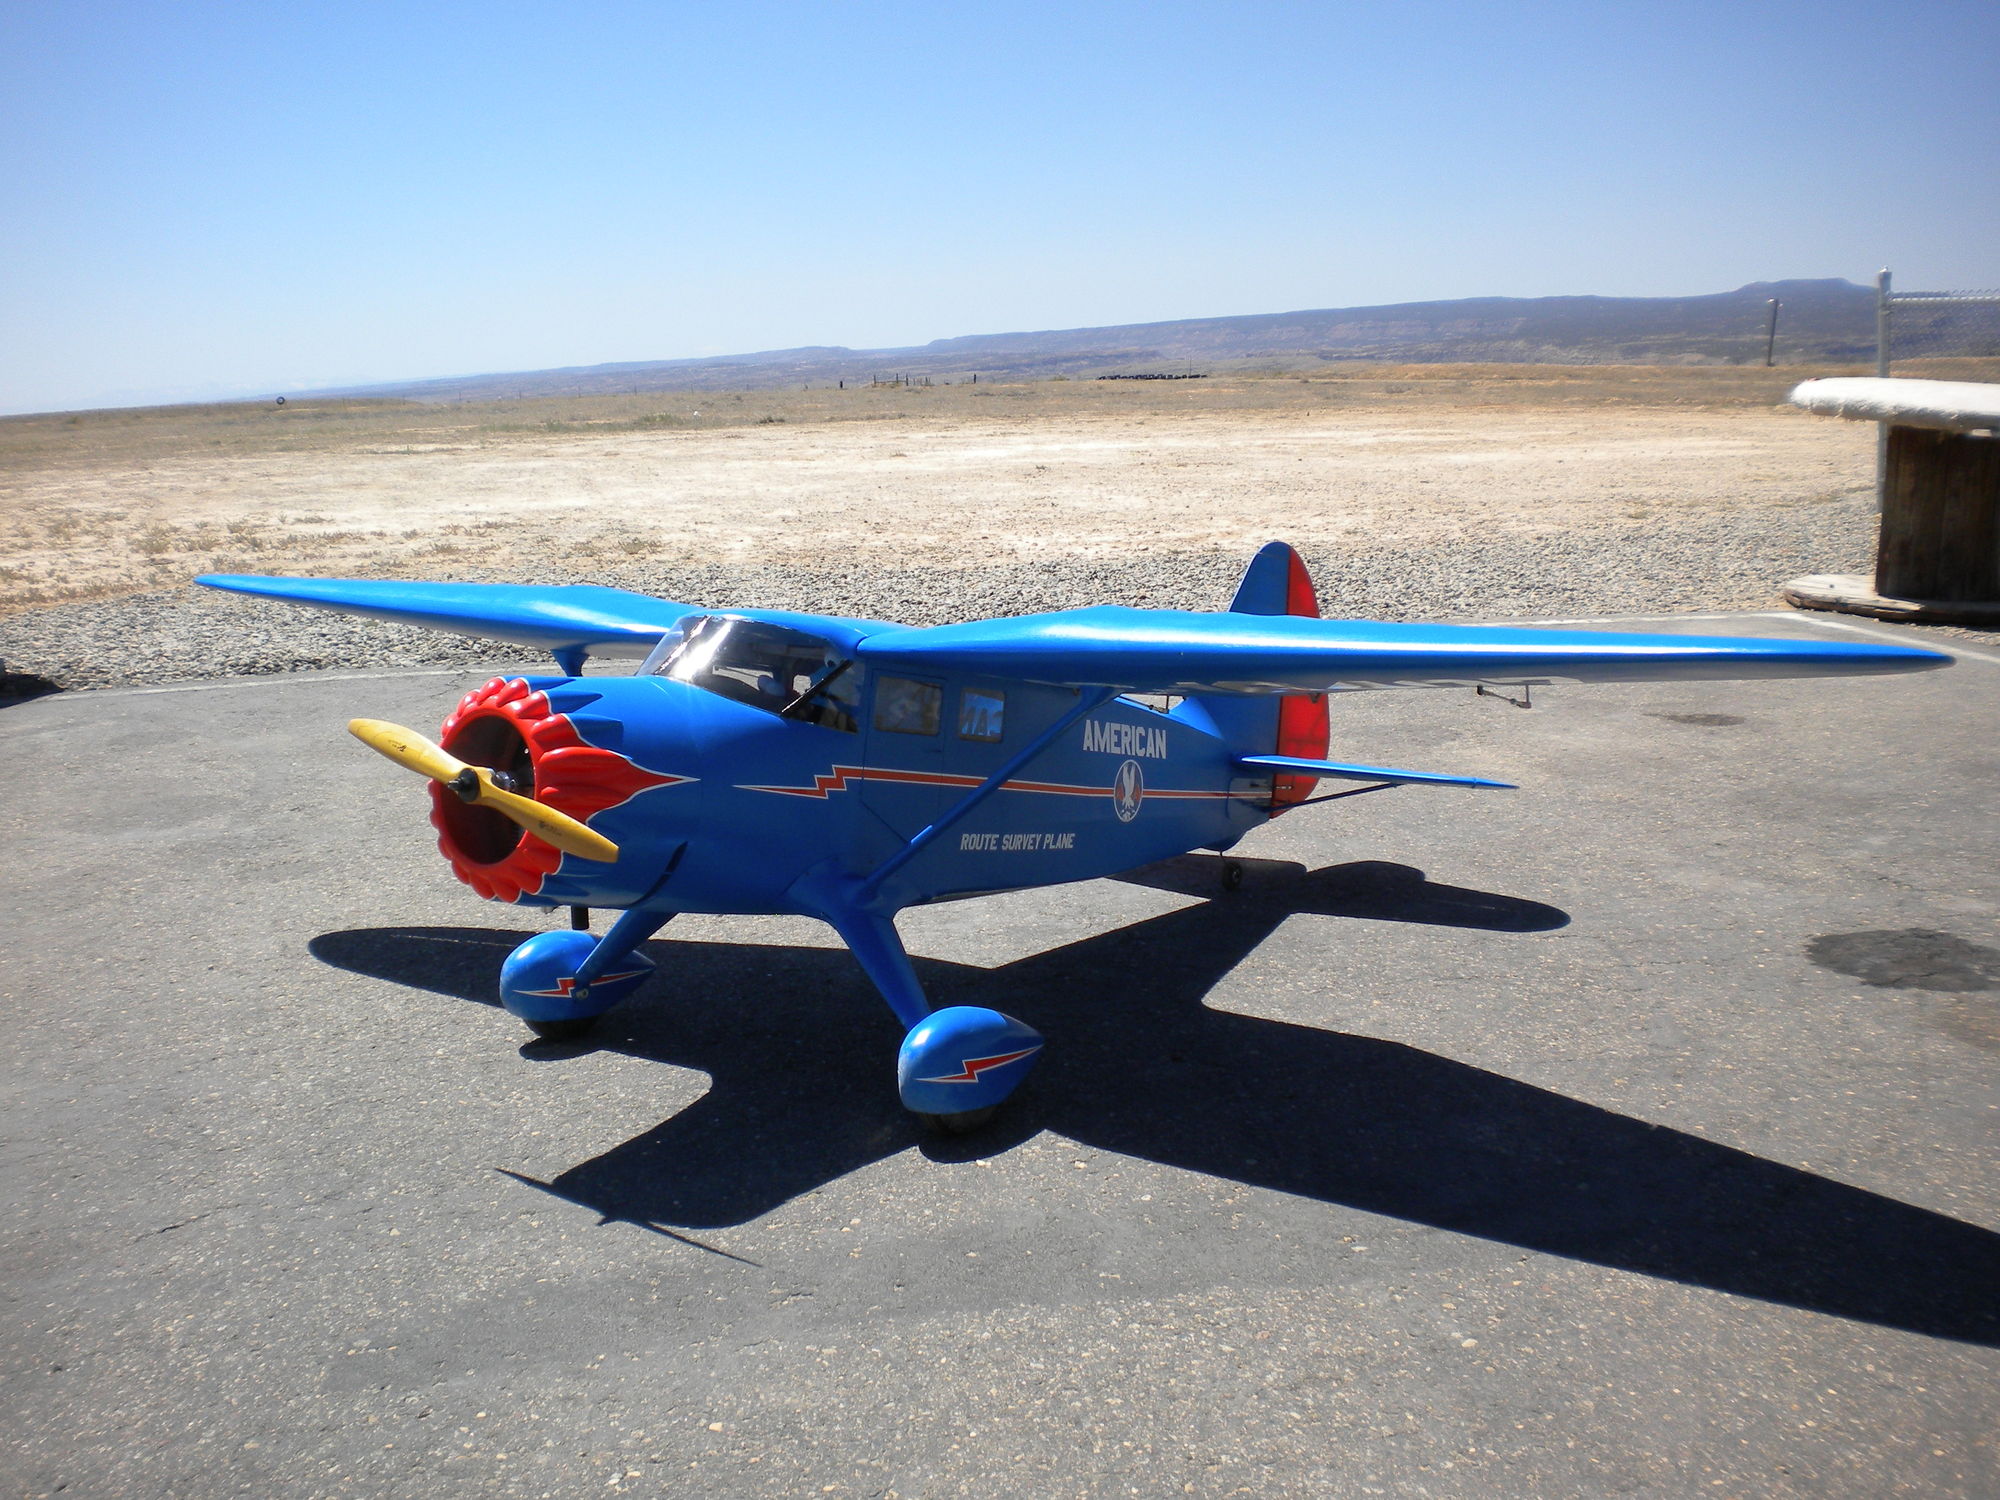
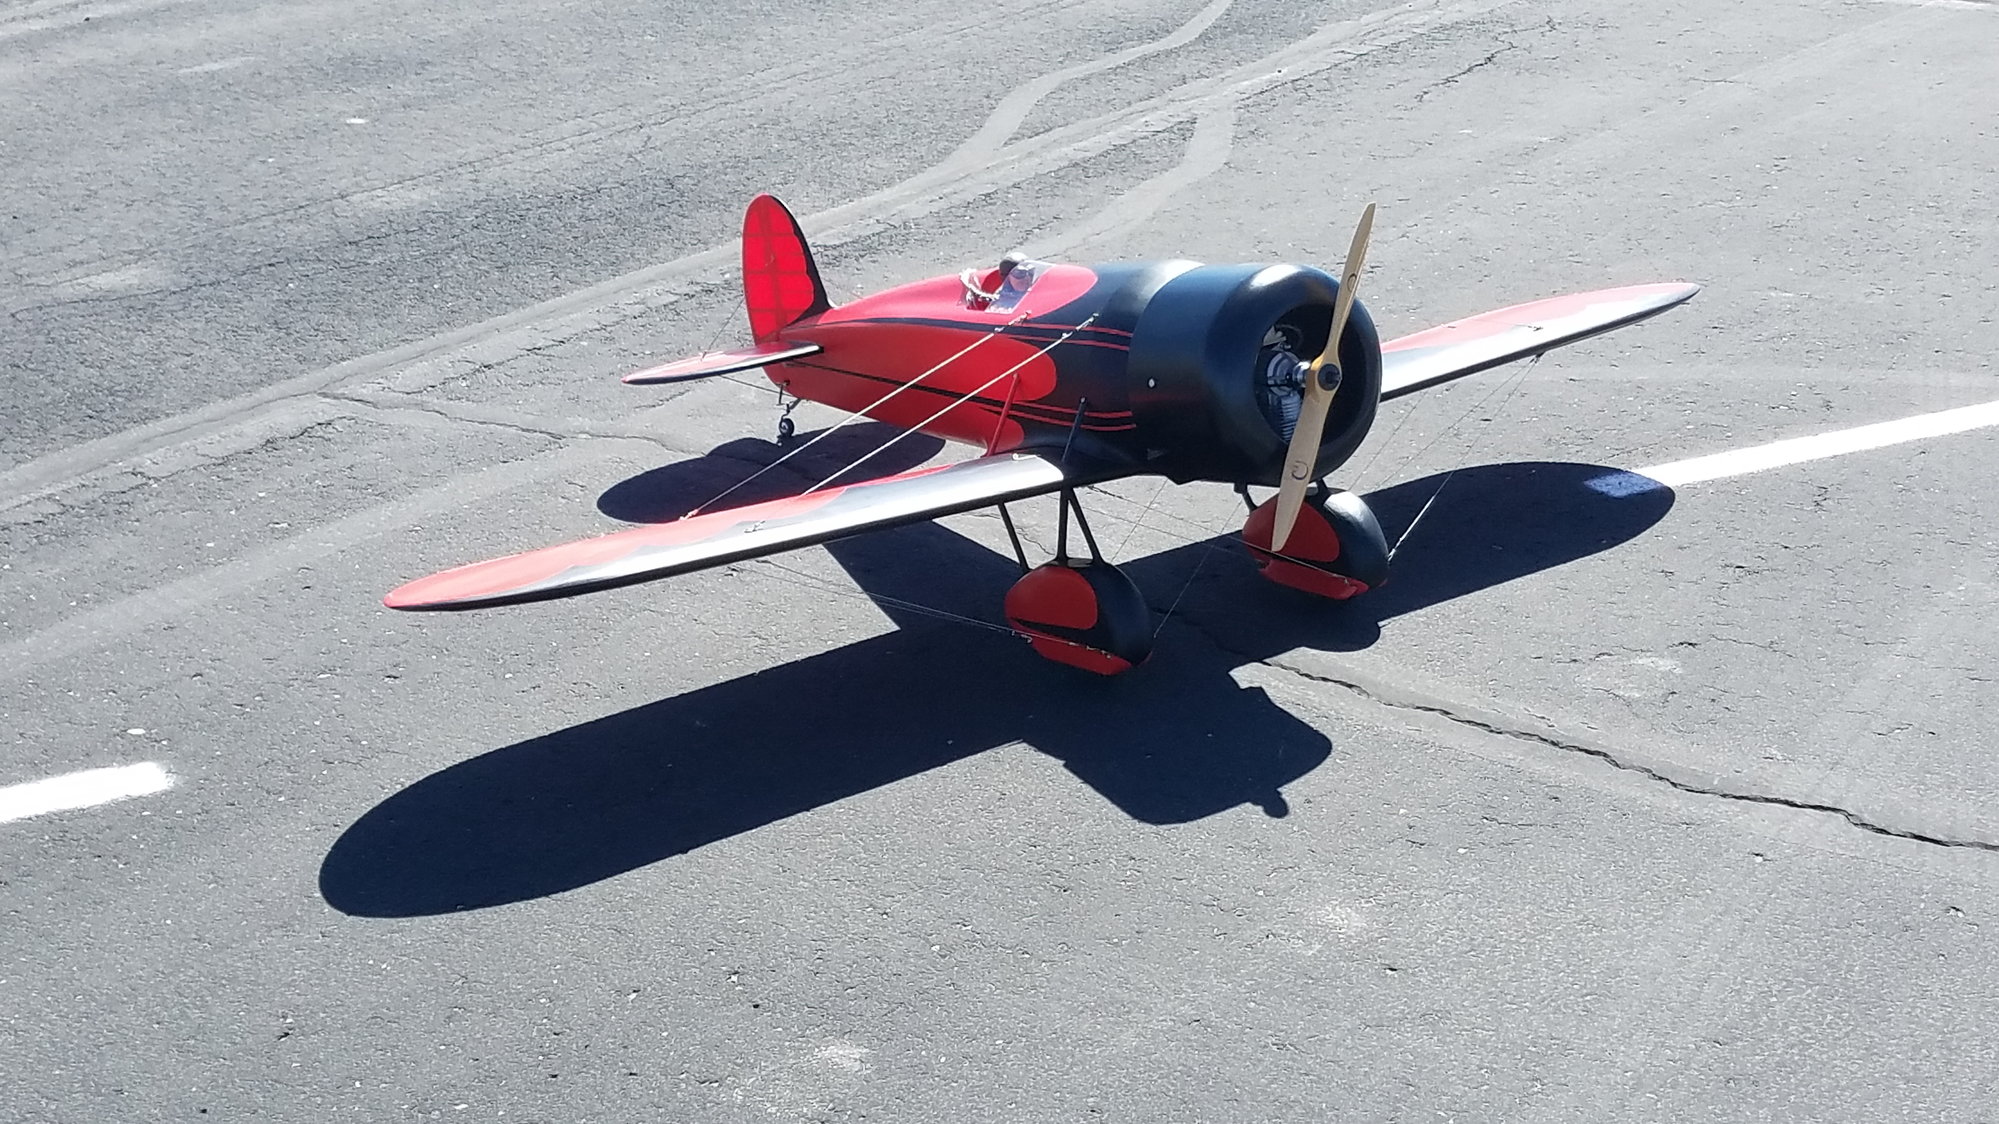
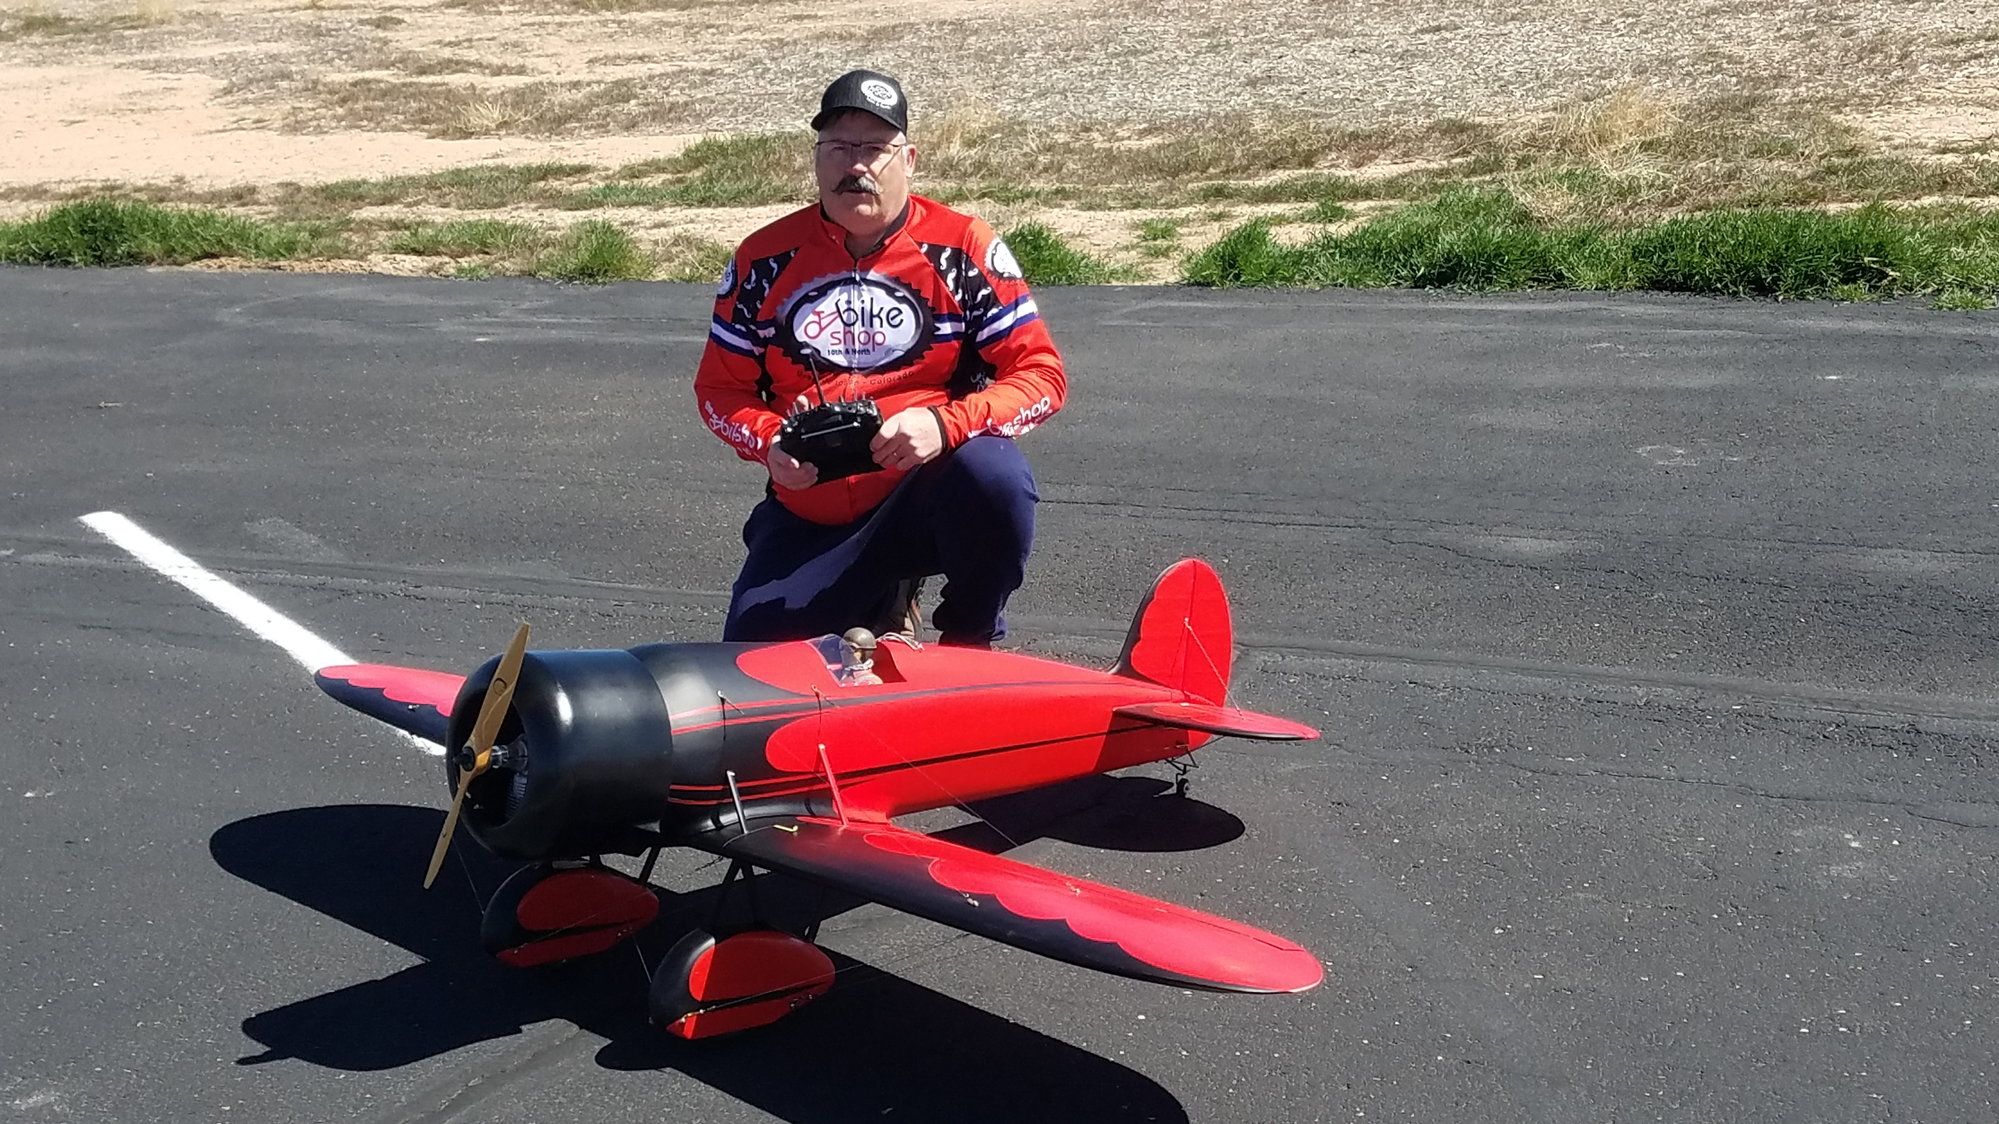
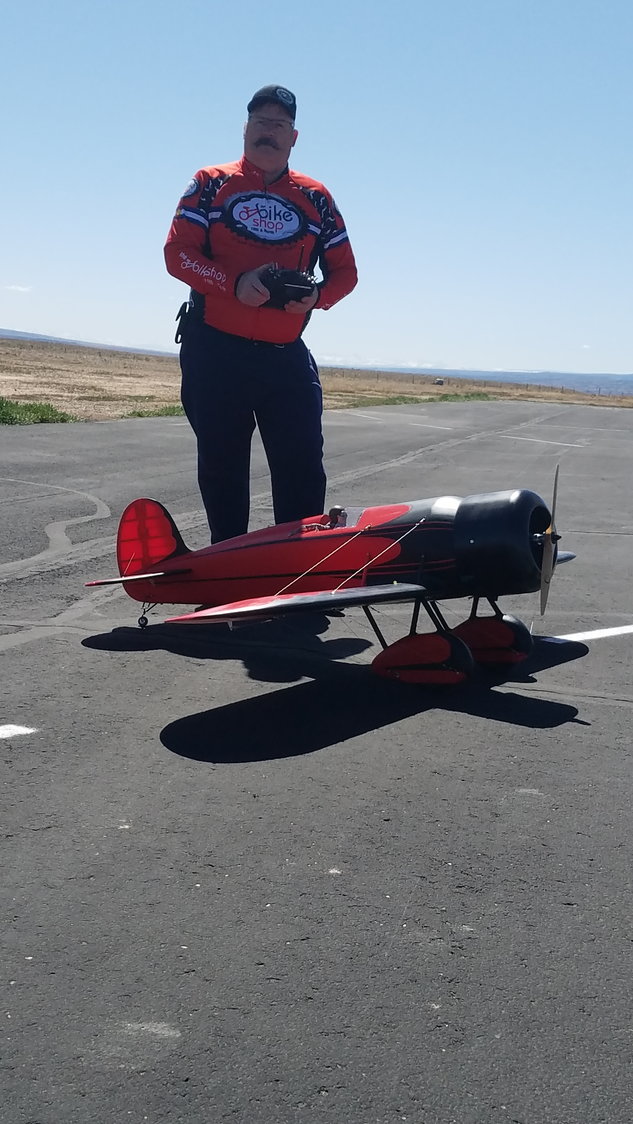
here's an update, test ran the engine and got the cowl finished. Maiden flight was last Wednesday. Slightly windy but I didn't let that stop me, Flew great, had to add 5 clicks of down trim for straight and level flight. Slows down beautifully for landing with no tendency to tip stall
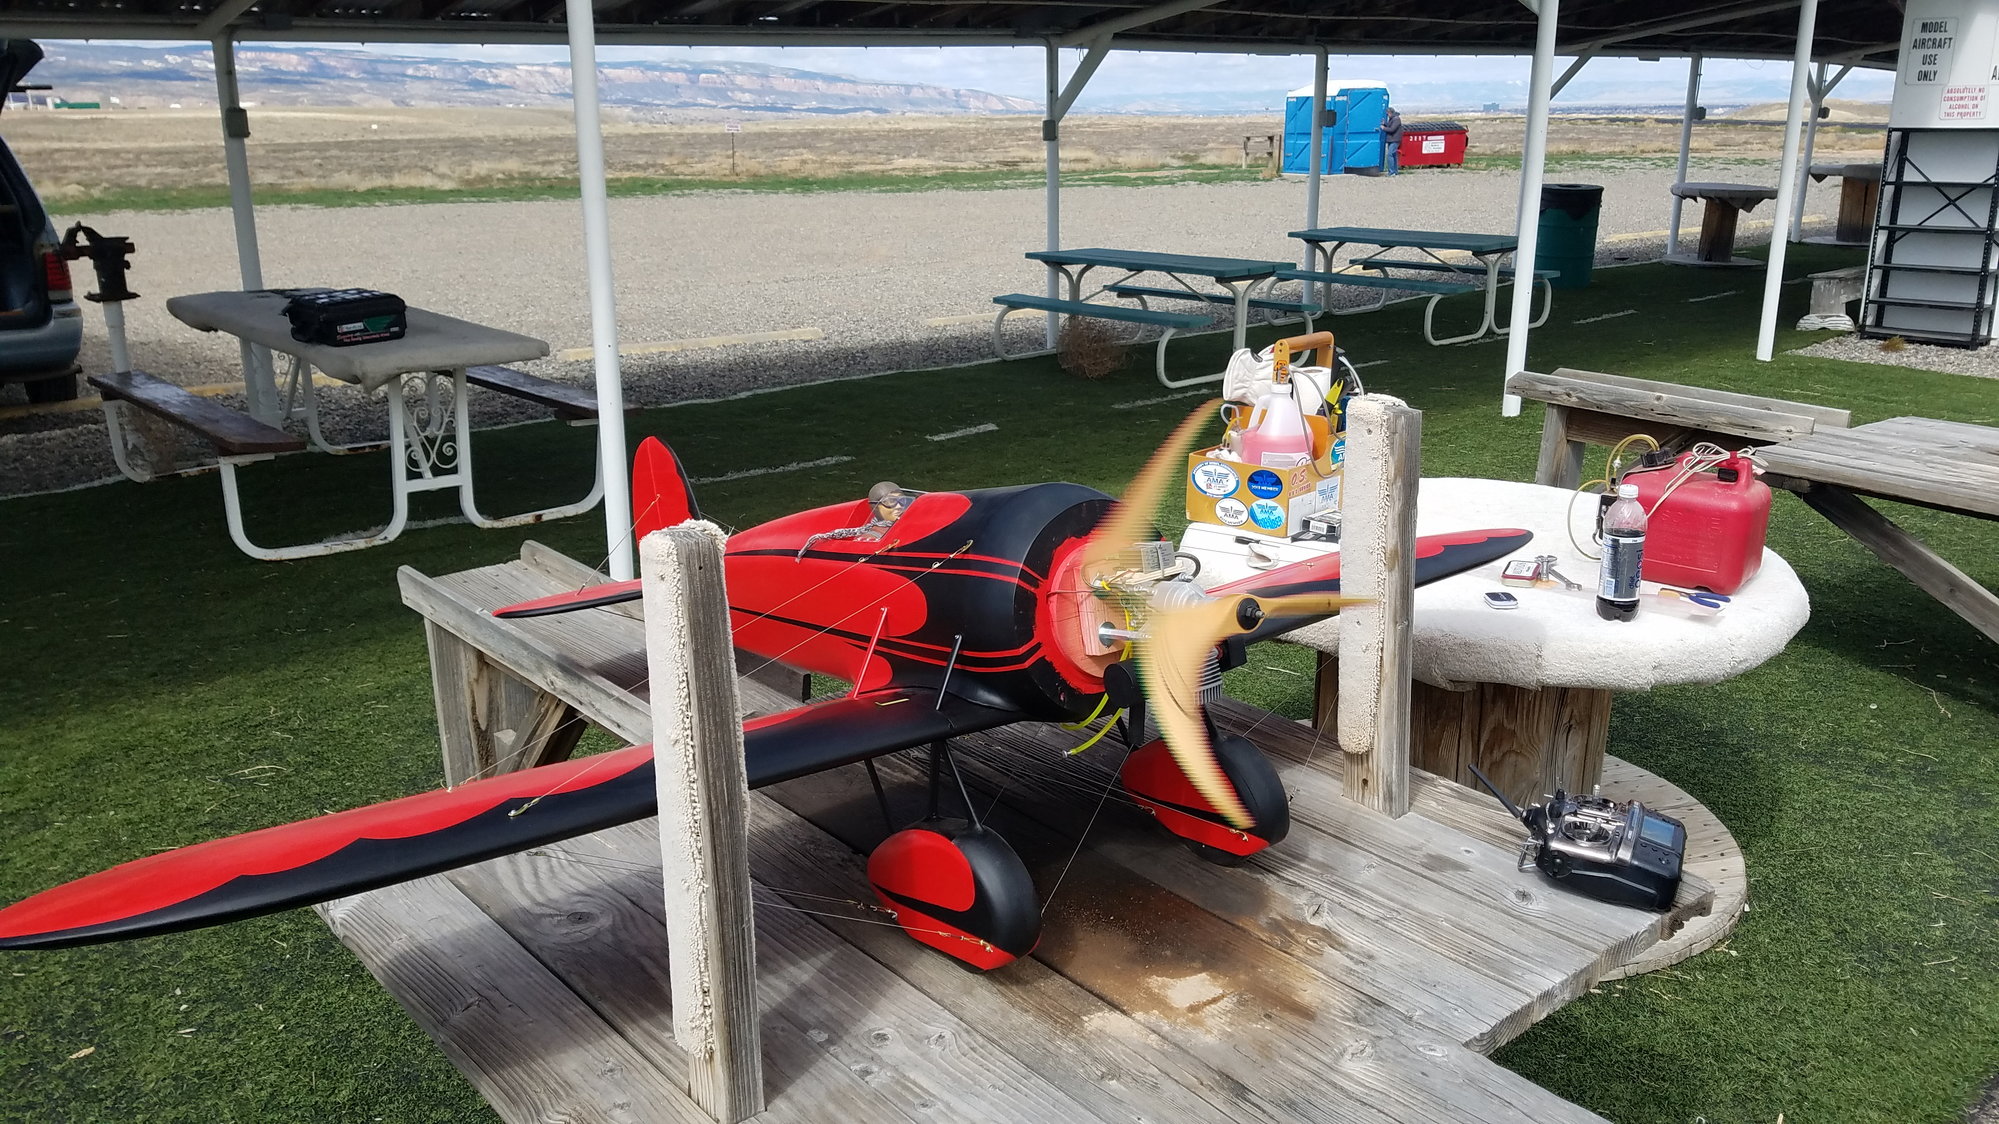
OS gt33 needed small adjustments to both hi and low speed needles for good running with 18-8 prop
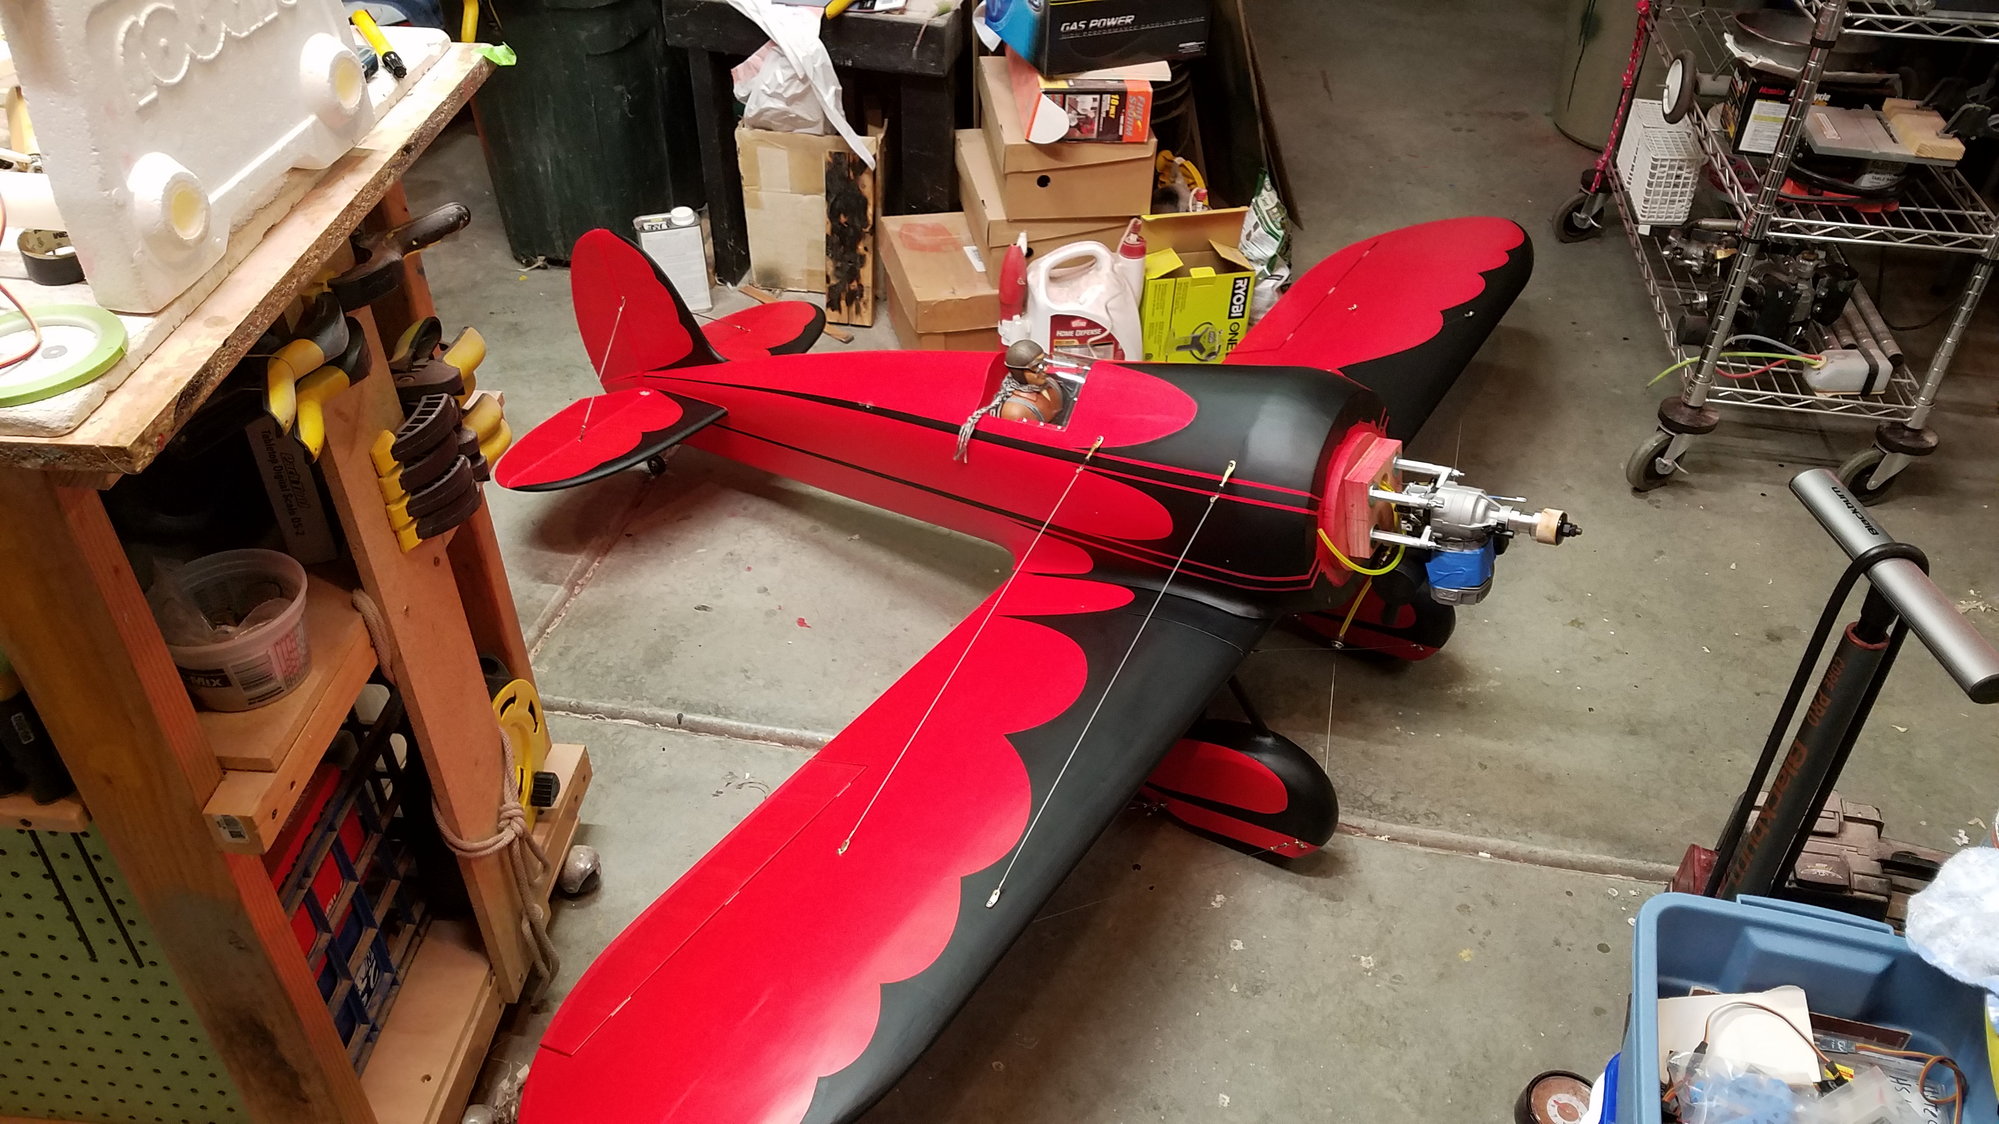
with cowl ready for first flight
post flight, small damage on left wheel pant when tire flexed and broke balsa wheel pant cover
another post flight picture
OS gt33 needed small adjustments to both hi and low speed needles for good running with 18-8 prop
with cowl ready for first flight
post flight, small damage on left wheel pant when tire flexed and broke balsa wheel pant cover
another post flight picture
04-11-2022, 09:04 PM
#23
Thread Starter
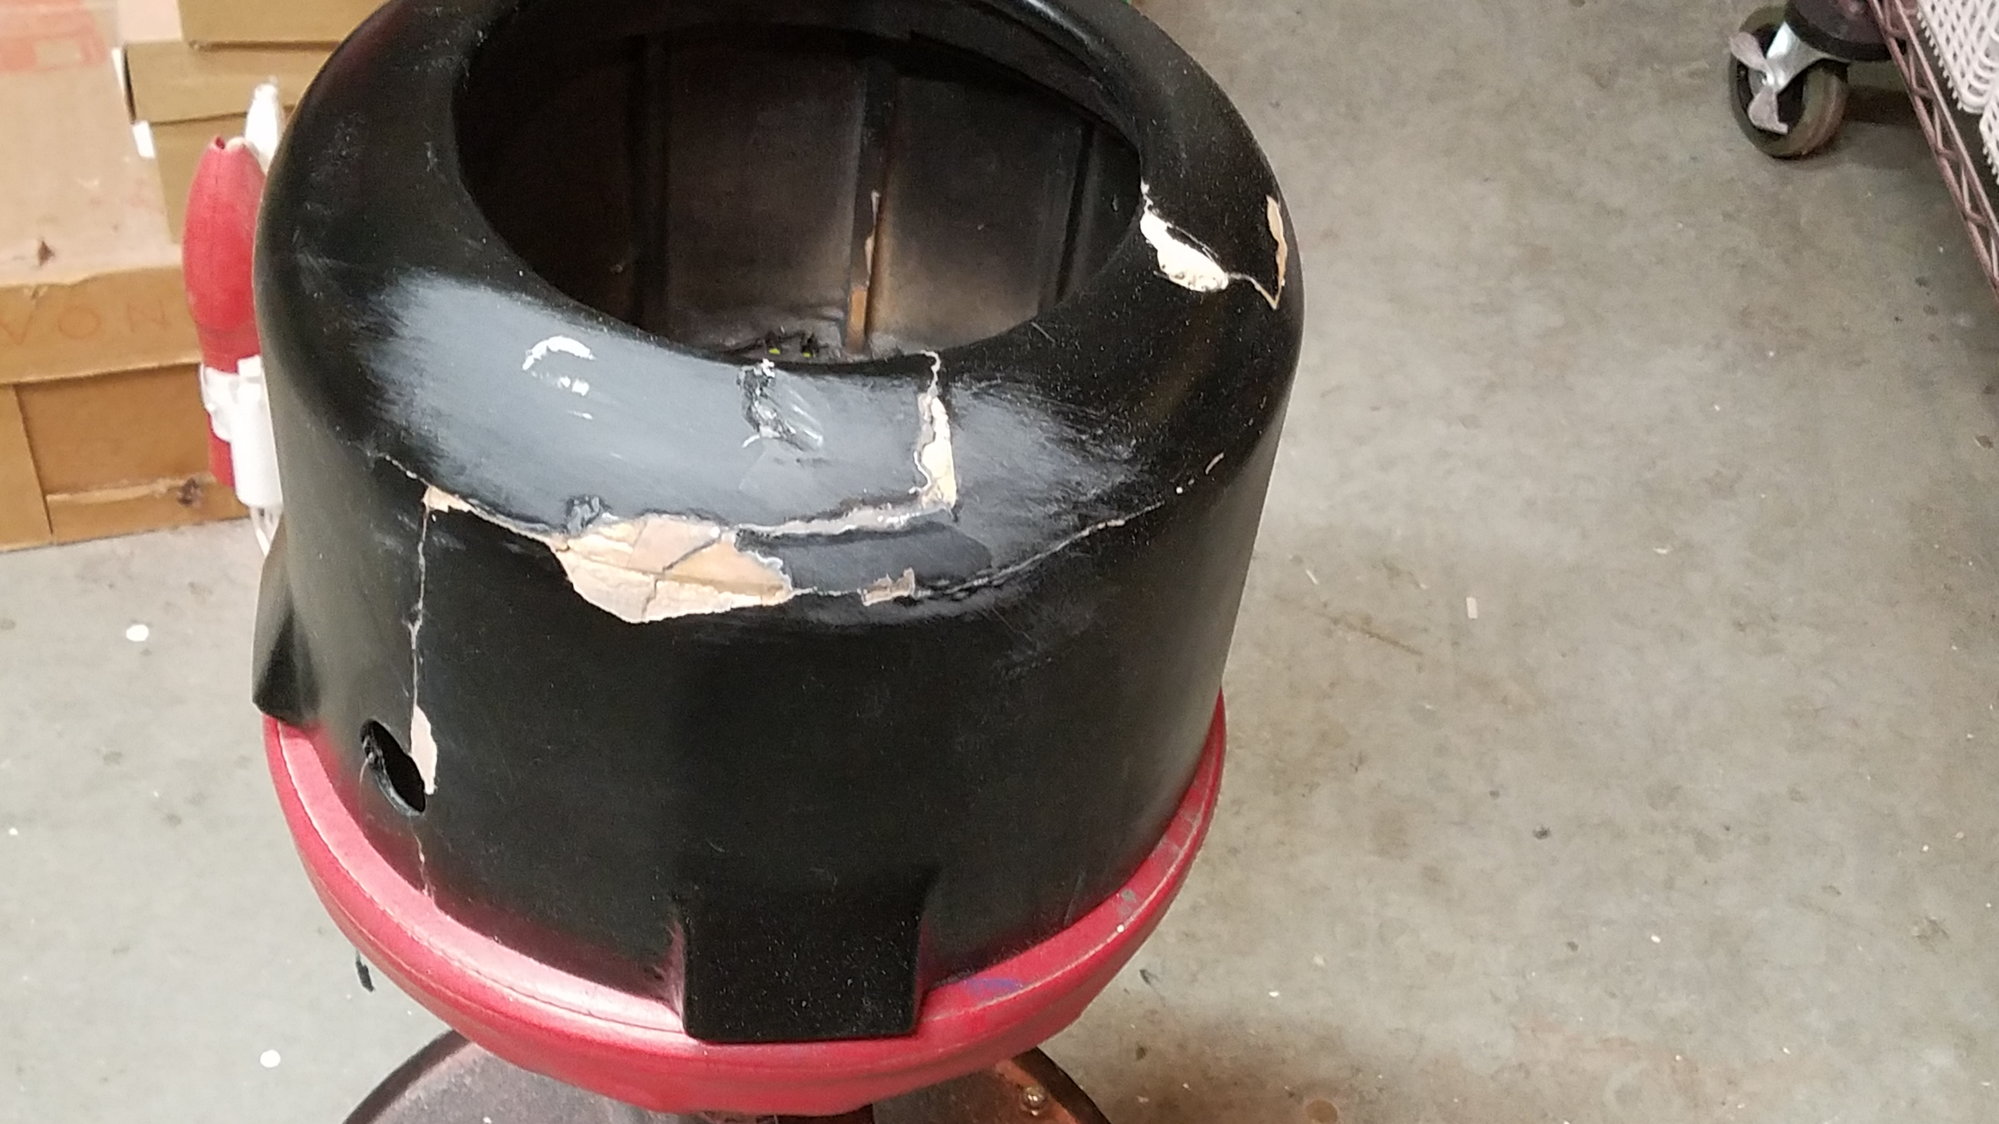
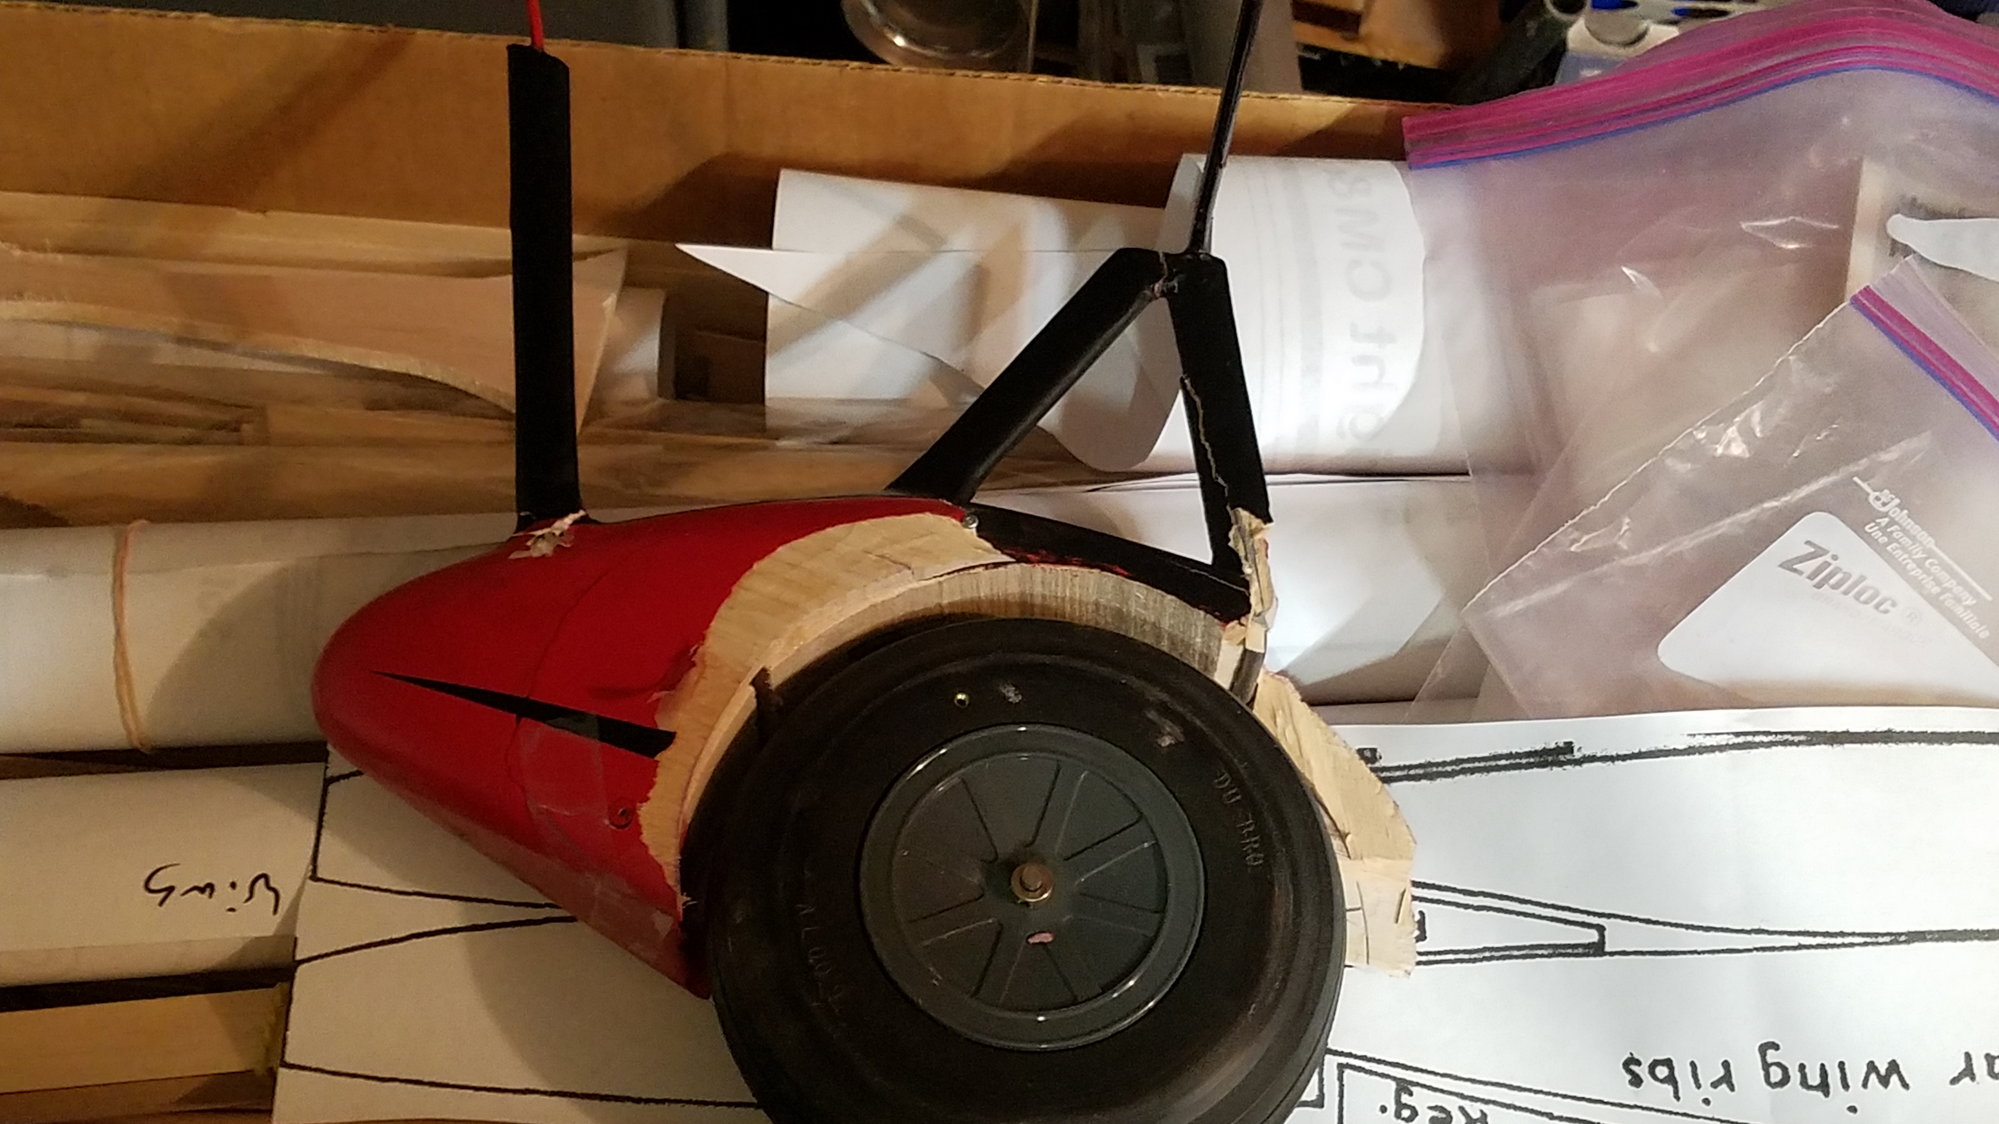
2nd flight didn't go as well, on takeoff role plain started to nose over, I pulled it back up with the elevator, it did it again, but this time hit the prop. I decided to cut the power and again used the elevator to bring the tail back down as it was going faster it went airborne with no power and exposed some design flaws in my landing gear and cowl, the rest of the plane received only minor damage that was easily fixed.
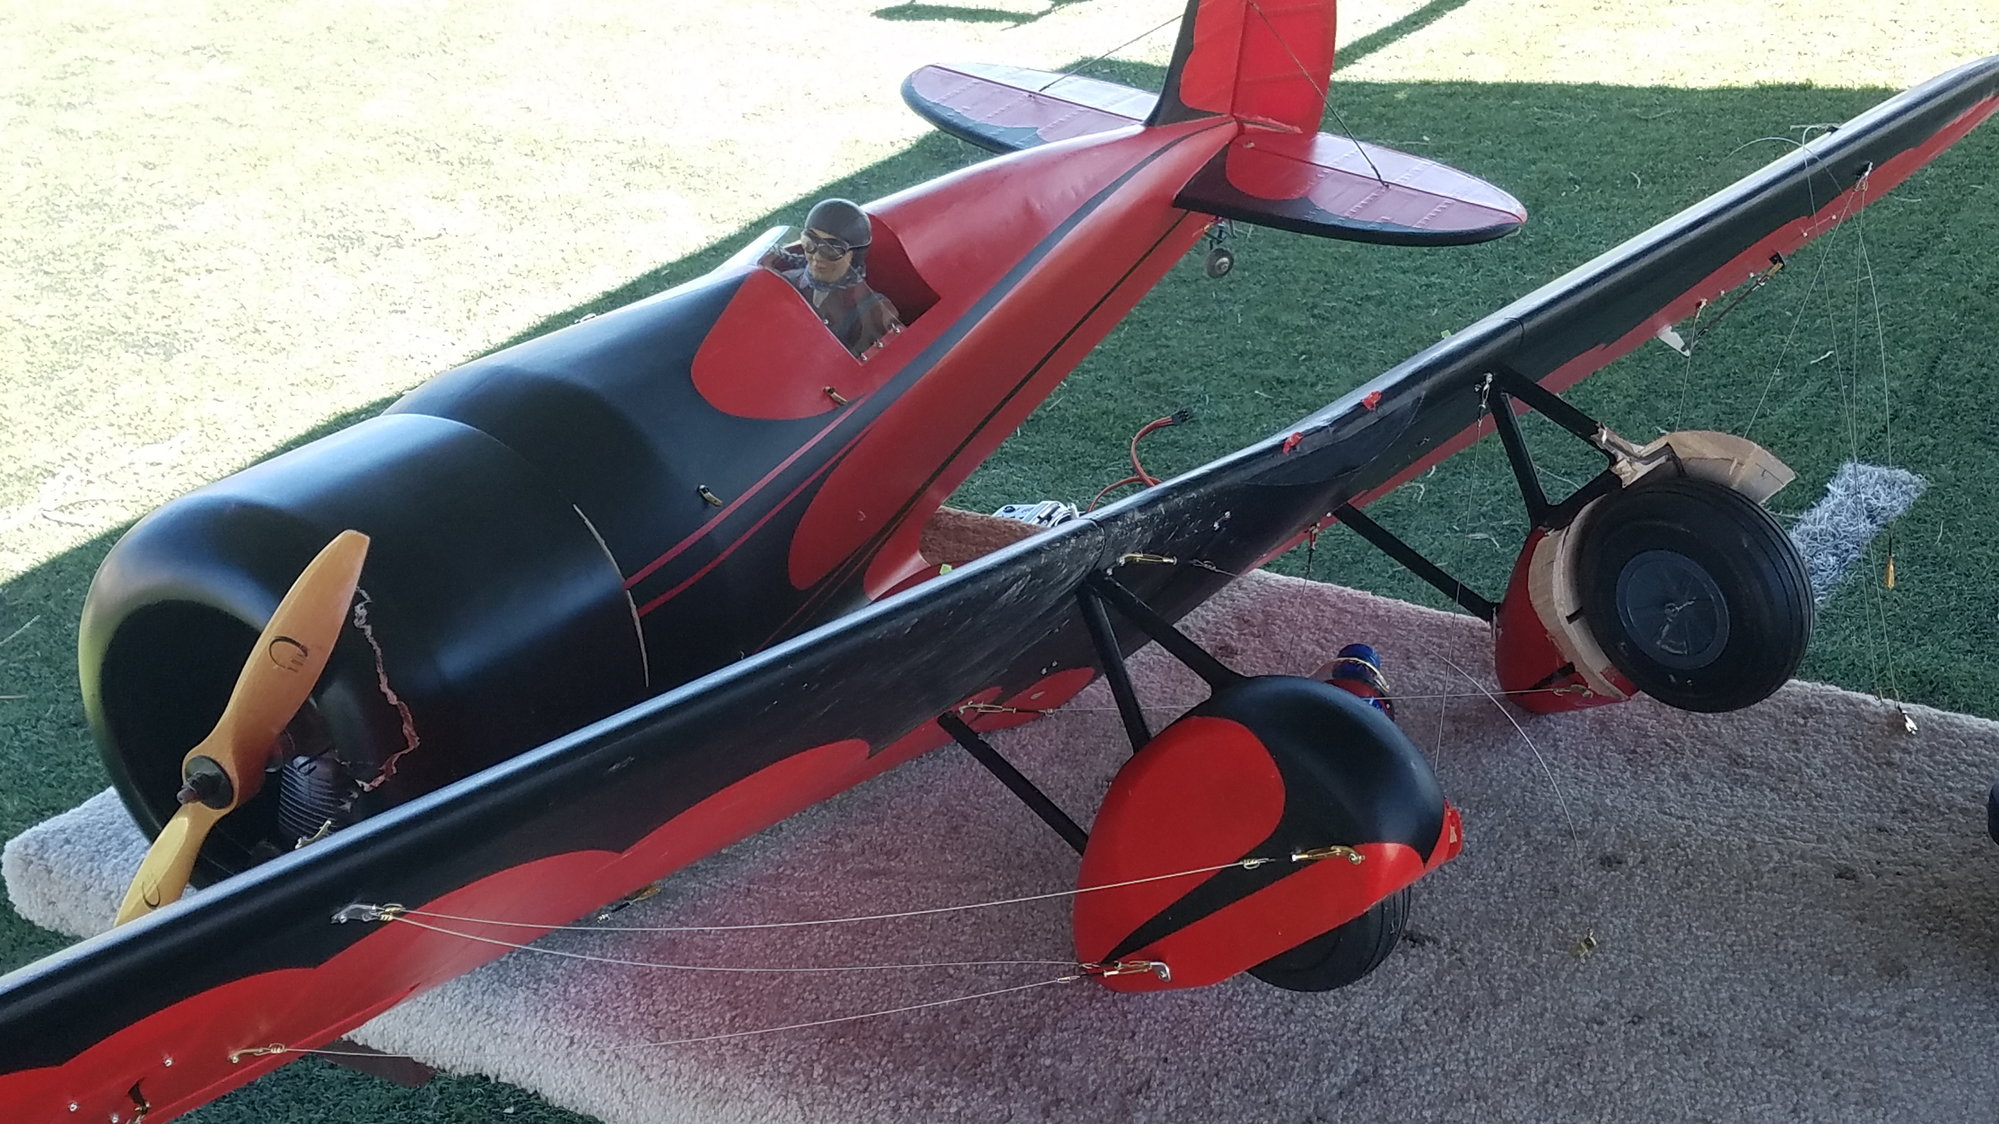
Wheel pants not strong enough, and I didn't like the landing gear the more I worked on the plane. I had thought about changing it in the future. It has to have anchors for the wires that I will try to attach to the metal parts of the gear when I re design it. I have some ideas but would be interested in any suggestions as well.
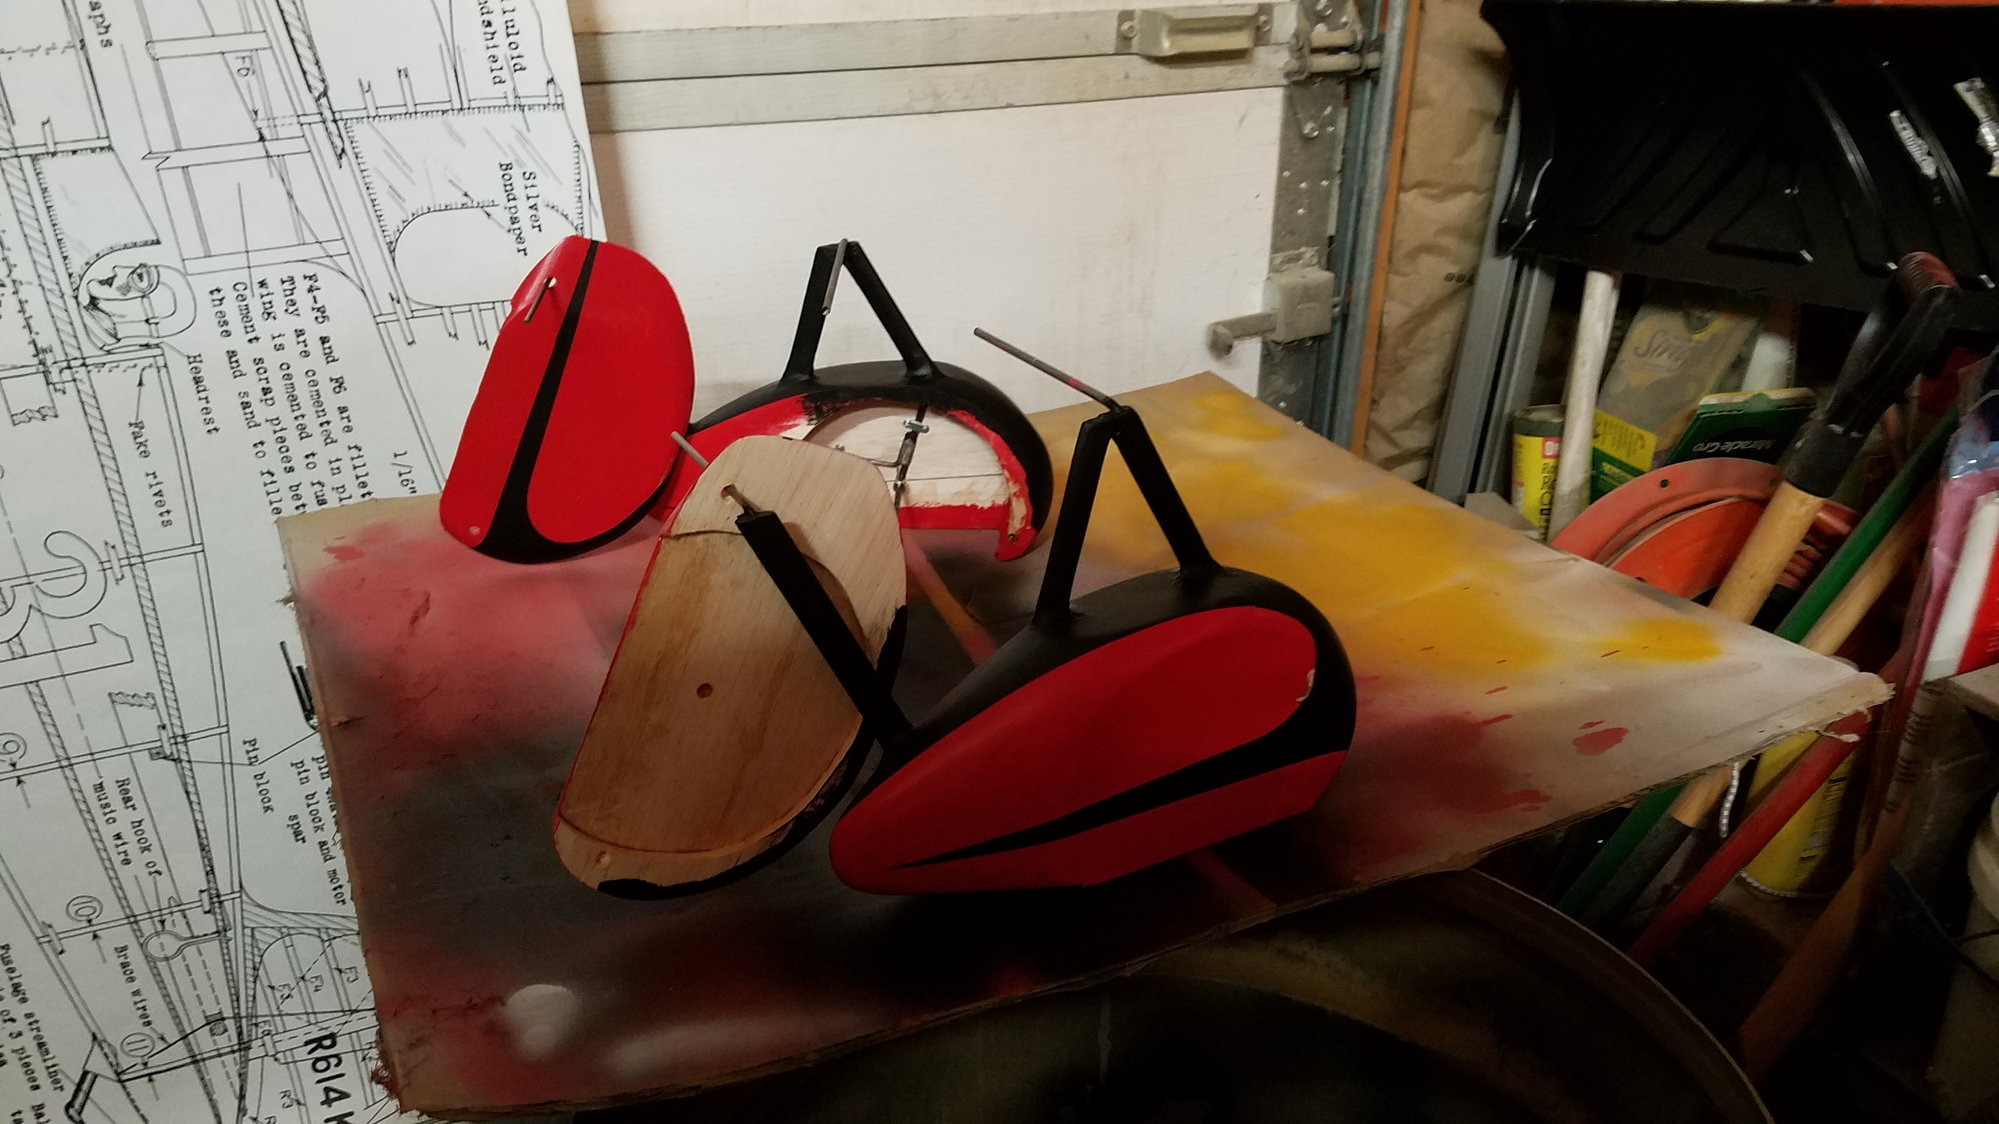
cowl broke also, it has 8 oz of weight in the front to balance plane. I need to make a sturdier back plate to mount it with, this time I will use aircraft ply instead of lite ply. I will also re fiberglass with heavier fabric, 3/4oz is ok for wings but this needs something stronger, I was able to glue the basic structure back together, now just needs strengthening and re paint.
Wheel pants not strong enough, and I didn't like the landing gear the more I worked on the plane. I had thought about changing it in the future. It has to have anchors for the wires that I will try to attach to the metal parts of the gear when I re design it. I have some ideas but would be interested in any suggestions as well.
cowl broke also, it has 8 oz of weight in the front to balance plane. I need to make a sturdier back plate to mount it with, this time I will use aircraft ply instead of lite ply. I will also re fiberglass with heavier fabric, 3/4oz is ok for wings but this needs something stronger, I was able to glue the basic structure back together, now just needs strengthening and re paint.
04-11-2022, 09:09 PM
#24
Thread Starter
Not sure what caused nose-over, we think that I may have applied too much throttle too fast not allowing enough air over the tail to hold it down. I was probably over confident because first flight went so well.
06-09-2022, 08:50 PM
#25
Thread Starter
"Fixing some engineering flaws from my build"
cowl glued back together
broken landing gear
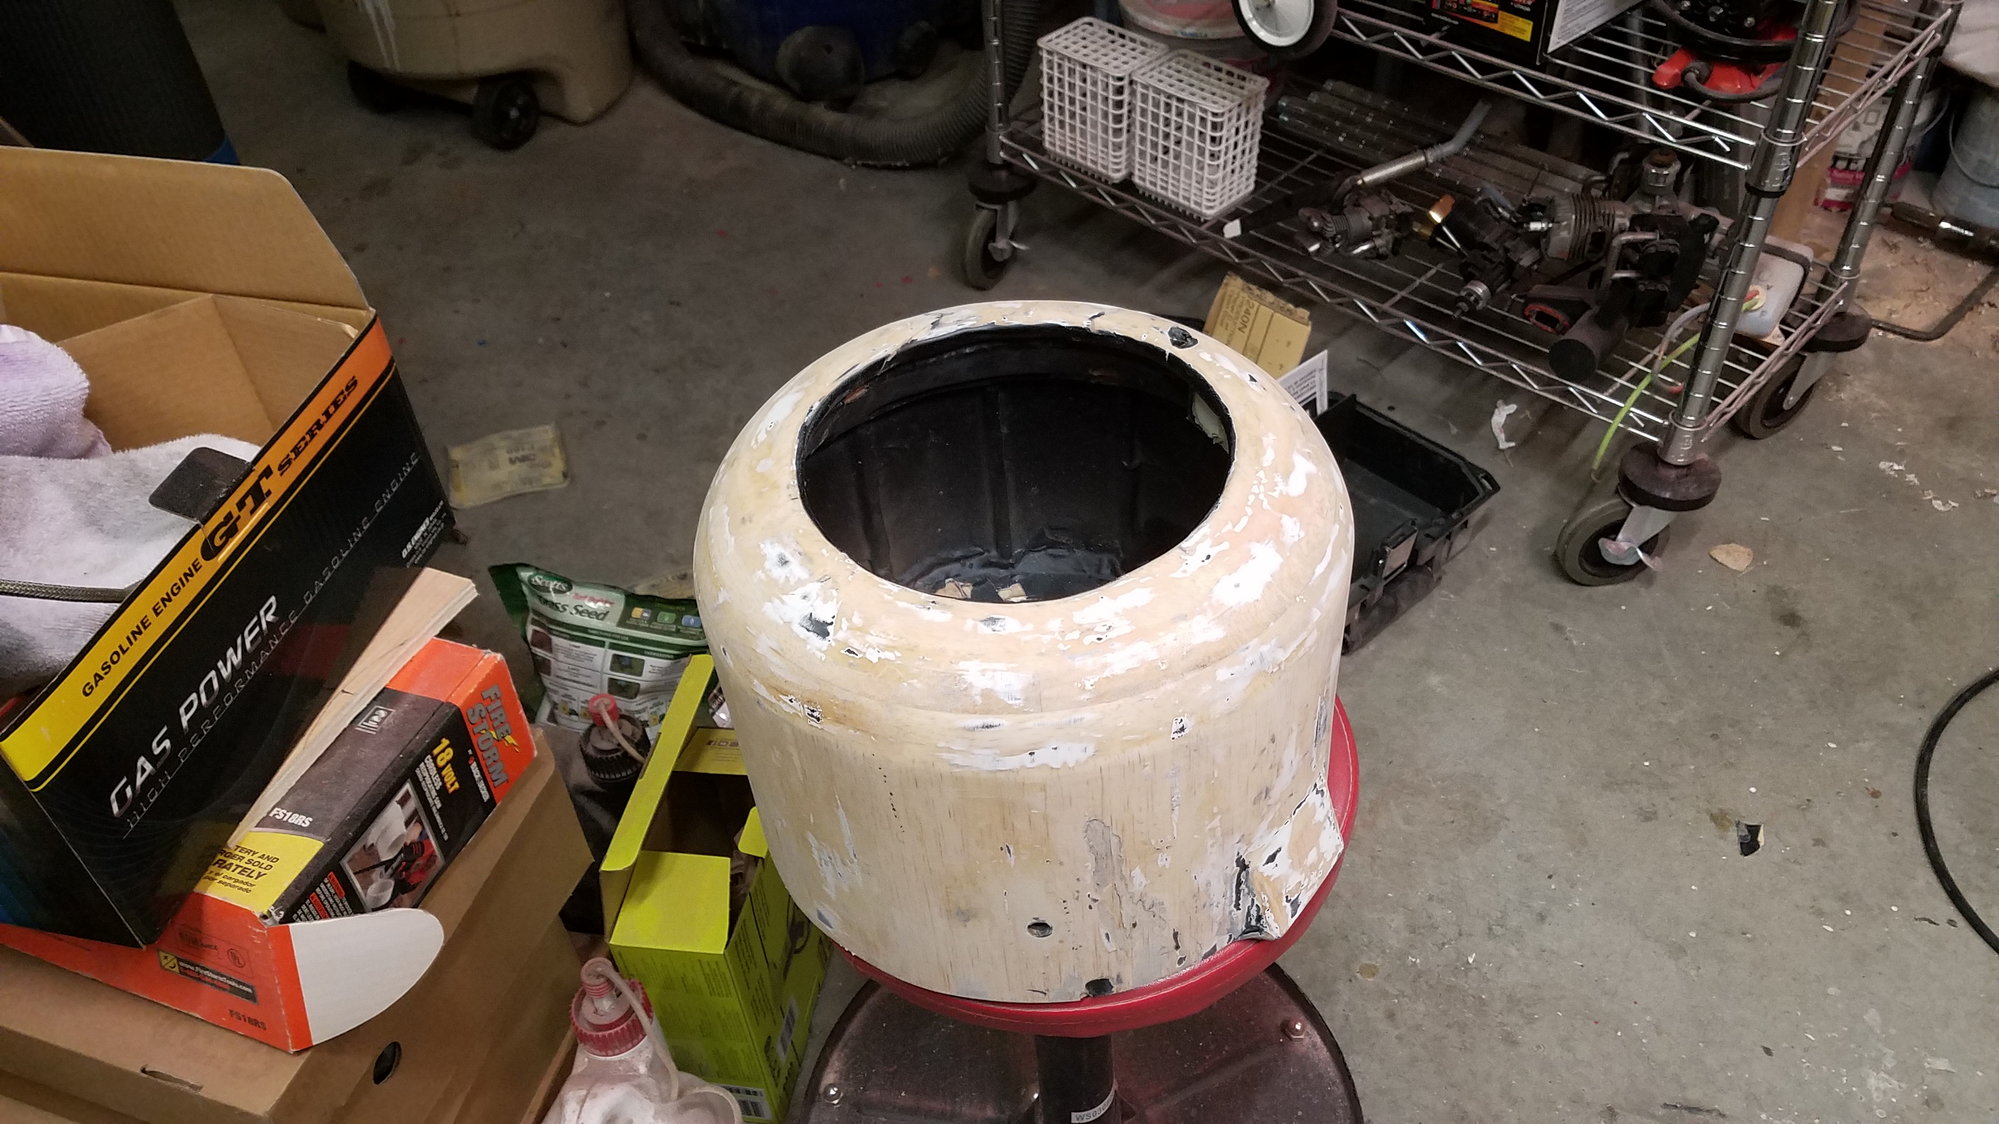
cowl ready to re fiberglass with heavier cloth, this will also help with nose weight. will recheck balance when done.
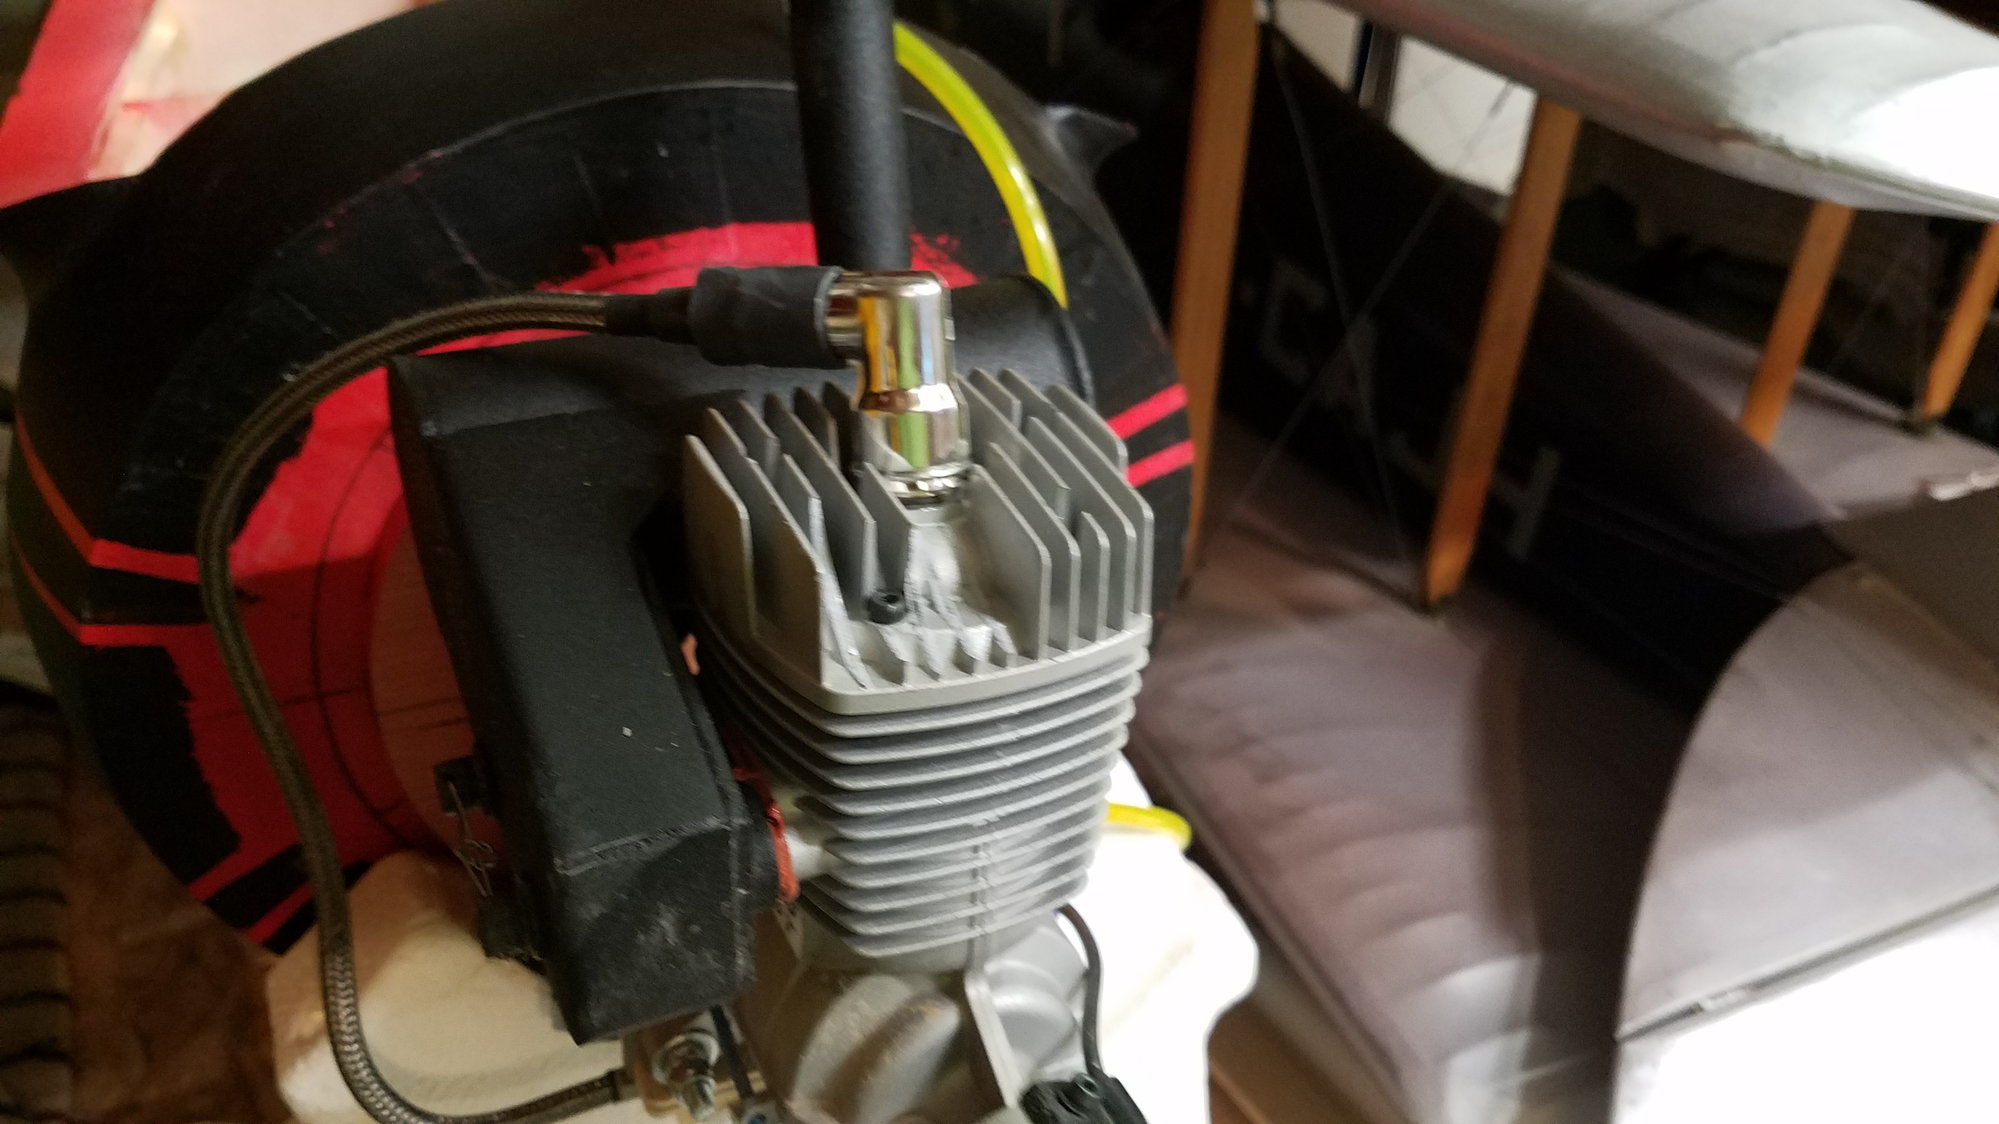
broke some cooling fins, I will replace cylinder head because it's available and I think that the fins are a good idea to help cool engine.
cowl glued back together
broken landing gear
cowl ready to re fiberglass with heavier cloth, this will also help with nose weight. will recheck balance when done.
broke some cooling fins, I will replace cylinder head because it's available and I think that the fins are a good idea to help cool engine.