


Airworld Sea Fury
 02-10-2026 | 03:46 AM
#1
Thread Starter

My Feedback: (7)
I recently purchased this product from Airworld Germany. I searched the entire internet and (surprisingly) could find zero instructions/build information on this old-but-still-available kit offering from Airworld. If anyone knows anything about this please chime in! In the mean time I'm going to chronicle the build here.
First off, let me say that if you are in the USA I CANNOT recommend purchasing one of these kits. The purchase price seemed quite reasonable to me and their quoted shipping price (approx $550) seemed reasonable. HOWEVER, after Airworld shipped it (yes, AFTER) I found out that I would have to become an "importer of record". I cannot emphasize just how complicated and preposterous this process was. Fortunately Airworld had given me a point of contact to help with the process but It took over a week of incredible effort getting a PILE of paperwork, licenses etc. together to a place where I could actually receive this package (not to mention forwarding my social security number at least a dozen times to god only knows who)! I was SO pissed.
And then the really bad news: the import process required a 6 hour round trip to the nearest international airport (Raleigh) and $1400 more dollars! I was flabbergasted. In my opinion Airword should NEVER have done this to an unsuspecting customer.
So, now that I've vented let's start the build process!
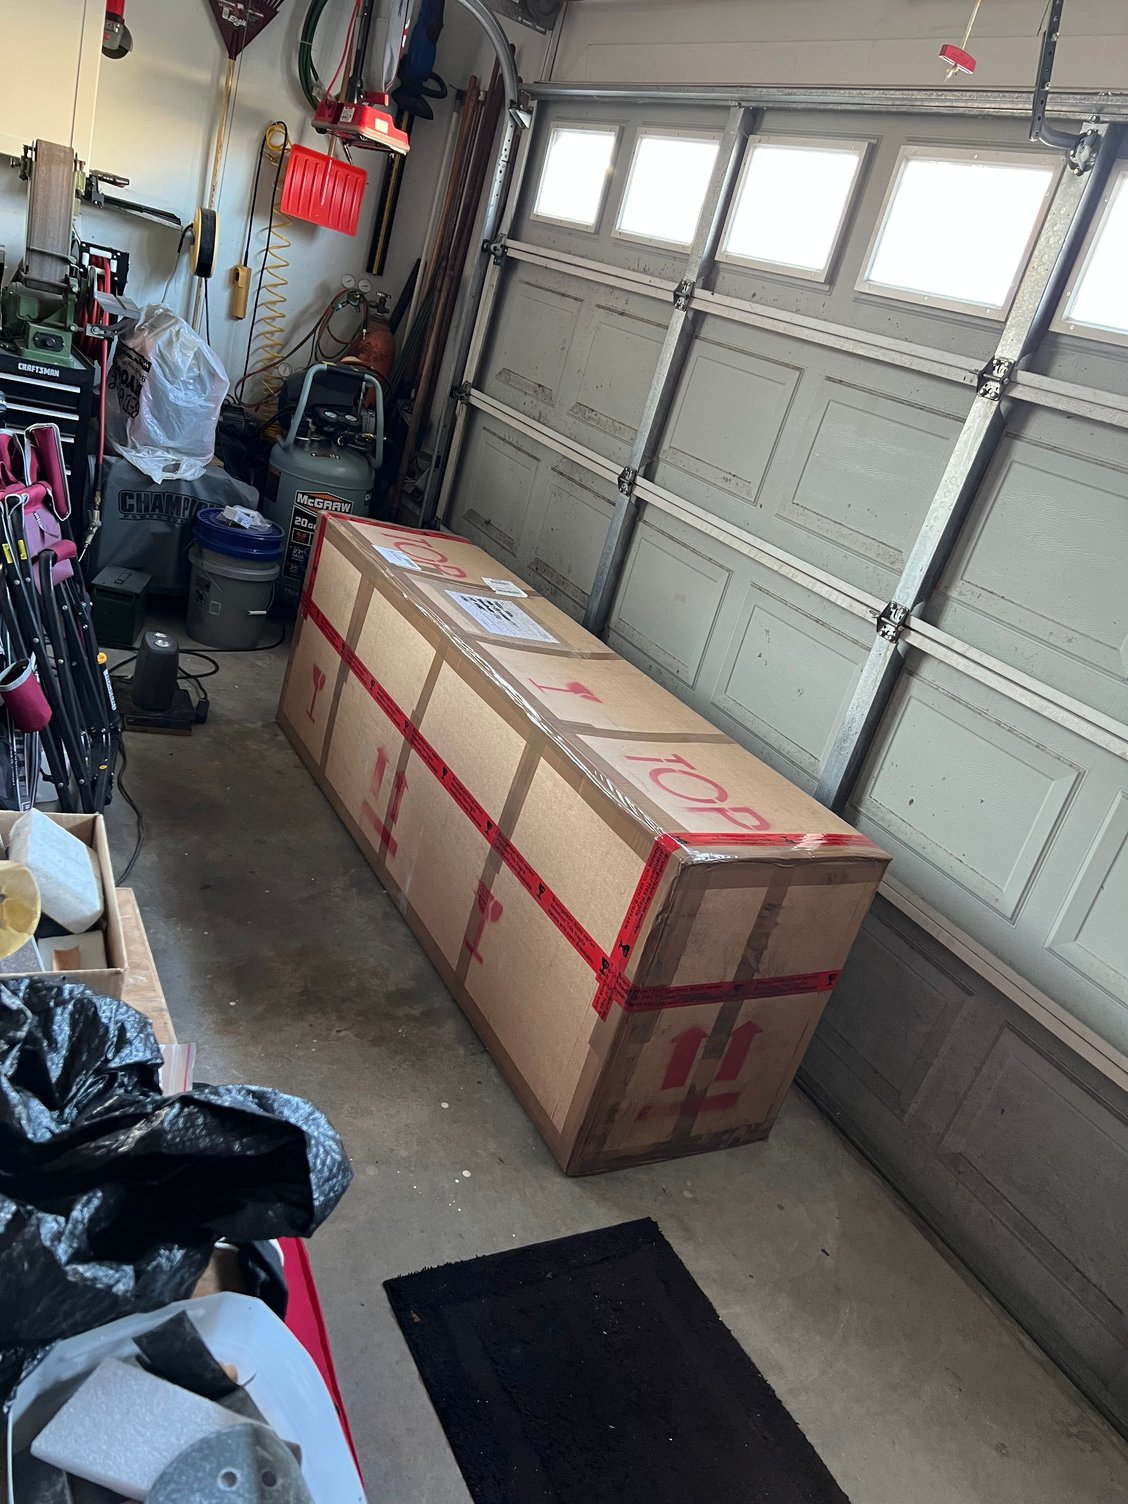
I thought I took more pics of the unpacking but I guess not! Everything was in bubble wrap and all that was encased in the most green packing peanuts you ever saw in your life. IOW well packed.
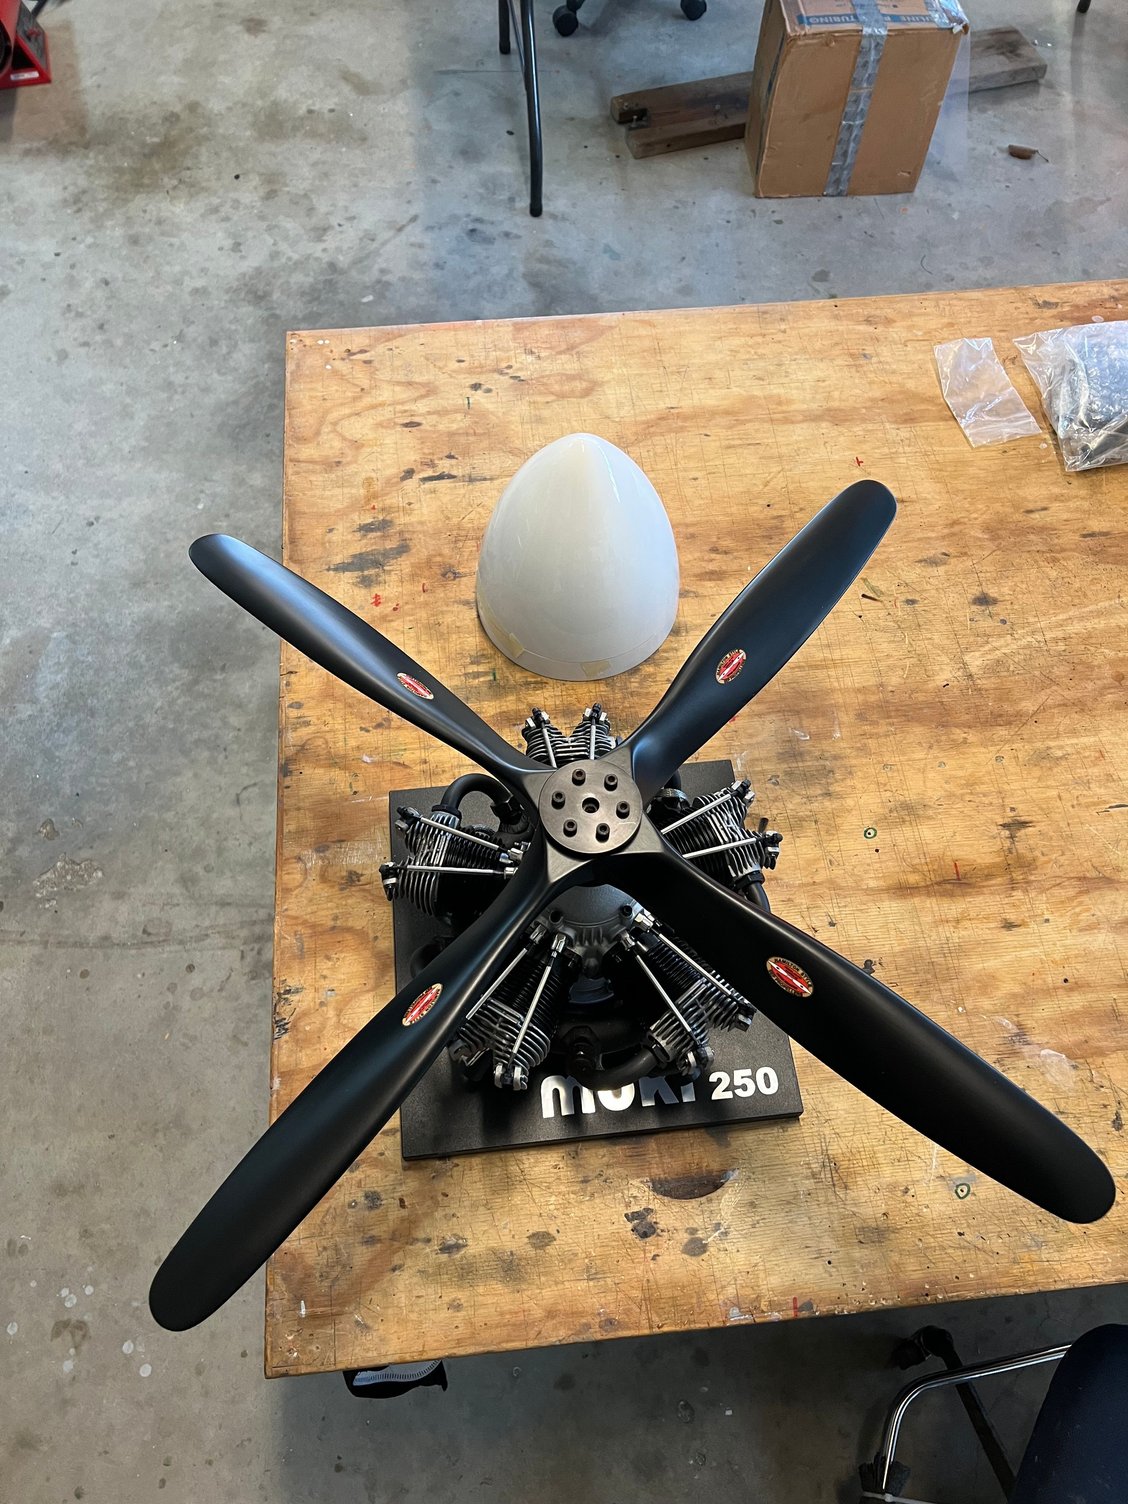
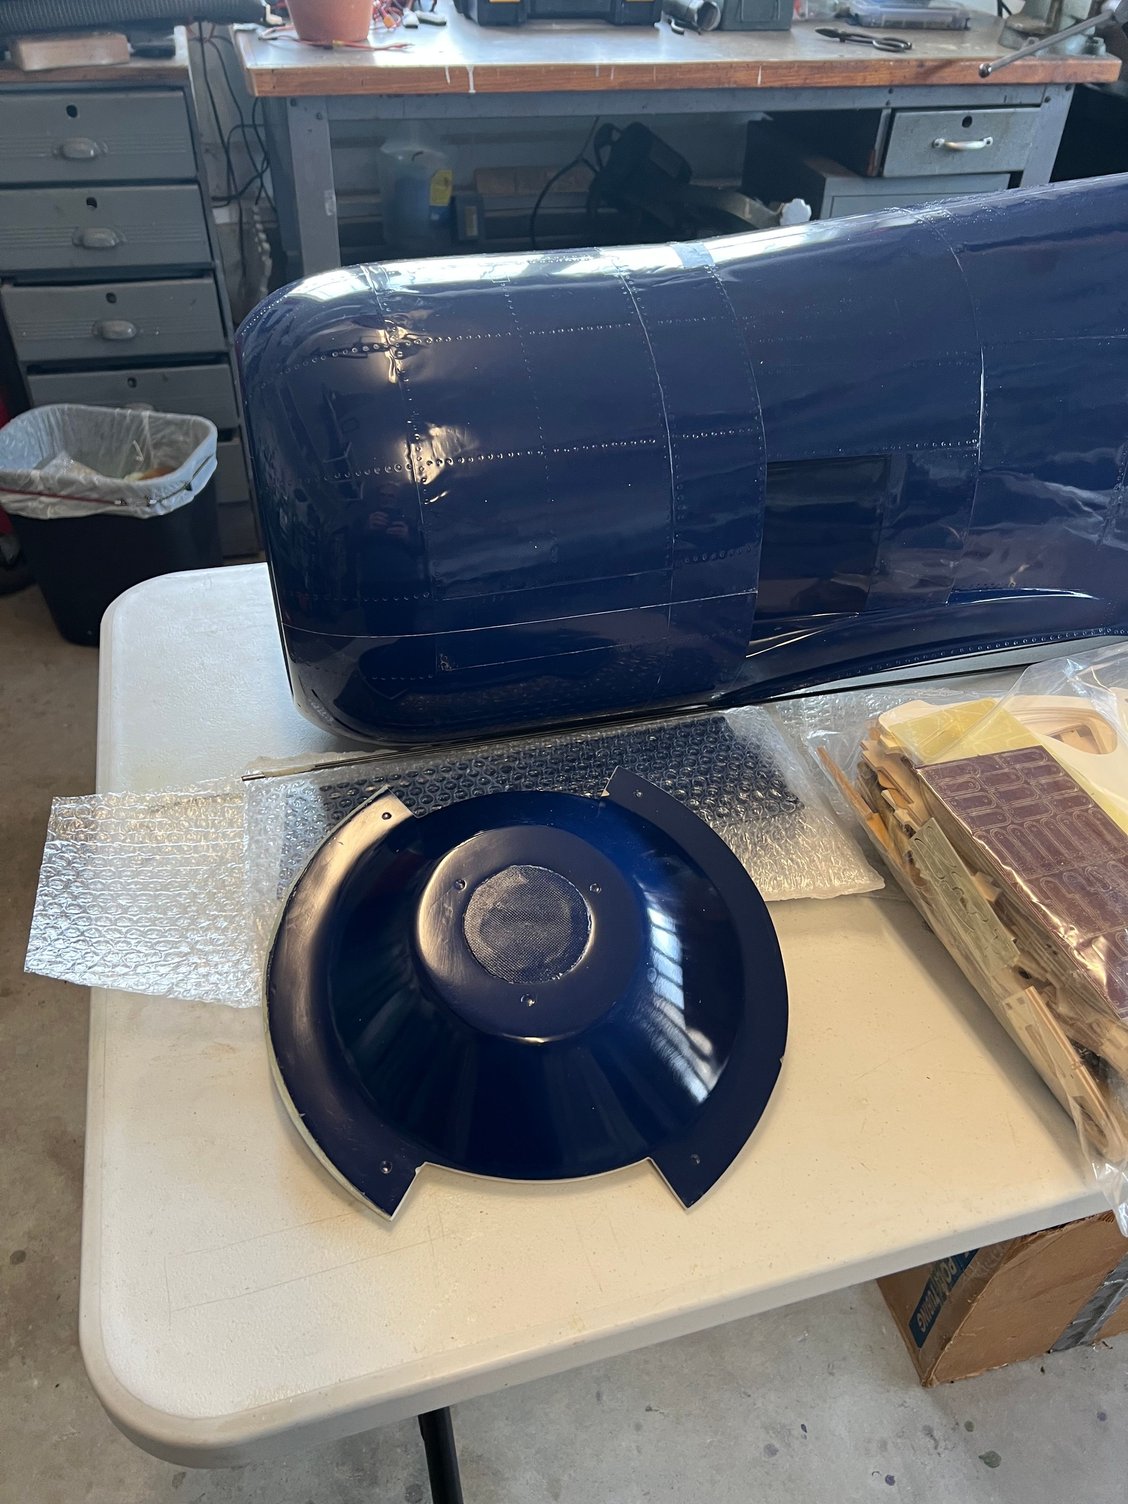
This shows the GORGEOUS spinner and the SEP 28x18 prop I had Airworld include in the box
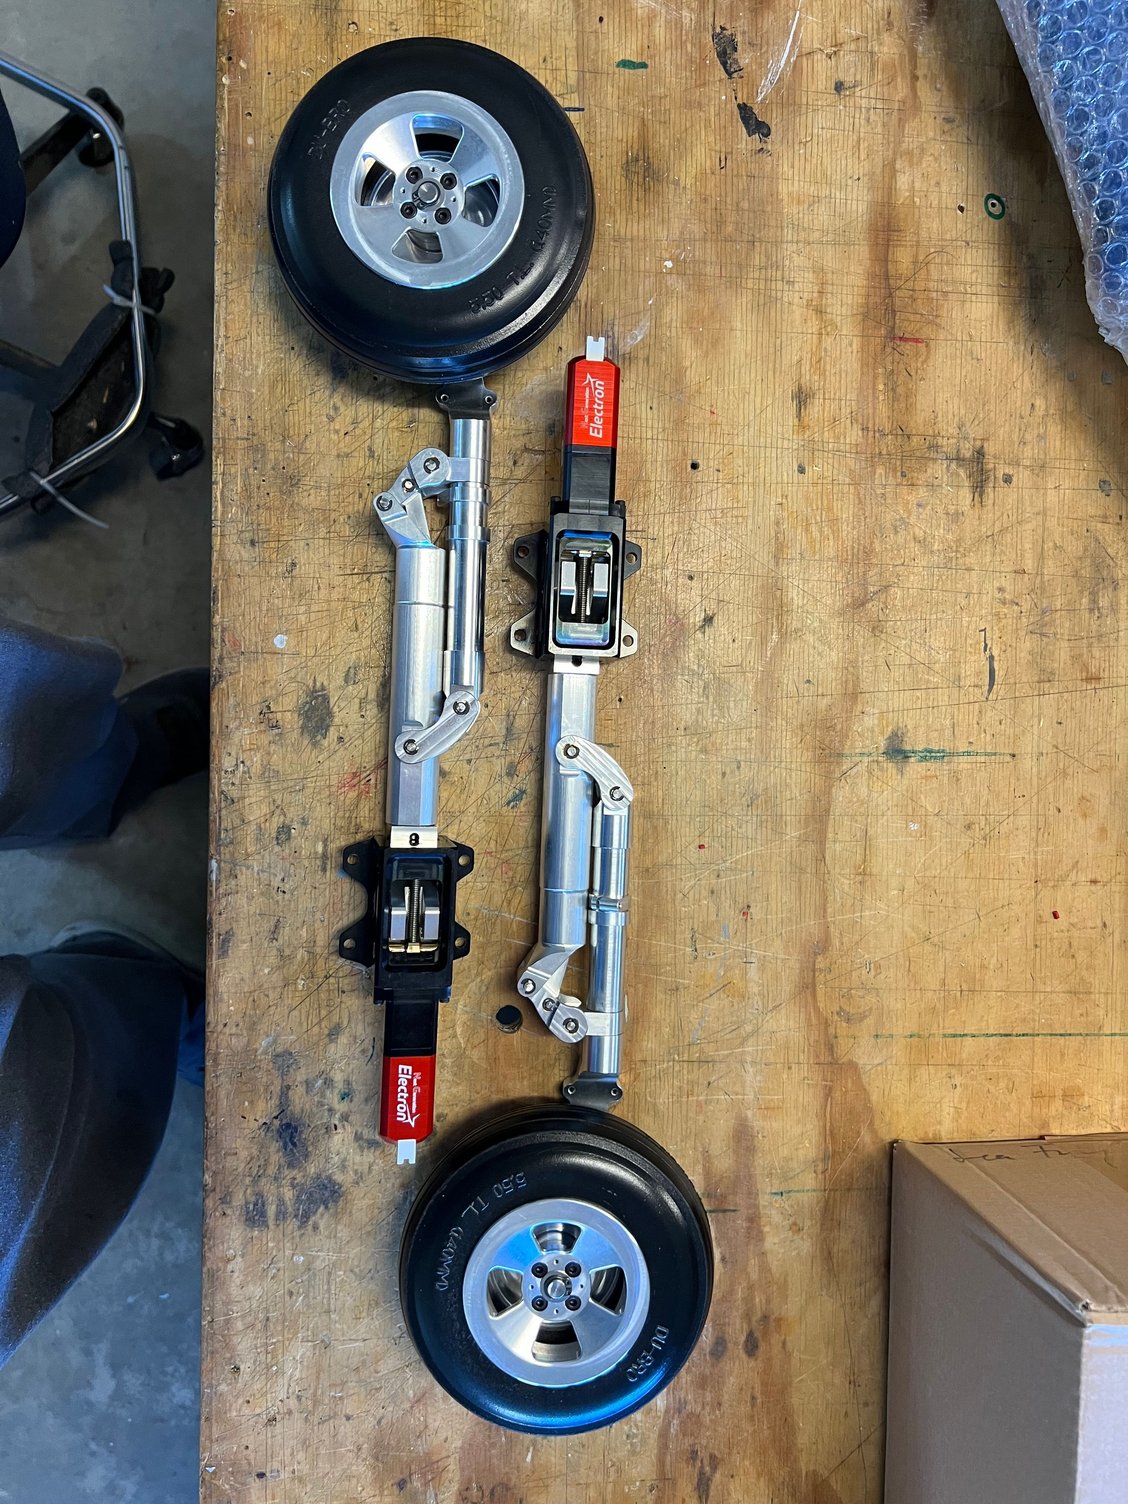
I ordered the electron gear package with the kit yet no tail gear was included. Not good! However, the mains are nothing less than bullet proof jewelry. I love them. Yes, the controller is included.
First off, let me say that if you are in the USA I CANNOT recommend purchasing one of these kits. The purchase price seemed quite reasonable to me and their quoted shipping price (approx $550) seemed reasonable. HOWEVER, after Airworld shipped it (yes, AFTER) I found out that I would have to become an "importer of record". I cannot emphasize just how complicated and preposterous this process was. Fortunately Airworld had given me a point of contact to help with the process but It took over a week of incredible effort getting a PILE of paperwork, licenses etc. together to a place where I could actually receive this package (not to mention forwarding my social security number at least a dozen times to god only knows who)! I was SO pissed.
And then the really bad news: the import process required a 6 hour round trip to the nearest international airport (Raleigh) and $1400 more dollars! I was flabbergasted. In my opinion Airword should NEVER have done this to an unsuspecting customer.
So, now that I've vented let's start the build process!
I thought I took more pics of the unpacking but I guess not! Everything was in bubble wrap and all that was encased in the most green packing peanuts you ever saw in your life. IOW well packed.
This shows the GORGEOUS spinner and the SEP 28x18 prop I had Airworld include in the box
I ordered the electron gear package with the kit yet no tail gear was included. Not good! However, the mains are nothing less than bullet proof jewelry. I love them. Yes, the controller is included.
Last edited by mitchilito; 02-10-2026 at 03:50 AM.

The following users liked this post:
mitchilito (02-12-2026)
02-12-2026 | 03:35 AM
#3
Thread Starter
My Feedback: (7)
About not receiving the tail retract:
The main gear offered are Electron actuated mains produced by Airworld. As I've said, they are GORGEOUS. However, the tail retract is not part of the electron/main gear package. As you see here it is actuated by the servo of your choice.
The reason I didn't order it with the rest of the kit is because Airworld lists it as a "Retractable Tail SKID". I assumed the tail retract came with the mains and the "tail skid" was a retractable tail HOOK (which I didn't need for my build) - which would be a nice scale detail from the full scale aircraft. But no, they want to call the wheel a skid, I guess.
I contacted Airworld and got the retract ordered.
Last edited by mitchilito; 02-13-2026 at 02:55 AM.
02-19-2026 | 10:26 AM
#4
Thread Starter
My Feedback: (7)
Started the build today. More pics to come.
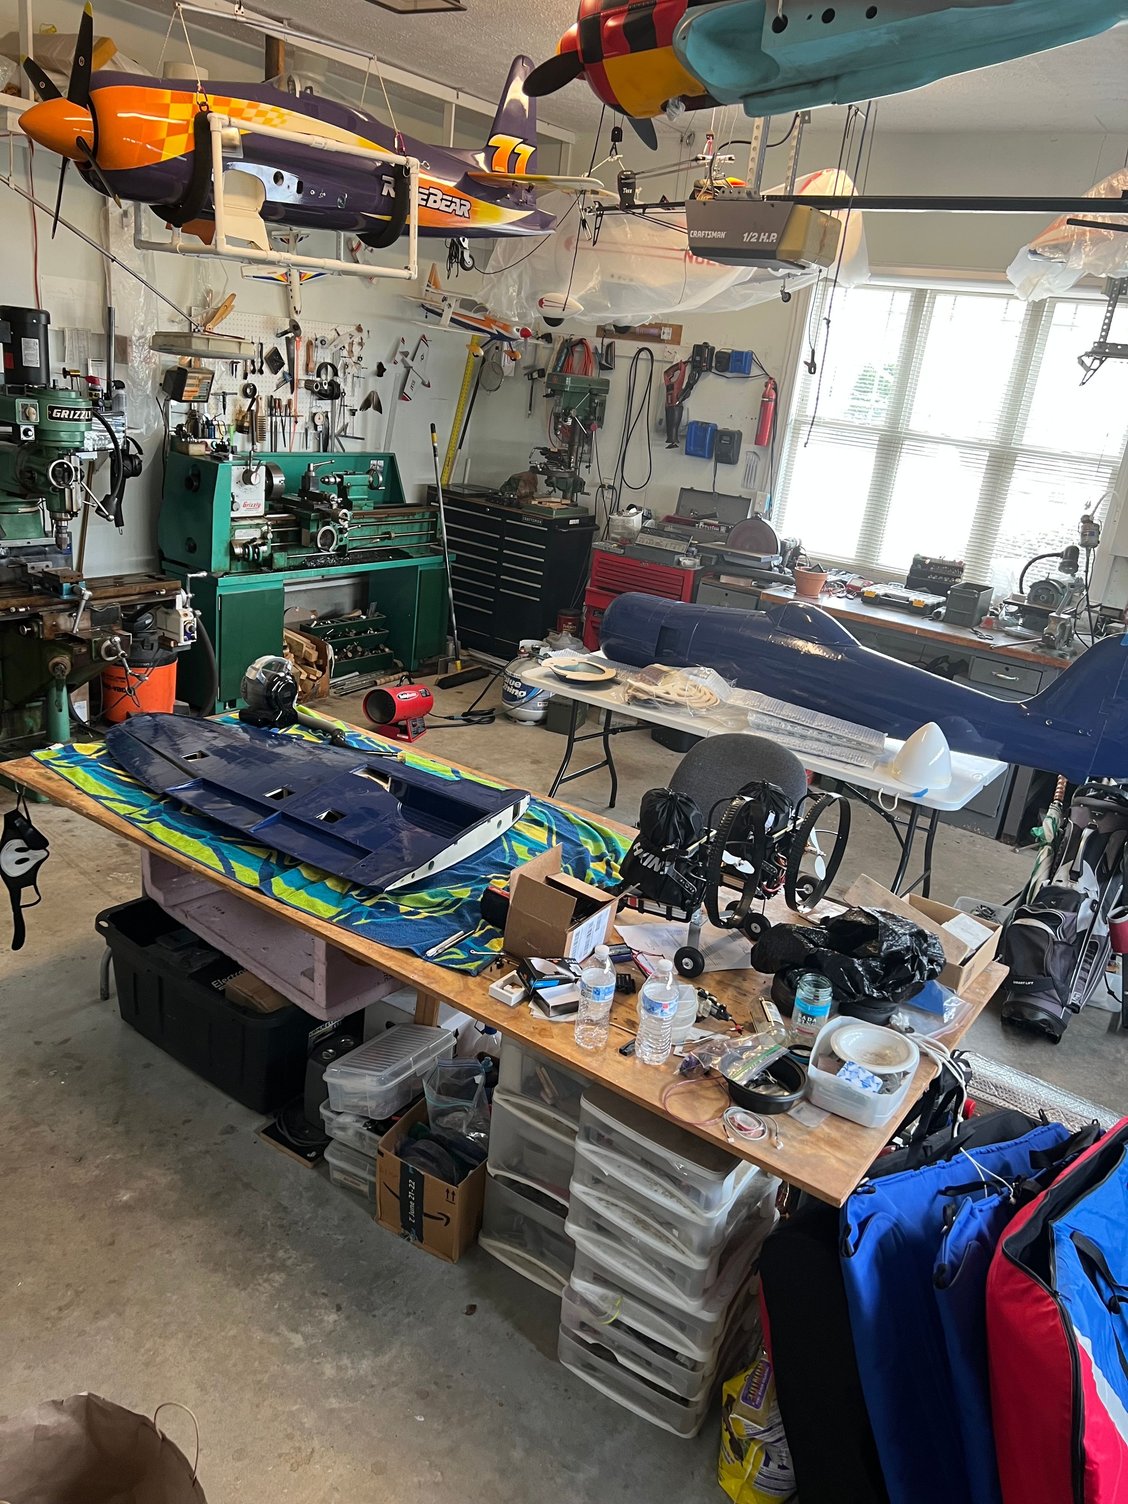
My shop. This is what happiness looks like! Note Mr Rarebear supervising my every move from above.
Motor mount from Airworld. Even has the motor mount holes already in it. So nice!
My shop. This is what happiness looks like! Note Mr Rarebear supervising my every move from above.
Motor mount from Airworld. Even has the motor mount holes already in it. So nice!
Last edited by mitchilito; 02-19-2026 at 10:29 AM.
The following users liked this post:
Jaketab (02-19-2026)
02-20-2026 | 03:30 AM
#6
Thread Starter
My Feedback: (7)
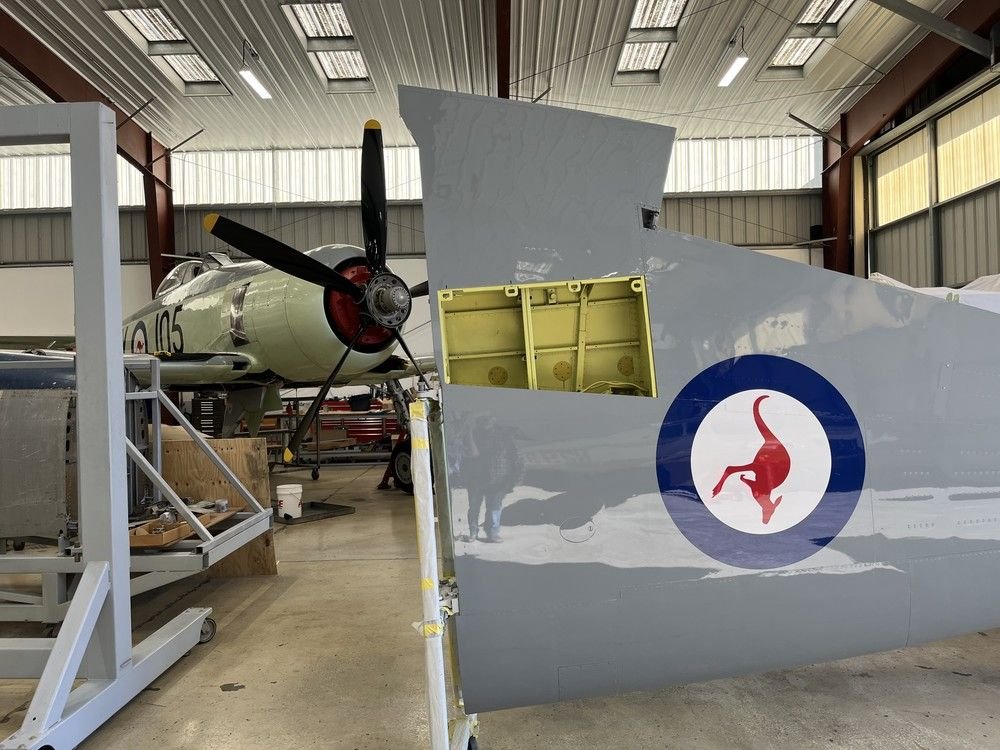
Chris, Airworld provided a huge set of pictures to act as a sort of instruction manual. Very nice, I'd say. Among those build pics were a MILLION shots of every kind of Sea Fury livery ever livered. At first glance these were the three I'm most drawn to. As you can see from my Rare Bear above I have a soft spot for unlimited racers, however, there is just something special about that green and gray scheme with the invasion stripes. . . .
I have a sneaking suspicion this one will win out


I have a sneaking suspicion this one will win out


 02-20-2026 | 04:17 PM
#8

My Feedback: (4)
Chris, Airworld provided a huge set of pictures to act as a sort of instruction manual. Very nice, I'd say. Among those build pics were a MILLION shots of every kind of Sea Fury livery ever livered. At first glance these were the three I'm most drawn to. As you can see from my Rare Bear above I have a soft spot for unlimited racers, however, there is just something special about that green and gray scheme with the invasion stripes. . . .

Chris
02-21-2026 | 06:00 AM
#9
Thread Starter
My Feedback: (7)
JT, this is the most interesting Fury I've seen yet. Original Bristol Centaurus engine, drop tanks and a two place canopy. Crazy!

Wow! But I don't want to make drop tanks and a two place canopy system. . . .
Wow! But I don't want to make drop tanks and a two place canopy system. . . .
Last edited by mitchilito; 02-21-2026 at 06:03 AM.
 03-21-2026 | 02:00 AM
#11
Thread Starter
My Feedback: (7)
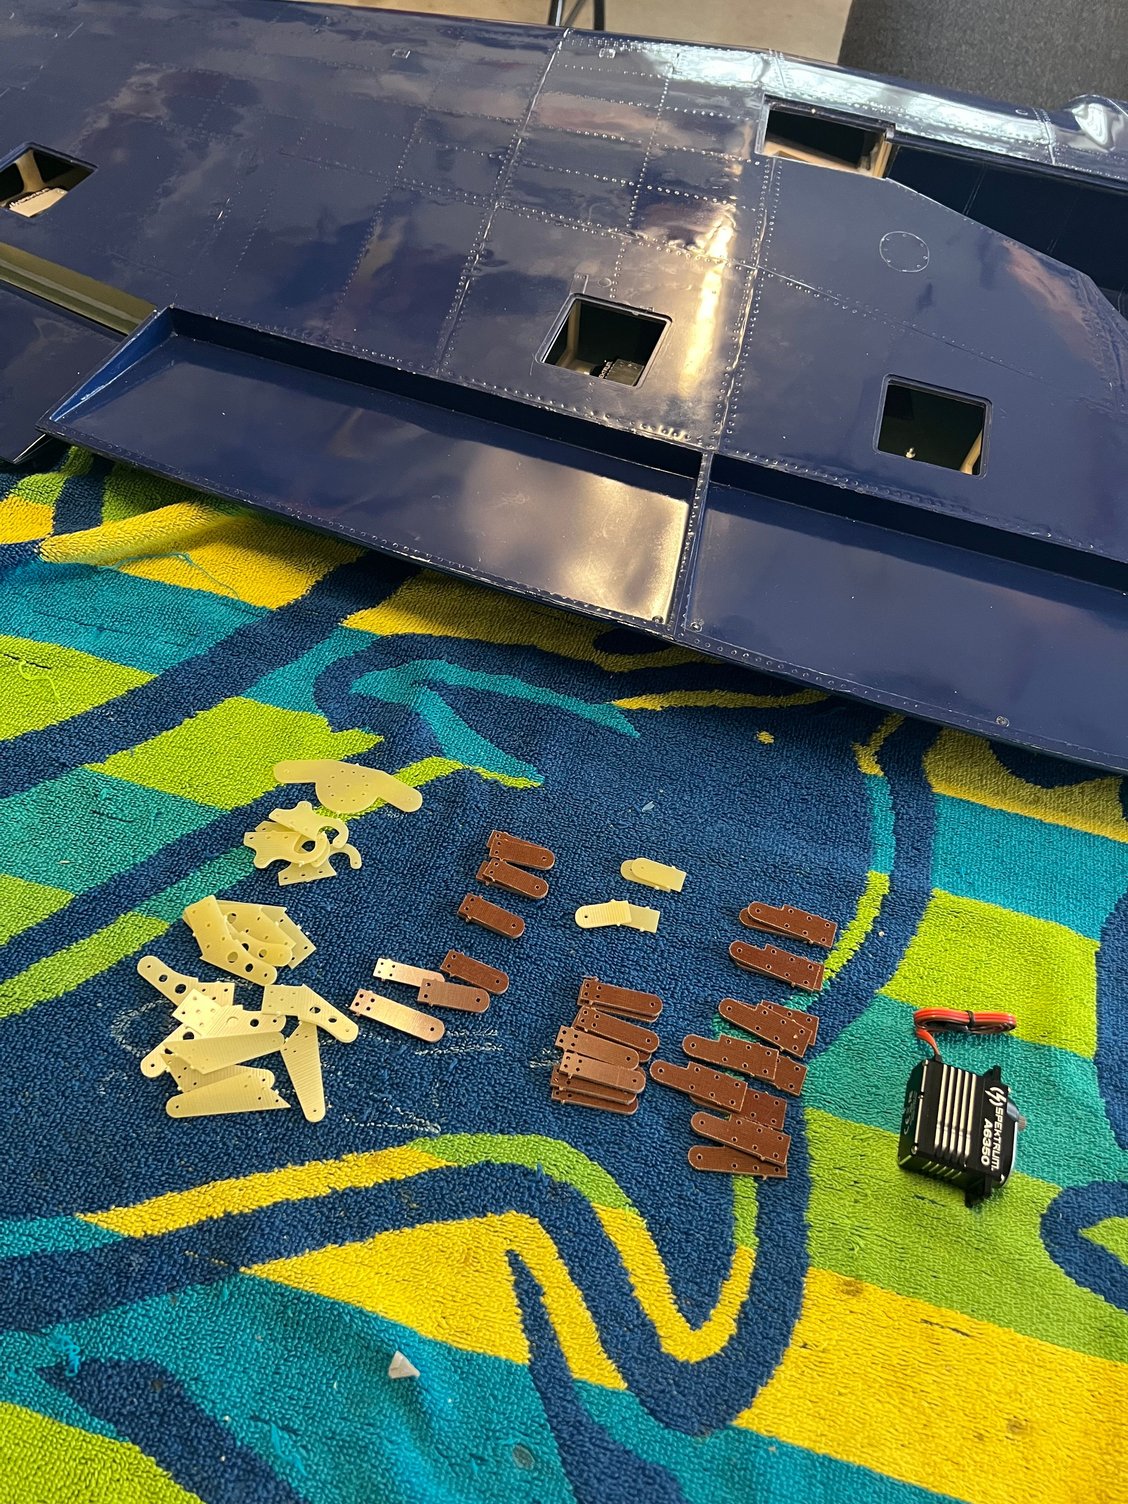
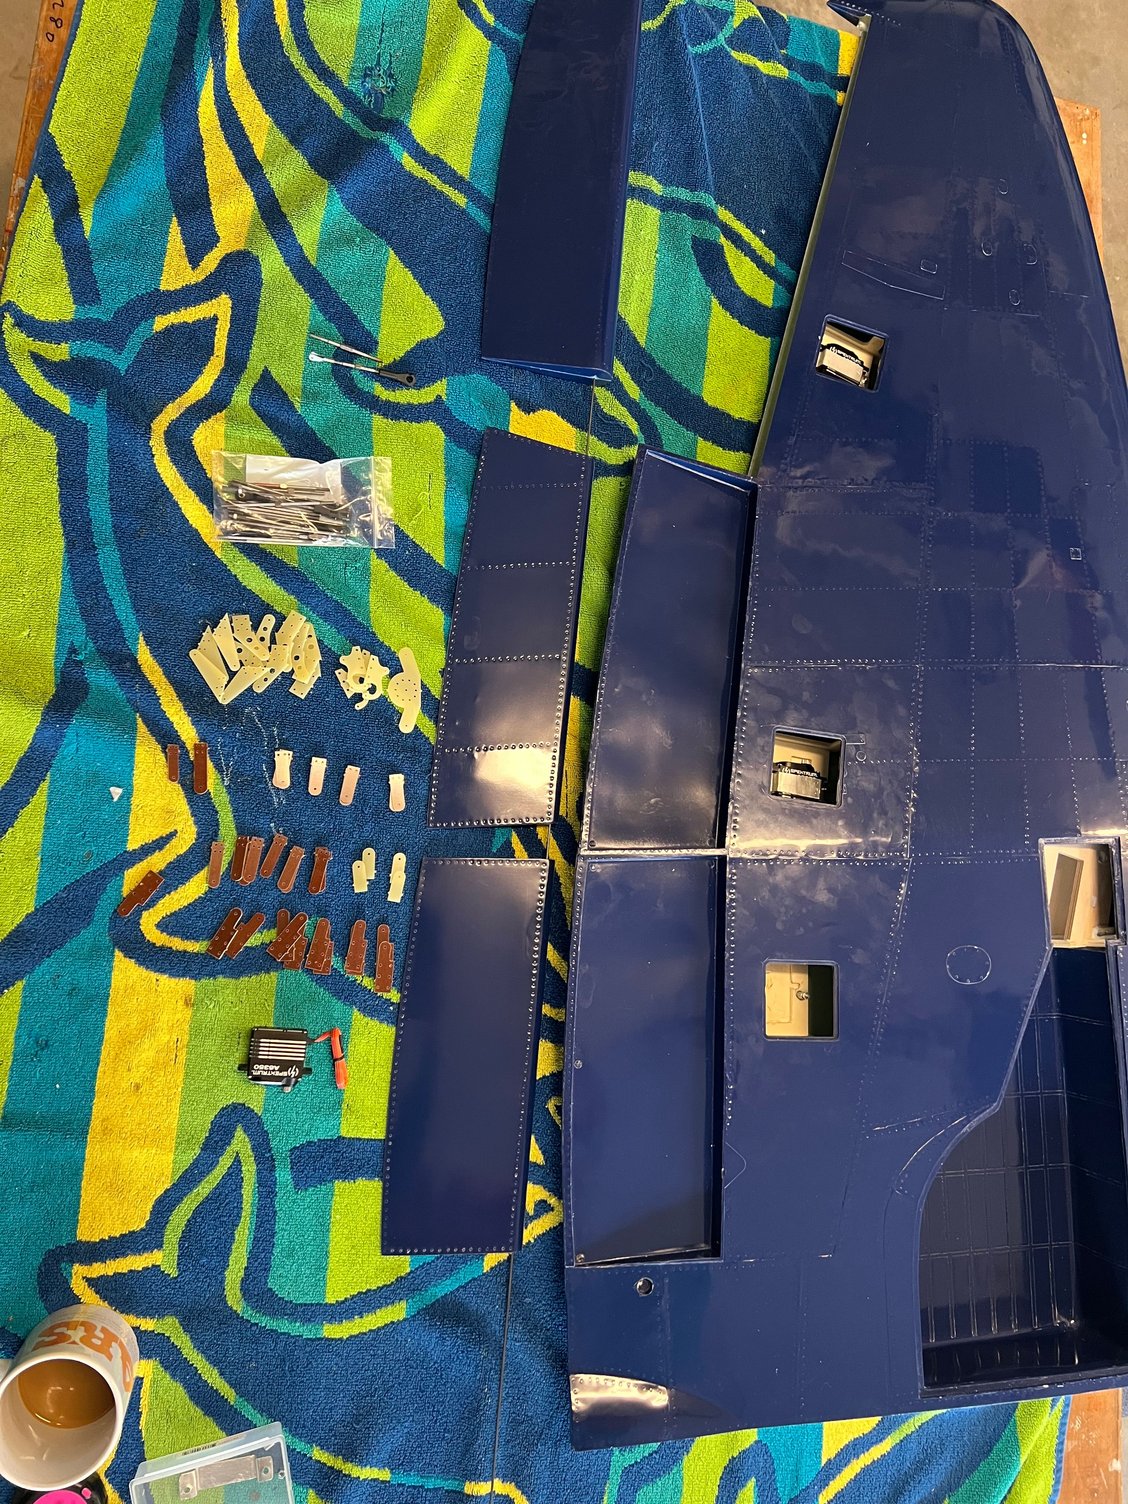
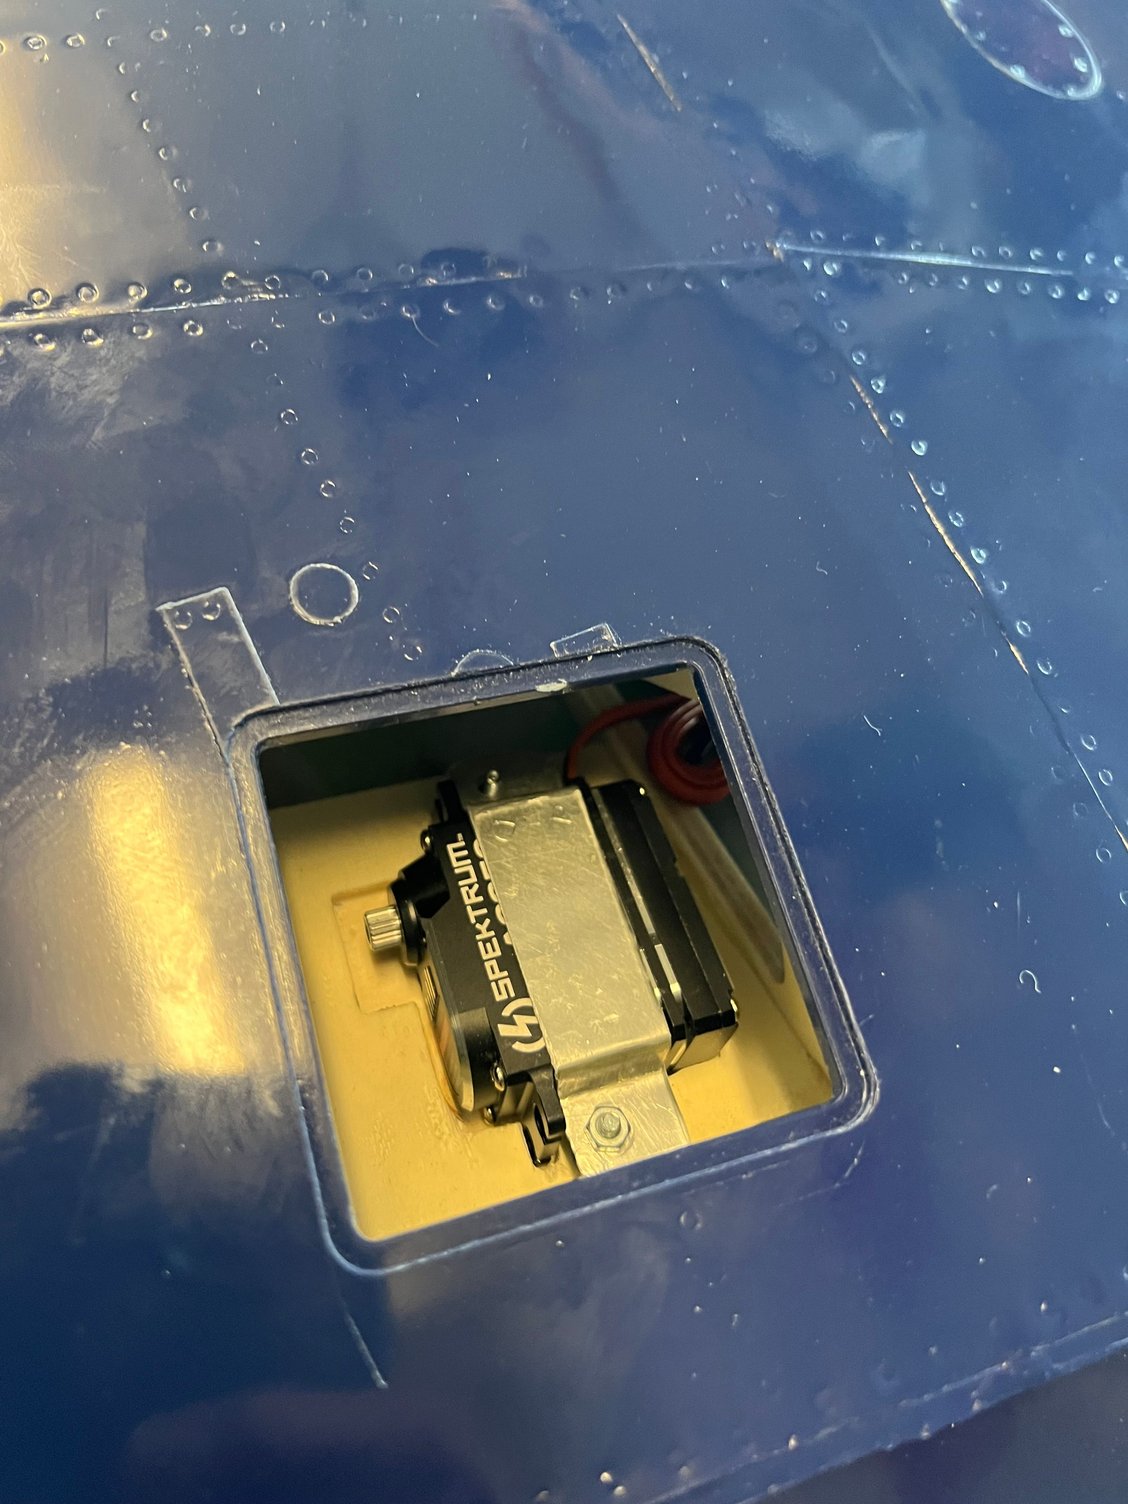
Servo mounting next. Airworld uses a novel approach to mounting. As you'll see aluminum straps secure the servos down (SOLIDLY). I both like and dislike this method. Back in the fragile days of analog electronic manufacture the lack of rubber vibration mounting would've prohibited. But modern electronics are just about indestructible. What the hell, if it's good enough for Airworld. . . .
I will say this: it's MUCH more convenient than servo grommets and screws and VERY secure.
The wings come with the 3mm threaded shafts mounted solidly.

I machined these little aluminum barrels (under the nut you see here) to keep the brackets from over bending. Proper length is important.
I will say this: it's MUCH more convenient than servo grommets and screws and VERY secure.
The wings come with the 3mm threaded shafts mounted solidly.
I machined these little aluminum barrels (under the nut you see here) to keep the brackets from over bending. Proper length is important.
03-21-2026 | 03:01 AM
#12
Thread Starter
My Feedback: (7)
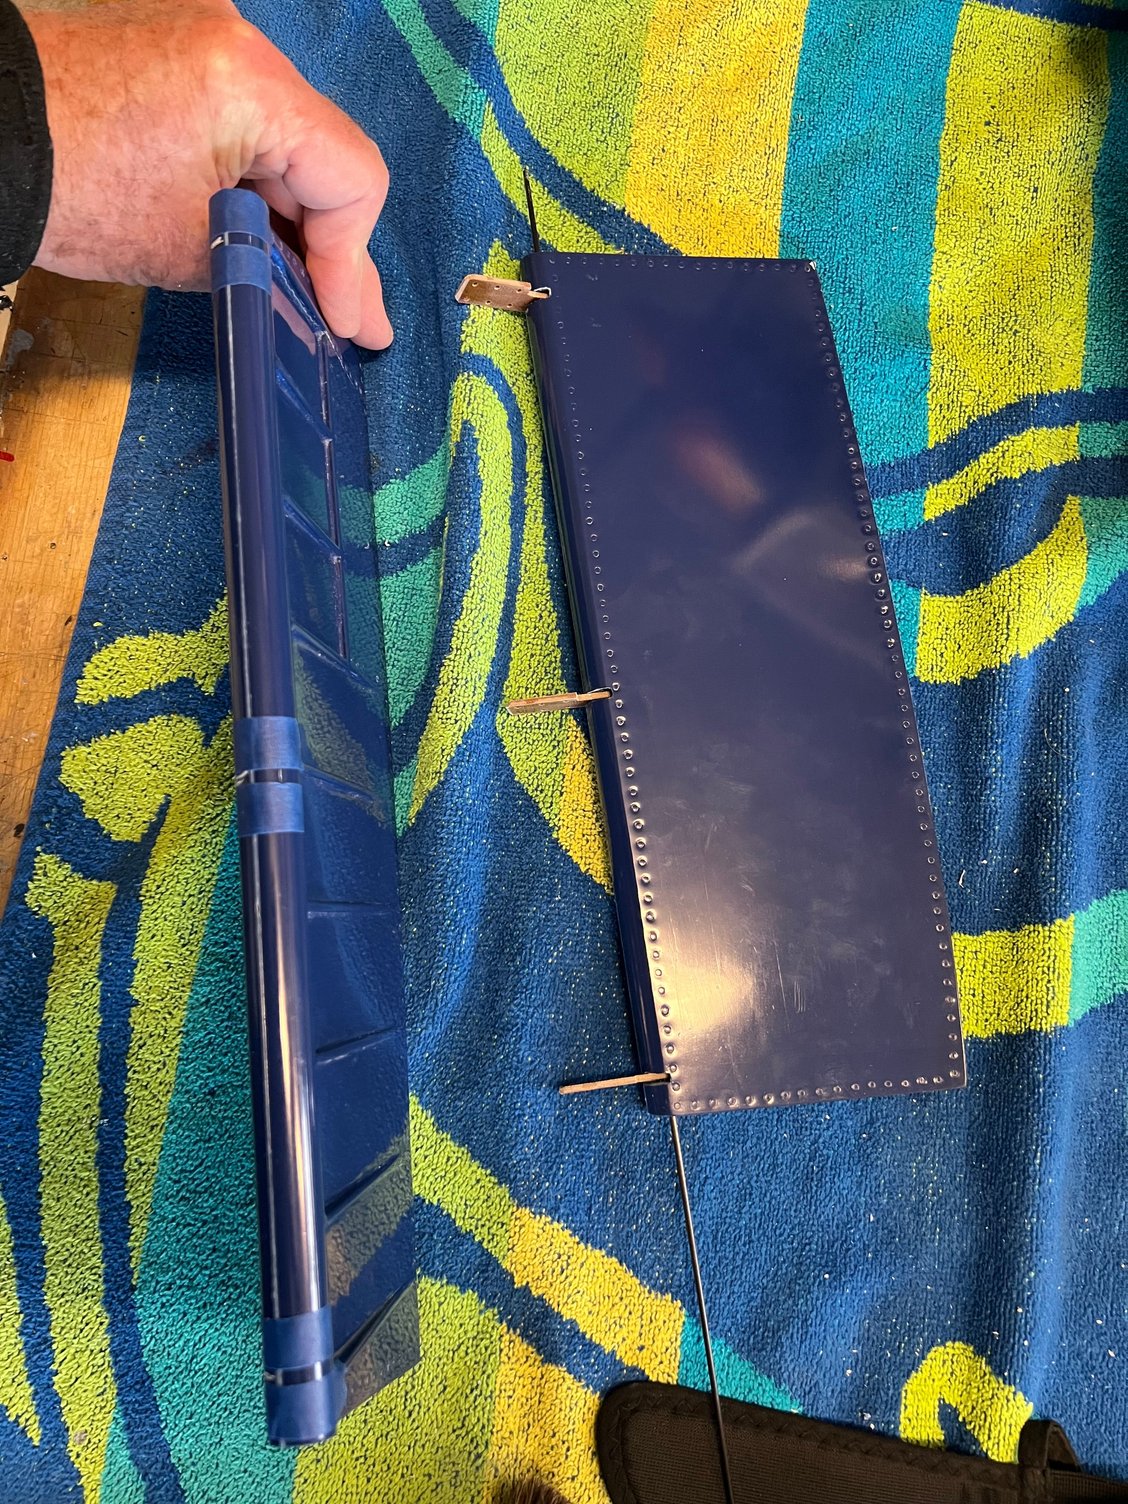
The instruction pics show hinge placement but it took me awhile to figure out the best method to install everything. NOTE: this is just the way I tackled it. There may be other/better ways to do it! In a nutshell, I cut all the hinge slots, applied Hysol epoxy to the hinges and slipped them into the wing then I carefully maneuvered the flaps into position and captured the hinges one by one by carefully pushing in the axle rods into the hinges. Now the most interesting thing about my choice for these axle rods:
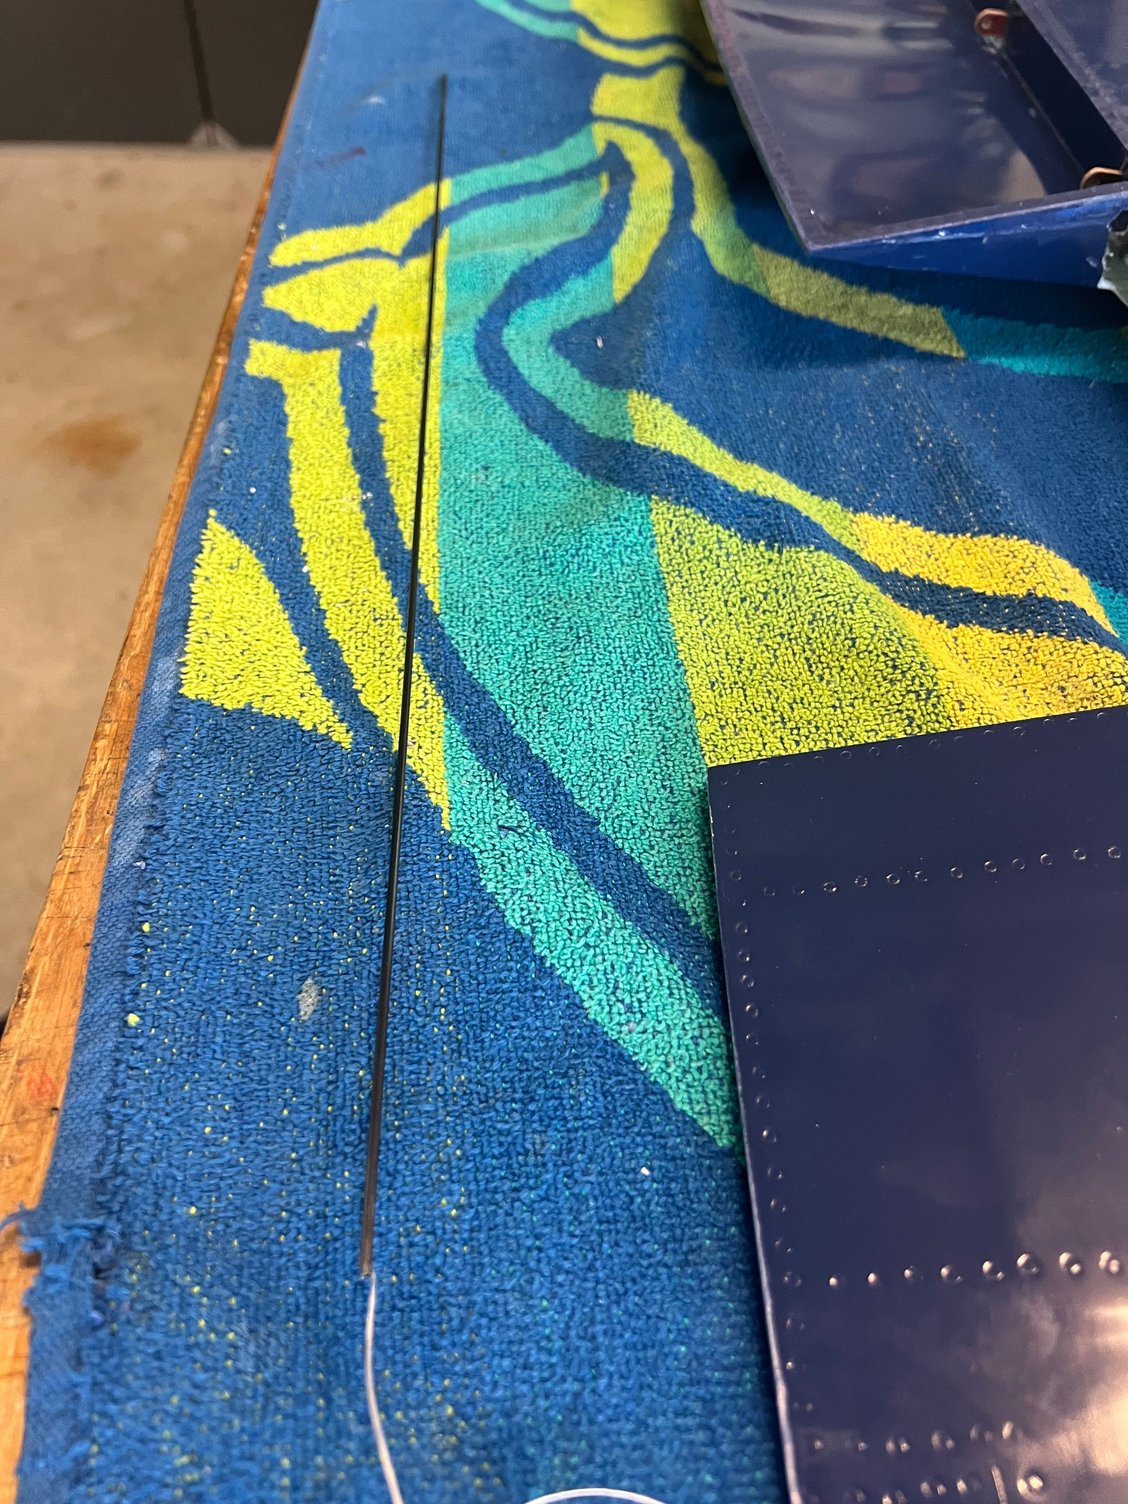
Airworld provides a bundle of 36 inch long 2mm wire rods for axle stock. I've used 2mm solid carbon rod for this in the past and to reduce tail weight on this aircraft I decided to use it here. Now the interesting part of my build so far:
I could not figure out how to make the two flaps and aileron removable. In a nutshell, once all the hinges are installed I:
1) Install the axle into the aileron first.
2) Then install the axle into the inboard flap (by starting the axle through the INBOARD flap hinges (actually only the most outboard hinge of the inboard flap) and traveling it outboard into the outboard flap. The problem here is that the two flaps are about 15 degrees off of straight to each other so that requires the carbon rod/axle to slightly bend around that corner as it goes into the outboard flap! Sounds crazy but it works great. NOTE: this would not be possible with the steel axles provided: that rod would not negotiate the bend.
3) After the outboard flap is installed the inboard flap is installed by inserting a long axle rod through the ROOT OF THE WING all the way through the hinges in the inboard aileron. In service this axle root end will be secured to the root rib with a little 90 degree bracket and flush head screw (there is space for it as the root rib is recessed a small bit into the wing.
Some of you may not like the idea of using the carbon rods. I'll say this: if the hinges were made out of say, metal, then carbon would not be a good choice. However, the hinges are phenolic which is basically CLOTH and thus pretty gentle on the rods. With that said, only the outboard flap requires the bendy rod so you COULD just use that one rod and inspect it at your convenience. Personally, I'm not concerned at all.
So to remove all the installed surfaces you: Pull the root rod and inboard flap, then pull the out board flap rod by arcing it through the first inboard hinge, then pull the aileron rod. EASY PEASY (ha ha ha ha ha ha . . . . . . .)
Note: Of course of maximum importance is the length of each of the three rods to allow easy retrieval/removal and you will have to discover that as you go.
Good luck to you :-)
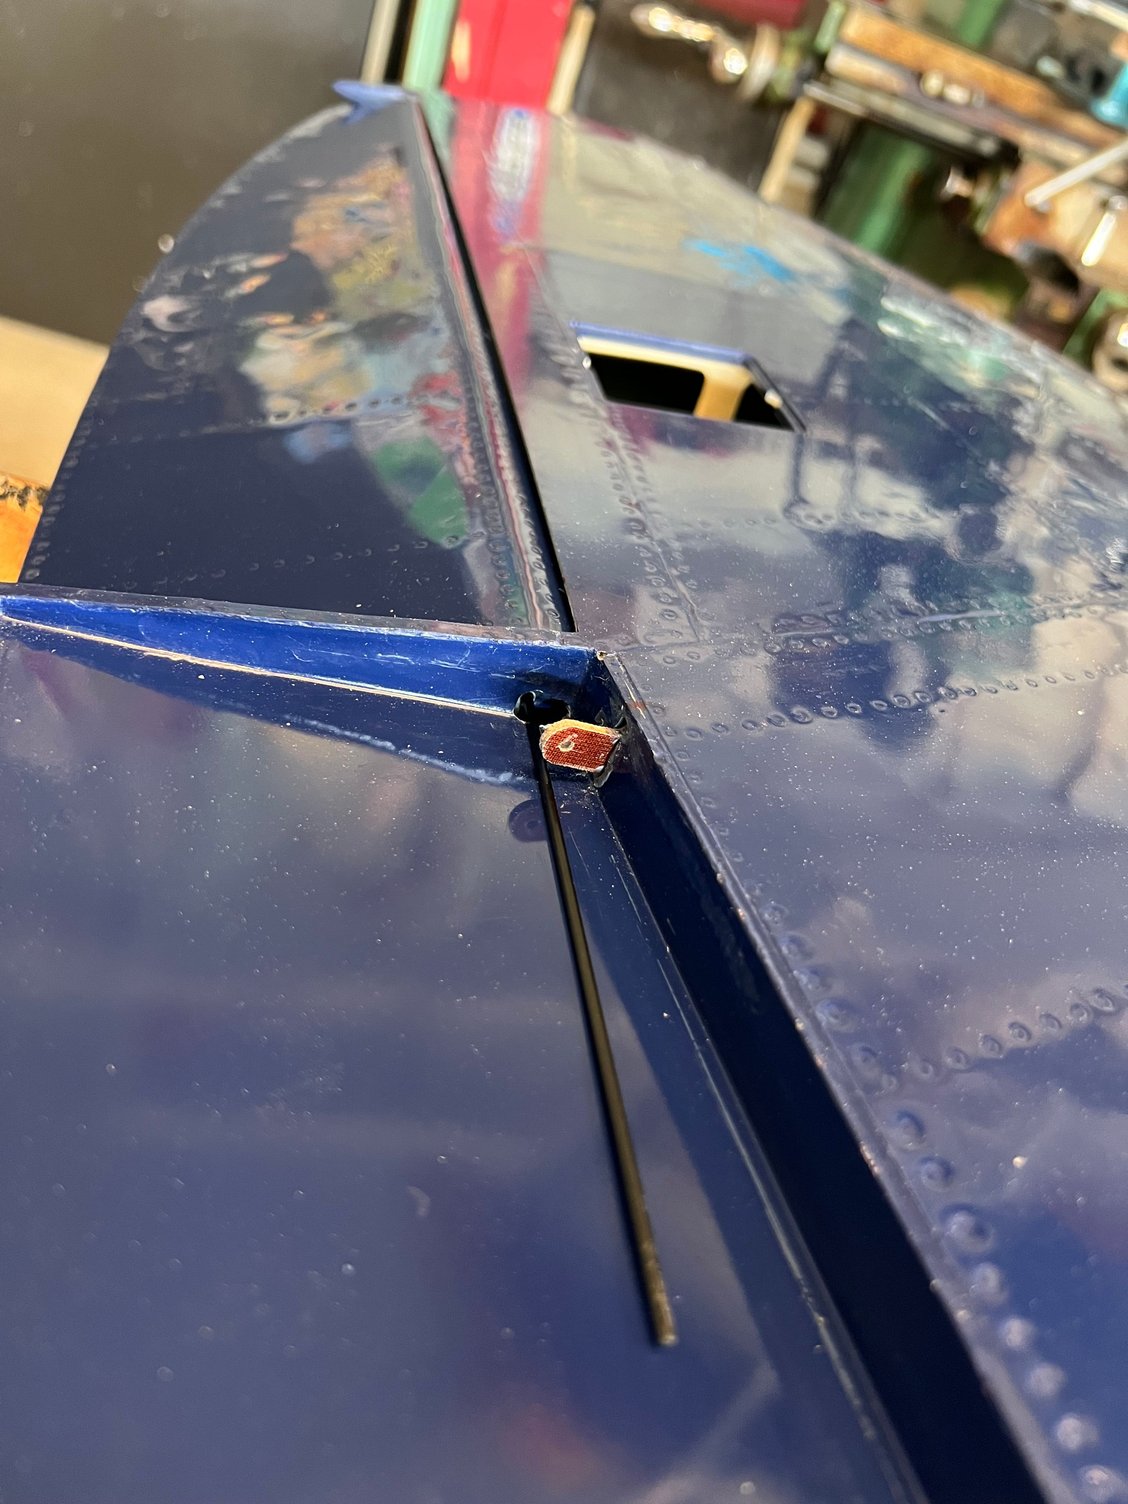
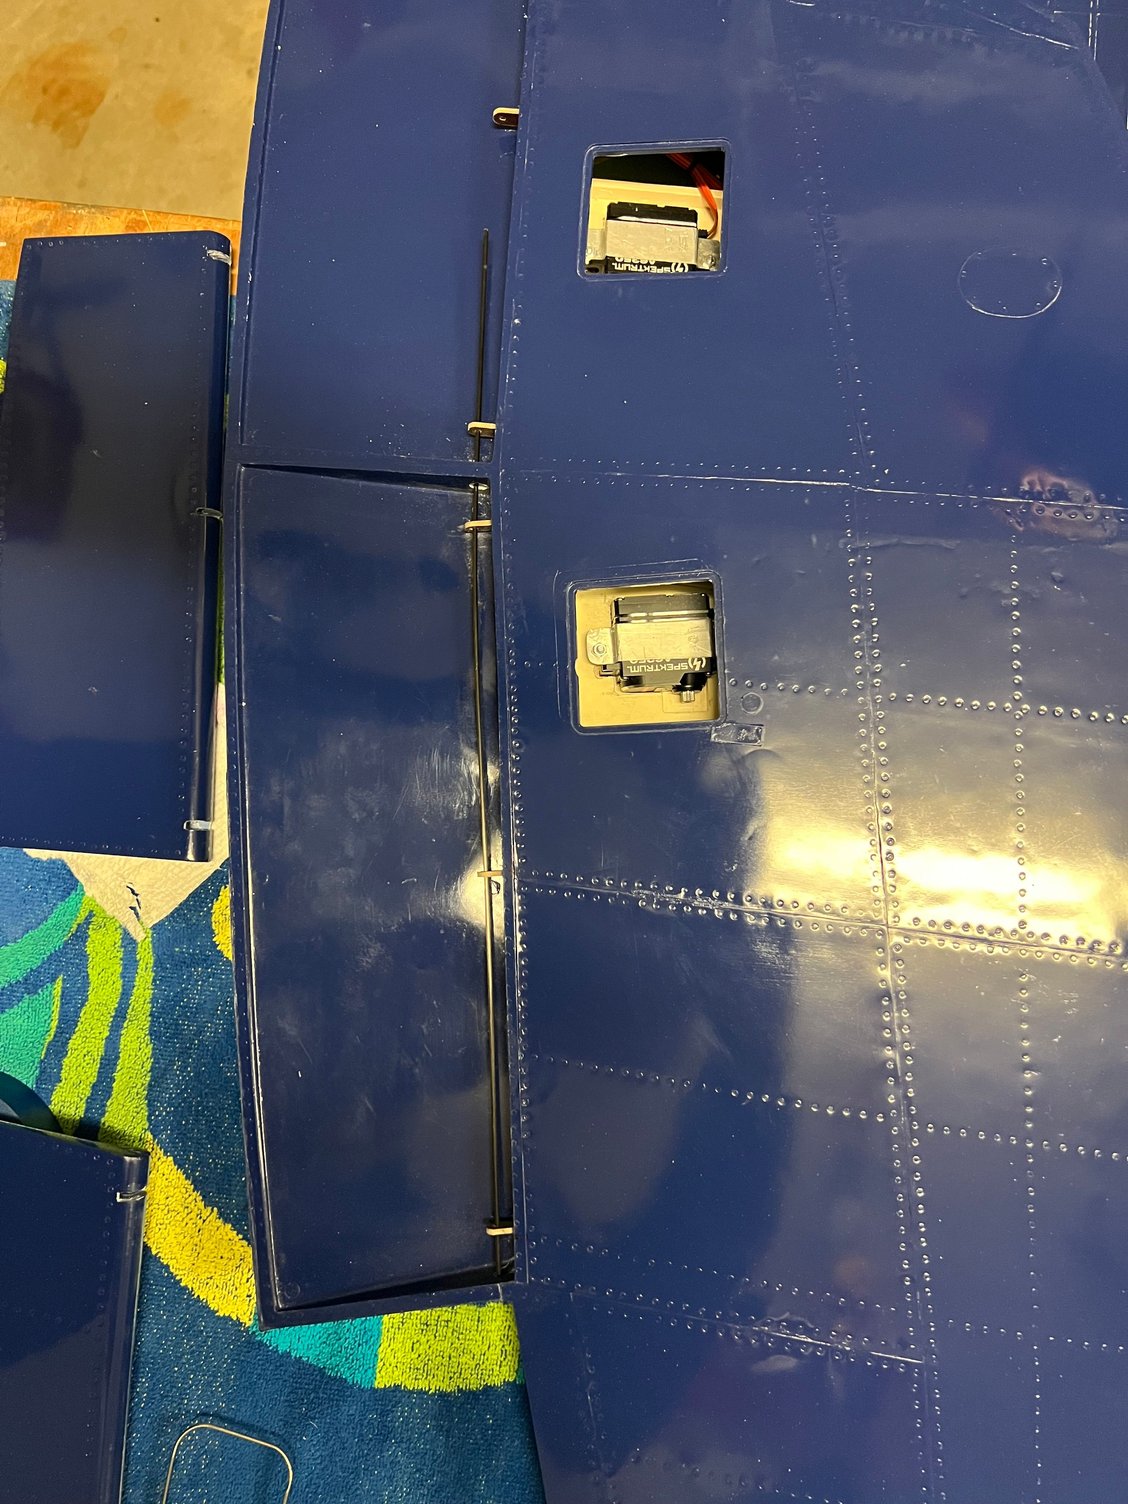
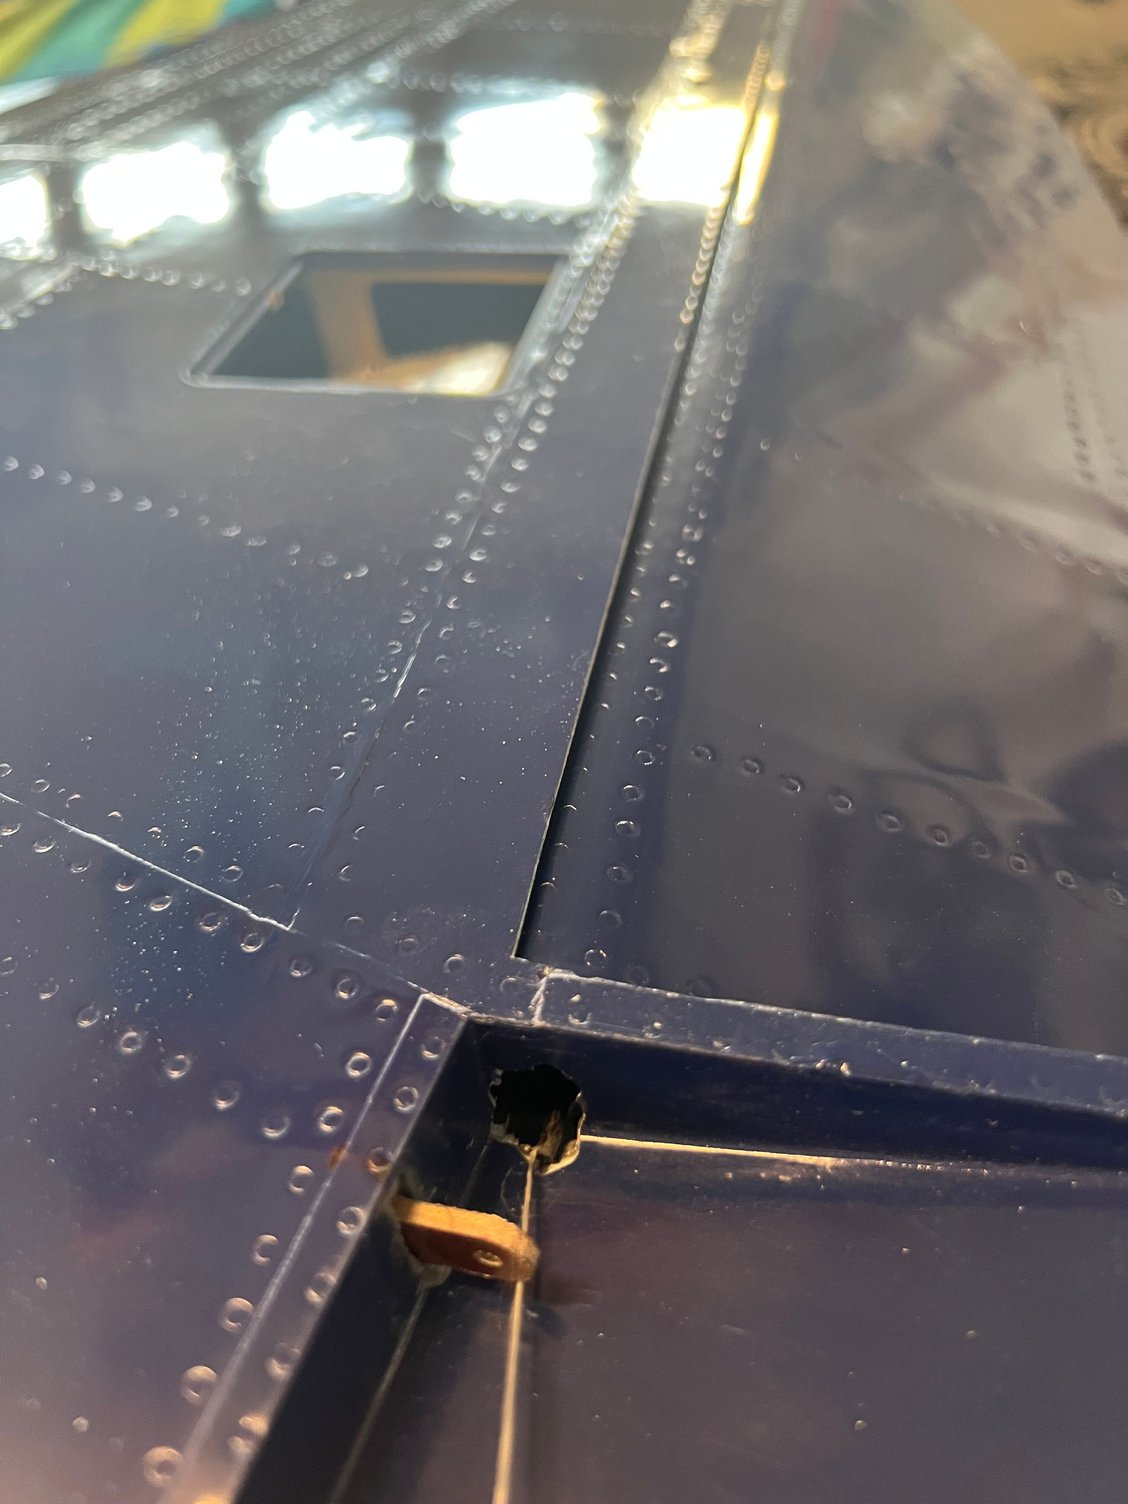
Fortunately, the aileron axle rod passed UNDER the flap hinge for easy removal.
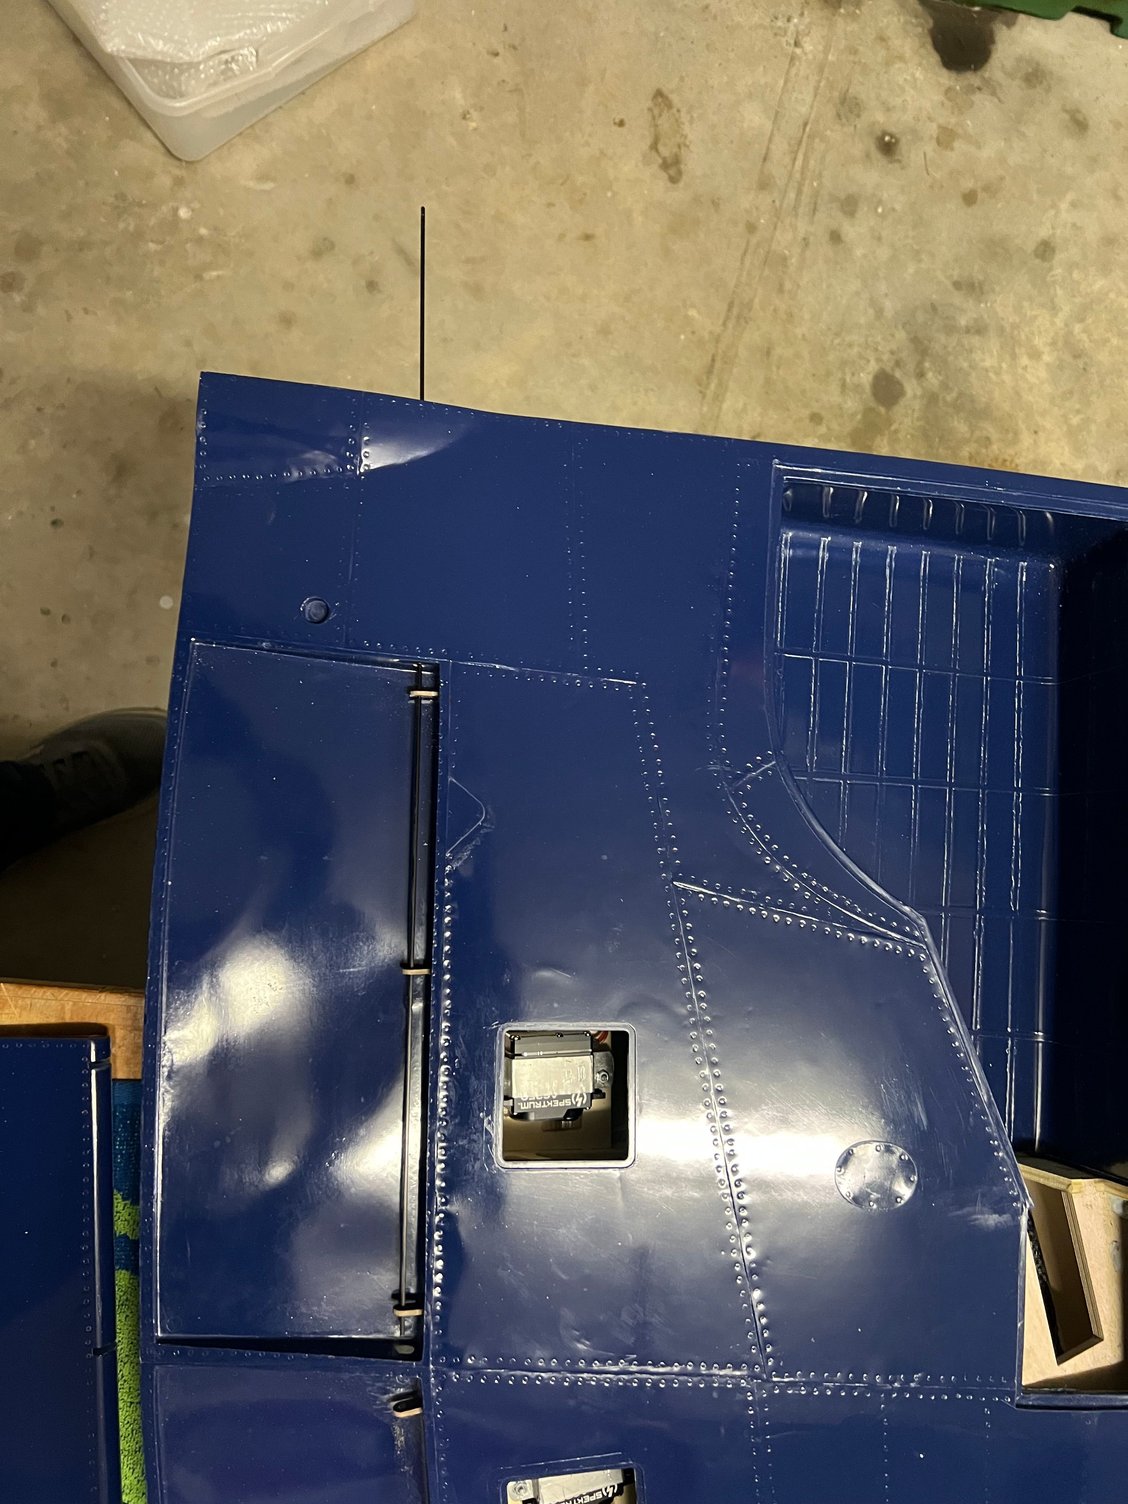
This shows the final length of the aileron axle to prevent interference with the flap yet leave enough to grab for removal
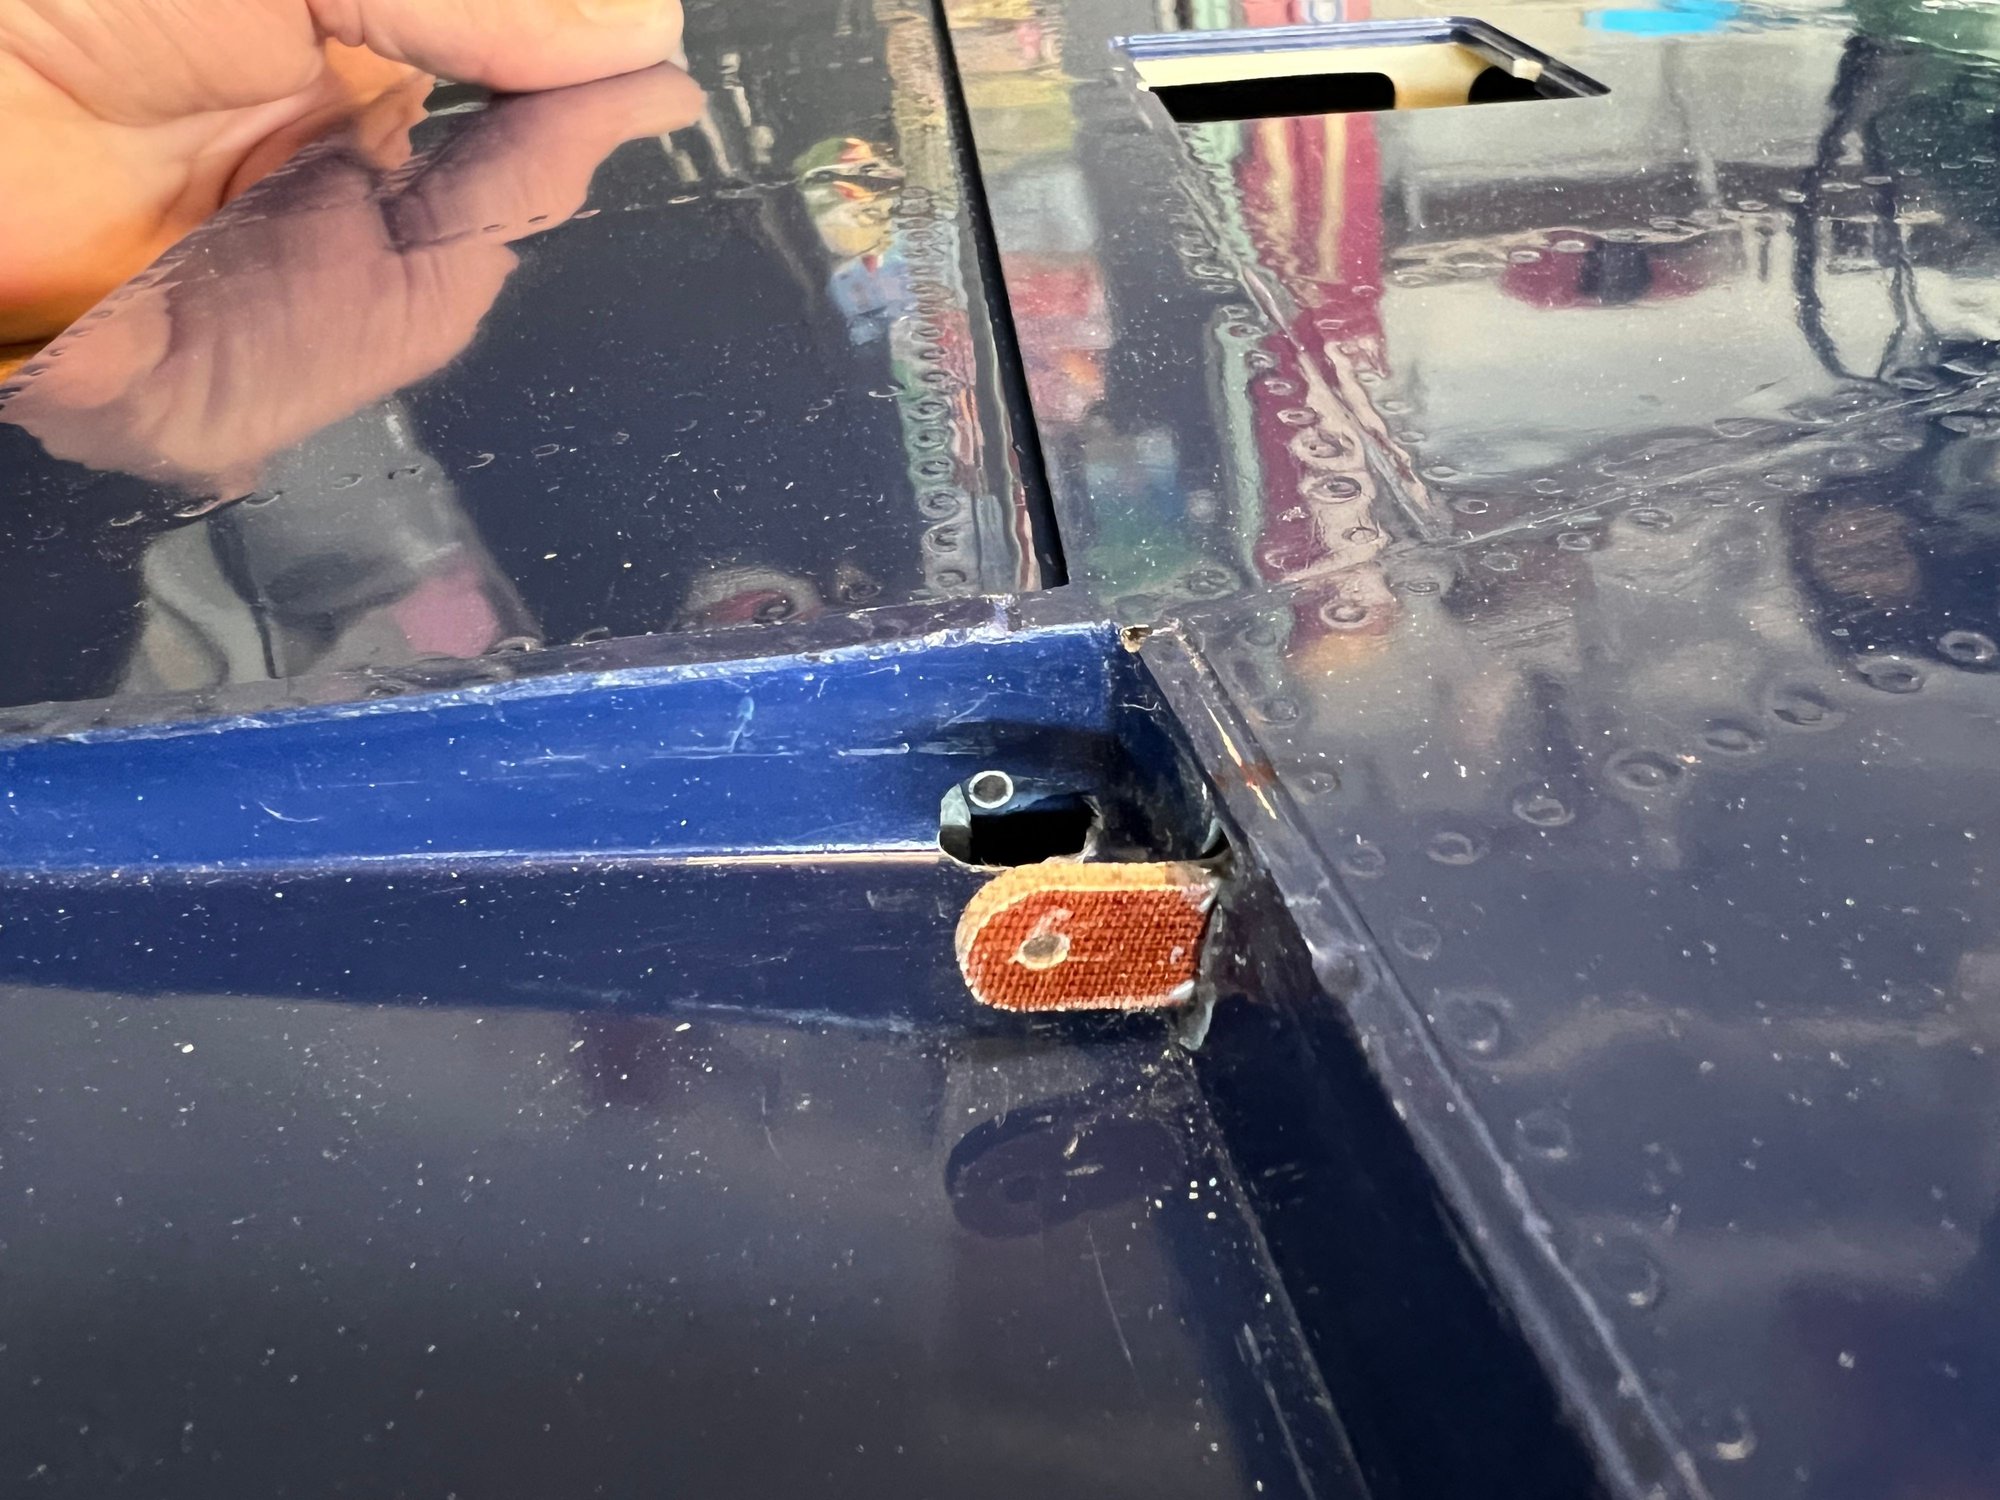
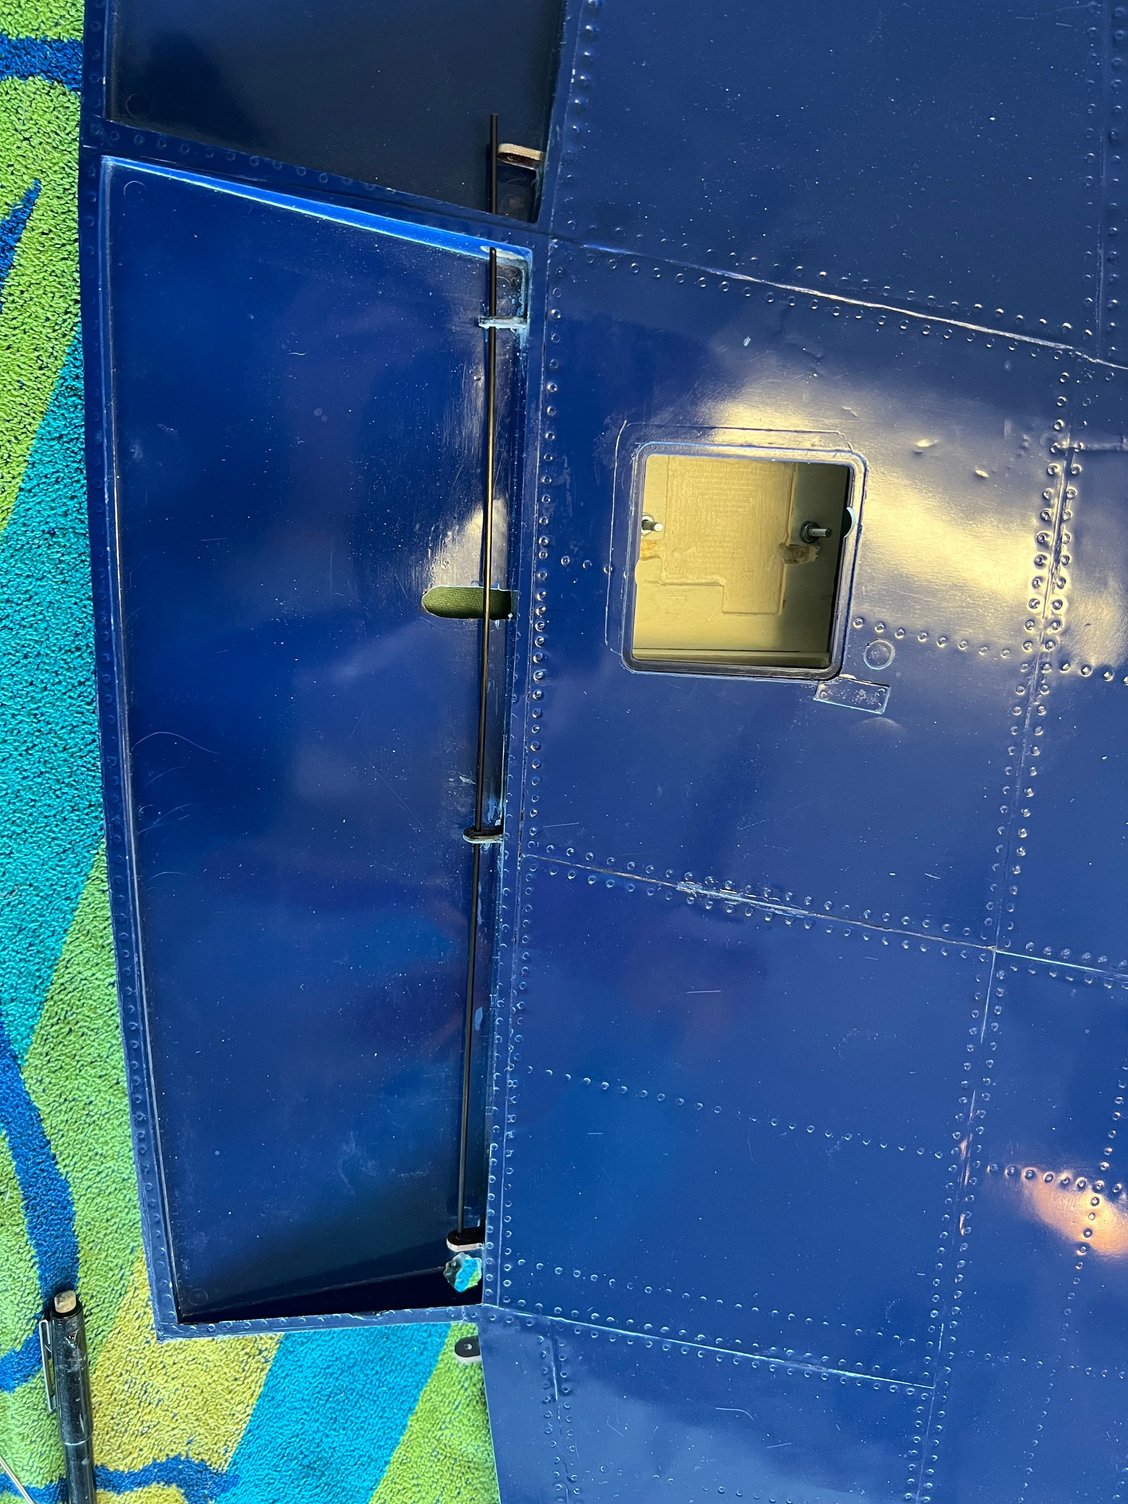
Flap rod arcing into place
Inboard flap axle installed from root of wing
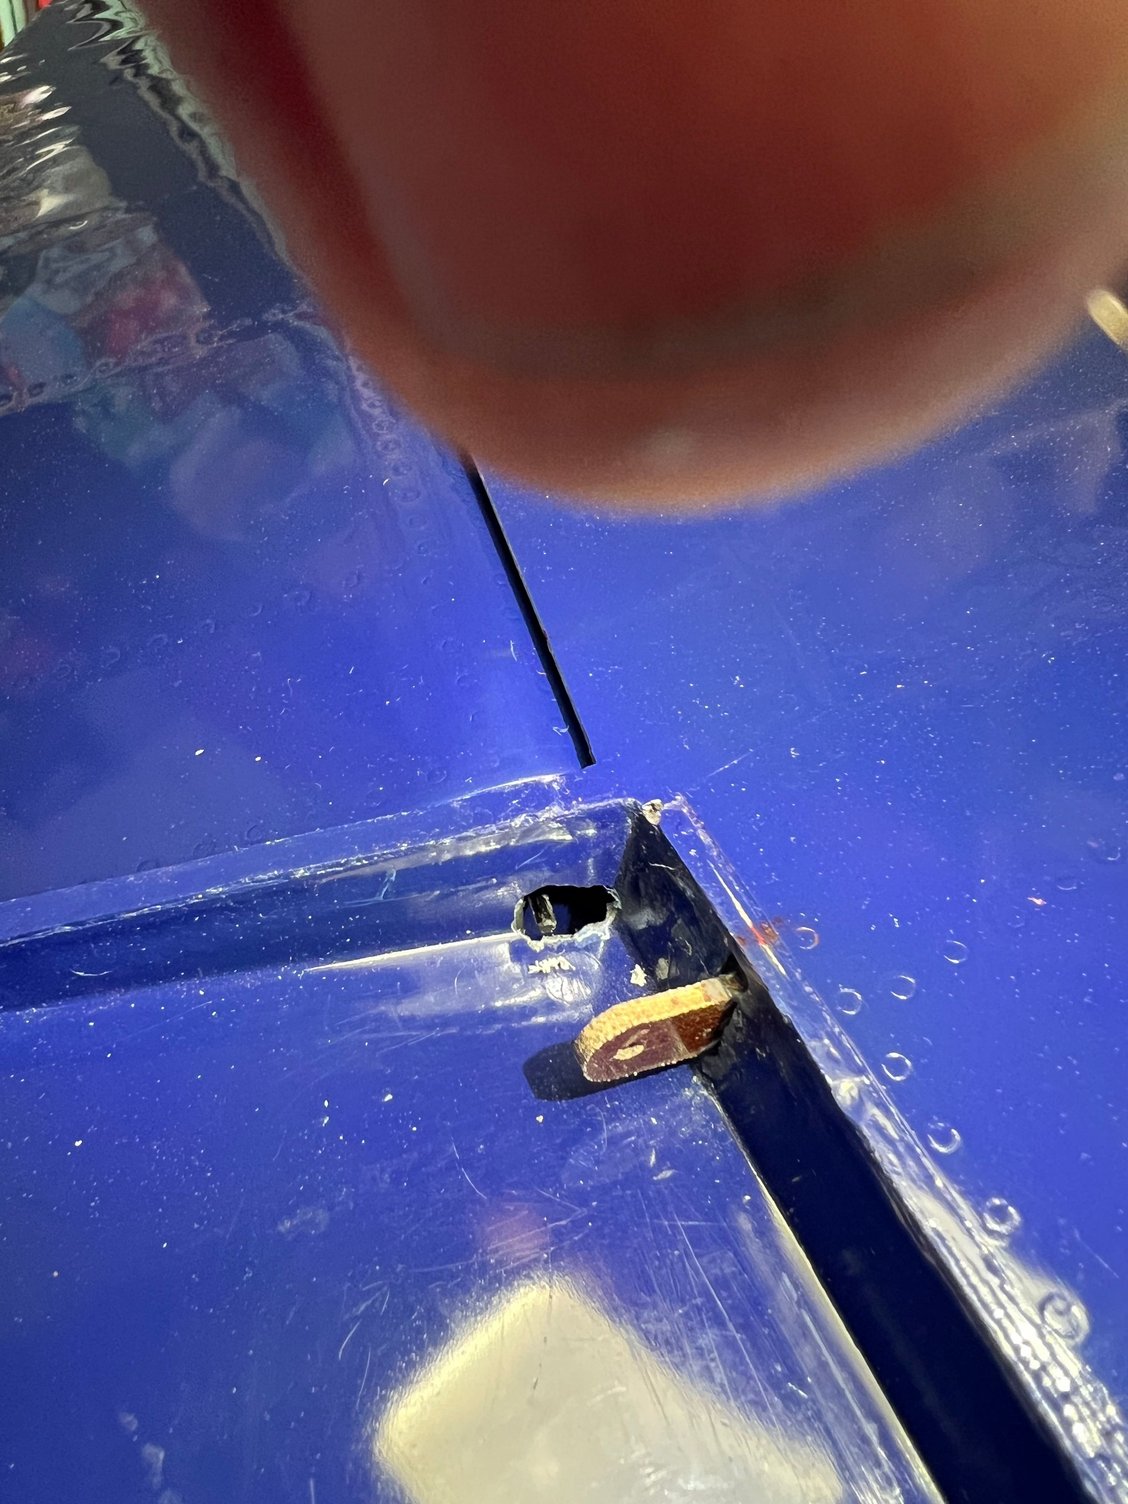
And finally NOTE THIS!: It's quite possible to LOSE AN AXLE into a control surface during this process (ask me how I know!) and not be able to remove it easily. This could actually be a nightmare SO BE CAREFUL!
Airworld provides a bundle of 36 inch long 2mm wire rods for axle stock. I've used 2mm solid carbon rod for this in the past and to reduce tail weight on this aircraft I decided to use it here. Now the interesting part of my build so far:
I could not figure out how to make the two flaps and aileron removable. In a nutshell, once all the hinges are installed I:
1) Install the axle into the aileron first.
2) Then install the axle into the inboard flap (by starting the axle through the INBOARD flap hinges (actually only the most outboard hinge of the inboard flap) and traveling it outboard into the outboard flap. The problem here is that the two flaps are about 15 degrees off of straight to each other so that requires the carbon rod/axle to slightly bend around that corner as it goes into the outboard flap! Sounds crazy but it works great. NOTE: this would not be possible with the steel axles provided: that rod would not negotiate the bend.
3) After the outboard flap is installed the inboard flap is installed by inserting a long axle rod through the ROOT OF THE WING all the way through the hinges in the inboard aileron. In service this axle root end will be secured to the root rib with a little 90 degree bracket and flush head screw (there is space for it as the root rib is recessed a small bit into the wing.
Some of you may not like the idea of using the carbon rods. I'll say this: if the hinges were made out of say, metal, then carbon would not be a good choice. However, the hinges are phenolic which is basically CLOTH and thus pretty gentle on the rods. With that said, only the outboard flap requires the bendy rod so you COULD just use that one rod and inspect it at your convenience. Personally, I'm not concerned at all.
So to remove all the installed surfaces you: Pull the root rod and inboard flap, then pull the out board flap rod by arcing it through the first inboard hinge, then pull the aileron rod. EASY PEASY (ha ha ha ha ha ha . . . . . . .)
Note: Of course of maximum importance is the length of each of the three rods to allow easy retrieval/removal and you will have to discover that as you go.
Good luck to you :-)
Fortunately, the aileron axle rod passed UNDER the flap hinge for easy removal.
This shows the final length of the aileron axle to prevent interference with the flap yet leave enough to grab for removal
Flap rod arcing into place
Inboard flap axle installed from root of wing
And finally NOTE THIS!: It's quite possible to LOSE AN AXLE into a control surface during this process (ask me how I know!) and not be able to remove it easily. This could actually be a nightmare SO BE CAREFUL!
Last edited by mitchilito; 03-21-2026 at 04:23 AM.
03-21-2026 | 04:13 AM
#13
Thread Starter
My Feedback: (7)
First and foremost is the set of carbide router bits I picture below. It took me a few tries to zero in on this process but the smallest of the shown router bits did 95% of the slotting/cutting. And I found out that marking (delineating?) the spots to cut is best accomplished with masking tape as you'll see.
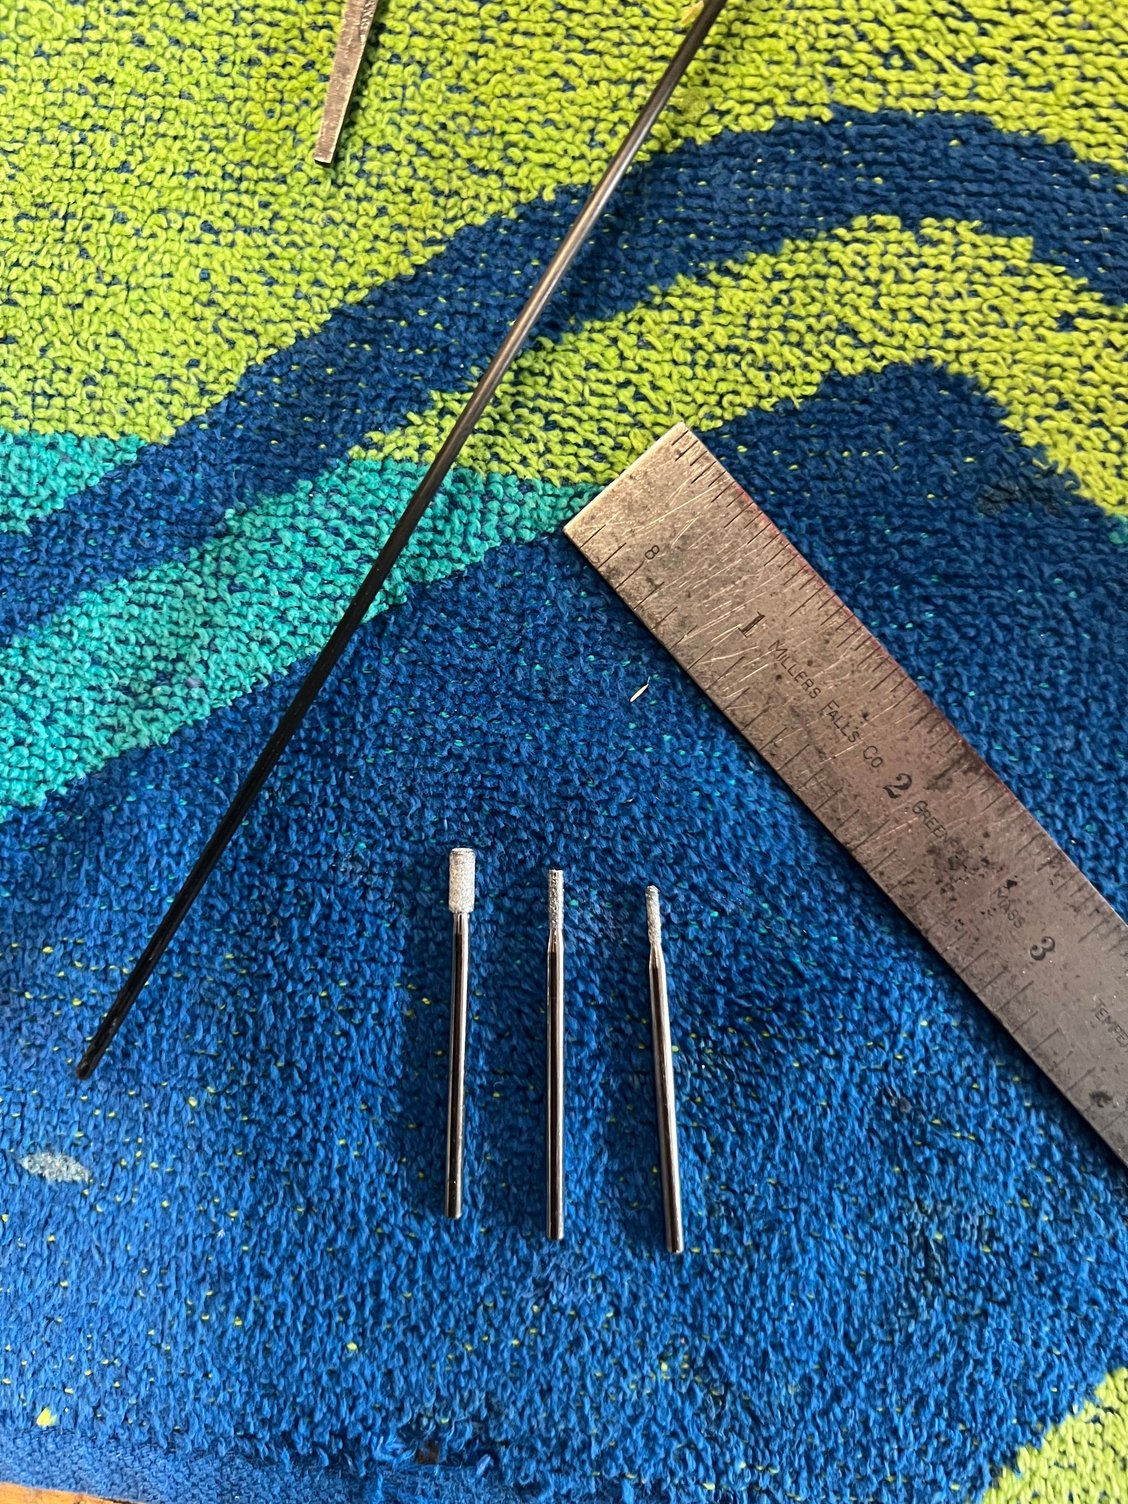
The littlest router bid is indispensable.
Slot the flap and use slot to locate control opening.
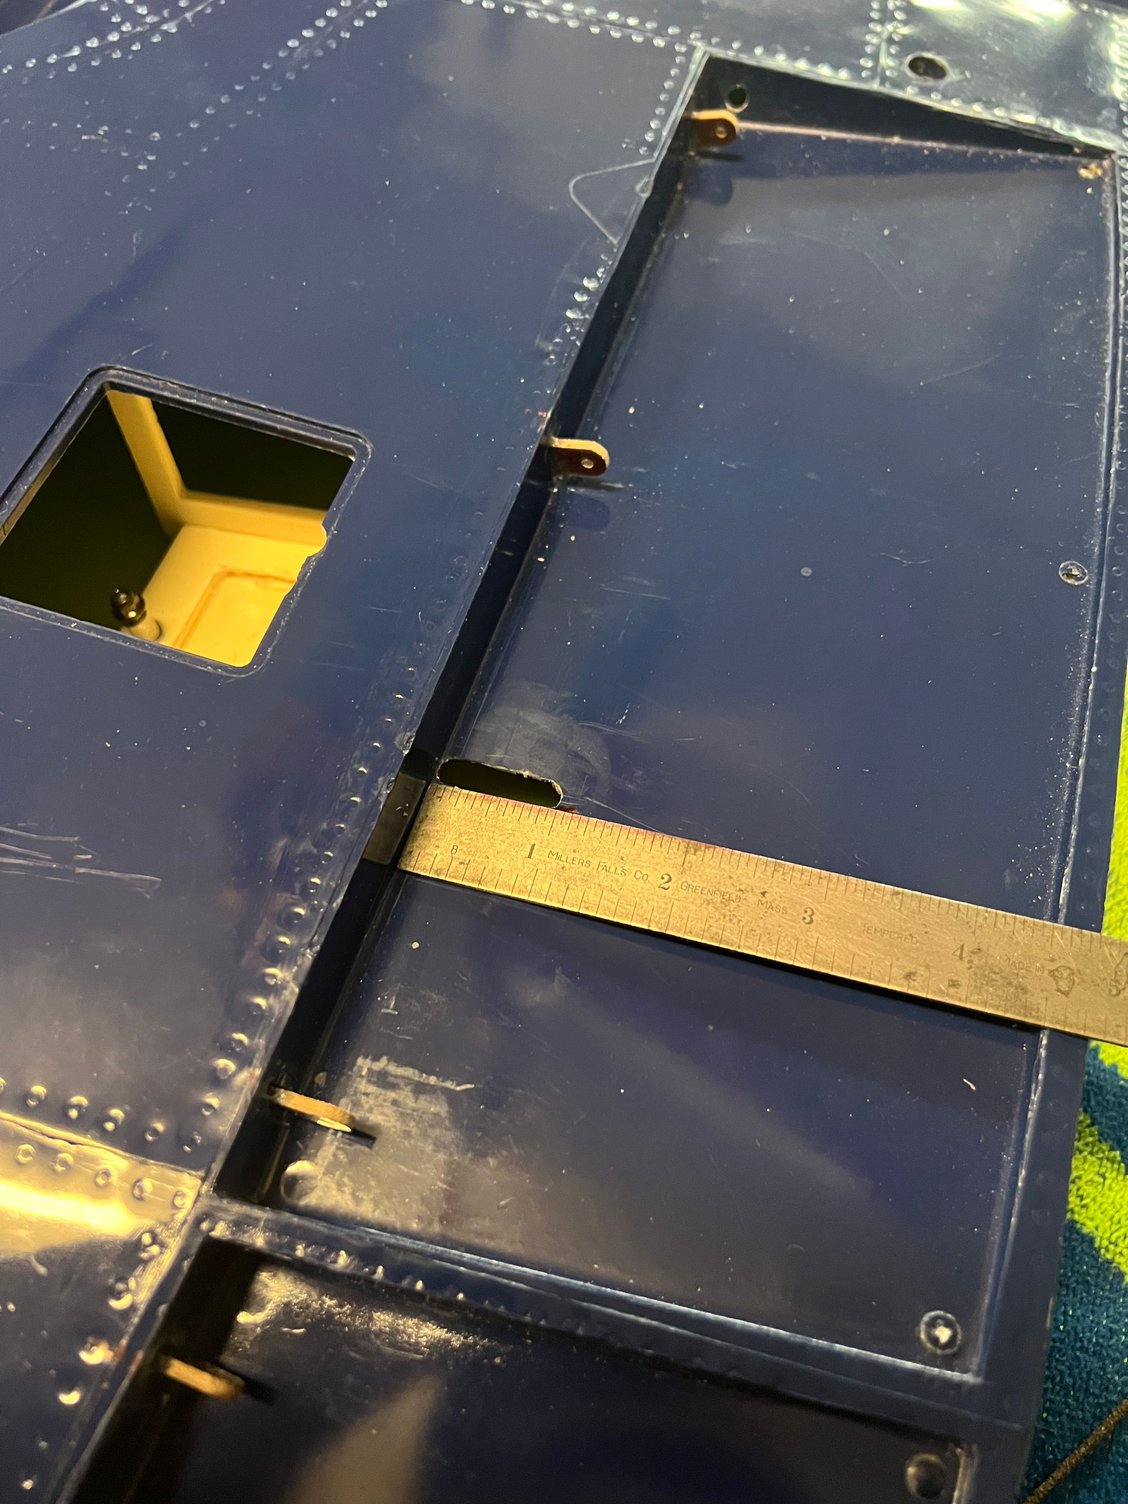
Just about exactly one inch
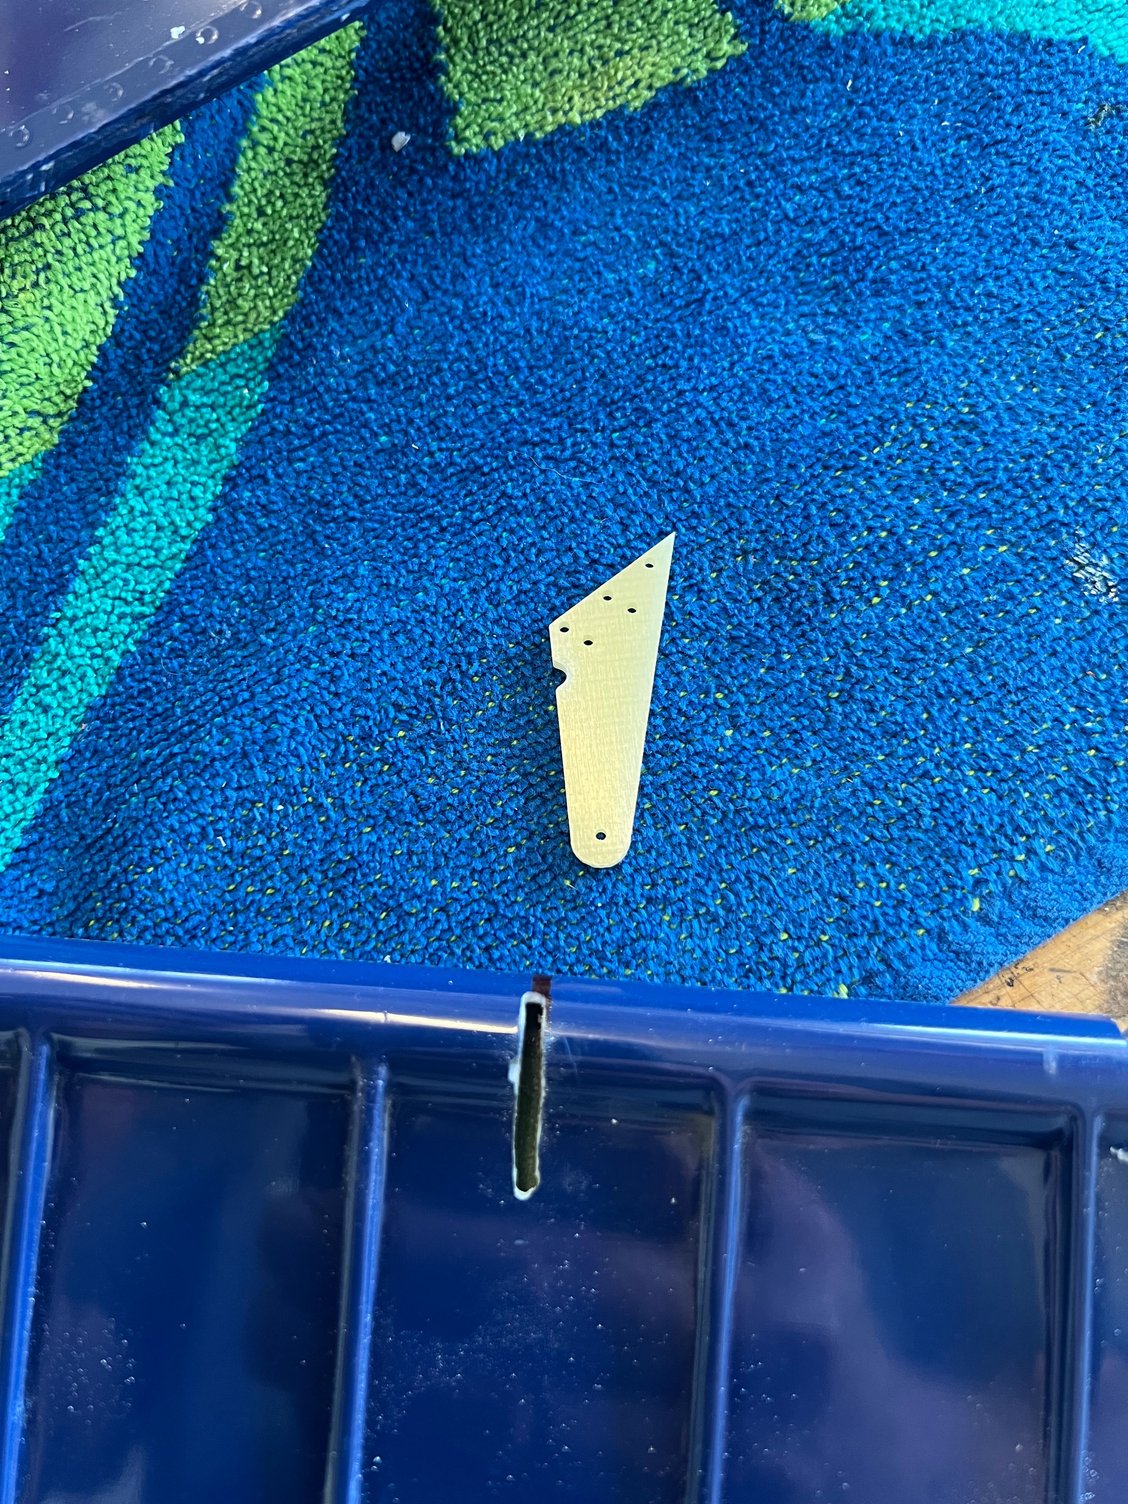
I notched out each flap horn to clear axle rods. I still had to section out the axle tube in the flaps to clear.
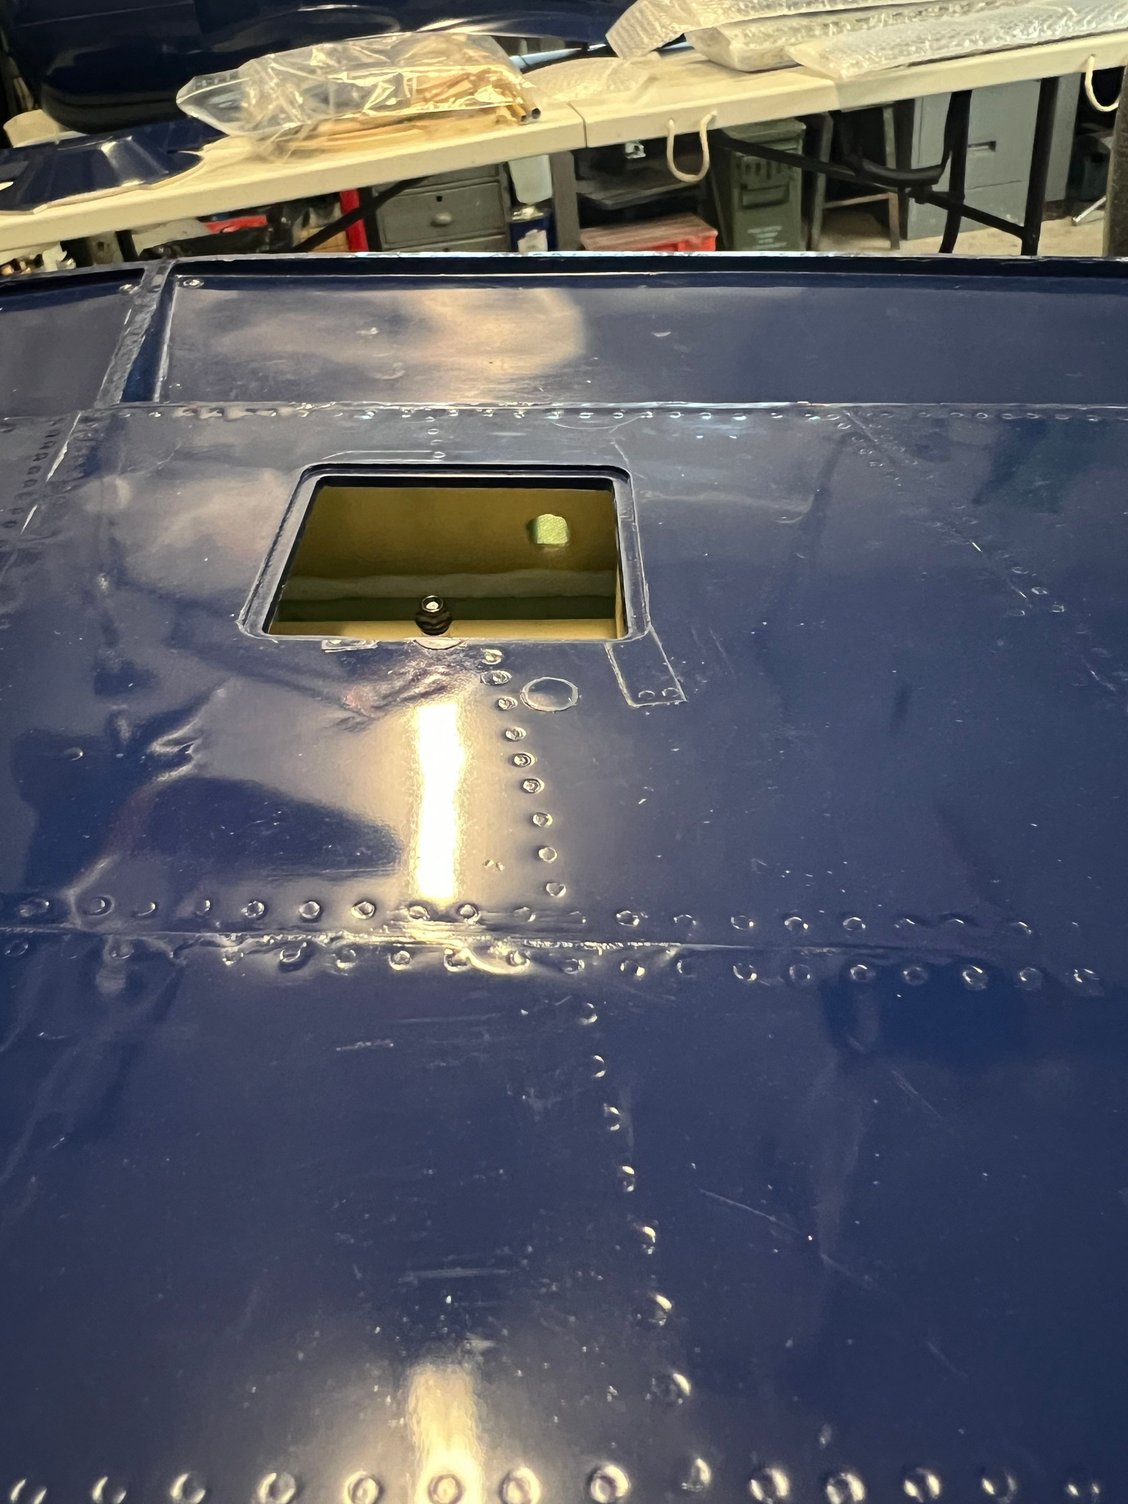
Here's a general idea of the size of the flap servo rod opening. Smaller than I expected! I started the hole thru the flap side to locate then ream most from the servo pocket.
"marking" the flap for the slot. I used this process for ALL cuts.
The littlest router bid is indispensable.
Slot the flap and use slot to locate control opening.
Just about exactly one inch
I notched out each flap horn to clear axle rods. I still had to section out the axle tube in the flaps to clear.
Here's a general idea of the size of the flap servo rod opening. Smaller than I expected! I started the hole thru the flap side to locate then ream most from the servo pocket.
"marking" the flap for the slot. I used this process for ALL cuts.
03-23-2026 | 01:49 AM
#14
Thread Starter
My Feedback: (7)
You will see that the ailerons hinges can't be glued in the same way as the flaps. I wonder how others have done it but this is the way I settled on. The carbon axle rods save the day again: I put a tiny split in one end of one of them and CA'ed a foot of dental floss in the split. I then installed the axle all the way into the aileron with the hinges captured and the dental floss threaded through the opening in the flap well for removal, applied Hysol and slipped it all into place in the wing to cure. The floss is needed because none of the axle can protrude from the ends of the aileron in order to install it all in the wing.
Dental floss ready to pull on to remove axle after cure
Dental floss ready to pull on to remove axle after cure

The following users liked this post:
mitchilito (03-24-2026)
03-26-2026 | 01:32 AM
#16
Thread Starter
My Feedback: (7)
The above description of hinging that inner flap was the right wing. When I did the left, for whatever reason, the carbon rod did not want to make the bend around the inner flap hinge into the outer flap as described. Instead, it wanted to just go into the flap from the outside of that inner hinge as show in this picture. As a matter of a fact, it actually takes less of a bend and is even easier to install than the other side! (outside the hinge definitely doesn't work on the right wing)
This is the left wing hinge rod that wants to install from OUSIDE the inner flap hinge. Crazy, but works good.
This is the left wing hinge rod that wants to install from OUSIDE the inner flap hinge. Crazy, but works good.
Last edited by mitchilito; 03-26-2026 at 02:27 AM.
03-26-2026 | 01:48 AM
#17
Thread Starter
My Feedback: (7)
So I now have all the wing surfaces installed and hooked up to servos. I'm pretty happy with the outcome. Let me tell you: this airframe is ROBUST. And it's fairly light for its incredible strength.
And here's how I set up the controls: instead of using a channel for each servo in the wings (six channels!) I decided to use a Y-connector for the two flaps in each wing for a total of 4 channels. The only downside is it takes careful matching of the servo horn and linkage installations and there will always be TINY differences in each flap that can't be tuned out - but certainly not enough to notice in flight. Here's a quick short of the outcome:
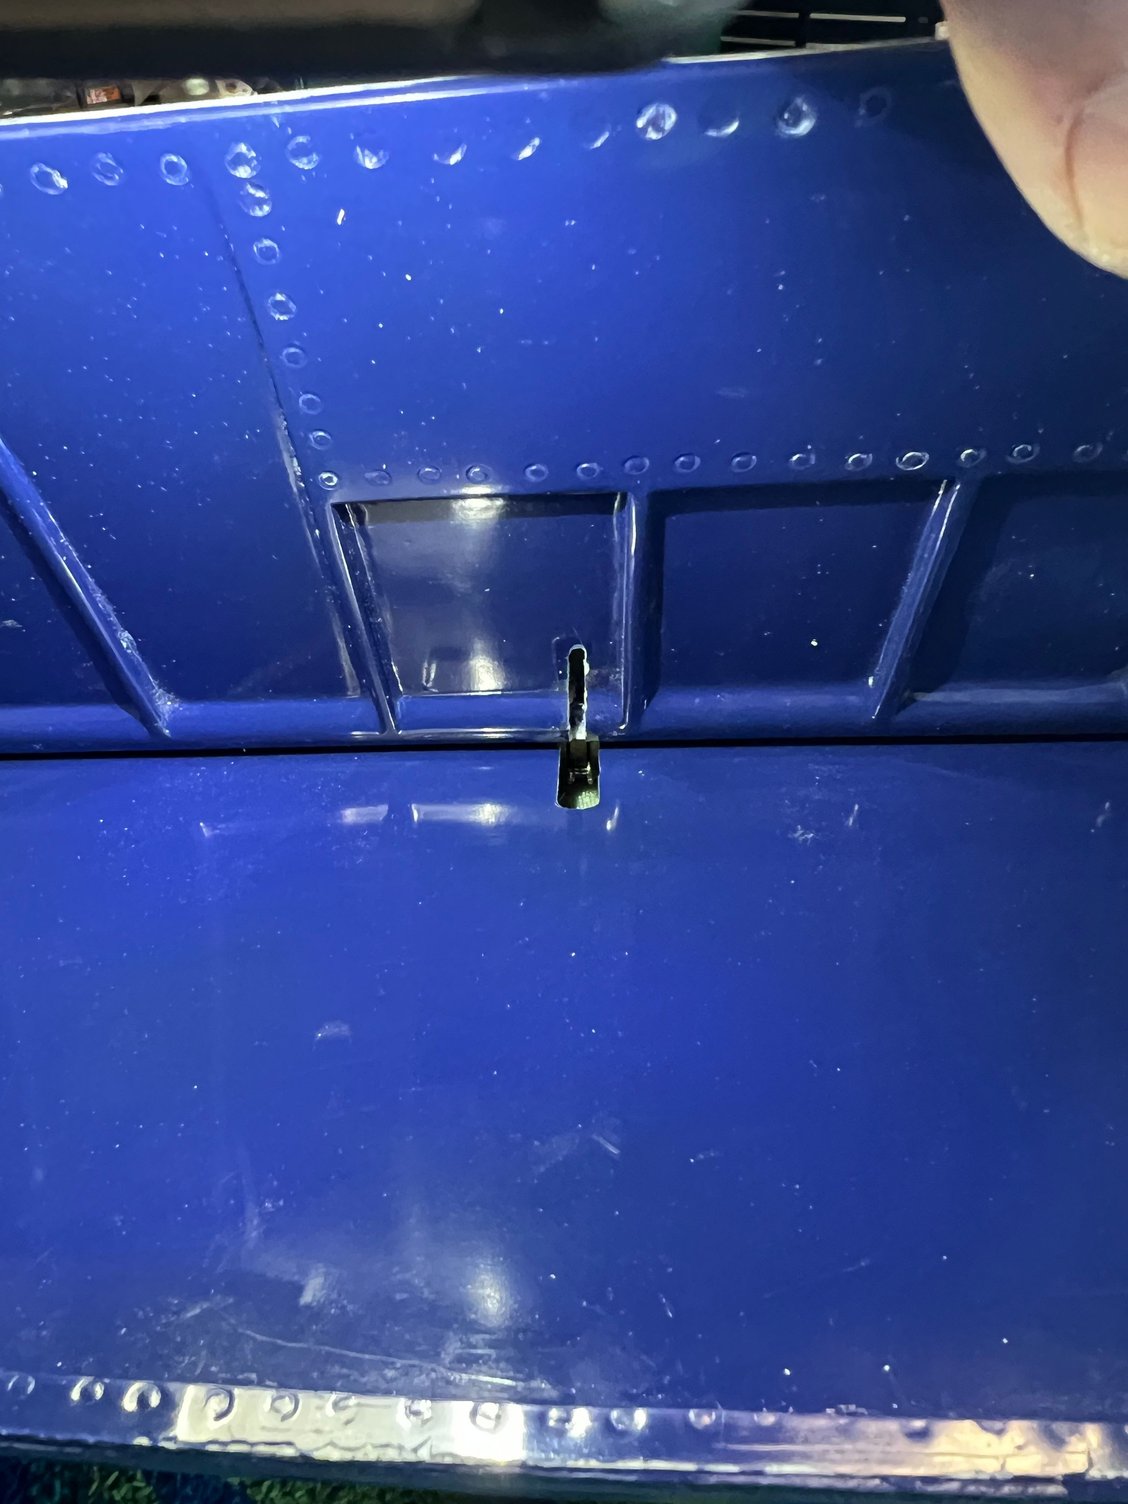
I love how, at full flap, the control horn is all the way down pointing at the flap which means that even though the air loads increase the total torque on the servo is reduced and at full flap there is ZERO torque on the servo. It's like magic!
EDIT: This is going to get lost in the all the previous words HOWEVER: I meant to mention that in my installation the G10 glass flap control levers were maybe 1/32 or a millimeter too long which will cause them to scrape on the surface of the top wing surface when arcing fore and aft. Fortunately there is plenty of material on the horn there to remove so we still have adequate material for the linkage hole.
And here's how I set up the controls: instead of using a channel for each servo in the wings (six channels!) I decided to use a Y-connector for the two flaps in each wing for a total of 4 channels. The only downside is it takes careful matching of the servo horn and linkage installations and there will always be TINY differences in each flap that can't be tuned out - but certainly not enough to notice in flight. Here's a quick short of the outcome:
I love how, at full flap, the control horn is all the way down pointing at the flap which means that even though the air loads increase the total torque on the servo is reduced and at full flap there is ZERO torque on the servo. It's like magic!
EDIT: This is going to get lost in the all the previous words HOWEVER: I meant to mention that in my installation the G10 glass flap control levers were maybe 1/32 or a millimeter too long which will cause them to scrape on the surface of the top wing surface when arcing fore and aft. Fortunately there is plenty of material on the horn there to remove so we still have adequate material for the linkage hole.
Last edited by mitchilito; 03-26-2026 at 04:28 PM.


