


It's here and Looks GOOD new Hangar 9 Taylorcraft


 02-28-2022, 10:32 AM
#1577
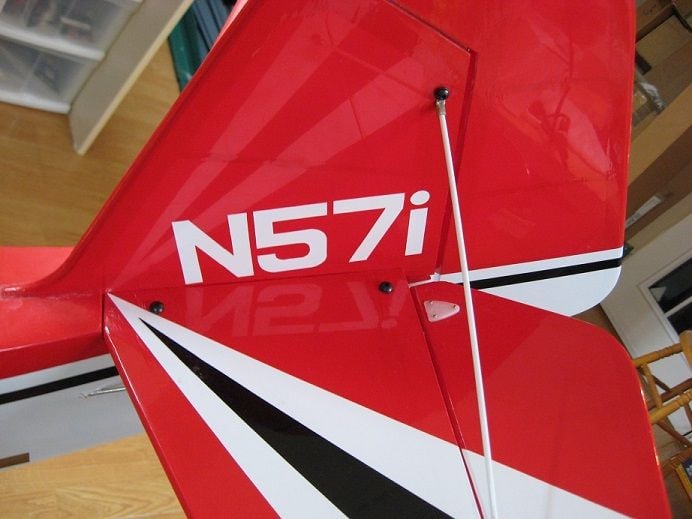
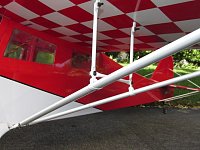
Laid out freestyle format with mirror image, cut in similar fashion as fuselage side decor using sticky back scrap, and added my registration number:
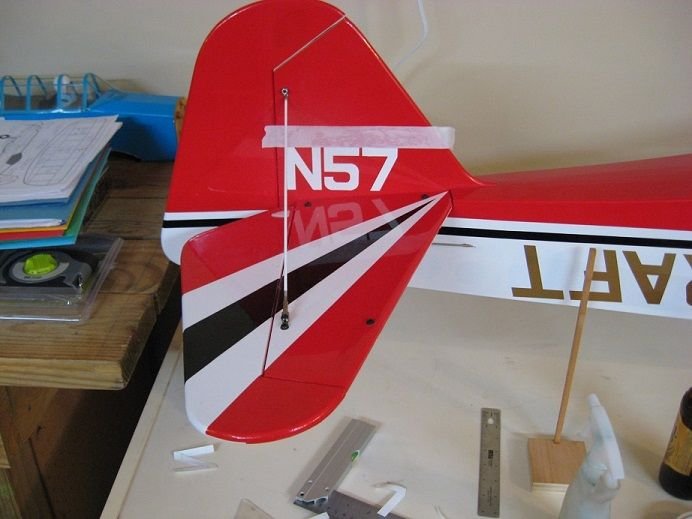
Reference tape perpendicular to hingeline -
After cleanup of Windex and reference tape for number placement -
Reference tape perpendicular to hingeline -
After cleanup of Windex and reference tape for number placement -
Last edited by H5606; 02-28-2022 at 10:52 AM.
02-28-2022, 08:19 PM
#1579

Join Date: Jul 2007
Location: Edinburg,
TX
Posts: 7
Likes: 0
Received 0 Likes
on
0 Posts
I am looking for a cowl for my 20cc TaylorCraft. Got the plane in a combo deal and was not interested until I got it home put the wings and cleaned it up and was like wow, I like this bird!
06-19-2022, 07:59 PM
#1580
Join Date: Apr 2009
Location: hood river, OR
Posts: 20
Likes: 0
Received 0 Likes
on
0 Posts
Posted this on RC Groups, I have gained more info in this thread so figured I would post it here too. I got some questions regarding the factory CA Hinges. I haven't read here that anyone has had a problem with them but????? should I trust them? Anyway, here is some pics and info on my restoration project.
I picked up a used 20cc Hangar Taylorcraft. It had seen a hard landing, but the price was too good to pass up.
I have picked up quite a few 1/4 scale sized aircraft lately, mostly arfs or already built kits, and have enjoyed the restoration of either repairing them or improving them, sometimes both. With each plane I try to alter the covering design slightly to make it just a bit different then all the other arfs of the same make. With this Taylorcraft I started with a simple replacement of the swoosh on the side of the fuse and as it is with most of the used kits I have acquired the more I uncovered the more I found that needed to be fixed or strengthened in my opinion. Maybe I tend to build my personal planes stronger/heavier then needed but these China arfs sure seem like they could all be strengthened a bit. I have heard keep them light, "build them to fly, not to crash" well.... I say build them to last! Besides.... with all the reading I have done from others this particular plane needs quite a bit of weight in the nose to balance so instead of lead I had strength and support.
Here is some picks of what I have done to this Taylorcraft.

Simply removed the swoosh......

lead to removing all covering on fuse....
I should have taken more picks of how far I went removing all the wood from the fuse too. The plane had seen a hard landing and some plywood was replaced in attempt to strengthen gear hard point. Looking over the entire fuse I wanted to make it stronger then simple Chinese plywood. I added two 1/2" square pine wood stringers on both sides of the fuse from firewall to tail. To do this and remove the repaired plywood I really had to take a lot of the fuse apart.
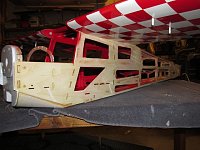
at this point in the pics I have already started putting the fuse back together, new stringers are in place,
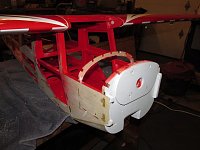
firewall was doubled in the back and a partial third layer of quality plywood mounted up front for new engine mount.
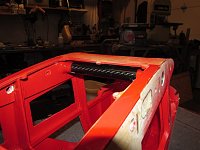
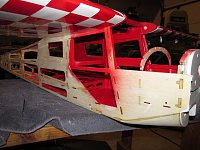
Previous hard landing had bent the aluminum wing tube so I replaced the whole set up with carbon fiber wing tube as well as replaced the week fiberglass sleeve in fuse with strong carbon fiber tube
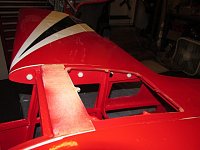
added two additional hardpoints in wing and fuse for additional wing bolts.....
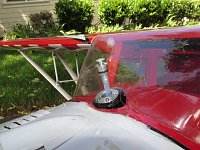
Fueling dot location.....
continue..........
I picked up a used 20cc Hangar Taylorcraft. It had seen a hard landing, but the price was too good to pass up.
I have picked up quite a few 1/4 scale sized aircraft lately, mostly arfs or already built kits, and have enjoyed the restoration of either repairing them or improving them, sometimes both. With each plane I try to alter the covering design slightly to make it just a bit different then all the other arfs of the same make. With this Taylorcraft I started with a simple replacement of the swoosh on the side of the fuse and as it is with most of the used kits I have acquired the more I uncovered the more I found that needed to be fixed or strengthened in my opinion. Maybe I tend to build my personal planes stronger/heavier then needed but these China arfs sure seem like they could all be strengthened a bit. I have heard keep them light, "build them to fly, not to crash" well.... I say build them to last! Besides.... with all the reading I have done from others this particular plane needs quite a bit of weight in the nose to balance so instead of lead I had strength and support.
Here is some picks of what I have done to this Taylorcraft.
Simply removed the swoosh......
lead to removing all covering on fuse....
I should have taken more picks of how far I went removing all the wood from the fuse too. The plane had seen a hard landing and some plywood was replaced in attempt to strengthen gear hard point. Looking over the entire fuse I wanted to make it stronger then simple Chinese plywood. I added two 1/2" square pine wood stringers on both sides of the fuse from firewall to tail. To do this and remove the repaired plywood I really had to take a lot of the fuse apart.
at this point in the pics I have already started putting the fuse back together, new stringers are in place,
firewall was doubled in the back and a partial third layer of quality plywood mounted up front for new engine mount.
Previous hard landing had bent the aluminum wing tube so I replaced the whole set up with carbon fiber wing tube as well as replaced the week fiberglass sleeve in fuse with strong carbon fiber tube
added two additional hardpoints in wing and fuse for additional wing bolts.....
Fueling dot location.....
continue..........
06-19-2022, 08:00 PM
#1581
Join Date: Apr 2009
Location: hood river, OR
Posts: 20
Likes: 0
Received 0 Likes
on
0 Posts
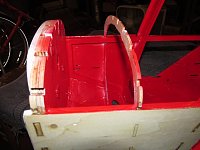
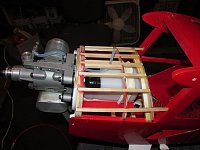
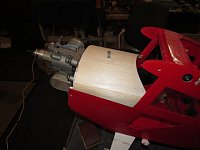
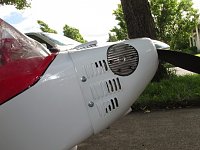
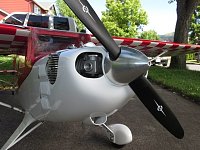
Previous owner had a gas engine, I'm going with a MOKI 1.80 glow so some repair work was done to cowl....
Built up front top of cowl to fit 3" spinner
after sanding, primming and painting......
continue.......
06-19-2022, 08:01 PM
#1582
Join Date: Apr 2009
Location: hood river, OR
Posts: 20
Likes: 0
Received 0 Likes
on
0 Posts
The list of upgrades and strengthening I have done will take me a while to list. Till then here is a look at my current progress....
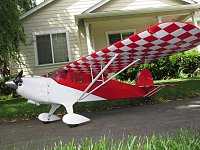
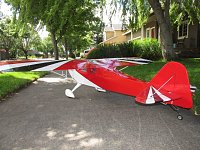
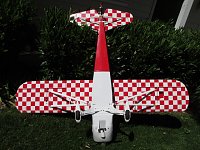


Been a fun project. Still not done but it looks like and airplane again after I tore it all up.
BT
Been a fun project. Still not done but it looks like and airplane again after I tore it all up.
BT
06-19-2022, 08:04 PM
#1583
Thread Starter

Looks awesome. I�m about to recover mine in Oratex. Had no problems with hinges and mine has done a lot of flying. 3 different IC motors and now electric. Always been a fun plane to fly
