


BUSA 1/6th scale Sopwith Pup build.
 12-15-2012, 12:56 PM
#51

My Feedback: (17)
Join Date: Apr 2010
Location: New Market, MD
Posts: 190
Likes: 0
Received 0 Likes
on
0 Posts
Looking good. I'll be keeping my laptop with me in my "building area" so I can look at some of your photos for reference. Built a few of the old Goldberg kits (mid 1970's) and last winter's build was a Sig Anniversary Cub. Just got the manual for the Sopwith Pup that I ordered from Balsa USA and looking through it I think this is more of a "builders" kit than those I've built before. Should be fun. I enjoy the building, but I always learn new things during the build and that keeps me interested as well. Kit should be here mid next week and I know I won't be able to hold off starting until after Christmas.
 12-15-2012, 01:30 PM
#52
Senior Member
Thread Starter
Join Date: Sep 2008
Location: Houston, TX
Posts: 2,101
Likes: 0
Received 0 Likes
on
0 Posts
ORIGINAL: Homer712
Looking good. I'll be keeping my laptop with me in my ''building area'' so I can look at some of your photos for reference. Built a few of the old Goldberg kits (mid 1970's) and last winter's build was a Sig Anniversary Cub. Just got the manual for the Sopwith Pup that I ordered from Balsa USA and looking through it I think this is more of a ''builders'' kit than those I've built before. Should be fun. I enjoy the building, but I always learn new things during the build and that keeps me interested as well. Kit should be here mid next week and I know I won't be able to hold off starting until after Christmas.
Looking good. I'll be keeping my laptop with me in my ''building area'' so I can look at some of your photos for reference. Built a few of the old Goldberg kits (mid 1970's) and last winter's build was a Sig Anniversary Cub. Just got the manual for the Sopwith Pup that I ordered from Balsa USA and looking through it I think this is more of a ''builders'' kit than those I've built before. Should be fun. I enjoy the building, but I always learn new things during the build and that keeps me interested as well. Kit should be here mid next week and I know I won't be able to hold off starting until after Christmas.
Thanks Homer. I hope you post your build pics here and if I can be of any help, please ask away. I think it would be motivational for us to share this build thread if you like. I sure could use a kick in the pants. [&:]
Youll find that the quality of the kit is excellent, but as you said, it's a "Builders" kit. During the wing assembly take note of the spar depths in the ribs, especially with W-1's. They are too shallow. Other things can be confusing also. On the SR-1 rib, the instructions call to use a dihedral gauge. Make sure to angle the top outwards in order to compensate for dihedral angle and cabane strut attachment between the two wings. And your not going to like building the wing tips. That's where I'm at now on the lower wing. Odds are, instead of laminating those pieces together, Ill just take a 1/4" thick piece of balsa, take it to work and cut it out on a band saw.
12-15-2012, 03:51 PM
#53
My Feedback: (17)
Join Date: Apr 2010
Location: New Market, MD
Posts: 190
Likes: 0
Received 0 Likes
on
0 Posts
Thank you for the invitation to share the thread. I'd be happy to post pictures as well as add comments on my build. Speaking of wing tips. I remember back to the mid 1970's and the Goldberg Cub I built. They gave you a chunk (I believe that's what they're called, "chunks") of balsa that was 3 inches deep by 3 inches tall by 8 inches long and said "sand to shape" per plans. You're kidding, right? I must have sanded for days, and it still basically looked like a "chunk" of balsa glued to the tip of the wing.
12-15-2012, 03:58 PM
#54
My Feedback: (17)
Join Date: Apr 2010
Location: New Market, MD
Posts: 190
Likes: 0
Received 0 Likes
on
0 Posts
Just noticed that you're in Houston, Texas. Spent much time there as a Project Manager working for an electrical manufacturer supporting Bechtel. Also worked with folks at a company called Protect Controls. Great city, Houston. Had many, many great times there. Being originally from New England (Connecticut actually) I was always a college basketball fan. My Houston counterpart told me once that in Texas there are two sports. Football, and pre-season football.
12-15-2012, 04:35 PM
#55

My Feedback: (7)
Join Date: Jan 2004
Location: Parrish,
FL
Posts: 206
Likes: 0
Received 0 Likes
on
0 Posts
Gary, looks good. BUSA does have a few interesting ways of doing things, like the balsa spars. But, I've not hear of any breaking apart in flight, so I guess they know what they're doing.
12-15-2012, 06:42 PM
#56
Senior Member
Thread Starter
Join Date: Sep 2008
Location: Houston, TX
Posts: 2,101
Likes: 0
Received 0 Likes
on
0 Posts
ORIGINAL: Homer712
Thank you for the invitation to share the thread. I'd be happy to post pictures as well as add comments on my build. Speaking of wing tips. I remember back to the mid 1970's and the Goldberg Cub I built. They gave you a chunk (I believe that's what they're called, ''chunks'') of balsa that was 3 inches deep by 3 inches tall by 8 inches long and said ''sand to shape'' per plans. You're kidding, right? I must have sanded for days, and it still basically looked like a ''chunk'' of balsa glued to the tip of the wing.
Thank you for the invitation to share the thread. I'd be happy to post pictures as well as add comments on my build. Speaking of wing tips. I remember back to the mid 1970's and the Goldberg Cub I built. They gave you a chunk (I believe that's what they're called, ''chunks'') of balsa that was 3 inches deep by 3 inches tall by 8 inches long and said ''sand to shape'' per plans. You're kidding, right? I must have sanded for days, and it still basically looked like a ''chunk'' of balsa glued to the tip of the wing.
I remember that kit and if I remember right, I used a chain saw and a body grinder before I got those things whittled down. [:@]
12-15-2012, 06:52 PM
#57
Senior Member
Thread Starter
Join Date: Sep 2008
Location: Houston, TX
Posts: 2,101
Likes: 0
Received 0 Likes
on
0 Posts
ORIGINAL: akbowen
Gary, looks good. BUSA does have a few interesting ways of doing things, like the balsa spars. But, I've not hear of any breaking apart in flight, so I guess they know what they're doing.
Gary, looks good. BUSA does have a few interesting ways of doing things, like the balsa spars. But, I've not hear of any breaking apart in flight, so I guess they know what they're doing.
Thanks. Yes it's the first time I ever heard of balsa spars and the wings are a tad flimsy, but from what I'm told they are fine that way. It might be overkill, but I'm going a little heavy with the glue.
12-15-2012, 06:58 PM
#58
Senior Member
Thread Starter
Join Date: Sep 2008
Location: Houston, TX
Posts: 2,101
Likes: 0
Received 0 Likes
on
0 Posts
ORIGINAL: Homer712
Just noticed that you're in Houston, Texas. Spent much time there as a Project Manager working for an electrical manufacturer supporting Bechtel. Also worked with folks at a company called Protect Controls. Great city, Houston. Had many, many great times there. Being originally from New England (Connecticut actually) I was always a college basketball fan. My Houston counterpart told me once that in Texas there are two sports. Football, and per-season football.
Just noticed that you're in Houston, Texas. Spent much time there as a Project Manager working for an electrical manufacturer supporting Bechtel. Also worked with folks at a company called Protect Controls. Great city, Houston. Had many, many great times there. Being originally from New England (Connecticut actually) I was always a college basketball fan. My Houston counterpart told me once that in Texas there are two sports. Football, and per-season football.
12-16-2012, 06:13 AM
#59
My Feedback: (17)
Join Date: Apr 2010
Location: New Market, MD
Posts: 190
Likes: 0
Received 0 Likes
on
0 Posts
<div class="Section0"><p class="p0" style="margin-bottom:0pt; margin-top:0pt; "><span style="font-size: 9pt; font-family: Arial; background-position: initial initial; background-repeat: initial initial;">Gary,checkouttheattachedlinks.Thefirston eisaYouTubevideoofaBalsaUSA1/6SopwithPup'sfirstflight.ClubisinLawton(assumethis
isOklahoma,spenttimethereatFortSillArtilleryOCS).</span><span style="font-size: 9pt; font-family: Arial; background-position: initial initial; background-repeat: initial initial;">Whatcaughtmyeyewastheredcowl.Looksreally outstanding.ThinkImaygothatway.
</span><span style="font-size: 9pt; font-family: Arial; background-position: initial initial; background-repeat: initial initial;"><o ></o></span></p><p class="p0" style="margin-bottom:0pt; margin-top:0pt; "><span style="font-size: 9pt; font-family: Arial; background-position: initial initial; background-repeat: initial initial;"><o></o></span></p><p class="p0" style="margin-bottom:0pt; margin-top:0pt; "><a href="http://www.youtube.com/watch?v=AX4SueTlFwQ"><span class="15" style="color: rgb(0, 0, 255); font-size: 9pt; font-family: Arial; background-position: initial initial; background-repeat: initial initial;">http://www.youtube.com/watch?v=AX4SueTlFwQ
</span></a><span style="font-size: 9pt; font-family: Arial; background-position: initial initial; background-repeat: initial initial;"><o></o></span></p><p class="p0" style="margin-bottom:0pt; margin-top:0pt; "><span style="font-size: 9pt; font-family: Arial; background-position: initial initial; background-repeat: initial initial;"><o></o></span></p><p class="p0" style="margin-bottom:0pt; margin-top:0pt; "><span style="font-size: 9pt; font-family: Arial; background-position: initial initial; background-repeat: initial initial;">Thesecondlinkistoaguyshomepage(intheUK)t hathasaverydetailed,picturebypicture,videoaftervid eobuildofaBalsaUSA1/4Scale
SopwithPup.IsuspectthatBalsaUSAprettymuchjustdowns izedour1/6scalekitsfromthatoneandmuchoftheconstructionshoul dbethe
same.Inanyevent,makesforanicereferenceonmanyofthec onstructiondetails.
</span><span style="font-size: 9pt; font-family: Arial; background-position: initial initial; background-repeat: initial initial;"><o></o></span></p><p class="p0" style="margin-bottom:0pt; margin-top:0pt; "><span style="font-size: 9pt; font-family: Arial; background-position: initial initial; background-repeat: initial initial;"><o></o></span></p></div><span class="15" style="color: rgb(0, 0, 255); font-size: 9pt; font-family: Arial; background-position: initial initial; background-repeat: initial initial;">http://www.iainsrcmodelplanes.co.uk/</span>
isOklahoma,spenttimethereatFortSillArtilleryOCS).</span><span style="font-size: 9pt; font-family: Arial; background-position: initial initial; background-repeat: initial initial;">Whatcaughtmyeyewastheredcowl.Looksreally outstanding.ThinkImaygothatway.
</span><span style="font-size: 9pt; font-family: Arial; background-position: initial initial; background-repeat: initial initial;"><o
></o></span></p><p class="p0" style="margin-bottom:0pt; margin-top:0pt; "><span style="font-size: 9pt; font-family: Arial; background-position: initial initial; background-repeat: initial initial;"><o></o></span></p><p class="p0" style="margin-bottom:0pt; margin-top:0pt; "><a href="http://www.youtube.com/watch?v=AX4SueTlFwQ"><span class="15" style="color: rgb(0, 0, 255); font-size: 9pt; font-family: Arial; background-position: initial initial; background-repeat: initial initial;">http://www.youtube.com/watch?v=AX4SueTlFwQ</span></a><span style="font-size: 9pt; font-family: Arial; background-position: initial initial; background-repeat: initial initial;"><o
></o></span></p><p class="p0" style="margin-bottom:0pt; margin-top:0pt; "><span style="font-size: 9pt; font-family: Arial; background-position: initial initial; background-repeat: initial initial;"><o></o></span></p><p class="p0" style="margin-bottom:0pt; margin-top:0pt; "><span style="font-size: 9pt; font-family: Arial; background-position: initial initial; background-repeat: initial initial;">Thesecondlinkistoaguyshomepage(intheUK)t hathasaverydetailed,picturebypicture,videoaftervid eobuildofaBalsaUSA1/4ScaleSopwithPup.IsuspectthatBalsaUSAprettymuchjustdowns izedour1/6scalekitsfromthatoneandmuchoftheconstructionshoul dbethe
same.Inanyevent,makesforanicereferenceonmanyofthec onstructiondetails.
</span><span style="font-size: 9pt; font-family: Arial; background-position: initial initial; background-repeat: initial initial;"><o
></o></span></p><p class="p0" style="margin-bottom:0pt; margin-top:0pt; "><span style="font-size: 9pt; font-family: Arial; background-position: initial initial; background-repeat: initial initial;"><o></o></span></p></div><span class="15" style="color: rgb(0, 0, 255); font-size: 9pt; font-family: Arial; background-position: initial initial; background-repeat: initial initial;">http://www.iainsrcmodelplanes.co.uk/</span>
12-16-2012, 08:06 AM
#60
Senior Member
Thread Starter
Join Date: Sep 2008
Location: Houston, TX
Posts: 2,101
Likes: 0
Received 0 Likes
on
0 Posts
Watching that Pup nose over on the landing makes me note to myself, up elevator once I slow down below fight speed. lol These thing are a lot of work, I don't wanna bust mine up. [&:]
Homer, what you going to power yours with? I was going to go with a Saito 56, but I sold the one I had and am now leaning towards a Magnum 52. I have had several Saitos and Magnums and in a way, I prefer the Magnums. Unless you get a bad copy which I never have, they are much cheaper, use less fuel and snot less. The kit calls for either a 8 or 10 oz tank and since I already have a nip 8 oz Sullivan, that made me lean more towards the Magnum with it's better fuel economy. Smaller tank, less fuel=less weight. I don't have to buy another tank, and save some coin on the engine. I doubt the displacement between the .56 and .52 will make much difference.
I won't get much work done today. The Houston Texans can clinch the AFC south with a win today against the Colts. I'm having a blast so far this year at 11-2.
12-16-2012, 08:50 AM
#61
My Feedback: (17)
Join Date: Apr 2010
Location: New Market, MD
Posts: 190
Likes: 0
Received 0 Likes
on
0 Posts
Gary, I've got a Saito 56 for the Pup coming in from Horizon Hobby. Free shipping on everything over $49 ordered before Christmas. I have a Saito FA-72 on my 1/5 Sig Anniversary Cub, and a Saito FA-62 on my H9 Toledo Special. I have 4-stroke Magnum 91's on a H9 Pulse 60 and a Sig Hog Bipe. The Magnum on the Pulse was bought used here on RCU. Love the way that one runs. The Magnum for the Hog Bipe was bought new. That one I'm not that happy with, but I guess it's still breaking in. We'll see next year. The two Saitos I'm in love with. Bought them both new, broke them in on a test stand (about 1/2 gallon through each). They both idle incredibly well, sound fantastic and power both planes in scale like fashion at 2/3 throttle. All my future builds will have 4-stroke engines, and all of my 4-stroke engines will be Saitos. Just my humble opinion.
Soon as my kit gets here I'll start taking some pictures and posting progress. I'll include a shot of the other end of the area I use for building. That area is reserved for my Postwar Lionel trains. Got my first set way back in the mid 1950's. Needless to say, I build there. but no sanding.
And as for football . . . Go Giants!<br type="_moz" />
12-16-2012, 09:51 AM
#62
Senior Member
Thread Starter
Join Date: Sep 2008
Location: Houston, TX
Posts: 2,101
Likes: 0
Received 0 Likes
on
0 Posts
Something to note Homer. The instructions tell you to instal the "Beveled" leading edges on the wings. They are not beveled. Depending on ones building style, I decided against trying to pre-bevel them and deal with it after the entire panels are built.
12-19-2012, 04:28 PM
#63
My Feedback: (17)
Join Date: Apr 2010
Location: New Market, MD
Posts: 190
Likes: 0
Received 0 Likes
on
0 Posts
My Sopwith Pup kit is scheduled to be here tomorrow via UPS. They've gone from delevering about 10:30 AM to just past 6:00 PM. That'll teach me to order during the Christmas season. Did get the Saito 56 from Horizon yesterday though. Put it on my home made test stand and took it out to the field this afternoon. I love my Saito 62 and 72, but after about a 1/2 gallon of fuel through the 56, this has to be the sweetest Saito ever made. Can't wait to get this on the Pup and in the air. Some pictures tomorrow.
Anybody have thoughts on the provided "skid" versus putting a tailwheel on this kit?<br type="_moz" />
Anybody have thoughts on the provided "skid" versus putting a tailwheel on this kit?<br type="_moz" />
12-19-2012, 04:47 PM
#64
Senior Member
Thread Starter
Join Date: Sep 2008
Location: Houston, TX
Posts: 2,101
Likes: 0
Received 0 Likes
on
0 Posts
ORIGINAL: Homer712
My Sopwith Pup kit is scheduled to be here tomorrow via UPS. They've gone from delevering about 10:30 AM to just past 6:00 PM. That'll teach me to order during the Christmas season. Did get the Saito 56 from Horizon yesterday though. Put it on my home made test stand and took it out to the field this afternoon. I love my Saito 62 and 72, but after about a 1/2 gallon of fuel through the 56, this has to be the sweetest Saito ever made. Can't wait to get this on the Pup and in the air. Some pictures tomorrow.
Anybody have thoughts on the provided ''skid'' versus putting a tailwheel on this kit?<br type=''_moz'' />
Originally I was leaning towards a tail wheel, but after the suggestions above and the idea of building a scale kit, (even though it's not), I will probably go with a tail skid. Besides park flyers, I have never flow a tail dragger without a steerable tail wheel before. Sorta scarey as windy as it is here.
12-19-2012, 05:33 PM
#65
My Feedback: (17)
Join Date: Apr 2010
Location: New Market, MD
Posts: 190
Likes: 0
Received 0 Likes
on
0 Posts
Gary,
I've watched a number of YouTube videos of these same Balsa USA Pup kits and the tail seems to come off the ground after about just two feet, so I'm thinking that if I can just get it lined up on the runway I should be alright without adding a tailwheel. Adding two ounces at the tail means I'll need to add six to eight ounces at the nose to balance. That rudder seems to be pretty effective. Here's a copy/paste of the email I received from the guy out in Lawton, Oklahoma whose video I sent you a link to. He and I have had a few emails back and forth and I'd be happy to include you on any future emails if you send me a PM with your address.
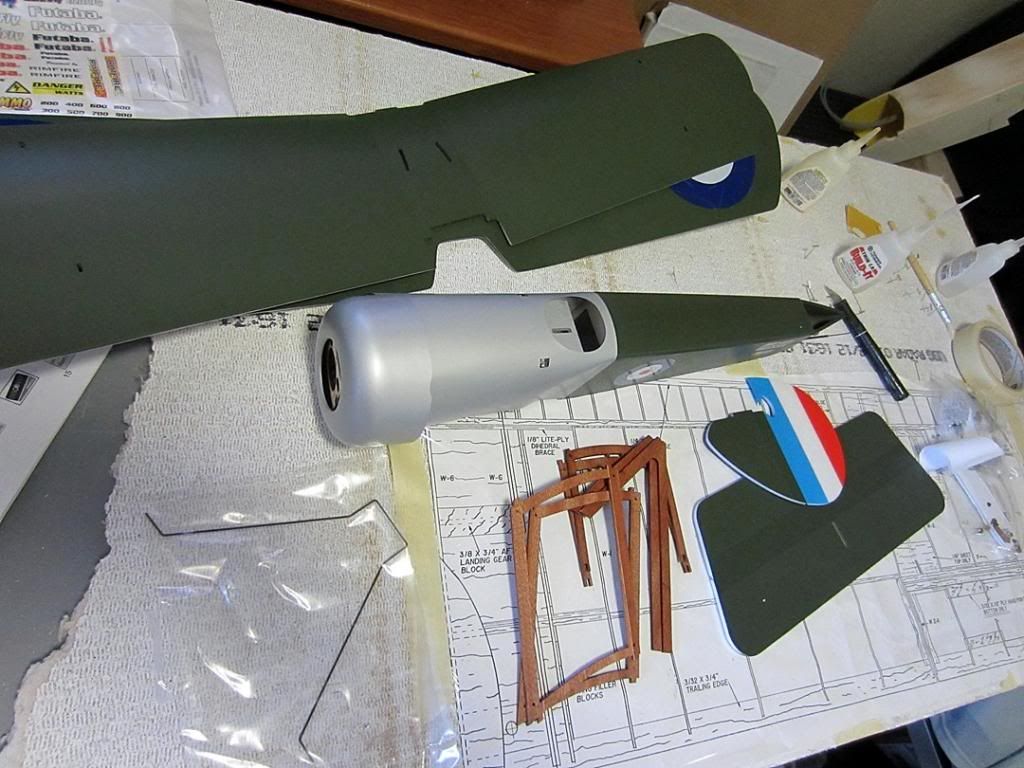
<!StartFragment><blockquote><font face="Calibri, Verdana, Helvetica, Arial"><span style="font-size:12pt">Hello, Henry! The “Pup” is a nice, docile-flying airplane and I should tell you that the nose-over on the maiden flight has never been repeated. A wheel collar came off and literally tripped the left gear leg. I wrestled with the paint color for some time and then finally just used Top Flite LustreKote spray, available from Tower. The cowl is the stock kit ABS plastic unit and it has served well. I do have a Hangar 9 dummy cylinder insert from their “Sopwith Camel” that I cut down to size that fills up the void in the front of the cowl.
The plane is covered with Solartex, and for me that is the answer to any other WWI plane I build. I currently have a Hobby Hangar “SE-5a” underway and will use Solartex on it, as I have on the attached photos of my BUSA “Eindecker”. The video for the “Eindecker” is also on Youtube, entitled “LAFFS Balsa USA Eindecker 40”, as I remember it.
I used a Saito .56 for the “Pup” and am extremely pleased with the engine in terms of performance and sound in the air. I should also mention the plane has a RAM machine gun sound unit operated from my transmitter, but the only time you can really hear it is on the ground! I crammed everything as far up front as I could as far as mounting all of the radio gear and then used a Harry Higley 2.5 oz. brass nut on the front. Surprisingly, the plane balanced perfectly!
Good luck on building the kit. I found it very pleasurable. BUSA kits build like big free flight stick models and do fly well. I’ll be interested in seeing your plane when it’s done!</span></font></blockquote> <!EndFragment>
I've watched a number of YouTube videos of these same Balsa USA Pup kits and the tail seems to come off the ground after about just two feet, so I'm thinking that if I can just get it lined up on the runway I should be alright without adding a tailwheel. Adding two ounces at the tail means I'll need to add six to eight ounces at the nose to balance. That rudder seems to be pretty effective. Here's a copy/paste of the email I received from the guy out in Lawton, Oklahoma whose video I sent you a link to. He and I have had a few emails back and forth and I'd be happy to include you on any future emails if you send me a PM with your address.
<!StartFragment><blockquote><font face="Calibri, Verdana, Helvetica, Arial"><span style="font-size:12pt">Hello, Henry! The “Pup” is a nice, docile-flying airplane and I should tell you that the nose-over on the maiden flight has never been repeated. A wheel collar came off and literally tripped the left gear leg. I wrestled with the paint color for some time and then finally just used Top Flite LustreKote spray, available from Tower. The cowl is the stock kit ABS plastic unit and it has served well. I do have a Hangar 9 dummy cylinder insert from their “Sopwith Camel” that I cut down to size that fills up the void in the front of the cowl.
The plane is covered with Solartex, and for me that is the answer to any other WWI plane I build. I currently have a Hobby Hangar “SE-5a” underway and will use Solartex on it, as I have on the attached photos of my BUSA “Eindecker”. The video for the “Eindecker” is also on Youtube, entitled “LAFFS Balsa USA Eindecker 40”, as I remember it.
I used a Saito .56 for the “Pup” and am extremely pleased with the engine in terms of performance and sound in the air. I should also mention the plane has a RAM machine gun sound unit operated from my transmitter, but the only time you can really hear it is on the ground! I crammed everything as far up front as I could as far as mounting all of the radio gear and then used a Harry Higley 2.5 oz. brass nut on the front. Surprisingly, the plane balanced perfectly!
Good luck on building the kit. I found it very pleasurable. BUSA kits build like big free flight stick models and do fly well. I’ll be interested in seeing your plane when it’s done!</span></font></blockquote> <!EndFragment>
12-20-2012, 05:43 PM
#66
My Feedback: (17)
Join Date: Apr 2010
Location: New Market, MD
Posts: 190
Likes: 0
Received 0 Likes
on
0 Posts
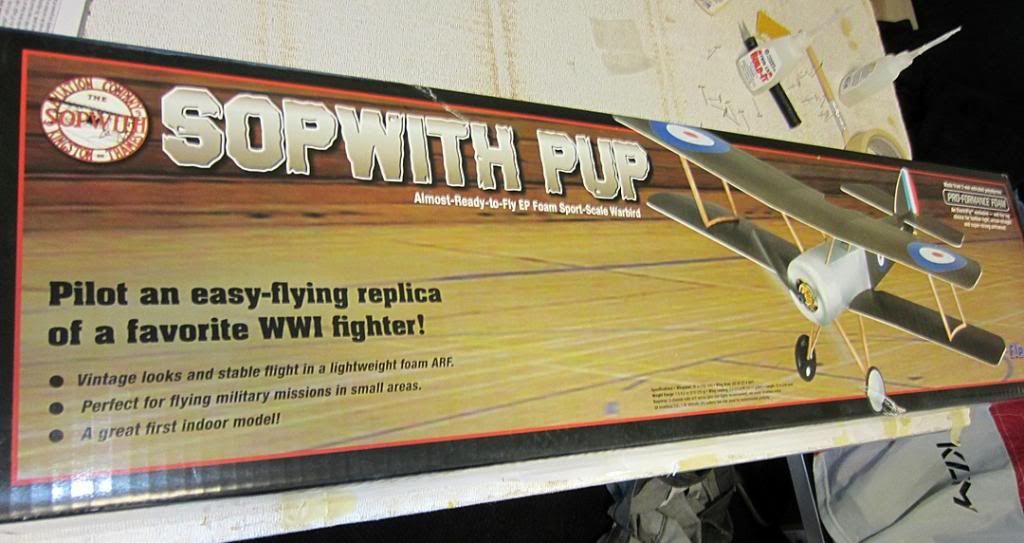
<p class="p1">And so it begins! USP delivered my Balsa USA Sopwith Pup this afternoon so I'll be building about a month behind Gary. Hope to pick up pointers to help speed things along without any blunders. I'll spend the next day separating the parts and putting all the die cut items in large, labeled Zip Lock bags. Keeps things organized for me.
Here's a few pictures I just took. Of course the kit itself, my building table/area (3/4 hardwood ply with a 2'x4' ceiling tile on top), as well as a shot of the other end of the room (Lionel Post War).
Gary, as for the possible "error" with the leading edge not being beveled. I took a shot of a sheet of corrections included with my kit. The piece is not supposed to be beveled, so you're fine. Let me know if you can't make out the wording on the corrections sheet and I'll type the items out for you.</p>
12-21-2012, 01:14 PM
#69
Senior Member
Thread Starter
Join Date: Sep 2008
Location: Houston, TX
Posts: 2,101
Likes: 0
Received 0 Likes
on
0 Posts
Yanno what I just noticed Henry? We have the same tables. Now what are the odds that two guys building a BUSA 1/6th scale Pup, on the same model table, at the same time, on the same thread? And the world was supposed to end today.
12-21-2012, 01:46 PM
#70
My Feedback: (17)
Join Date: Apr 2010
Location: New Market, MD
Posts: 190
Likes: 0
Received 0 Likes
on
0 Posts
I'd actually like something a bit wider so that the entire plan would lay flat, but then they don't make tiles any biger than 2'x4', so it is what it is. Works for me.
Here's a few shots of how I organize myself prior to starting (tonight hopefully) the build. My wife thinks I'm just a bit strange, but this is what works for me. All loose wood bundled according to size and all die cut pieces bagged and marked with the die # per the instruction manual. Speaking of die cut pieces. Didn't really have that much issue punching things out, but it sure made me appreciate the laser cutting that's done by Sig. Hopefully I'll be able to show some progress after tonight.
<br type="_moz" />
12-21-2012, 02:17 PM
#71
Senior Member
Thread Starter
Join Date: Sep 2008
Location: Houston, TX
Posts: 2,101
Likes: 0
Received 0 Likes
on
0 Posts
You are far more organized than I am and I agree with Sig's laser cutting. They are hard to beat but BUSA does a heck of alot better job than the older GP kits like the PT 20. I gave up on my last one the wood was so bad.
I got my lower left wing panel framed up and it came out pretty good and am set up to start on the right side but I don't know if Ill get on it tonight. I got up at 1:15 this morning and put in a 12 hour day and I'm not used to that. lol I've only worked 2 hours of OT all year, and I work tomorrow. And my toy Pup showed up today and I need to start ordering electronics for it. I wanted something that I can walk across the street to fly and not have to drive that 4 miles to the field.
This is where I fly.
http://www.bayoucityflyers.com/Home/...3/Default.aspx
12-21-2012, 02:24 PM
#72
Senior Member
Thread Starter
Join Date: Sep 2008
Location: Houston, TX
Posts: 2,101
Likes: 0
Received 0 Likes
on
0 Posts
BTW Henry, if you download your pics to something like photobucket, you can use the image code up above in order to post bigger pics. Re-size to 1080 on the longest side, hit upload, double click direct link, cut and split the image/image thing, and paste.
12-21-2012, 04:16 PM
#73

Okay Homer...Wait...Stop....Step away from the work bench. That is WAY to neat and organized. How do you expect to get any work done?
My last build took 140 hours.
115 hours of that was spent looking for that @#%$^$# xacto knife.
My last build took 140 hours.
115 hours of that was spent looking for that @#%$^$# xacto knife.
12-22-2012, 12:36 PM
#75
My Feedback: (17)
Join Date: Apr 2010
Location: New Market, MD
Posts: 190
Likes: 0
Received 0 Likes
on
0 Posts
<p class="p1">Gary, I sure I'm a bit older than you but the taste in music is very similar. That video clip is how Rock & Roll is suppose to sound! I have a new band to follow, thanks.
As for the "uploading full size photos" suggestion. You lost me right at the "hit upload, double click direct link" part. Maybe I'll see if there's any more detailed instructions available on the web.
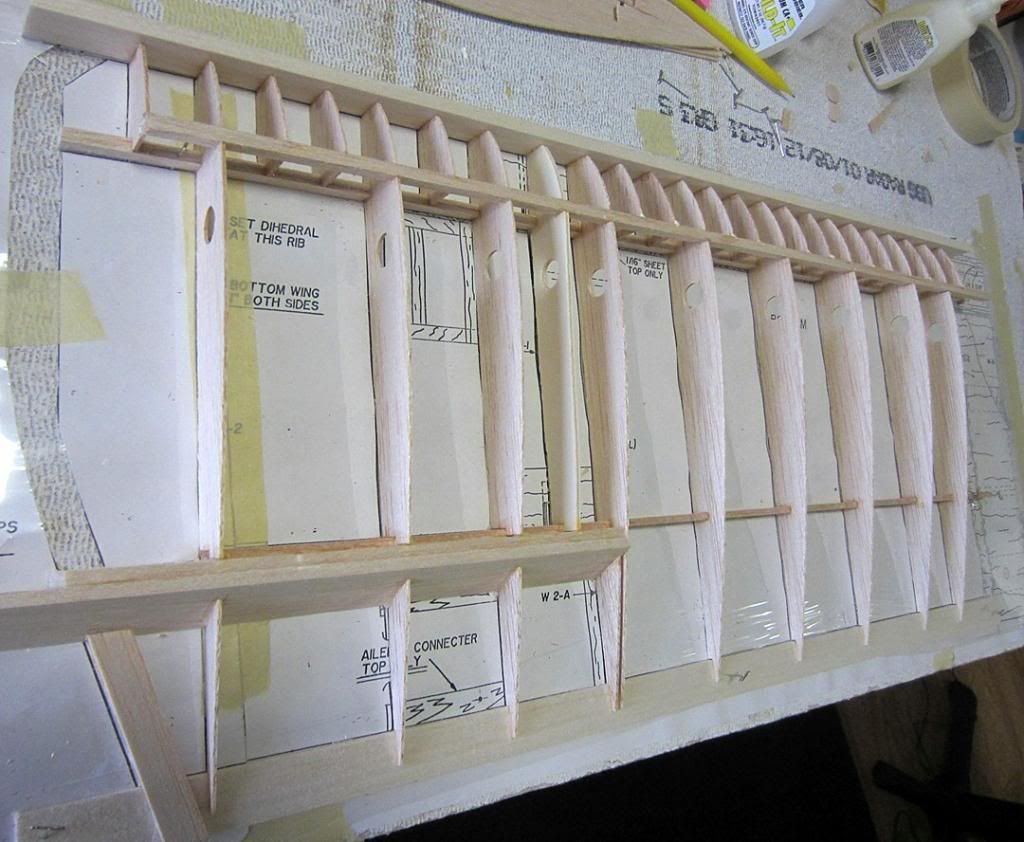
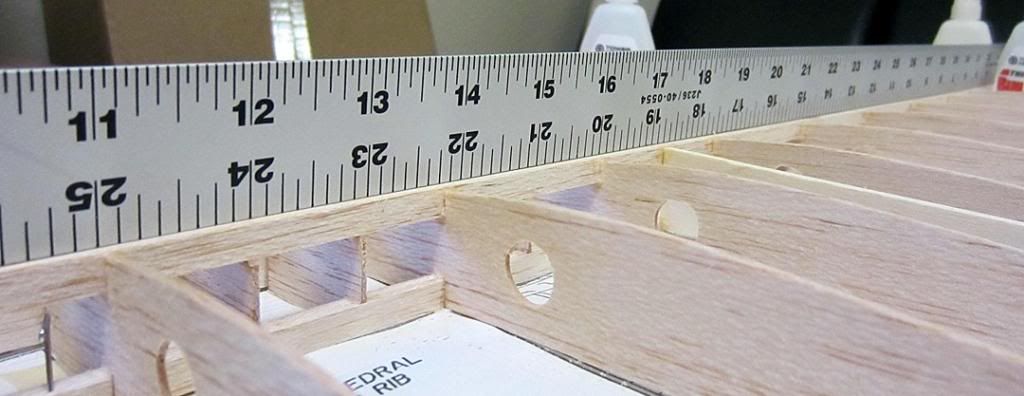
Got a little bit of work done on the left top wing (did you notice that in the Balsa manual, some pictures are right side up, some are right side down, added to my confusion). One thing I didn't do was follow your lead on the "notches for the forward spar are too shallow" fix. Mistake!
My thought was this. The spars on this kit are balsa, how hard will it be to sand the spars flush with the ribs once the wing is finished. Well, although it really will be easy to sand the spars flush later, there's another issue that comes into play. With the forward upper spar sitting higher than its meant to, when you go to install the false fibs they just fall through the opening. Ended up using some scrap balsa sticks (1/32) and gluing them to the bottom of the top spar. That gave the false ribs a nice snug fit. And because they're glued to the underside of the top spar it aligns the false ribs perfectly with the other ribs. Next three wing sections, I'm doing it your way. I also highlighted and underlined in red every place in the manual that Balsa says "leaving excess at the tip." When I read "cut to length", I, well, CUT TO LENGTH! Lots of lessons for the rest of the wing building.
Another hint. Check the fit of the leading edge against the false ribs BEFORE gluing the false ribs. That way, if any one of them needs to be sanded a bit to fit flush up against the leading edge you can just pop it out and give it a quick hit with the sandpaper rather than taking the wing off the building board. Ask me how I know this!Tonight I'll work on building all four wing tips. How much trouble can I get into here?
</p>
As for the "uploading full size photos" suggestion. You lost me right at the "hit upload, double click direct link" part. Maybe I'll see if there's any more detailed instructions available on the web.
Got a little bit of work done on the left top wing (did you notice that in the Balsa manual, some pictures are right side up, some are right side down, added to my confusion). One thing I didn't do was follow your lead on the "notches for the forward spar are too shallow" fix. Mistake!
My thought was this. The spars on this kit are balsa, how hard will it be to sand the spars flush with the ribs once the wing is finished. Well, although it really will be easy to sand the spars flush later, there's another issue that comes into play. With the forward upper spar sitting higher than its meant to, when you go to install the false fibs they just fall through the opening. Ended up using some scrap balsa sticks (1/32) and gluing them to the bottom of the top spar. That gave the false ribs a nice snug fit. And because they're glued to the underside of the top spar it aligns the false ribs perfectly with the other ribs. Next three wing sections, I'm doing it your way. I also highlighted and underlined in red every place in the manual that Balsa says "leaving excess at the tip." When I read "cut to length", I, well, CUT TO LENGTH! Lots of lessons for the rest of the wing building.
Another hint. Check the fit of the leading edge against the false ribs BEFORE gluing the false ribs. That way, if any one of them needs to be sanded a bit to fit flush up against the leading edge you can just pop it out and give it a quick hit with the sandpaper rather than taking the wing off the building board. Ask me how I know this!Tonight I'll work on building all four wing tips. How much trouble can I get into here?
</p>

