


Top Flite GS P-47 sports scale; diary of a build


 12-17-2013, 05:27 AM
#827
Not much to report. I did go to the field yesterday with the intent to get some more flights in. I did some more setup, got the flaps all trimmed and set for half and full with 3% down elevator, balance shows that I am neutral at 5-3/8" the engine ran strong. The new therma cowl setting was better, the flaps did not open until the engine was all warmed up, and full after shut down. I was ready to go when a instructor and his student were getting ready to fly and the students plane went out of control on the taxi way, racing across the pits in front of the hanger where I was working as I watched this plane go by and make a beeline strait into my parked cub sitting out side my trailer. It hit just behind the wing, the wing was not on. I was so pissed to find out that the instructor was teaching that it was ok to turn the radio off for a second while taxing out to reset the timer, ***!  So I was to pissed to fly and just did some more setup. Going to fly today.
TB
So I was to pissed to fly and just did some more setup. Going to fly today.TB
12-17-2013, 08:05 AM
#828

My Feedback: (16)
Join Date: Apr 2002
Location: Macedon,
NY
Posts: 301
Likes: 0
Received 0 Likes
on
0 Posts
Tony I have never heard of such a thing. You never turn off your radio just to reset the timer. mine does not start until I start it. Hope the damage is not too bad. John T. Happy holidays

 12-17-2013, 08:25 AM
#831
I couldn't resist, SO how do these people with so little common sense get these jobs? I can't even fathom turning the radio off while the model is on and the motor running. Somebody is going to get hurt. Or lose a model.
Ron
P.S. Thanks Tony for all the updates on your progress.
Ron
P.S. Thanks Tony for all the updates on your progress.
12-17-2013, 10:20 AM
#832
Call him out in the next meeting on a clearly unsafe practice maybe he can replaced or at least reprimanded and taken out of the trainer pool. I can't see him having any support in the club after that stupidity! If that's the best they can do for a safety officer you're better off without one.
12-17-2013, 02:48 PM
#833
OKC, he is a new pilot, a friend and I have called him out and the club knows of the stupid move, he is very embarised and it is a learning experience for all. I am no longer pissed at him. The pilot that was flying has compinsated me very well. I will be keeping an eye on him.
TB
TB
12-17-2013, 05:55 PM
#834
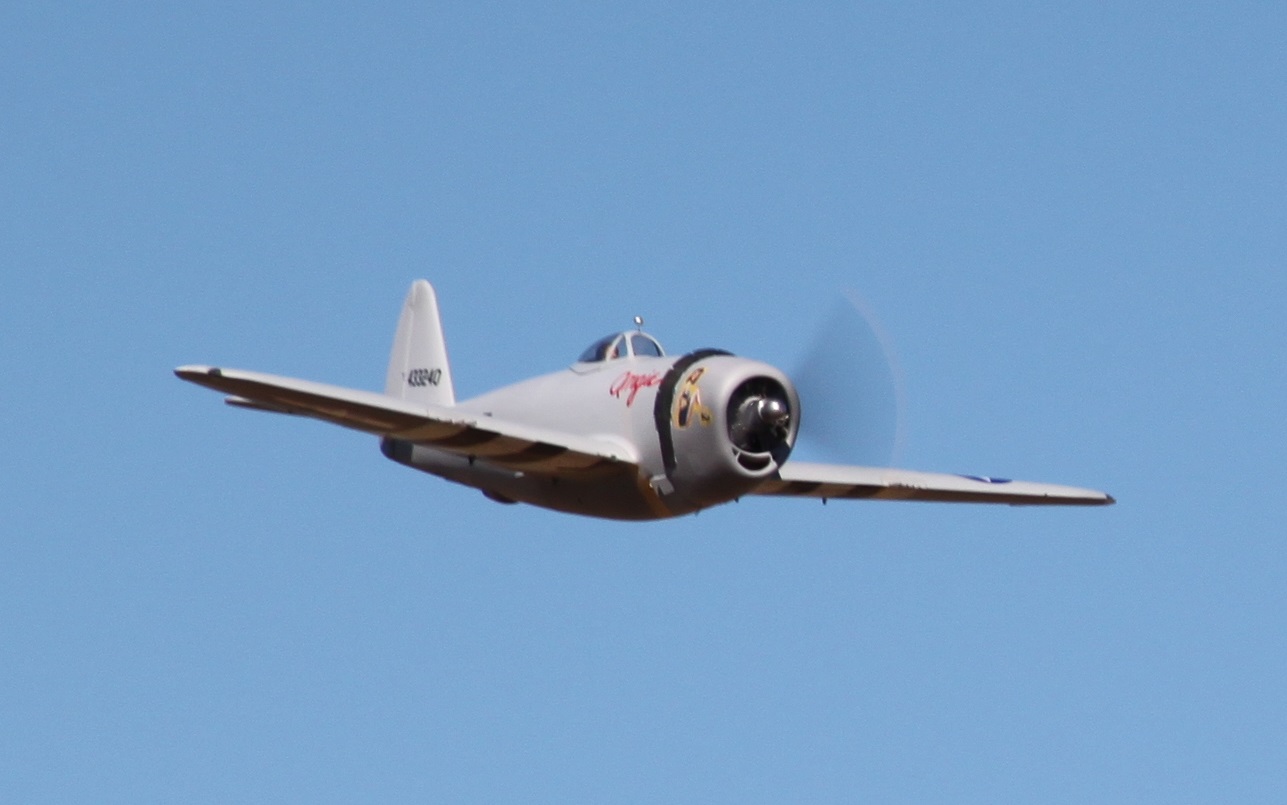
Today was a great day for flying. The weather was great, I had two of my flying buddies from ARCA there and Angie was in top forum. I got to the field fairly early to charge and to do some last minute tweaking. Shortly after Bob showed up with his Hanger 9 Taylorcraft plane. It was a blue sky day with calm winds from the south.
We waited for the sun to get high enough to fly without being blinded. I flew a warm up flight with my Sbach and Bob flew a flight with his Taylorcraft. Edwin showed up with his hell cat and a new TF corsair to maiden. I was ready to go so I rolled her out to start and I must have flooded the engine. It had been sitting in the sun for a couple of hours and I gave it choke and flipped it. So back to the bench and off with the cowl to clear the plug. She started right up on the first flip with no choke. I have been working on the start up procedure. So for cold starts, chock, for warm starts no chock.
Edwin was ready to go with his bird so we went for it. On takeoff his bird was way out of trim and very touchy. It was a hair raising battle to get her trimmed out and at one point it was so far away going all over the place I though she was a goner, but Edwin pulled her back and slowly we got control of her. After that harassing maiden it was time for me to go.
Flight #5
After start up she ran really strong so I was ready.

A short roll out and then go. She tracked very strait this time and I had no problem keeping her going down the runway, lift off and the DLE85 and the 26x10 Xoar pulled her strong into the air.


Once in the air a quick trimming, she needed some down elevator being the last flight it was noes heavy and now it is more neutral. A little of left aileron and we were flying. I flew around and varied the throttle. With the 26x10 she really pulled strong. I was tacking at around 5900 rpms on the ground. Low passes at half throttle then full to a strong climb out.


I did a stall test with gear up and flaps down, I slowed her down and gave elevator until I had full elevator and I was flying in high alpha, she kept steady as I pulled back on the throttle she dropped the left wing. This showed me I could fly her really slow in a flair. A few more laps and after over a 10 min flight it was time to land. The gear came down, light on and as I turned for the perch full flaps. I have 3% down elevator mixed in and this seamed perfect.


I cam in really slow, almost to slow to my surprise with light wind, with a cross left to right. I touched down right past the beginning of the runway and came to a stop at mid runway, wow that was slow.
Flight #6
After a quick inspection I found no problems and was satisfied I could go again. So after a short rest and to cool her down I was ready for the next flight. I am feeling more confident with the flights, and the landings now. She started right up and I taxied out and down the runway I went. I just had fun flying her this time, no tests, no trimming, just flying. I flew for 10 min then came around and dropped the gear. a slow pas to confirmed all is god then I hit the gear instead of my flaps, still learning the switches. Around again and the gear is down and locked. This time I came in a bit faster but still slow. A near perfect soft landing and a short roll out to about 3/4 down the runway. That's the way she will land from here on.
this is the first flights that I did not have any issues, so she is getting closer to being ready to just fly. I will look her over tomorrow before I fly again but the gear is holding strong, the muffler is holding, all the surfaces are good, no loos screws or bolts. all is good. I will try and get in a few more flights this week.
TB
We waited for the sun to get high enough to fly without being blinded. I flew a warm up flight with my Sbach and Bob flew a flight with his Taylorcraft. Edwin showed up with his hell cat and a new TF corsair to maiden. I was ready to go so I rolled her out to start and I must have flooded the engine. It had been sitting in the sun for a couple of hours and I gave it choke and flipped it. So back to the bench and off with the cowl to clear the plug. She started right up on the first flip with no choke. I have been working on the start up procedure. So for cold starts, chock, for warm starts no chock.
Edwin was ready to go with his bird so we went for it. On takeoff his bird was way out of trim and very touchy. It was a hair raising battle to get her trimmed out and at one point it was so far away going all over the place I though she was a goner, but Edwin pulled her back and slowly we got control of her. After that harassing maiden it was time for me to go.
Flight #5
After start up she ran really strong so I was ready.
A short roll out and then go. She tracked very strait this time and I had no problem keeping her going down the runway, lift off and the DLE85 and the 26x10 Xoar pulled her strong into the air.
Once in the air a quick trimming, she needed some down elevator being the last flight it was noes heavy and now it is more neutral. A little of left aileron and we were flying. I flew around and varied the throttle. With the 26x10 she really pulled strong. I was tacking at around 5900 rpms on the ground. Low passes at half throttle then full to a strong climb out.
I did a stall test with gear up and flaps down, I slowed her down and gave elevator until I had full elevator and I was flying in high alpha, she kept steady as I pulled back on the throttle she dropped the left wing. This showed me I could fly her really slow in a flair. A few more laps and after over a 10 min flight it was time to land. The gear came down, light on and as I turned for the perch full flaps. I have 3% down elevator mixed in and this seamed perfect.
I cam in really slow, almost to slow to my surprise with light wind, with a cross left to right. I touched down right past the beginning of the runway and came to a stop at mid runway, wow that was slow.
Flight #6
After a quick inspection I found no problems and was satisfied I could go again. So after a short rest and to cool her down I was ready for the next flight. I am feeling more confident with the flights, and the landings now. She started right up and I taxied out and down the runway I went. I just had fun flying her this time, no tests, no trimming, just flying. I flew for 10 min then came around and dropped the gear. a slow pas to confirmed all is god then I hit the gear instead of my flaps, still learning the switches. Around again and the gear is down and locked. This time I came in a bit faster but still slow. A near perfect soft landing and a short roll out to about 3/4 down the runway. That's the way she will land from here on.
this is the first flights that I did not have any issues, so she is getting closer to being ready to just fly. I will look her over tomorrow before I fly again but the gear is holding strong, the muffler is holding, all the surfaces are good, no loos screws or bolts. all is good. I will try and get in a few more flights this week.
TB
Last edited by TonyBuilder; 12-18-2013 at 07:39 AM.
12-18-2013, 02:33 PM
#838
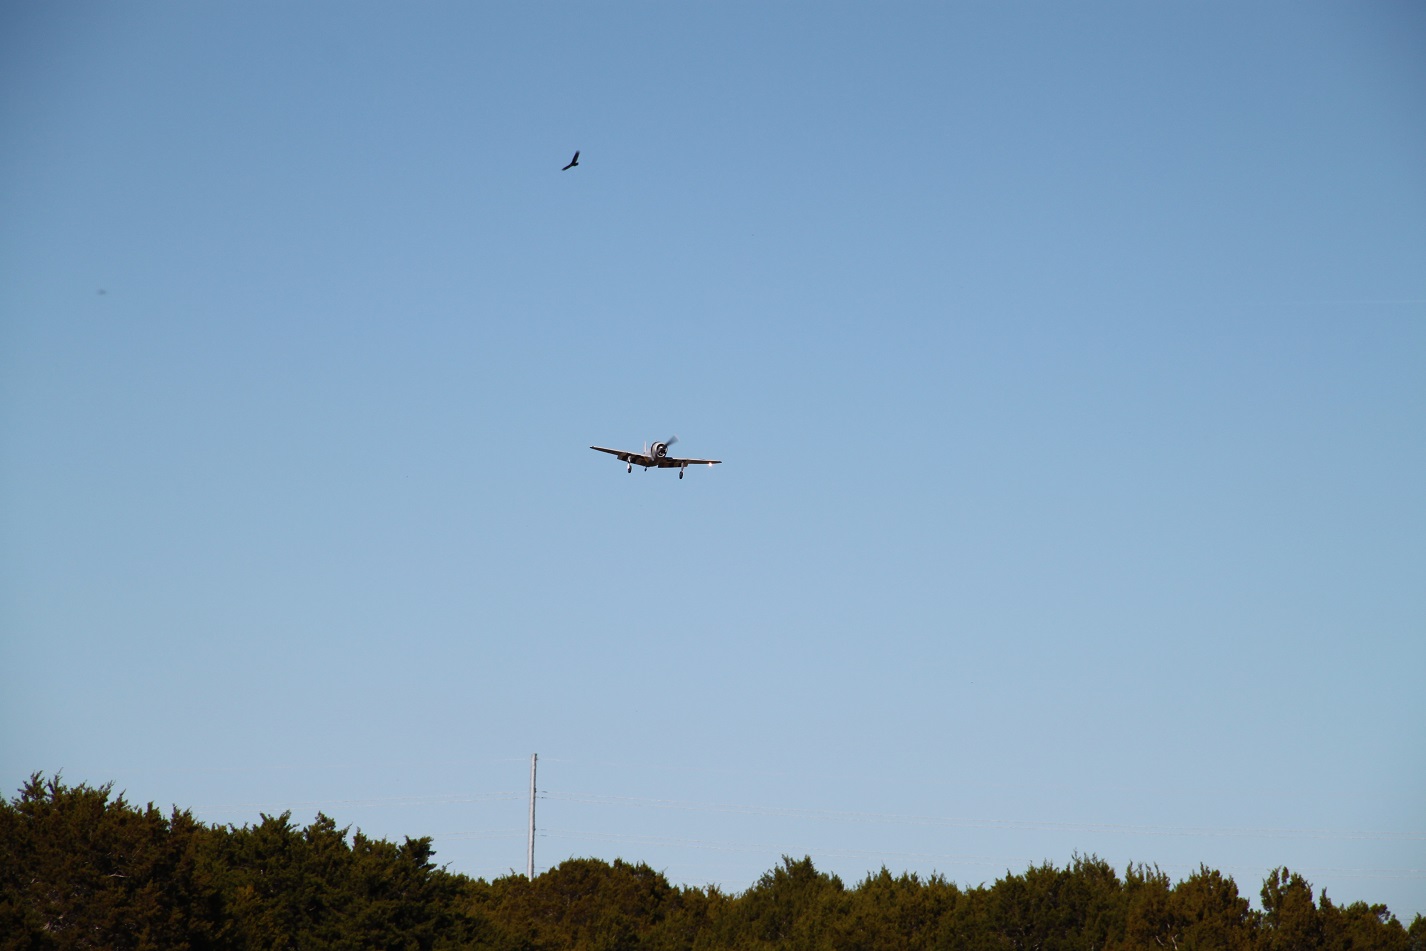
Today was the first just flying day, I did not have anything to do but fly. It was a really nice day, my favorite sky, white pillows floating over. It was breezy so this was the first windy day flying for Angie. The temp was in the 70s and there was only a couple other pilots there. So just before noon I gassed her up and she started like clockwork. This part is done, I know how she wants to be started.
Flight #7
I rolled out and take off was routine, steady down the runway slowly advancing my speed. I can keep her right down the middle now. I hold off until I am at speed then a gradual ascend to the sky. No trim was need but I did trim the elevator so I could fly hands off at half throttle (cursing speed). I am being conservative and flying high and only a few seconds of full from time to time. I flew a 10 min flight and lined up for a landing. I was using half flaps this time. Not actually half flaps, I think around 2". Full flaps is set at 3-1/4". She came in very stable and I flared and touched down about 10' deep in the center of the runway, she came to a stop by mid runway. I was a little slow so now I know what to do with this setting.
Flight #8
Again she started right up, this was another routine flight, nothing different then the last, the wind was a bit stronger. We measured it to be 10-15 with the high gust at 16, strait down the runway. This time I came in with a little more speed. I am gaging that better now. She touched down in a near perfect three point landing and came to a stop about 2/3 down the runway. I have been doing an inspection after every flight still just to make sure nothing is loos.
Flight #9
Another fun and routine flight, right now I am just trying to get as much gas threw her as I can for break in. The engine is running great, and sounds great too Half flaps again and this time I had my best landing to date, perfectly set at 1/4 into the runway, dead center and a three pointer.
I am 100% confident with her now, I need to be diligent on the inspections and not let something slip by and cause trouble. She handles really good. I weighed her fueled up and ready to fly, her take off weight is 37lb on the dot. I need a total of 20-25 flights for break in then I will try the 4 blade prop. I am getting excited about finishing this bird.
Next flights will be sometime next week.
TB
Flight #7
I rolled out and take off was routine, steady down the runway slowly advancing my speed. I can keep her right down the middle now. I hold off until I am at speed then a gradual ascend to the sky. No trim was need but I did trim the elevator so I could fly hands off at half throttle (cursing speed). I am being conservative and flying high and only a few seconds of full from time to time. I flew a 10 min flight and lined up for a landing. I was using half flaps this time. Not actually half flaps, I think around 2". Full flaps is set at 3-1/4". She came in very stable and I flared and touched down about 10' deep in the center of the runway, she came to a stop by mid runway. I was a little slow so now I know what to do with this setting.
Flight #8
Again she started right up, this was another routine flight, nothing different then the last, the wind was a bit stronger. We measured it to be 10-15 with the high gust at 16, strait down the runway. This time I came in with a little more speed. I am gaging that better now. She touched down in a near perfect three point landing and came to a stop about 2/3 down the runway. I have been doing an inspection after every flight still just to make sure nothing is loos.
Flight #9
Another fun and routine flight, right now I am just trying to get as much gas threw her as I can for break in. The engine is running great, and sounds great too
Half flaps again and this time I had my best landing to date, perfectly set at 1/4 into the runway, dead center and a three pointer. I am 100% confident with her now, I need to be diligent on the inspections and not let something slip by and cause trouble. She handles really good. I weighed her fueled up and ready to fly, her take off weight is 37lb on the dot. I need a total of 20-25 flights for break in then I will try the 4 blade prop. I am getting excited about finishing this bird.
Next flights will be sometime next week.
TB
Last edited by TonyBuilder; 12-18-2013 at 02:37 PM.
12-18-2013, 03:50 PM
#839
I also made a kickstand for the wing for setup. This wire is thin so I will make it out of 2-56, that should hold up. This makes setting up the wing easy, I am mostly the only one out in the mornings so I got to be able to do it by myself.
TB
TB
12-18-2013, 05:02 PM
#840

Boy Tony you have alot of stuff under that wing. Good idea on the wire, I did a similar thing on my mustang so I could plug things in without help, kinda a third hand. How much gas have you ran through it now, they say a couple of gallons will seat things pretty well and will still take air time to finish the job. Sounds like you are enjoying yourself.
Leroy
Leroy
12-18-2013, 05:06 PM
#841
Boy Tony you have alot of stuff under that wing. Good idea on the wire, I did a similar thing on my mustang so I could plug things in without help, kinda a third hand. How much gas have you ran through it now, they say a couple of gallons will seat things pretty well and will still take air time to finish the job. Sounds like you are enjoying yourself.
Leroy
Leroy
I will put 25 on her before I do the 4 blade then I till I am good and comfortable, then onto the finishing for two months. Yes I am having a lot of fun.
TB
12-19-2013, 06:09 AM
#842
I revised the wing setup kickstand, using 4-40 wire and ball links. This is just meant to be a quick helper to hold the wing for a few seconds , not as a walk away kind of thing, but it does help a lot.


I don't really have anything ells to do but fly this plane. I am getting ready to start the finishing detailing. So I am gathering information and all that I need. I think I may do the two bombs on the wings.

I have never done panel lines so I need to know the correct way to do them. After I am done with the break in I will tear down the plane for finishing. I will sand off all the primer and get it nice and smooth. So do I prime again and then do the panel lines, then prime and sand, or do I just apply the panel lines before I prime and just do one primer coat. I am not clear on this.
TB
I don't really have anything ells to do but fly this plane. I am getting ready to start the finishing detailing. So I am gathering information and all that I need. I think I may do the two bombs on the wings.
I have never done panel lines so I need to know the correct way to do them. After I am done with the break in I will tear down the plane for finishing. I will sand off all the primer and get it nice and smooth. So do I prime again and then do the panel lines, then prime and sand, or do I just apply the panel lines before I prime and just do one primer coat. I am not clear on this.
TB
Last edited by TonyBuilder; 12-19-2013 at 06:19 AM.
12-19-2013, 07:55 AM
#843
Tony once you have the surface ready for paint, I put the chart-pack tape on, You can get this in just about any width you wish. I then paint the colors on and go over the panel line once. pull the tape off and go over the panel line one more time with a coat just enough to cover the primer. You'll have a nice line and then you can proceed with the rivets.
12-19-2013, 08:06 AM
#844
My Feedback: (60)
Join Date: Dec 2001
Location: Litchfield Park,
AZ
Posts: 7,677
Likes: 0
Received 25 Likes
on
23 Posts
Once you have all the primer sanded off their is no need to prime the entire airframe again before doing the panel lines. That's just adding unecessary weight. Once the airframe is smooth to your satisfaction then go ahead and apply the panel line tapes. I then generally spray three coats of primer over the tapes only and then carefully sand it back to reveal the edges of the tape. Pull up the tapes and your done. That's my .02 cents anyway.
12-19-2013, 12:52 PM
#846
Tony a word of caution, don't push you or the plane, keep up the maintenance and keep a good watch for problem areas. Even my small planes need continuous oversight. And the planes we have built will require a great deal of oversight of all the systems. If you do you'll have it for many years to enjoy.
Ron
Ron
12-19-2013, 01:03 PM
#847
It's amazing what you see in the pre-preflight (at home), preflight (at the field), postflight (at the field) and post-postflight (at home) inspections through the lifespan of an airplane. OK so I'm a worry wart!  They are like old sports cars you never know what you are going to find when you back it out of winter storage!
They are like old sports cars you never know what you are going to find when you back it out of winter storage!
12-19-2013, 01:06 PM
#848
Tony a word of caution, don't push you or the plane, keep up the maintenance and keep a good watch for problem areas. Even my small planes need continuous oversight. And the planes we have built will require a great deal of oversight of all the systems. If you do you'll have it for many years to enjoy.
Ron
Ron

TB
12-20-2013, 08:44 AM
#849
These forums are great for sharing ideas and helping others build there planes. Even though I don't post a lot, I do try to give back a little of what has been given to me over the years in my build. I don't think we truly realize just how much it help when one of us has a successful build and maiden flight. Tony your plane is a great example of this. I started building mine in 2004 and due to cost over runs, issues trying to figure this out or that I am almost done. Thanks to all that have helped me in one way or another.
Merry Christmas, and may our heavenly Father watch over us and guide us this next year.
Ron
Merry Christmas, and may our heavenly Father watch over us and guide us this next year.
Ron
