


CAP10 building experience
 01-15-2020 | 07:20 PM
#1
Thread Starter

Joined: Feb 2013
Posts: 59
Likes: 0
Received 0 Likes
on
0 Posts
From: , OH
I thought I'd report the build of my CAP10 in the event someone might find some information applicable to their project or might even take up this kit for their next build. I started a thread on this last year, but stopped at the halfway mark, so I thought I'd put it in one place.
This is an 80in span kit from mraerodesign. I had a few questions for the designer as the project went on, and MR was always prompt and helpful. The quality of the wood is outstanding. The balsa is of consistent density and the plywood sheets are warp free and 3-5 layer. I would venture to say the 1/4 in plywood firewall, and it is a large area, was about as flat as a sheet of glass. You build off the illustrations - nothing written. If you have some build experience, this will be fine.
Fuselage:

Full size plans
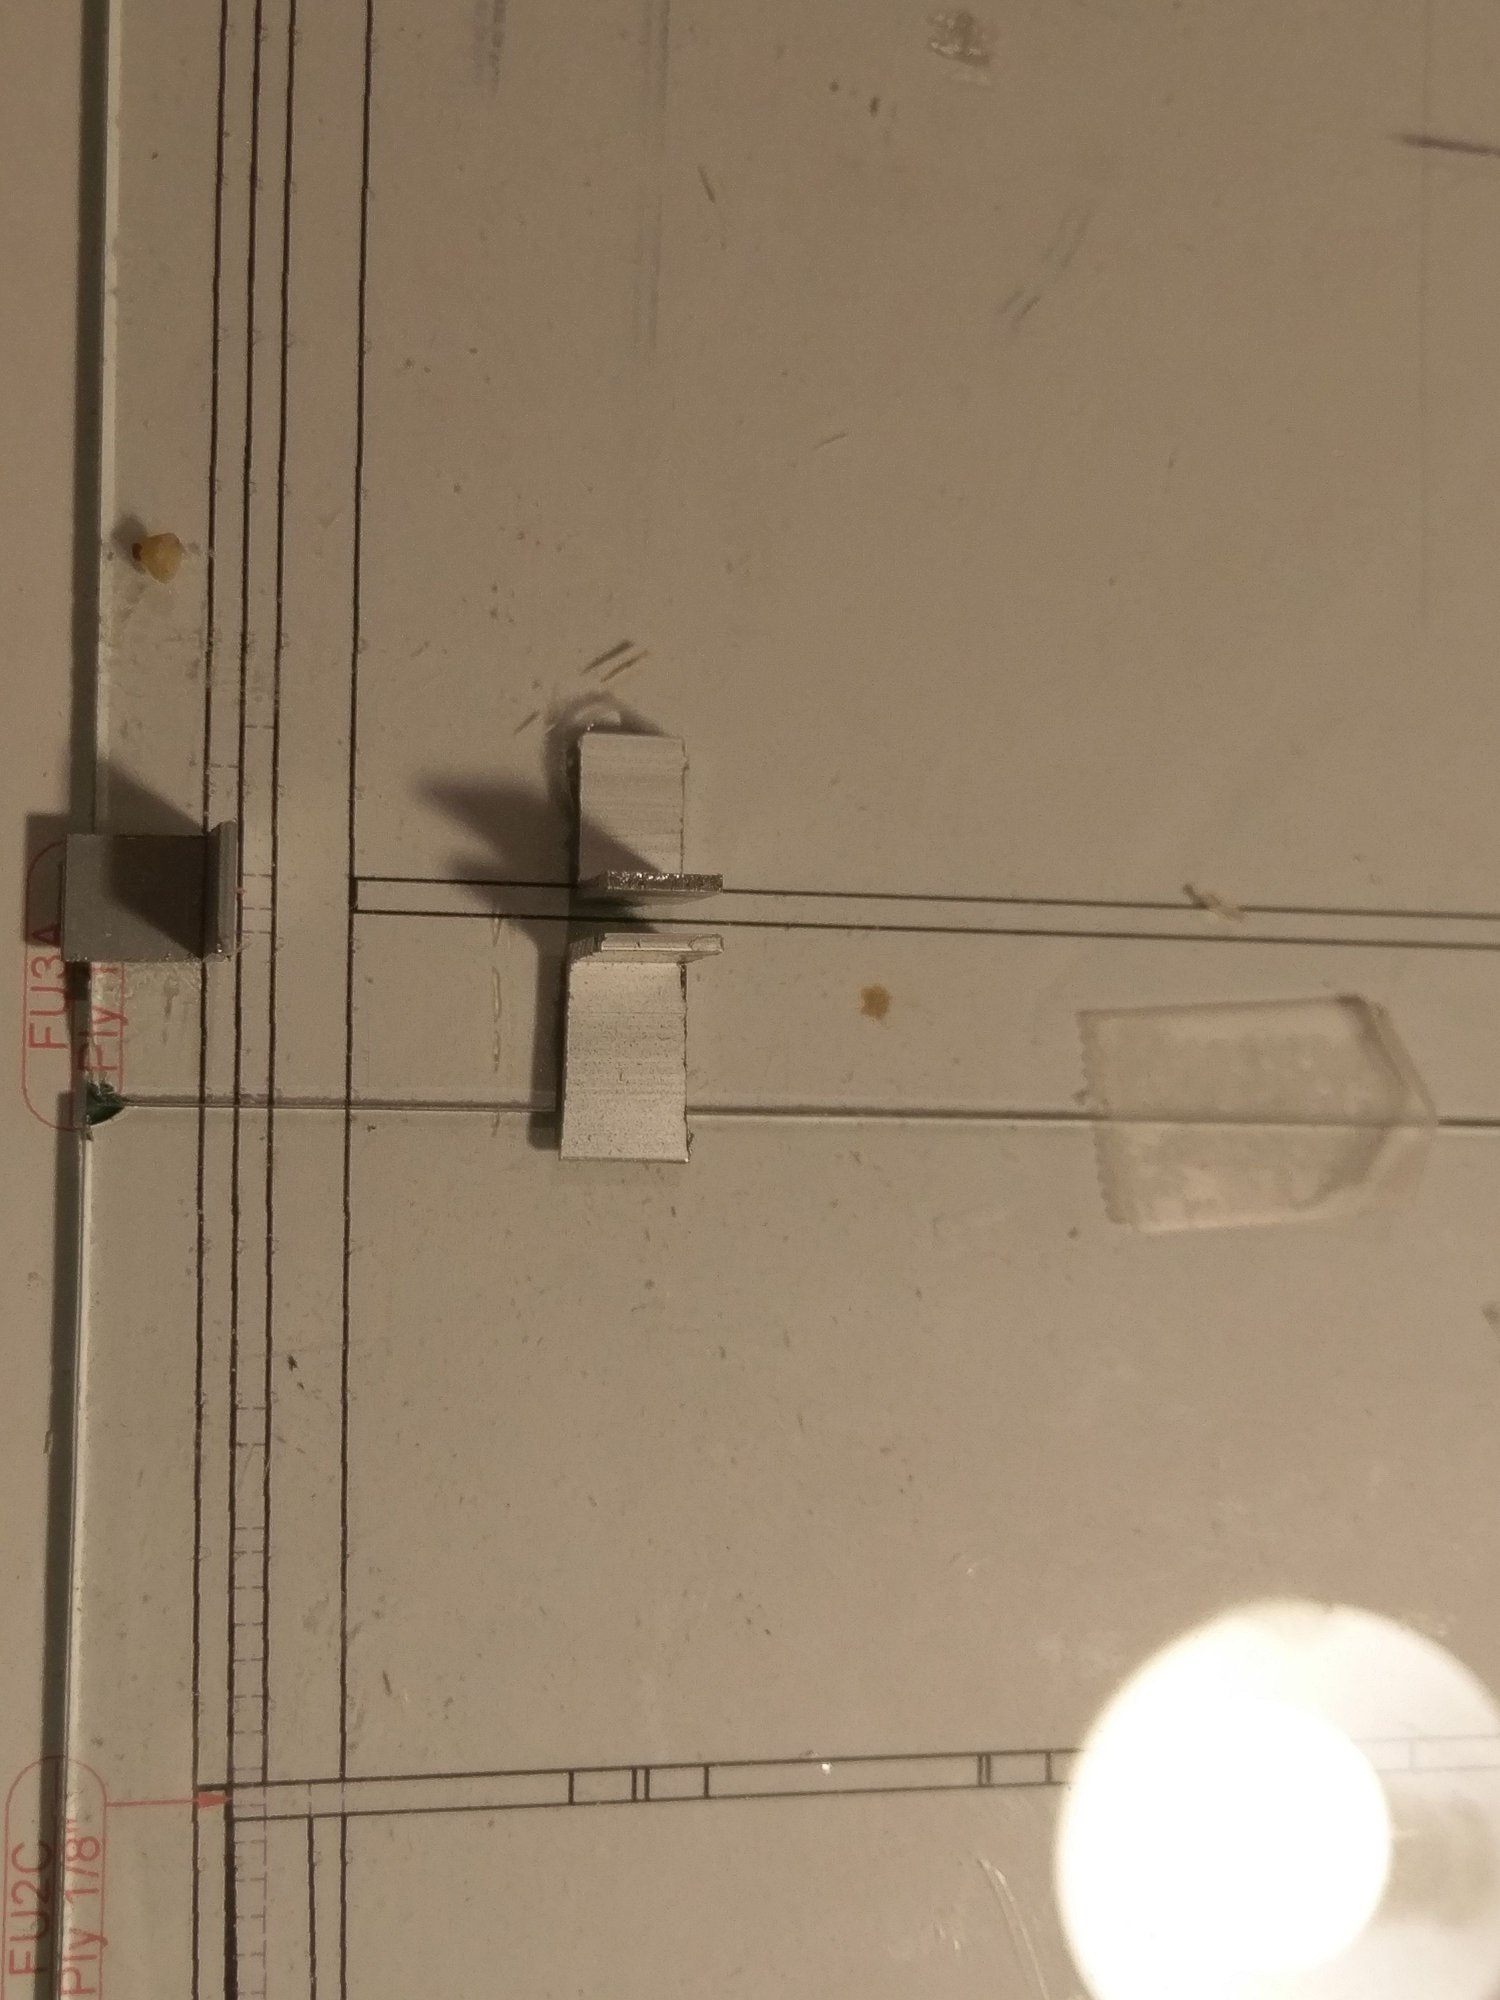
Aluminum L brackets attached to glass with CA
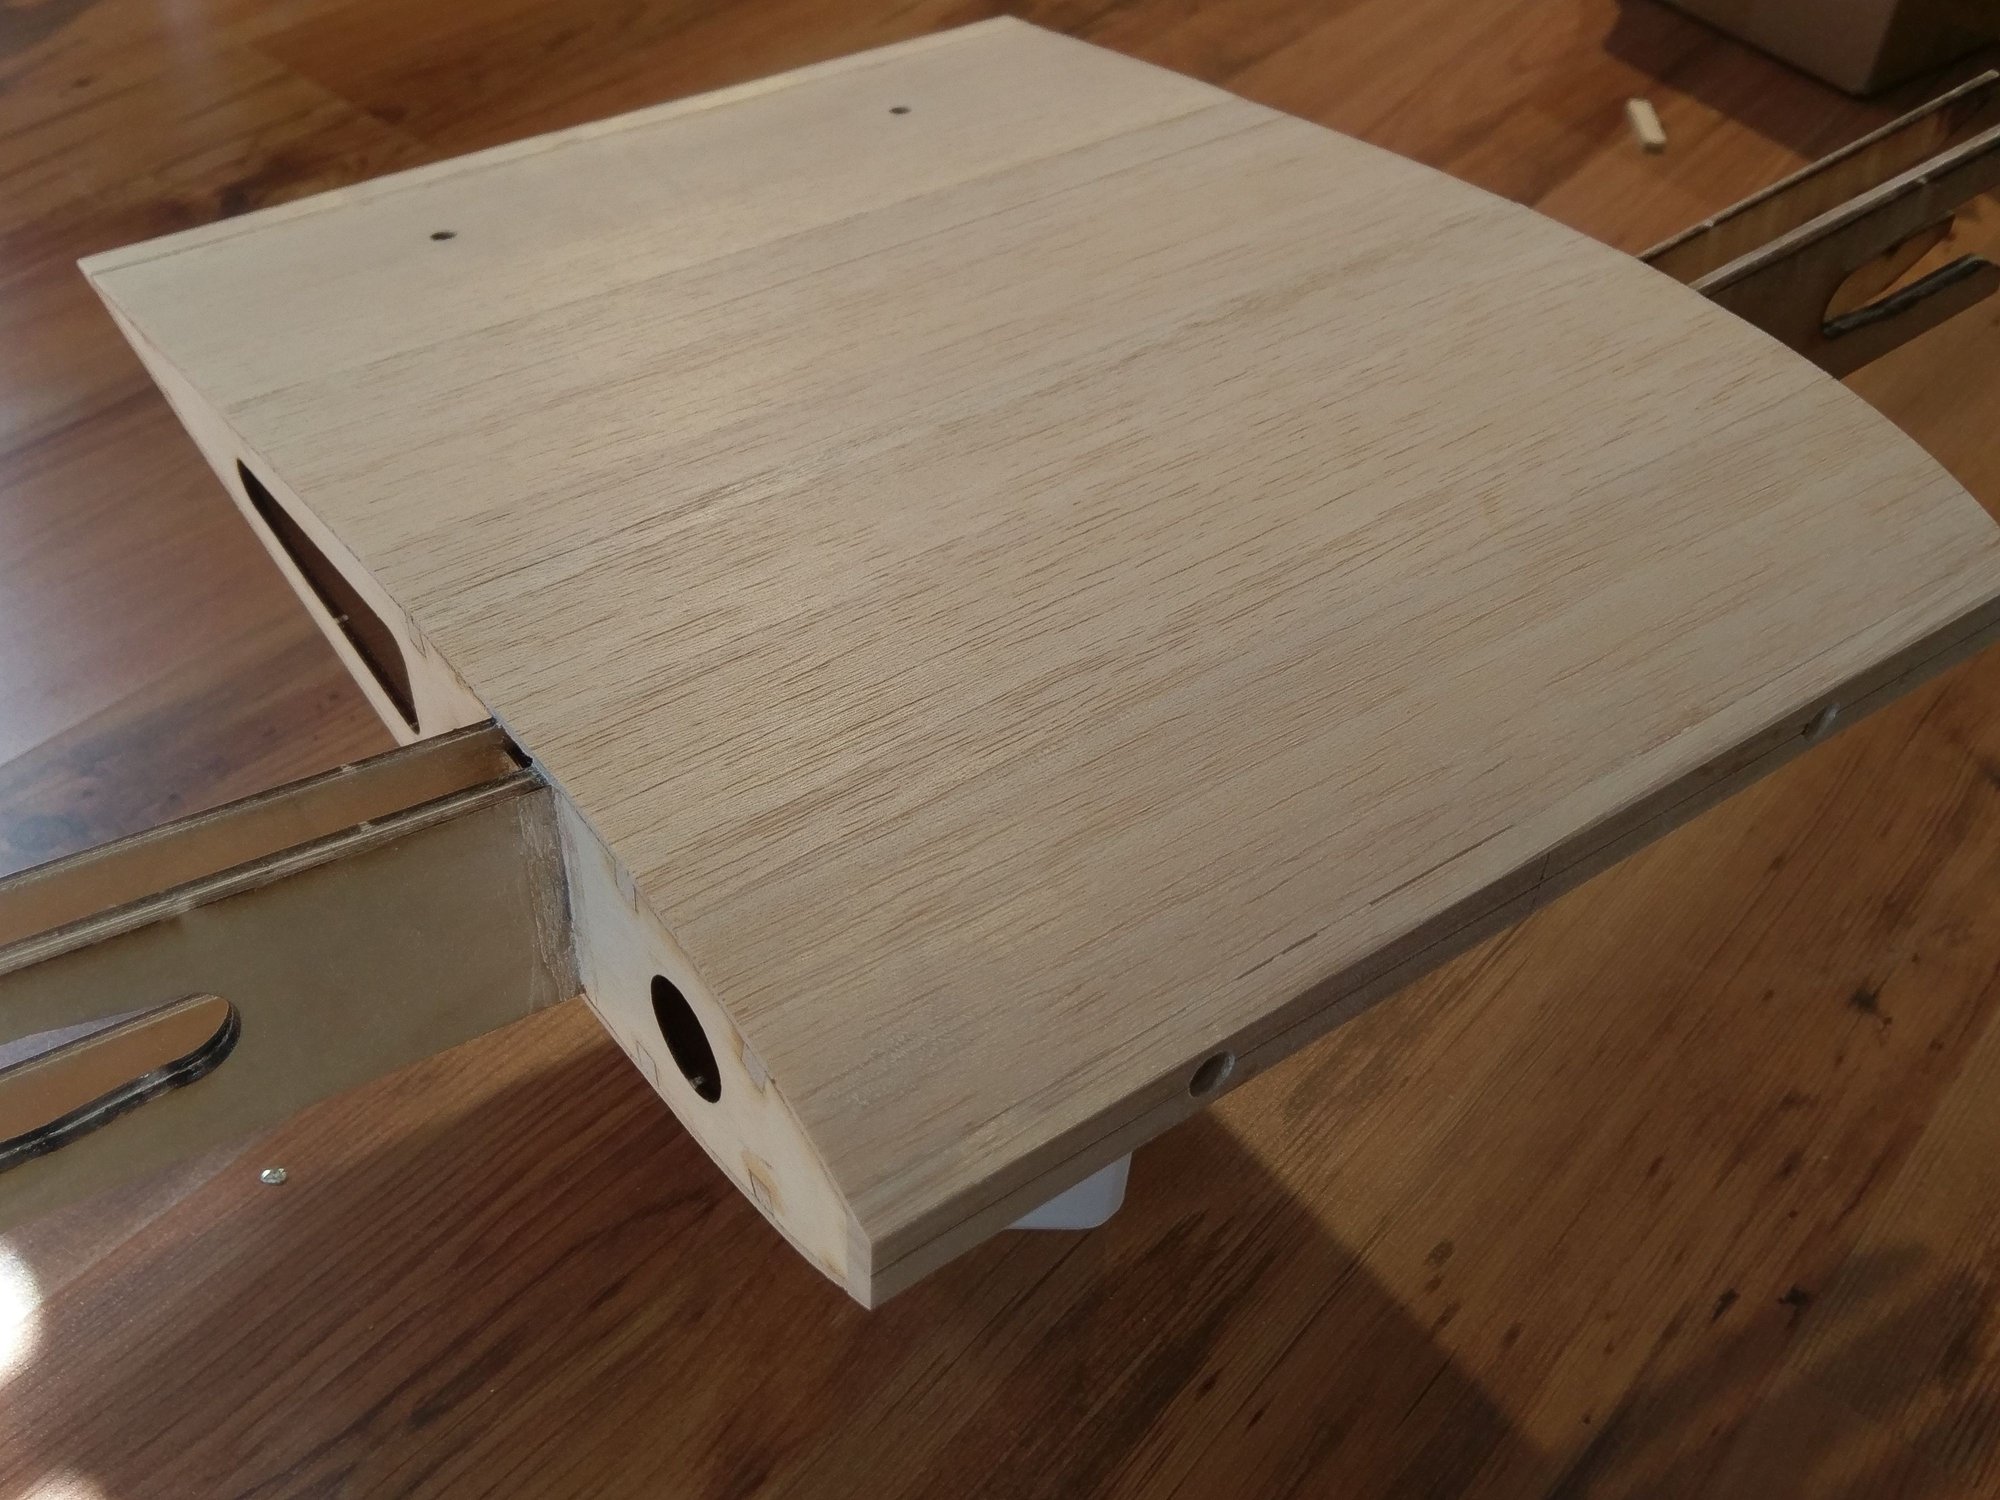
Closeup of interlocking tabs - fuse was removed from the table after completion. Hence lack of contact with the aluminum brackets.

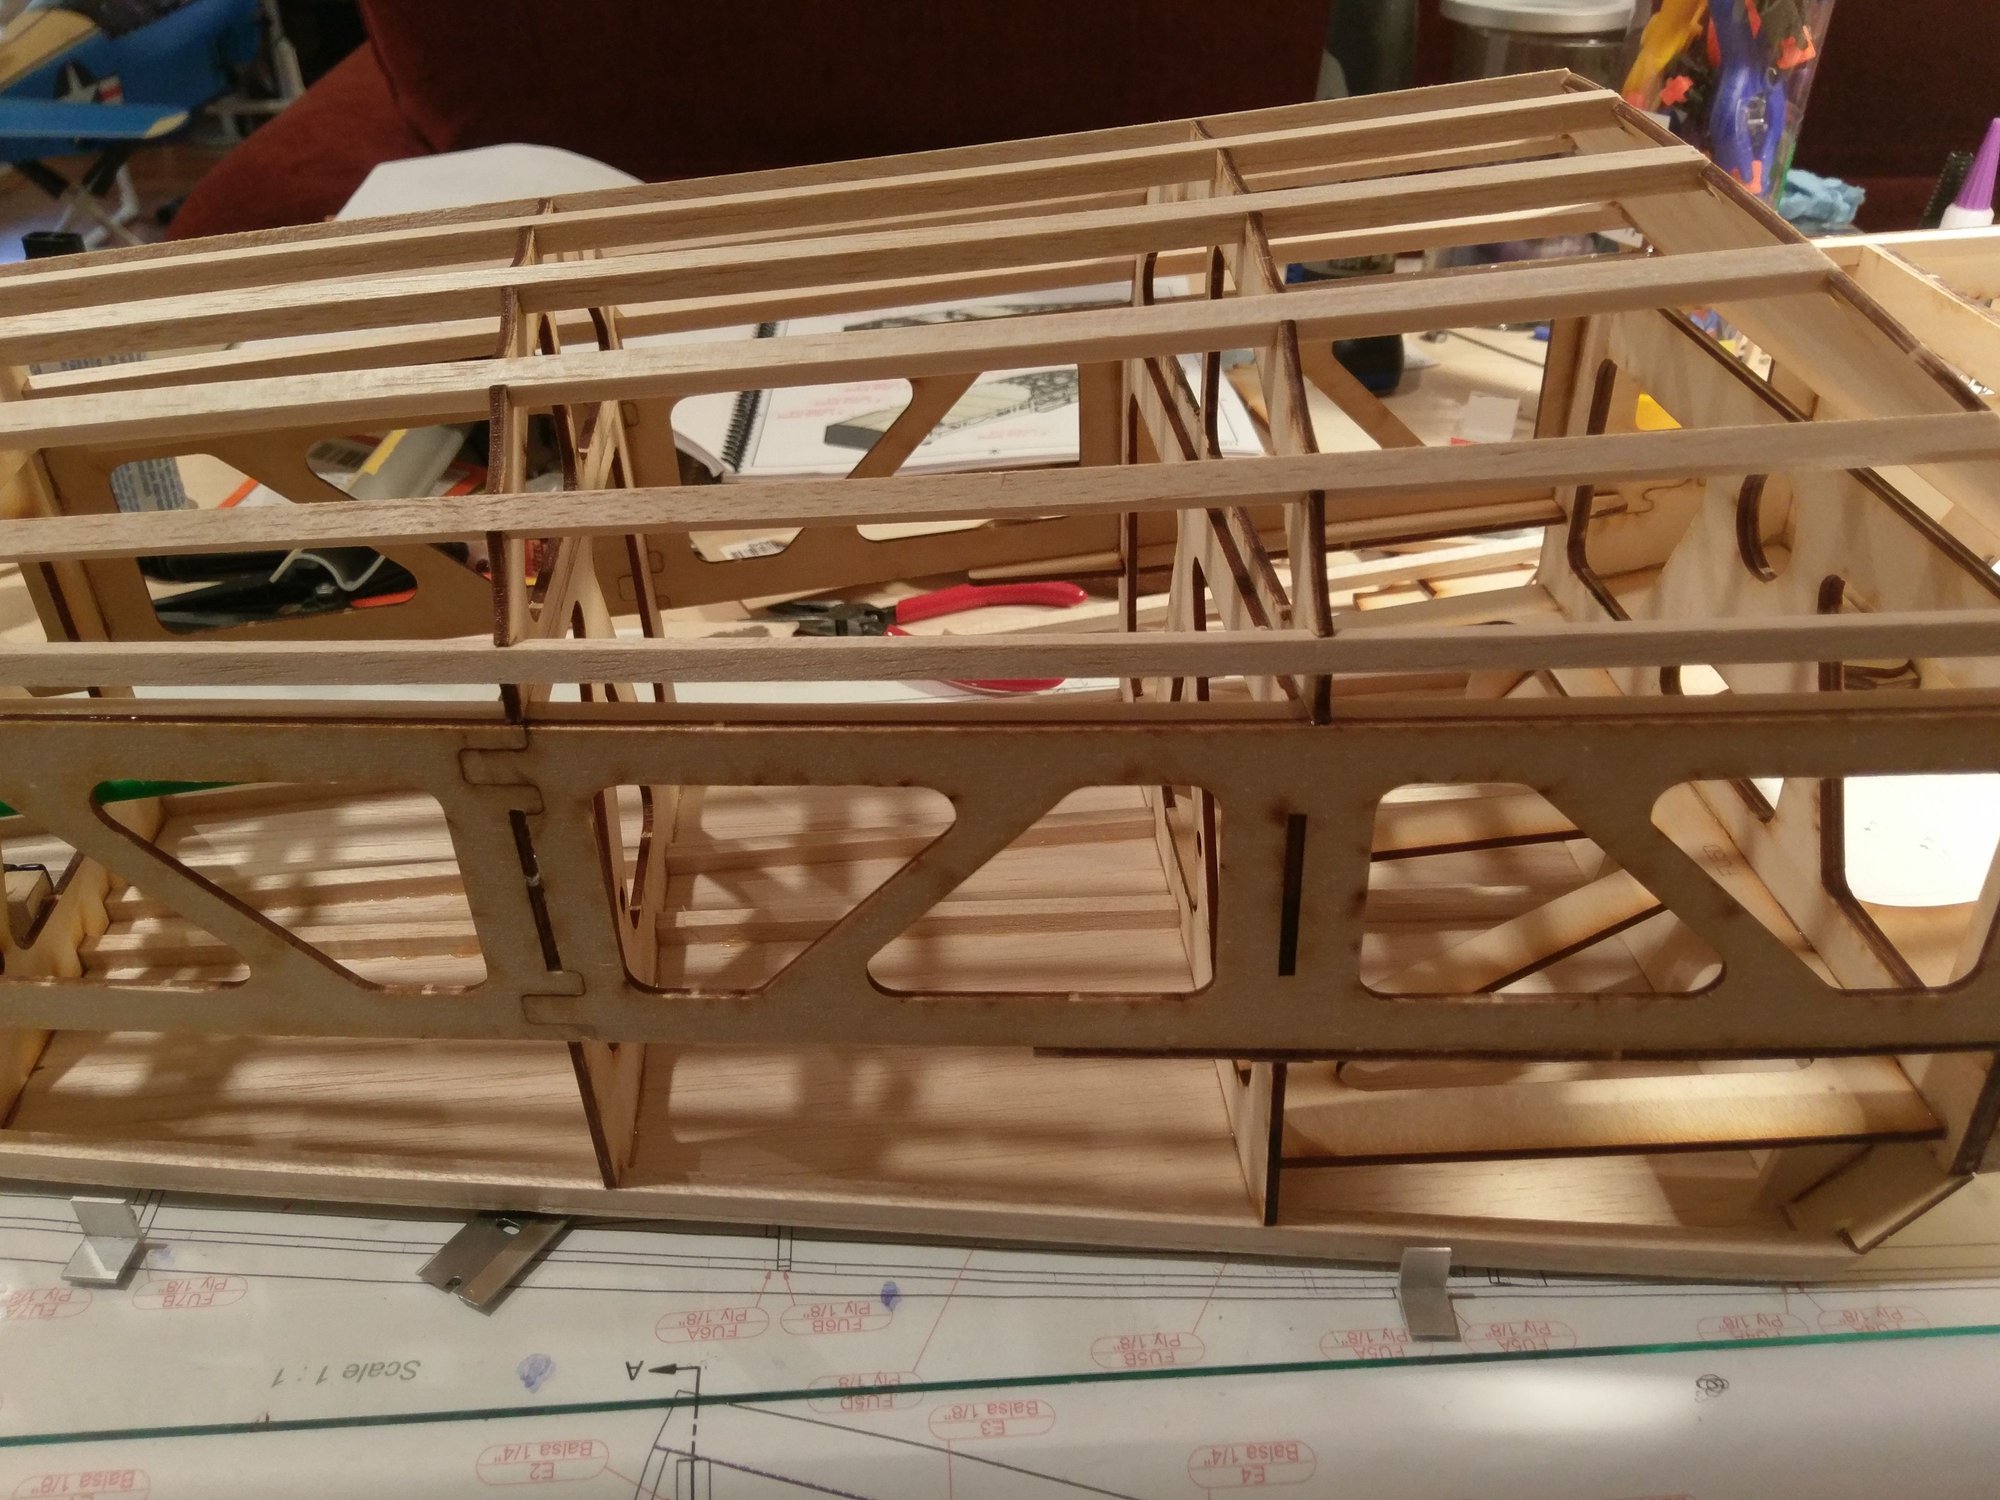
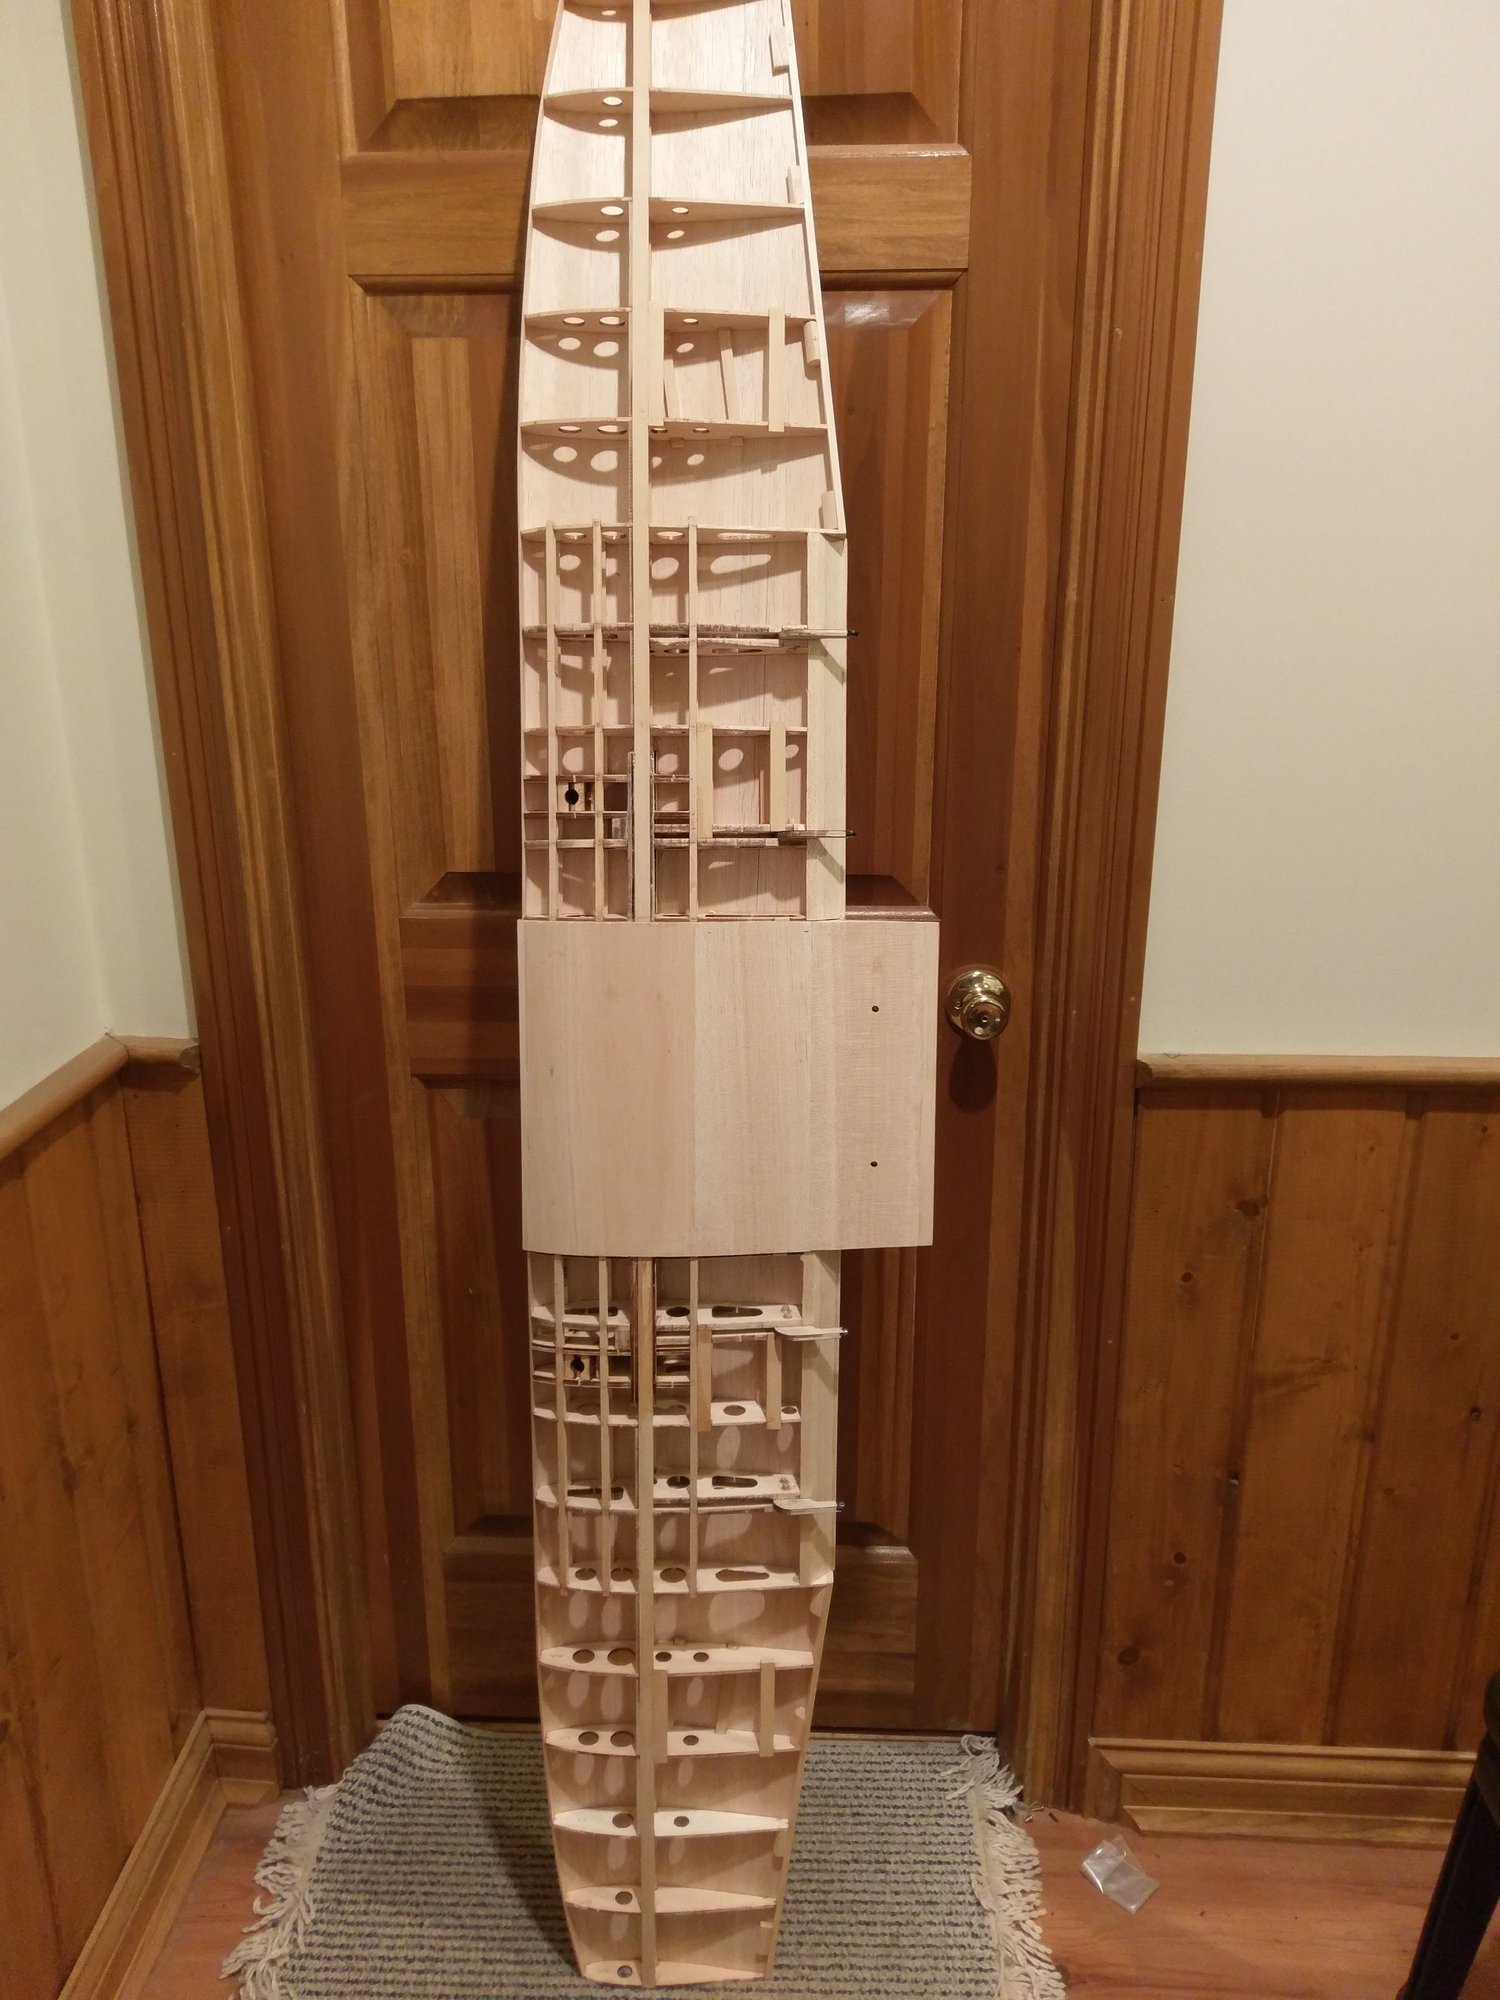
Top rear section of fuselage-lifted from the table after completion
The laser cutting is generally excellent, and the parts interlock snugly with minimal to no gaps. Speaking of fit, that is a revelation in this kit, especially the fuselage. The interlocking tabs allow for easy framing of the wide fuselage. I build with a glass sheet on the plans. This makes for a very flat smooth surface. For this build I used small aluminum 90 degree angles pieces to hold the formers in place. These can be easily tacked to table with CA, and then knocked off. A few wipes of a scraper blade and the glass is clean again.
This is an 80in span kit from mraerodesign. I had a few questions for the designer as the project went on, and MR was always prompt and helpful. The quality of the wood is outstanding. The balsa is of consistent density and the plywood sheets are warp free and 3-5 layer. I would venture to say the 1/4 in plywood firewall, and it is a large area, was about as flat as a sheet of glass. You build off the illustrations - nothing written. If you have some build experience, this will be fine.
Fuselage:
Full size plans
Aluminum L brackets attached to glass with CA
Closeup of interlocking tabs - fuse was removed from the table after completion. Hence lack of contact with the aluminum brackets.
Top rear section of fuselage-lifted from the table after completion
The laser cutting is generally excellent, and the parts interlock snugly with minimal to no gaps. Speaking of fit, that is a revelation in this kit, especially the fuselage. The interlocking tabs allow for easy framing of the wide fuselage. I build with a glass sheet on the plans. This makes for a very flat smooth surface. For this build I used small aluminum 90 degree angles pieces to hold the formers in place. These can be easily tacked to table with CA, and then knocked off. A few wipes of a scraper blade and the glass is clean again.
 01-15-2020 | 07:34 PM
#2
Thread Starter
Joined: Feb 2013
Posts: 59
Likes: 0
Received 0 Likes
on
0 Posts
From: , OH
Wings.
The panels build differently from other kits I've put together in that the spar does not lay flat on the build table. It must curve up to meet the slots in the ribs, and being hard wood, I thought it best to steam and bend the spars to the correct angle before installation. I steam bent the upper and lower on the same jig so they would be symmetrical. This way, they naturally fit into place and minimize the chance of any warping afterwards. Following the sheeting, the panel sat evenly on all all the build tabs - nice and true.
Before the underside of the panels got sheeted, I laid out the wiring for the navigation lights, beacons and landing lights. First time installation of these features. I went with units from unilight.at which is an Austrian company. The seem well made, and the 4 channel controller is very small so I will install it in the wing center to reduce the number of wires to be connected/disconnected when the wing is removed. No lights on the fuselage planned for the moment. I silver soldered some brass square tube sections to make brackets so that I could mount the landings lights to the struts.
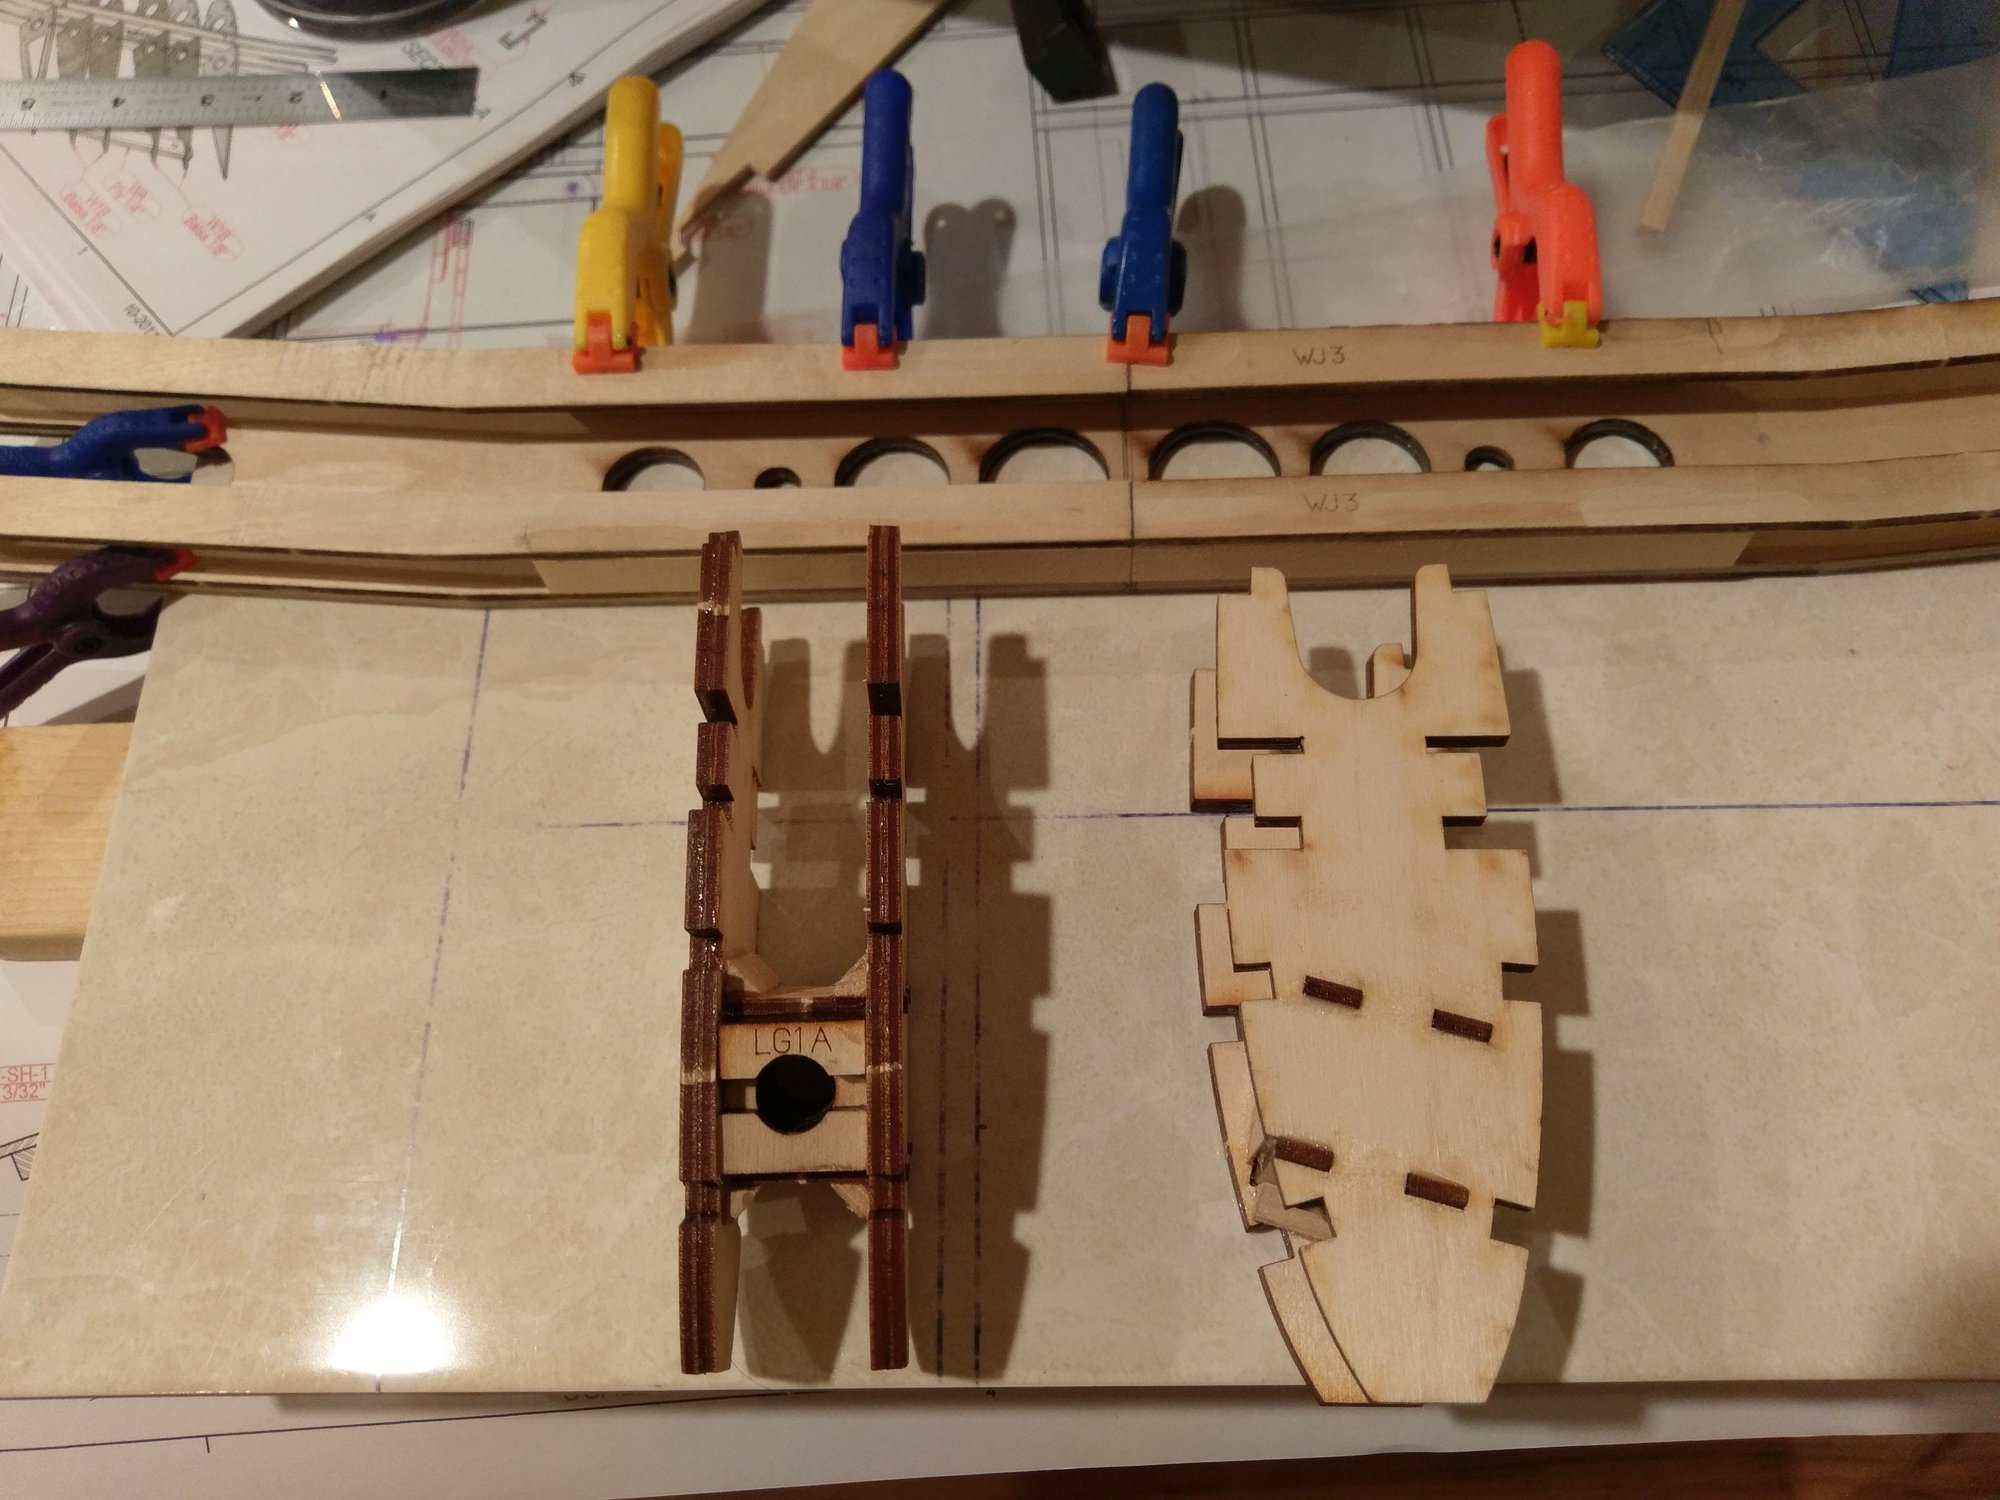
Center beam. All 5 layer ply made for a very stiff structure. Landing gear mounts are a sub-assembly.

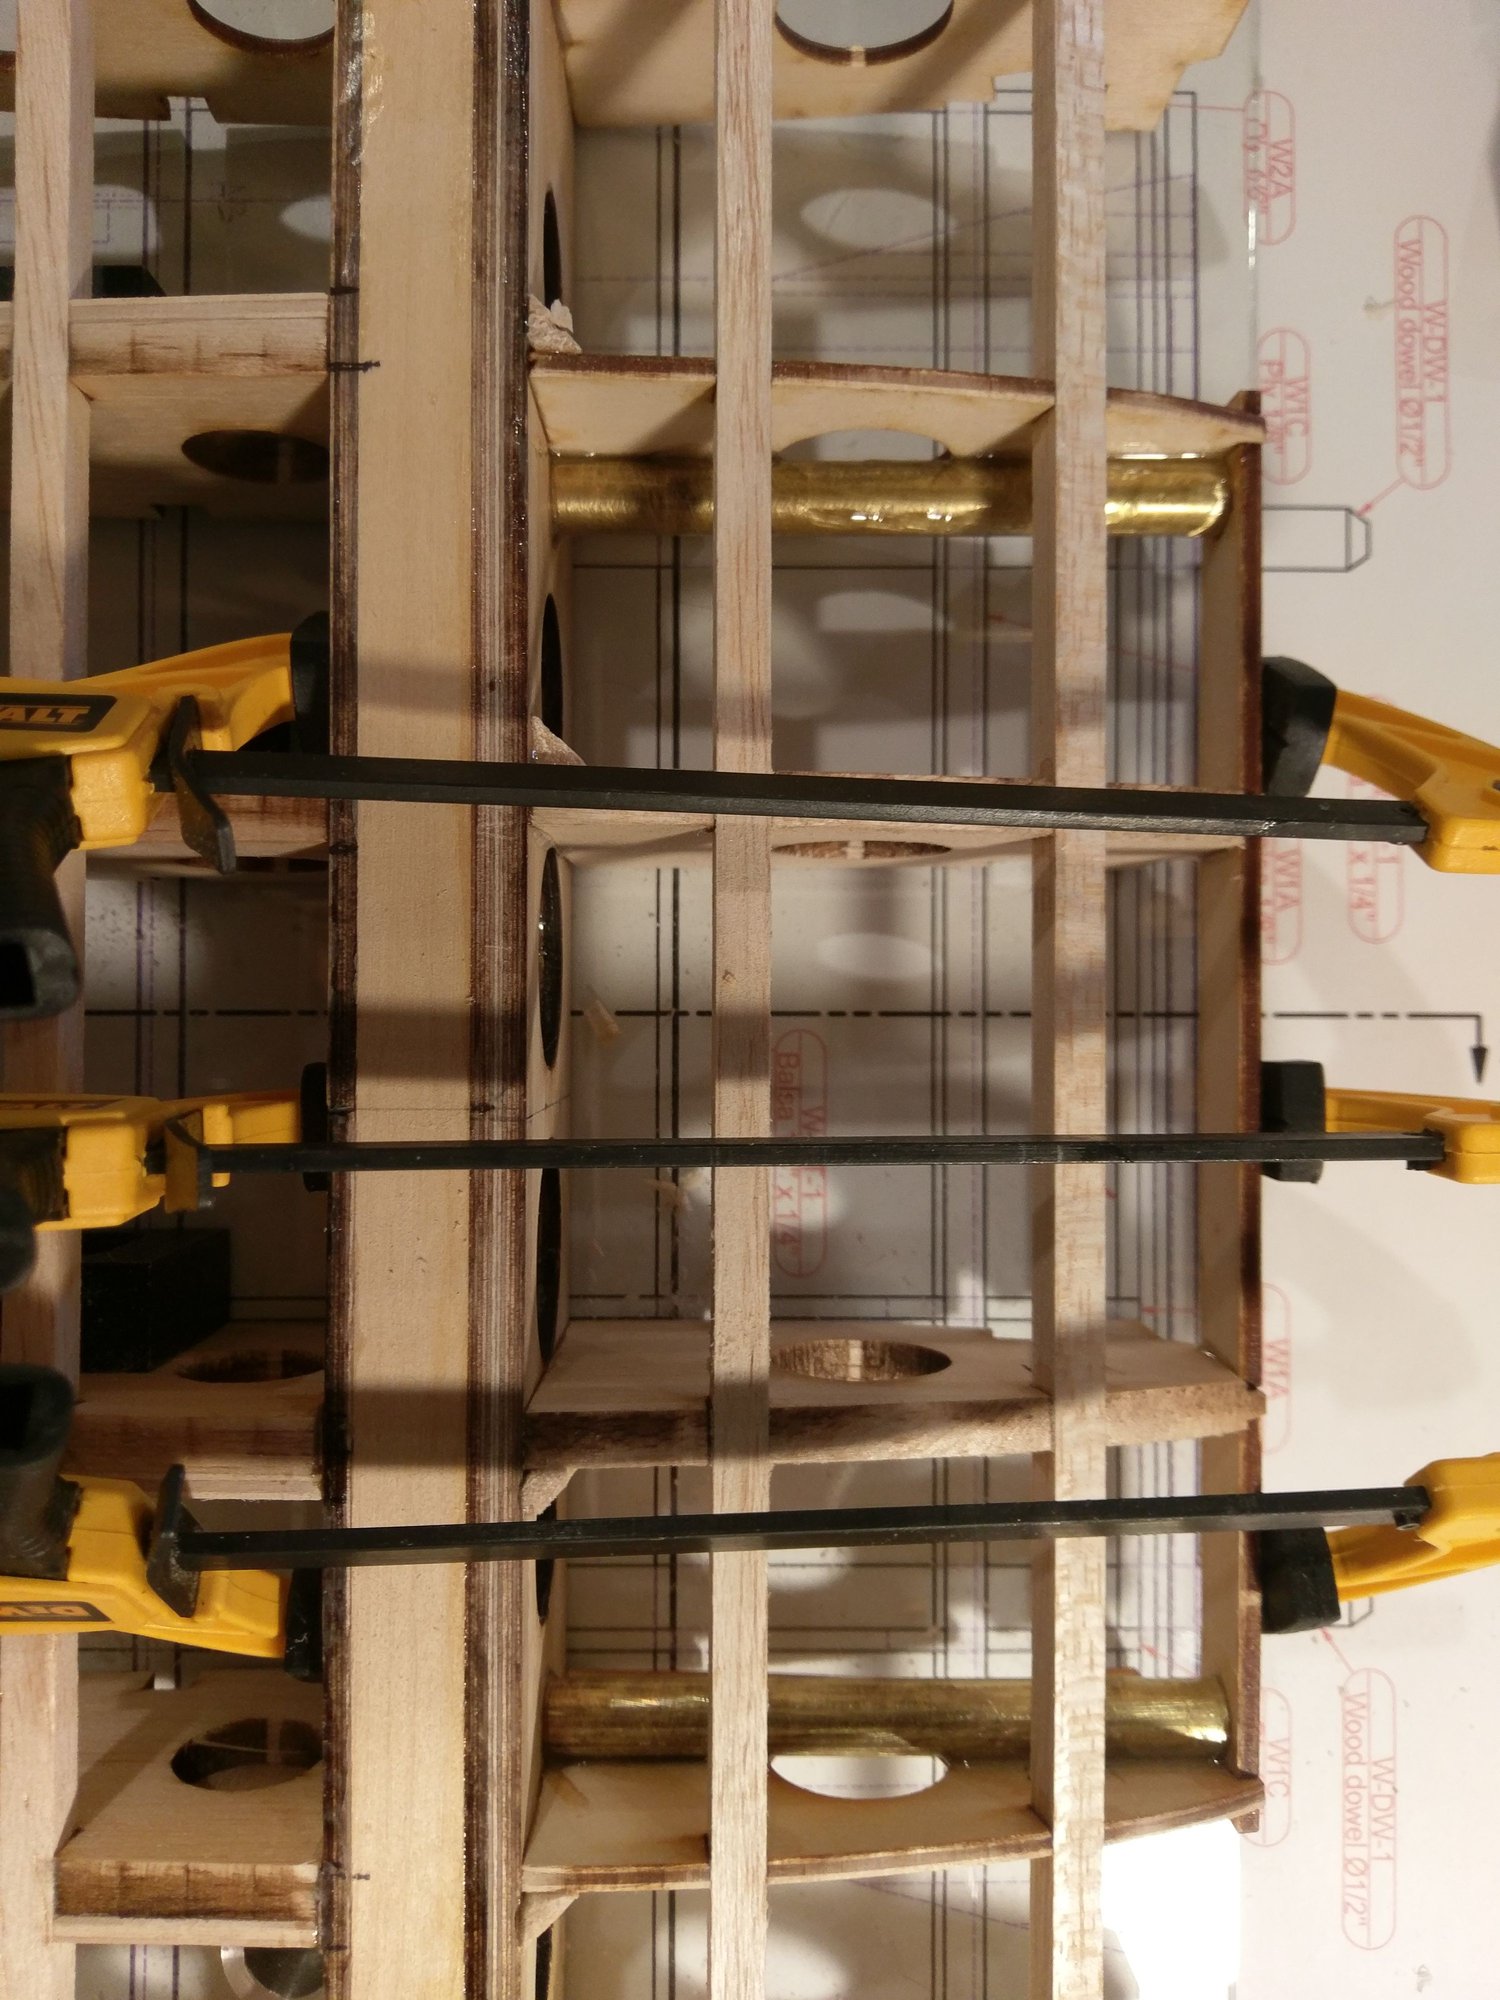
I installed brass tubes so that the 3/8 dowels would be removable. A solder #2 wood screw on the end cap allows the dowel to be twisted in.
Assembly of center section.
Sheeted center section

While the ribs have tabs, one steam bend in the main spars allowed them to be fitted without pressure.

Assembly of the wing panels.

More wing panel construction.
Lots of days later, and all three sections aligned nicely and were epoxied in place. Yes, it's a one piece wing. Not ideal for transportation.
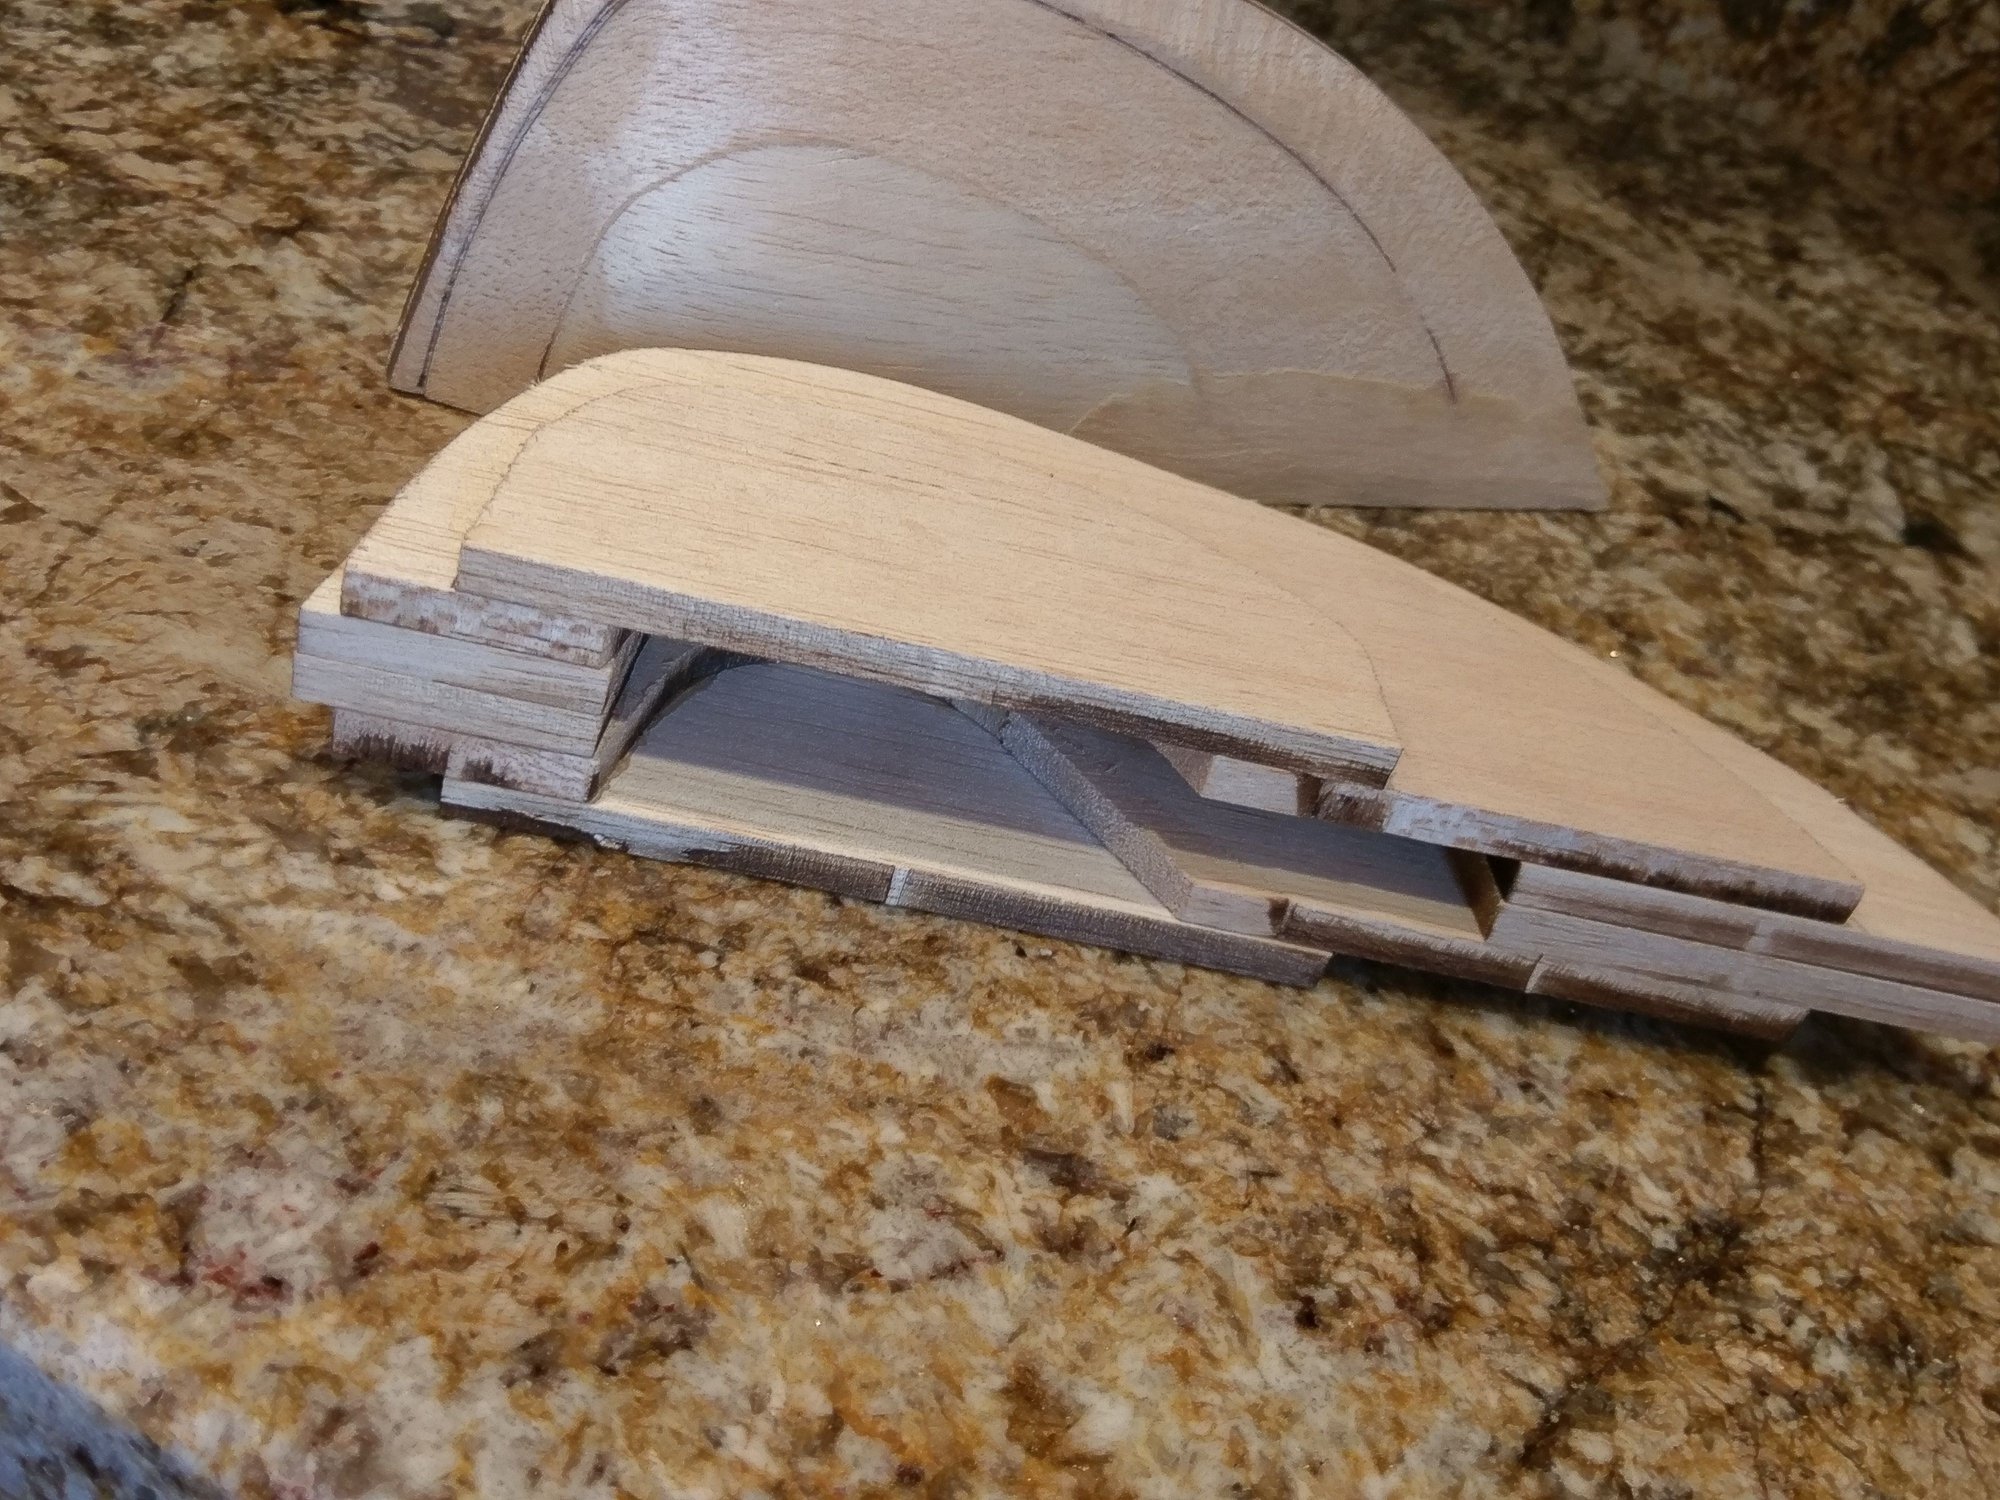
My first experience with hollow, laminated wing tips. This was actually great for installing the wing tip lights.
The panels build differently from other kits I've put together in that the spar does not lay flat on the build table. It must curve up to meet the slots in the ribs, and being hard wood, I thought it best to steam and bend the spars to the correct angle before installation. I steam bent the upper and lower on the same jig so they would be symmetrical. This way, they naturally fit into place and minimize the chance of any warping afterwards. Following the sheeting, the panel sat evenly on all all the build tabs - nice and true.
Before the underside of the panels got sheeted, I laid out the wiring for the navigation lights, beacons and landing lights. First time installation of these features. I went with units from unilight.at which is an Austrian company. The seem well made, and the 4 channel controller is very small so I will install it in the wing center to reduce the number of wires to be connected/disconnected when the wing is removed. No lights on the fuselage planned for the moment. I silver soldered some brass square tube sections to make brackets so that I could mount the landings lights to the struts.
Center beam. All 5 layer ply made for a very stiff structure. Landing gear mounts are a sub-assembly.
I installed brass tubes so that the 3/8 dowels would be removable. A solder #2 wood screw on the end cap allows the dowel to be twisted in.
Assembly of center section.
Sheeted center section
While the ribs have tabs, one steam bend in the main spars allowed them to be fitted without pressure.
Assembly of the wing panels.
More wing panel construction.
Lots of days later, and all three sections aligned nicely and were epoxied in place. Yes, it's a one piece wing. Not ideal for transportation.
My first experience with hollow, laminated wing tips. This was actually great for installing the wing tip lights.
01-16-2020 | 03:21 PM
#3
Thread Starter
Joined: Feb 2013
Posts: 59
Likes: 0
Received 0 Likes
on
0 Posts
From: , OH
Engine
I had been wanting to purchase a Kolm for sometime, and finally managed to get one. I think it is the most beautifully made RC engine I've ever seen. To get the correct down and right thrust angles, I machined an aluminum mounting plate with standoffs. This way the standoffs sit square with the mounting lugs of the engine. With limited space in the cowl, I decided to place the muffler behind the firewall. The muffler was custom built by Zimmermann in Germany. They were very helpful. A 20 mm stainless
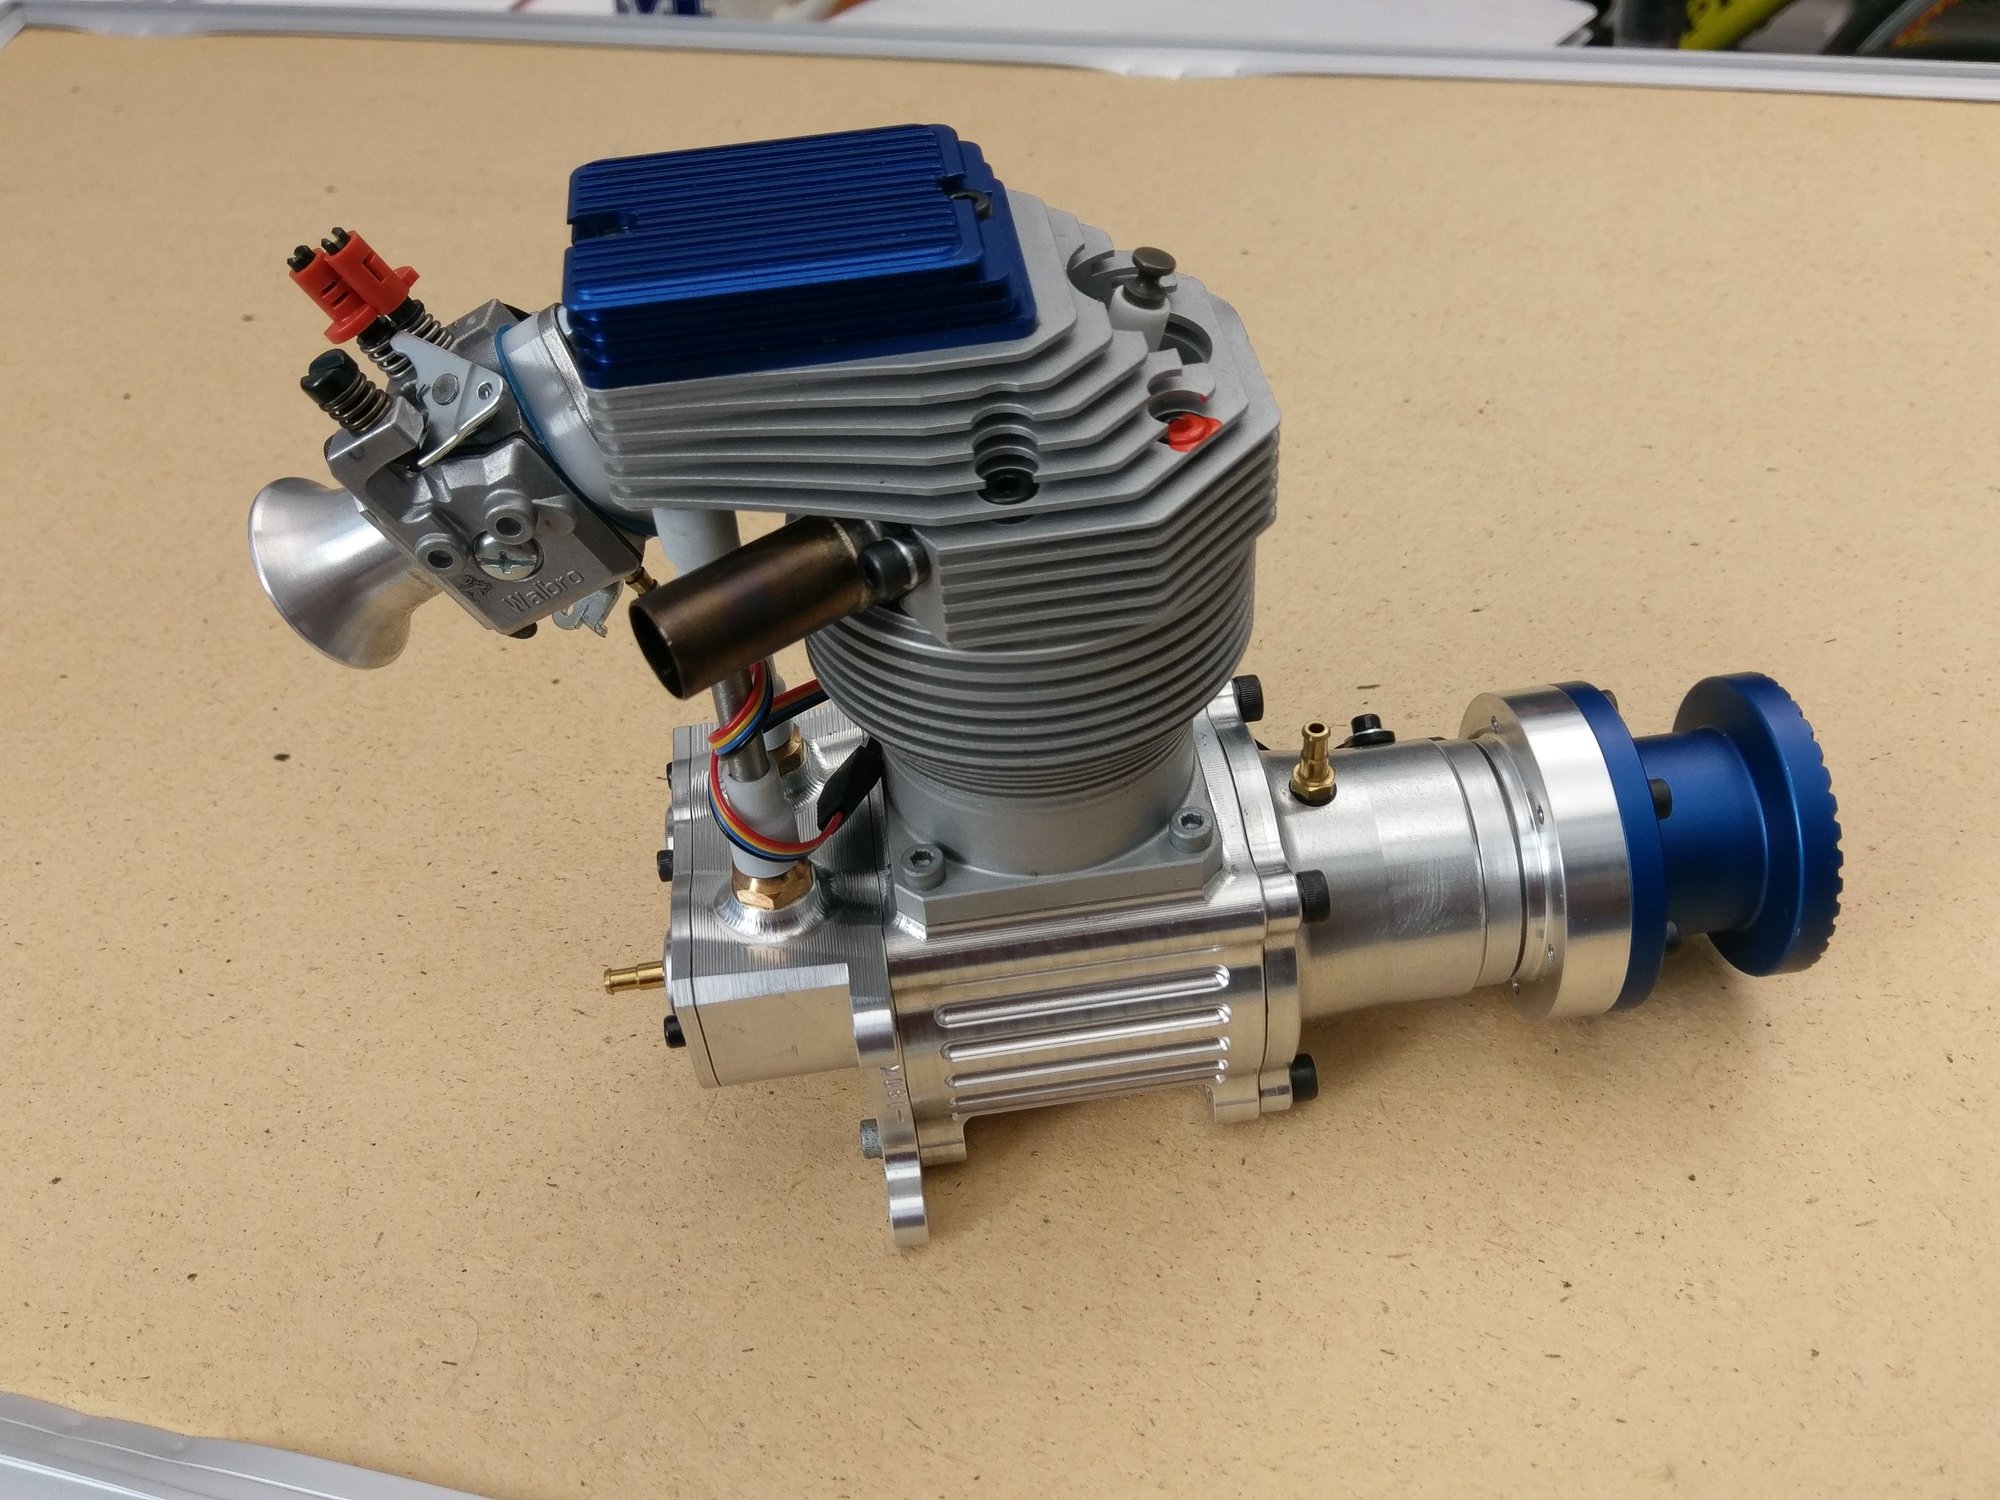
The twin cam Kolm 50

Aluminum mounting plate with 3 deg down, 2 deg right thrust.
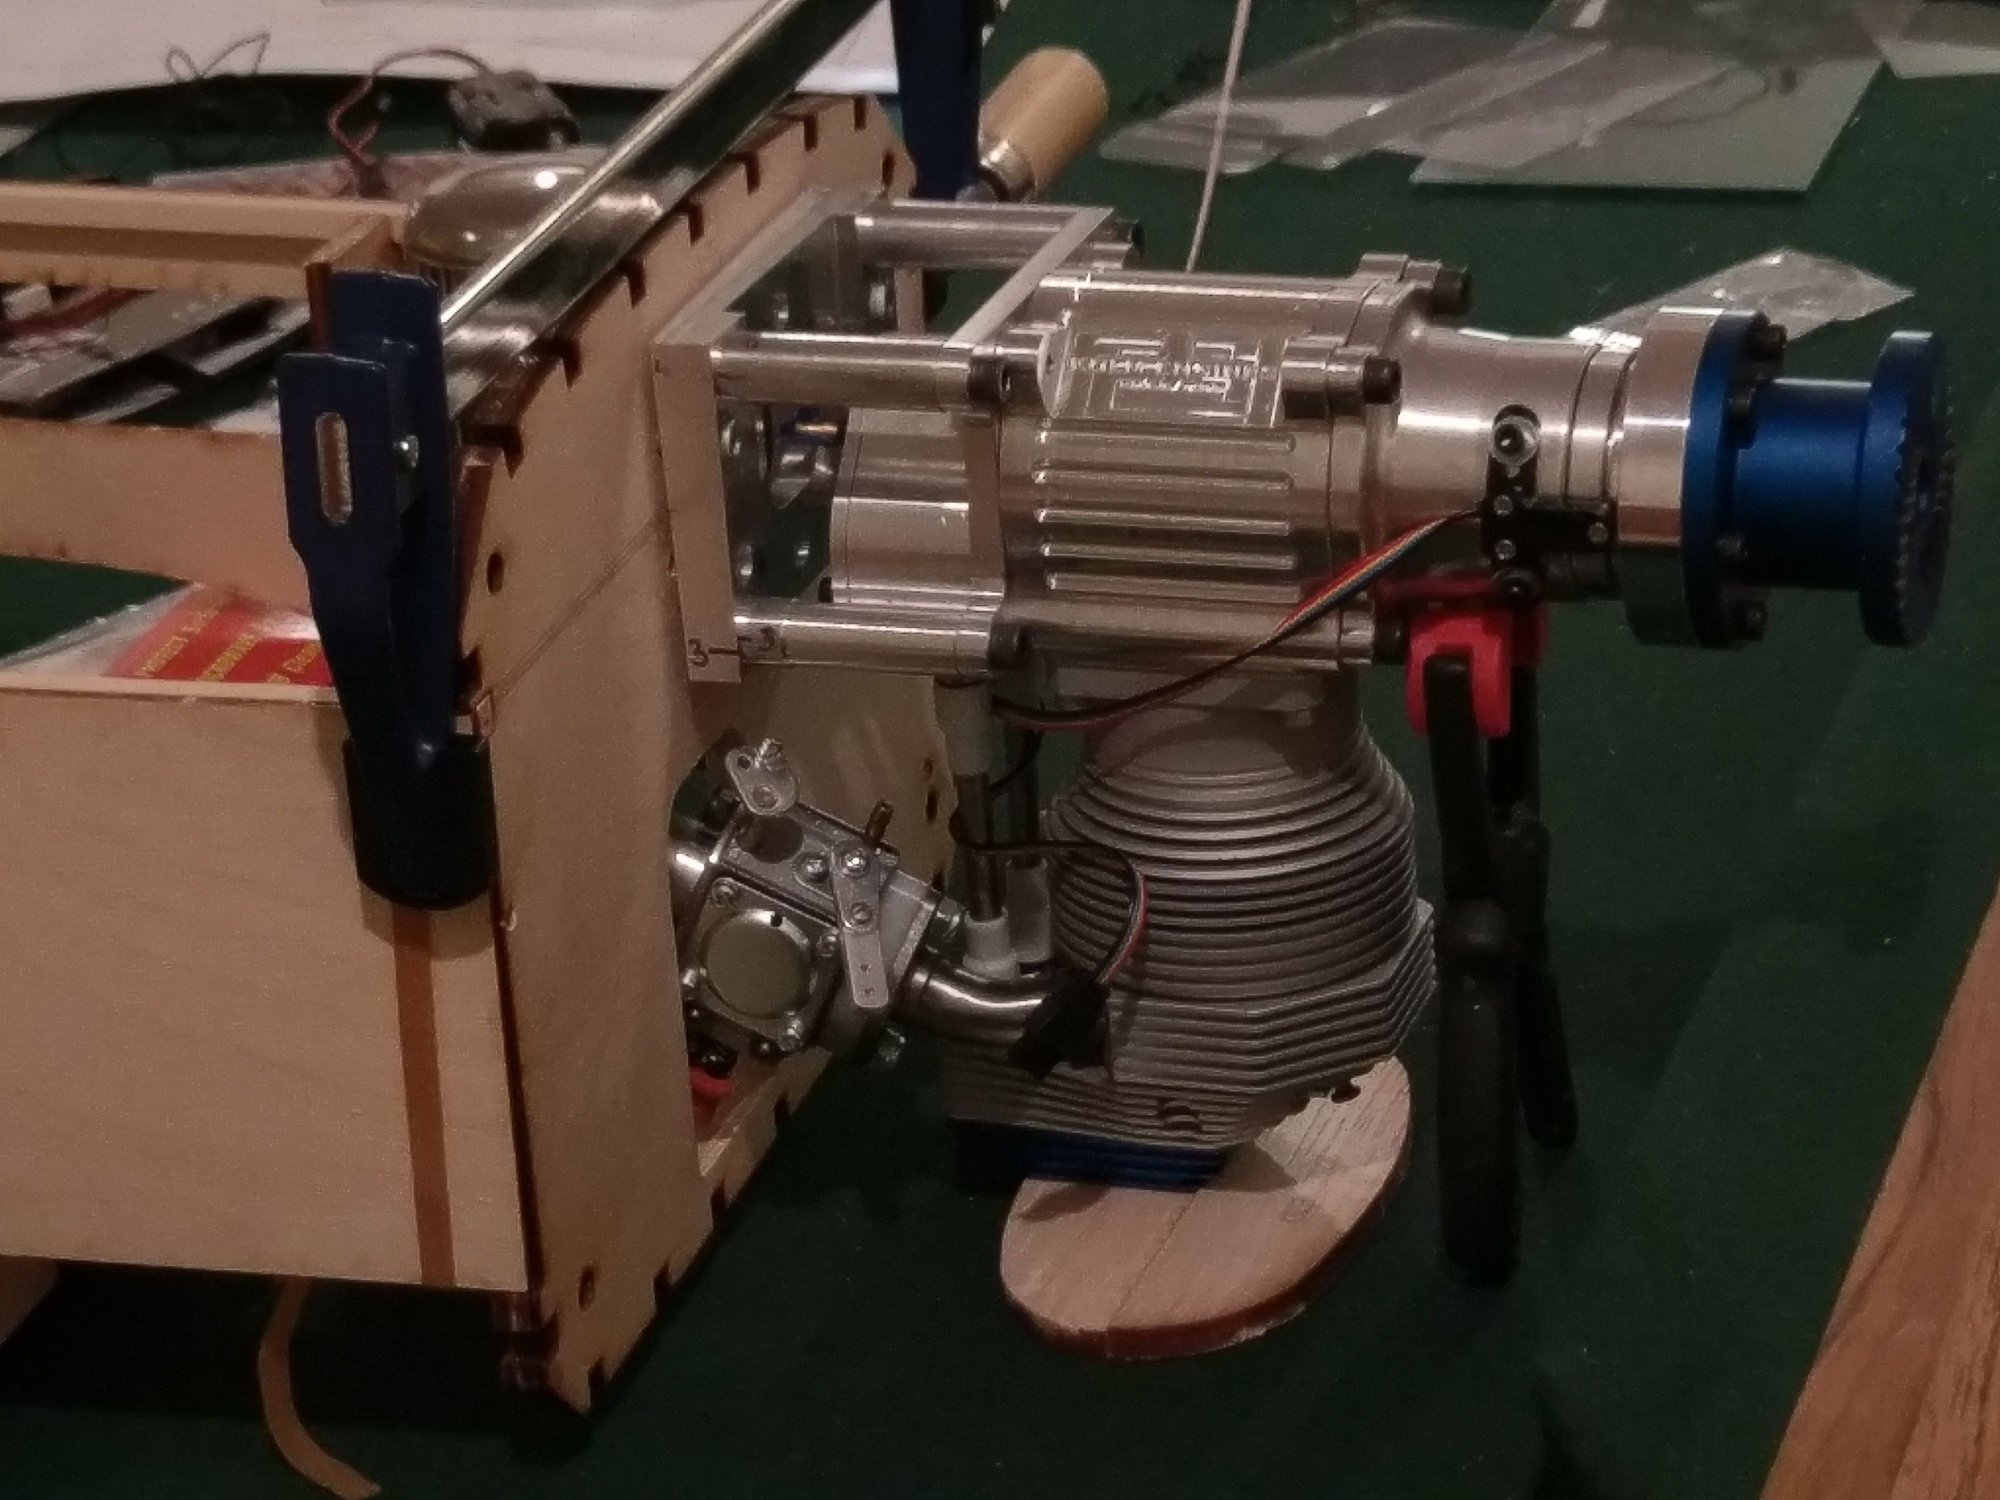
Mounted in the firewall

Corner blocks to strengthen the firewall joint

Placement of the muffler

Path of the flex connecting pipe
flex line from Toni Clarke will connect the header to the muffler. I thought I'd include the resources in case someone needed such parts for a build.
I had been wanting to purchase a Kolm for sometime, and finally managed to get one. I think it is the most beautifully made RC engine I've ever seen. To get the correct down and right thrust angles, I machined an aluminum mounting plate with standoffs. This way the standoffs sit square with the mounting lugs of the engine. With limited space in the cowl, I decided to place the muffler behind the firewall. The muffler was custom built by Zimmermann in Germany. They were very helpful. A 20 mm stainless
The twin cam Kolm 50
Aluminum mounting plate with 3 deg down, 2 deg right thrust.
Mounted in the firewall
Corner blocks to strengthen the firewall joint
Placement of the muffler
Path of the flex connecting pipe
flex line from Toni Clarke will connect the header to the muffler. I thought I'd include the resources in case someone needed such parts for a build.
01-20-2020 | 06:58 AM
#4
Thread Starter
Joined: Feb 2013
Posts: 59
Likes: 0
Received 0 Likes
on
0 Posts
From: , OH
Wheels and lights: I wanted to use a nice looking set of wheels and I was a little put off by the price of the Robarts. I found a set on Aliexpress, and though I'm a little about the quality of such stuff, their reasonable price made the risk acceptable. The machining on the assembled wheels proved to be excellent, but they were rock hard. They came apart fully, so a length of closed cell neoprene hollow cord from Mcmaster in place of the original dense foam, made the wheels perfectly compliant.
This is the first time I've installed lights. They were acquired from unilight.at in Austria, although I think Dreamworks is now an authorized retailer. I made some brass brackets for the lights to fit around the struts. At 4W with a reflector, they are very bright. The controller is very small and has several pre-programmed options/patterns.
I've not found any struts in the past that featured proper damping. The Robart and Prolink are just spring action. So I sourced these from Eurokitshop in Italy. They are fully machined, and have internal oil damping. The company actually adjusted the spring rate to match the projected weight of the CAP. They are wonderfully smooth with zero play.

Cut rectangular brass tube and silver solder = landing light mounting brackets
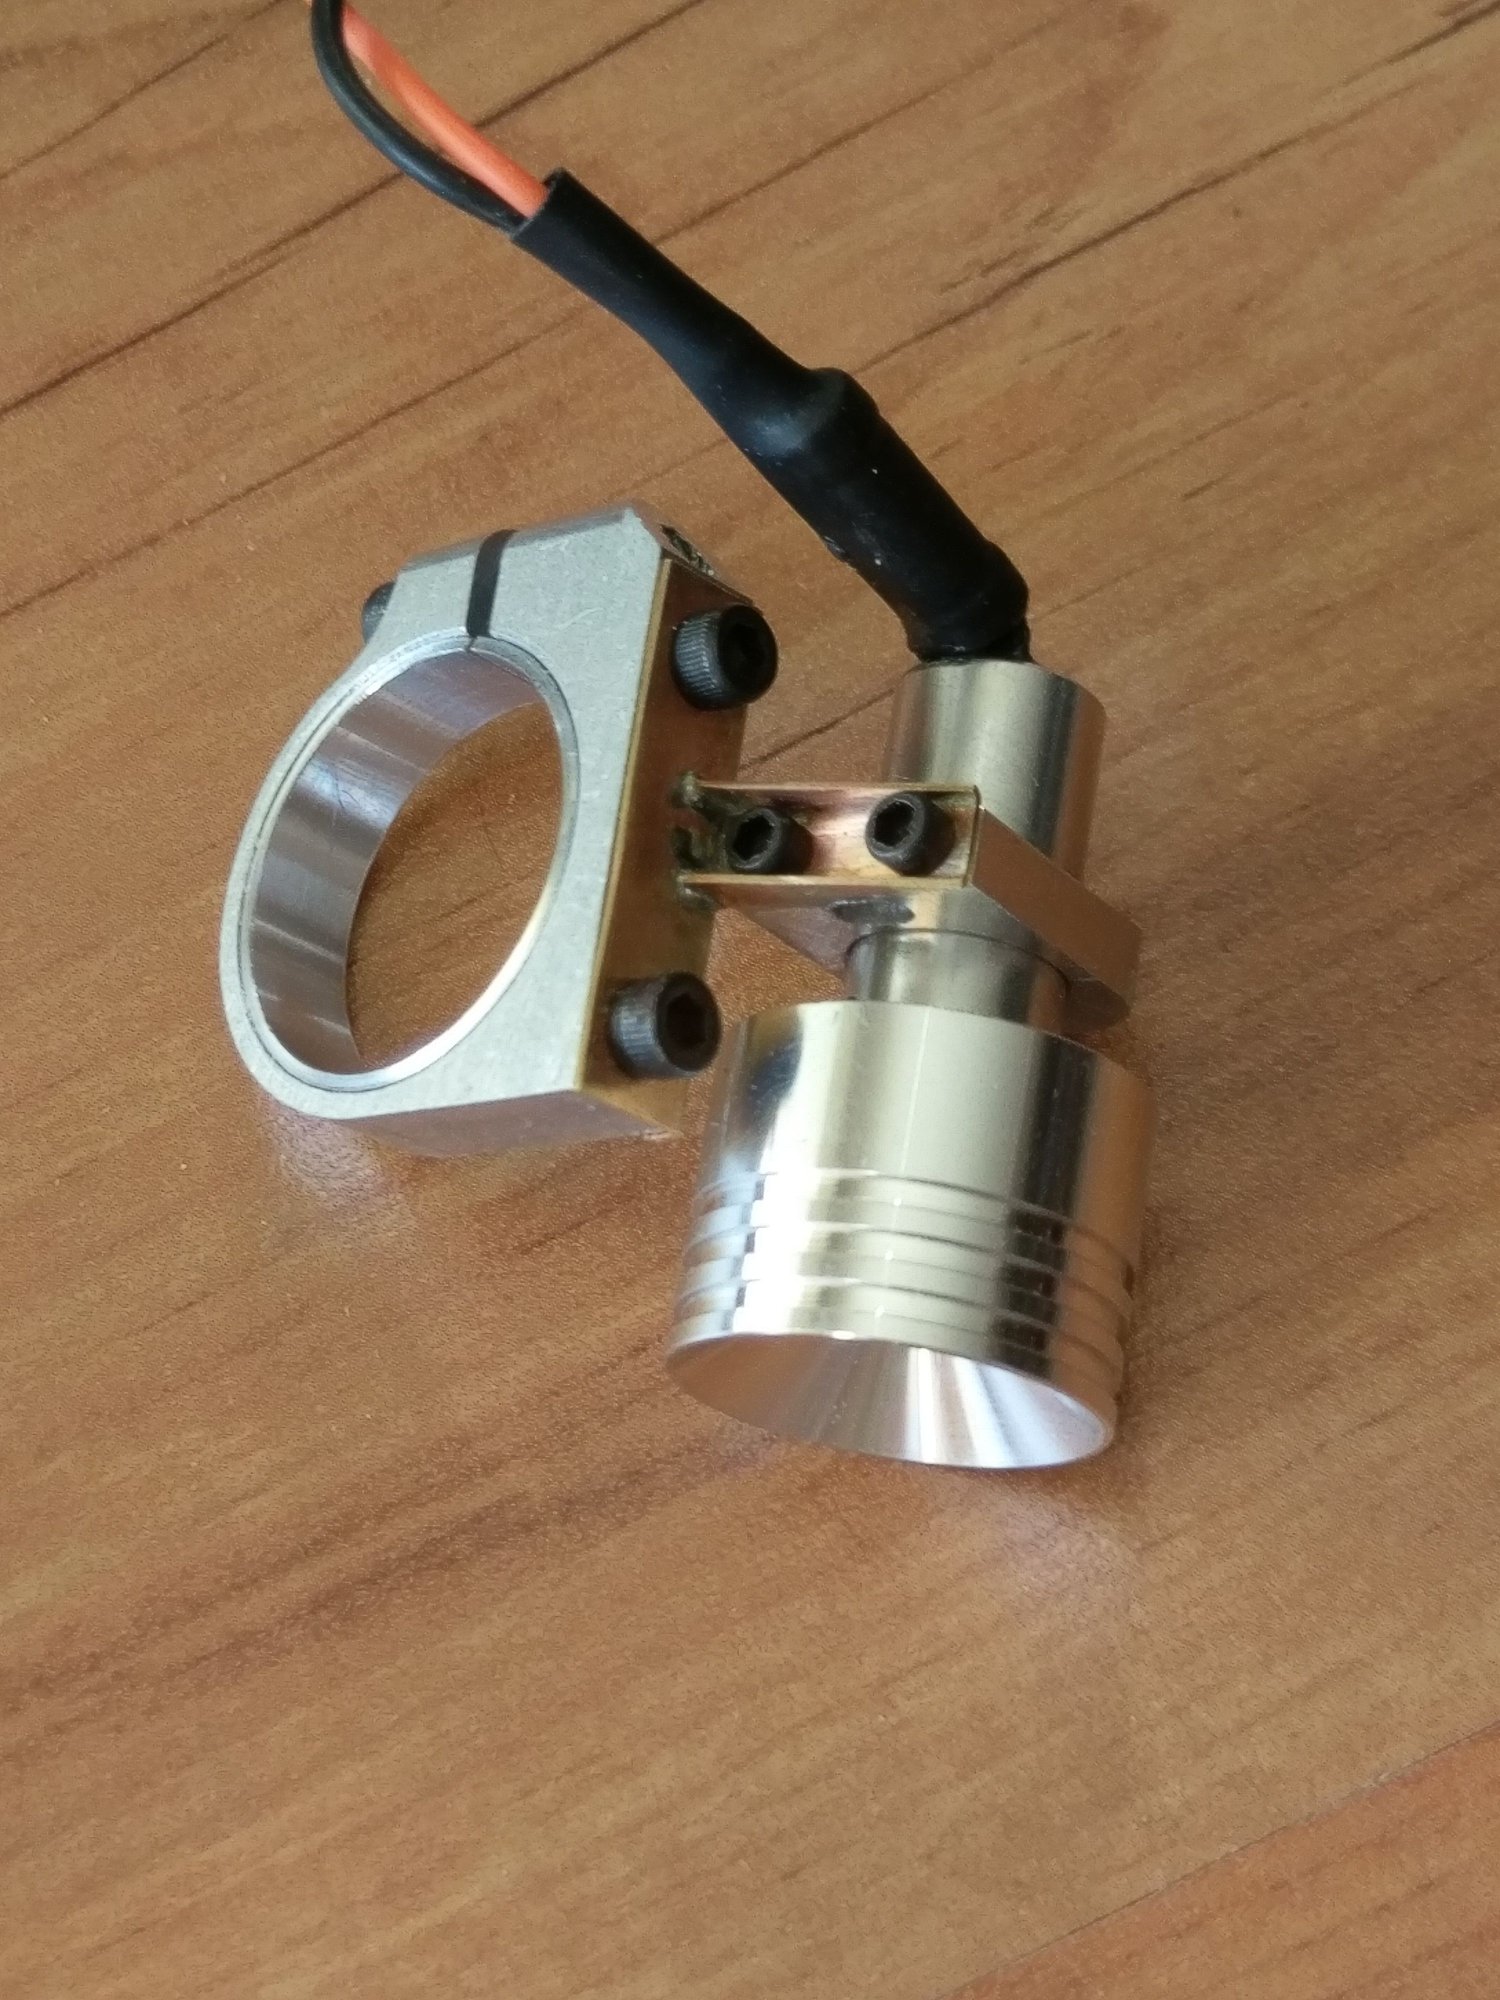
Landing lights with clamps
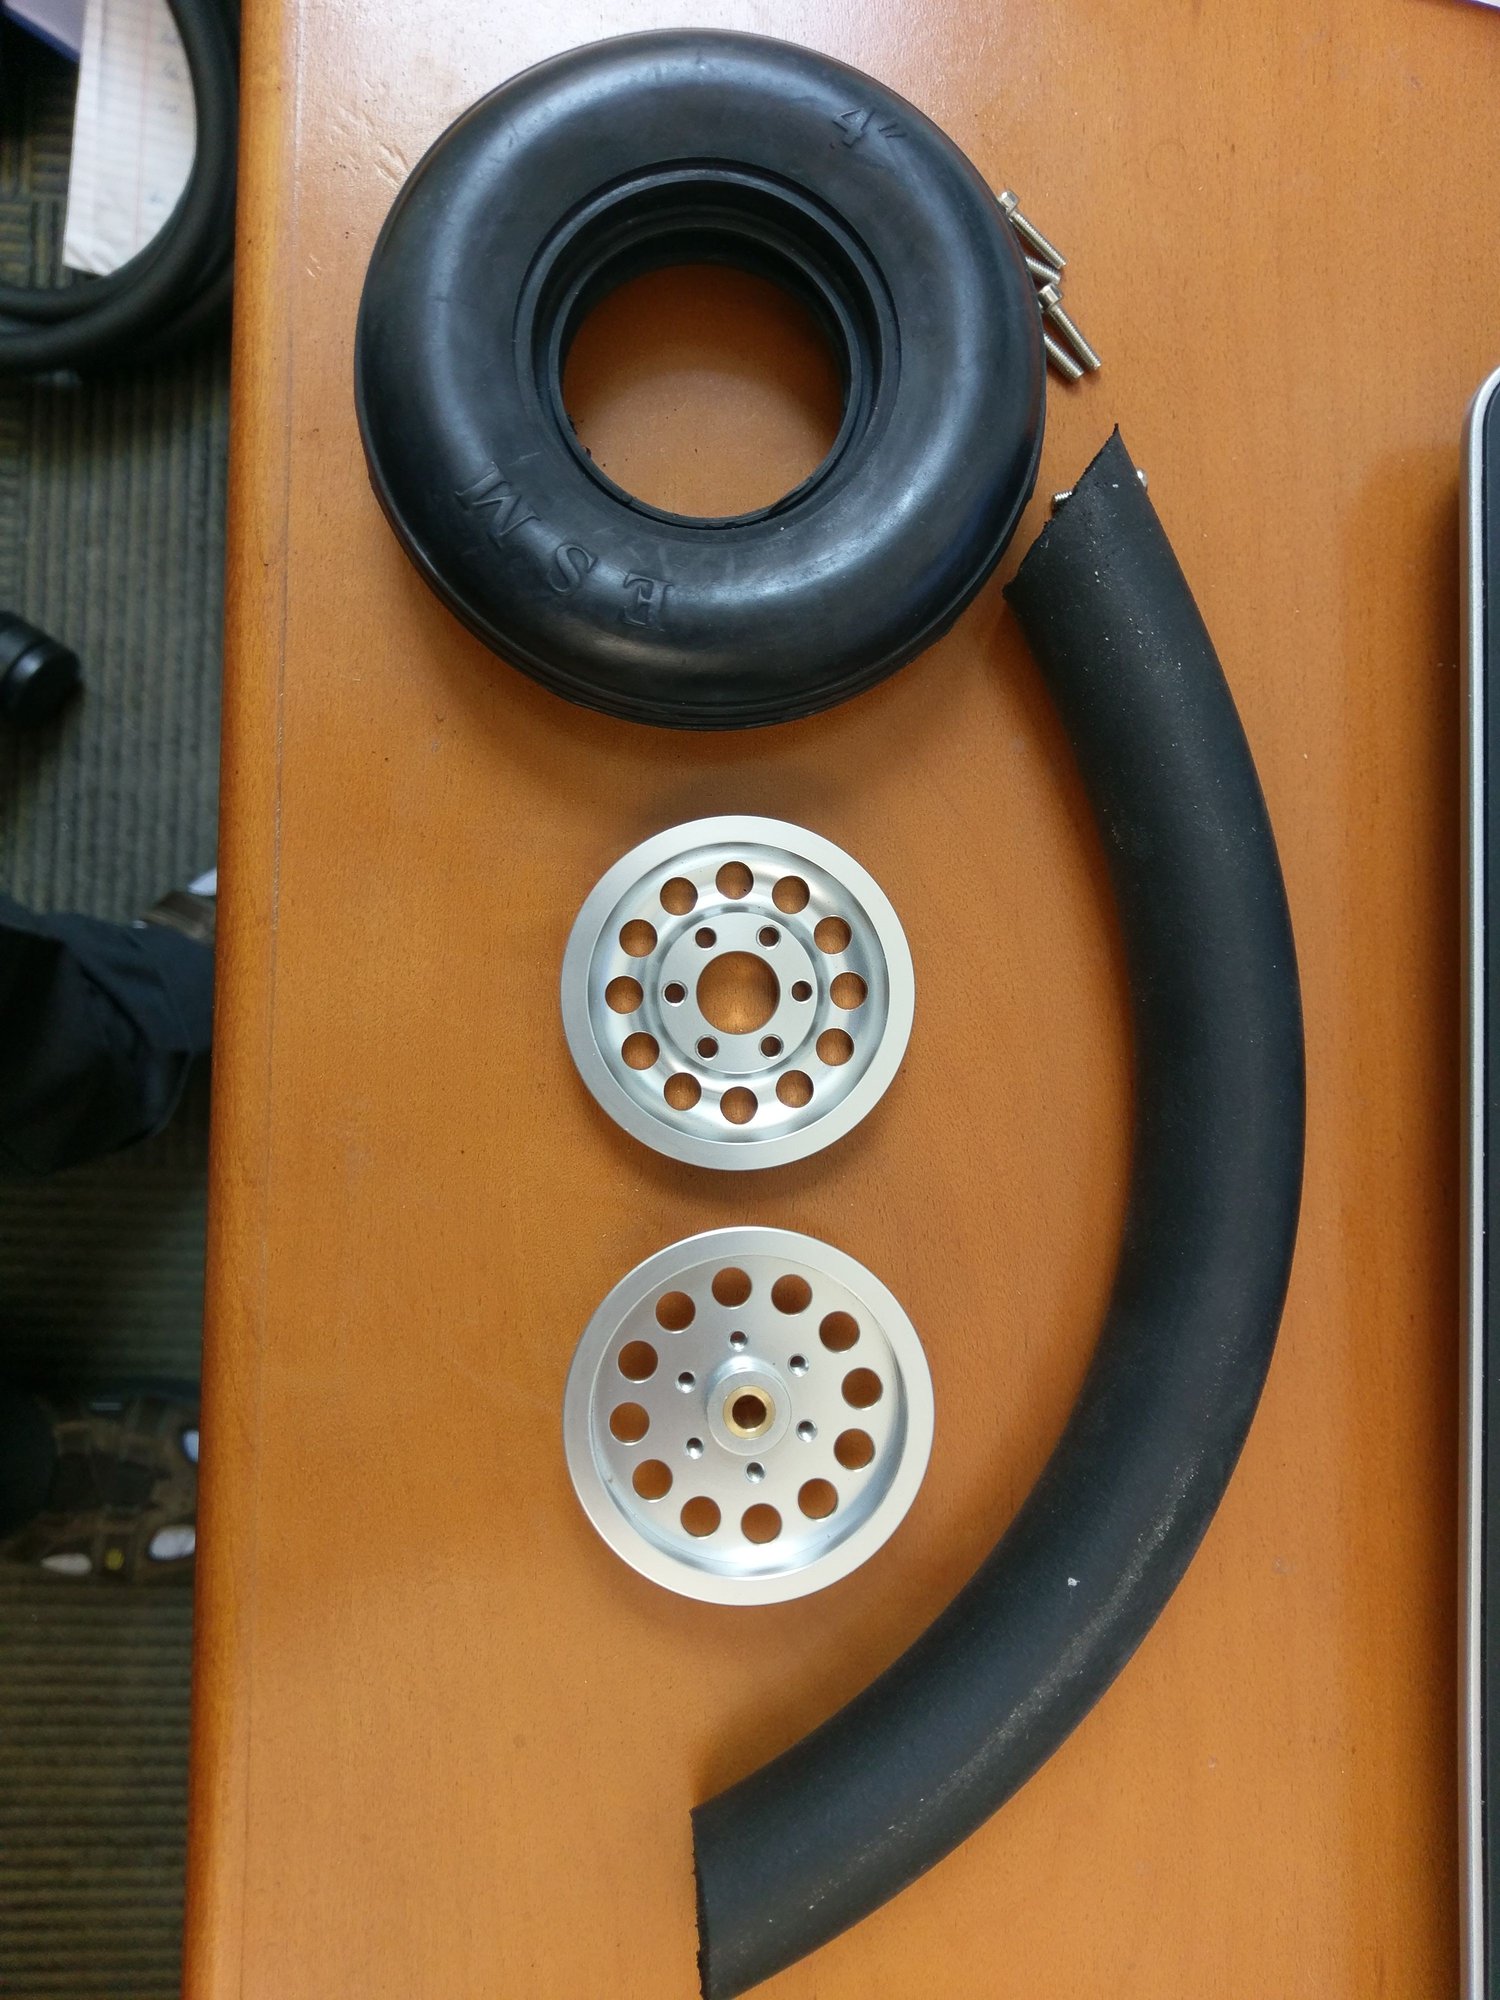
New lower durometer closed cell neoprene foam inserts
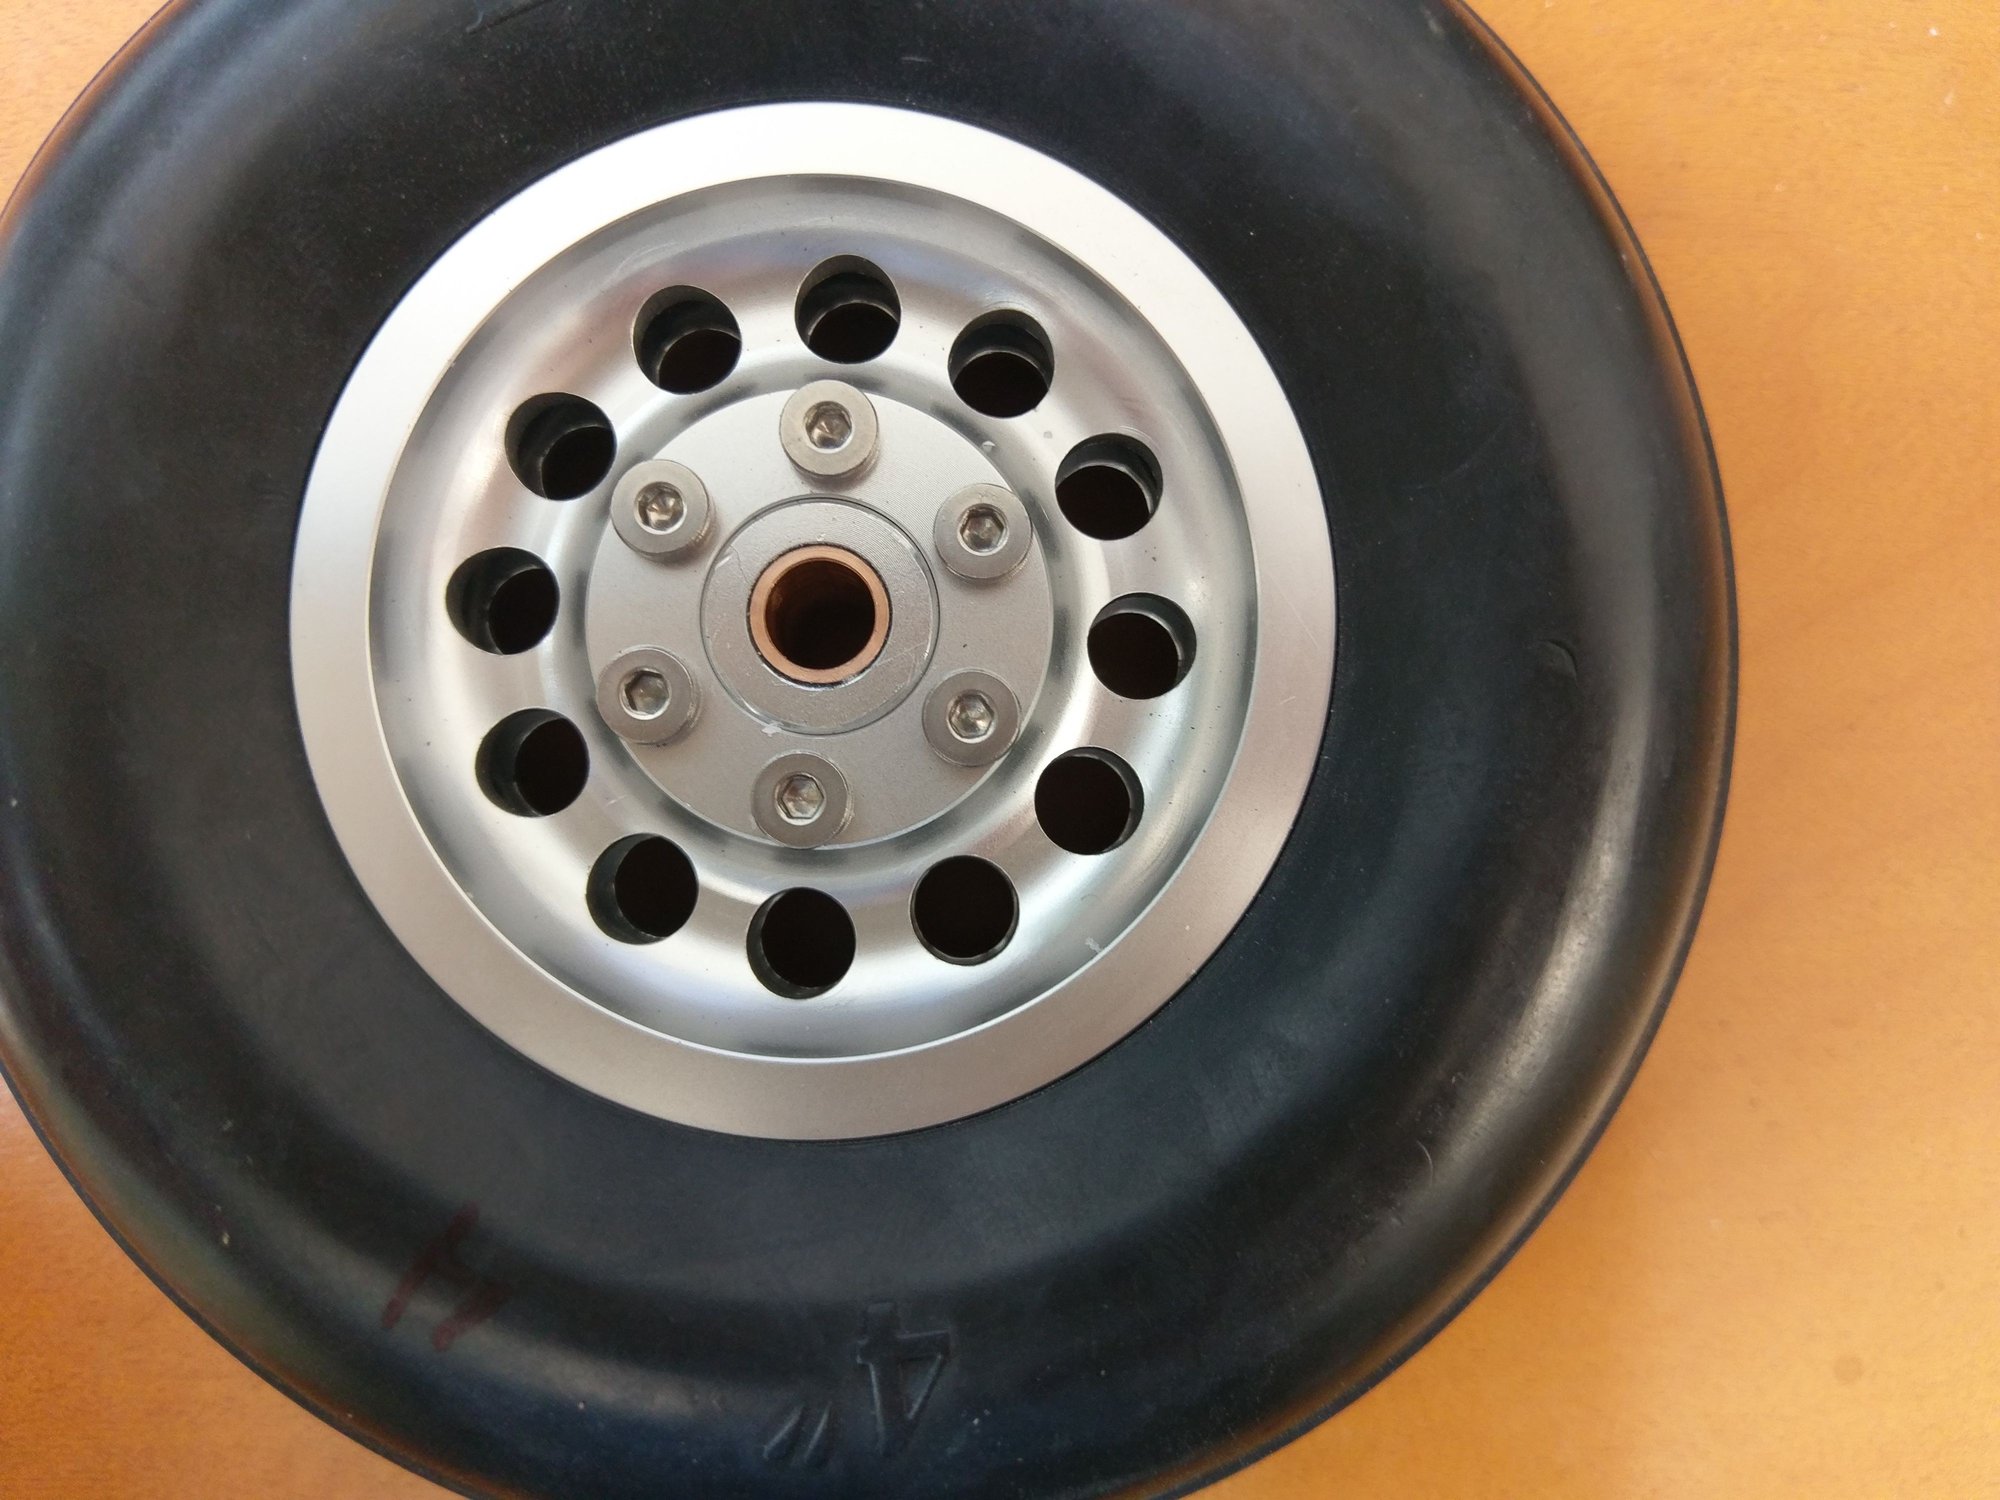
Assembled wheel with new bronze bushing reamed to 6mm
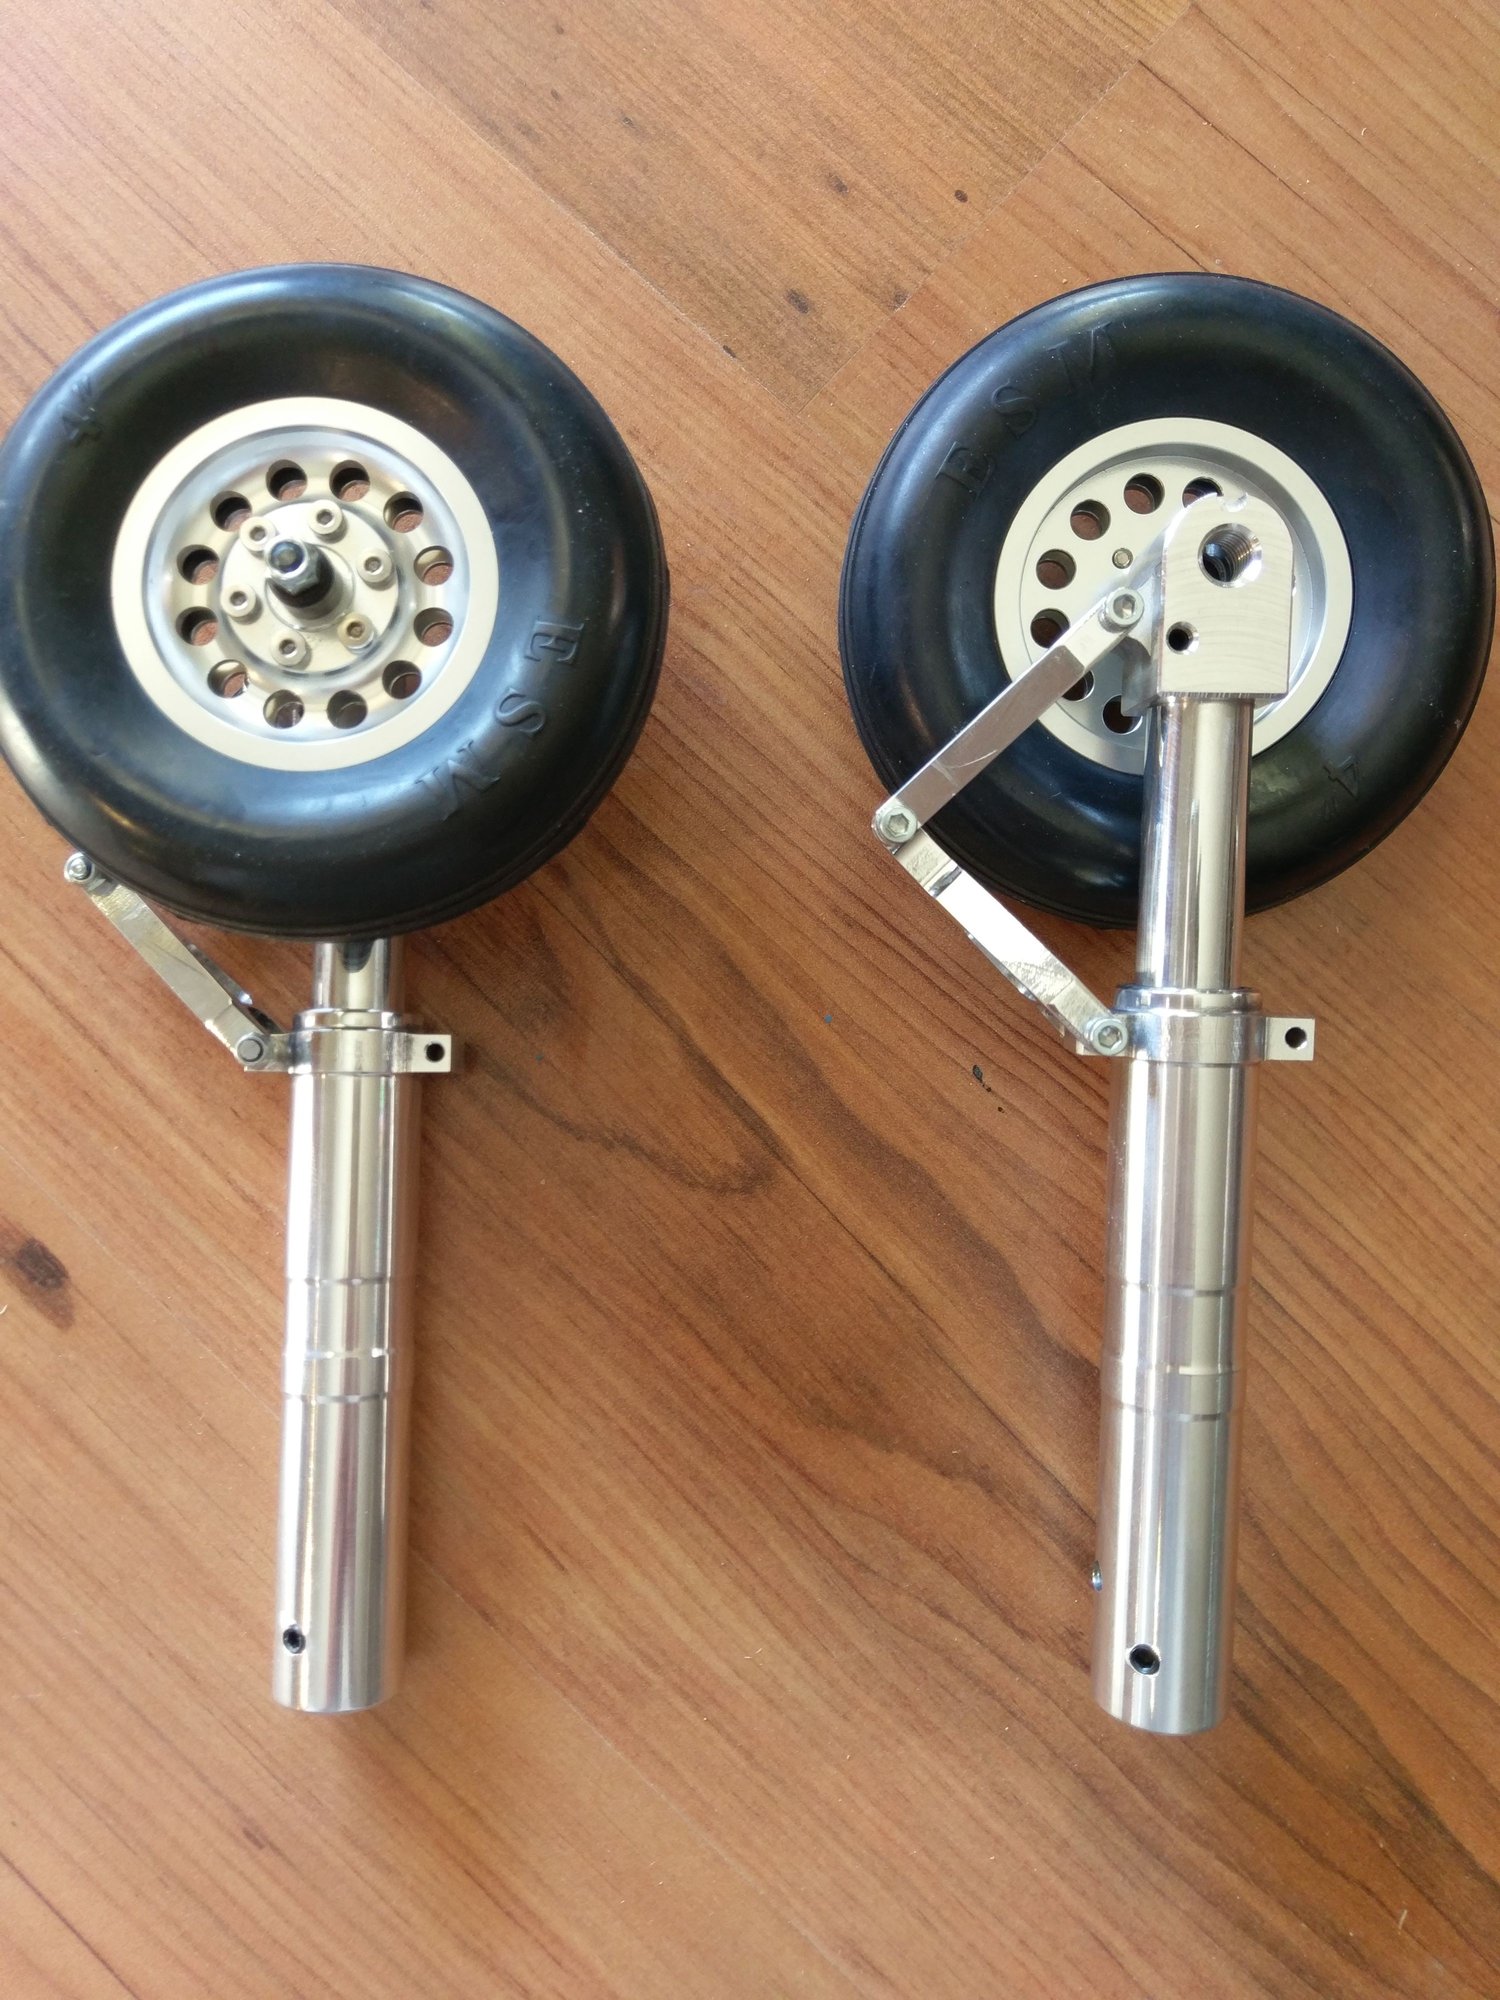
Oil damped struts
This is the first time I've installed lights. They were acquired from unilight.at in Austria, although I think Dreamworks is now an authorized retailer. I made some brass brackets for the lights to fit around the struts. At 4W with a reflector, they are very bright. The controller is very small and has several pre-programmed options/patterns.
I've not found any struts in the past that featured proper damping. The Robart and Prolink are just spring action. So I sourced these from Eurokitshop in Italy. They are fully machined, and have internal oil damping. The company actually adjusted the spring rate to match the projected weight of the CAP. They are wonderfully smooth with zero play.
Cut rectangular brass tube and silver solder = landing light mounting brackets
Landing lights with clamps
New lower durometer closed cell neoprene foam inserts
Assembled wheel with new bronze bushing reamed to 6mm
Oil damped struts


