Weeks Solution 70WS
 11-16-2020 | 12:44 PM
#51


Hang in there, looking good.
Another joke the Pappy told was one of our friends was making pilots. They DIDN'T look good. He was asked if he wanted one for his plane and his response was" I would rather put in a sweet potato than on of those"
Oh you could have heard a pin drop.
Another joke the Pappy told was one of our friends was making pilots. They DIDN'T look good. He was asked if he wanted one for his plane and his response was" I would rather put in a sweet potato than on of those"
Oh you could have heard a pin drop.
 11-16-2020 | 05:19 PM
#52

Working on the cockpit area is on the list of things to do also. That area of the fuse also looks like a weak spot of the fuse.
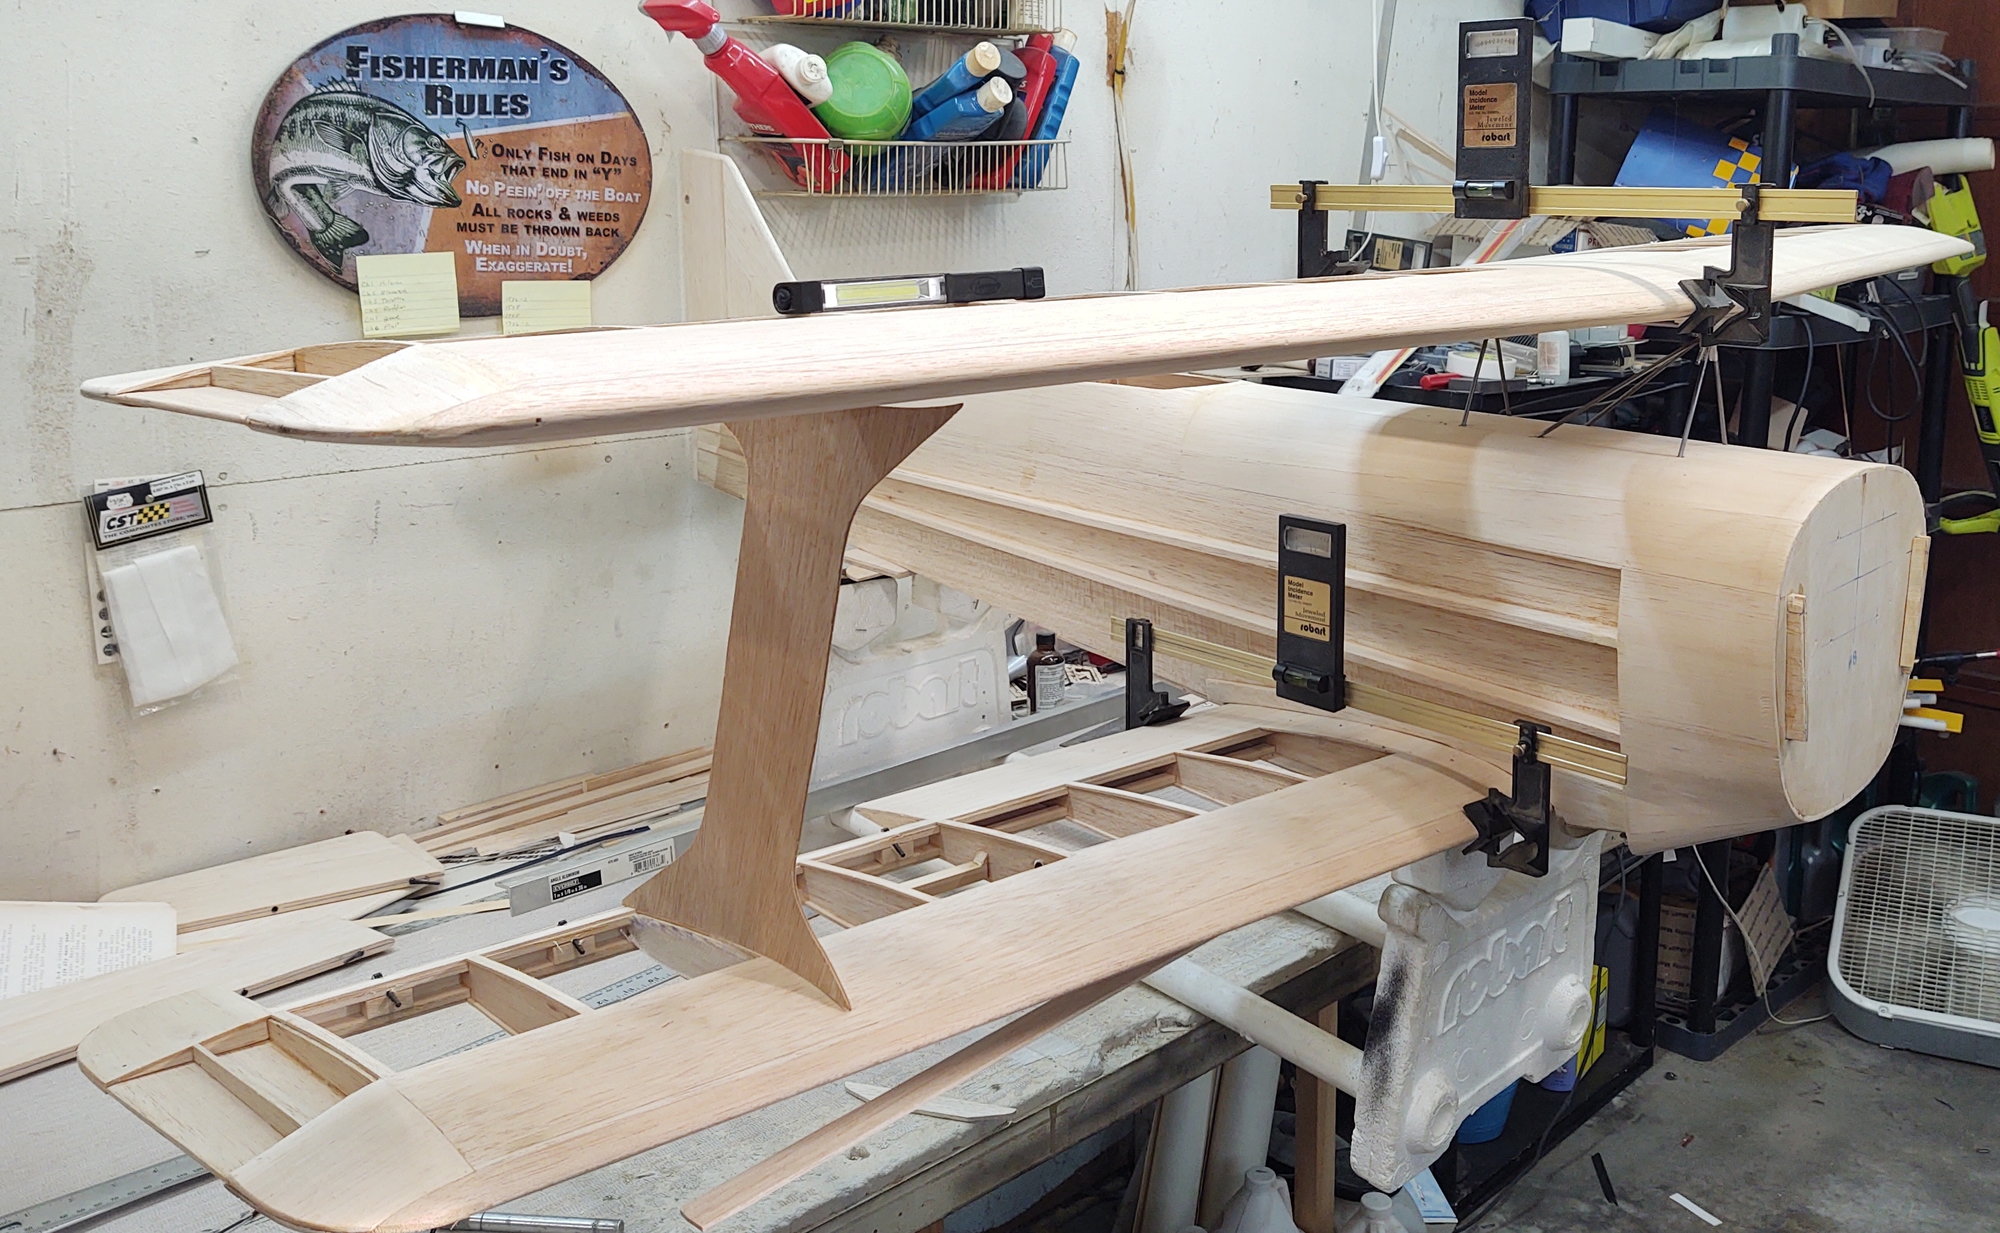
got the fuse leveled today and sat the lower wing on it and dang if it was 0deg The fire wall is 0 up/down but some how i got the firewall about 1/2 degree right. It is what it is now.
got the fuse leveled today and sat the lower wing on it and dang if it was 0deg
The fire wall is 0 up/down but some how i got the firewall about 1/2 degree right. It is what it is now.
 11-20-2020 | 04:42 AM
#55
Plan on getting the stabilizer set today and not sure exactly what to do here.
The print calls for 3/32 positive incidence and the article calls out 1-1/2 degrees positive. Don't want it flying with the tail to low or to high.
3/32in does not seem like its enough and 1-1/2 degree seems a little to much. Problem is ya get it wrong and your stuck with it pretty much!
The print calls for 3/32 positive incidence and the article calls out 1-1/2 degrees positive. Don't want it flying with the tail to low or to high.
3/32in does not seem like its enough and 1-1/2 degree seems a little to much. Problem is ya get it wrong and your stuck with it pretty much!
11-20-2020 | 05:23 AM
#56
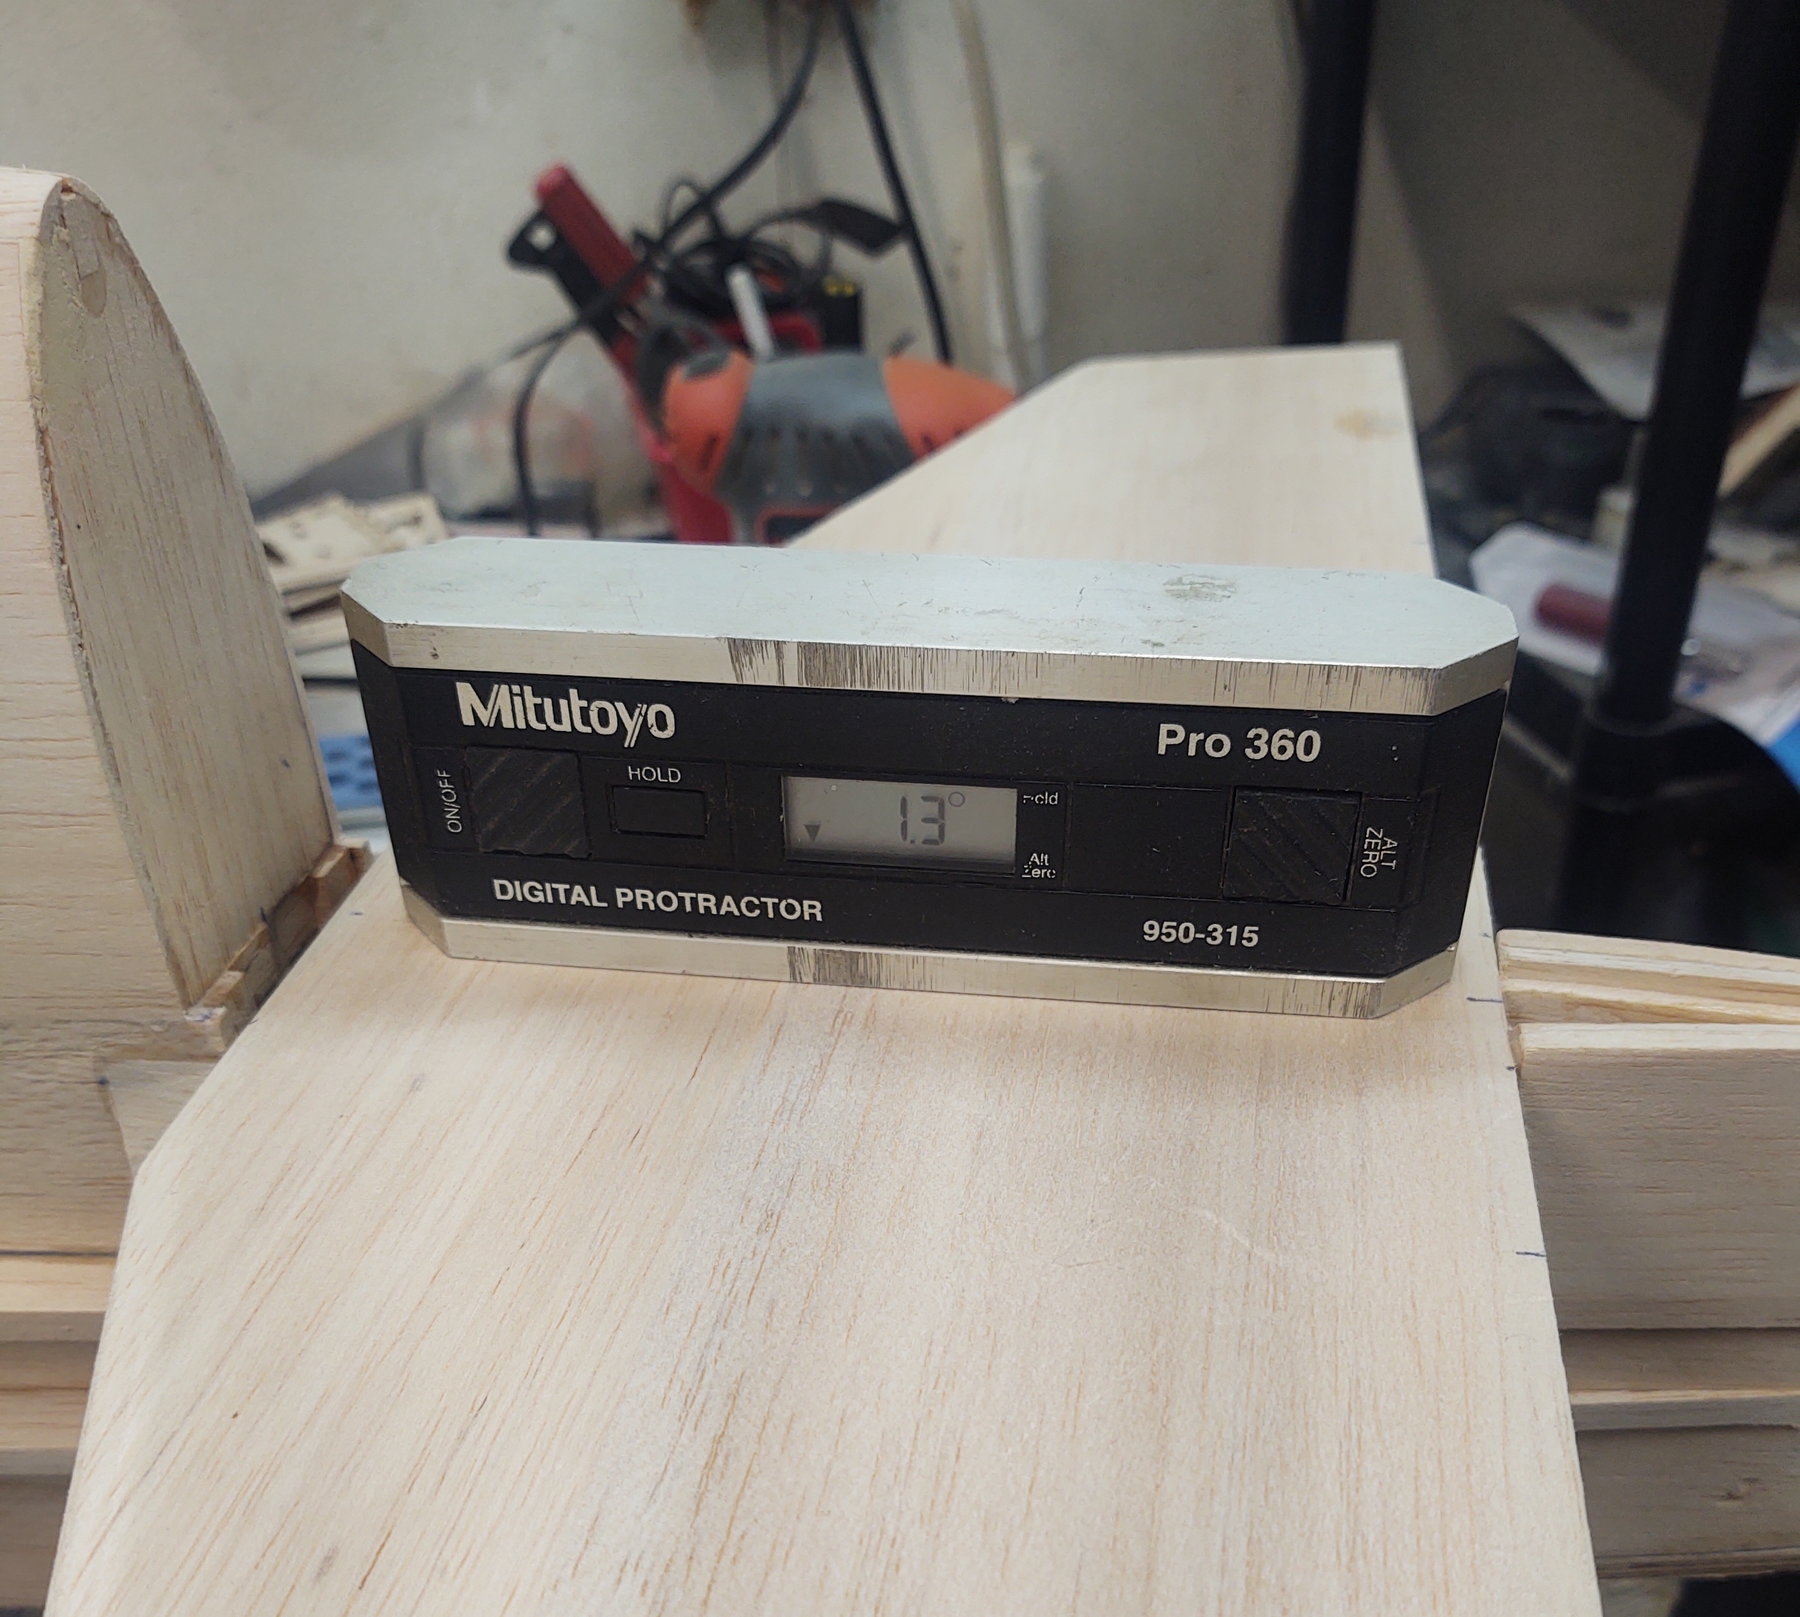
Figured it out! Set my protractor at 0deg once i knew where "0" was i slid a 3/32 drill bit under it and the measurement was 1.3deg
I don't believe .2 difference will make much a difference sense this is not rocket science and in our modeling world things are never truly perfect.
I don't believe .2 difference will make much a difference sense this is not rocket science and in our modeling world things are never truly perfect.
11-21-2020 | 06:20 AM
#59
Yes i set it at 1.3deg per print and can mount it at anytime now but decided to wait.
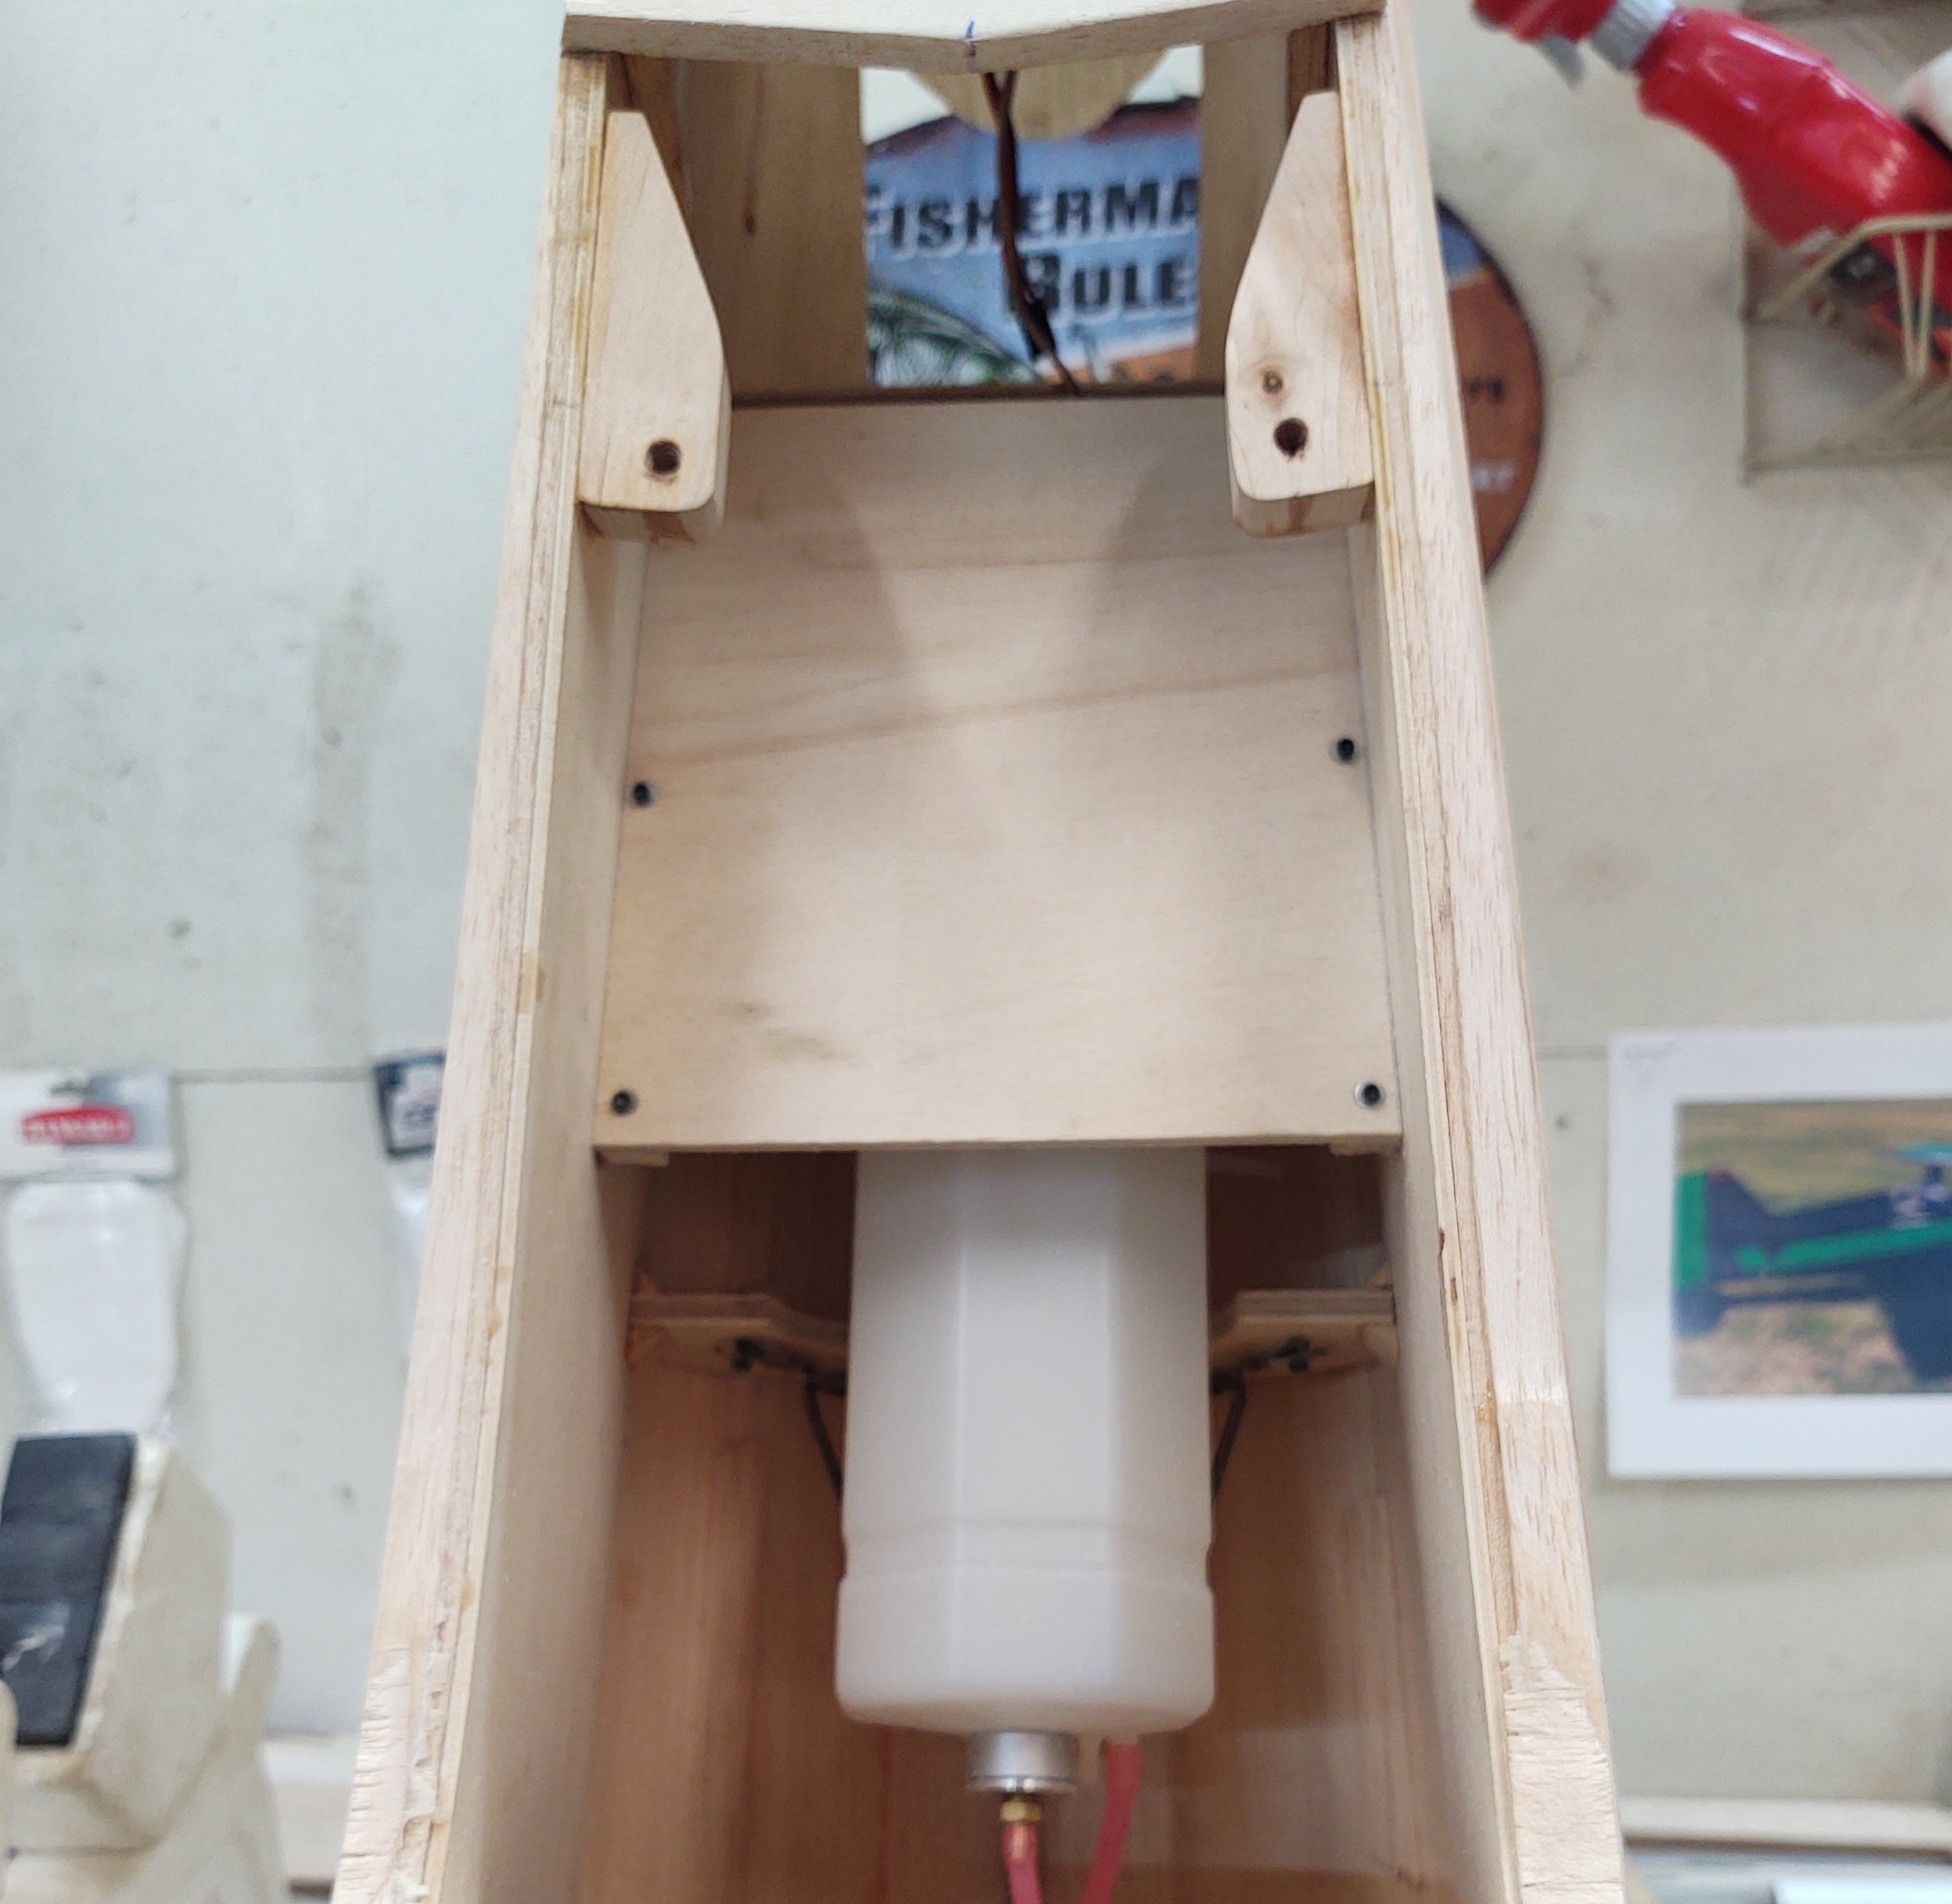
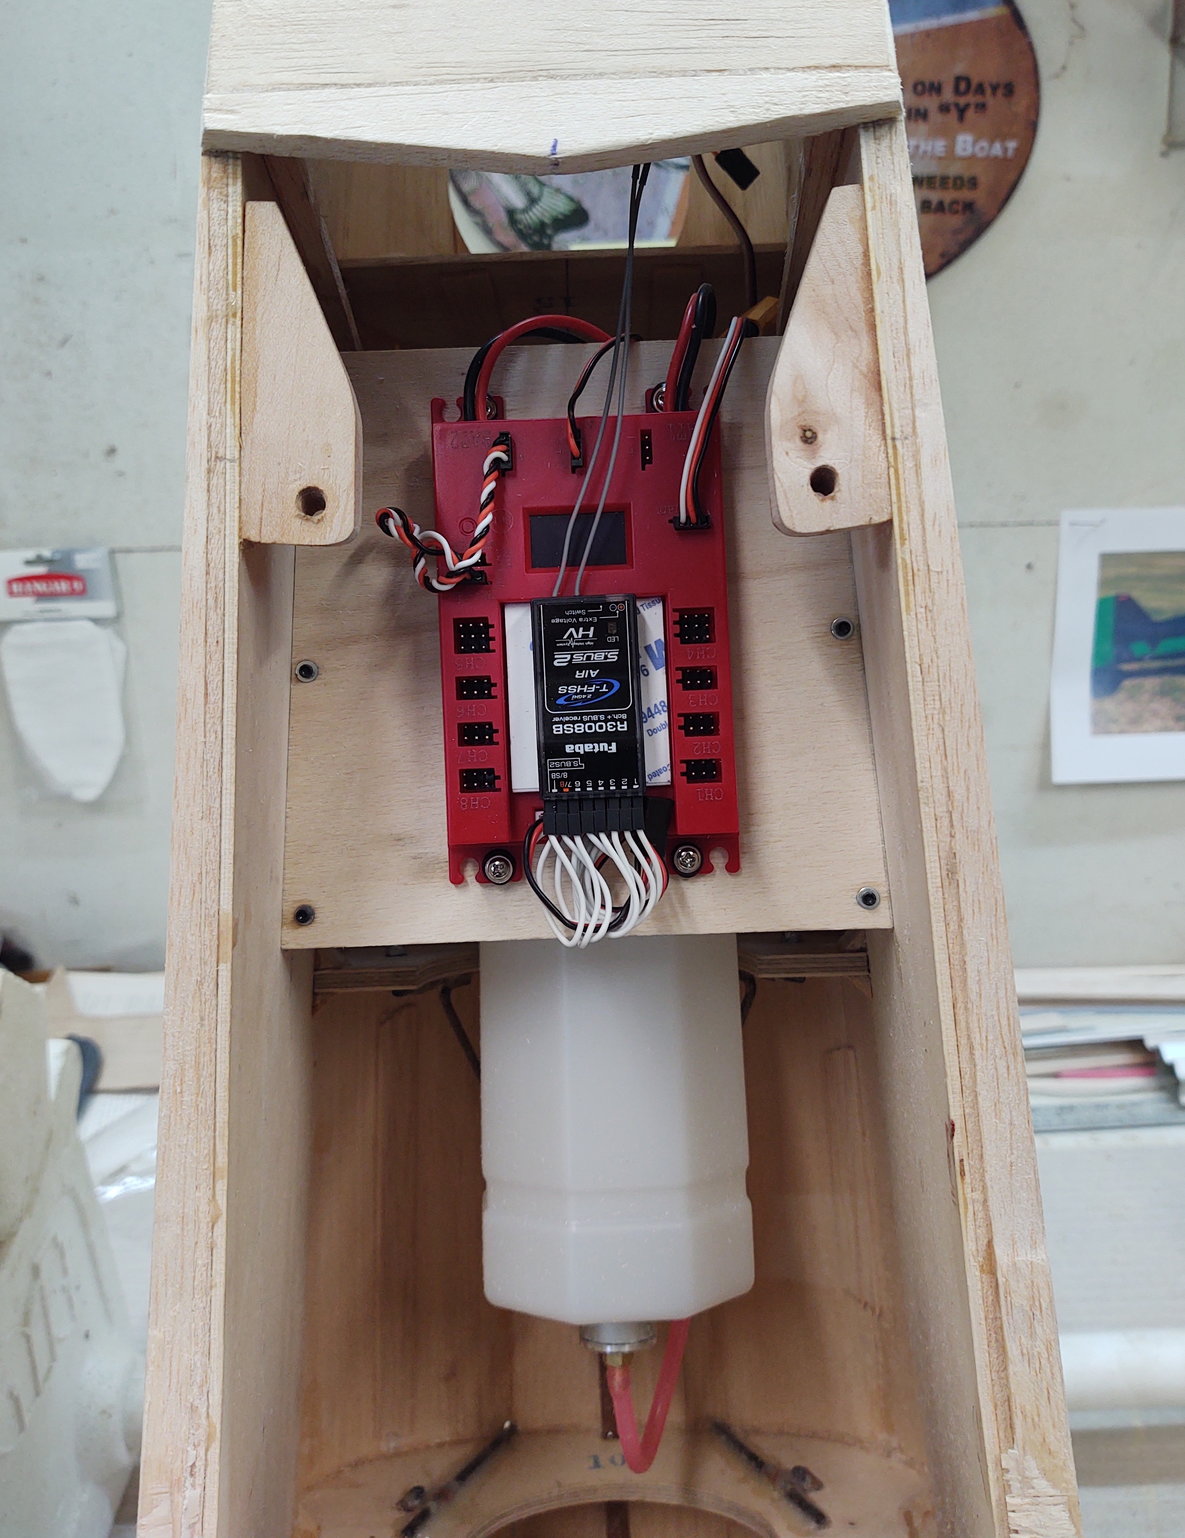
I need to get the internal structure figured out for mounting things to. Fuel tank, Smoke tank, Servos, Batteries all that kinda stuff.
Hmm maybe just get it built and worry about that stuff later but before covering. I need to stare at it a while and think.
I need to get the internal structure figured out for mounting things to. Fuel tank, Smoke tank, Servos, Batteries all that kinda stuff.
Hmm maybe just get it built and worry about that stuff later but before covering. I need to stare at it a while and think.
11-22-2020 | 10:39 AM
#60
Got the inside worked out in my head kinda
After taking hours to set readjust reset readjust measure and measure again one last time i finally fastened it down. When i glued it down it was perfect to the measurements. Now after all dry and secure it is askew by close to 1/16 in. No idea how that happened. I don't really think it will be noticeable. Might be able to fix it with some sanding of the long side if you think it would matter?.
Incidence is still good and well as being level with the airframe.
11-22-2020 | 11:01 AM
#61
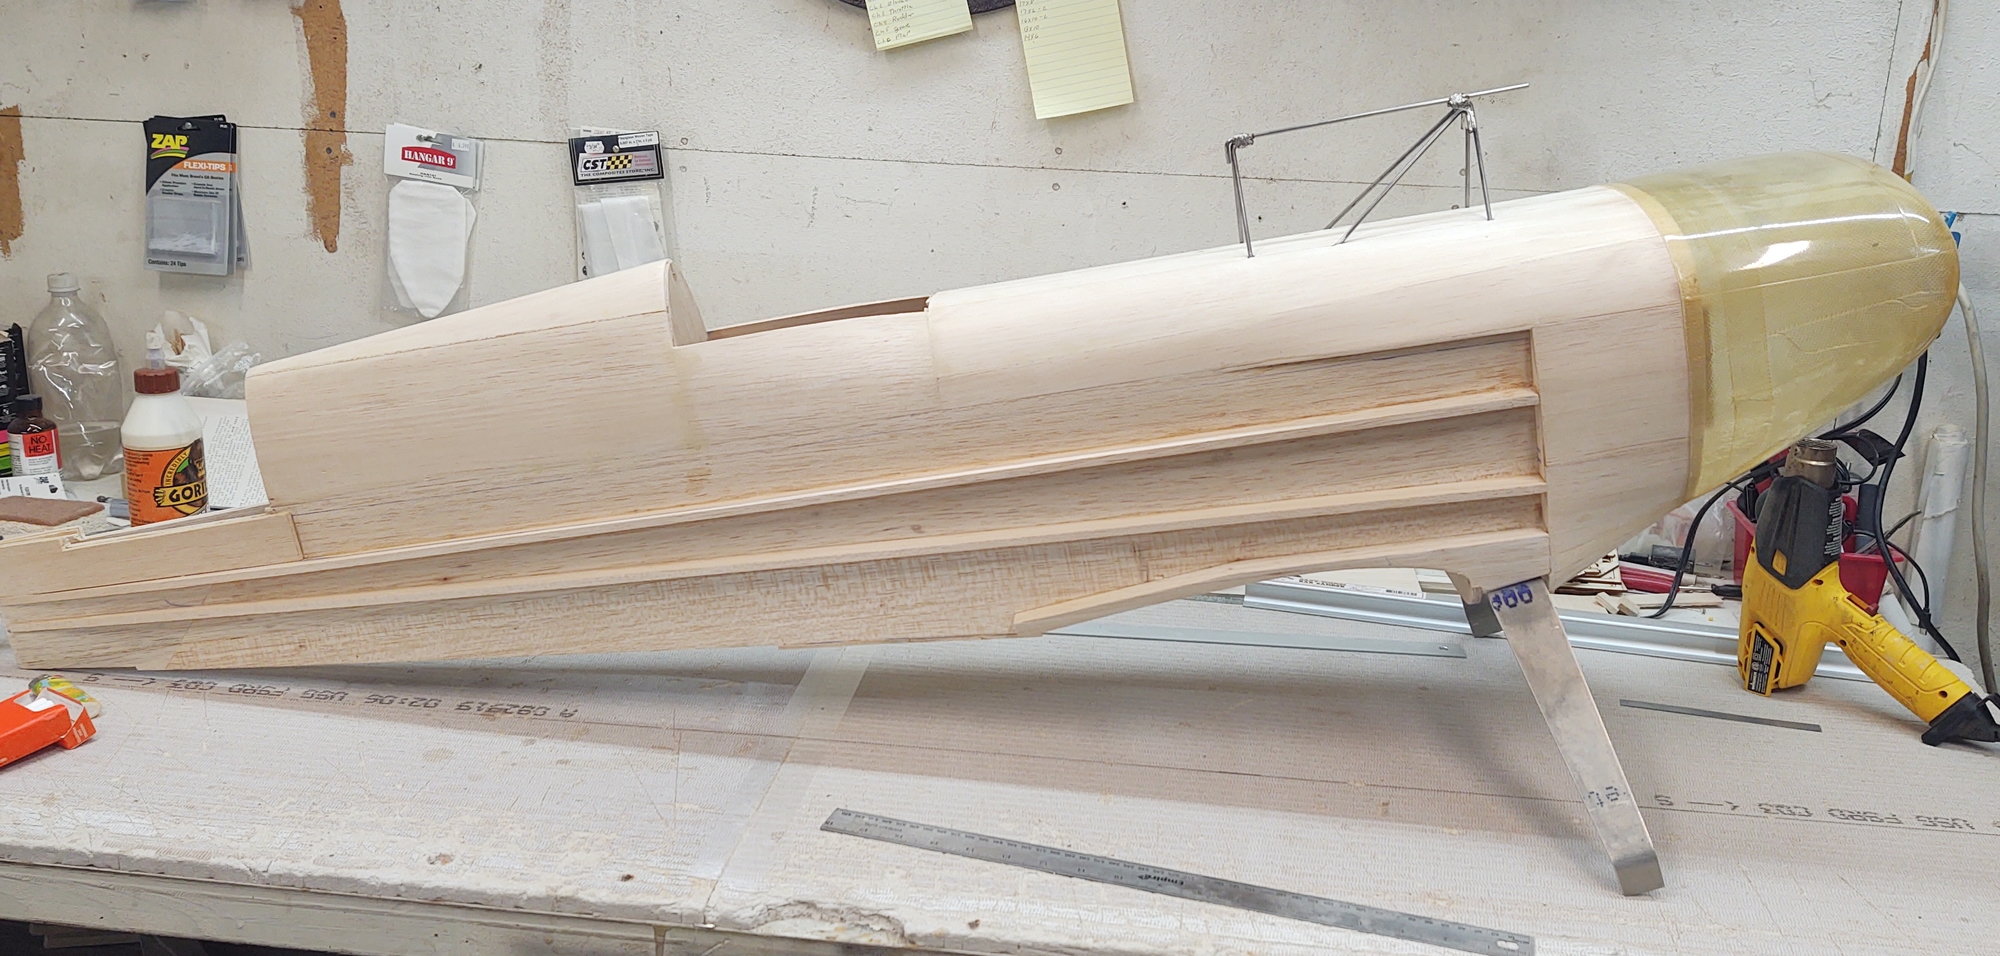
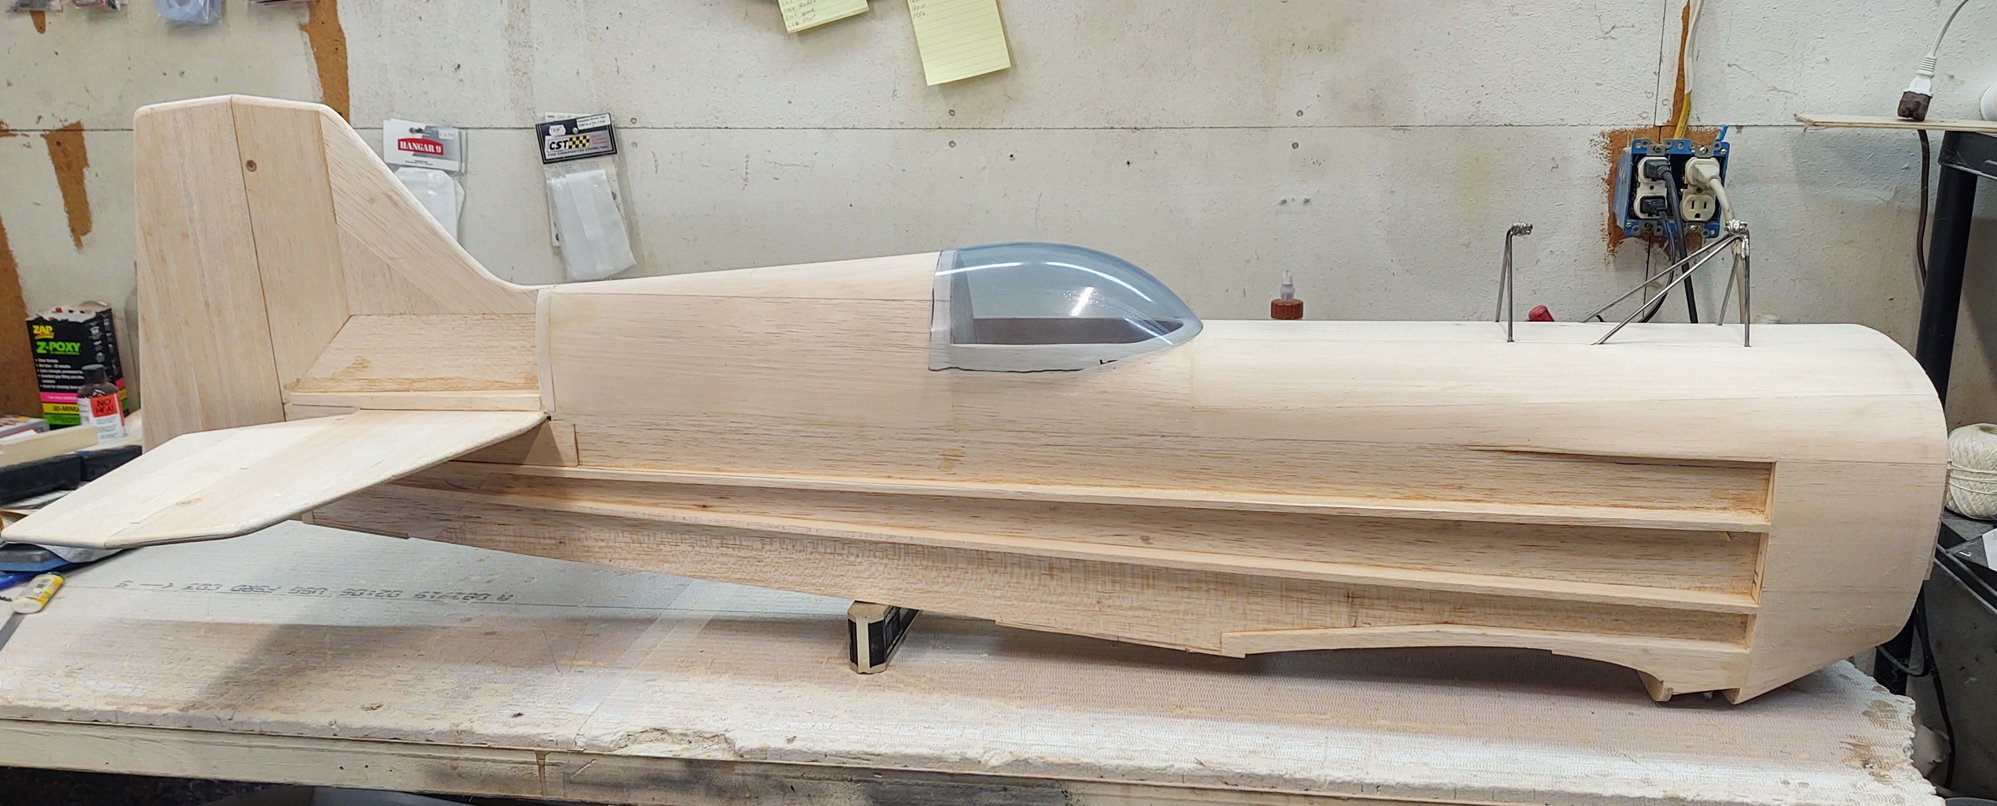
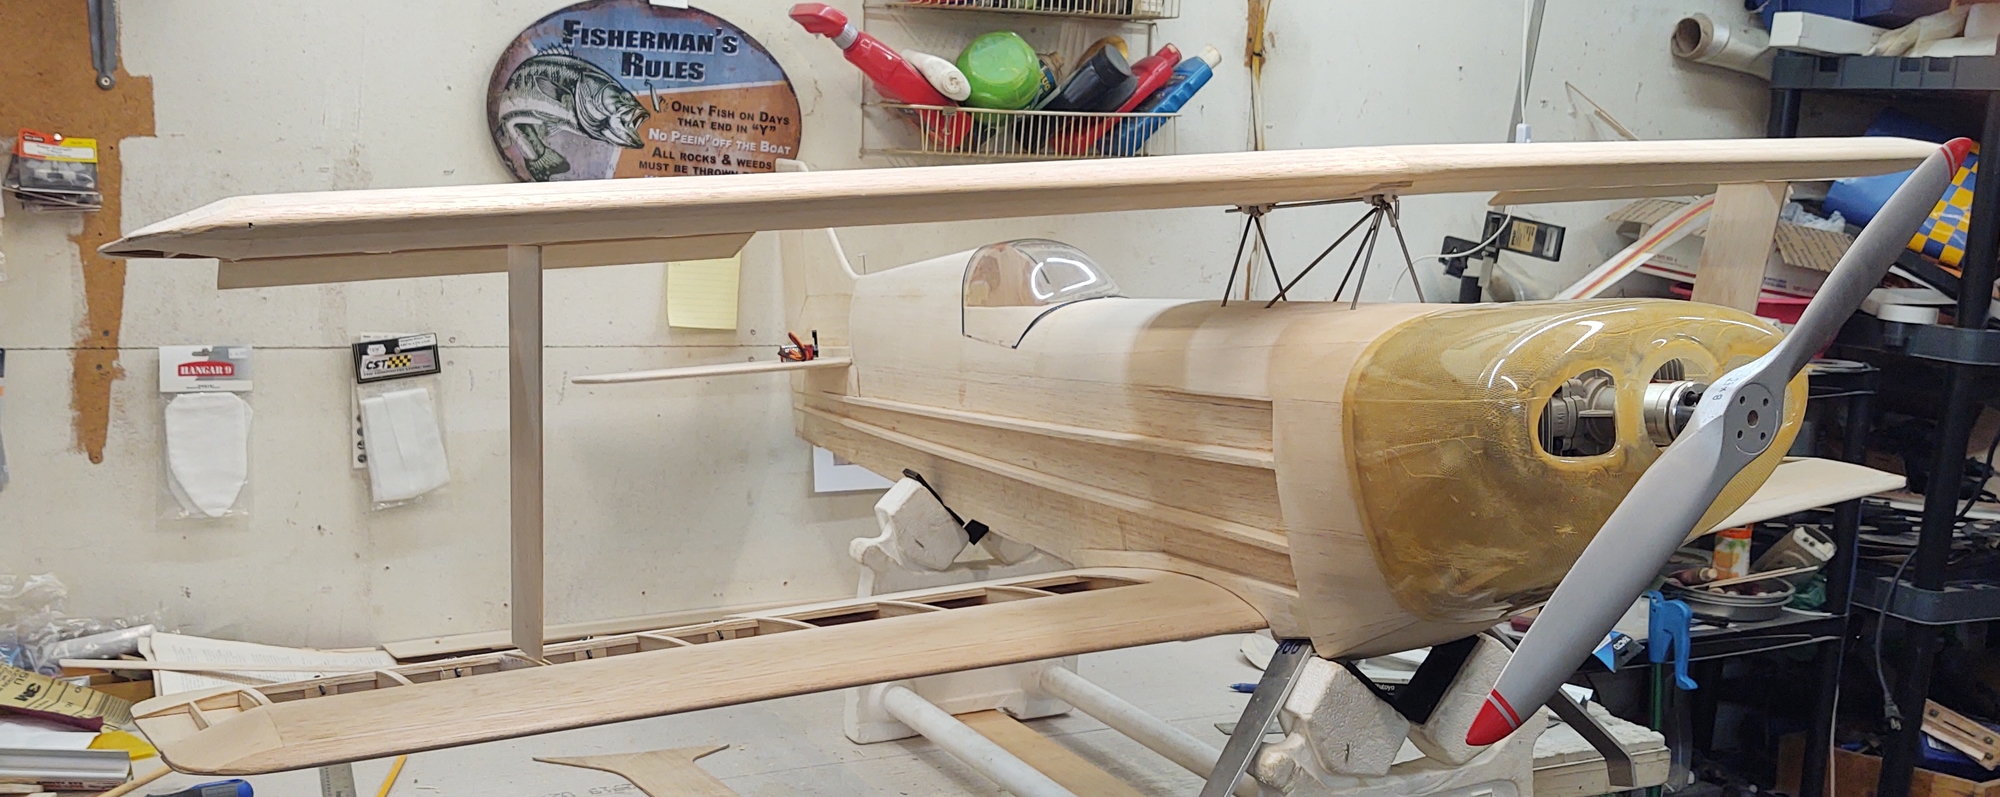
This is how she is looking presently
Still need to figure out the cockpit and how to get a pilot mounted in there.
Right now the wings weigh 1.5lbs each and the fuse weighs 3.15oz with nothing inside not even servo mounts.
Im thinking she should weigh around 15/17lbs when complete RTF?
Still need to figure out the cockpit and how to get a pilot mounted in there.
Right now the wings weigh 1.5lbs each and the fuse weighs 3.15oz with nothing inside not even servo mounts.
Im thinking she should weigh around 15/17lbs when complete RTF?
12-03-2020 | 03:09 PM
#62
Been slow going. Had back surgery couple weeks ago and thanksgiving really puts the kibosh on things so not a bunch to talk about but i have a few more things done.
Had some sheeting on the aft upper fuse that would not play right when trying to sand it to a smooth curve that i ended up removing it and replacing it a new section. MUCH better now and solid
Had some sheeting on the aft upper fuse that would not play right when trying to sand it to a smooth curve that i ended up removing it and replacing it a new section. MUCH better now and solid
12-03-2020 | 03:21 PM
#63
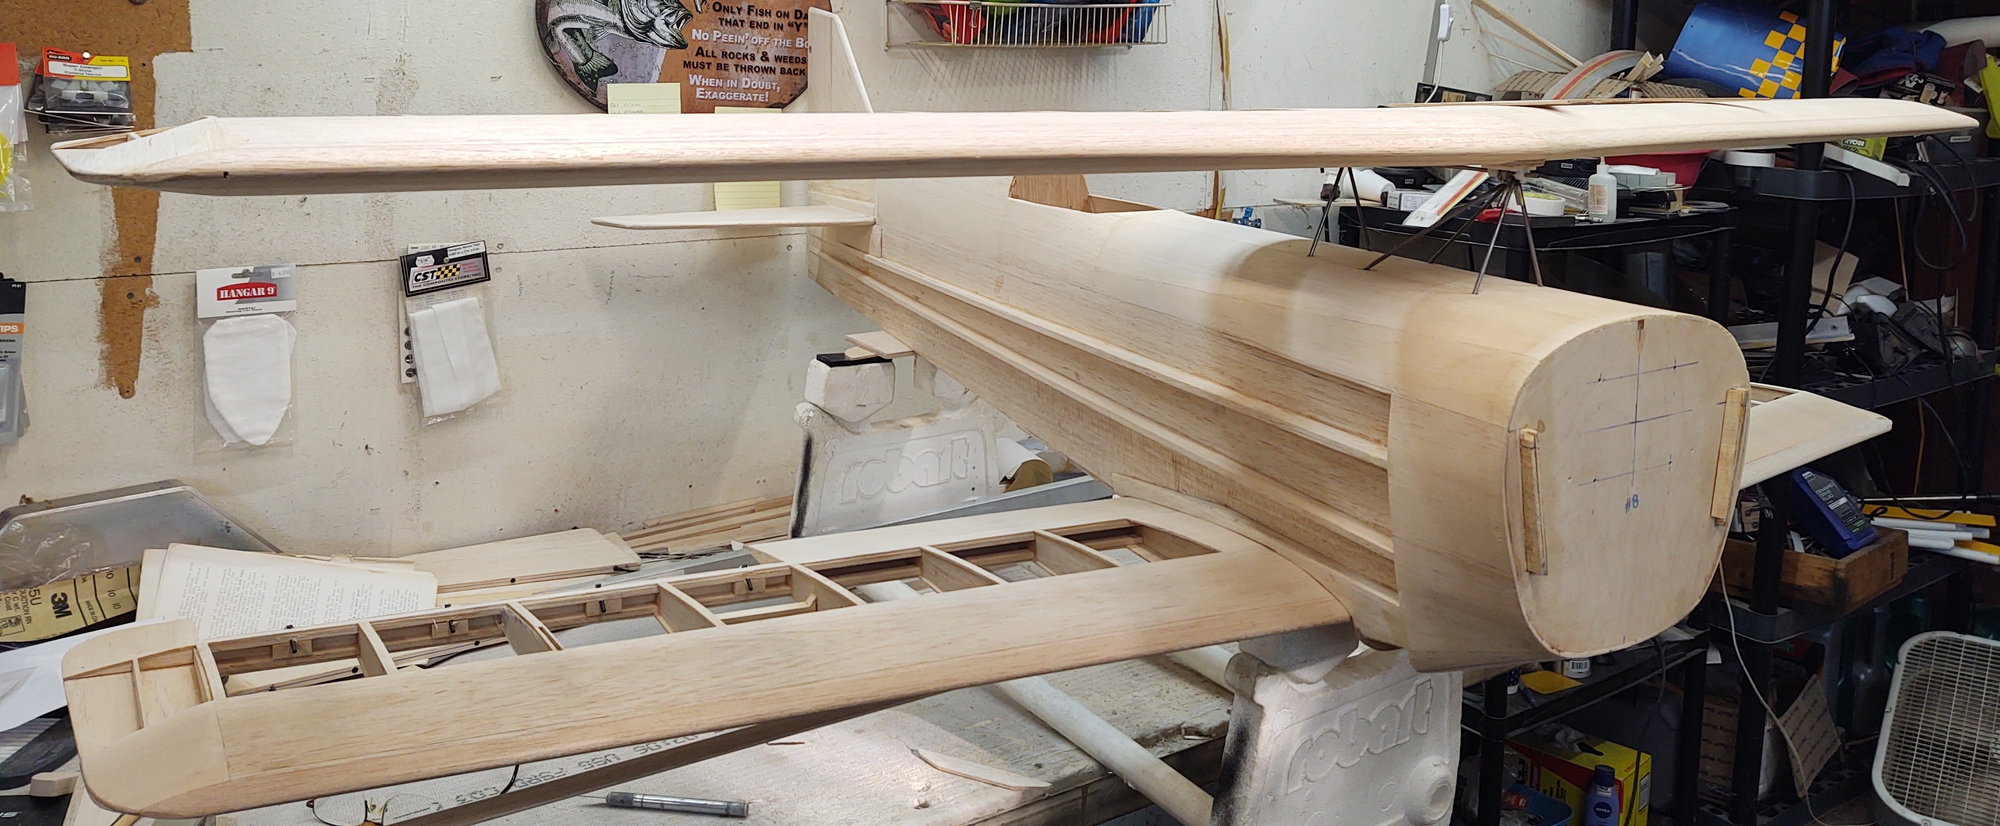
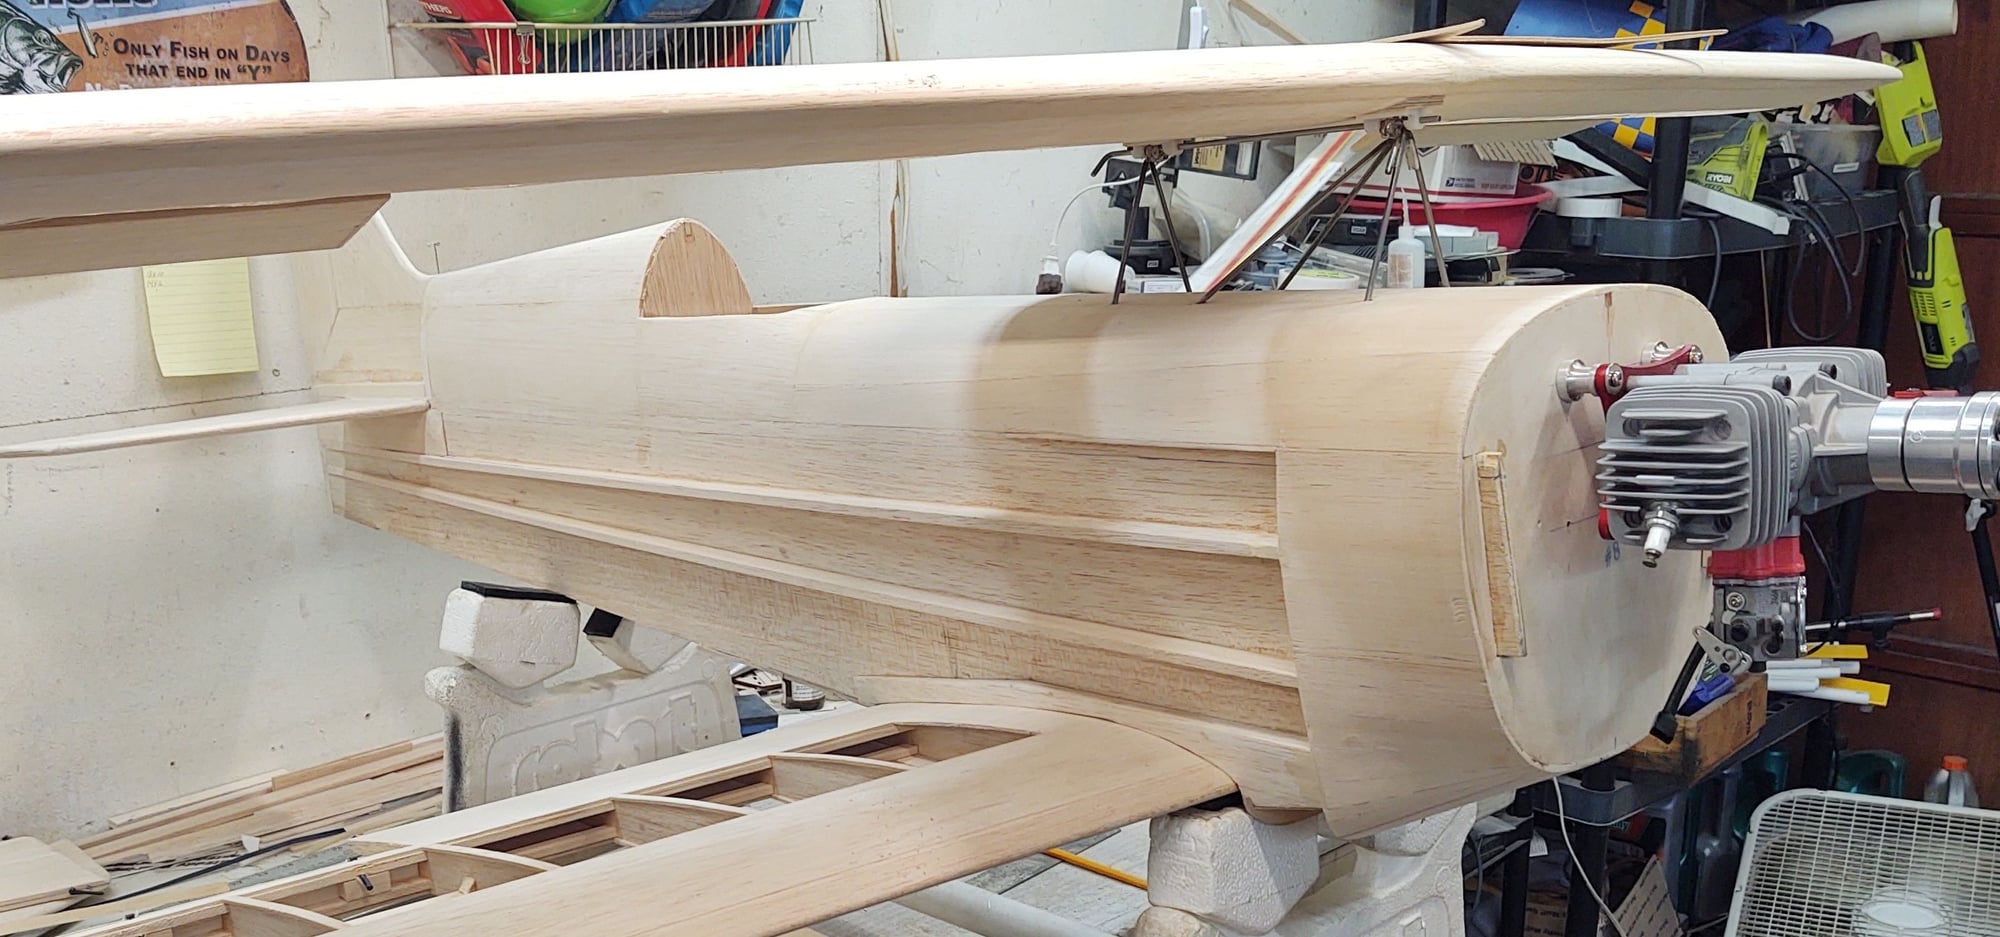
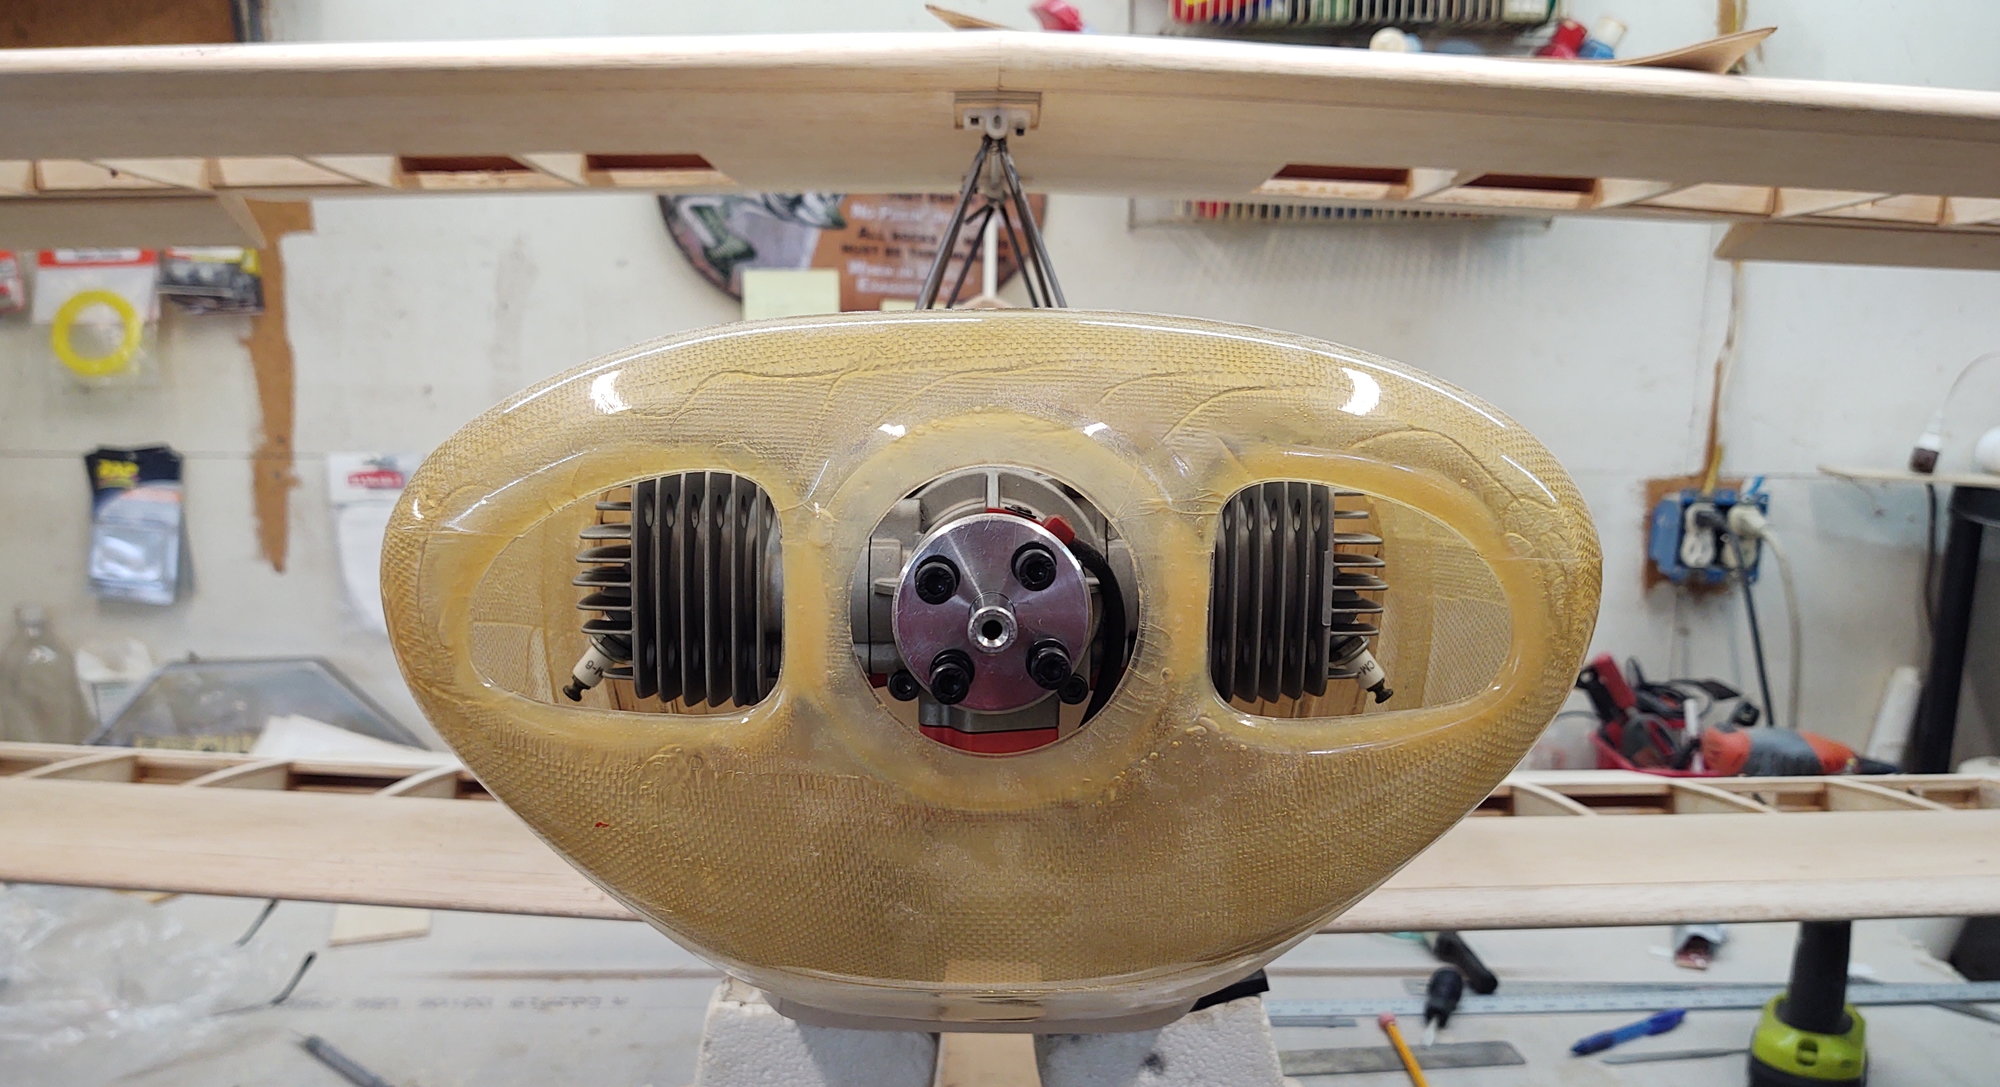
So among the other 1000 little odds and ends you don't think about taking a picture of I got the engine set in position and mounting holes drilled. Landing gear drilled and mounted, Lower wing drilled for the mounting dowels and 1/4x20 bolts and the top wing mounted.
With the fire wall at 0 deg both wings are set to as close to 0 deg as i could get. They are both within 1/16 deg of 0 near as i can tell. Messed with them both for hours before deciding close enough.
Sounds like alot but not really just a lil everyday mostly.
With the fire wall at 0 deg both wings are set to as close to 0 deg as i could get. They are both within 1/16 deg of 0 near as i can tell. Messed with them both for hours before deciding close enough.
Sounds like alot but not really just a lil everyday mostly.
12-03-2020 | 03:35 PM
#64
Got curious as to where the COG might be right now as she sits and what it was starting to weigh.
Had a buddy come over to gimme a hand as im restricted to 5 lbs or less for the next month. So as you see it now in the pics it was 10.5lbs and the COG is just slightly nose heavy. Still a lot of stuff the install on the inside but with the major structure done im pretty sire i will be able to fine tune the balance with the batteries and careful placement of the interior components. Well see if i get that lucky.
Ohya my 24OZ Rototank arrived so now i can start installing the interior. Needed that to start as it will be going in first on the COG and on the thrust line as its a perfect spot!
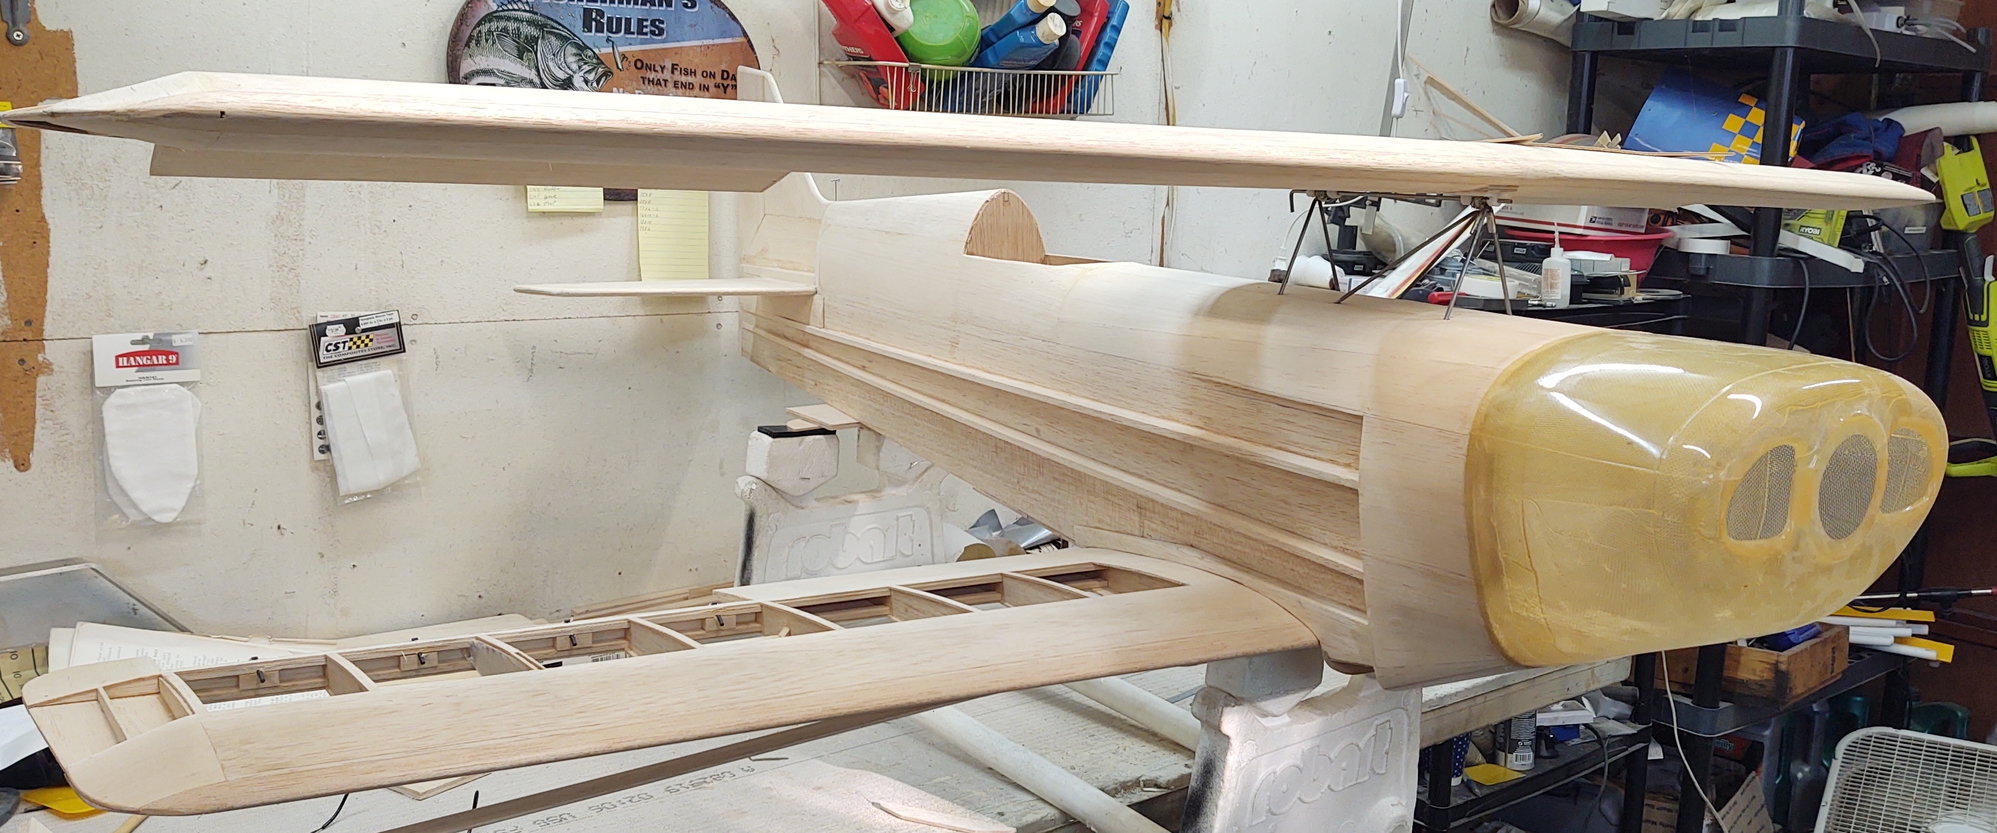
 12-04-2020 | 11:54 AM
#68
Guess i should add to that. The engine has a gallon run through it so far and it turns a 23X10 wood prop at 7400 RPM on a test stand and thats to high as the instructions say between 6100 to 7100.
Plan is the first few flights will be with a 24X10 wood prop till i know the ground handling then ill switch it to a 23x10ish 3 blade carbon fiber prop.
Plan is the first few flights will be with a 24X10 wood prop till i know the ground handling then ill switch it to a 23x10ish 3 blade carbon fiber prop.
12-06-2020 | 06:48 PM
#69
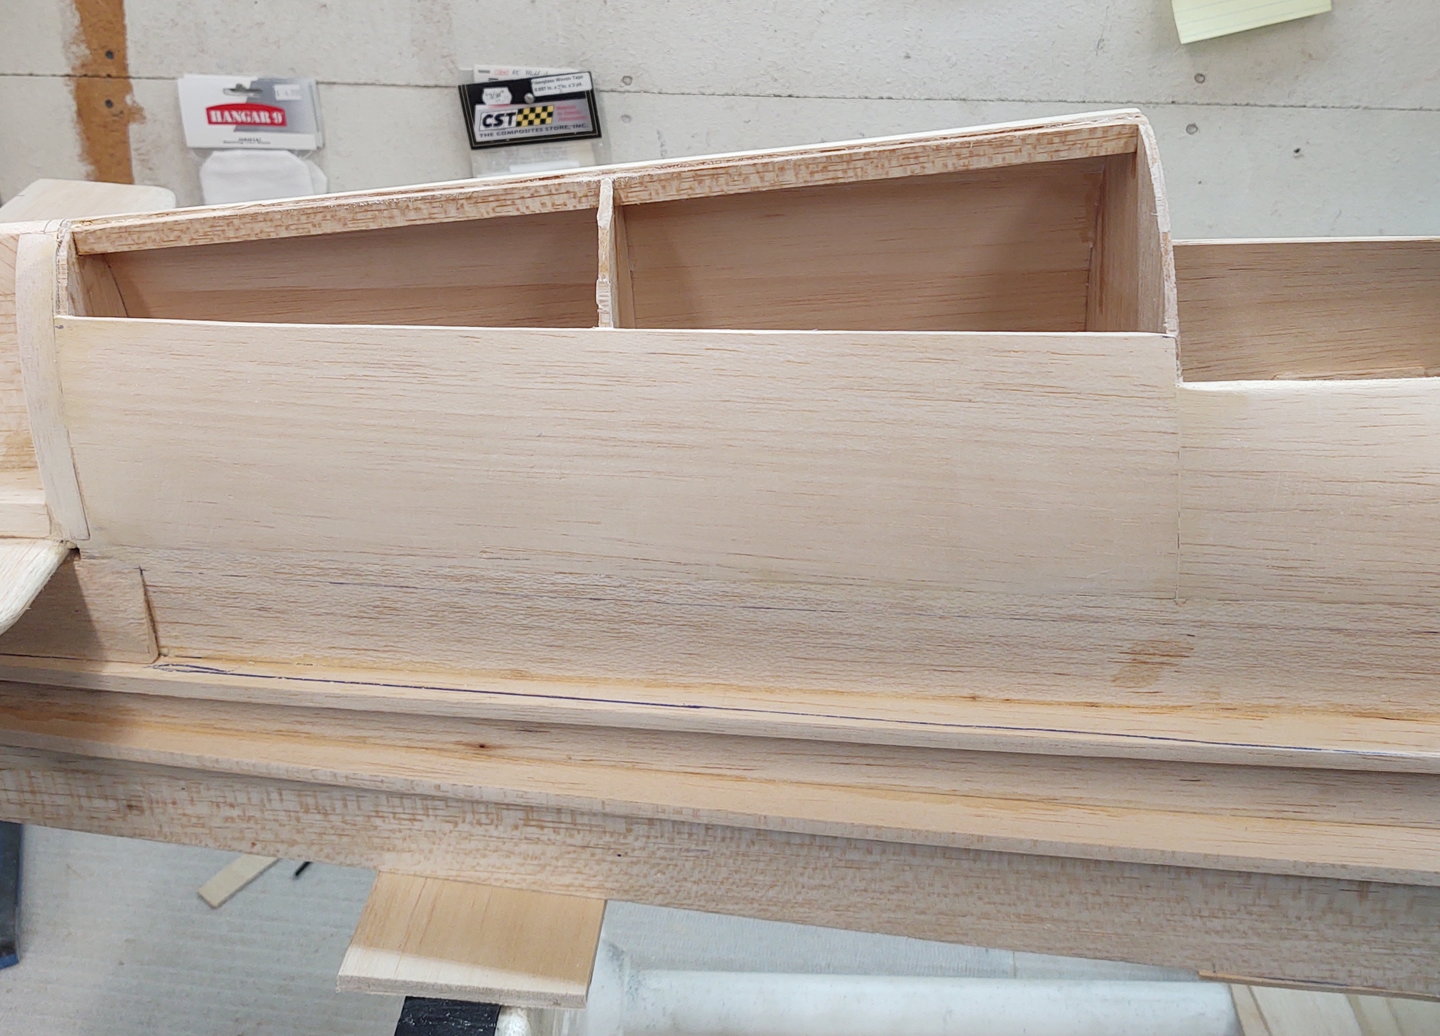
The servos for rudder/elevators are being mounted in the mid aft fuse section. I have tried to make them as near bullet proof as i know how because mounting them there makes for a small problem.
Option 1, if i sheet the bottom the servos will be covered and unreachable with out cutting it back open. Option 2 is make a hatch for accessibility but will loose some structural strength.
Personally im leaning toward sheeting the bottom.
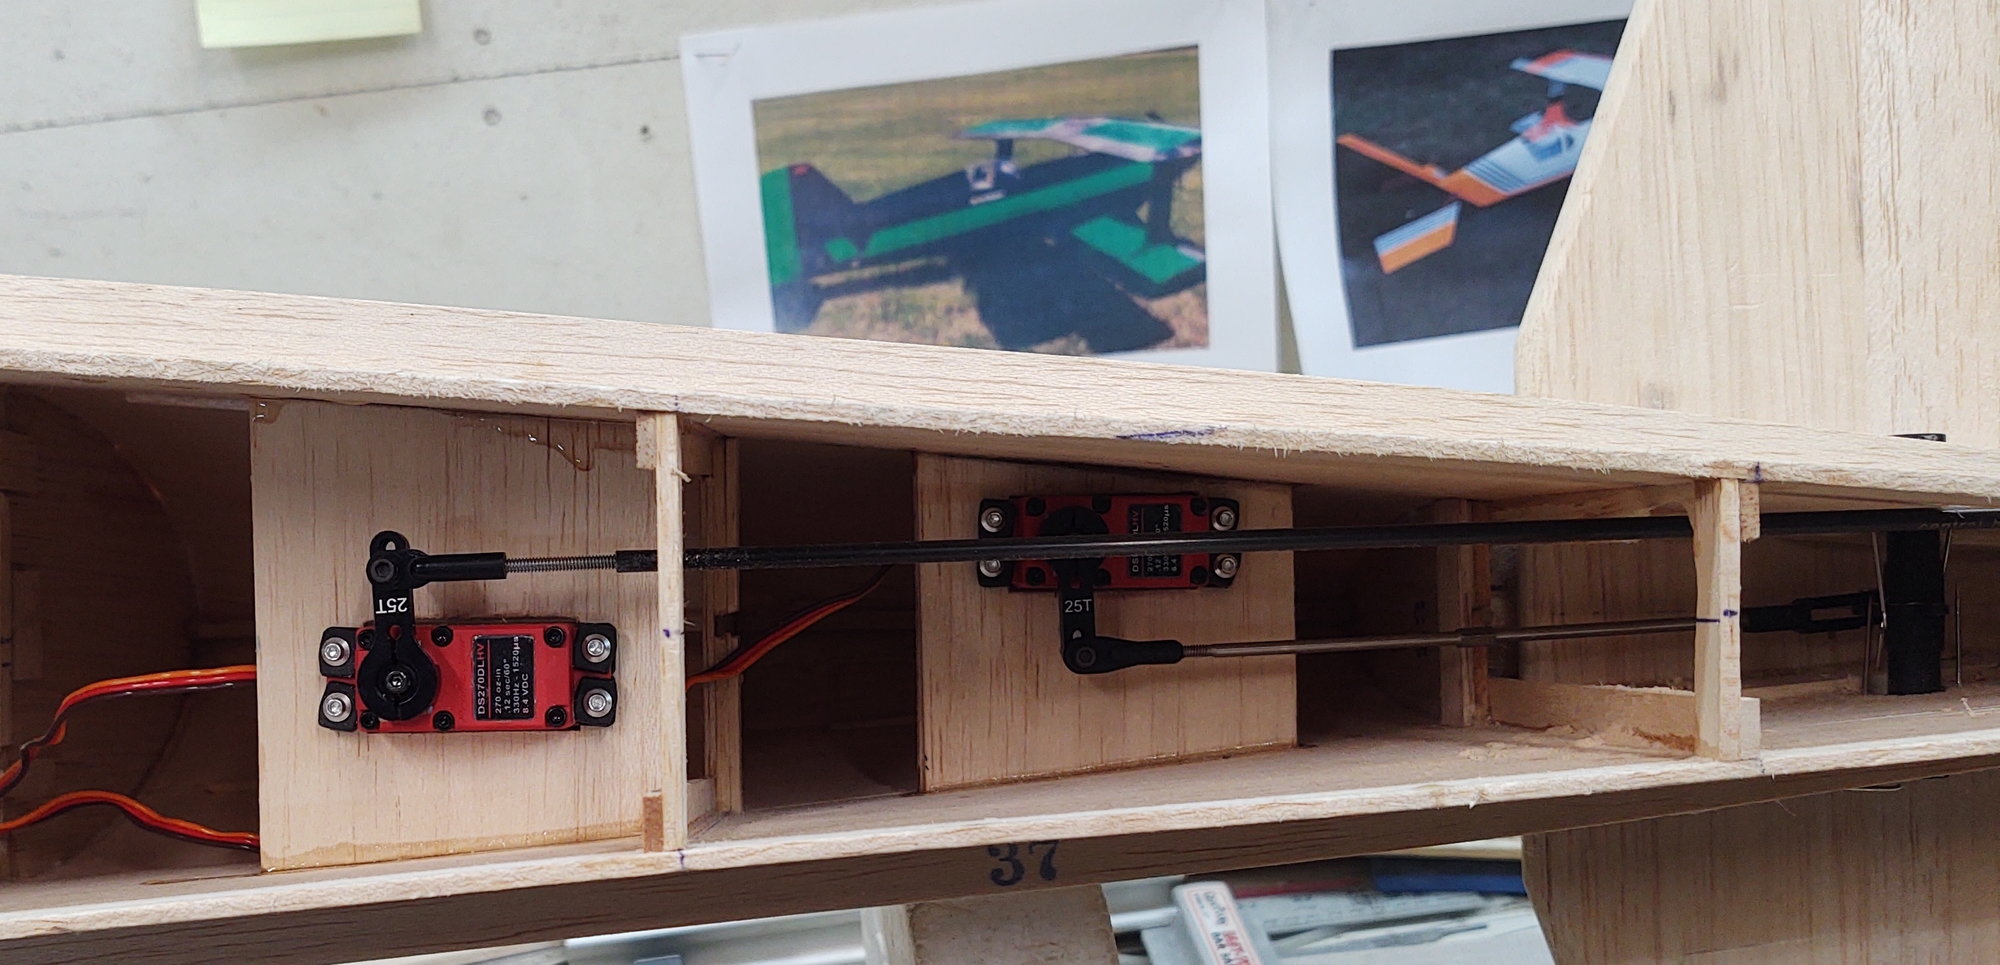

Option 1, if i sheet the bottom the servos will be covered and unreachable with out cutting it back open. Option 2 is make a hatch for accessibility but will loose some structural strength.
Personally im leaning toward sheeting the bottom.
12-11-2020 | 06:58 AM
#73
Well then you are about to find out what a mess it makes! I only had one plane with smoke, an Ohio RC Giles 300 with a GT 80, Bisson Mufflers. Made great smoke with a Sullivan smoke pump mixed with the throttle. It's been a while but I'm guessing there was 24 ounce of smoke fluid that lasted 3 to 4 minutes, the manual states a flow rate of 3 to 6 ounces per minute. Could have reduced the flow to make it last longer, but if you're going to smoke, may as well go all out!
12-11-2020 | 03:33 PM
#74
I have read some oils will make a bigger mess then others. I don't remember off hand what was considered the best but i will get it when the time comes. Im also getting a couple of the BadDog smoke oil nozzles. cleanup can't be worse then a rich running glow engine can it?