


Extra Extra V2 - Build thread and showcase
 03-10-2009, 10:43 AM
#26
Senior Member
Join Date: Jul 2006
Location: Charlottesville,
VA
Posts: 723
Likes: 0
Received 0 Likes
on
0 Posts
It's virtually ready to fly. Just need to plug up the RX and set up the radio.....less than an hour, I'd estimate. The problem is time. I may not be able to touch it until some time next week.  Maybe something will change and I can sneak away for a few hours.
  I hardly ever have anyone to fly with, so camera operators are at a premium. After seeing the results of our buddy Wulf, however, I came up with a "helmet cam". I drilled a hole through the top of a hard hat, fit a bolt through it that matches the tripod mount on my camera and tightened it down. I think it might work. At the very least, it will be funny to watch, if not useful in evaluating the plane. I used some big fender washers with coarse sandpaper to keep the camera from spinning around. I was afraid to over-tighten the bolt and strip out the socket.
edited to add pic.

Maybe something will change and I can sneak away for a few hours. I hardly ever have anyone to fly with, so camera operators are at a premium. After seeing the results of our buddy Wulf, however, I came up with a "helmet cam". I drilled a hole through the top of a hard hat, fit a bolt through it that matches the tripod mount on my camera and tightened it down. I think it might work. At the very least, it will be funny to watch, if not useful in evaluating the plane. I used some big fender washers with coarse sandpaper to keep the camera from spinning around. I was afraid to over-tighten the bolt and strip out the socket.edited to add pic.

 03-13-2009, 04:29 PM
#28
Member
Thread Starter
My Feedback: (2)

Join Date: Sep 2003
Location: Sellersburg,
IN
Posts: 83
Likes: 0
Received 0 Likes
on
0 Posts
Wow the motor and plane look too nice and new to fly[>:] Grats Erik. Looks killer. Btw, how much lighter do you think the Doculum is over say Ultracote light?
Also can't wait to see how the helmet cam turns out. I like the idea!
Also can't wait to see how the helmet cam turns out. I like the idea!
03-13-2009, 07:06 PM
#29
Senior Member
Join Date: Jul 2006
Location: Charlottesville,
VA
Posts: 723
Likes: 0
Received 0 Likes
on
0 Posts
ORIGINAL: guinnb
Wow the motor and plane look to nice and new to fly[>:] Grats Erik. Looks killer. Btw, how much lighter do you think the Doculum is over say Ultracote light?
Also can't wait to see how the helmet cam turns out. I like the idea!
Wow the motor and plane look to nice and new to fly[>:] Grats Erik. Looks killer. Btw, how much lighter do you think the Doculum is over say Ultracote light?
Also can't wait to see how the helmet cam turns out. I like the idea!
Thanks Brian.
Auger did a detailed analysis of the weights of various covering, including Doculam. I have the notes somewhere. It's on the other site, but I can't remember where. I'll see if I can find it.
05-29-2009, 11:36 AM
#31
Member
Thread Starter
My Feedback: (2)
Join Date: Sep 2003
Location: Sellersburg,
IN
Posts: 83
Likes: 0
Received 0 Likes
on
0 Posts
For those that haven't heard or seen this yet we are hosting a Pro Bro Event in the Louisville area on June 12-14th. As part of that event I am building an EEV2 as a raffle prize to generate funds for our local club. If you're interested here's the raffle information:
The plane pic is of the intended covering scheme. Plan is to begin covering on Monday.
Also note that the plane will be built ready for you to mount your gear and motor. If arranging delivery is a problem (shipping is not an option) or you can't pick it up at the event I can arrange to have a kit shipped to the winner for he/she to build instead.
I am also emailing pictures of ppl's actual tickets so they can have a record of their ticket numbers (assuming they are not local or attending the event).
Brian
06-02-2009, 04:12 PM
#32
Member
Thread Starter
My Feedback: (2)
Join Date: Sep 2003
Location: Sellersburg,
IN
Posts: 83
Likes: 0
Received 0 Likes
on
0 Posts
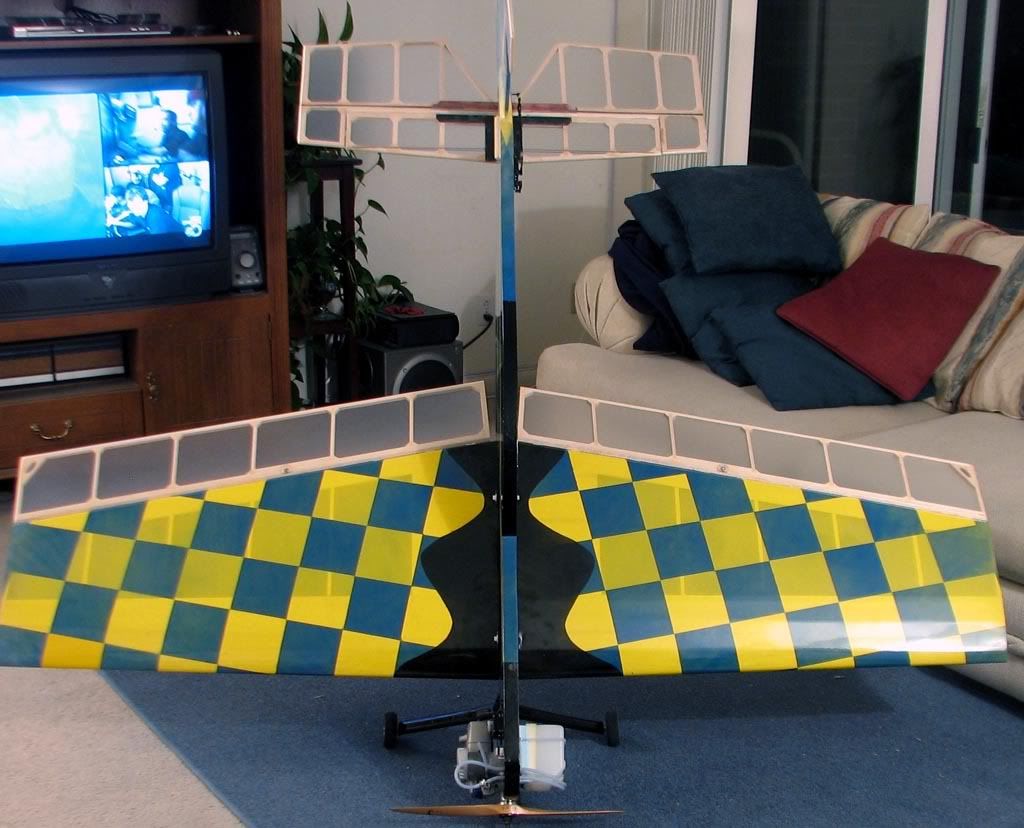
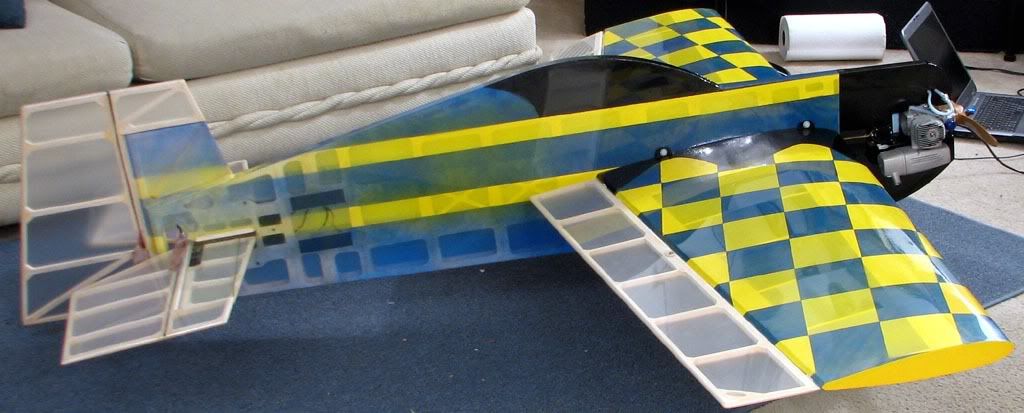
Here's a couple shots of Conkster's new EE. Man I love the looks of this one!
Great job Conk! Making Great Progress!
Great job Conk! Making Great Progress!
06-11-2009, 10:18 AM
#33
Member
Thread Starter
My Feedback: (2)
Join Date: Sep 2003
Location: Sellersburg,
IN
Posts: 83
Likes: 0
Received 0 Likes
on
0 Posts
Here's a picture of the EE raffle plane in ARF form. Just have to finish the ailerons by Saturday and it's ready to go.
Get your tickets (if you're not in person) before tomorrow night at midnight as I'll be at the field all day Saturday and won't be able to accept any more online tickets.
Thanks,
Brian
Get your tickets (if you're not in person) before tomorrow night at midnight as I'll be at the field all day Saturday and won't be able to accept any more online tickets.
Thanks,
Brian
06-21-2009, 09:25 PM
#34
Member
Thread Starter
My Feedback: (2)
Join Date: Sep 2003
Location: Sellersburg,
IN
Posts: 83
Likes: 0
Received 0 Likes
on
0 Posts
Grats go to D. Scott (a local club member) for winning the EE V2plane. He, as an incredibly gracious act, then had the plane auctioned off and the proceeds given back to the club! What a stand up guy!
Can't wait to see this one in the air!
Brian
Can't wait to see this one in the air!
Brian
08-10-2009, 10:24 AM
#35
Member
Thread Starter
My Feedback: (2)
Join Date: Sep 2003
Location: Sellersburg,
IN
Posts: 83
Likes: 0
Received 0 Likes
on
0 Posts
Check this out... PBAndy goes E-power on the EEV2! He still has prop stuff to work out as this prop was a gasser prop but it's looking real good!
http://www.youtube.com/watch?v=YQtuJTbHGfw
Great job Andy and CFA for a great E-Power setup!
http://www.youtube.com/watch?v=YQtuJTbHGfw
Great job Andy and CFA for a great E-Power setup!
08-18-2009, 05:37 PM
#37
Member
Thread Starter
My Feedback: (2)
Join Date: Sep 2003
Location: Sellersburg,
IN
Posts: 83
Likes: 0
Received 0 Likes
on
0 Posts
ORIGINAL: wessco
There will be a new video of an Extra, Extra...posted some time this weekend..powered by an OS 1.60
There will be a new video of an Extra, Extra...posted some time this weekend..powered by an OS 1.60
How about a few pictures in the mean time! Haven't seen it all put together yet....
08-18-2009, 05:40 PM
#38
Senior Member
My Feedback: (7)
Join Date: Apr 2005
Location: Summerville,
GA
Posts: 493
Likes: 0
Received 0 Likes
on
0 Posts
Flies great. Can't put a video here, as the link has the Profile Brother Hood in it. pictures...uhhh...let me find one!
08-21-2009, 09:24 AM
#40
Member
Thread Starter
My Feedback: (2)
Join Date: Sep 2003
Location: Sellersburg,
IN
Posts: 83
Likes: 0
Received 0 Likes
on
0 Posts
Here's your maiden video Wess. I put it up on YT but they will likely cut the sound due to the music....
http://www.youtube.com/watch?v=YXHyK_ueq-A
http://www.youtube.com/watch?v=YXHyK_ueq-A
11-09-2009, 01:12 PM
#43
Member
Thread Starter
My Feedback: (2)
Join Date: Sep 2003
Location: Sellersburg,
IN
Posts: 83
Likes: 0
Received 0 Likes
on
0 Posts
Note the vertical stab update below before beginning your build.
ORIGINAL: guinnb
Once the glues are set (you should be around 1 hour to this point, maybe less) dry fit the other side to this one. You may have to fit some tabs or slots depending on how well you assembled the fuse. Don't worry here. As long as there is a good glue joint at each tab you'll be fine. The main alignment, again, comes from the dowels and tail alignment holes. Also be sure to dry fit the wing tube socket (phenolic tube).
Once you're happy with the fit (be sure it goes on and off fairly easily) add glue to the wing and tail saddles, wing tube to saddle areas (poly, foam safe CA, or epoxy), motor mounts, to the tail and wing tube areas as needed (poly glue), the formers, and assemble the side. Use a slow setting glue as you need a little time to get the glue where you need it. Be sure to keep the glue out of the front and rear anti rotation pin holes (3/8'' holes on the wing centerline), the wing tube hole, and the horizontal stab slot. If you get some in there wipe it down. Now glue the wing tube socket (phenolic tube) into the wing with a foam safe glue (poly or epoxy). Be sure not to cut the tube off yet and use a square to make sure it is in proper alignment with the fuse (cut it off after the glues set).
When all is correct glue the tabs to the right side fuse. Go back and check your formers to make sure they are glued to the right side properly. After this is done the wing tube socket can be cut off with a Zona saw and sanded flush.
SPECIAL NOTE: Do the following mod in the vertical stab area before sheeting the fuse....
Add tri-stock to the inside of the fuse in the vertical stab area before sheeting. That will give the sheeting something to hang on to. Use 3/8" tri-stock and it will basically span the gap between the sides of the fuse.
Next add the 3/8'' x 1'' (cut from sticks) square stock to the top of the canopy area (all ready precut in the sides). Next glue in the two tail wheel plywood pieces, the tail/rudder hinge cap (1'' wide, 1/4'' thick) balsa section, and cap the fuse with 1/16'' balsa sheeting. Next glue in the two landing gear wooden dowels and sand flush to the fuse.
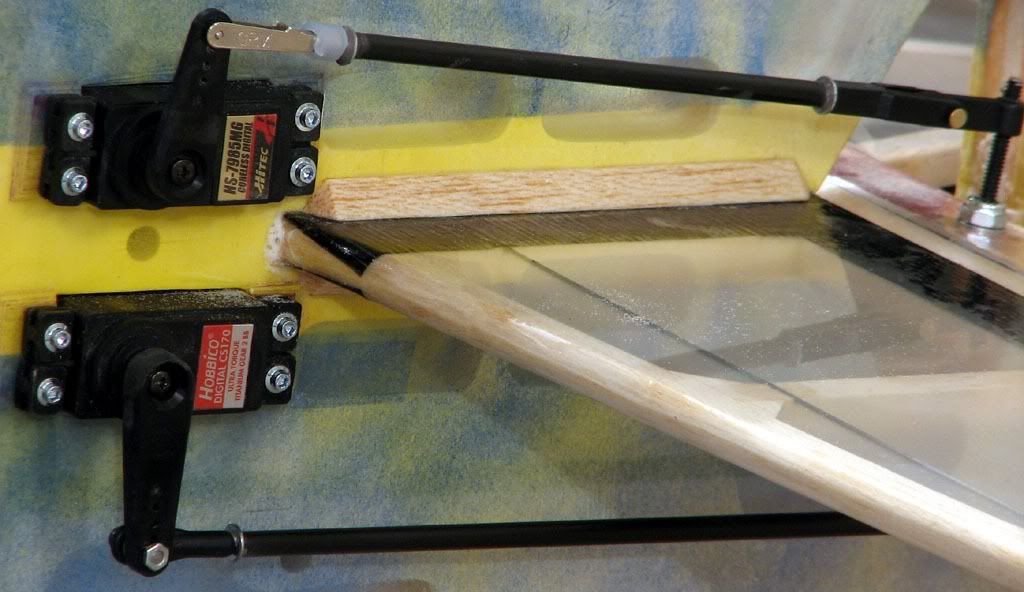
Now is the time to install the tail and throttle servos and wiring. There are servo trays made for this but I ended up not using them in the tail and just gluing in a ply strip on each end of the servo for the screws to bite into.
One Note: AT THIS POINT DO NOT INSTALL THE RUDDER TRI-STOCK. It will be added after you install the tail surfaces.
Final step, sit back and enjoy you're work! The fuse is complete. Just set it aside for covering and move onto the wings. My total time for the first fuse was 3 hours and that included me slowing down to take pictures. I'm confident this can be done in less than two hours. When you build it send me your times (and comments) as I'm curious to see if I'm correct.
Once the glues are set (you should be around 1 hour to this point, maybe less) dry fit the other side to this one. You may have to fit some tabs or slots depending on how well you assembled the fuse. Don't worry here. As long as there is a good glue joint at each tab you'll be fine. The main alignment, again, comes from the dowels and tail alignment holes. Also be sure to dry fit the wing tube socket (phenolic tube).
Once you're happy with the fit (be sure it goes on and off fairly easily) add glue to the wing and tail saddles, wing tube to saddle areas (poly, foam safe CA, or epoxy), motor mounts, to the tail and wing tube areas as needed (poly glue), the formers, and assemble the side. Use a slow setting glue as you need a little time to get the glue where you need it. Be sure to keep the glue out of the front and rear anti rotation pin holes (3/8'' holes on the wing centerline), the wing tube hole, and the horizontal stab slot. If you get some in there wipe it down. Now glue the wing tube socket (phenolic tube) into the wing with a foam safe glue (poly or epoxy). Be sure not to cut the tube off yet and use a square to make sure it is in proper alignment with the fuse (cut it off after the glues set).
When all is correct glue the tabs to the right side fuse. Go back and check your formers to make sure they are glued to the right side properly. After this is done the wing tube socket can be cut off with a Zona saw and sanded flush.
SPECIAL NOTE: Do the following mod in the vertical stab area before sheeting the fuse....
Add tri-stock to the inside of the fuse in the vertical stab area before sheeting. That will give the sheeting something to hang on to. Use 3/8" tri-stock and it will basically span the gap between the sides of the fuse.
Next add the 3/8'' x 1'' (cut from sticks) square stock to the top of the canopy area (all ready precut in the sides). Next glue in the two tail wheel plywood pieces, the tail/rudder hinge cap (1'' wide, 1/4'' thick) balsa section, and cap the fuse with 1/16'' balsa sheeting. Next glue in the two landing gear wooden dowels and sand flush to the fuse.
Now is the time to install the tail and throttle servos and wiring. There are servo trays made for this but I ended up not using them in the tail and just gluing in a ply strip on each end of the servo for the screws to bite into.
One Note: AT THIS POINT DO NOT INSTALL THE RUDDER TRI-STOCK. It will be added after you install the tail surfaces.
Final step, sit back and enjoy you're work! The fuse is complete. Just set it aside for covering and move onto the wings. My total time for the first fuse was 3 hours and that included me slowing down to take pictures. I'm confident this can be done in less than two hours. When you build it send me your times (and comments) as I'm curious to see if I'm correct.
01-28-2010, 10:47 AM
#44
Member
Thread Starter
My Feedback: (2)
Join Date: Sep 2003
Location: Sellersburg,
IN
Posts: 83
Likes: 0
Received 0 Likes
on
0 Posts
Posted this on another website but thought it applied here as well...
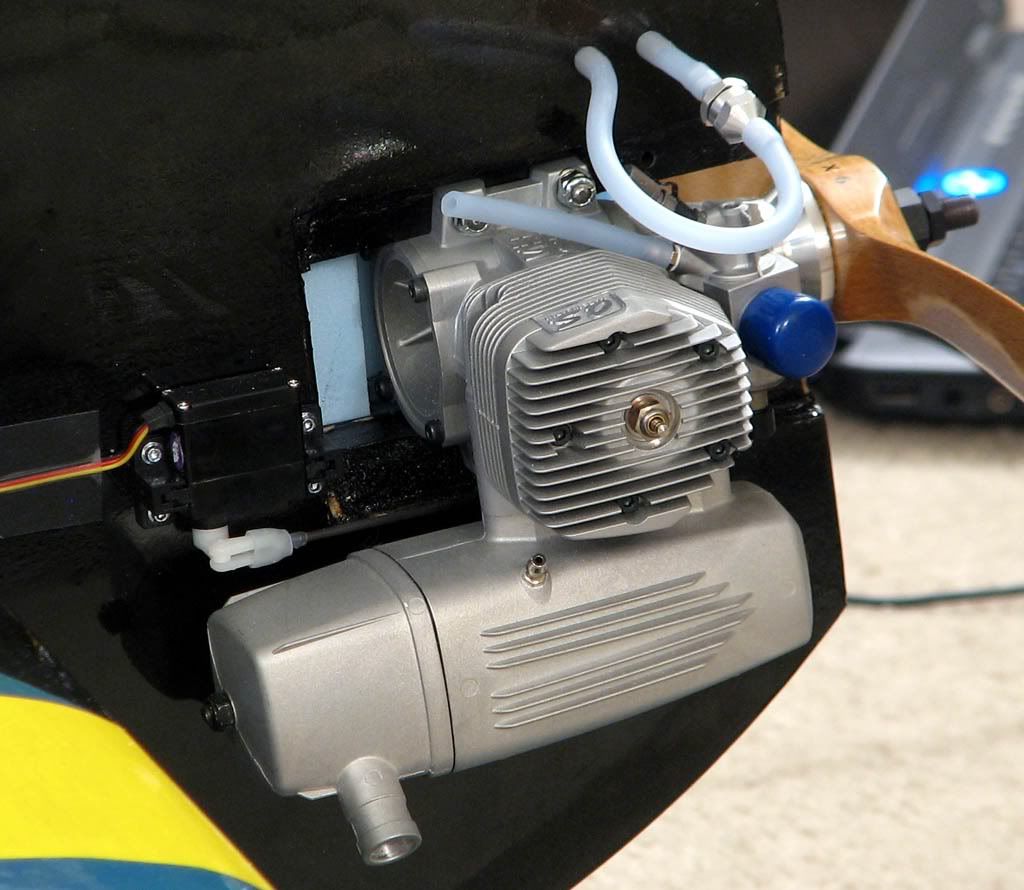
Wanted to share with you some out of the norm support I've just received on an EEV2 build. Chips asked me to build him an EEV2 and I agreed. He has bought a Syssa 180HP (30cc) gasser for it which will fit with little to no mods (although I think I'll jazz this setup a bit). He then emails Todd Syssa some questions that I had as far as mounting goes and Todd emailed me back with the dimensions.
Todd then asked for my address and mailed me a full mock up motor (actual case, crank, cylinder, exhaust, and carb. Man, I feel like I'm mocking up a bike at OCC!
My impressions of the motor and quality are very high indeed. It is a very compact and light design (especially for a 30cc gasser). Todd even has a program written for his CNC (all US produced motors) that will cut mounting ears on the case! With the compact cylinder and case design mounting this in a "normal" way seems more than feasible. From all reports this thing really smooths out after a couple gallons of fuel unlike some other gassers I've been acquainted with.
This will be my next motor. Now I just have to sell my either my Saito 180 (likely) or my YS 160DZ (less likely, awesome motor in it's own right) to help fund this gasser in one of my own EEV2's.
Anyway, not a commercial for Syssa, but man am I impressed with the engine and out of the norm support!
Brian
Btw, here's a few pics of the mock up motor Todd sent and a link with some info.
http://syssaaircraft.com/sap.html
02-23-2010, 09:16 AM
#45
Member
Thread Starter
My Feedback: (2)
Join Date: Sep 2003
Location: Sellersburg,
IN
Posts: 83
Likes: 0
Received 0 Likes
on
0 Posts
Here's the finished fuse w/the custom motor mounts for the Syssa 30cc rail mount gasser. Came out really nice.
02-24-2010, 11:58 PM
#46
Member
Thread Starter
My Feedback: (2)
Join Date: Sep 2003
Location: Sellersburg,
IN
Posts: 83
Likes: 0
Received 0 Likes
on
0 Posts
Here's a cool size comparison...The EEV2, EE60 (new proto), and EE25 (new proto). Can't wait to get all of these up in the air!
03-15-2010, 05:33 PM
#47
Member
Thread Starter
My Feedback: (2)
Join Date: Sep 2003
Location: Sellersburg,
IN
Posts: 83
Likes: 0
Received 0 Likes
on
0 Posts
Been working on this for a while and it's now at the point where I feel good about releasing kits. This is the initial prototype plane. The plane can also be run with glow power (.15 to .25) but I'm really liking the E-power setup.
It looks like the EE25 kits will be ~$45-50. Depends on a couple changes I may make. This will include the fuse tube,wire landing gear, plans, and all wood necessary to complete the kit. It builds really fast which was one of my design goals.
The setup is:
Value Hobbies E400 1000Kv motor
30A ESC/UBEC combo (what they had at them time, I'd go with the all in one unit now that it's available).
11-4.7SF prop
1300 - 1800 mah 3S 30C packs (I like both, it handled the extra weight w/o issue)
Servos: 2 hs55's in the wings (I think I'd like to try the new digitals in this range as well), and HS-81's on the rudder and elevator (what I had at the time, plenty strong enough, weak gear train though by my experience).
If you drop the landing gear, like many do, this setup will be ballistic. As it is it has more that sufficient power for 3D. With that said, I'd like to try a G10 on it next as the plane can handle it.
Right now I'm planning on ordering a large number of these kits cut in the next week or two. I just want to update a few minor details on the plans and then I'll have them cut.
A .25 Norvel glow version flying soon. I have another fellow prototyping that setup as he flies a similar size plane with the same engine.
Here's a few pic of the proto build. You'll notice that the wing ribs interlock with the main spar making alignment and squaring a breeze. The ribs are tabbed of course to assure the wing builds "flat" on the table while maintaining the correct wing taper.
Been a really fun project. You ought to see this sitting beside the EEV2 (71" Extra Extra)
Here's a video of the maiden flights. Even in very windy conditions it flew very well.
[link=http://www.youtube.com/watch?v=J5Hz3tw7USE]You Tube Maiden Flight Video[/link]
03-23-2010, 01:58 PM
#48
Member
Thread Starter
My Feedback: (2)
Join Date: Sep 2003
Location: Sellersburg,
IN
Posts: 83
Likes: 0
Received 0 Likes
on
0 Posts
Finally launched the website.
www.3dorbust.com
Kinda describes my flying style
The EE25's are on order to be cut so kits will be available in 2-3 weeks. The EEv2 is on there as well. Also, although not yet ready to release, is the EE60 (60", Saito 100-125 level power). The EE60 kits should be available in the last part of April pending some final flight testing.
Brian
03-31-2010, 09:02 AM
#49
Member
Thread Starter
My Feedback: (2)
Join Date: Sep 2003
Location: Sellersburg,
IN
Posts: 83
Likes: 0
Received 0 Likes
on
0 Posts
Here's a few pics of my EE60. We'll get a better video up soon as this one is just of the initial flight right as I ran out of sunlight. More to come and a new thread as well...
Flew great! Can't wait to get the throws and rates dialed in.
Video:
http://www.youtube.com/watch?v=6hkyFnSsfbk
Flew great! Can't wait to get the throws and rates dialed in.
Video:
http://www.youtube.com/watch?v=6hkyFnSsfbk
04-03-2010, 11:07 PM
#50
Member
Thread Starter
My Feedback: (2)
Join Date: Sep 2003
Location: Sellersburg,
IN
Posts: 83
Likes: 0
Received 0 Likes
on
0 Posts
Here's a couple videos shot today of an EE60 in Memphis, TN.
BB:
http://www.youtube.com/watch?v=FjF23oWcSKw
Gator:
http://www.youtube.com/watch?v=XI071-2ki1E
BB:
http://www.youtube.com/watch?v=FjF23oWcSKw
Gator:
http://www.youtube.com/watch?v=XI071-2ki1E