


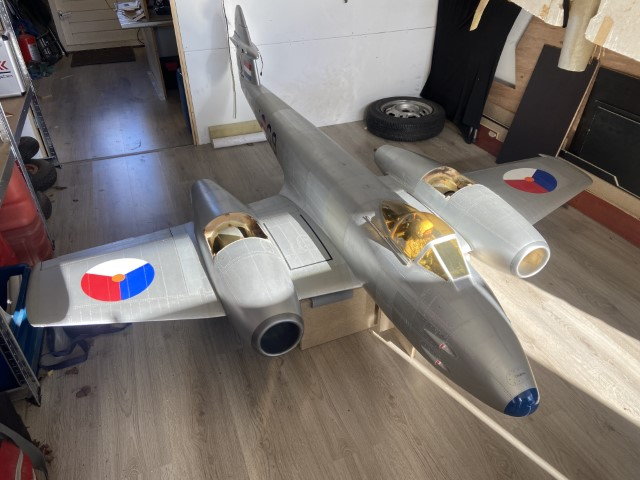
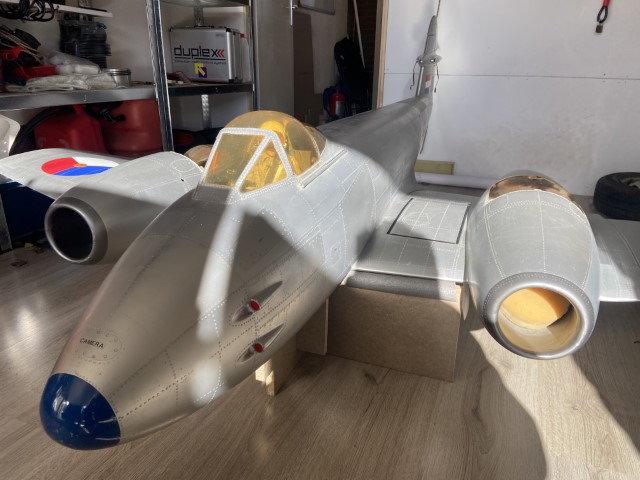
Maiden Gloster Meteor mk4 1:5 scale
 03-11-2023, 01:05 AM
#26

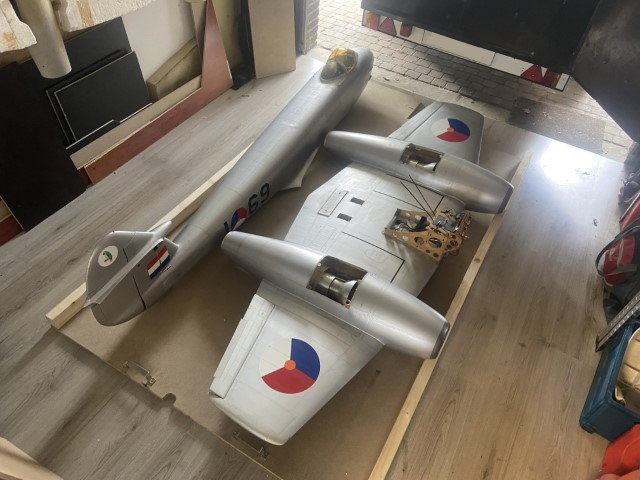
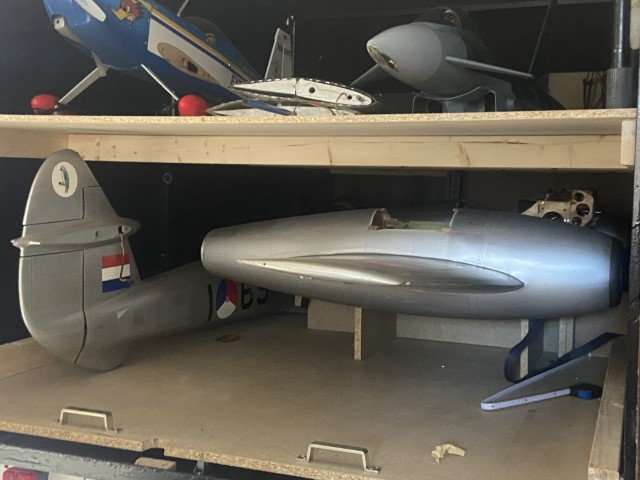
For this model (and of course my other models) I bought a trailer.
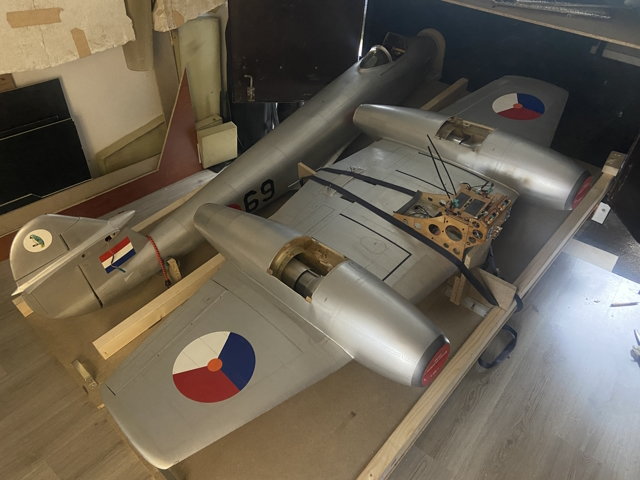
So have spent a weekend to make a stand for the wing for transportation and build up at the field.
The bottom plate I can pull out of the trailer, wing and fuselage fits on this plate:
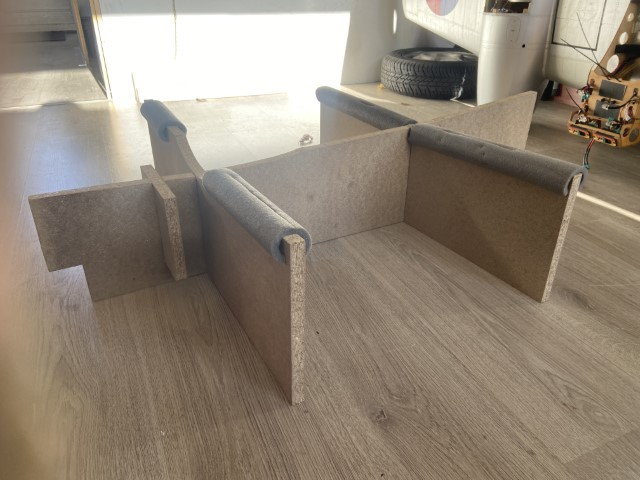
Made a stand fot the wing, have made 3 in total I guess before I was satisfied:
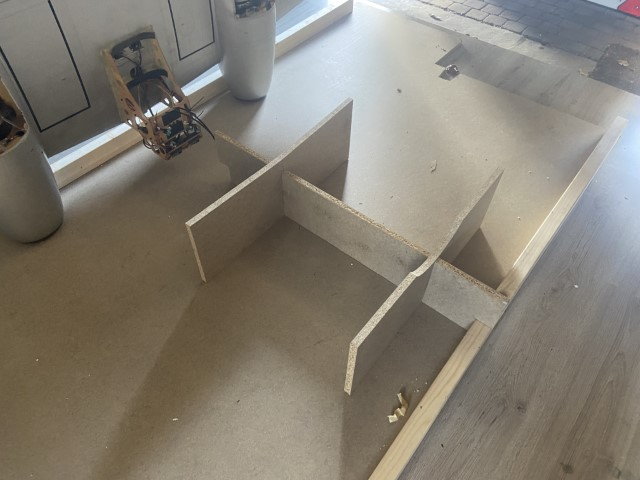

Fitting:
And it does fit

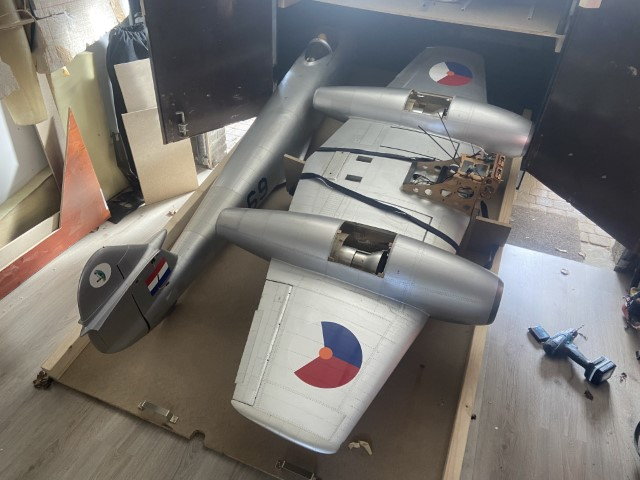
Also will use the wing stand for build up at the field:
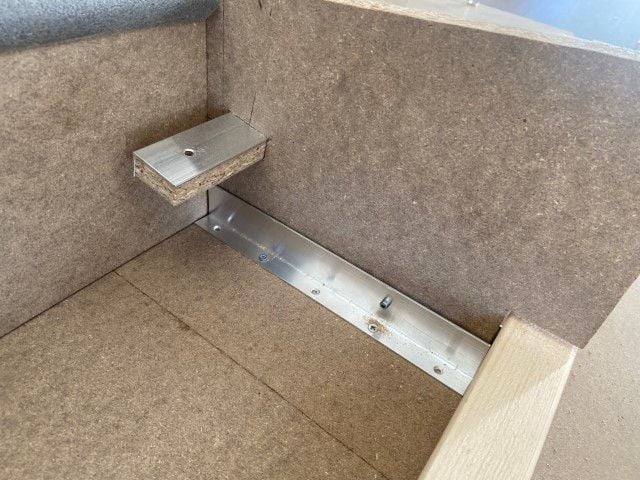
The stand will be installed on the plate with some bolts and wingnuts, removing the bolt and I can lift the wing with the stand:

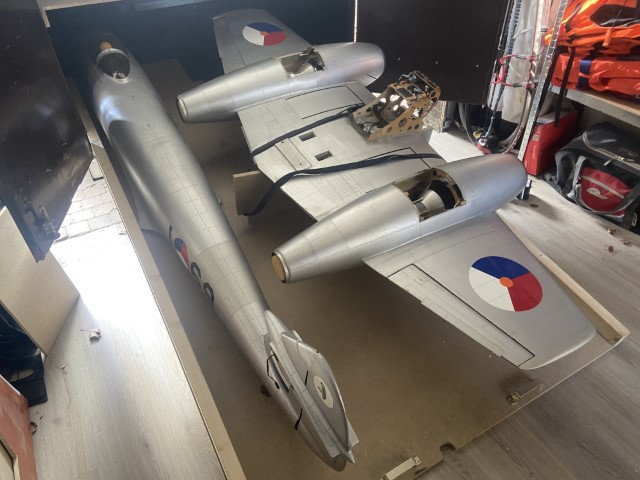
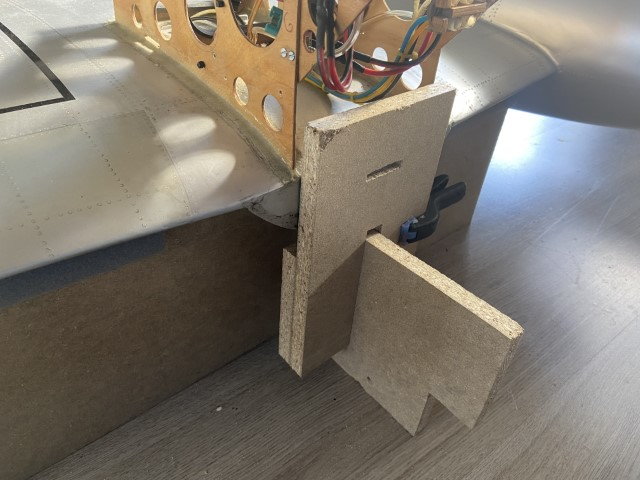
Front side of the wing will be hold in place with the same lip as used for installing the fuse:
And aft side using some long threaded wire, in this way the wing is fixed on the stand:
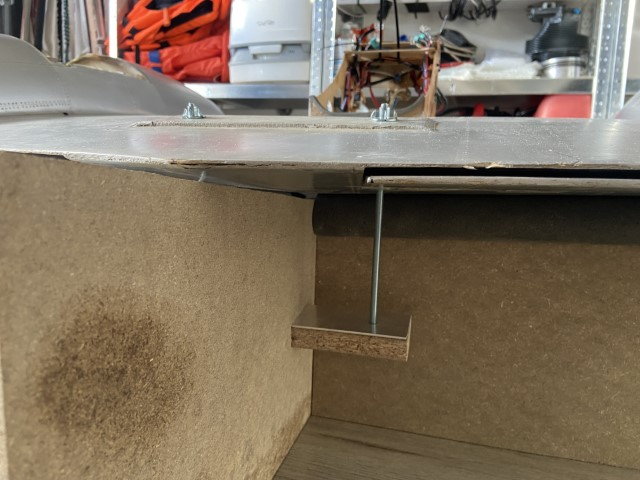
Just enough space:

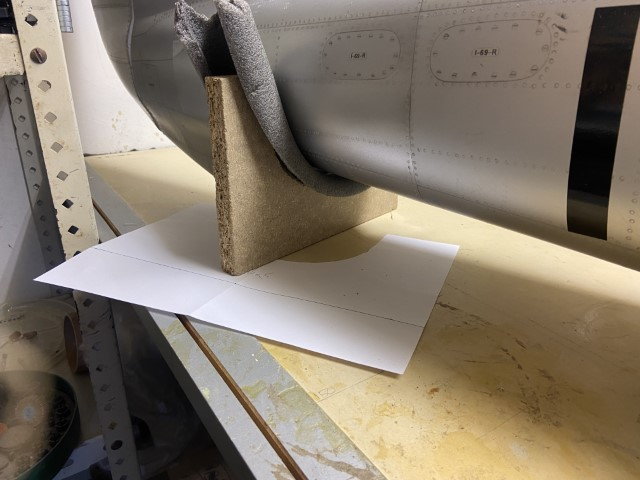
Aft fuselage stand:
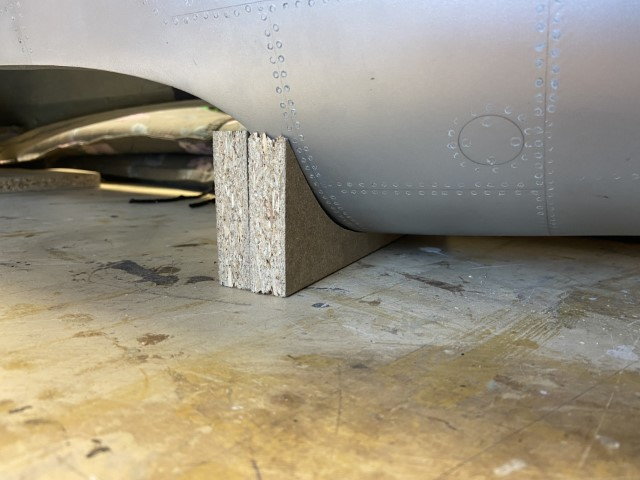
Middle fuselage stand, I will make a front stand also:
So have spent a weekend to make a stand for the wing for transportation and build up at the field.
The bottom plate I can pull out of the trailer, wing and fuselage fits on this plate:
Made a stand fot the wing, have made 3 in total I guess before I was satisfied:
Fitting:
And it does fit
Also will use the wing stand for build up at the field:
The stand will be installed on the plate with some bolts and wingnuts, removing the bolt and I can lift the wing with the stand:
Front side of the wing will be hold in place with the same lip as used for installing the fuse:
And aft side using some long threaded wire, in this way the wing is fixed on the stand:
Just enough space:
Aft fuselage stand:
Middle fuselage stand, I will make a front stand also:
 03-11-2023, 01:14 AM
#27
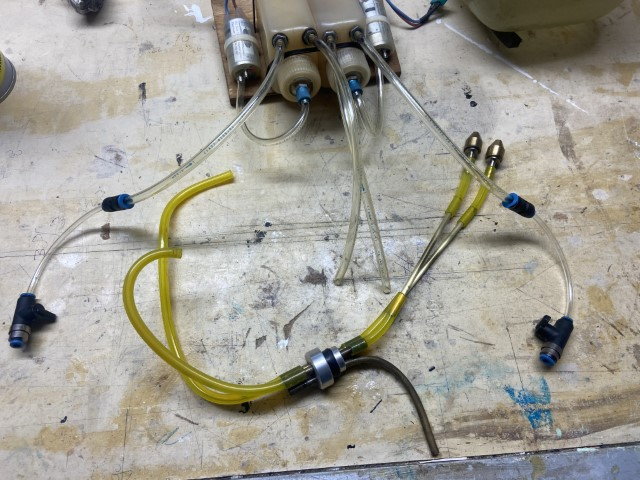
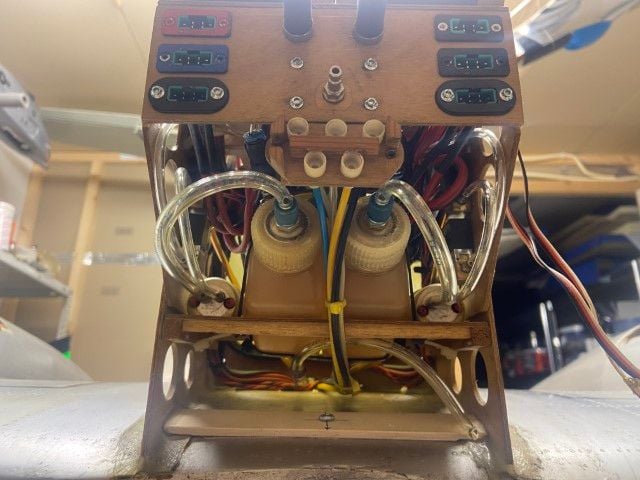
Fuel lines from the UAT`s:
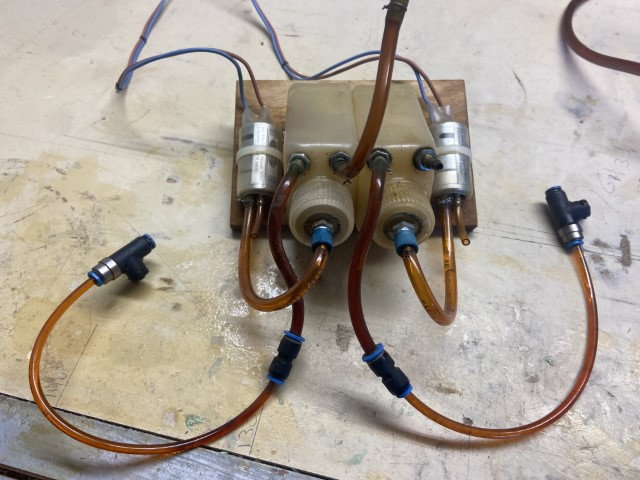
Fuel lines from the tank:
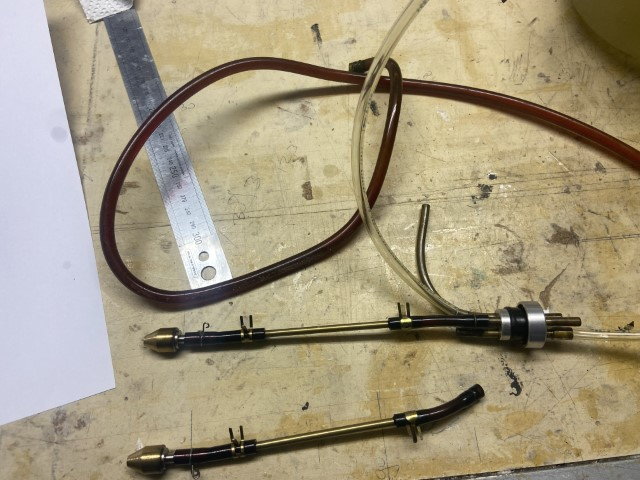
Replaced all hoses, will need to add lock wire at this stage:
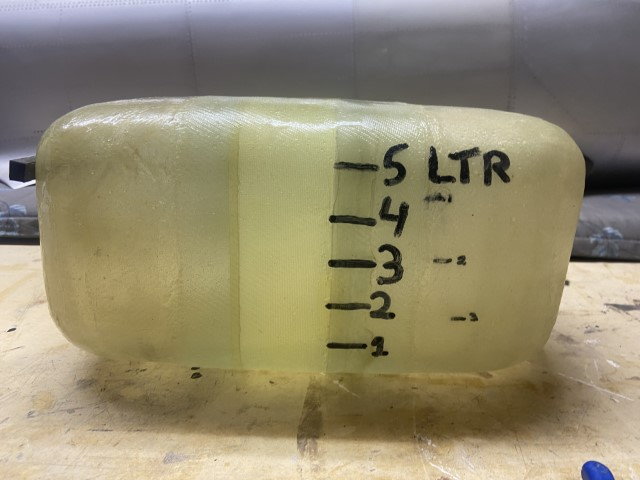
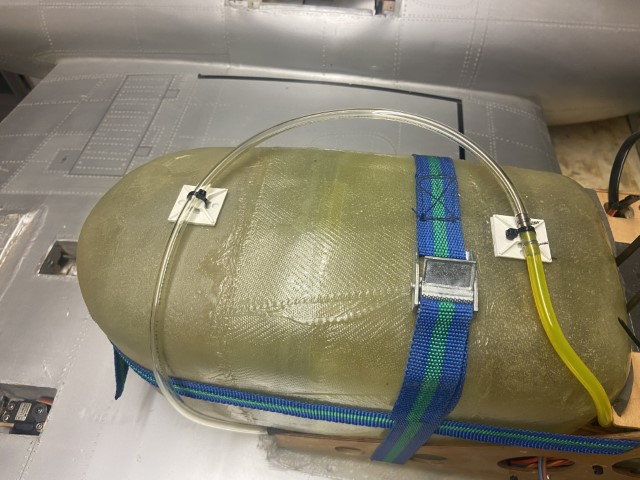
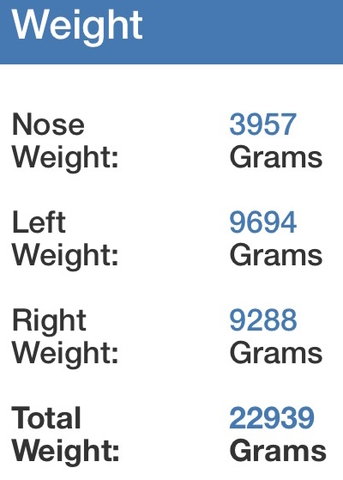
And measured fuel capacity, just over 5ltrs in total, enough for 2 JetCat P80`s:
Fuel lines from the tank:
Replaced all hoses, will need to add lock wire at this stage:
And measured fuel capacity, just over 5ltrs in total, enough for 2 JetCat P80`s:
The following users liked this post:
gpman (03-11-2023)
03-12-2023, 01:21 AM
#28
That's an excellent idea to make a cradle for the trailer. Saves any damage and helps with assembly.
I have run into a problem that my Hunter is too long for my car so I am looking for solutions :-/
Fuel system looks better now it has been refreshed, I did the same with my Vampire last year as they pipework was 10 years old.
Keep the pictures coming as it is igniting my passion to carry on with my build.
03-12-2023, 02:41 AM
#29
I can transport this model in my car, but I then can not take anyone with me or any other model, so that`s why I bought a trailer.
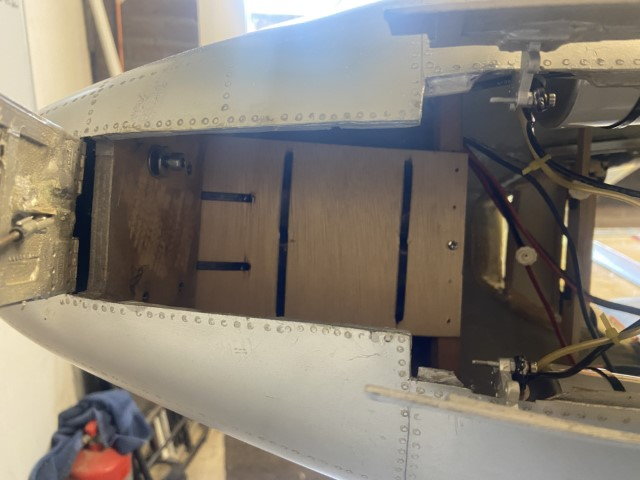
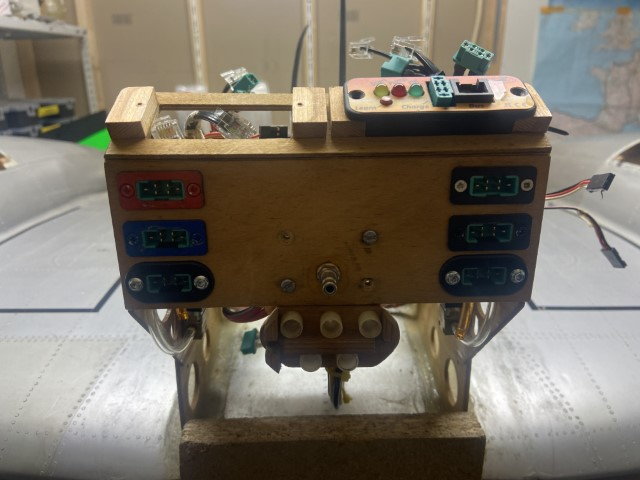
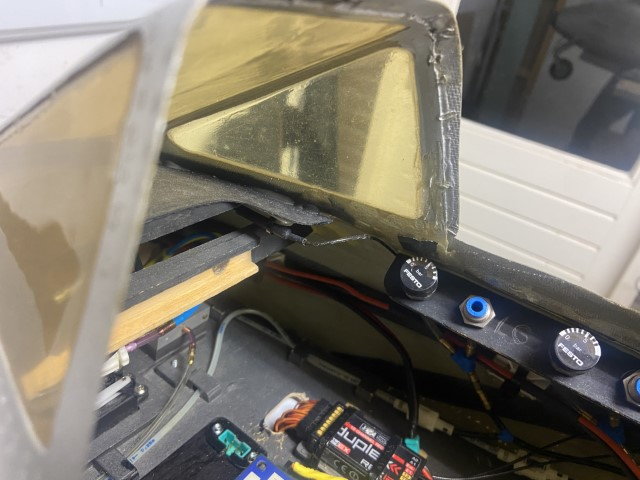
After removing the radio plate I found the nosewheel:
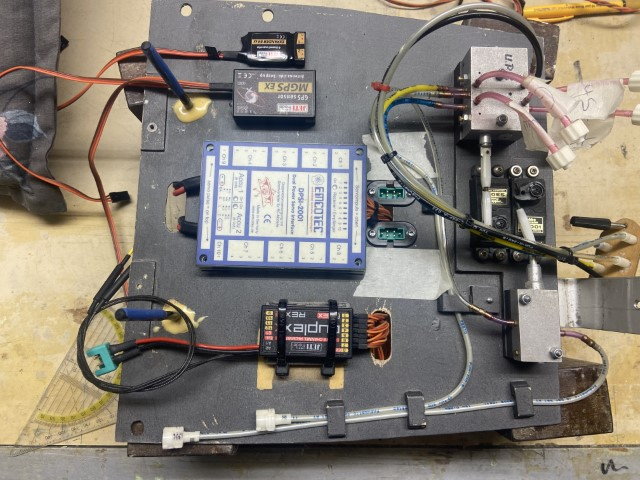
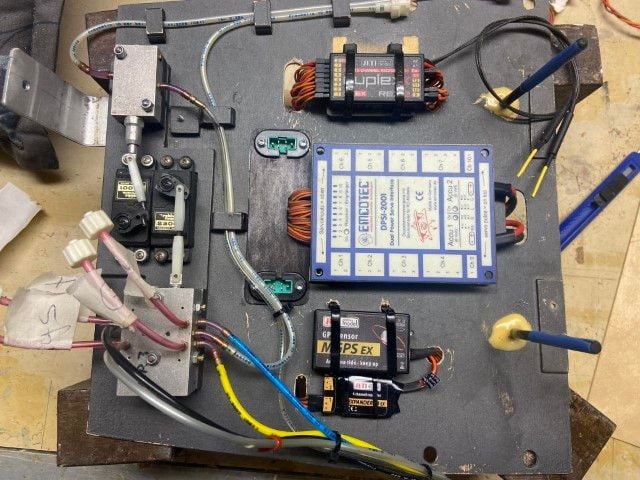
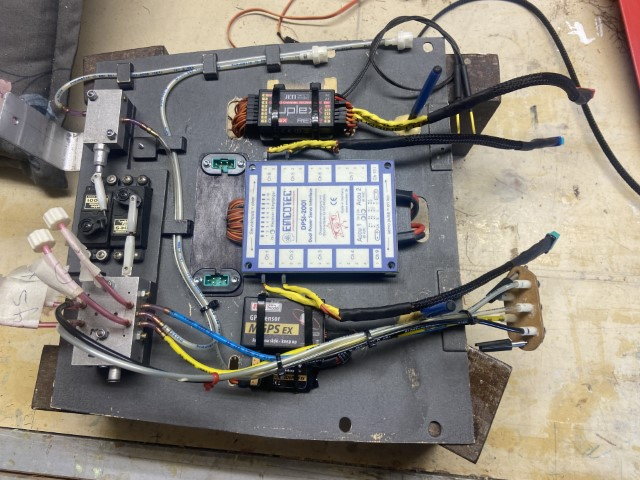
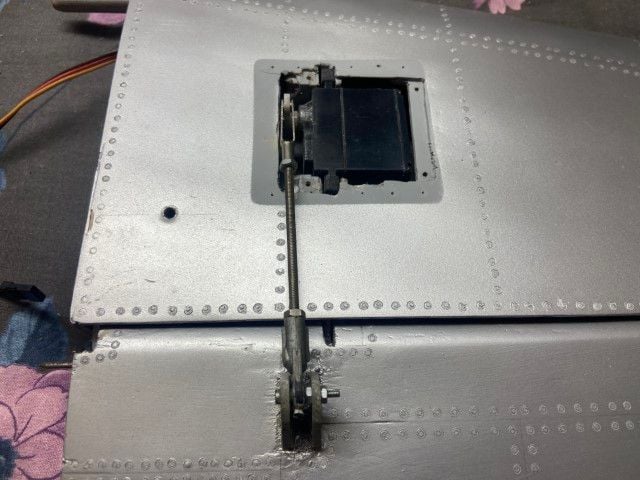
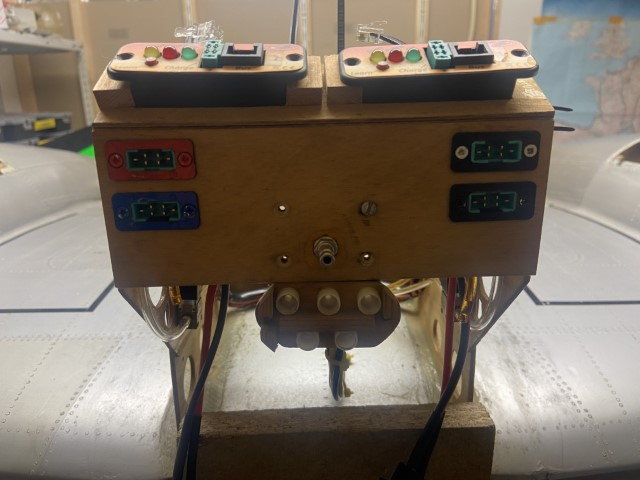
And radio plate with Emcotec powerbox, gear and brake selector and air connectors to the wing:

Goal is to run the wiring below the plate:
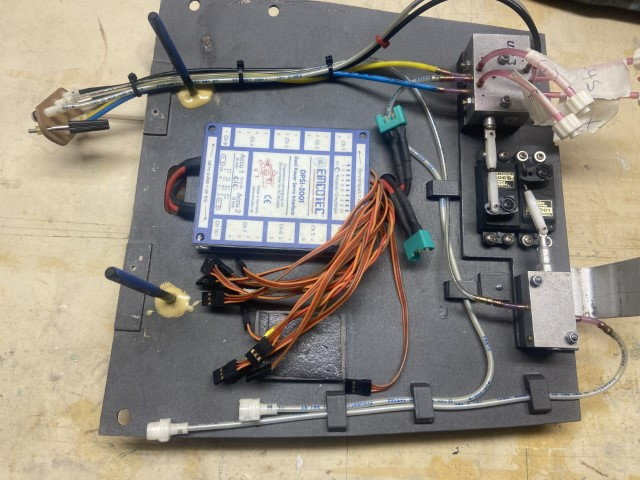
And that should work:
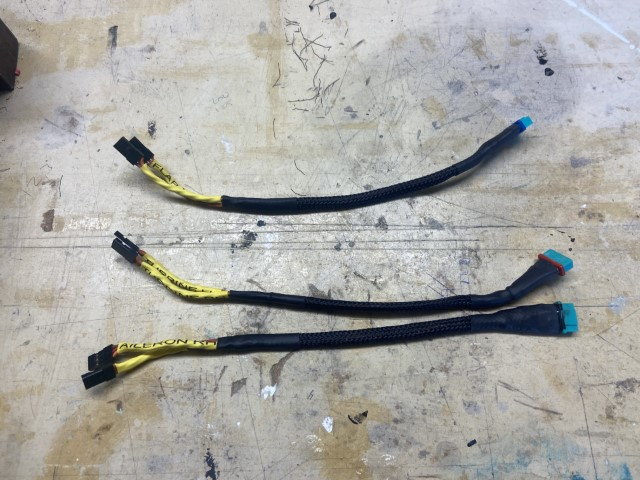
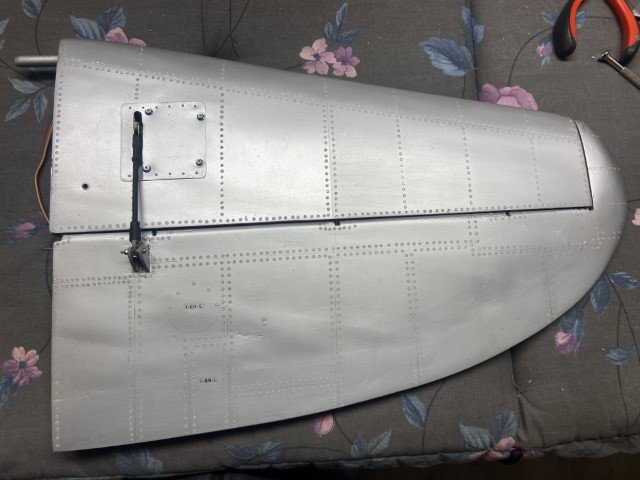
Wiring from the receiver/powerbox to the wing, original 4:
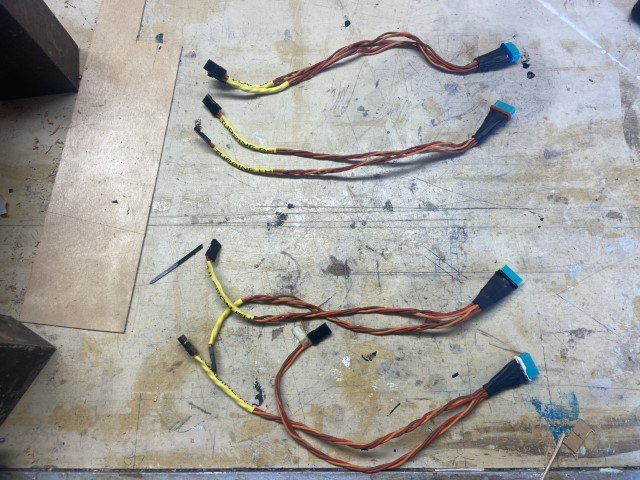
But to some rearranging I only need 3, but the 4th will be used now for turbine telemetry:
After removing the radio plate I found the nosewheel:
And radio plate with Emcotec powerbox, gear and brake selector and air connectors to the wing:
Goal is to run the wiring below the plate:
And that should work:
Wiring from the receiver/powerbox to the wing, original 4:
But to some rearranging I only need 3, but the 4th will be used now for turbine telemetry:
03-12-2023, 05:32 AM
#30
You are really making fast progress through the Meteor.
Who made the oleo's for it and can you upload some pictures please. I am trying to design mine and it would be nice to see how yours have been done.
Who made the oleo's for it and can you upload some pictures please. I am trying to design mine and it would be nice to see how yours have been done.
03-14-2023, 11:36 AM
#31
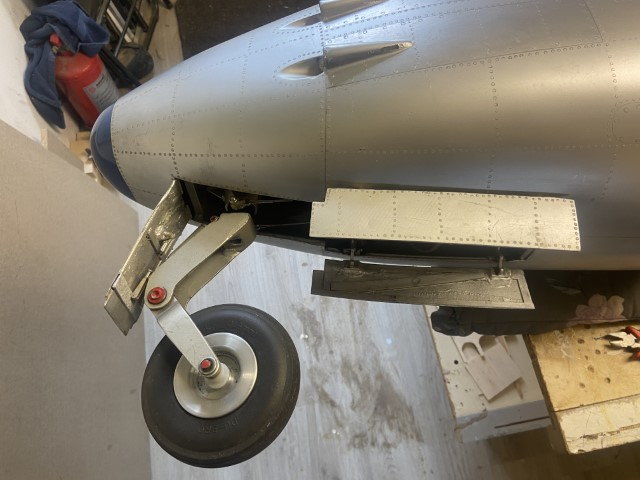
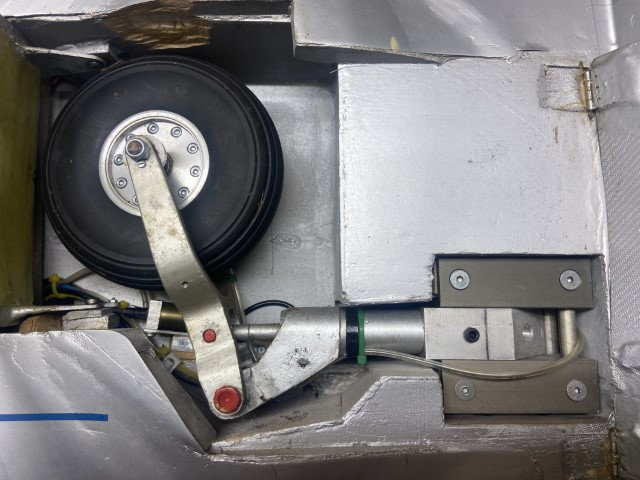
Will make a few photo`s for you.
The retracts are from HAWE, the gears are homemade I guess.
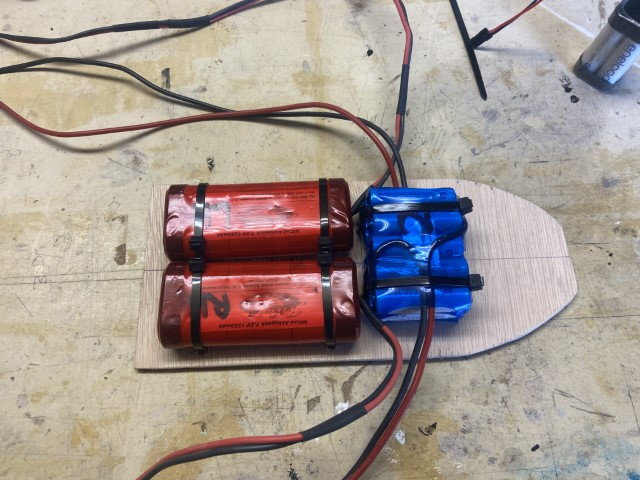
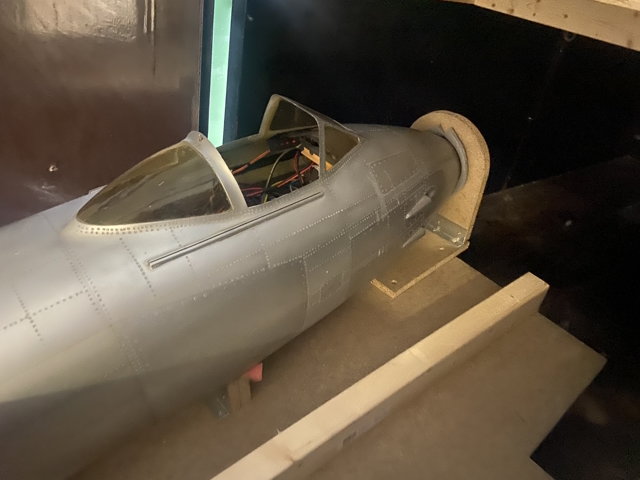
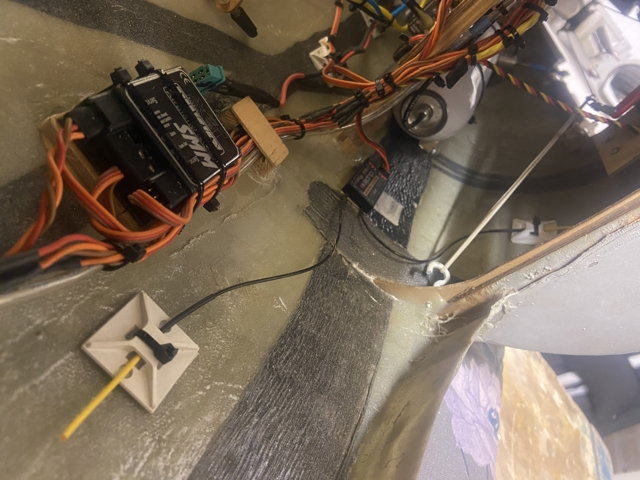
The receiver and ECU battery`s were in front of the nose, spend 1 hour to remove them (and that was after 30min removing the nose gear).
I now have them placed on a tray above the nose gear, so a little more accessible:
The retracts are from HAWE, the gears are homemade I guess.
The receiver and ECU battery`s were in front of the nose, spend 1 hour to remove them (and that was after 30min removing the nose gear).
I now have them placed on a tray above the nose gear, so a little more accessible:
 03-15-2023, 03:37 AM
#34
All good progress. It makes sense to have the batteries in an easier to access space.
Thank you for the picture of the nose gear. I have some pictures from another Meteor that was built by Christian Hoffman and they are very similar.
My friend does have a lathe so I am hoping he can help me out as I advent done any milling/turning since my apprenticeship days back in 2000!
Can you provide some main gear pictures as and when you get chance please.
Looking forward to another flight video of this model.

The following 2 users liked this post by RemoteJets:
jcterrettaz (05-27-2023),
jescardin (03-20-2023)
03-21-2023, 12:37 PM
#38
Small leak in the air bottle from the brakes:
Simple elastic bands for getting the steering cables out of the way during retraction:
Shimmed the nosewheel so doors closed better:
2 of the 4 antenna`s have a place:
So far the pilot is happy:

Simple elastic bands for getting the steering cables out of the way during retraction:
Shimmed the nosewheel so doors closed better:
2 of the 4 antenna`s have a place:
So far the pilot is happy:
The following users liked this post:
gpman (03-21-2023)
 03-24-2023, 11:13 AM
#40
Landing gear goes up and down nicely.
I am thinking about modifying my fuel tanks plans and to go with a similar set up to yours.
At the moment my tank stay in the fuzz which means disconnecting the fuel lines each time I take the wing off. I will have to have a think.
looking forward to some more flight pictures and videos.
I am thinking about modifying my fuel tanks plans and to go with a similar set up to yours.
At the moment my tank stay in the fuzz which means disconnecting the fuel lines each time I take the wing off. I will have to have a think.
looking forward to some more flight pictures and videos.
03-24-2023, 01:44 PM
#41
Originally this model also had the tank etc. in the fuselage.
But even before it had ever flown the nose broke off during transportation in a trailer.
So the fuselage was rebuild and improved and the tank + all turbine stuff is placed on the wing.
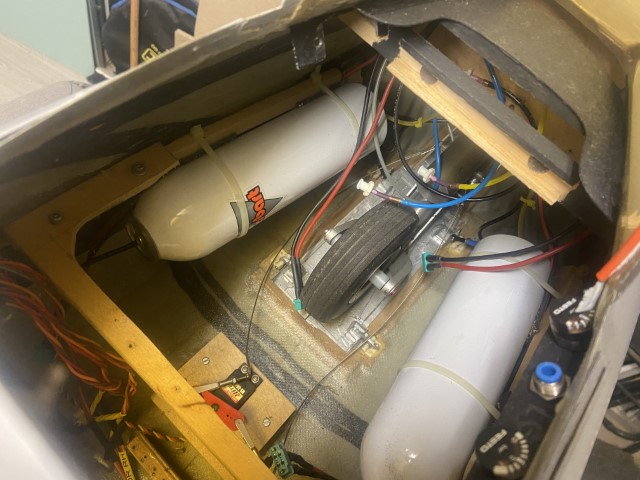
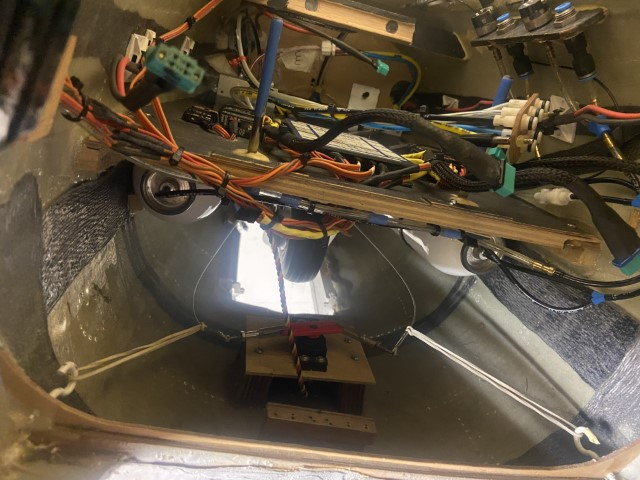
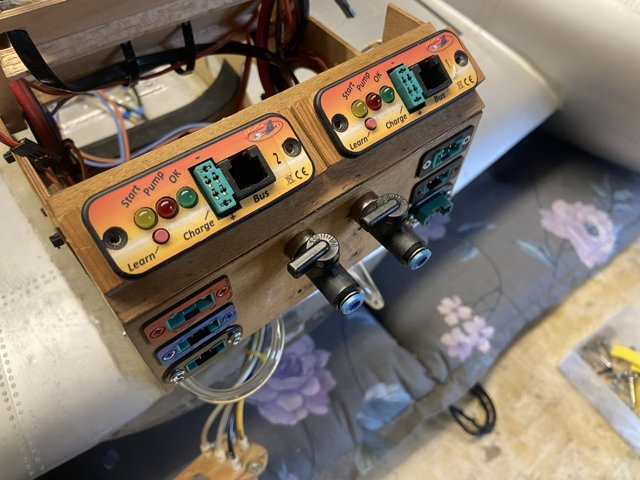
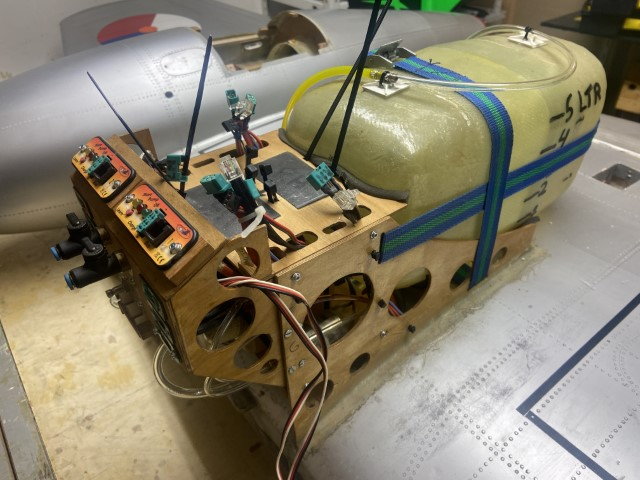
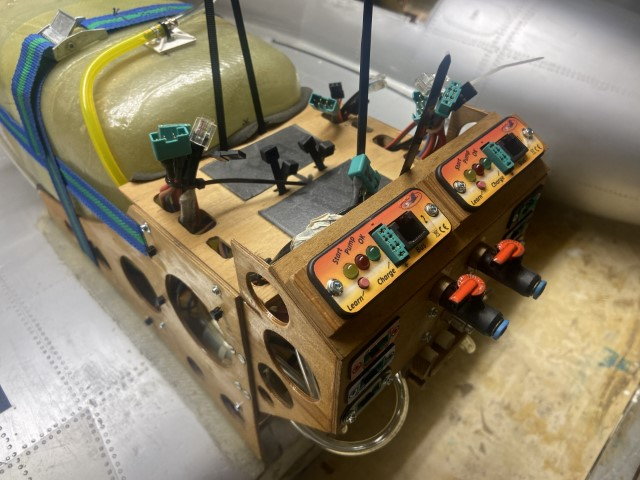
UAT`s, fuel pump etc. installed and connected:
Waiting for the ECU`s, they are coming Monday:
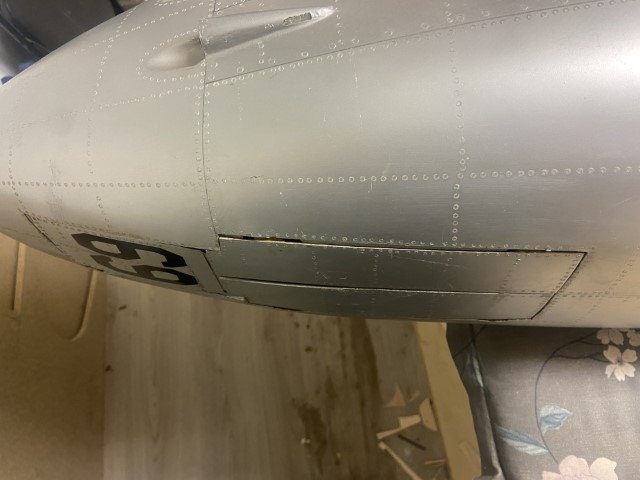
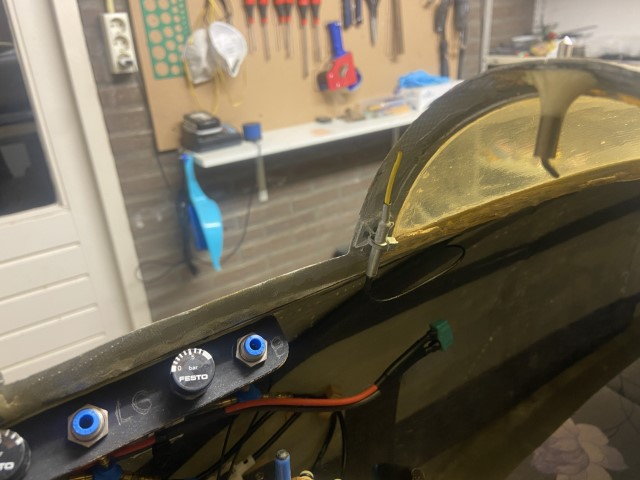
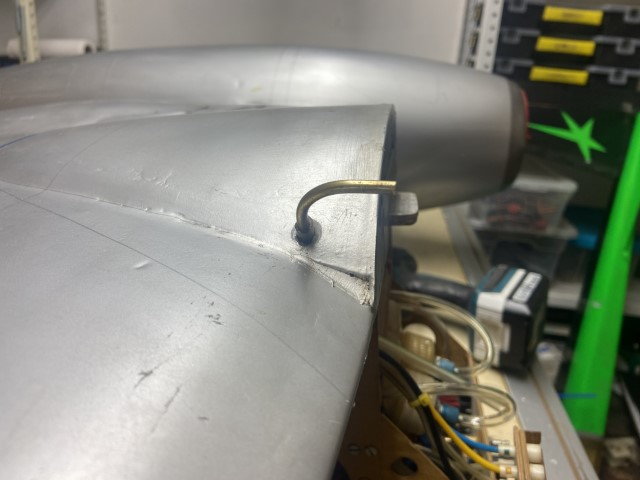
Tank breather line:
Tank breather under the wing leading edge:
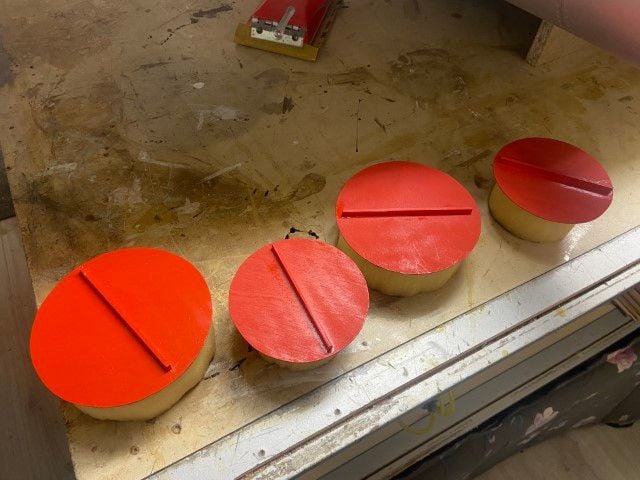
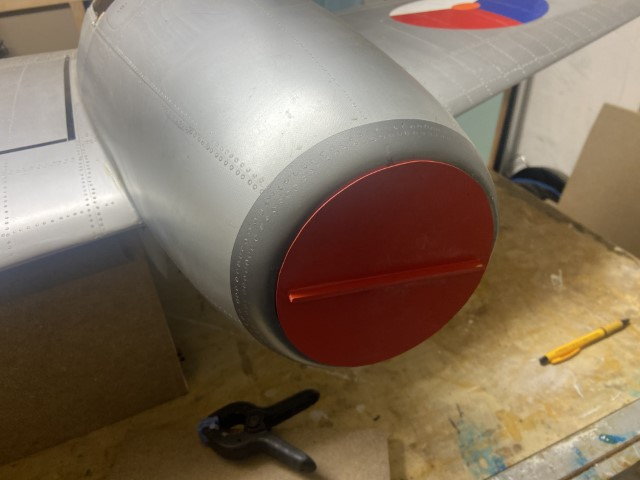
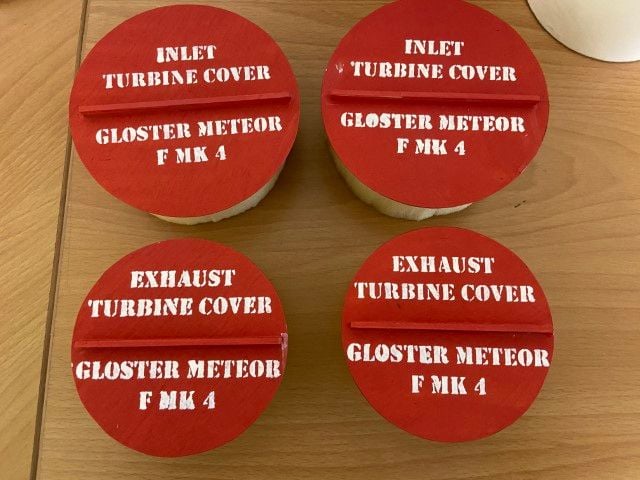
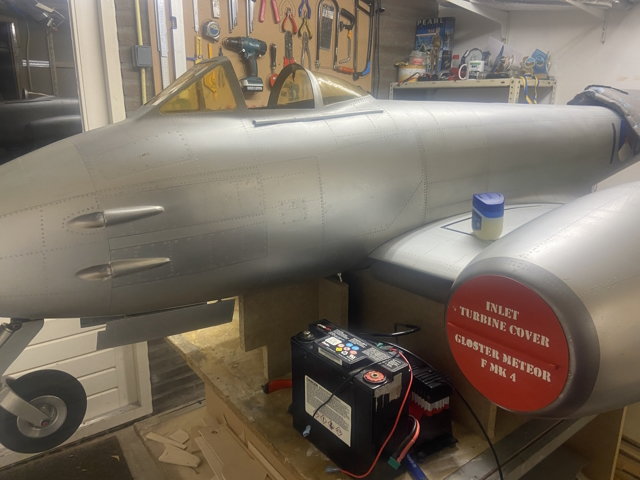
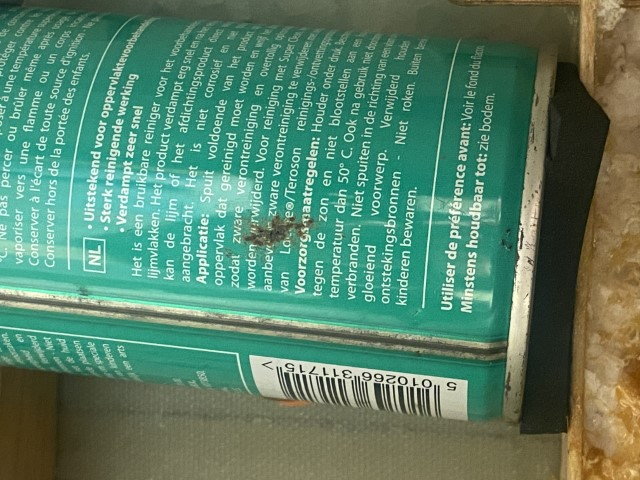
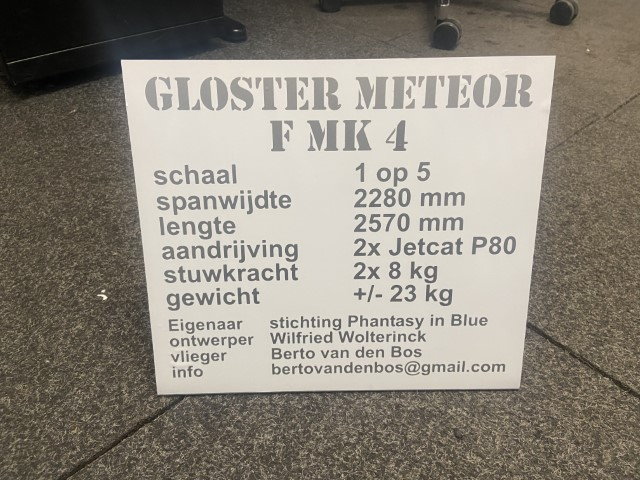
Made a info sign for the fairs etc.:
But even before it had ever flown the nose broke off during transportation in a trailer.
So the fuselage was rebuild and improved and the tank + all turbine stuff is placed on the wing.
UAT`s, fuel pump etc. installed and connected:
Waiting for the ECU`s, they are coming Monday:
Tank breather line:
Tank breather under the wing leading edge:
Made a info sign for the fairs etc.:
The following users liked this post:
Gerald Rutten (03-28-2023)
The following users liked this post:
paul_h300 (03-31-2023)
04-02-2023, 05:27 AM
#45
My Feedback: (66)
I just found this thread and it made my day 
I have been in the hobby for 56 years, mostly scratch building scale models. I want to build a 1/4 scale Meteor F.Mk.8 to be powered by 2 Jetsmunt XBL 100 turbines. I prefer traditional Balsa/Plywood construction because it is much lighter than composites.
Questions, please:
Roberto: Is your model built using composites?
Paul: How close are you to starting a build thread?
Best Regards
Josh Harel
USA
04-02-2023, 08:17 AM
#46
Glad to see another Meteor fan 👍🏻
I have started one but it is a bit further down the page.
if you want a 1/4 scale one then you could buy the smaller version of the plan I have and scale it up.
It would give you a good base for former and rib shapes.
I have started one but it is a bit further down the page.
if you want a 1/4 scale one then you could buy the smaller version of the plan I have and scale it up.
It would give you a good base for former and rib shapes.


 04-03-2023, 04:07 AM
#48
I used the plan from TnJ models. He has closed down now by the looks of it but Manzano Laser in the US stock the plan and short kit.
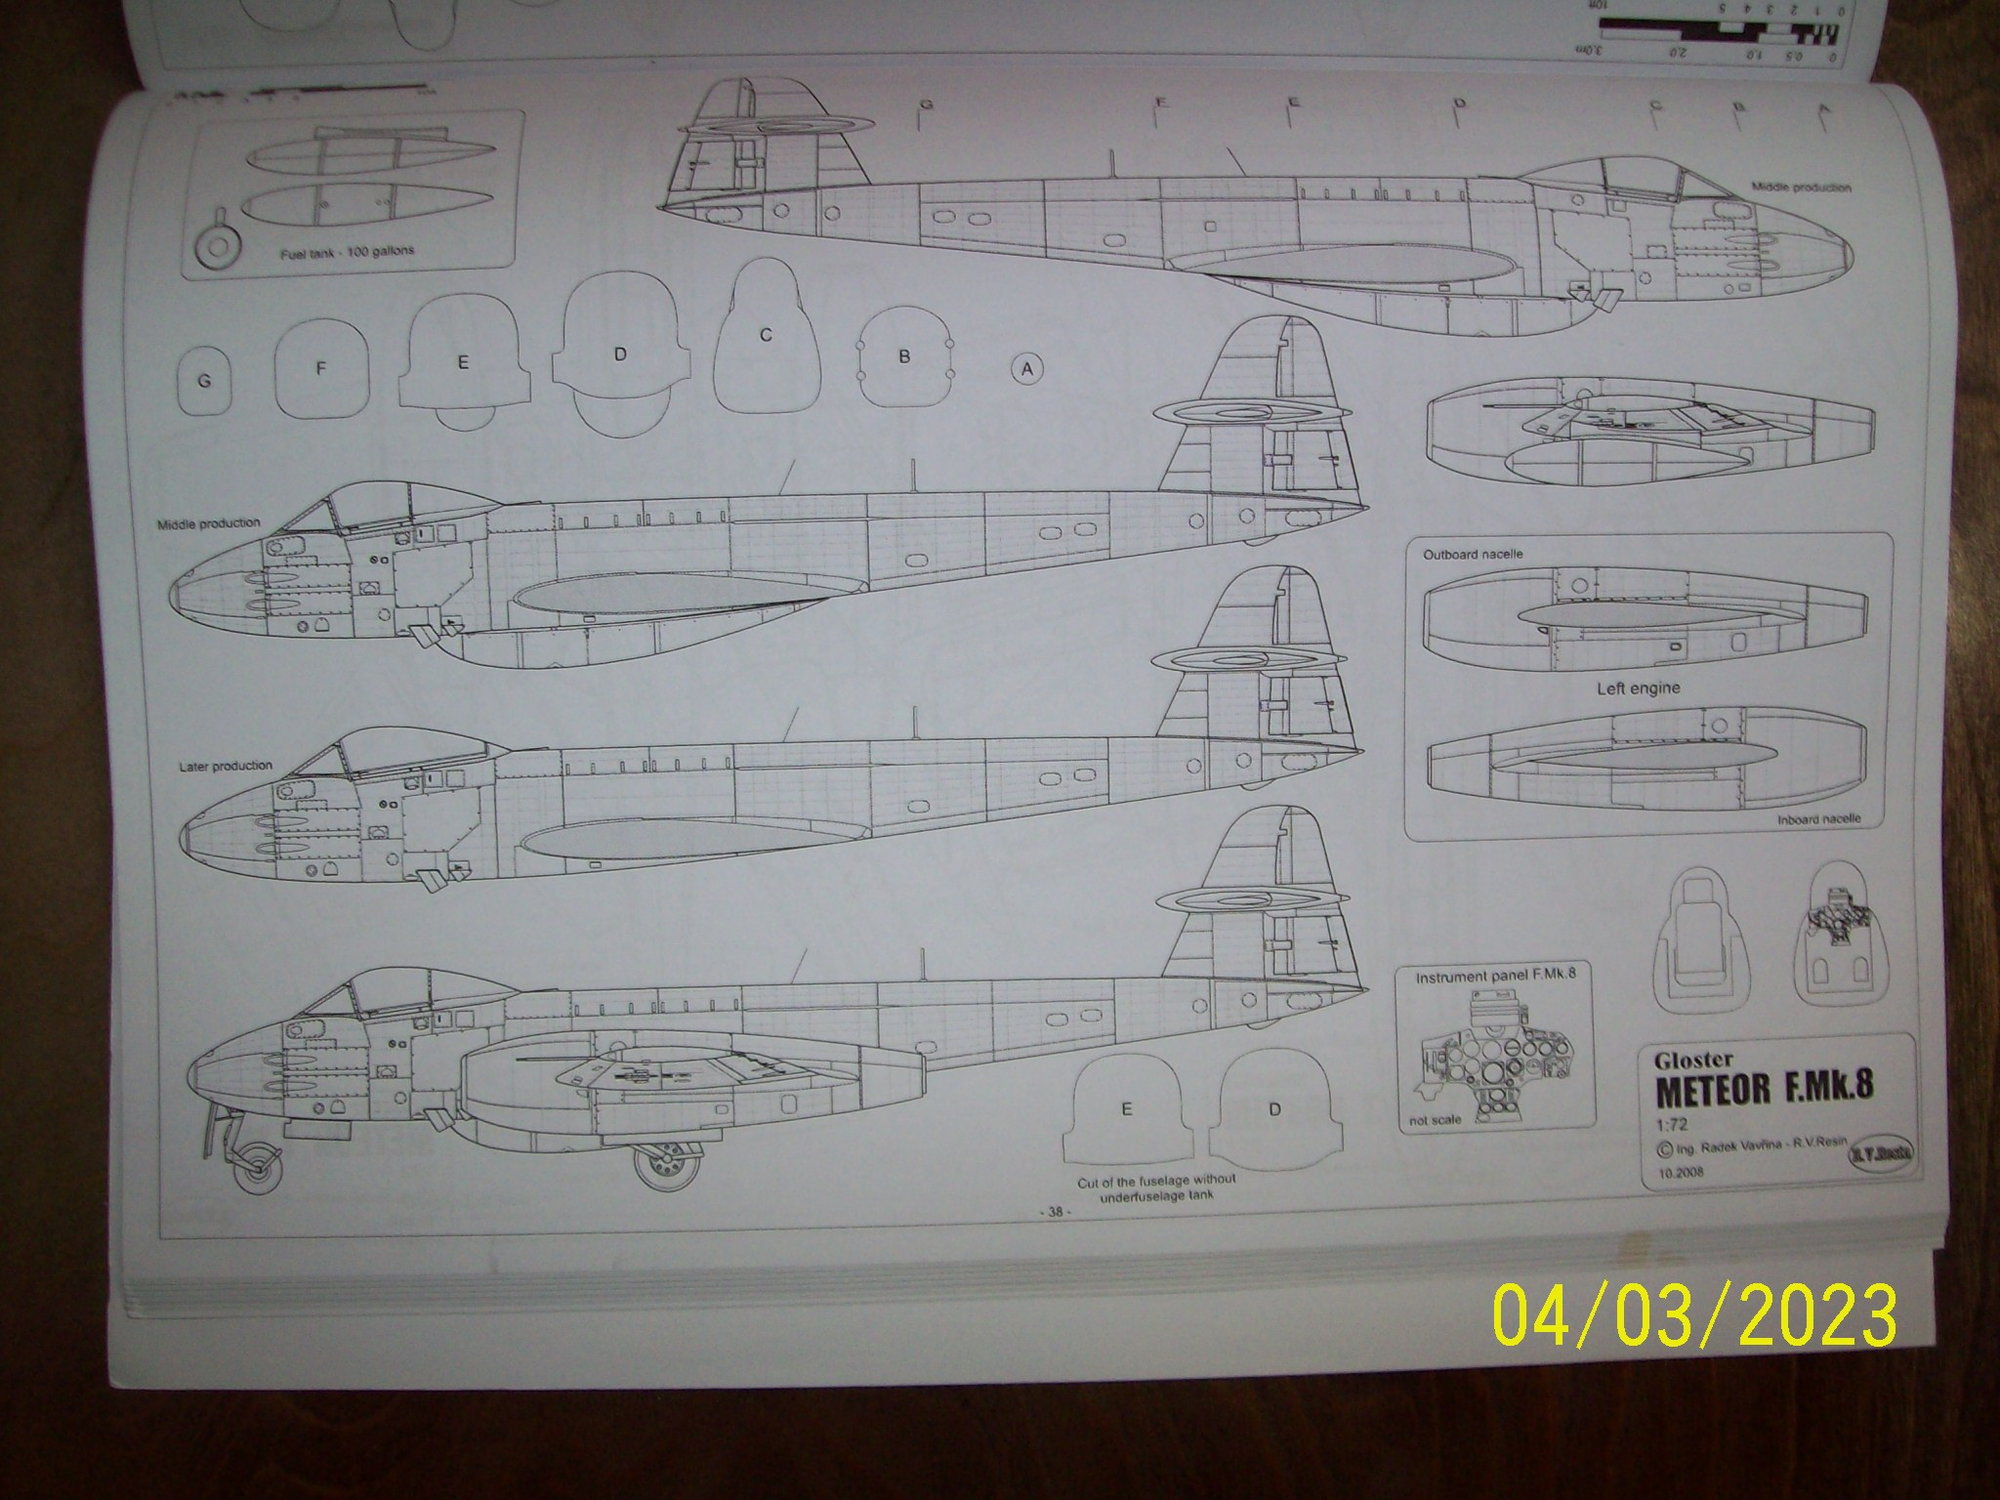
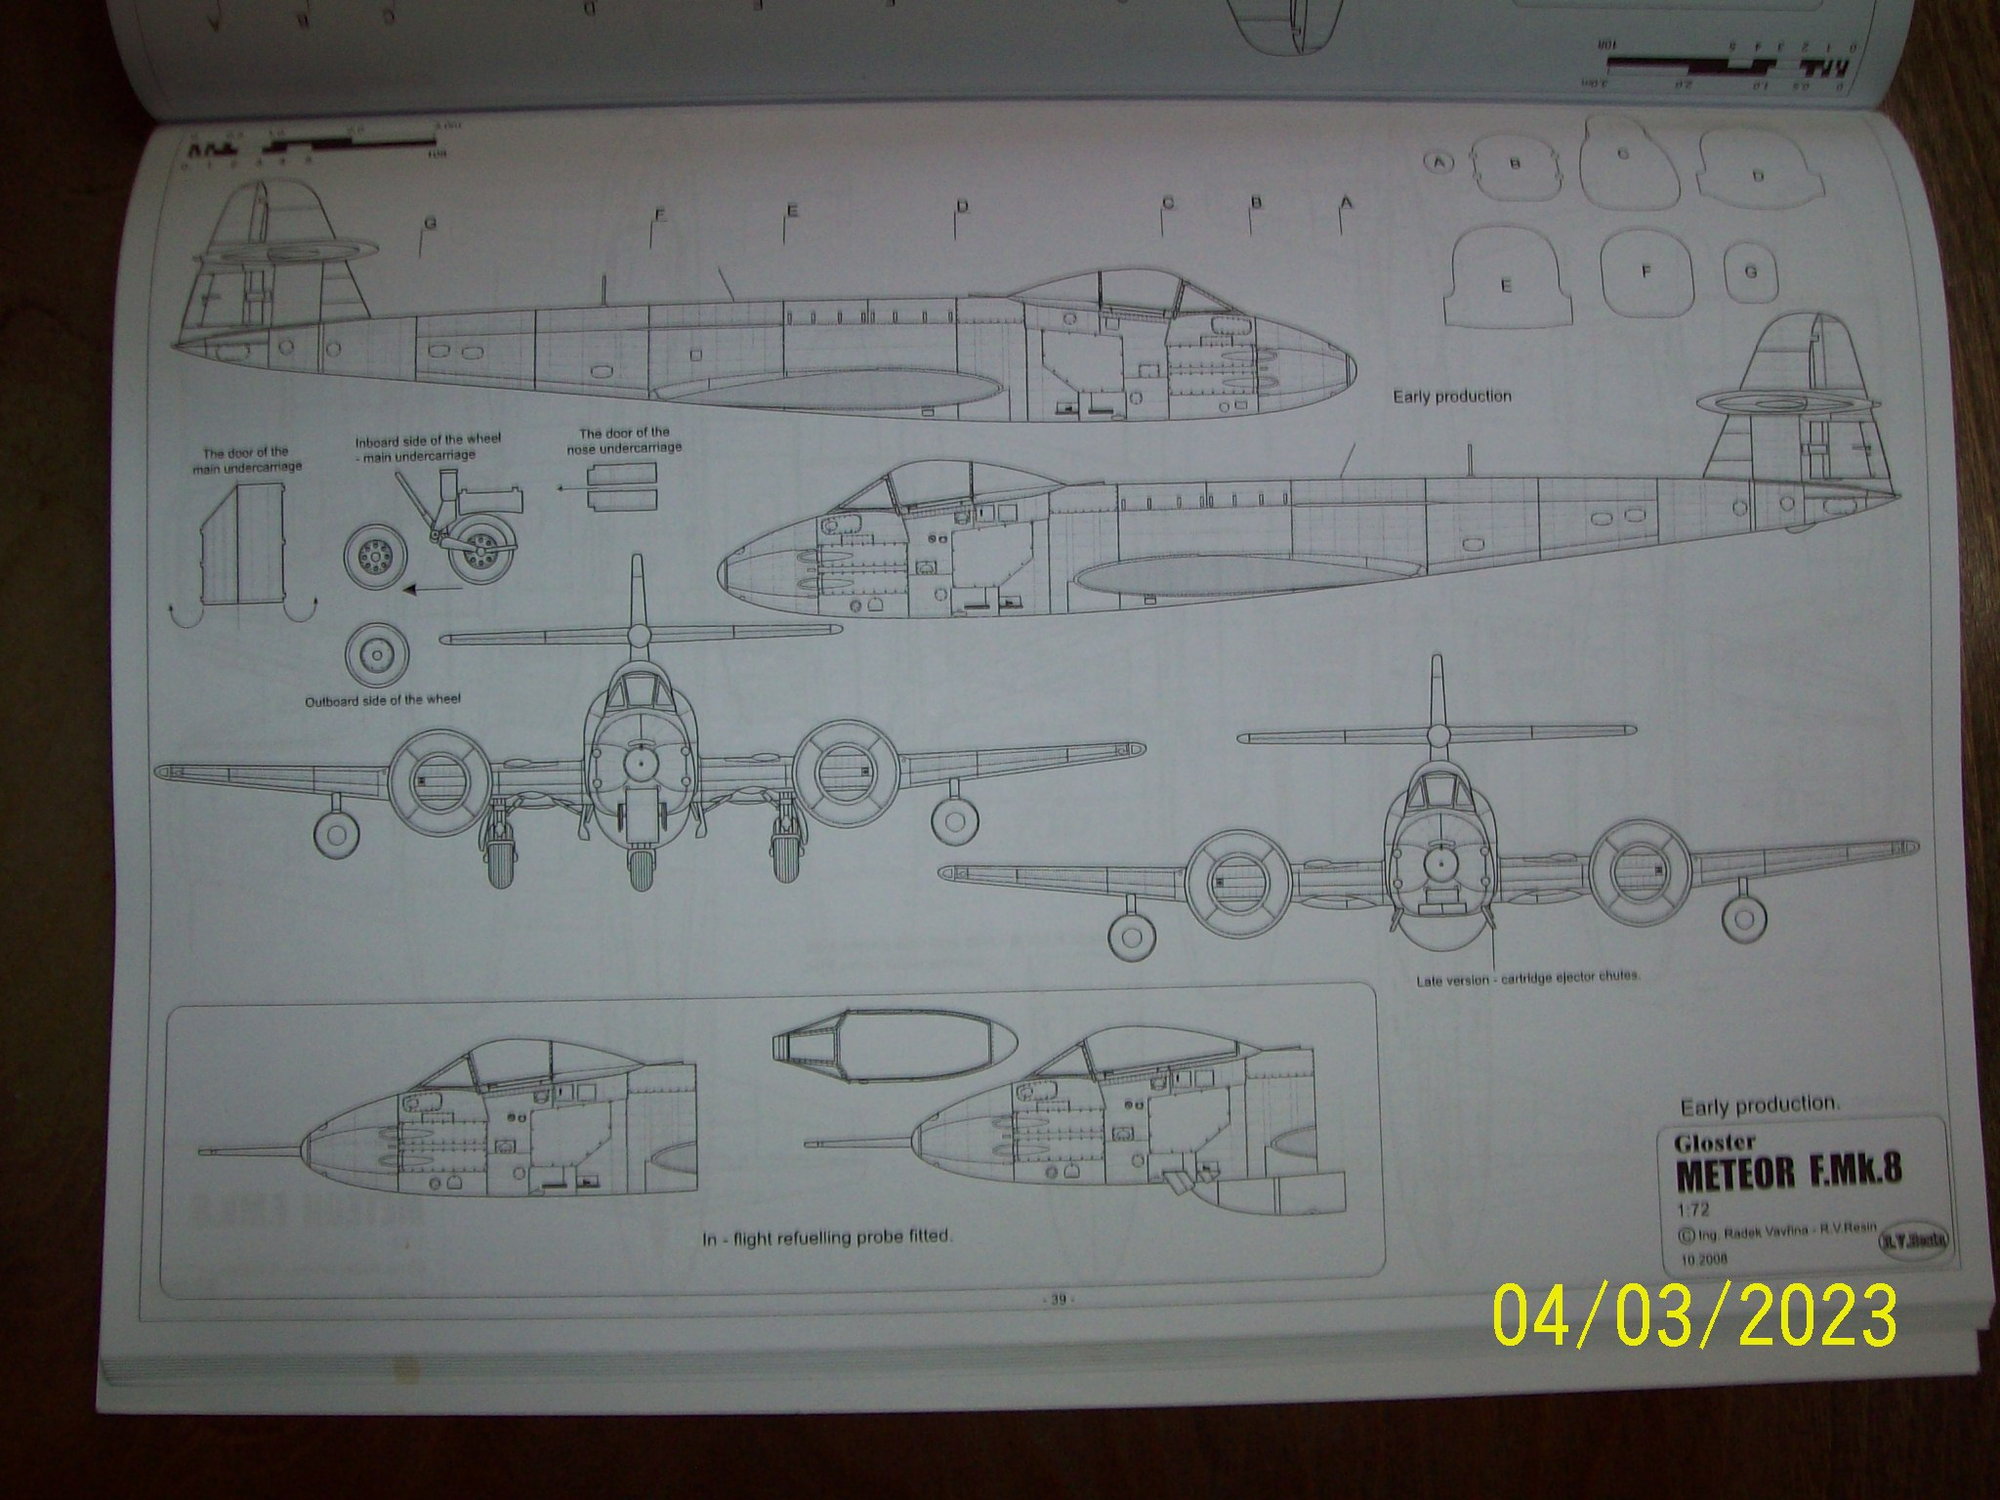
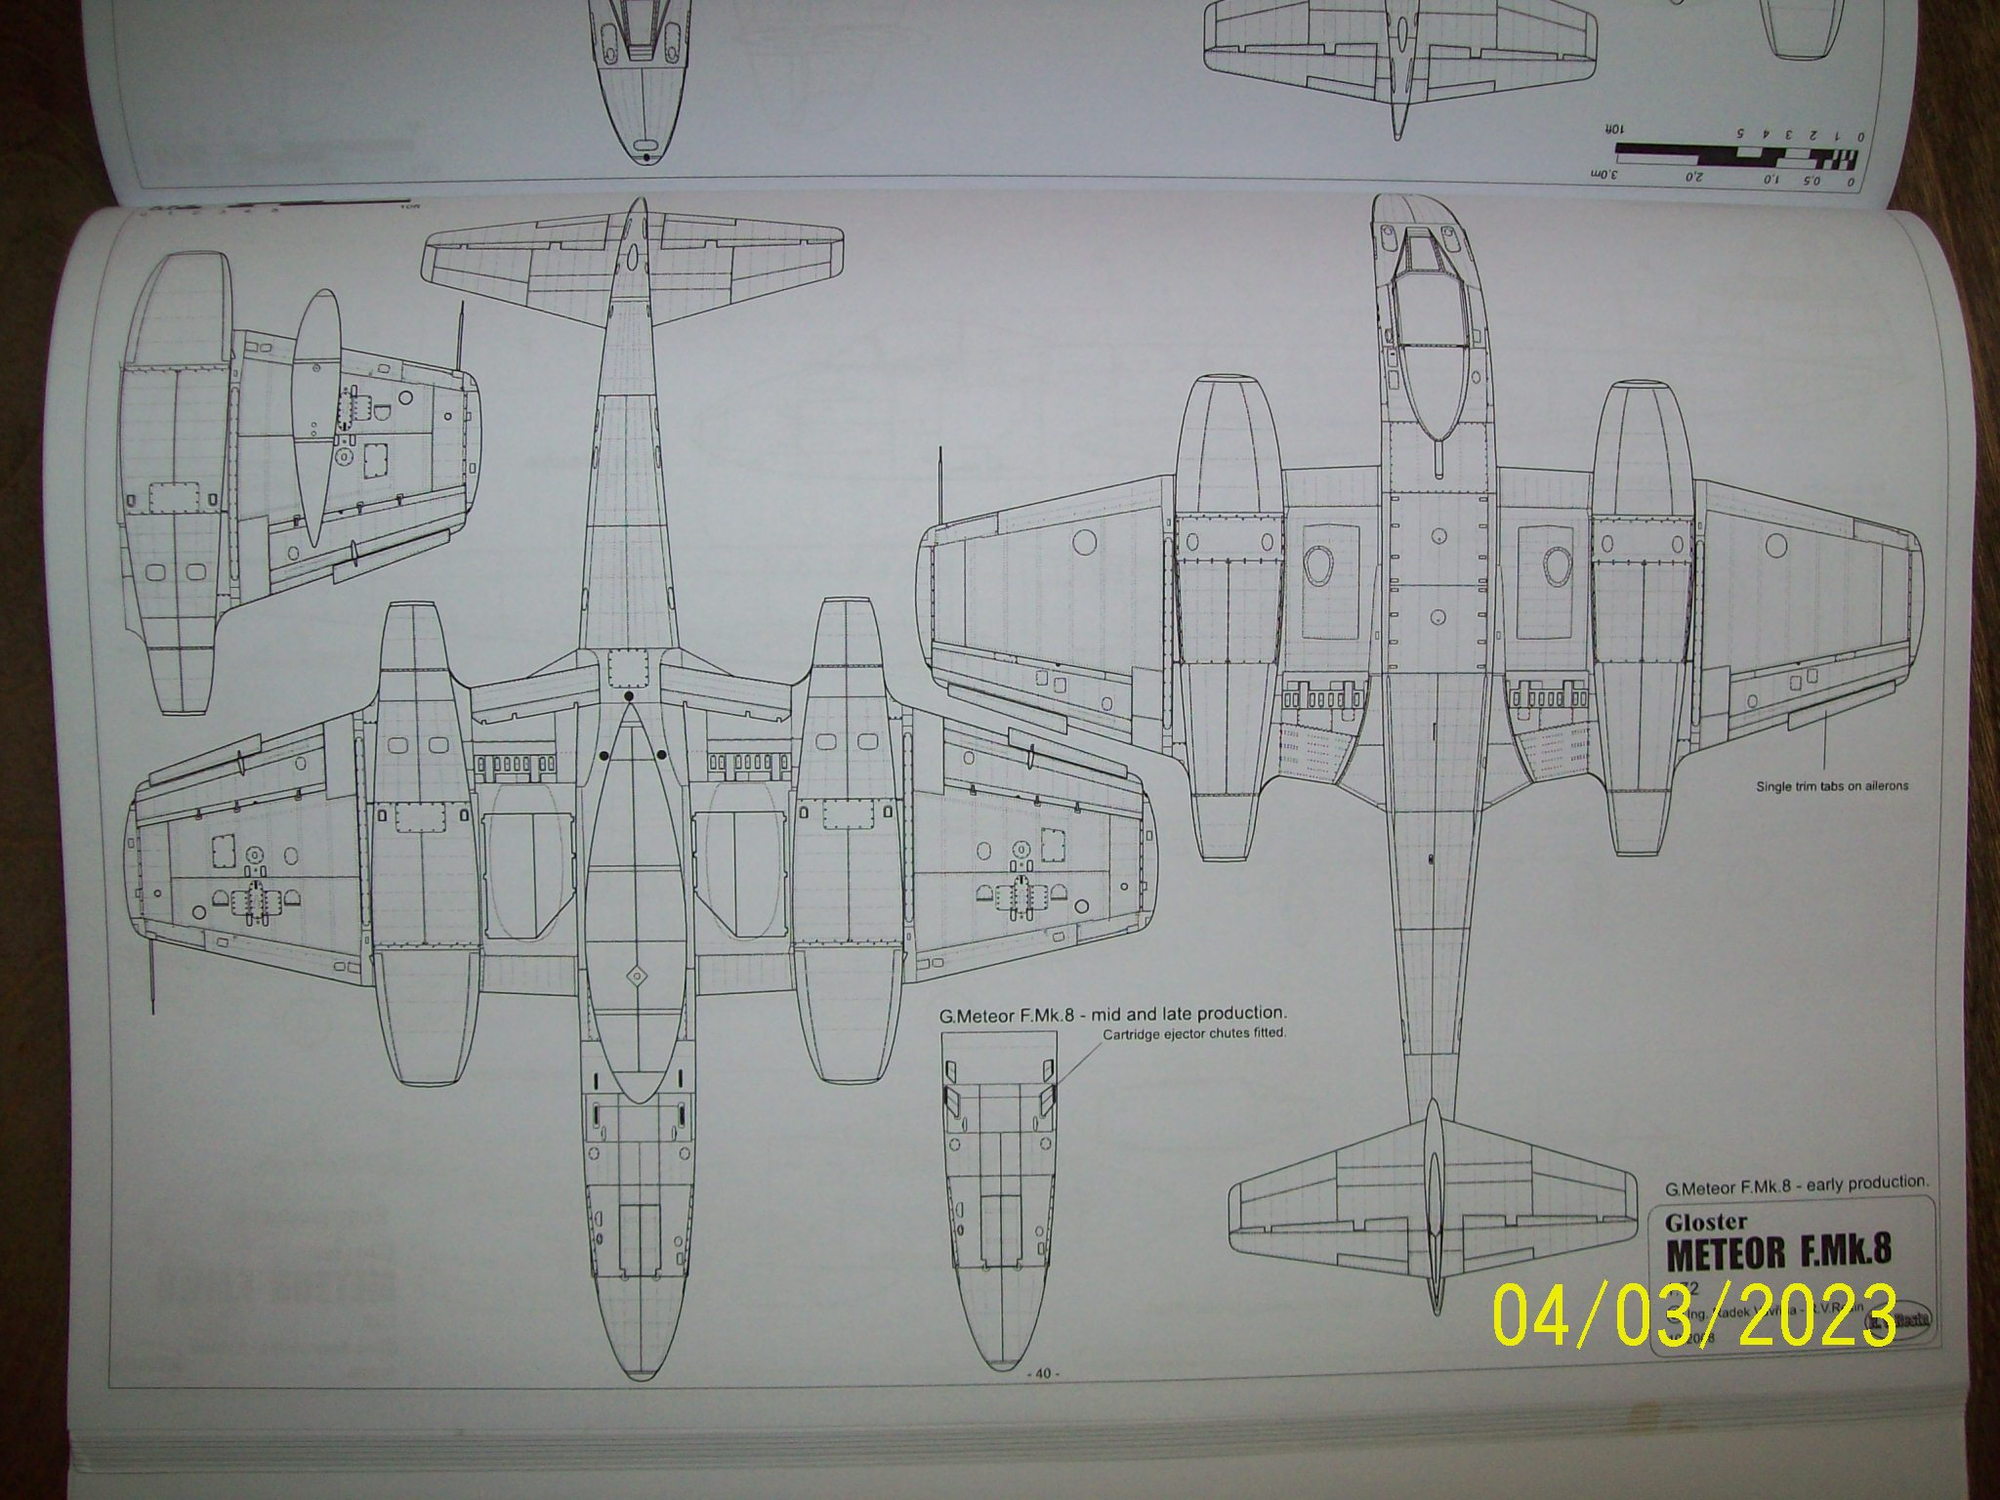
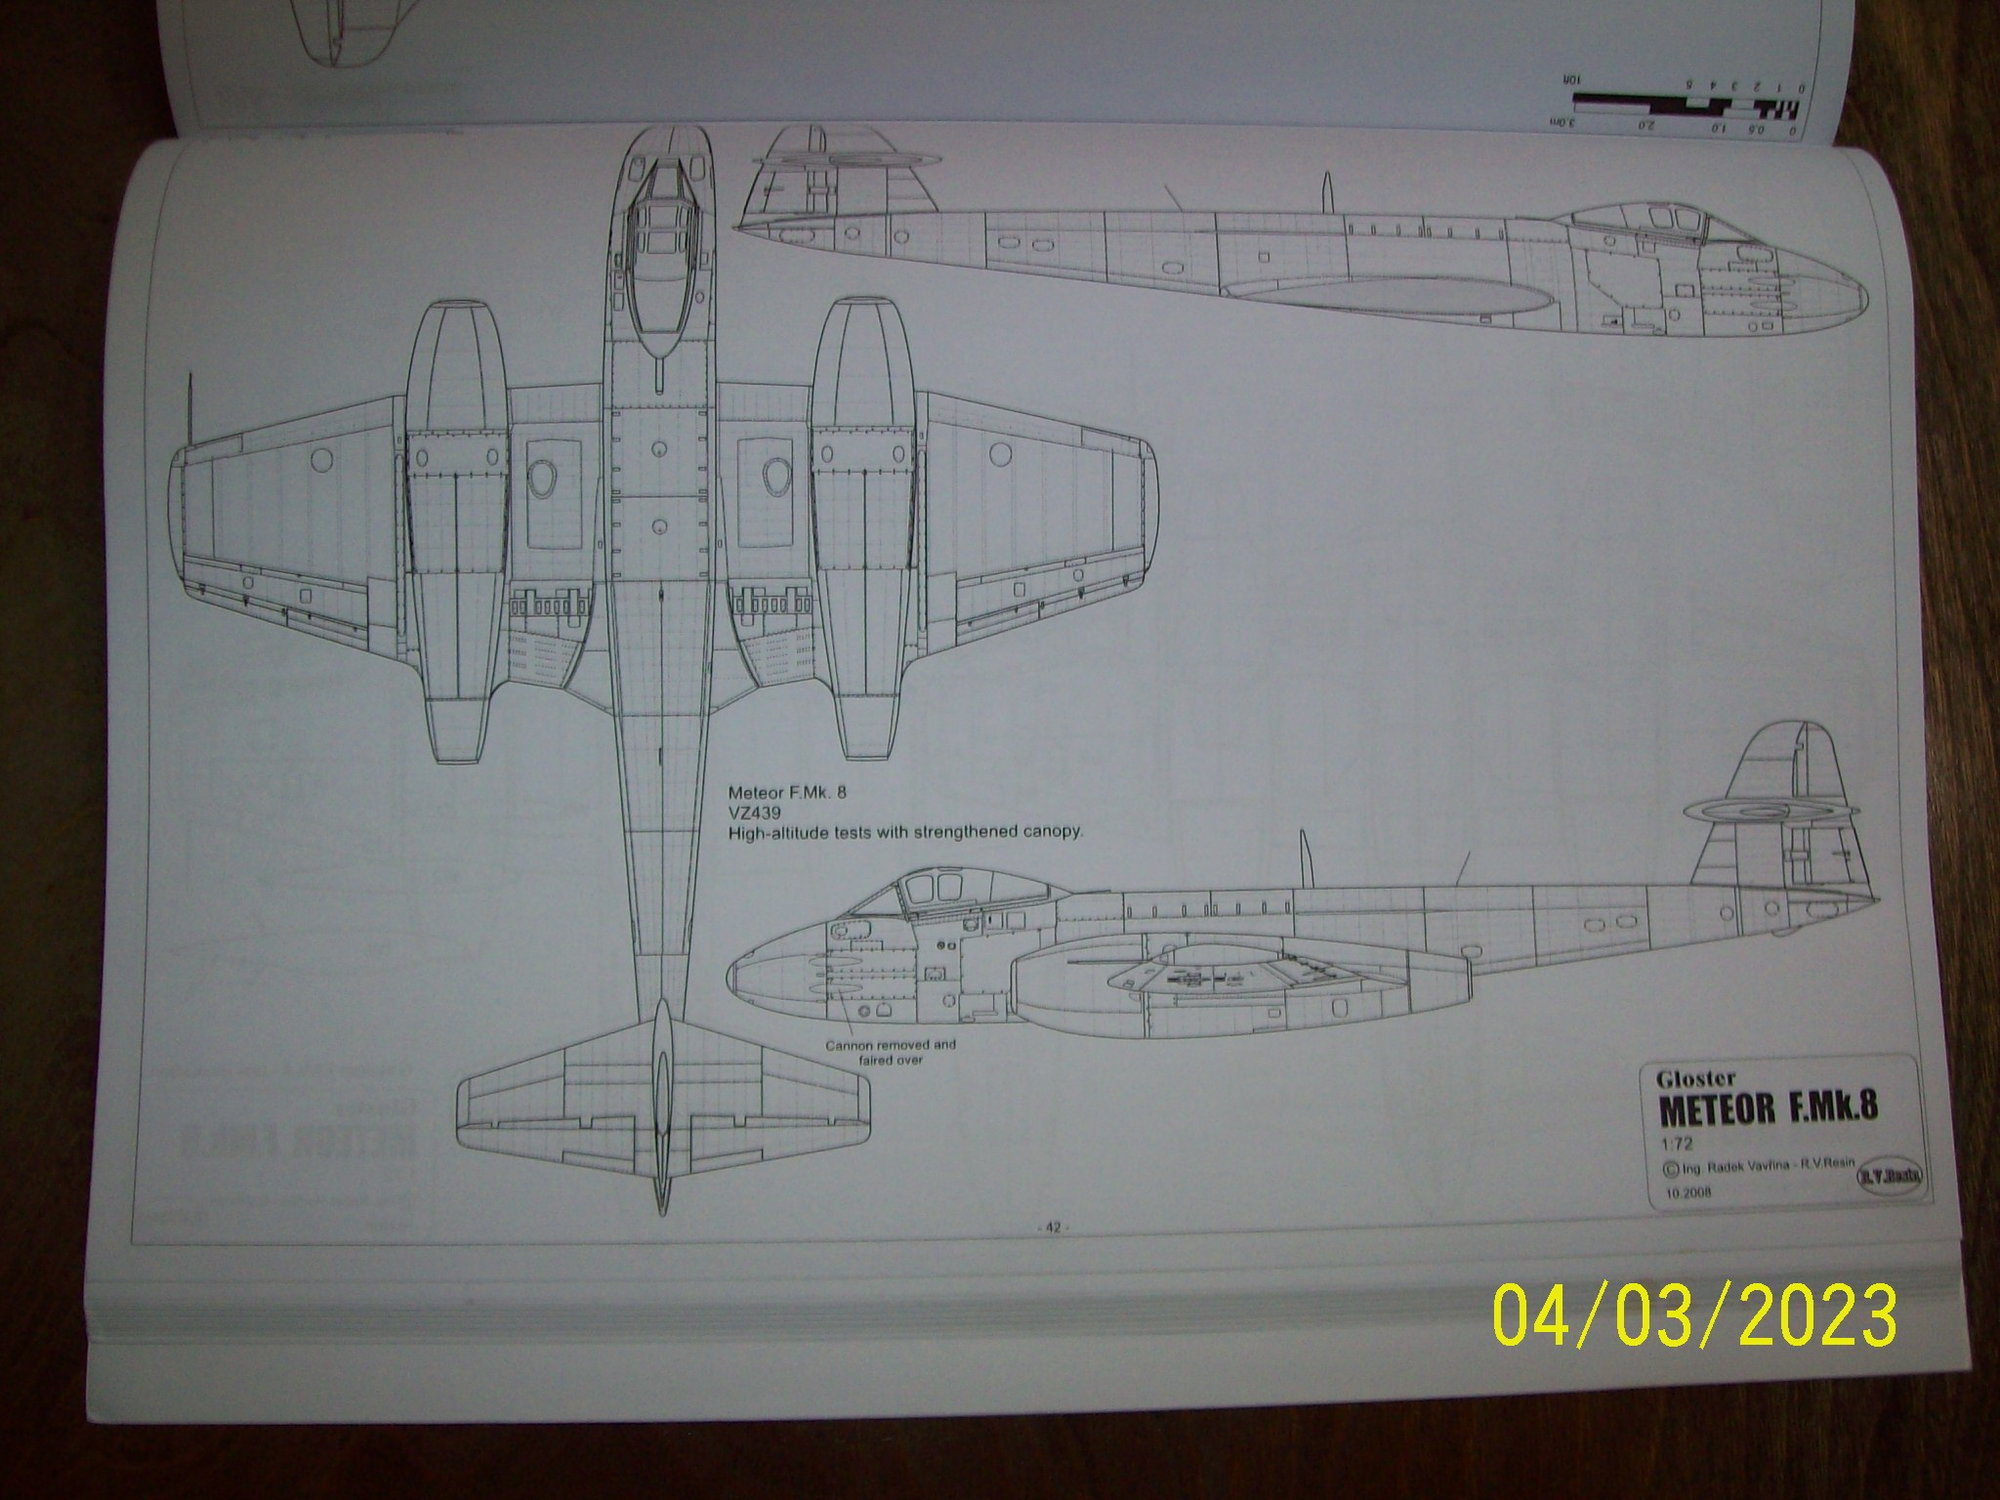
I haven�t seen that book you have used for the outlines. I may have to get that.
Looking forward to seeing your progress.
that will be a 1/4,1/5 and 1/6 scale
Meteor�s flying 👍🏻
I haven�t seen that book you have used for the outlines. I may have to get that.
Looking forward to seeing your progress.
that will be a 1/4,1/5 and 1/6 scale
Meteor�s flying 👍🏻
04-03-2023, 05:14 AM
#49
My Feedback: (66)
These plans were drawn by Jim Young and a construction article and plans were published in Model Aviation Jan. 2012. The plans are available from the AMA Plans service for $30. https://plans.modelaircraft.org/prod...ster-meteor-5/
This model is a T7/T8 which is a two seater. My goal is F.Mk.8.
This model is a T7/T8 which is a two seater. My goal is F.Mk.8.
04-03-2023, 10:38 AM
#50
I don�t want to teach you to suck eggs with Meteor variants but Jim�s plan isn�t a T7 as it has the incorrect tail.
Jim was actually trying to model a T7.5 which is a modified F8 and used by Martin Baker here in the UK still as the ejector seat test bed. Sometimes called a T7/8.
The T7.5 canopy isn�t as easy to model so he just added a T7 canopy for some reason.
The plan is actually an F8 with the incorrect canopy.
A simple mod on the plan by changing former 6, single seat canopy and you have an F8.