


ORION - sports jet build thread
 08-11-2012, 05:26 AM
#26


Join Date: Feb 2004
Location: herts, UNITED KINGDOM
Posts: 589
Likes: 0
Received 0 Likes
on
0 Posts
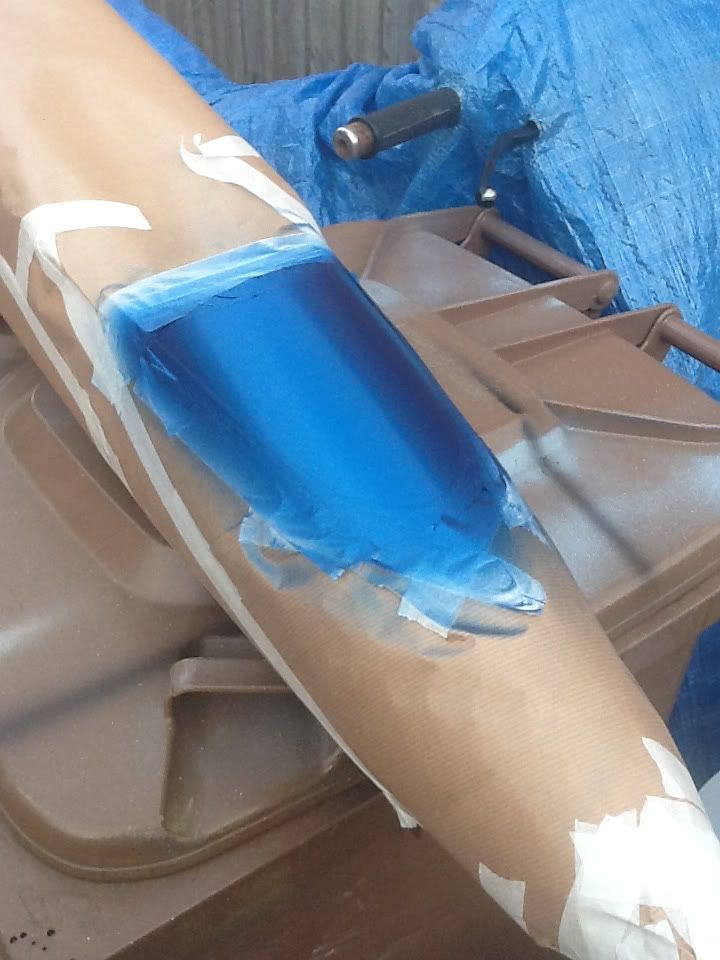
Just got the last two colours to go, metallic blue and gunmetal.
I forgot to take photos of the burgundy but did take a couple of the vertical stab.
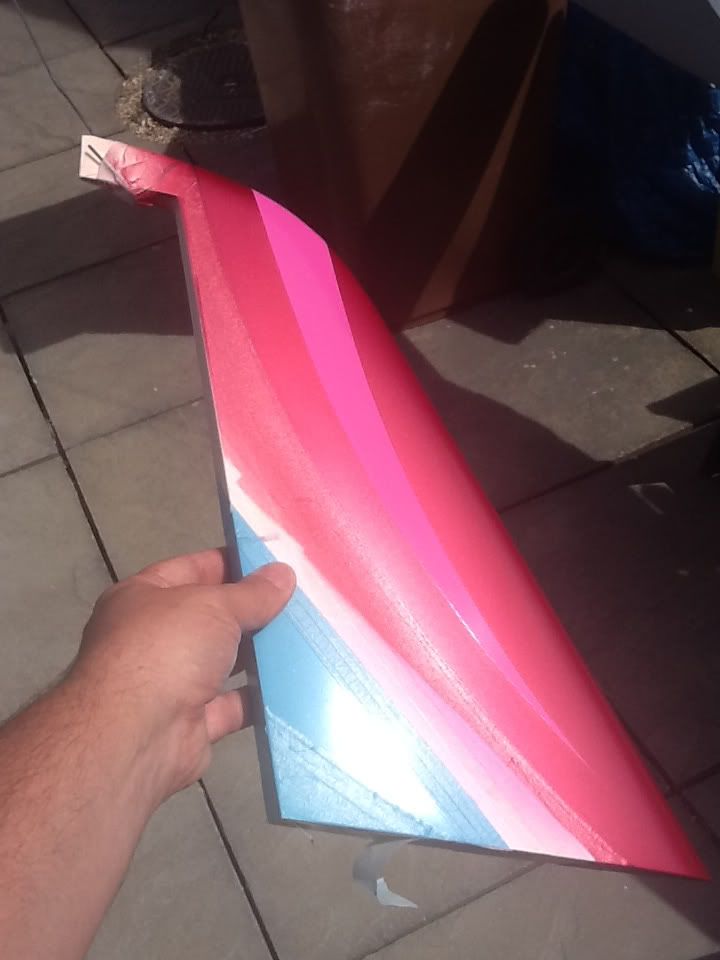
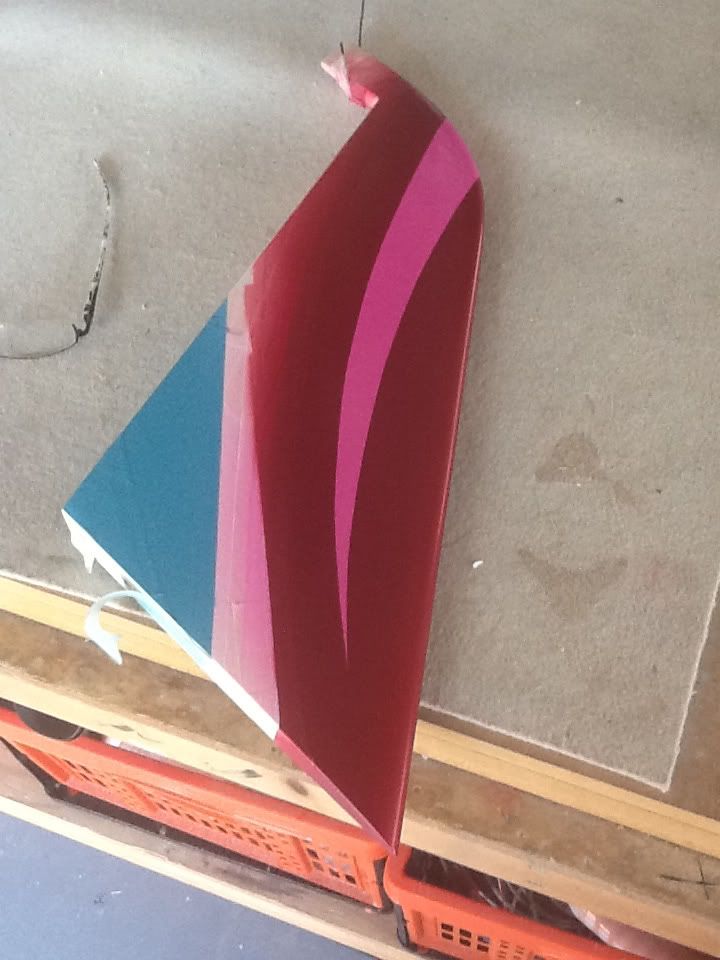
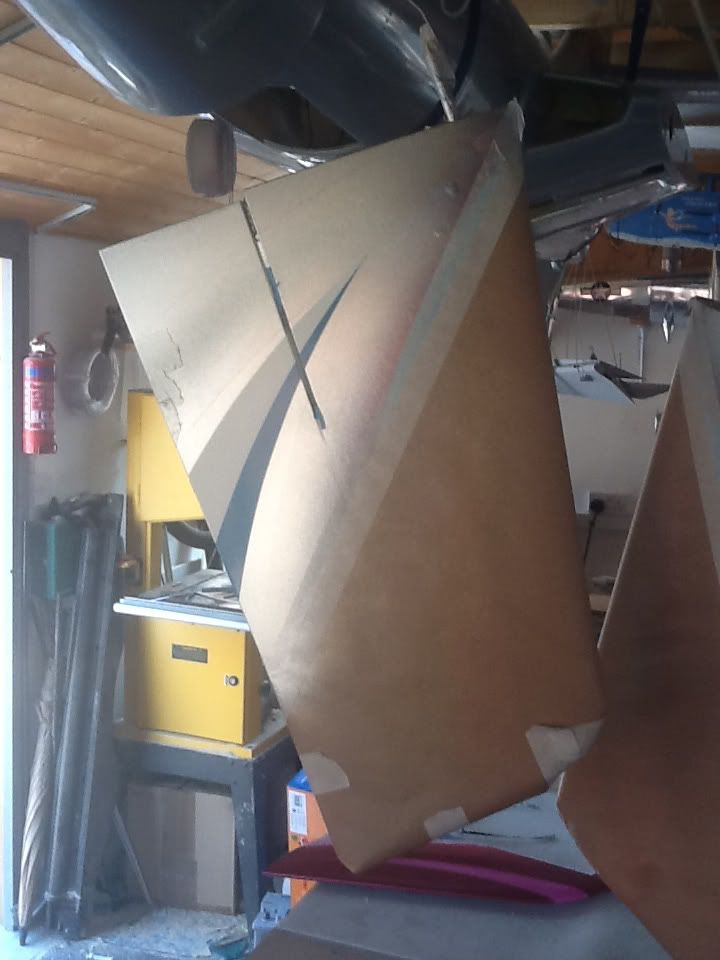
I forgot to take photos of the burgundy but did take a couple of the vertical stab.


 08-11-2012, 12:13 PM
#27
Join Date: Feb 2004
Location: herts, UNITED KINGDOM
Posts: 589
Likes: 0
Received 0 Likes
on
0 Posts
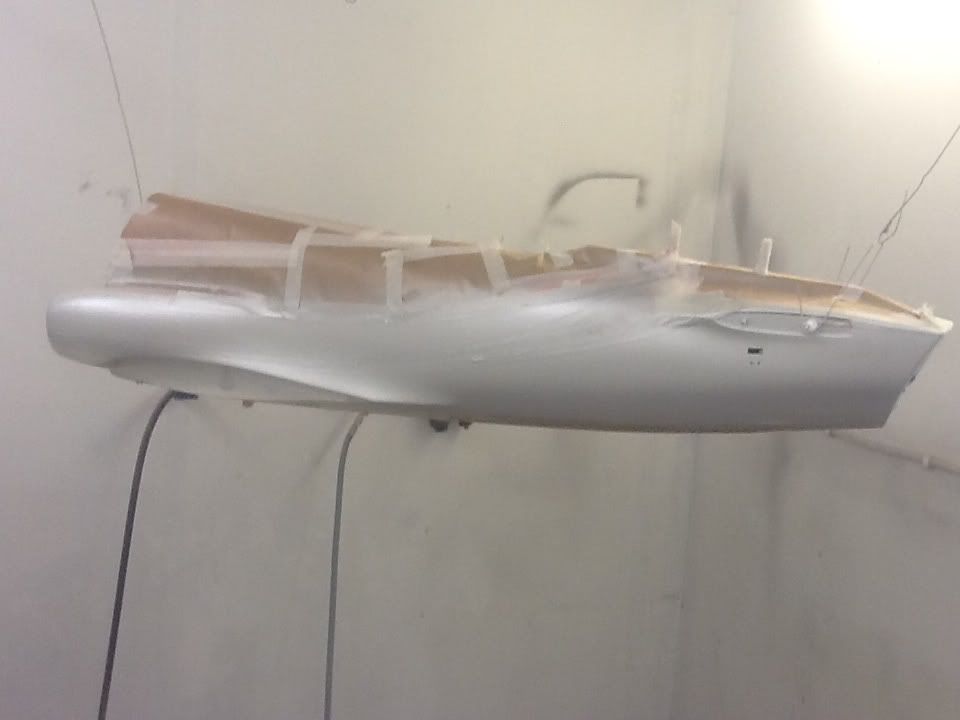
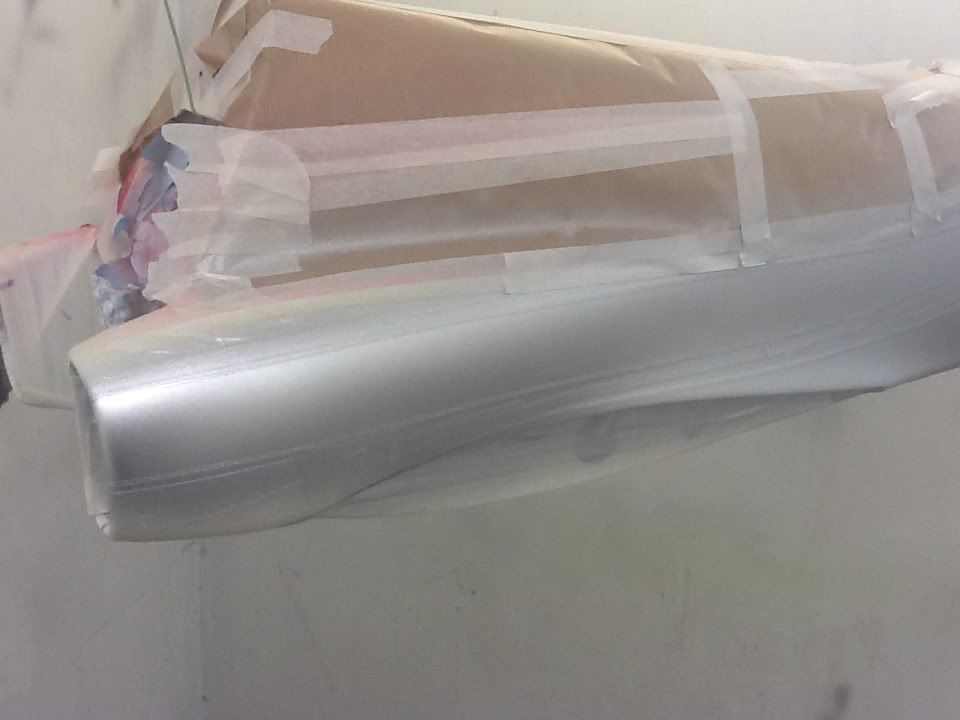
Tonight I was able to get the metallic blue on, only the gunmetal to put on tomorrow.
The nose is now finished so was able to remove all the masking and give you a preview of the final scheme
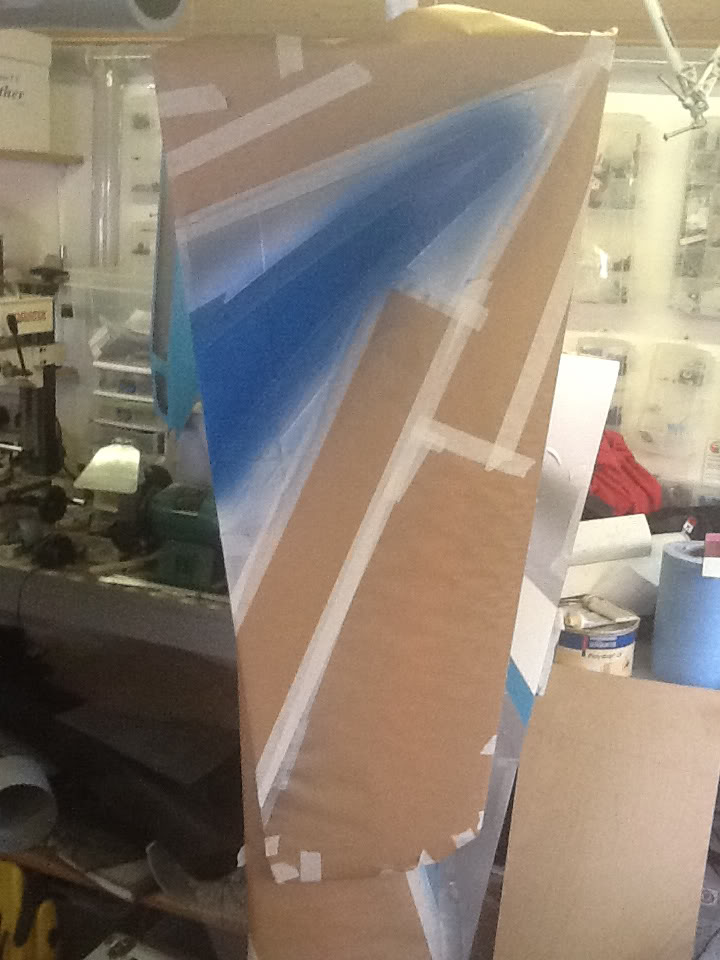
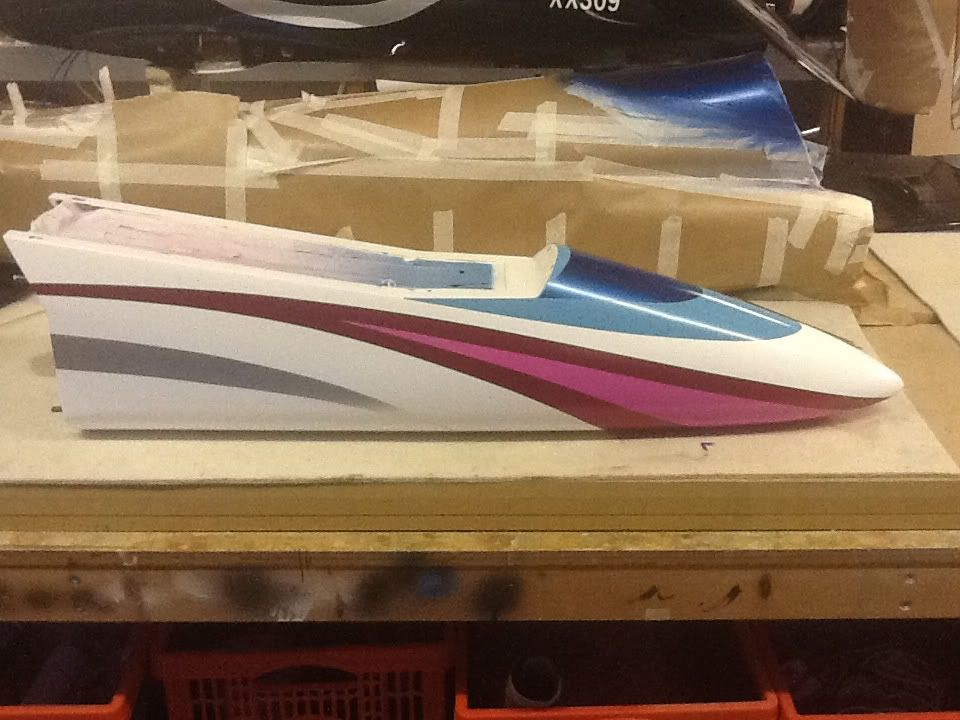
The nose is now finished so was able to remove all the masking and give you a preview of the final scheme


 08-22-2012, 04:07 AM
#34

Thread Starter
Join Date: Jan 2007
Location: farnborough, , UNITED KINGDOM
Posts: 3,294
Likes: 0
Received 1 Like
on
1 Post
Thanks Bob and Nicos, looks even better in the flesh.
Started the build, and as always before Jetpower time just seems to vanish!
Hinged the nose gear door with the small brass hinges I have used with success on a few jets, really simple to use, dont cause issues with edge binding but can only really be used on doors with minimal curvature. In this case I have kept the hinges in the area where the door is not curved and will support the front of the door with some lengthways stiffeners.
I hate hinging and control horn fitting, on the Orion the elevators and ailerons are live hinged so no work here, the flaps are hinged and are supplied ready for them to be glued in pre-made slots so again a simple job, the only control surface is the rudder which uses Robart hinges and these need to be fitted and fixed.
Normally control horns require a single or double slot to be cut in the surface, its a tricky job and takes time normally, so with an ever keen eye for simpler solutions I found some interesting horns and servo parts from [link]http://www.gabriel-stahlformenbau.de[/link] these are moulded from incredibly strong carbon impregnated plastic, under some crazy pressure and temperature, the result is a very nice rigid product which has the advantage of simple fixing (two holes), it is a dual top arm design which houses a ball link so the forces are nicely balanced and allows for sideways movement too.
There is a range of servo arms, ball links and all sorts of other goodies too.
I made a template from some FR4 to get the hole spacing right and after marking the control horn mounting line, taped the template in position, slotted a piece of Tygon over the drill bit to act as a depth gauge and made two holes, realy simple I scuffed the base of the horns a little and added a bead of Aeropoxy around the edge of the base plate of the control horns, filled the holes with the same. Pre-masked the area and dropped the horns in place, squeezing out the Aeropoxy around the plate which I cleaned off with some cotton buds - then whipped off the tape and result is a nice clean horn instal. Best of all it took 10 mins to do two stabs - happy days.
Next up are the wings - ailerons and flaps..........
marcs
Started the build, and as always before Jetpower time just seems to vanish!
Hinged the nose gear door with the small brass hinges I have used with success on a few jets, really simple to use, dont cause issues with edge binding but can only really be used on doors with minimal curvature. In this case I have kept the hinges in the area where the door is not curved and will support the front of the door with some lengthways stiffeners.
I hate hinging and control horn fitting, on the Orion the elevators and ailerons are live hinged so no work here, the flaps are hinged and are supplied ready for them to be glued in pre-made slots so again a simple job, the only control surface is the rudder which uses Robart hinges and these need to be fitted and fixed.
Normally control horns require a single or double slot to be cut in the surface, its a tricky job and takes time normally, so with an ever keen eye for simpler solutions I found some interesting horns and servo parts from [link]http://www.gabriel-stahlformenbau.de[/link] these are moulded from incredibly strong carbon impregnated plastic, under some crazy pressure and temperature, the result is a very nice rigid product which has the advantage of simple fixing (two holes), it is a dual top arm design which houses a ball link so the forces are nicely balanced and allows for sideways movement too.
There is a range of servo arms, ball links and all sorts of other goodies too.
I made a template from some FR4 to get the hole spacing right and after marking the control horn mounting line, taped the template in position, slotted a piece of Tygon over the drill bit to act as a depth gauge and made two holes, realy simple
I scuffed the base of the horns a little and added a bead of Aeropoxy around the edge of the base plate of the control horns, filled the holes with the same. Pre-masked the area and dropped the horns in place, squeezing out the Aeropoxy around the plate which I cleaned off with some cotton buds - then whipped off the tape and result is a nice clean horn instal. Best of all it took 10 mins to do two stabs - happy days.Next up are the wings - ailerons and flaps..........
marcs
 08-22-2012, 05:46 AM
#36
Thread Starter
Join Date: Jan 2007
Location: farnborough, , UNITED KINGDOM
Posts: 3,294
Likes: 0
Received 1 Like
on
1 Post
Sean, was looking to use the arms too but due to the width you have to make a big slot in the servo cover to allow them to clear which looks a little naff sometimes, I use their normal arms which are very good and run an M3 metal clevis from them.
marcs
marcs
08-23-2012, 09:46 AM
#37
Thread Starter
Join Date: Jan 2007
Location: farnborough, , UNITED KINGDOM
Posts: 3,294
Likes: 0
Received 1 Like
on
1 Post
Whilst the glue was setting last night from installing the elevator and aileron horns I fabricated two internal push rods for the elevator linkages, these were made from two arrow shafts, kindly donated by a work friend who drops me in damaged ones after her competitions!
The shaft is a thin aluminium tube wound with carbon and is light and very stiff. Terry my machining guru cracked off four aluminium inserts to go in each end with an M3 tapped hole for a short length of SS M3 threaded rod, the ends were glued in and then safety pinned with M1.6 CH bolts and nuts with a piece of heatshrink over the top to make sure nothing works loose.
The ball links and servo arms are from Gabriel, and have zero slop.
The servos for the elevators are mounted in my servo docks one each side of the turbine in the main hatch area, I glued them in last night and this morning painted the engine bay and servo docks grey.
Hooked up the linkages, locktite'd all the nuts etc and mounted the 8411's.
Also fitted the nose gear door servo but waiting for glue to dry so will post pics and info tomorrow on this.
marcs
08-24-2012, 12:12 AM
#39
Thread Starter
Join Date: Jan 2007
Location: farnborough, , UNITED KINGDOM
Posts: 3,294
Likes: 0
Received 1 Like
on
1 Post
The nose gear wheel is just slightly proud of the shut position for the door when retracted so rather than mess around with the mounting rails in an attempt to lower them I decided to tilt the whole retract unit a degree or so to kick the nose wheel down a few millimeters.
I could not find some very thin long tapered wedges so decided to make them instead, not sure how they will turn out but waxed up a flat plate (two strips of brown packing tape stuck to my work bench) and then a thick piece of FR4 covered in brown tape and waxed as well. I gunned two generous strips of Aeropoxy to the plate, rested a spacer at one end and placed the top plate onto the waxed tape on the workbench. Hopefully when dry I will have two long wedges which I can trim on the band saw to place under the retract unit - fingers crossed.
marcs
08-29-2012, 02:33 PM
#40
Thread Starter
Join Date: Jan 2007
Location: farnborough, , UNITED KINGDOM
Posts: 3,294
Likes: 0
Received 1 Like
on
1 Post
Sorry for the lack of posts but I have been working away to try to get this jet done in time for this weekend which will be the only time to test and maiden the orion before jetpower where I hope it will be performing.
Snapped a few shots tonight
- wiring connectors to hook up front to main fuselage (Ashloks)
- made a new data cable as the supplied were a little short
- servo heat shields
- nice Grumania pipe
- B100F turbine
- elevator linkages all made and connected
- stab roots
- rudder linkage
- rear pipe exit detail
- main equipment board, PB switch and IO board
marcs
08-30-2012, 02:17 PM
#41
Thread Starter
Join Date: Jan 2007
Location: farnborough, , UNITED KINGDOM
Posts: 3,294
Likes: 0
Received 1 Like
on
1 Post
Had a friend come over to have a look at the Orion so assembled it outside quickly to show off the overall look and scheme...
Most of the wiring and cabling is all done, finishing off the wings by fitting the control linkages and pinning the flaps hinges to make sure they dont come loose - found a neat way to do this using tiny rivets with domed heads, drilled a 1.5mm hole through each hinge and dropped a small amount of medium cyano in the hole using a pin and then popped in the little rivets which makes for a neat safety job.
Assembled the wheels and electric brakes, fitted the Electron retract units to the formers in the wing with M4 blind nuts. Needed to extend the legs a little so Rich is machining up some 6mm pins and a spacer collet to go in the gap between the retract trunion and the top of the trailing link upper leg, these should be back in the morning when I hope to get the second wing done too.
Final jobs are to add a CAT, sort batteries, work out CG and then program TX, hopefully then I can run up the turbine and check the systems before a small taxi test.
marcs
08-30-2012, 10:35 PM
#42

ORIGINAL: marc s
Had a friend come over to have a look at the Orion so assembled it outside quickly to show off the overall look and scheme...
Had a friend come over to have a look at the Orion so assembled it outside quickly to show off the overall look and scheme...
@Ali: Please take it up high and give him the sticks for a few seconds...just so he can say he's ACTUALLY flown a jet
 08-31-2012, 03:14 AM
#43
Looks very nice Marc. I'll admit to being skeptical at the start with so many different colors, but seeing it together it has come out looking quite sharp. I'm sure the B100 will be really nice in there. Did you do any assembly work before paint or did you get it completely painted first? I have a Futura 1.9m that I'm going to move my B100 into and am leaning toward painting it first then installing everything.....I hope I can have the discipline to do that as I'd love to just get out and start flying.
Good luck with the Orion at JP. I'm sure it will present well.
Good luck with the Orion at JP. I'm sure it will present well.
01-01-2013, 04:22 AM
#44
Join Date: Dec 2008
Location: Melbourne, AUSTRALIA
Posts: 121
Likes: 0
Received 0 Likes
on
0 Posts
Hi Guys,
Did this jet ever go into production?? or did it suffer the same fate as Ali's Mack 1 [ ] ??
] ??
Is there any video of it flying?
Cheers,
Paul
Did this jet ever go into production?? or did it suffer the same fate as Ali's Mack 1 [
] ??Is there any video of it flying?
Cheers,
Paul
03-22-2013, 01:59 PM
#47
Thread Starter
Join Date: Jan 2007
Location: farnborough, , UNITED KINGDOM
Posts: 3,294
Likes: 0
Received 1 Like
on
1 Post
I hope to have some video in the next few months, it has flown but by my own admission I over complicated the elevator linkage and we had a flutter on the maiden last year which resulted in one elevator parted company from the stab!
Fortunately I had the best pilot Ali Machinchy on the sticks and he was able to land it without further damage.
I am just about to start to re-do the elevator servo set up and this time I will simply mount the servos (2 x JR8411's) in the side of the fuselage under the stabs and have direct short linkages to each elevator. The original linkage system I devised was too complex, had too many areas where play occurred and this created slop - resulting in flutter
The kit however is superb and the original Orion has flown over 100 times under control of the designer and manufacturer.
marcs
03-27-2013, 04:24 AM
#48
Thread Starter
Join Date: Jan 2007
Location: farnborough, , UNITED KINGDOM
Posts: 3,294
Likes: 0
Received 1 Like
on
1 Post
I have now started the 'revised' elevator servo set up and this is the plan.....
I decided to mount the servos in the fuselage side under each stab and have very short linkages directly to the elevator, its admittedly not the cleanest option but hopefully it will be 100% reliable and not too naff to look at.
There is just about enough room to get an 8411 JR servo in each side of the fuselage in the same area where the original bell crank was mounted, this is so that the hole already made in the fuselage could be 'disguised' as part of the enlargement to house the servo and to also take advantage of the ply plate I had already fitted inside this area for extra strength.
I made a template and marked out the servo case size and converted this to the fuselage side and cut the opening out. Once done I inserted the servo and was not happy for two reasons, firstly it looked really naff and second the servo base was only 1mm away from the thrust pipes outer second wall. I know it does not get too hot but it seemed a little close for comfort.
To make more room I designed a spacer for the servo to sit in which added 3mm to the gap between the pipe and servo base, the spacer was also shaped to make it look more 'in tune' with its surroundings. Made from ABS 5mm plastic it holds the servo secure and blends in the look a little better.
marcs
