


Skymaster Avanti XXL Build Thread
 11-05-2014, 09:08 PM
#1

Thread Starter

After months of sitting and counting the days in Afghanistan and here at home the second of three new projects has arrived! Really excited about about this jet, I wanted one from the time I saw the Avanti small back when it released.
It took about 3 months once the order was placed and It was a little challenging getting an order placed in a combat zone but it all worked out. That being said I would like to thank Eric Clapp for his hard work to make these projects happen. We had lots of email action over the months and I can be a handful at times, but it was a straight forward dealings and always a professional! A++ guy to deal with, but most of you already know that.
Super excited to get back to some building and flying this year! Just like before I will be posting pictures and videos from the beginning to the end and for people that may like to follow youtube or facebook I have pages listed in my signature of my personal pages. I will being doing the Avanti here but will probably just post the F-14 to my youtube/facebook site once it gets here, but anyway I hope you guys enjoy it! Cheers!
Video#1 https://www.youtube.com/watch?v=lV_j...BAxA8bHVCw3VQQ
Video#2 https://www.youtube.com/watch?v=dsFh...BAxA8bHVCw3VQQ
Video#3 https://www.youtube.com/watch?v=0m_H...BAxA8bHVCw3VQQ
Video#4 https://www.youtube.com/watch?v=TYWc...BAxA8bHVCw3VQQ
Last edited by FenderBean; 11-05-2014 at 09:13 PM.


 11-06-2014, 12:48 AM
#3
My Feedback: (1)
Join Date: Jul 2002
Location: SevenoaksKent, UNITED KINGDOM
Posts: 5,193
Likes: 0
Received 0 Likes
on
0 Posts
Good stuff. It's a fairly simple build. Need to get back on mine to finish it off after a 2-3 week break.
Last edited by schroedm; 11-06-2014 at 03:53 AM.

 11-06-2014, 05:56 AM
#7
Thread Starter
11-06-2014, 06:12 AM
#9
Thread Starter
Your talking about the equipment trays correct? Mine didnt come with them, im heading out to check the box again and make sure I didnt miss them.
Also a side not, i am seriously considering just going with air and not converting the gear to electric. The gear works sooooooooooo smooth as is, I understand why they charge so much for gear! Work of art!!!
What are you guys running for torq on your Flaps and Ailerons? I was thinking about using 9074s which are 277 oz of torq and BLS172s on the elevators and rudder. The thrust vectoring im using two BLS175s
Last edited by FenderBean; 11-06-2014 at 06:16 AM.
11-06-2014, 06:34 AM
#10
Thread Starter
Bam! Yelp have to be careful almost missed them, they were in the bottom. I dont normally use the equipment trays and if I do I make my own out of thinner ply to save weight. That being said these are so nice and with a UAT slot and stuff already cut I may just use them or at least use it for a pattern for my own. These are pretty light weight!

Last edited by FenderBean; 11-06-2014 at 06:36 AM.
11-06-2014, 07:44 AM
#11
My Feedback: (1)
Join Date: Jul 2002
Location: SevenoaksKent, UNITED KINGDOM
Posts: 5,193
Likes: 0
Received 0 Likes
on
0 Posts
Cool. Told ya they'd likely be there! Only because I threw mine away!! 
I'm using
8911s on all surfaces
8915 on vectored thrust
Powerbox Royal SRS with integrated iGyro
Powerbox 3200 LiFe packs
Behotec 220
I'm using
8911s on all surfaces
8915 on vectored thrust
Powerbox Royal SRS with integrated iGyro
Powerbox 3200 LiFe packs
Behotec 220
11-06-2014, 08:58 AM
#14
Thread Starter
Small problem on wheel shaft length and washer that holds the wheel on. Nothing major I just added a small spacer to prevent the locknut from bending the washer that holds the wheel on the shaft.
Video#5 https://www.youtube.com/watch?v=_AqP...ature=youtu.be
Video#6 https://www.youtube.com/watch?v=QB00...ature=youtu.be


Video#5 https://www.youtube.com/watch?v=_AqP...ature=youtu.be
Video#6 https://www.youtube.com/watch?v=QB00...ature=youtu.be
Last edited by FenderBean; 11-06-2014 at 10:12 AM.
11-06-2014, 10:11 AM
#15
Thread Starter
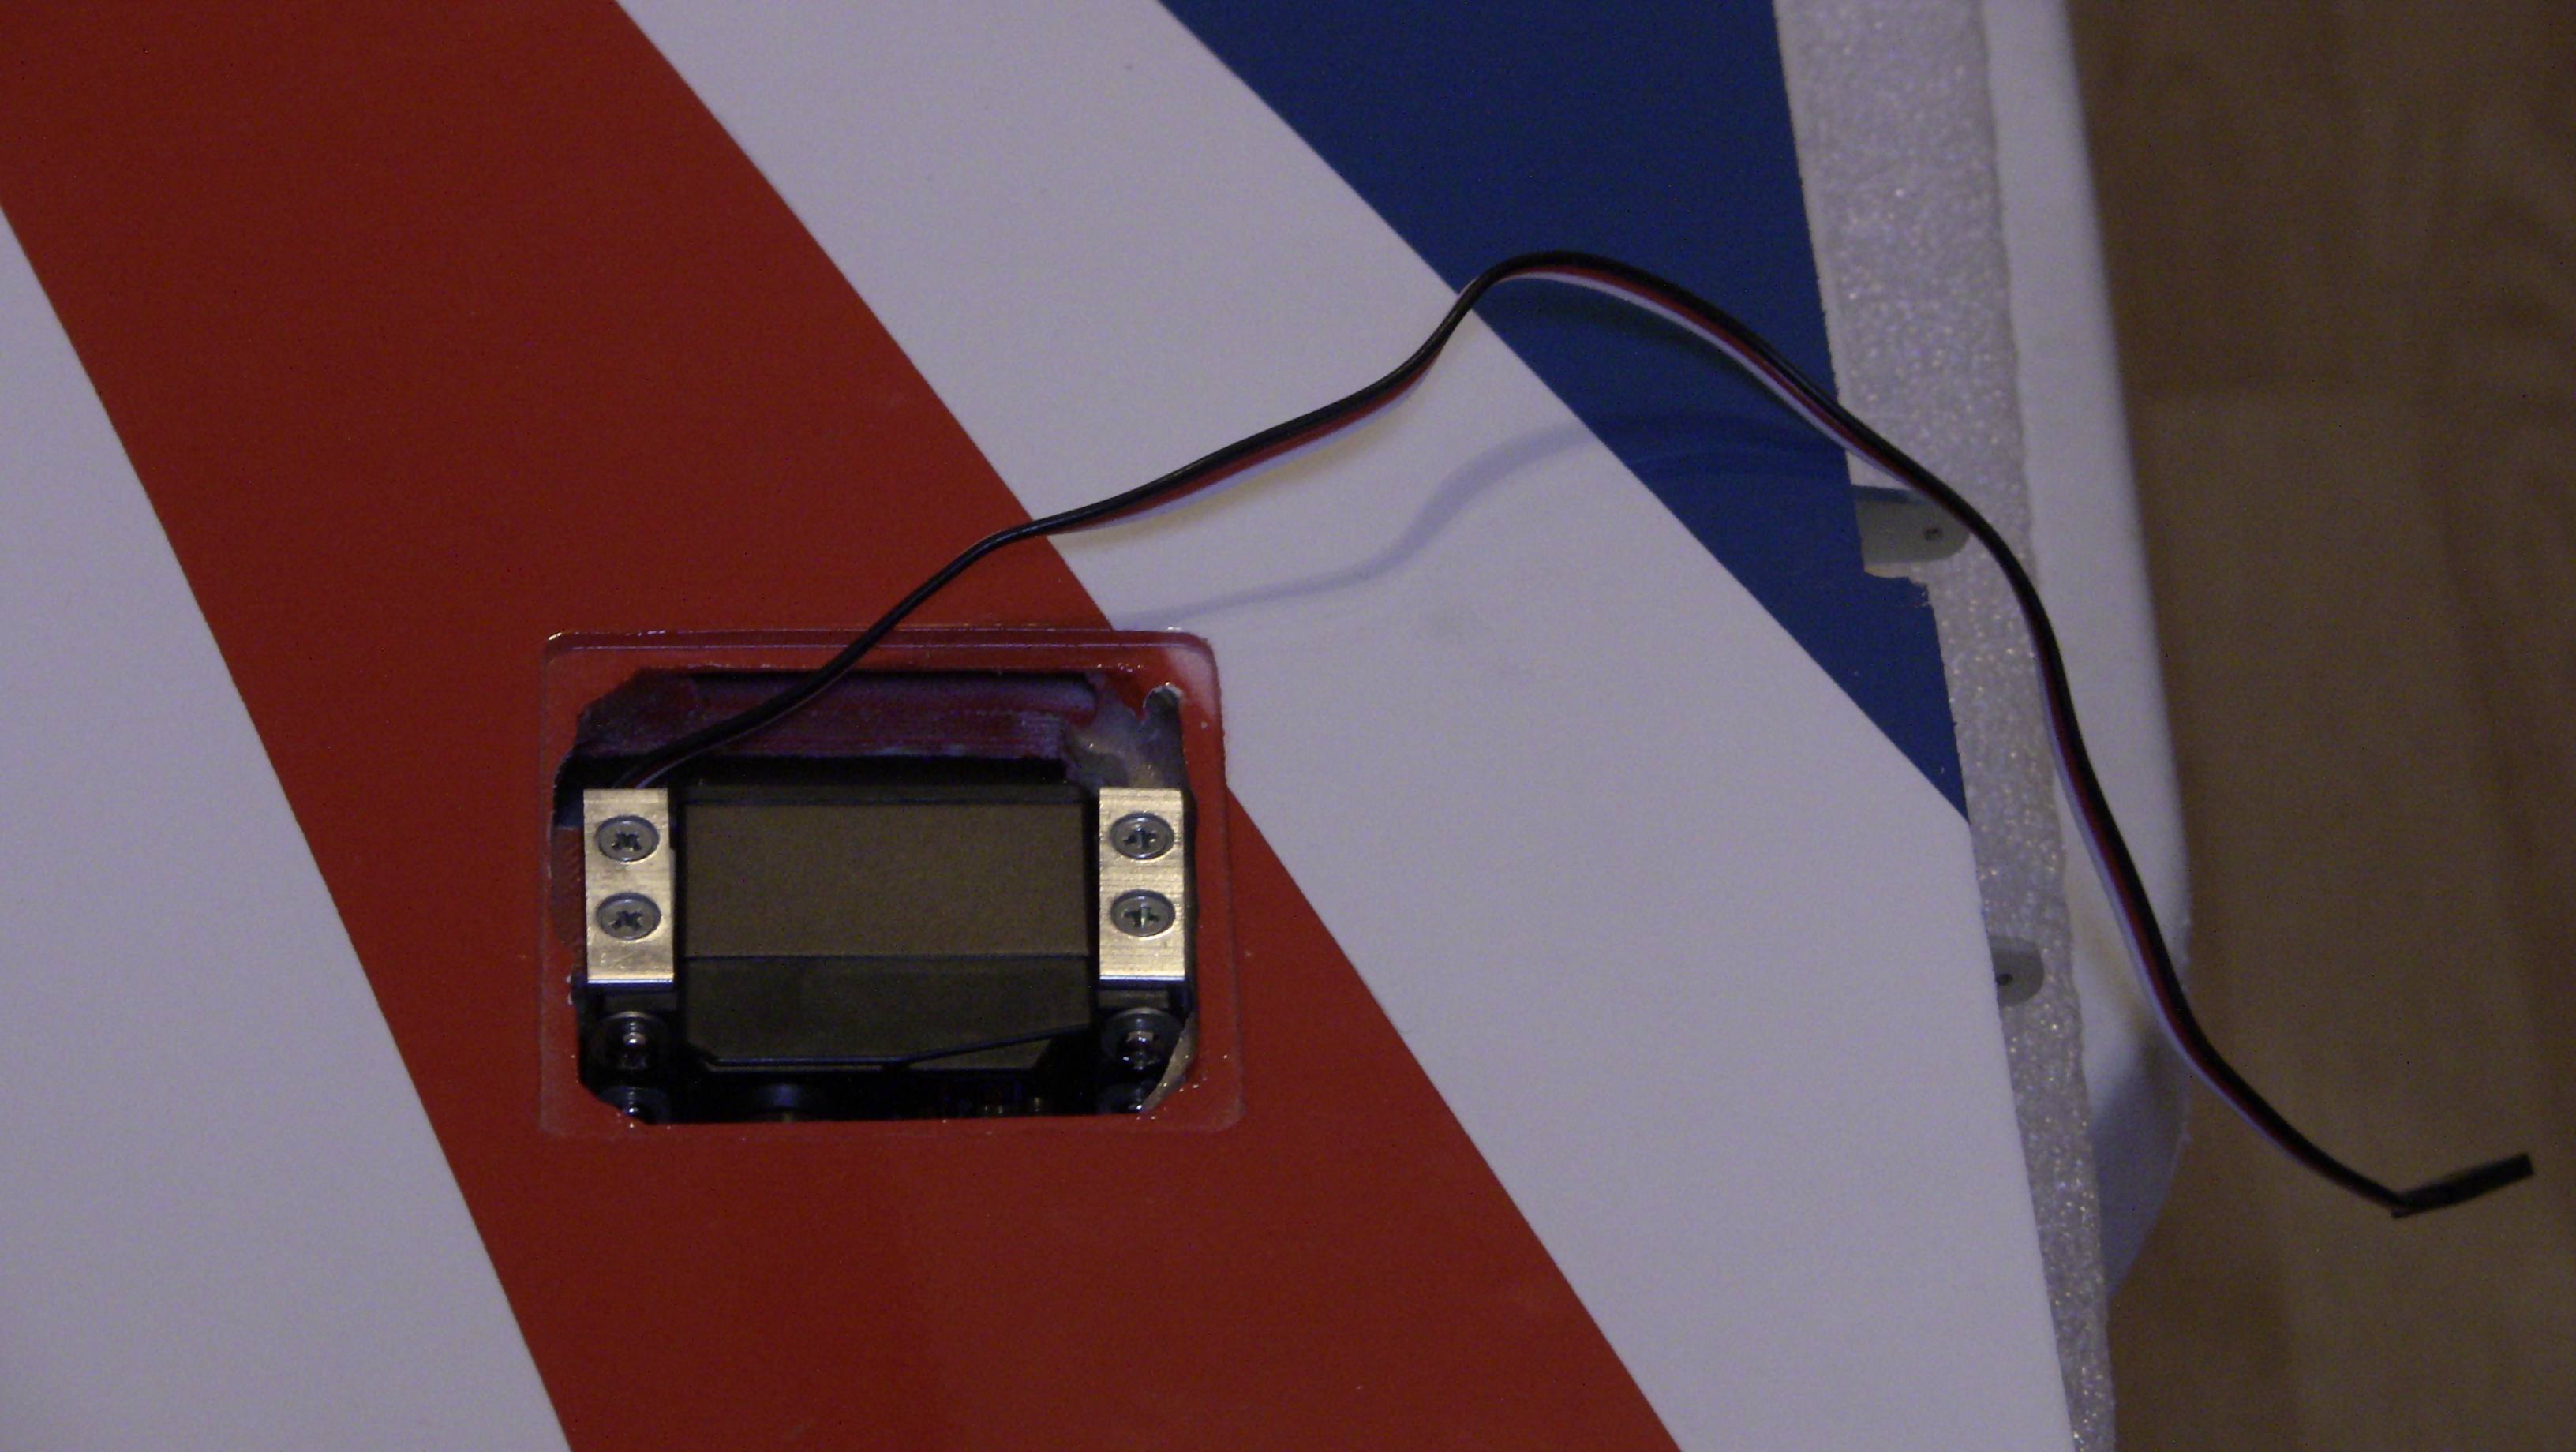
Okay so slow going today, just when I got going I hit my first road block. Problem #2 hit me in the face, one of the Aileron servo boxes is glued in wrong. It is way off center so I have to reconstruct one side of the servo box, this has to be done or the servo arm is almost sitting on the edge of the opening at center  So on that not I will be back at the build once I fix this problem.
So on that not I will be back at the build once I fix this problem.
11-06-2014, 12:55 PM
#16
Thread Starter
Okay so the corrected servo box issue is curing and the servos are mounted via your typical "L" bracket with screws and washers.
I have to get longer servo Arms, looks like 1.5 inch arm will work for everything, the flaps and Rudder need the longest arms. You could even use a 2 inch on the flaps and rudder, but i going 1.5 if I have to cut more area for the arms I will.


I have to get longer servo Arms, looks like 1.5 inch arm will work for everything, the flaps and Rudder need the longest arms. You could even use a 2 inch on the flaps and rudder, but i going 1.5 if I have to cut more area for the arms I will.
11-07-2014, 09:55 AM
#17
Thread Starter
Ugh I have to work on some lightening its making the picture process a pain. Anyway just a small update, things are slow going with life stuff.
Video#7 https://www.youtube.com/watch?v=ImpA...ature=youtu.be


I changed from the stock "L" brackets to a version that I like better.
Servo hatch is rough cut and the screws are installed. I didnt see any with the kit so I used some small screws I had


Video#7 https://www.youtube.com/watch?v=ImpA...ature=youtu.be
I changed from the stock "L" brackets to a version that I like better.
Servo hatch is rough cut and the screws are installed. I didnt see any with the kit so I used some small screws I had
Last edited by FenderBean; 11-07-2014 at 11:15 AM.
11-11-2014, 03:50 PM
#18
Thread Starter
Okay a few more things done today, I wasnt able to build this weekend due to family stuff and im still waiting on my servo arms. I did however receive some stuff from BVM Monday and I put together a video with some info on their new Hi-flow items if anyone is curious like I was to the inner diameters. Which reminds me all future videos can be found on my Youtube page under theirs perspective playlist on the left side of the page.
https://www.youtube.com/channel/UCE_...BAxA8bHVCw3VQQ
I will still post the pictures and things here its just easier to organize stuff there and jumping back and forth enough as it is.
As far as the build goes I worked on the Tanks today and the nose gear. I added the mod like my F-15 to the tanks and once the epoxy sets up I will plum them and finish it up. The nose steering arm supplied is to long for me and I had to cut some off each end since they drilled the arm in the wrong place.
Last edited by FenderBean; 11-11-2014 at 04:58 PM.
11-11-2014, 06:06 PM
#20
My Avanti gear converted to Down and Locked electrics should be here later this week. I will post some pics of their work. BTW I have had 100 % success with their gear in both my Ultra Flash and Carf Tutor. Looking forward to the simple install!
D.W.
D.W.
11-11-2014, 07:28 PM
#21
Thread Starter
Yeah, I had great success with there conversion with my F-16, I also converted my F-15 and F-14. Its good stuff I just opted out at the moment due to budget and the air gear is so nice.
11-11-2014, 07:39 PM
#22
Thread Starter
The nose gear is assembled and back in the jet. Im not a fan of the mounting of the retract on top of the mounts, not sure why the did that since its clear the retract is meant to be mounted the other way. The screw holes are even tapered on the other side to fit flush type screws, it is possible to mount it this way but would require some cutting of the bulkhead. I will leave it unless an issue develops down the road with a hard landing or something. The mounts for the screws could be a bit thicker or even some carbon like on the mains gear, its only 1/4in ply.
That being said I do think it will hold up to normal flying.
The tank mod is finished, the hysol setup and I to a dremel and cleaned up the inner lip where the stopper sits. I put the main tanks in there location and they do sit on the CG, it appears to be a little aft which would work out with the smoke tank installed but I will have to measure the CG location to confirm that. I will add some paint to make the aluminum look better tomorrow, im calling it for the night., 0530 comes pretty early. Cheers And Happy V day to all my fellow Vets!!!
11-13-2014, 04:30 PM
#23
Thread Starter
Well after waiting a few extra days my package that I thought was sent back showed up, glad they actually forward stuff when you fill out the online forwarding address when you move!!!
So I can kick into high gear now!!! I finished up the tanks and the plumbing and getting back to installing the flap servos and cutting the servo arm holes. The 1.5in servo arm is perfect for the flaps and rudder, you can do a 1 in for ailerons and elevators no problem. Really like the high flow stuff BVM is making.
The latest video is up at my page showing the work so far and the goodies I got from Dreamworksrc.
https://www.youtube.com/channel/UCE_rywpdgBAxA8bHVCw3VQQ
11-13-2014, 05:21 PM
#24
Thread Starter
Okay im starting to think this project is trying to tell me something. So after the delivery issues I get much servo horns and only one is for the futaba, the other 4 are JR so now I have to wait on more servo arms. Not a huge deal but i keep hitting all these little stoppages LOL so I have to switch gears again.
11-13-2014, 09:32 PM
#25
Thread Starter
Hey guys I have a question about videos, would you guys prefer the live action or like im doing now just going over the work I have done as it progresses? This build has been bumpy with all the delays and jumping around due to waiting on items.
I have a question for current owners, could you measure your thrust pipes and post it here with your turbine size? Trying to verify pipe sizes to turbine sizes to help folks out. I should be able to build all weekend so hang in there more is on the way. Cheers!
I have a question for current owners, could you measure your thrust pipes and post it here with your turbine size? Trying to verify pipe sizes to turbine sizes to help folks out. I should be able to build all weekend so hang in there more is on the way. Cheers!