


Wizard S


 all at once.
The following users liked this post:
Didier (05-20-2021)
 06-14-2021 | 07:08 AM
#104

My Feedback: (1)
Hi
My CG is a little aft with the tank empty. Its about 10mm behind the rearward spot. If I add fuel it moves forward. And with a full tank it will be slightly nose heavy.
How far back should I let the CG go with an empty tank? is this even important? because I cannot fly with an empty tank and should never be less than a 1/8 tank at landing.
06-16-2021 | 08:45 AM
#105
Senior Member
Hi
My CG is a little aft with the tank empty. Its about 10mm behind the rearward spot. If I add fuel it moves forward. And with a full tank it will be slightly nose heavy.
How far back should I let the CG go with an empty tank? is this even important? because I cannot fly with an empty tank and should never be less than a 1/8 tank at landing.
My CG is a little aft with the tank empty. Its about 10mm behind the rearward spot. If I add fuel it moves forward. And with a full tank it will be slightly nose heavy.
How far back should I let the CG go with an empty tank? is this even important? because I cannot fly with an empty tank and should never be less than a 1/8 tank at landing.
10-02-2023 | 09:36 AM
#106
My Feedback: (1)
I been working on my small Wizard. I reinforced the front part of the fuselage, because it was so light and there was no structural connection between the front gear mount and the rest of the fuselage structure. My fuselage ripped a few times and the front mount broke out. I put a layer of carbon fiber inside the fuselage and it is now much stiffer and stronger.
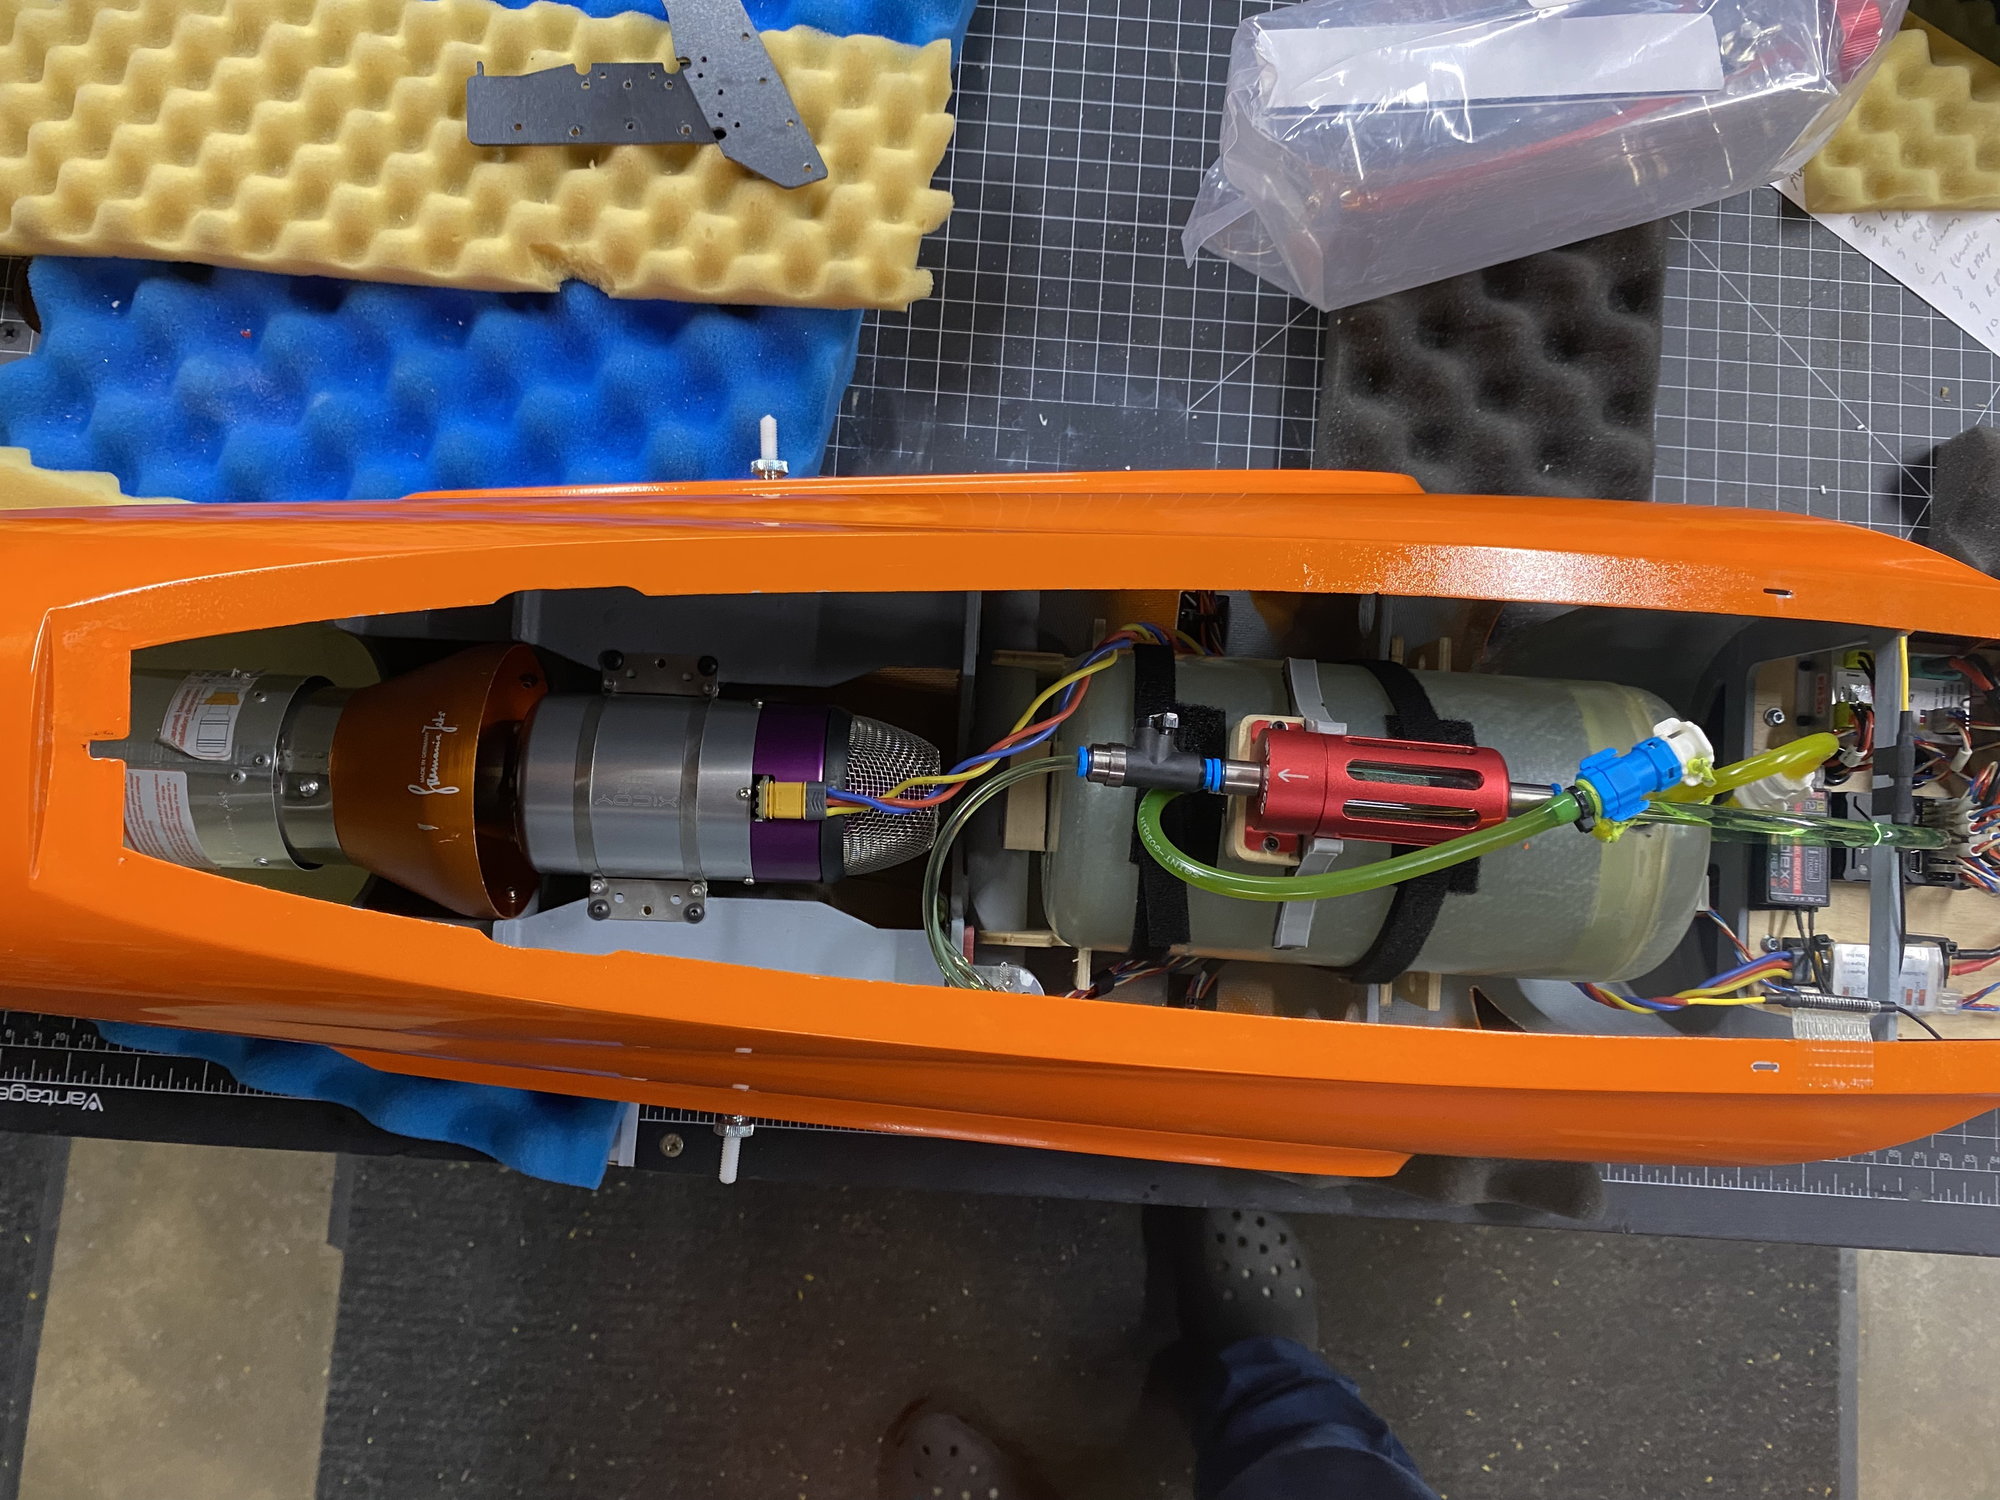
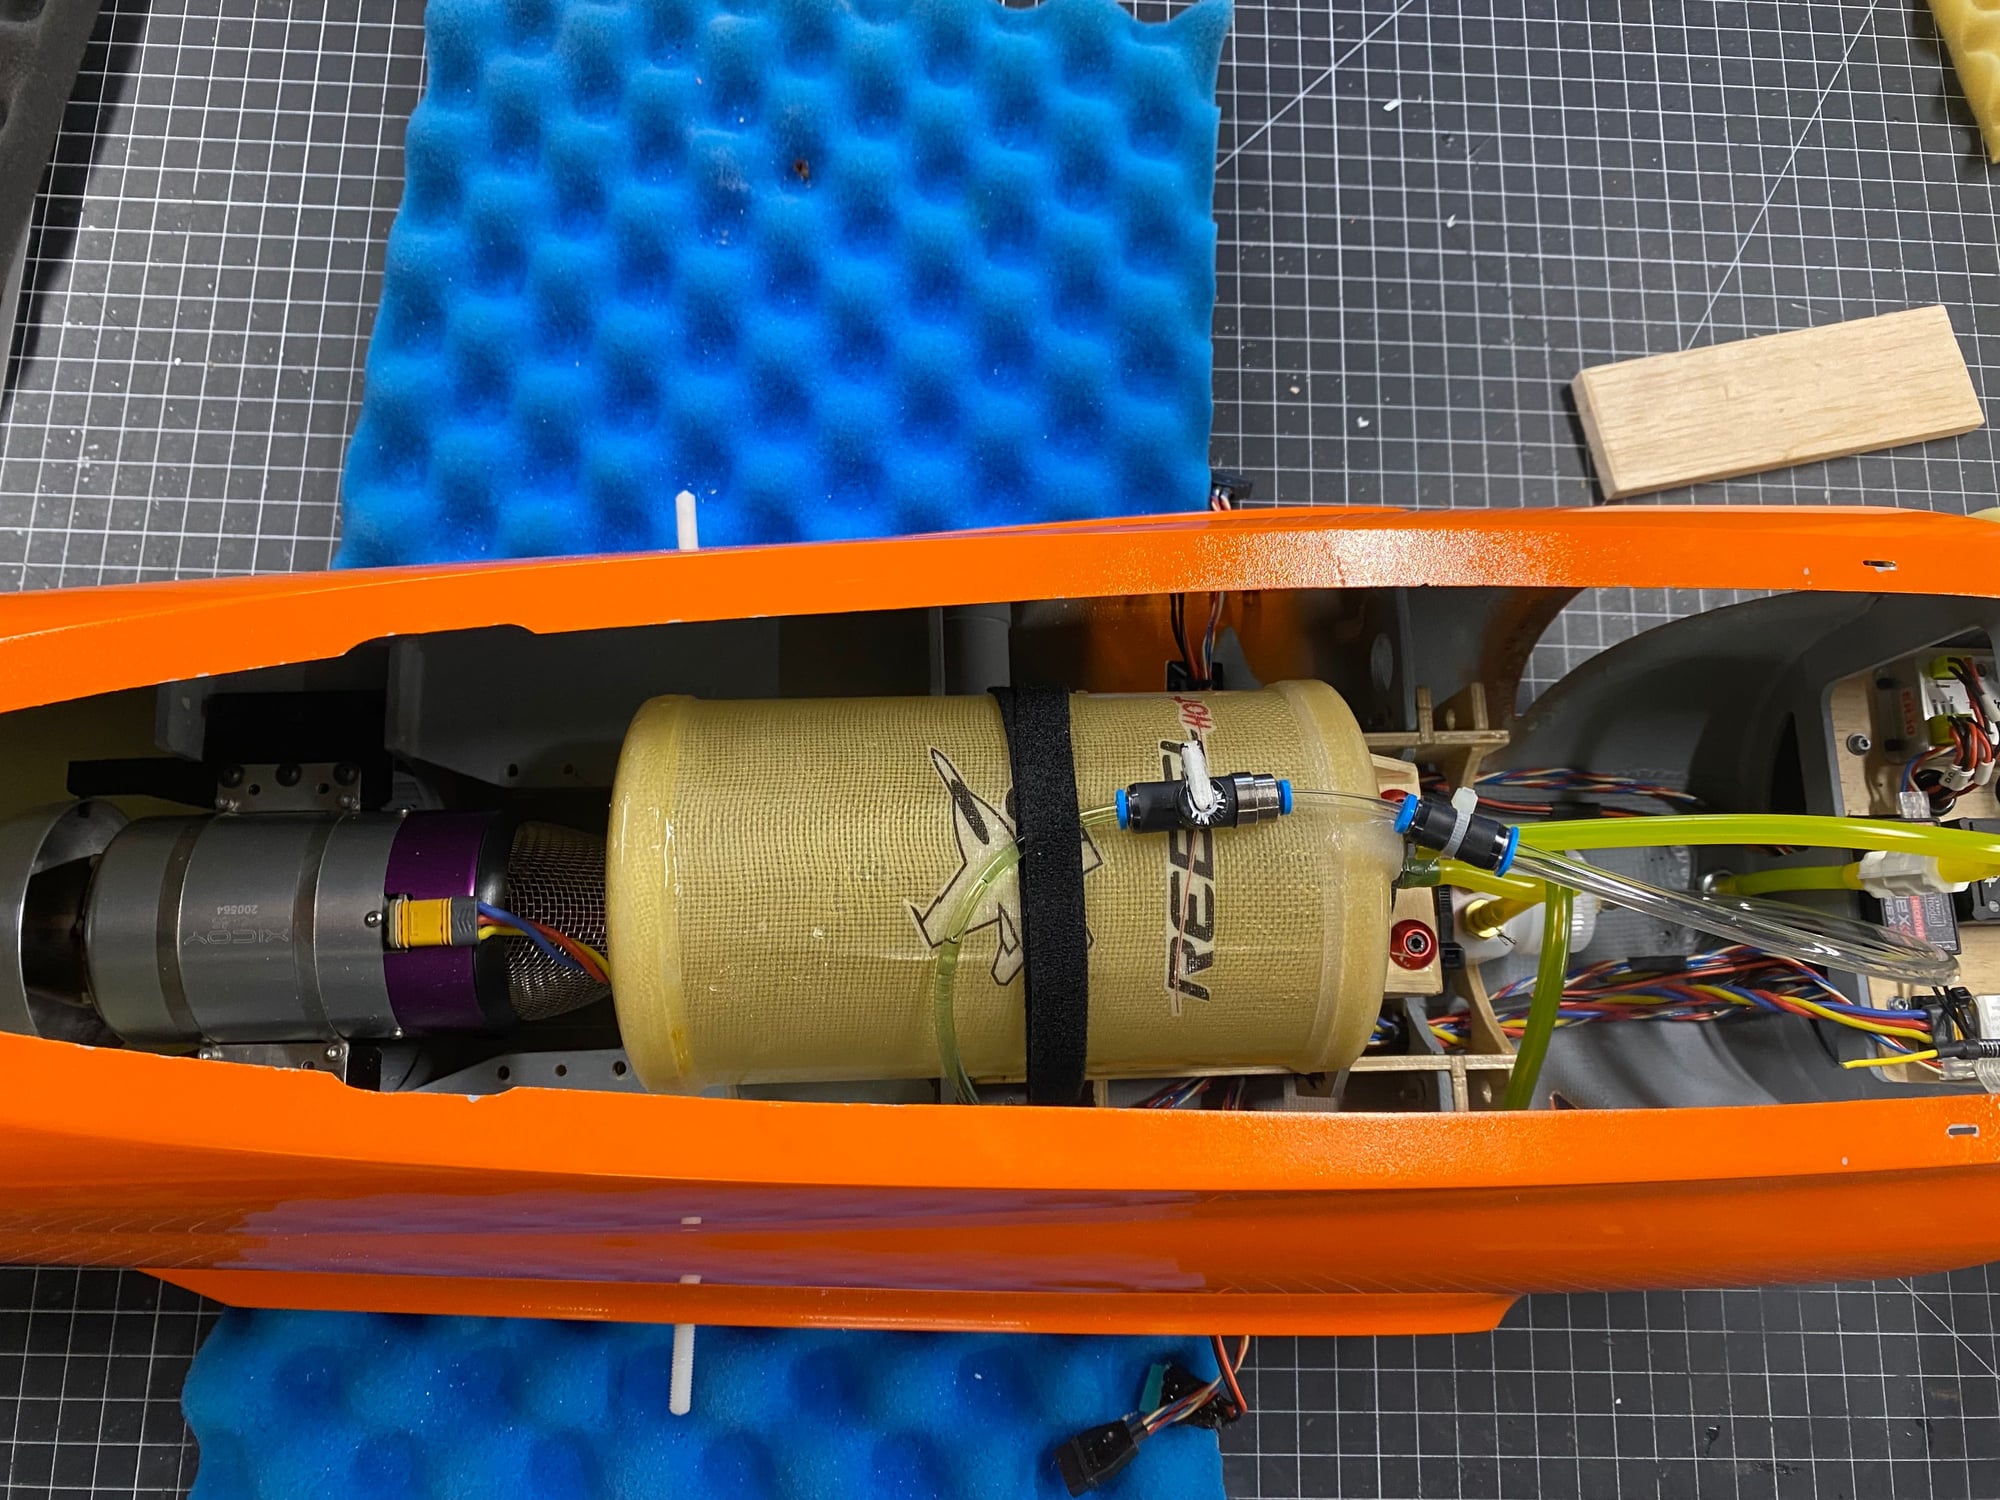
I found that the CG moved forward 1 inch between empty and full tank. Much up elevator trim was needed. At half throttle my Wizard flies without climbing, but with a nose up attitude. At higher throttle settings, it climbs. I decided to shift the tank rearwards to put the full on the CG. ZN Line had cut the fuselage for the turbine mount for the X45, so I used HAB G10 plates for new position. I really like these mounts.
I moved the turbine back 3 inches and replaced the stock 1.5 liter tank with a 1.2 liter tank from CM Jets (made for my X45 Rebel Hot). The fuel is centered over the wing tube, which is very close to the CG. I switched to a single wall HAB pipe, which I've had good success with.
The empty weight weht form 5.35kg to 5.11kg. Full weight went from 6.45kg to 6.10kg. I needed 75g of tail weight. My before and after photos are attached. I thought about using the clear plastic 1 liter tank that I also had. But making a mount for the CM Jets tank was a better solution. 1 liter is more than enough for 5 minute flights with reserve.
10-02-2023 | 09:48 AM
#107

My Feedback: (4)
I think what happen was the steering plug goes in to the last (6) spot of the Cortex Pro. Its possible to miss-plug spots 4, 5 & 6 and get the negative pin on the positive pin. This is because the program jumper pins align with the servo pins. Others have done this. If its going straight to a servo then it is not a disaster. But in my case, it was going to the Electron controller, so it made a dead short.
01-20-2024 | 08:16 AM
#109
Junior Member
I'm late to the party. I just got my Wizard S from JP last week. His shop is only a 3 hour drive away, so I went to pick up my plane and meet JP personally. He's a super nice guy, also gave me a tour through his awesome shop, and I got to take a peek at his F16 that he's almost done building.
Could you let me know which Hab.se pipe you installed? I might want to switch to that as well. The Grumania pipe is unnecessarily heavy and my grass runway is short and bumpy.
Best,
Jo
01-20-2024 | 10:41 AM
#110
My Feedback: (1)
Hi,
Its never too late to party!
The stock pipe overall length is 55cm. My mod's reduced the length by 7.5cm, or so.
I would order a HAB pipe 55- 60cm long and trim it to fit your installation. The stainless steel HAB uses is only 0.006" thick; the width of two sheets of paper! It cuts easily with sharp scissors. It will also cut you easily, be careful.
I recommend mounting a light turbine back as far as you can go. And then moving the tank over the CG. It flies much better as such and needs no nose weight.
I bought a second Wizard from JP. I ask for orange. The quality was not as good as the 1st one I got. I had to have it painted, which ended up costing as much as the model with retracts did. My painter complained about all the amount of pin holes and body work needed. He made it look awesome. I may stick a X85 in it.
01-20-2024 | 01:53 PM
#111
Junior Member
Hi,
Its never too late to party!
The stock pipe overall length is 55cm. My mod's reduced the length by 7.5cm, or so.
I would order a HAB pipe 55- 60cm long and trim it to fit your installation. The stainless steel HAB uses is only 0.006" thick; the width of two sheets of paper! It cuts easily with sharp scissors. It will also cut you easily, be careful.
I recommend mounting a light turbine back as far as you can go. And then moving the tank over the CG. It flies much better as such and needs no nose weight.
I bought a second Wizard from JP. I ask for orange. The quality was not as good as the 1st one I got. I had to have it painted, which ended up costing as much as the model with retracts did. My painter complained about all the amount of pin holes and body work needed. He made it look awesome. I may stick a X85 in it.
Its never too late to party!
The stock pipe overall length is 55cm. My mod's reduced the length by 7.5cm, or so.
I would order a HAB pipe 55- 60cm long and trim it to fit your installation. The stainless steel HAB uses is only 0.006" thick; the width of two sheets of paper! It cuts easily with sharp scissors. It will also cut you easily, be careful.
I recommend mounting a light turbine back as far as you can go. And then moving the tank over the CG. It flies much better as such and needs no nose weight.
I bought a second Wizard from JP. I ask for orange. The quality was not as good as the 1st one I got. I had to have it painted, which ended up costing as much as the model with retracts did. My painter complained about all the amount of pin holes and body work needed. He made it look awesome. I may stick a X85 in it.
Does your Hab.se pipe fit with the formers holding the pipe? I asked JP to do all the glueing work for me, so taking the formers back out is something I�d like to avoid.
Sorry to hear the orange paint wasn�t that good. I considered orange too mainly for its great visibility but chose white to be flexible by using vinyl wrapping. My white finish has some spots on some of the edges where a bit of paint is missing. I can accept that as I will wrap these areas anyway. Not sure about the looks yet.
01-20-2024 | 02:35 PM
#112
My Feedback: (1)
Hey JoShrubs,
You'll need a rear support for the HAB pipe. HAB makes them too. You need let them know the outside diameter of the part. Then it screws to the read ply former that JP installed.
I get the entire kit from HAB. It includes the turbine mounting plates, the pipe and the rear support. I used the kit from the Rebel Hot w/ X45 for my Wizard. I had to trim the motor plates to get them to fit. But that was easy. I trimmed the pipe too. Look at my photos above.
01-21-2024 | 01:33 PM
#113
Junior Member
Hey JoShrubs,
You'll need a rear support for the HAB pipe. HAB makes them too. You need let them know the outside diameter of the part. Then it screws to the read ply former that JP installed.
I get the entire kit from HAB. It includes the turbine mounting plates, the pipe and the rear support. I used the kit from the Rebel Hot w/ X45 for my Wizard. I had to trim the motor plates to get them to fit. But that was easy. I trimmed the pipe too. Look at my photos above.
You'll need a rear support for the HAB pipe. HAB makes them too. You need let them know the outside diameter of the part. Then it screws to the read ply former that JP installed.
I get the entire kit from HAB. It includes the turbine mounting plates, the pipe and the rear support. I used the kit from the Rebel Hot w/ X45 for my Wizard. I had to trim the motor plates to get them to fit. But that was easy. I trimmed the pipe too. Look at my photos above.
01-21-2024 | 02:46 PM
#114
My Feedback: (1)
Hi Jo,
As long as the wires do not touch the pipe they will stay cool. There is airflow thru the fuselage and it is good a keeping the heat out.
In any case, I like to route the wires in a insulated braided sleeve.
https://www.wirecare.com/category/br...erm-ultraflexx
The wire holders or tape may fall off and it pays to have the extra protection.
I also use a very good wire that will not short out if it gets too hot. The insulation of the wire has the brand name of TEFZEL. This is real aircraft wire.
https://www.milspecwiring.com/Hookup-Wire_c_393.html
01-22-2024 | 05:51 AM
#115
Junior Member
I ordered the Hab pipe today and they told me it weighs 78 grams. That's crazy compared to the 223 grams of the Grumania pipe. JP installed Powerbox silicon cables for me which should be more heat resistant than the usual poly cables. That plus the braided sleeve and the layer of airflow should do. I'm going to test that before flying just to be sure. The final parts should arrive this week so that I can start final assembly. I'm going with a 1.5 liters fuel bag which I think will be plenty for the X45. The gear is an electron and my rx is a VBar as I also fly helicopters using the same tx. I like the way it is programmed.
01-22-2024 | 06:06 AM
#116
My Feedback: (1)
Hi Jo,
0.8l will give you five minutes flights with a reasonable reserve. 1.5l you can fly 2x as long. The Wizard is so fun to fly that you'll enjoy the extra air time.
I've used Powerbox wires too, in fact JP installed them in my Wizard. However, I am not impressed with the wire and consider low grade at a high price. The Powerbox wire is better suited to audiophile usage.
I made a video of the wire testing I've done:
01-25-2024 | 11:43 AM
#118
My Feedback: (1)
I've bought it from different sources in the past. My latest purchase was from Milspecwiring.com:
https://www.milspecwiring.com/20AWG-...l-_p_2516.html
https://www.milspecwiring.com/20AWG-...l-_p_2516.html
01-27-2024 | 01:33 AM
#120
Junior Member
Thanks for creating and sharing the video. I thought Powerbox cables were high quality. In our club I see them in every plane that�s a bit more expensive. And Powerbox advertises them for being lighter and because they say silicon, I inferred it�s more heat resistant (we have a silicon cable running to a heat sensor in our open fireplace, that�s why). Naive me ;-) Next time I will know better thanks to you test.
01-30-2024 | 10:41 AM
#121
Junior Member
Hi Jvaliensi,
My Hab pipe finally arrived. Like you I ordered the Rebel Hot conversion kit and asked Amir at Hab.se to adjust the rear former. I also got drawing from Amir about where to drill the holes in the bell mouth in order to fix the pipe to the turbine holder. The description says to drill 2.5mm holes about 3-4mm from the leading edge of the bell mouth and to slightly offset them vertically; however, the drawing isn't specific about the amount of offset. Hope this explanation makes sense as I am not allowed to attach pictures or point to a URL at this time. Is this how you fixed the pipe to the holder? Did you offset the holes vertically?
Best,
Jo
PS: I threw all the stuff I will install into the fuselage to measure the expected total weight. Total dry weight will be around 4.550 grams (10.03 lbs), assuming I won't need any balancing weight.
01-30-2024 | 10:57 AM
#122
My Feedback: (1)
Hi Jo,
It seems you are making good progress.
I've installed several HAB kits for the X45. I really think they are brilliant.
I drill a 3mm hole on the bell mouth center-line. And it works. I can see how offsetting it the thickness of the G10 plate would better align it on the turbine center-line. My experience shows that its not that critical.
Amir never sent me directions. I will try his tips for the next one I do. 3mm is a little loose.
The last pipe HAB sent me was crushed by UPS. We filed a claim two months ago and UPS hasn't done a thing - the *******s!
I have another Wizard in the build line, but it might get a K70-G4.
01-30-2024 | 11:09 AM
#123
Junior Member
Thanks Jvaliensi for your tips! I asked Amir for a template or description and he emailed it. He's really quick to respond. I can try to direct mail (DM) it to you if you'd like to have it. Sorry to hear about the crushed pipe. Hope UPS will sort it out soon.

