


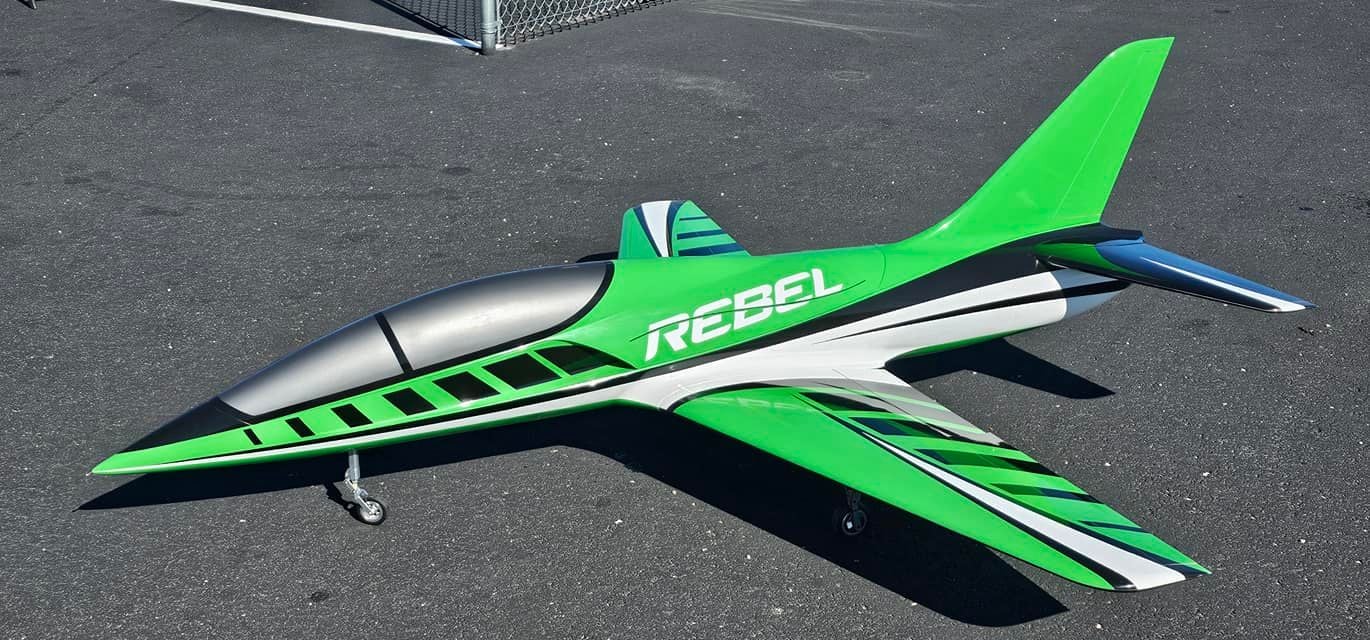
CARF REBEL 2m
 01-15-2024, 09:24 PM
#826

I'm happy with the way the build is going and it should be ready to fly in about a week. It has been a good learning experience compared to the PNP's I've been flying lately.
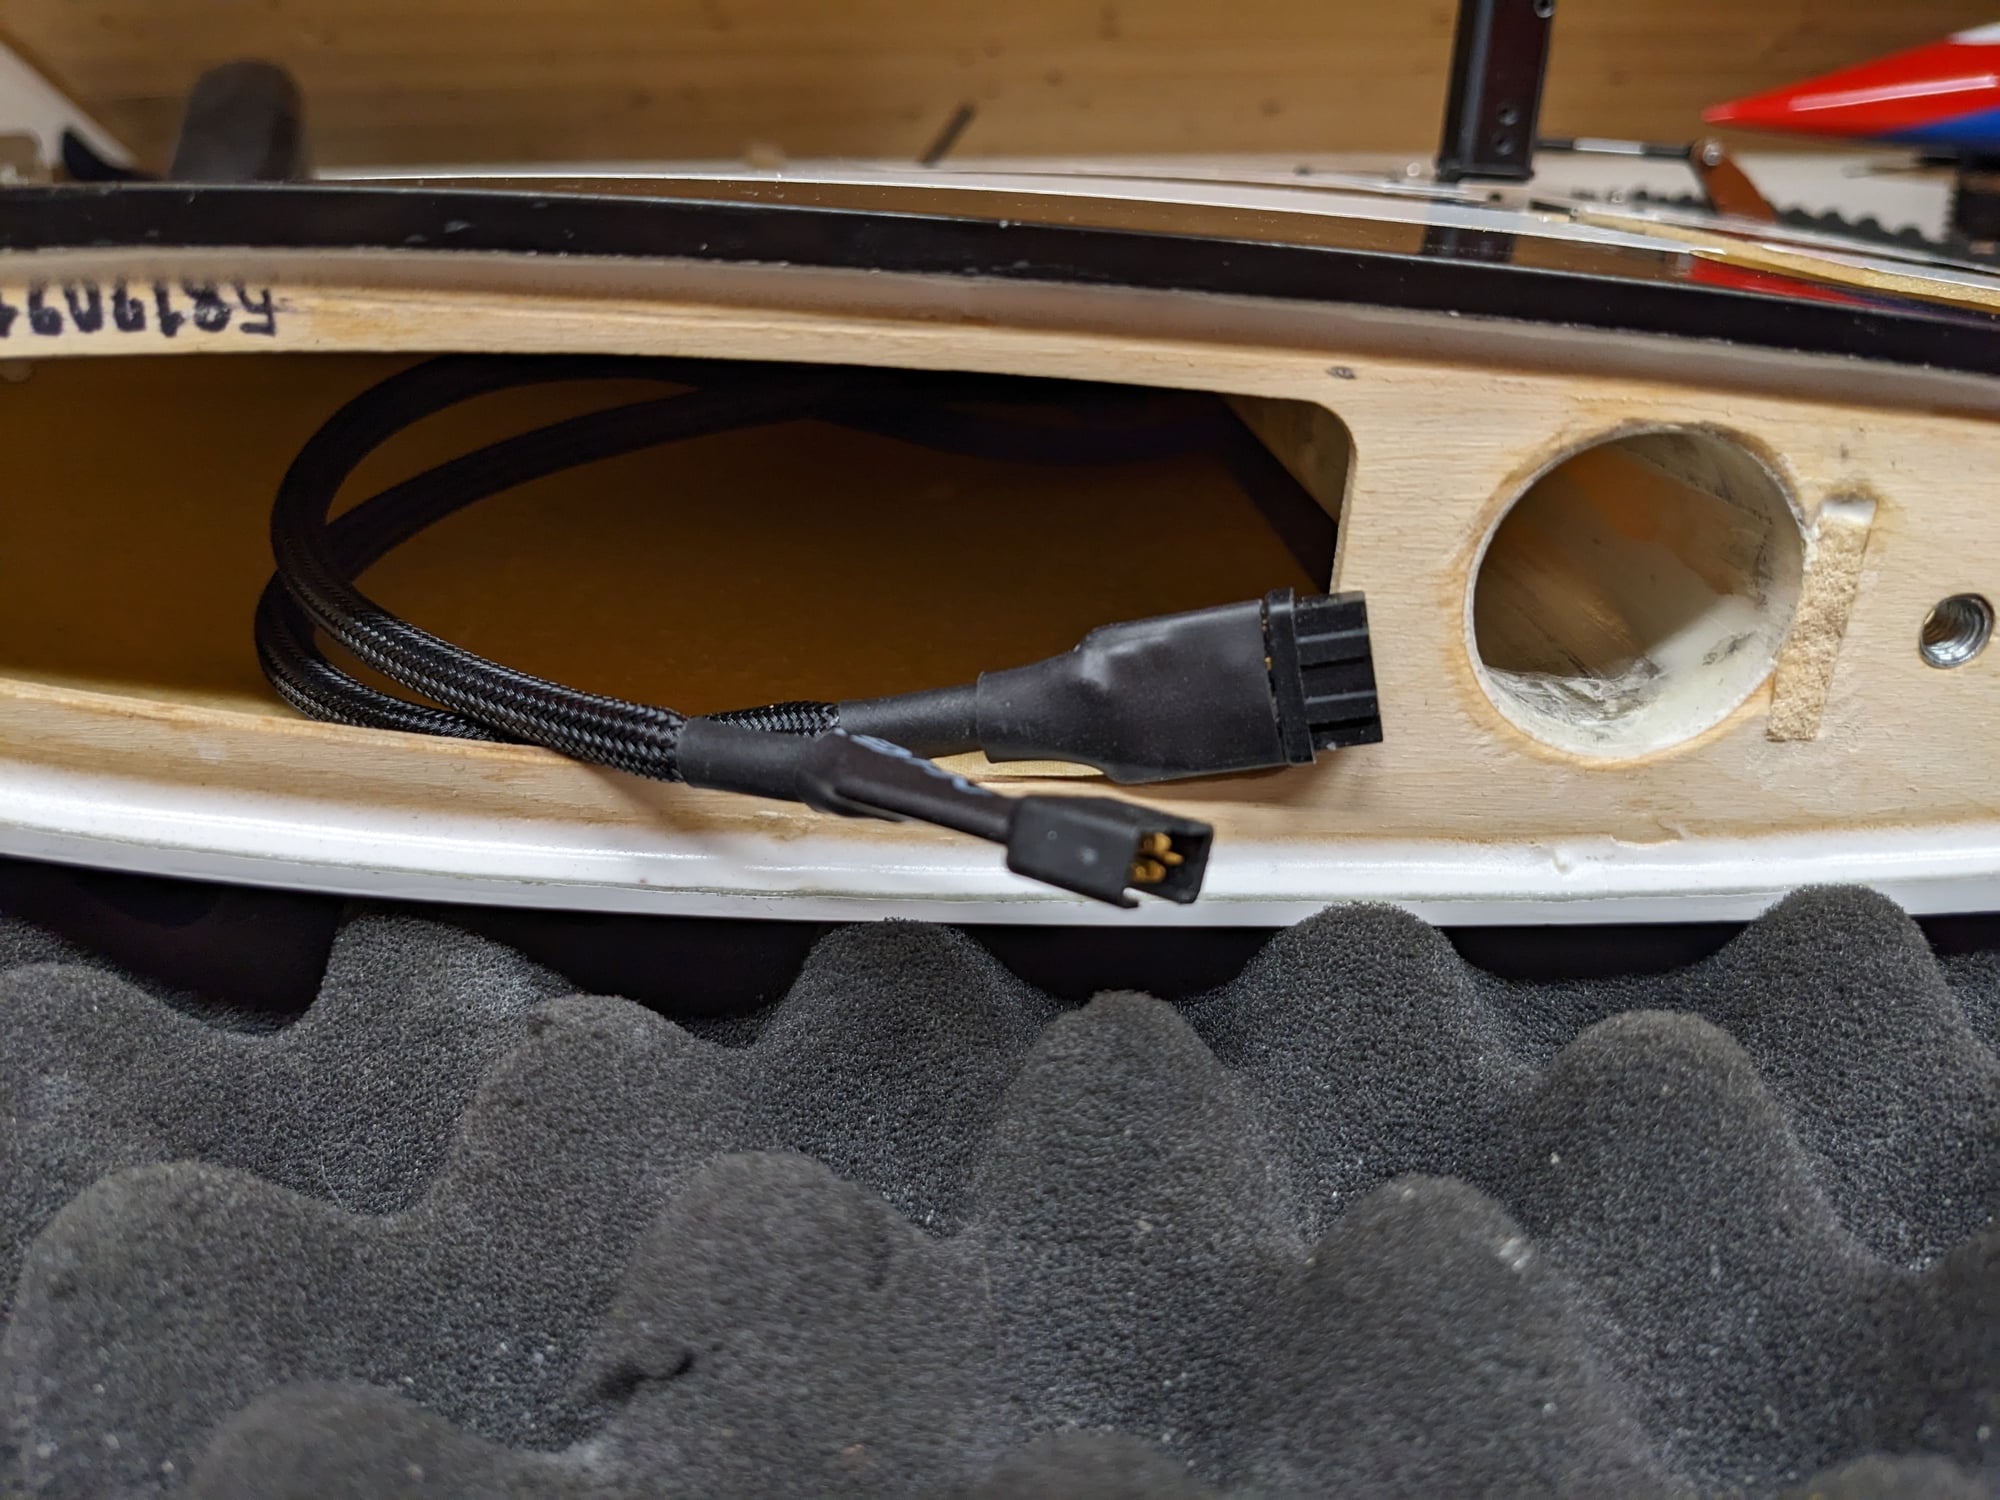
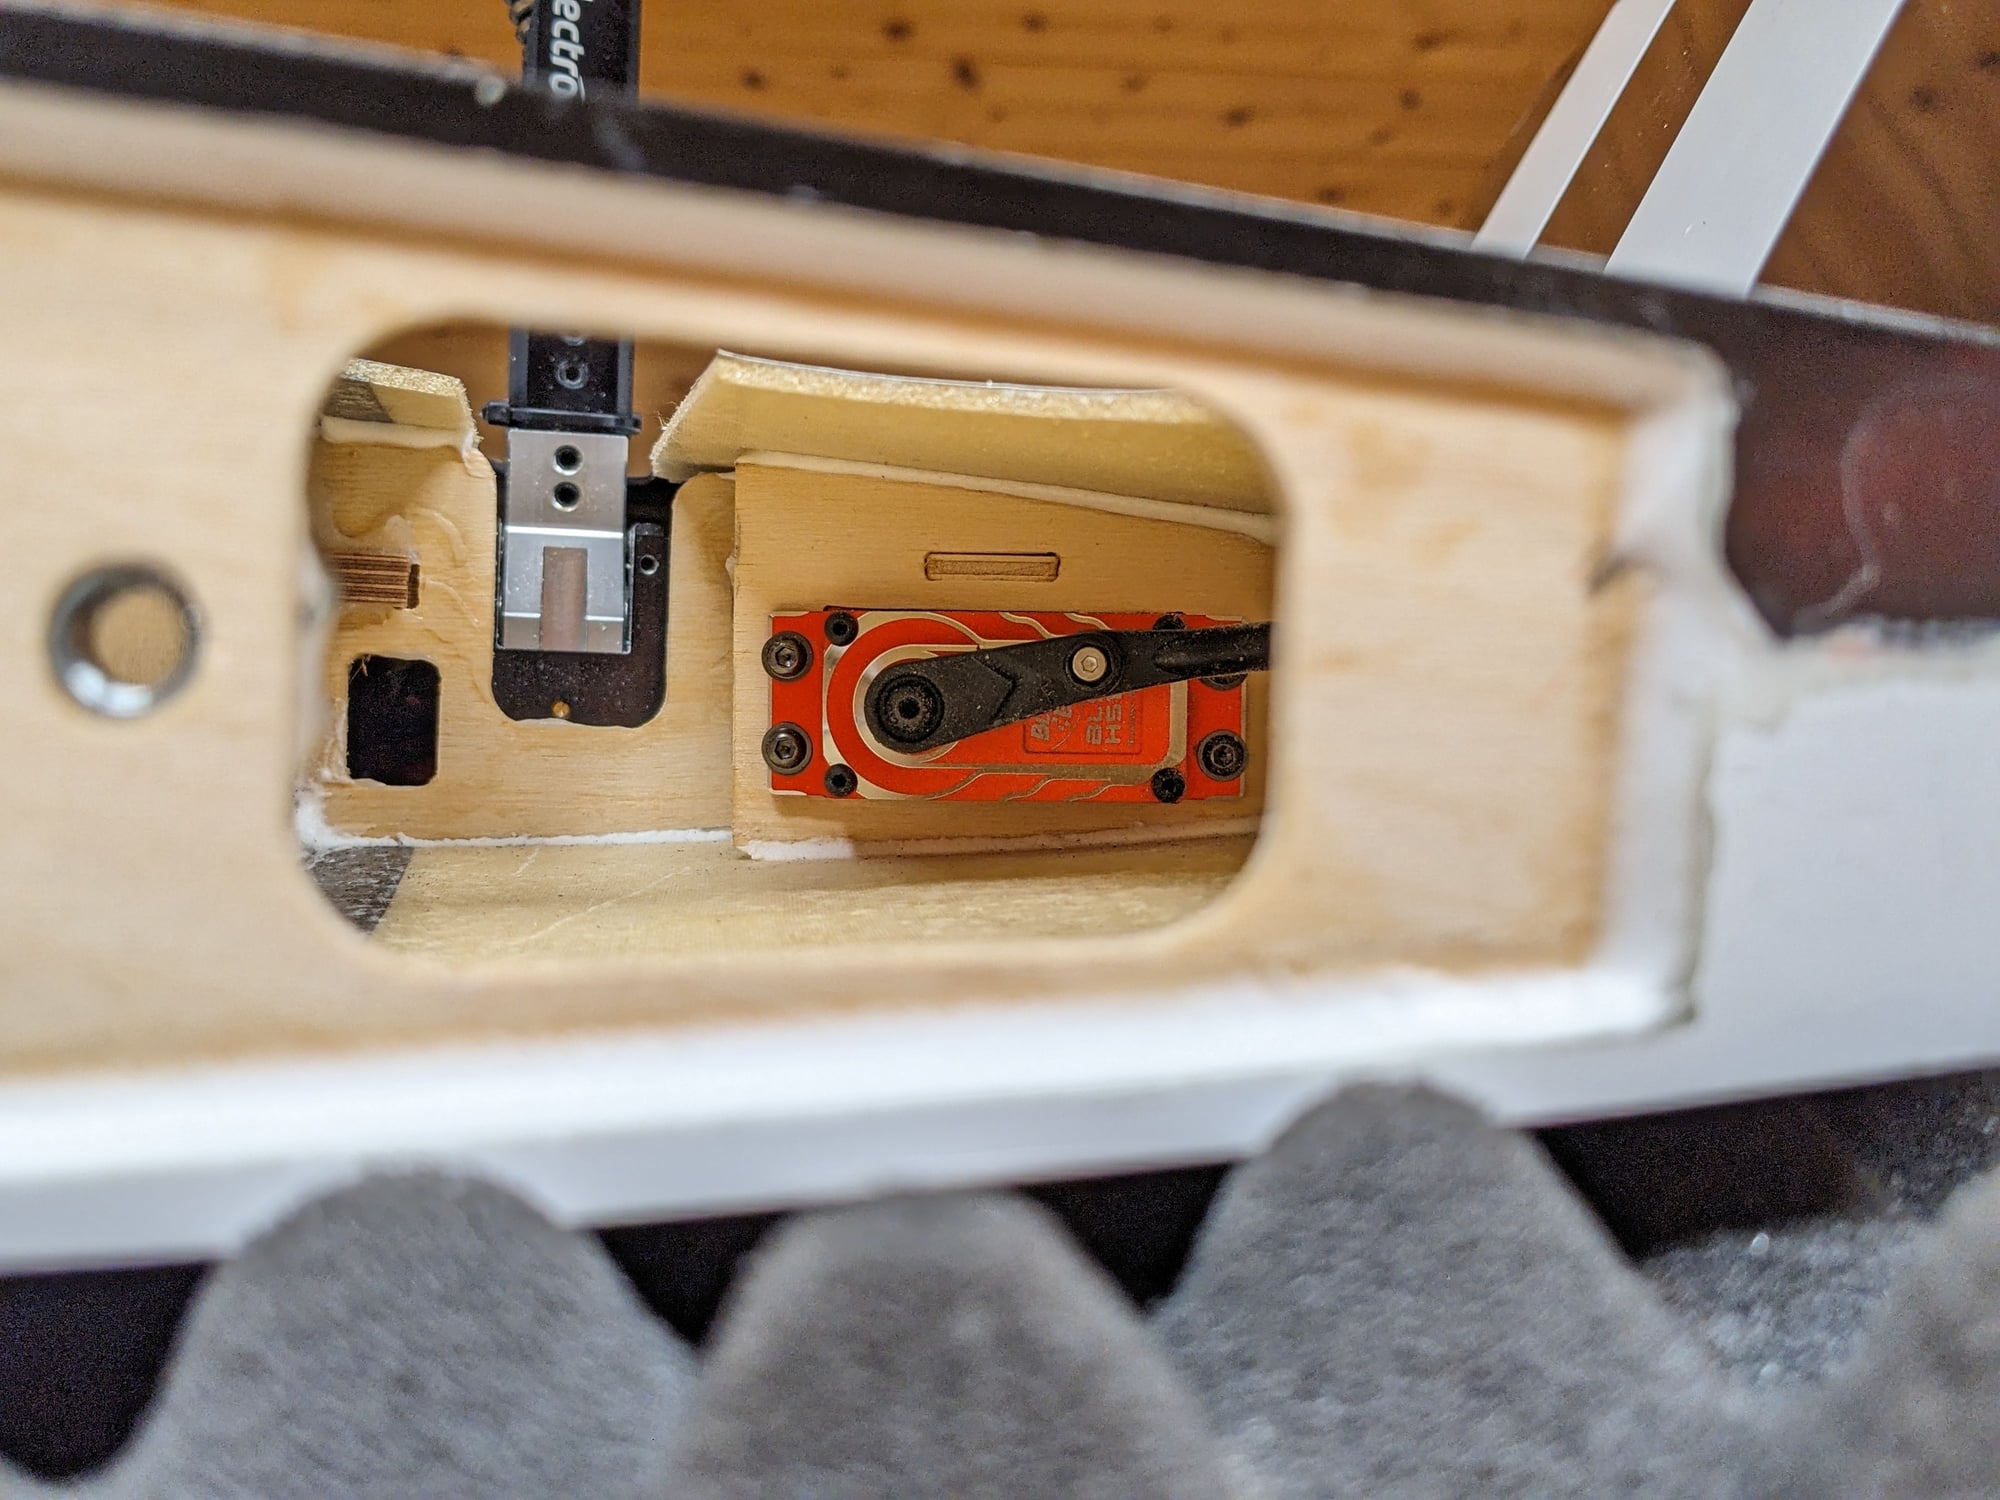
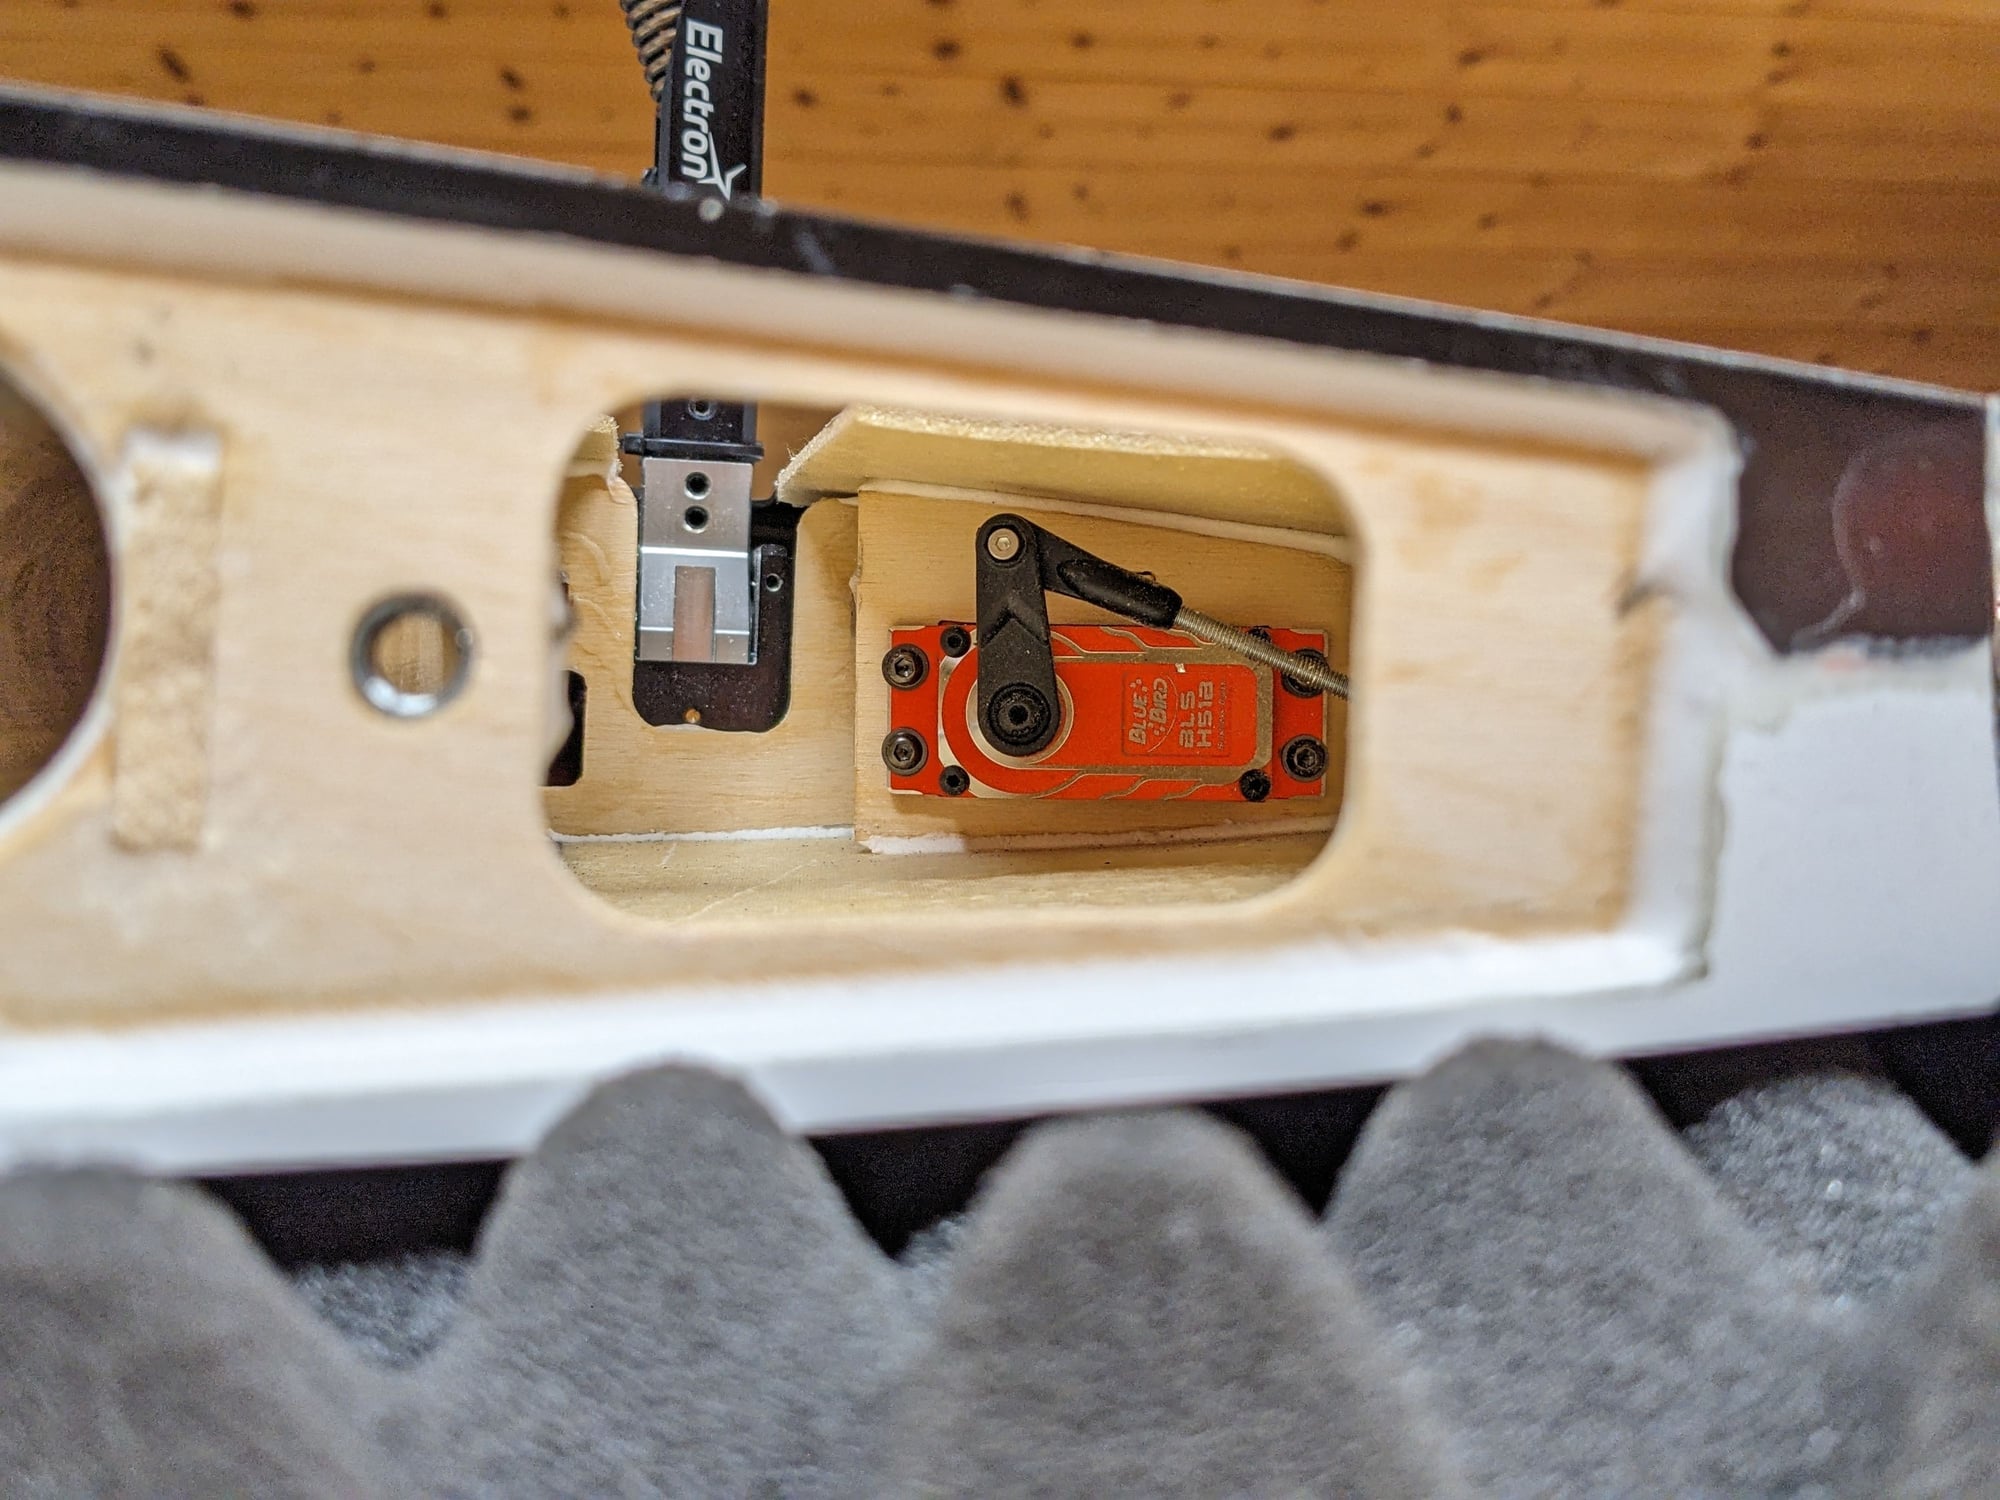
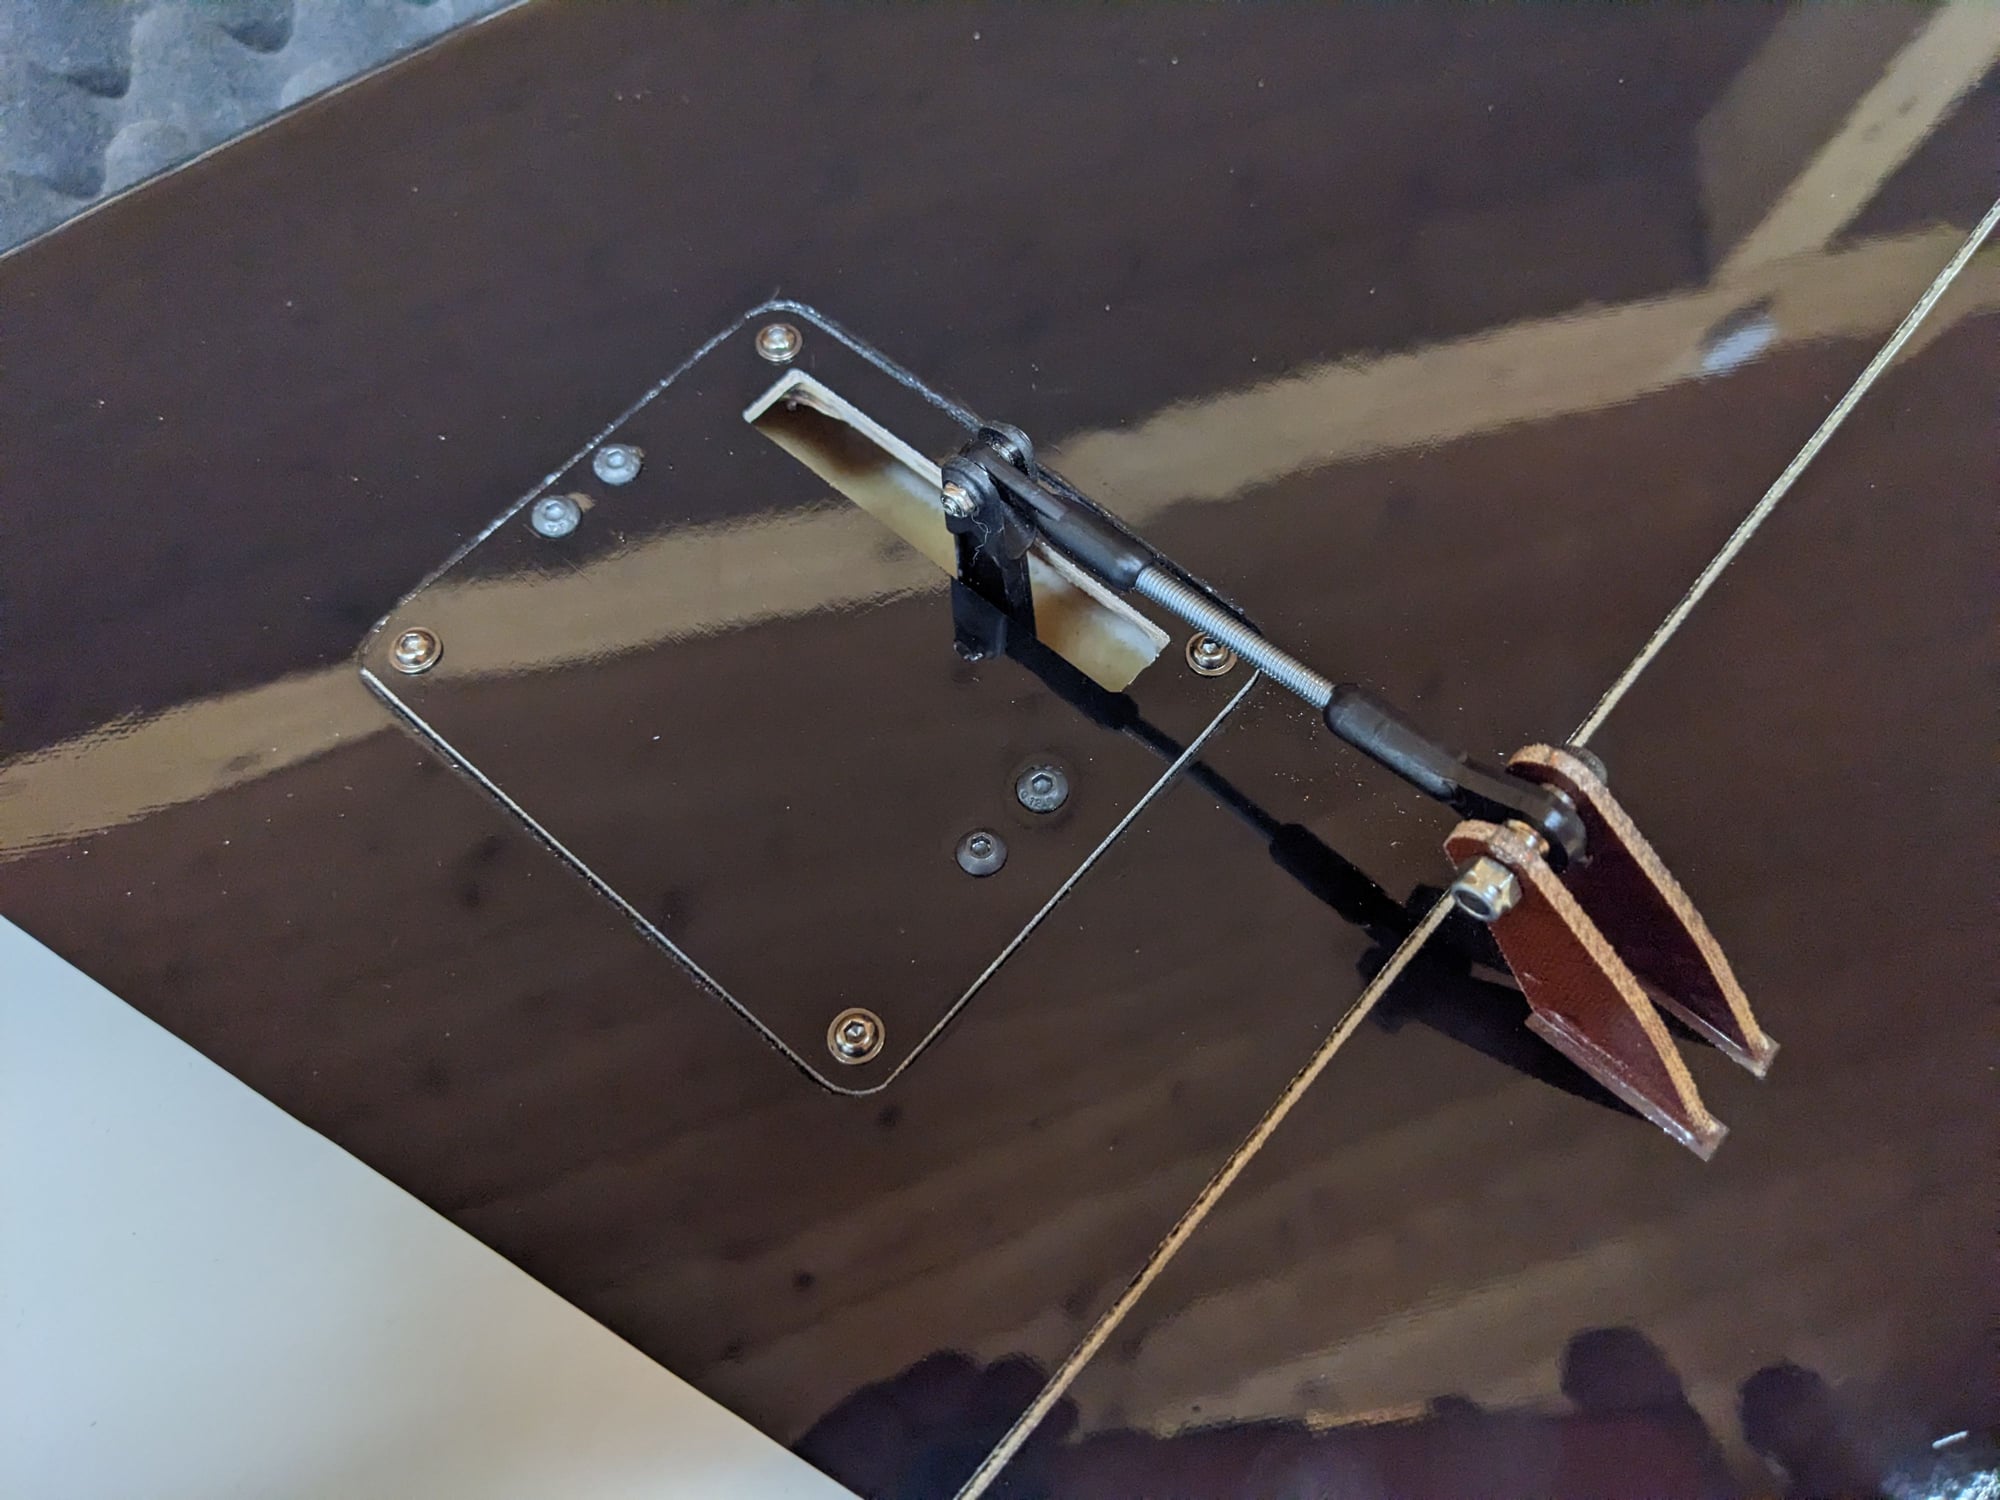
My Electron gear is all installed, but I didn't grind any flat spots on the shafts because with so many set screws they seemed secure. If I fly off of a paved runway, should I disassemble them and grind the flat spots on all three gear and the steering arm?
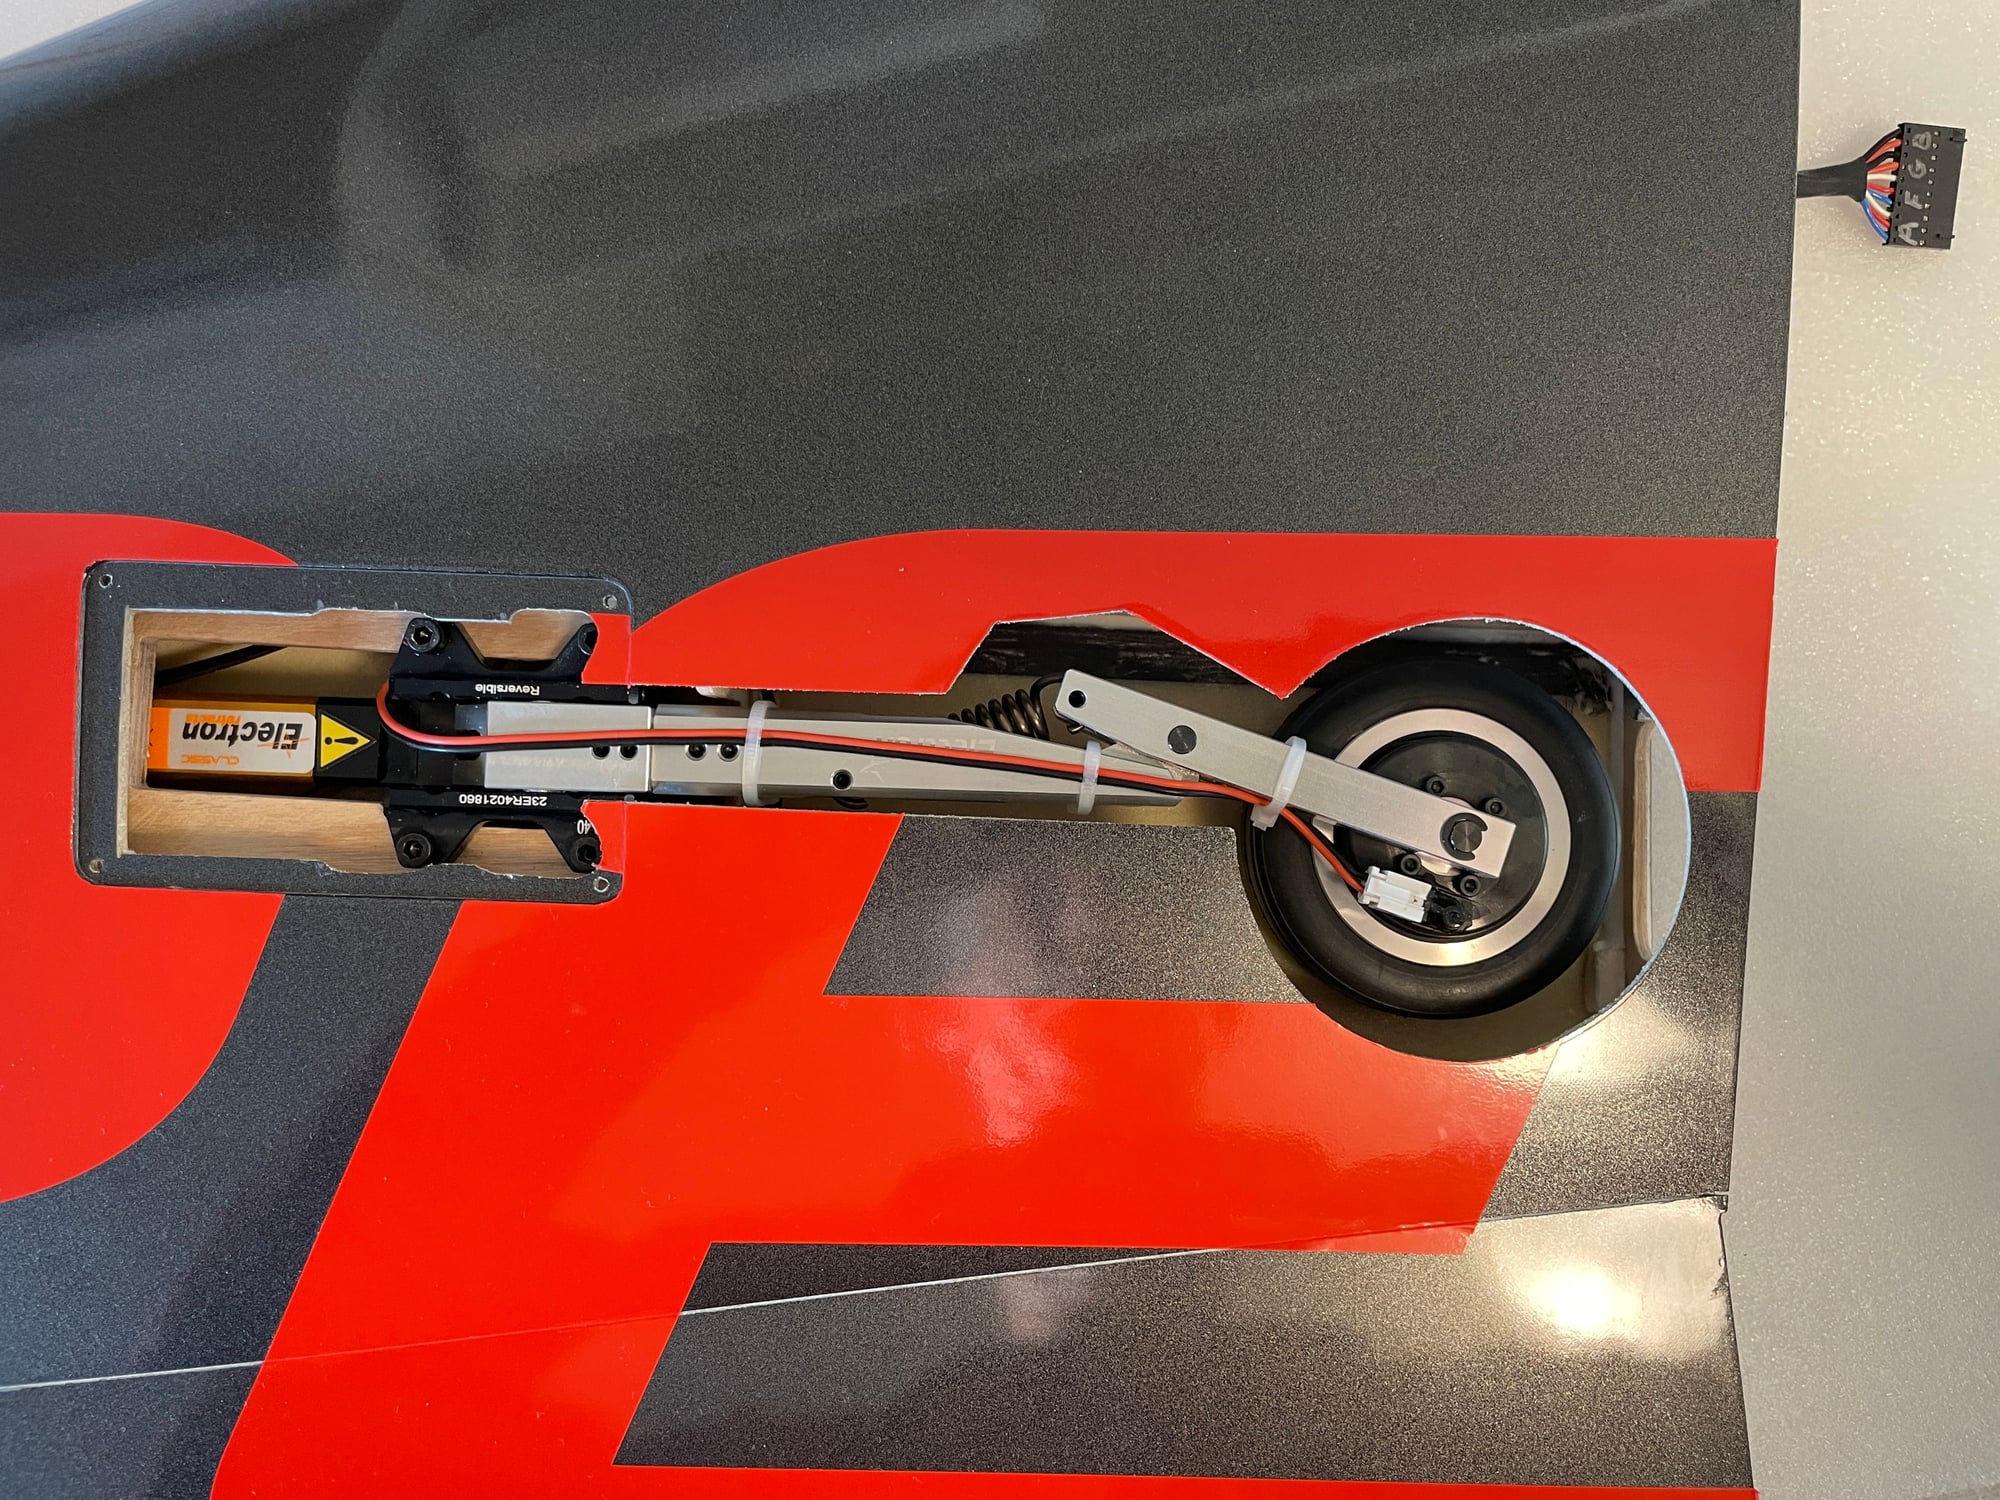
My Electron gear is all installed, but I didn't grind any flat spots on the shafts because with so many set screws they seemed secure. If I fly off of a paved runway, should I disassemble them and grind the flat spots on all three gear and the steering arm?
Last edited by RC Rich; 01-15-2024 at 09:26 PM.
 01-15-2024, 10:10 PM
#827

Yes. 100% flats are needed, even if it is just one set screw per side of pin.
I have this argument regularly whether it’s needed, Electron pins are so hard the screw cannot grab without a flat.
I have this argument regularly whether it’s needed, Electron pins are so hard the screw cannot grab without a flat.
The following 2 users liked this post by Dave Wilshere:
Canadian Man (01-16-2024),
Skunkwrks (02-16-2024)
 01-16-2024, 09:41 PM
#830
01-16-2024, 09:48 PM
#831
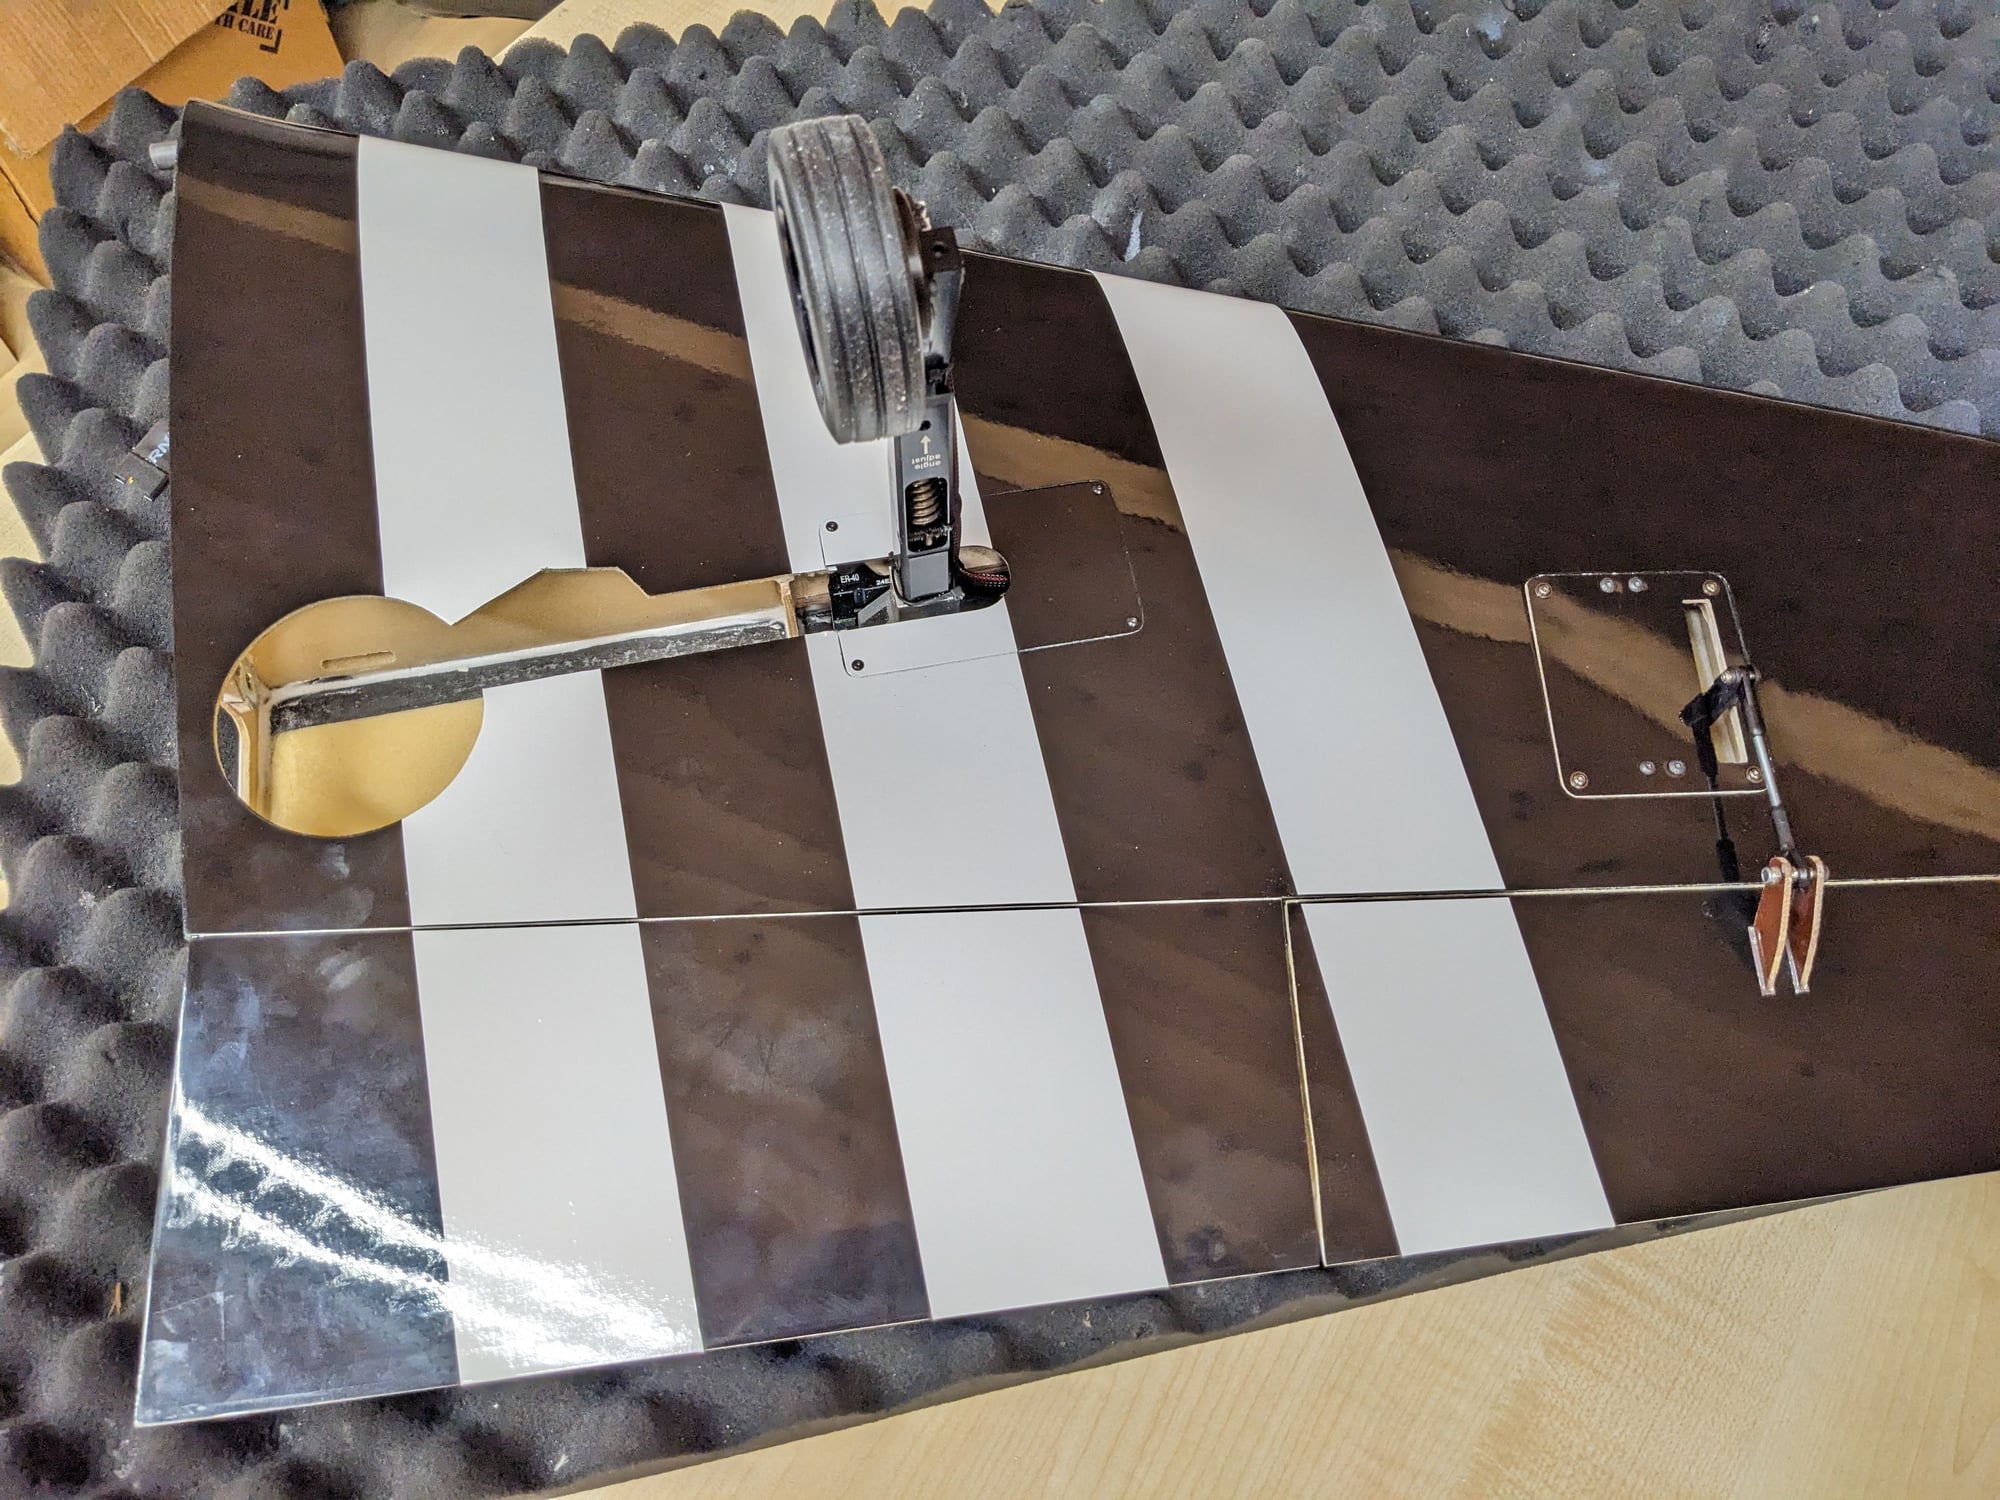
That's good to know. On the same note, the manual recommends 20mm up and down for the ailerons that I'm measuring from the root, but it looks a little aggressive for a starting point. Any opinion on that?
01-16-2024, 10:34 PM
#832
Yes, you can reduce the aileron travel, you should know how you like an aeroplane to feel, some pilots like powerful controls, some very soft, then there is Expo and how to use it.
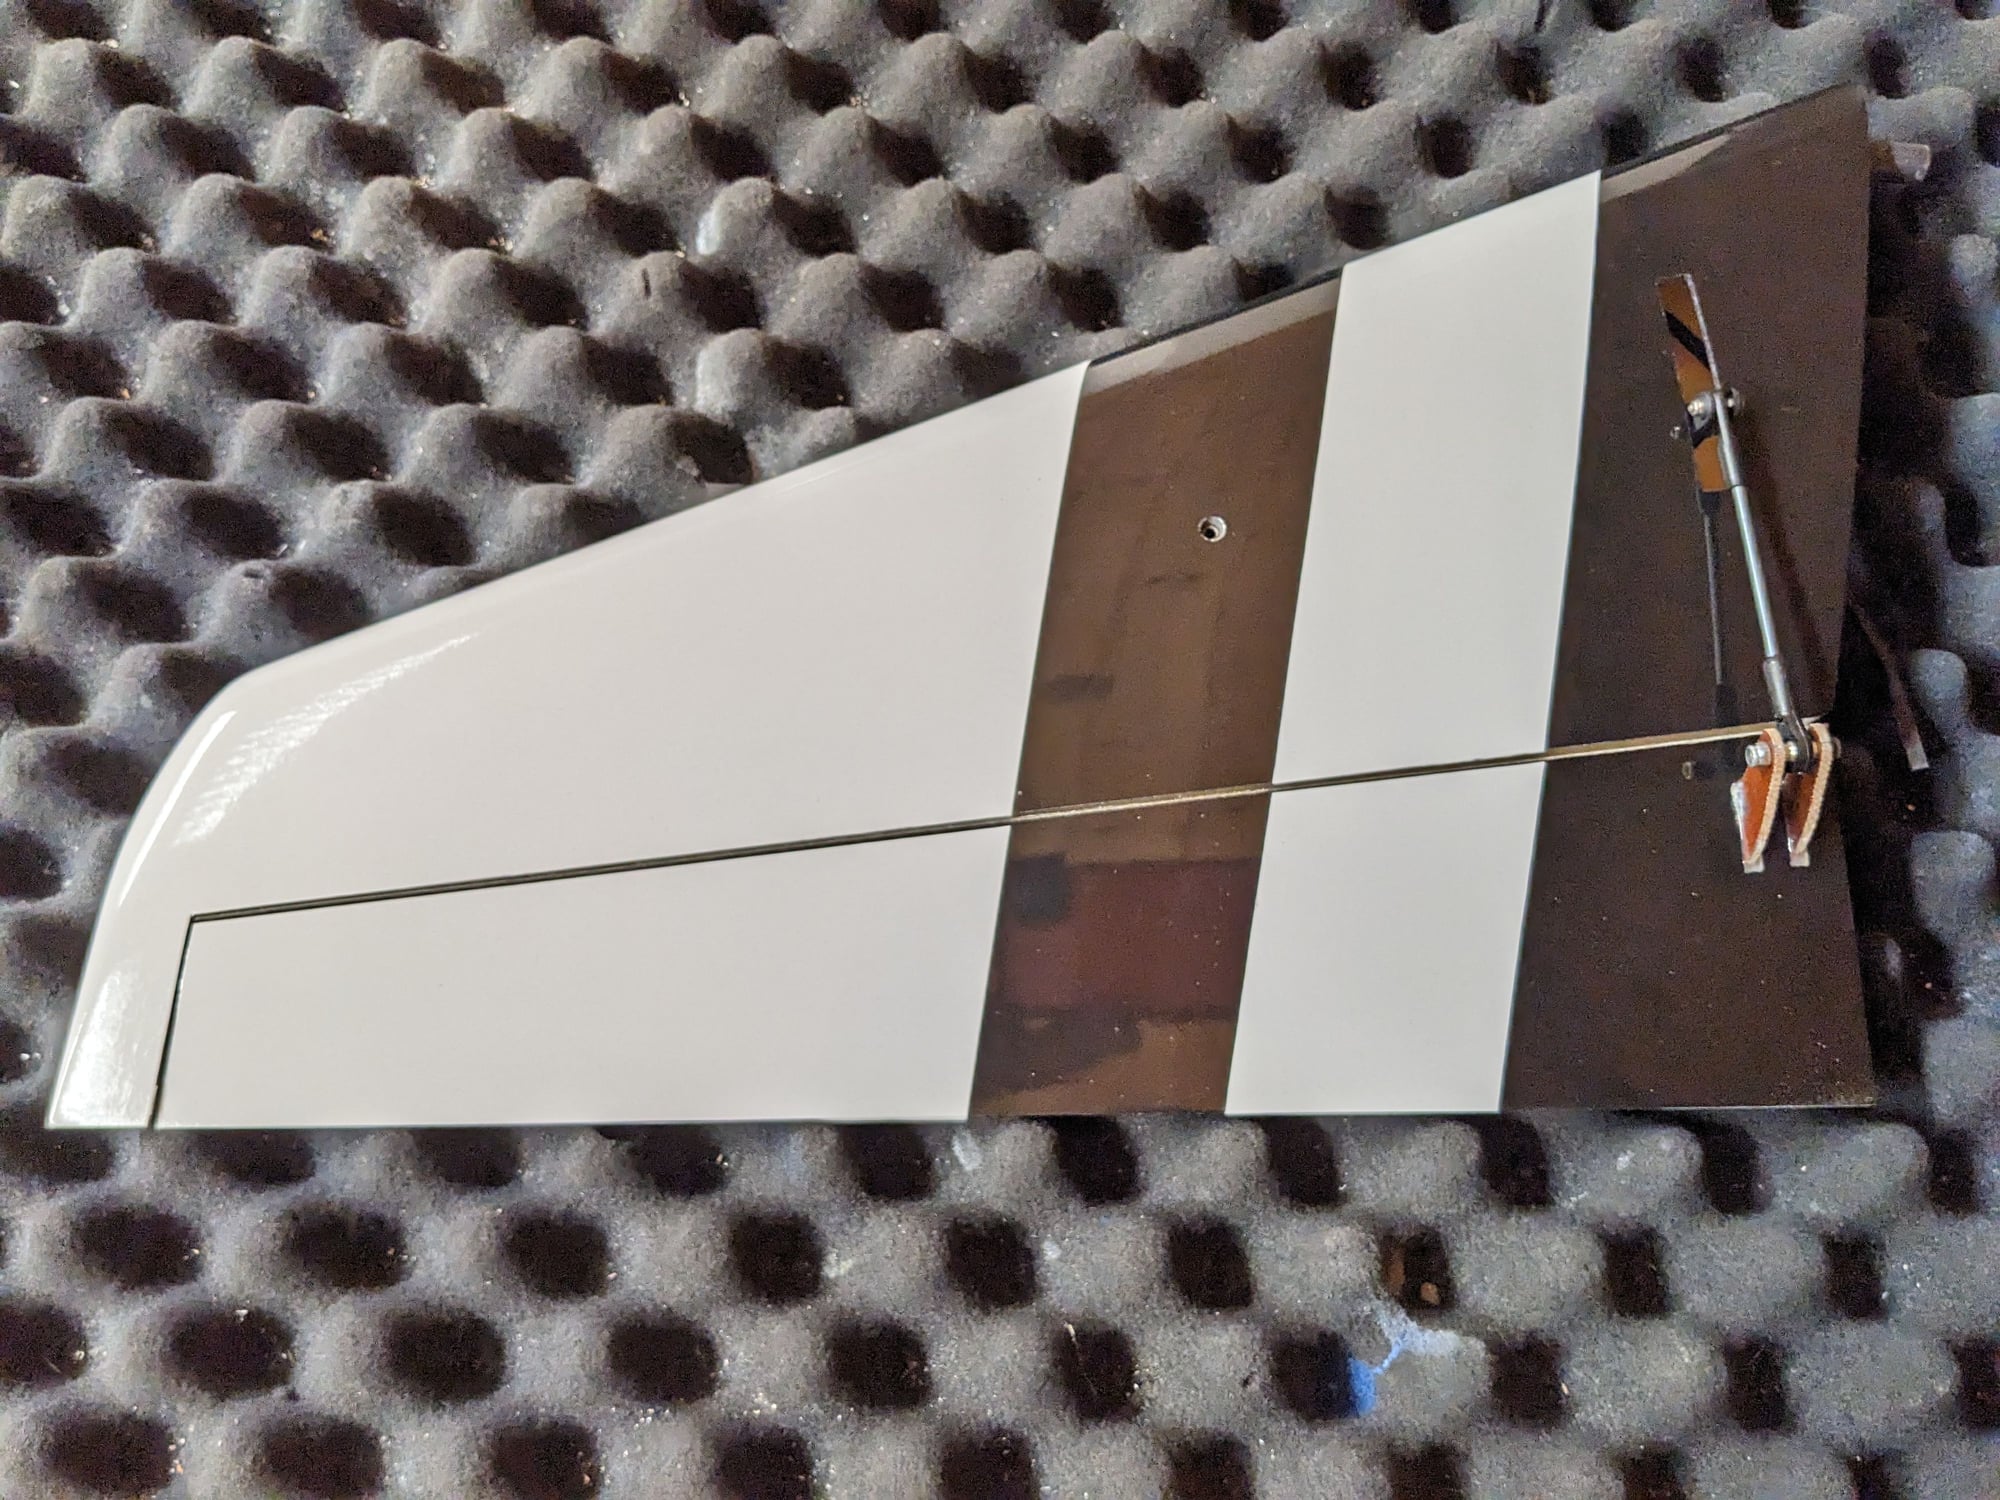
On the Rebel a visual look at the control surfaces would be more movement on the tail surfaces than the Ailerons. Lots of flap movement.
On the Rebel a visual look at the control surfaces would be more movement on the tail surfaces than the Ailerons. Lots of flap movement.
The following users liked this post:
RC Rich (01-17-2024)

The following users liked this post:
Ken Bryant (02-23-2024)


The following 2 users liked this post by RC Rich:
Ken Bryant (02-23-2024),
Skunkwrks (01-26-2024)
01-26-2024, 09:47 PM
#835
Senior Member
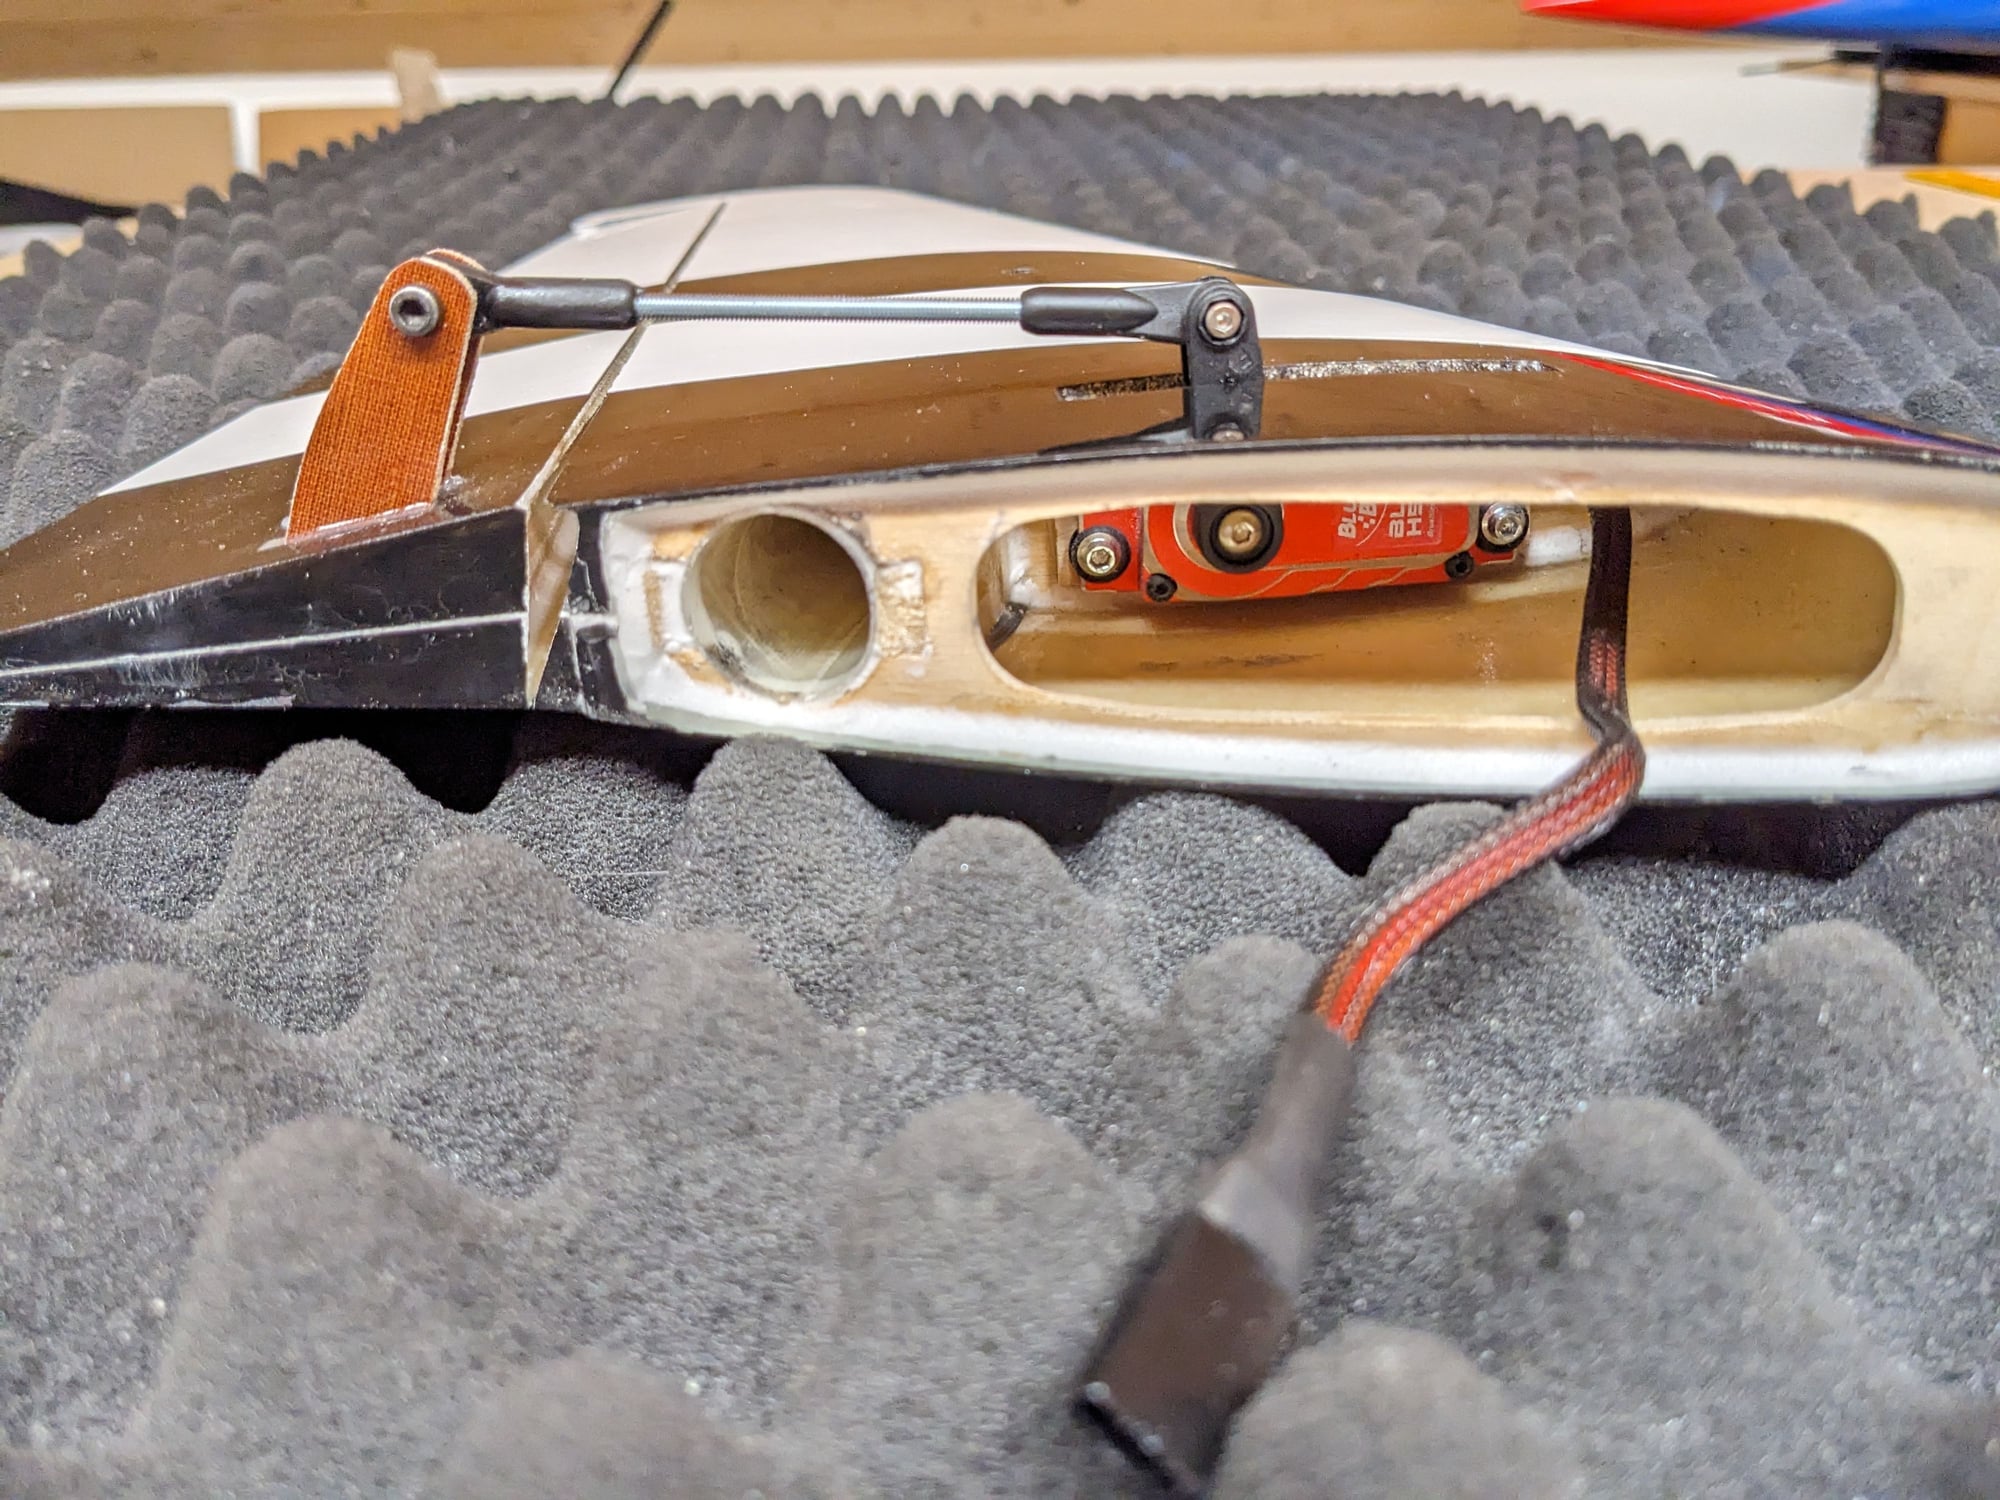
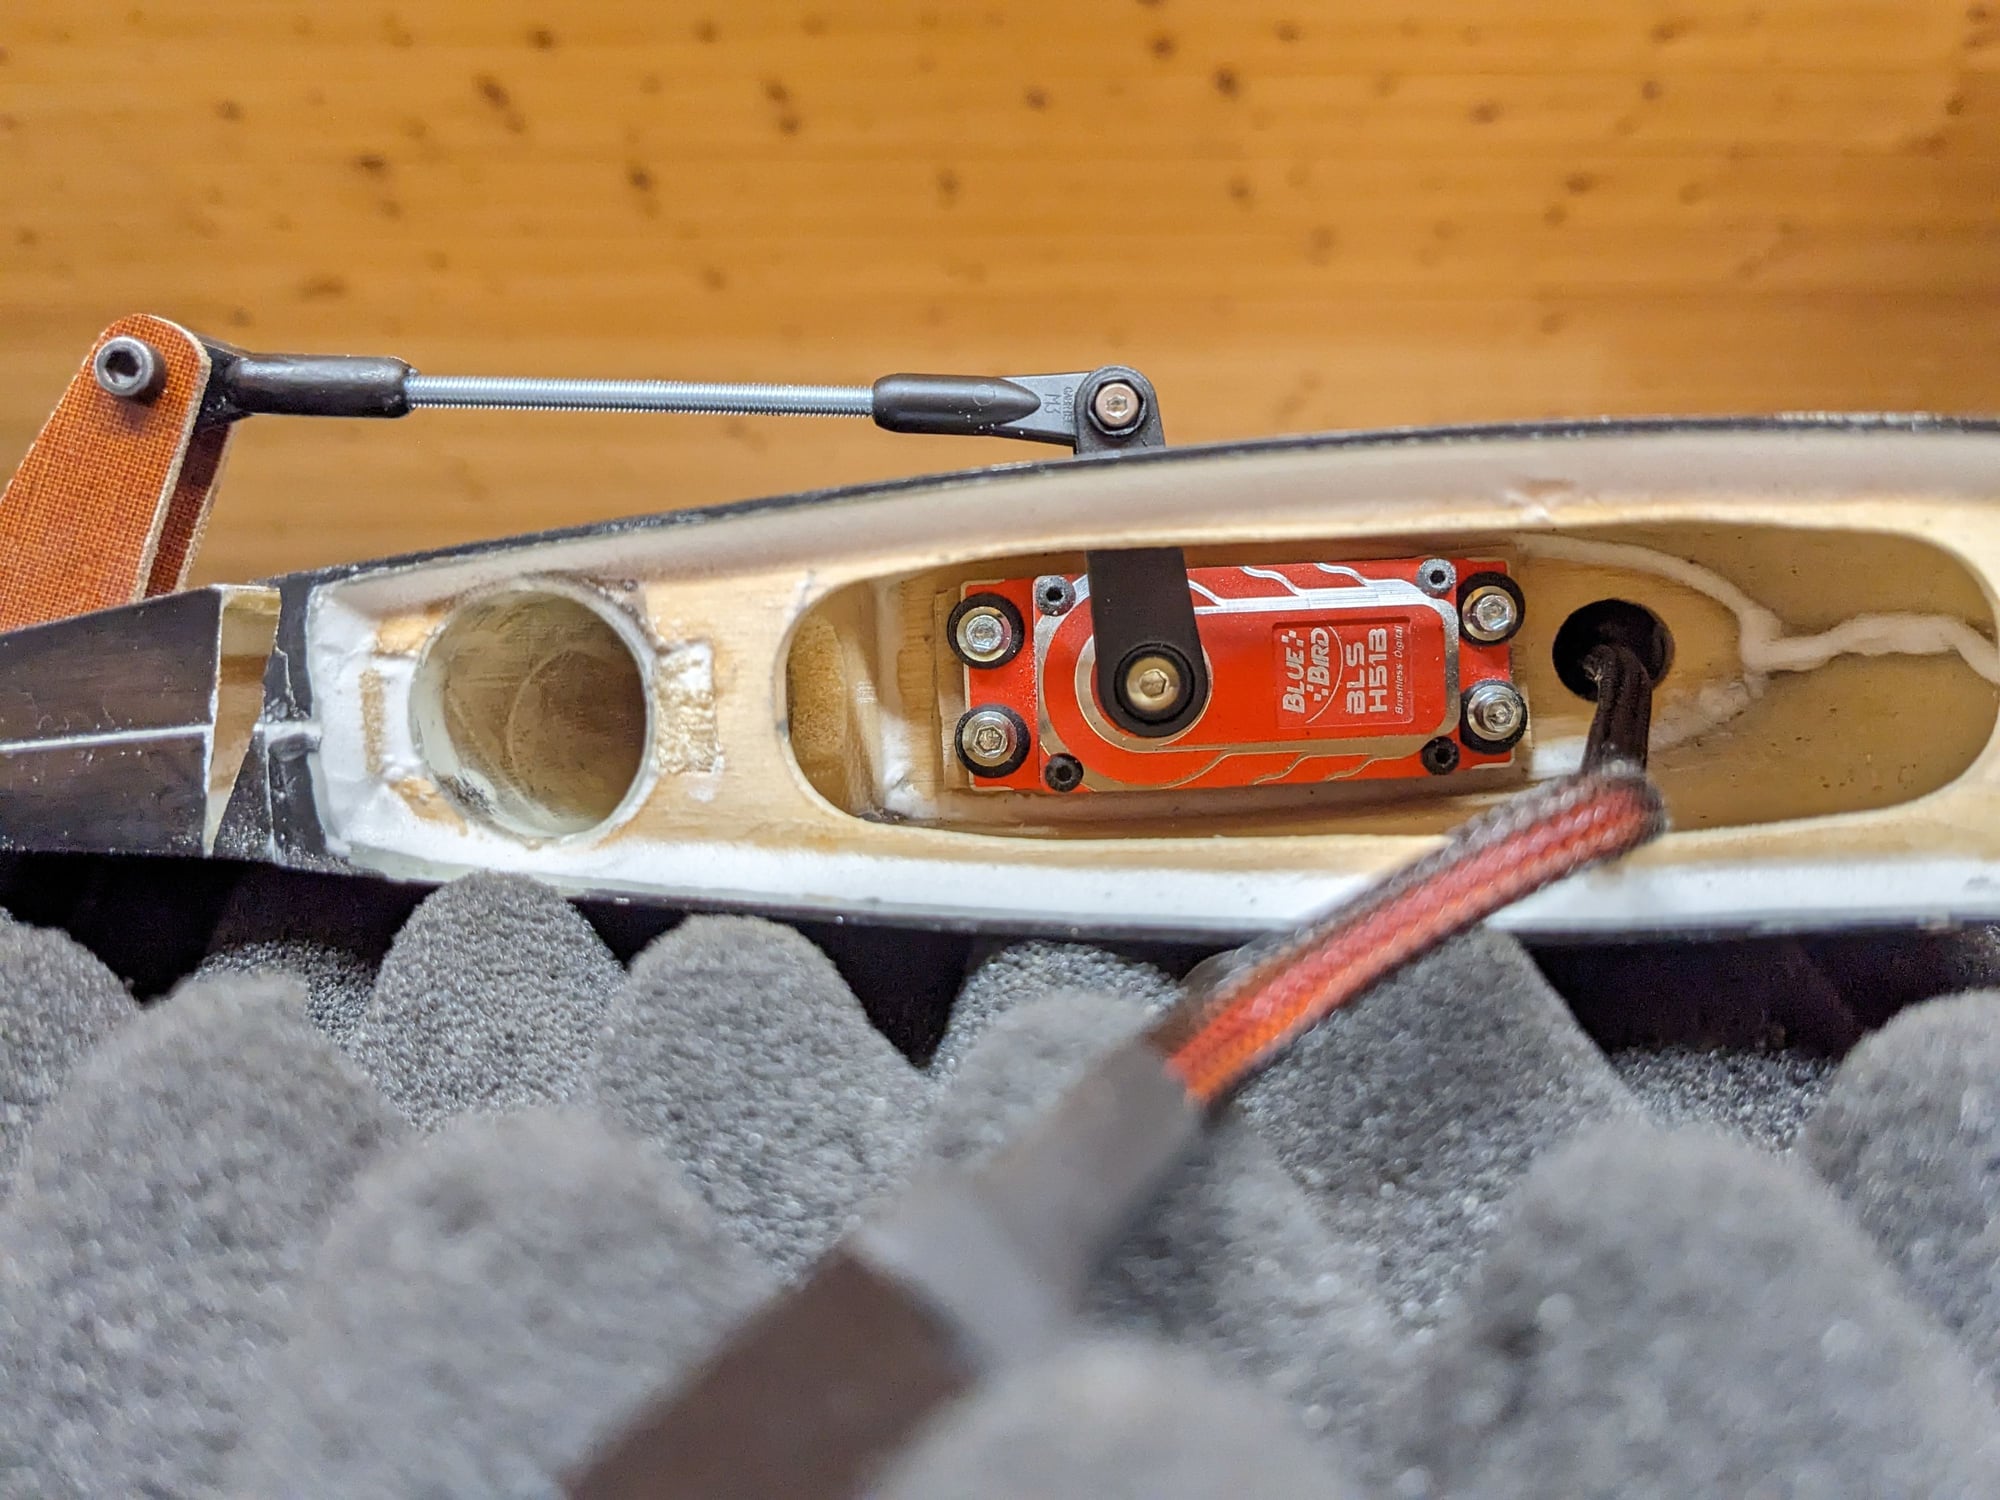
Ric has provided good photos to go by


The following 4 users liked this post by vegasking:
02-20-2024, 12:46 PM
#839
On my Futaba 18SZ, the servo monitor shows gyro numbers of 65-normal flight, 85-half flaps and 105-full flaps. The gains increase in the flap conditions to provide more stability while flying slower. Those are all negative numbers for all three conditions on the regular Demon Cortex, not the Pro. My Rebel Classic flys very smooth and I have never seen a hint of oscillation. When I connected the Cortex to a PC, I didn't change any of the stock gain settings and only changed the orientation, SBus and channel assignments.
02-20-2024, 02:50 PM
#840

My Feedback: (1)
The Rebel doesn't really need a gyro but my cortex definitely helps during x-wind operations and turbulent weather.
02-22-2024, 11:48 AM
#841

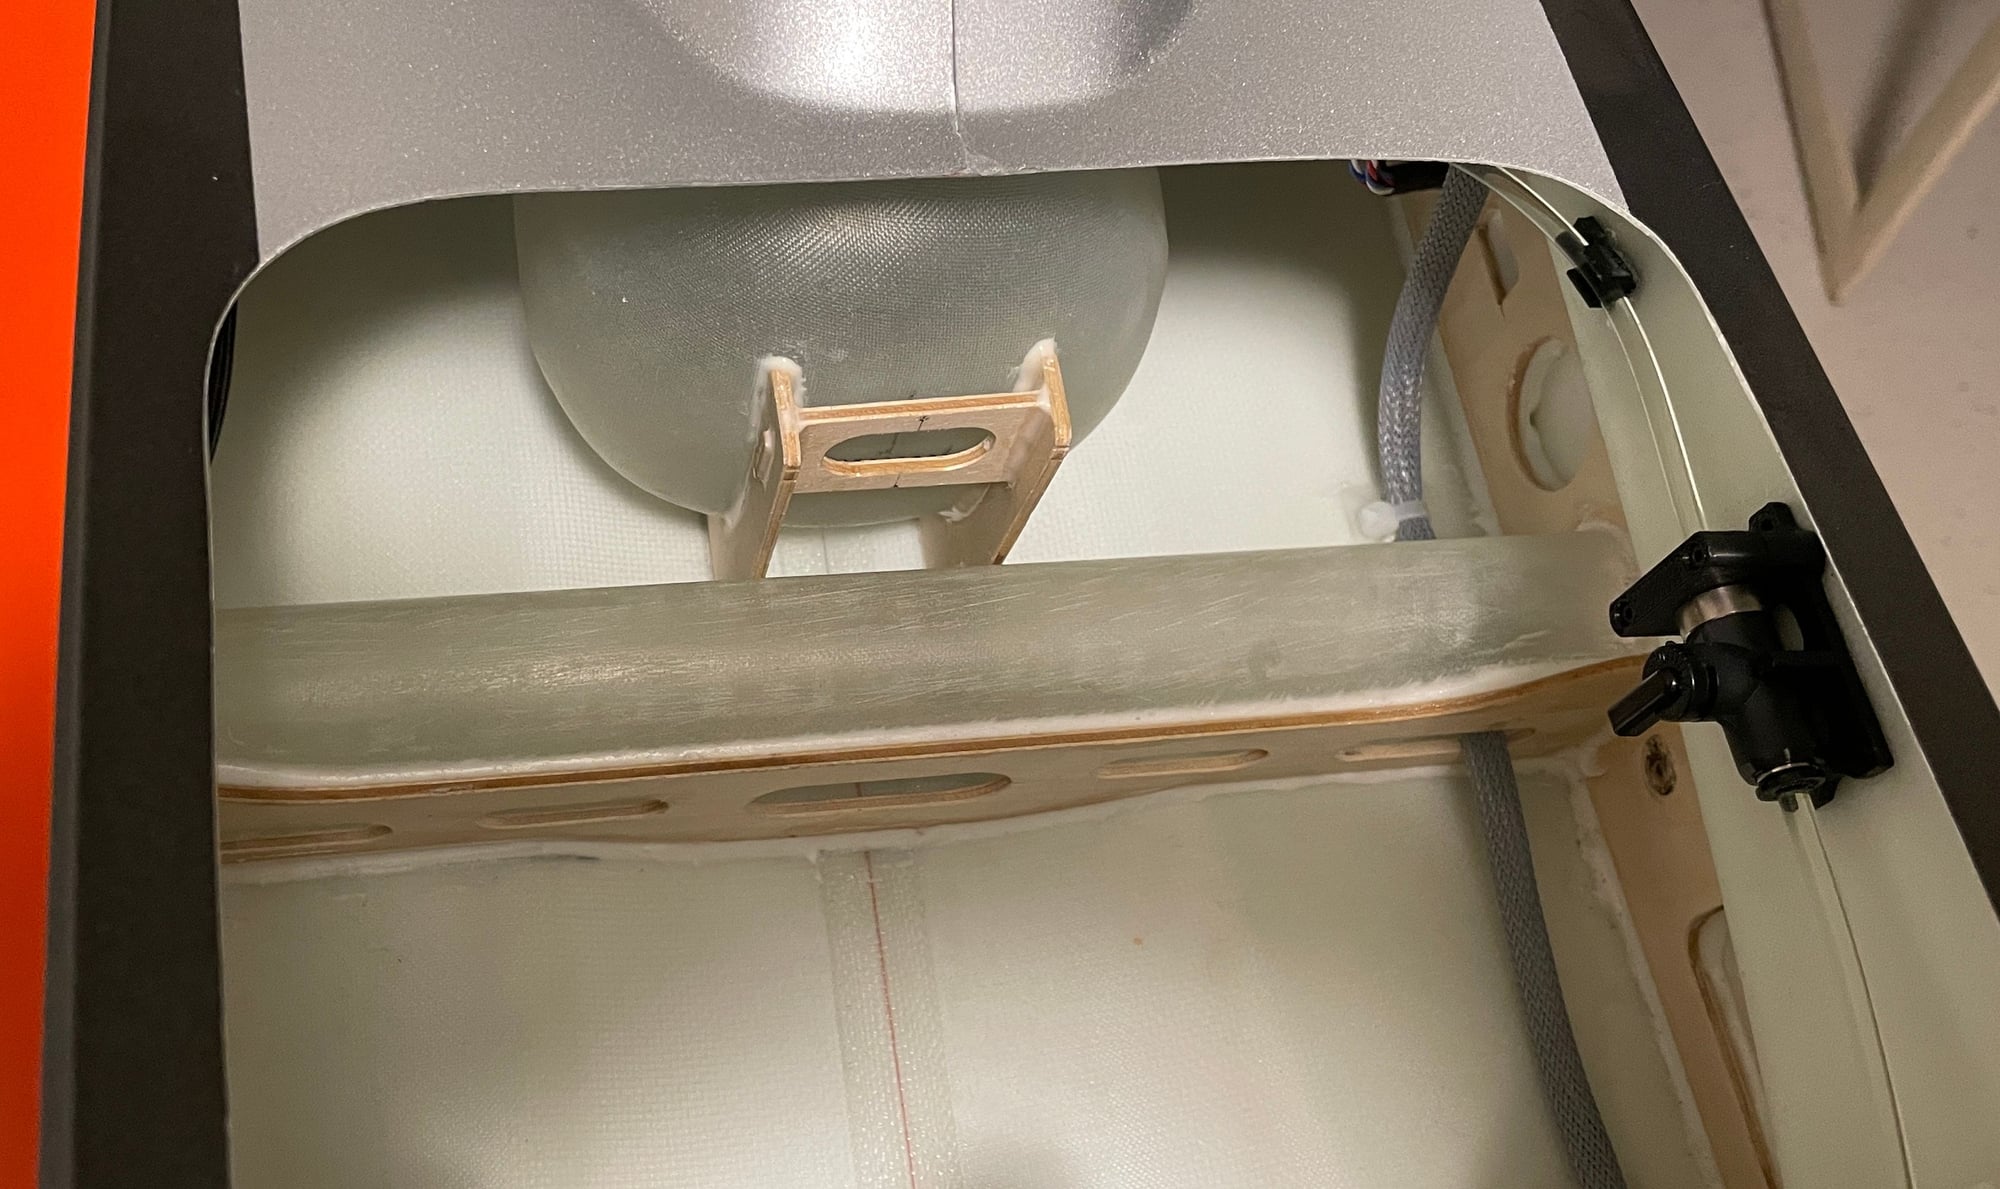
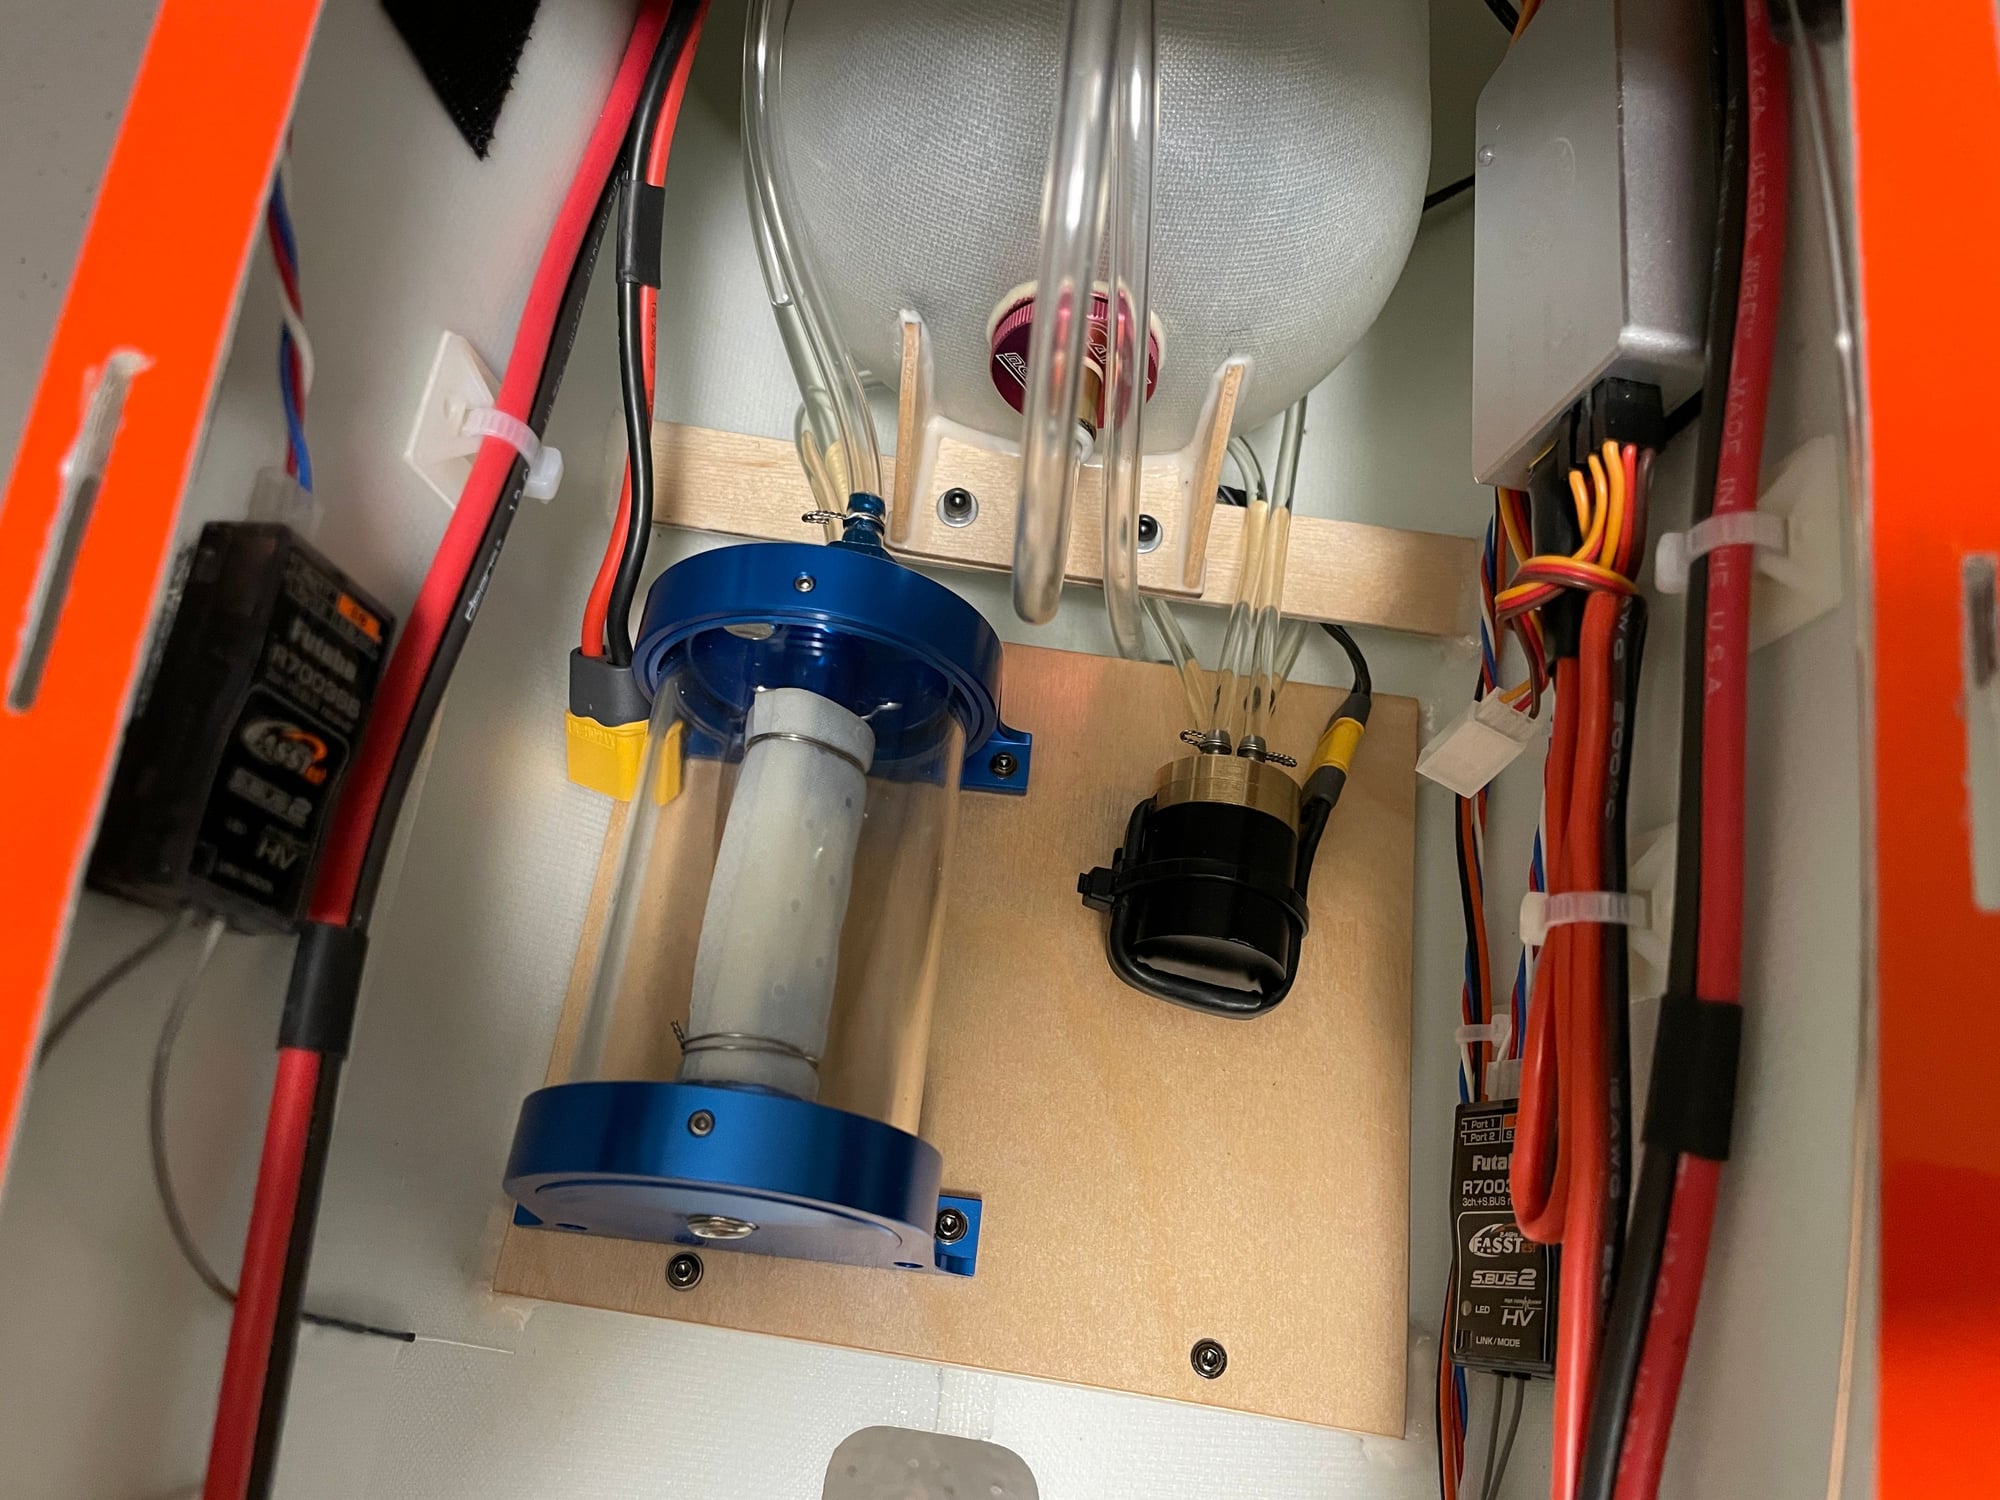
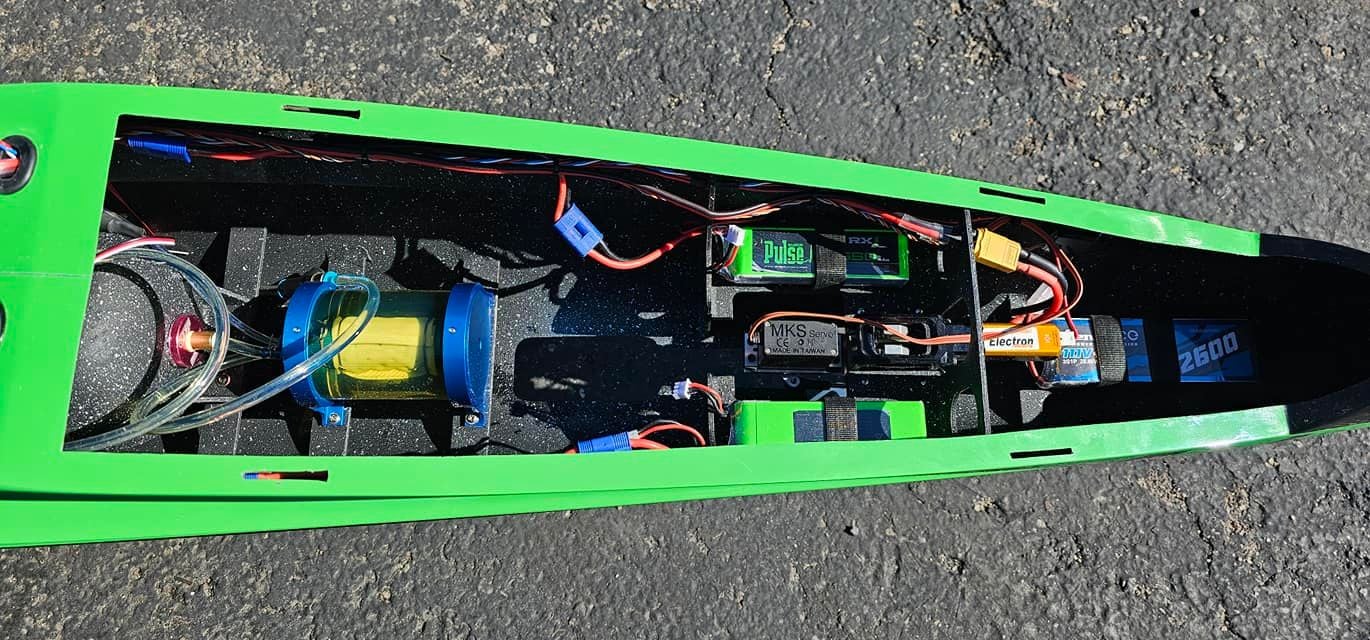
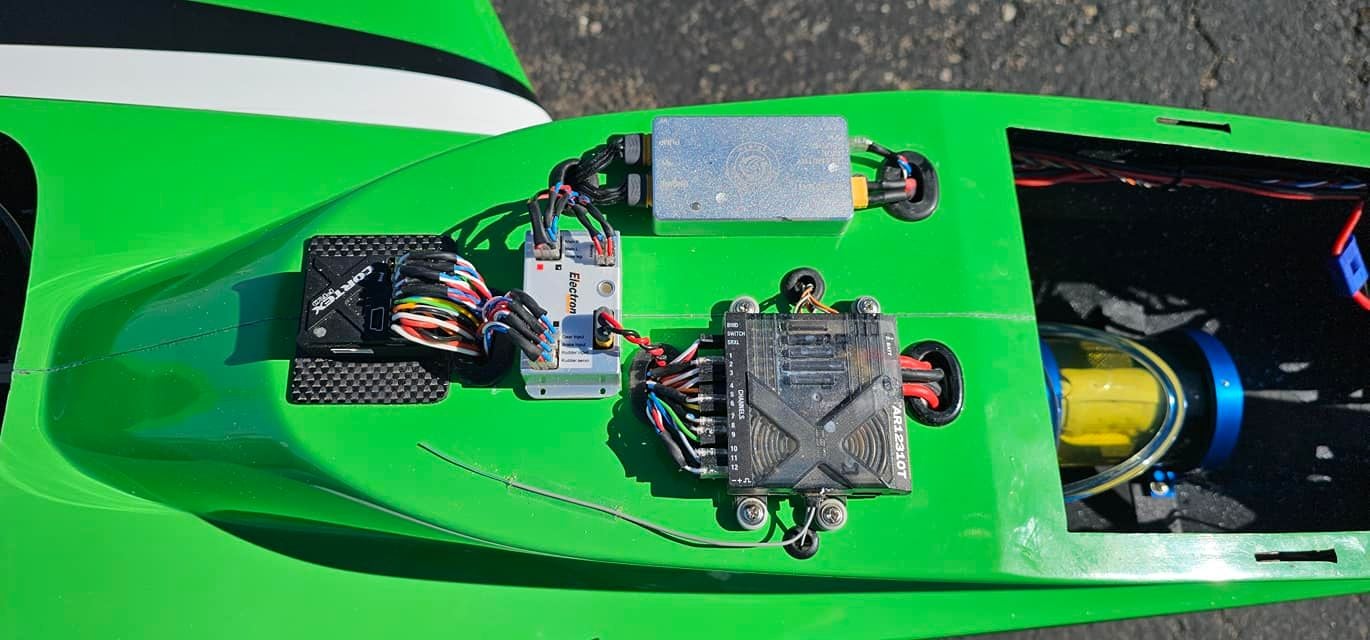
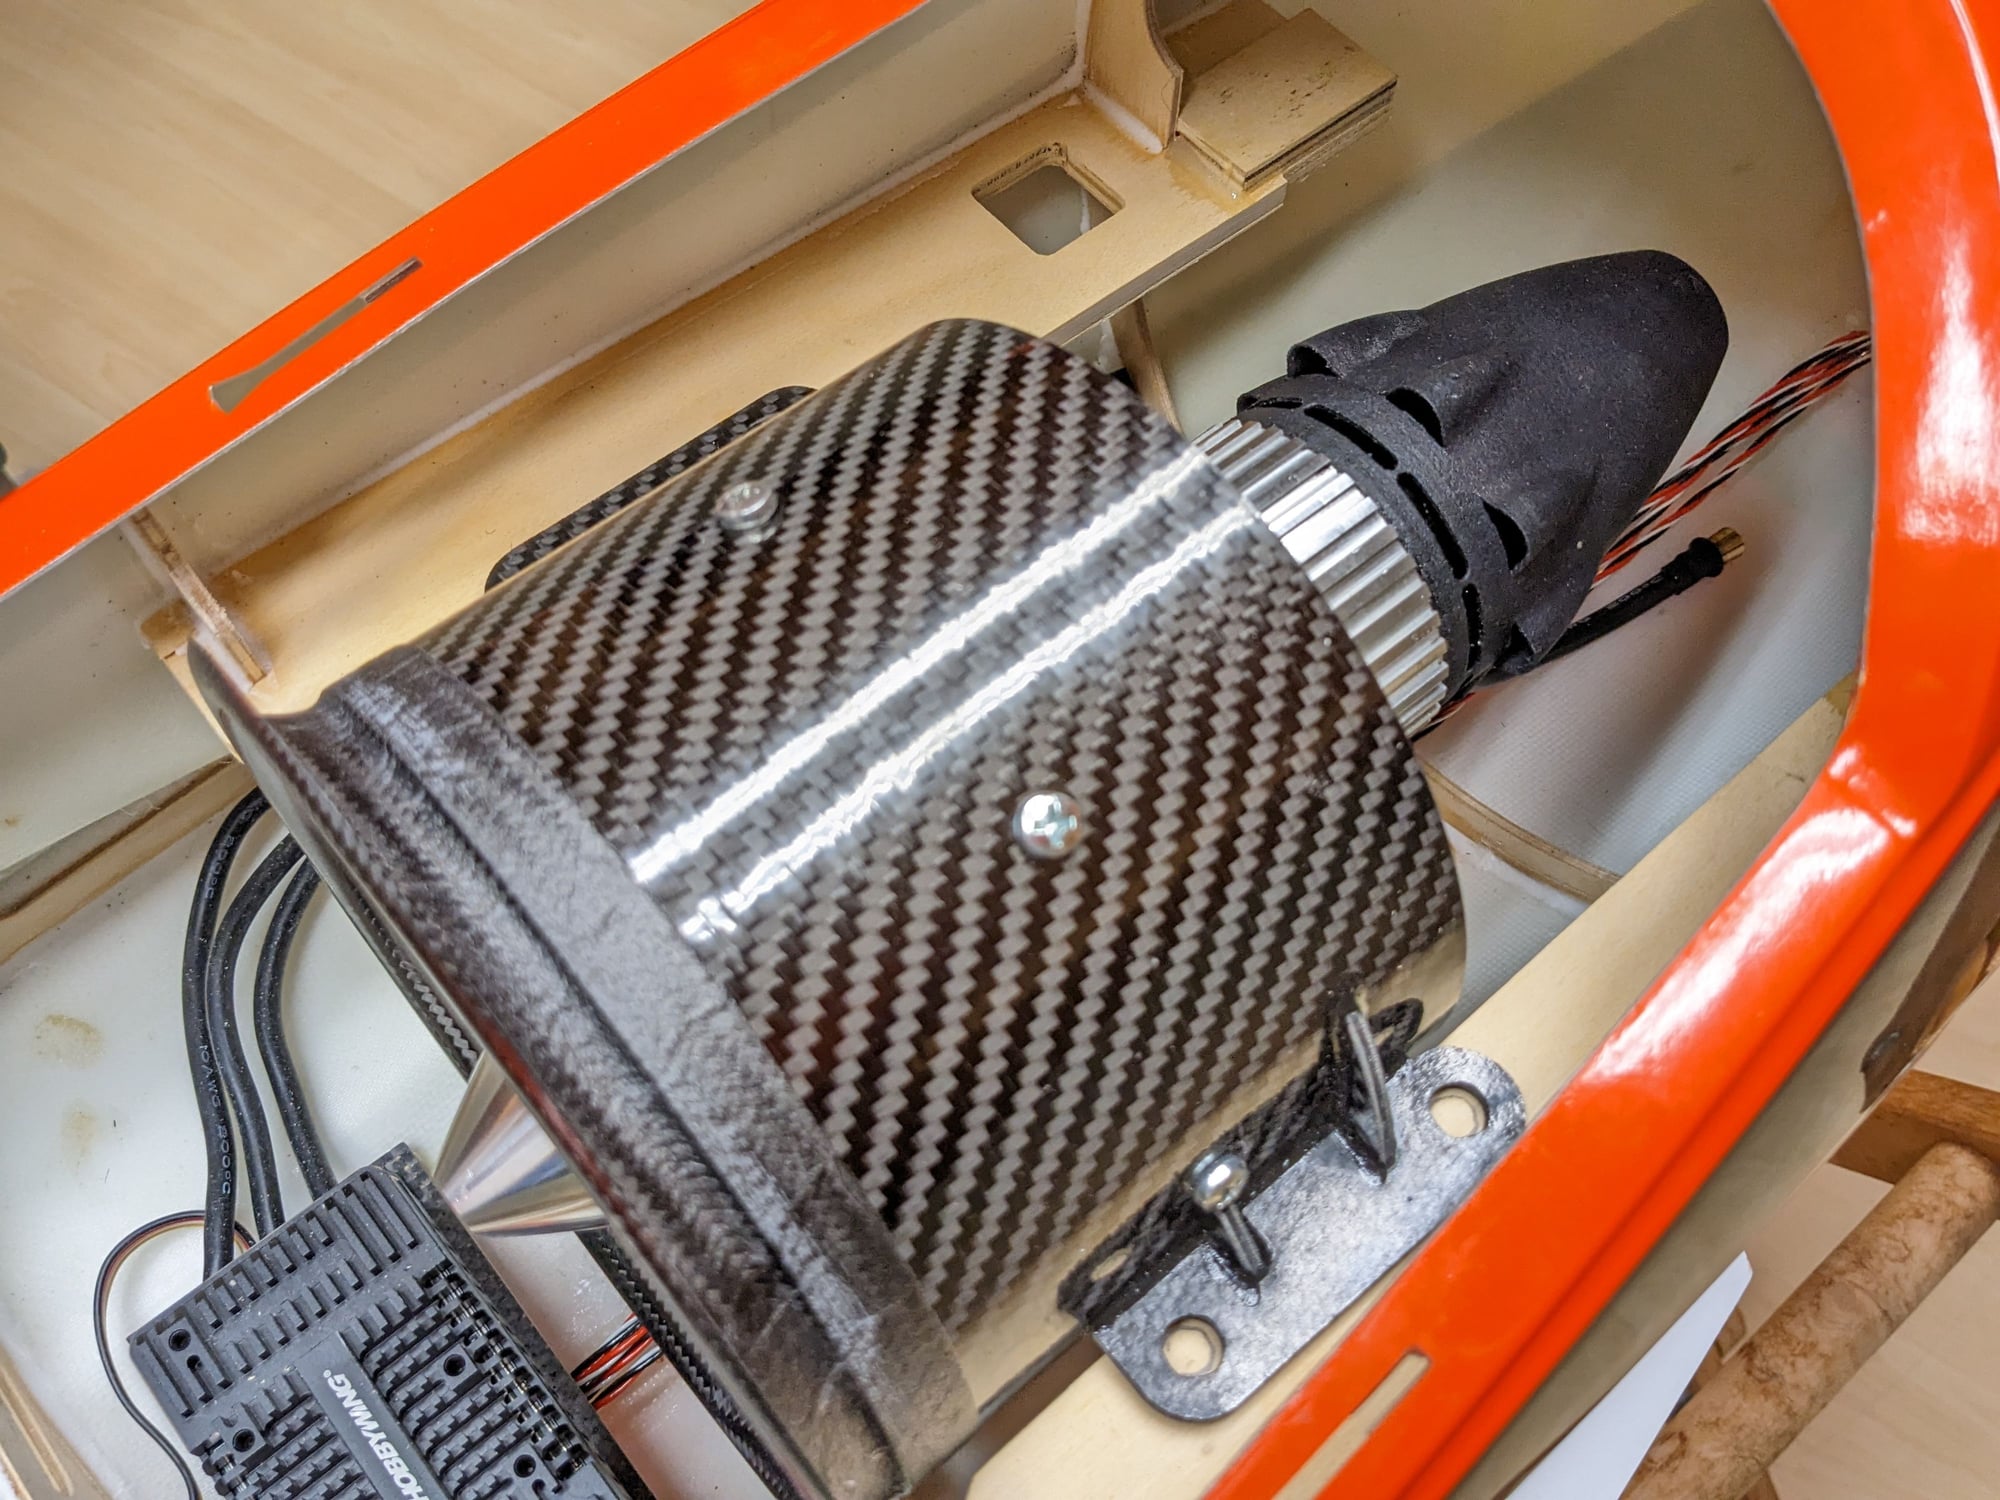
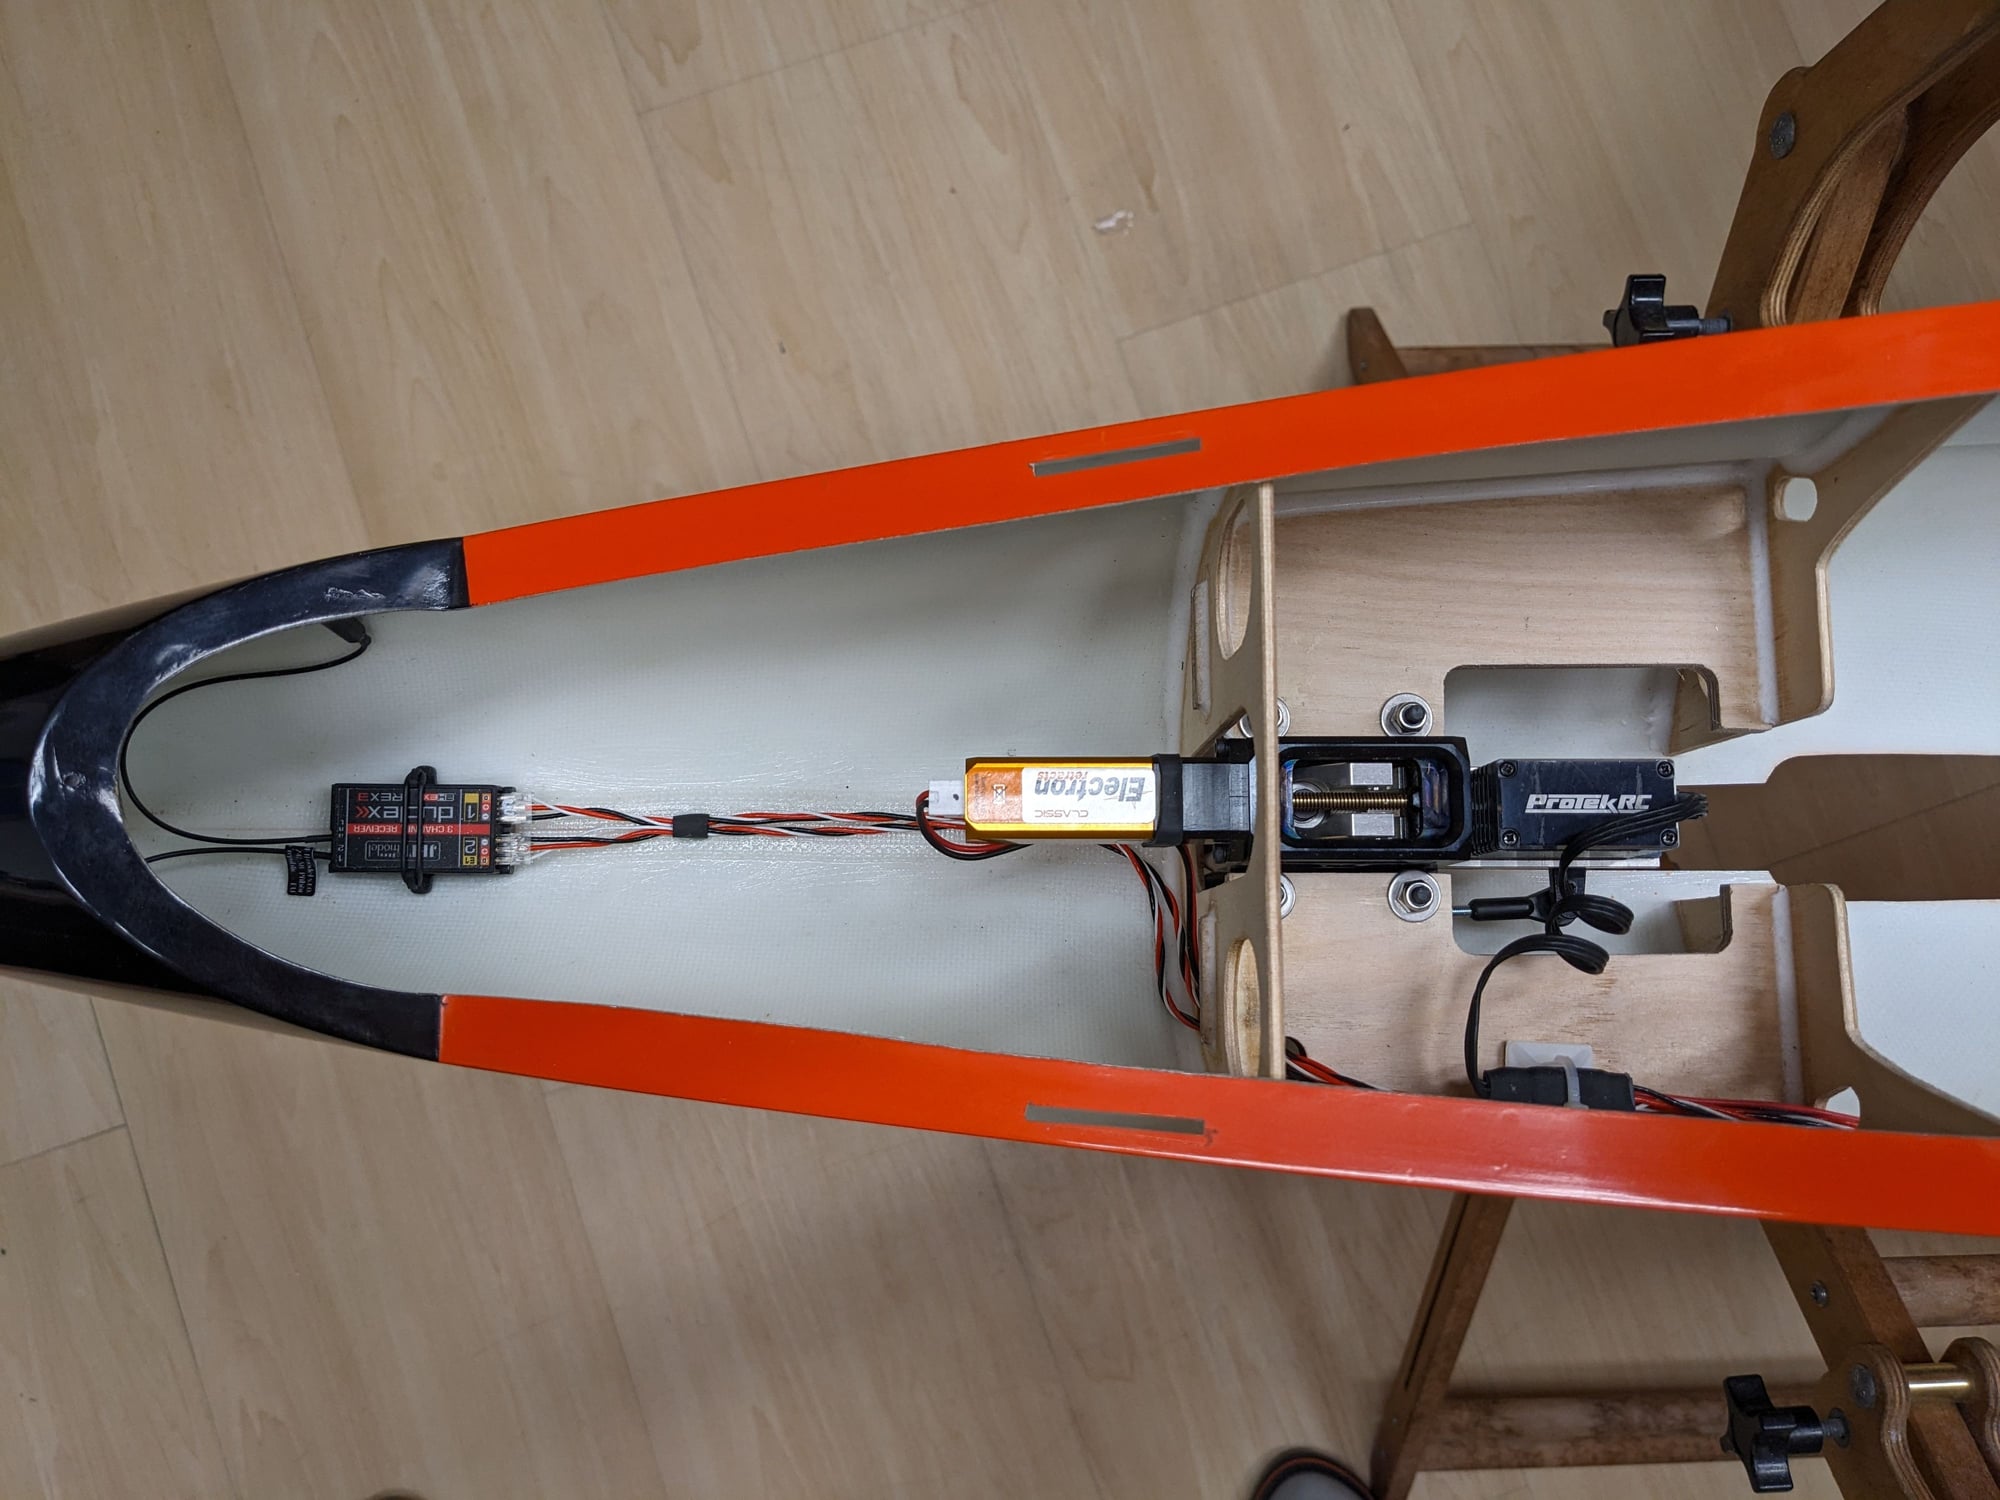
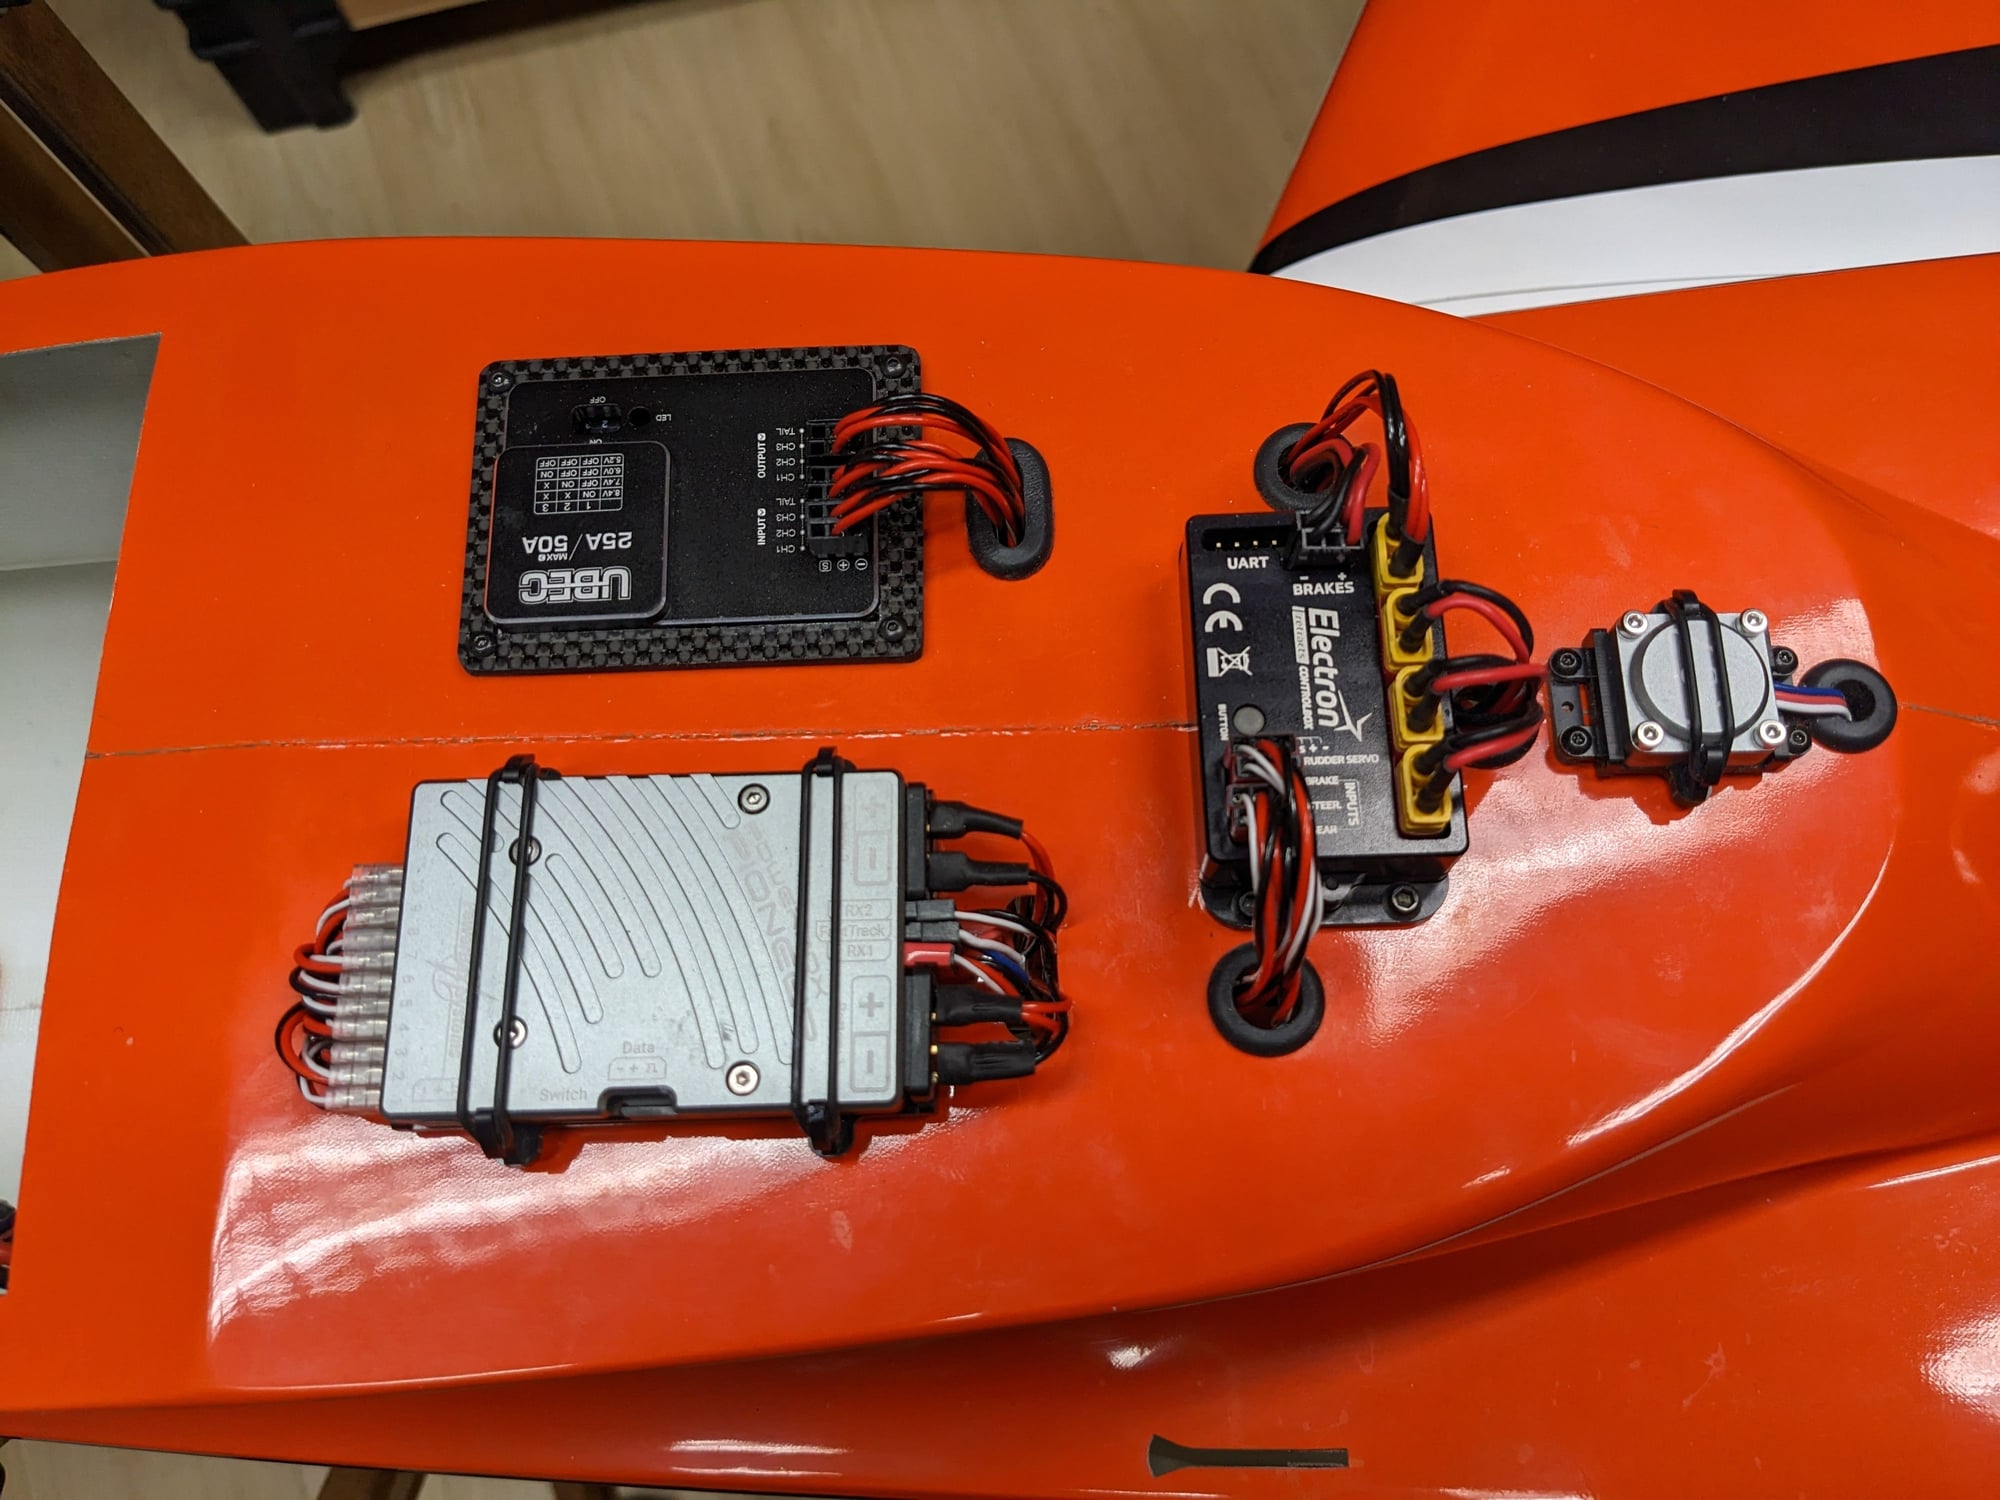
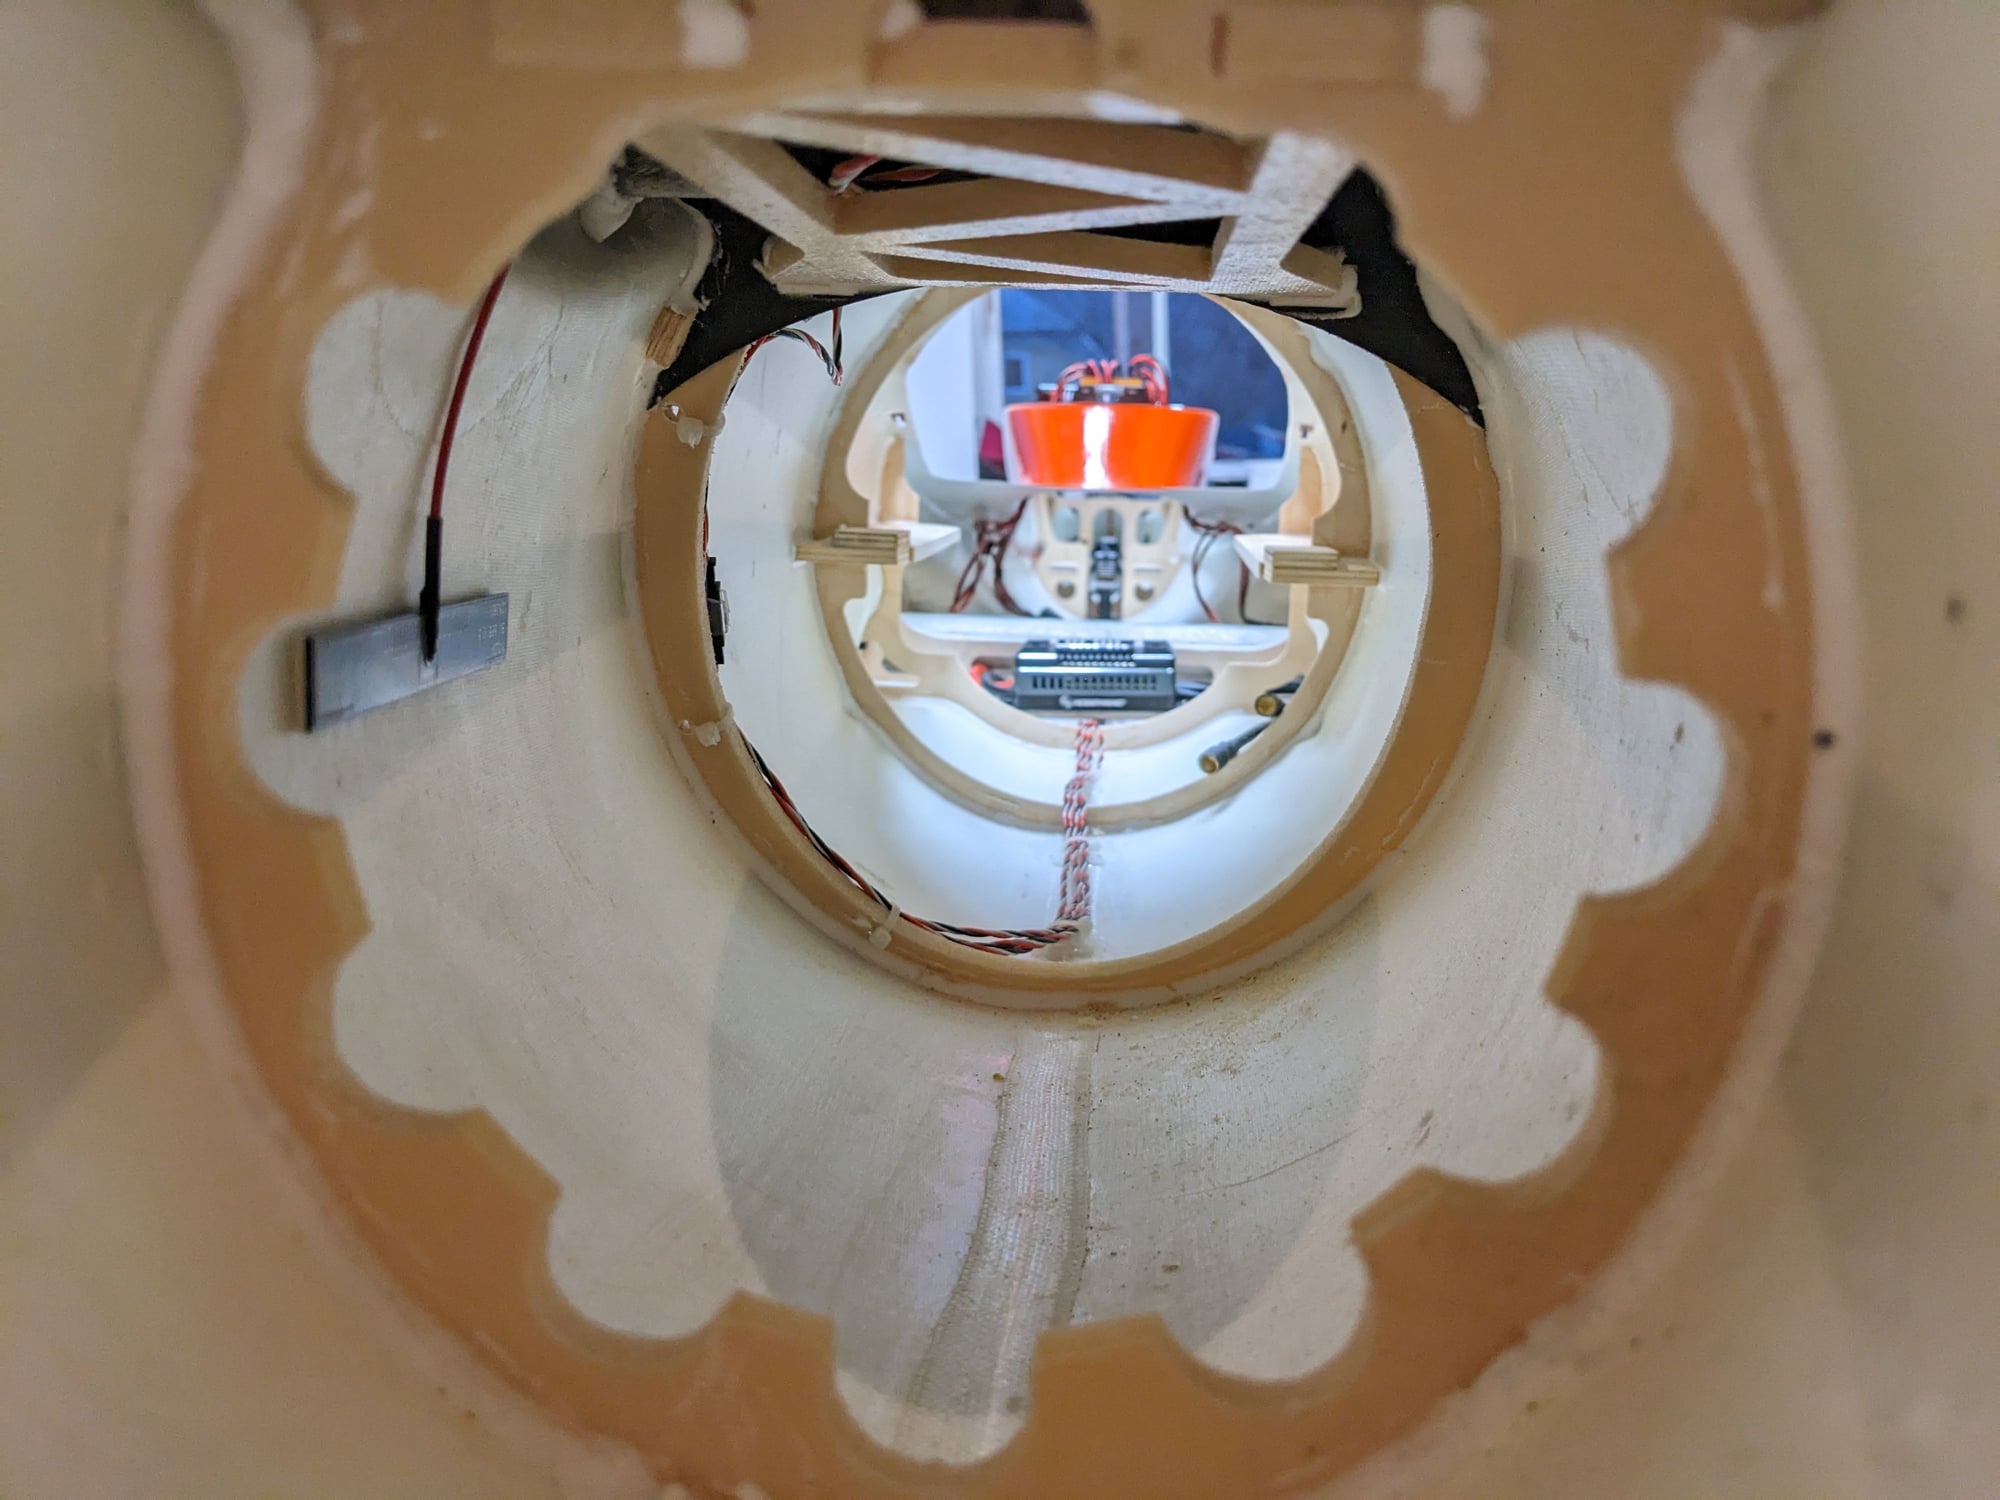
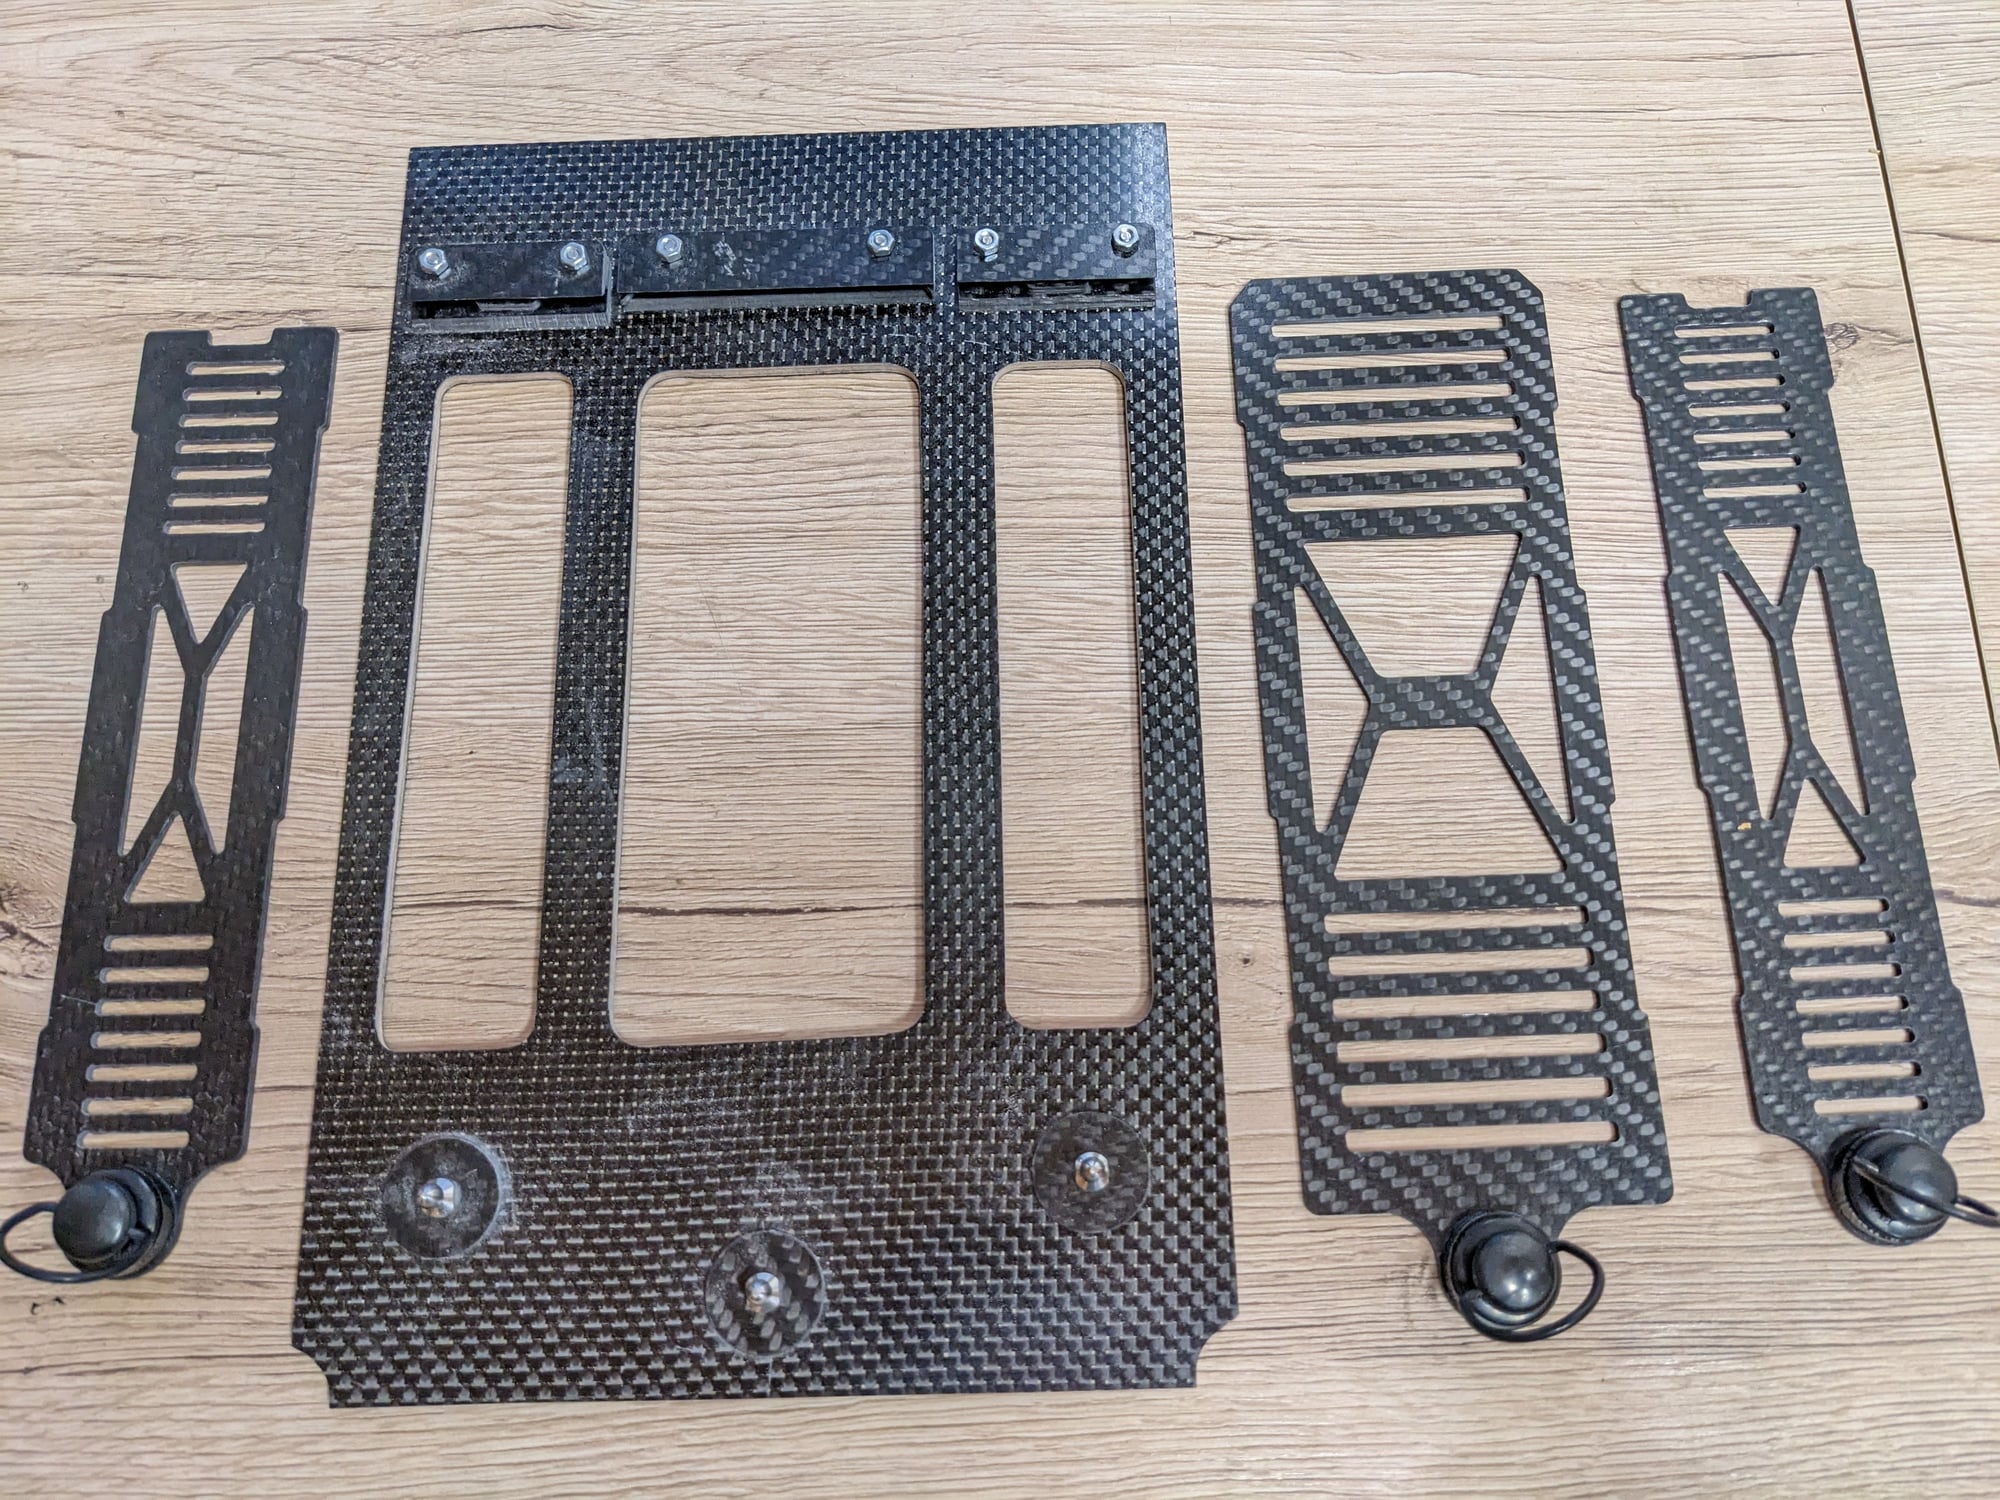
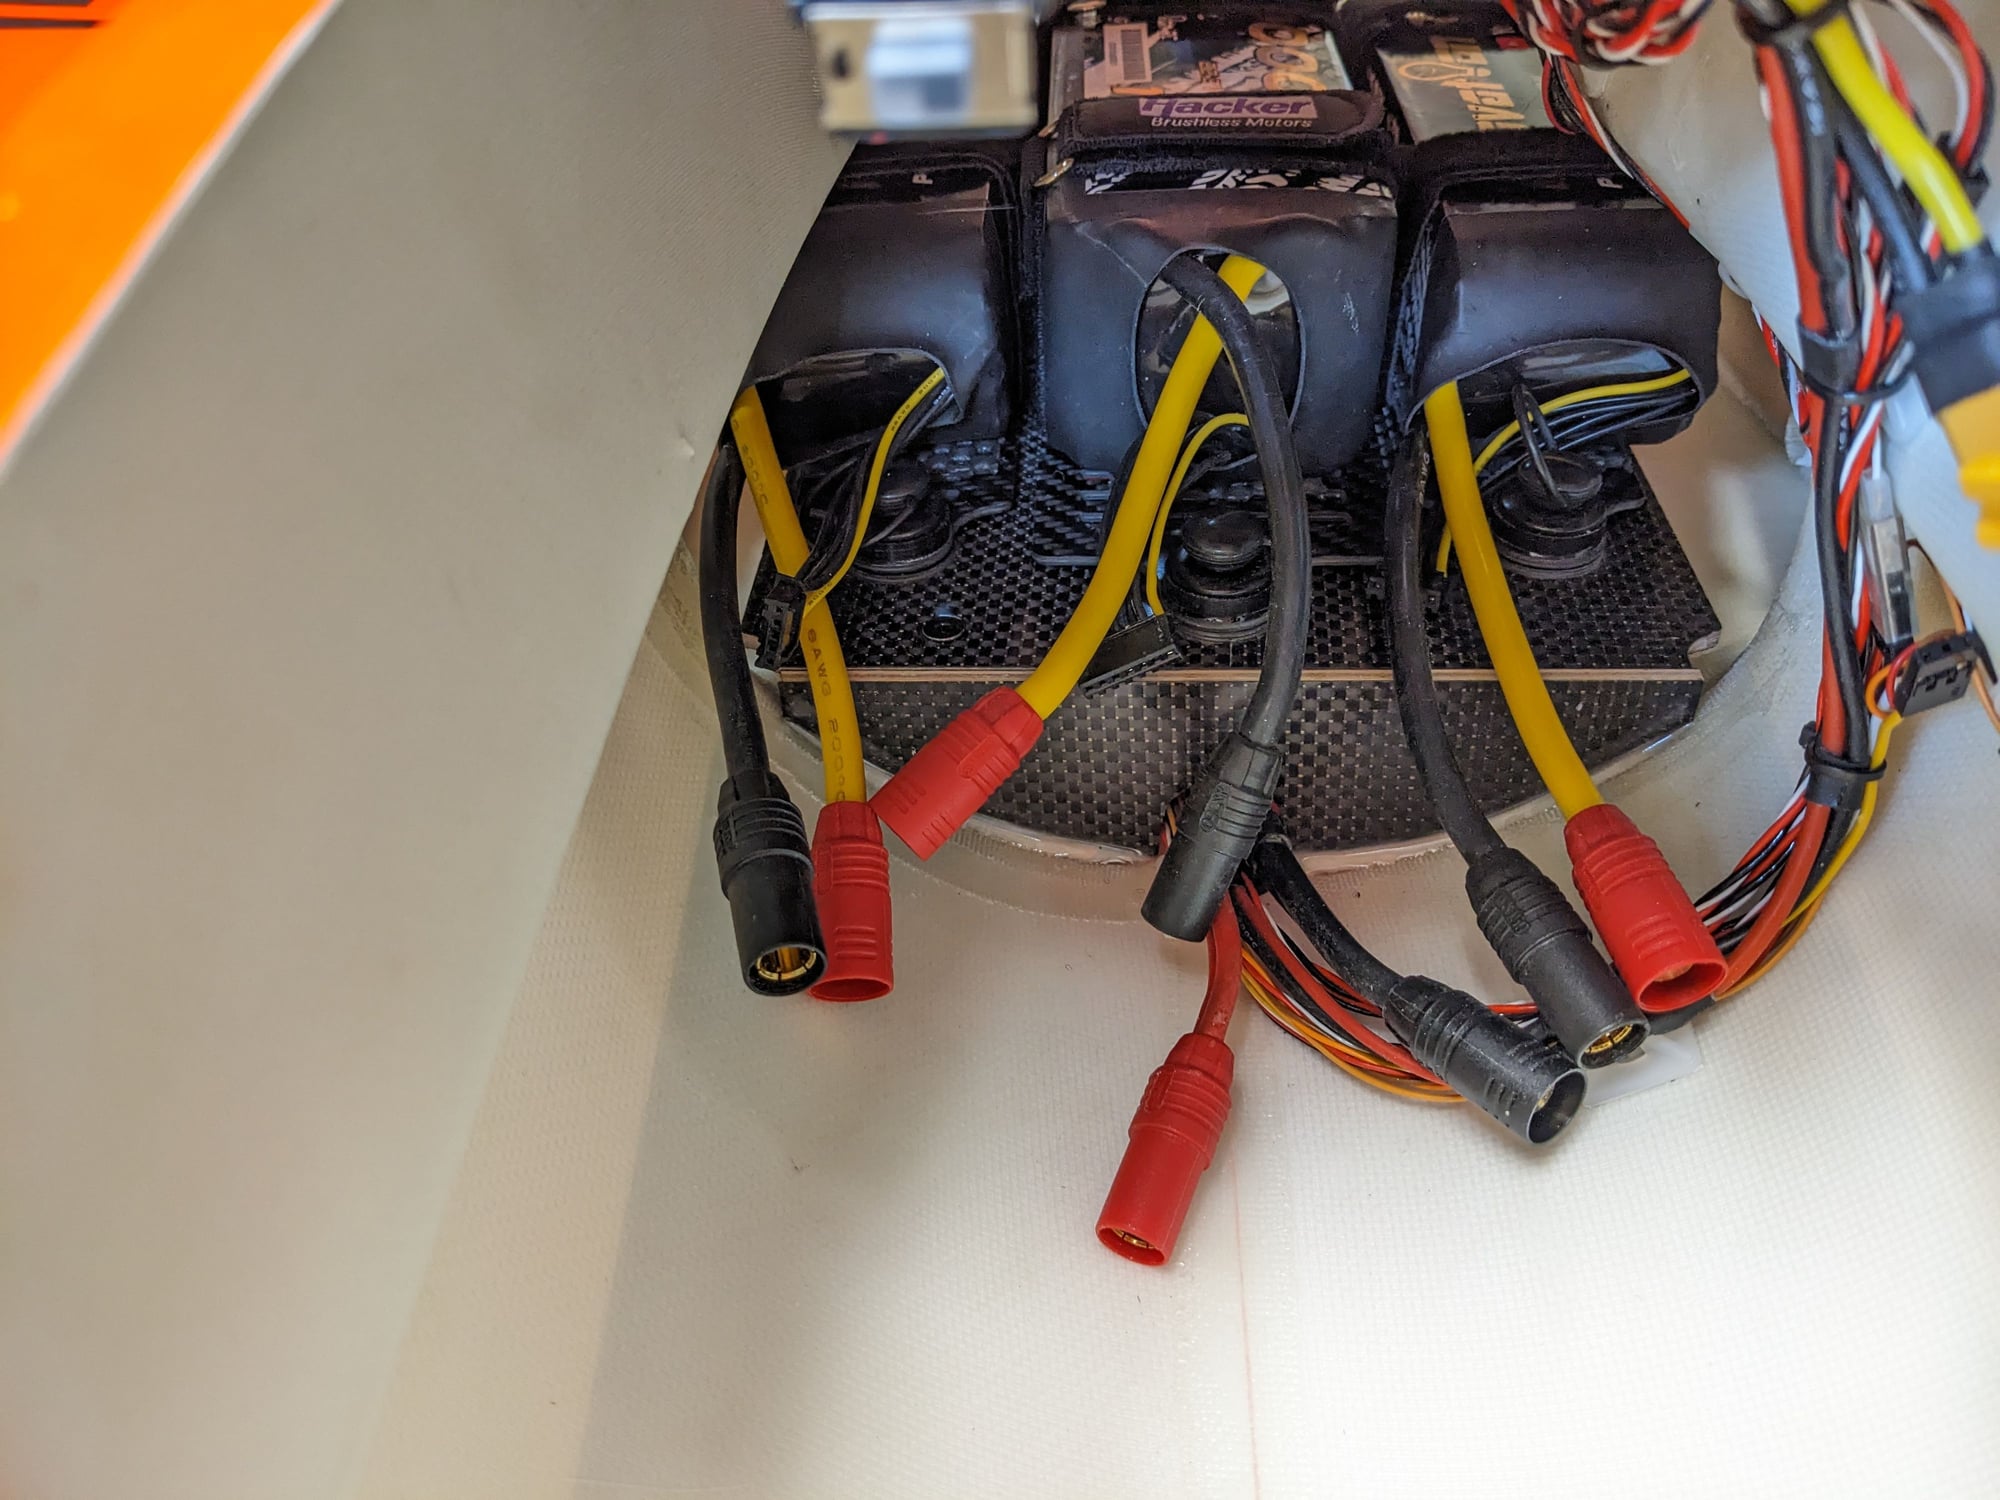
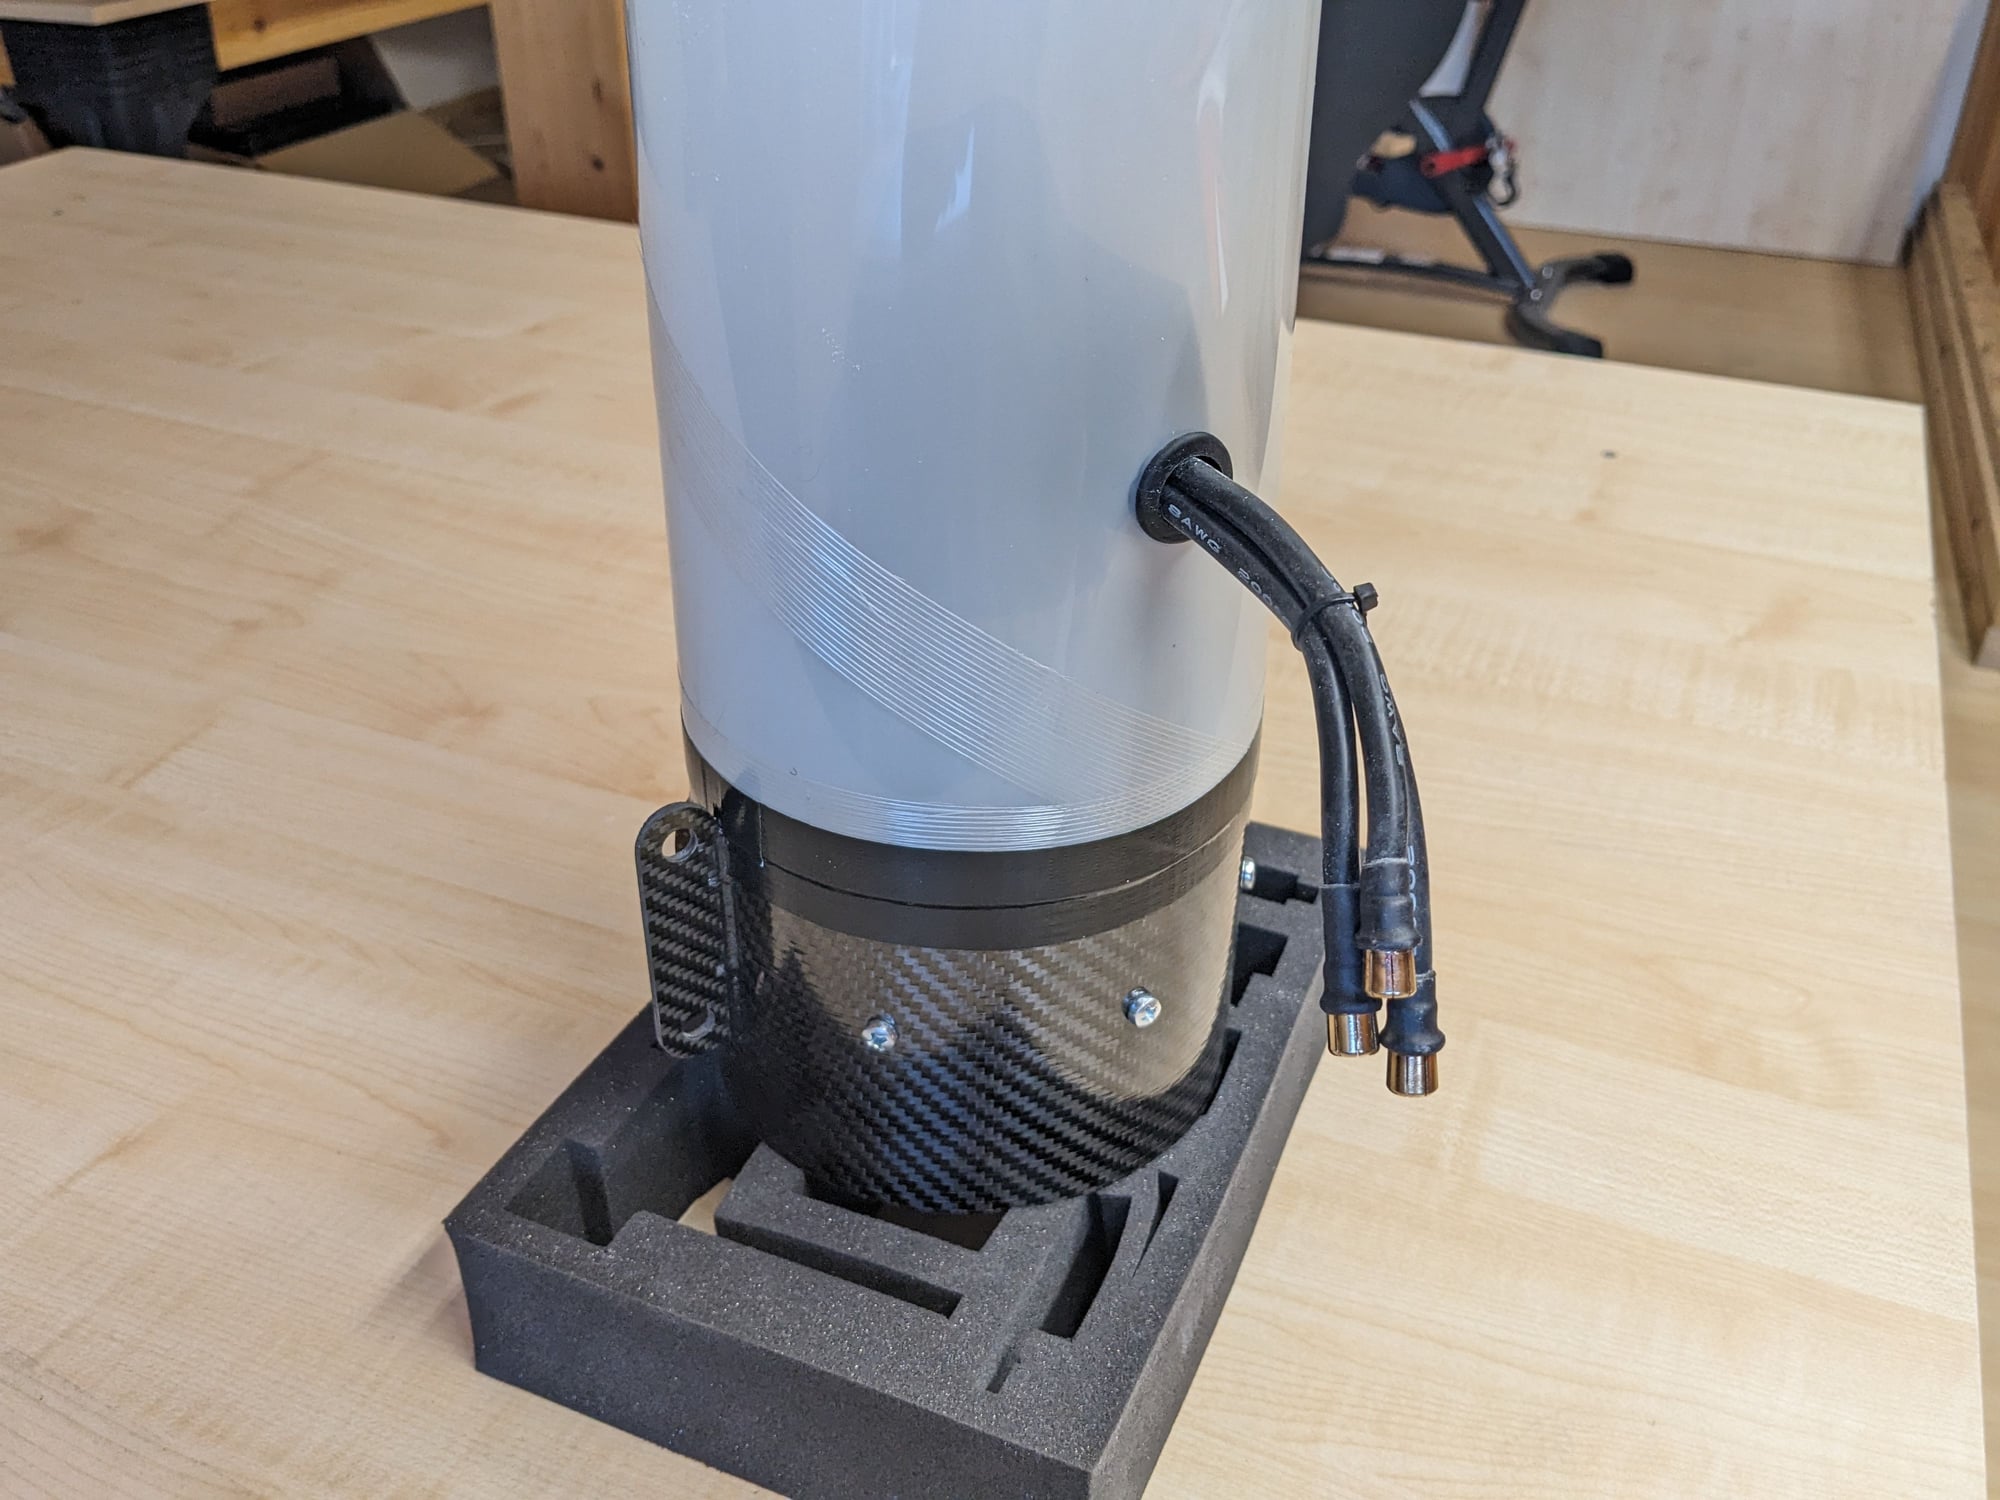
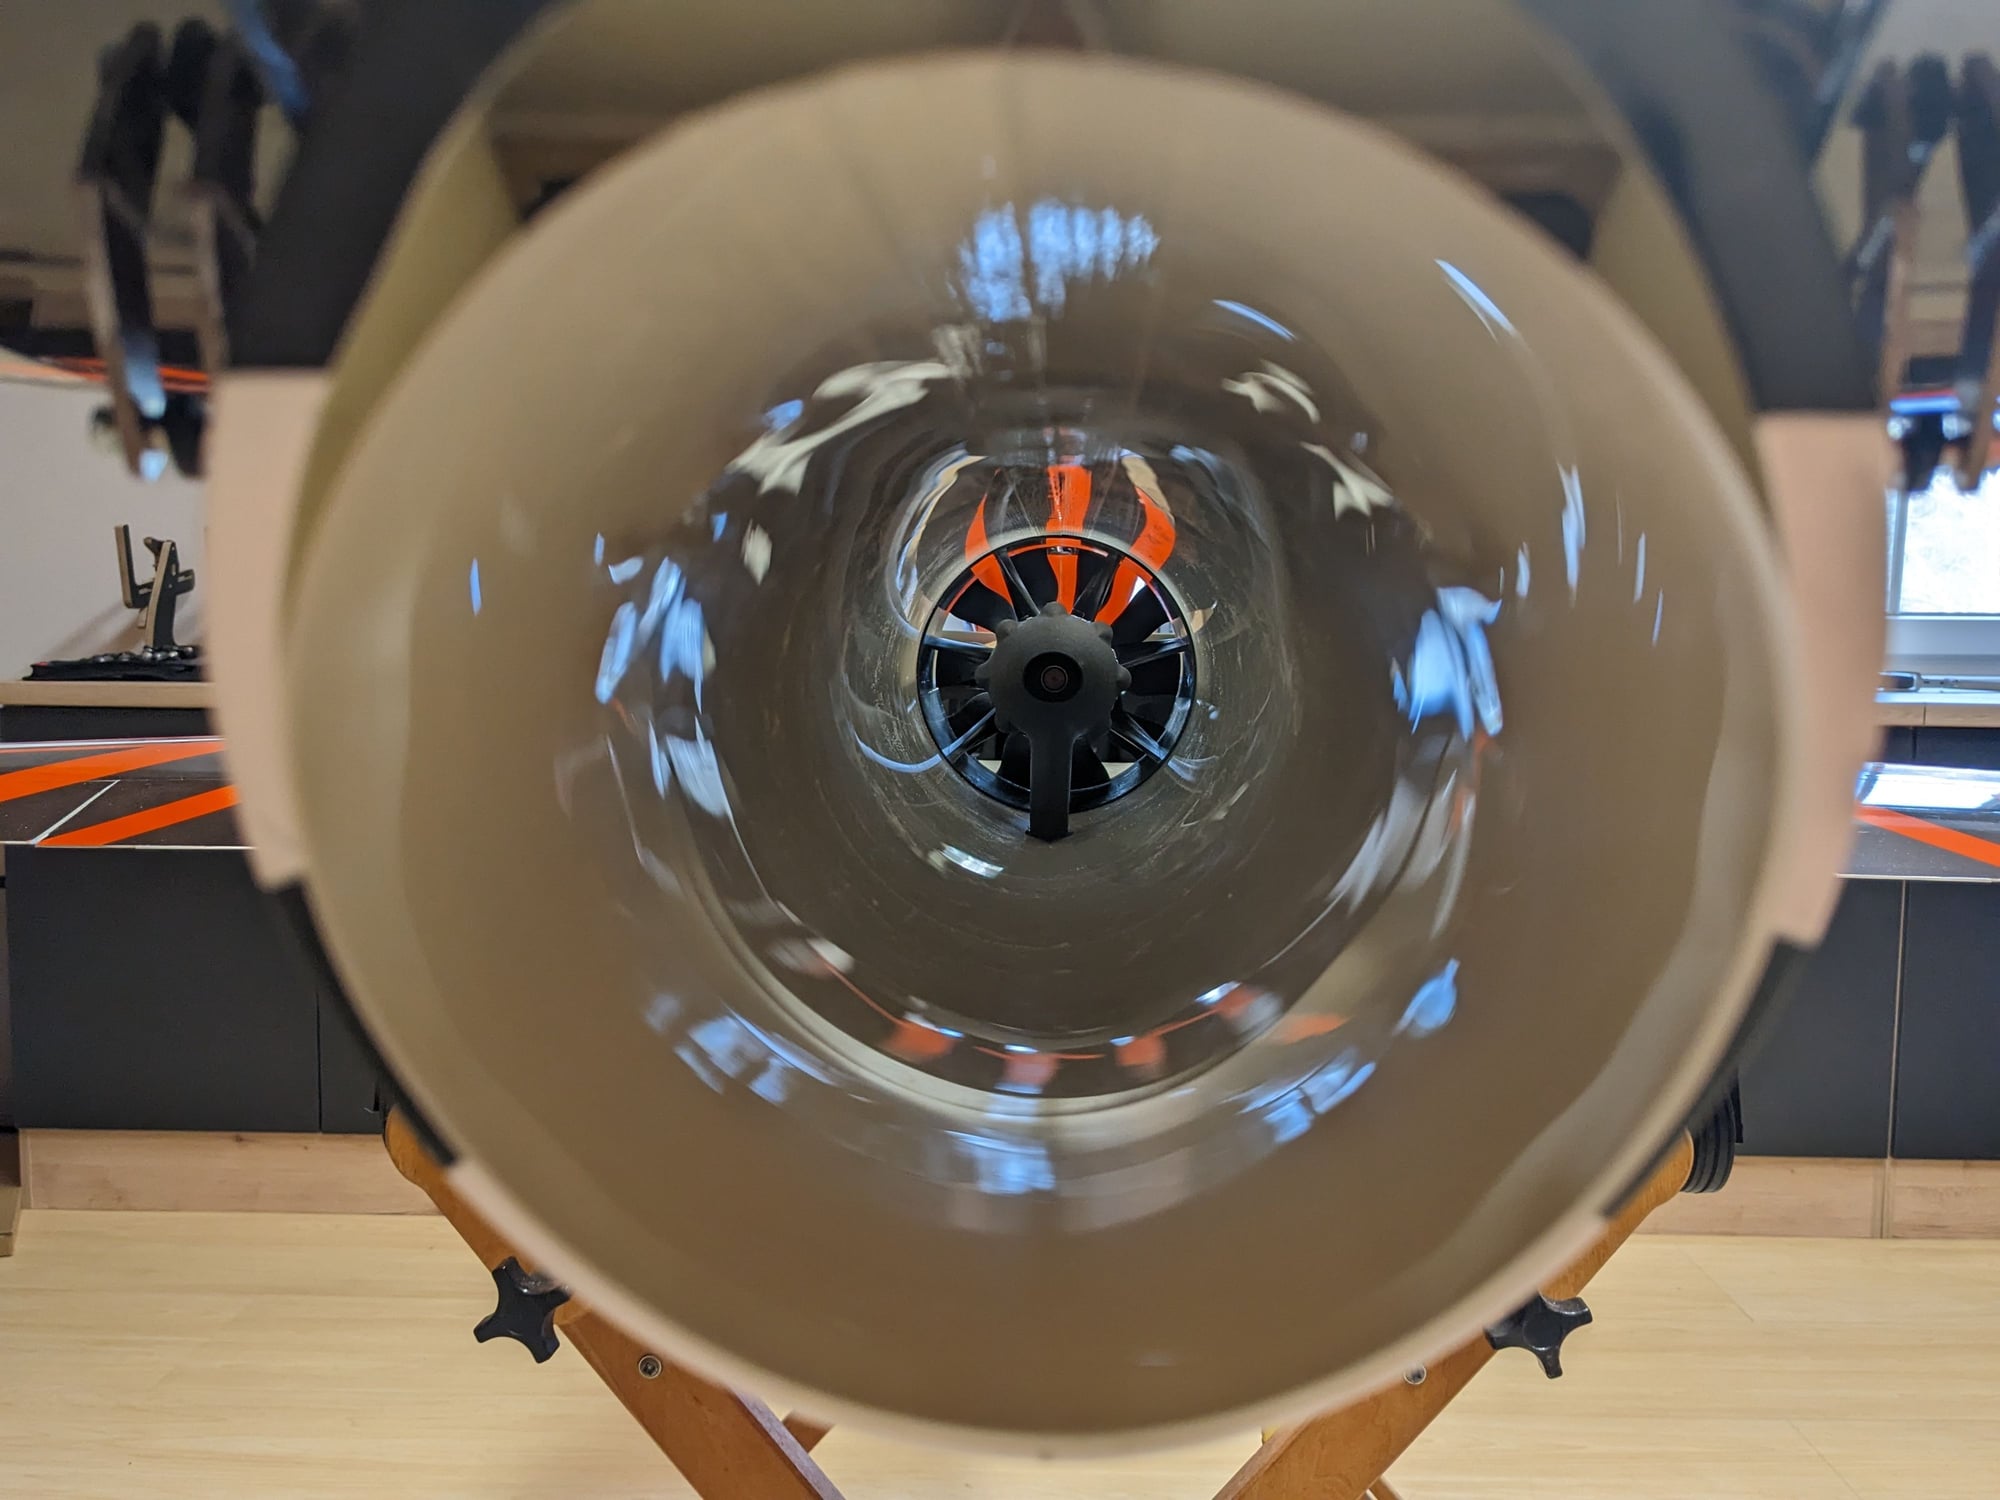
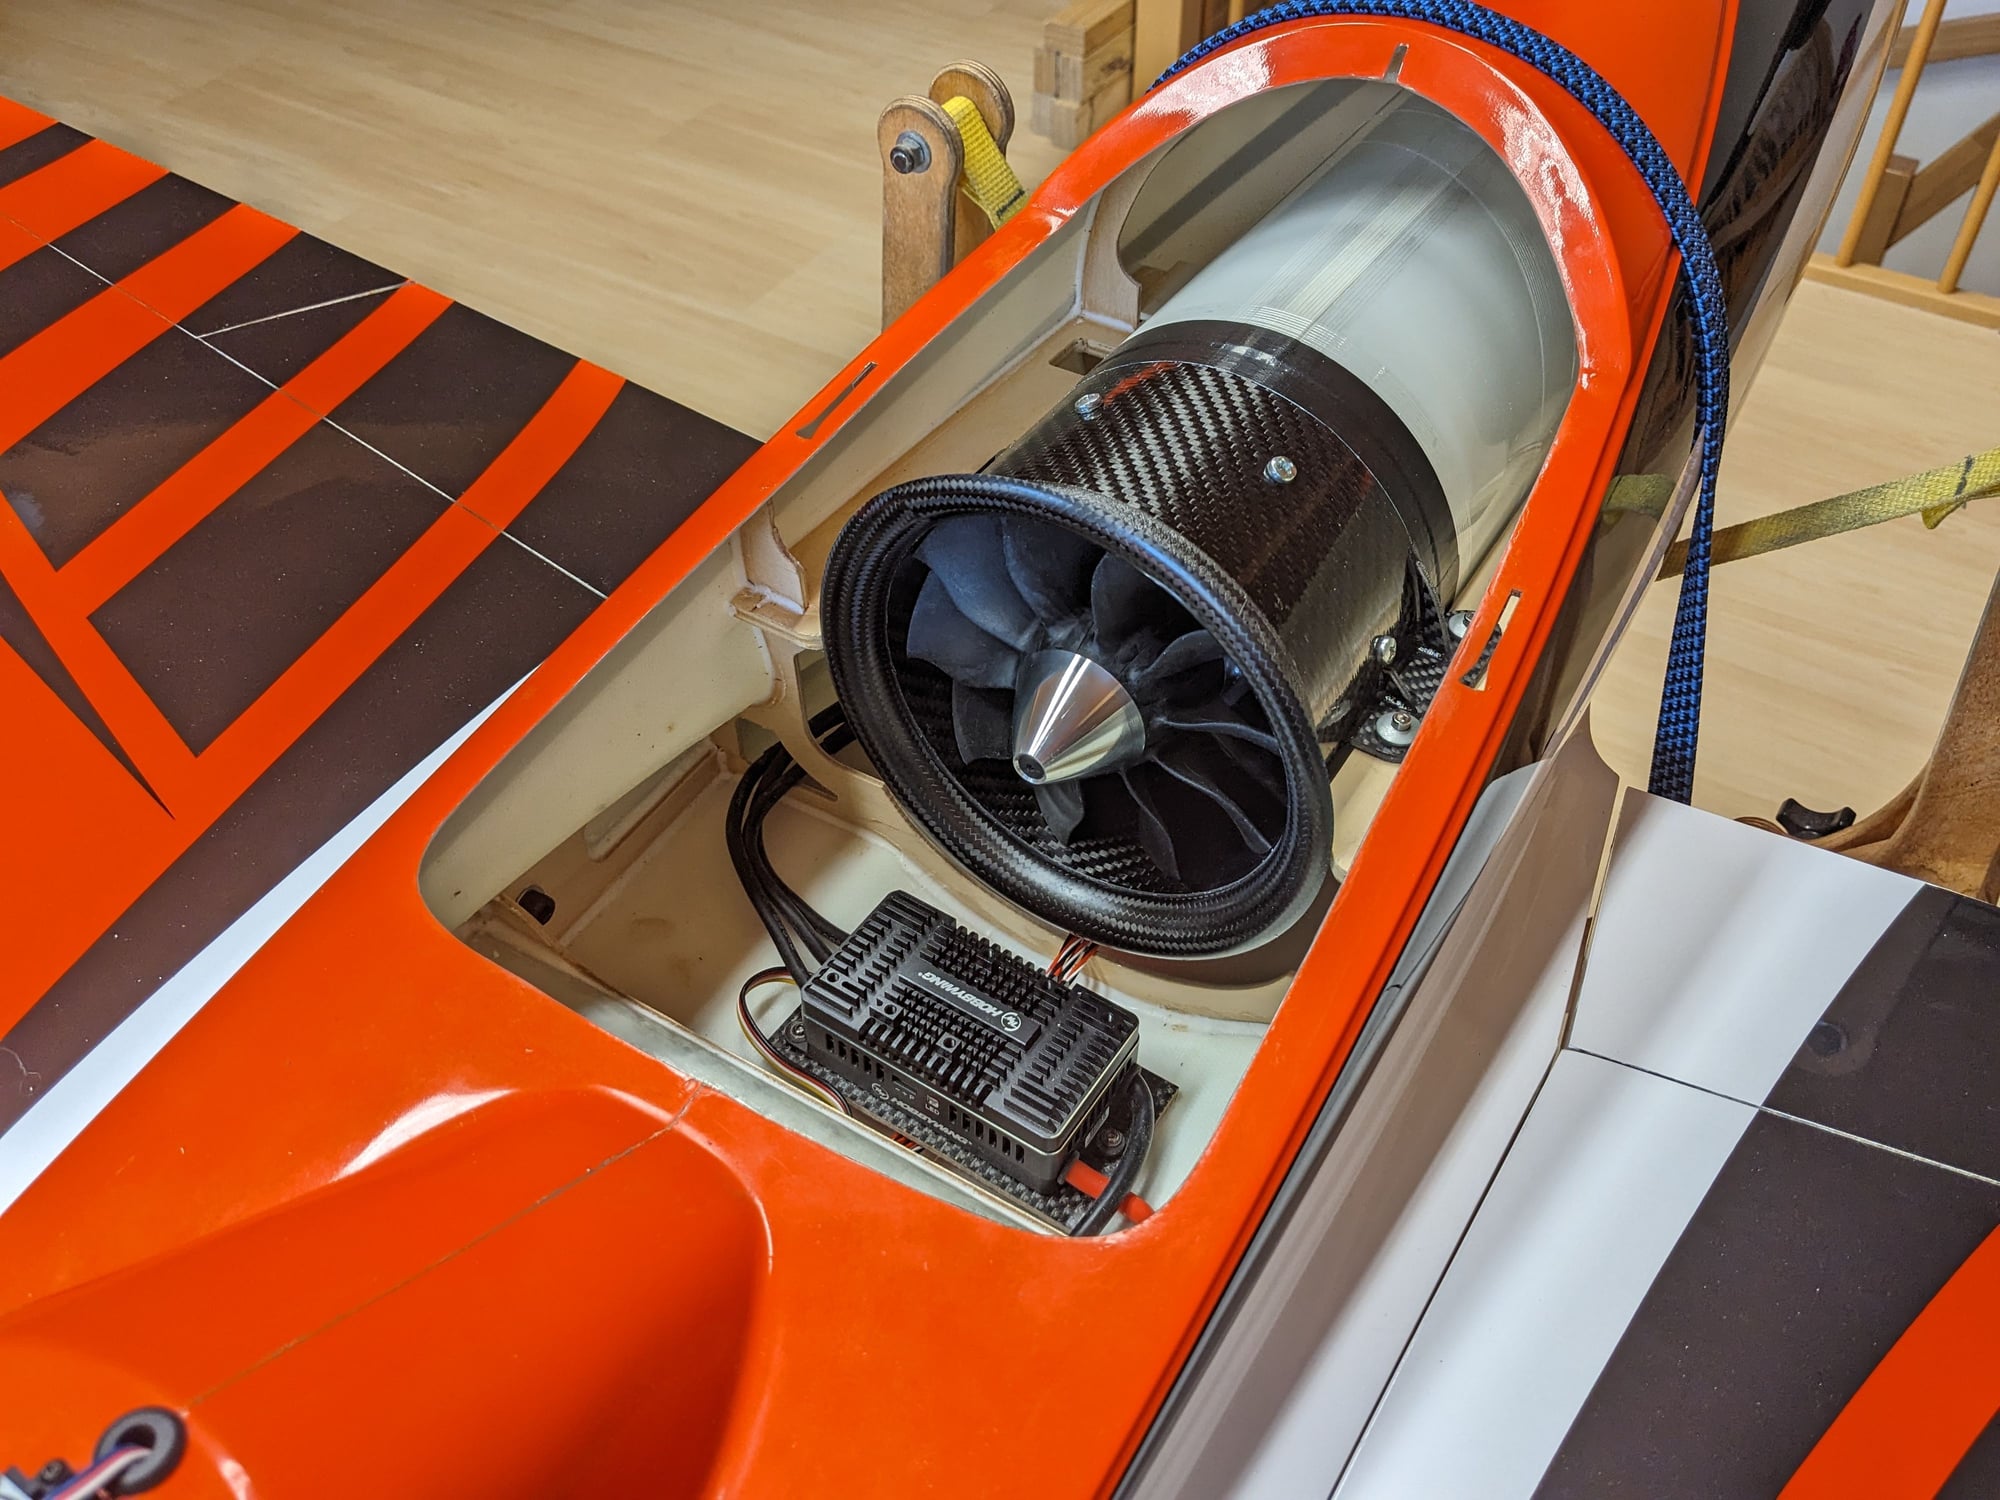
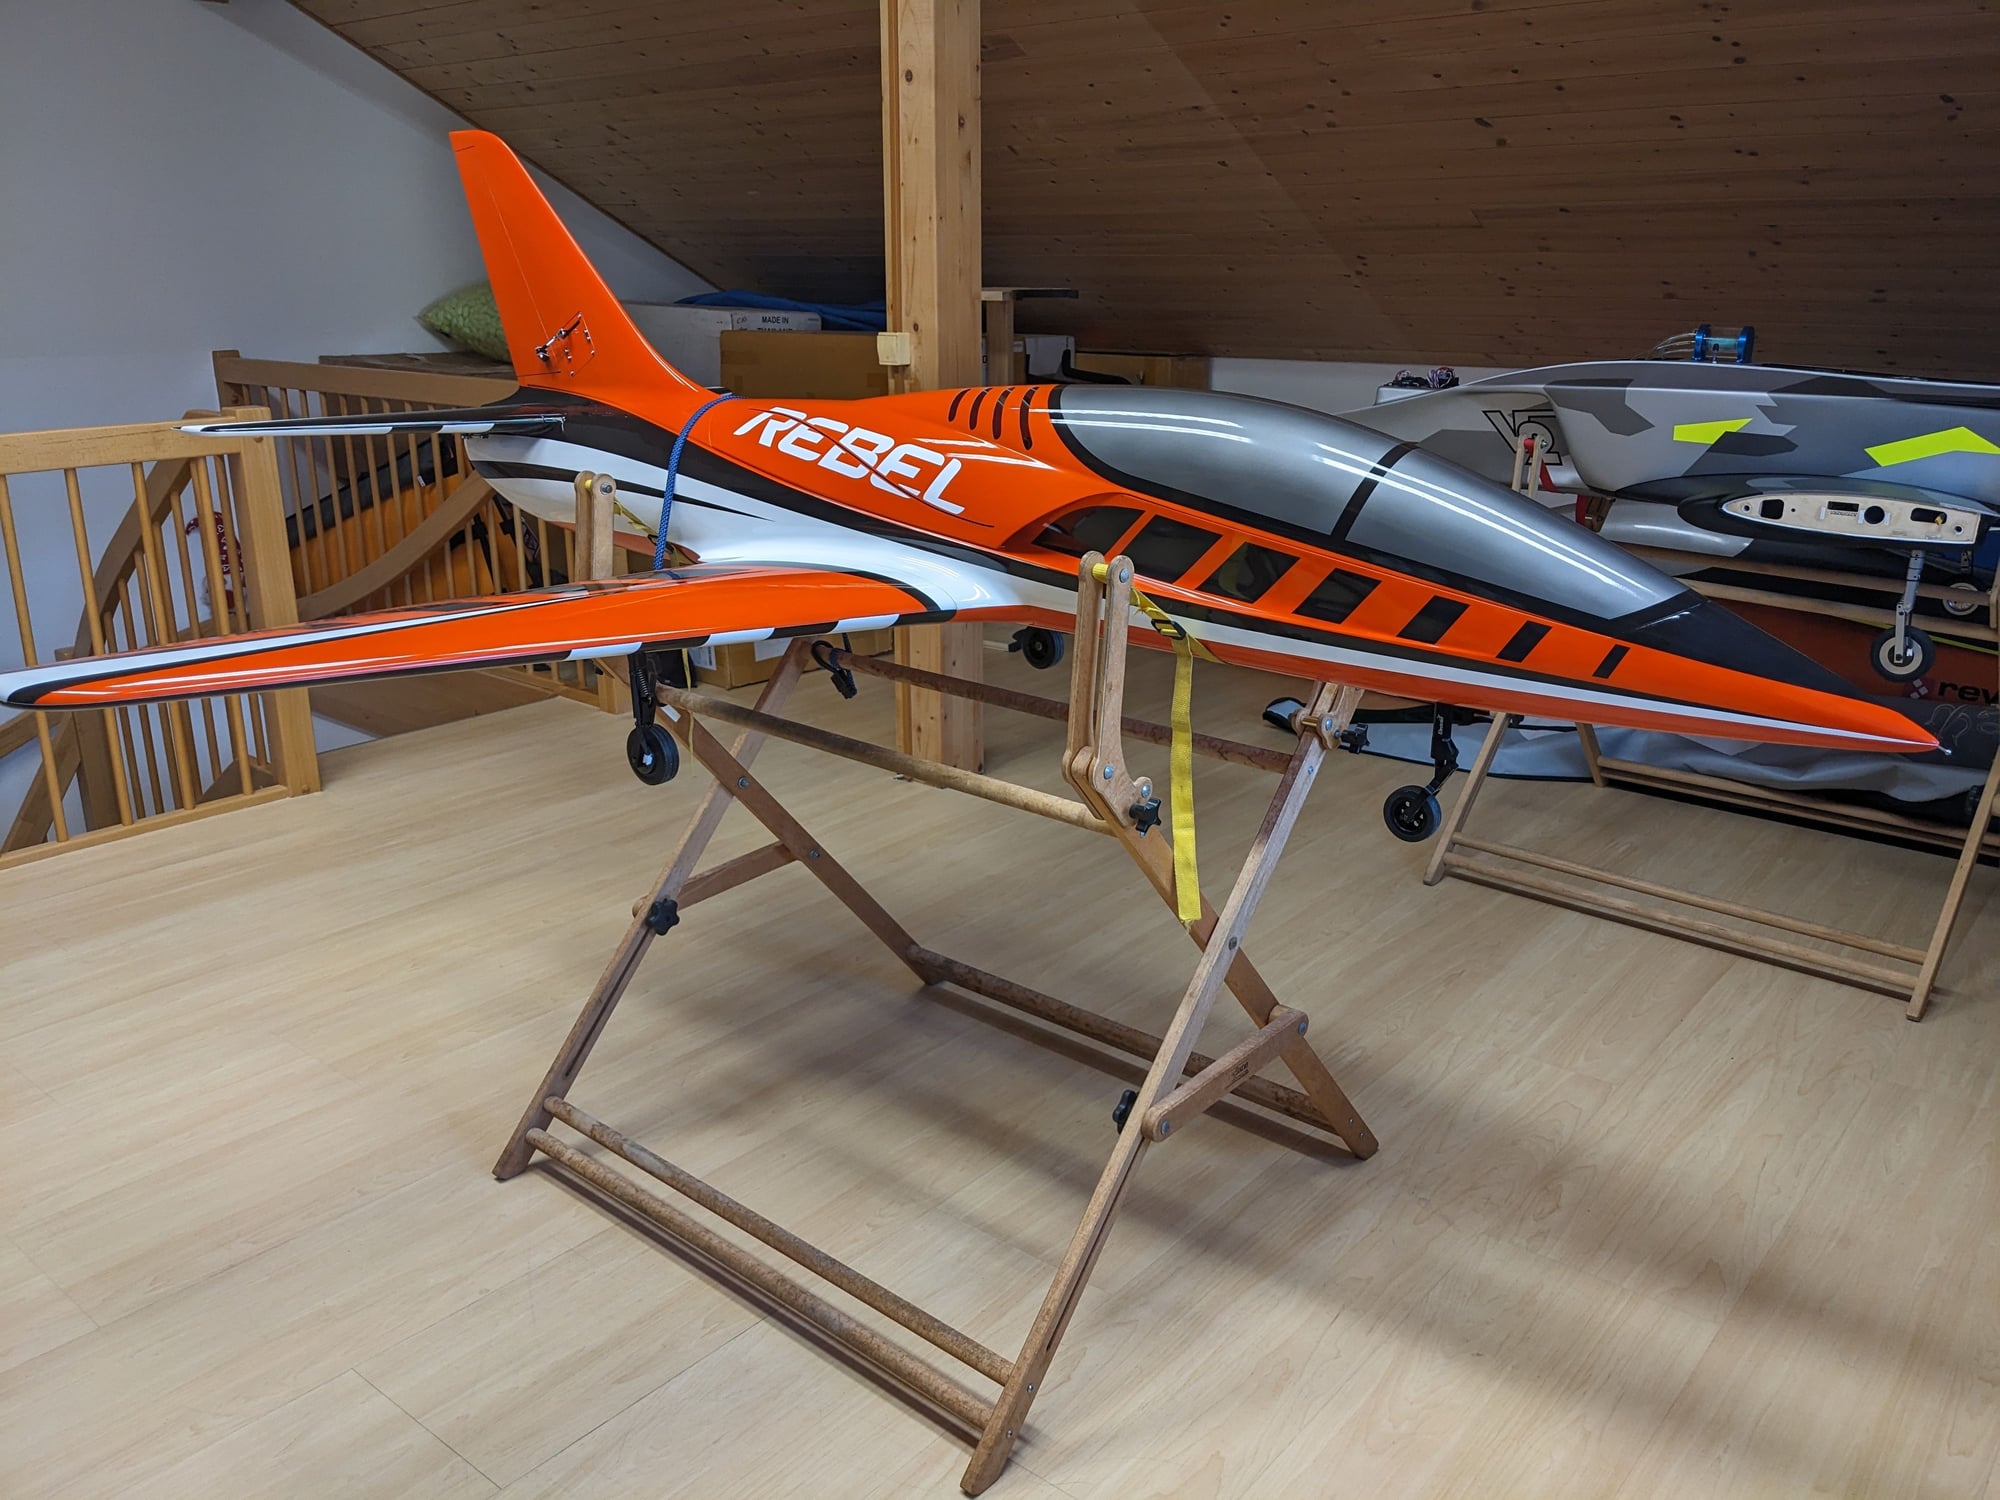
Mine will be electric, putting in a 130mm Jetfan on 14s 10000mAh Lipos. Build is progressing well, nearly done with only the thrust tube and battery tray mounts missing. Will also have to add cheater holes so that the fan can breathe freely.
I have attached a few pictures of my progress so far. Also decided to add some white to the underside of wings and stabs to make it more visible.
No thrust tube yet
No thrust tube yet


Decided to add some white to the bottom
Added some white stripes
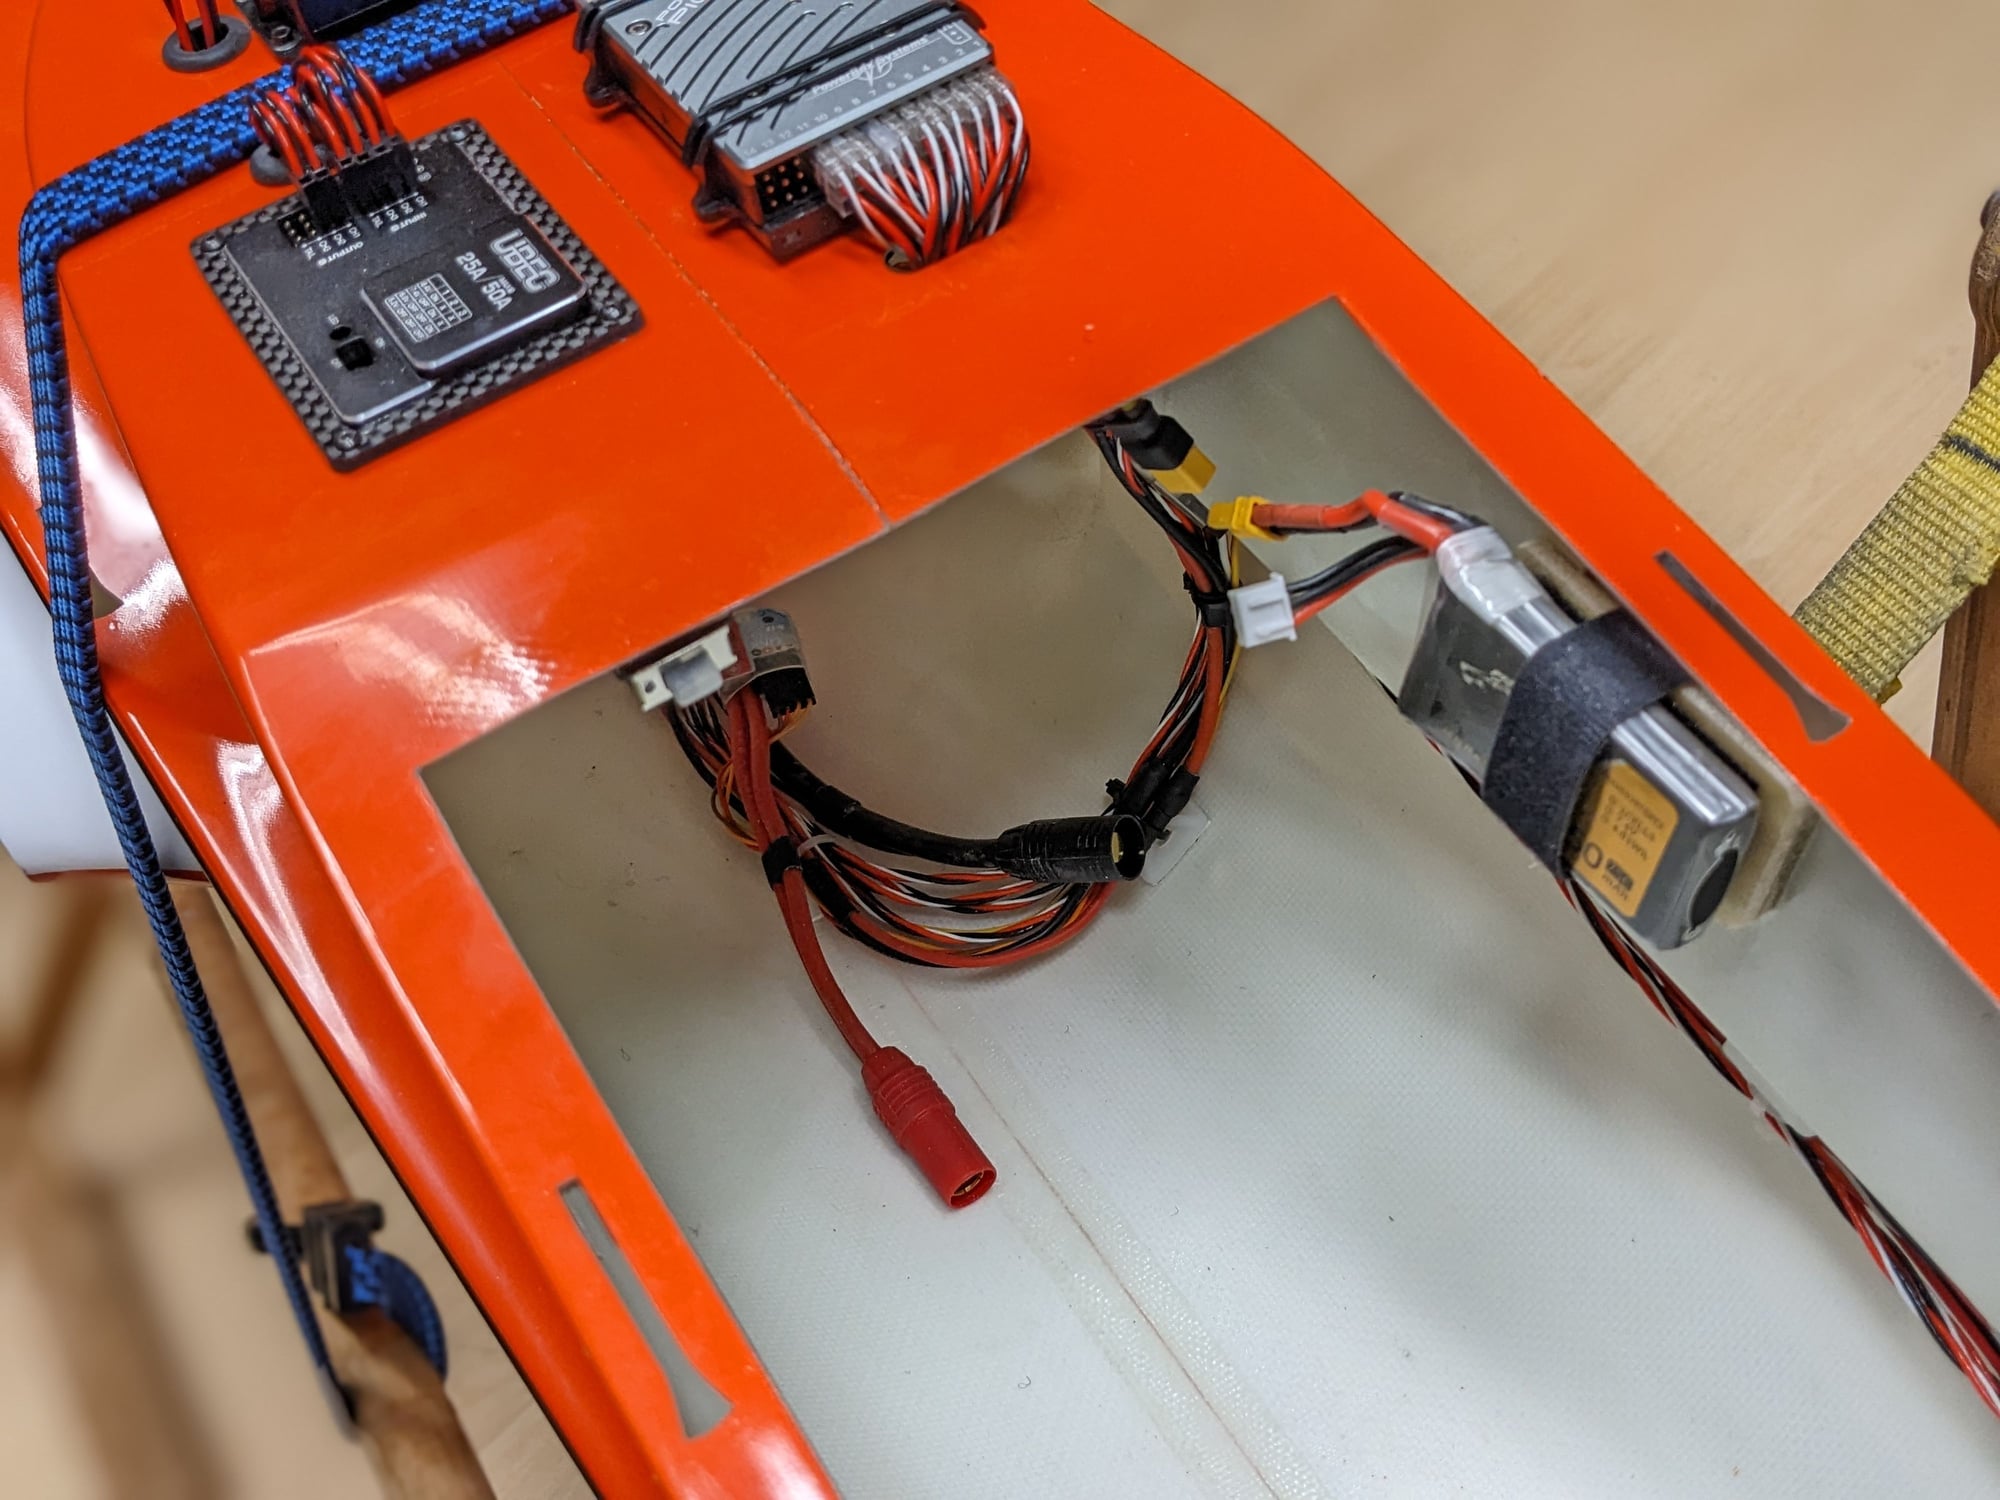
UBec with small 800mAh buffer battery

No battery tray yet
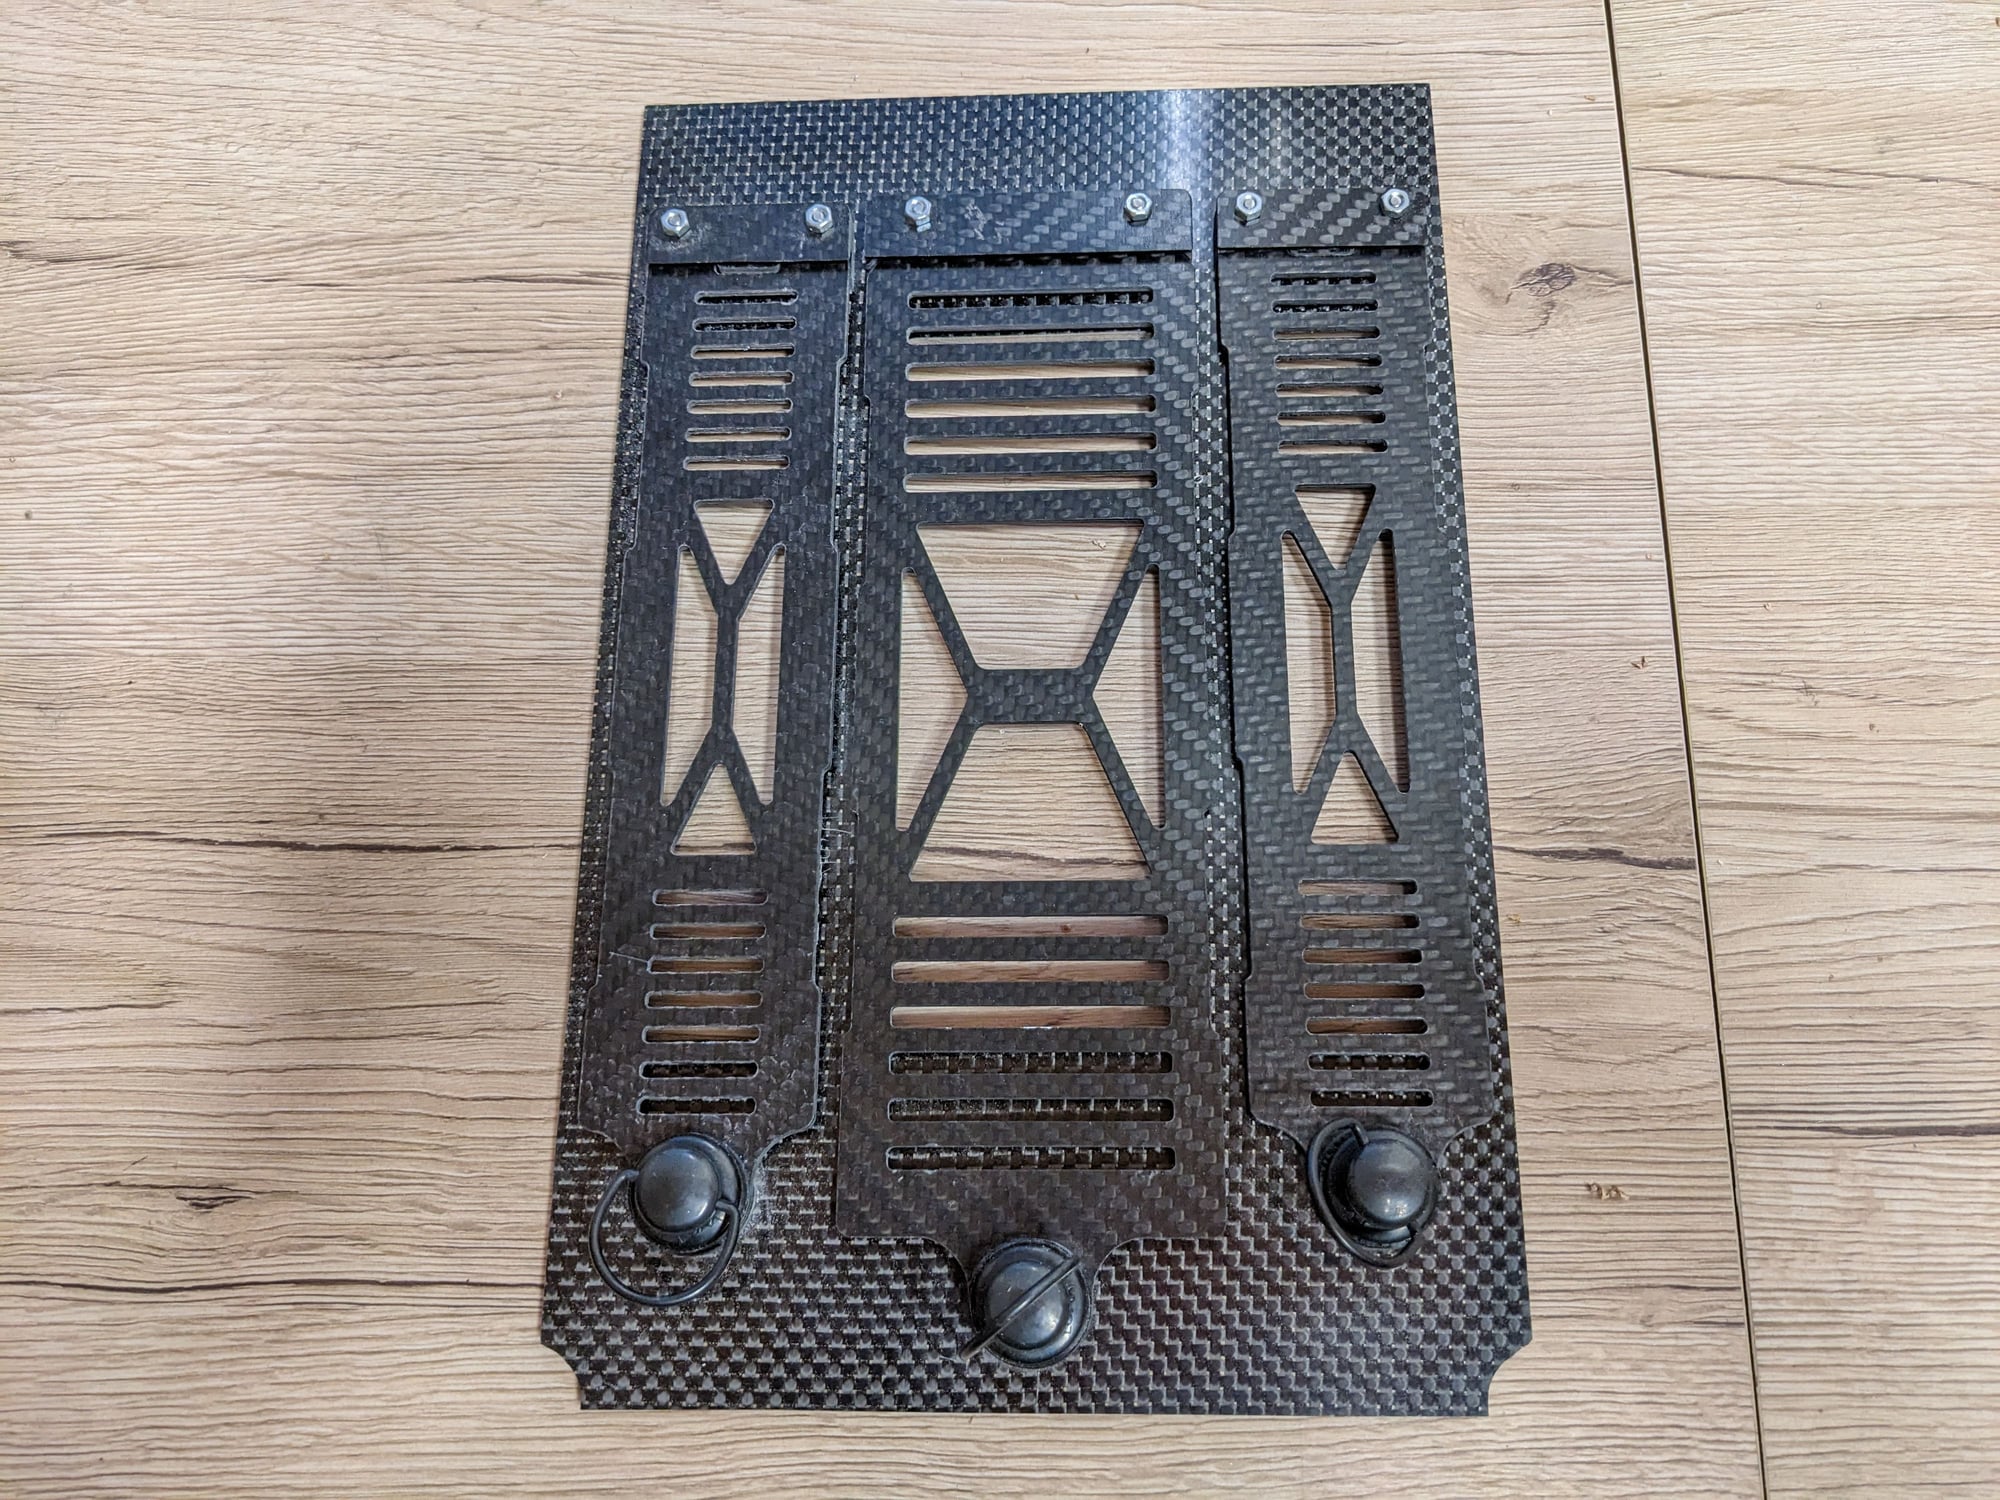
Battery tray with quick release
Quick release for batteries
I have attached a few pictures of my progress so far. Also decided to add some white to the underside of wings and stabs to make it more visible.
No thrust tube yet
No thrust tube yet
Decided to add some white to the bottom
Added some white stripes
UBec with small 800mAh buffer battery
No battery tray yet
Battery tray with quick release
Quick release for batteries
Last edited by bluelevel; 02-22-2024 at 11:54 AM.
03-02-2024, 08:32 AM
#842
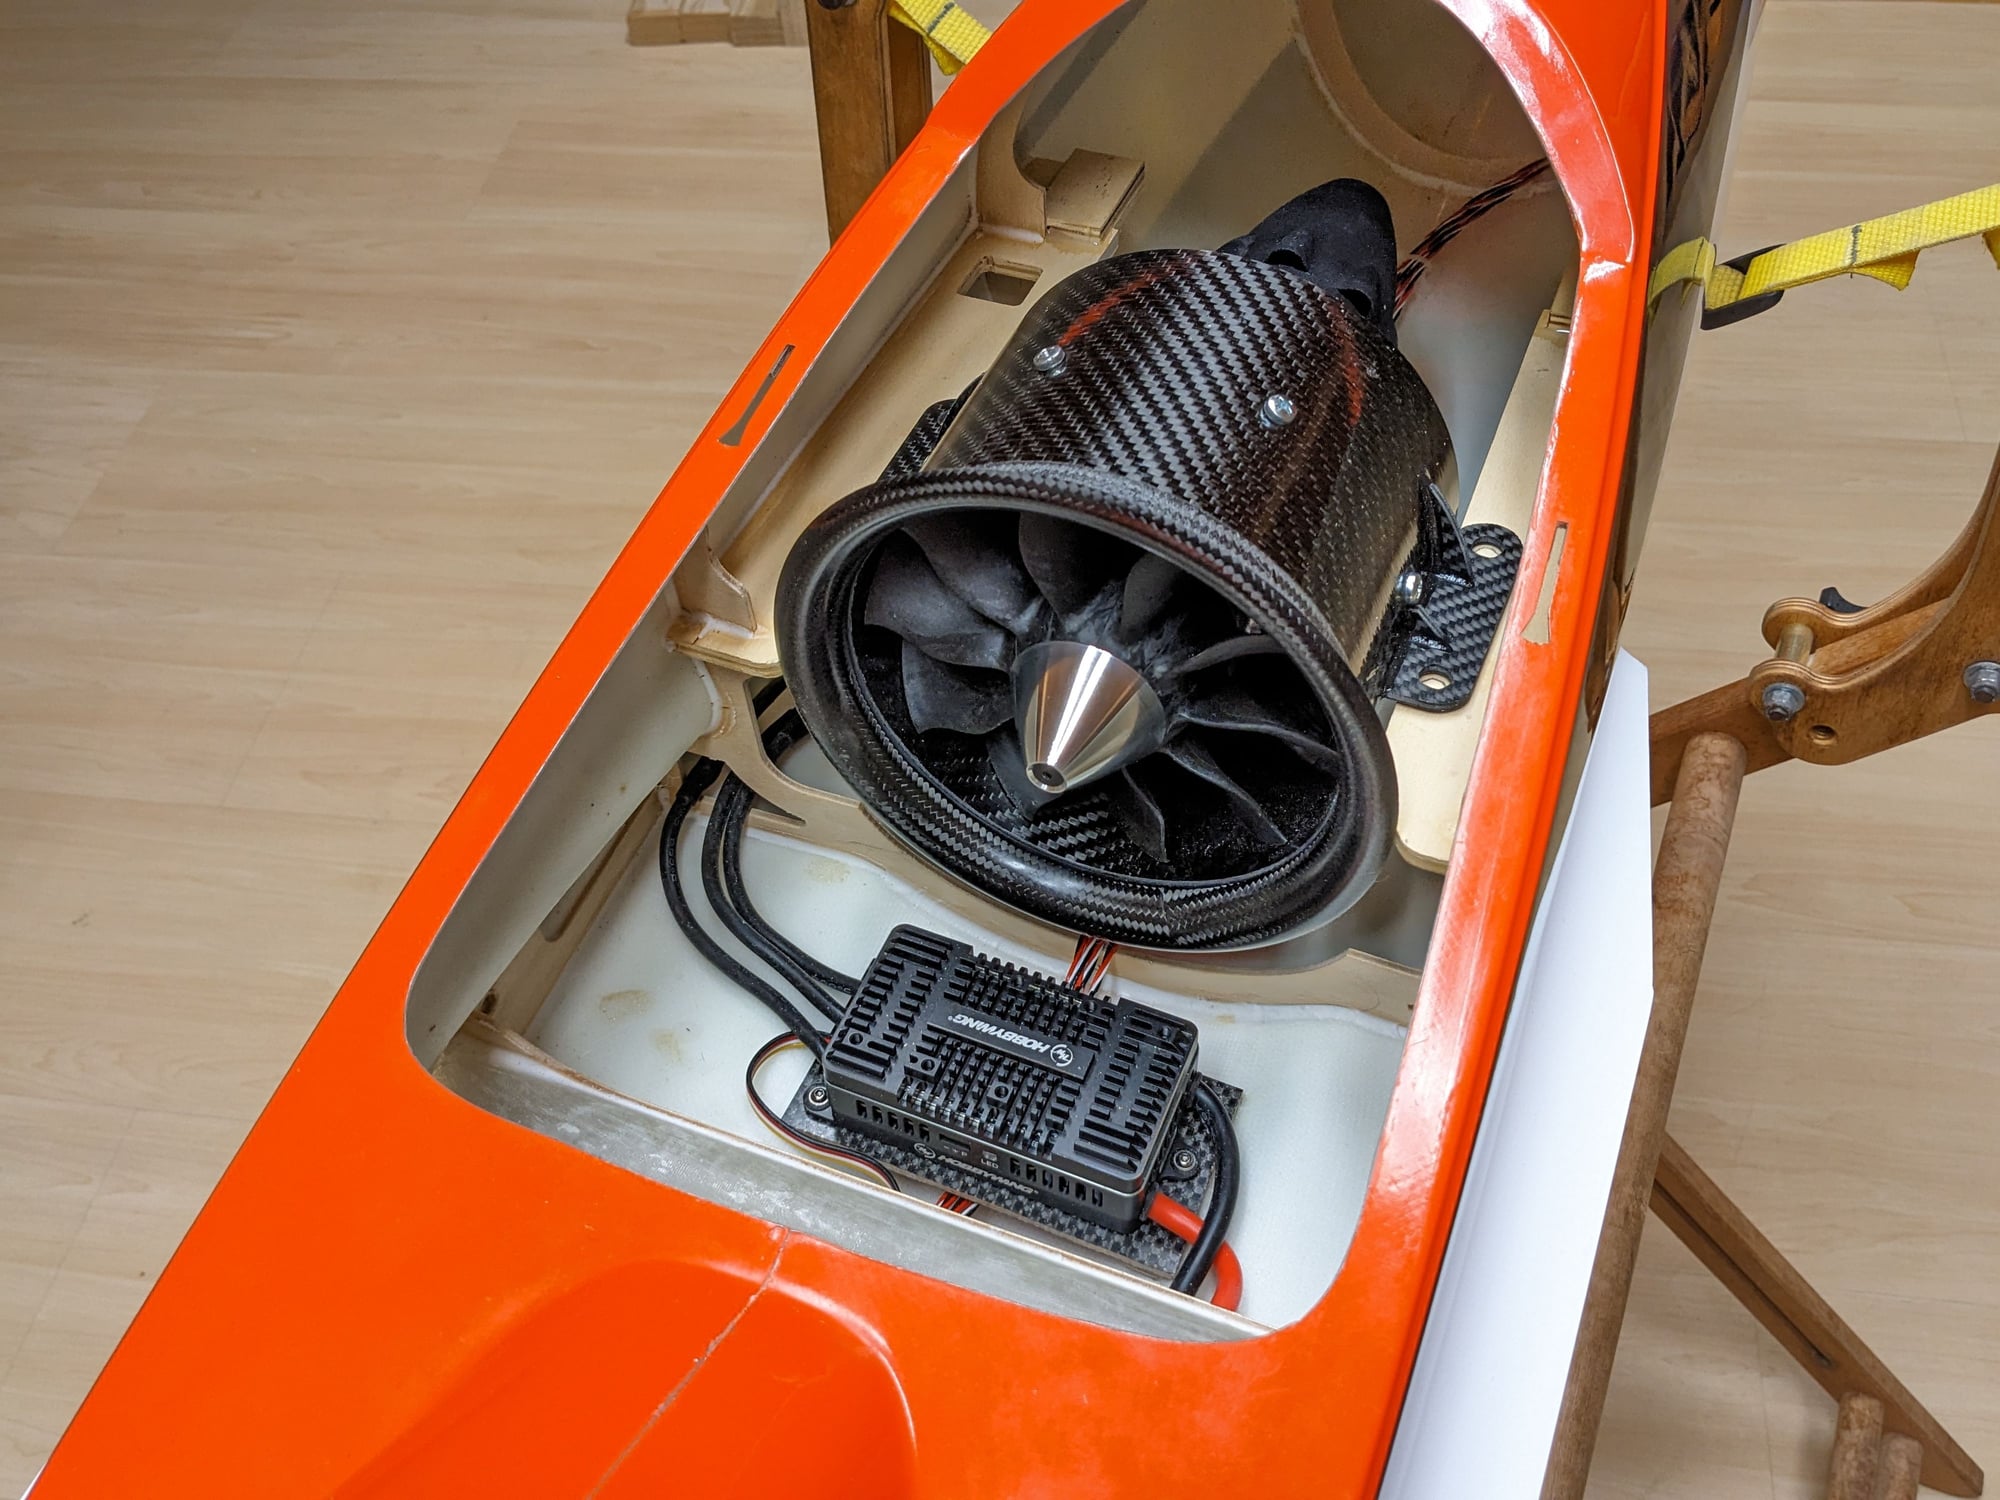
Plane is done! Tried different materials for the thrust tube. The 0.35mm Mylar film I used at first turned out to be a bit too thick and stubborn. Found the same material in 0.25mm strength and this worked much better. Very happy with the outcome!
Batteries are a bit far back in the fuselage to achieve a proper CG, feeding them through the fuse is a bit of a hassle. All in all not too bad though, the quick release battery trays should help a bit.
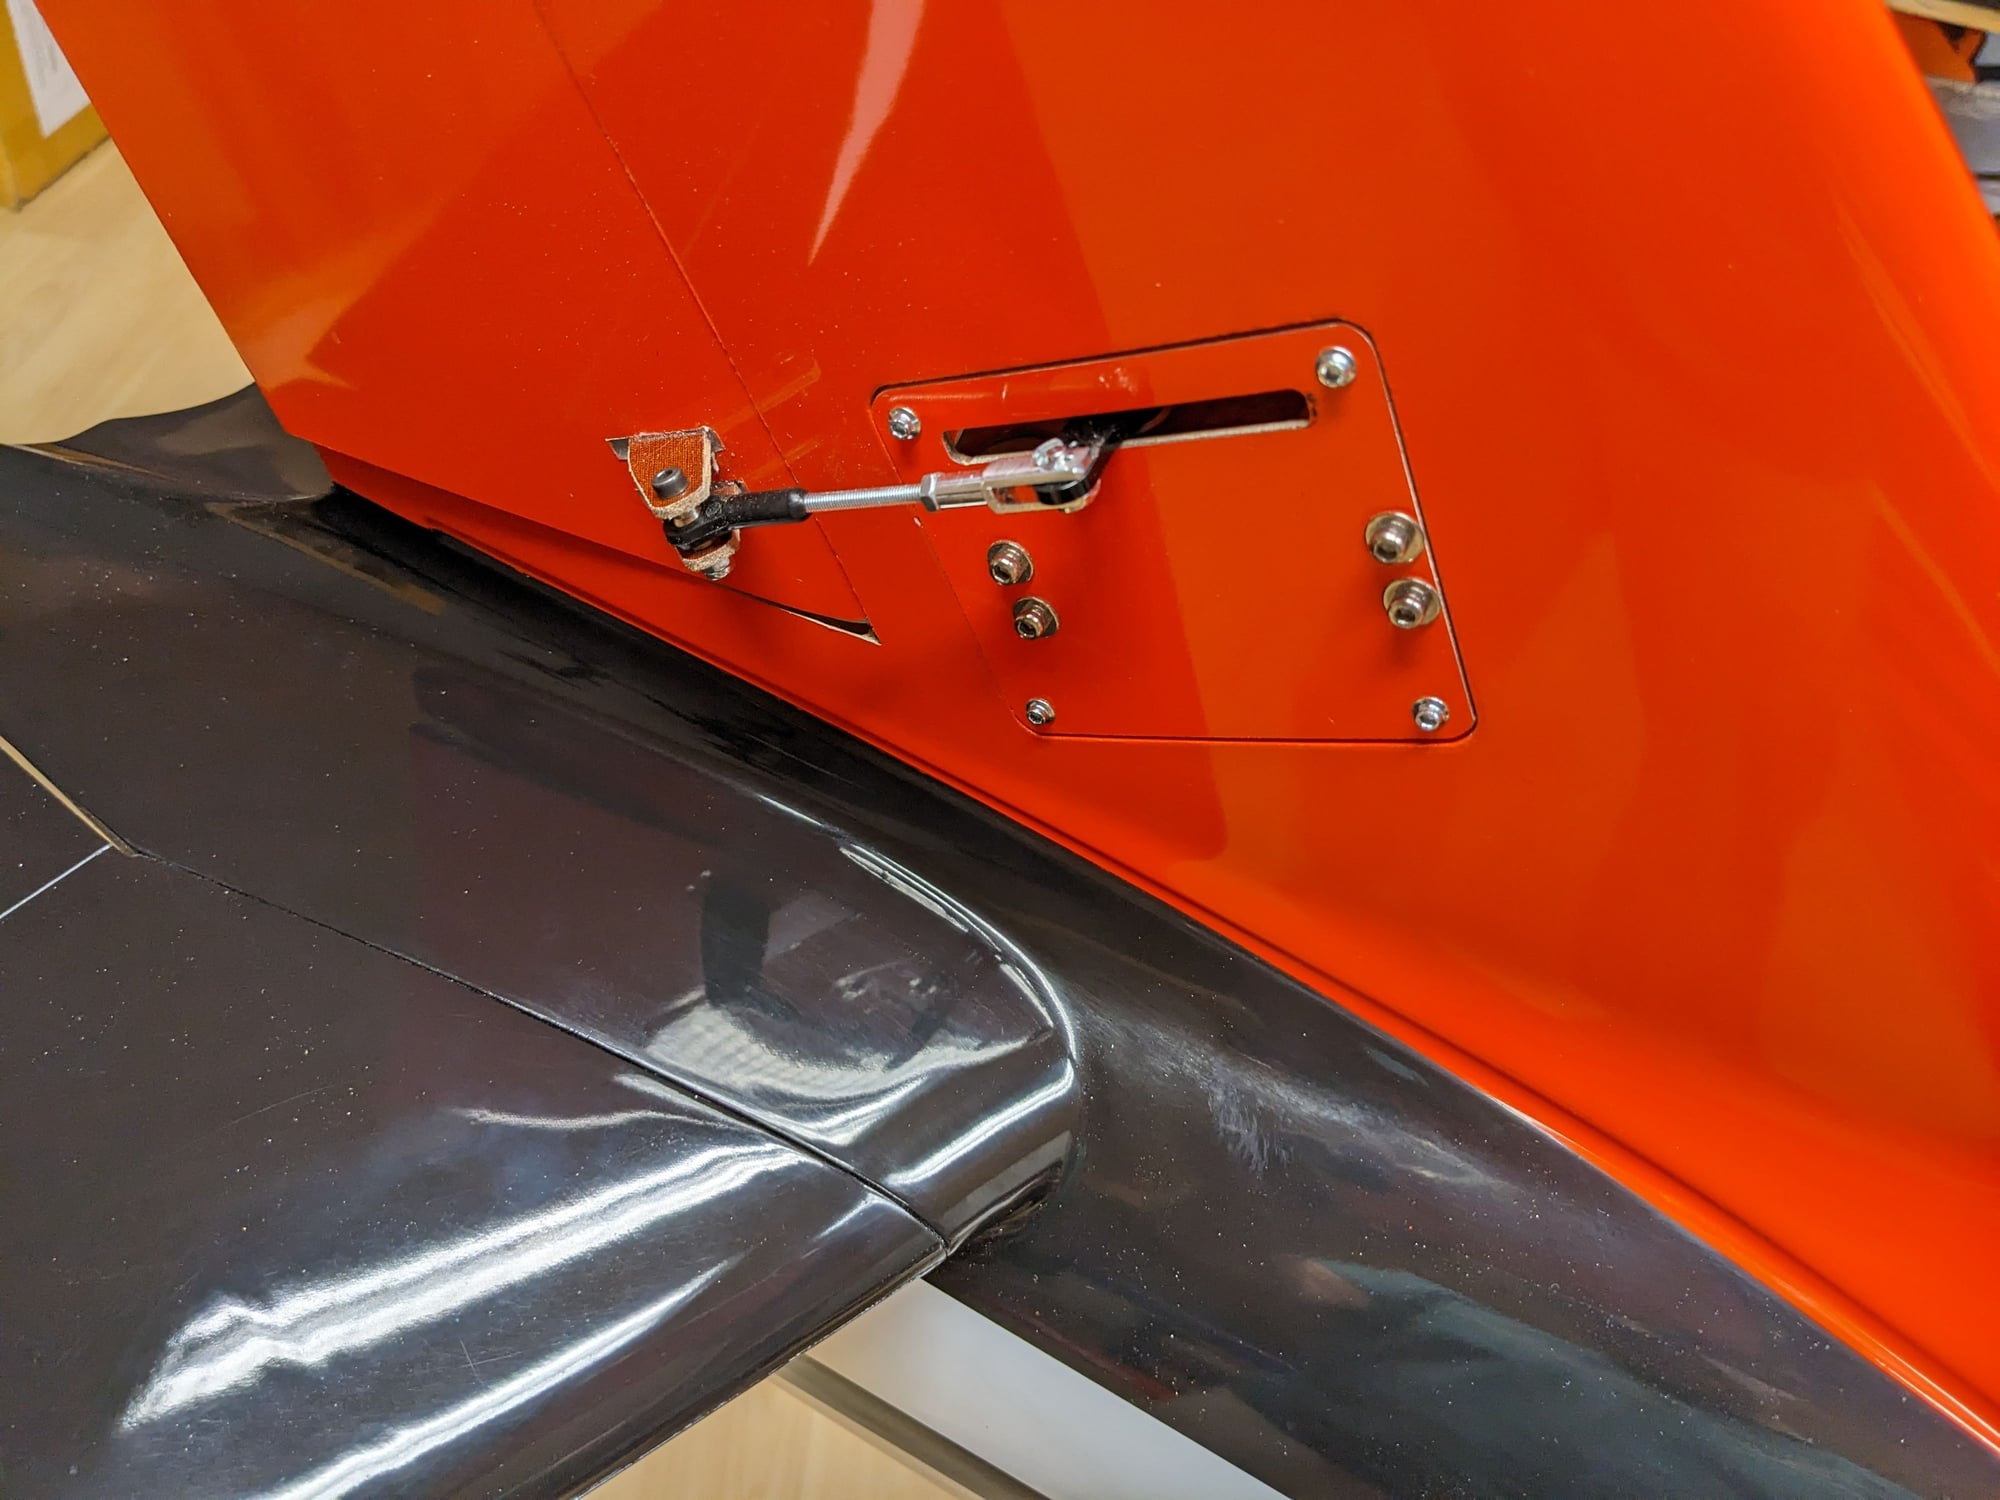
Cheater holes have also been added to the top hatch. Wanted to put some mesh behind the openings at first but then decided against it. The open intakes are closer to the ground than the cheater holes, also these "gills" provide a cool view onto the equipment tray inside the fuselage.
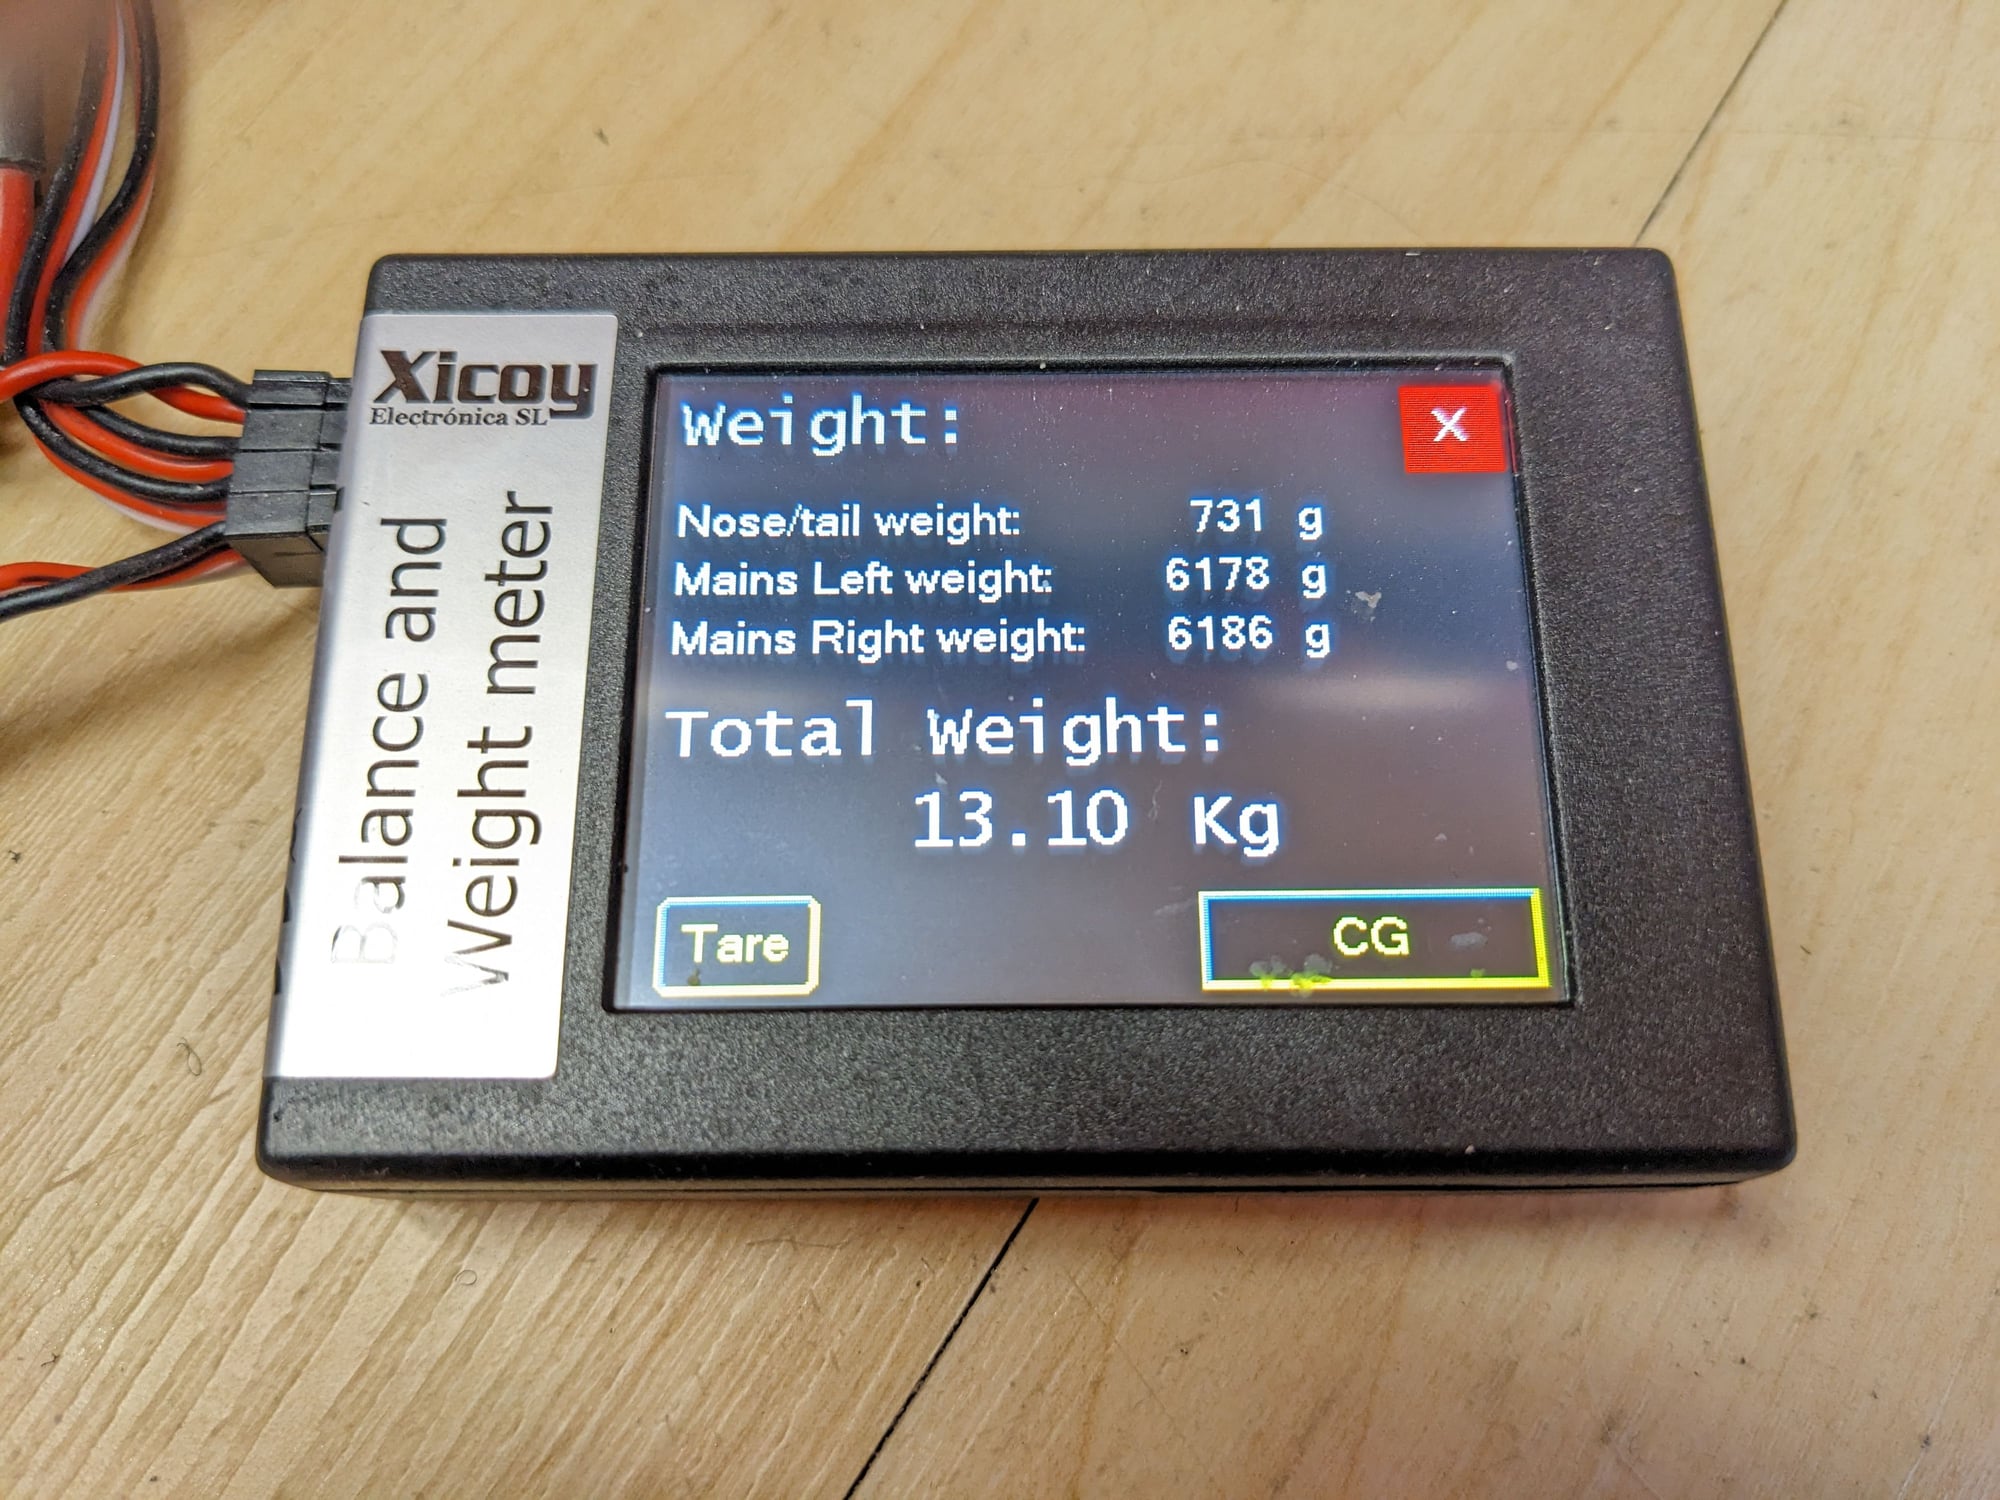
Weight wise I ended up at 13kg (with fully charged batteries ), so about the same number as the turbine powered versions full of fuel.
Batteries are a bit far back in the fuselage to achieve a proper CG, feeding them through the fuse is a bit of a hassle. All in all not too bad though, the quick release battery trays should help a bit.
Cheater holes have also been added to the top hatch. Wanted to put some mesh behind the openings at first but then decided against it. The open intakes are closer to the ground than the cheater holes, also these "gills" provide a cool view onto the equipment tray inside the fuselage.
Weight wise I ended up at 13kg (with fully charged batteries
The following users liked this post:
RC Rich (03-06-2024)
03-06-2024, 07:44 PM
#843
Nice job on everything along with excellent workmanship! I can't believe how perfect of a job you did cutting in the "gills".
Looking forward to a flight report and a video would be nice also. I'm having fun with the Rebel Classic, but when I go home for the summer, no turbine fields. This would be an interesting option.
Looking forward to a flight report and a video would be nice also. I'm having fun with the Rebel Classic, but when I go home for the summer, no turbine fields. This would be an interesting option.
03-14-2024, 07:01 AM
#844
Tried the maiden of my EDF powered Classic Rebel today but it was a non-starter (literally). I fly off grass that was still fairly wet today. Regardless what I tried, I couldn't get the plane to rotate. I started with the CG at the back of the wing tube and moved it back from there by mounting the batteries about 2cm further back. Elevator travel looks good to me and of course I was using my usual setting of 15 degrees of take-off flap.
I used the "Dave" method to check the CG holding it by the fuselage lip right above the spar behind the wing tube with the canopy off. With the canopy on the CG will shift forward a bit but it looks like that CG has worked fine for others. Anyway I find this strange as that method was suggested for turbine powered Rebels with just landing fuel on board. With a full tank the CG will shift forward by a good margin because all of the fuel is in front of the CG. My EDF powered plane does not shift the CG at all and is at the back of the wing tube all the time.
Power-wise it did not seem under powered, she accelerated just fine. My logs showed 190Amps @ 54 Volts max, so almost 10kW equaling about 13kg of thrust as per the manufacturers stats.
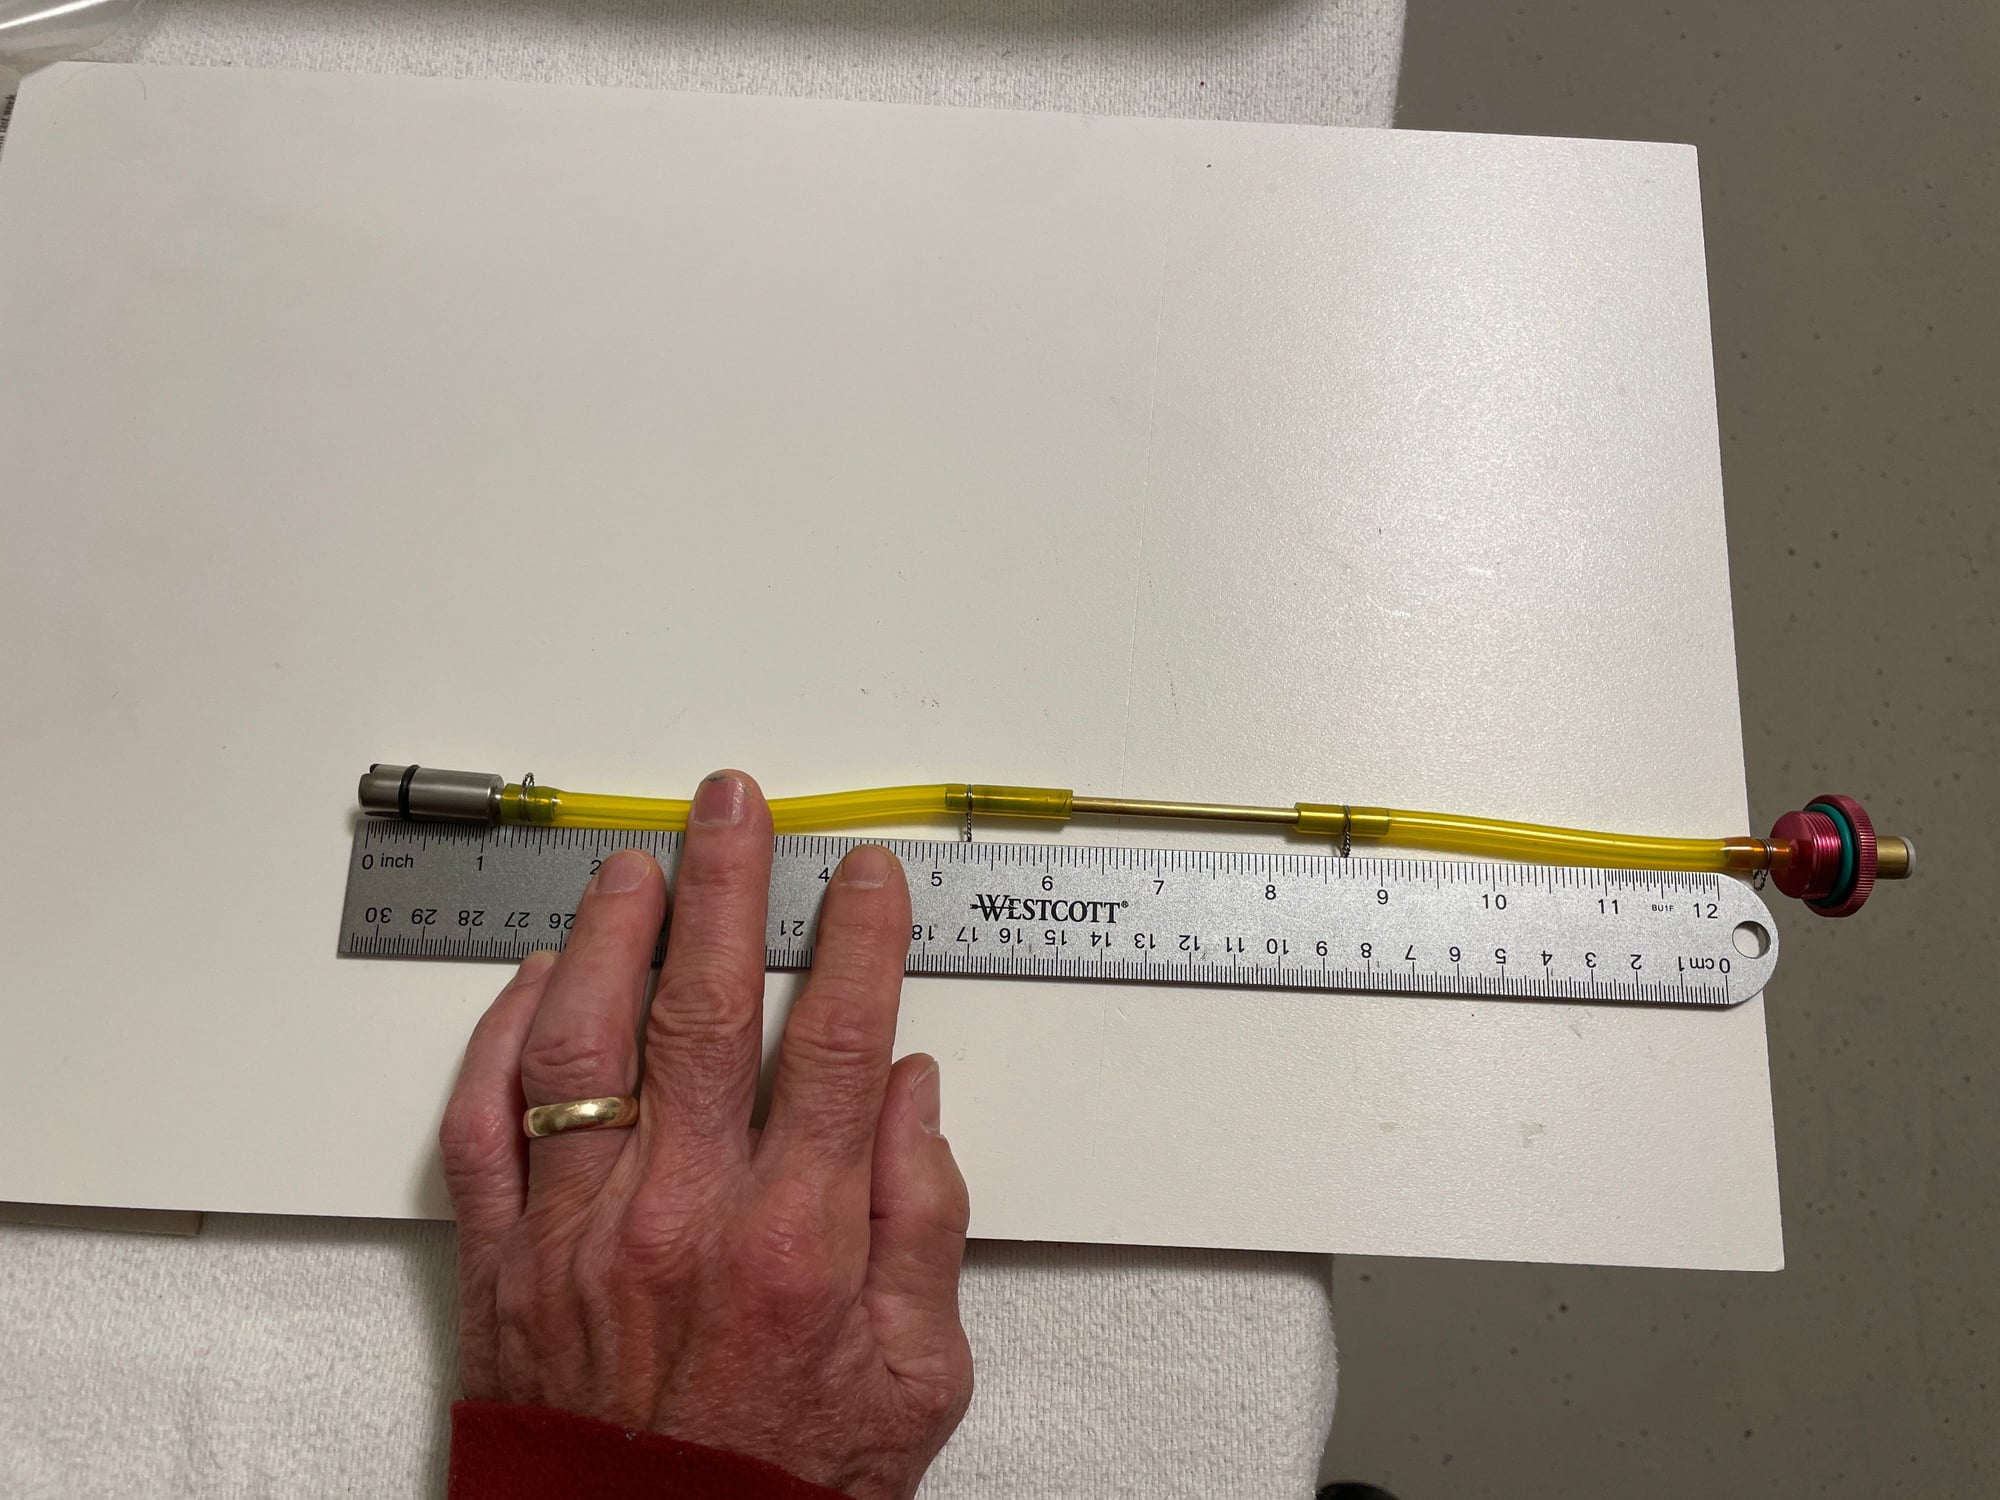
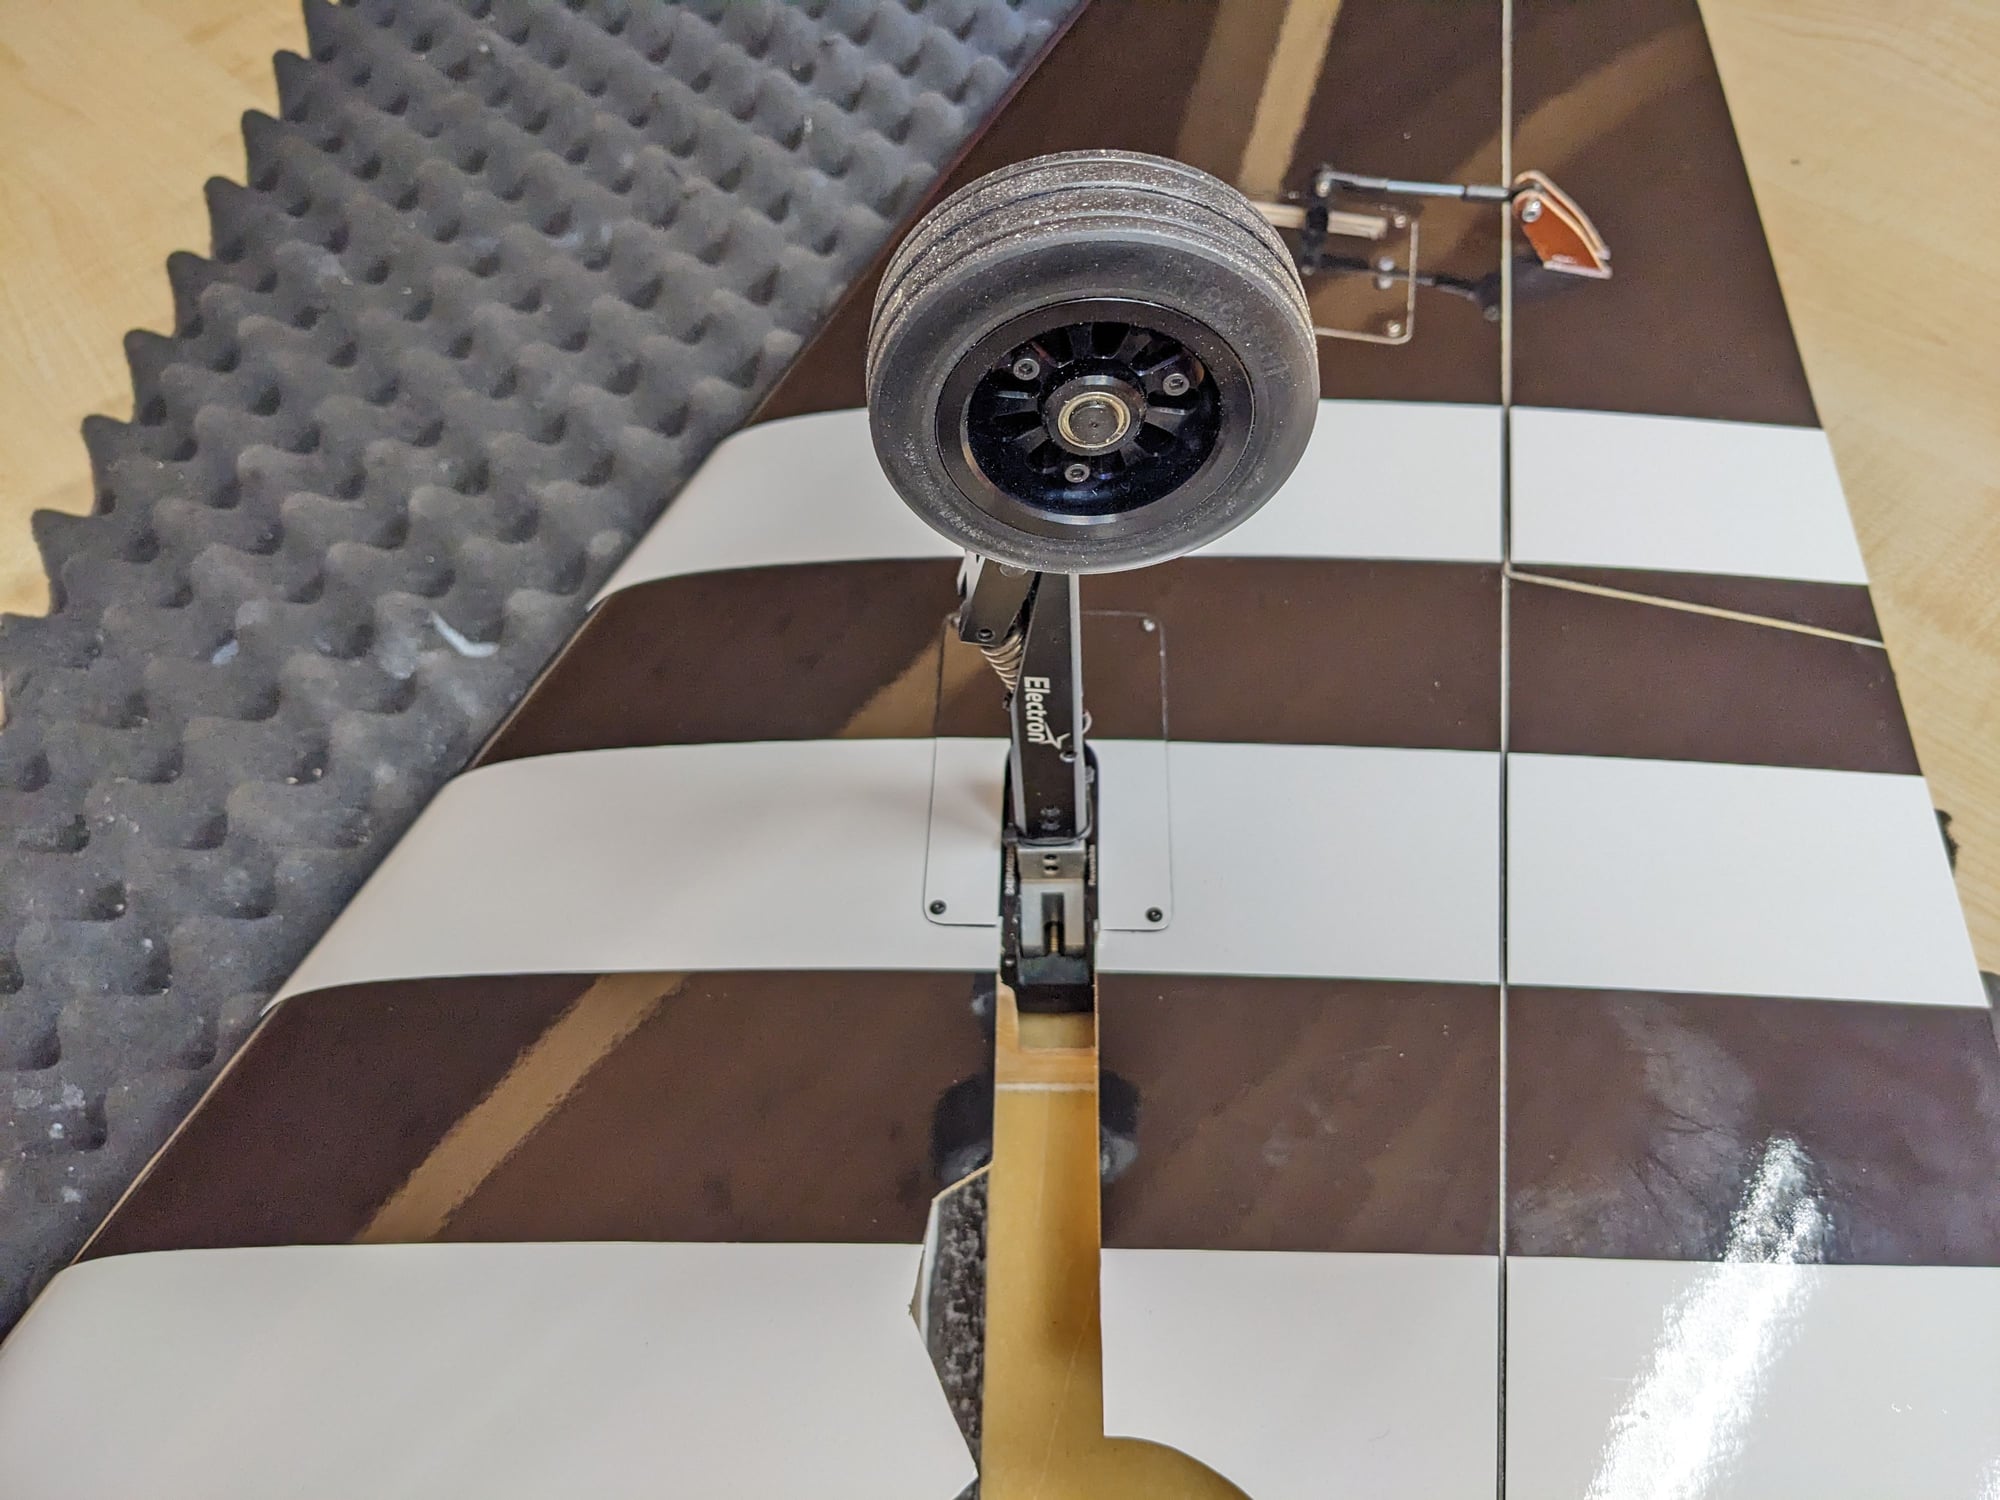
Just watching the plane accelerate it looked as if the nose was pushed down. Of course it draws air from the nose gear opening but I do not think that this will be enough to affect the plane negatively. Didn't want to move the CG further back for a maiden and suspect that the angle of attack may not be right (the nose strut being too short). Can you guys please do me a favor and measure the length of your nose strut? I was once given a too long nose gear when I ordered a set for an Ultra Flash, probably this time it's the other way round and it might be a bit too short.
I used the "Dave" method to check the CG holding it by the fuselage lip right above the spar behind the wing tube with the canopy off. With the canopy on the CG will shift forward a bit but it looks like that CG has worked fine for others. Anyway I find this strange as that method was suggested for turbine powered Rebels with just landing fuel on board. With a full tank the CG will shift forward by a good margin because all of the fuel is in front of the CG. My EDF powered plane does not shift the CG at all and is at the back of the wing tube all the time.
Power-wise it did not seem under powered, she accelerated just fine. My logs showed 190Amps @ 54 Volts max, so almost 10kW equaling about 13kg of thrust as per the manufacturers stats.
Just watching the plane accelerate it looked as if the nose was pushed down. Of course it draws air from the nose gear opening but I do not think that this will be enough to affect the plane negatively. Didn't want to move the CG further back for a maiden and suspect that the angle of attack may not be right (the nose strut being too short). Can you guys please do me a favor and measure the length of your nose strut? I was once given a too long nose gear when I ordered a set for an Ultra Flash, probably this time it's the other way round and it might be a bit too short.
Last edited by bluelevel; 03-14-2024 at 12:14 PM.
03-14-2024, 08:33 AM
#845
My Feedback: (1)
On my plane, the distance between the bottom of the fuselage in front of the front landing gear and the plane at the bottom of the wheel is 155mm
If that's not the problem, I would actually measure the static thrust that you are getting at full power. This can be done with a travel luggage scale attached to the front landing gear leg. Also could it it be that your EDF thrust tube is pointing downwards too much?
If that's not the problem, I would actually measure the static thrust that you are getting at full power. This can be done with a travel luggage scale attached to the front landing gear leg. Also could it it be that your EDF thrust tube is pointing downwards too much?
03-14-2024, 09:03 AM
#846
On my plane, the distance between the bottom of the fuselage in front of the front landing gear and the plane at the bottom of the wheel is 155mm
If that's not the problem, I would actually measure the static thrust that you are getting at full power. This can be done with a travel luggage scale attached to the front landing gear leg. Also could it it be that your EDF thrust tube is pointing downwards too much?
If that's not the problem, I would actually measure the static thrust that you are getting at full power. This can be done with a travel luggage scale attached to the front landing gear leg. Also could it it be that your EDF thrust tube is pointing downwards too much?
The fuselage is way too narrow to allow any tube angle. My EDF tube is larger in diameter than the original metal thrust tube and my fan sits exactly at the same height as a turbine would (right on the mounting rails).
Thrust wasn't measured but feels absolutely fine compared to my turbine powered planes. Max ground speed also seemed fine. My Rebel Max will take off at that speed without any flap...
As I said in my original post, the turf was fairly wet today, that will for sure make a big difference. But anyway I'd like to be able to fly that plane from any surface. Only other ideas I have is moving the CG further back and probably adding a spacer of 1cm between the steering arm and the strut to see if that helps.
Last edited by bluelevel; 03-14-2024 at 11:58 AM.

 03-14-2024, 12:02 PM
#849
The large tail is not balance critical, but if you balance it my method/ position with batteries, I think you will have a nice starting point.
The reason you can�t rotate is part EDF suck, but really just Electron nose oleo spring being too soft. I got fed up with modifying them for customers (Diablo too) so we are working with Electron for stronger springs.
TBH the Electron nose leg is a bit short for the Rebel, a 5mm spacer would make a huge difference, but what you need to do is fill the spring + 15-20mm extra of 3/32 Tygon. Sit the spring in the plunger, push a length of Tygon through till it hits the bottom of the plunger, with the spring uncompressed cut the Tygon flush with the top. Reassemble and go fly.
The following users liked this post:
DenisFerrari (03-24-2024)
03-14-2024, 12:05 PM
#850