


Top-rc F-4


 10-22-2023, 05:03 AM
#2

I�m going to wait and see. I had an odyssey and my kit was great. I also had electrons installed. However if you look back at some posts or FB about the odyssey it�s 50/50 on quality. I have been seeing reports about the new Trojan having quality control issues.
Definitely want a F4 but I�m still waiting on EA BDXs :-( to ship. TopRC needs to release a full flight video and a manual
Definitely want a F4 but I�m still waiting on EA BDXs :-( to ship. TopRC needs to release a full flight video and a manual
The following users liked this post:
erh7771 (10-23-2023)
11-01-2023, 06:51 AM
#3
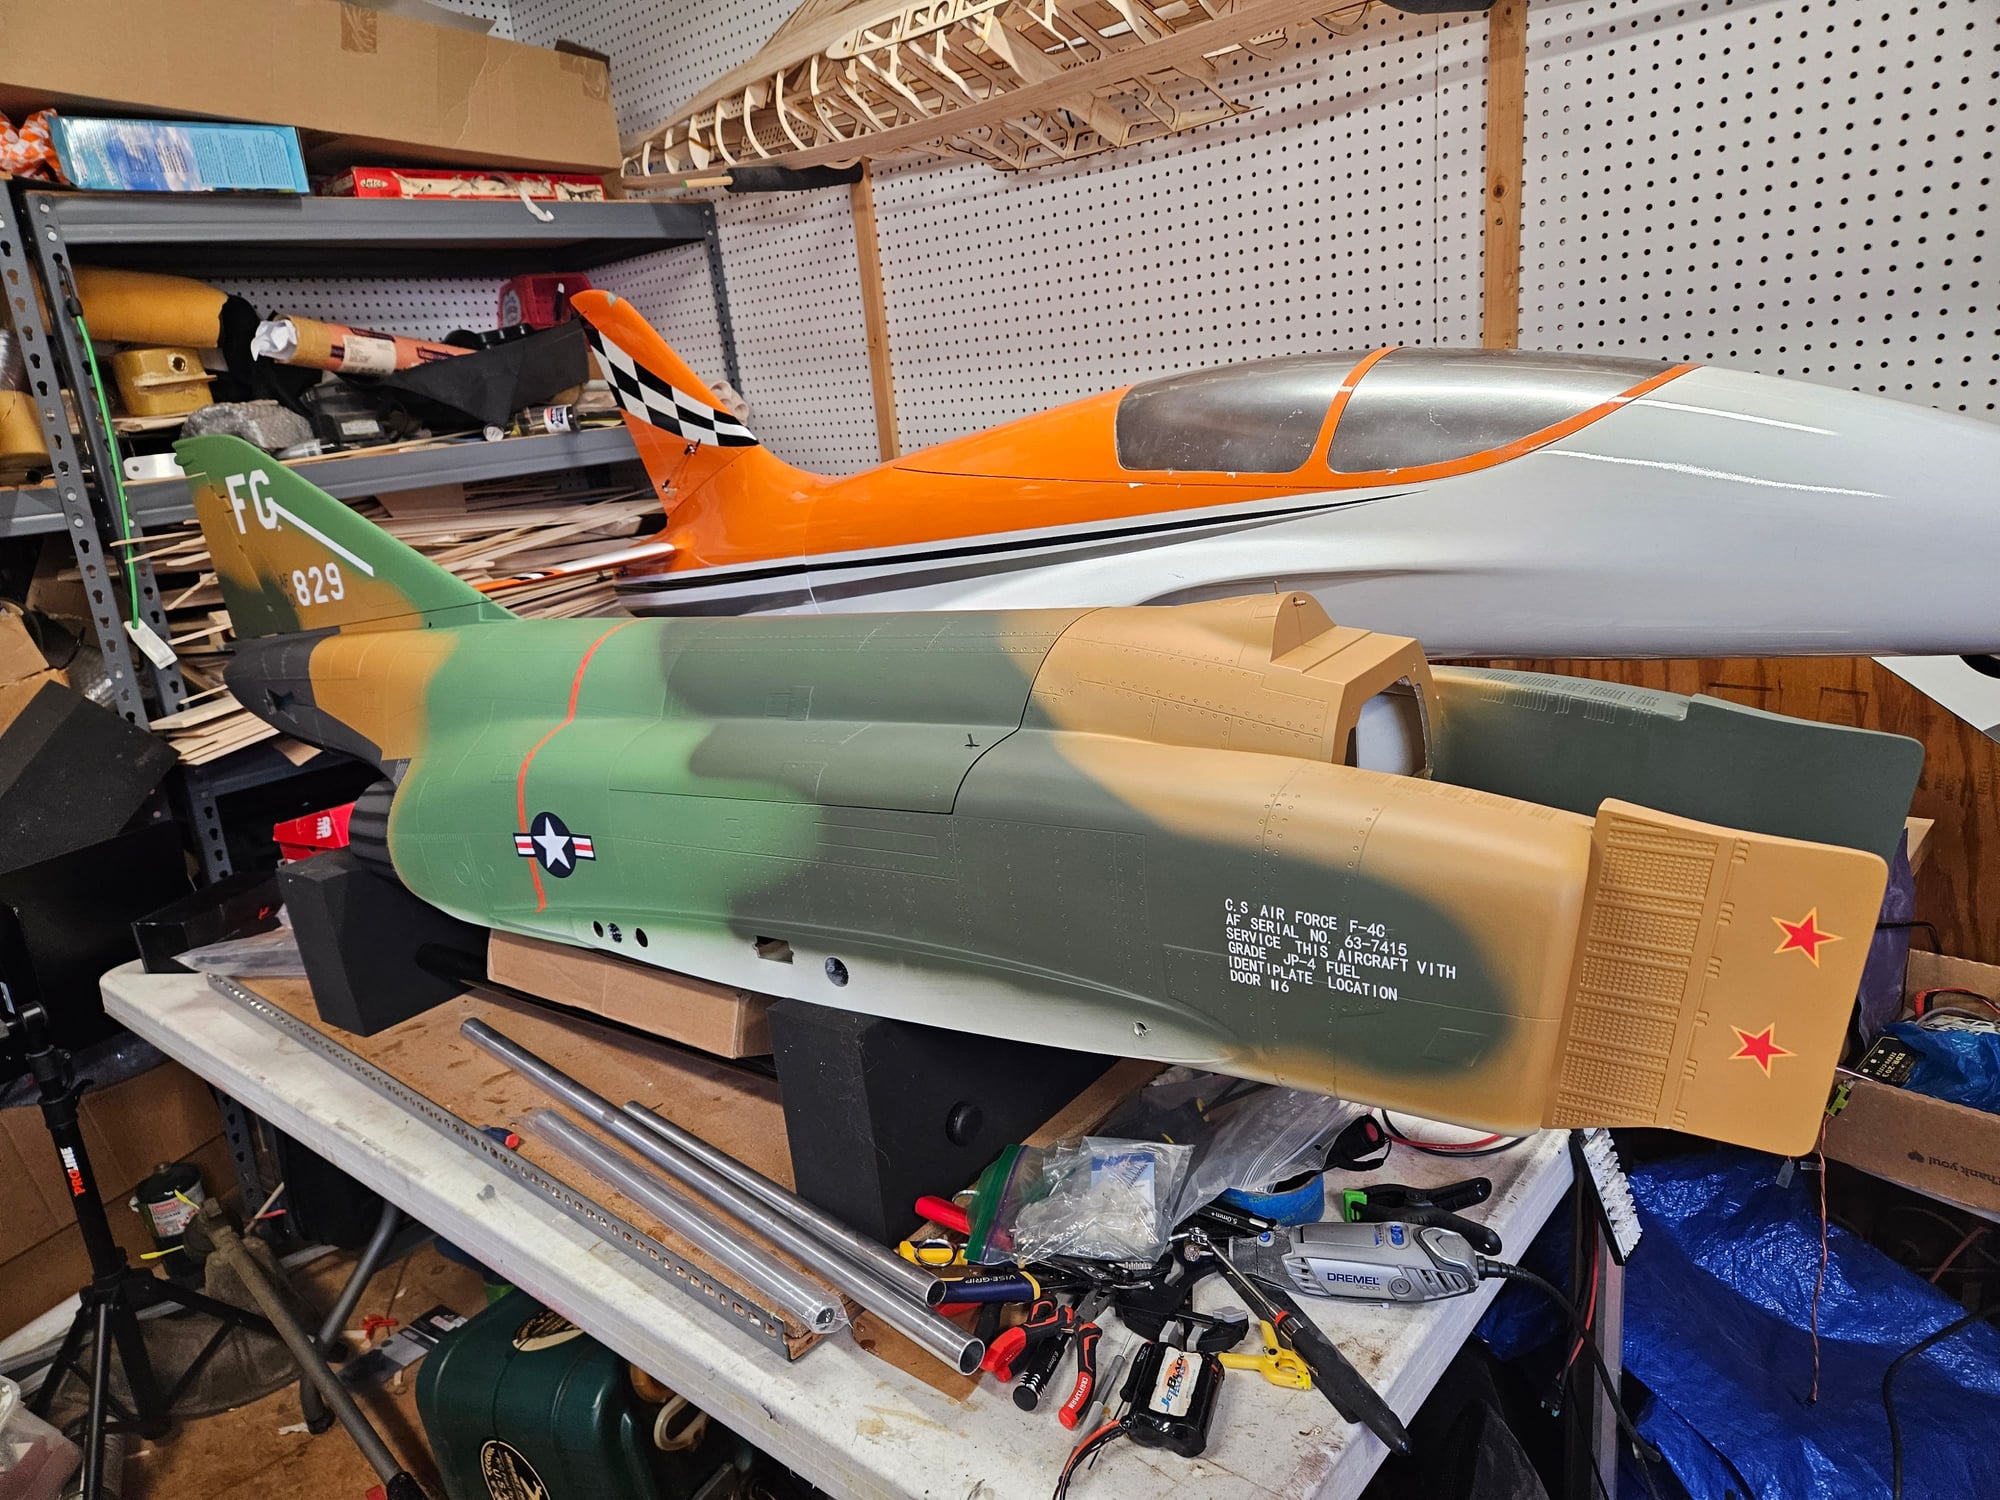
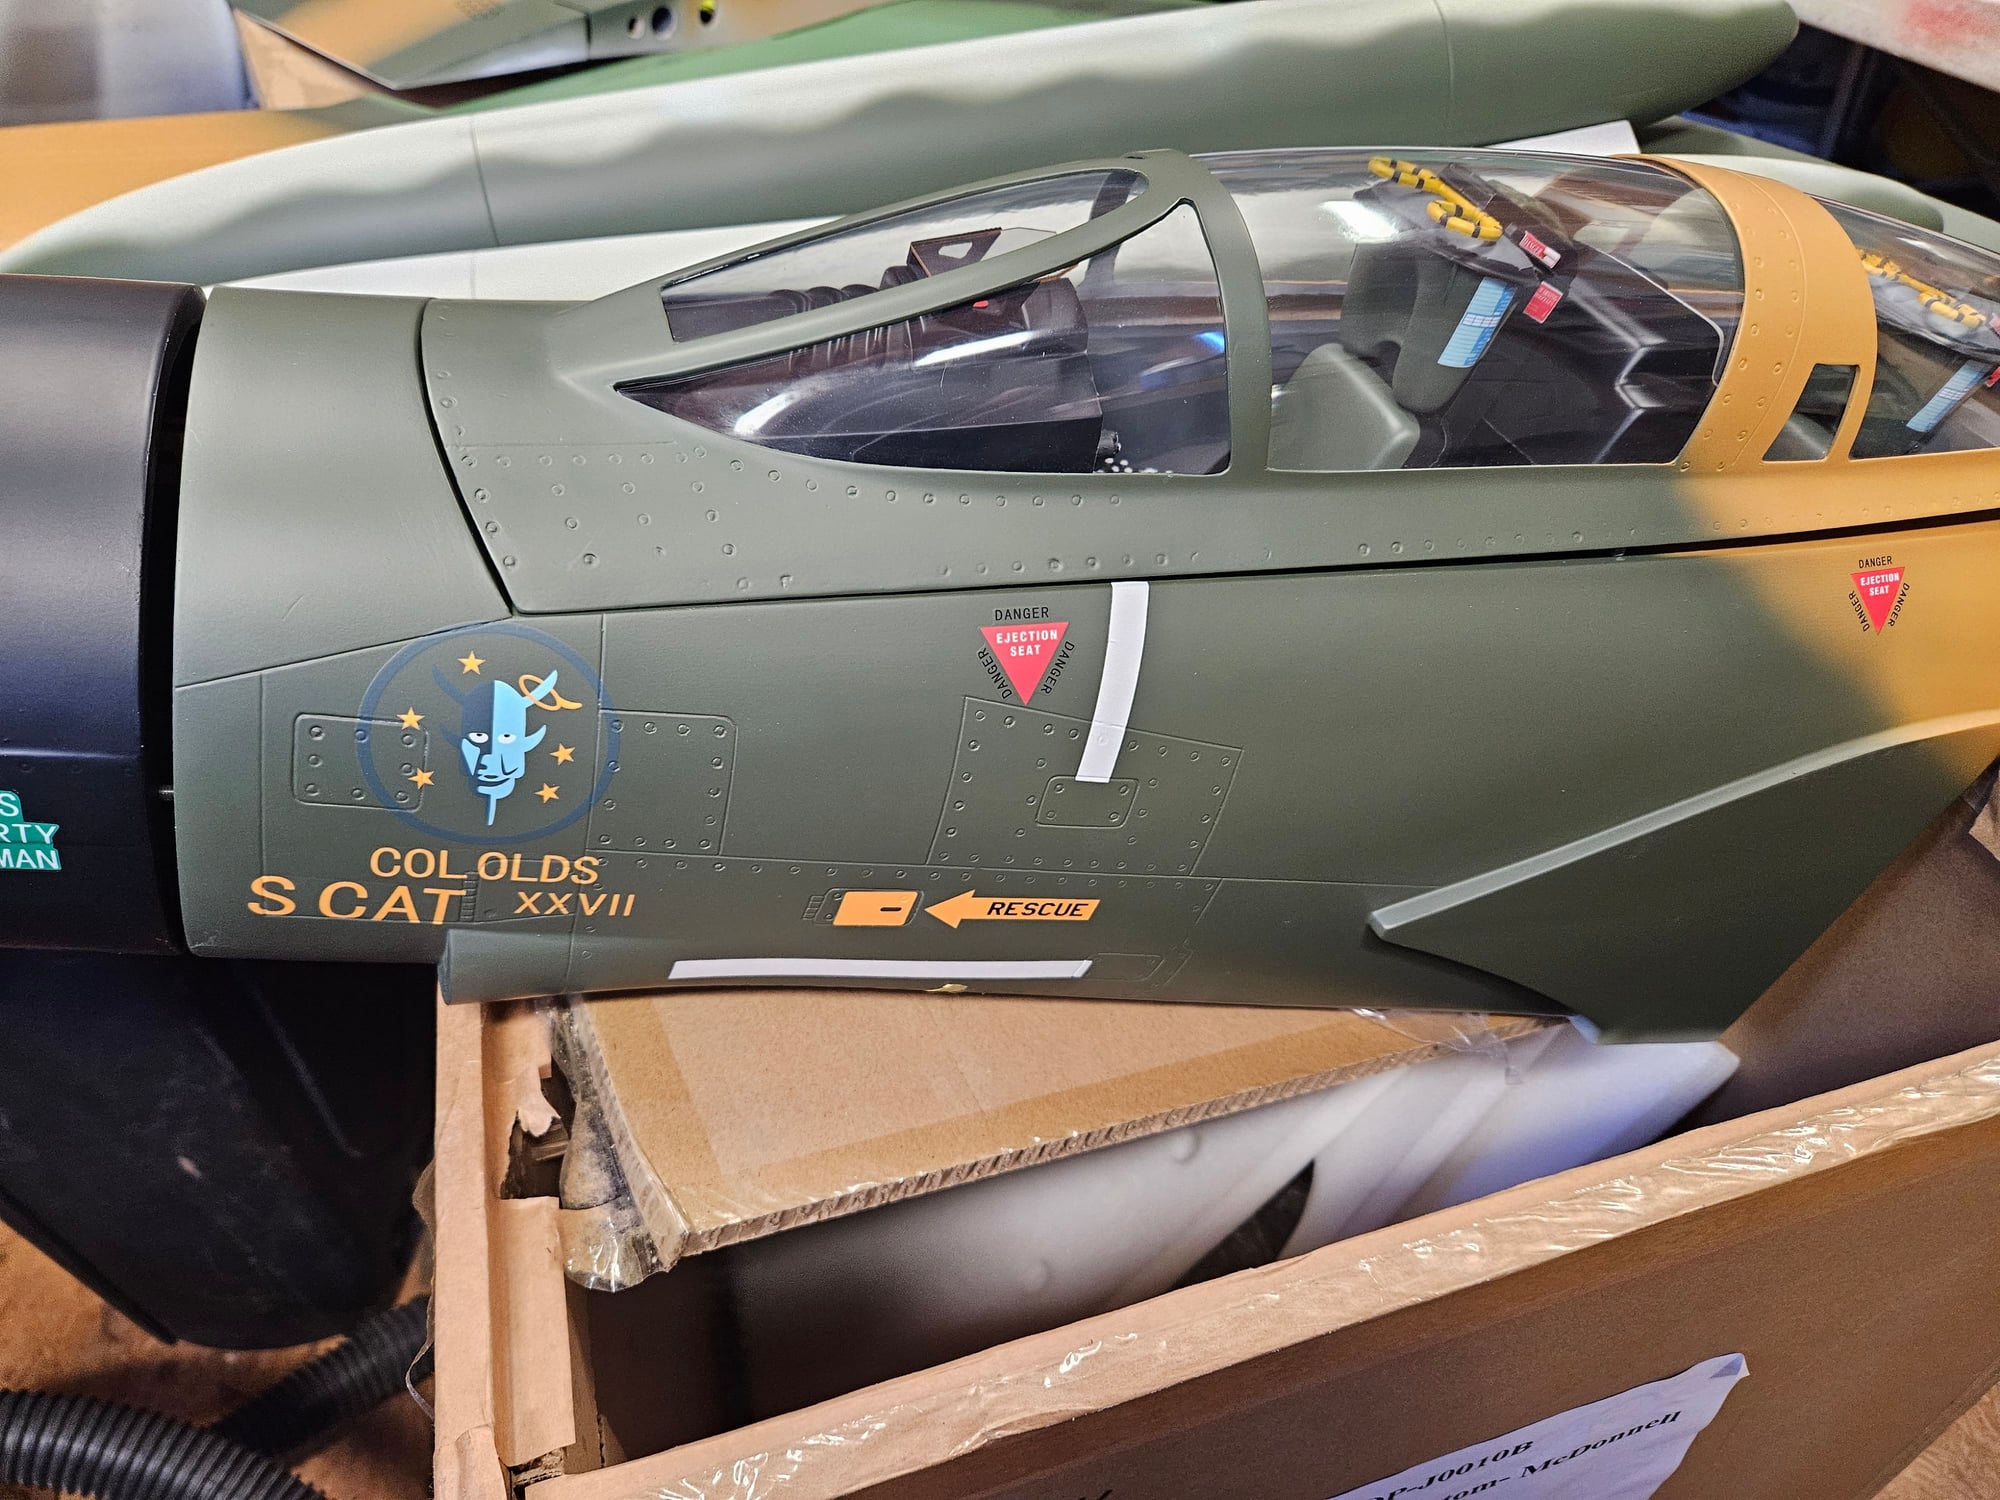
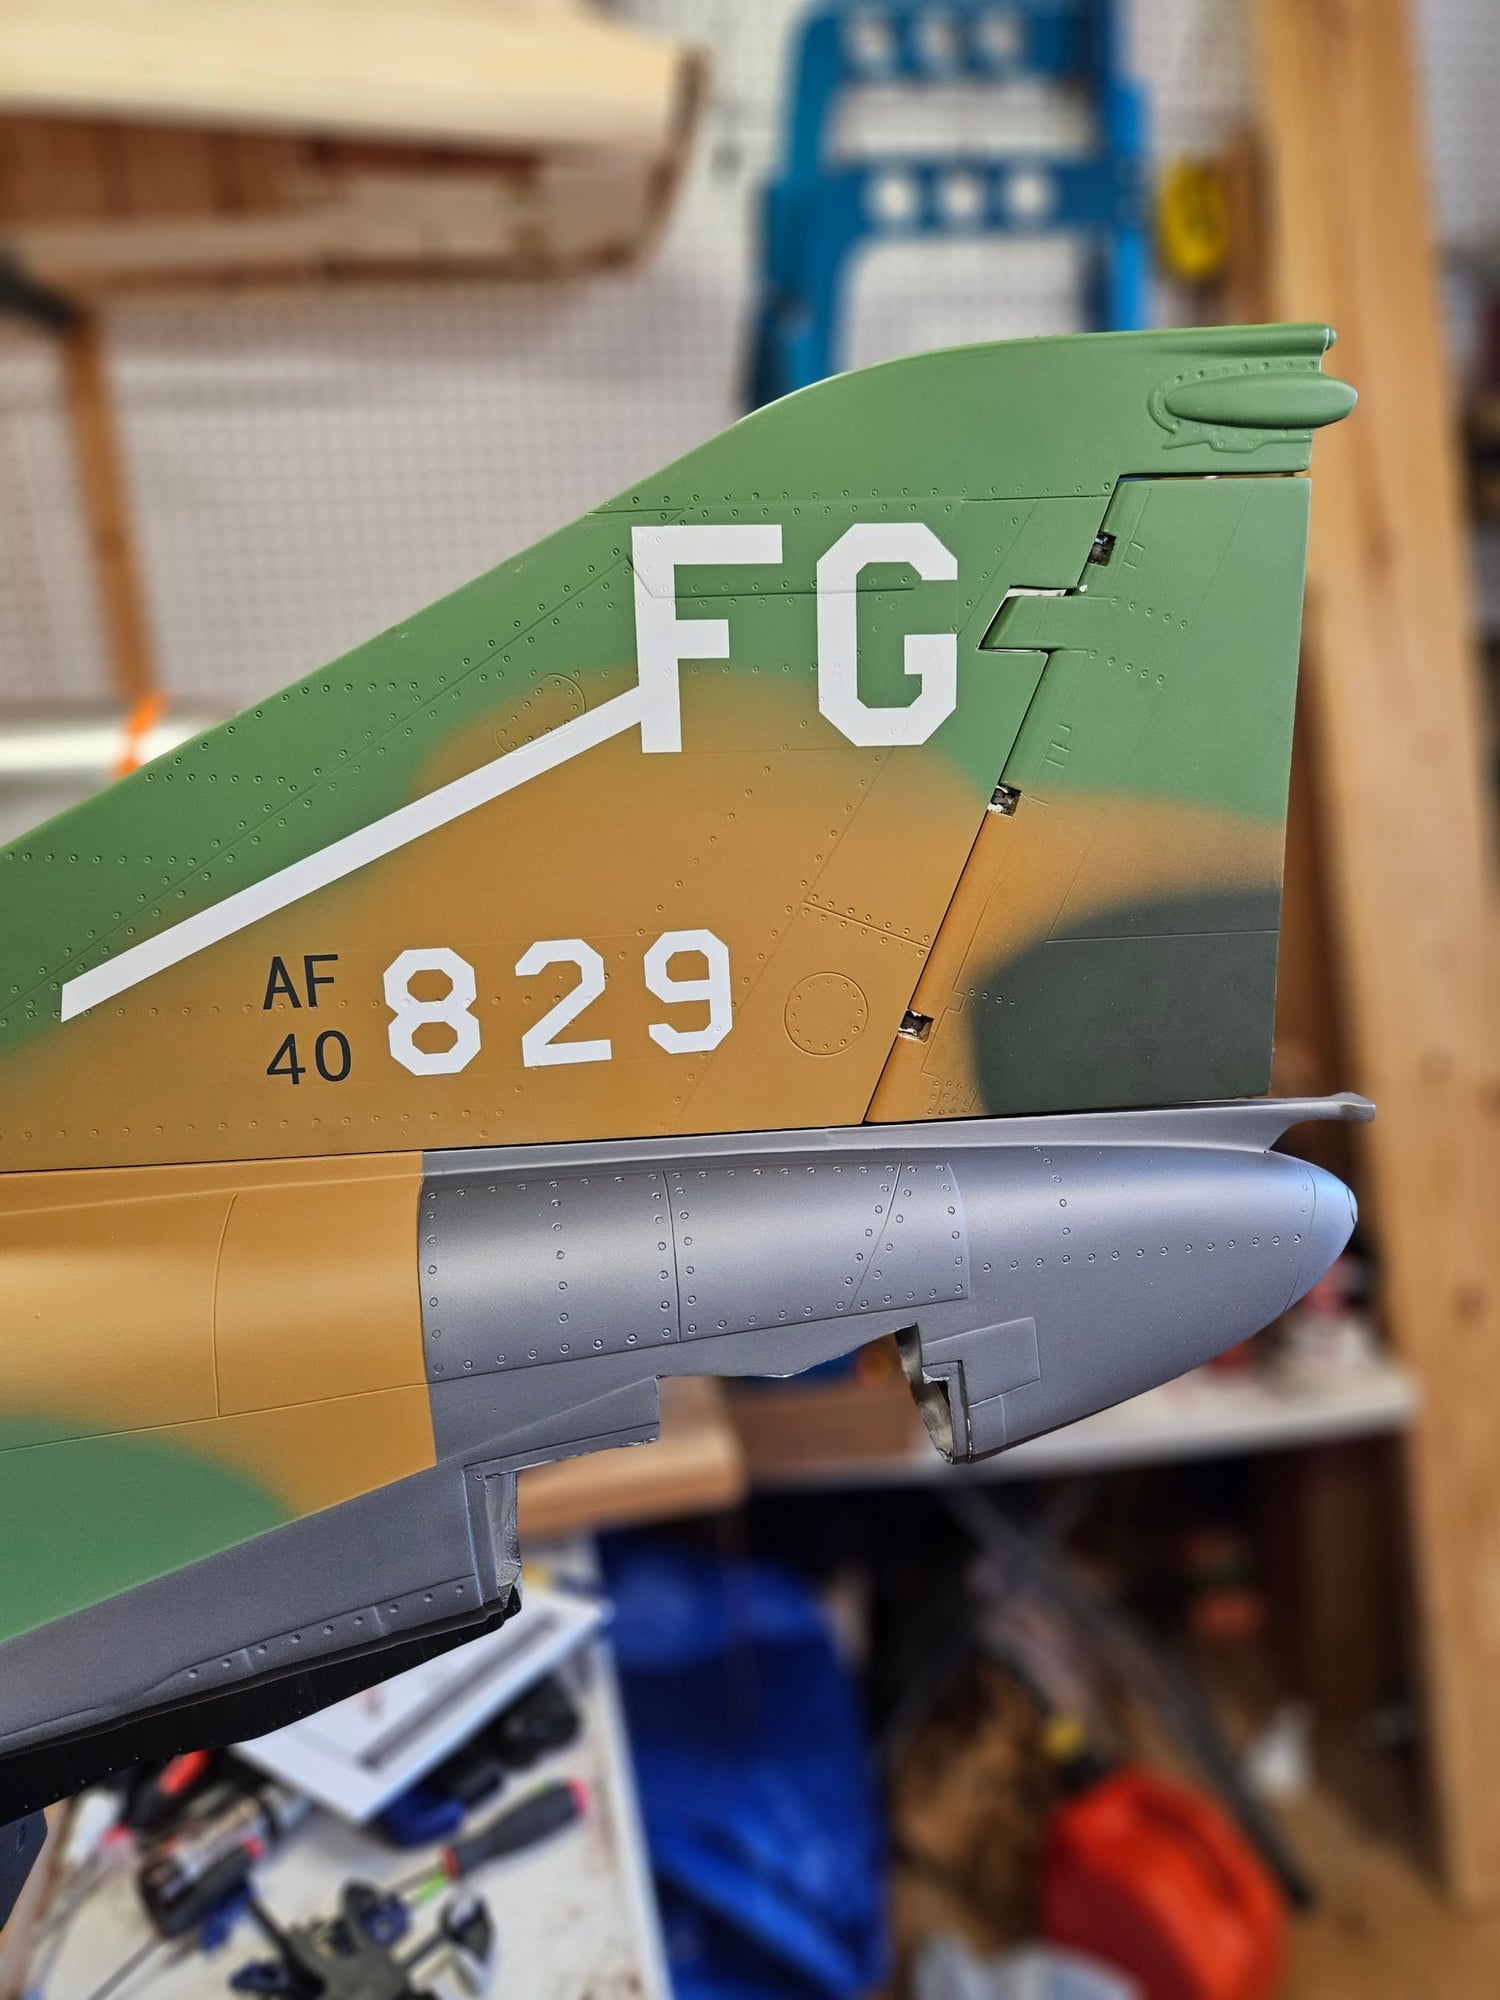
Delivered yesterday. Unboxed and inspected. Overall construction looks pretty good. My only complaint is the light Olive drab is totally wrong and the tail flash and serial numbers are wrong...they don't match. The Olds jet is SCAT....not S Cat. I can live with it as most people will never notice and it it flys well it won't matter at all. Some minor attention to detail will make this a really nice kit for the money.
The following users liked this post:
Viper1GJ (11-02-2023)
 11-02-2023, 11:40 AM
#5
Started some initial construction today. Made the servo leads. Couldn't get Power Box so I tried AR 20g. Larger diameter, stiffer than PB but it was easier to crimp on the Power Box connectors. Took my entire roll for 3 tail leads and 4 for the wing leads.
Weighed this thing. Out of the box all the components, retracts and hardware weight 30#5 oz. Adding my motor (Swiwin 190), radios, batts and misc stuff I expect 38.5 dry.
2 f/g tanks @ 76oz each (2.25ltr) I expect about 48.5# at takeoff weight. Beefy....just like the real thing.
Weighed this thing. Out of the box all the components, retracts and hardware weight 30#5 oz. Adding my motor (Swiwin 190), radios, batts and misc stuff I expect 38.5 dry.
2 f/g tanks @ 76oz each (2.25ltr) I expect about 48.5# at takeoff weight. Beefy....just like the real thing.
The following users liked this post:
uncleTom (11-03-2023)
The following 3 users liked this post by tp777fo:
 11-08-2023, 02:45 PM
#10
Decided to work on rudder/stab today as I foresaw minor problems. The rudder mechanism was made to sit at 90� to the stab mount line and the hinge line is at an angle. I bent the mechanism to the correct angle and glued it into the pocket. This caused problems mounting the stab. I cut a slot into the mount which allows the stab horn to pass through. After the glue cures I will make a cap to put on the horn to give it 2 pivot points. A small hole will be drilled on each side of the fuse to allow the rudder arm to be tightened. The vertical stab fits well on the fuselage and the rudder is straight. So far so good.
Last edited by tp777fo; 11-09-2023 at 04:54 AM.
The following users liked this post:
Viper1GJ (11-09-2023)

The following users liked this post:
u2fast (11-10-2023)
12-23-2023, 05:54 AM
#15
Thanks


 02-06-2024, 03:44 PM
#19
This thread gone quiet so here are first pictures of my TopRC F4 Phantom in Jolly Roger scheme. Decided to get one as very happy with my TopRC Hunter, great flyer, nice details and good value. Well the Phantom looks the part for sure when all put together, great details, which I have already highlighted and lightly weathered (love doing that bit). The molding is really crisp and the paint finish looks great and just right on this one as do the colours. Cockpit instruments were OK but crudely painted up by someone in a hurry so had to be reworked, ejections seats not bad, but some work and soon improved and remember, its included and not an expensive extra like some makers charge (same goes for tanks and thrust tube, all included as well as underwing tanks, all included).
I found a manual but it tells you nothing much useful apart from CG and throws and gets a lot of details wrong so not very inspiring or useful. At this level most people will do there own thing.
The retracts legs and wheels look good, springs far too stiff just like the Hunter and will need replacing. The motors are the same size as the Hunter and I expected they might be larger for a heavier model. Anyway Hunter retracts been faultless so far (I use XICOY LG22 controller, the TopRC controllers work OK as well if you can follow the poorly translated instructions).
Engine for this will be XICOY 180. There is a ton of downthrust built in with the engine mounts.
Pilots are Warbird 10" which fit nice
I ll keep posting as and when progress is made, not so much a build thread, (we all know the basics don't we?) but more what I did and found, good and bad, and any changes or improvements made. I ve read of a Version 2 Phantom which has better fit of the gear and rudder operation. Mine did not come with the wood battery holder and mounting former in the nose. I ll make my own. The nose cone is a nice and secure fit with locking pin and easily removed, much better than the rubber bands that came with the Hunter!
Looking to keep dry weight under 18Kg. Lets see.
Last edited by Edhamp; 02-06-2024 at 04:04 PM.
The following users liked this post:
yeahbaby (02-06-2024)
 02-07-2024, 09:00 AM
#21
Thanks for that.
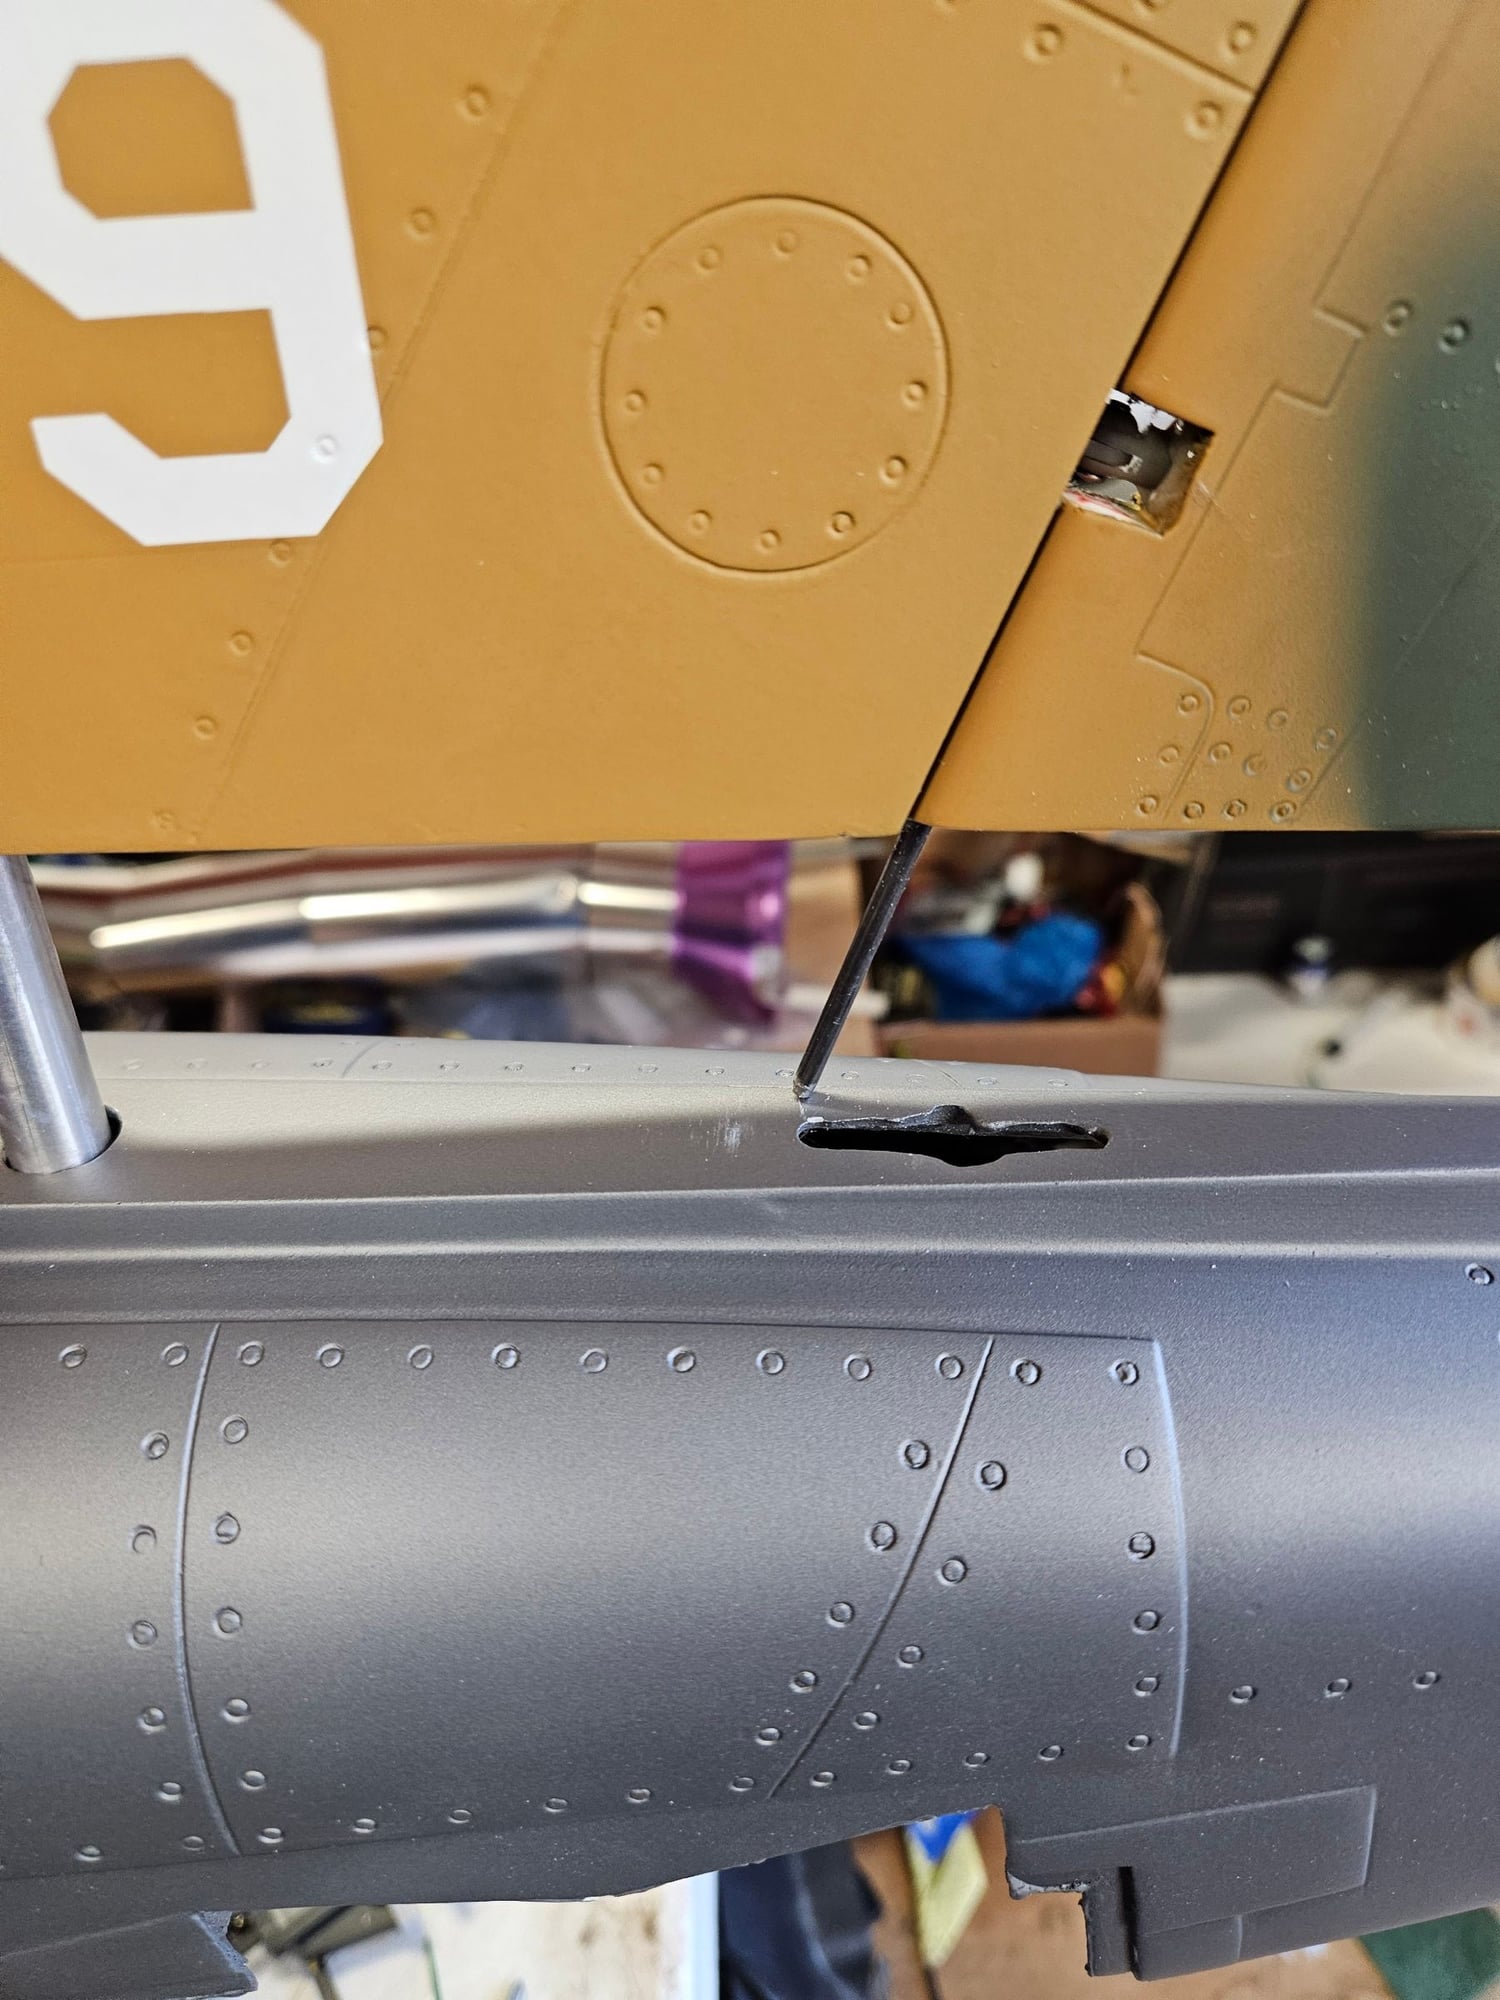
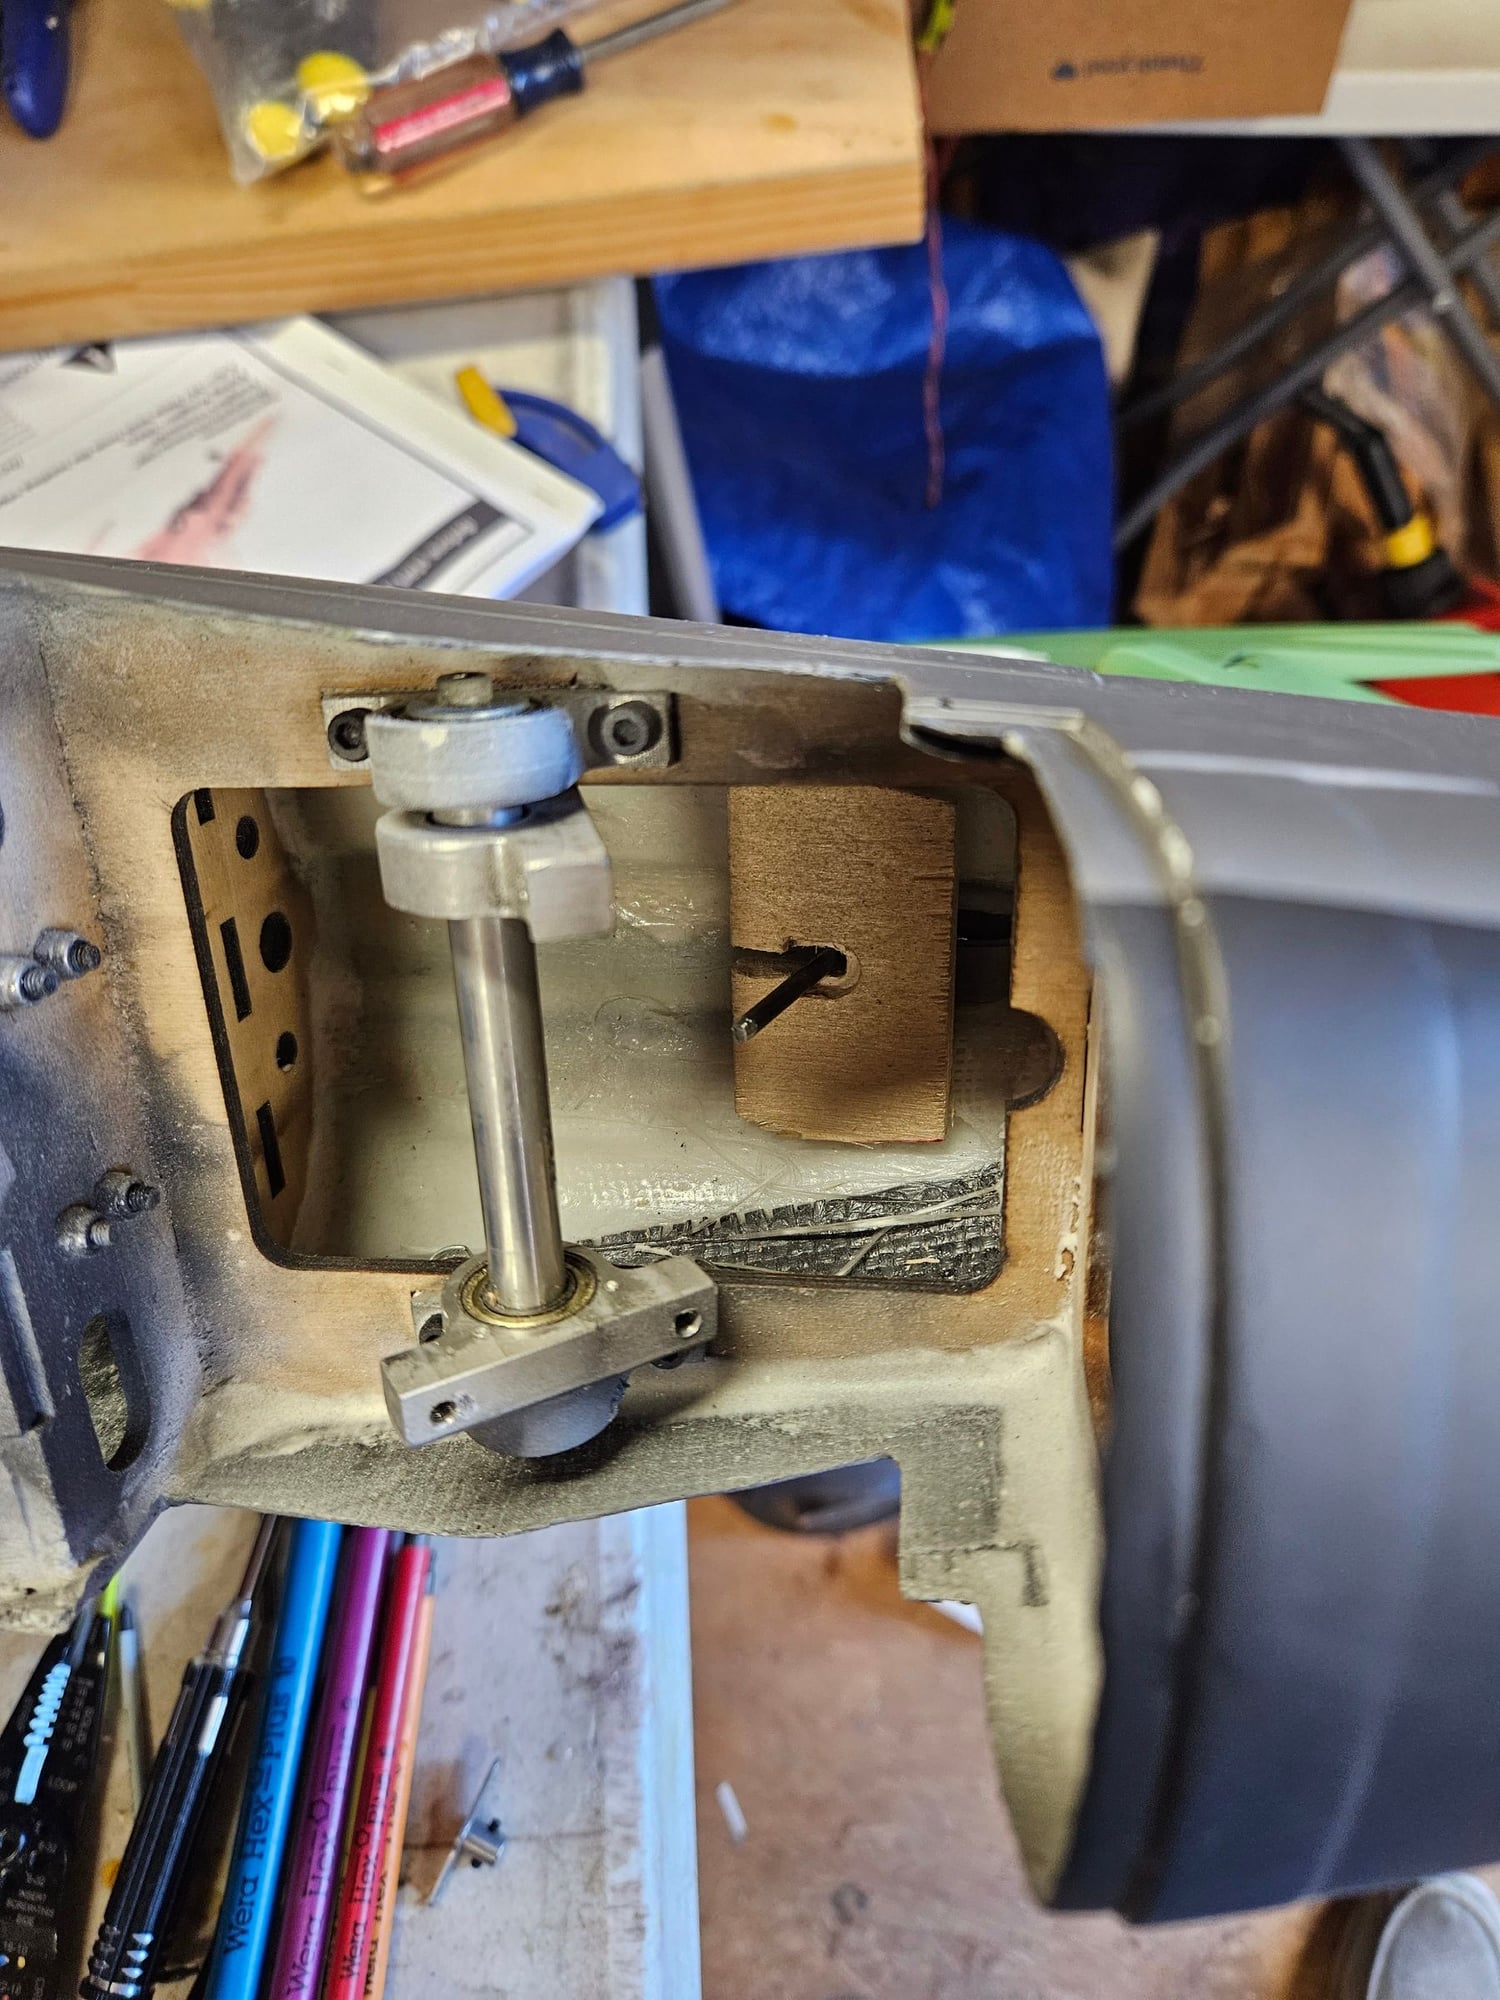
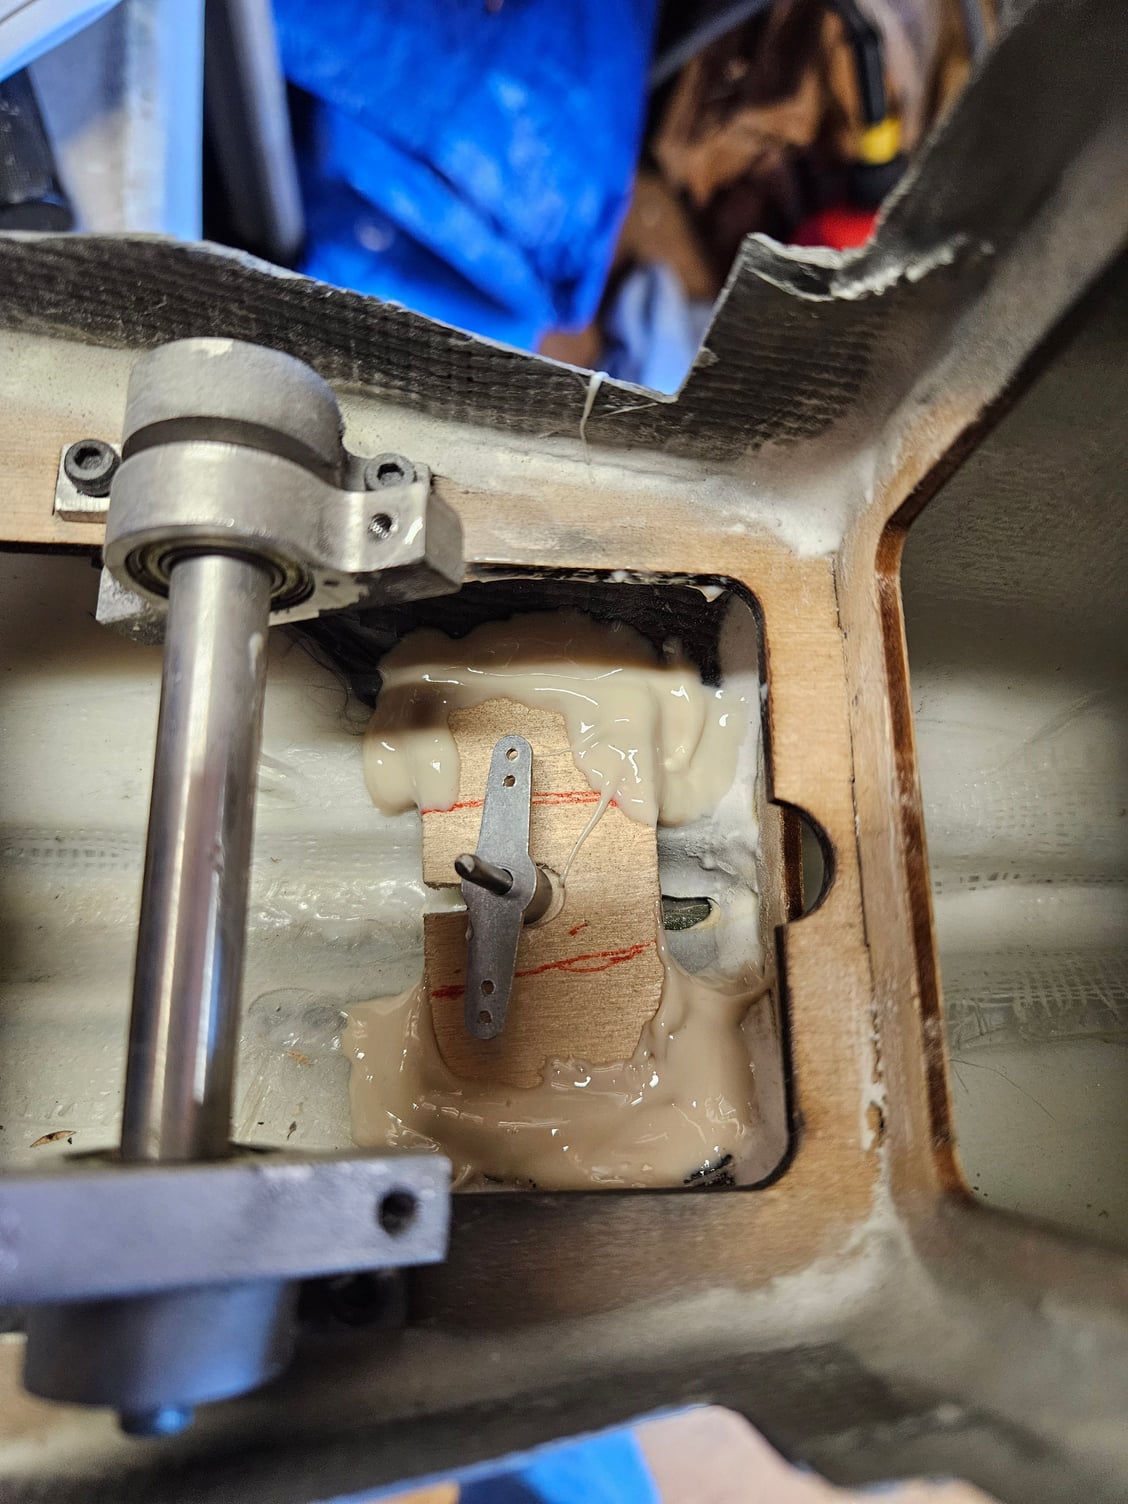
Rudder Servo: The first task to sort out the rudder servo. Gave up trying to follow the setup suggested in the manual with the servo mounted in the fuselage and steering arm connected to the rudder. For one thing some of the parts shown in the manual photos was not included and clearly the vertical tail looks like it is designed to be removable. A better option is to mount a midi servo in the tail with a direct link as I have seen on another TopRC F4. Good idea. I used a quality 20kg HV servo which should be good enough. An easy solution.
Main gear doors: No information in the manual about fitting the main doors to the UC legs. There as some wooden spacers supplied with the UC set, a couple of U shaped composite brackets that look like they to be glued to the main doors (see photos) and not much more. The doors themselves are properly made and reinforced with or if not out off carbon fibre and fit well, but gaps could have been smaller. I could not see the point of using the U shaped reinforcements as the doors are stiff enough and all it does is add weight. I found some aluminum door mount brackets, not sure but they may be Robart, which were modified so doors could be bolted on direct. You could use something similar and/or make use of the parts supplied to attach to the door and a simple bracket to clamp on the legs.
The inner doors are hinged at the wing root, where the servo is also mounted but again the setup in the manual shown for the linkage is best ignored and just use a couple of small ball links for a slop free direct link. The standard size servo body pokes out the wing root if you go with the factory mounting which is OK but there is room to mount or use other servo types if you prefer. The small outer doors on the full size open with the gear as well but it looks like Top RC have left it all to you to sort out if you want them to be active, maybe actuated using the legs. There is no space to fit any kind of servo. Keeping it simple, I decided these doors would be fixed and rather than cut the supplied doors (just in case I decide to make it operating one day) I just made some plastic covers which may be painted off white to match.
Last edited by Edhamp; 02-08-2024 at 05:55 AM.
02-09-2024, 01:49 PM
#22
One of the first vids showing model in flight. Looks like Jet-munts 210?
Also this one but electric.
Info says this has two 120mm fans, checked specs and looks like producing up to 8kg thrust each so lets say equivalent to 160N give or take. Model weight is stated as just over 20kg (and remember will be landing weight as well). So flies really well at this power/weight ratio, high alpha landings and gives me confidence.
Anybody flying one of these would be good if you shared you CG and throws for elevator. Are the numbers in the not very accurate manual a good starting point (360mm from root leading edge and 15 degrees)? The main wheels are a fair way behind the factory CG so how does the model rotate?
Also any problems with heat on the tail for us turbine users?
Last edited by Edhamp; 02-09-2024 at 02:42 PM.
02-11-2024, 02:45 AM
#23
I do nt know why Top RC use such hard and rubbish springs that have no "spring" to their retracts. Replaced with some decent steel springs, they are 9mm outside diameter. The wire diameter is 2mm, same as the springs fitted but these have more give. The front leg springs are twice as long which again much too hard so this was replaced also. At same time I made a dummy front door with provision for a landing light. The model has a single large door for the nose leg which is not scale.
02-14-2024, 03:15 PM
#24
I ve been working on fitting the tanks, engine and thrust tube. The tanks are located just about on the cg which is good and there is plenty of room for everthing with easy access in that wide fusalage. But I can see a potential problem.
The supplied tanks have a large deep sump at the front about 1/3 the tank length which is in front of and below the main wing tube. The question is how long should I make the fuel pick up line and clunk? If the pick up line goes to the bottom of the sump then it will not be long enough to get to the back when the model is heading towards vertical. With the tanks emptying, this is risking more air getting into the fuel system for the bubble trap to deal with (I use felt clunks which should help reduce air bubbles). If the pick up goes almost to the back half of the tank, as usual, the fuel in the sump is in dead space. Also the fuel outlet is, in my view, cut too high on the tank.
I am tempted to put the tanks in inverted (option 3 in the diagram) so the sump is on top (I shall not be flying inverted circuits with tanks almost empty!!). I ve been working on what mods may be needed.. If the model flies nice then may be justified fitting some better tanks with better shape. There is plenty of room for larger tanks and do away with the sump so pity TopRc did not do this.
I m also tempted to move the engine forward as far as it will go and extend the bifurcated thrust tube before it splits. I ve worked out this would be equivalent to saving approx. 500g nose weight needed to balance for a tail heavy model. There is plenty of space to do this and looks an easy mod and easily reversed. Only disasdvantage I can think is increased losses in the exhaust.
Last edited by Edhamp; 02-15-2024 at 04:03 AM.
02-14-2024, 05:23 PM
#25

IMHO�.. too bad that the saddle tank doesn�t have another low chamber after going over the wing tube. If you�re familiar with the CARF Lightning, the saddle tank has two lower chambers with the wing tube going through the center of the length of the tank. The clunk goes to the rear chamber. Going vertical sends the fuel over the wing tube, and then siphons from the rear chamber. With a main center tank, this happens early into the flight.
- Whoever designed the tanks doesn�t fly them.
- inverted is a great option. But depending upon the stopper hole height, could create a problem with the bending the vent line to get to the top of the tanks. You can patch the original stopper hole, even with a stopper, then drill a stopper hole high in the inverted tank.
- fill the lower chamber with epoxy creating a level floor for the tank.
- I understand that fuel bags have been approved for the USA.
- buy different saddle tanks.
Best wishes!