


CARF Beam build thread
 03-21-2026 | 01:43 PM
#1
Thread Starter

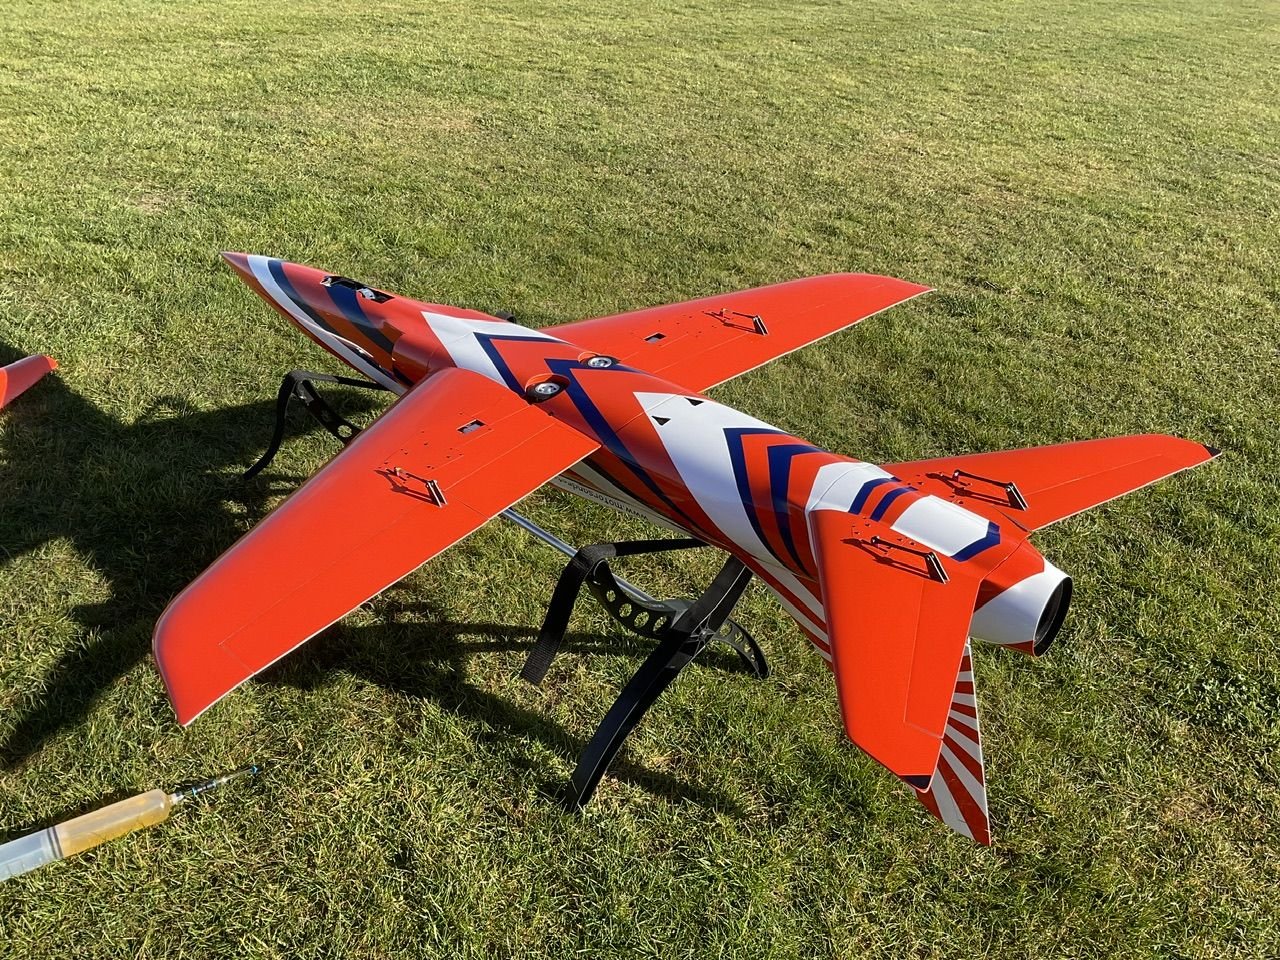
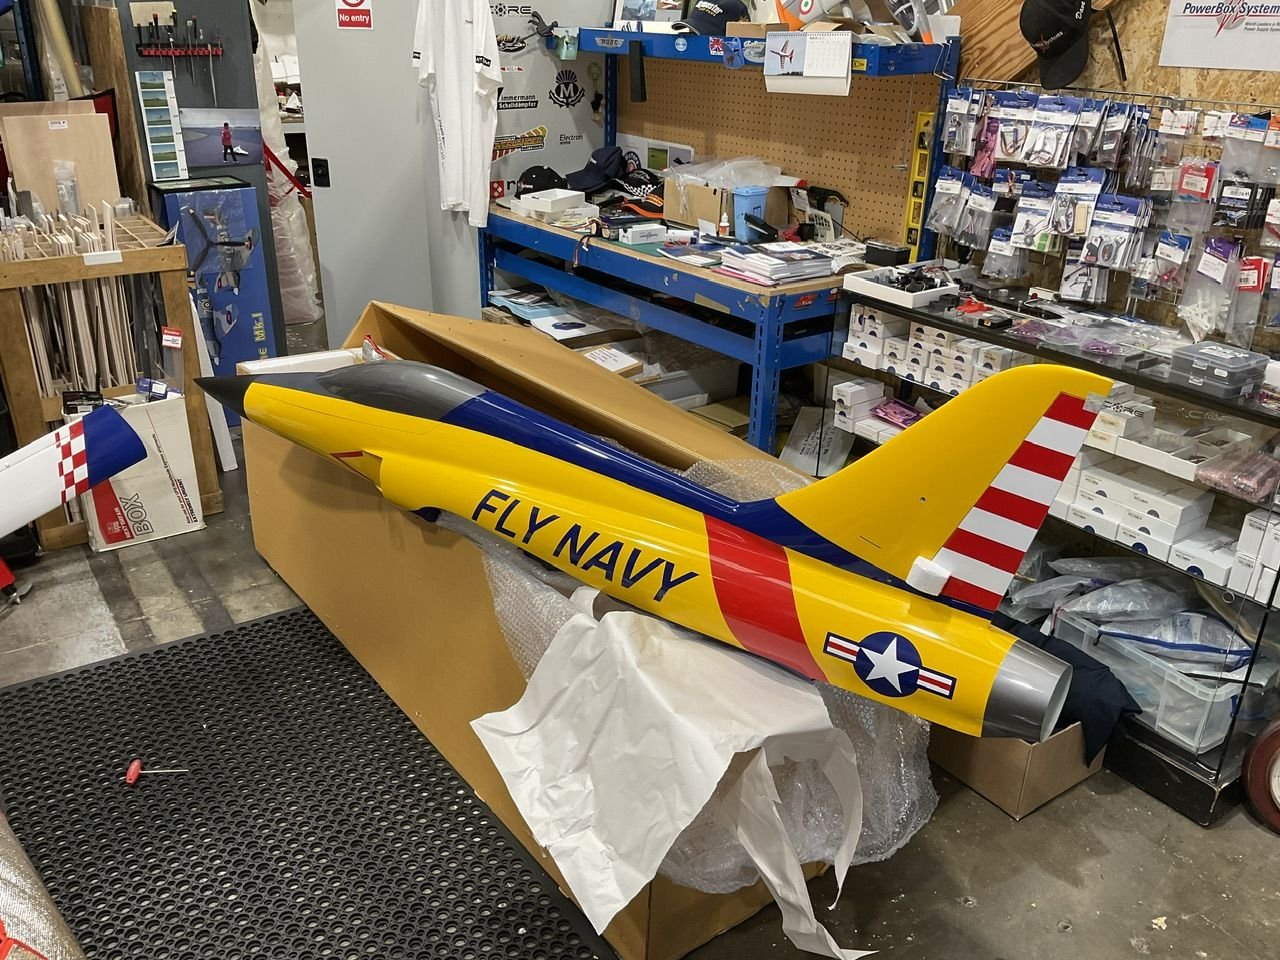
The development of any completely new composite airframe is a lengthy process, it is also expensive to produce moulds. Inside the CARF team there has been talk about a Mini Bolt for about five years, the performance of the Bolt airframe was converted by many, but it was just a little too big for a lot of people.
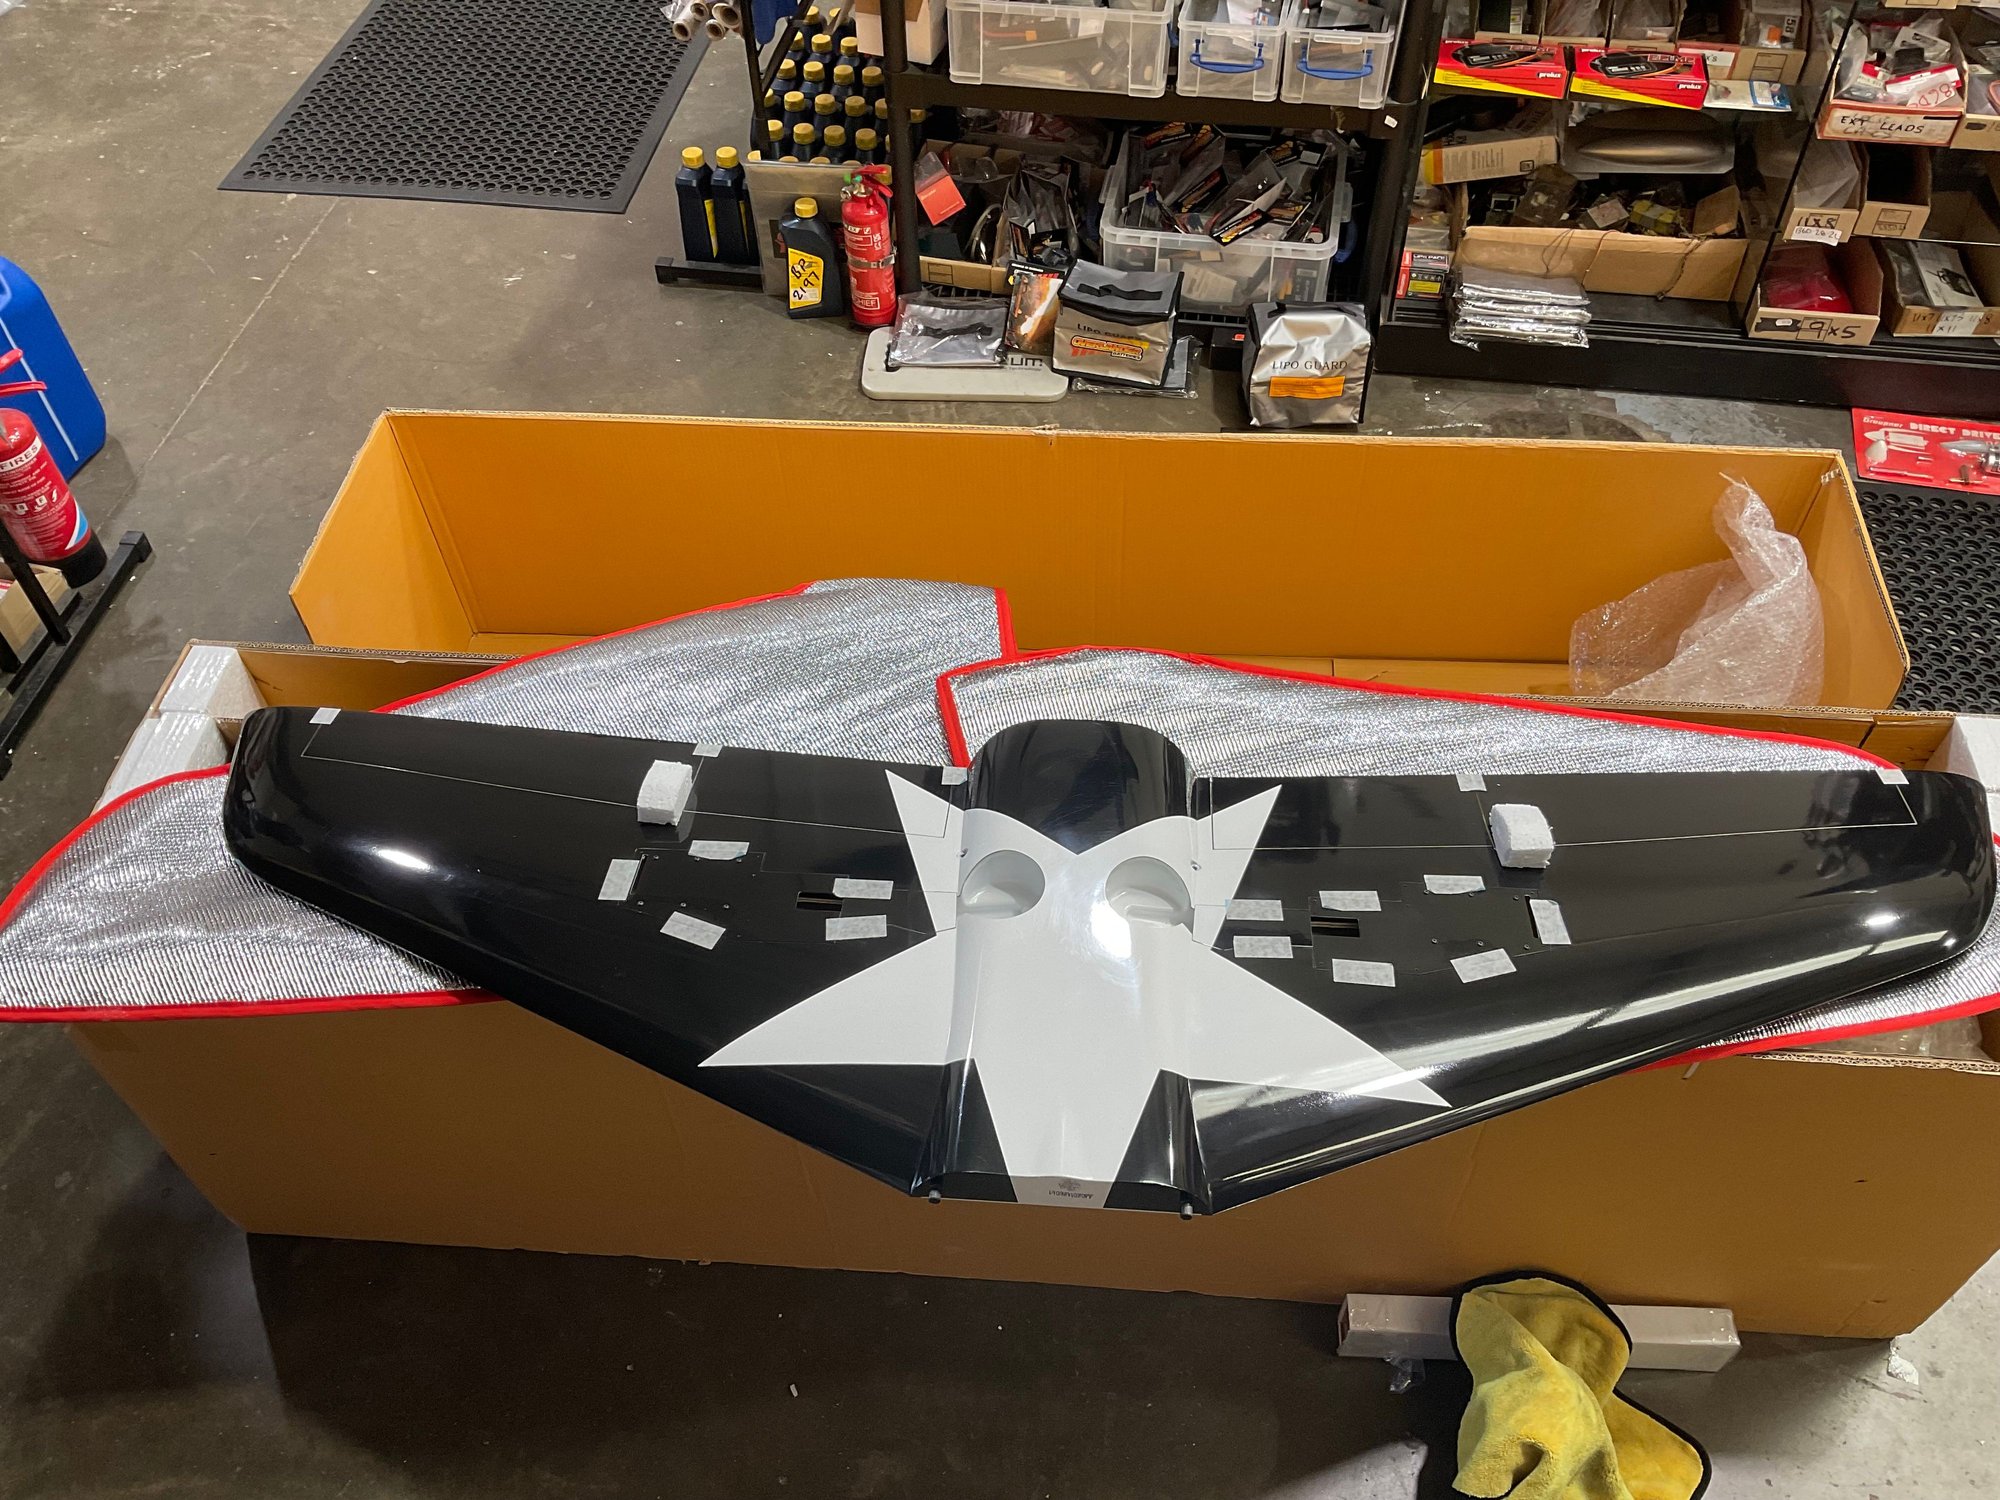
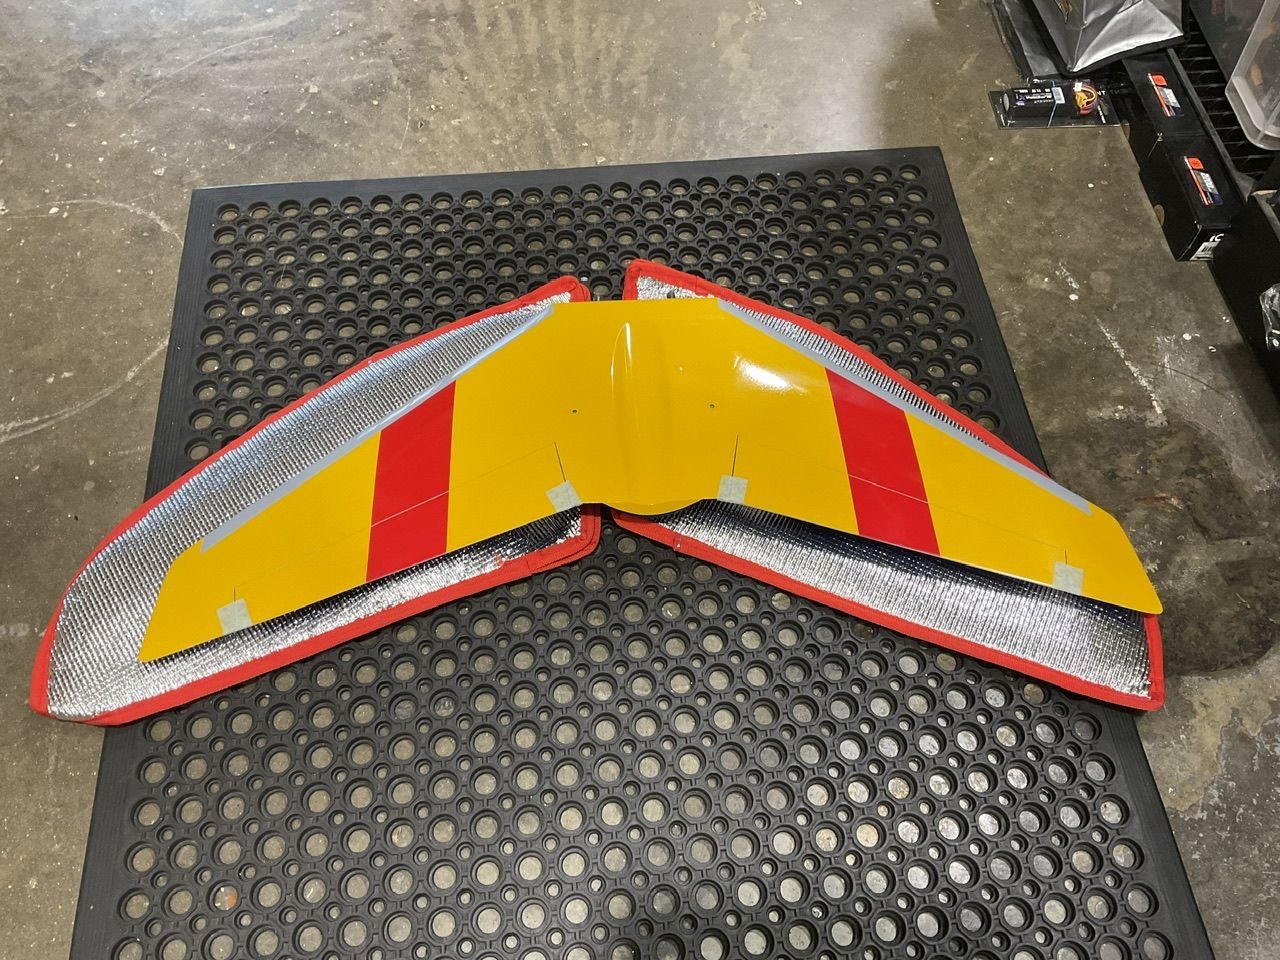
The Bolt was designed around the Ultra Lightning wing platform, so with the UL being big brother of the Ultra Flash, it was obvious the son of Bolt would use the UF wing platform. We did talk about a new wing, but since the UF wing worked great fast and slow it was decided to stick with it. I did push for some changes, the main one was moving the main gear back to increase the load on the nose wheel-this aids ground handling in a cross wind. Apparently, this sentence is easier to write than execute!
Experience with the Bolt prototype allowed changes to be agreed before the moulds were produced, the tailplane is also larger as a result.
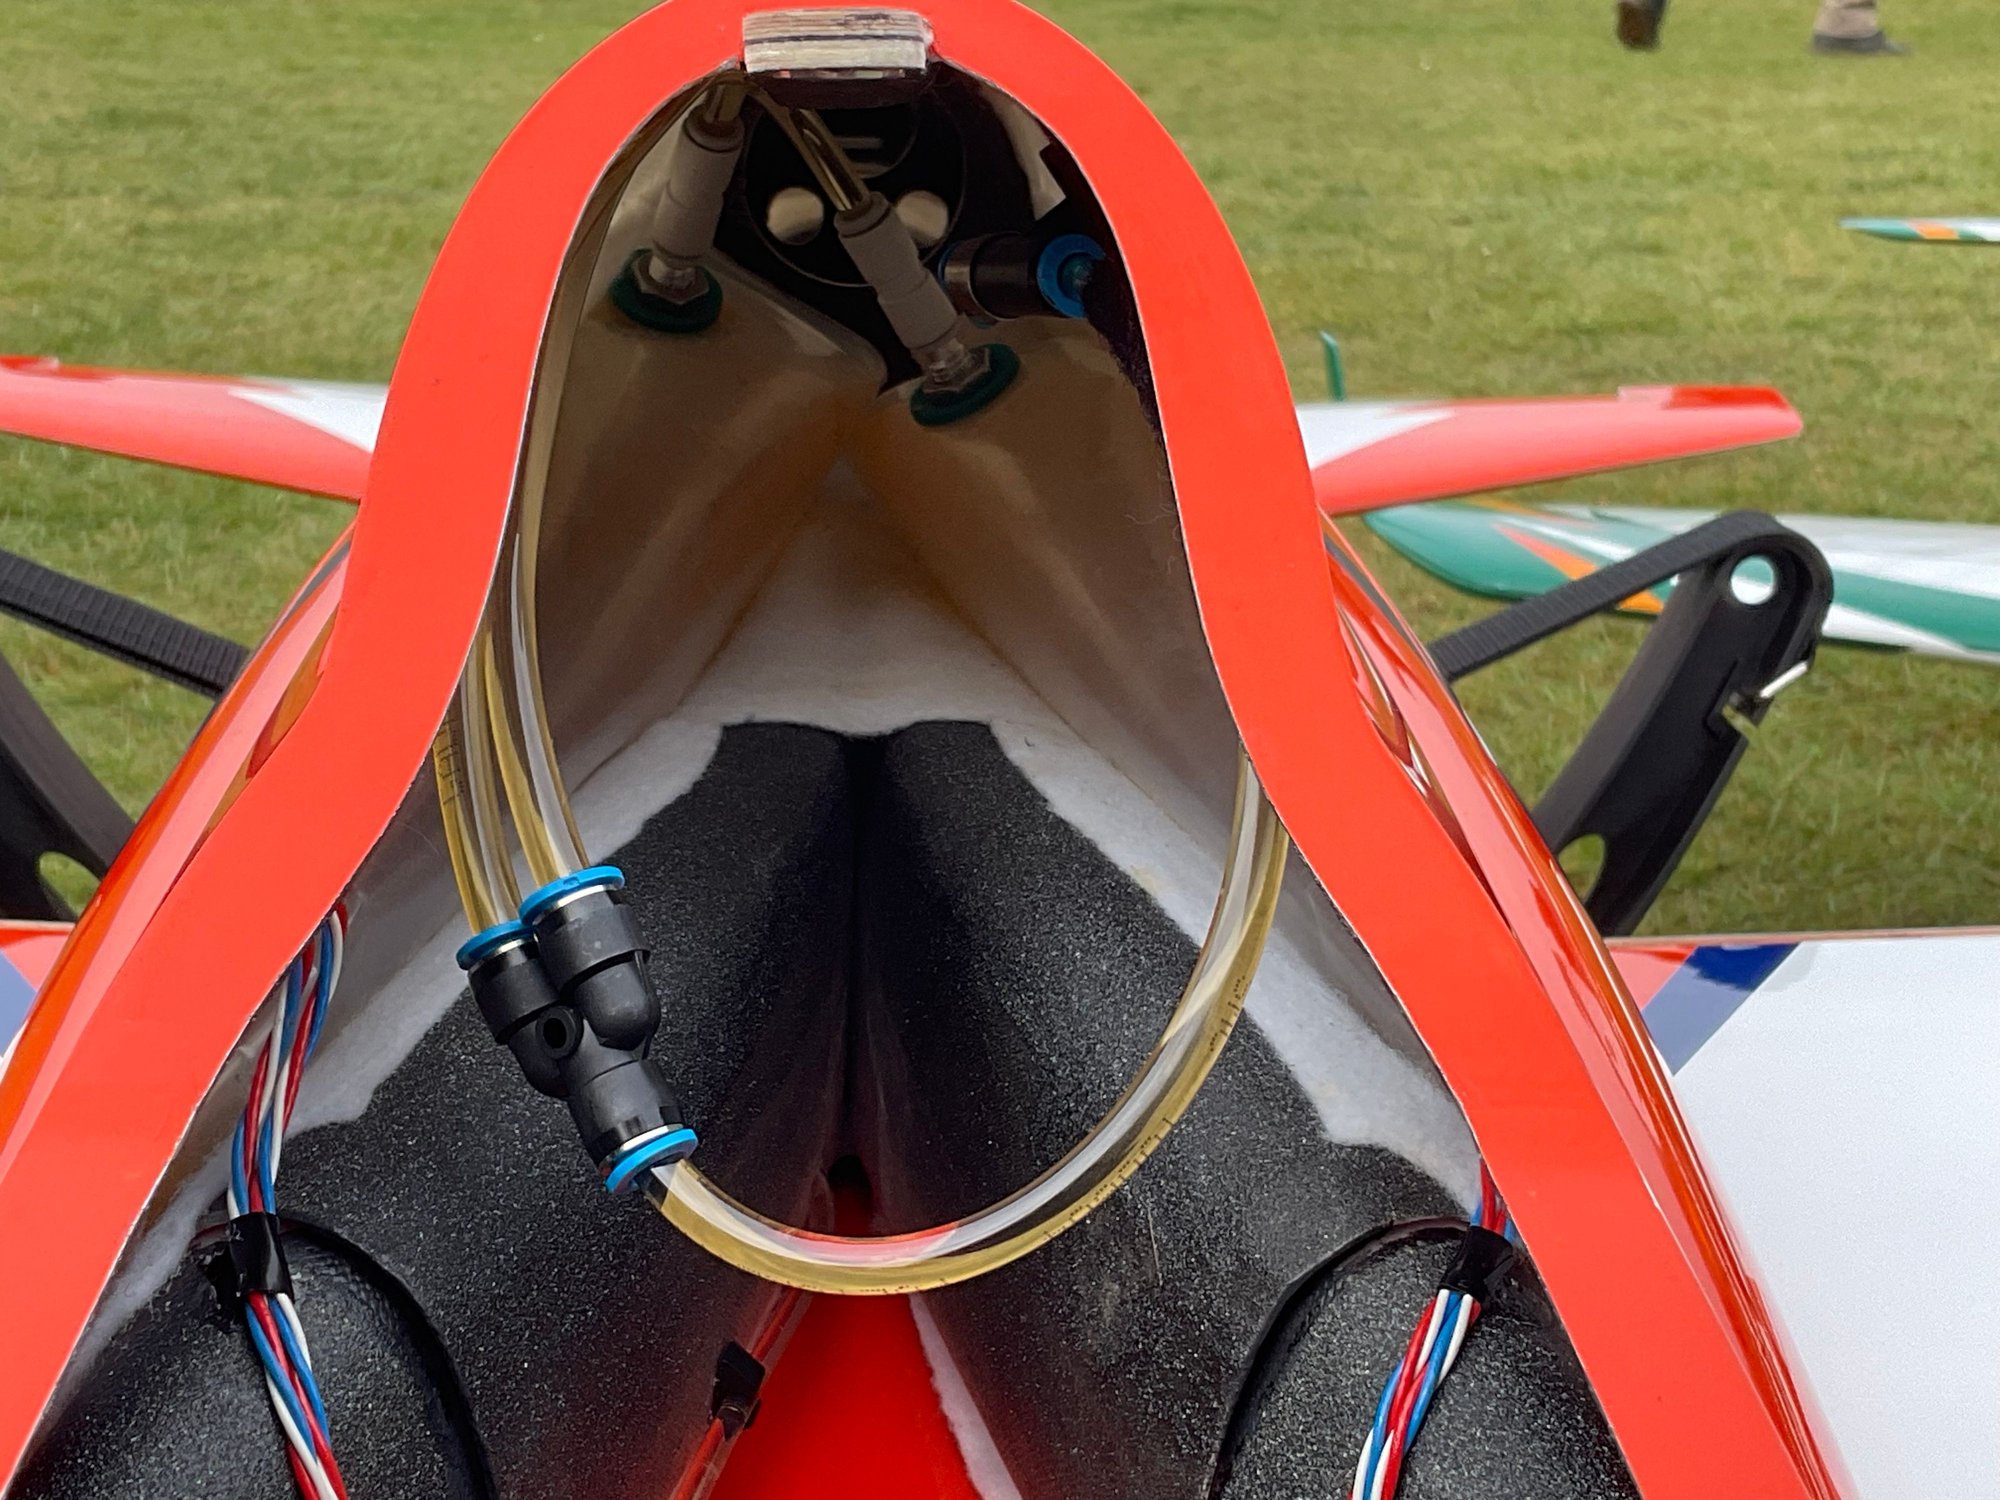
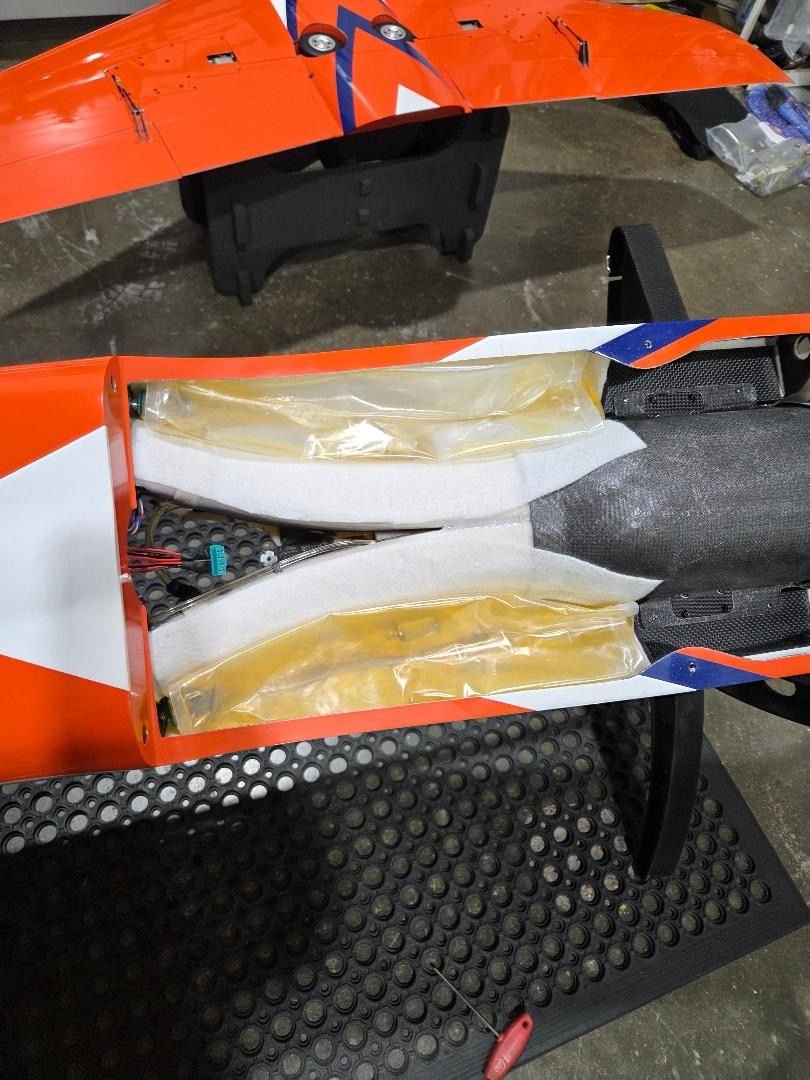
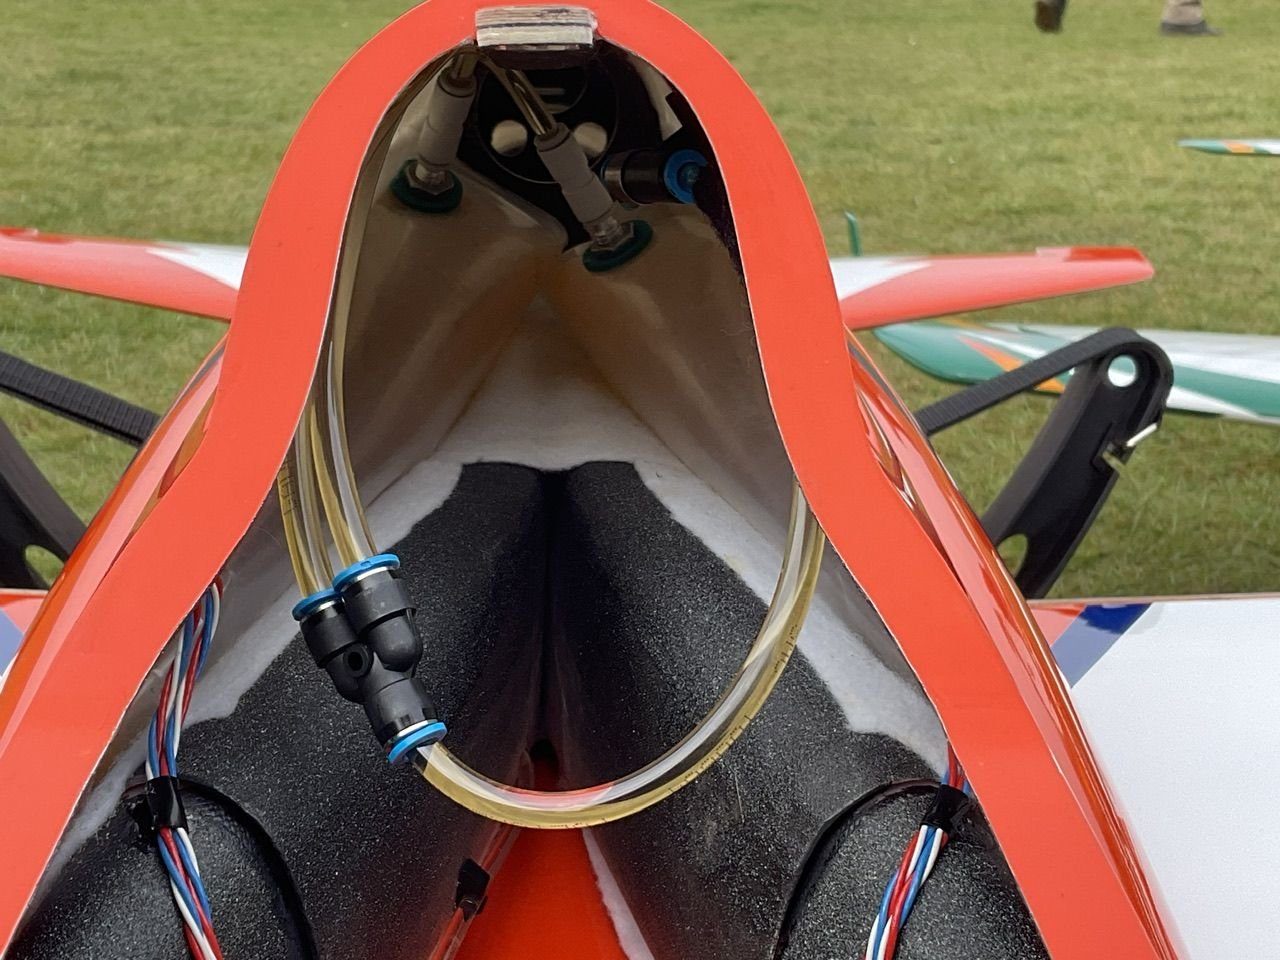
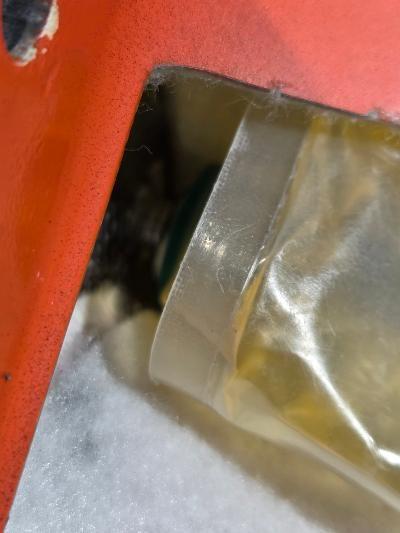
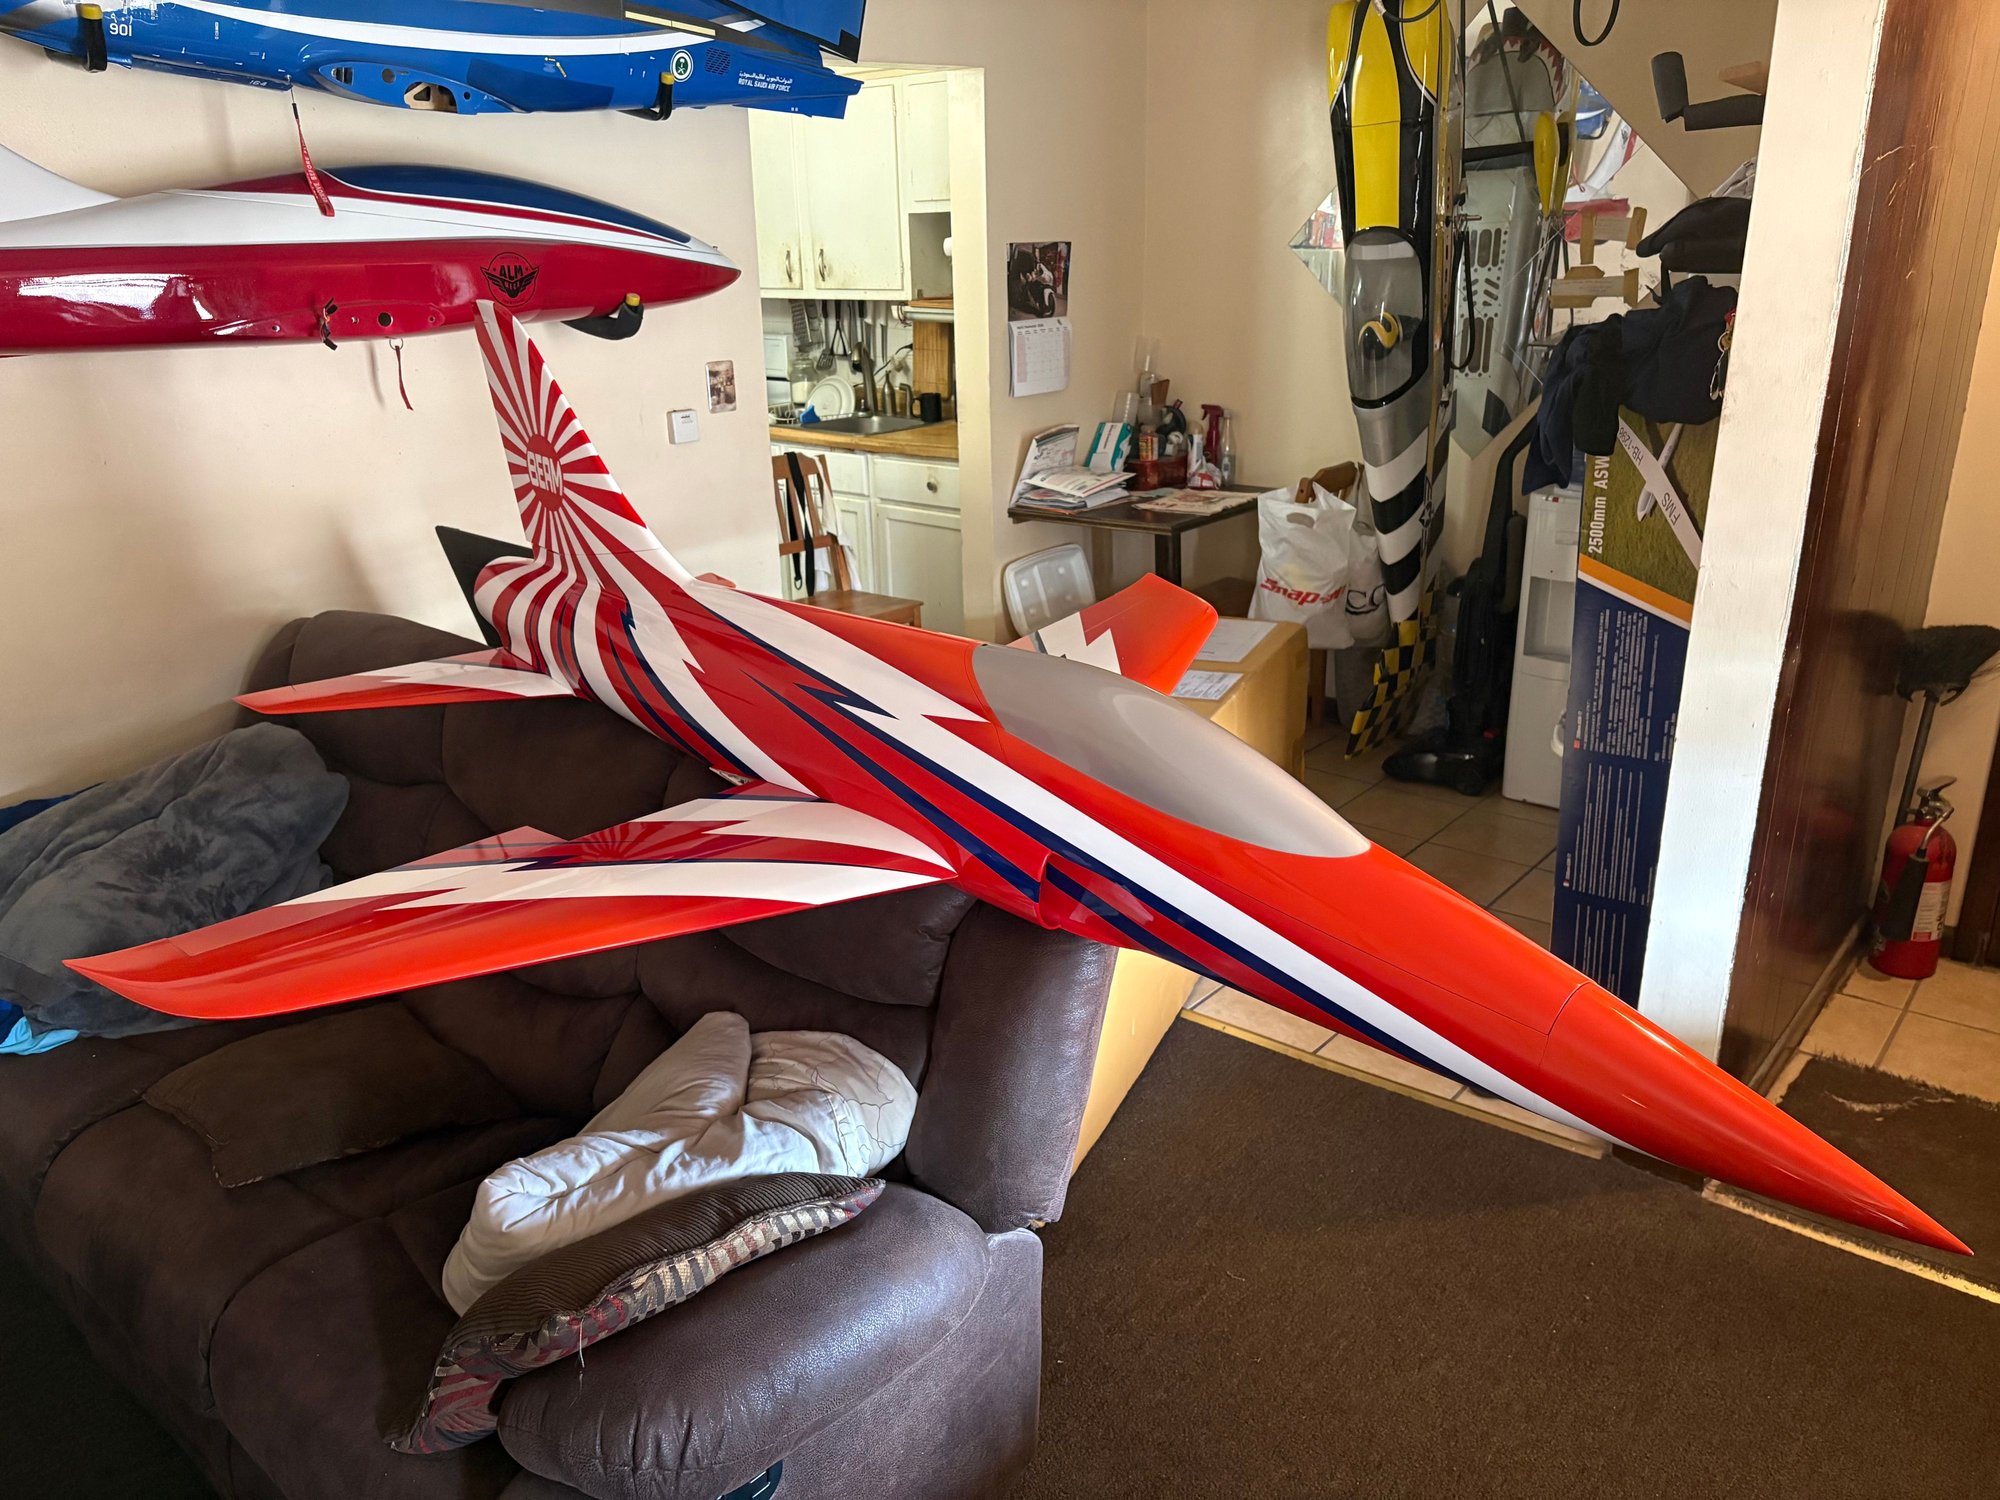
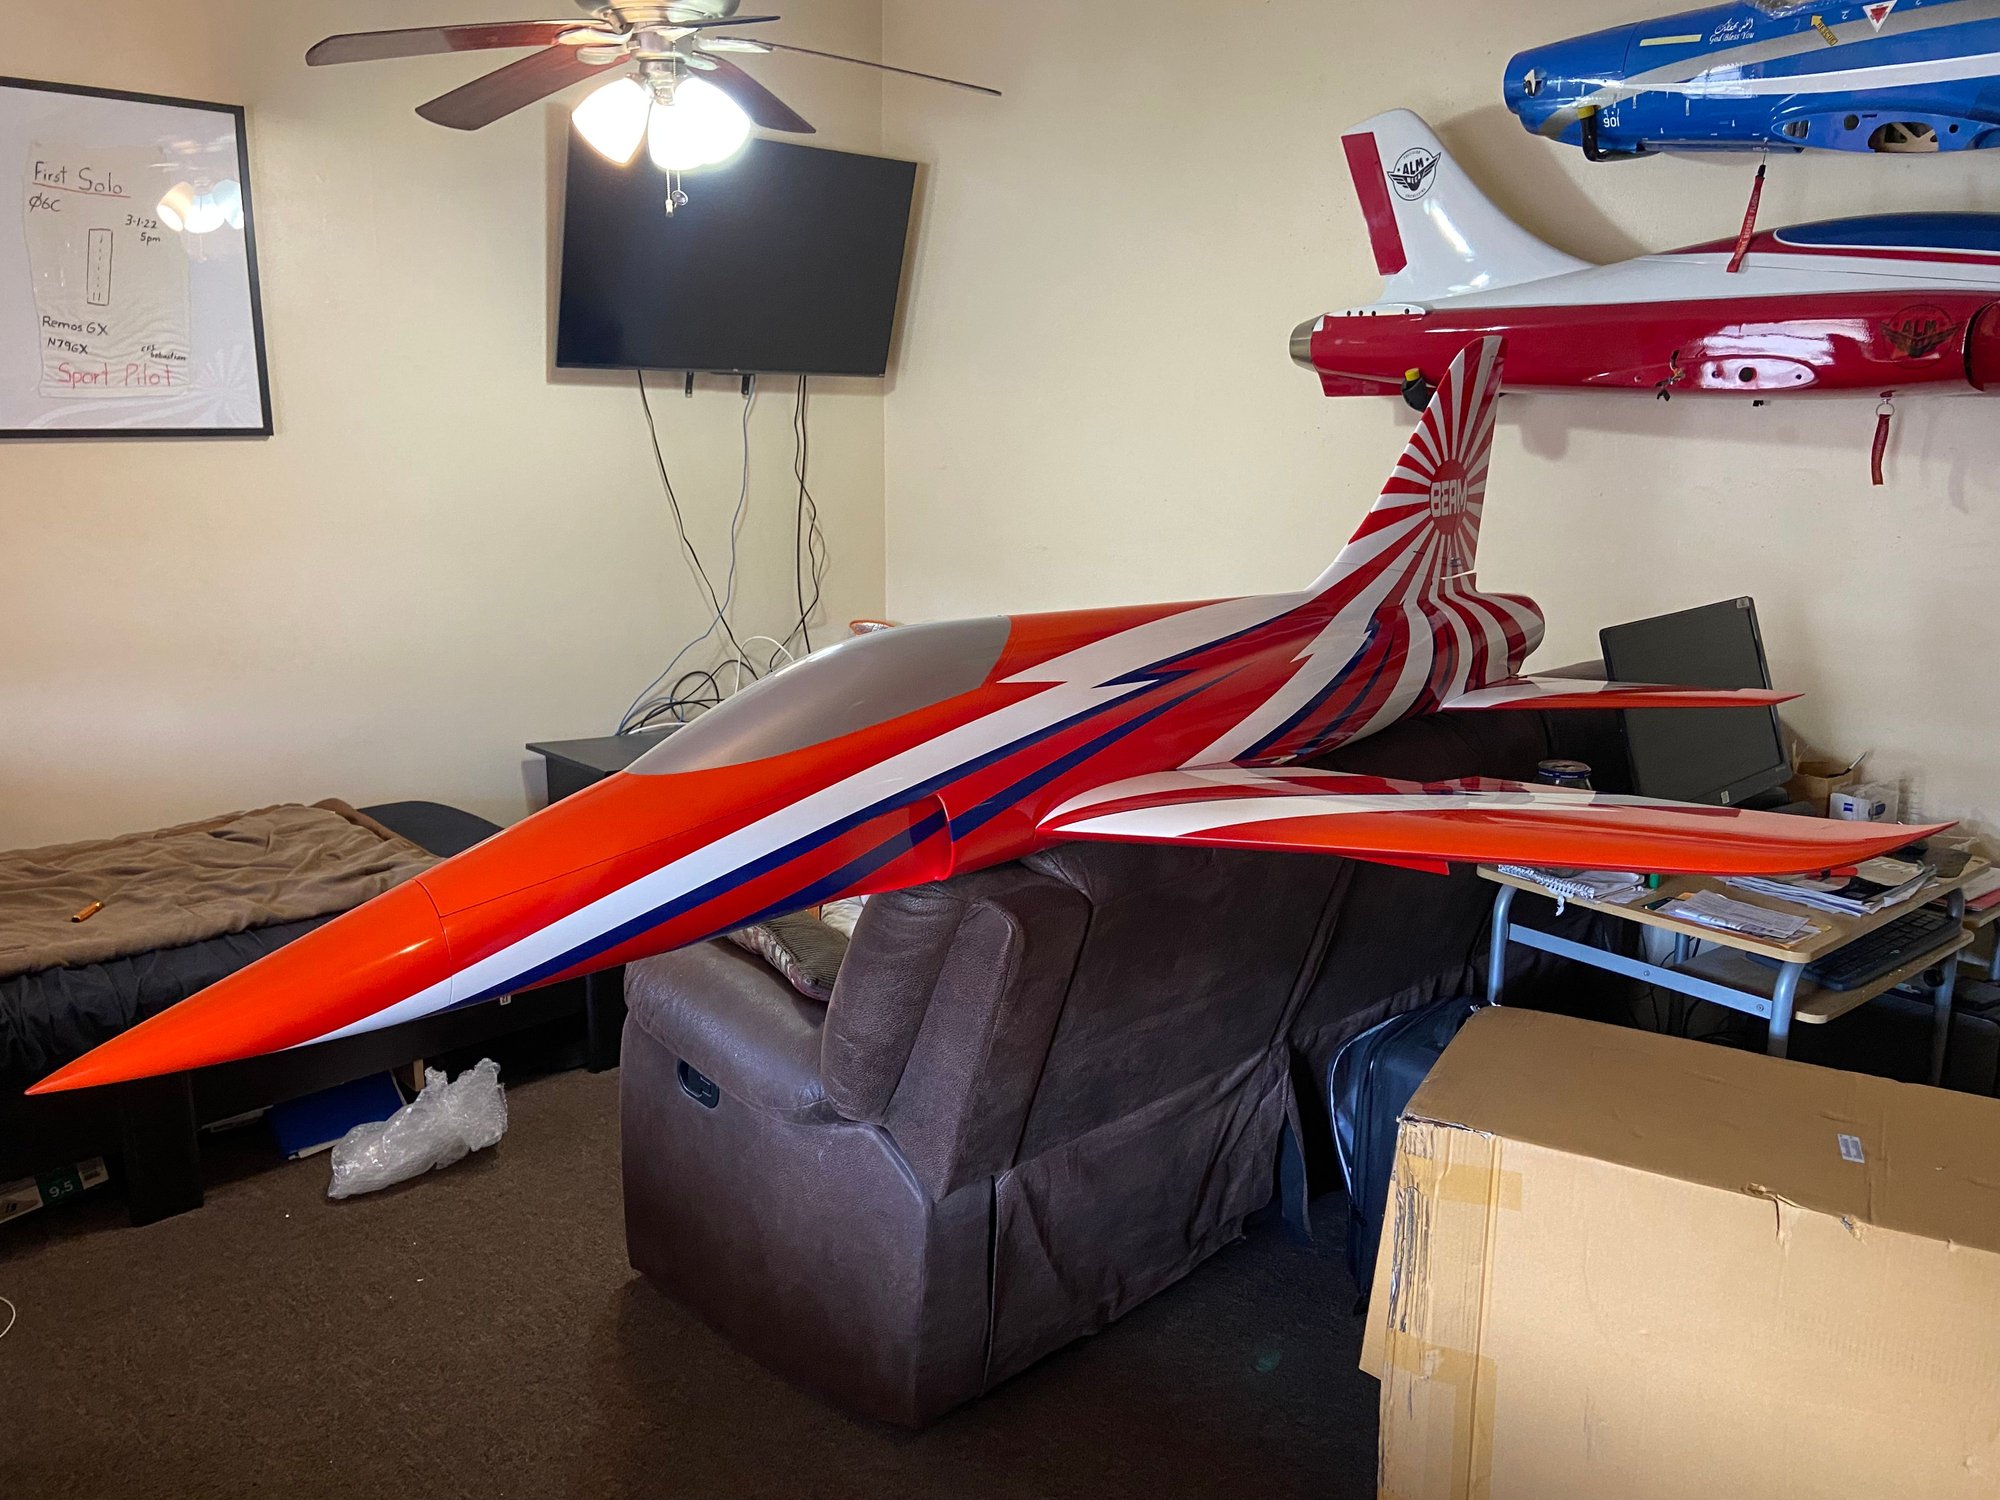
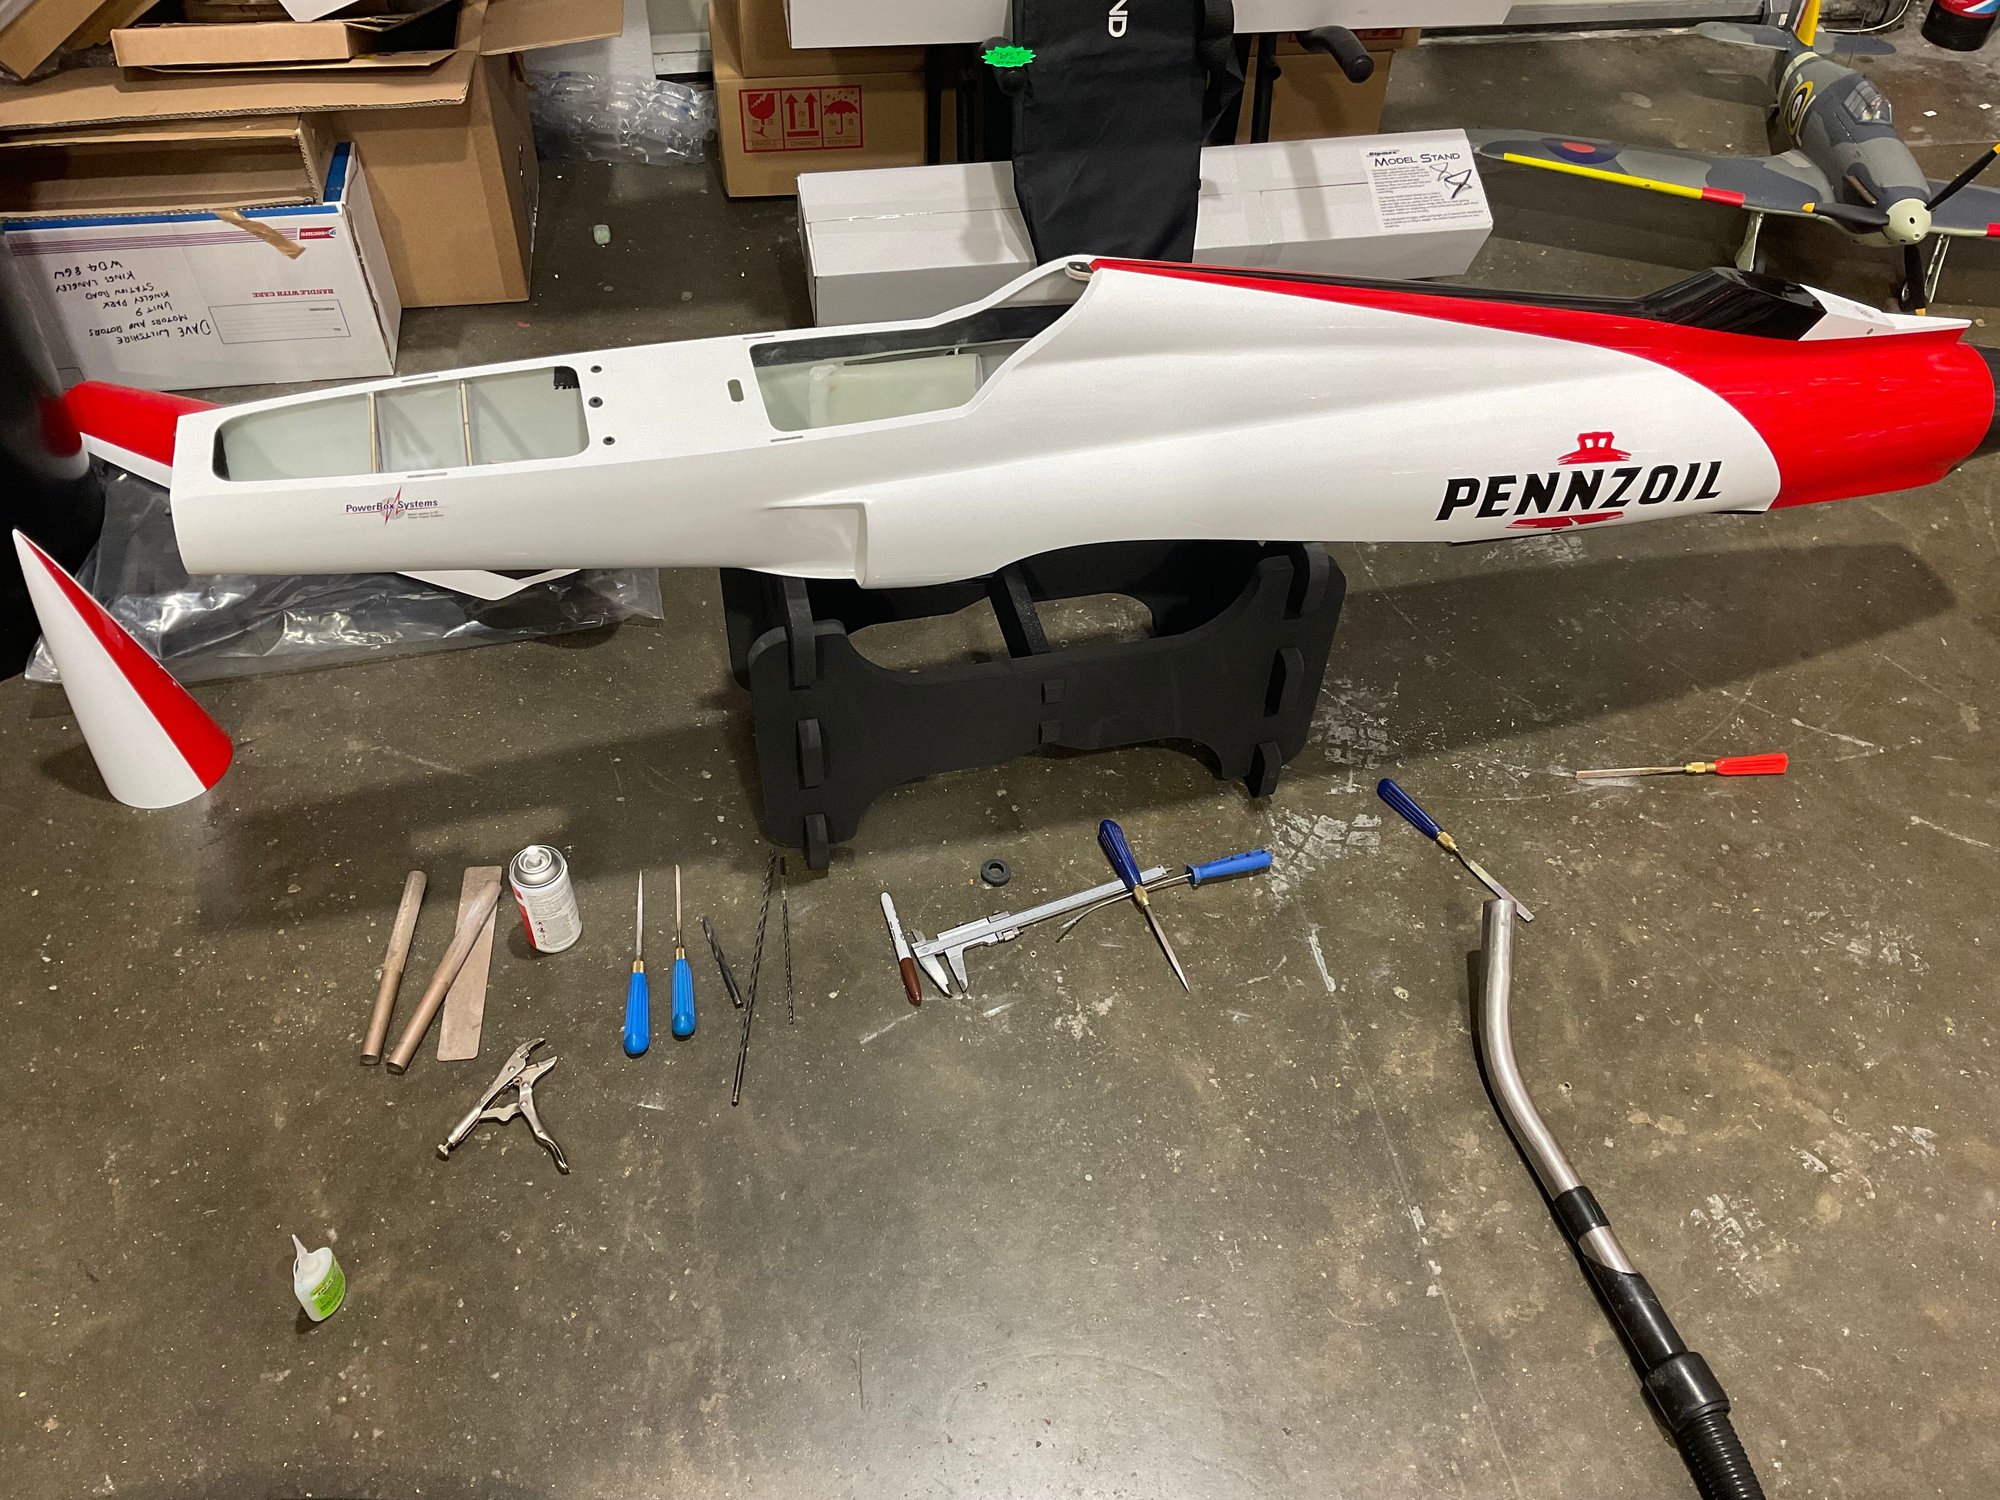
The biggest departure from previous CARF models was the choice to go for bag tanks. I have not seen anyone else using saddle style twin bags-to be honestly I wasn�t sure about bag tanks, being a creature of habbit! The flights I have had so far are faultless, I will update at the end of this information, after I would have completed more flights. 8 flights of two days so far.
The prototypes started the test flying program the month before JetPower 2025 and the public debut happened at the show�like all important new jet related products.
There was plenty of interest and the orders came in over the three show days-and continued after.
I had my first order in before the show and received my first kit mid December 2025. The normal process these days is to post it on various platforms, I like to do things in my own time without friends asking every day when it is going to be finished! It also coincided with a busy period for one of my businesses and some travel- the weather in the UK has also been particularly poor, so nothing to provide an incentive to make extra workshop time.
Having an early kit allowed me to feed back information to the factory, so future kits have correct hardware sizes and a few other changes that I found during my build. Now I have had a few flights on mine I was ready to post here.
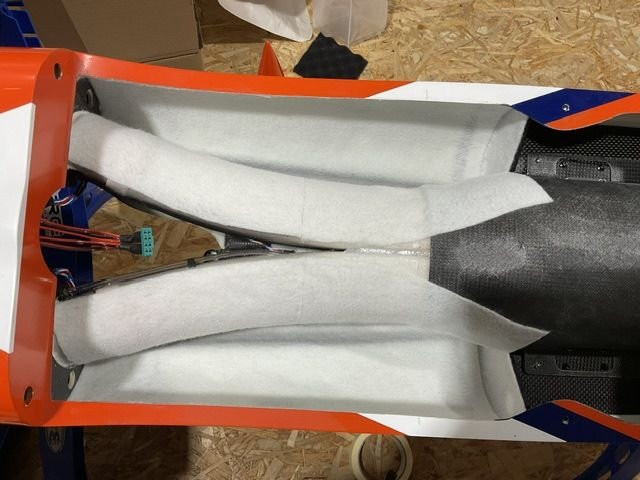
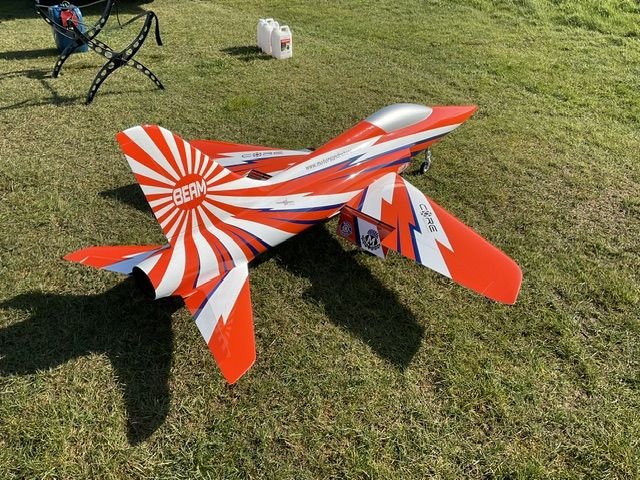
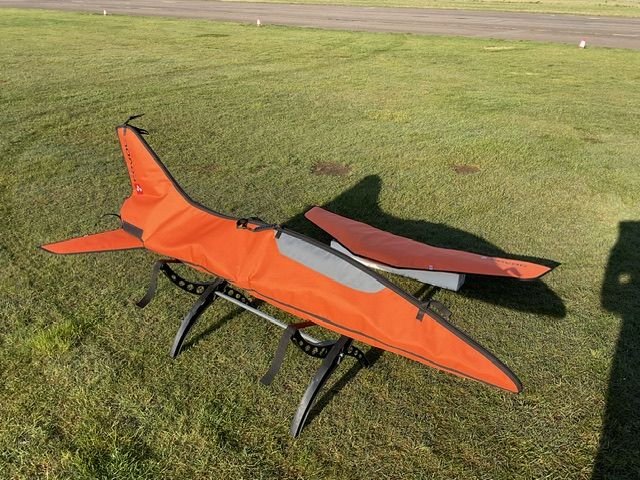
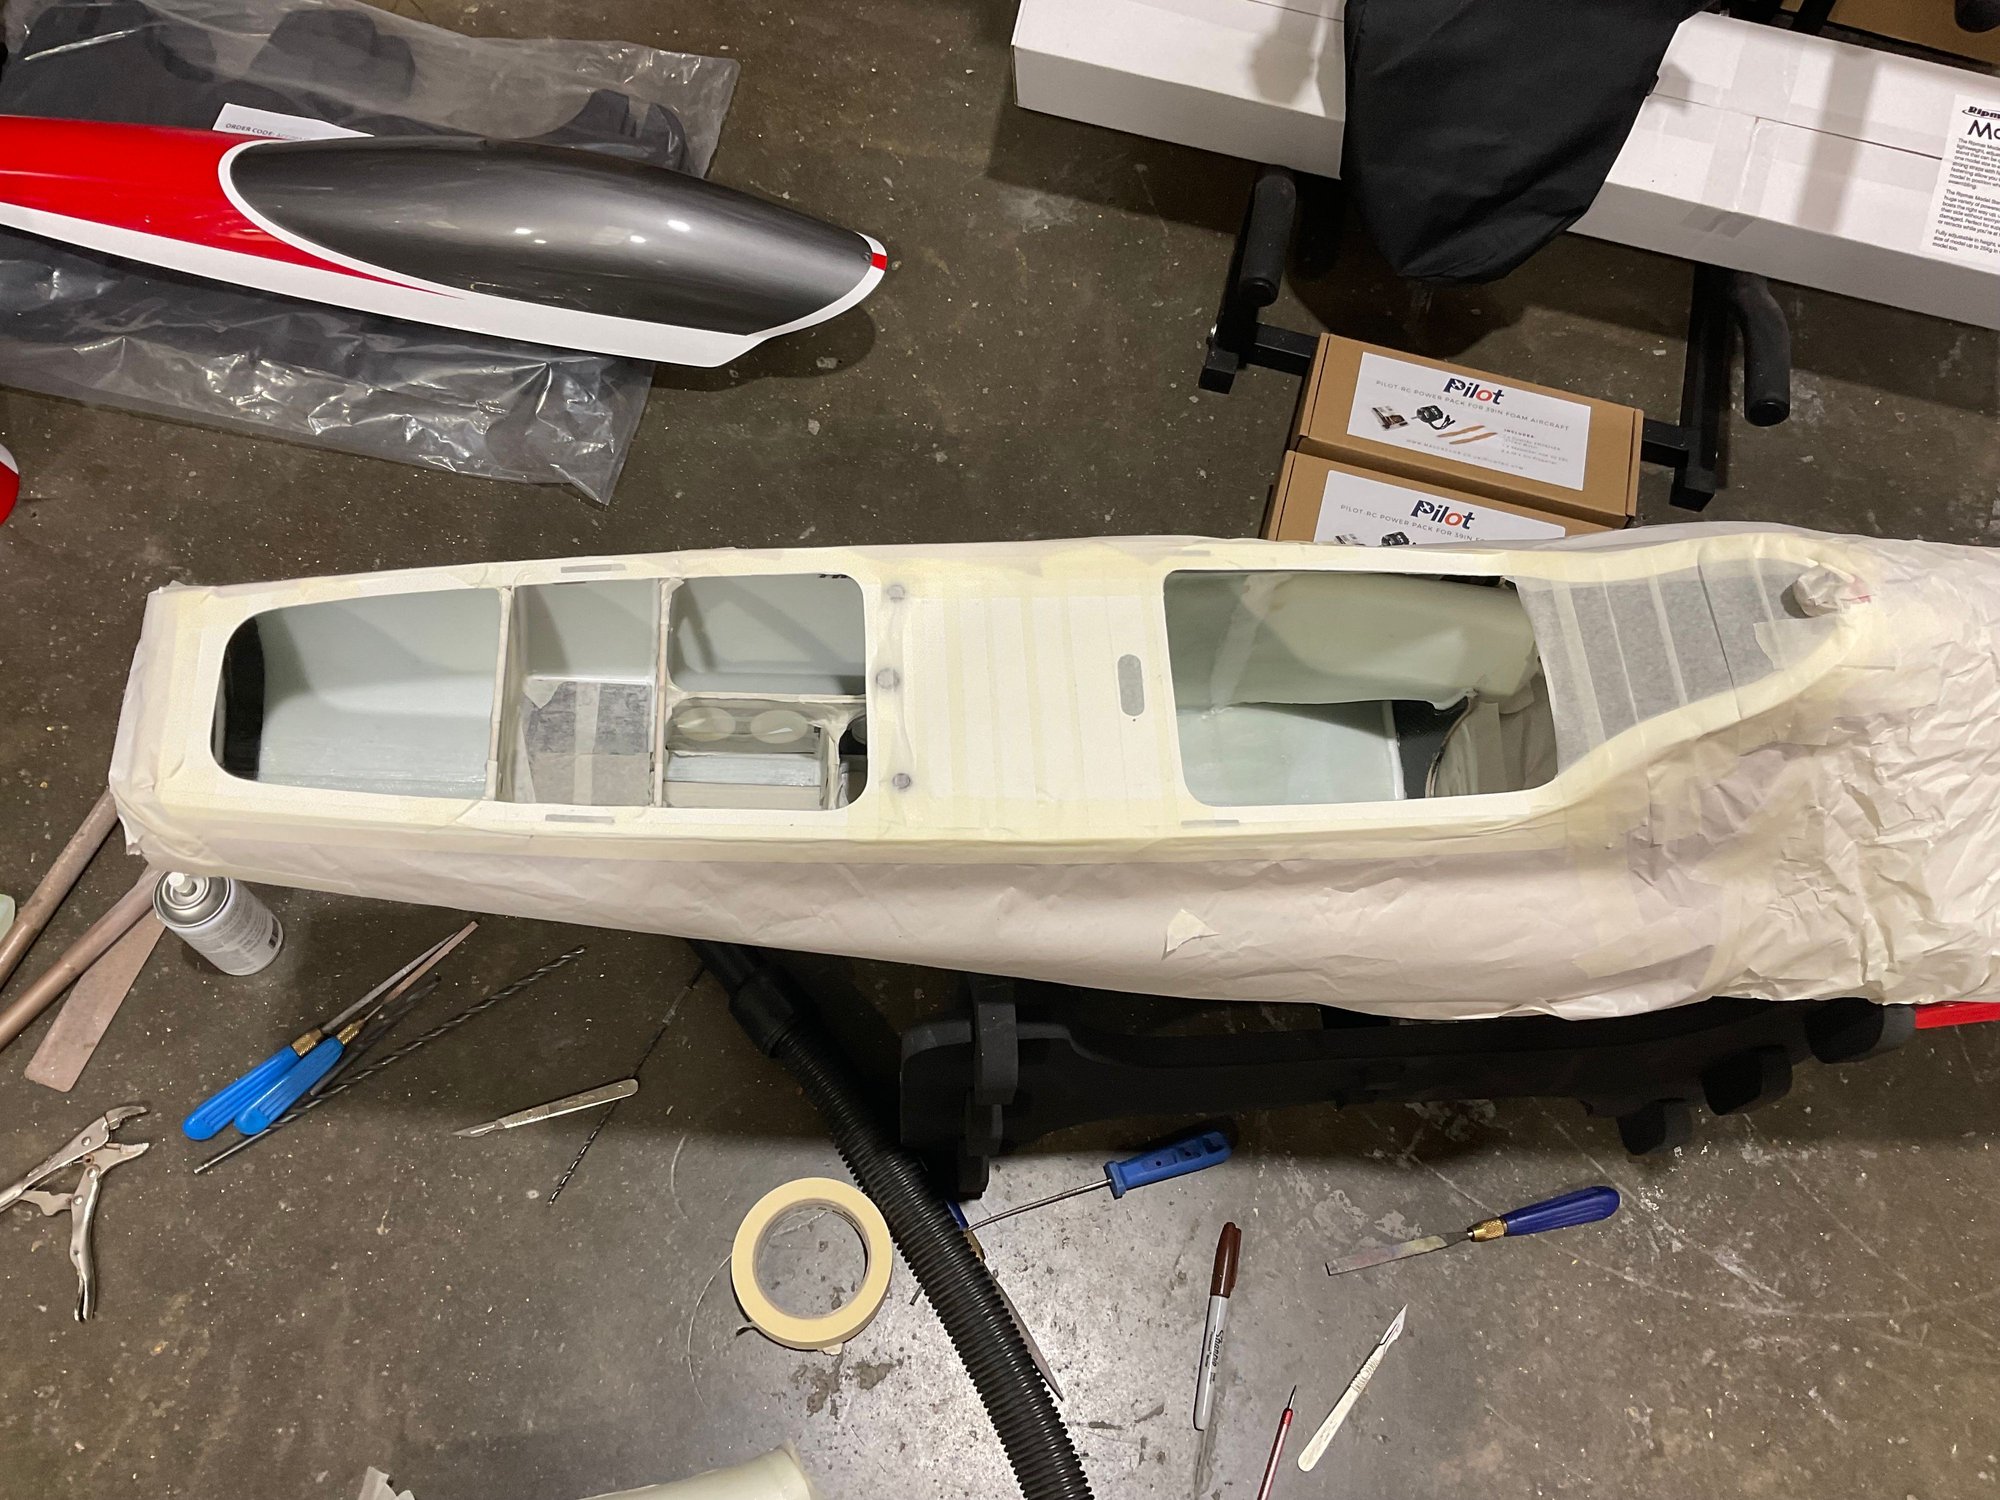
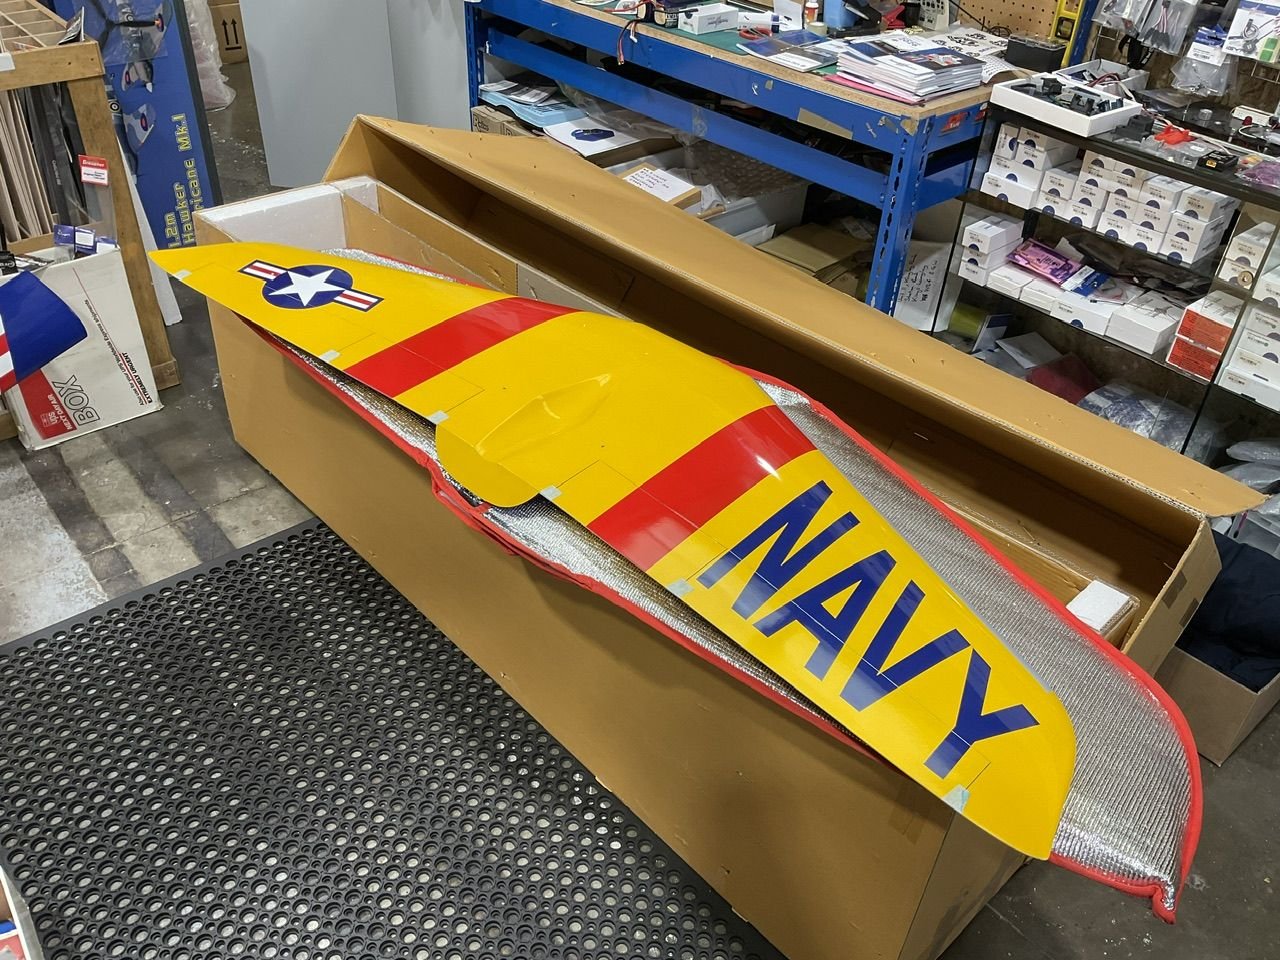
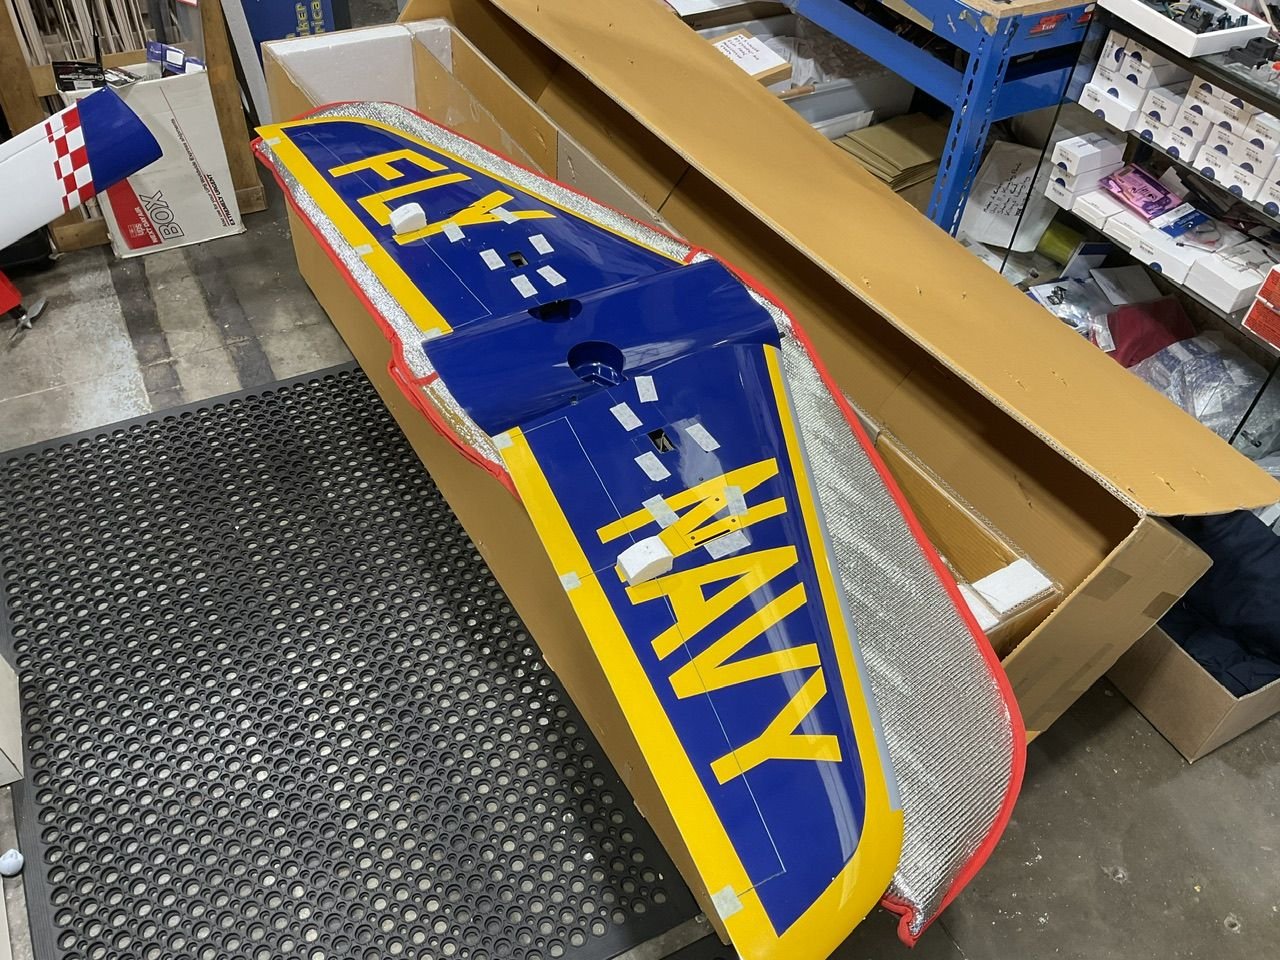
The Beam (Beam of light to follow the family name theme) features a removable vertical fin. Early kits have the carbon spar glued into the fuselage, which means with the fin removed there is still a carbon tube sticking out. Now all kits have the carbon tube bonded into the vertical fin and the fixing screw is in the fuselage. This does not bother me on my first Beam as I will transport with the fin on. Having an early kit also allowed me to work with Revoc to get the fuselage and tailplane bags designed, they had tried to work with the factory, but it is difficult with the factory on the other side of the World-So they sent test bags that I was able to try on my airframe and we modified the shape so when my actual bag set arrived they fitted perfectly.
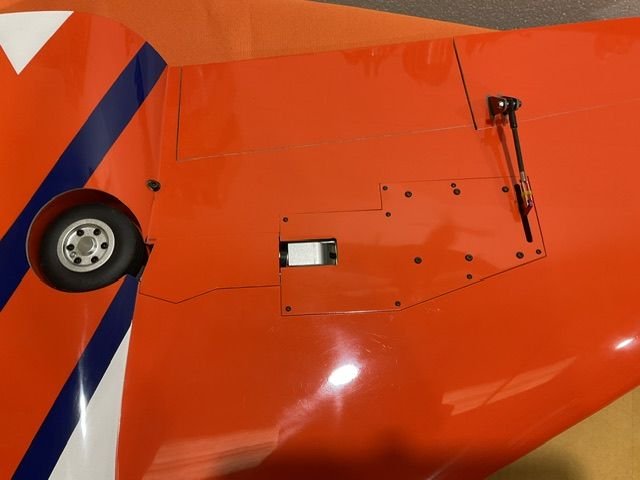
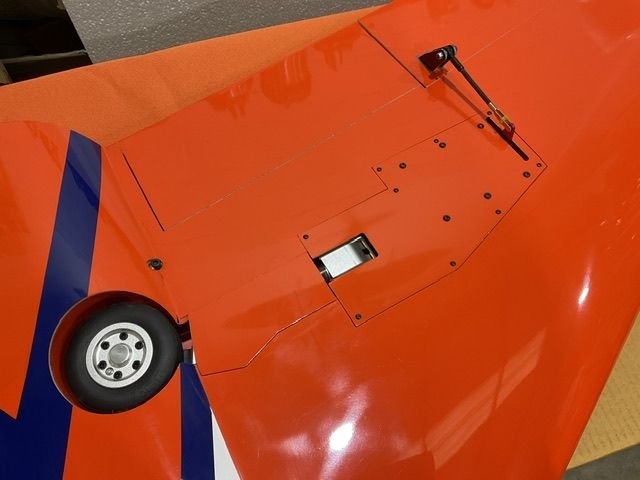
One thing owners will like is that the Beam can be completely assembled at the field with one 3mm Allen key. The Beam has been designed with ease of use and also transport-my kits came by air because the box is short enough.
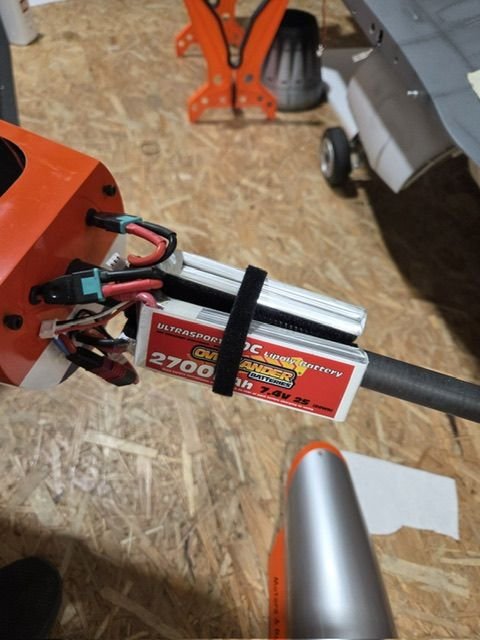
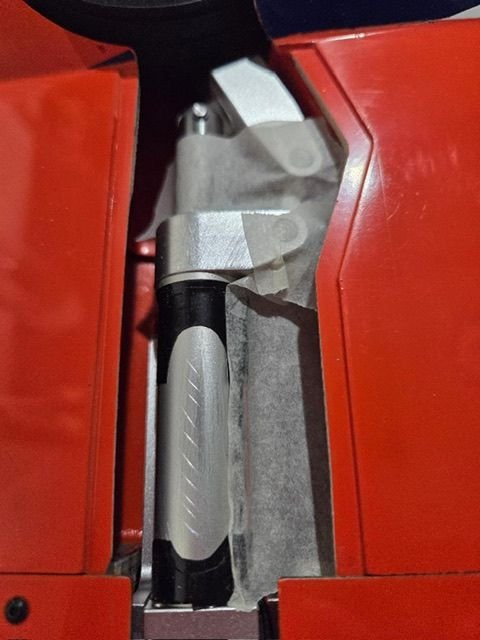
We regularly do weekend jet meetings and that involves charging the batteries. Rather than charge batteries in the airframe, most prefer to remove them. The CARF team are great at neat ideas, the nose cone is removable without tools using three key way screws to access the batteries. Rather than unstrap the batteries they are mounted to a carbon tube and this also turns and removes on a key way. This allows the batteries to be taken away to charge-super convenient.
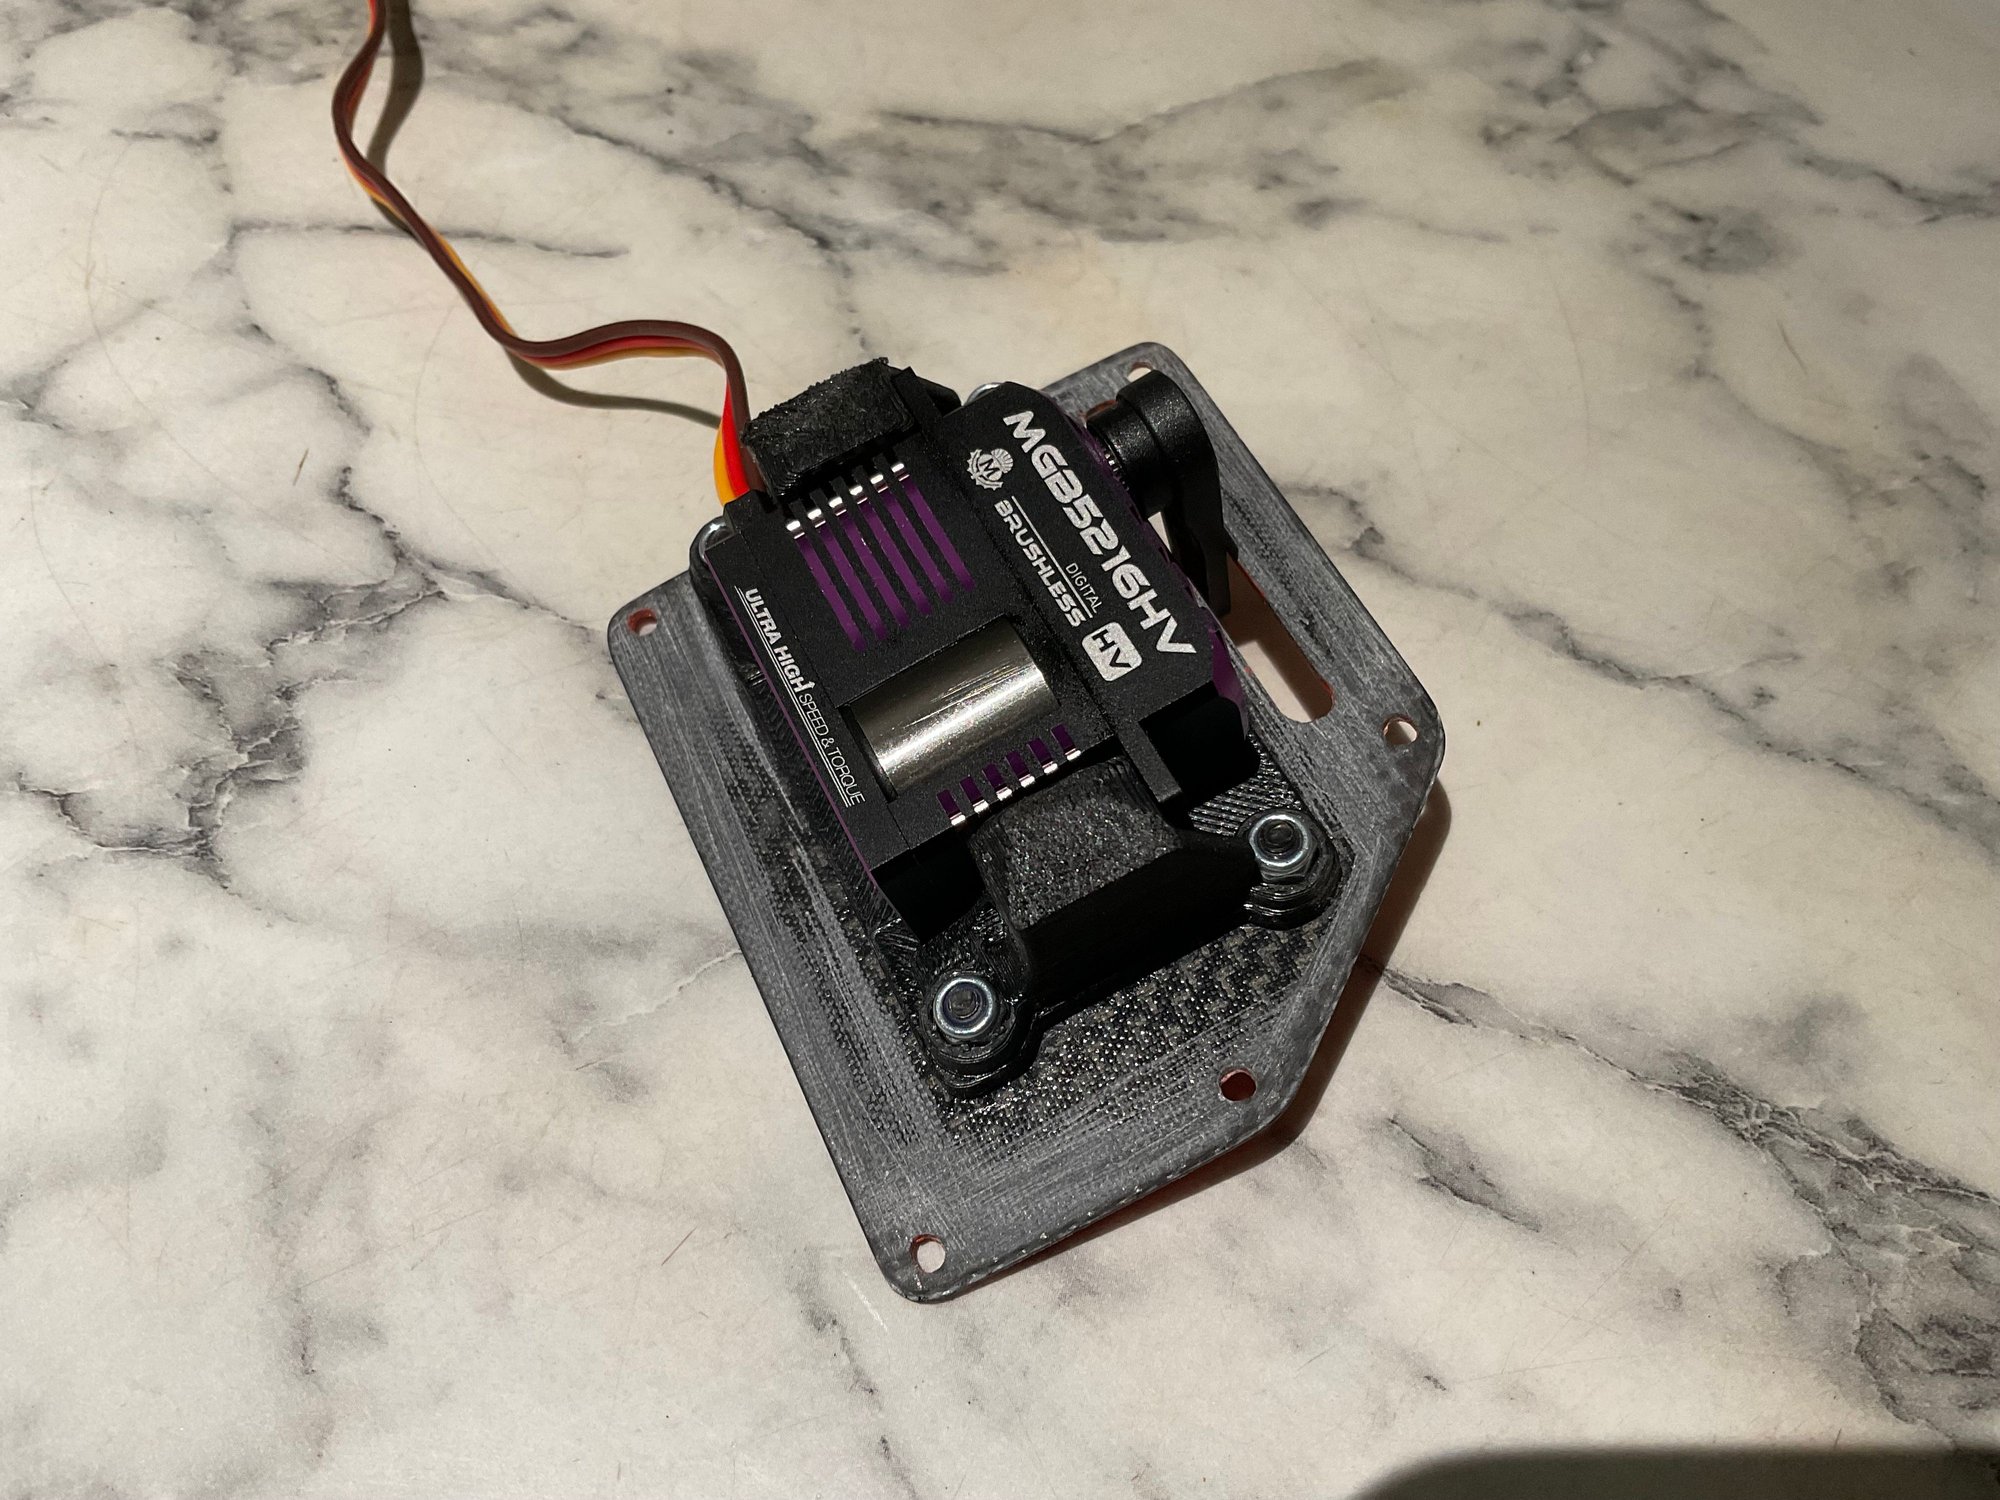
The servo size choice was also a team debate, I had a customer who wanted a light install on an Ultra Flash Evo, so I suggested the Midi MacGregor servo 5216. This is a 15mm wide servo, but 16kg torque. We flew Ultra Flash models with the JR 8411 at 11kg torque, so I knew the 16kg was more than enough. Would also be the same for the landing Flaps, but I worry they get knocked more and the smaller gears can be an issue, so full size servos on just the flaps. I chose the MacGregor 6928 which is way over torque, but a great servo. Nose steering std MacGregor 5921 fits the JP nose steering mount.
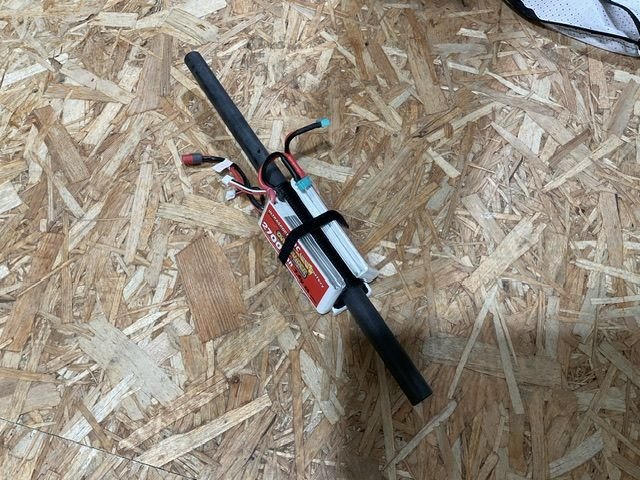
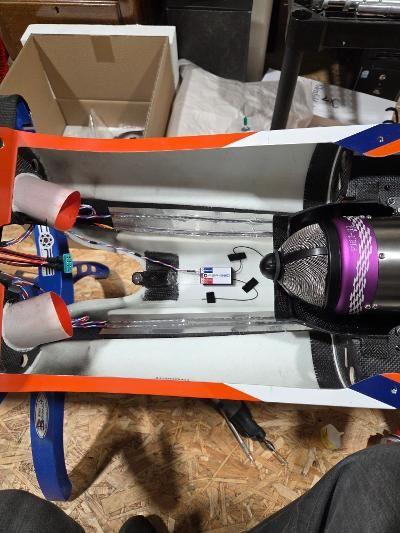
I would be flying my Beam with a Powerbox Core radio and chose a Pioneer to act as the central hub, 2 x 26D receivers and fed with 2 x 2s Li-Po batteries-I guessed 2700 2s and these ended up giving a perfect balance with a 2s 3700 ECU pack to feed my chosen JetCat P-150Rx-BL turbine.
I had already decided on JP retracts, I have them in my Ultra Flash Evo Art Scholl and 100+ flights they have been perfect!
I use a separate 2s Li-Po for the retract controller at 600mAh, I�m not a fan of shared batteries�
So far, the battery use is 90mAh per pack/per flight on the radio side and 20Mah on the retracts-brakes. So, plenty of flights- just turbine battery that will need charging during a normal weekend meeting.
I used CARF aluminium short arms after quite a bit of personal debate. I know the HD nylon arms are strong enough, but where I was going to use ball links I wanted the metal arm, so ended up using aluminium arms on all except the nose steering, where I use nylon to dampen any shock loads from the nose leg.
As designed the Beam uses spring steel clevis on the elevator servo arms. Because of the swept back tail design the hinge line is not 90 degrees to the servo arm swing. I know the spring steel clevis are able to flex and CARF fly their demo models like that, but I couldn�t do it. Luckily the kit includes two M3 ball links for the steering linkage, but my chosen JP retract option also includes a pushrod with ball links, so I used the two CARF supplied units on the servo arm end of the elevator pushrods.
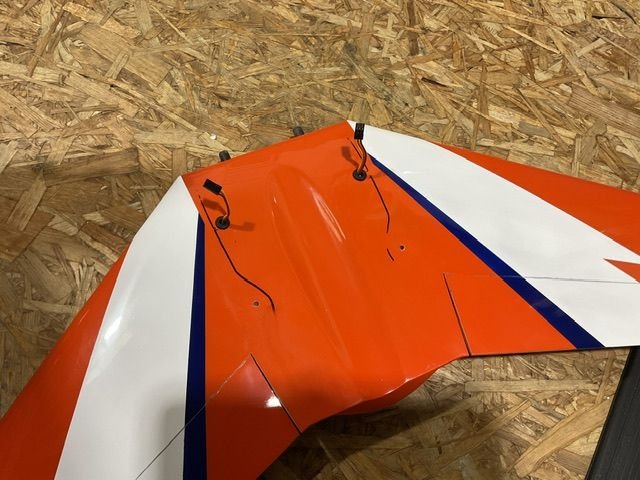
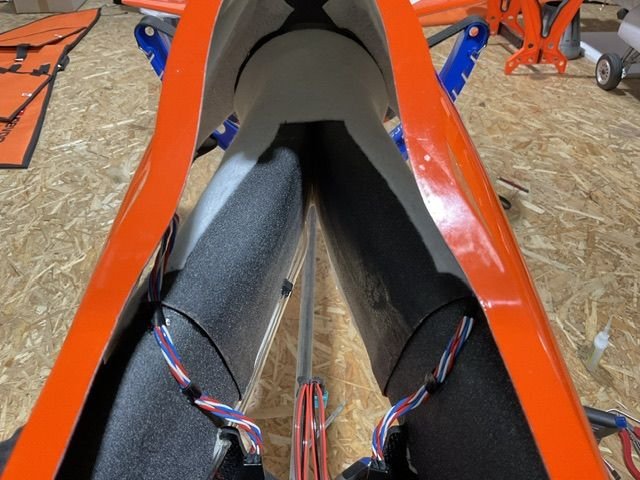
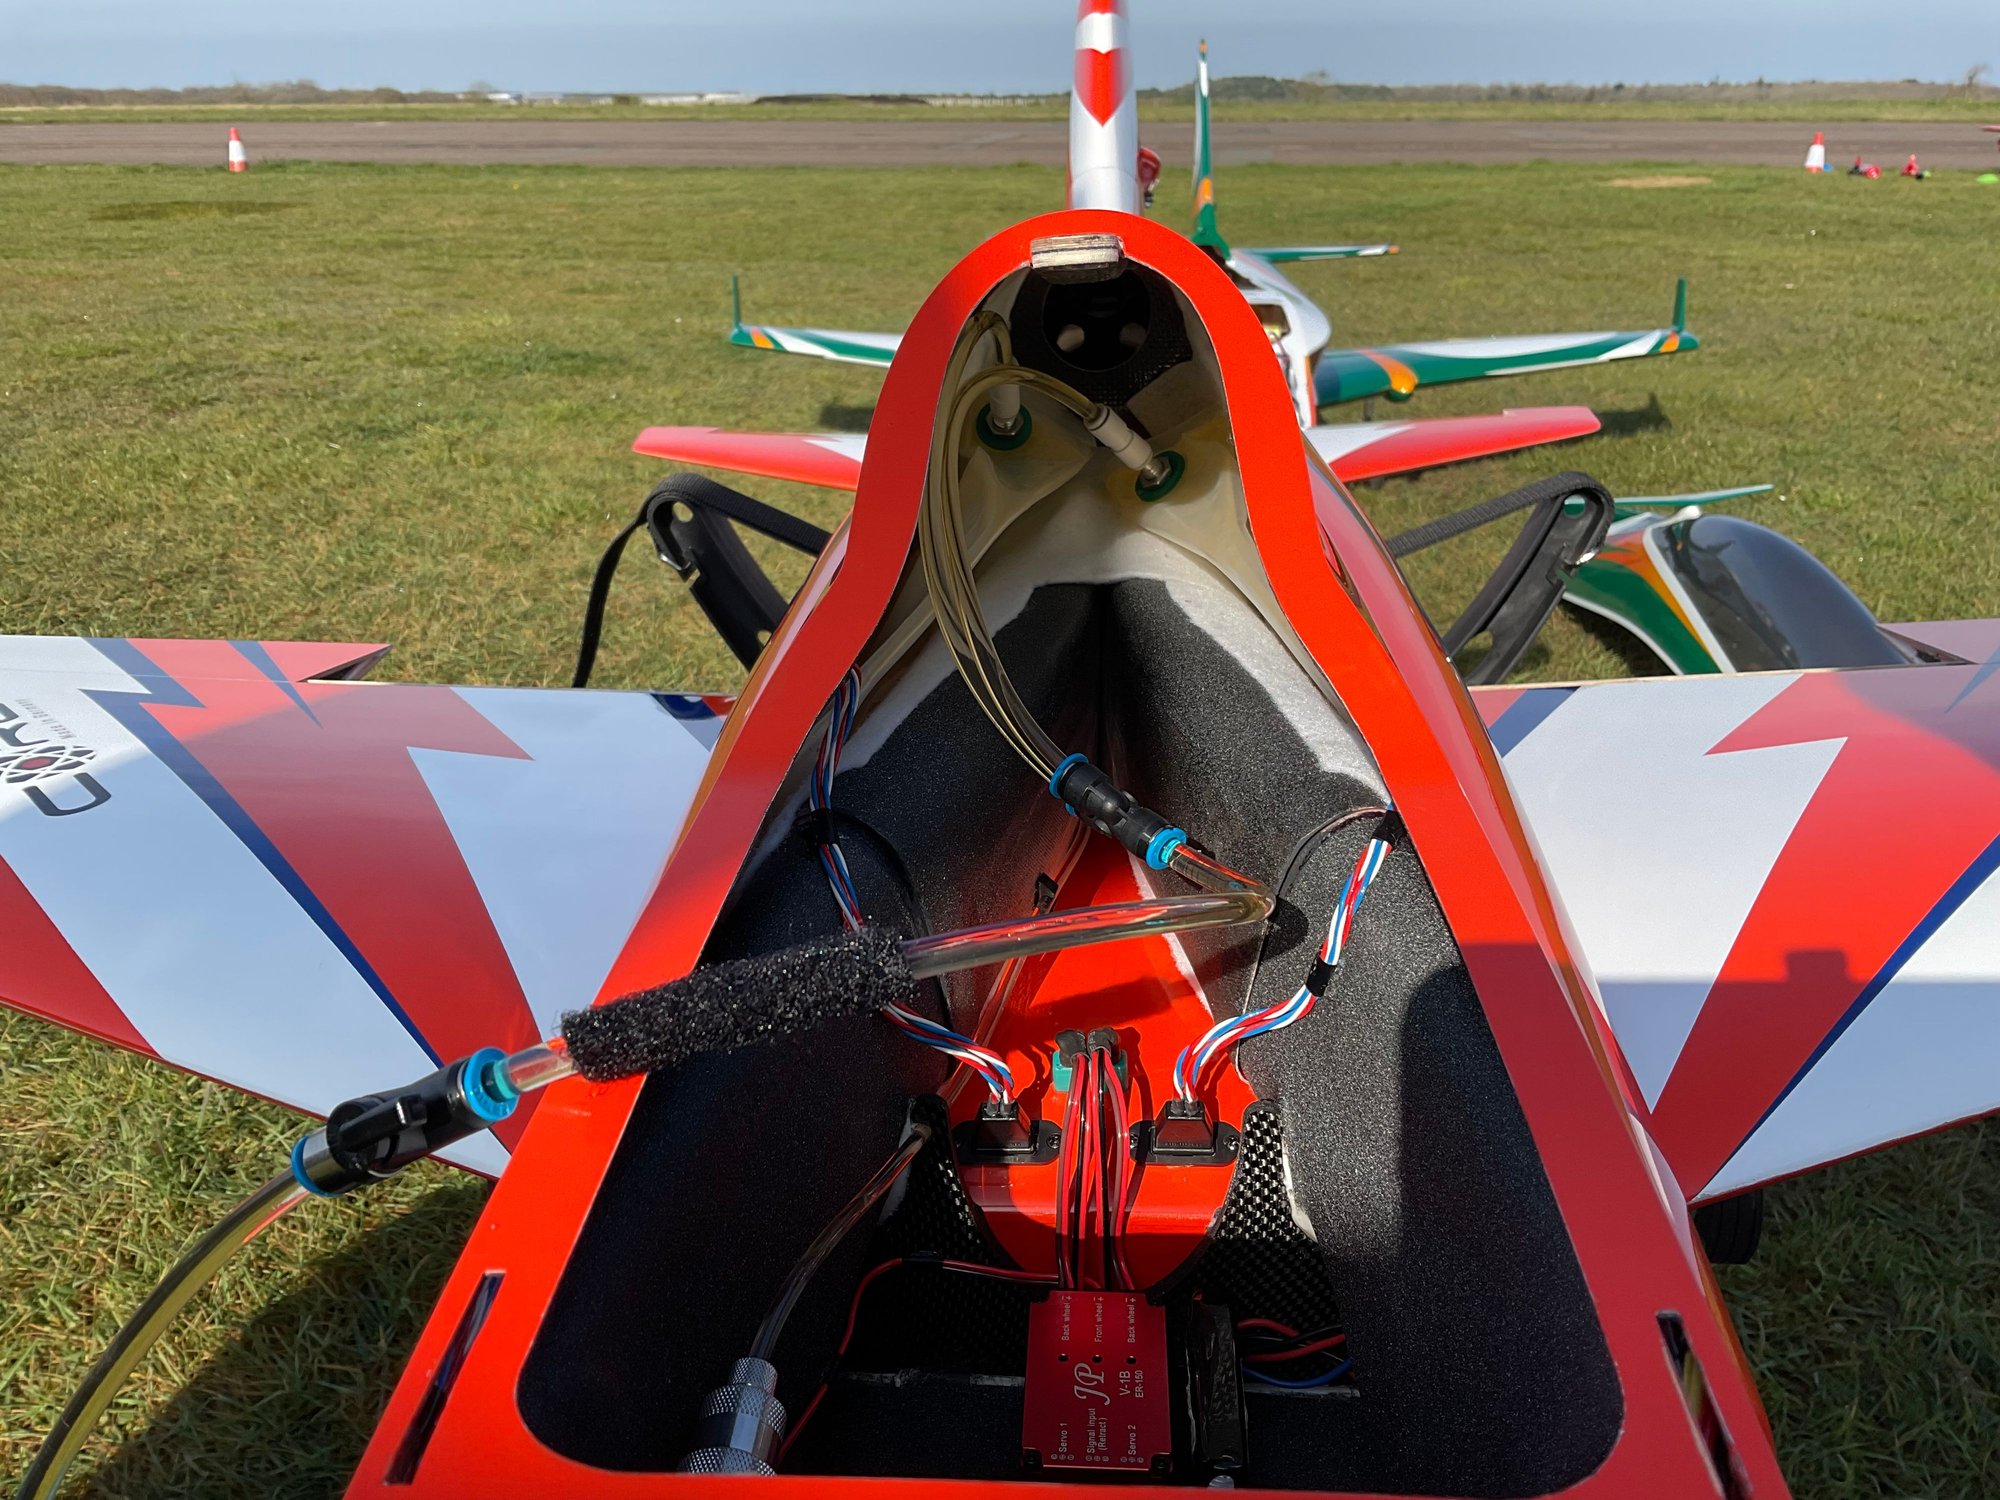
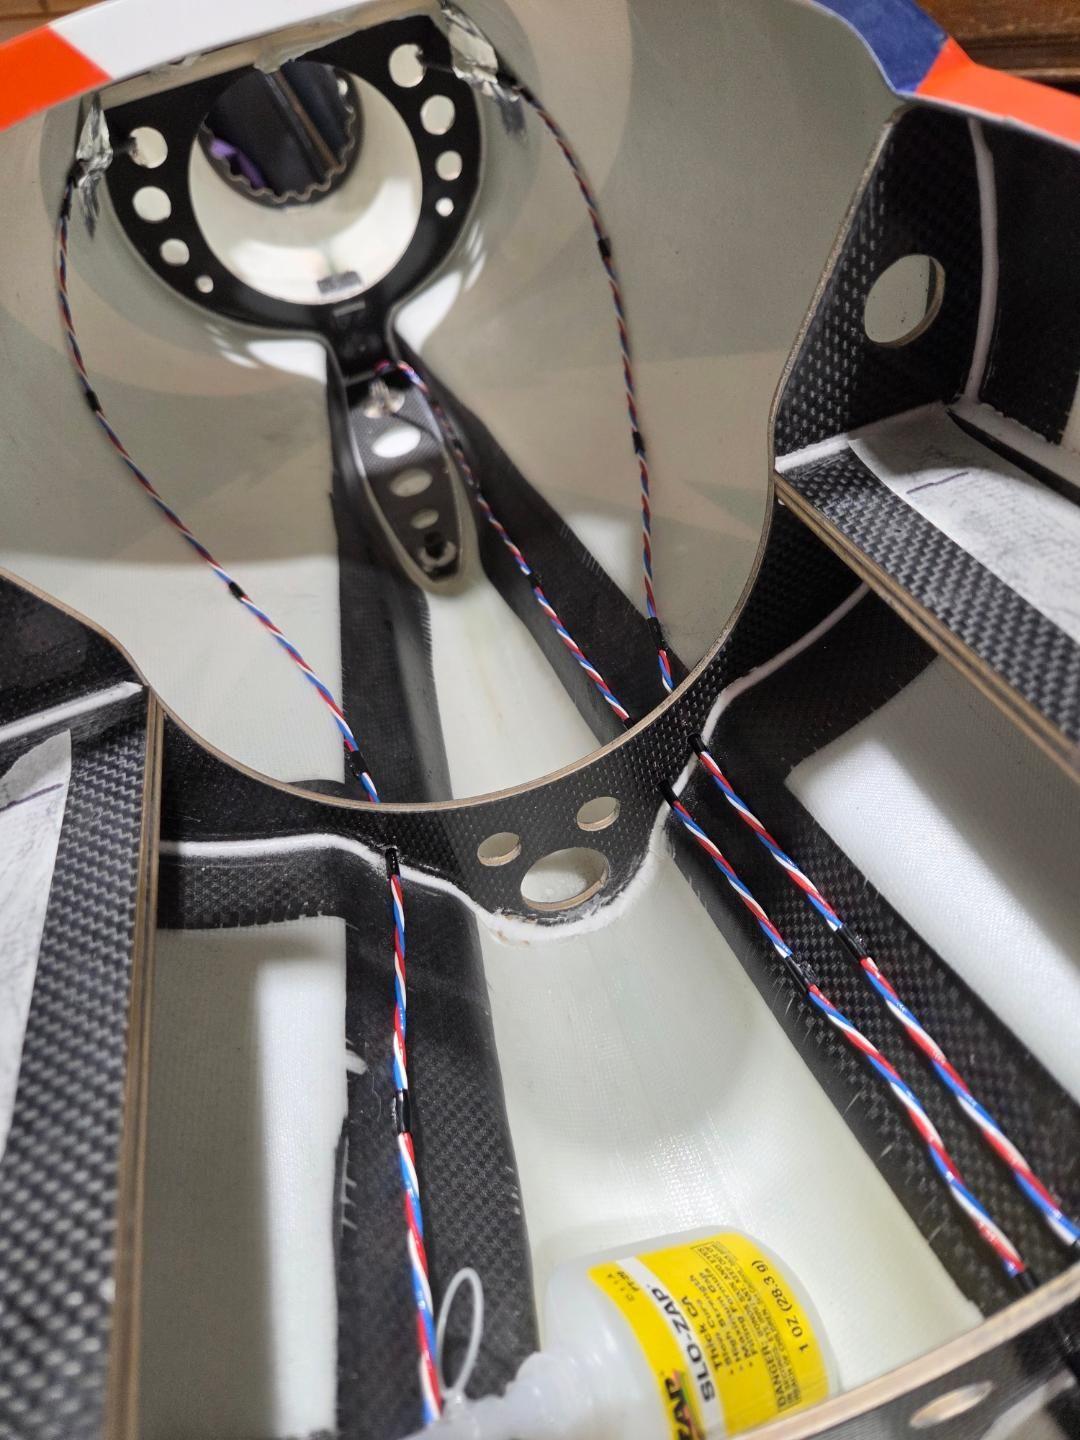
I alway build from the back and work forward. I decided to glue a servo lead male in the fin seat area and plug the rudder servo in directly. Carf show a single connection for the two elevator servos, but I decided to use std servo connectors one either side. I drew the fuselage tailplane seat on the tailplane so I knew where the leads could exit the top skin. Velcro holds these leads away from the tailpipe (although there is plenty of space) Finishing the tailplane and vertical fin was easy. The 3-D printed servo mounts accept the MacGregor servo perfectly-four M3 socket head screws, there are recesses for nyloc nuts. The screws in my kit were too short, but that is part of my feedback.
I swapped the screws supplied to hold the servo covers on, tailplane and wing to black screws I keep for this type of job.
My rudder pushrod required a long slot because of the offset servo. Later kits have a revised rudder horn geometry, so this should be easier. I just have my second Beam kit and will look at that as it is produced 3 months later.
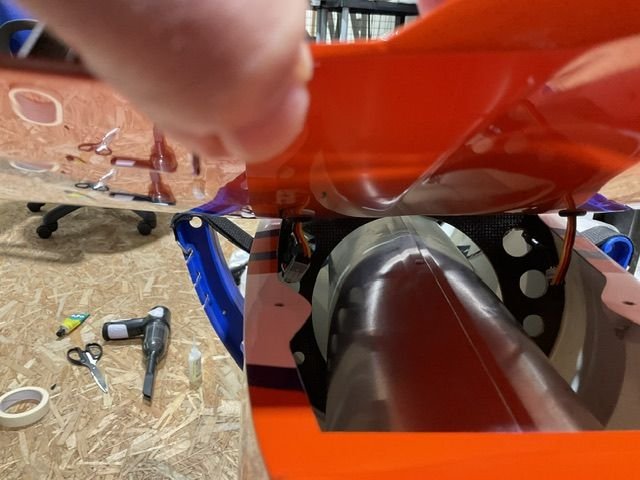
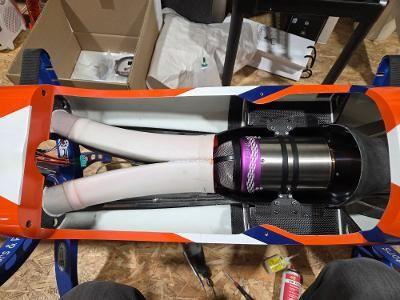
The tailpipe needs assembling, the holes are pre drilled, but you do need to ensure the pipe is square to the carbon turbine shrould. The tailpipe is supported at the back in a composite former the builder installs. I had to sand the opening to allow the tailpipe fit-hopefully this has been addressed too.
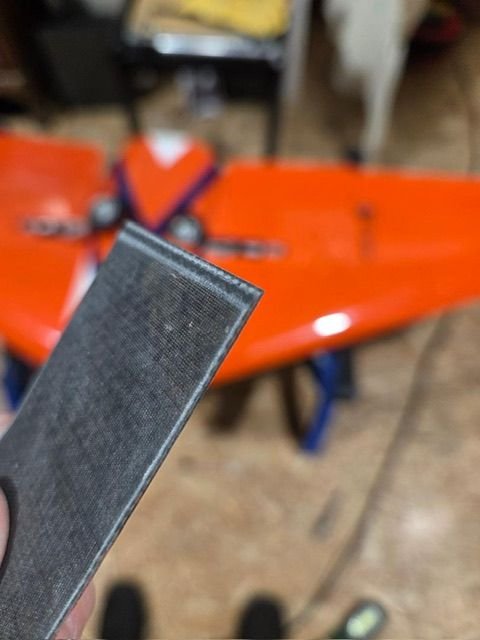
My chosen JetCat P-150 Rx-BL follows JetCat�s latest motor mount design where the mounting lugs are on the centreline. The P-130/150 is a small diameter turbine, so the mount needs spacer plates. The kit included Kingtech suitable plates. I made my own from scrap carbon sheet I had.
I�m posting this in the middle of a Jet meeting weekend, so will be back with more soon.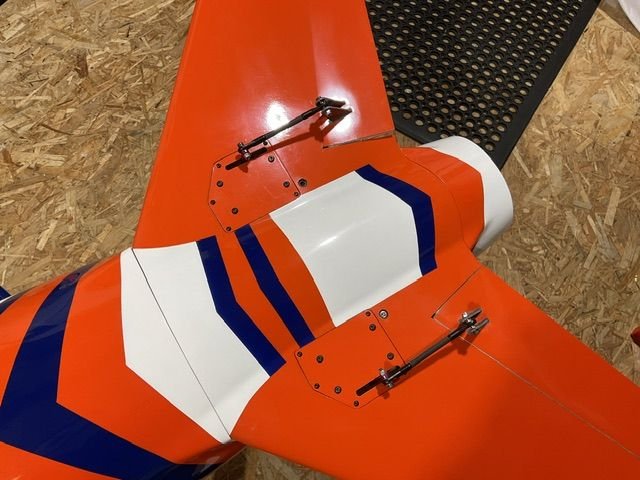


The Bolt was designed around the Ultra Lightning wing platform, so with the UL being big brother of the Ultra Flash, it was obvious the son of Bolt would use the UF wing platform. We did talk about a new wing, but since the UF wing worked great fast and slow it was decided to stick with it. I did push for some changes, the main one was moving the main gear back to increase the load on the nose wheel-this aids ground handling in a cross wind. Apparently, this sentence is easier to write than execute!
Experience with the Bolt prototype allowed changes to be agreed before the moulds were produced, the tailplane is also larger as a result.
The biggest departure from previous CARF models was the choice to go for bag tanks. I have not seen anyone else using saddle style twin bags-to be honestly I wasn�t sure about bag tanks, being a creature of habbit! The flights I have had so far are faultless, I will update at the end of this information, after I would have completed more flights. 8 flights of two days so far.
The prototypes started the test flying program the month before JetPower 2025 and the public debut happened at the show�like all important new jet related products.
There was plenty of interest and the orders came in over the three show days-and continued after.
I had my first order in before the show and received my first kit mid December 2025. The normal process these days is to post it on various platforms, I like to do things in my own time without friends asking every day when it is going to be finished! It also coincided with a busy period for one of my businesses and some travel- the weather in the UK has also been particularly poor, so nothing to provide an incentive to make extra workshop time.
Having an early kit allowed me to feed back information to the factory, so future kits have correct hardware sizes and a few other changes that I found during my build. Now I have had a few flights on mine I was ready to post here.
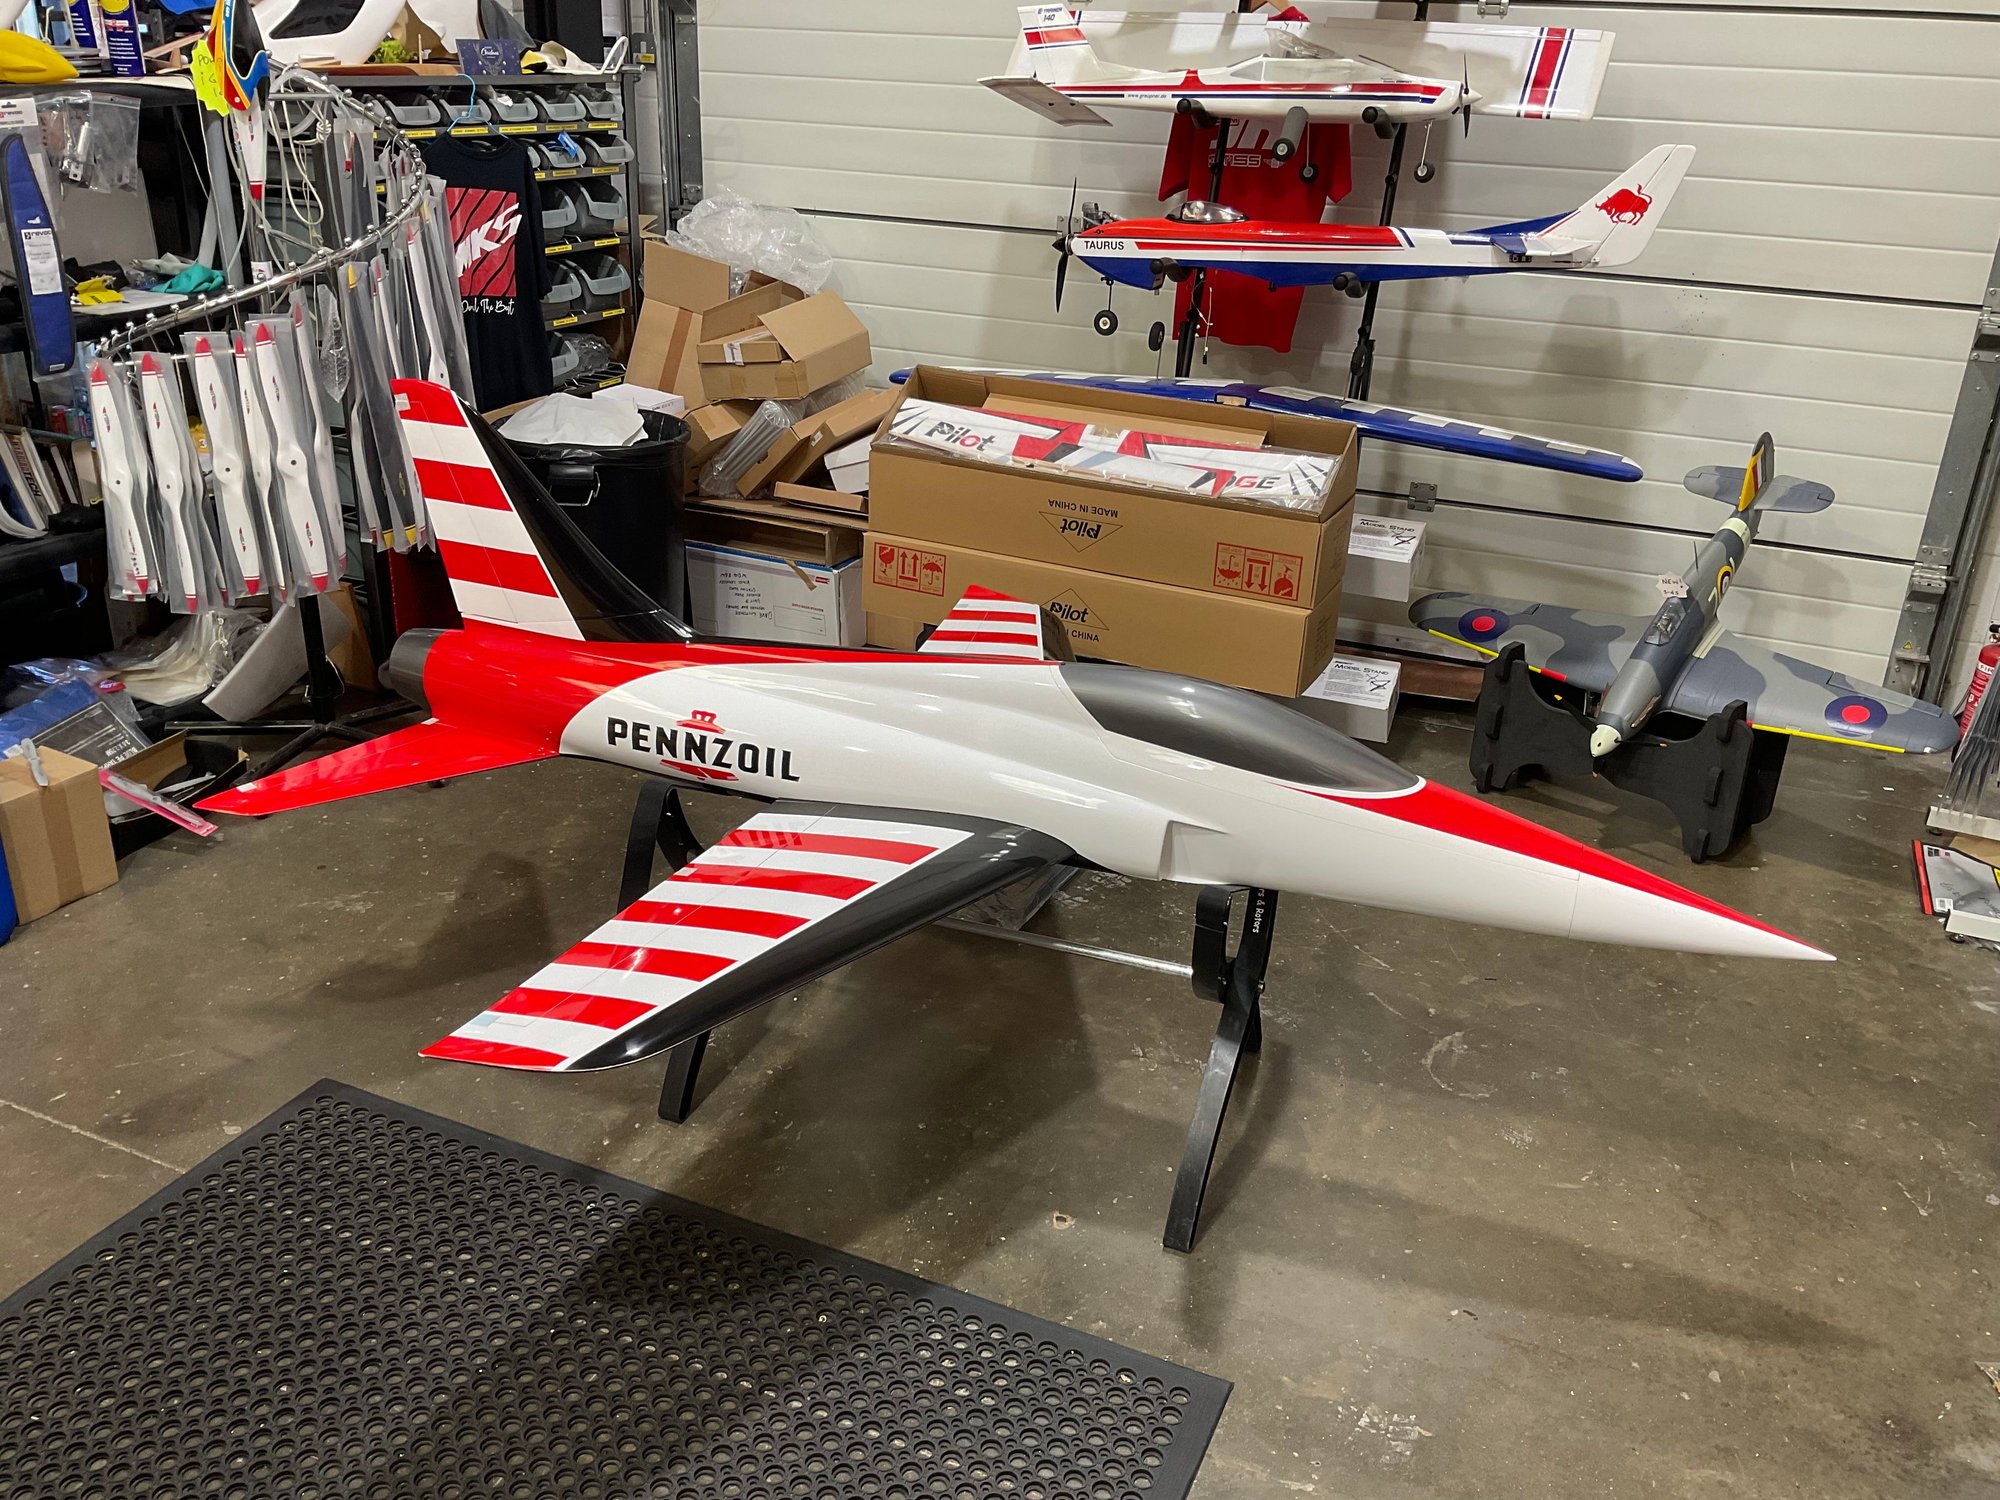
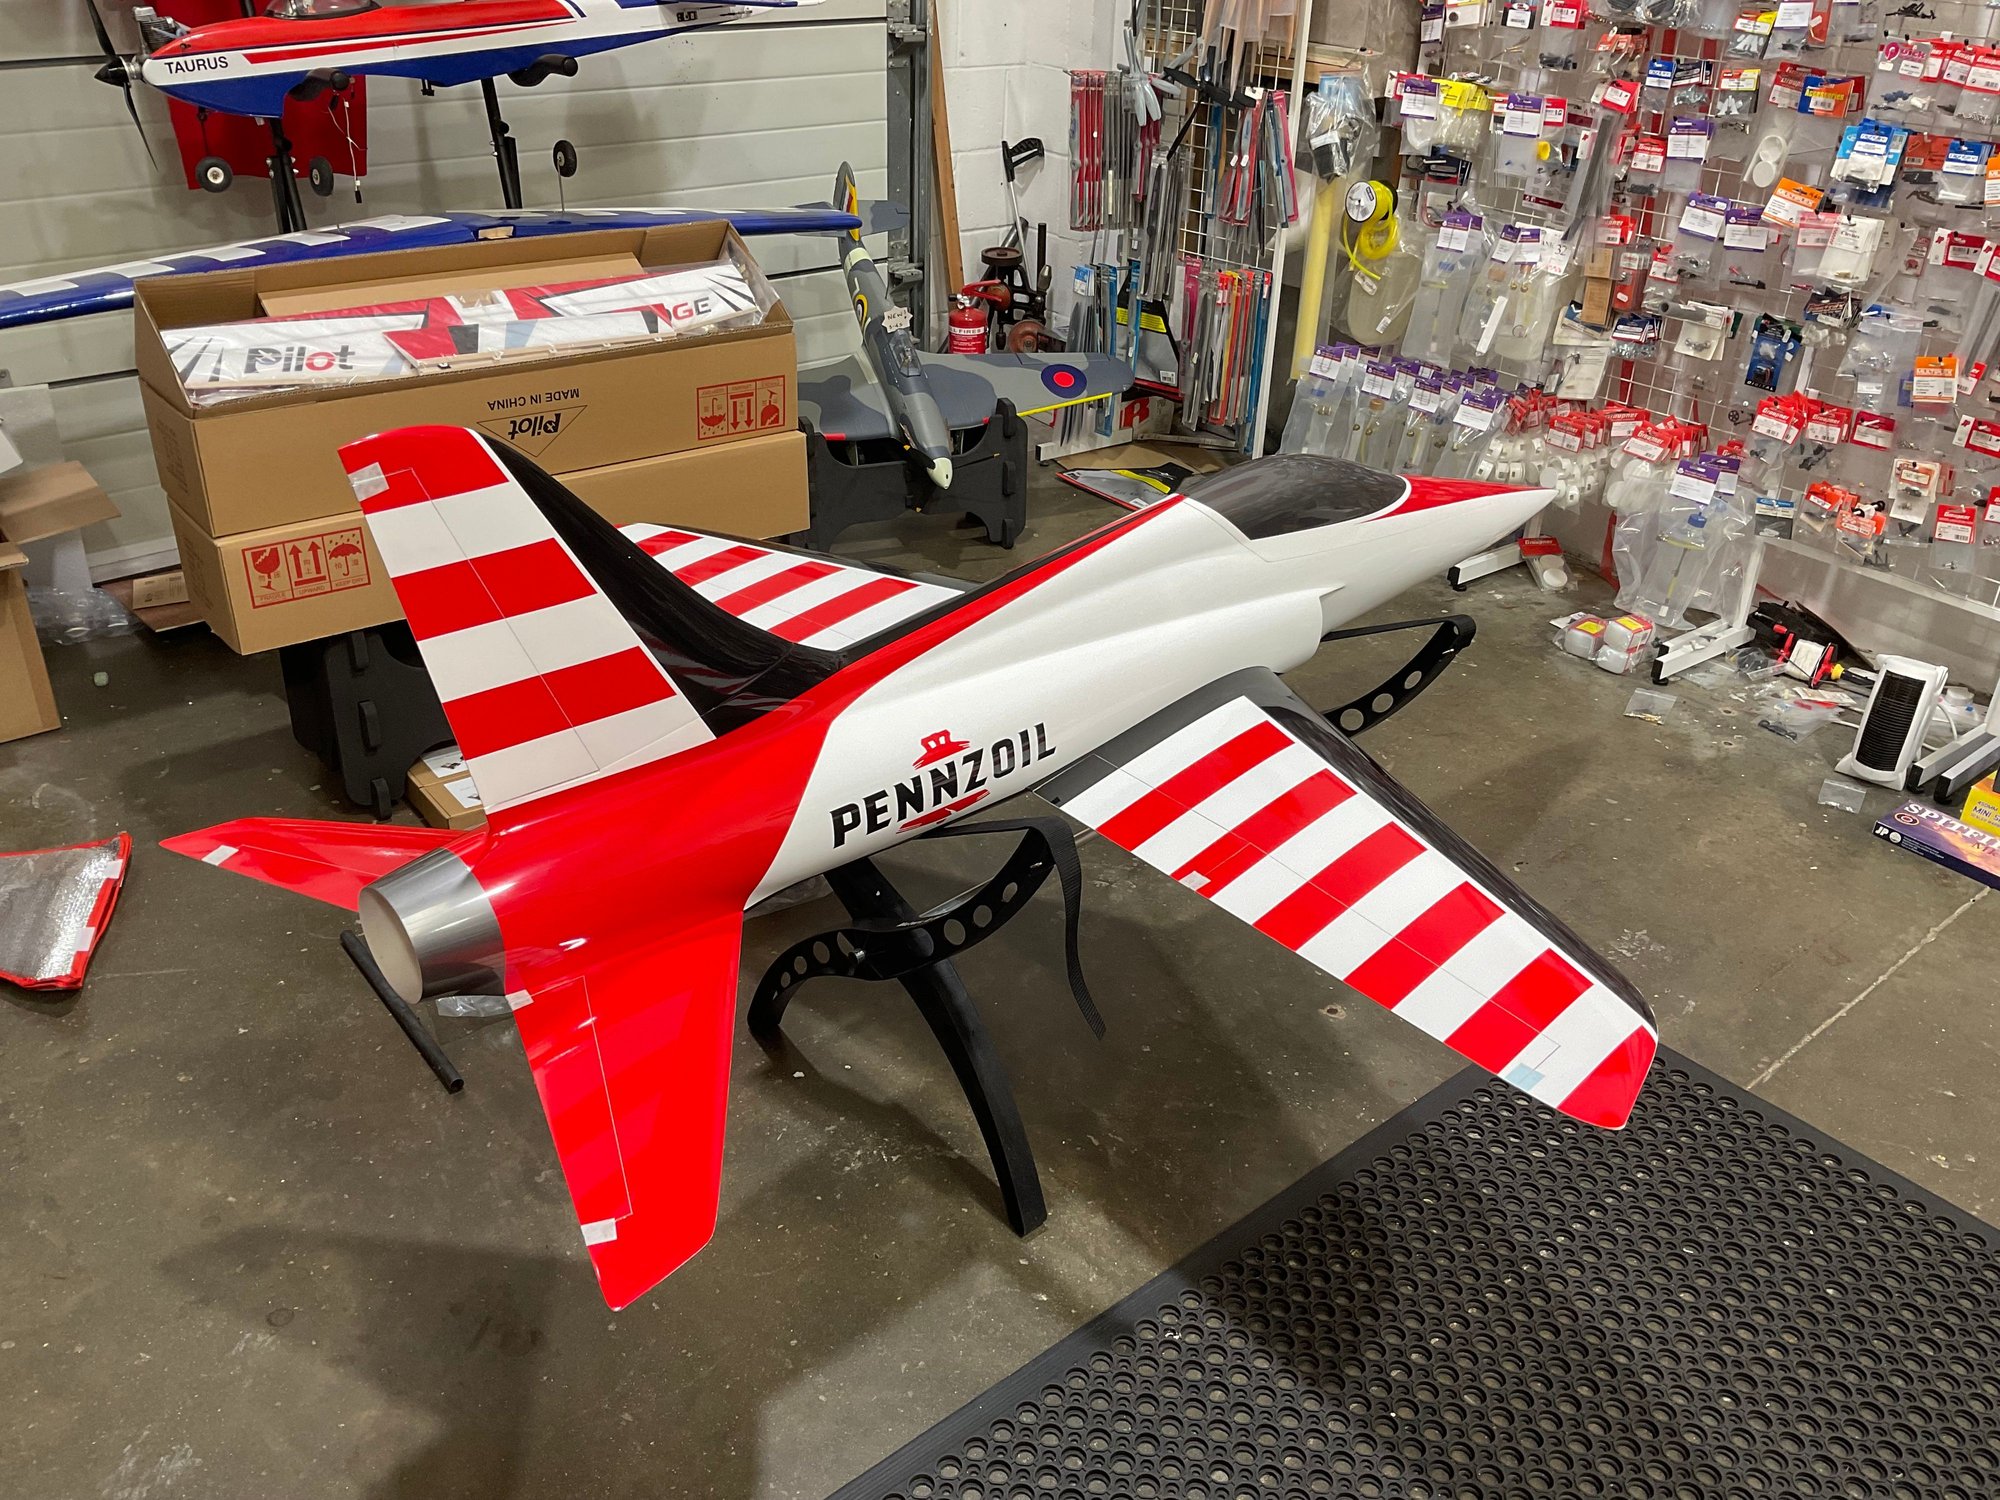
The Beam (Beam of light to follow the family name theme) features a removable vertical fin. Early kits have the carbon spar glued into the fuselage, which means with the fin removed there is still a carbon tube sticking out. Now all kits have the carbon tube bonded into the vertical fin and the fixing screw is in the fuselage. This does not bother me on my first Beam as I will transport with the fin on. Having an early kit also allowed me to work with Revoc to get the fuselage and tailplane bags designed, they had tried to work with the factory, but it is difficult with the factory on the other side of the World-So they sent test bags that I was able to try on my airframe and we modified the shape so when my actual bag set arrived they fitted perfectly.
One thing owners will like is that the Beam can be completely assembled at the field with one 3mm Allen key. The Beam has been designed with ease of use and also transport-my kits came by air because the box is short enough.
We regularly do weekend jet meetings and that involves charging the batteries. Rather than charge batteries in the airframe, most prefer to remove them. The CARF team are great at neat ideas, the nose cone is removable without tools using three key way screws to access the batteries. Rather than unstrap the batteries they are mounted to a carbon tube and this also turns and removes on a key way. This allows the batteries to be taken away to charge-super convenient.
The servo size choice was also a team debate, I had a customer who wanted a light install on an Ultra Flash Evo, so I suggested the Midi MacGregor servo 5216. This is a 15mm wide servo, but 16kg torque. We flew Ultra Flash models with the JR 8411 at 11kg torque, so I knew the 16kg was more than enough. Would also be the same for the landing Flaps, but I worry they get knocked more and the smaller gears can be an issue, so full size servos on just the flaps. I chose the MacGregor 6928 which is way over torque, but a great servo. Nose steering std MacGregor 5921 fits the JP nose steering mount.
I would be flying my Beam with a Powerbox Core radio and chose a Pioneer to act as the central hub, 2 x 26D receivers and fed with 2 x 2s Li-Po batteries-I guessed 2700 2s and these ended up giving a perfect balance with a 2s 3700 ECU pack to feed my chosen JetCat P-150Rx-BL turbine.
I had already decided on JP retracts, I have them in my Ultra Flash Evo Art Scholl and 100+ flights they have been perfect!
I use a separate 2s Li-Po for the retract controller at 600mAh, I�m not a fan of shared batteries�
So far, the battery use is 90mAh per pack/per flight on the radio side and 20Mah on the retracts-brakes. So, plenty of flights- just turbine battery that will need charging during a normal weekend meeting.
I used CARF aluminium short arms after quite a bit of personal debate. I know the HD nylon arms are strong enough, but where I was going to use ball links I wanted the metal arm, so ended up using aluminium arms on all except the nose steering, where I use nylon to dampen any shock loads from the nose leg.
As designed the Beam uses spring steel clevis on the elevator servo arms. Because of the swept back tail design the hinge line is not 90 degrees to the servo arm swing. I know the spring steel clevis are able to flex and CARF fly their demo models like that, but I couldn�t do it. Luckily the kit includes two M3 ball links for the steering linkage, but my chosen JP retract option also includes a pushrod with ball links, so I used the two CARF supplied units on the servo arm end of the elevator pushrods.
I alway build from the back and work forward. I decided to glue a servo lead male in the fin seat area and plug the rudder servo in directly. Carf show a single connection for the two elevator servos, but I decided to use std servo connectors one either side. I drew the fuselage tailplane seat on the tailplane so I knew where the leads could exit the top skin. Velcro holds these leads away from the tailpipe (although there is plenty of space) Finishing the tailplane and vertical fin was easy. The 3-D printed servo mounts accept the MacGregor servo perfectly-four M3 socket head screws, there are recesses for nyloc nuts. The screws in my kit were too short, but that is part of my feedback.
I swapped the screws supplied to hold the servo covers on, tailplane and wing to black screws I keep for this type of job.
My rudder pushrod required a long slot because of the offset servo. Later kits have a revised rudder horn geometry, so this should be easier. I just have my second Beam kit and will look at that as it is produced 3 months later.
The tailpipe needs assembling, the holes are pre drilled, but you do need to ensure the pipe is square to the carbon turbine shrould. The tailpipe is supported at the back in a composite former the builder installs. I had to sand the opening to allow the tailpipe fit-hopefully this has been addressed too.
My chosen JetCat P-150 Rx-BL follows JetCat�s latest motor mount design where the mounting lugs are on the centreline. The P-130/150 is a small diameter turbine, so the mount needs spacer plates. The kit included Kingtech suitable plates. I made my own from scrap carbon sheet I had.
I�m posting this in the middle of a Jet meeting weekend, so will be back with more soon.

 03-22-2026 | 09:51 PM
#4
Thread Starter
D
Last edited by Dave Wilshere; 03-23-2026 at 11:35 AM.
03-22-2026 | 09:59 PM
#5
Thread Starter
Dave

 03-23-2026 | 10:04 PM
#7
Thread Starter
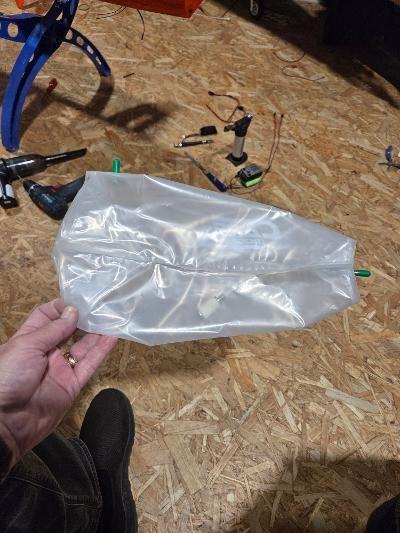
Fuel wise, it took a couple of fills to get the bags settled in the fuselage so they filled to their maximum. I used a large car engine oil extraction syringe pump to inflate and deflate the tanks before fuel was added- it has volume marks so I could see what was going into the bags. I then used calibrated bottles of fuel with 1ltr marks on them. I consistently get 2.9 ltrs in the two bags, on one fill with more pressure I got just over 3ltrs. Both these figures are greater than the user able fuel in an UF Evo tank.
I now extract all the remaining fuel and air from the tanks before filling with a conventional fuel station.


I now extract all the remaining fuel and air from the tanks before filling with a conventional fuel station.
03-29-2026 | 11:24 AM
#10
is the bypass able to fit something larger than a 160??i have a UF in witch i am running a 180 G5 that will upgrated to a 210 and if the beam is able to fit a 180 will be awesome!!
03-29-2026 | 01:02 PM
#11
Thread Starter
The Beam ducting is basically the same diameter as the UF carbon


 04-07-2026 | 02:50 PM
#16
Thread Starter
The following users liked this post:
dutch_tw (04-08-2026)
04-14-2026 | 09:05 PM
#17
Thread Starter
I have settled on a balance point and movements. Will try and get a chance to measure everything and then post.
Fuel system continues to be reliable.
Dave


Fuel system continues to be reliable.
Dave
The following 2 users liked this post by Dave Wilshere:
AEROSHELDON (04-15-2026),
Ken Bryant (04-15-2026)


 04-20-2026 | 11:03 AM
#19
Thread Starter
OK, finally managed to put it together and measure, weigh and balance.
Weight of this early kit came out at 10.8kg dry.
Balance is 240mm back from the fuselage/wing break line. I used a 2.6mm dia string trapped between the wing and fuselage for a super accurate position. Gear down, tanks as empty as I can suck them!
Movement and expo is so personal that I hope people can adjust to what they know works for them, whether they have a gyro, whether they fly with long sticks etc. My set up has lots of control power, but softened by expo
i measured the aileron and elevator at the tip, the rudder at the base. The flaps at the root.
Aileron
16mm up. 14.5mm down. 45% expo
Elevators
12mm up and down. Expo 40% up and 45% down
Rudder
45mm. 30% expo
Flap
Take off 32mm. Landing 103mm
Elevator compensation at tip joint 2mm down TO and 6mm down LNDing
05-01-2026 | 10:29 PM
#21
Thread Starter
When I get some time over the next couple of days I will report, but my first one has been great with no issues.
Dave
The following users liked this post:
AEROSHELDON (05-02-2026)
The following users liked this post:
AEROSHELDON (05-22-2026)

