


BOOMERANG ELAN - New Build & Setup Thread!


 01-02-2021, 03:38 PM
#627
ok - here we go, sharing how I cg my planes. This is not the end all/be all method, but it works well for me. It has worked for small foamy planes like my Havoc XE up to a large 1/3 scale Skymaster Hawk (+90lbs). It works quite well for tail-daggers too. I usually move the jet to a finished area of the basement in order for me to move around on a finished floor, it makes it much easier when you need to crawl under the plane to get your measurements.
For smaller jets like this Boomer, I just use a foldable table. Below are pics of the tools I use and how I take my measurements.
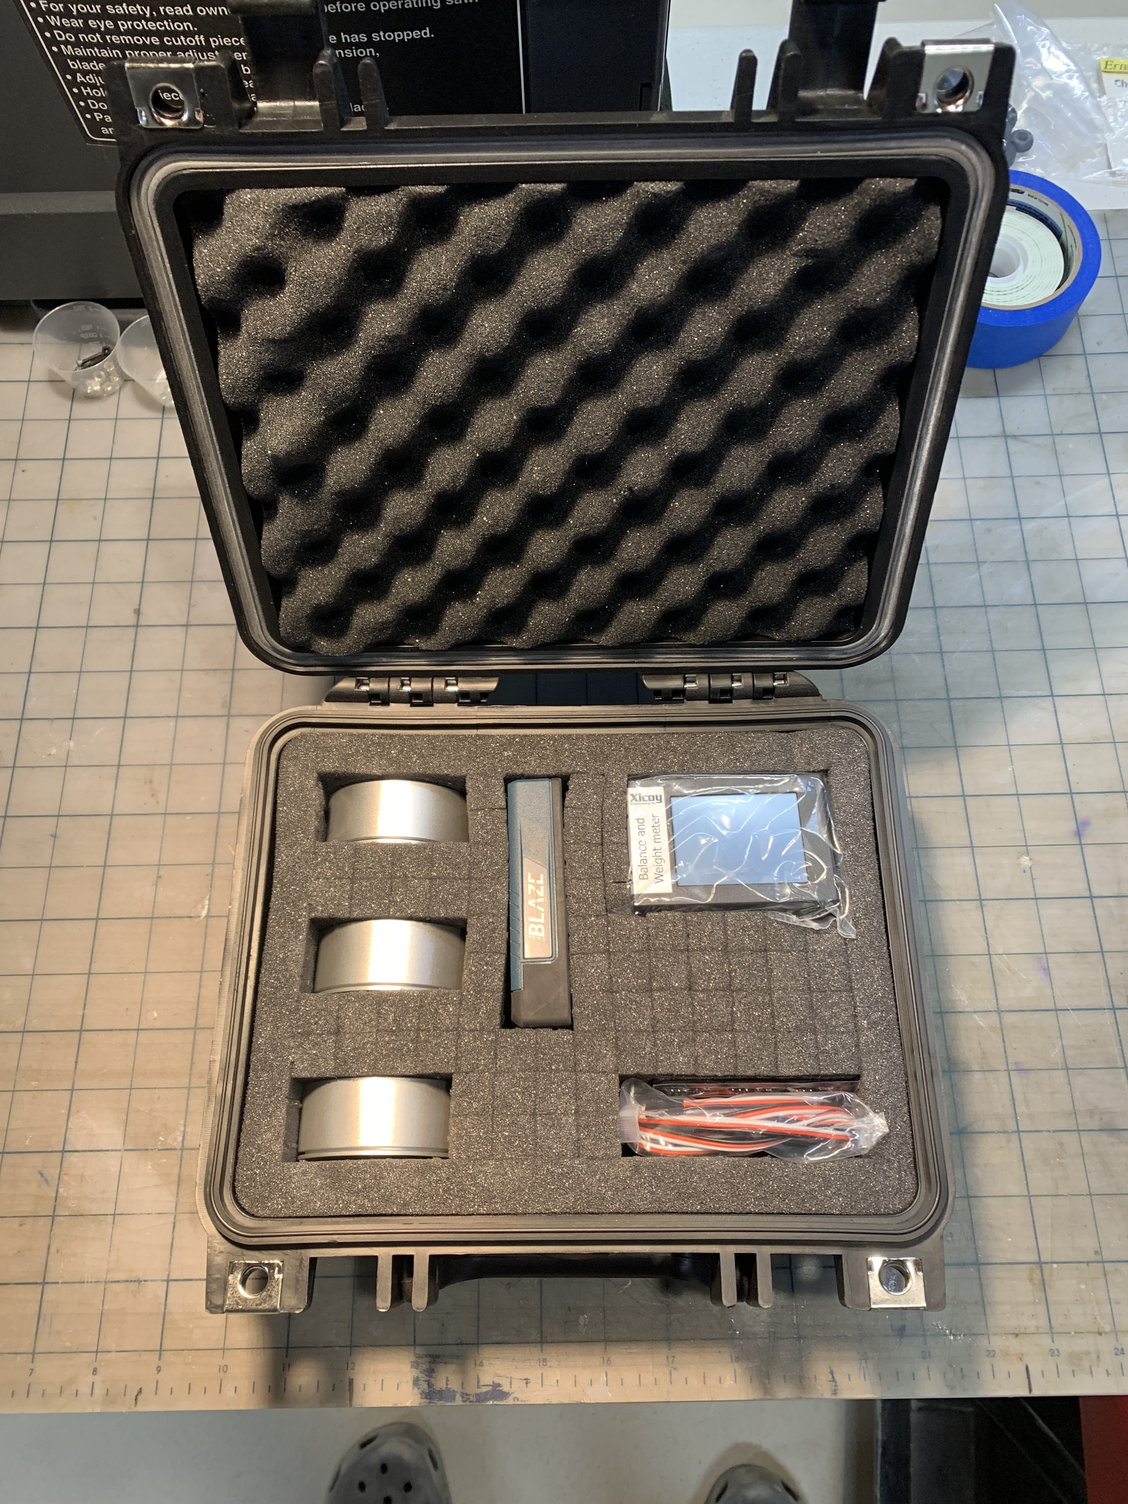
This is the xicoy tool I use
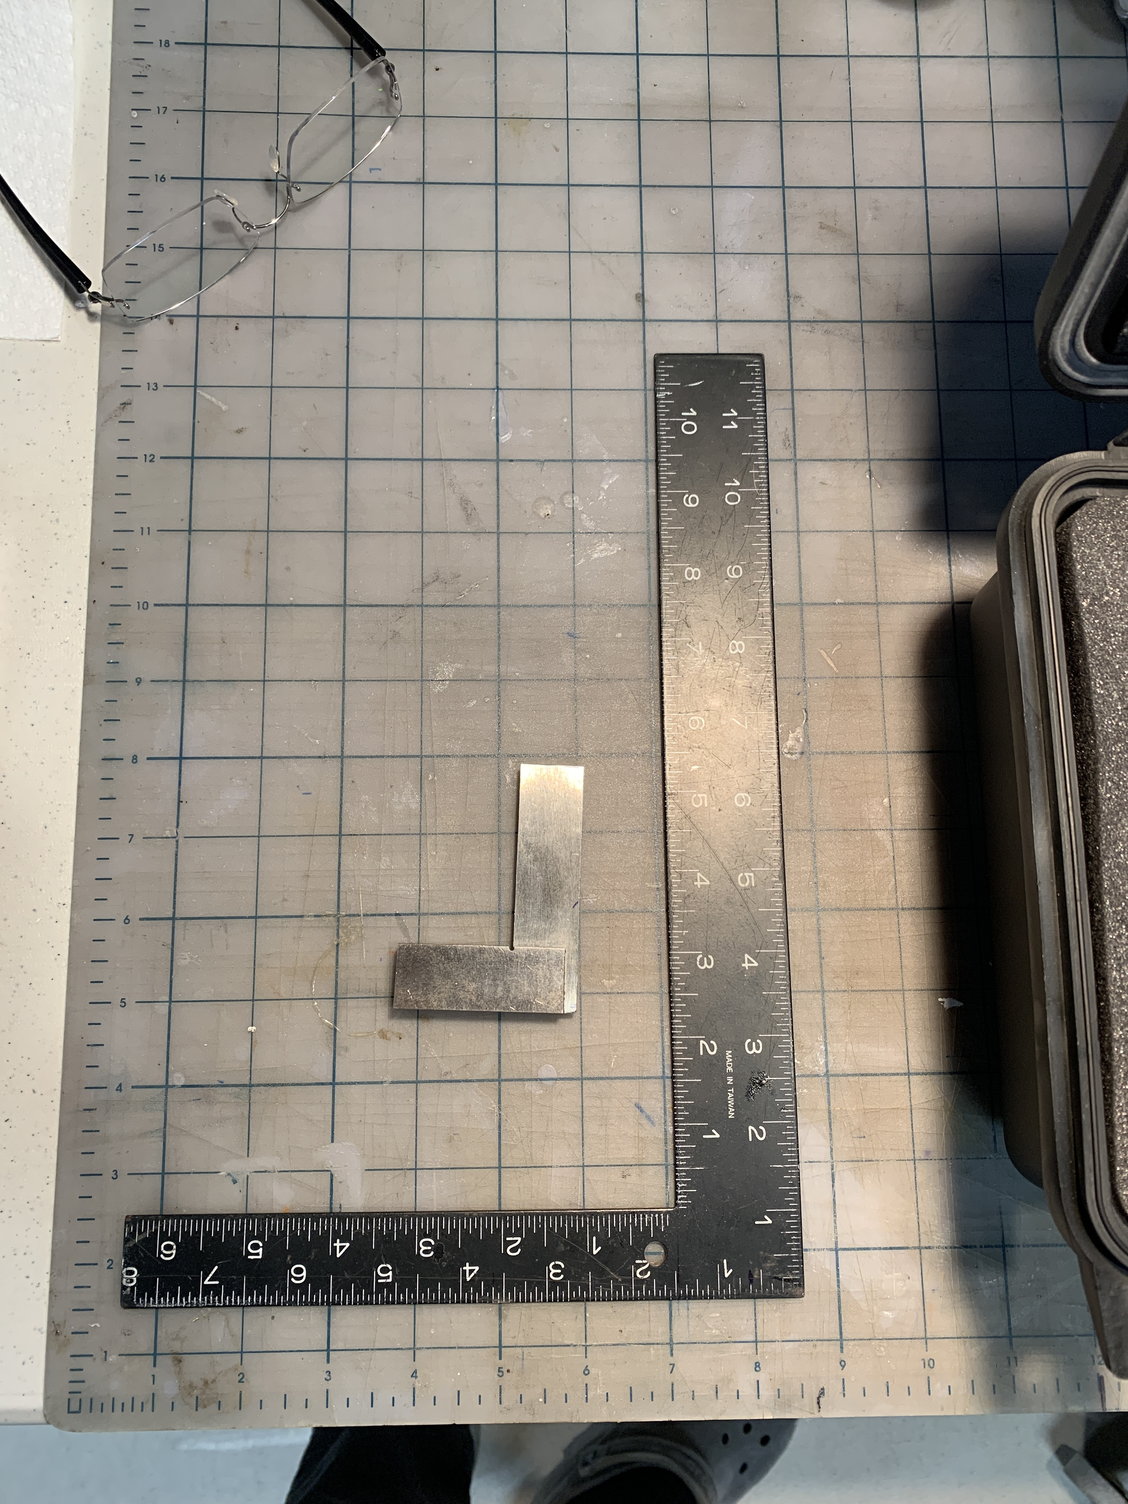
measurement tools I use
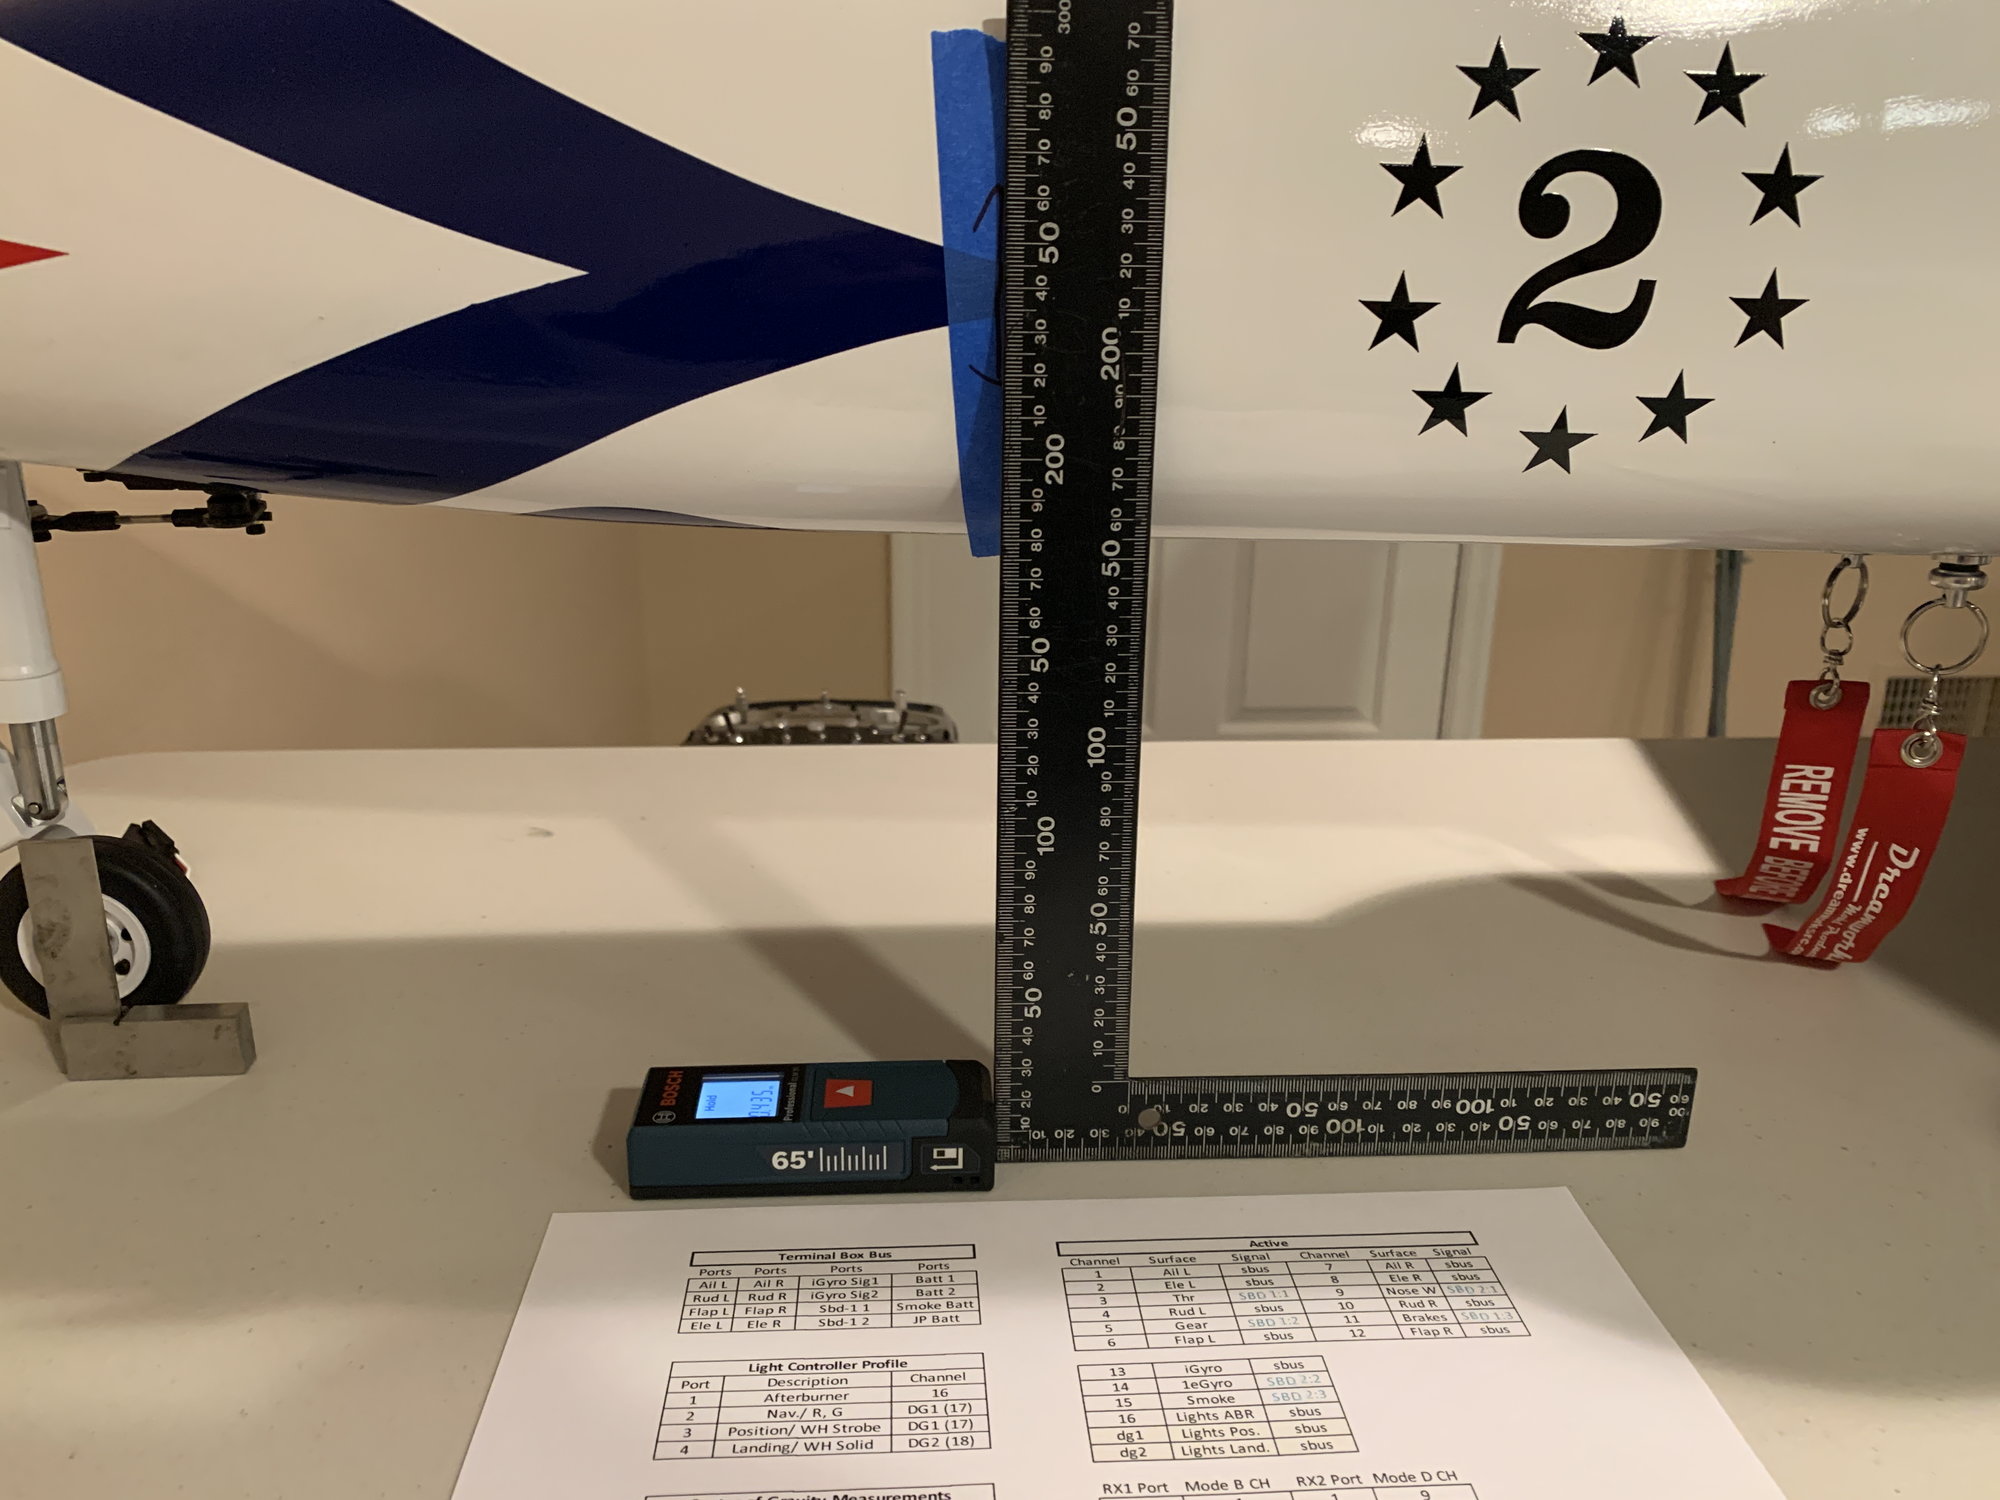
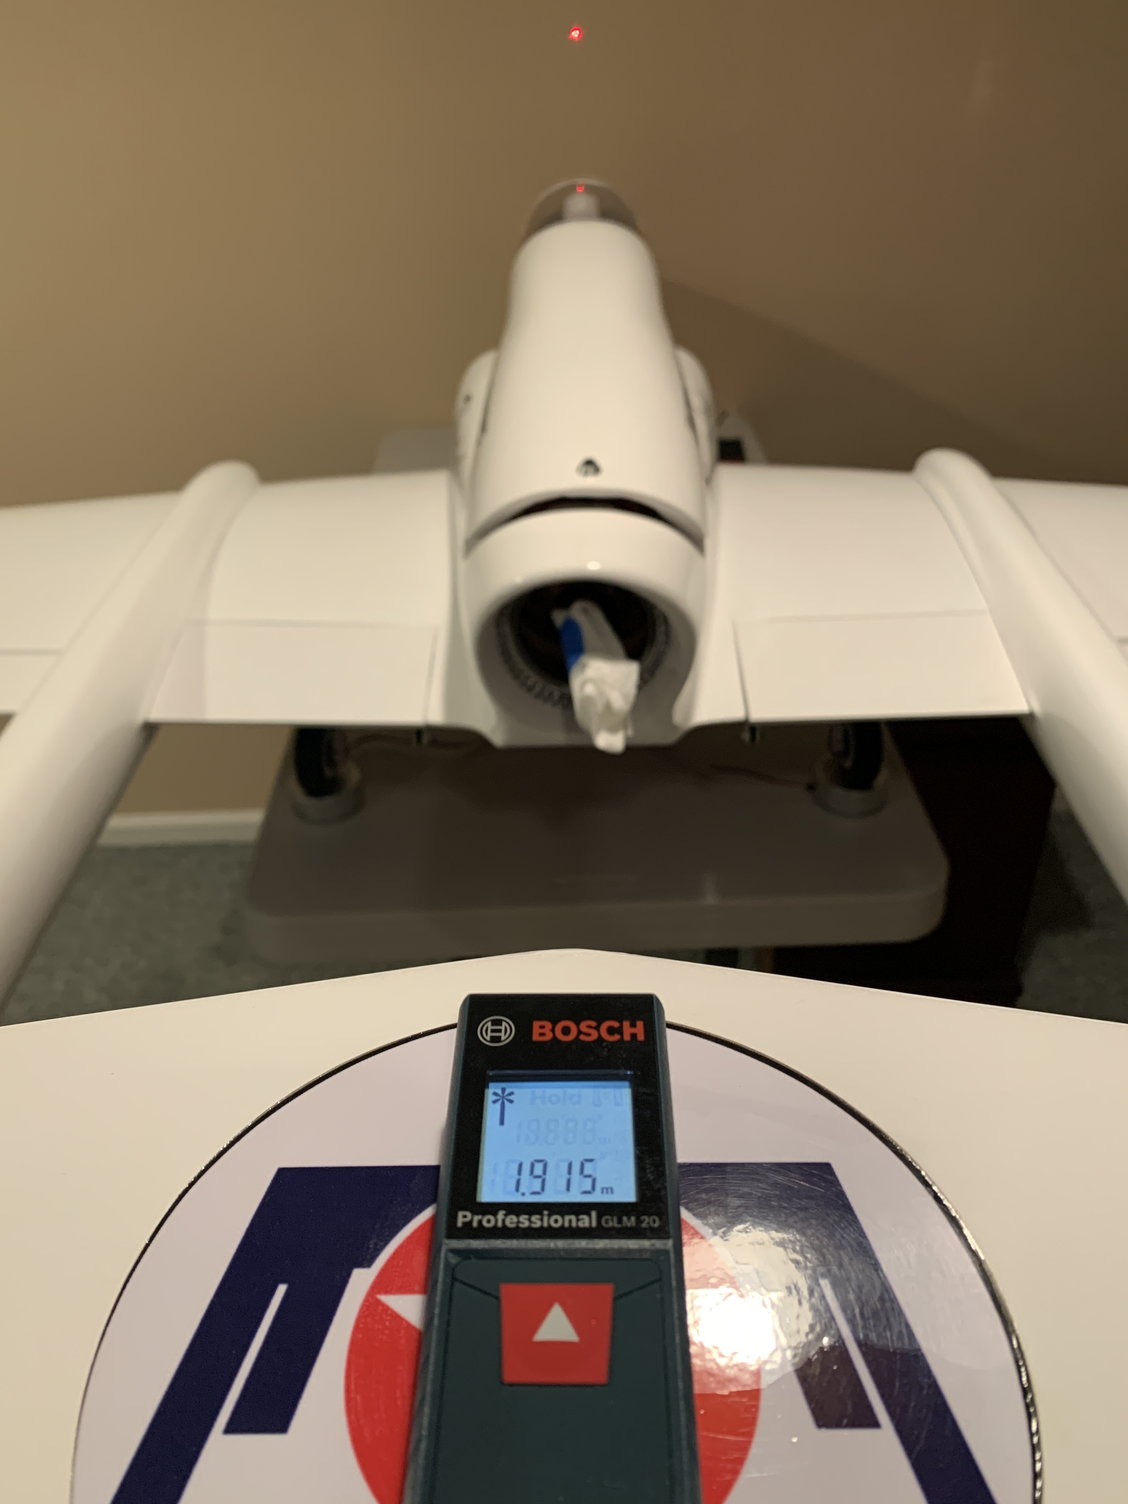
Nose measurement spot
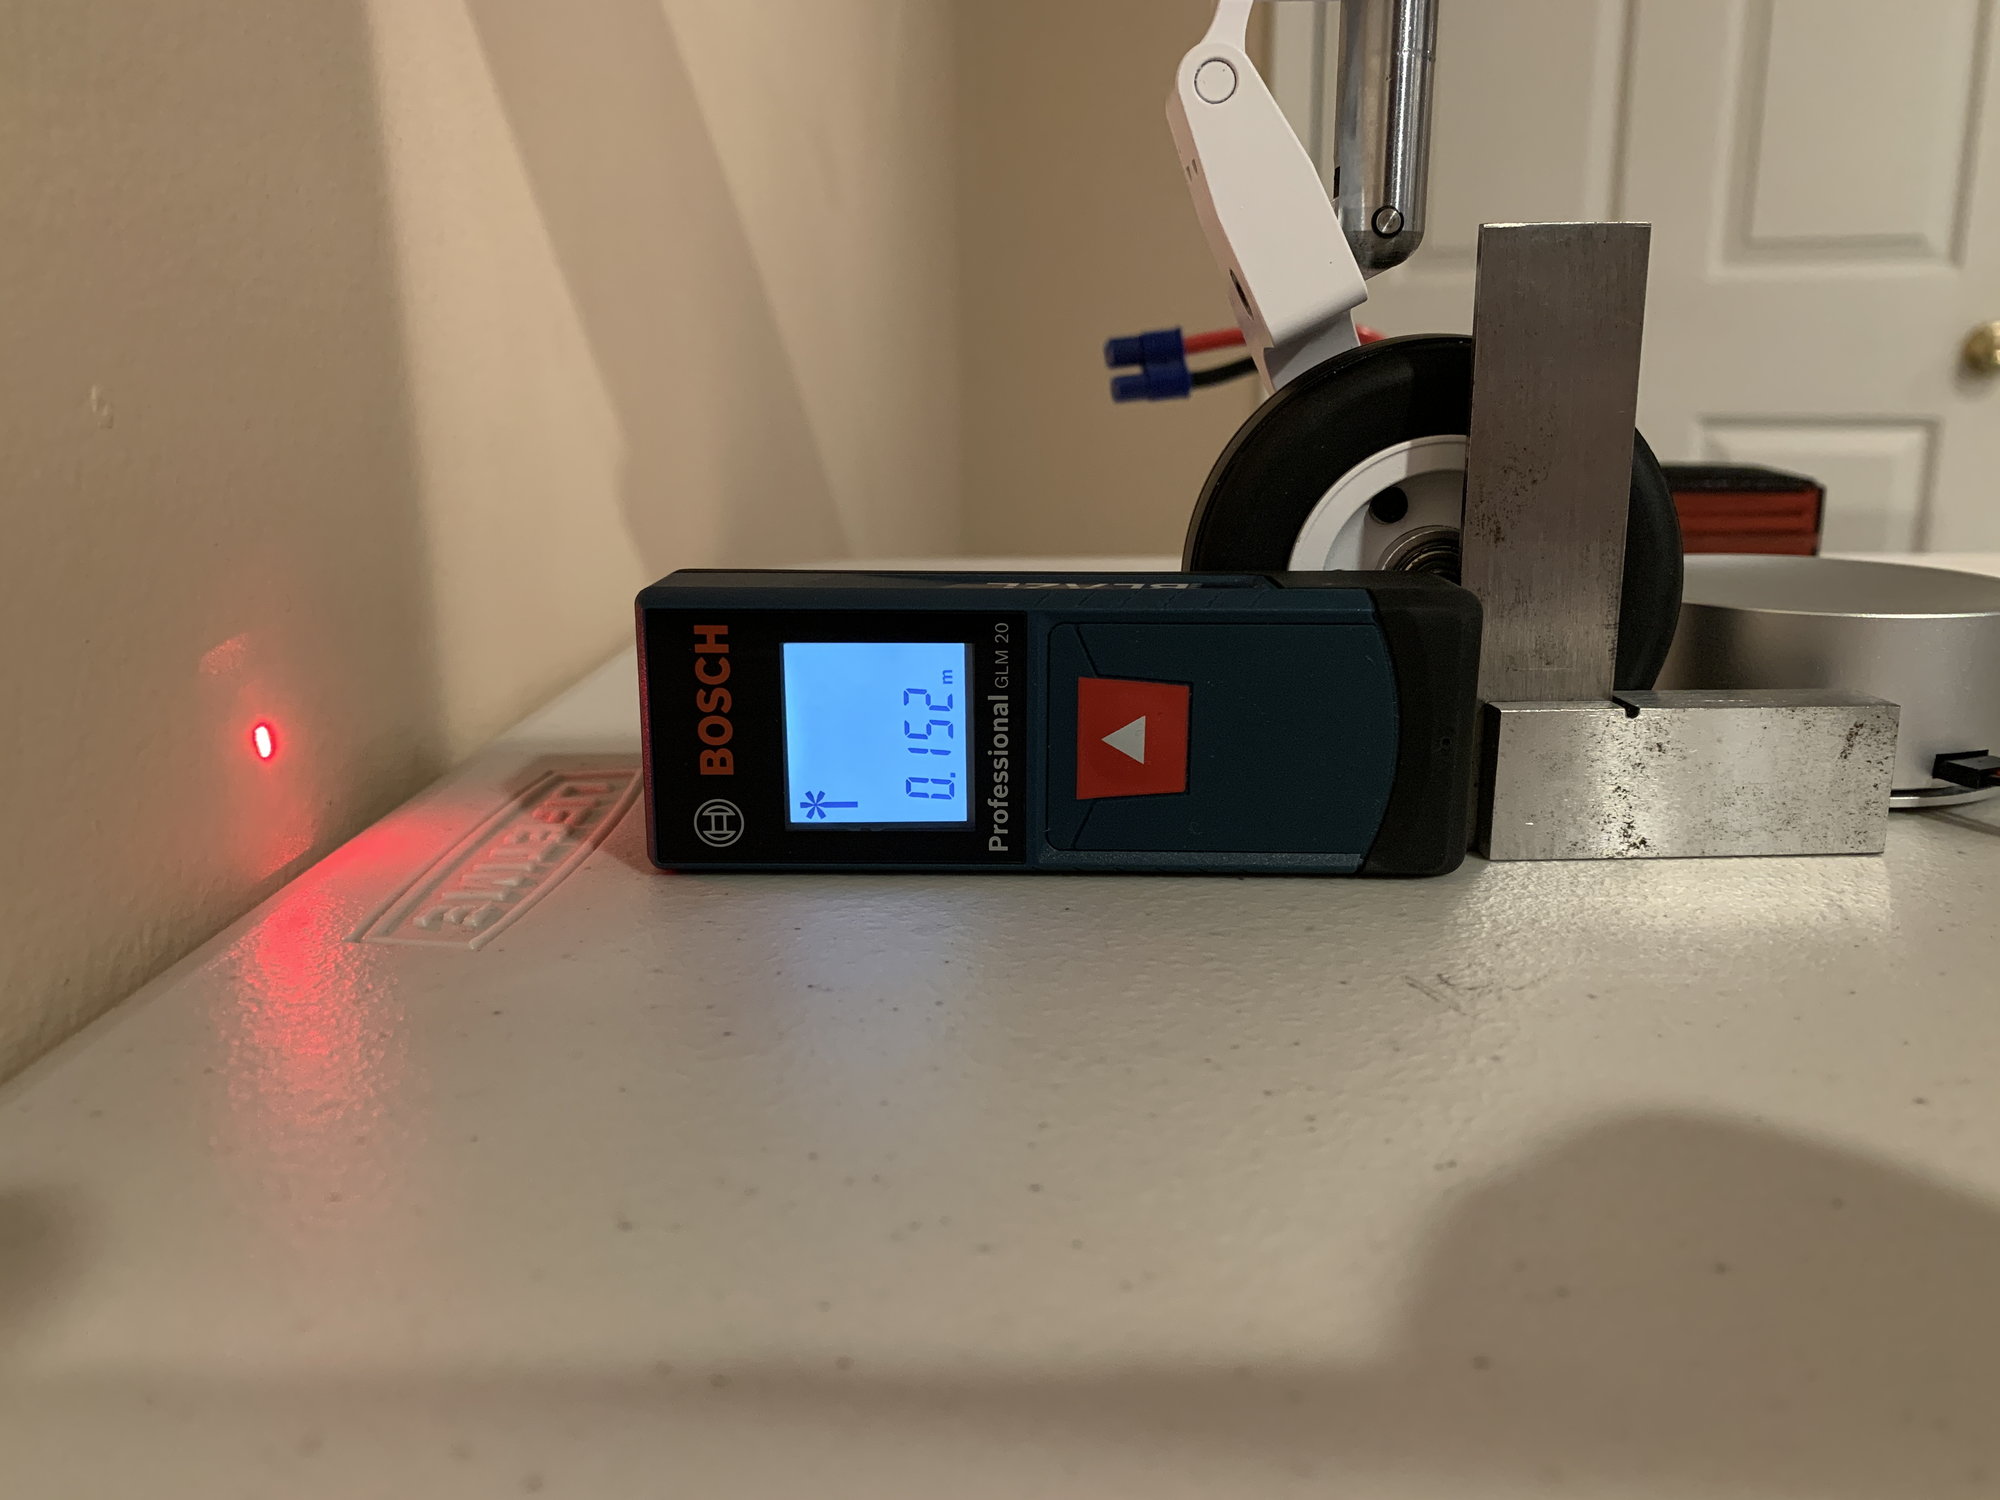
Nose measurement
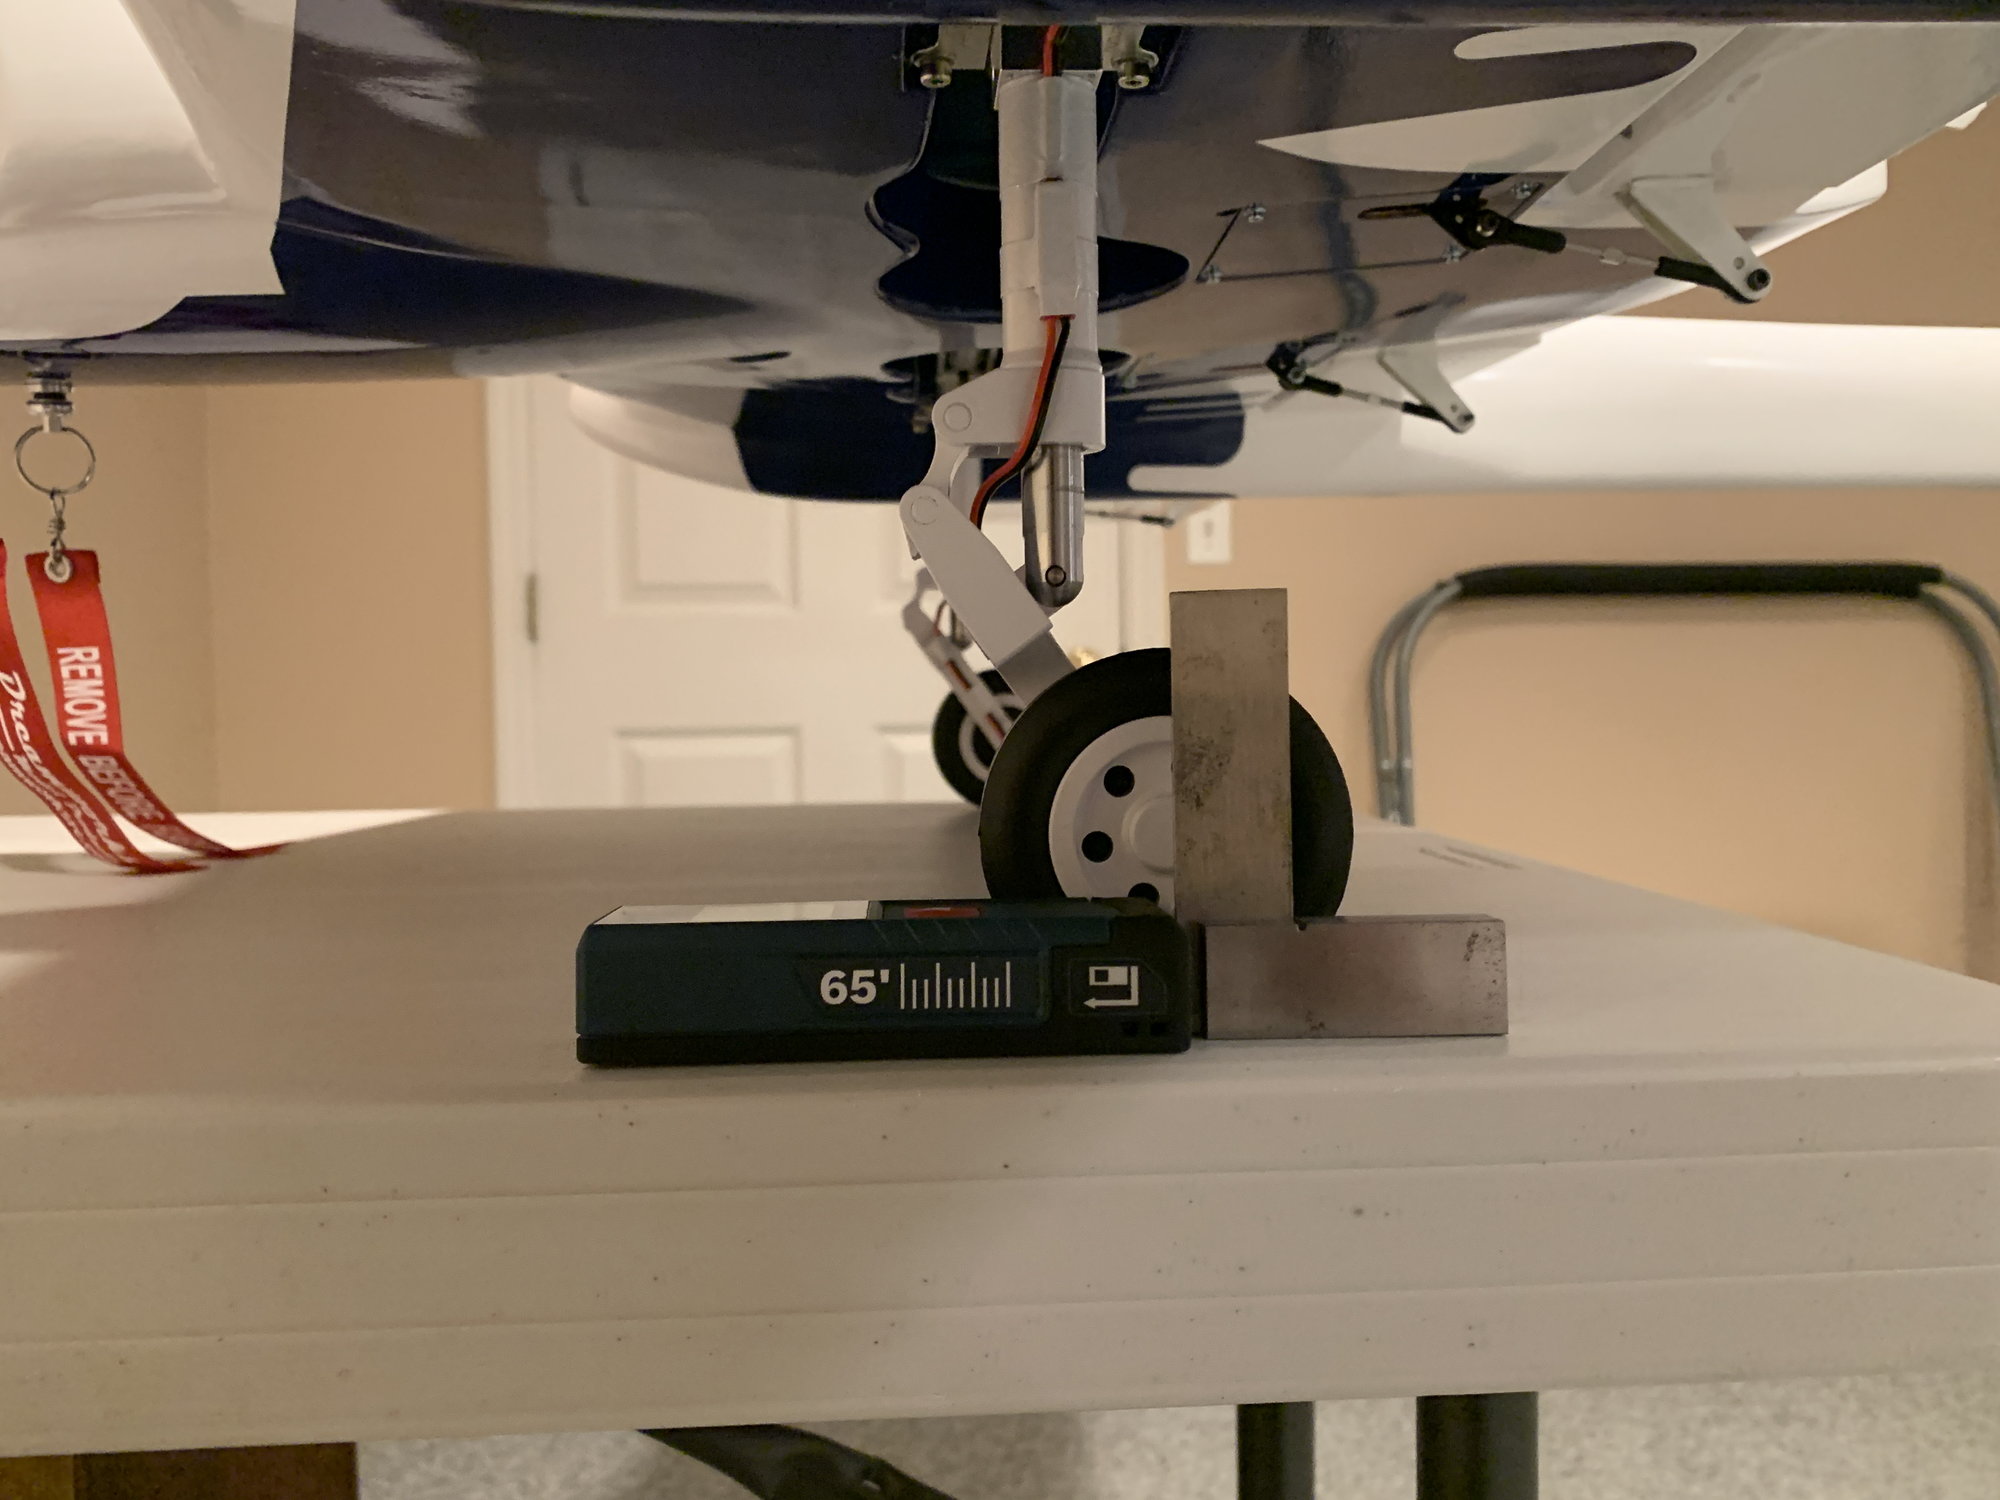
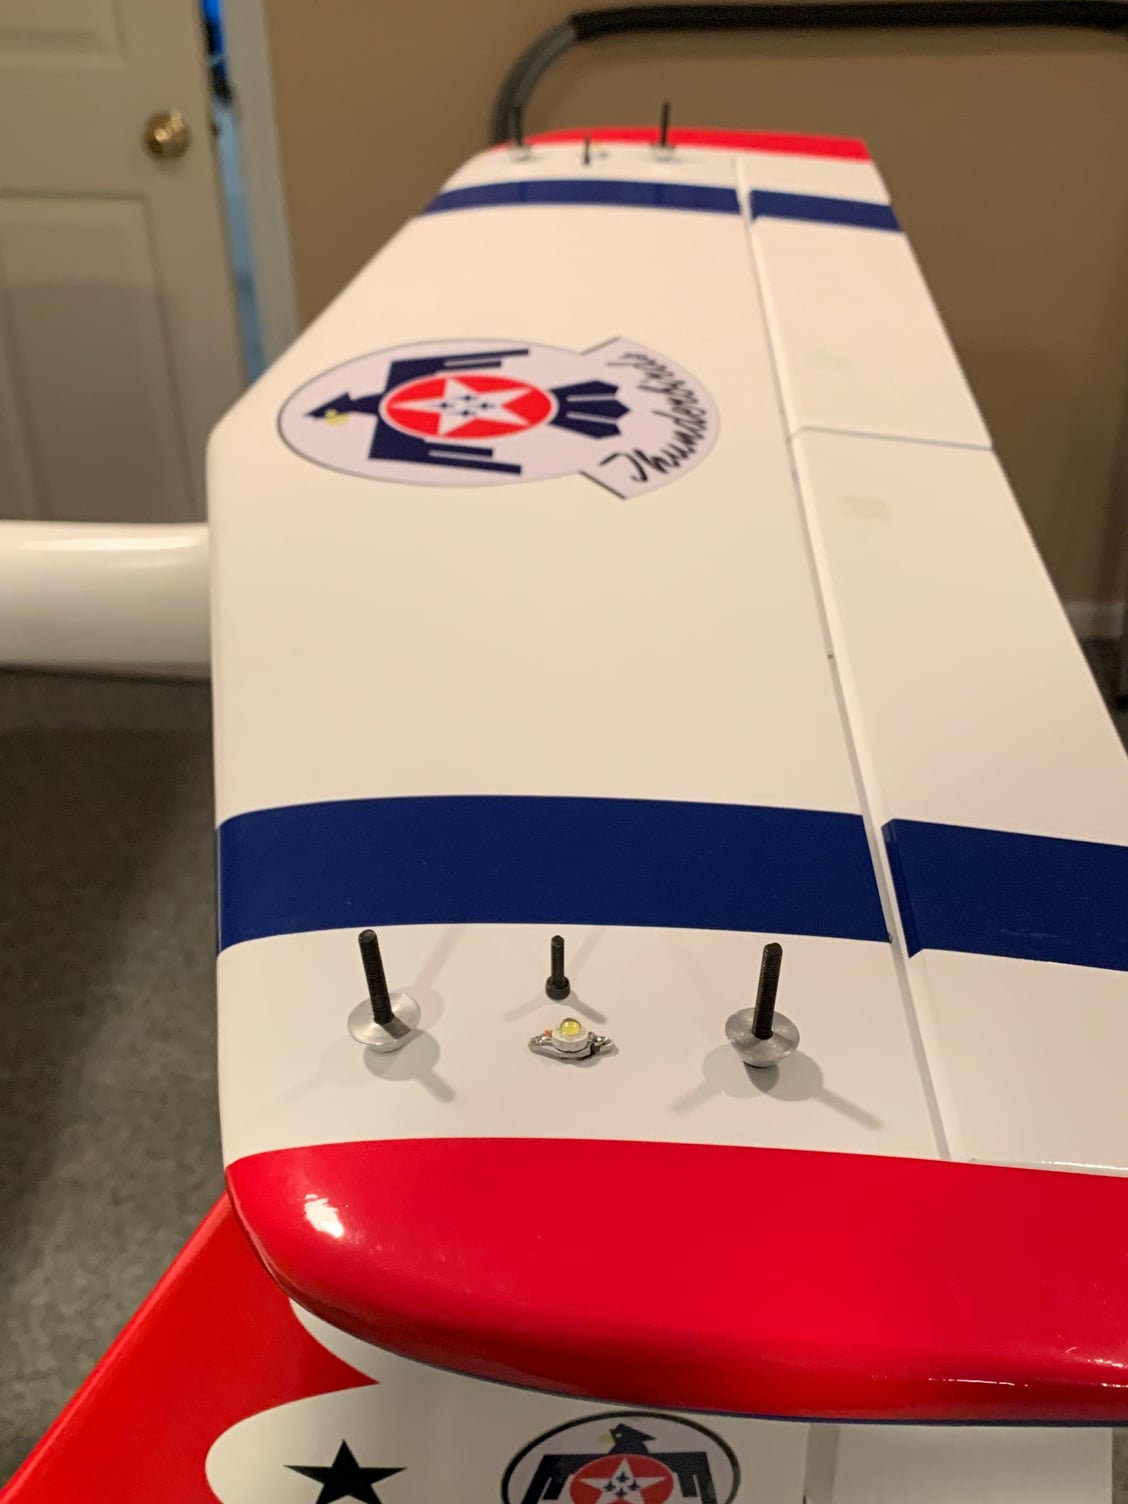
Mains measurement spot
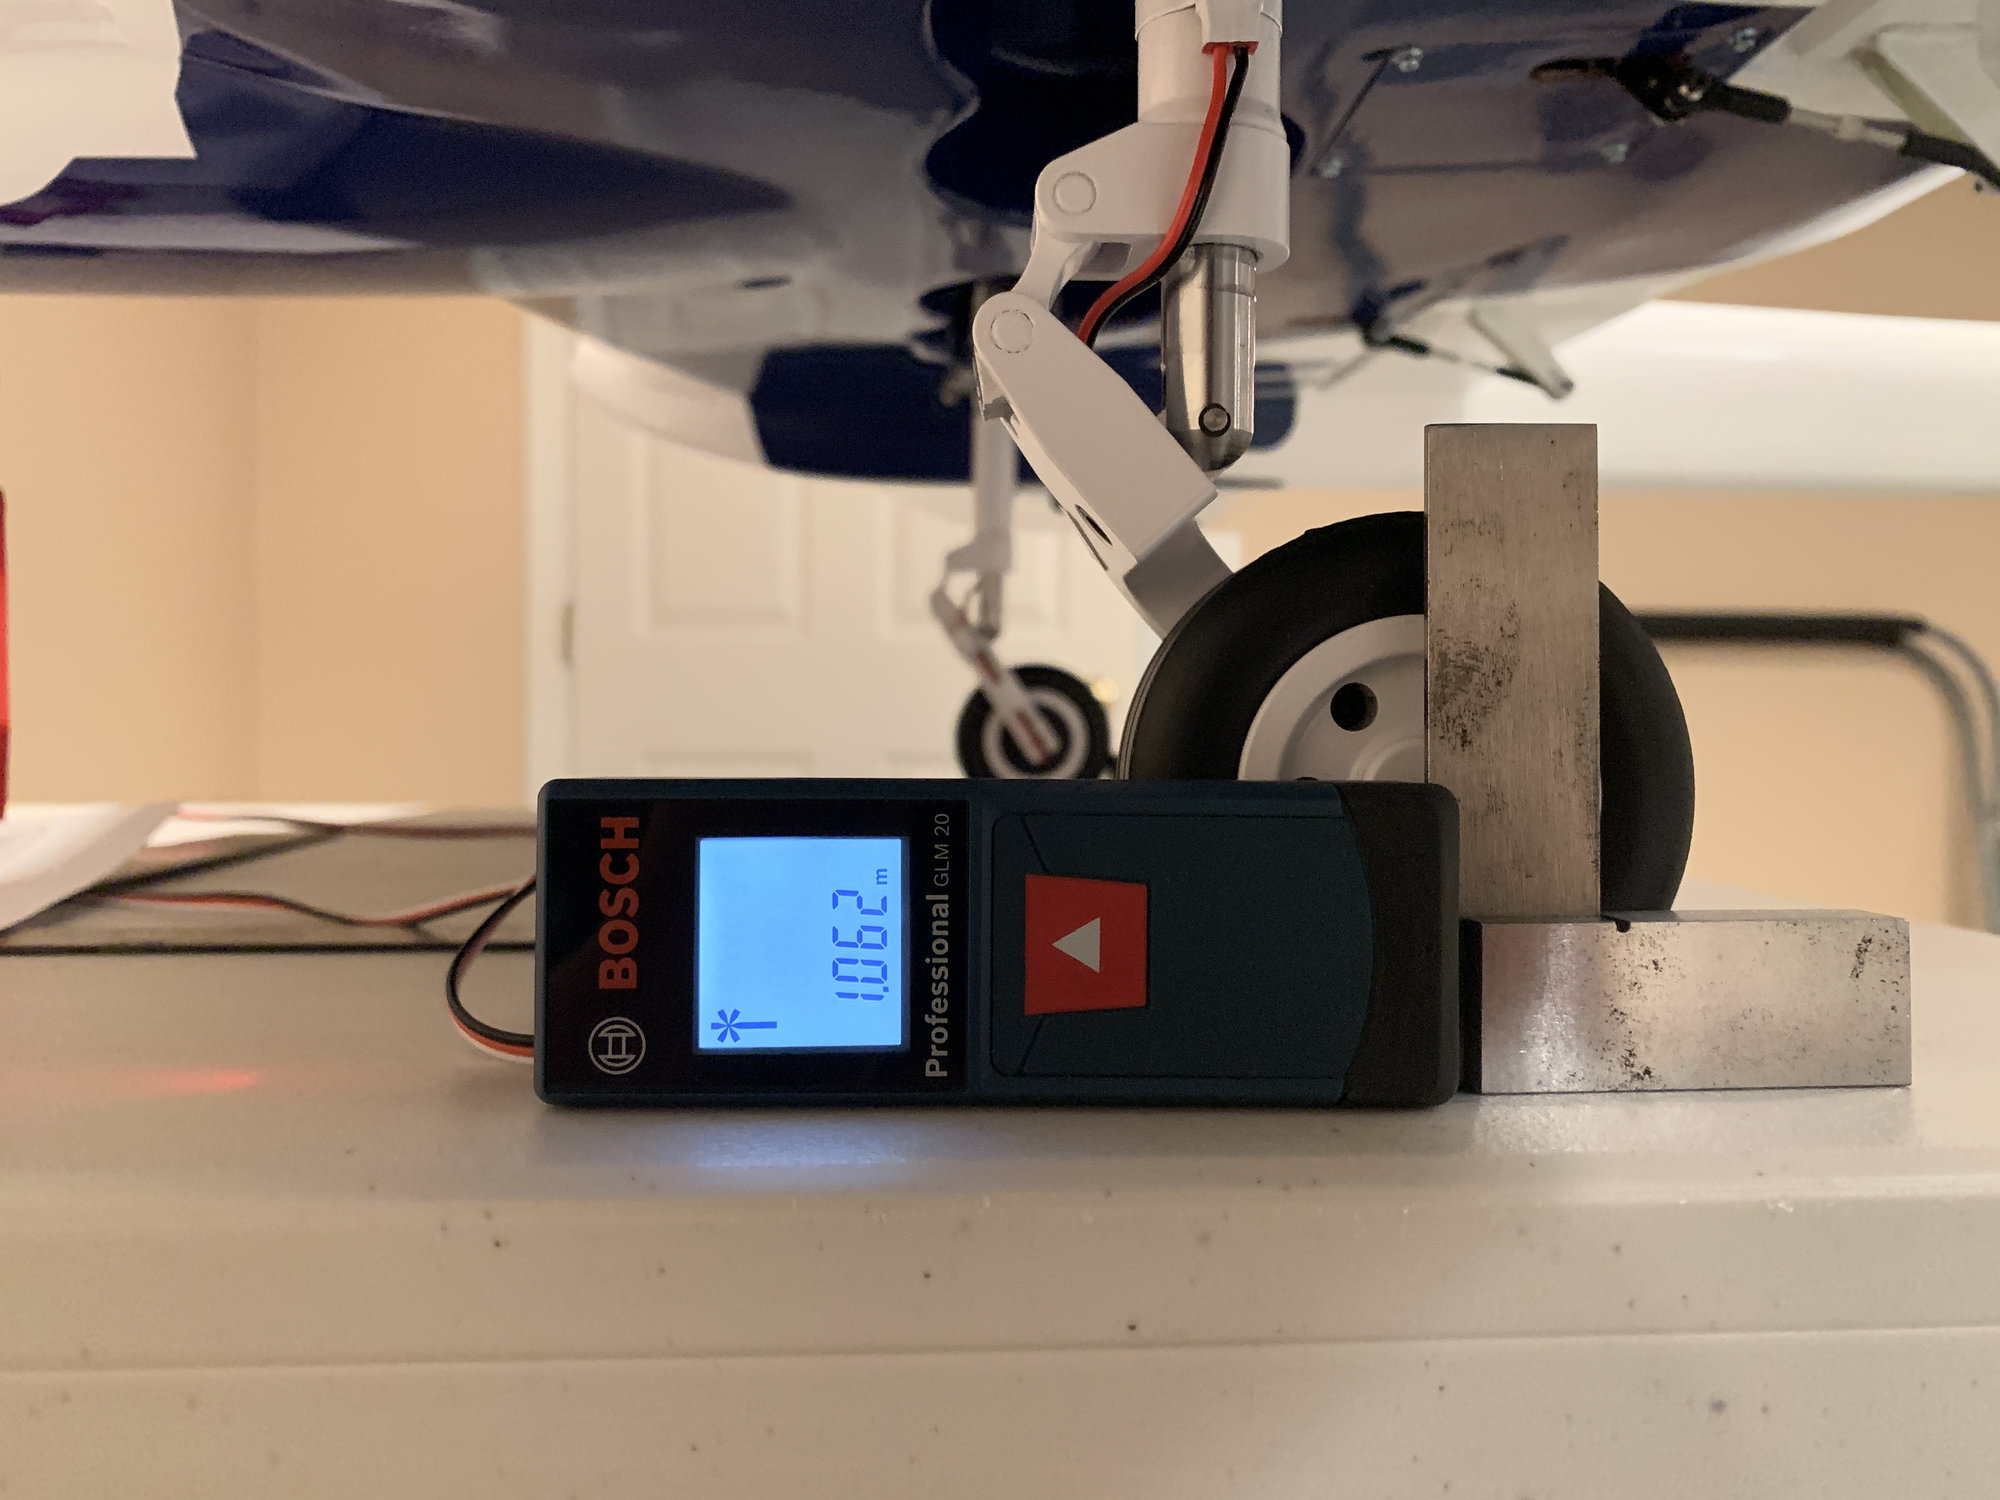
Mains measurement
Initial weight measurement spot
Initial weight spot measurement
secondary weight measurement spot - due to nose heavy condition - ugh!!! sux...
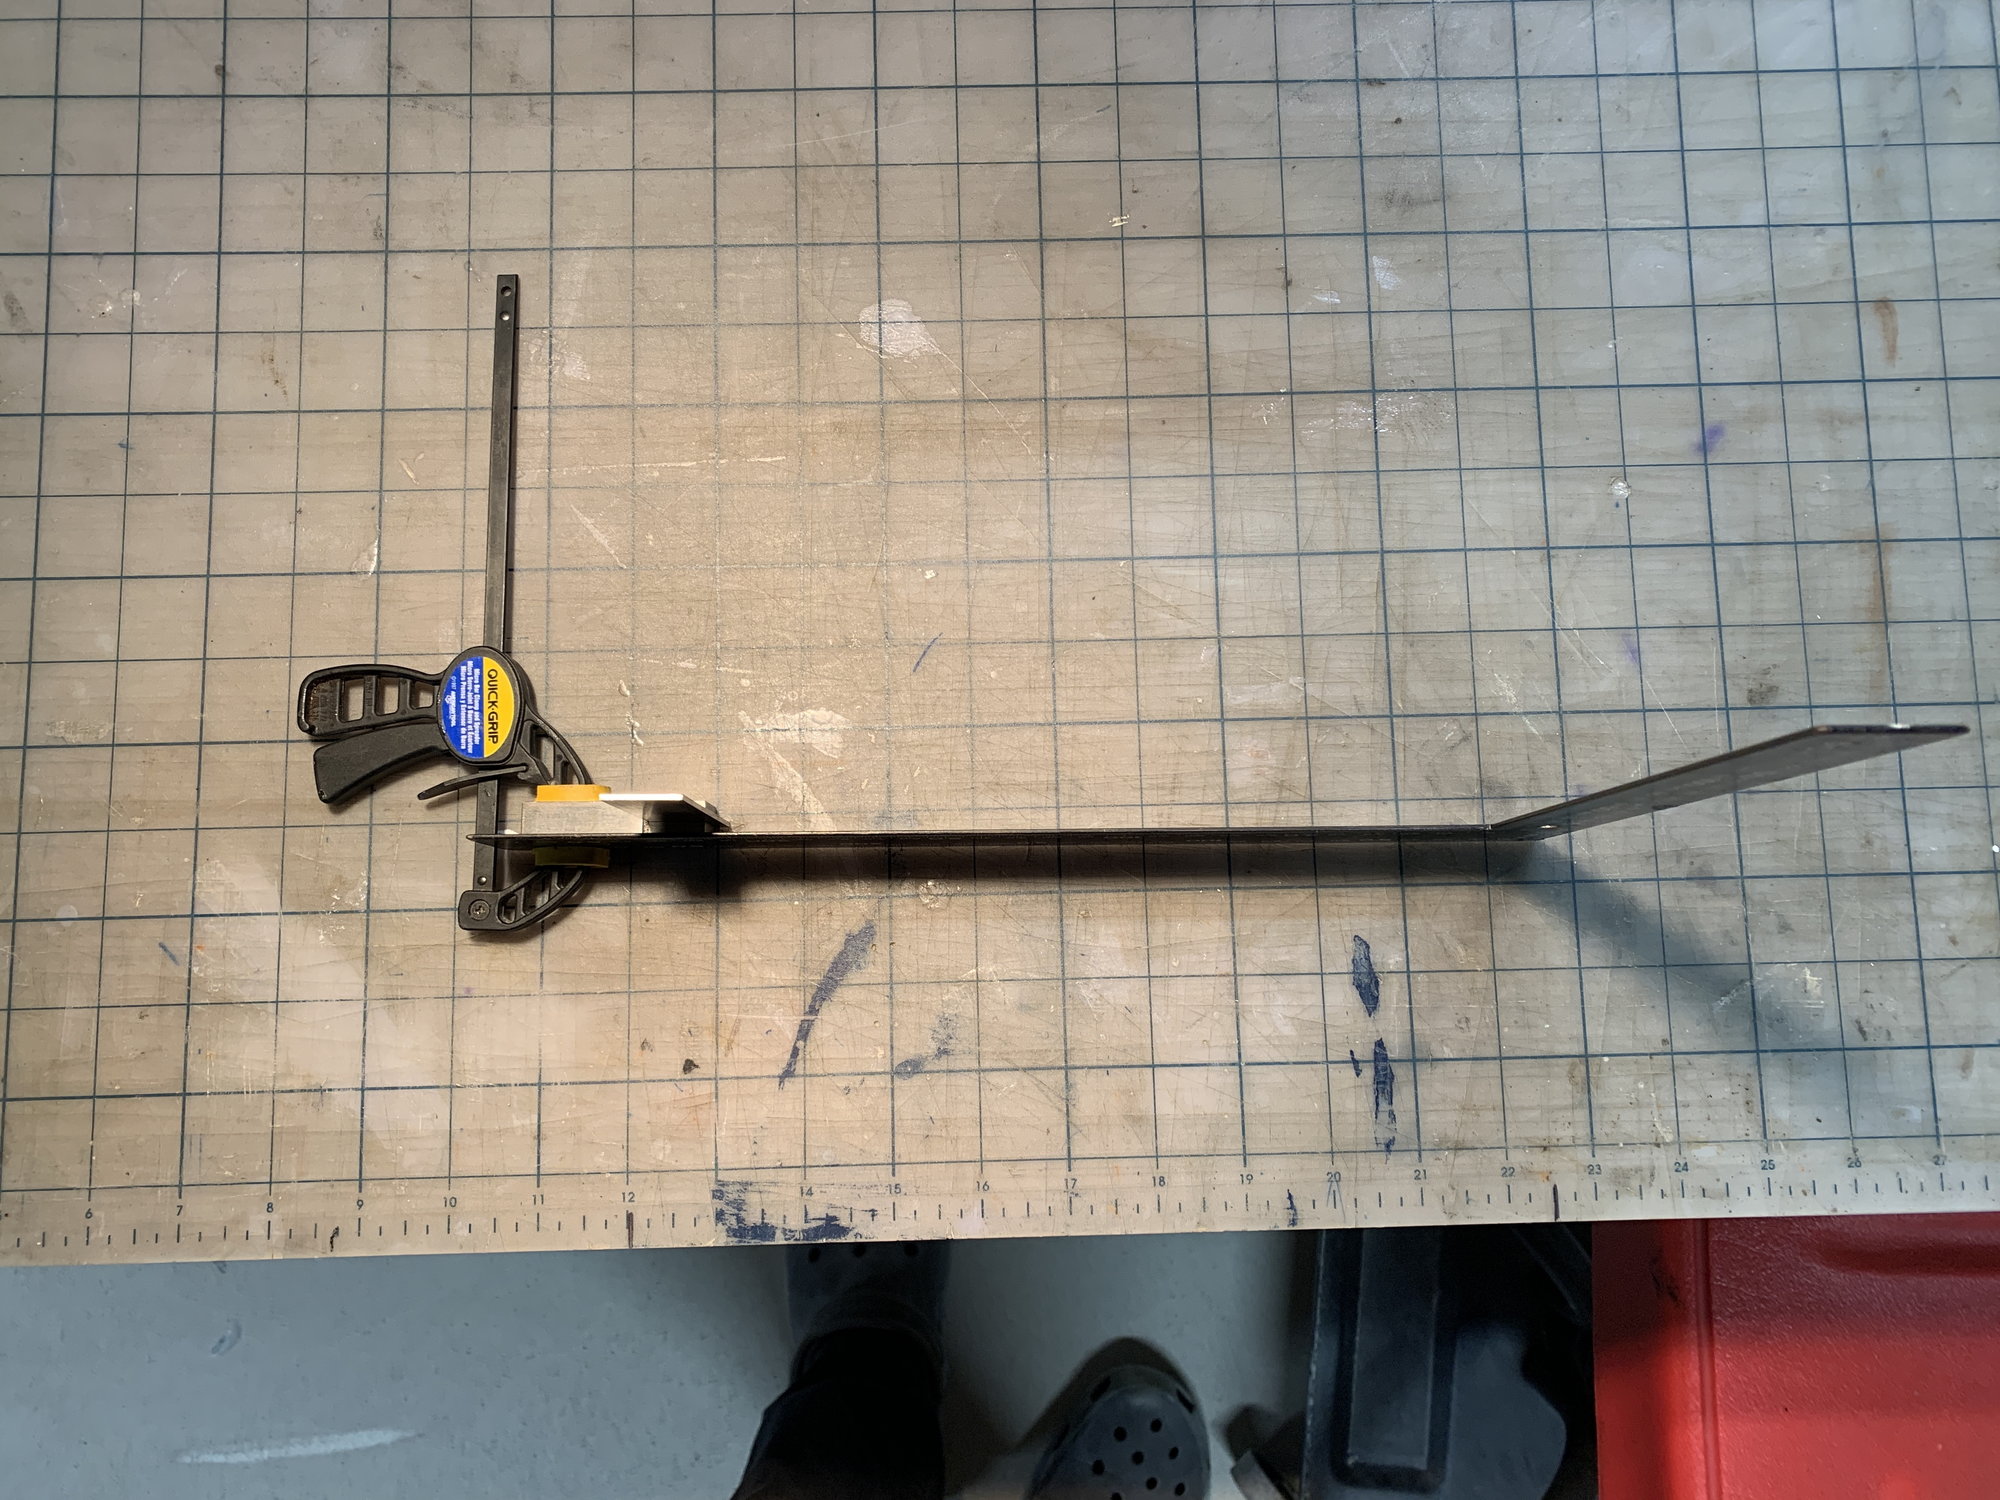
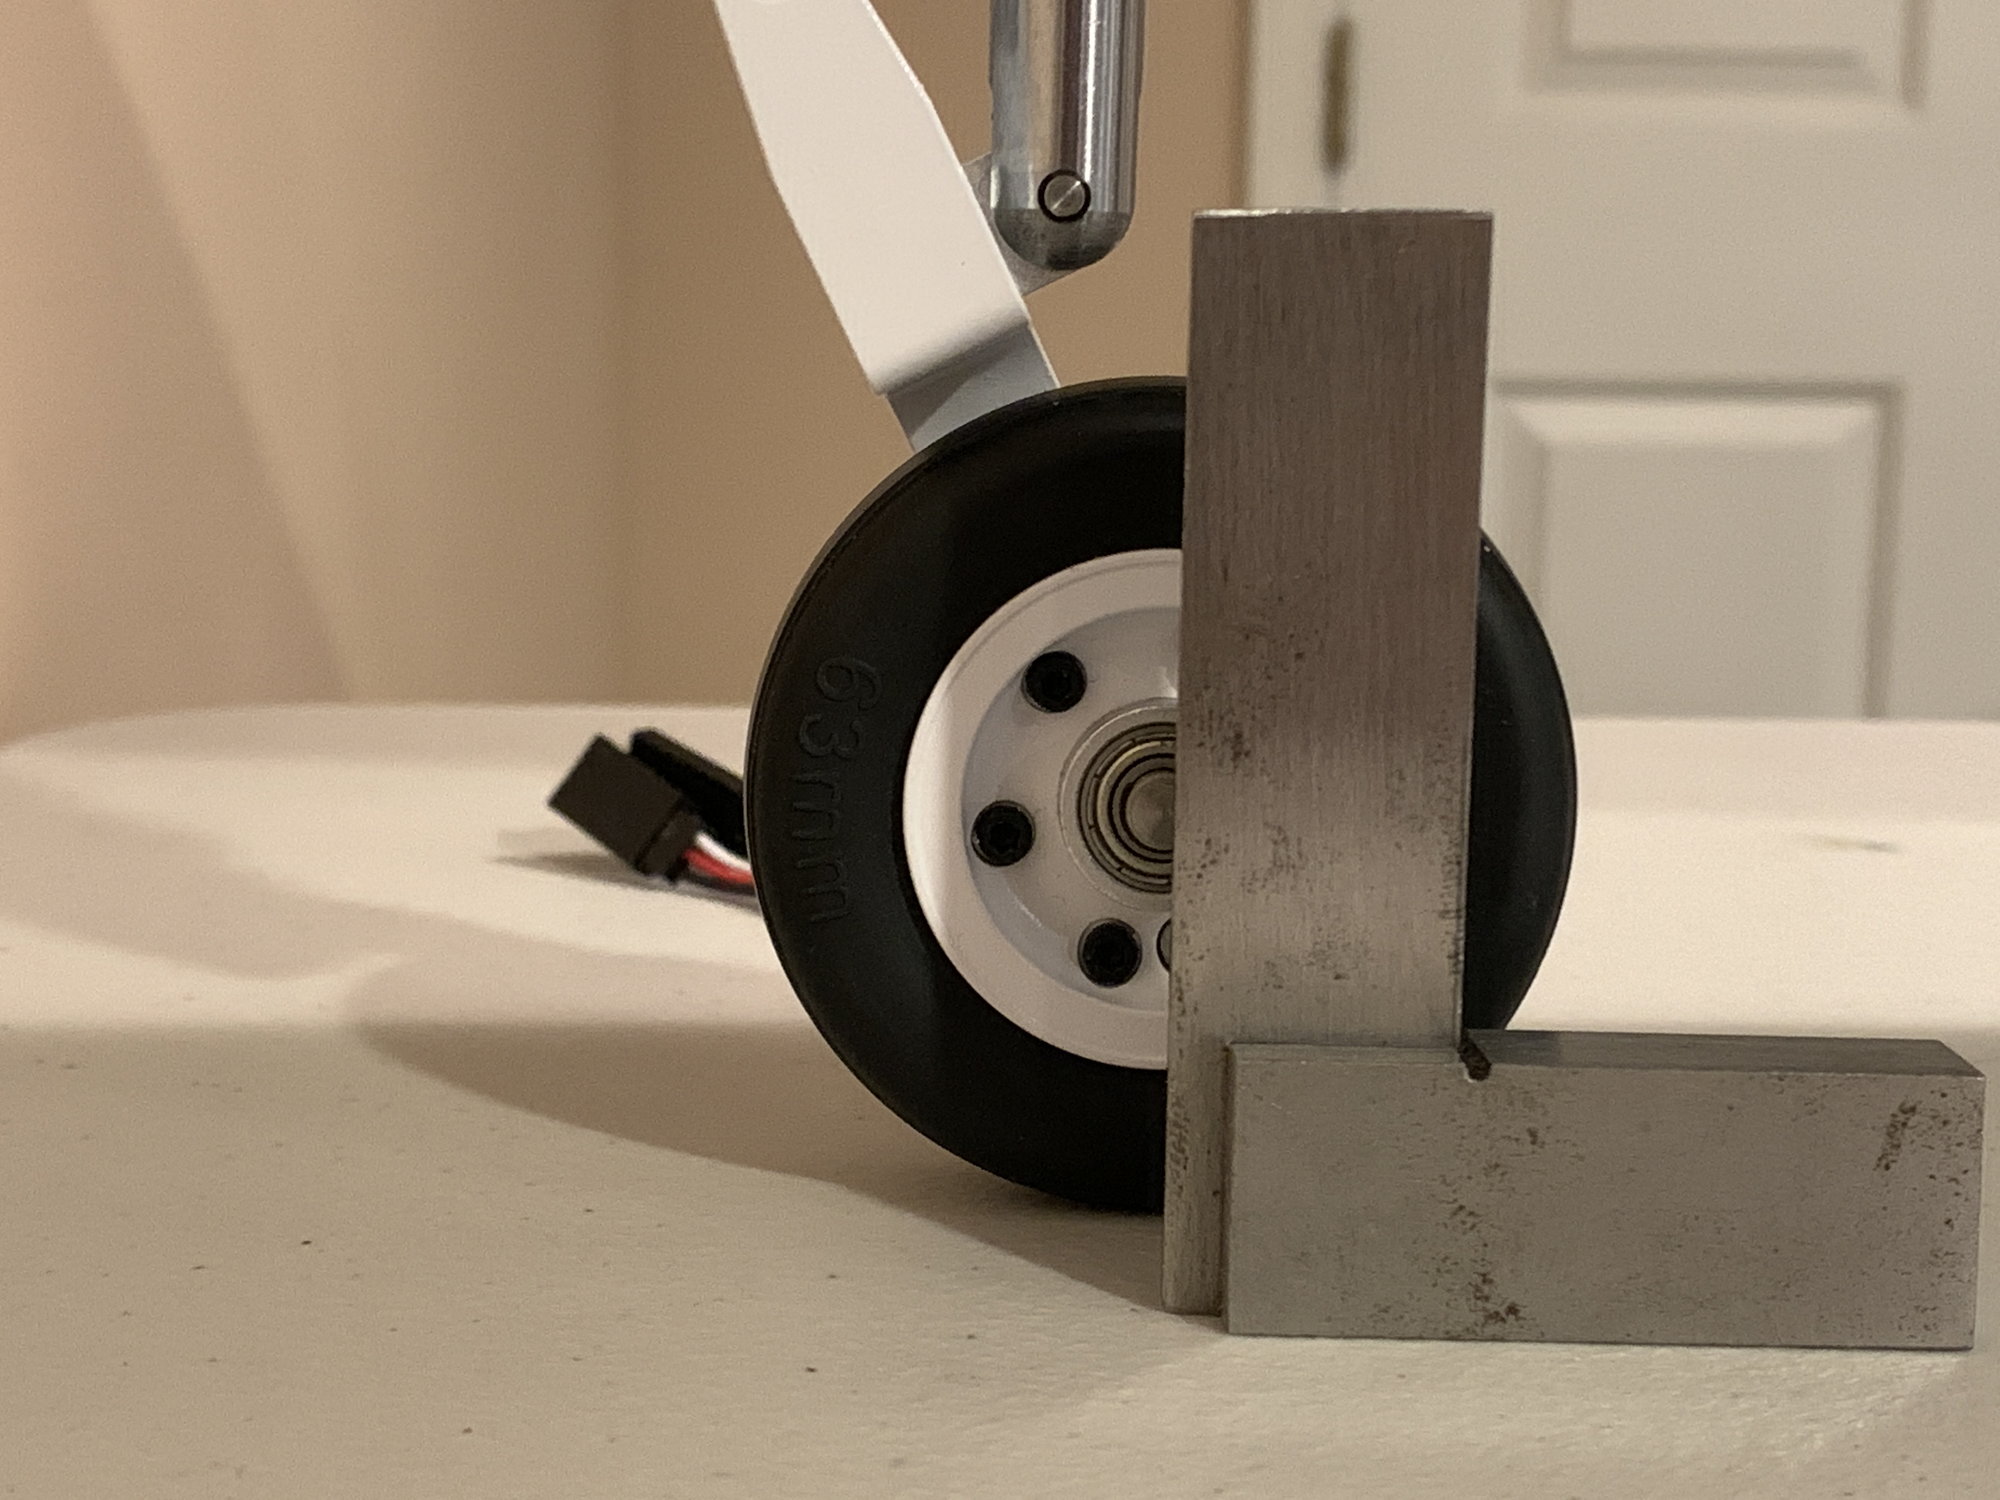
CG measurement assist tool - top view
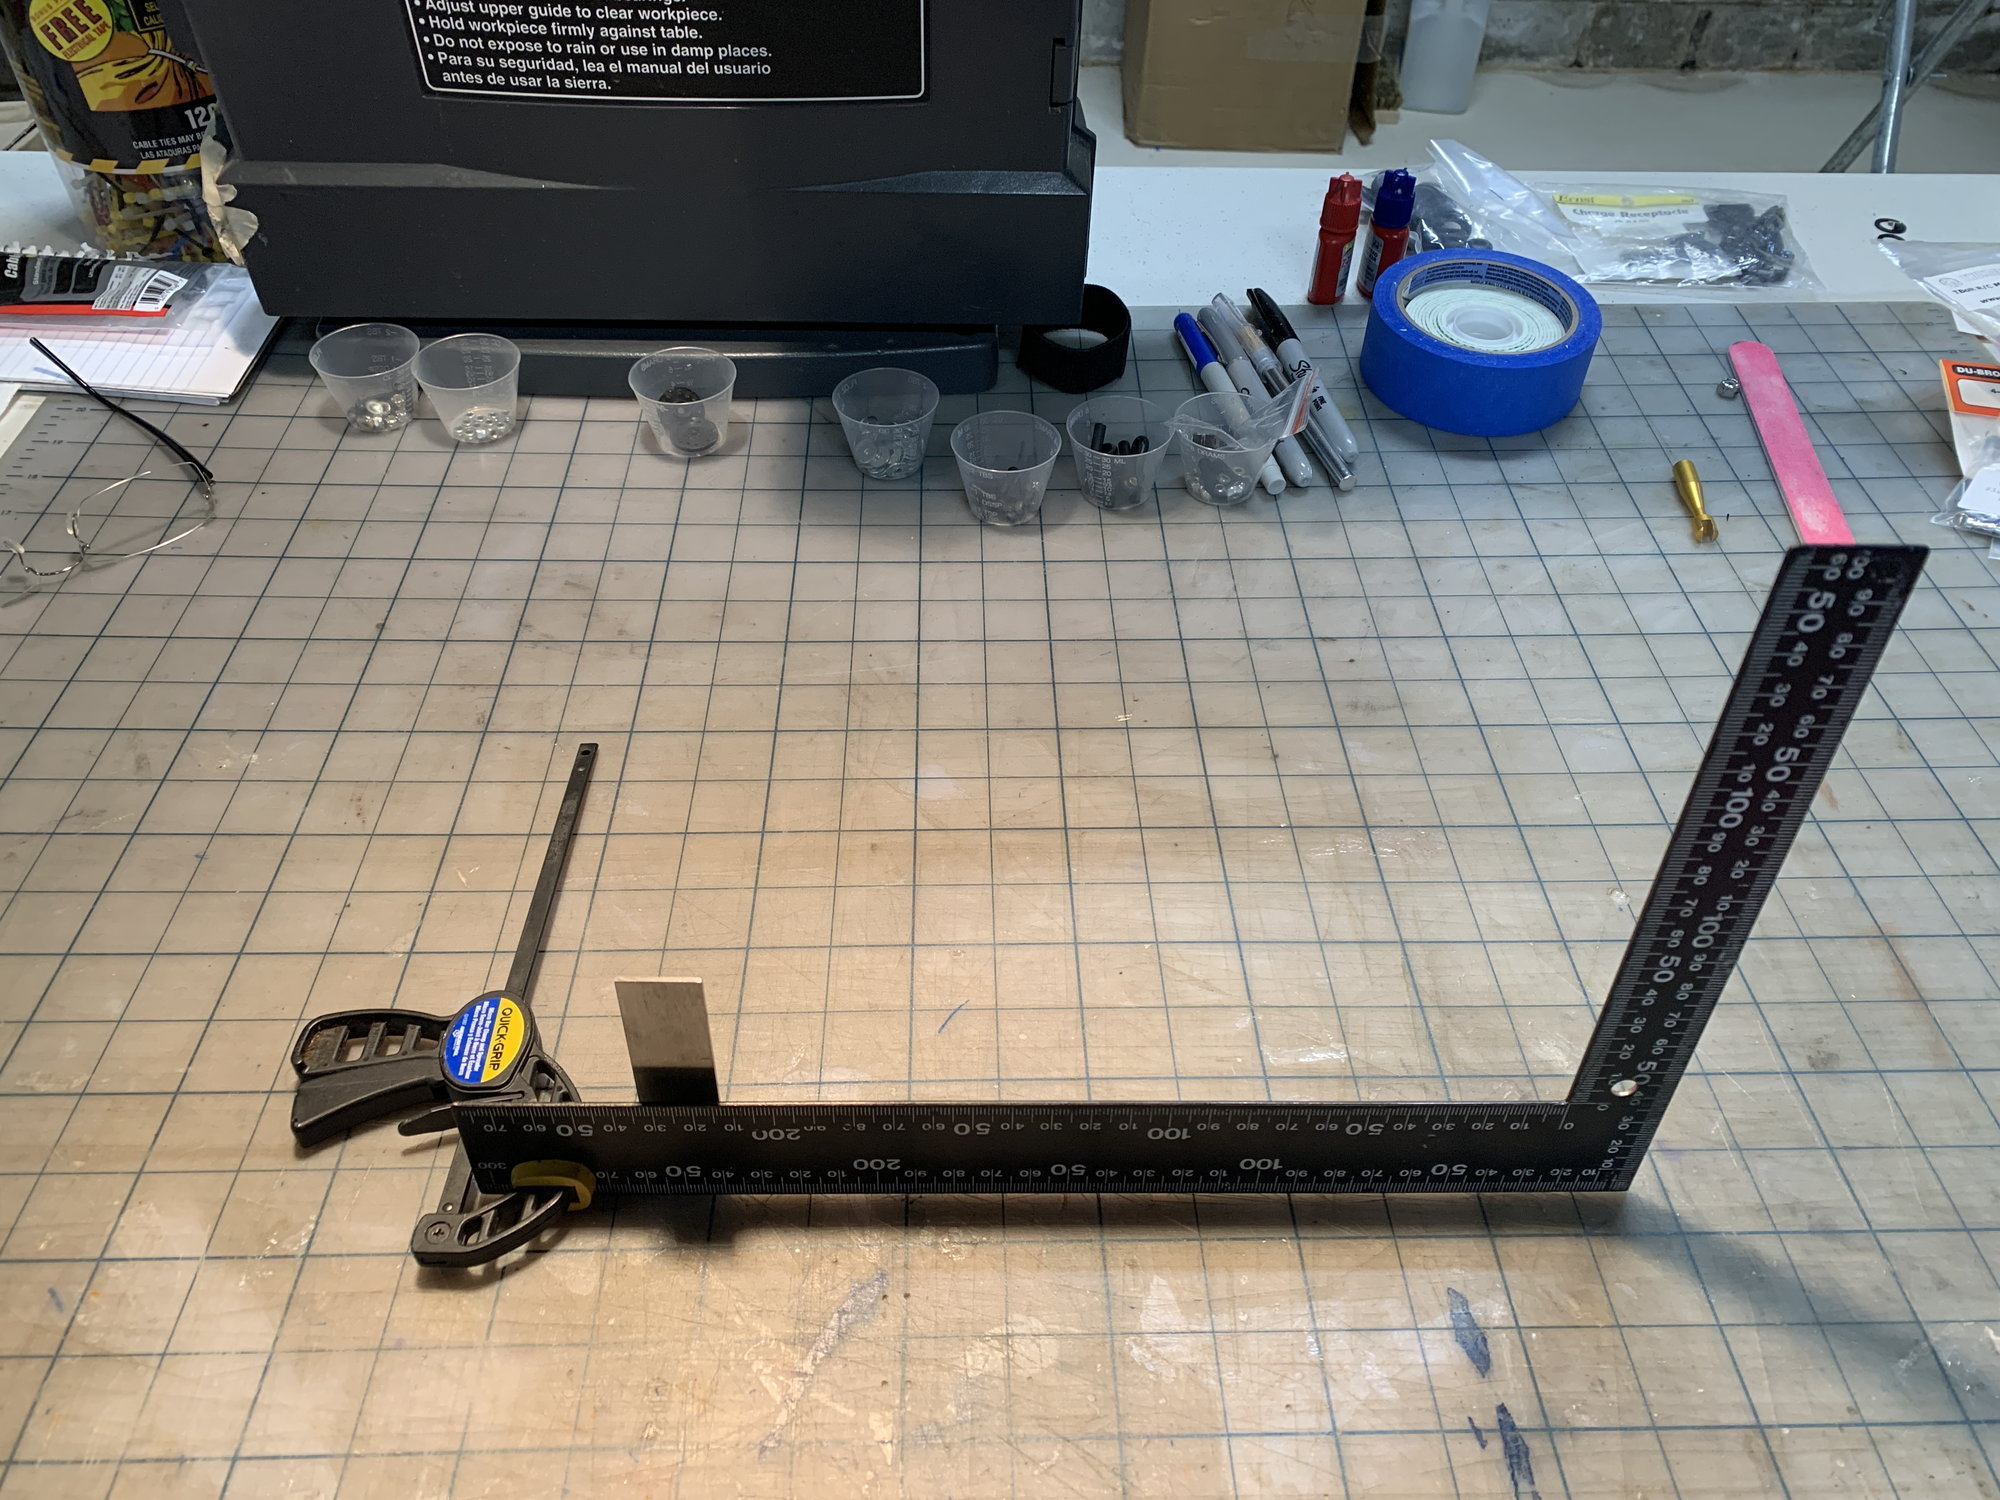
CG measurement assist tool - side view
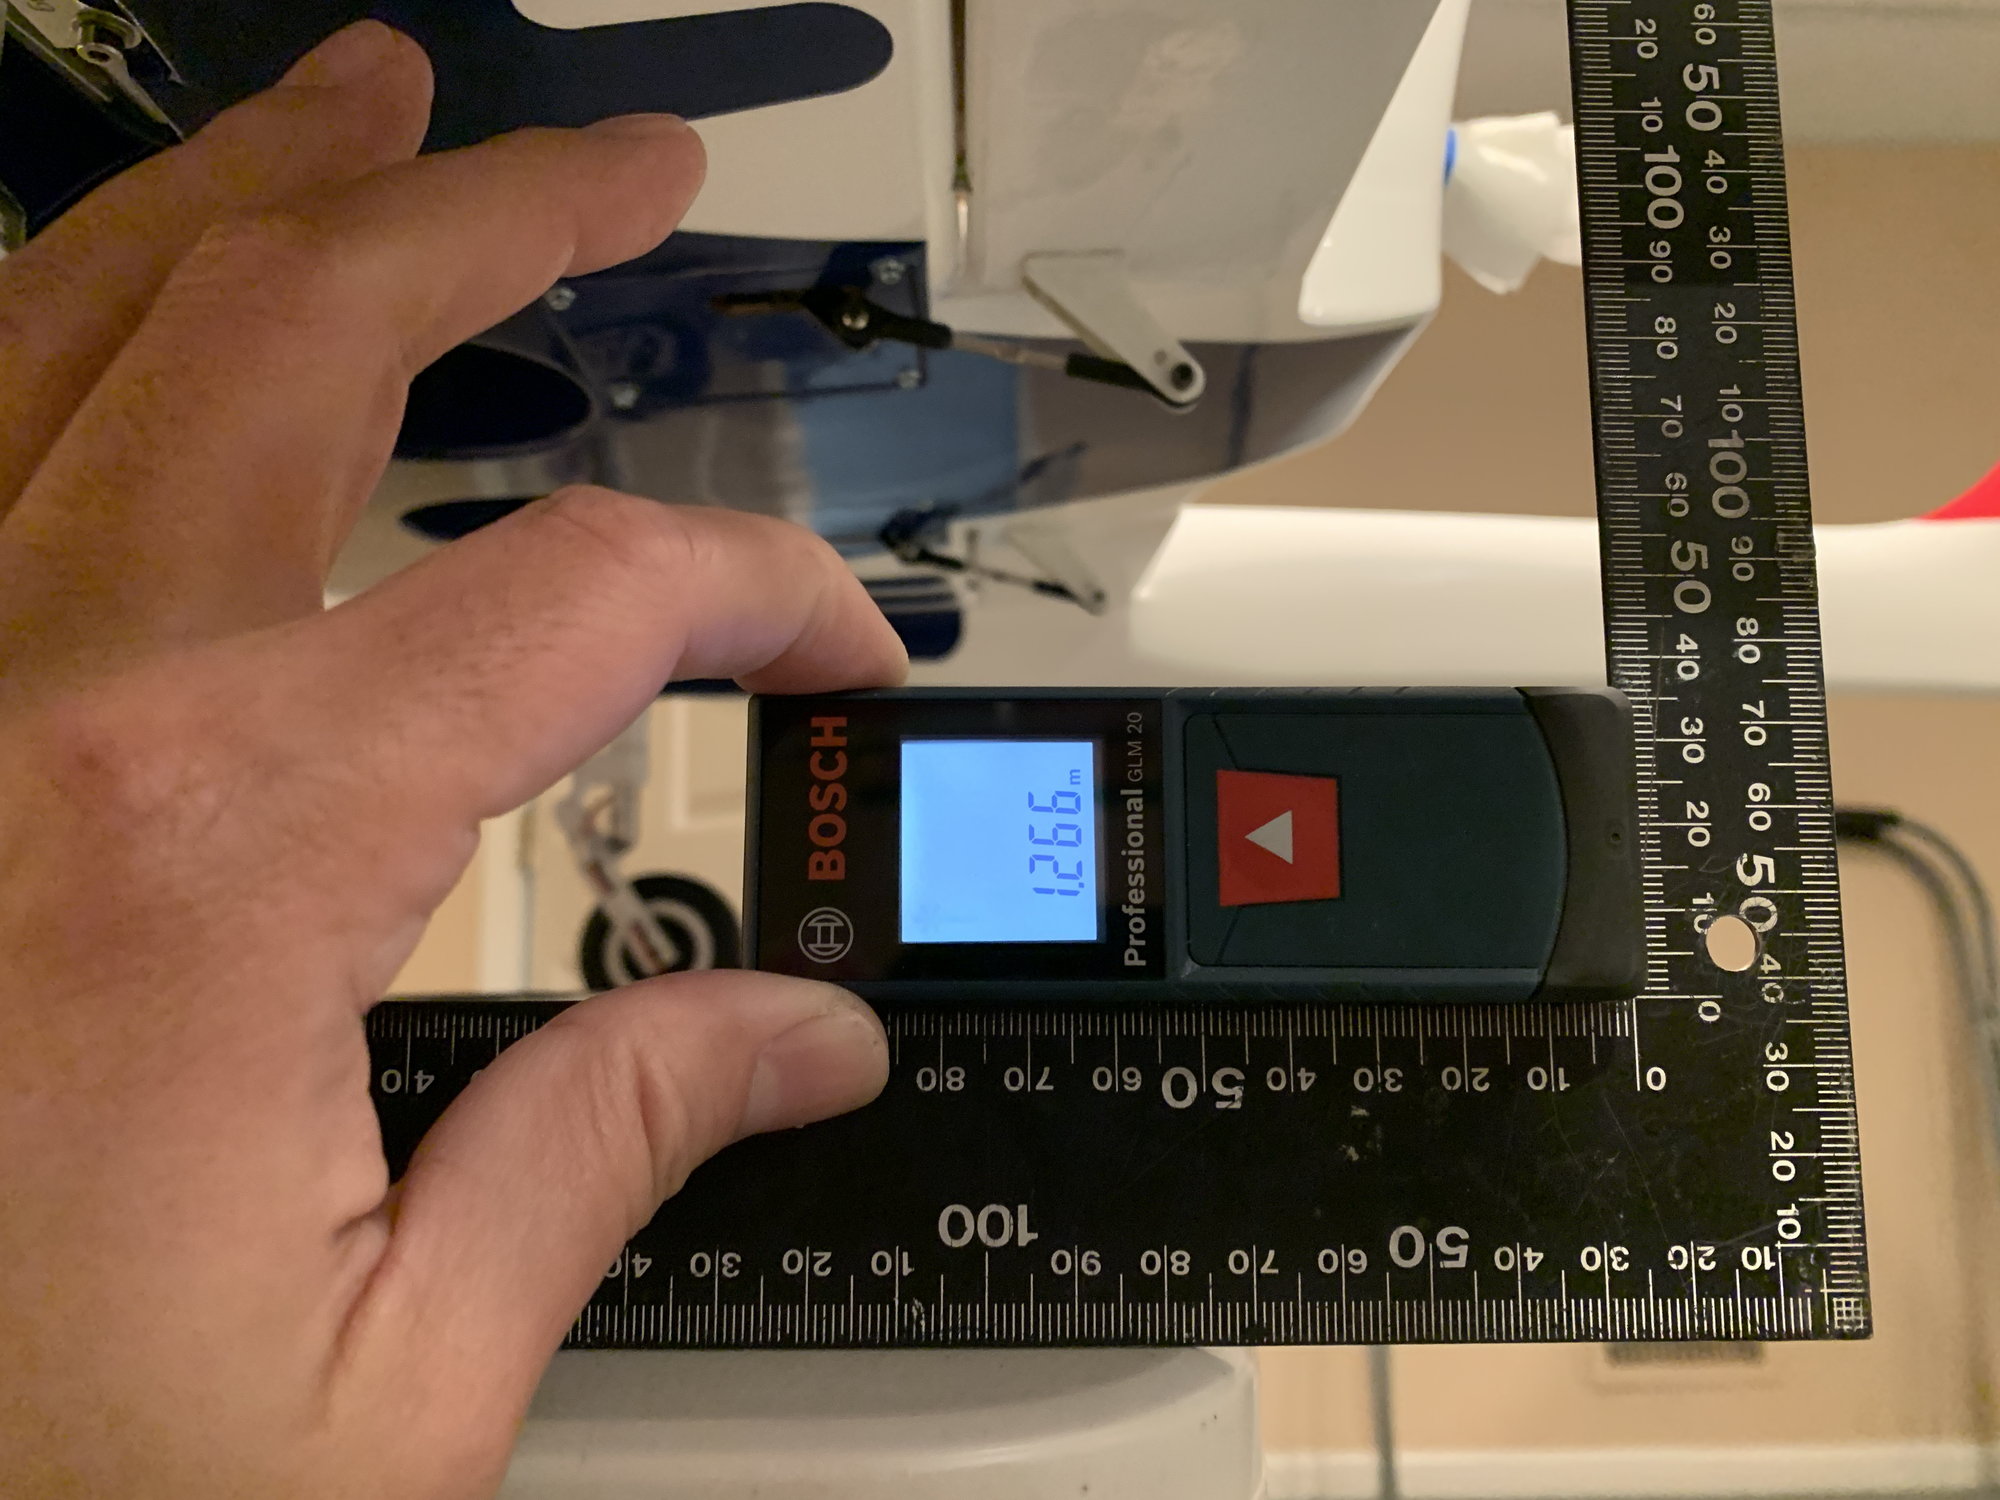
CG measurement
For smaller jets like this Boomer, I just use a foldable table. Below are pics of the tools I use and how I take my measurements.
This is the xicoy tool I use
measurement tools I use
Nose measurement spot
Nose measurement
Mains measurement spot
Mains measurement
Initial weight measurement spot
Initial weight spot measurement
secondary weight measurement spot - due to nose heavy condition - ugh!!! sux...
CG measurement assist tool - top view
CG measurement assist tool - side view
CG measurement
01-02-2021, 03:44 PM
#628
I am kind of a stickler for records, so I keep a close account of the measurements. Bellow is the from I have been using to track the build from the beginning.
As I go I keep adding to it. Once I have my measurements and after some basic math, I have what I need as input values for the Xicoy tool.
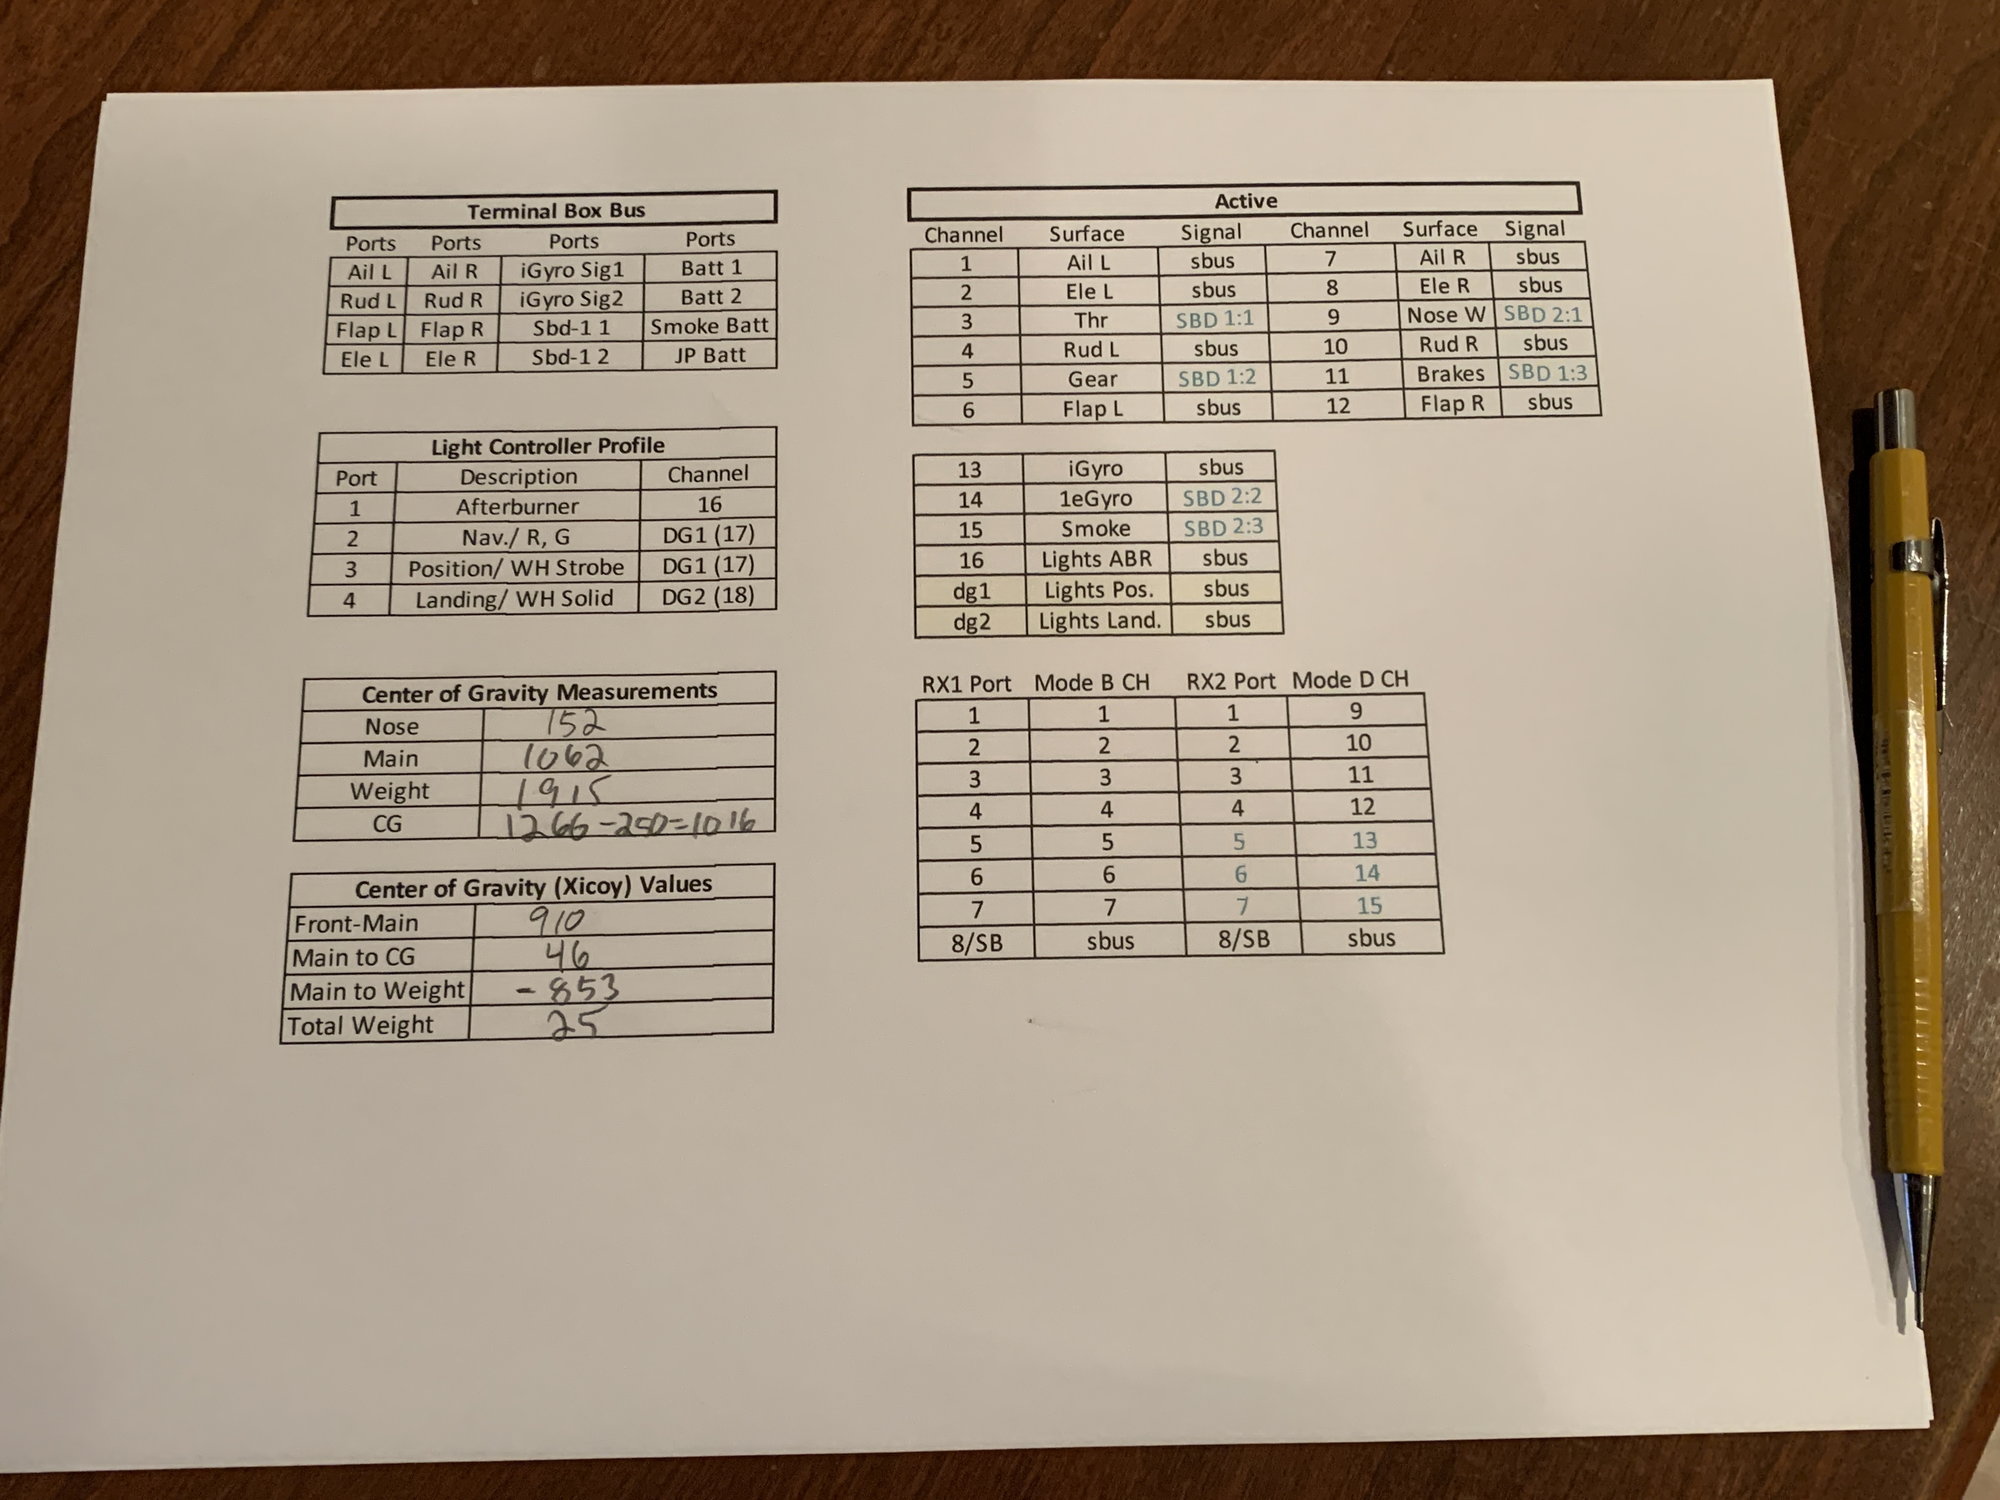
Measurements and input values for the Xicoy tool
As I go I keep adding to it. Once I have my measurements and after some basic math, I have what I need as input values for the Xicoy tool.
Measurements and input values for the Xicoy tool
Last edited by skunkwurk; 01-03-2021 at 12:48 AM.
01-02-2021, 03:59 PM
#629
I forgot to mention this, but I think it is obvious from the pics. I don't measure between the components. I find it easier to select a reference point (a static value), in most cases a wall. I butt the plane's nose up against it and then take all of the measurements from each component to the reference point. From there I simply derive the measurements between components.
Note: if working off of the floor, make sure you account for base molding, etc... I know that should go without saying, but I don't want anyone to accidentally get something wrong when it comes to cg.
Note: if working off of the floor, make sure you account for base molding, etc... I know that should go without saying, but I don't want anyone to accidentally get something wrong when it comes to cg.
Last edited by skunkwurk; 01-02-2021 at 04:02 PM.
01-02-2021, 04:23 PM
#630
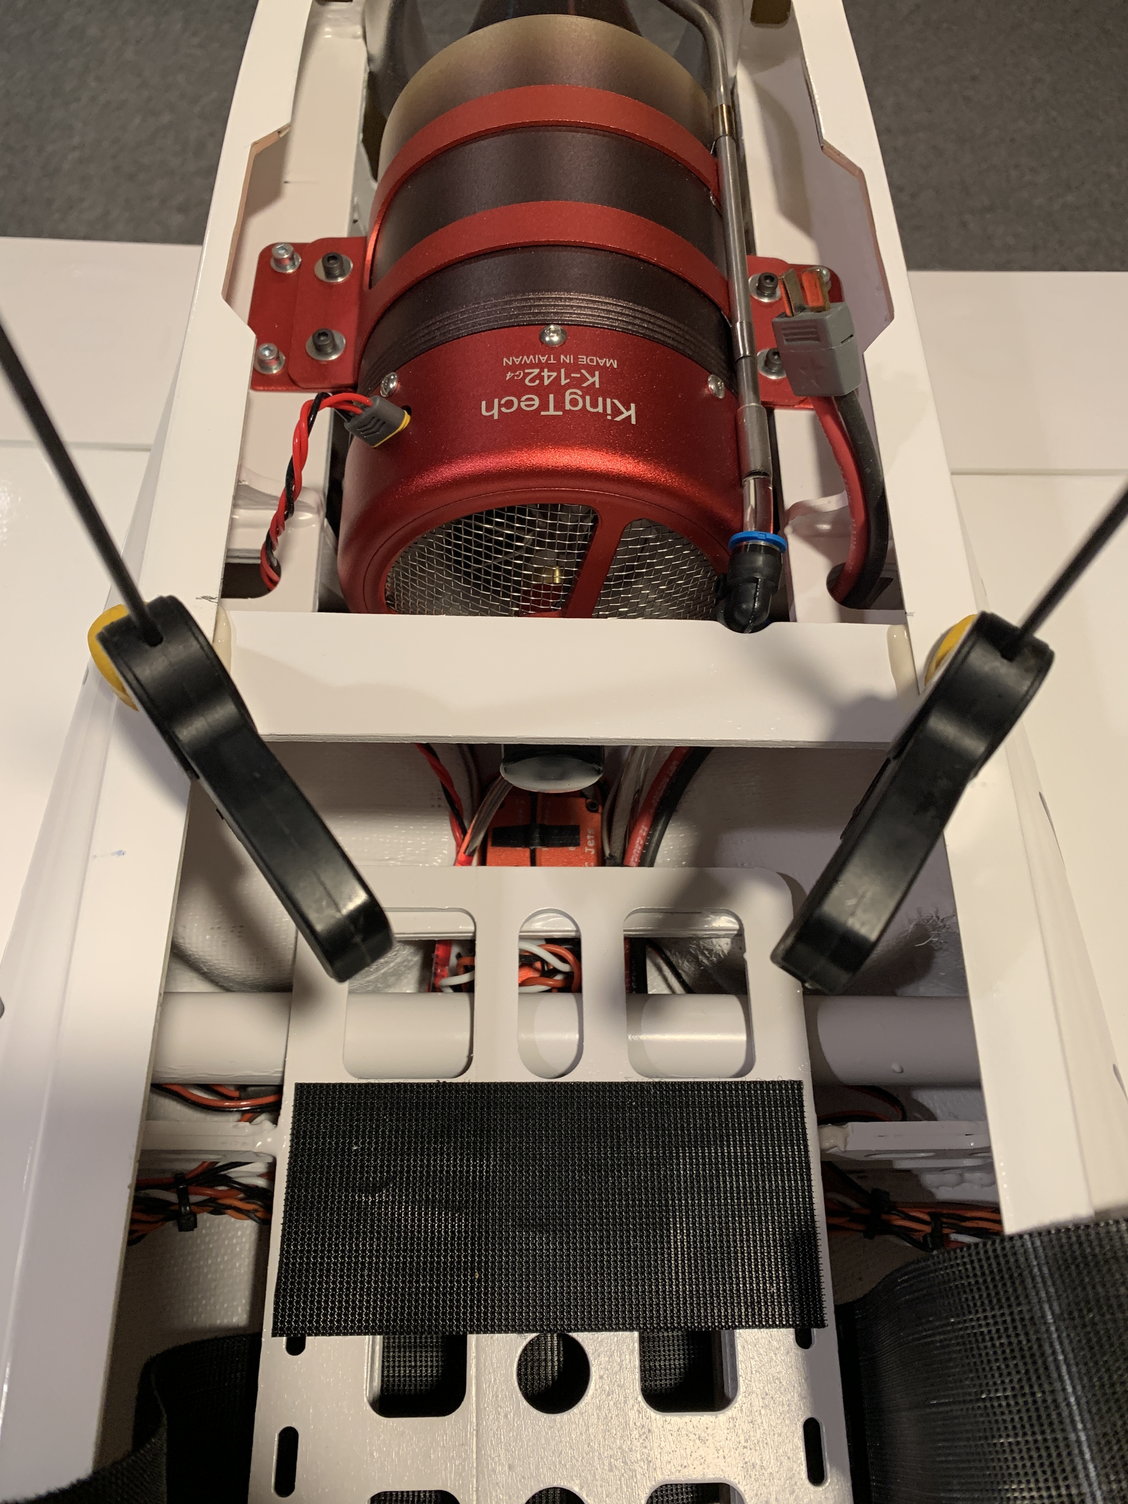
Here are the results of the effort. What did we learn? Basically that I need to install the drm battery in front of the turbine. A small little board/tray should do the trick. I guess - back to work! 
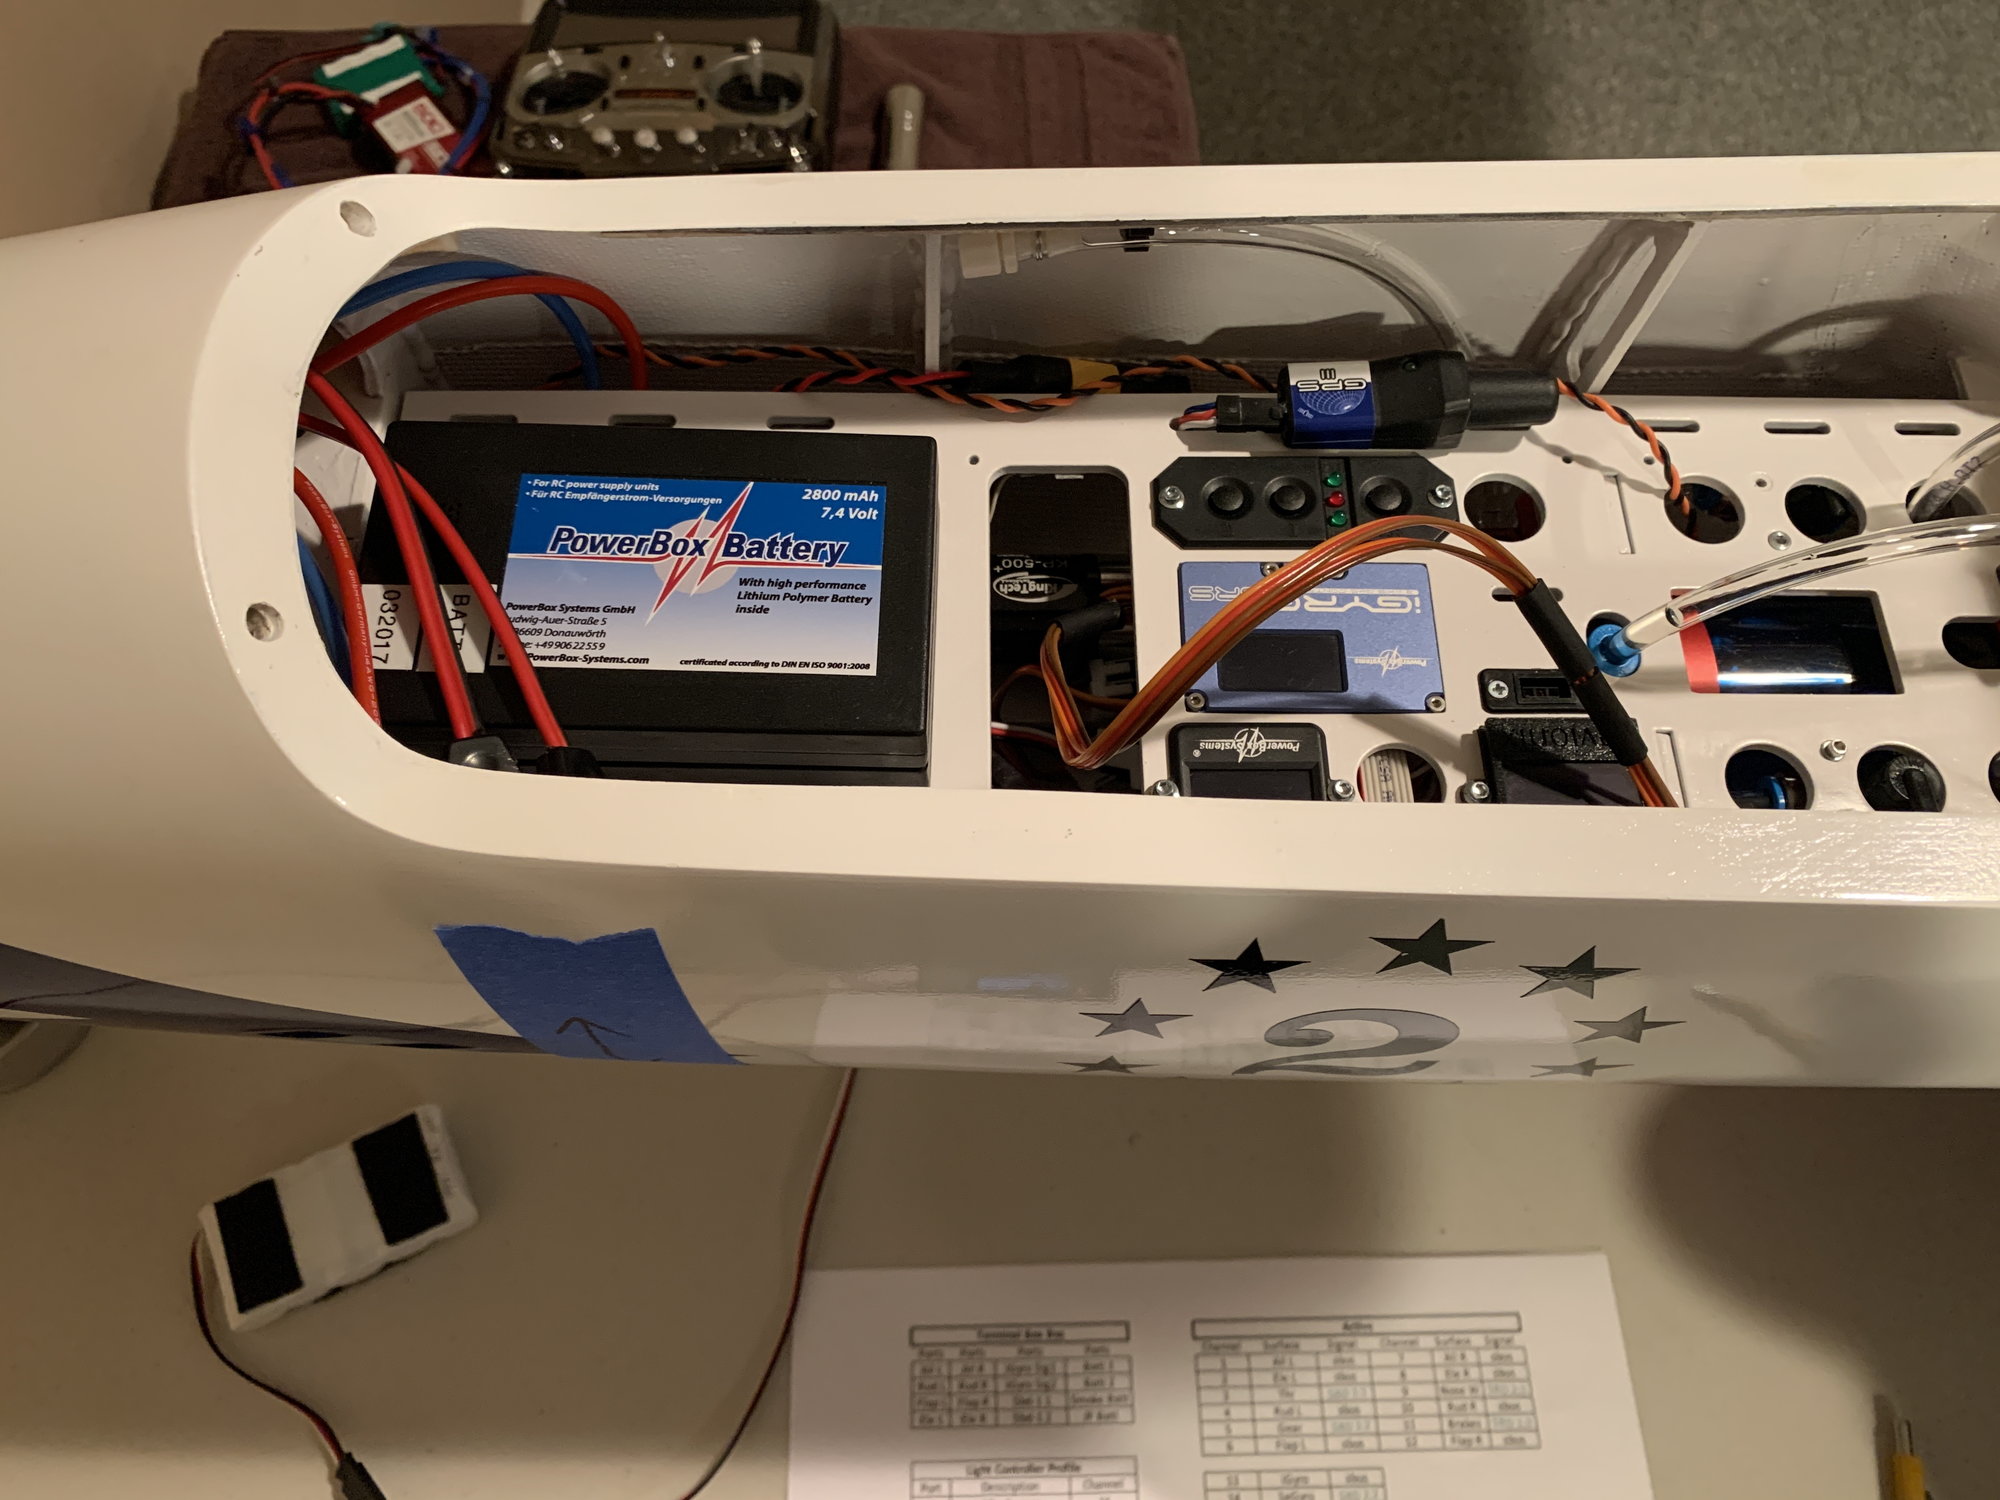
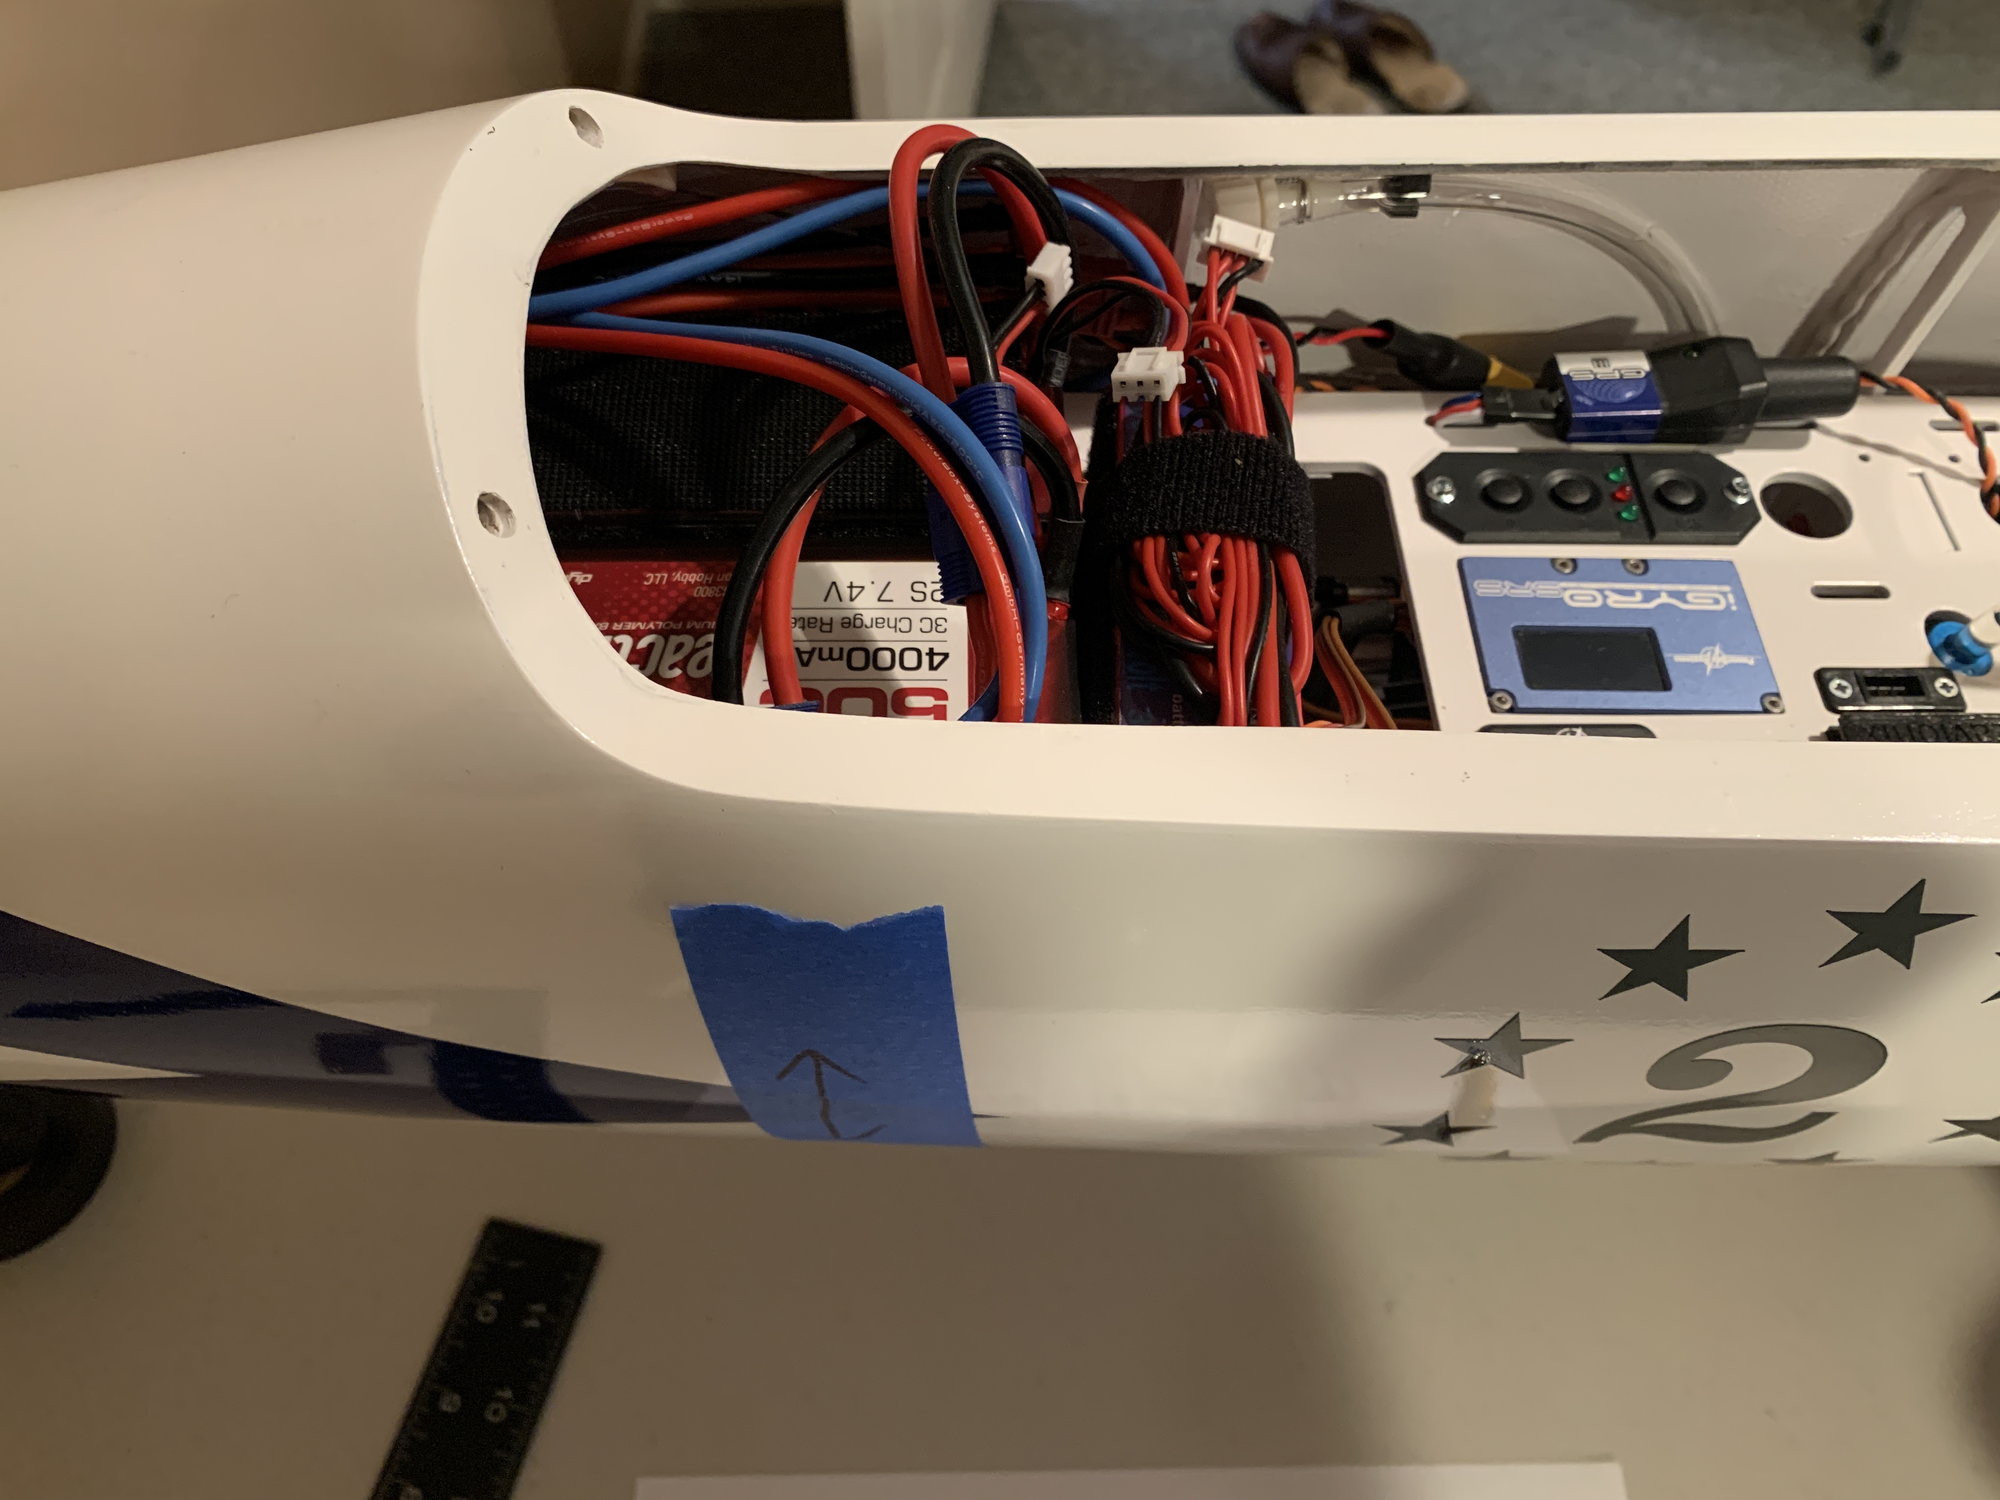
Front rx battery mounting position
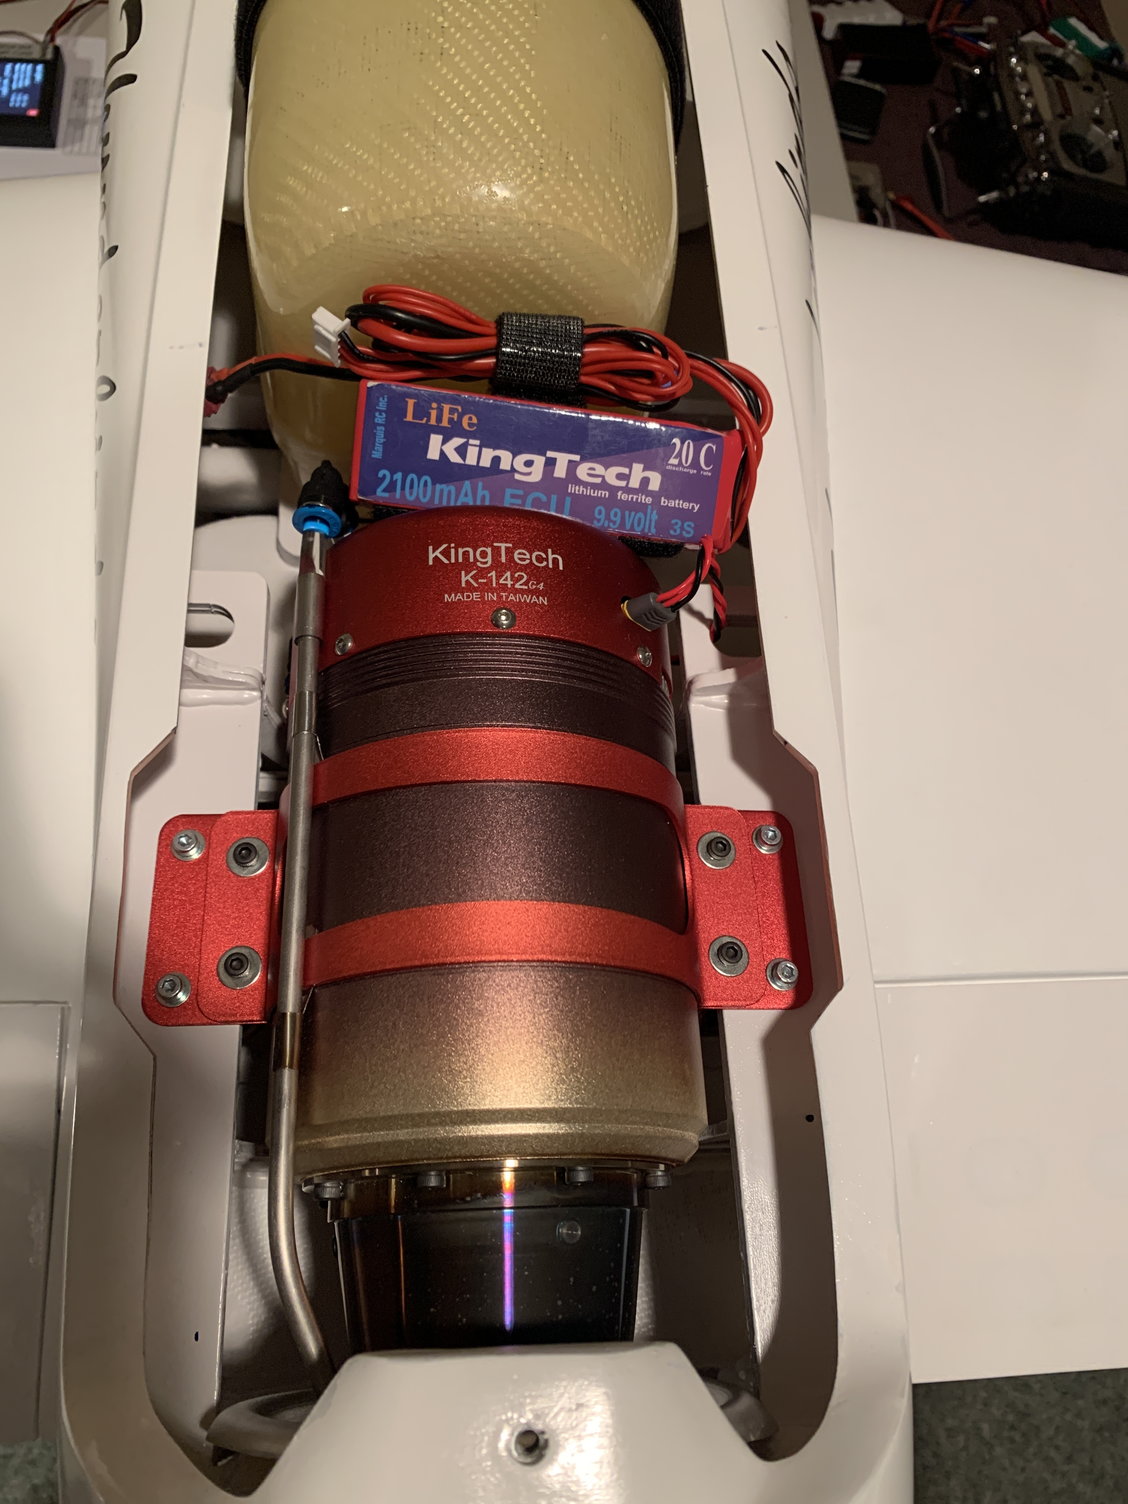
rear drm battery mounting position
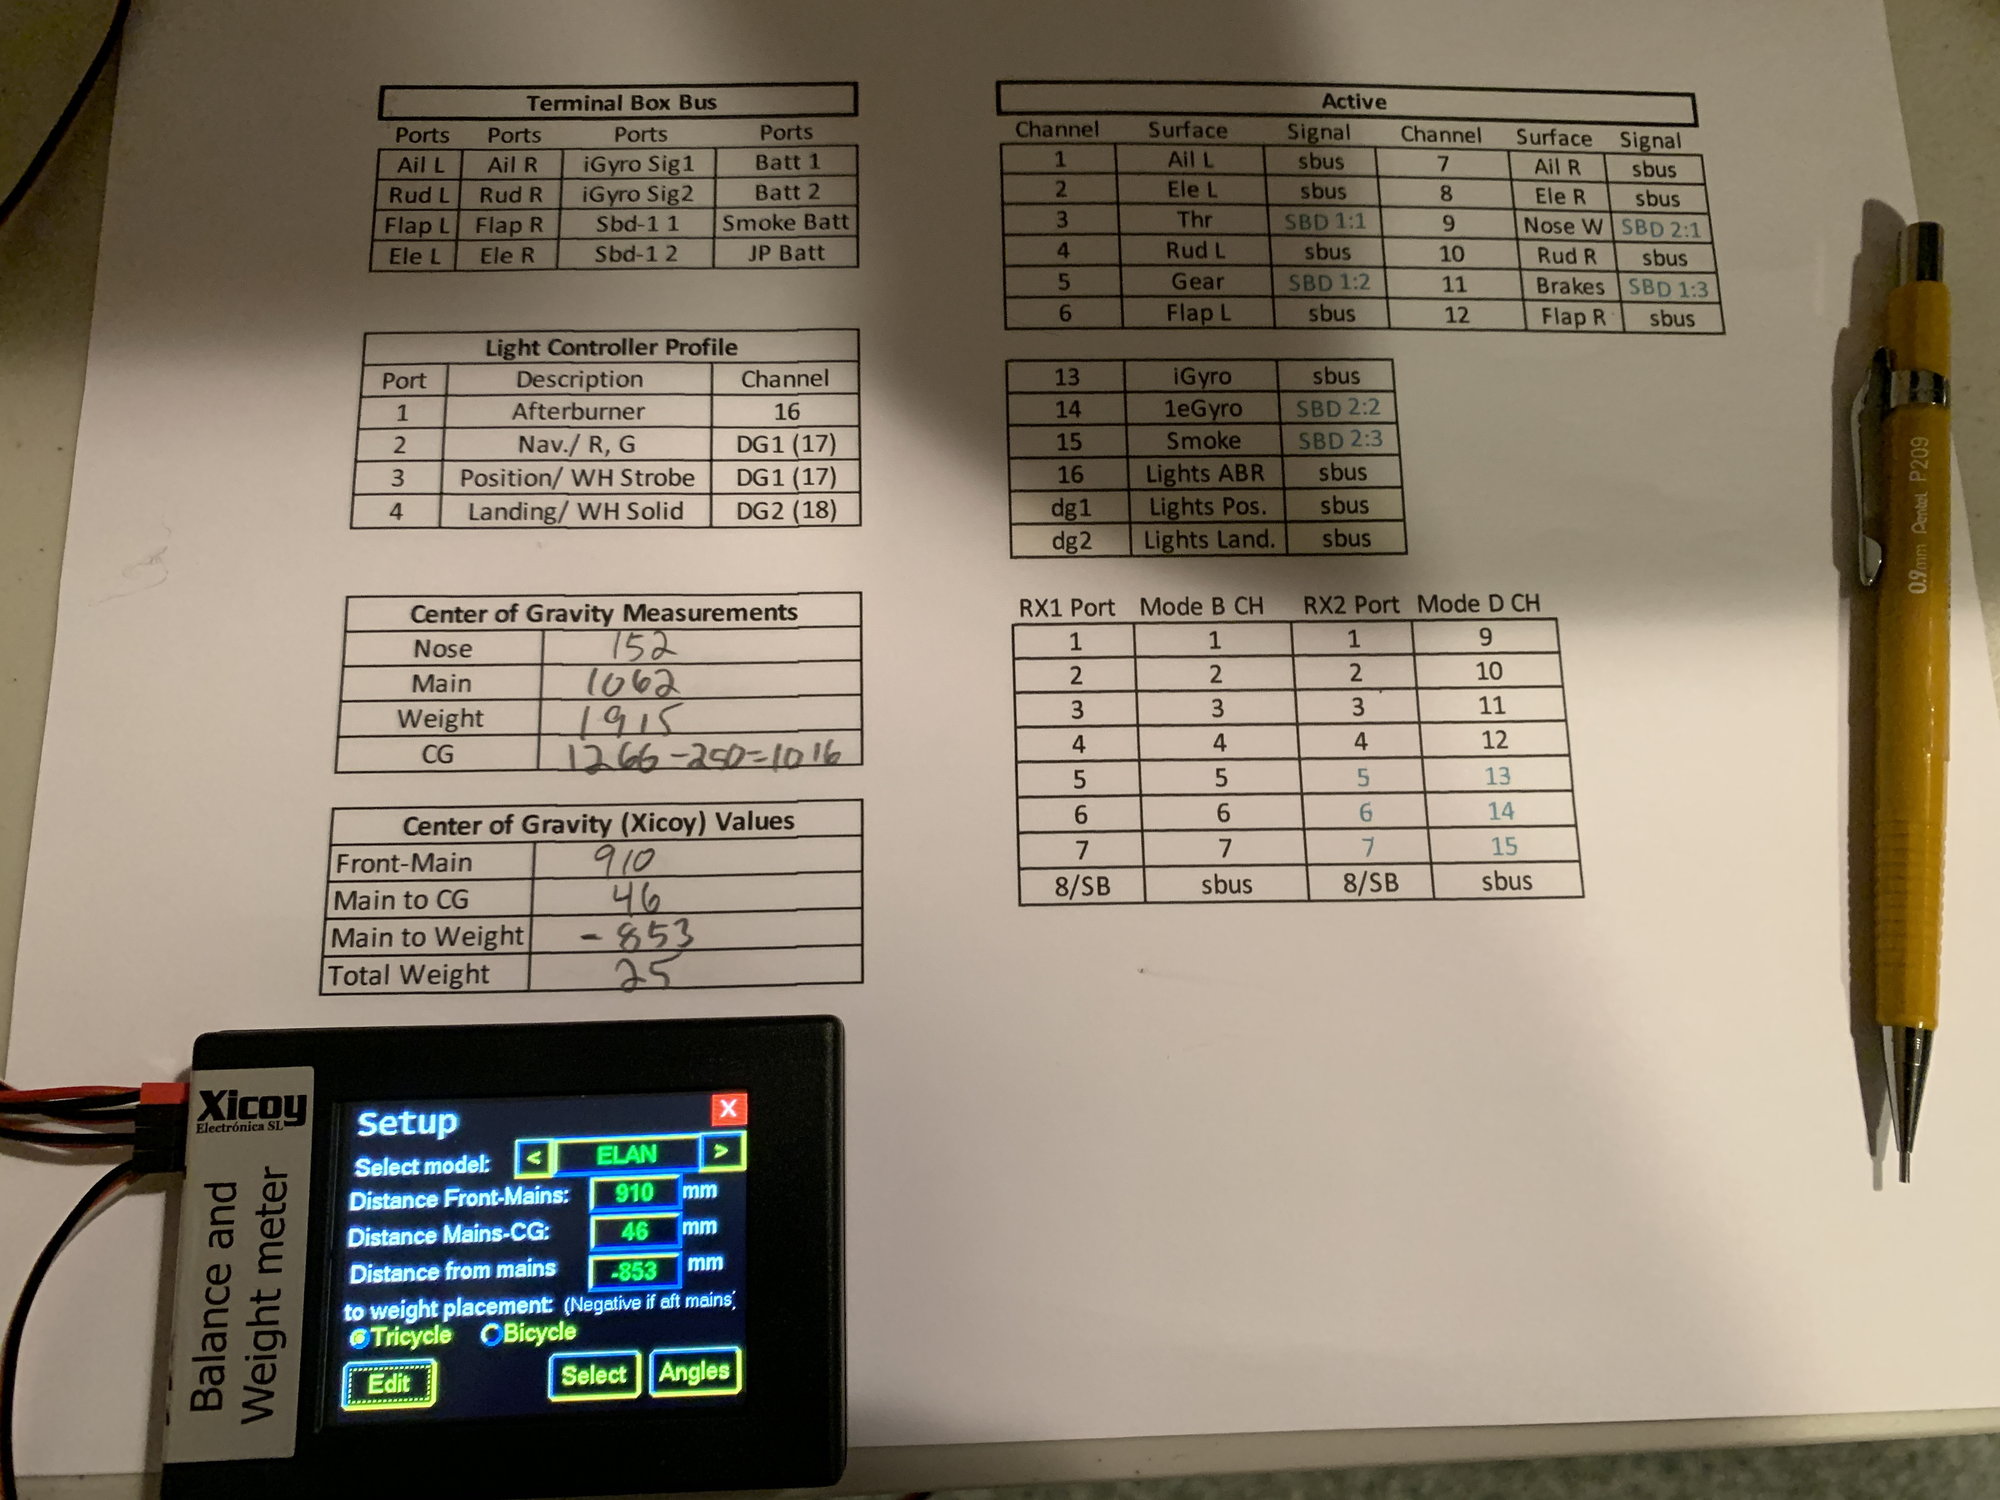
input values
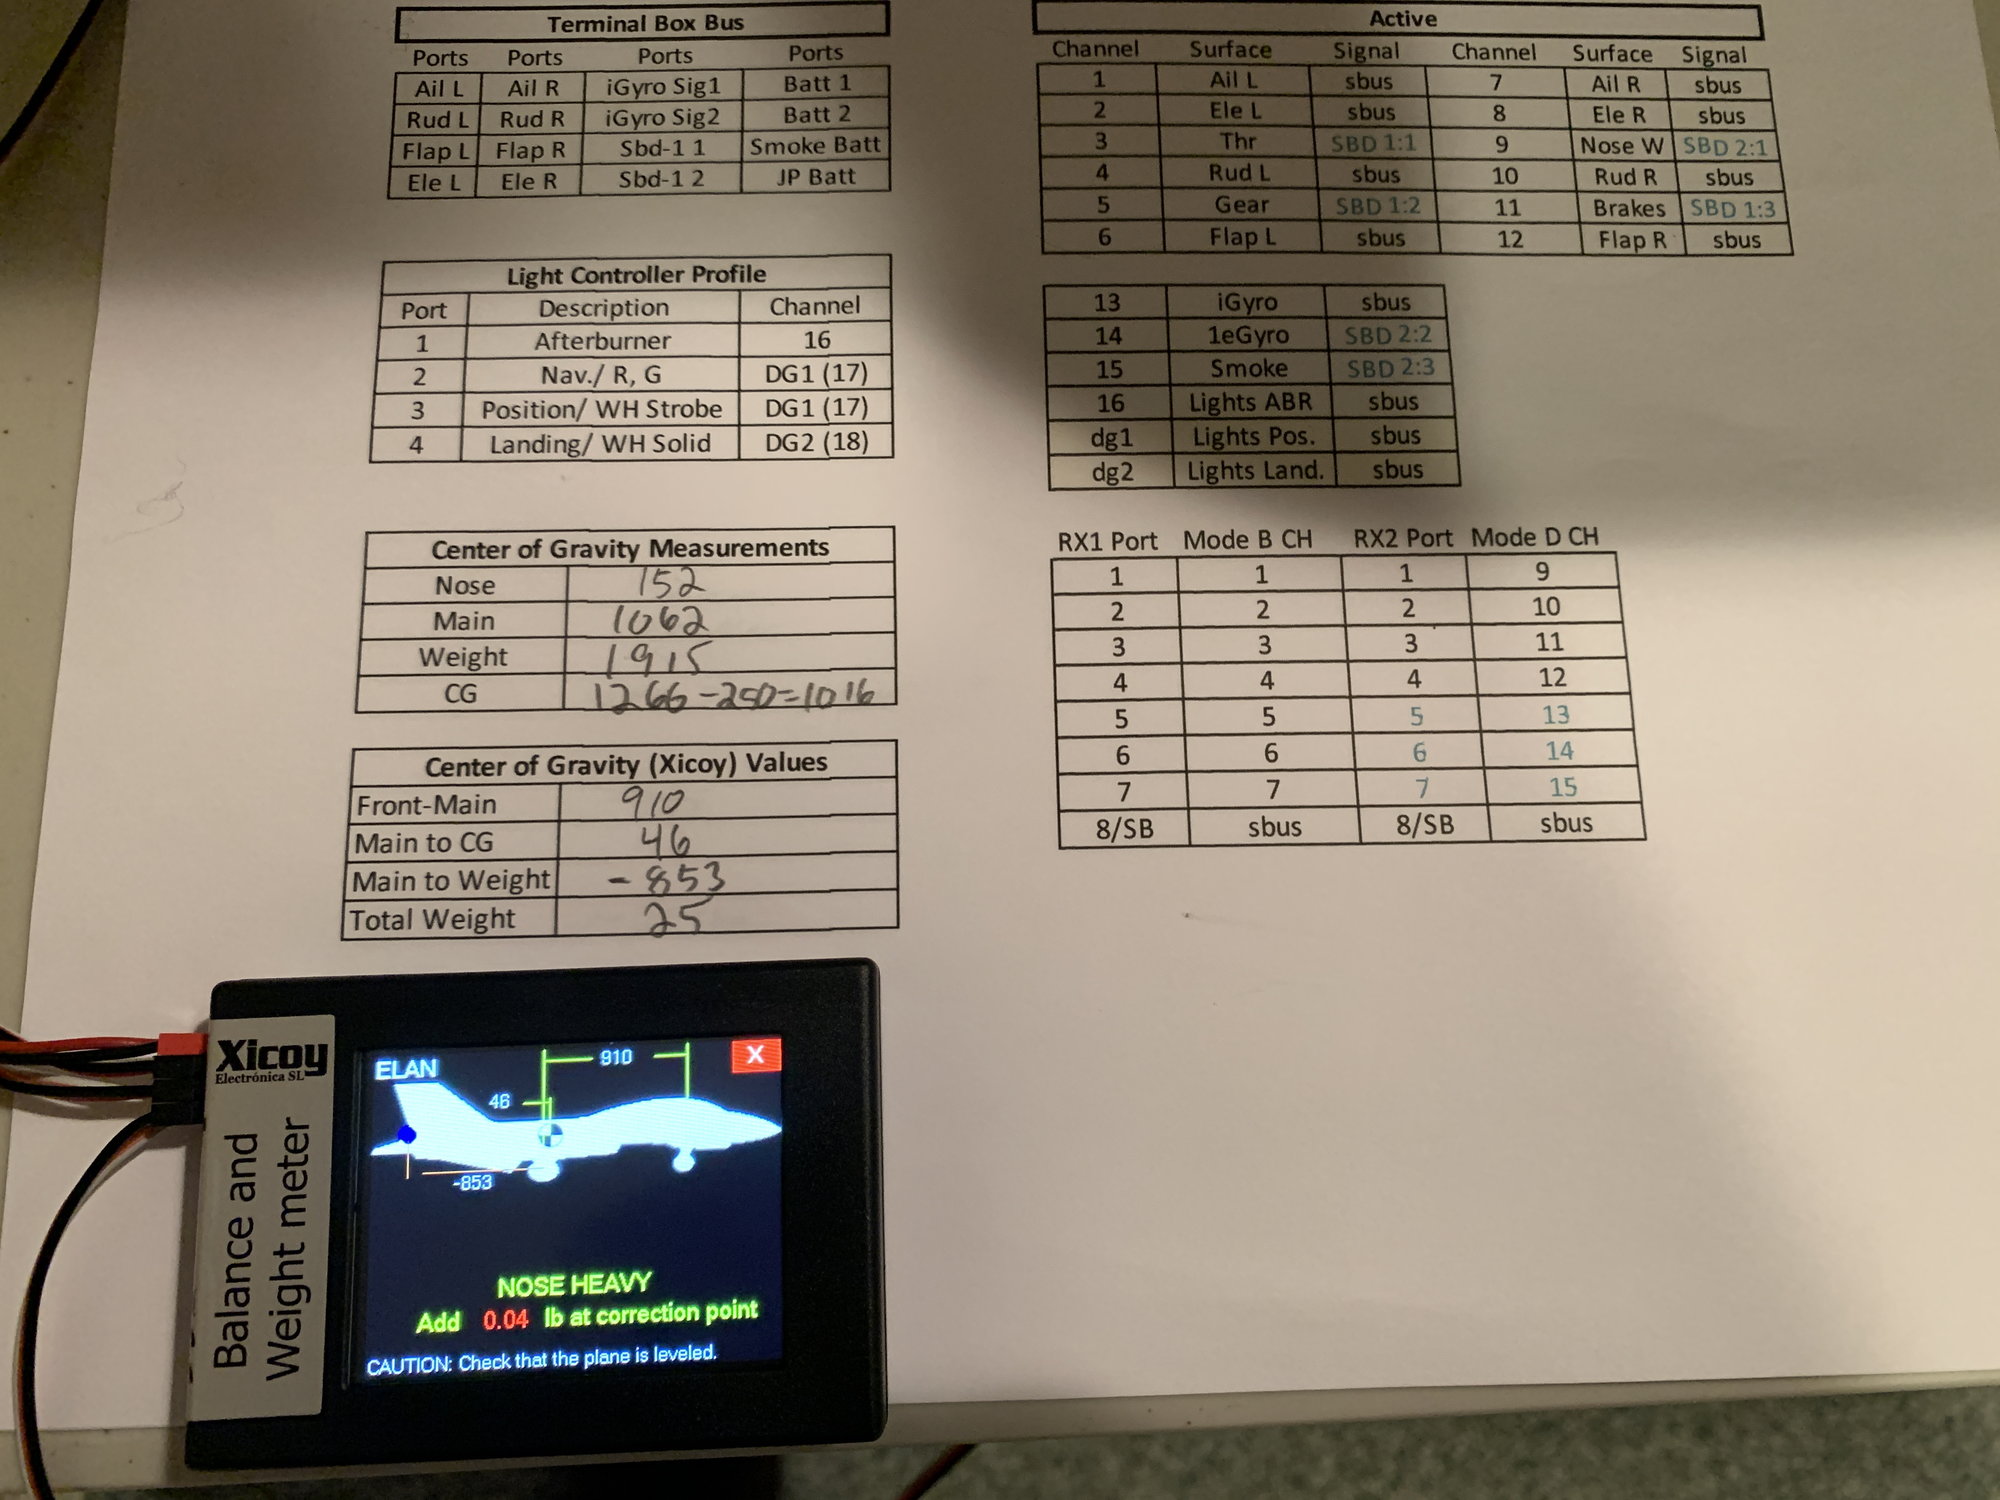
cg of plane - in this configuration it is a tad nose heavy. 3/4 of an oz to be exact. lol...
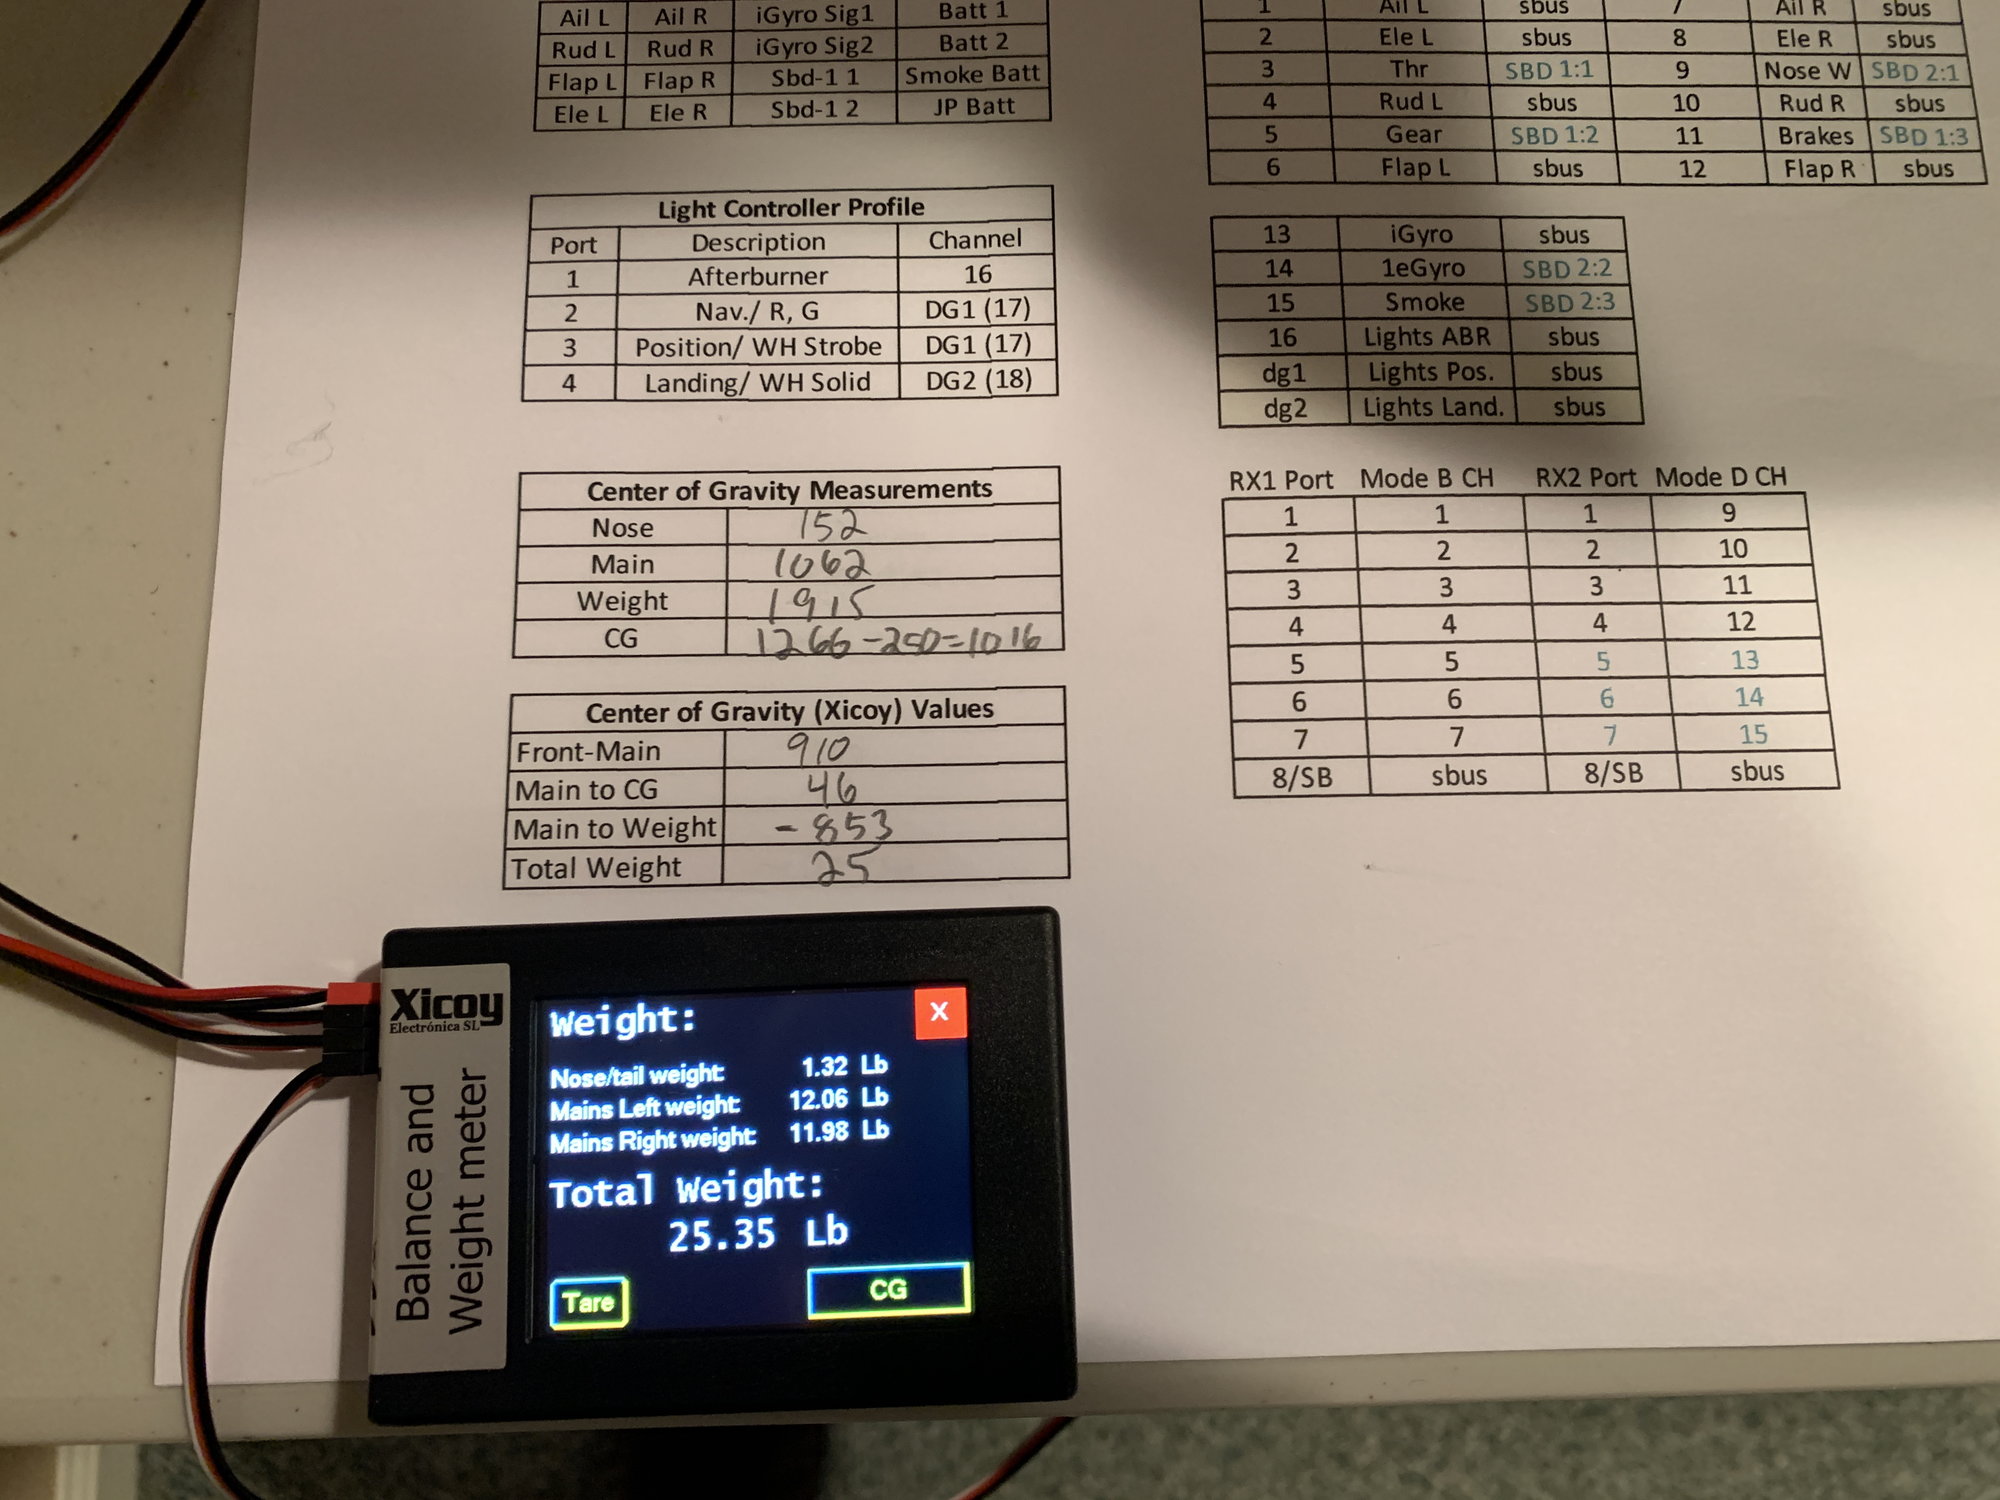
weight and balance (lateral)
I try to account for every nut and bolt where possible.
Front rx battery mounting position
rear drm battery mounting position
input values
cg of plane - in this configuration it is a tad nose heavy. 3/4 of an oz to be exact. lol...
weight and balance (lateral)
I try to account for every nut and bolt where possible.
Last edited by skunkwurk; 01-03-2021 at 08:21 AM.
 01-02-2021, 10:18 PM
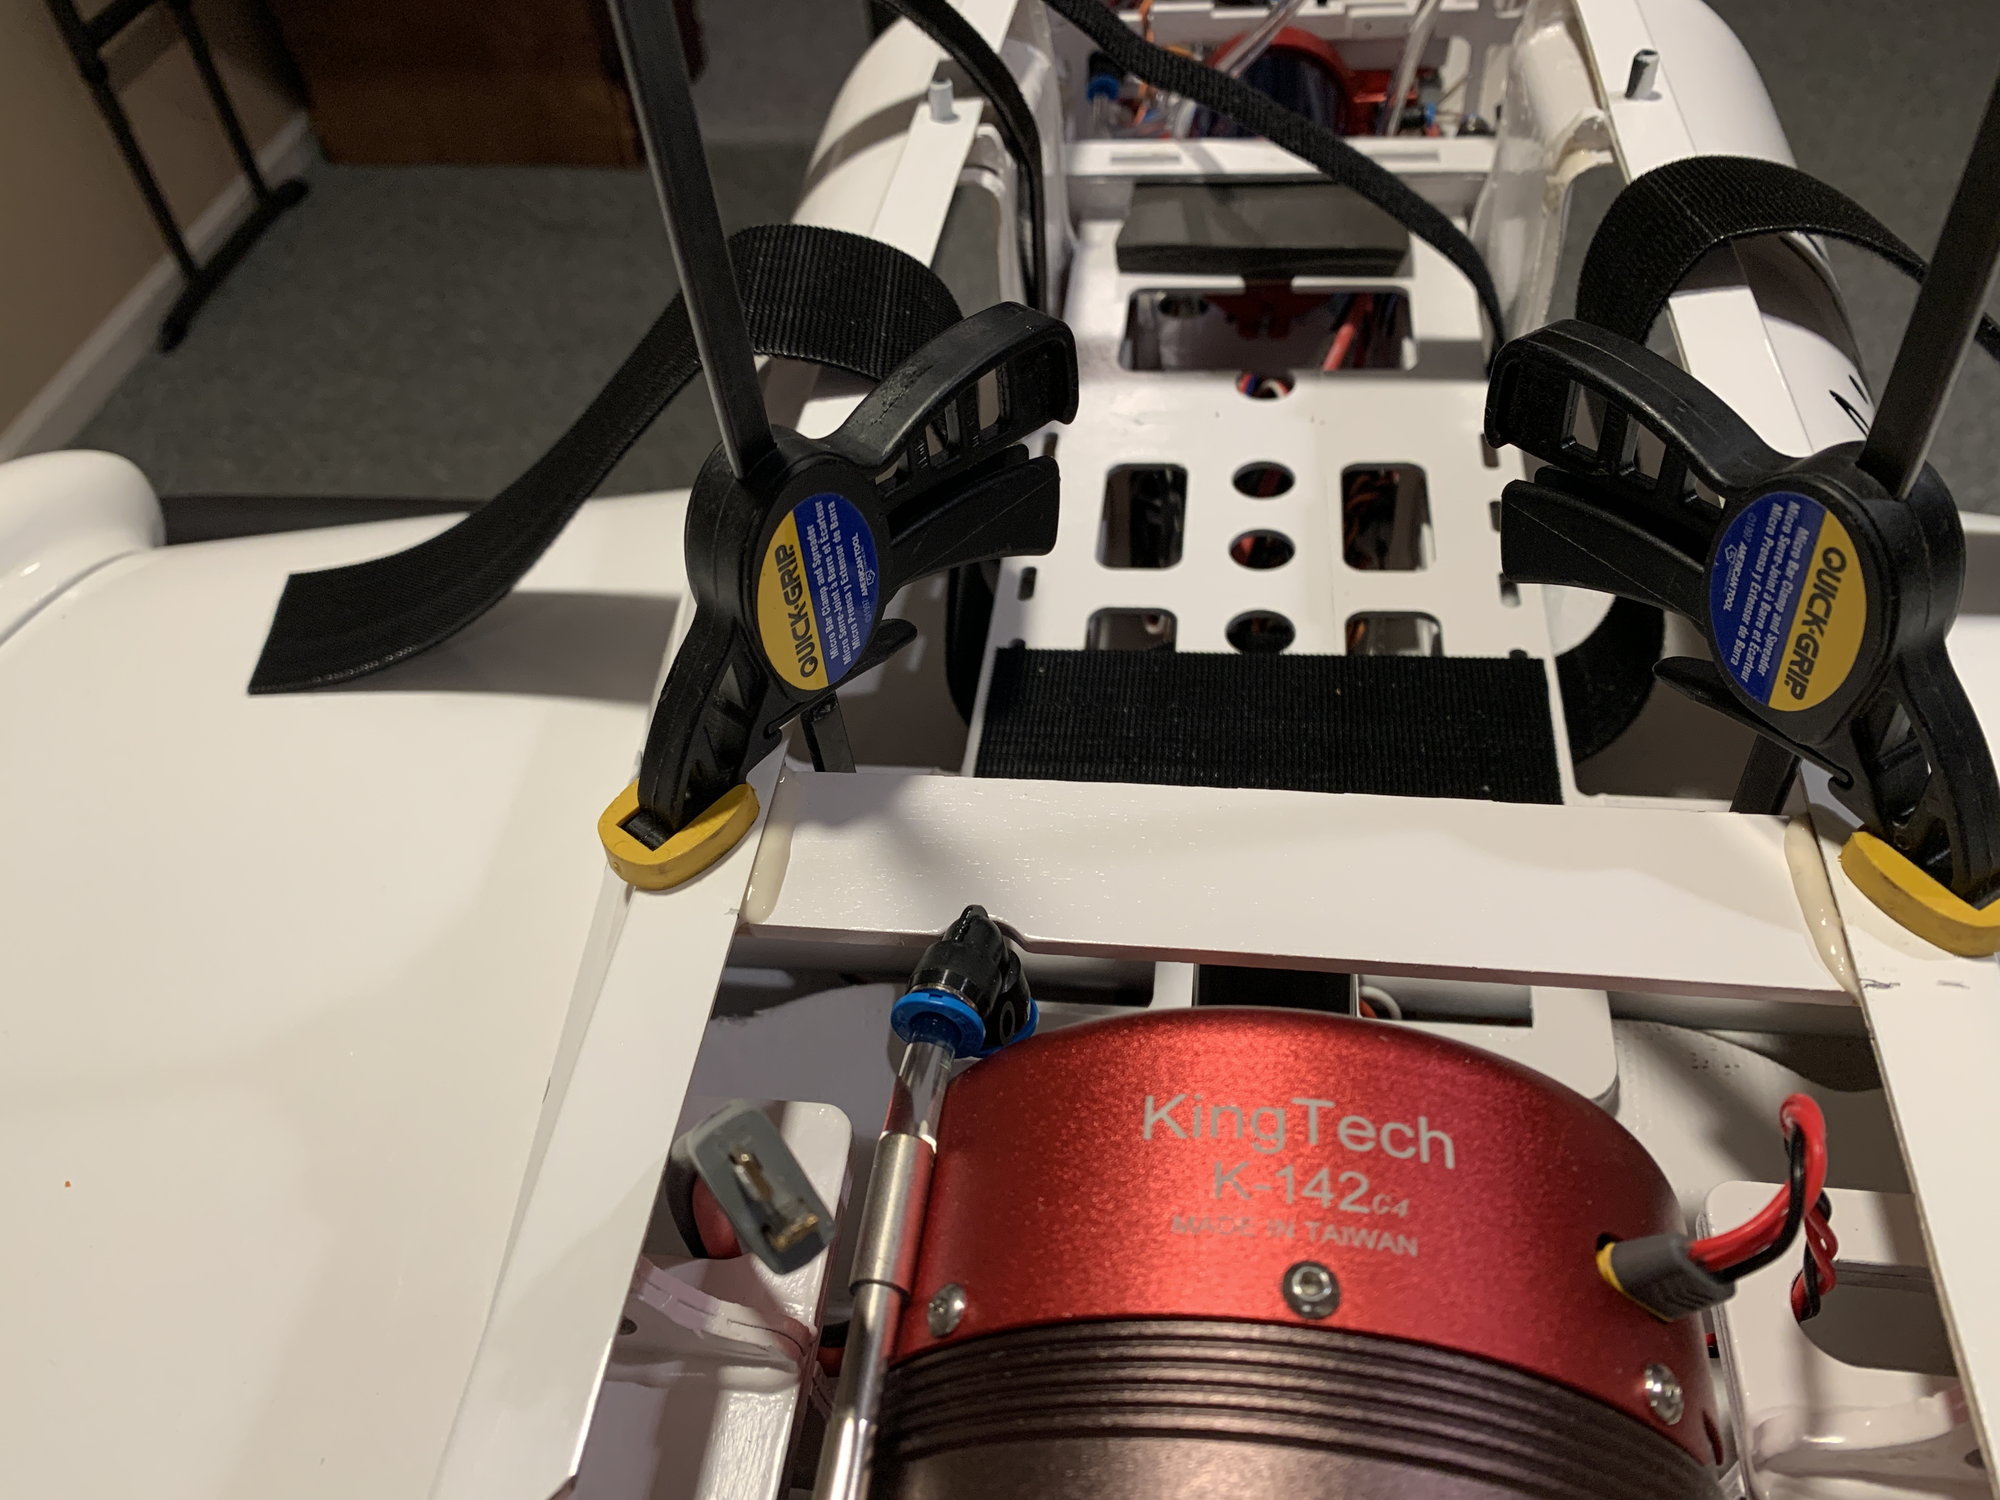
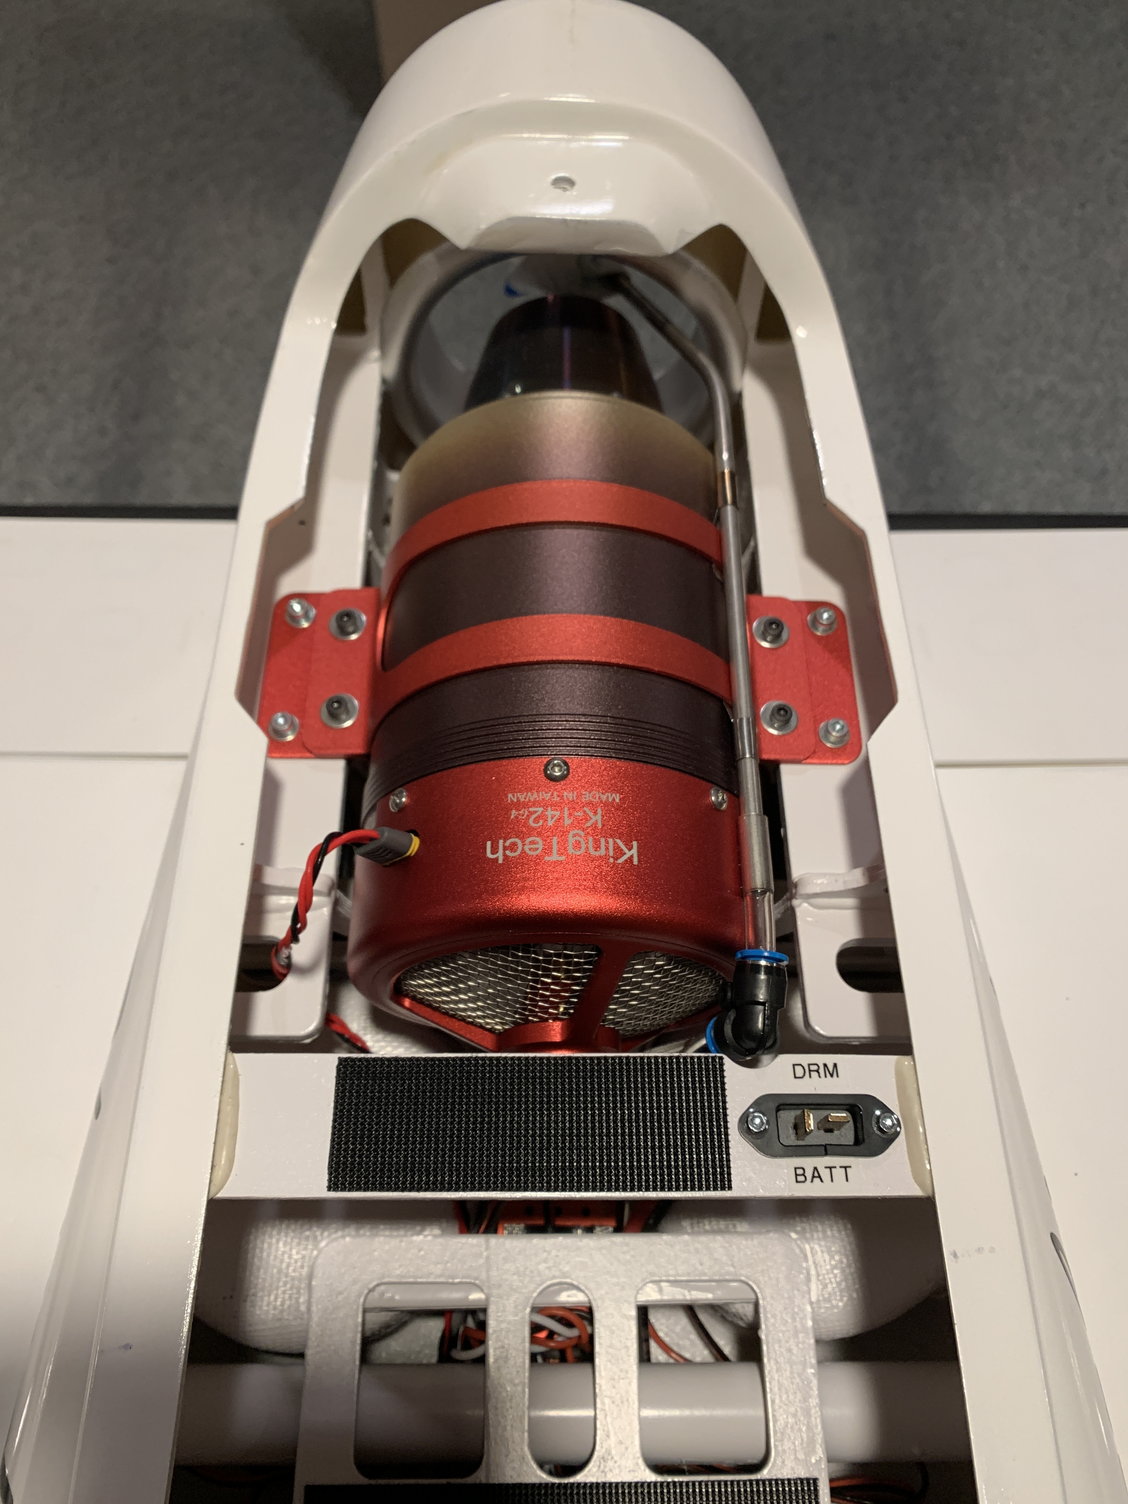
#632
DRM battery tray is curing, I should be able to re-test in the morning. I tried to install it as aft as possible. I want the weight rearward and to be able to install and remove the turbine and tank with ease. I think this spot should meet all of those requirements. I'm going to use Velcro with Velcro straps to secure the battery. I made a deans extension as well.
Last edited by skunkwurk; 01-03-2021 at 08:19 AM.
01-03-2021, 06:00 AM
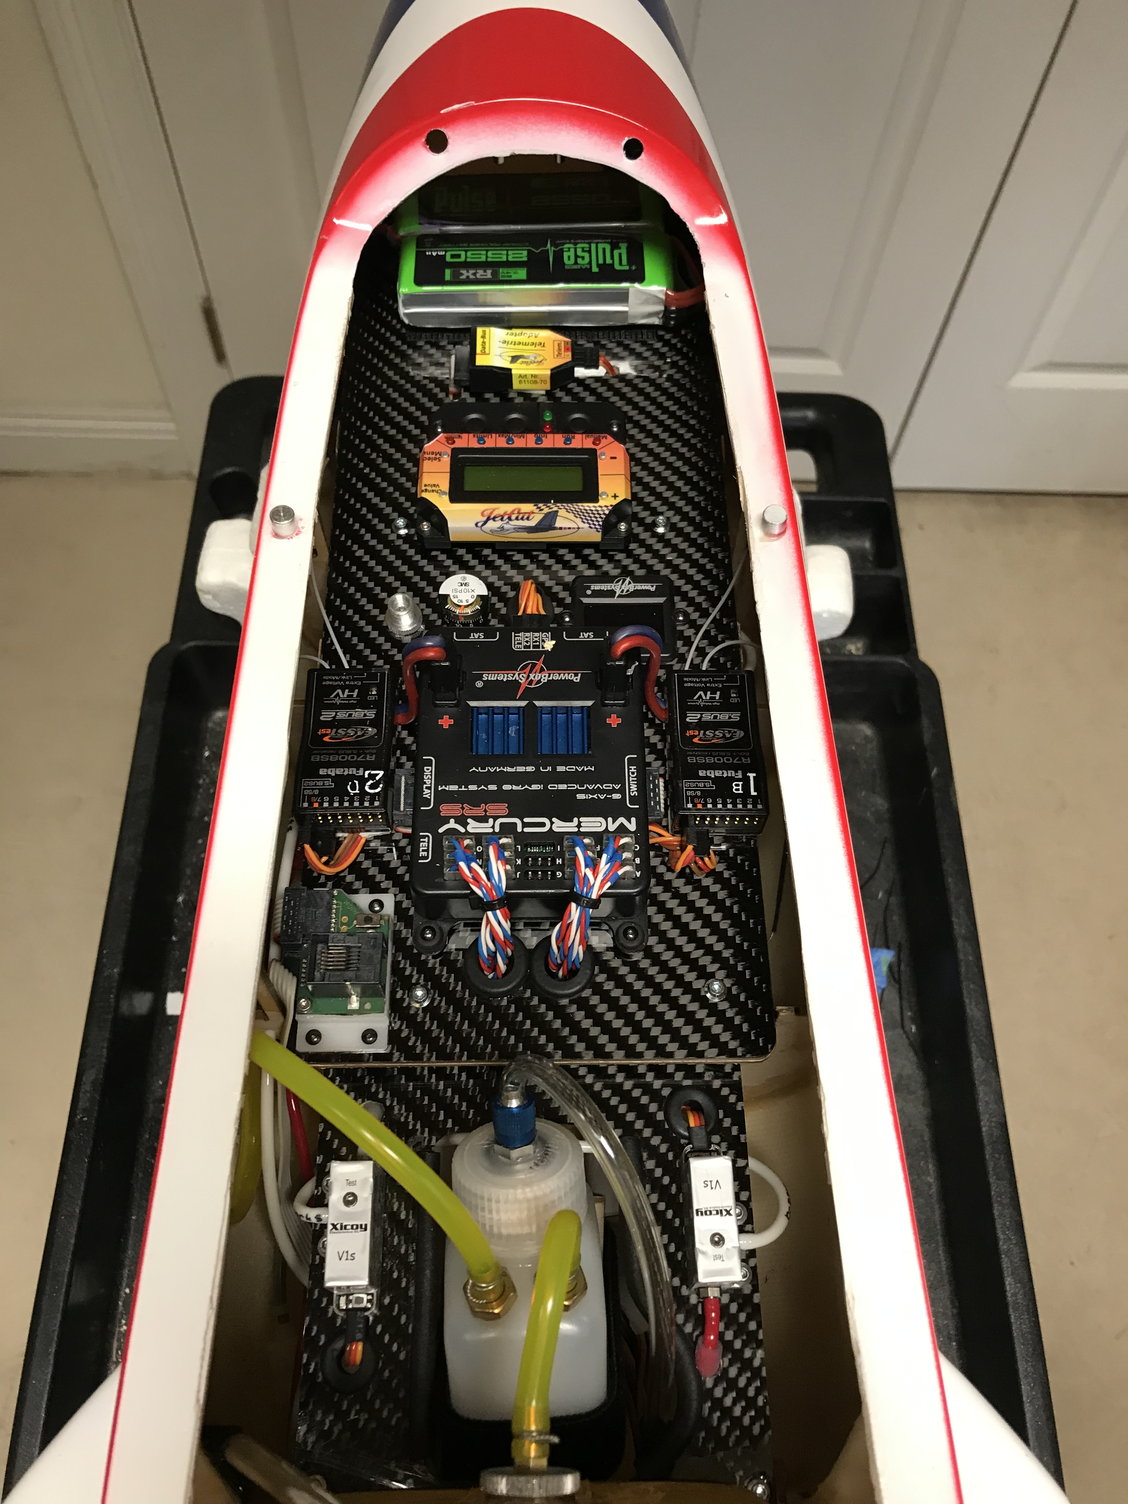
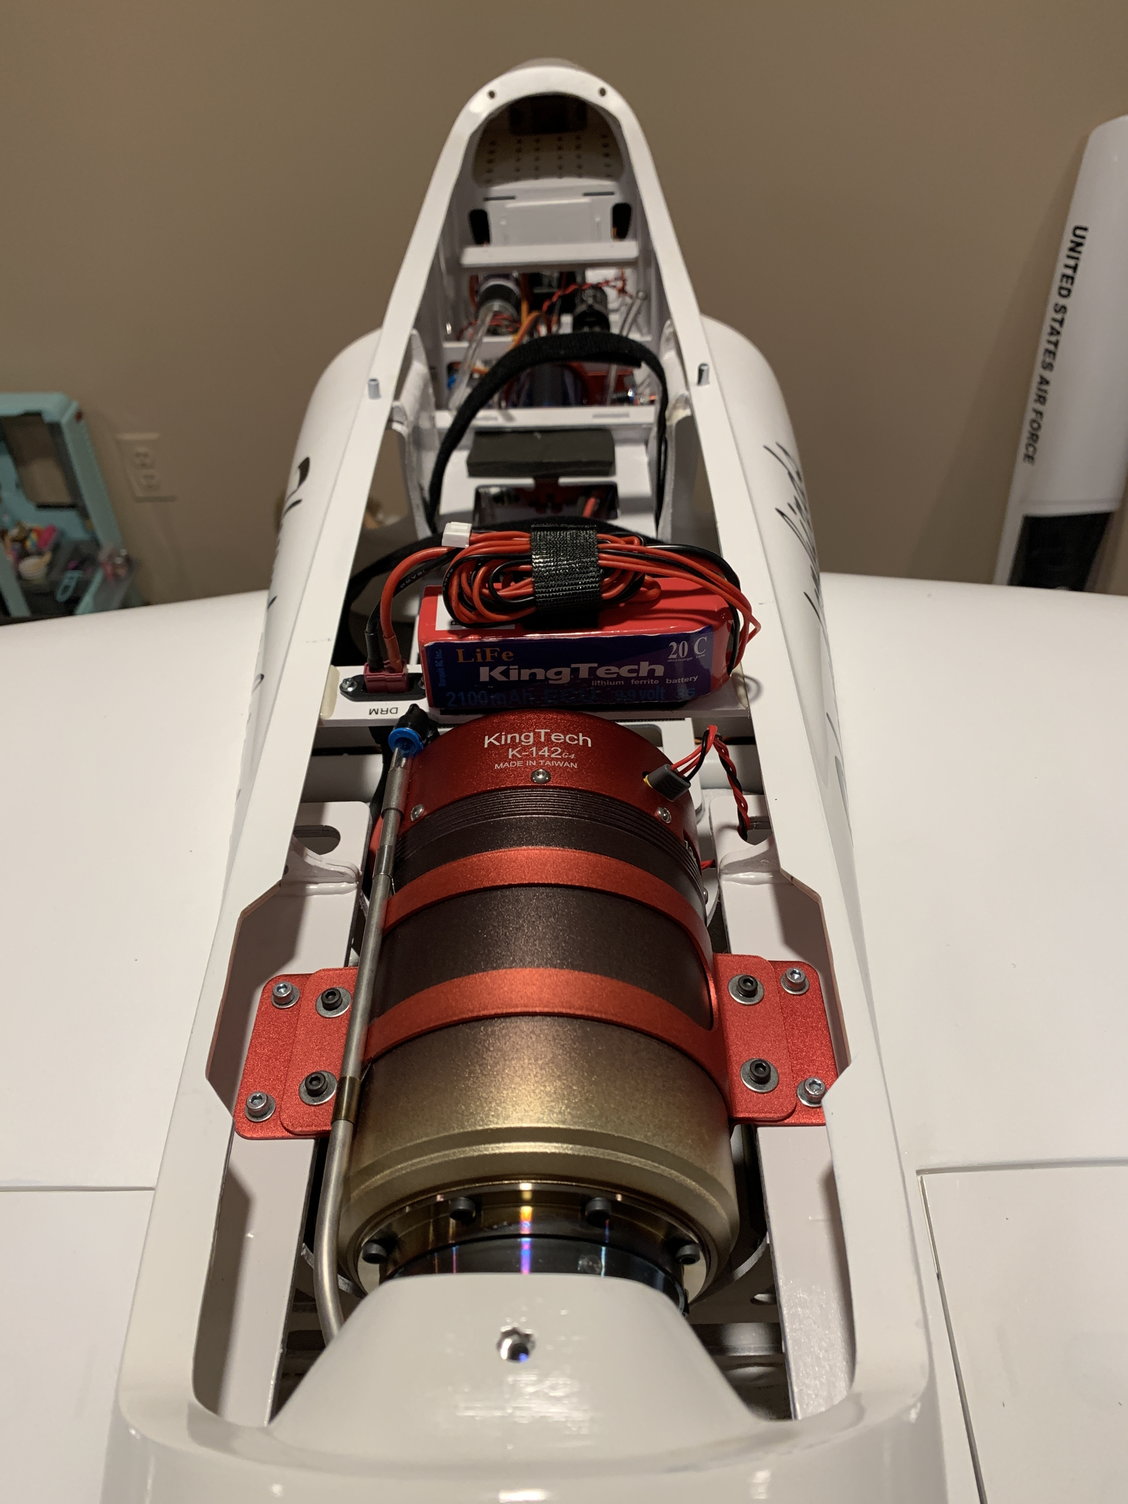
#633

Here's the layout from my older Elan. Ended up with a much larger ECU battery than necessary, but needed the weight aft. Looks like the new Elan will be very similar. Probably going to install a P100-RX in this one as well. The Xicoy X120 may be a while...

Last edited by patniven; 01-03-2021 at 06:03 AM.
01-03-2021, 06:40 AM
#634
Hi Pat, thanks for sharing. I agree, it looks like the v2 requires the ecu batt in the same spot as the v1.
A couple questions:
Do you remember your all-in dry weight by chance?
manual for v1 says to cg dry, did you cg with an empty uat?
what percentage or measurement in mm did you use for take-off flaps? There is no value for this in the manual.
Thank you in advance.
A couple questions:
Do you remember your all-in dry weight by chance?
manual for v1 says to cg dry, did you cg with an empty uat?
what percentage or measurement in mm did you use for take-off flaps? There is no value for this in the manual.
Thank you in advance.
01-03-2021, 07:33 AM
#635
Hi Pat, thanks for sharing. I agree, it looks like the v2 requires the ecu batt in the same spot as the v1.
A couple questions:
Do you remember your all-in dry weight by chance?
manual for v1 says to cg dry, did you cg with an empty uat?
what percentage or measurement in mm did you use for take-off flaps? There is no value for this in the manual.
Thank you in advance.
A couple questions:
Do you remember your all-in dry weight by chance?
manual for v1 says to cg dry, did you cg with an empty uat?
what percentage or measurement in mm did you use for take-off flaps? There is no value for this in the manual.
Thank you in advance.
I set the CG with full UAT, empty main tank and gear down. This jet is so forgiving, you really can't go wrong on the initial setting. I never needed to adjust the CG after the maiden. For flaps, I just set the full flap setting as far down as they would go without servo binding, probably about 80 degrees. I don't recall using any takeoff flap with my V1 Elan. I fly exclusively off asphalt, and never saw a need for takeoff flaps. They might help a bit with grass takeoffs, but would likely need to be 30-40 degrees to have any effect at rotation speed. They are very small.
01-03-2021, 07:35 AM
#636
Well got to fly the Elan last weekend. What a wonderful jet. Throws were set up according to the manual. CG was 240mm from TE with gear down and UAT full. P70 for power. After the first flight I had a lot of up trim so I put 2 washers under the rear screw holding the Horizontal stab on. All the trim was taken out on the 2nd flight. A real fun jet to fly. No bad habits at all, and the P70 has plenty of uummph to haul it around. Vertical is out of sight. Weight is 19lbs dry.
Wouldn�t adding fuel up front (or weight) to a more aft CG make the move a moot point?
It would be nice if there was a static reference point related to the UAT. It would make for a clearer message on the CG.
Last edited by skunkwurk; 01-03-2021 at 08:00 AM.
01-03-2021, 07:37 AM
#637
It's been a while and a dozen or so builds since then, so I can't recall the weight. I'll post it when I finish the jet. My theme for this build is light weight and simplicity in onboard equipment, so I think it will be quite a bit lighter and an even better performer than the first Elan with the same P100-RX engine.
I set the CG with full UAT, empty main tank and gear down. This jet is so forgiving, you really can't go wrong on the initial setting. I never needed to adjust the CG after the maiden. For flaps, I just set the full flap setting as far down as they would go without servo binding, probably about 80 degrees. I don't recall using any takeoff flap with my V1 Elan. I fly exclusively off asphalt, and never saw a need for takeoff flaps. They might help a bit with grass takeoffs, but would likely need to be 30-40 degrees to have any effect at rotation speed. They are very small.
I set the CG with full UAT, empty main tank and gear down. This jet is so forgiving, you really can't go wrong on the initial setting. I never needed to adjust the CG after the maiden. For flaps, I just set the full flap setting as far down as they would go without servo binding, probably about 80 degrees. I don't recall using any takeoff flap with my V1 Elan. I fly exclusively off asphalt, and never saw a need for takeoff flaps. They might help a bit with grass takeoffs, but would likely need to be 30-40 degrees to have any effect at rotation speed. They are very small.
01-03-2021, 07:43 AM
#638


Just been reading through some notes, and I ended up with the UAT removed to get the C of G 35mm behind the recommended setting, my Elan would sit down on the booms at the rear on its main legs and would not rotate onto the front leg without a positive push, ended up that I did not need elevator in inverted flight, also the dire warnings from Ali and Alan about over speeding the Elan where a sobering re-read.
Last edited by BaldEagel; 01-03-2021 at 07:45 AM.
01-03-2021, 07:49 AM
#639
That quoted post from Voodoodb is the same one I referenced when I built my V1 Elan. This jet uses a straight wing design with a high aspect ratio airfoil. The CG is not nearly as critical as a swept-wing jet with a "thinner" airfoil. Go with the 240mm measurement at the most forward CG (empty main, full UAT and gear down) and you'll be happy with the way it flies on the maiden. Hopefully, this Elan doesn't need the washer under the rear stab mount. The V1, as mentioned in the quote above, definitely needed the washers to set the stab incidence properly, so be ready for that if it need lots of pitch trim to maintain level flight. I built my first Elan with the washers already in place before the maiden, so never had a trim issue. Best flying jet I have ever owned. Period.
Last edited by patniven; 01-03-2021 at 07:51 AM.
01-03-2021, 07:54 AM
#640
Another thing i now remember is having to Hysol the incidence pins into the wings to prevent boom movement and trim changes during flight, happened a lot on the Mk II versions, may be worth rigging and checking, some of the guys had movement after a number of flights.
The following users liked this post:
patniven (01-03-2021)
01-03-2021, 08:06 AM
#641
That quoted post from Voodoodb is the same one I referenced when I built my V1 Elan. This jet uses a straight wing design with a high aspect ratio airfoil. The CG is not nearly as critical as a swept-wing jet with a "thinner" airfoil. Go with the 240mm measurement at the most forward CG (empty main, full UAT and gear down) and you'll be happy with the way it flies on the maiden. Hopefully, this Elan doesn't need the washer under the rear stab mount. The V1, as mentioned in the quote above, definitely needed the washers to set the stab incidence properly, so be ready for that if it need lots of pitch trim to maintain level flight. I built my first Elan with the washers already in place before the maiden, so never had a trim issue. Best flying jet I have ever owned. Period.
01-03-2021, 08:14 AM
#643
Just been reading through some notes, and I ended up with the UAT removed to get the C of G 35mm behind the recommended setting, my Elan would sit down on the booms at the rear on its main legs and would not rotate onto the front leg without a positive push, ended up that I did not need elevator in inverted flight, also the dire warnings from Ali and Alan about over speeding the Elan where a sobering re-read.
The following users liked this post:
patniven (01-03-2021)
01-03-2021, 01:24 PM
#647
Good Grief Len Mount I knew him when I used to fly with Bunny and John from Ripmax, over fifty years ago now, he was flying scale WW1 biplanes in the nationals in those days.
Last edited by BaldEagel; 01-03-2021 at 01:54 PM.
The following users liked this post:
patniven (01-03-2021)
01-04-2021, 04:19 PM
#648
Busy Sunday and at work today, but I got the drm tray finished this evening. Now that I know where the batts are going I could install mounting frames for the connections. I also added labels, finished the install of the velco for the batts onto the main board and drm tray, they're missing the straps but I will add them later. I'm going to try and test cg at 240 and 250 tomorrow. Slow but moving along... final stretch.
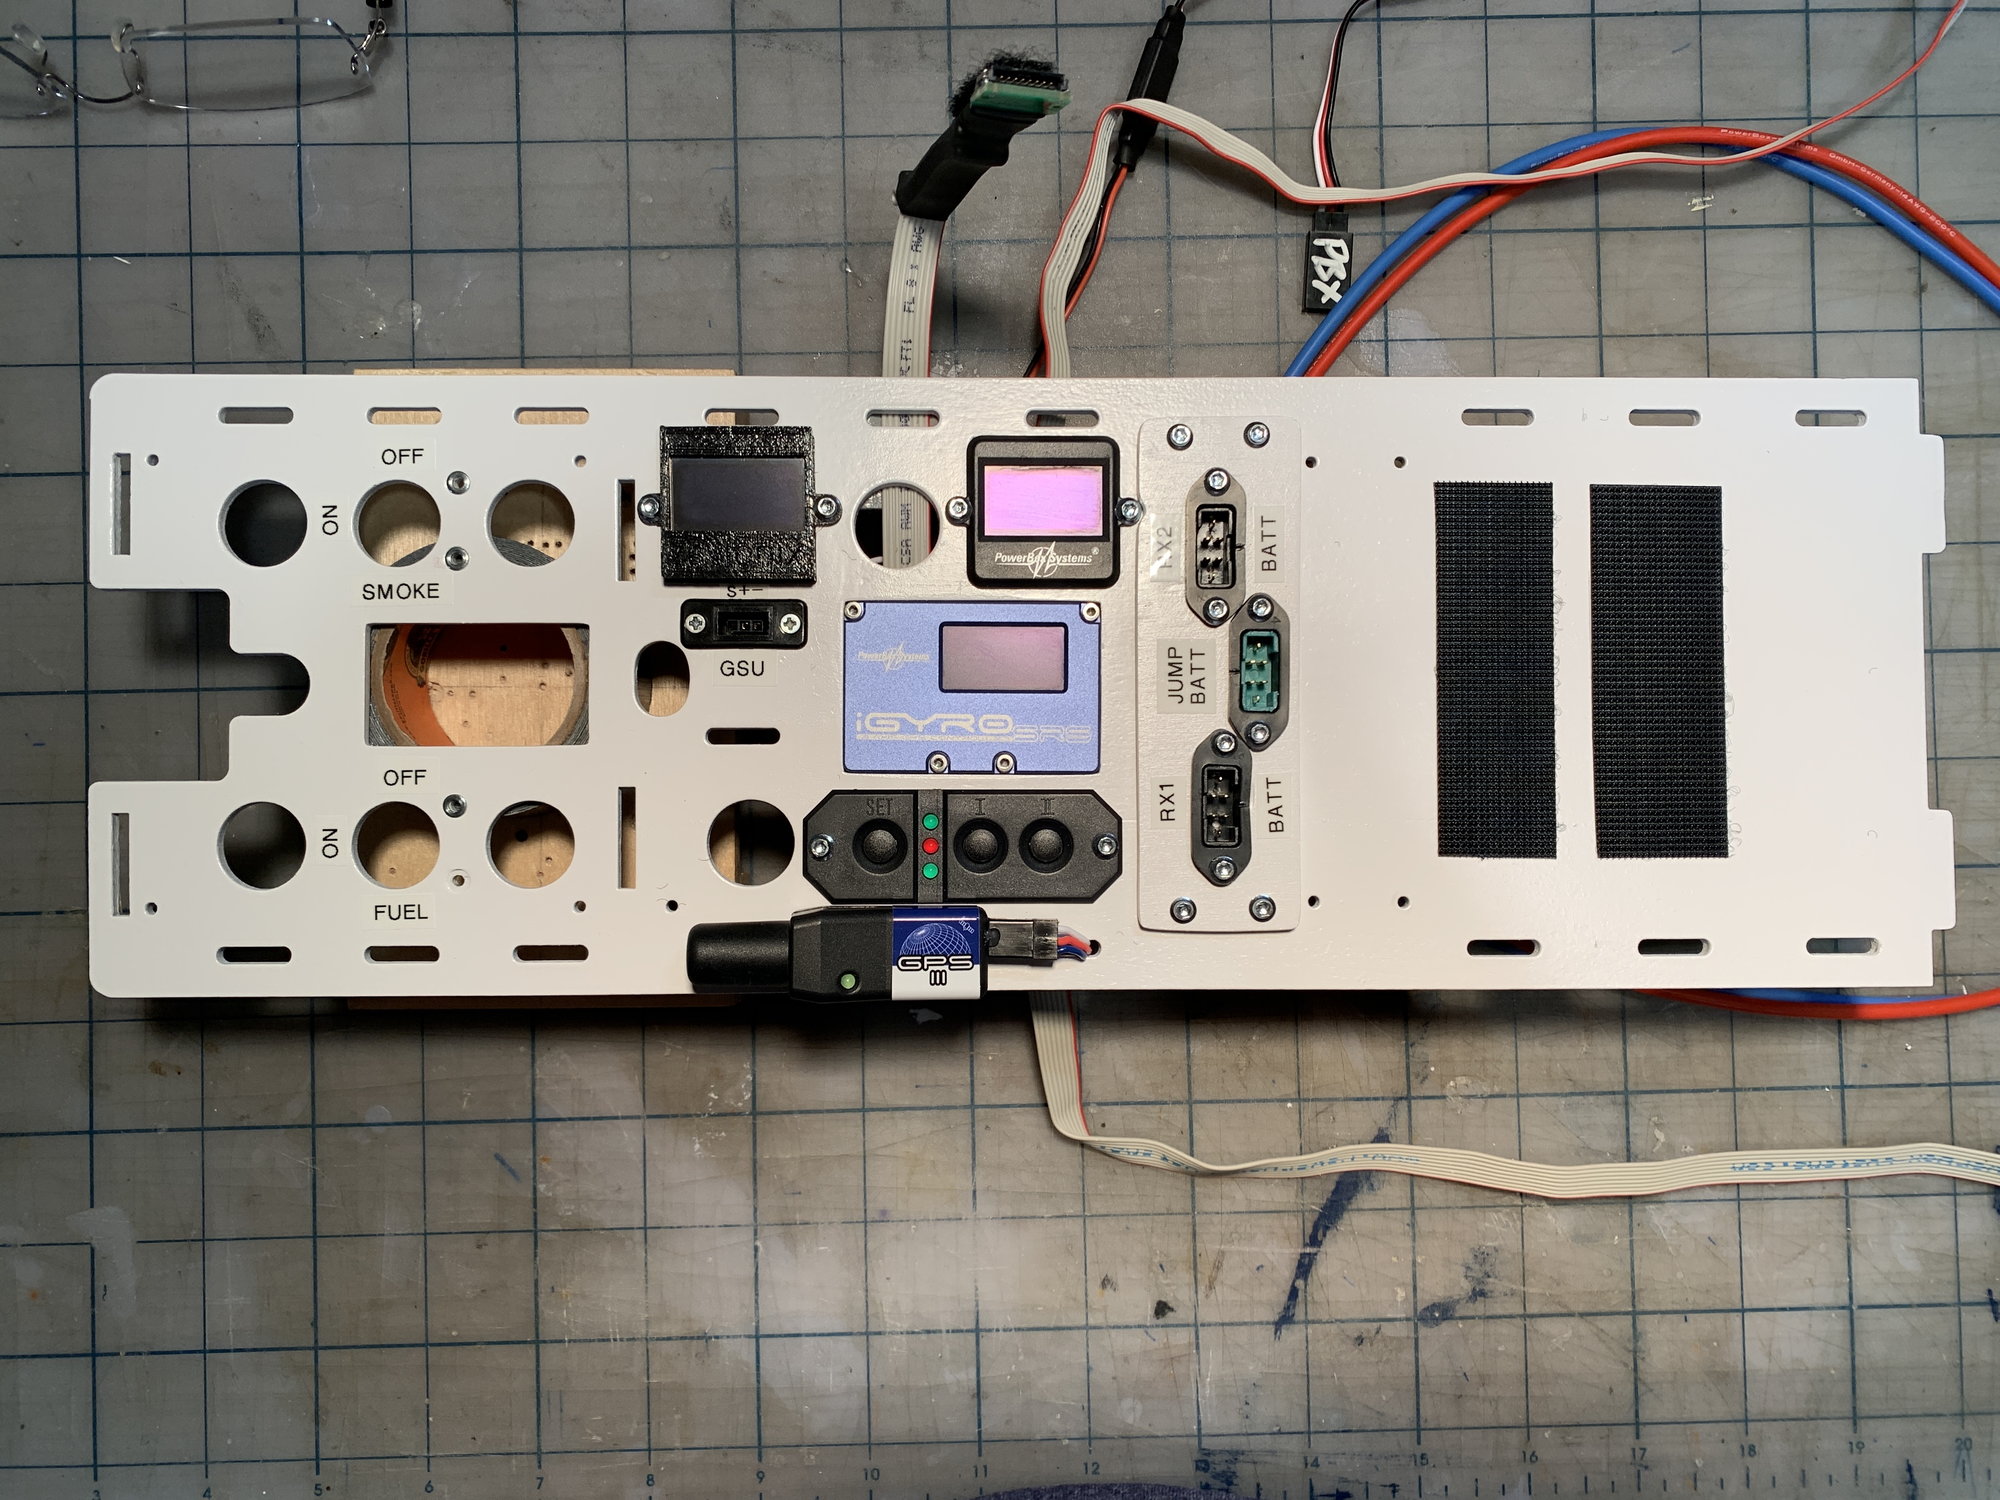
main board - added jacks and labeled
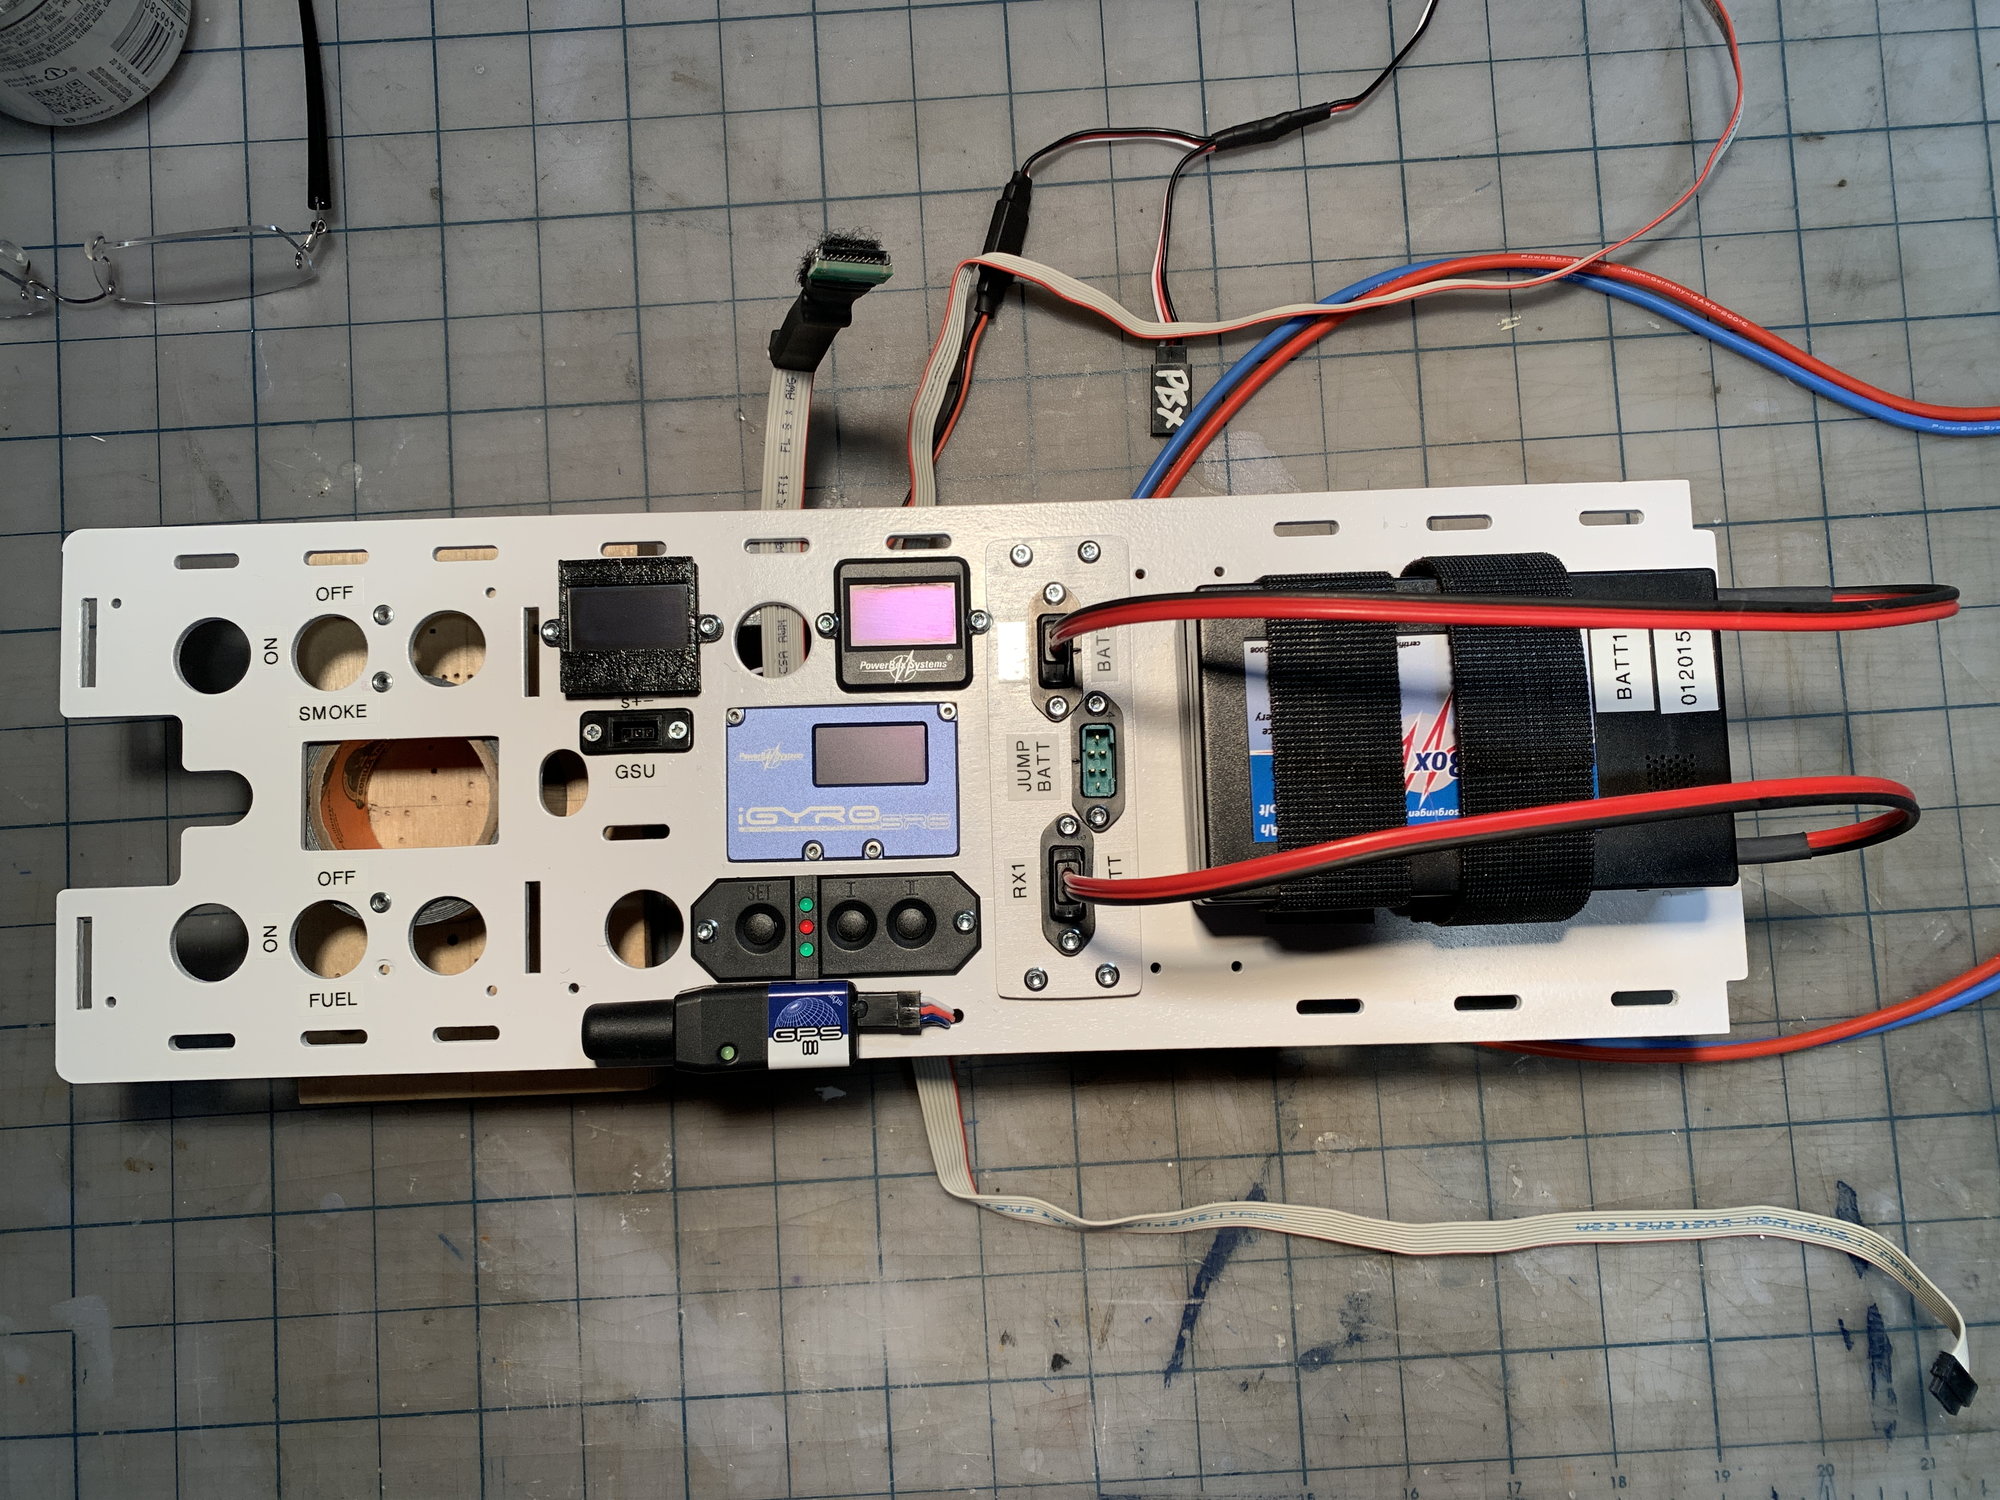
main board rx batts
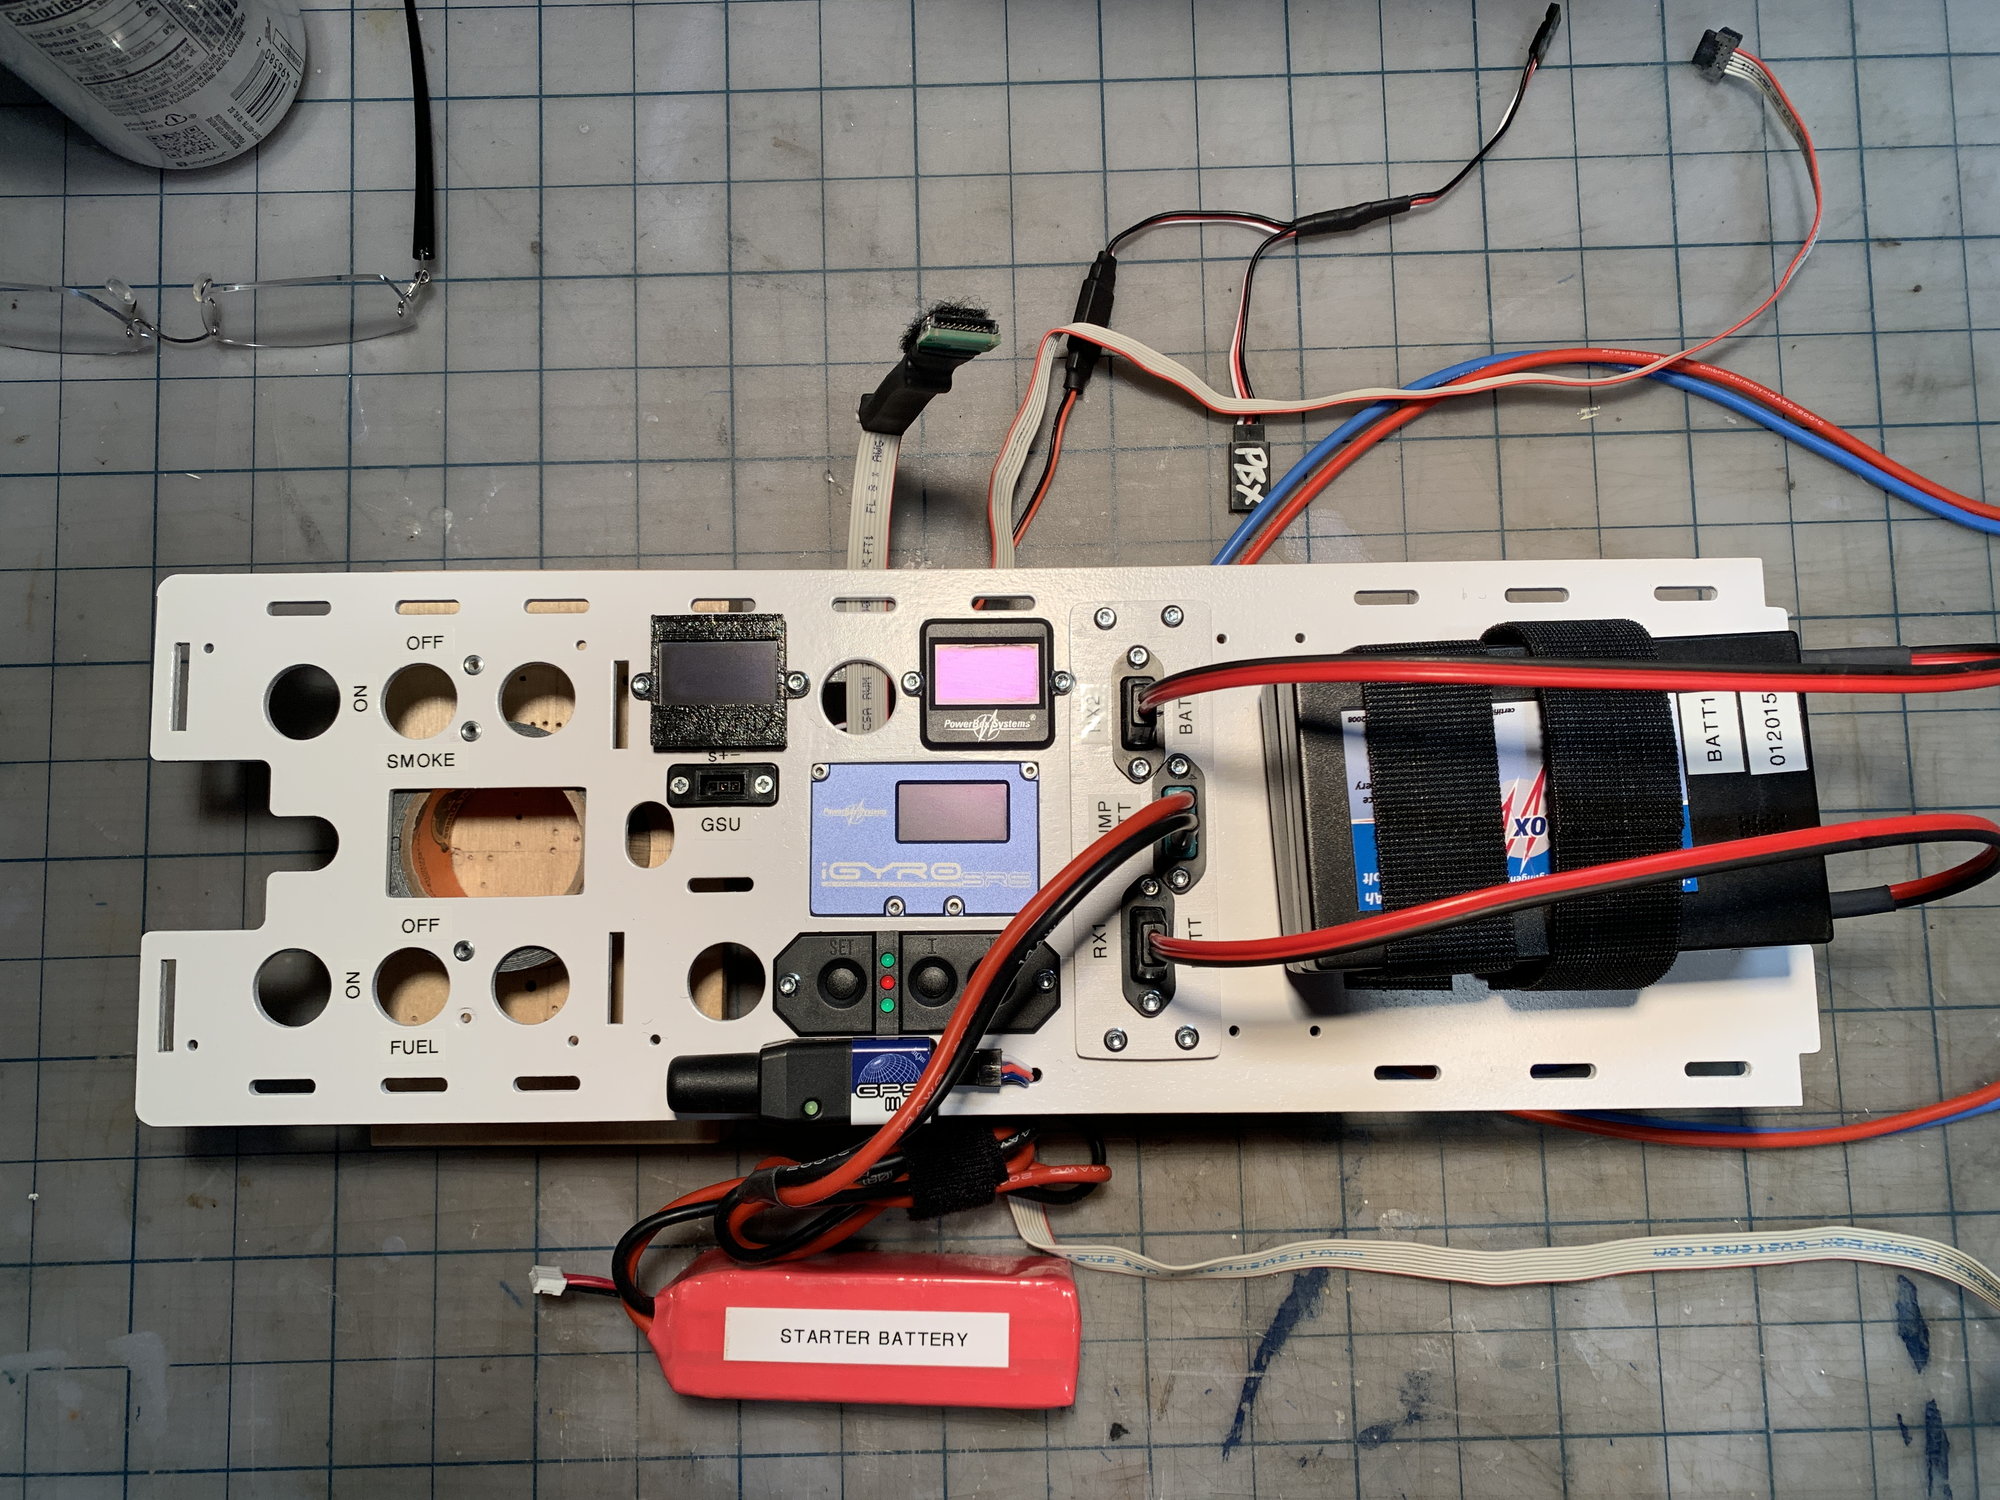
main board jump start batt
drm batt top

drm batt front w/jack
drm batt rear
main board - added jacks and labeled
main board rx batts
main board jump start batt
drm batt top
drm batt front w/jack
drm batt rear
09-22-2021, 08:17 AM
#649
I've been on hiatus due to a busy schedule, but I am finally back on this project.
Is it true Boomerang RC was sold? I tried to reach out to Larry this week with a question and heard the company was sold.
If so, how has it been dealing/working with the new owner? Does anyone have contact info they could share?
Is it true Boomerang RC was sold? I tried to reach out to Larry this week with a question and heard the company was sold.
If so, how has it been dealing/working with the new owner? Does anyone have contact info they could share?
09-22-2021, 09:10 AM
#650
My Feedback: (53)

I've been on hiatus due to a busy schedule, but I am finally back on this project.
Is it true Boomerang RC was sold? I tried to reach out to Larry this week with a question and heard the company was sold.
If so, how has it been dealing/working with the new owner? Does anyone have contact info they could share?
Is it true Boomerang RC was sold? I tried to reach out to Larry this week with a question and heard the company was sold.
If so, how has it been dealing/working with the new owner? Does anyone have contact info they could share?