Using a vinyl cutter to cut covering
 11-13-2016, 06:44 AM
#26

Both stabs finished 
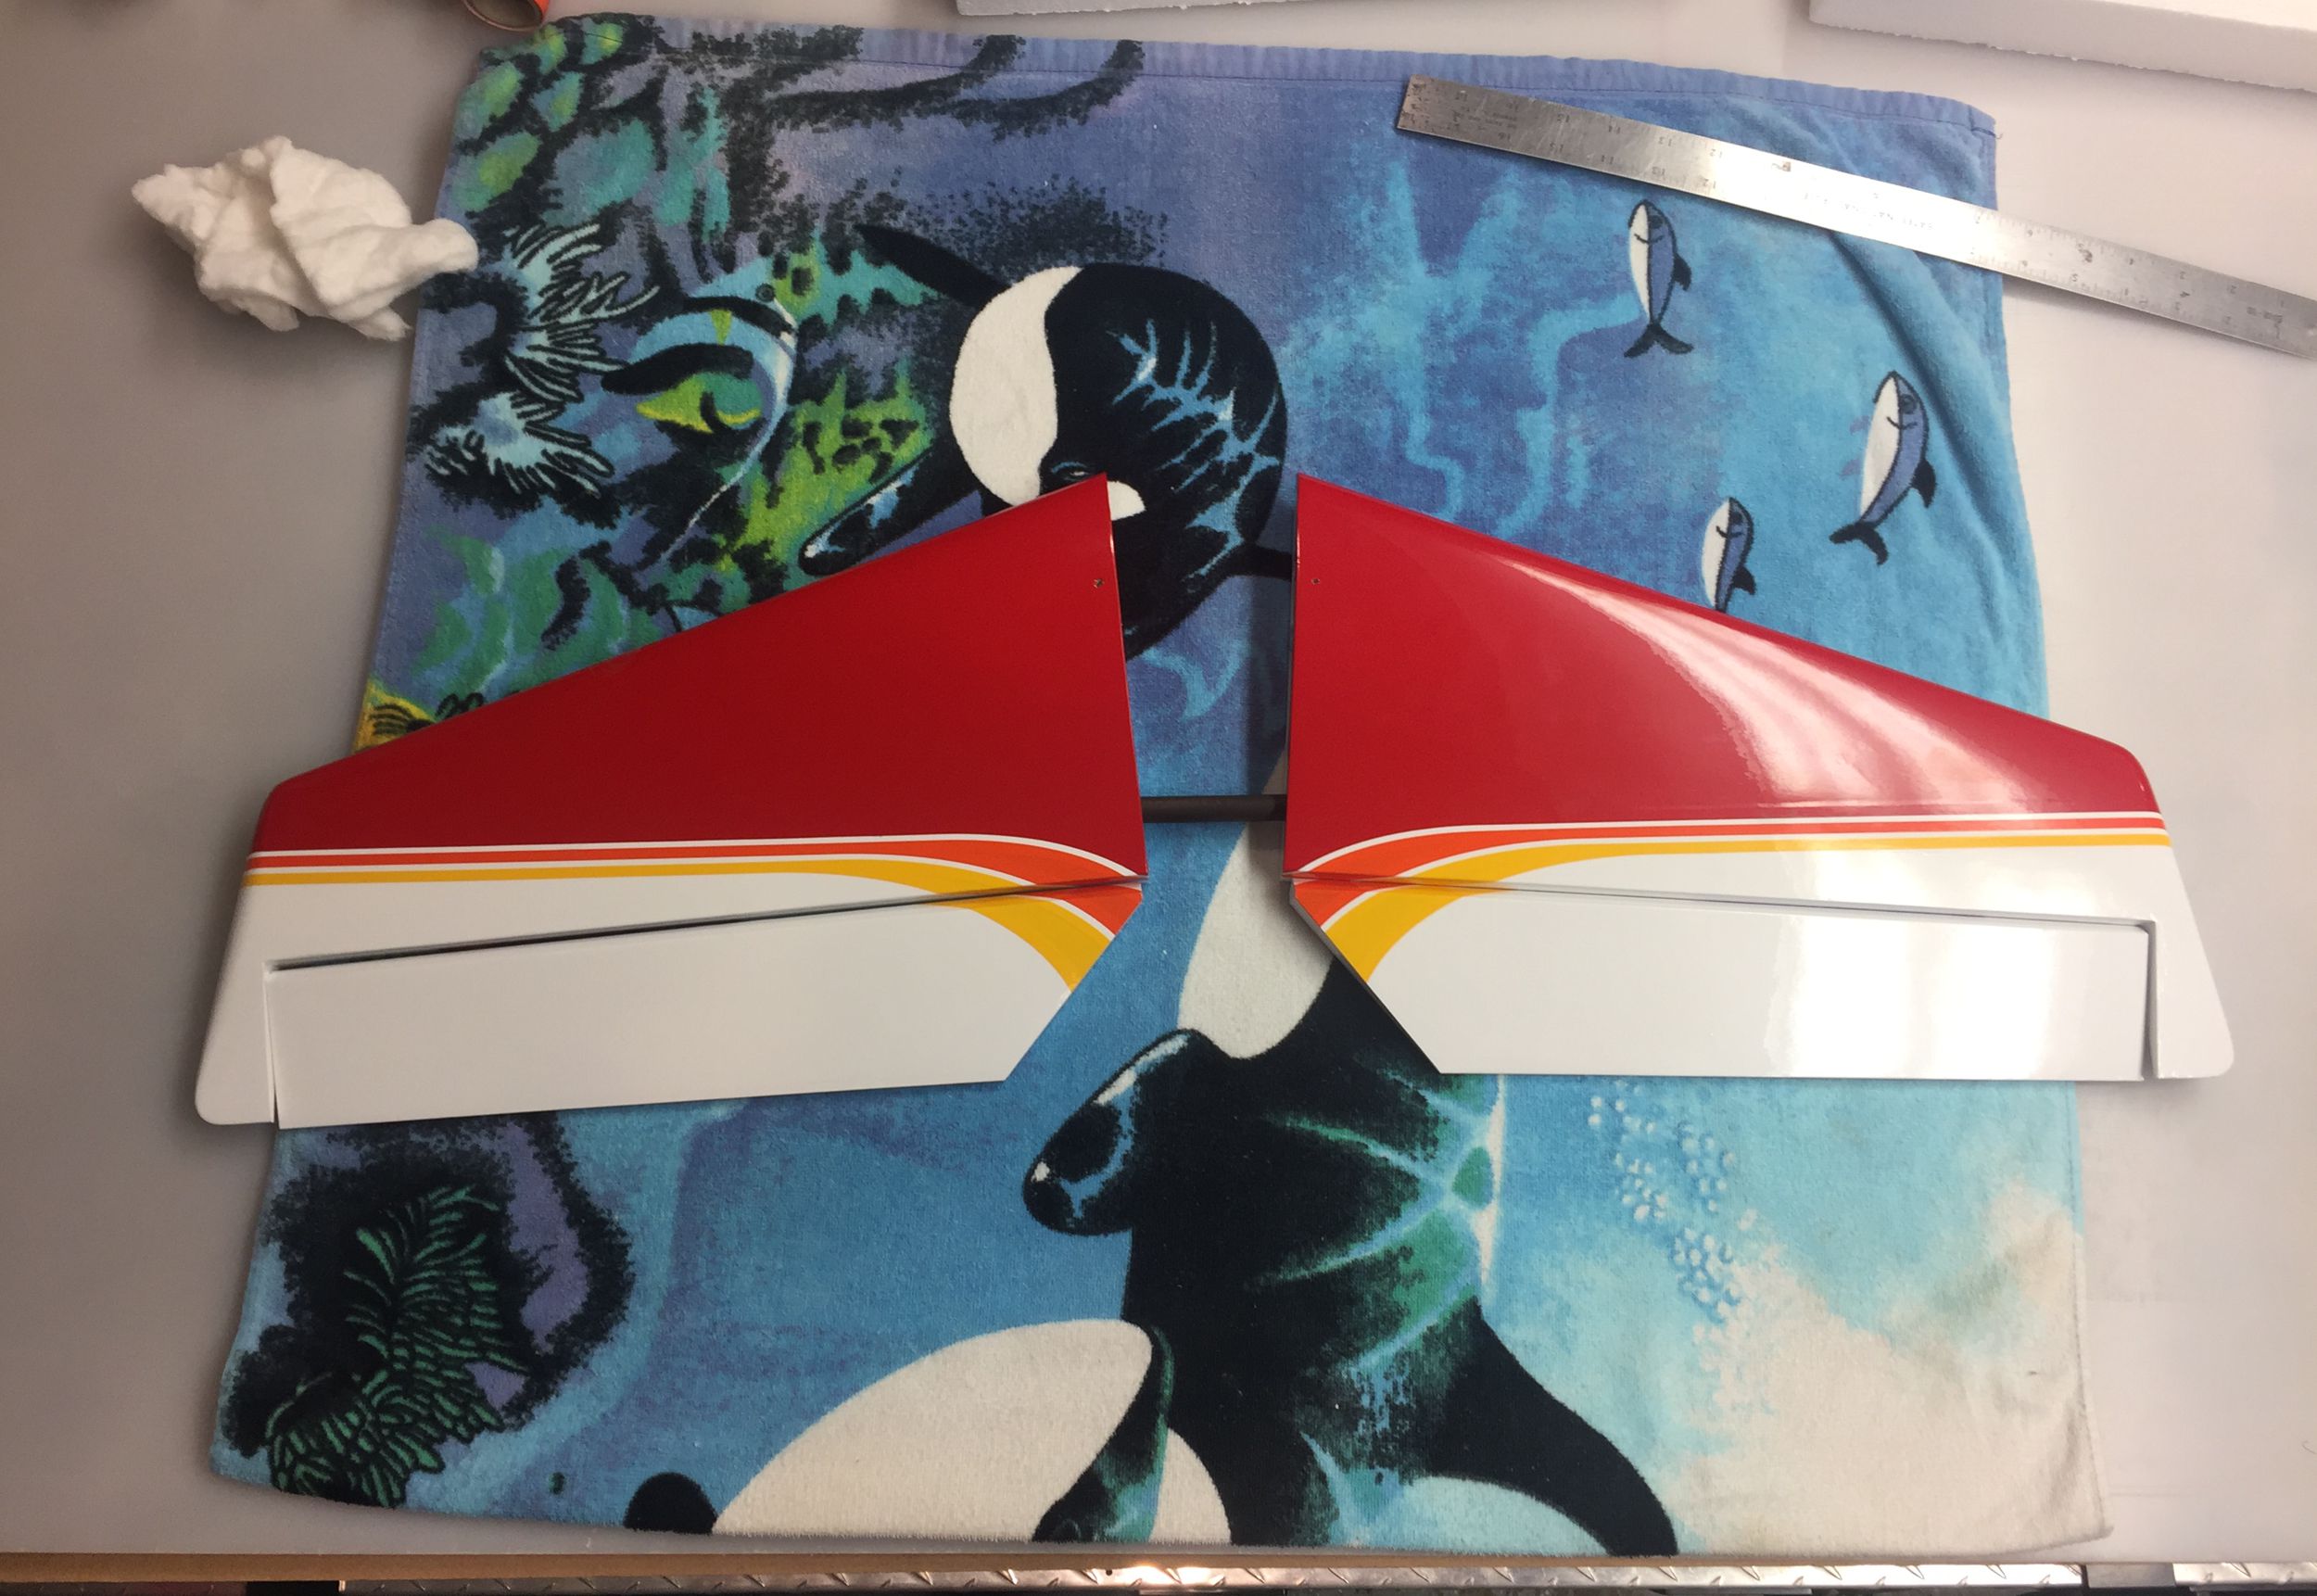
Cutouts all done and sealed. I did add the piece of white to the inboard end of the elevator to cover the orange and yellow overlap. I did not end up using the piece cut to cap the outboard end of the elevator.


The remains of the white sheet. I did mess up in positioning the sheet on the cutter and one of the pieces started to cut off the side of the sheet so I had to stop and re position the rest of the parts. That is why there is a good sized area of wasted material on the left.

Cutouts all done and sealed. I did add the piece of white to the inboard end of the elevator to cover the orange and yellow overlap. I did not end up using the piece cut to cap the outboard end of the elevator.
The remains of the white sheet. I did mess up in positioning the sheet on the cutter and one of the pieces started to cut off the side of the sheet so I had to stop and re position the rest of the parts. That is why there is a good sized area of wasted material on the left.
 12-07-2016, 10:50 PM
#27
Had to take a short break for a home project but I was able to get to the wing this week and get it covered as well.
The root piece for the wing was not a solid piece but had an inner outline cut with several short attachment points around its edge. This way the shape was held as it was applied but the inner portion easily removed with a few cuts like a die cut piece of balsa. Harder to keep a thin outline piece to shape with the center fully cut out.


The rest of the pieces were added in sequence completing the bottom first.


The top white piece on the body of the wing was a PIA to apply.

Spacing between the colored trim was made easier by cutting a 5mm strip from a piece of Ultracote backing and placing that between the red and orange straight area when applying the orange and between the orange and yellow when applying the yellow. There is a enough of a lip from the covering overlap to catch the piece of backing between the the 2 colors.
May still add some lettering cut from covering material.
The root piece for the wing was not a solid piece but had an inner outline cut with several short attachment points around its edge. This way the shape was held as it was applied but the inner portion easily removed with a few cuts like a die cut piece of balsa. Harder to keep a thin outline piece to shape with the center fully cut out.
The rest of the pieces were added in sequence completing the bottom first.
The top white piece on the body of the wing was a PIA to apply.
Spacing between the colored trim was made easier by cutting a 5mm strip from a piece of Ultracote backing and placing that between the red and orange straight area when applying the orange and between the orange and yellow when applying the yellow. There is a enough of a lip from the covering overlap to catch the piece of backing between the the 2 colors.
May still add some lettering cut from covering material.
Last edited by Stuart Chale; 12-07-2016 at 10:54 PM.
12-10-2016, 06:46 AM
#28
Looks like this project is done but I wanted to add another helpful technique to this thread to have it all in one place. You can cut small lettering or graphics with free floating pieces and apply it almost like applying a vinyl graphic. The benefit to using covering is that it is thinner and lighter and you are less likely to damage the covering pulling the transfer tape off. When using vinyl graphics the transfer tape holds everything in registration. Piecing small lettering or the pieces of an individual graphic one at a time would not likely result as well. As long as the covering is well stuck to its backing it can be cut. If loose from the backing you can still use it as normal but will not cut properly using a vinyl cutter. I also find that small details cut better at slower speeds.
The key is to use a product sold for the kitchen called Glad Press'n Seal. This acts as the transfer tape would. You can apply it to your cut and even un-weeded graphics and pull them free from their backing. Then position them and iron through the Press'n seal. You might need to experiment with temperatures. Once stuck in place you can easily remove the Press'n seal. It may leave some residue which is removable with lacquer thinner. Then iron once more to firmly affix your graphic. I use about 200 degrees on Ultracote for this, the same as I adhere the edges of my normally applied pieces.


The key is to use a product sold for the kitchen called Glad Press'n Seal. This acts as the transfer tape would. You can apply it to your cut and even un-weeded graphics and pull them free from their backing. Then position them and iron through the Press'n seal. You might need to experiment with temperatures. Once stuck in place you can easily remove the Press'n seal. It may leave some residue which is removable with lacquer thinner. Then iron once more to firmly affix your graphic. I use about 200 degrees on Ultracote for this, the same as I adhere the edges of my normally applied pieces.
07-20-2022, 03:14 AM
#30
I use Corel Draw for my Vector drawing program only because I have used it since it came on Floppy disks.
For operating the cuttter I use Sign Blazer elements. A free program, not the greatest but free. You can use it to draw as well but I just import my .ai file into it.
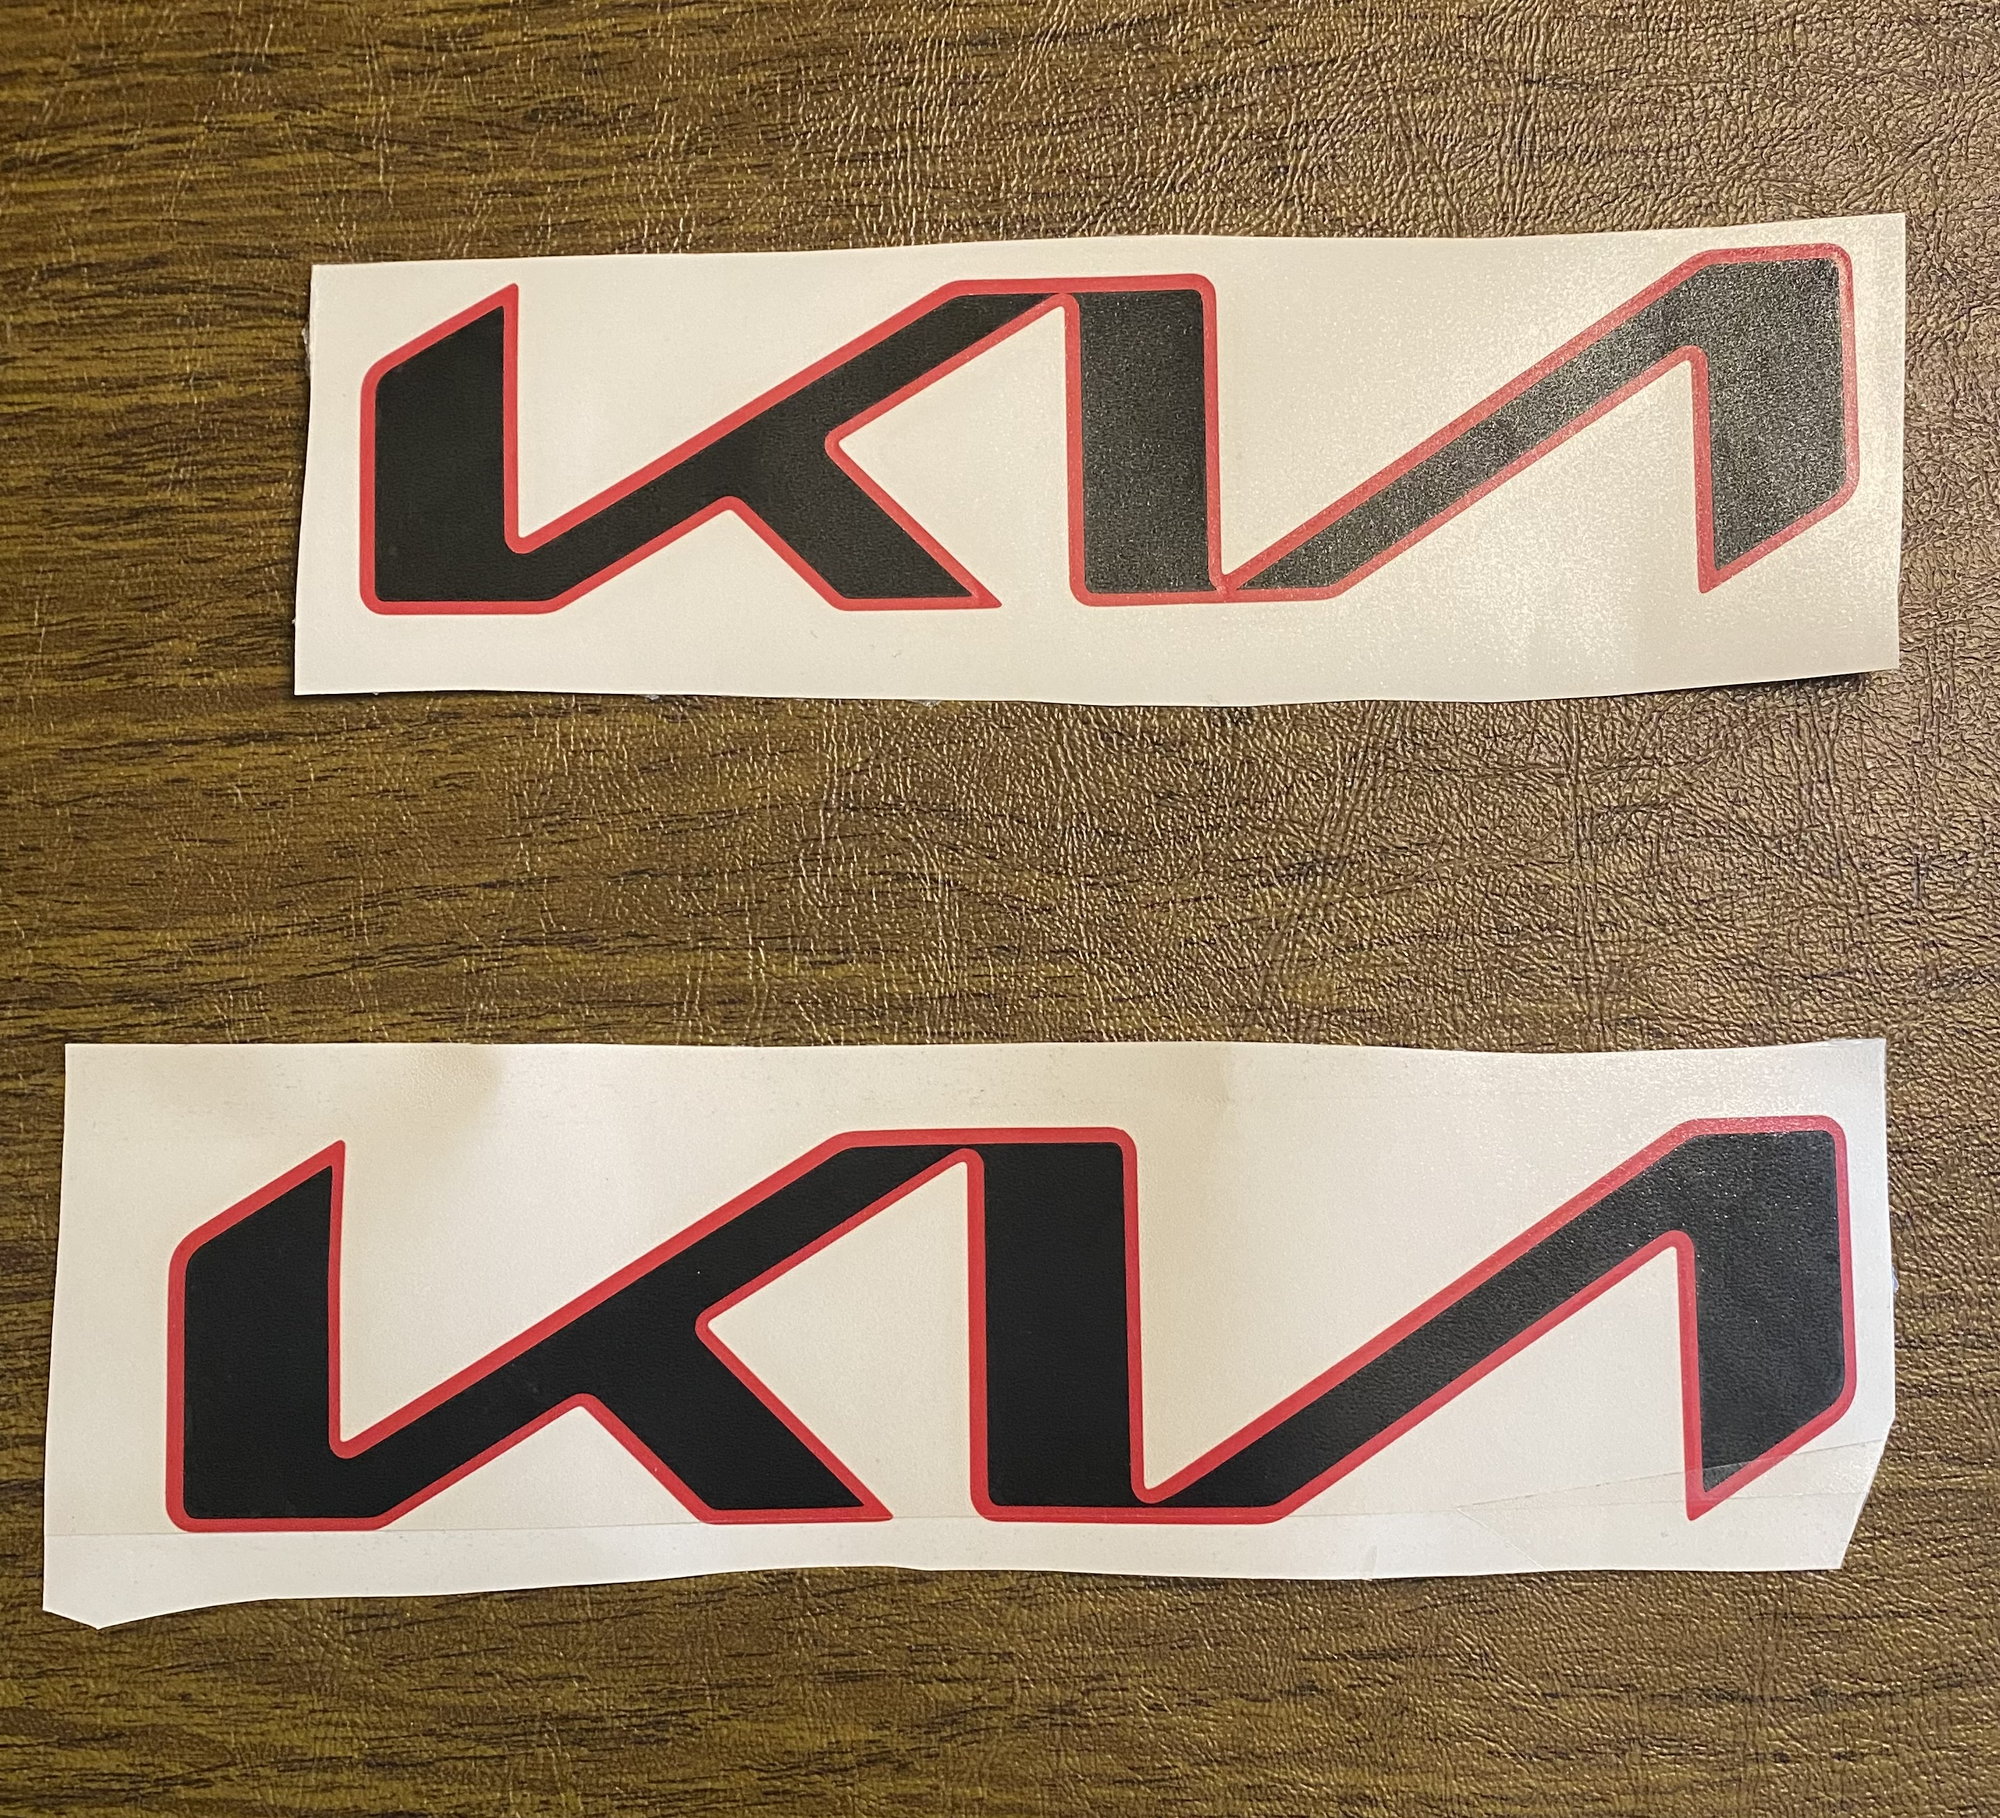
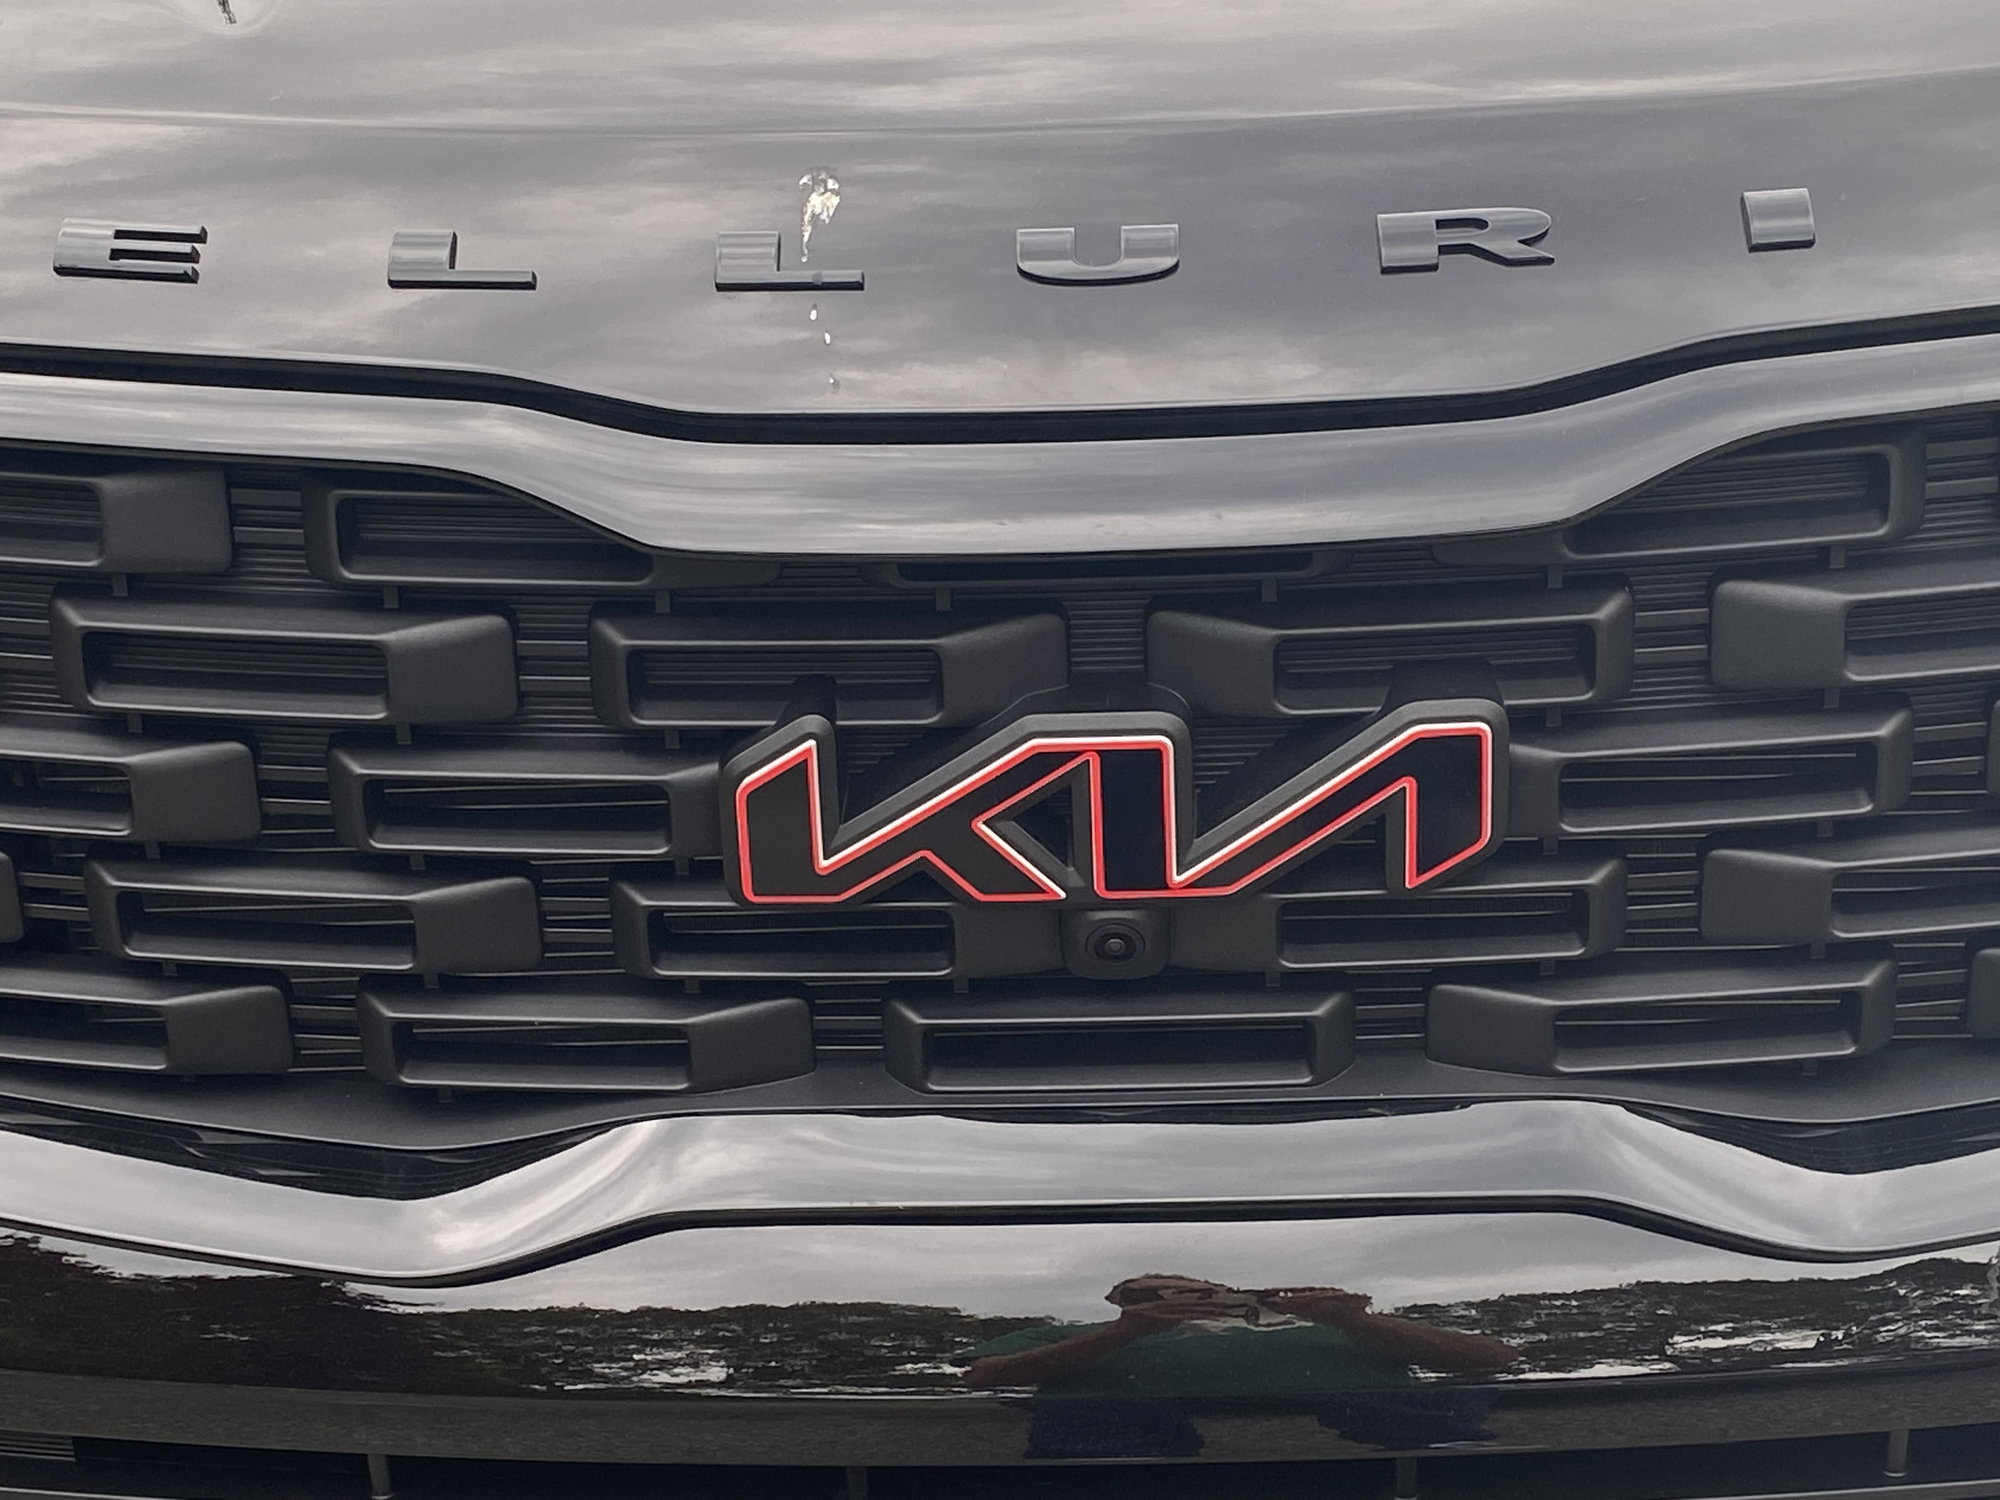
Havent done any plane work lately but did make some graphics to cover the silver emblem on my Kia Telluride.

 07-20-2022, 09:49 AM
#32