


Hobby Engine Abrams Re-build
 12-30-2012 | 11:26 AM
#1
Thread Starter
Senior Member
Joined: Jul 2011
Posts: 359
Likes: 0
Received 0 Likes
on
0 Posts
From: Swindon, UNITED KINGDOM
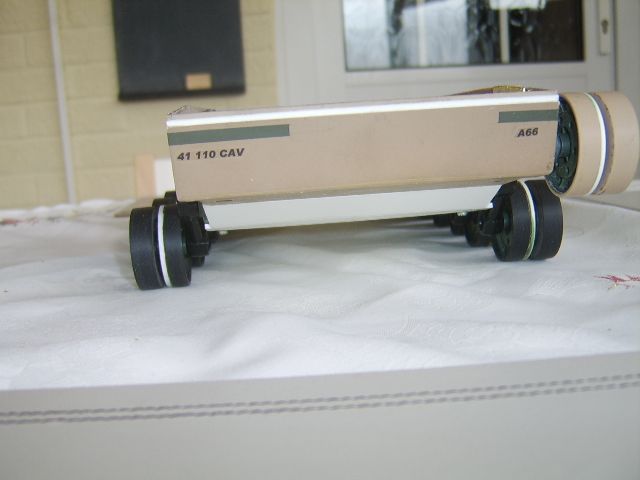
i bought this from Trev Boxerdog after keith (Firefly) Did an amazing paint job on this:
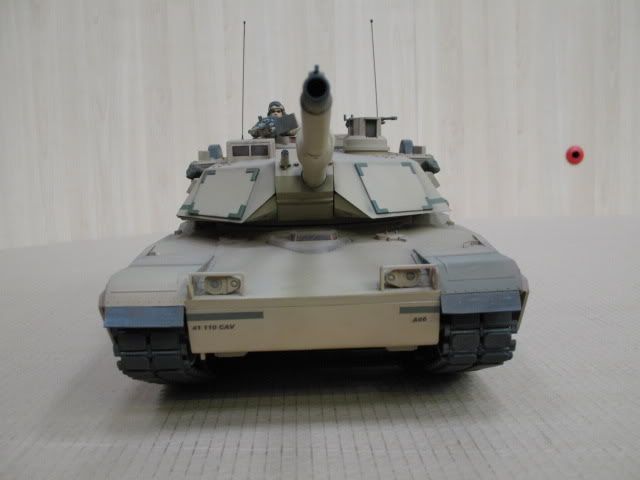
well i managed to acquire it after fancying one of these tanks for a while
the top half im not going to touch as its damned near perfect its just the lower half thats in for an overhaul ohh plus the electronics
havent decided on those yet but it maybe Elmod or clarkmodel
turret rotation and main gun re-coil will be going and replaced with something better again got some ideas im toying with nothing certain yet
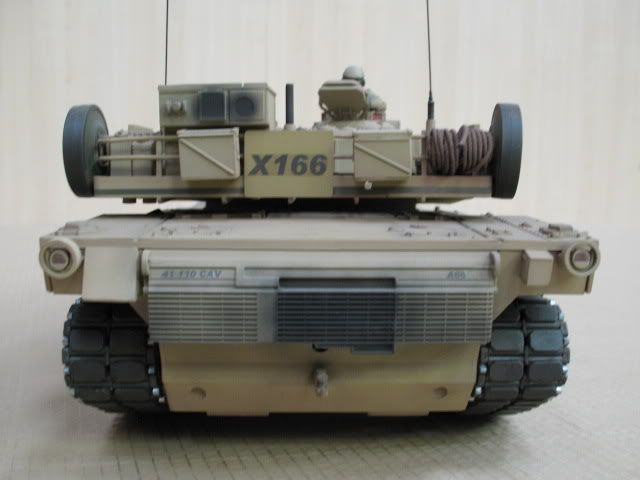
on to the lower half
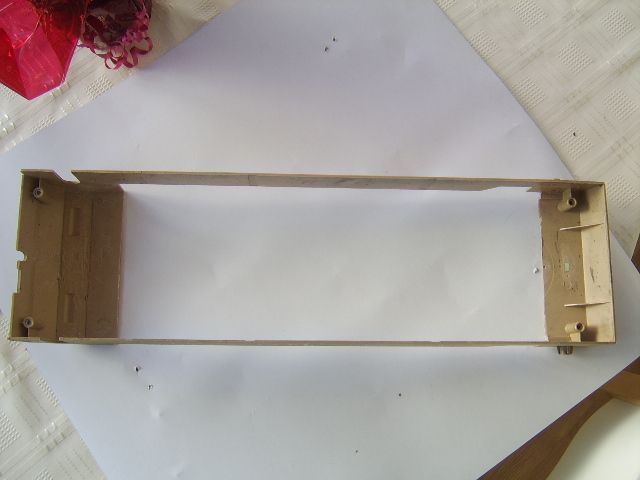
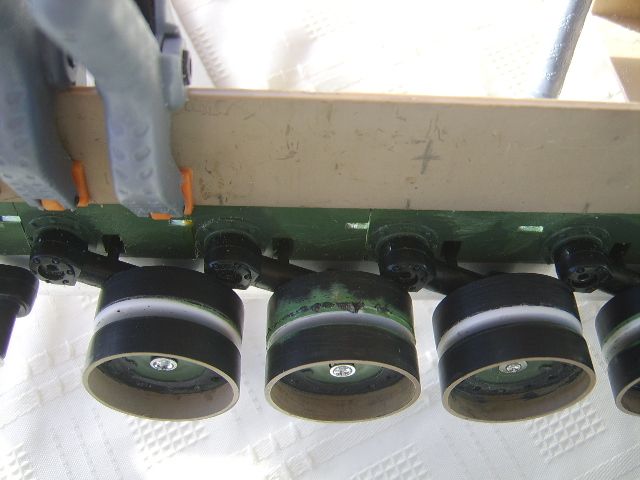
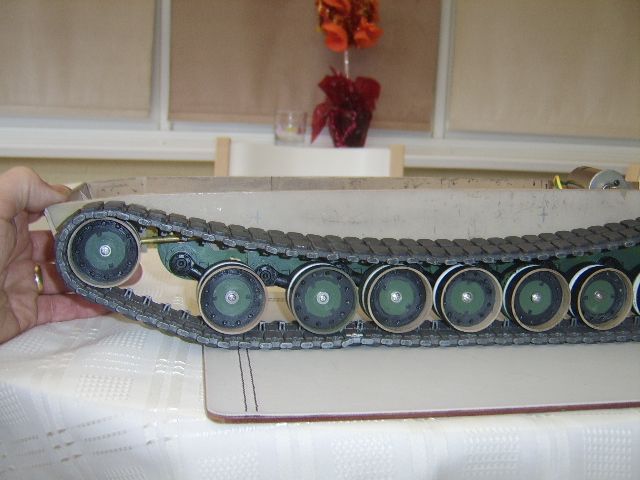
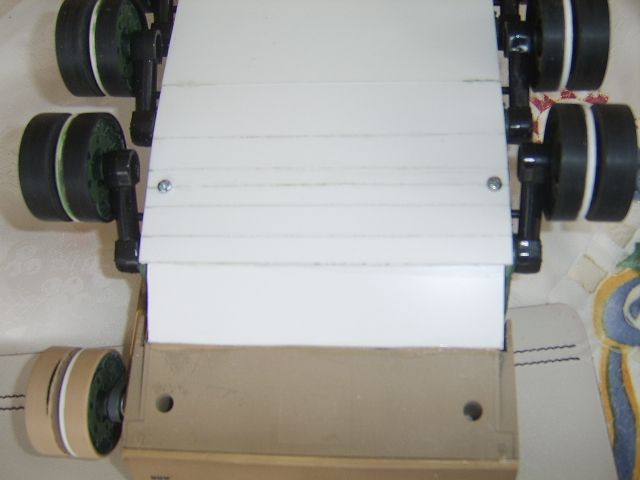
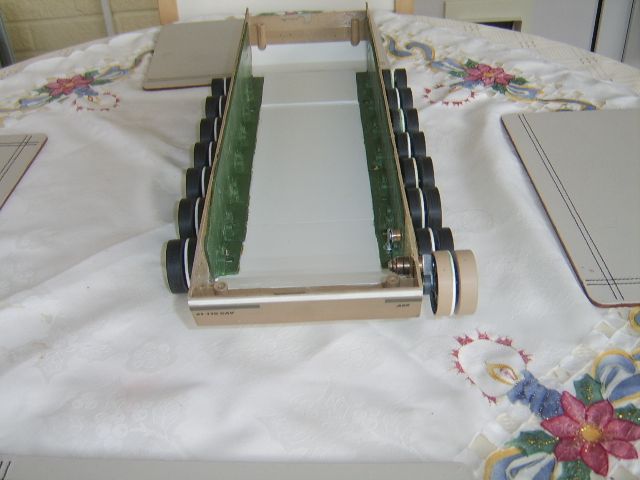
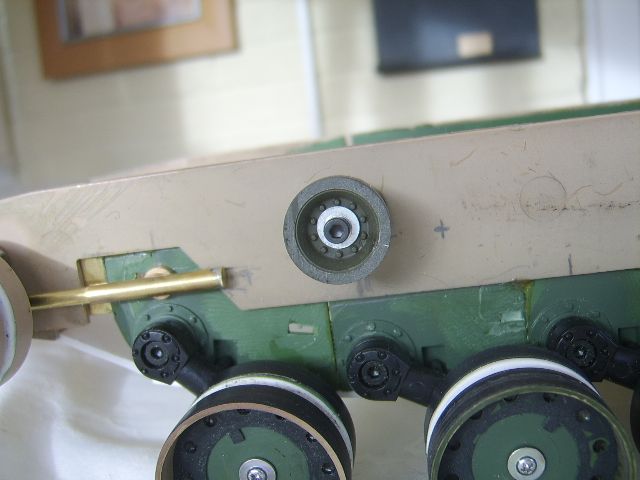
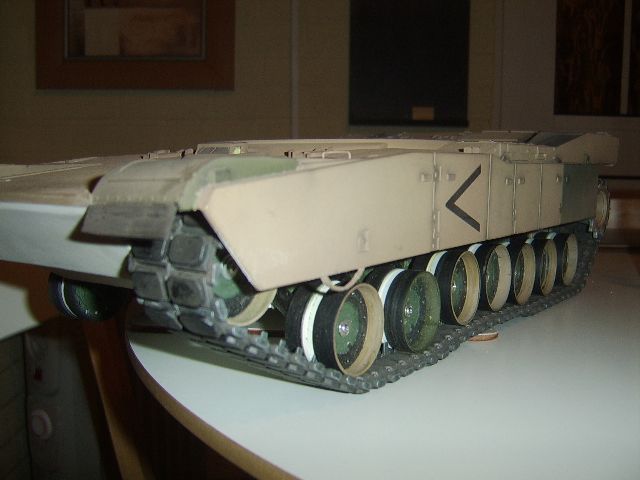
first pics show the problem
kenny kong tracks and hobby engine wheels arent quite suitable well not yet anyway
i hope from those pics you can see the issue?
well i managed to acquire it after fancying one of these tanks for a while
the top half im not going to touch as its damned near perfect its just the lower half thats in for an overhaul ohh plus the electronics
havent decided on those yet but it maybe Elmod or clarkmodel
turret rotation and main gun re-coil will be going and replaced with something better again got some ideas im toying with nothing certain yet
on to the lower half
first pics show the problem
kenny kong tracks and hobby engine wheels arent quite suitable well not yet anyway
i hope from those pics you can see the issue?
 12-30-2012 | 11:29 AM
#2
Thread Starter
Senior Member
Joined: Jul 2011
Posts: 359
Likes: 0
Received 0 Likes
on
0 Posts
From: Swindon, UNITED KINGDOM
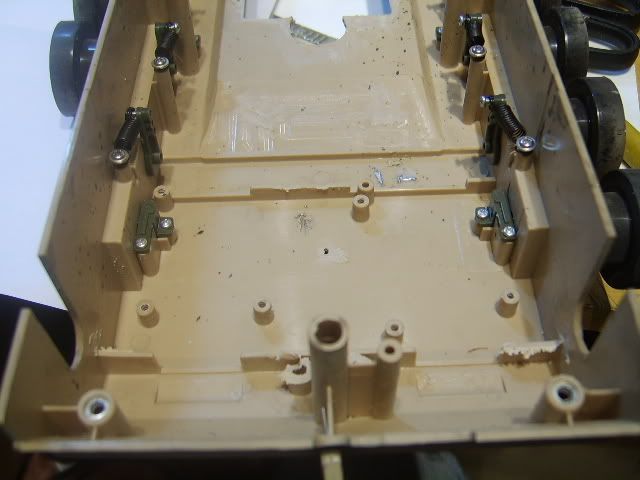
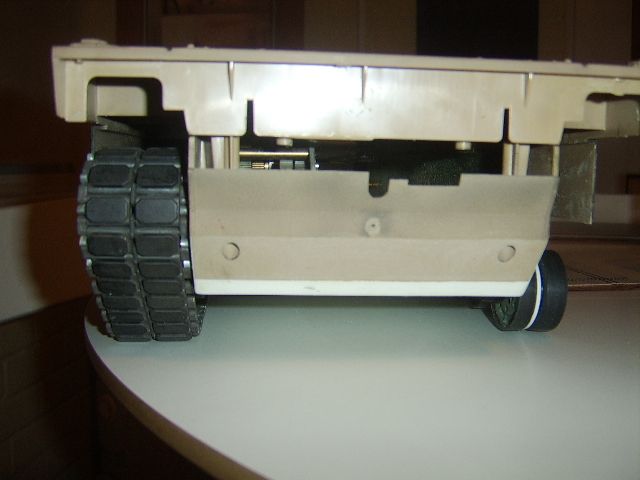
some more done on the inside cleaned out all the defunct plastic and stands making a nice flat bottom for the sheet Plasti-card
12-30-2012 | 11:31 AM
#3
Thread Starter
Senior Member
Joined: Jul 2011
Posts: 359
Likes: 0
Received 0 Likes
on
0 Posts
From: Swindon, UNITED KINGDOM
Finally some time spent and parts acquired
starting Hacking the lower hull around to get my idea of using a Kv 1 chassis well the arms and wheels
from this
to this
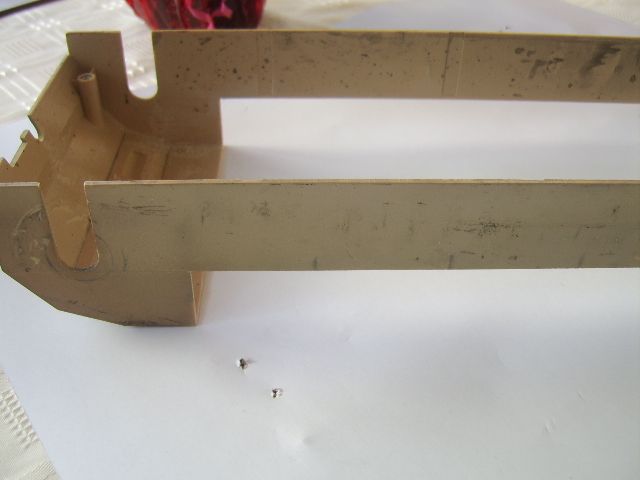
next job completely dremel out an old KV1 chassis and cut it to size so the arms line up
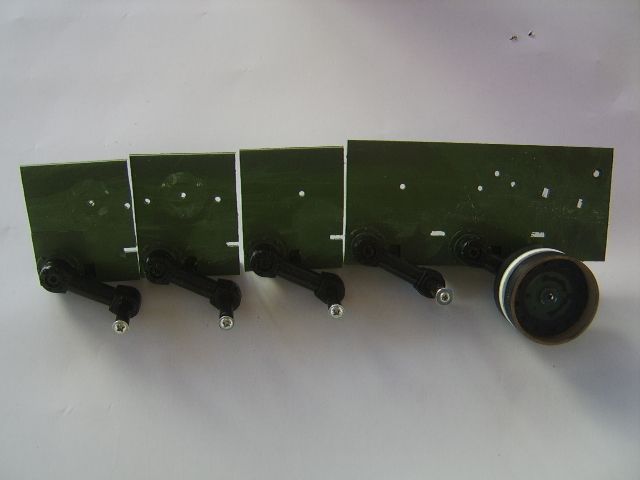
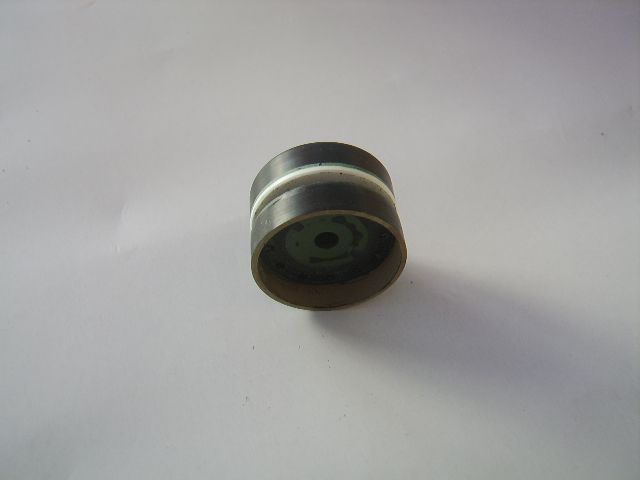
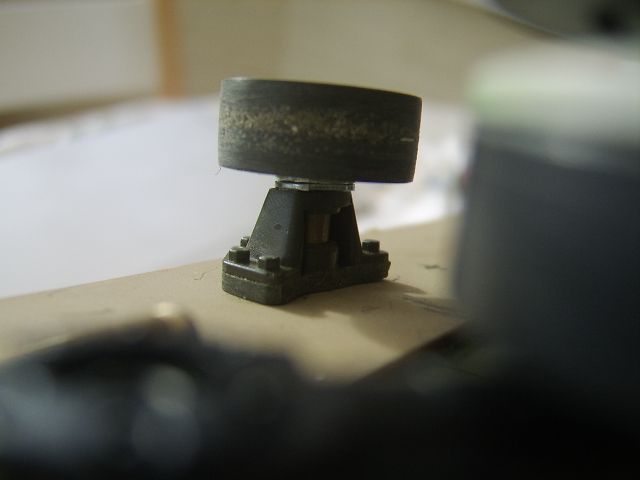
Hmmm Wheels these arent much cop
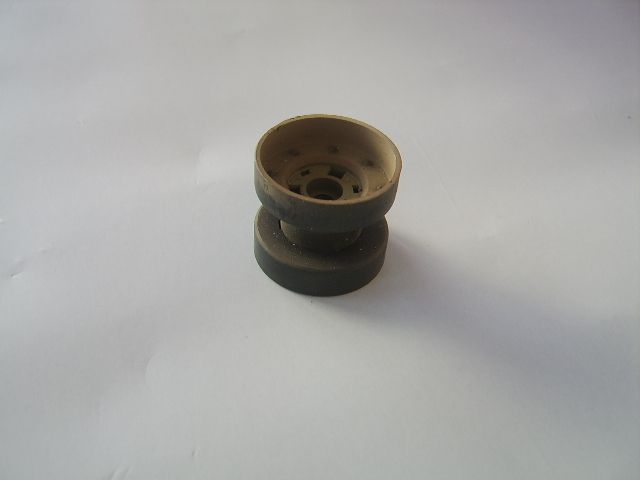
sooooo grab the old Abrams wheels hmmmm razor saw
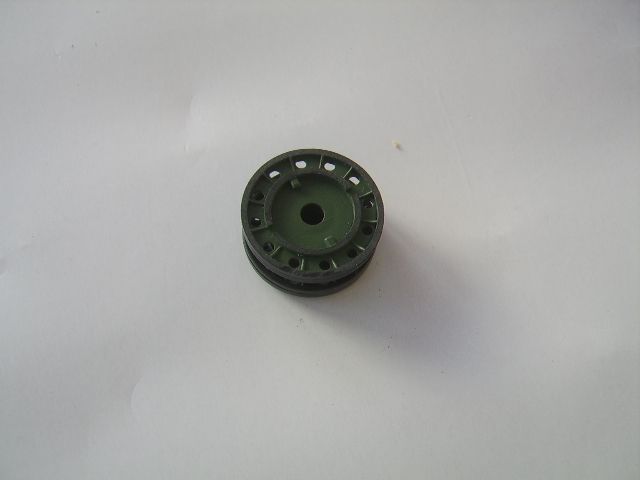
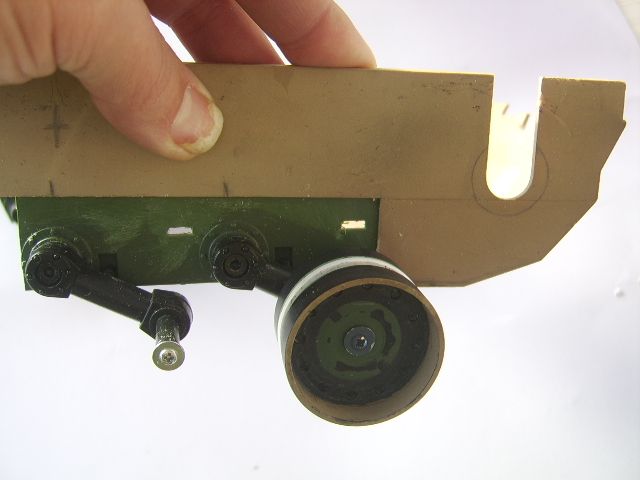
cut out the silly abrams wheels and make the kv wheels sit nice and snug inside
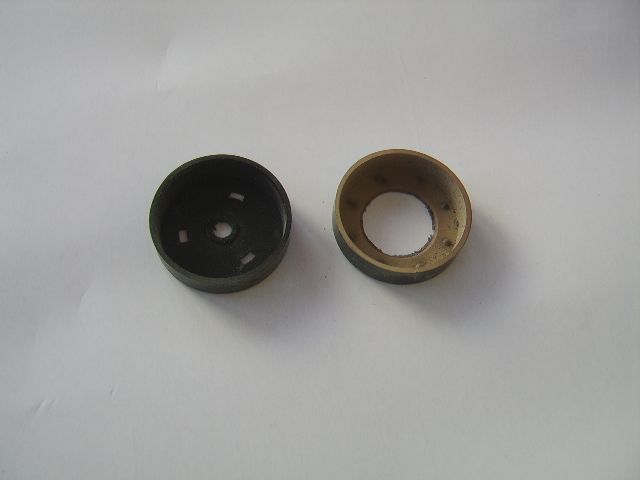
this is what i have now spacing correct and the inner hub runs lovely on the kv arms
starting Hacking the lower hull around to get my idea of using a Kv 1 chassis well the arms and wheels
from this
to this
next job completely dremel out an old KV1 chassis and cut it to size so the arms line up
Hmmm Wheels these arent much cop
sooooo grab the old Abrams wheels hmmmm razor saw
cut out the silly abrams wheels and make the kv wheels sit nice and snug inside
this is what i have now spacing correct and the inner hub runs lovely on the kv arms
12-30-2012 | 11:35 AM
#4
Thread Starter
Senior Member
Joined: Jul 2011
Posts: 359
Likes: 0
Received 0 Likes
on
0 Posts
From: Swindon, UNITED KINGDOM
Getting round to attaching the new suspension in place

some more wheels made

the ally angle is to help keep things straight whilst the glue dries
im using some plumbing adhesive for plastic pipes on this seems to hold pretty good and sets pretty quick too :O
some more wheels made
the ally angle is to help keep things straight whilst the glue dries
im using some plumbing adhesive for plastic pipes on this seems to hold pretty good and sets pretty quick too :O

 12-31-2012 | 01:34 AM
#6
Thread Starter
Senior Member
Joined: Jul 2011
Posts: 359
Likes: 0
Received 0 Likes
on
0 Posts
From: Swindon, UNITED KINGDOM
Thank you Hal for the kind Words my friend
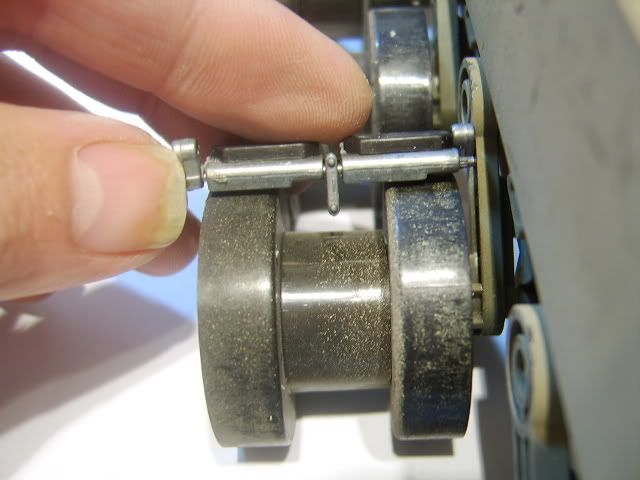
those that have these hobby engine Abrams will know the availability of an Idler is non existent so i set about creating my own version
as those Kenny kong tracks are darned heavy it needed to be metal here's what i did:
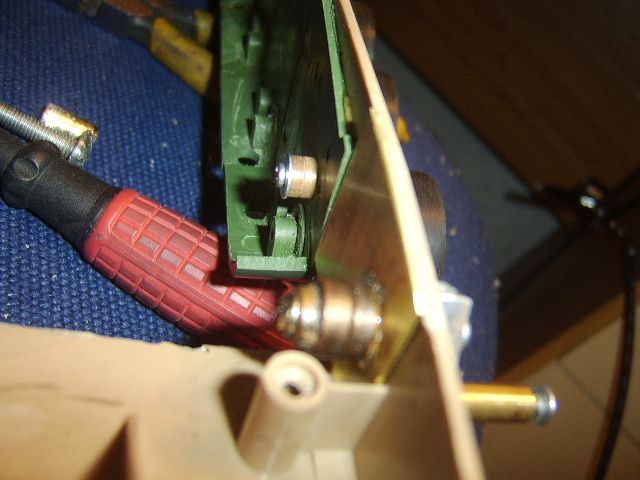
built the adjustable idler for it now
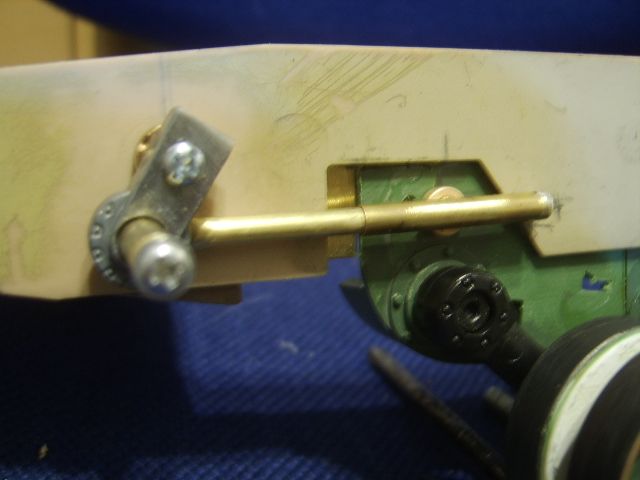
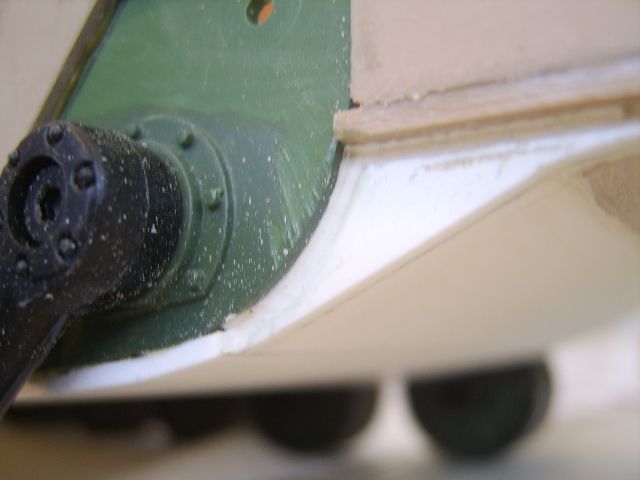
used an old Metal Tiger arm cut to size and some "BRASS" gearbox standoffs 3 in total for the wheel axle arm axle and the axle for the tensioning arm
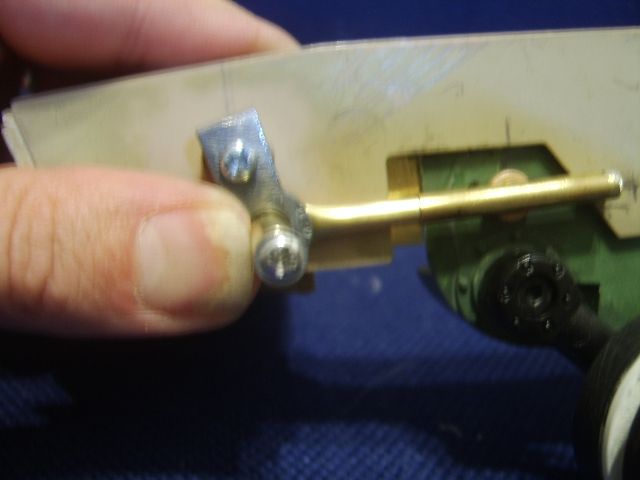
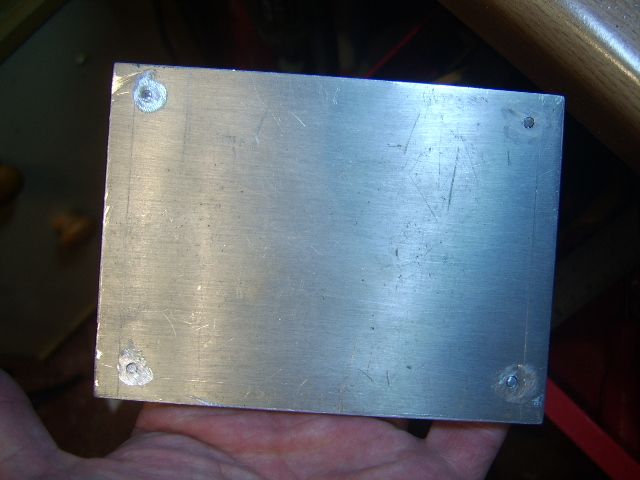
Beefed up the inside wall with Brass plate to add strength
those that have these hobby engine Abrams will know the availability of an Idler is non existent so i set about creating my own version
as those Kenny kong tracks are darned heavy it needed to be metal here's what i did:
built the adjustable idler for it now
used an old Metal Tiger arm cut to size and some "BRASS" gearbox standoffs 3 in total for the wheel axle arm axle and the axle for the tensioning arm
Beefed up the inside wall with Brass plate to add strength
12-31-2012 | 01:36 AM
#7
Thread Starter
Senior Member
Joined: Jul 2011
Posts: 359
Likes: 0
Received 0 Likes
on
0 Posts
From: Swindon, UNITED KINGDOM
ok i couldnt wait

i think some Return Rollers next lol
Hoping the gearboxes are going to fit otherwise i may need to add a power buldge
old style Tamiya King tiger gearboxes
i think some Return Rollers next lol
Hoping the gearboxes are going to fit otherwise i may need to add a power buldge
old style Tamiya King tiger gearboxes
12-31-2012 | 03:01 AM
#8
Thread Starter
Senior Member
Joined: Jul 2011
Posts: 359
Likes: 0
Received 0 Likes
on
0 Posts
From: Swindon, UNITED KINGDOM
visiting relatives,eating and drinking sure gets in the way of a build 8O
bit more done
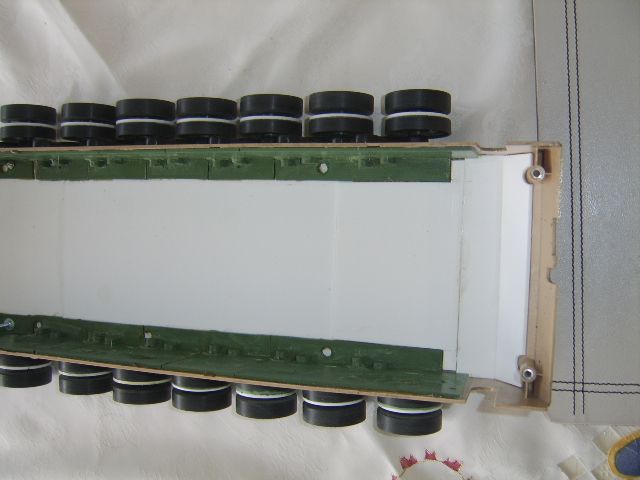
all the wheels have been made finished and set on the arms
got some 80th plasti-card and started filling in the ermm large holes in the chassis
corrected the rear
another skim of plasti-card and some filler should be good to go
front was a bit of a pain with the angle but its better now some nuts and bolts added to aid the Gluing
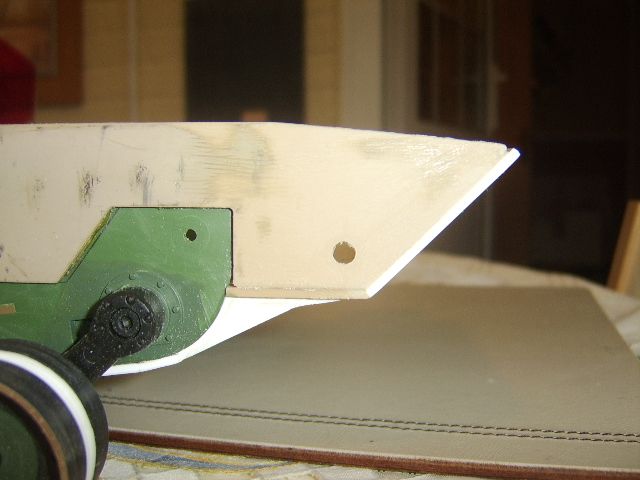
still not sure what to do on the front end whether to adjust the frontal angle or just leave it as is?
(i should have enough Plasti-card '8 )
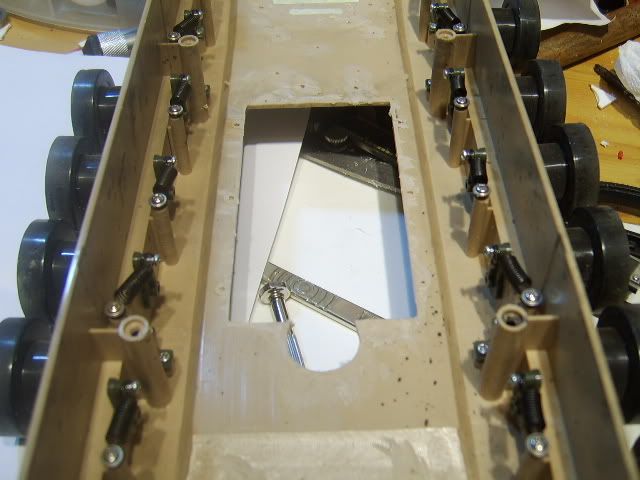
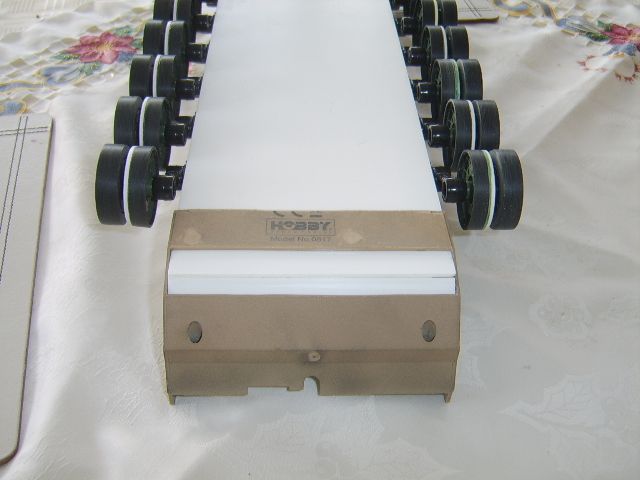
Right hand side idler to build and some more holes to fill and the lower should be ready for it's gearboxes :O
bit more done
all the wheels have been made finished and set on the arms
got some 80th plasti-card and started filling in the ermm large holes in the chassis
corrected the rear
another skim of plasti-card and some filler should be good to go
front was a bit of a pain with the angle but its better now some nuts and bolts added to aid the Gluing
still not sure what to do on the front end whether to adjust the frontal angle or just leave it as is?
(i should have enough Plasti-card '8 )
Right hand side idler to build and some more holes to fill and the lower should be ready for it's gearboxes :O

 12-31-2012 | 05:26 AM
#10

Senior Member
WOW. Very ambitous project. Looks great so far.
You know what is going to happen don't you. Just as you get this finished the new HL one will be released.
You know what is going to happen don't you. Just as you get this finished the new HL one will be released.
12-31-2012 | 08:20 AM
#13
Thread Starter
Senior Member
Joined: Jul 2011
Posts: 359
Likes: 0
Received 0 Likes
on
0 Posts
From: Swindon, UNITED KINGDOM
ORIGINAL: YHR
WOW. Very ambitous project. Looks great so far.
You know what is going to happen don't you. Just as you get this finished the new HL one will be released.
WOW. Very ambitous project. Looks great so far.
You know what is going to happen don't you. Just as you get this finished the new HL one will be released.
and yes thats why ive bitten the bullet now
when i did my tiger 1 suspension many moons ago i got half a side done and then some daft twit released the asiatam lower
 12-31-2012 | 04:58 PM
#14
Thread Starter
Senior Member
Joined: Jul 2011
Posts: 359
Likes: 0
Received 0 Likes
on
0 Posts
From: Swindon, UNITED KINGDOM
Finishing up the outside filling all the holes etc
rear end now with the correct shape

yup it had to be done corrected the Front Armour
inside shot i also retained the front Screw holders

Started adding the Weldlines sorry about the picture not being to clear
rear end now with the correct shape
yup it had to be done corrected the Front Armour
inside shot i also retained the front Screw holders
Started adding the Weldlines sorry about the picture not being to clear
12-31-2012 | 06:03 PM
#15
Wow, a lot of hard aggressive work being done on this. And I like what I see.
This has always been on my to do list, but it's a lot of work. Looks like you're doing all the right stuff to it.
~ Jeff
This has always been on my to do list, but it's a lot of work. Looks like you're doing all the right stuff to it.
~ Jeff
01-01-2013 | 03:53 AM
#16
Thread Starter
Senior Member
Joined: Jul 2011
Posts: 359
Likes: 0
Received 0 Likes
on
0 Posts
From: Swindon, UNITED KINGDOM
ORIGINAL: Panther F
Wow, a lot of hard aggressive work being done on this. And I like what I see.
This has always been on my to do list, but it's a lot of work. Looks like you're doing all the right stuff to it.
~ Jeff
Wow, a lot of hard aggressive work being done on this. And I like what I see.
This has always been on my to do list, but it's a lot of work. Looks like you're doing all the right stuff to it.
~ Jeff
Yes it sure is a labour of love

 01-01-2013 | 02:15 PM
#18
Thread Starter
Senior Member
Joined: Jul 2011
Posts: 359
Likes: 0
Received 0 Likes
on
0 Posts
From: Swindon, UNITED KINGDOM
Thank you wsn123
a bit more for tonight
Made all the Return Rollers and the right hand side adjustable idler
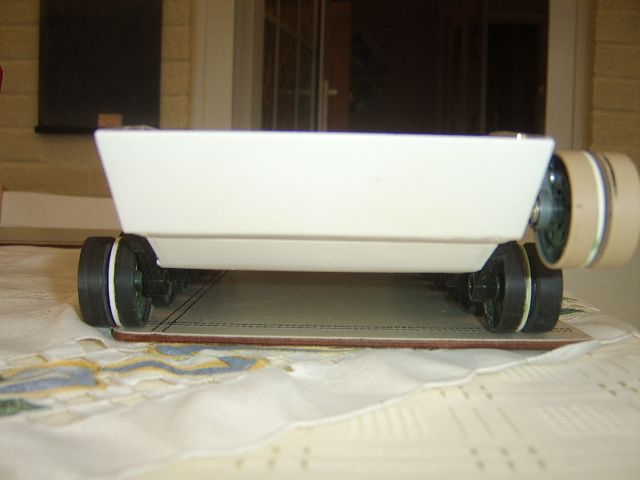
Fitted one side and popped the top on to see what it looks like


Motors need a plate adding to the rear to hold them nice and snug
Rear end dont look to bad now

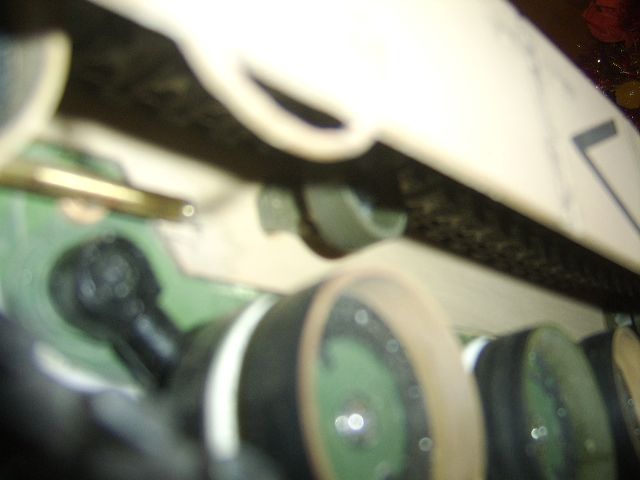
blurry shot of the return rollers
a bit more for tonight
Made all the Return Rollers and the right hand side adjustable idler
Fitted one side and popped the top on to see what it looks like
Motors need a plate adding to the rear to hold them nice and snug
Rear end dont look to bad now
blurry shot of the return rollers
01-04-2013 | 05:00 PM
#21
Thread Starter
Senior Member
Joined: Jul 2011
Posts: 359
Likes: 0
Received 0 Likes
on
0 Posts
From: Swindon, UNITED KINGDOM
some more done but a bit slower due to work grrr
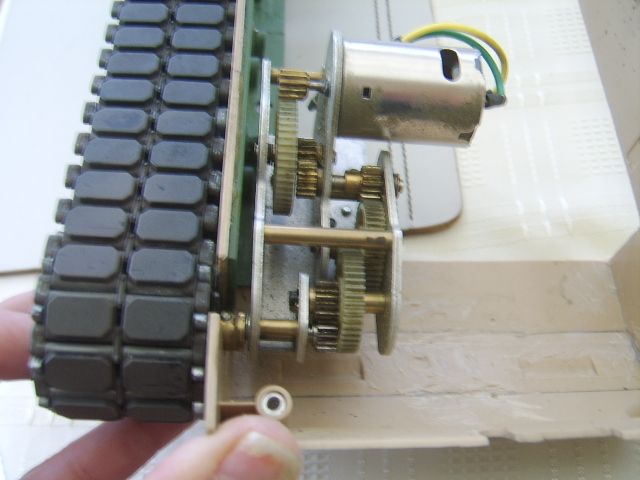
right hand idler built and both sides Return rollers built and fixed on

Started Figuring out how to Get those K/tiger g/boxes in there
nice bit of 5mm ally plate held inplace with some ally angle bolt to the sides with M 2.5 screws captive nut serts fitted as i am not fiddling with nuts in there lol
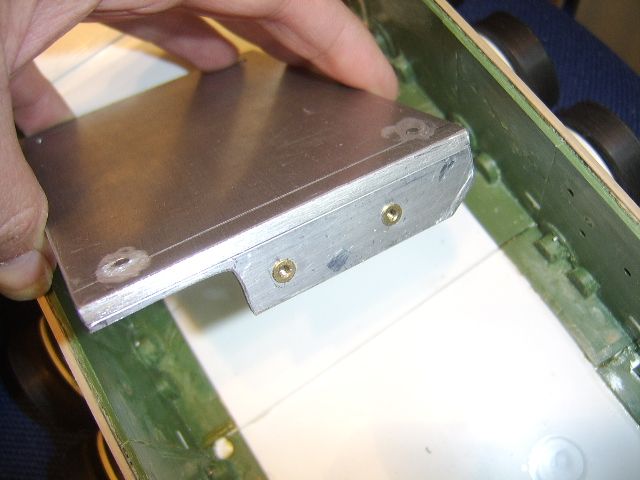
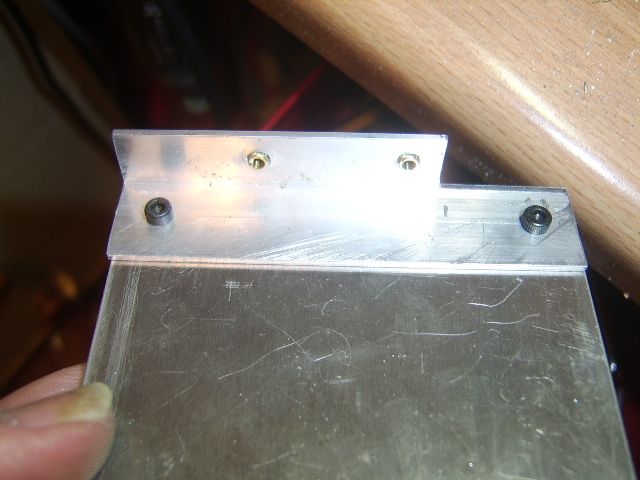
how it looks in the lower hull
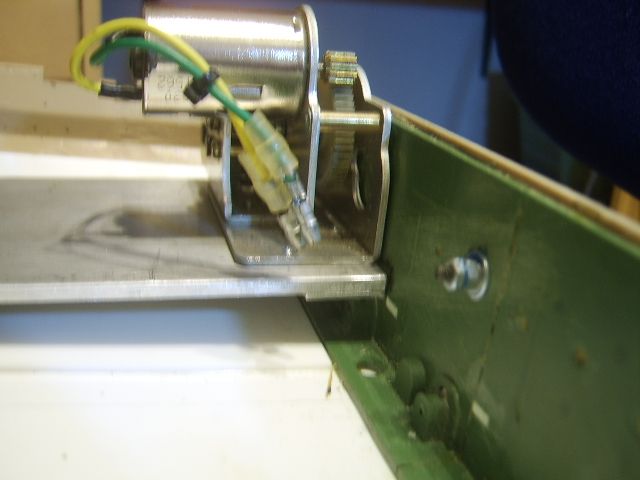
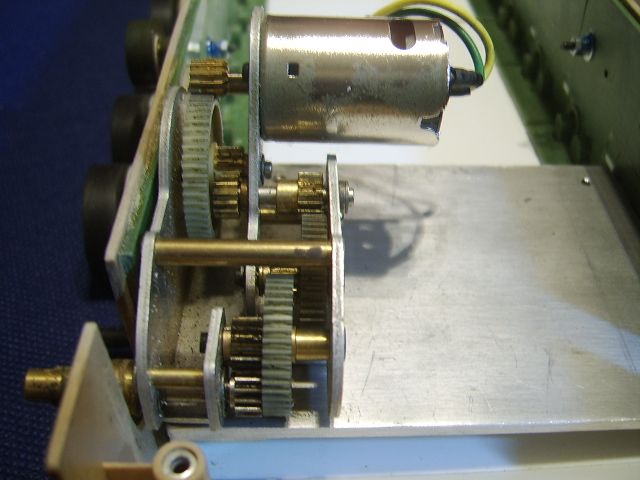
thats it for now more to follow soon
right hand idler built and both sides Return rollers built and fixed on
Started Figuring out how to Get those K/tiger g/boxes in there
nice bit of 5mm ally plate held inplace with some ally angle bolt to the sides with M 2.5 screws captive nut serts fitted as i am not fiddling with nuts in there lol
how it looks in the lower hull
thats it for now more to follow soon
 01-27-2013 | 06:23 AM
#24
Thread Starter
Senior Member
Joined: Jul 2011
Posts: 359
Likes: 0
Received 0 Likes
on
0 Posts
From: Swindon, UNITED KINGDOM
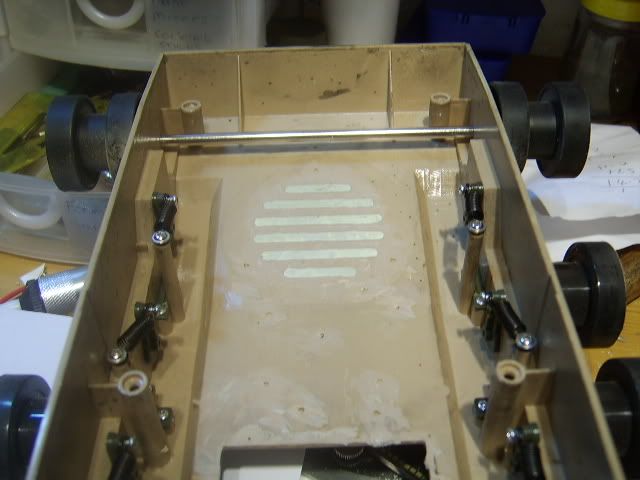
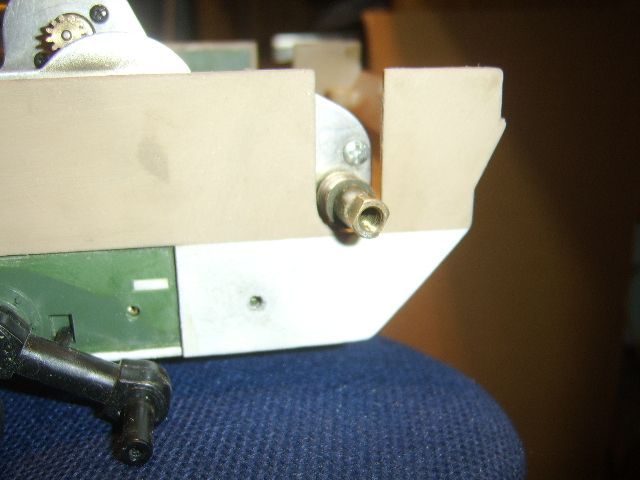
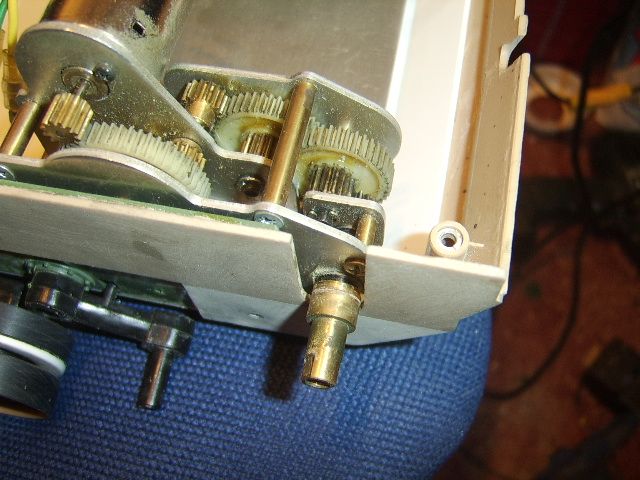
"Speaker box" added

this shows the "Tuned port" entering the baffle chamber
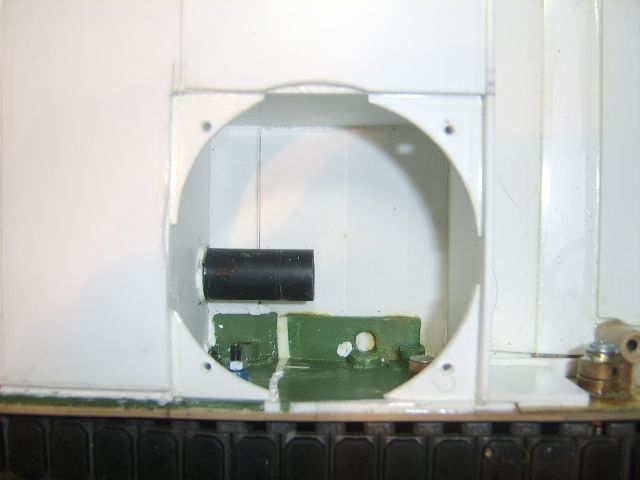
The tuned port lol
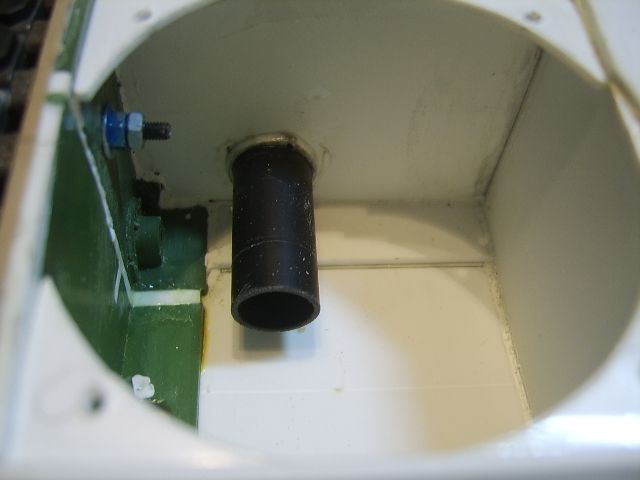
final Bass port
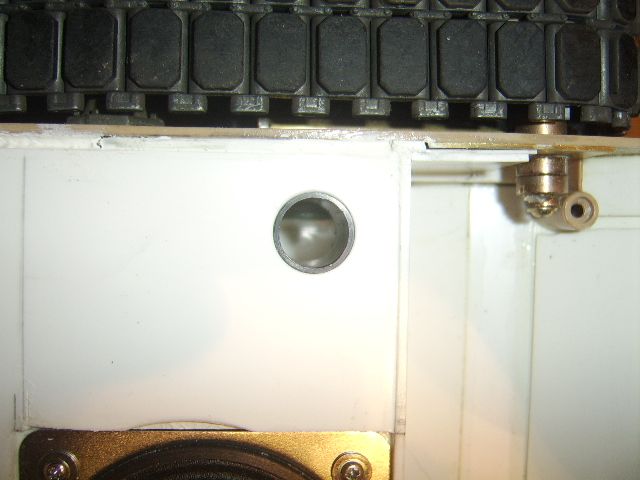
had her out in the snow and its all good except the left hand gearbox is slightly out of alignment so need to fix that
this shows the "Tuned port" entering the baffle chamber
The tuned port lol
final Bass port
had her out in the snow and its all good except the left hand gearbox is slightly out of alignment so need to fix that
01-27-2013 | 06:33 AM
#25
Looking good Rob! 
~ Jeff
~ Jeff

