


Hobby Engine Abrams M1A2 Build
 06-17-2013 | 02:04 AM
#1
Thread Starter
Senior Member
Joined: Jul 2011
Posts: 359
Likes: 0
Received 0 Likes
on
0 Posts
From: Swindon, UNITED KINGDOM
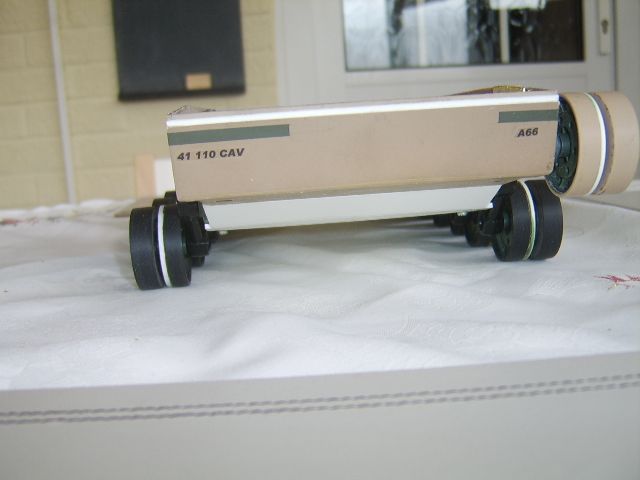
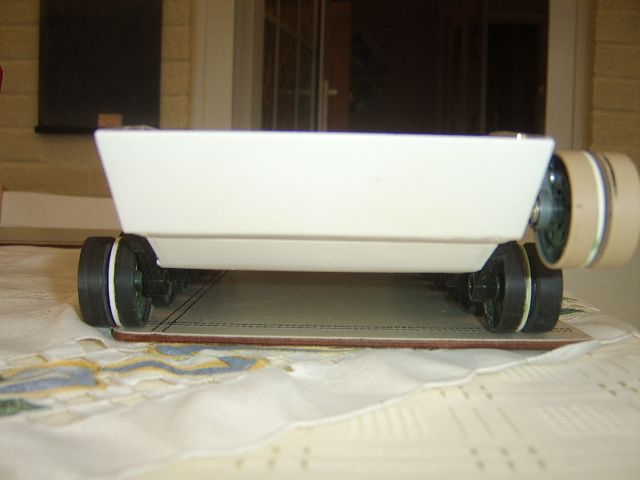
not sure i have posted this yet 
Finally some time spent and parts acquired
starting Hacking the lower hull around to get my idea of using a Kv 1 chassis well the arms and wheels
from this
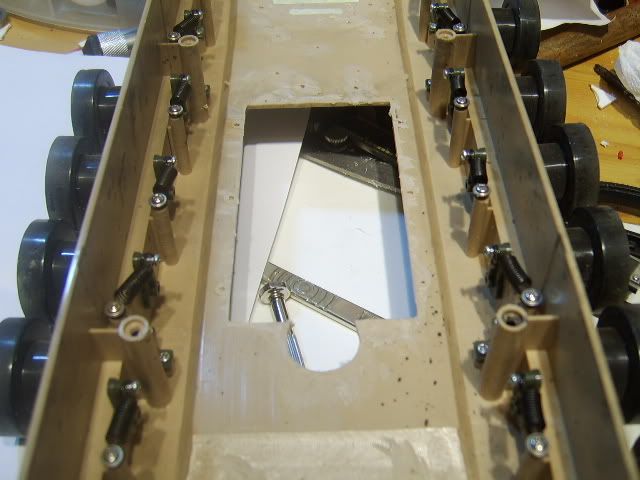
to this
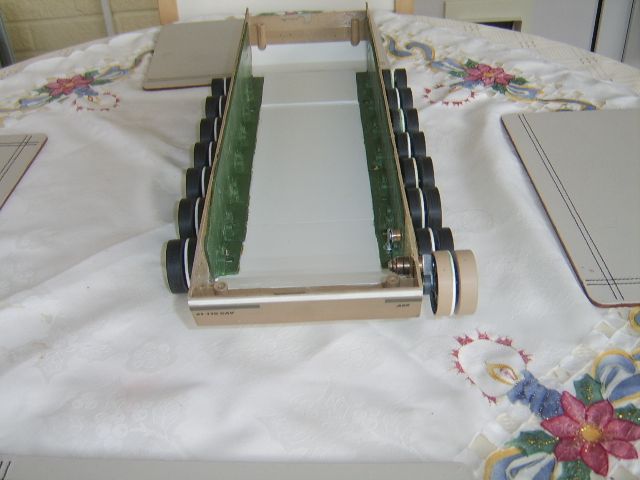
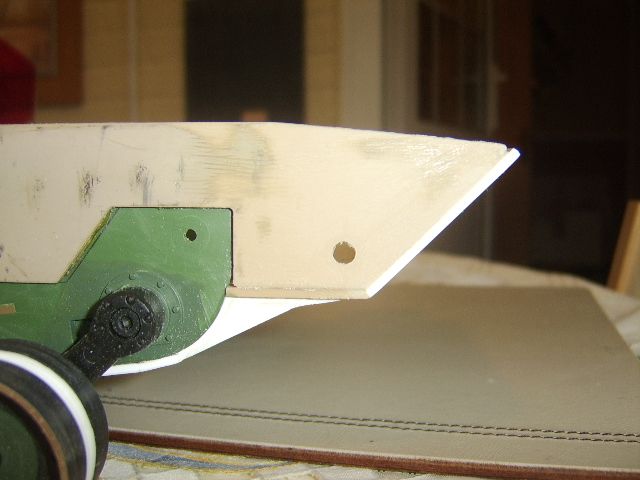
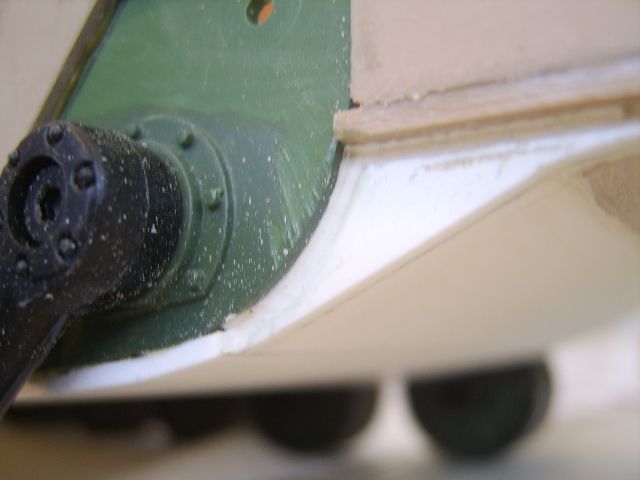
next job completely dremel out an old KV1 chassis and cut it to size so the arms line up
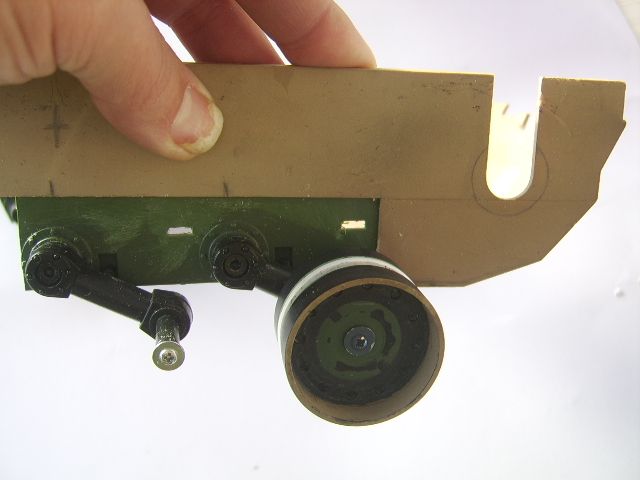
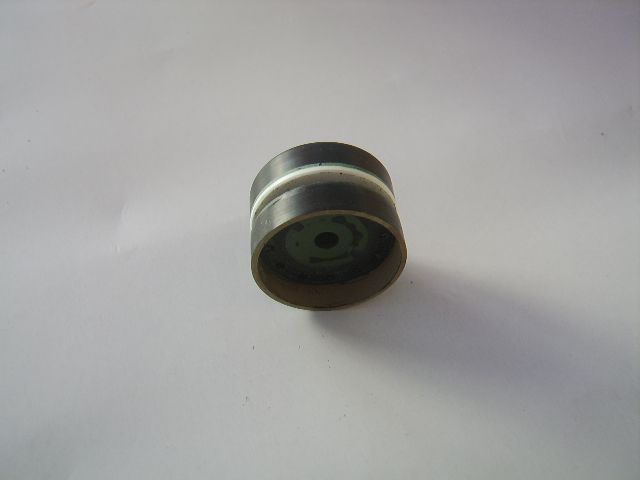
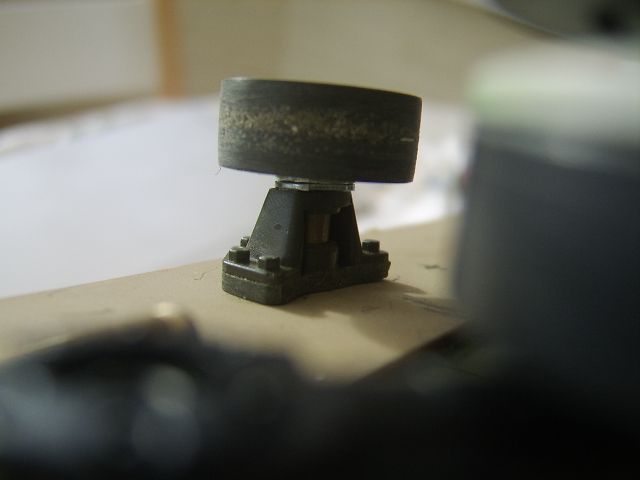
Hmmm Wheels these arent much cop
sooooo grab the old KV wheels hmmmm razor saw
cut out the silly abrams wheels and make the kv wheels sit nice and snug inside
this is what i have now spacing correct and the inner hub runs lovely on the kv arms
Finally some time spent and parts acquired
starting Hacking the lower hull around to get my idea of using a Kv 1 chassis well the arms and wheels
from this
to this
next job completely dremel out an old KV1 chassis and cut it to size so the arms line up
Hmmm Wheels these arent much cop
sooooo grab the old KV wheels hmmmm razor saw
cut out the silly abrams wheels and make the kv wheels sit nice and snug inside
this is what i have now spacing correct and the inner hub runs lovely on the kv arms
 06-17-2013 | 02:05 AM
#2
Thread Starter
Senior Member
Joined: Jul 2011
Posts: 359
Likes: 0
Received 0 Likes
on
0 Posts
From: Swindon, UNITED KINGDOM
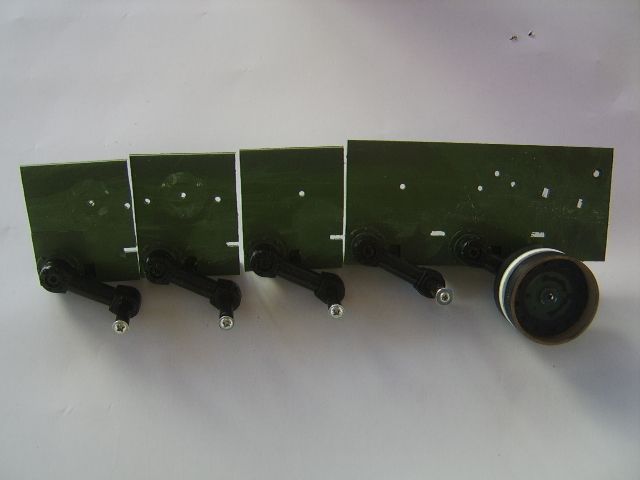
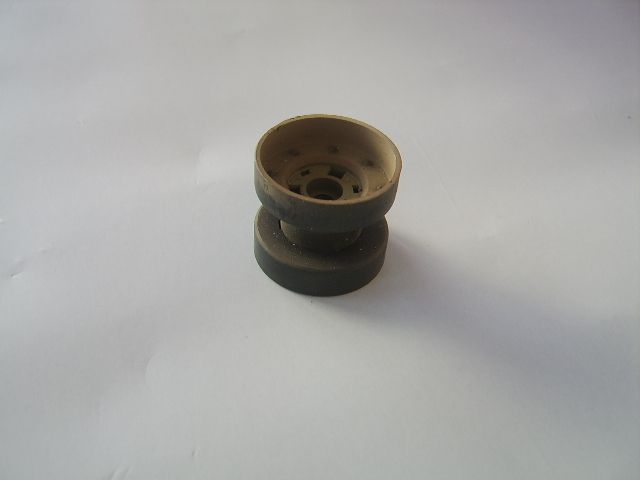
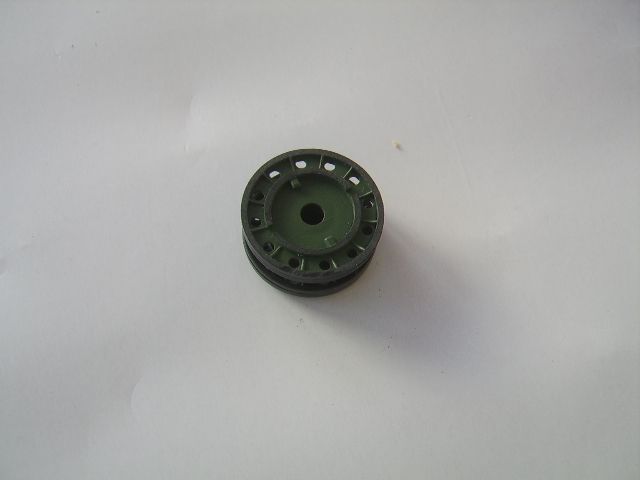
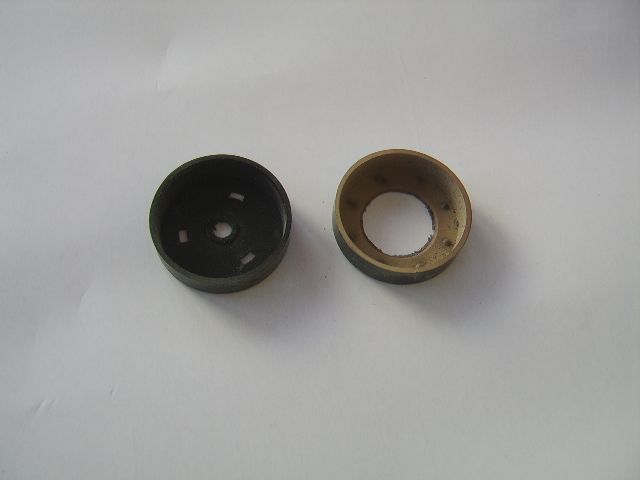
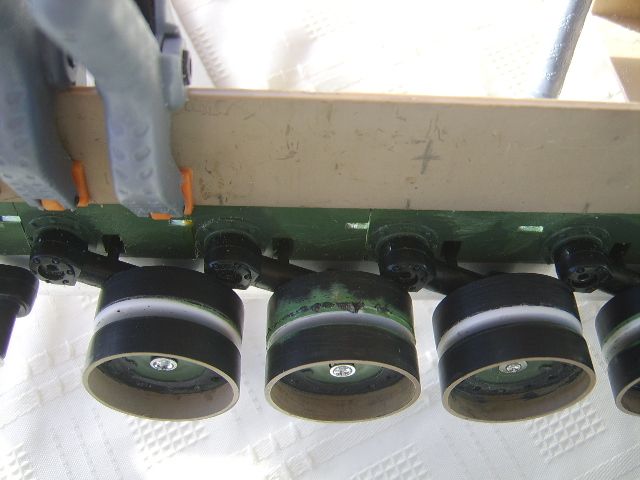
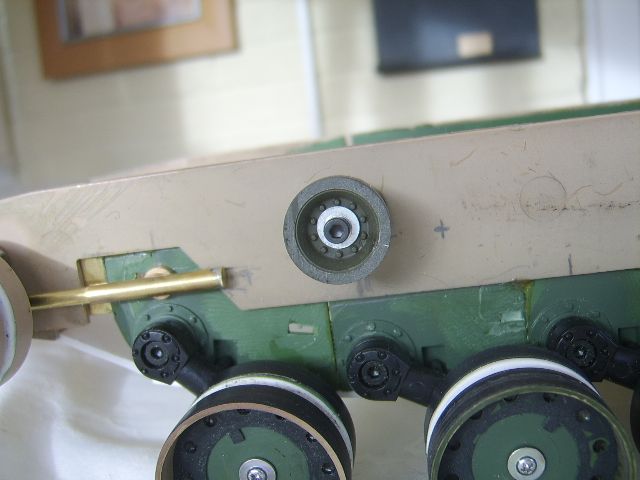
Getting round to attaching the new suspension in place

some more wheels made

the ally angle is to help keep things straight whilst the glue dries
im using some plumbing adhesive for plastic pipes on this seems to hold pretty good and sets pretty quick too :O
some more wheels made
the ally angle is to help keep things straight whilst the glue dries
im using some plumbing adhesive for plastic pipes on this seems to hold pretty good and sets pretty quick too :O
06-17-2013 | 02:48 PM
#3
Thread Starter
Senior Member
Joined: Jul 2011
Posts: 359
Likes: 0
Received 0 Likes
on
0 Posts
From: Swindon, UNITED KINGDOM
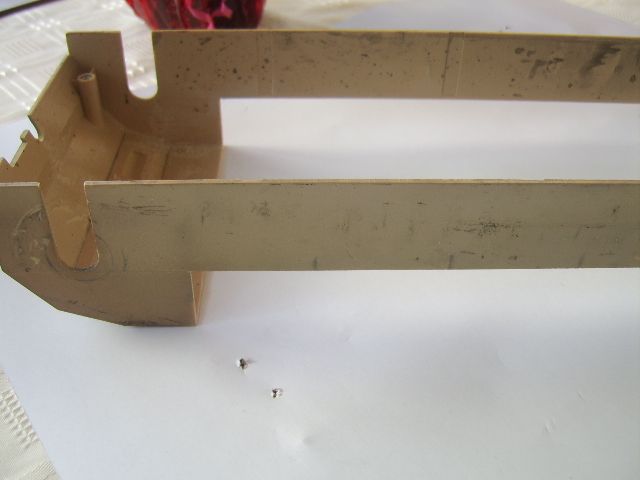
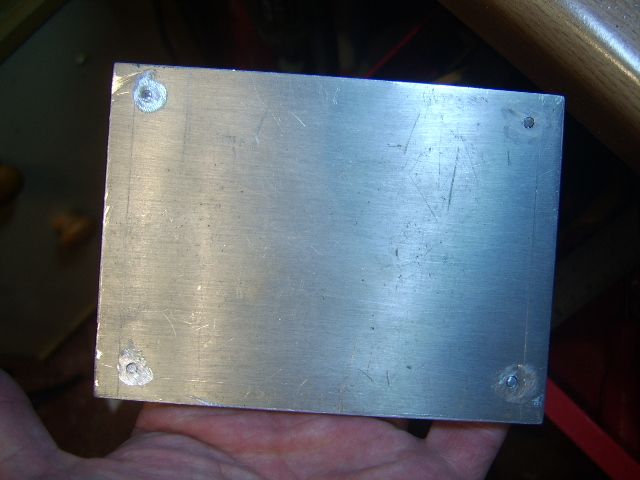
built the adjustable idler for it now
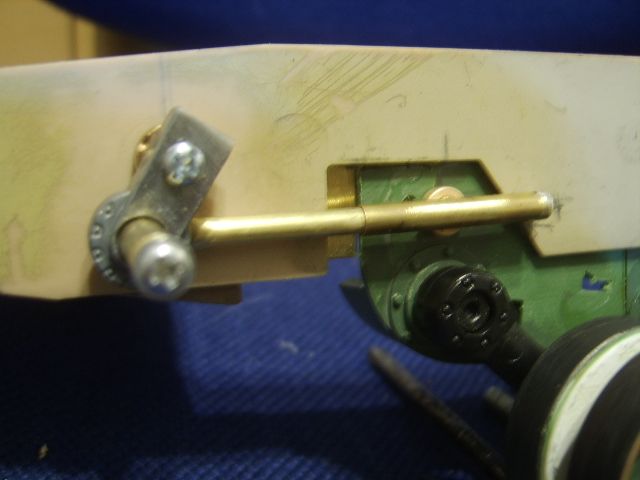
used an old Metal Tiger arm cut to size and some "BRASS" gearbox standoffs 3 in total for the wheel axle arm axle and the axle for the tensioning arm
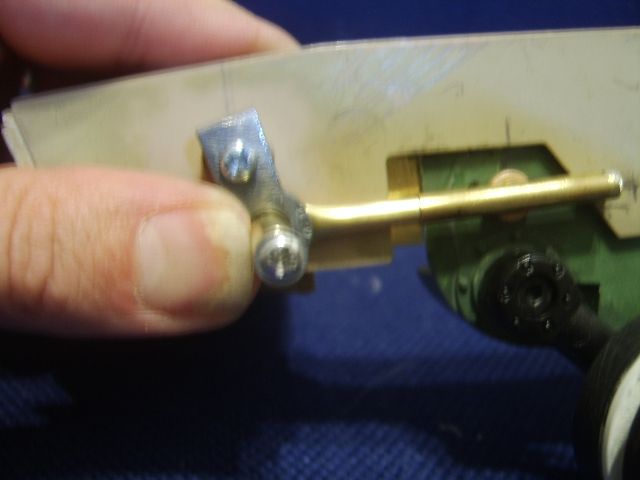
Beefed up the inside wall with Brass plate to add strength
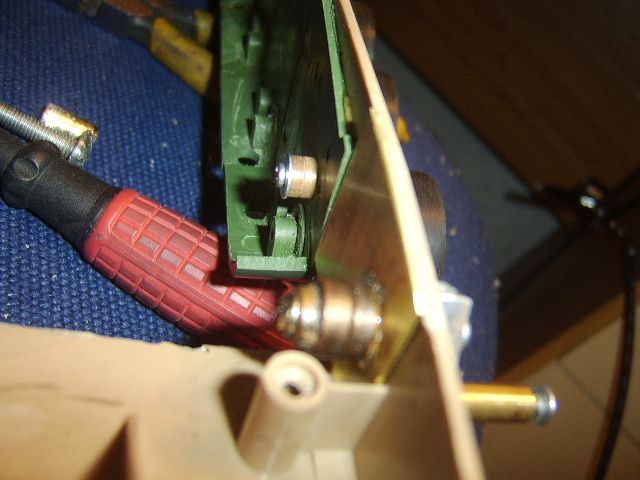
used an old Metal Tiger arm cut to size and some "BRASS" gearbox standoffs 3 in total for the wheel axle arm axle and the axle for the tensioning arm
Beefed up the inside wall with Brass plate to add strength
06-17-2013 | 02:51 PM
#4
Thread Starter
Senior Member
Joined: Jul 2011
Posts: 359
Likes: 0
Received 0 Likes
on
0 Posts
From: Swindon, UNITED KINGDOM
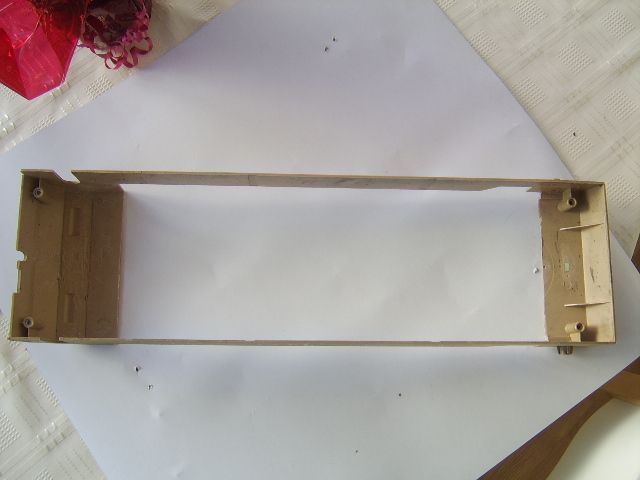
bit more done
all the wheels have been made finished and set on the arms
got some 80th plasti-card and started filling in the ermm large holes in the chassis
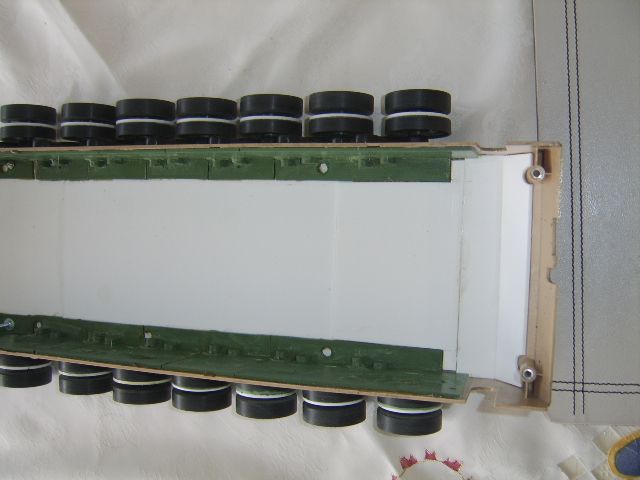
corrected the rear
another skim of plasti-card and some filler should be good to go
front was a bit of a pain with the angle but its better now some nuts and bolts added to aid the Gluing
still not sure what to do on the front end whether to adjust the frontal angle or just leave it as is?
(i should have enough Plasti-card '8 )
Right hand side idler to build and some more holes to fill and the lower should be ready for it's gearboxes :O
all the wheels have been made finished and set on the arms
got some 80th plasti-card and started filling in the ermm large holes in the chassis
corrected the rear
another skim of plasti-card and some filler should be good to go
front was a bit of a pain with the angle but its better now some nuts and bolts added to aid the Gluing
still not sure what to do on the front end whether to adjust the frontal angle or just leave it as is?
(i should have enough Plasti-card '8 )
Right hand side idler to build and some more holes to fill and the lower should be ready for it's gearboxes :O


 06-18-2013 | 12:10 AM
#7
Thread Starter
Senior Member
Joined: Jul 2011
Posts: 359
Likes: 0
Received 0 Likes
on
0 Posts
From: Swindon, UNITED KINGDOM
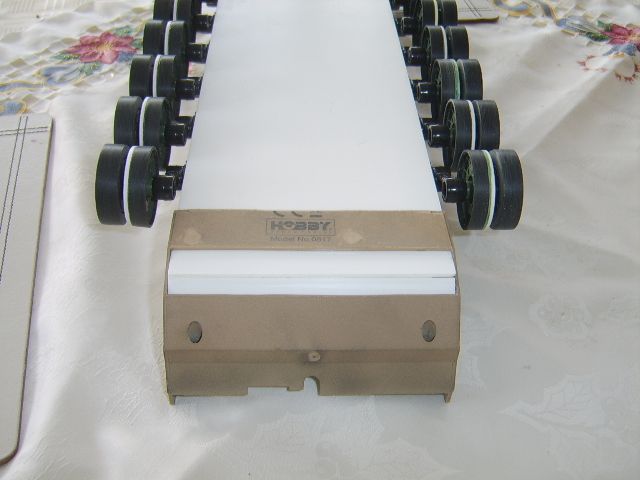
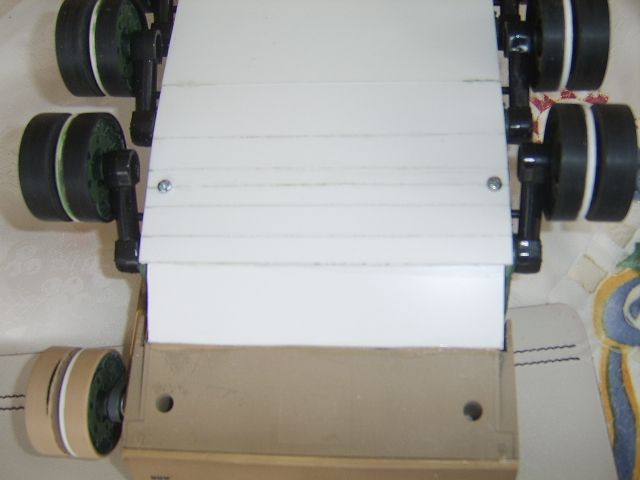
Finishing up the outside filling all the holes etc
rear end now with the correct shape

yup it had to be done corrected the Front Armour
inside shot i also retained the front Screw holders 8O 8O

Started adding the Weldlines sorry about the picture not being to clear :{
rear end now with the correct shape
yup it had to be done corrected the Front Armour
inside shot i also retained the front Screw holders 8O 8O
Started adding the Weldlines sorry about the picture not being to clear :{
06-18-2013 | 12:10 PM
#8
Thread Starter
Senior Member
Joined: Jul 2011
Posts: 359
Likes: 0
Received 0 Likes
on
0 Posts
From: Swindon, UNITED KINGDOM
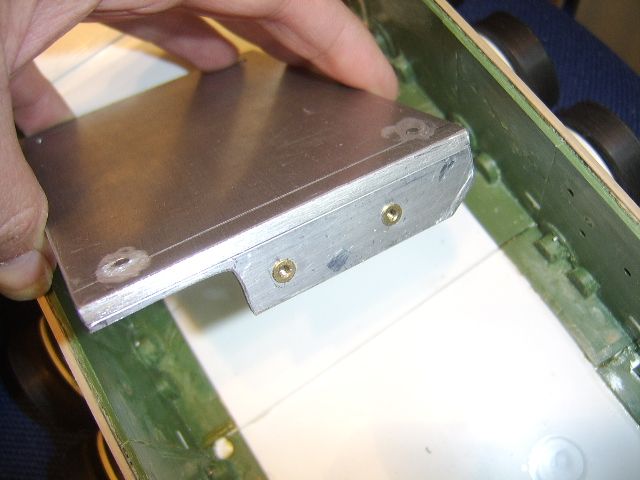
right hand idler built and both sides Return rollers built and fixed on

Started Figuring out how to Get those K/tiger g/boxes in there
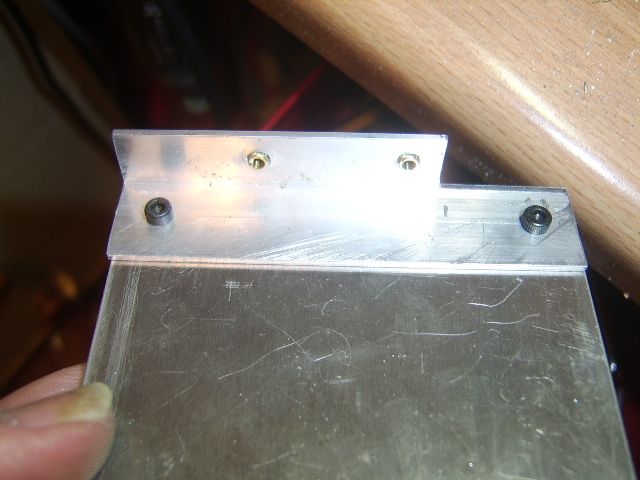
nice bit of 5mm ally plate held inplace with some ally angle bolt to the sides with M 2.5 screws captive nut serts fitted as i am not fiddling with nuts in there lol
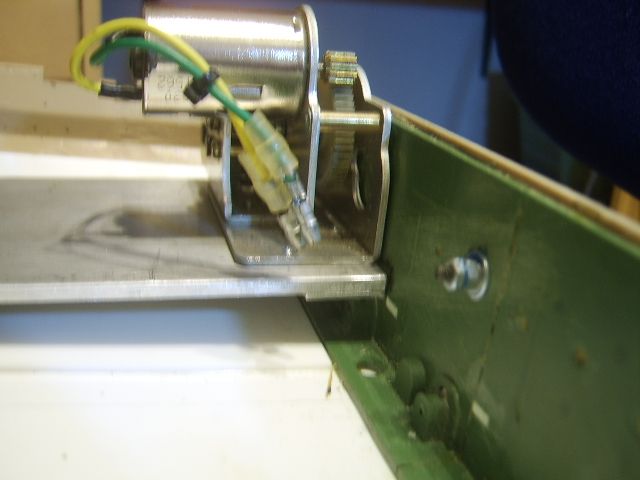
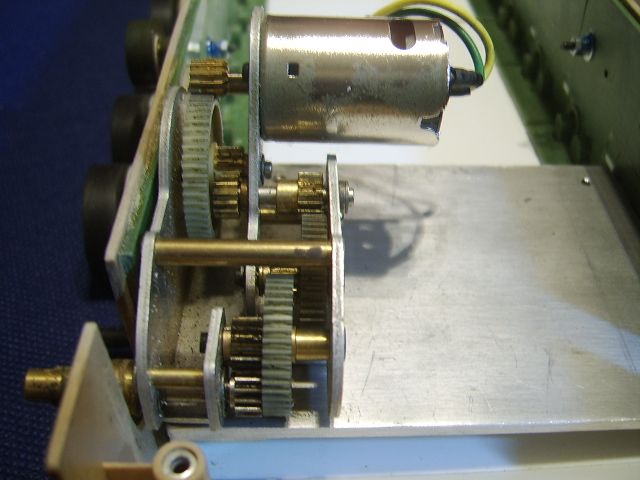
how it looks in the lower hull
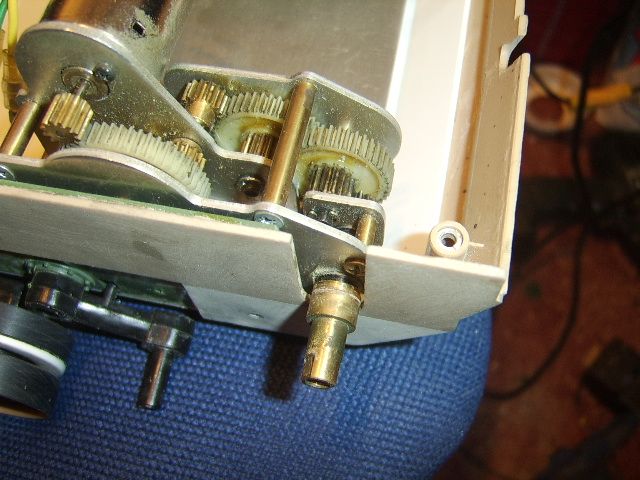
thats it for now more to follow
Started Figuring out how to Get those K/tiger g/boxes in there
nice bit of 5mm ally plate held inplace with some ally angle bolt to the sides with M 2.5 screws captive nut serts fitted as i am not fiddling with nuts in there lol
how it looks in the lower hull
thats it for now more to follow
06-18-2013 | 12:12 PM
#9
Thread Starter
Senior Member
Joined: Jul 2011
Posts: 359
Likes: 0
Received 0 Likes
on
0 Posts
From: Swindon, UNITED KINGDOM
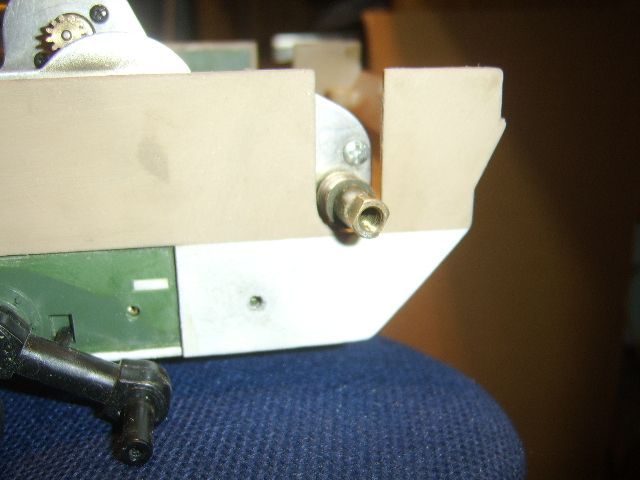
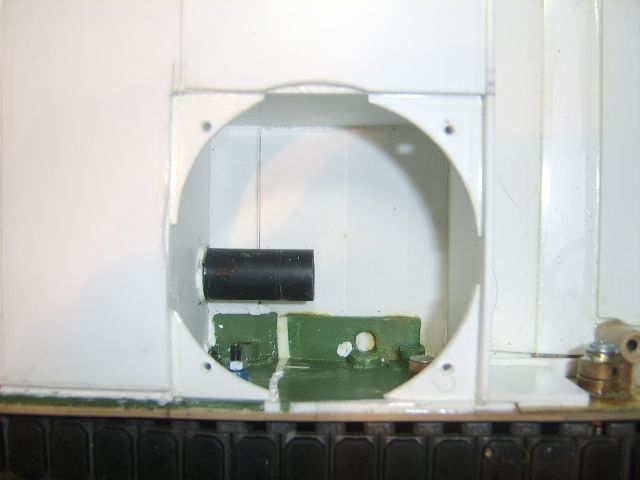
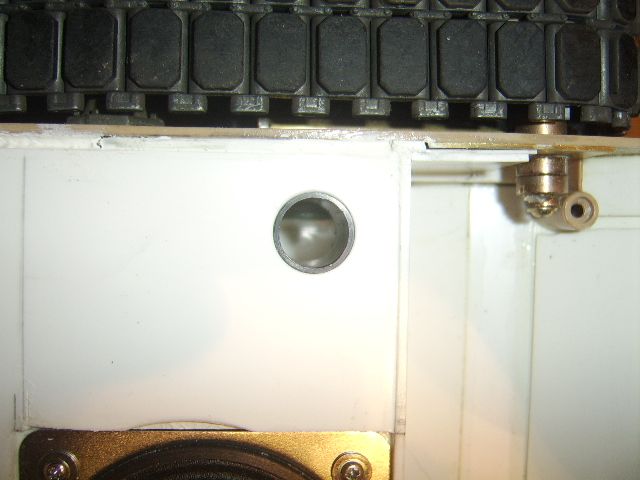
"Speaker box" added

this shows the "Tuned port" entering the baffle chamber
The tuned port lol
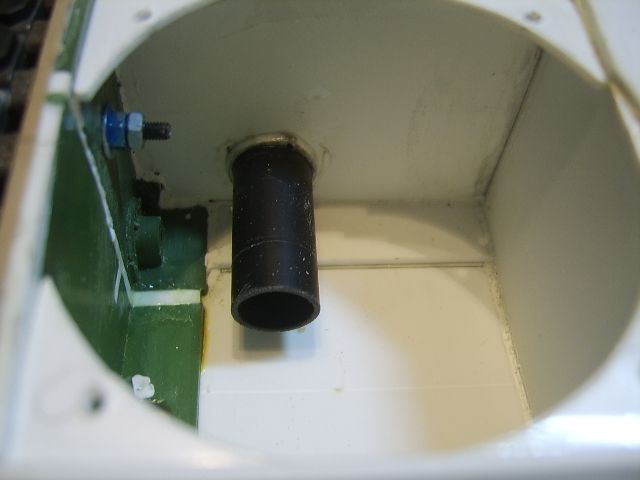
final Bass port
this shows the "Tuned port" entering the baffle chamber
The tuned port lol
final Bass port


 06-20-2013 | 04:01 AM
#12
Looks like original Tiger gearboxes! You will like the scale ~32mph the TU's give for this model.
Also liked the strengthening bar you installed, I'm sure it will help.
Also liked the strengthening bar you installed, I'm sure it will help.
06-20-2013 | 06:04 AM
#13


Joined: Nov 2012
Posts: 903
Likes: 0
Received 0 Likes
on
0 Posts
From: USA
Looks great! You are doing a super job turning a craptastic toy tank into something to envy. I dont know why someone cant produce a quality M1 from the factory (Come on Tamiya!!) for those of us who lack your skills...
06-20-2013 | 11:30 AM
#14
Thread Starter
Senior Member
Joined: Jul 2011
Posts: 359
Likes: 0
Received 0 Likes
on
0 Posts
From: Swindon, UNITED KINGDOM
ORIGINAL: heavyaslead
Looks like original Tiger gearboxes! You will like the scale ~32mph the TU's give for this model.
Also liked the strengthening bar you installed, I'm sure it will help.
Looks like original Tiger gearboxes! You will like the scale ~32mph the TU's give for this model.
Also liked the strengthening bar you installed, I'm sure it will help.

and yes they do move it quite nicely big thanks to paul "Septon" for those
many thanks for the comments keep em coming this is a trial and error build
 06-20-2013 | 01:17 PM
#15

Really nice work. i would be happy if I could get my ElMod set up finished and working. Phil had it set up but when i installed it i'm ure i got something wrong. I probably should have sent him the whole tank and let him do it. Now it is a little late for that.<div>I guess one day i will just drag the tank and my butt up to my buddy Joe's house. Good ol'e yellowshaker will get it squared away for me. </div>
</div>
06-20-2013 | 01:50 PM
#16
Thread Starter
Senior Member
Joined: Jul 2011
Posts: 359
Likes: 0
Received 0 Likes
on
0 Posts
From: Swindon, UNITED KINGDOM
Cheers Greg go on pop it up to Joe's he'll sort it
Apple fitted

base primered


flash fitted and not seen is the emitter

headlights improved and you can just see the light bulb

Apple fitted
base primered
flash fitted and not seen is the emitter
headlights improved and you can just see the light bulb
06-25-2013 | 11:58 AM
#20
Thread Starter
Senior Member
Joined: Jul 2011
Posts: 359
Likes: 0
Received 0 Likes
on
0 Posts
From: Swindon, UNITED KINGDOM
Thanks Guys
@philipat
nothing major just a tidy up and a new .50 cal mount but its going back to an older marine version
ive started to detail the gun and then onto the cupola
took the abrams to our first Club meet at Wartime in the vale show and it went really well still had track throwing issues on the left but i think we figured that out
the plasticard spacers i put between the roadwheels have left no "Skew" on the tracks DOH so i removed a few and its better but another test is due and im thinking more need to come out
plus the kenny kongs may need a slight file down on the sprocket and end connecters
will report back with more soon
06-25-2013 | 12:32 PM
#21
She certainly is a big improvement on the HE effort, you've done a cracking job, and thanks for letting me take her out for a spin..loved it
06-26-2013 | 10:27 AM
#22
Thread Starter
Senior Member
Joined: Jul 2011
Posts: 359
Likes: 0
Received 0 Likes
on
0 Posts
From: Swindon, UNITED KINGDOM
ORIGINAL: fynsdad
She certainly is a big improvement on the HE effort, you've done a cracking job, and thanks for letting me take her out for a spin..loved it
She certainly is a big improvement on the HE effort, you've done a cracking job, and thanks for letting me take her out for a spin..loved it
just glad the bloomin tracks stayed on lol


