


IS-2 under way.
 01-24-2014 | 01:15 PM
#1


There's enough build threads out there on this one, so I'm just going to post my mods. If there's interest, I'll continue during the rest of the build.
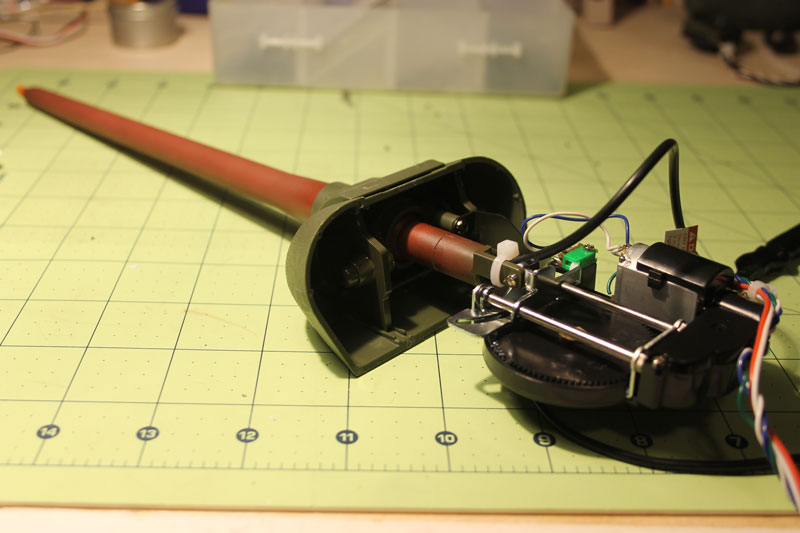
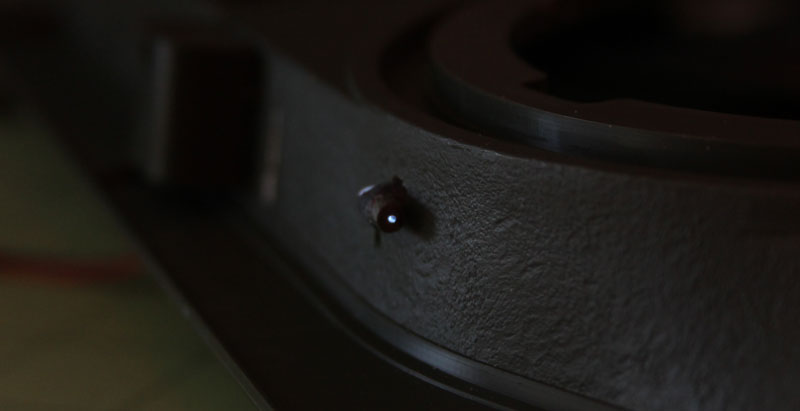
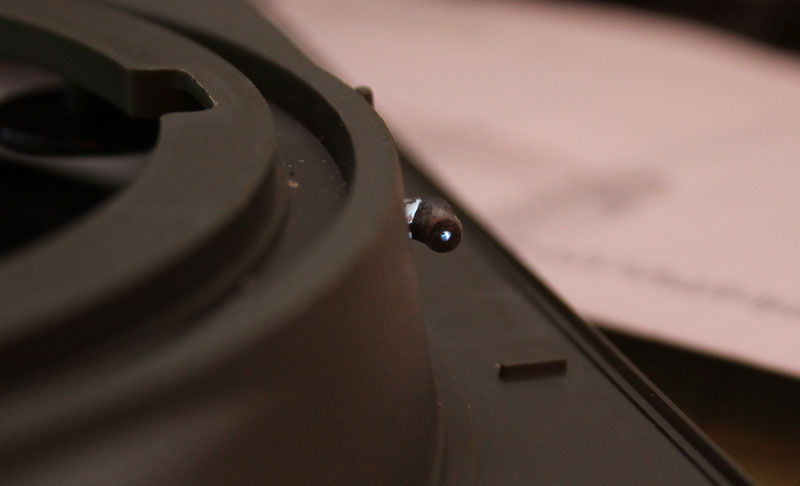
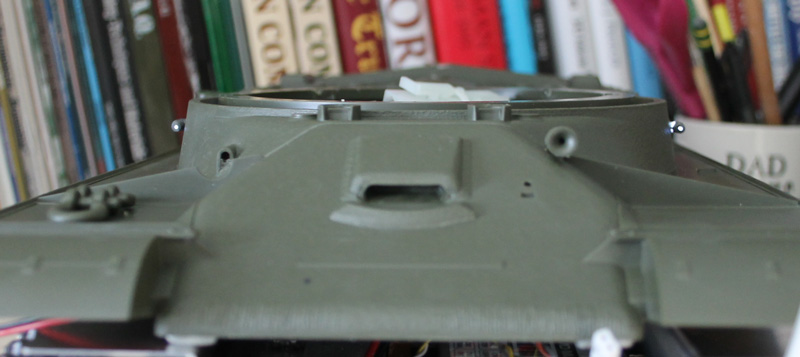
First off, if you know me, you know there's no way the IR emitter is going to be visible. Fortunately, the IS-2 mantlet has a great sight hole, so no cosmetic changes are necessary. Unfortunately, the elevation pivot design doesn't allow for the normal coax type, the emitter tube had to be connected to the mantlet, but has to pass over the turret with the pivot points on the inside edge, not the outside.
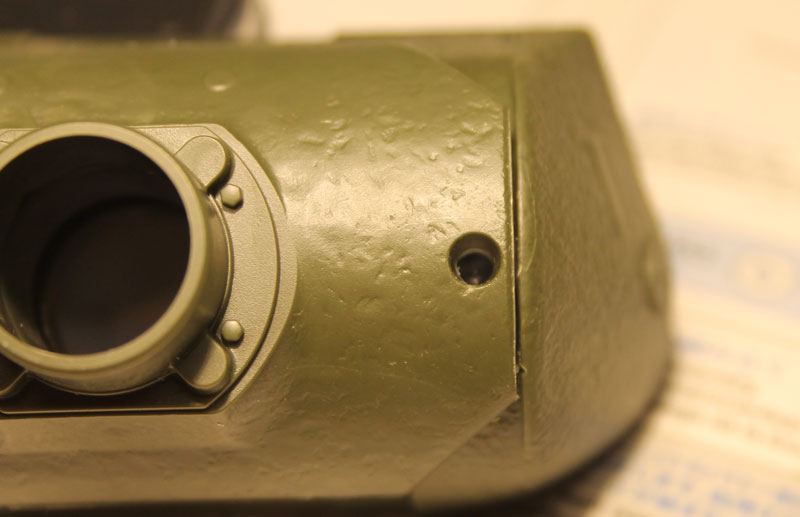
First off, if you know me, you know there's no way the IR emitter is going to be visible. Fortunately, the IS-2 mantlet has a great sight hole, so no cosmetic changes are necessary. Unfortunately, the elevation pivot design doesn't allow for the normal coax type, the emitter tube had to be connected to the mantlet, but has to pass over the turret with the pivot points on the inside edge, not the outside.
Last edited by ausf; 01-24-2014 at 01:32 PM.
 01-24-2014 | 01:21 PM
#2
This is one of the best recoil setups I've seen with Tamiya, nice solid aluminum barrel with a good support in ABS.
I primed the barrel with Vallejo red oxide, then blasted a couple of coats of Future to make sure it's a solid, scratch resistant base.
I then weighed the barrel, 72 grams, and then took twice that amount of steel BBs, mixed it in Aves and added it to the rear of the turret roof to counterweight that massive gun.
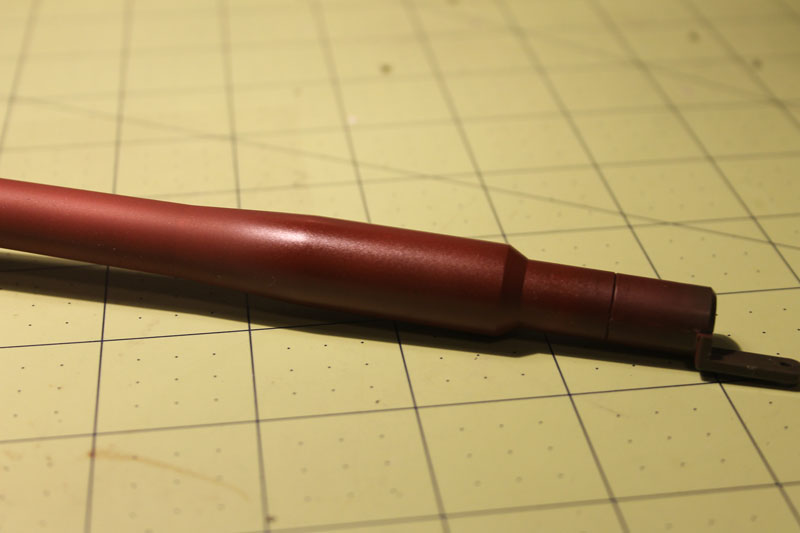
Last edited by ausf; 01-24-2014 at 01:34 PM.
01-24-2014 | 01:28 PM
#3
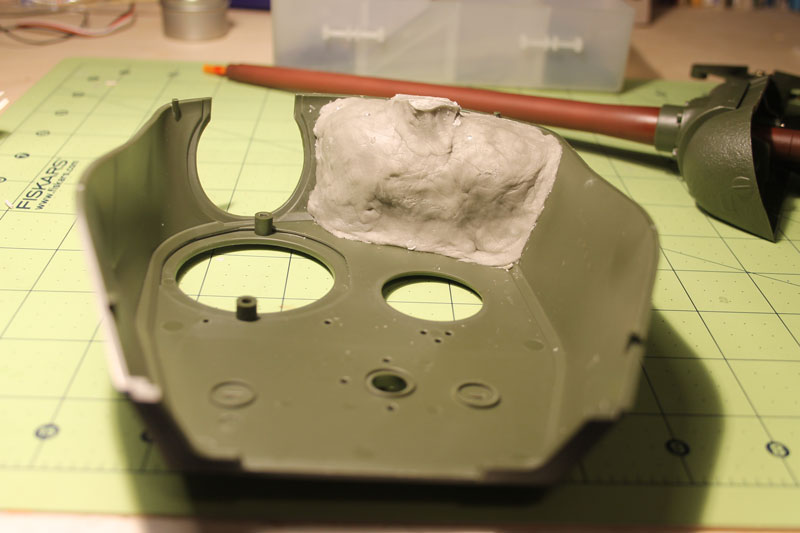
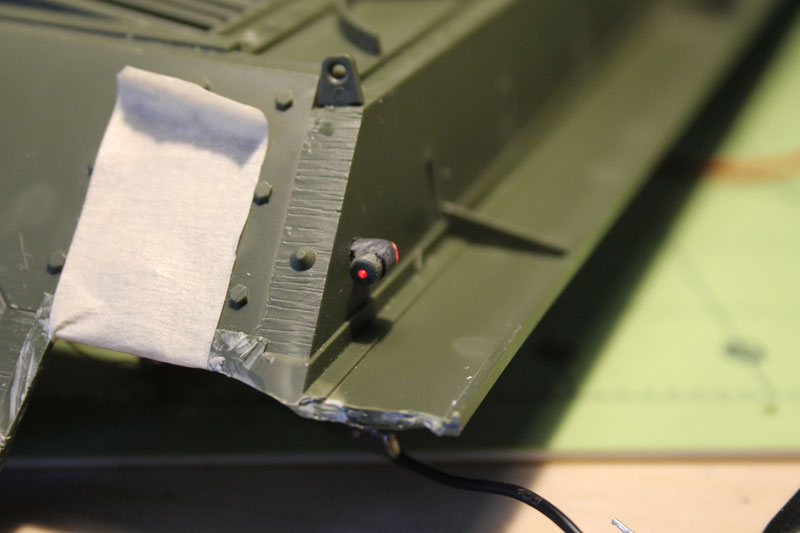
Next up, the lights.
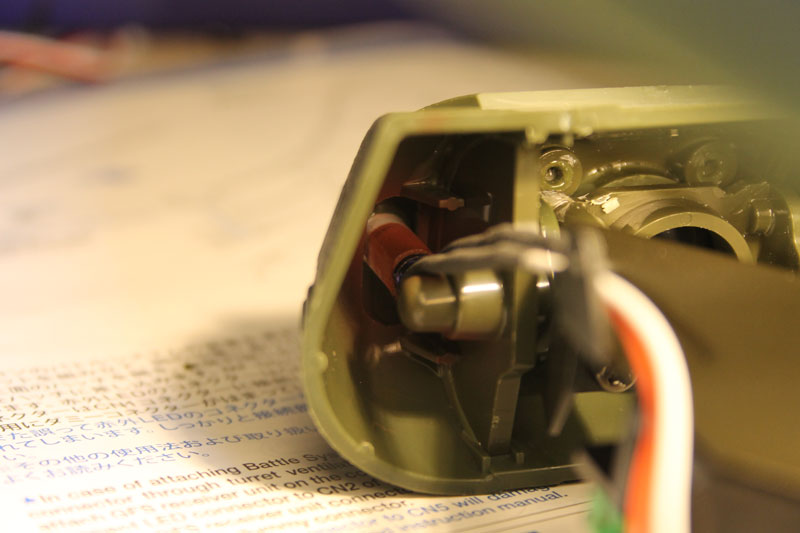
The IS-2 has a headlight and four running lights in armored housings. The housings in the kit are not meant to be used as light, they're just solid pieces, so I had to creative again.
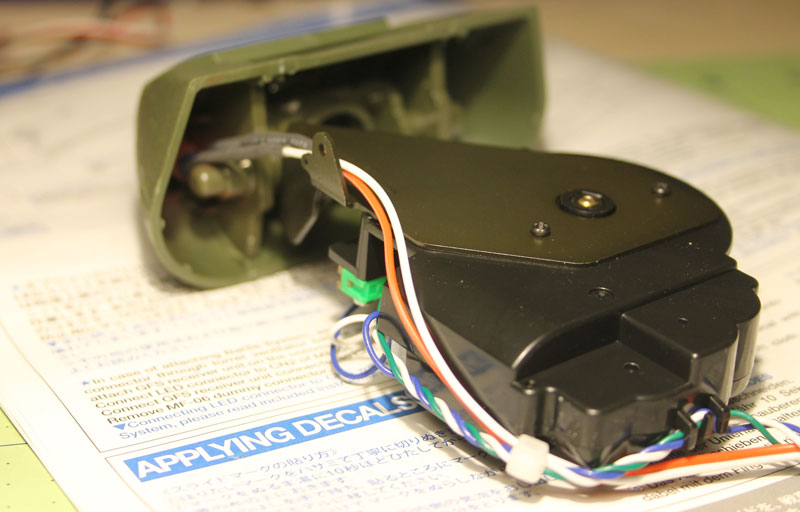
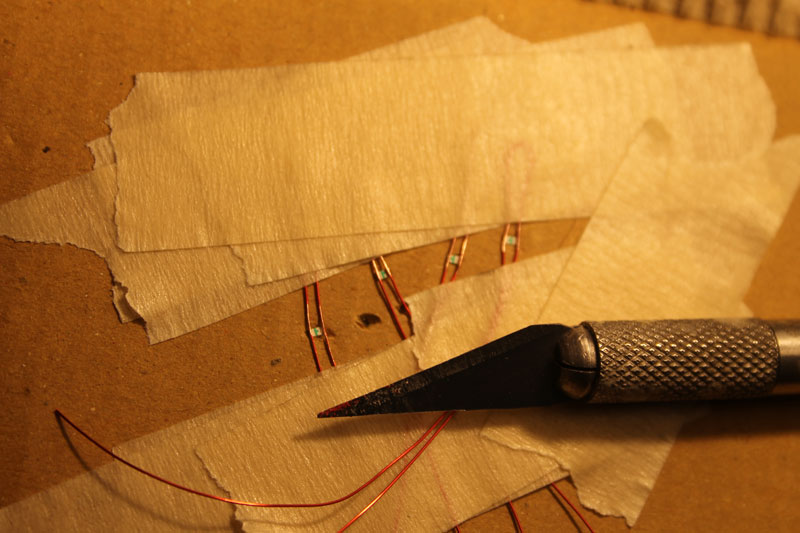
Tamiya gives you this great wiring harness for this with a working brake light, then tells you not to use the red LED. Turns out it's the same MFU as the KV series that have a brake light, so they give you the clear sprue with tail light lens and harness of the KV. Well, I can't be teased like that, so that wiring harness is going in my T-34 with the new MFU and I will hot wire the brake system. I found the active pins that provide the right voltage and grabbed the box of SMD LEDs. some magnet wire and the soldering station.
I built the housings with Aves and sprue, mounted two rear hooked up to the brakes and two white facing forward.
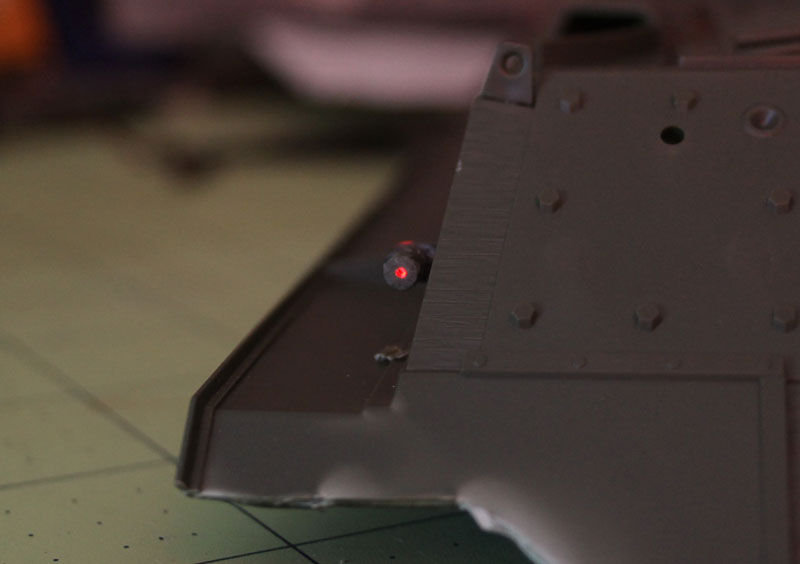
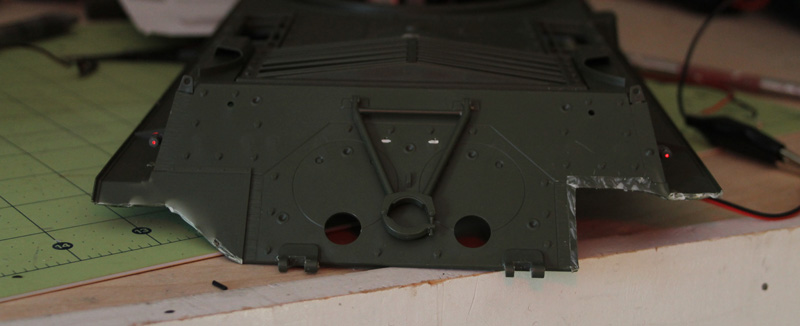
The IS-2 has a headlight and four running lights in armored housings. The housings in the kit are not meant to be used as light, they're just solid pieces, so I had to creative again.
Tamiya gives you this great wiring harness for this with a working brake light, then tells you not to use the red LED. Turns out it's the same MFU as the KV series that have a brake light, so they give you the clear sprue with tail light lens and harness of the KV. Well, I can't be teased like that, so that wiring harness is going in my T-34 with the new MFU and I will hot wire the brake system. I found the active pins that provide the right voltage and grabbed the box of SMD LEDs. some magnet wire and the soldering station.
I built the housings with Aves and sprue, mounted two rear hooked up to the brakes and two white facing forward.
Last edited by ausf; 01-24-2014 at 01:51 PM.
01-24-2014 | 01:31 PM
#4
Here's a vid of the brake lights working. Sorry, the quality sucks but you get the idea. They are on when the engine isn't reving, go off when it does.
https://www.youtube.com/watch?v=Ue6ciiYfwi0
https://www.youtube.com/watch?v=Ue6ciiYfwi0
01-24-2014 | 01:52 PM
#5
Battle Damage or are we replacing the rear fenders?  Like what you did with the lights.
Like what you did with the lights.
01-24-2014 | 01:58 PM
#6
You know me and fenders: As far as I'm concerned, they didn't last 5 minutes off the dealer lot. 
Just roughly hacked off for now, will be cleaned up the mud covered after I finalized how I'm connecting the upper hull. I originally thought I was going stock since this is a lift off turret and the battery can be removed through the hole like the Tiger I, but after fitting it, there's no clean plate in the front to connect like the Tiger. The JS-2 split is right down the middle of a weld and it's not a tight fit. I tried shimming it, but still it's prone to shifting, so I went with a rear pivot, front magnet approach. Just have to wait for things to set before I can finish.
Just roughly hacked off for now, will be cleaned up the mud covered after I finalized how I'm connecting the upper hull. I originally thought I was going stock since this is a lift off turret and the battery can be removed through the hole like the Tiger I, but after fitting it, there's no clean plate in the front to connect like the Tiger. The JS-2 split is right down the middle of a weld and it's not a tight fit. I tried shimming it, but still it's prone to shifting, so I went with a rear pivot, front magnet approach. Just have to wait for things to set before I can finish.
01-24-2014 | 02:23 PM
#7
Can't wait to see your fenderbender work!!!
01-24-2014 | 02:31 PM
#8
 01-24-2014 | 02:51 PM
#9
Isn't that the way it always is!!! Just got me some 1mm nuts and bolts for the schuzen I am building for my StuG. Couldn't just solder them like you ausf, I had to have the scale bolts to do it like the real thing. Why did I look at your schurzen?? That was my weakness not your's!!! But then it wouldn't be a hobby would it???
01-24-2014 | 05:54 PM
#11
Just tried the video and it worked for me?
01-25-2014 | 08:35 AM
#13
I agree Yellowshaker, OOB could almost be considered a curse word on this site. 


