


M3A1 Troop Halftrack Model
 05-06-2014 | 06:56 PM
#1


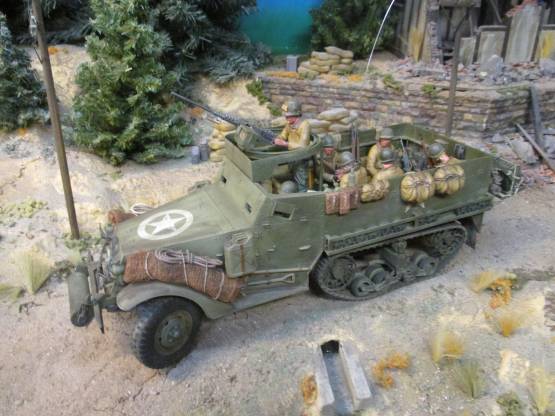
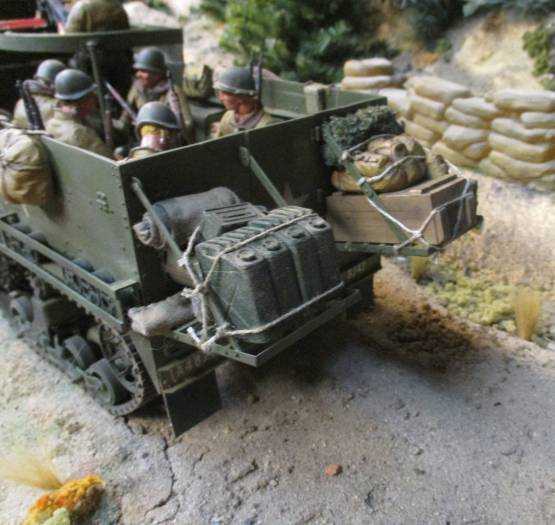
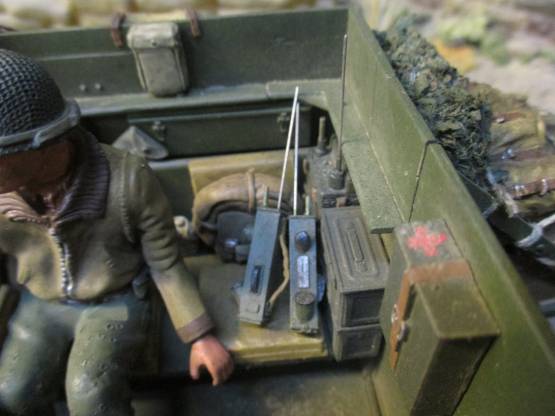
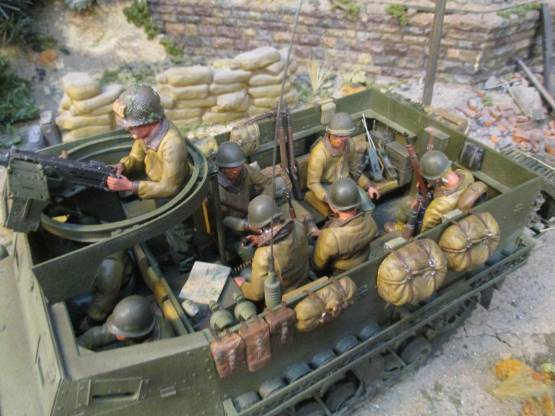
Gentlemen: I decided to convert the Torro M16 Quad 50 Halftrack to an M3A1 Troop Halftrack. The project was not as simple as I thought it would be but the results were worth the effort. The model is RC’d by removing all of the stock electronics and installing a 1/18 scale Side-Winder Micro speed control by Castle Creations. Any of these various type speed controllers will work. I also added a Futaba 75 mghz radio receiver, with the aerial coiled under the deck plate. Power is from a standard 9v battery, installed in one of the gas tanks, as there is no room for our typical 7.2v nicads. Running time is about 30 mins before the battery needs to be replaced.The following pictures show the finished model on a diorama built for picture taking background.
Last edited by Panzerpaul; 05-06-2014 at 07:00 PM.
 05-06-2014 | 07:07 PM
#3
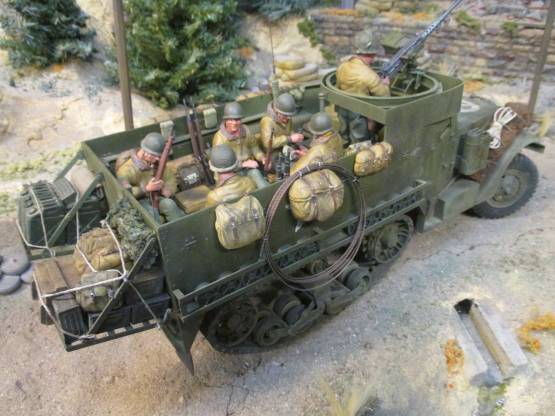
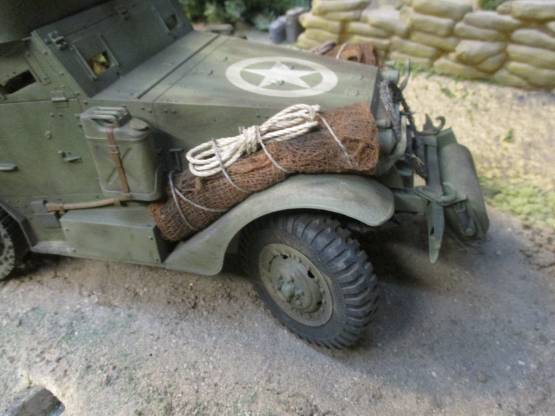
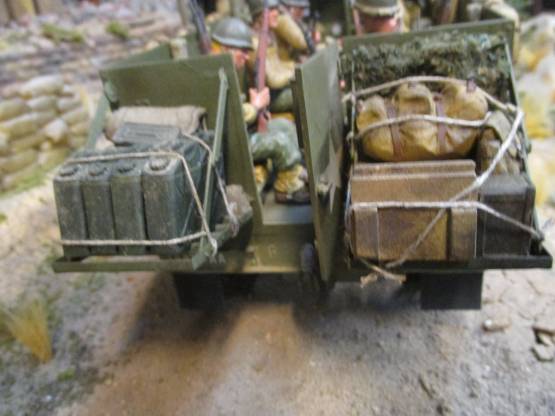
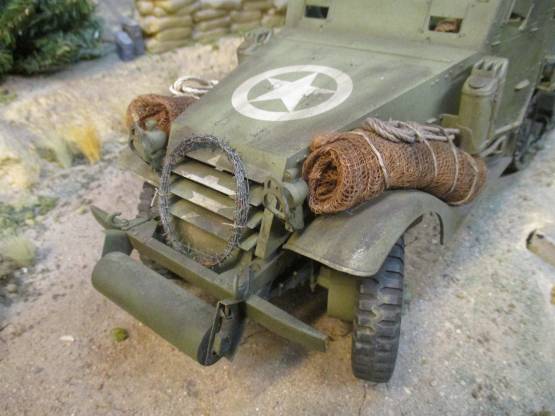
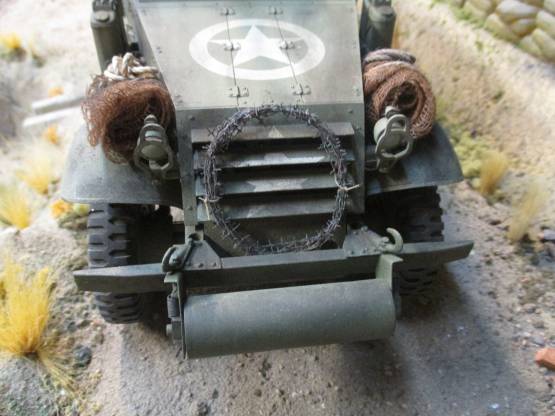
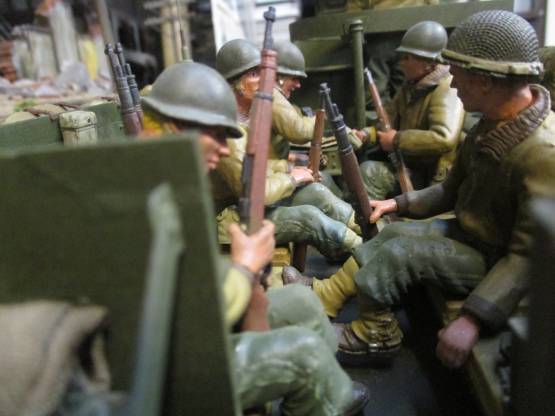
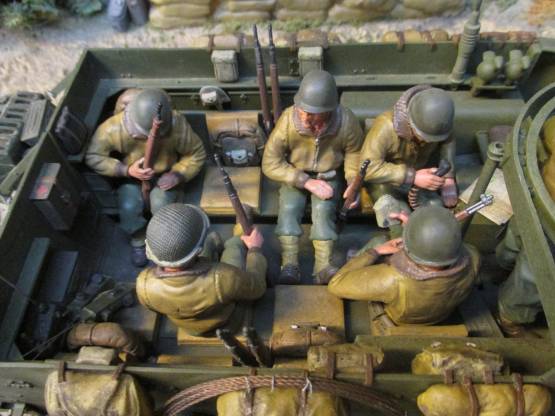
The rear stowage racks, side land mine racks and front ditch roller mechanism were all made from brass strips, tube, bar stock etc. The soldiers were bashed together from various resin parts cast from a number of RTV molds I have made. They were fashioned in a variety of poses to show different relationships and functions that might exist among a motorized infantry squad. And for those of you with a keen eye, you might have picked up on most of the small details (guns, canteens, small packs, etc) being 1/18[SUP]th[/SUP] scale from 21[SUP]st[/SUP] Century figures.
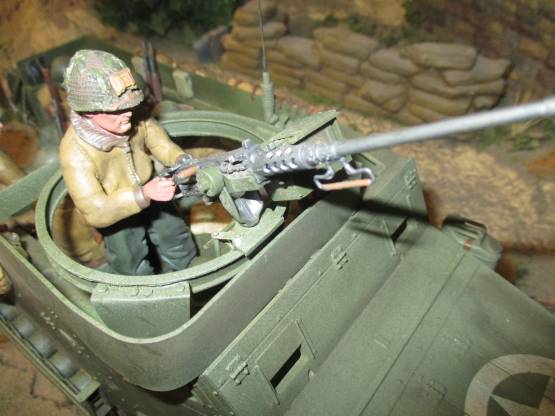
A special note about the 50 cal MG shroud. This is made from .040 thick styrene strips held in place around a wood form. Then heated in a microwave for 2 mins and cooled in a freezer for 10 mins. The shape came out perfect and the 2 parts were then glued together for the needed form. The MG ring mounted inside the shroud is a resin casting. The master was fabricated from a brass I-beam used to make an RTV mold. Both brass and styrene strips were used for the mounting brackets holding the ring to the shroud. The pintel bracket which the 50 cal mounts into (and which slides around the ring) was made from bits and pieces of brass tube and styrene.
Total construction time to create and paint the model was about 30 hrs over a period of a month. Hope you enjoyed the pics. PP
Last edited by Panzerpaul; 05-06-2014 at 07:13 PM.
05-07-2014 | 03:50 AM
#5

That's sweet. Great attention to detail and it's a real beauty.
If you get tired of the 9v, this is the place where lipos come in handy. I have squeezed them into the Kubel trunk, the Kettenkrad body and soon a Schwimmwagen. I'm not one to throw a lipo in something that could take a NiMH, but in these cases it's well worth the extra attention/risk. At this point, you can pretty much pick a 2 cell by dimensions to custom fit any need.
If you get tired of the 9v, this is the place where lipos come in handy. I have squeezed them into the Kubel trunk, the Kettenkrad body and soon a Schwimmwagen. I'm not one to throw a lipo in something that could take a NiMH, but in these cases it's well worth the extra attention/risk. At this point, you can pretty much pick a 2 cell by dimensions to custom fit any need.

 05-07-2014 | 05:45 PM
#10
Thanks guys......part of the joy in building a model is sharing it with all of you tanker buddies........and enjoying your comments. And, maybe encouraging someone else toward making a similar model themselves. Thanks again. PP
05-07-2014 | 07:42 PM
#13
Junior Member
Joined: Mar 2014
Posts: 20
Likes: 0
Received 0 Likes
on
0 Posts
cool, nice to meet you. i have shared your FB page in a tank group in Philippines where I'm moving to. You gained several fans over there. between your photos and the VA tank museum, the 2 of yall have caused me to spend too much $$$ preparing for retirement. i know i'll have plenty of time to do *something*. figure a backyard for the tanks to go along with the semi's and construction equipment should keep me busy for sometime.
05-07-2014 | 08:04 PM
#14

Gentlemen: I decided to convert the Torro M16 Quad 50 Halftrack to an M3A1 Troop Halftrack. The project was not as simple as I thought it would be but the results were worth the effort. The model is RC’d by removing all of the stock electronics and installing a 1/18 scale Side-Winder Micro speed control by Castle Creations. Any of these various type speed controllers will work. I also added a Futaba 75 mghz radio receiver, with the aerial coiled under the deck plate. Power is from a standard 9v battery, installed in one of the gas tanks, as there is no room for our typical 7.2v nicads. Running time is about 30 mins before the battery needs to be replaced.The following pictures show the finished model on a diorama built for picture taking background.
WOW nice Detail Great Work
05-08-2014 | 07:31 AM
#15
The figures make it come alive!!! Great job!!!


