Go Back  RCU Forums > RC Cars, Buggies, Trucks, Tanks and more > RC Tanks
Tamiya 56030 KV-2 Build/Project >

Tamiya 56030 KV-2 Build/Project

Community
Search
Notices
RC Tanks Discuss all aspects of rc tank building and driving here!

Tamiya 56030 KV-2 Build/Project

Thread Tools
 
Search this Thread
 
Old 08-01-2015 | 08:11 AM
  #1  
StumpyBloke's Avatar
Thread Starter
 
Joined: Jan 2008
Posts: 270
Likes: 0
Received 1 Like on 1 Post
From: Stone, Staffordshire, UNITED KINGDOM
Default Tamiya 56030 KV-2 Build/Project

Hi guys, I've just managed to get a NIB Tamiya 56030 KV-2 1/16 full option kit at a great price (for us in the UK at least). I don't really know much about this tank and was wondering if anyone knew of any reference sites or books (I already have KV-1 and 2 Heavy Tanks, 1939-45 (Osprey New Vanguard)) I could get? I dont even know which variant/yar to build.

Also, what about upgrades? I've already ordered wheel bearings, Aber Upgrade Set #16043 and Aber fuel tank set. Anthing else? I see there is an Aber early and late tool kit set - no idea which to get Any advice whatsoever would be appreciated.

Thanks

Last edited by StumpyBloke; 08-01-2015 at 08:24 AM.
The following users liked this post:
Battus (03-26-2023)
Old 08-01-2015 | 09:53 AM
  #2  
My Feedback: (1)
 
Joined: Sep 2013
Posts: 2,756
Likes: 0
Received 47 Likes on 35 Posts
From: Detroit
Default

I think if I were you I might PM Rivetcounter and ask his advice about the books. He knows quite a bit about WWII reference material (among other things).
Old 08-01-2015 | 10:36 AM
  #3  
StumpyBloke's Avatar
Thread Starter
 
Joined: Jan 2008
Posts: 270
Likes: 0
Received 1 Like on 1 Post
From: Stone, Staffordshire, UNITED KINGDOM
Default

Thanks for that!
Old 08-01-2015 | 02:49 PM
  #4  
 
Joined: Sep 2010
Posts: 391
Received 0 Likes on 0 Posts
From: nelson, UNITED KINGDOM
Default

Hi Stumpy Nice to see you back , hope things are well with you .

regards pete
Old 08-01-2015 | 04:40 PM
  #5  
Strato50's Avatar
 
Joined: Jan 2006
Posts: 1,422
Likes: 0
Received 7 Likes on 7 Posts
From: Hamilton, ON, CANADA
Default

For what it's worth I remember from my KV2 build that you'd be limited to the early KV wheel types, if that's an option!
Old 08-30-2015 | 08:07 AM
  #6  
StumpyBloke's Avatar
Thread Starter
 
Joined: Jan 2008
Posts: 270
Likes: 0
Received 1 Like on 1 Post
From: Stone, Staffordshire, UNITED KINGDOM
Default

Thanks Pete, yes all good ta

Sorry for the delay in replying - I didn't know there were any responses

Last edited by StumpyBloke; 08-30-2015 at 08:10 AM.
Old 08-30-2015 | 08:09 AM
  #7  
StumpyBloke's Avatar
Thread Starter
 
Joined: Jan 2008
Posts: 270
Likes: 0
Received 1 Like on 1 Post
From: Stone, Staffordshire, UNITED KINGDOM
Default

Originally Posted by Strato50
For what it's worth I remember from my KV2 build that you'd be limited to the early KV wheel types, if that's an option!
Yup, you're absolutely right...so thats the one I'm doing. Just trying to fit the speaker unit but the screw holes neither reach nor match-up!
Old 08-30-2015 | 08:15 AM
  #8  
StumpyBloke's Avatar
Thread Starter
 
Joined: Jan 2008
Posts: 270
Likes: 0
Received 1 Like on 1 Post
From: Stone, Staffordshire, UNITED KINGDOM
Default

Attached Thumbnails Click image for larger version

Name:	IMG_0001.jpg
Views:	787
Size:	805.2 KB
ID:	2117328   Click image for larger version

Name:	IMG_0002.jpg
Views:	1002
Size:	738.1 KB
ID:	2117329   Click image for larger version

Name:	IMG_0003.jpg
Views:	803
Size:	643.0 KB
ID:	2117330   Click image for larger version

Name:	IMG_0004.jpg
Views:	761
Size:	661.7 KB
ID:	2117331   Click image for larger version

Name:	IMG_0005.jpg
Views:	835
Size:	749.2 KB
ID:	2117332   Click image for larger version

Name:	IMG_0006.jpg
Views:	1009
Size:	887.5 KB
ID:	2117333   Click image for larger version

Name:	IMG_0007.jpg
Views:	755
Size:	694.9 KB
ID:	2117334   Click image for larger version

Name:	IMG_0008.jpg
Views:	749
Size:	531.9 KB
ID:	2117335  

Click image for larger version

Name:	IMG_0009.jpg
Views:	744
Size:	561.0 KB
ID:	2117336   Click image for larger version

Name:	IMG_0010.jpg
Views:	705
Size:	635.7 KB
ID:	2117337   Click image for larger version

Name:	IMG_0011.jpg
Views:	689
Size:	730.4 KB
ID:	2117338   Click image for larger version

Name:	IMG_0012.jpg
Views:	713
Size:	561.5 KB
ID:	2117339   Click image for larger version

Name:	IMG_0013.jpg
Views:	719
Size:	565.4 KB
ID:	2117340   Click image for larger version

Name:	IMG_0014.jpg
Views:	694
Size:	614.9 KB
ID:	2117341   Click image for larger version

Name:	IMG_0015.jpg
Views:	786
Size:	896.7 KB
ID:	2117342   Click image for larger version

Name:	IMG_0350.jpg
Views:	748
Size:	529.7 KB
ID:	2117343  

Click image for larger version

Name:	IMG_0351.jpg
Views:	710
Size:	884.3 KB
ID:	2117344   Click image for larger version

Name:	IMG_0352.jpg
Views:	735
Size:	610.1 KB
ID:	2117345   Click image for larger version

Name:	IMG_0353.jpg
Views:	690
Size:	619.7 KB
ID:	2117346   Click image for larger version

Name:	IMG_0354.jpg
Views:	721
Size:	690.7 KB
ID:	2117347   Click image for larger version

Name:	IMG_0355.jpg
Views:	730
Size:	666.2 KB
ID:	2117348   Click image for larger version

Name:	IMG_0356.jpg
Views:	680
Size:	782.8 KB
ID:	2117349   Click image for larger version

Name:	IMG_0401.jpg
Views:	774
Size:	1.48 MB
ID:	2117350   Click image for larger version

Name:	IMG_0402.jpg
Views:	718
Size:	1.23 MB
ID:	2117351  

Click image for larger version

Name:	IMG_0403.jpg
Views:	760
Size:	1.20 MB
ID:	2117352   Click image for larger version

Name:	IMG_0406.jpg
Views:	719
Size:	1.23 MB
ID:	2117353   Click image for larger version

Name:	IMG_0407.jpg
Views:	716
Size:	1.27 MB
ID:	2117354   Click image for larger version

Name:	IMG_0408.jpg
Views:	688
Size:	1.48 MB
ID:	2117355   Click image for larger version

Name:	IMG_0409.jpg
Views:	721
Size:	1.23 MB
ID:	2117356  
Old 08-30-2015 | 08:24 AM
  #9  
My Feedback: (12)
 
Joined: Jul 2005
Posts: 1,328
Received 6 Likes on 6 Posts
Default

I did a couple things that really made the tank more realistic(IMHO), I added the ETO 3:1 gear downs and then put a set of Impact metal tracks on it. Makes it go nice and slow, and the metal tracks sag nicely.

It's a great runner, and has many hours of run time on it.
Old 08-30-2015 | 08:29 AM
  #10  
StumpyBloke's Avatar
Thread Starter
 
Joined: Jan 2008
Posts: 270
Likes: 0
Received 1 Like on 1 Post
From: Stone, Staffordshire, UNITED KINGDOM
Default

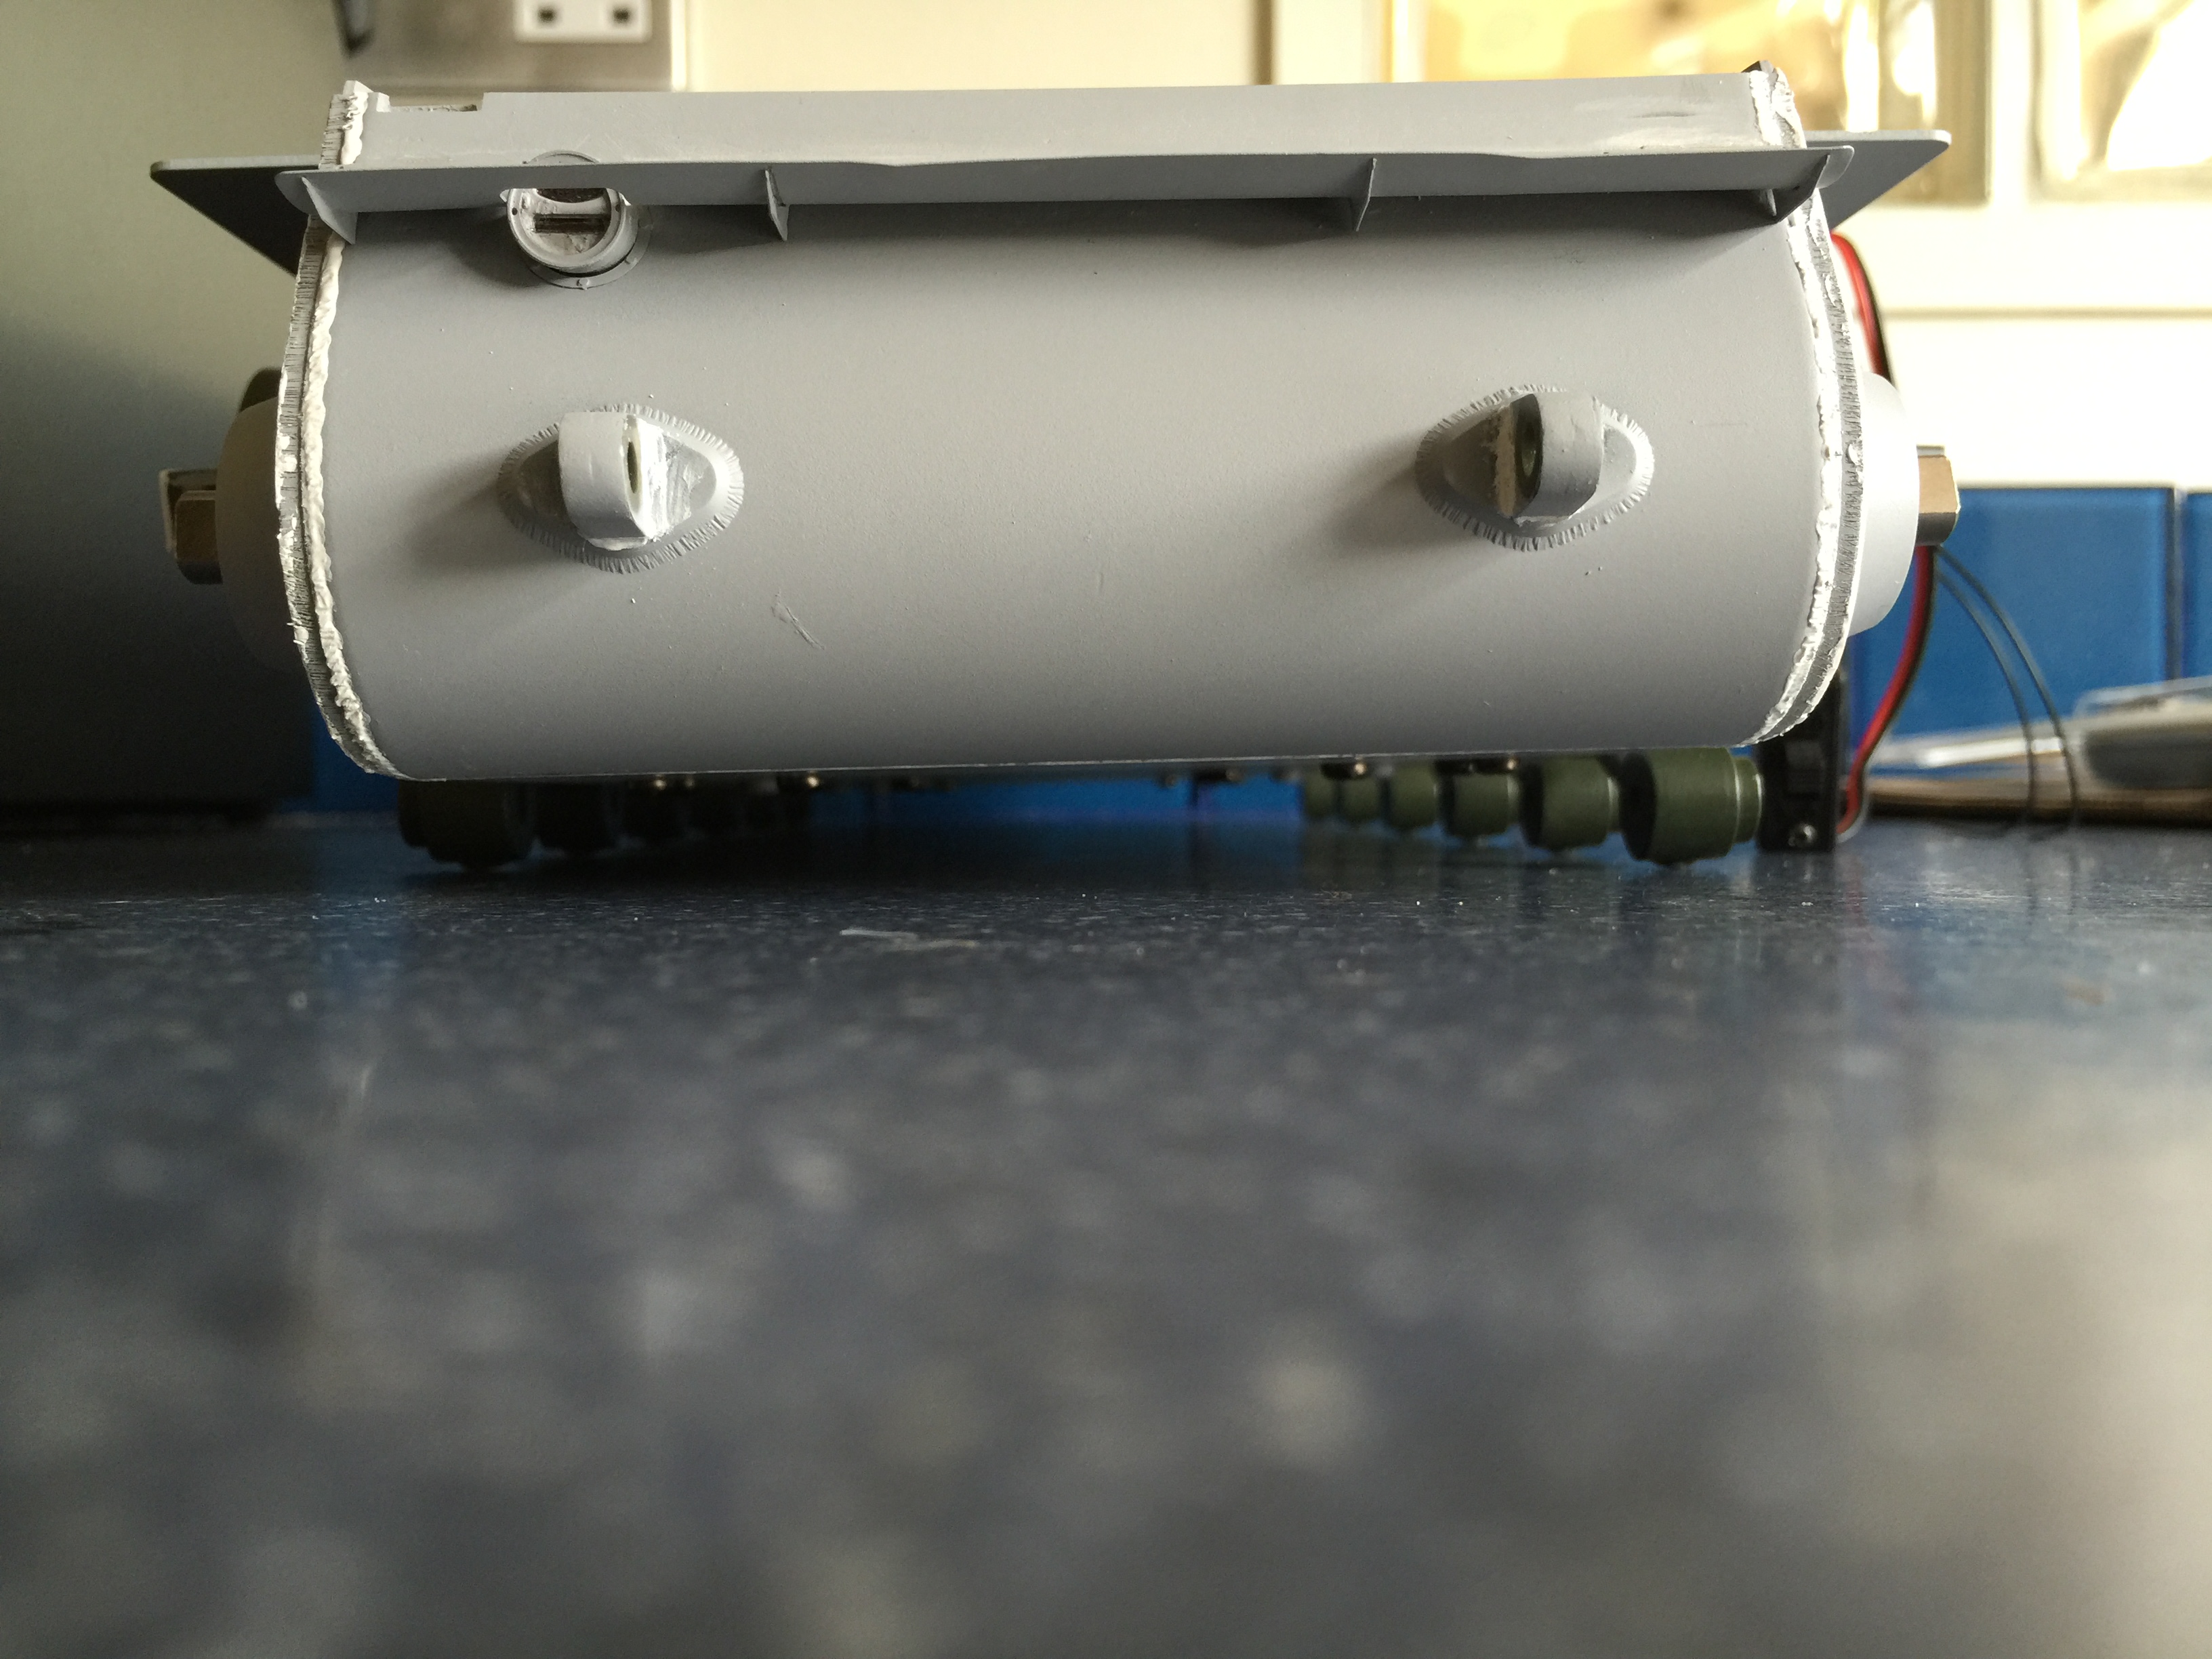
Thanks Jeff. I've got the metal tracks already Even though I don't run my tanks, I love the metal tracks anyway. Did you have any issues mounting the speaker unit? The holes in the hull bottom (four of them) don't line up properly with the offset holes in the speaker, nor do the screws reach.
Old 08-30-2015 | 08:36 AM
  #11  
My Feedback: (12)
 
Joined: Jul 2005
Posts: 1,328
Received 6 Likes on 6 Posts
Default

Rich,

I had to remount the speaker...because the 3:1 geardowns needed some extra room (about 1/2 inch). I had to drill, and plug the original holes.
Old 08-30-2015 | 08:38 AM
  #12  
StumpyBloke's Avatar
Thread Starter
 
Joined: Jan 2008
Posts: 270
Likes: 0
Received 1 Like on 1 Post
From: Stone, Staffordshire, UNITED KINGDOM
Default

ah ok. No idea whats going on with mine. Its as though the speaker is meant to sit on some mounting plate or some such and then screwed in to the hull.
Old 08-30-2015 | 08:44 AM
  #13  
My Feedback: (12)
 
Joined: Jul 2005
Posts: 1,328
Received 6 Likes on 6 Posts
Default

FYI, you might want to consider a screw in the rock guards just forward of the drive sprockets. I've lost a couple. They just don't hang on, despite copious amounts of glue (i.e. the bigger the glob...the better the job).
Old 08-30-2015 | 08:47 AM
  #14  
My Feedback: (12)
 
Joined: Jul 2005
Posts: 1,328
Received 6 Likes on 6 Posts
Default

If you need a pic, I'd open up my KV 1 and take a few pics. Planning some tank maintenance today. It's pretty much stock, and the deck down is identical to the KV2.
Old 08-30-2015 | 08:48 AM
  #15  
StumpyBloke's Avatar
Thread Starter
 
Joined: Jan 2008
Posts: 270
Likes: 0
Received 1 Like on 1 Post
From: Stone, Staffordshire, UNITED KINGDOM
Default

Rock guards? Do you do you mean these?
Attached Thumbnails Click image for larger version

Name:	image.jpeg
Views:	700
Size:	1.67 MB
ID:	2117357  
Old 08-30-2015 | 08:49 AM
  #16  
StumpyBloke's Avatar
Thread Starter
 
Joined: Jan 2008
Posts: 270
Likes: 0
Received 1 Like on 1 Post
From: Stone, Staffordshire, UNITED KINGDOM
Default

Originally Posted by Jeff489
If you need a pic, I'd open up my KV 1 and take a few pics. Planning some tank maintenance today. It's pretty much stock, and the deck down is identical to the KV2.
Sorry sorry sorry, I've just found my mistake by looking at the actual instructions - novel idea hey! LOL

I've missed out the mounting brackets!!

Last edited by StumpyBloke; 08-30-2015 at 09:23 AM.
Old 08-30-2015 | 10:02 AM
  #17  
sollie's Avatar
 
Joined: Mar 2006
Posts: 1,384
Received 38 Likes on 21 Posts
From: DRAMMENBuskerud, NORWAY
Default

Not to often one see a kv2 build . Great . Following for sure .

I only have a HL, but here is how it turned out


Old 08-30-2015 | 10:07 AM
  #18  
My Feedback: (12)
 
Joined: Jul 2005
Posts: 1,328
Received 6 Likes on 6 Posts
Default

Rock guards? Do you do you mean these?
Yep, that's them

Glad to hear you've got the speaker solved.
Old 08-30-2015 | 10:24 AM
  #19  
yellowshaker's Avatar
My Feedback: (1)
 
Joined: Oct 2009
Posts: 4,473
Received 6 Likes on 6 Posts
From: bayonne, NJ
Default

I wanted to add that if you wanted to do a later style, I believe the asiatam wheels can be used.
Old 08-30-2015 | 01:18 PM
  #20  
My Feedback: (1)
 
Joined: May 2009
Posts: 372
Likes: 0
Received 0 Likes on 0 Posts
From: Pearl City, HI
Default

I have this Tamiya kit, and really like it. I added metal tracks to mine, and noted that the front hull (where the idlers mount) is as weak on the Tamiya kit as it is on the Heng Long or Asiatam hulls. I added an idler brace to mine, which is available from Forgebear http://www.ebay.com/itm/161747560676. Guido Henn of Henn-Tec also makes one that works very well. As far as references on the KV-2 go, there are a couple of good Tankograd books on it, or you can really splurge and buy the Neil Stokes' "KV Technical History & Variants" book by Airconnection (560 pages of everything you ever wanted to know, but were afraid to ask).
Old 08-30-2015 | 01:47 PM
  #21  
StumpyBloke's Avatar
Thread Starter
 
Joined: Jan 2008
Posts: 270
Likes: 0
Received 1 Like on 1 Post
From: Stone, Staffordshire, UNITED KINGDOM
Default

That looks awesome!

Originally Posted by sollie
Not to often one see a kv2 build . Great . Following for sure .

I only have a HL, but here is how it turned out
Old 08-30-2015 | 01:48 PM
  #22  
StumpyBloke's Avatar
Thread Starter
 
Joined: Jan 2008
Posts: 270
Likes: 0
Received 1 Like on 1 Post
From: Stone, Staffordshire, UNITED KINGDOM
Default

thanks for the replies guys
Old 08-30-2015 | 01:51 PM
  #23  
StumpyBloke's Avatar
Thread Starter
 
Joined: Jan 2008
Posts: 270
Likes: 0
Received 1 Like on 1 Post
From: Stone, Staffordshire, UNITED KINGDOM
Default

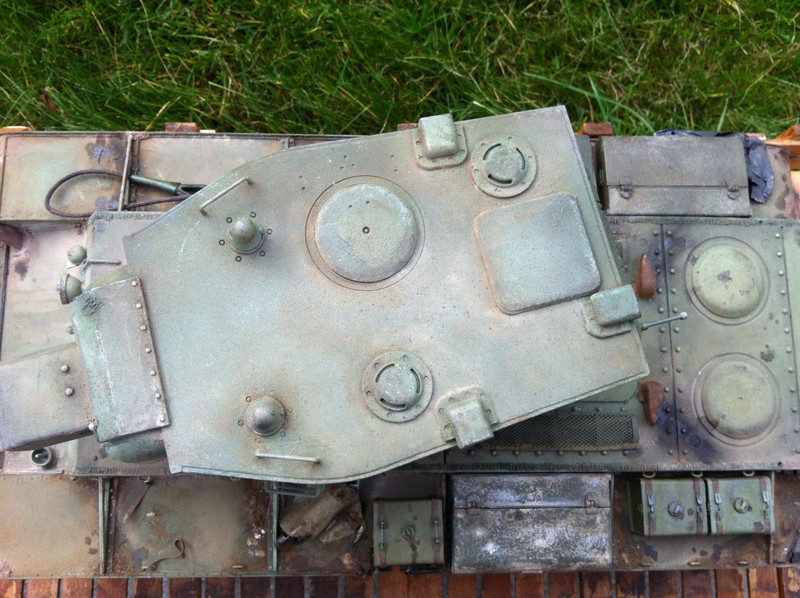
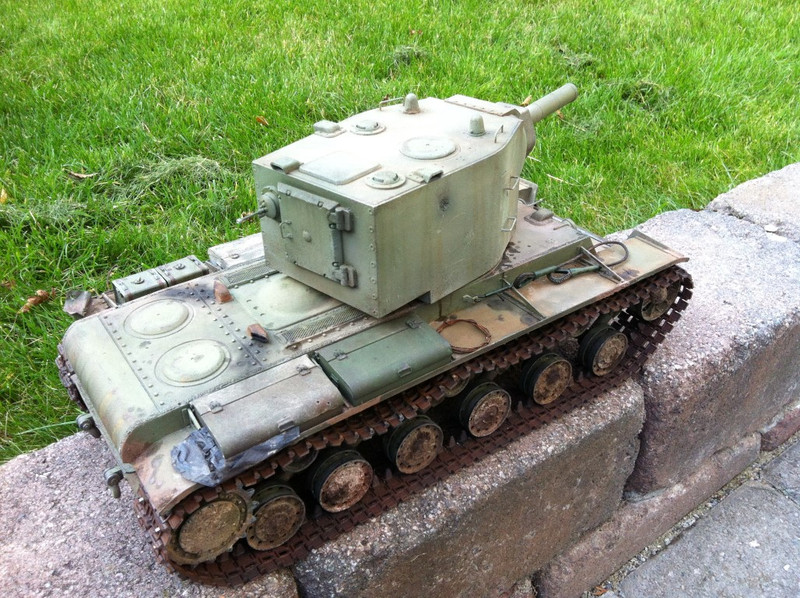
The photos above show what I have done so far: thinned out the fenders as the moulded ones are ridiculously thick. Added some Aber PE parts including rear light, and other rear parts. Added detail to the stock rock guards which are missing the extra bracing and brackets.
Old 09-02-2015 | 05:29 AM
  #24  
StumpyBloke's Avatar
Thread Starter
 
Joined: Jan 2008
Posts: 270
Likes: 0
Received 1 Like on 1 Post
From: Stone, Staffordshire, UNITED KINGDOM
Default

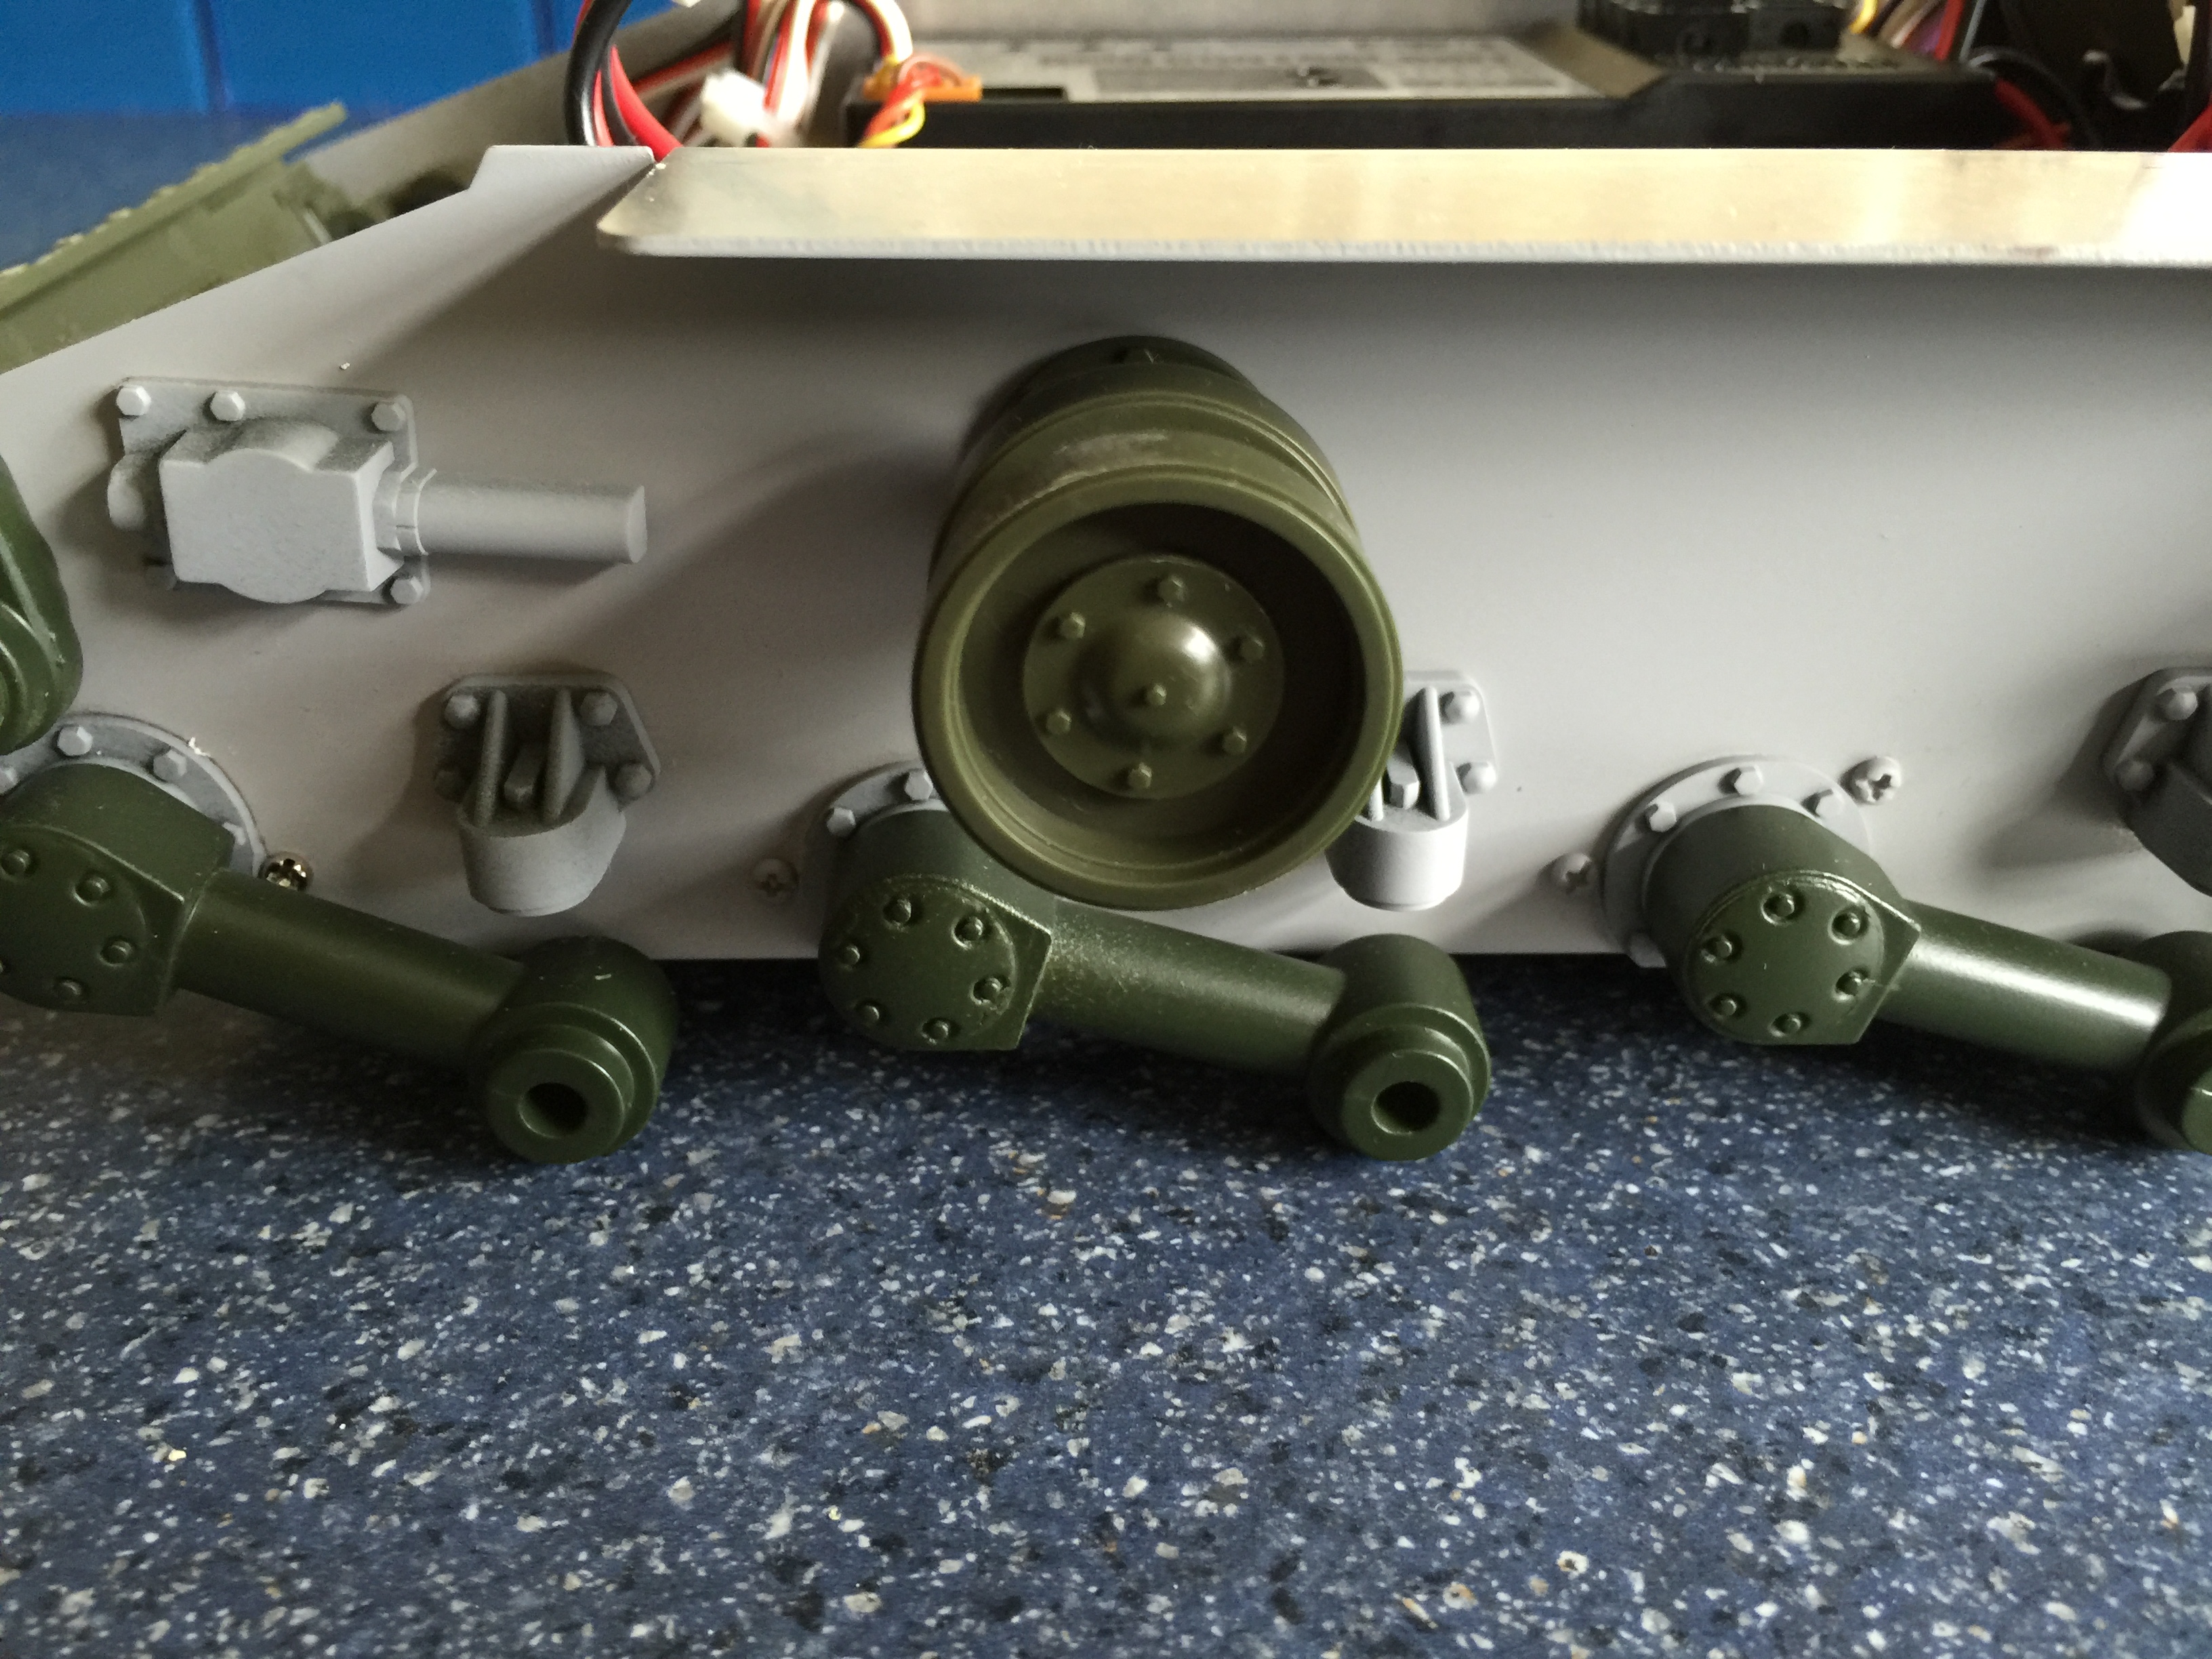
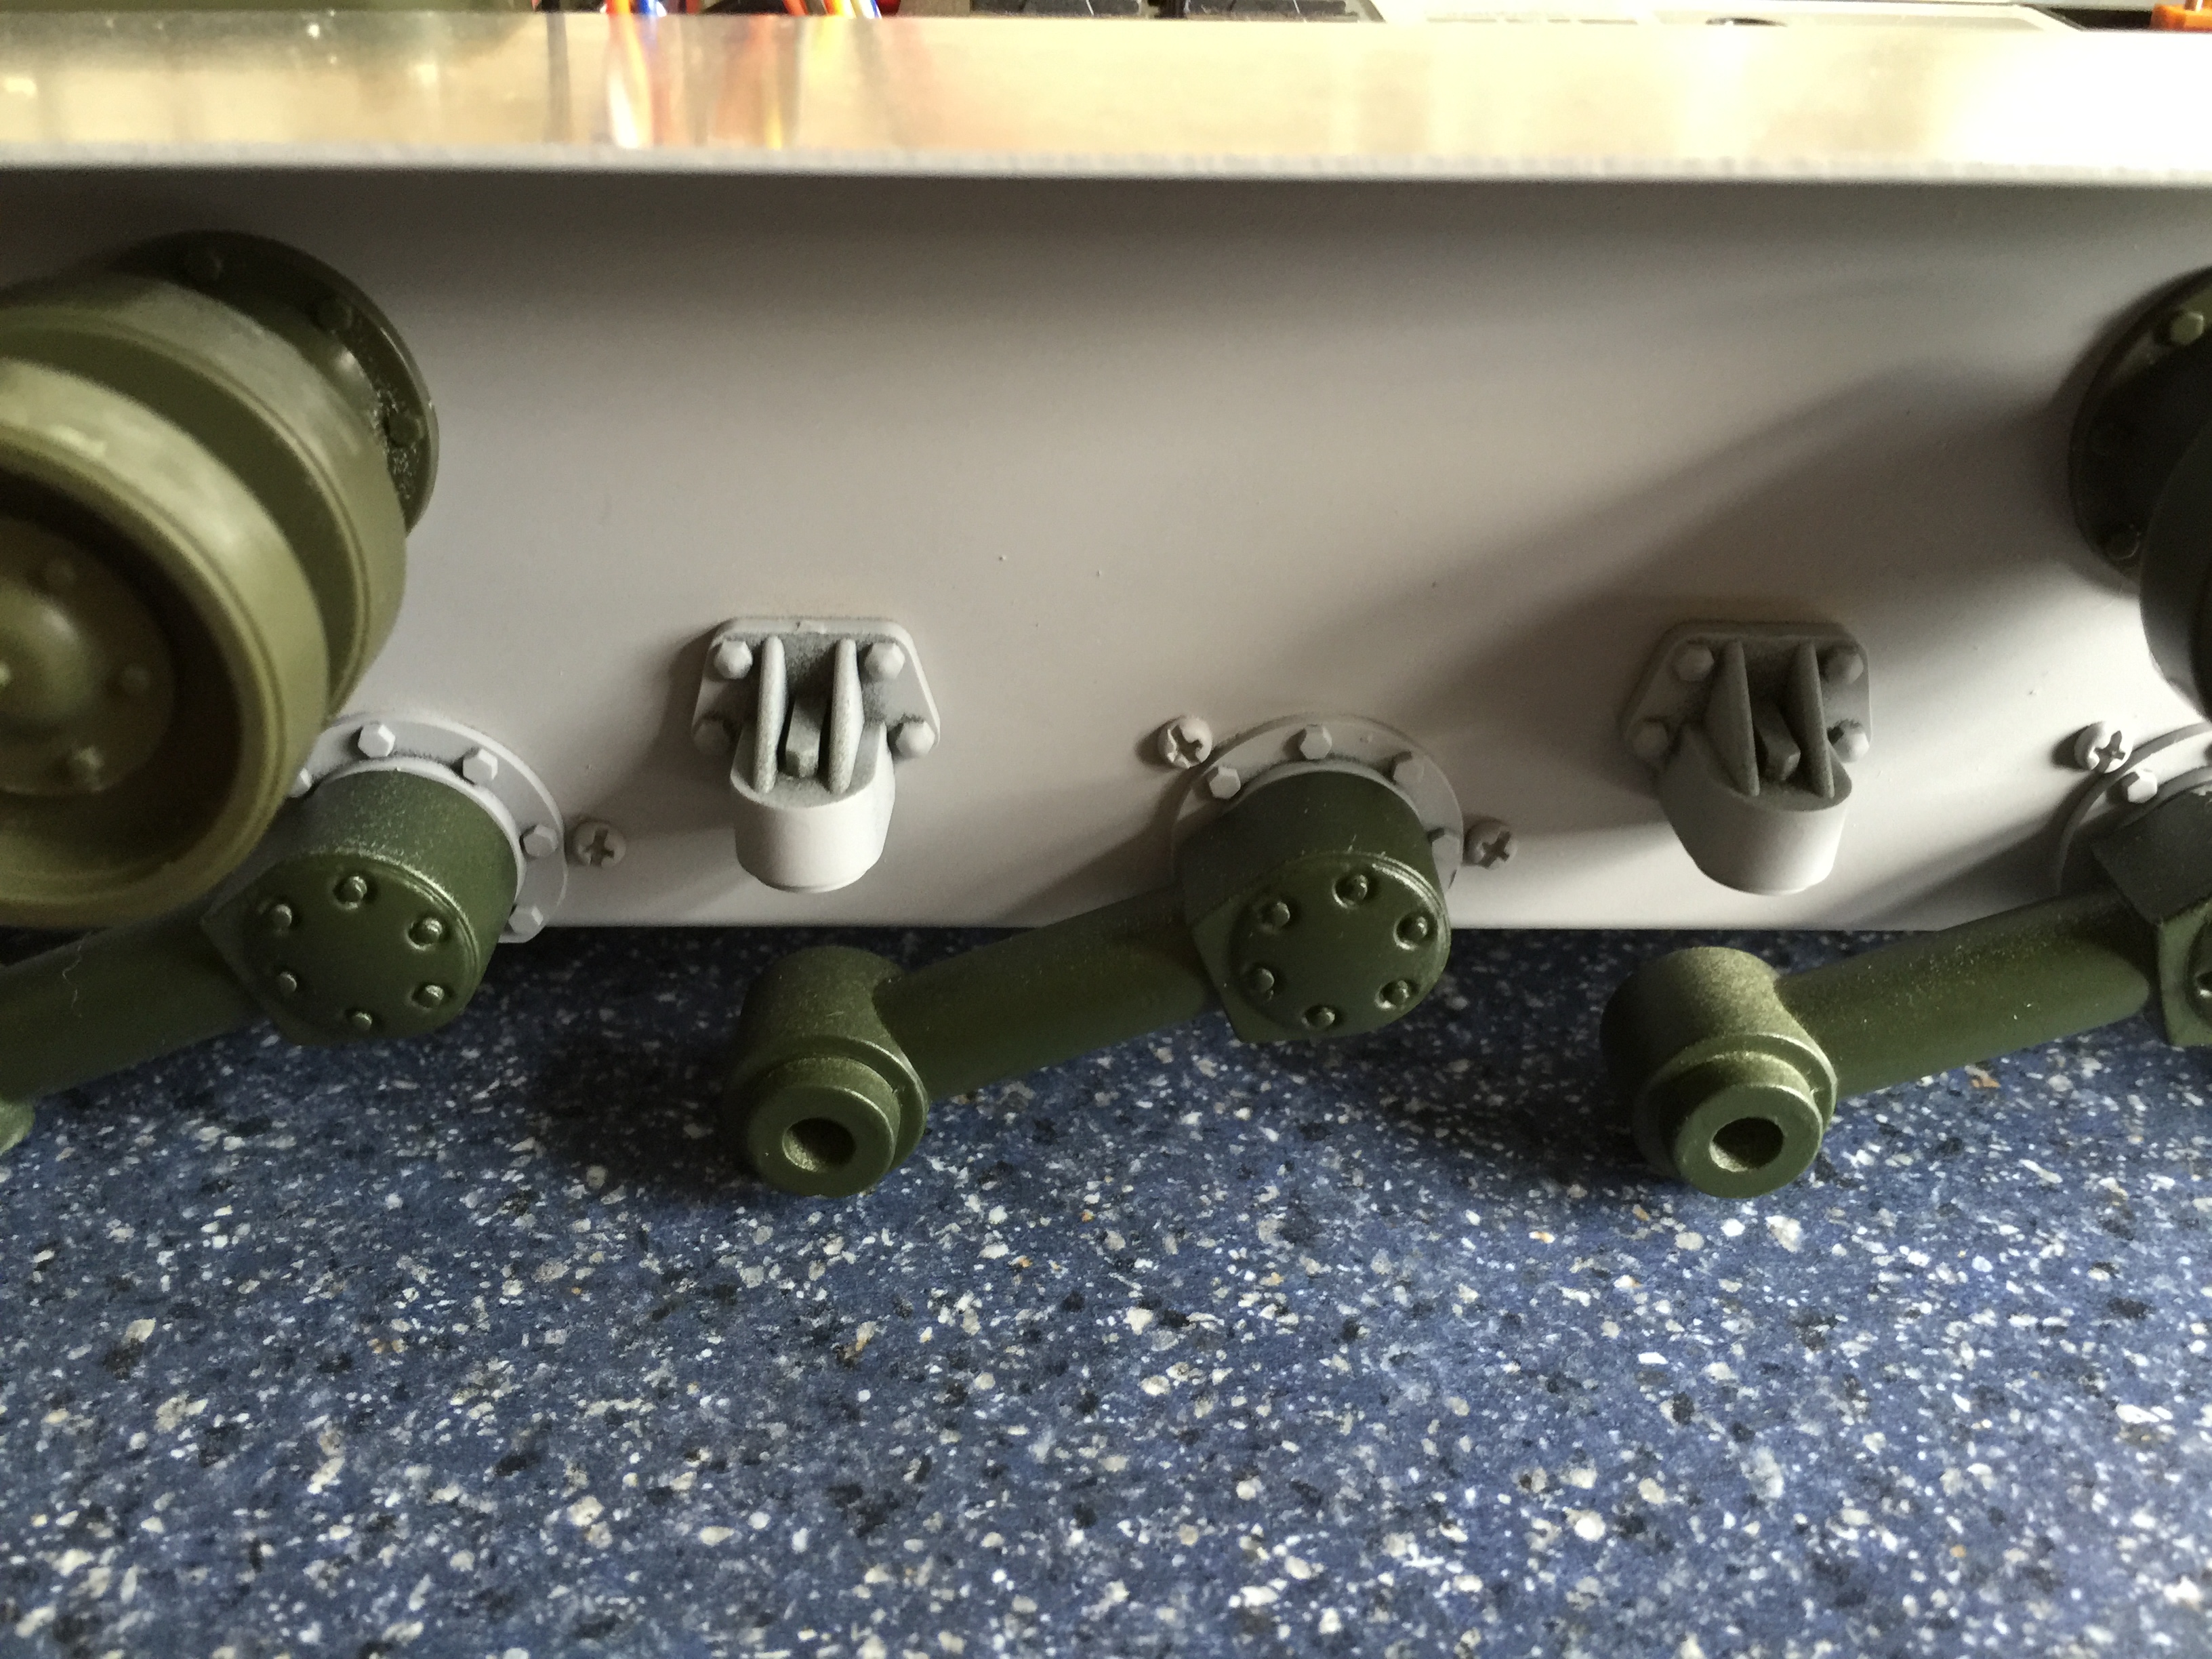
Guys, my tank is lower on the left hand side than the right - i.e. its lopsided. The point at which the suspension bars catch is definitely higher on the left (therefore the tank sits lower that side) than the right. Its got the battery and all equipment in it so its not that. If anyone could see what theirs does I would really appreciate it. Thanks

EDIT: having done a bit of research it looks like the low side is at fault. I have no idea how to stiffen the suspension on that side!

Attached Thumbnails Click image for larger version

Name:	IMG_0423.JPG
Views:	784
Size:	1.56 MB
ID:	2117813   Click image for larger version

Name:	IMG_0424.JPG
Views:	787
Size:	2.14 MB
ID:	2117814   Click image for larger version

Name:	IMG_0425.JPG
Views:	783
Size:	2.16 MB
ID:	2117815  

Last edited by StumpyBloke; 09-02-2015 at 08:30 AM.
Old 09-02-2015 | 10:10 AM
  #25  
 
Joined: Dec 2012
Posts: 760
Likes: 0
Received 0 Likes on 0 Posts
From: littlestown, PA
Default

You can try bending the leaf spring to provide more tension. I did this using needle nose pliers on the spring and just holding the suspension arm by hand to prevent torquing it backwards.


Contact Us - Archive - Advertising - Cookie Policy - Privacy Statement - Terms of Service

Copyright © 2026 MH Sub I, LLC dba Internet Brands. All rights reserved. Use of this site indicates your consent to the Terms of Use.