


Hybrid firefly
 06-11-2016 | 03:18 AM
#1
Thread Starter

It's been a while since I have had any progress to post about owing to lack of facilities, however thanks to Gary "the tank man" page and his dinner table I've managed to make some progress.
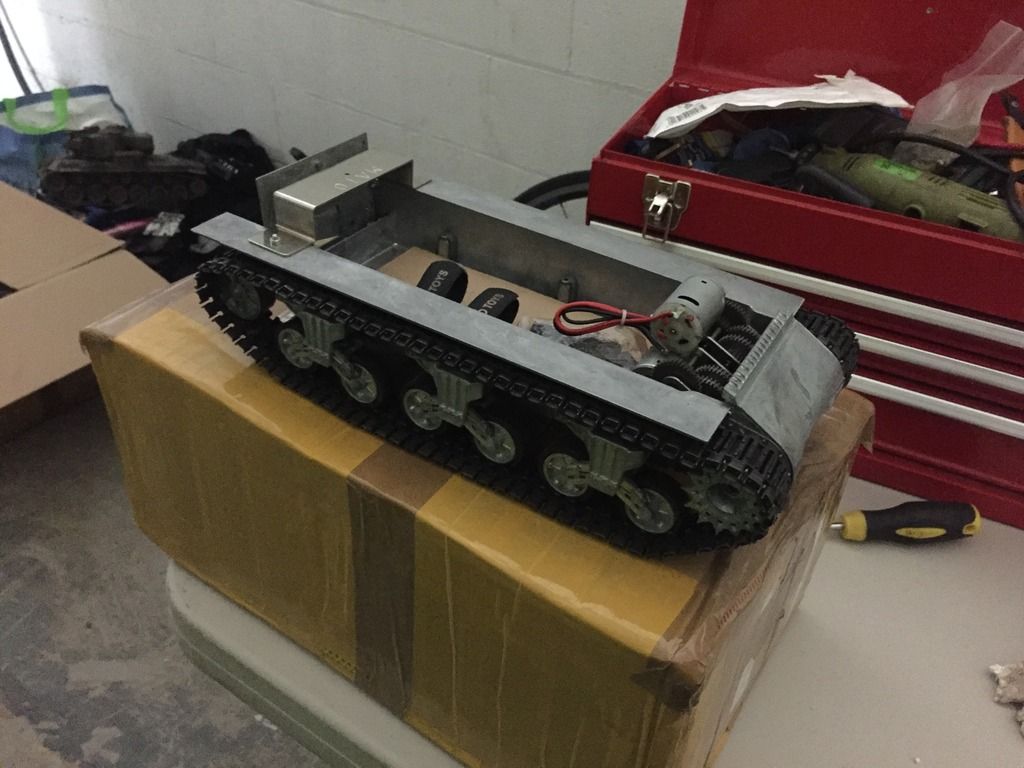
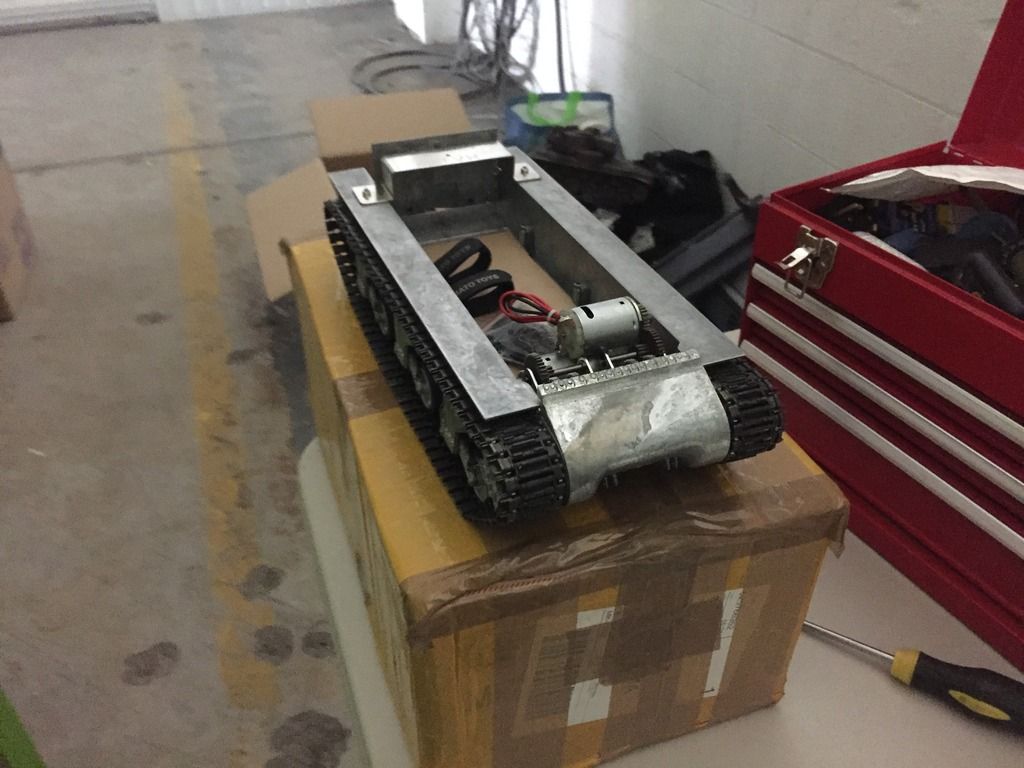
The firefly was bought from flamme with no electronics, provision for recoil or proper elevation. It's on the Mato chassis which is mechanically crude, so an upgrade was required.
I was impressed with the Mato m36b1 so I managed to get forgebear to get me just the chassis
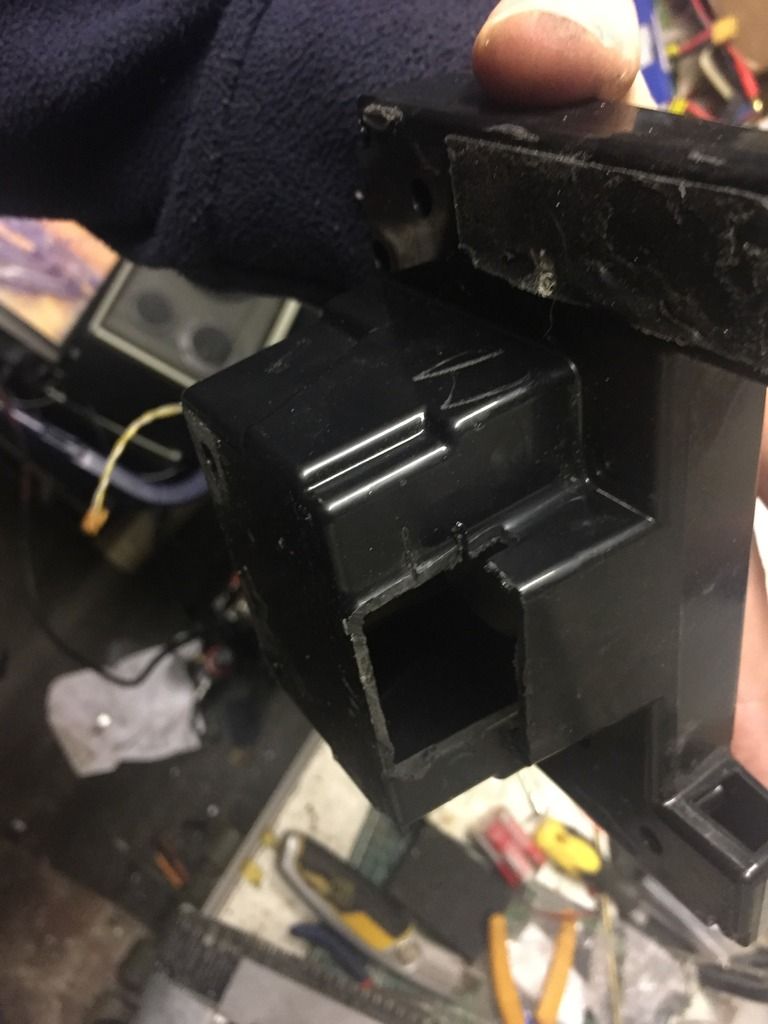
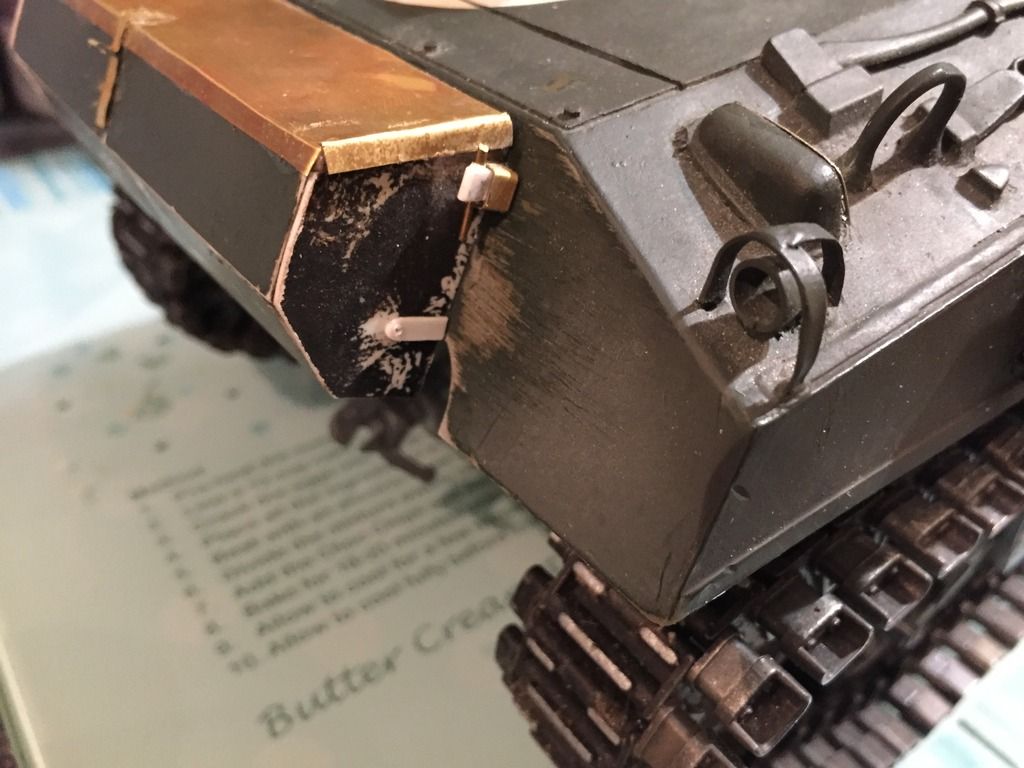
Next up was replacement of the damaged fender, using the old one as a template I made a replacement out of styrene.
A Mato metal mantlet was added. I had to make some modifications however to achieve suitable depression. As the tank will be a battler the ir led tube has been added in place of the mg in the mantlet. To help assist the recoil I've added a brass sleeve to support the barrel
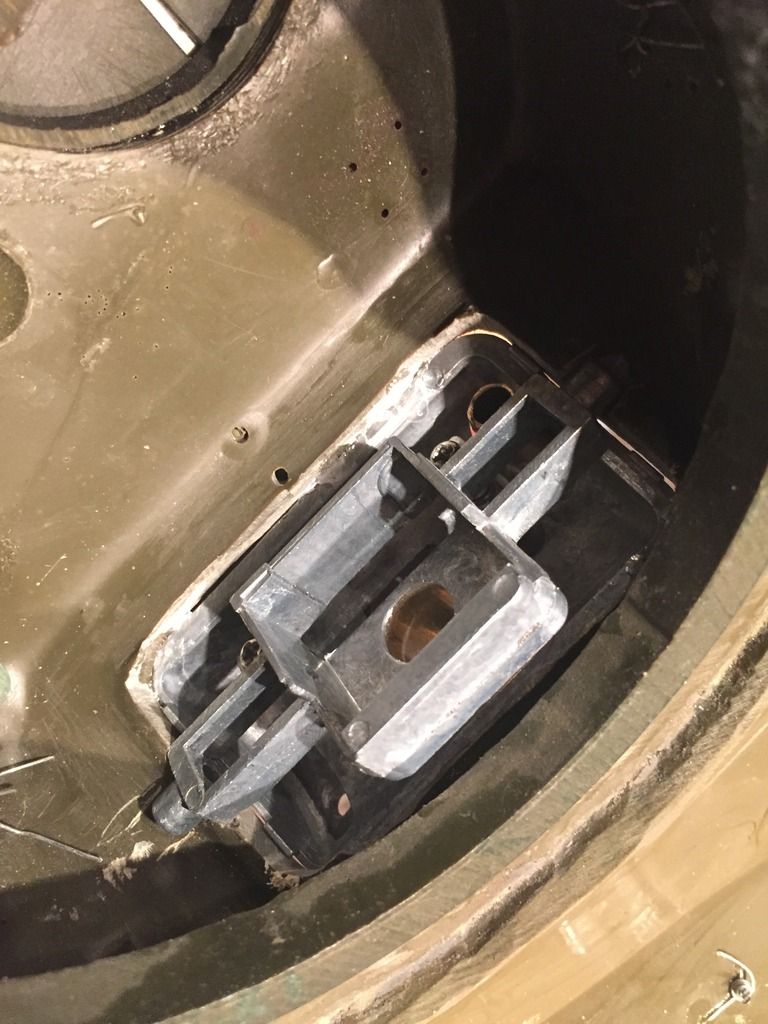
It looks a bit Heath Robinson but it works well and will be finessed with I detail her

The Mato mantlet looks to support the henglong recoil unit, so the dklm one should fit too.
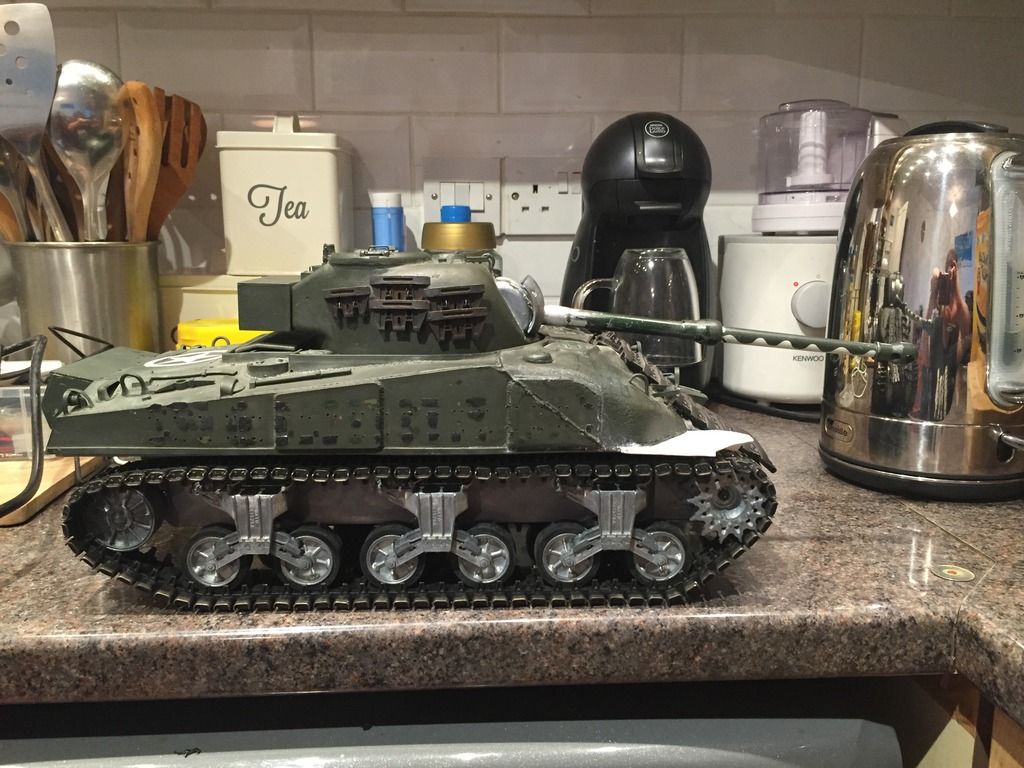
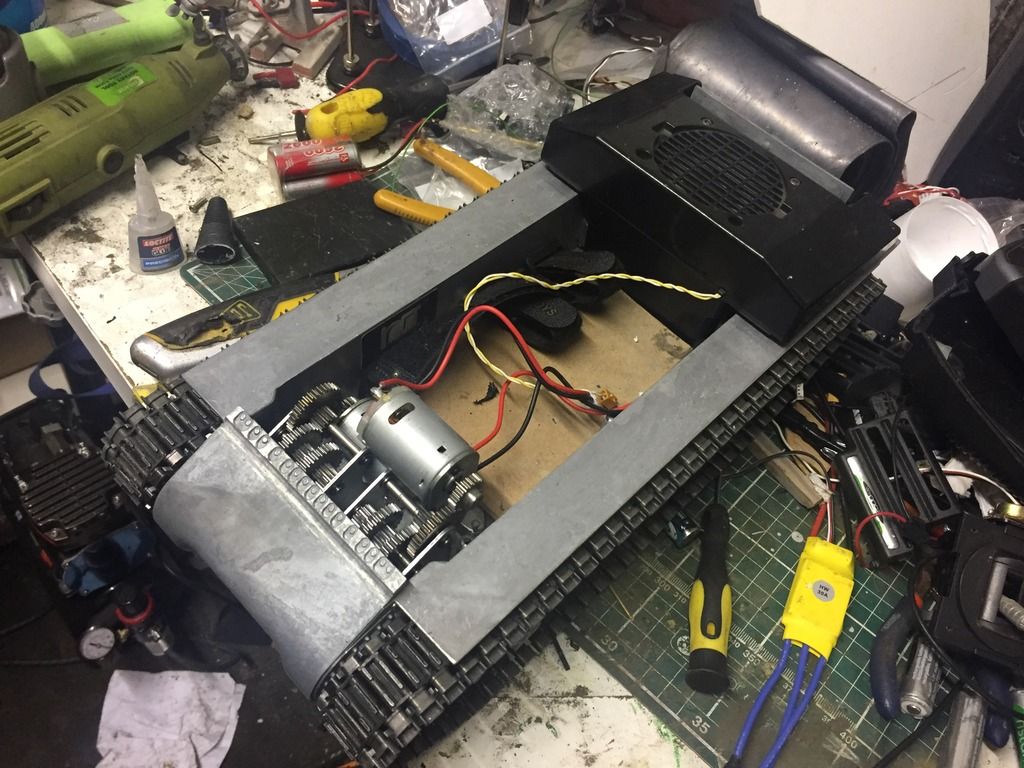
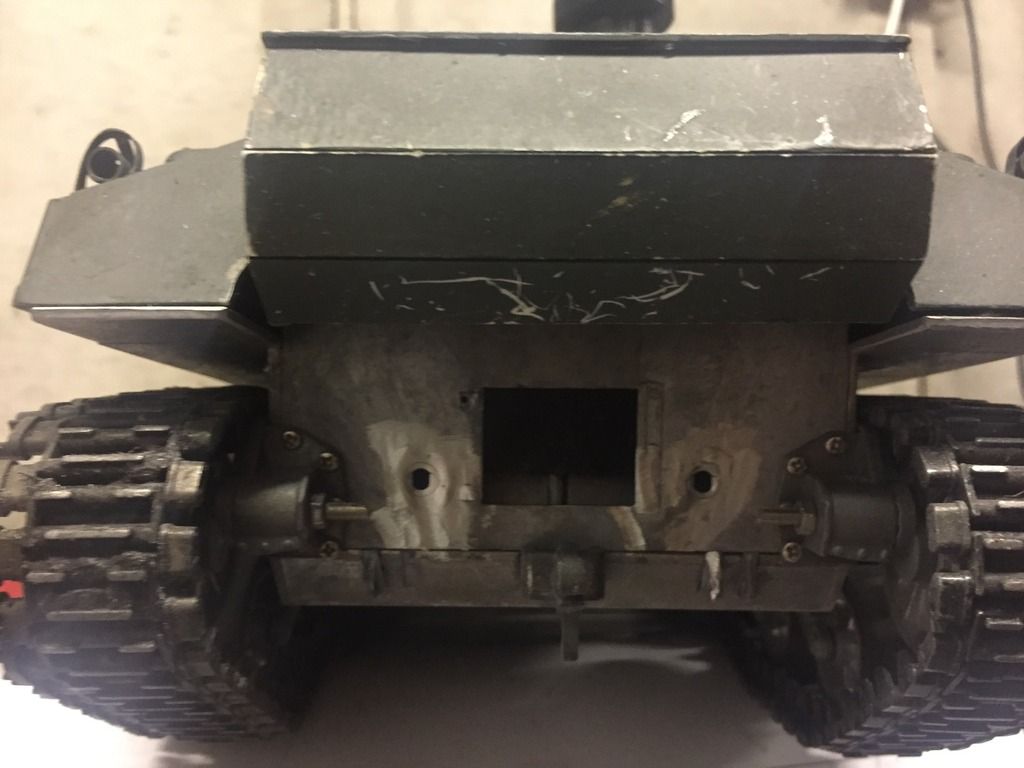
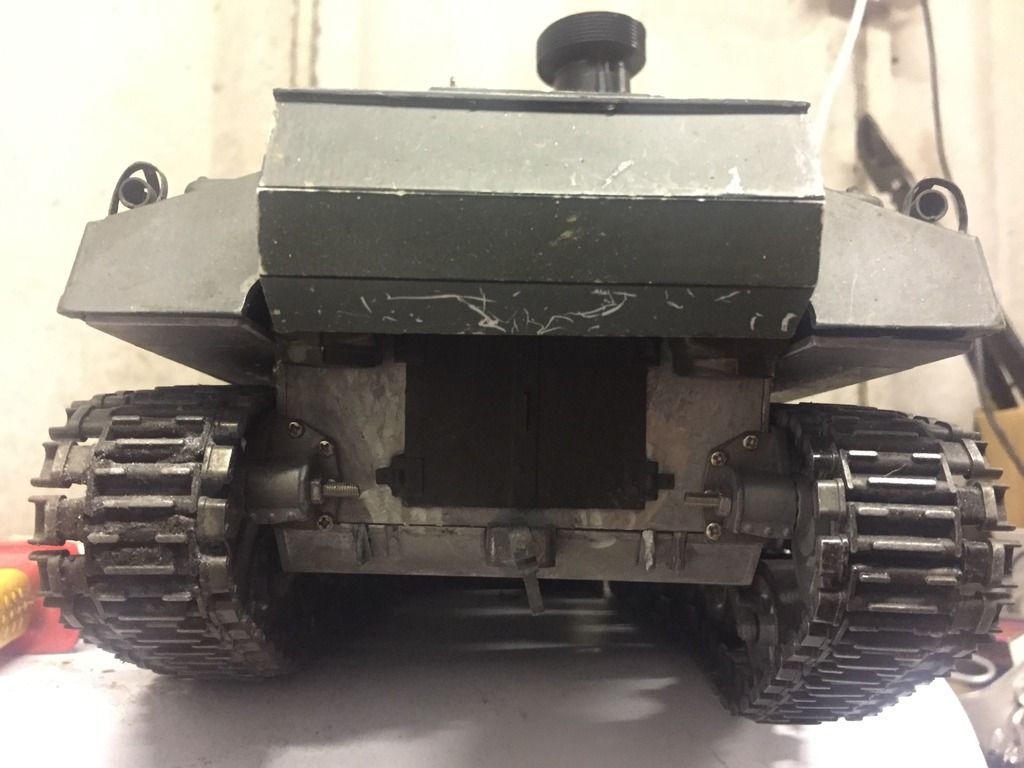
Here's the tank as she sits so far. The upper is all made of resin cast by flamme, the only of the shelf bit is the engine deck taken from an Tamiya Sherman.
The tracks are proper Churchill tracks, and I'm very lucky to have a whole bag of extra links!
The firefly was bought from flamme with no electronics, provision for recoil or proper elevation. It's on the Mato chassis which is mechanically crude, so an upgrade was required.
I was impressed with the Mato m36b1 so I managed to get forgebear to get me just the chassis


Next up was replacement of the damaged fender, using the old one as a template I made a replacement out of styrene.

A Mato metal mantlet was added. I had to make some modifications however to achieve suitable depression. As the tank will be a battler the ir led tube has been added in place of the mg in the mantlet. To help assist the recoil I've added a brass sleeve to support the barrel

It looks a bit Heath Robinson but it works well and will be finessed with I detail her


The Mato mantlet looks to support the henglong recoil unit, so the dklm one should fit too.
Here's the tank as she sits so far. The upper is all made of resin cast by flamme, the only of the shelf bit is the engine deck taken from an Tamiya Sherman.
The tracks are proper Churchill tracks, and I'm very lucky to have a whole bag of extra links!


 01-11-2017 | 12:58 AM
#4
Thread Starter
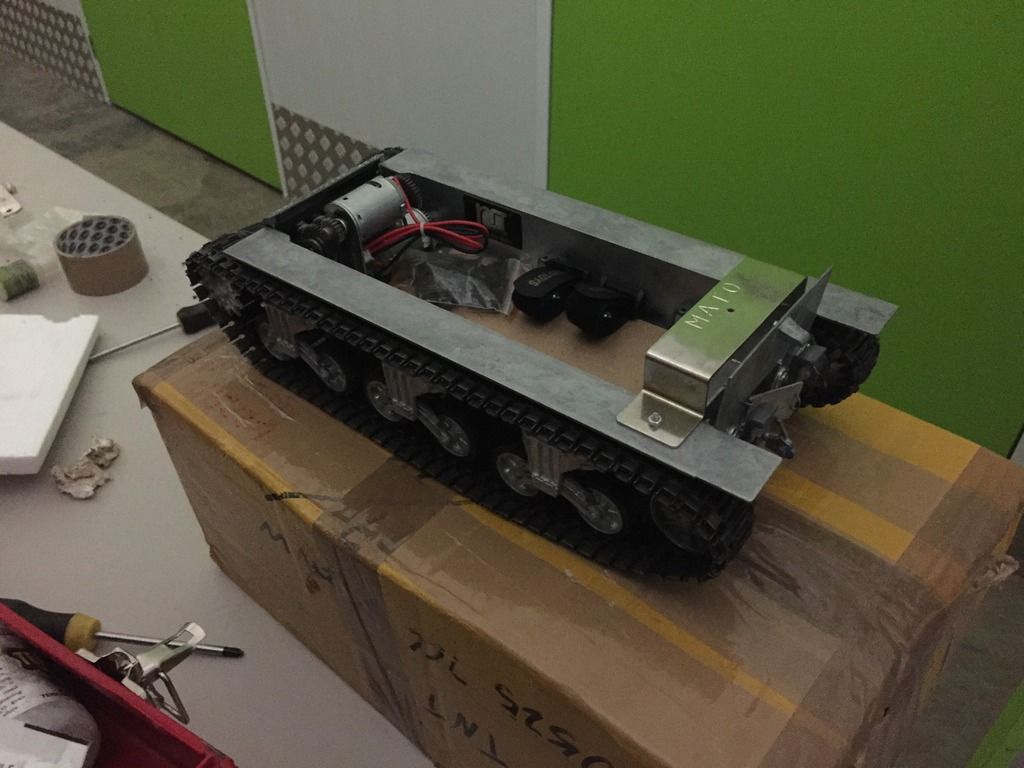
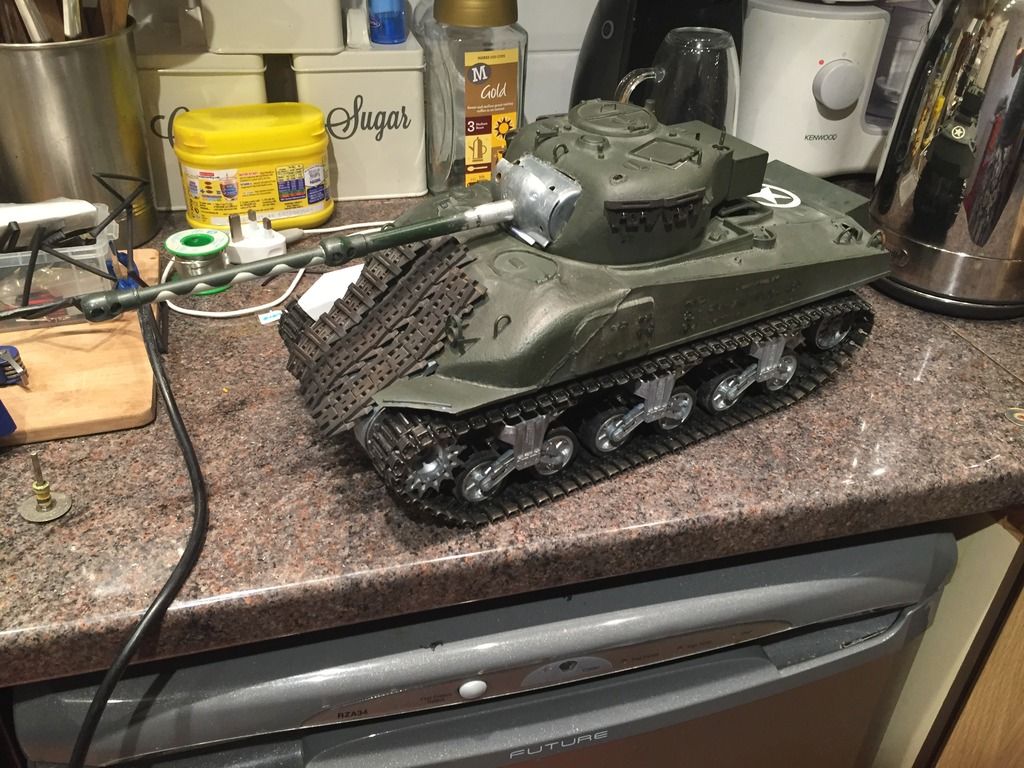
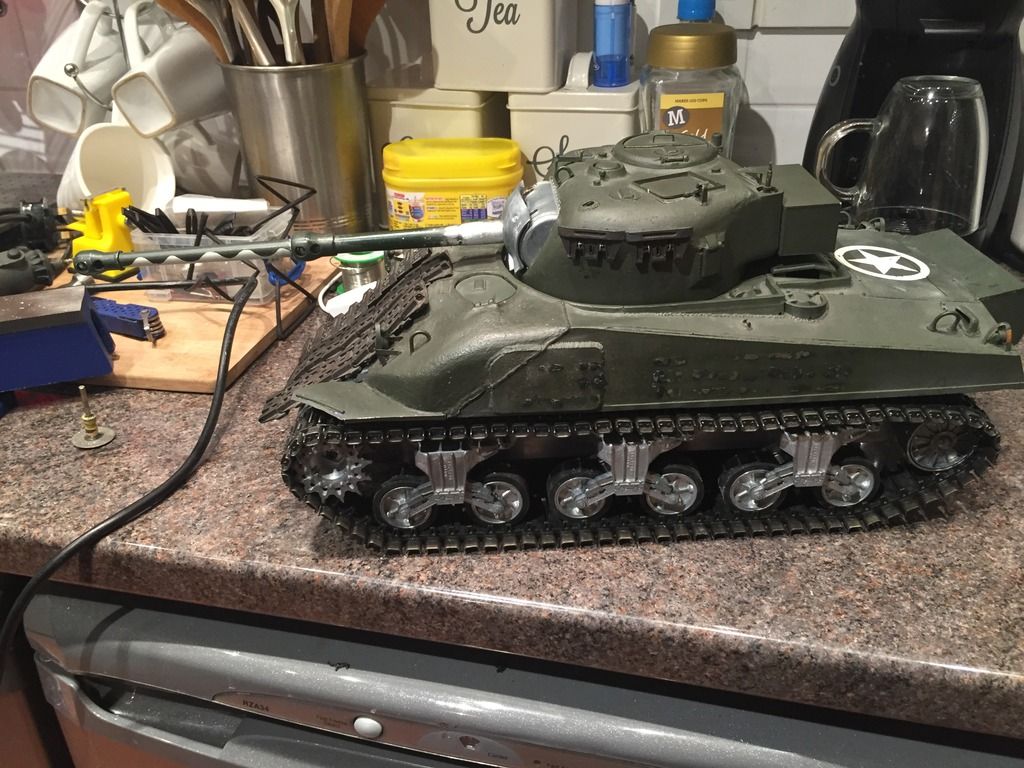
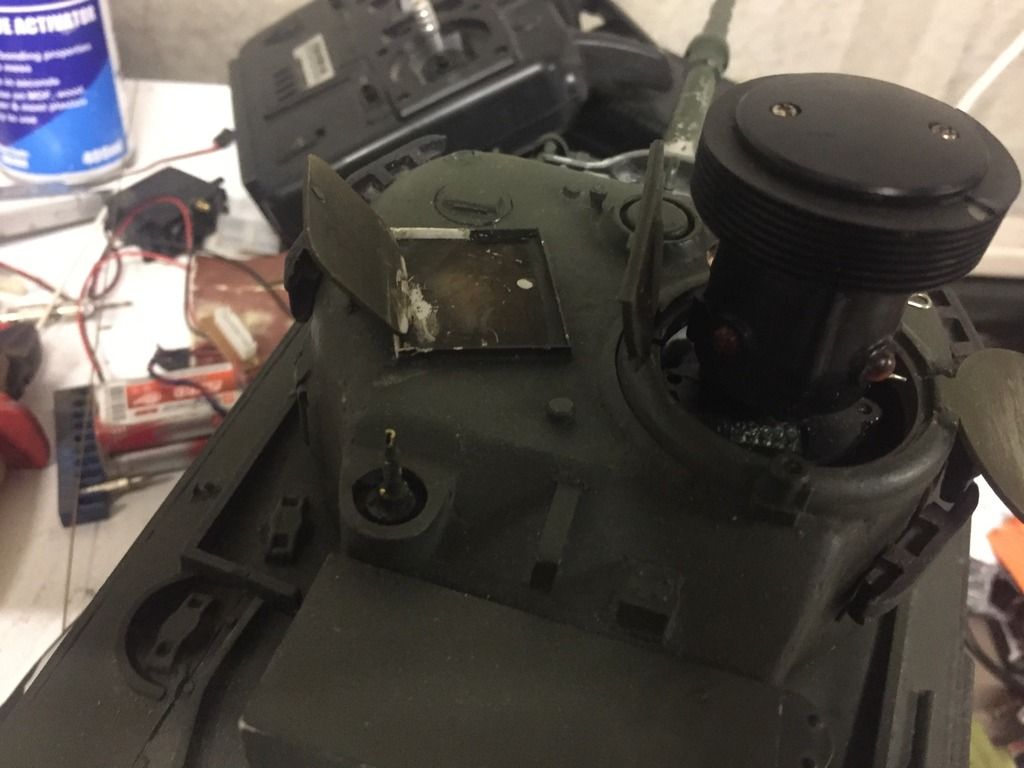
Dusted this one off last night, It will probably be getting an IBU2 pro this weekend so afew jobs to do including fitting a battle unit, ir emitter, speaker, flash unit and turret rotation.
First up adapting the tamiya speaker to fit the Mato hull. Couple of bits needed cutting out of the speaker and hull.
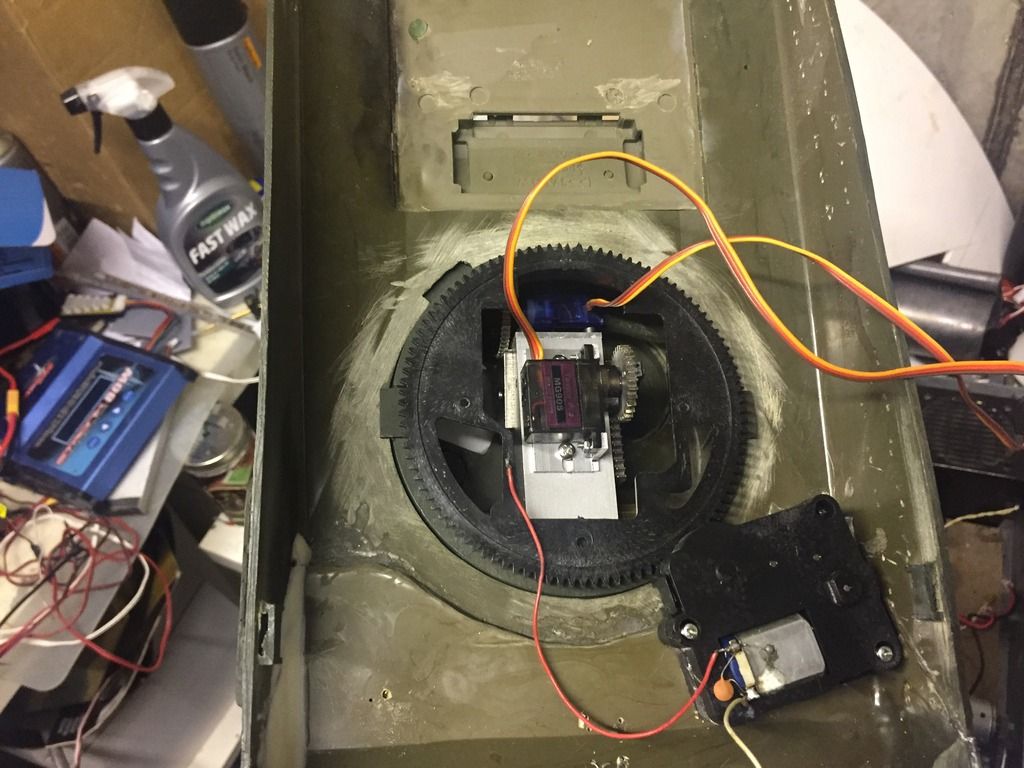
Turret rotation, fortunately the turret its self is wider than the HL rotation ring so I can lift the turret out of required. The rotation unit had to be sited under the drivers hatch to prevent interference with the speaker.
Last job was the opening hatches, added pins to the hinges to give them a bit more strength. Next job is to cut out the openings where I'll put the on off switch.
First up adapting the tamiya speaker to fit the Mato hull. Couple of bits needed cutting out of the speaker and hull.


Turret rotation, fortunately the turret its self is wider than the HL rotation ring so I can lift the turret out of required. The rotation unit had to be sited under the drivers hatch to prevent interference with the speaker.

Last job was the opening hatches, added pins to the hinges to give them a bit more strength. Next job is to cut out the openings where I'll put the on off switch.
 01-11-2017 | 07:05 AM
#6
My Feedback: (1)
That's awesome, Tom. So if you use the M36 chassis you don't have to make it longer for the Firefly? A buddy of mine is about to start a firefly project and he said he has to cut the lower Hull into 2 or three sections to make it long enough for a firefly. But, I think that's because he has the M3 chassis and not the M4 chassis. Can you confirm this for me, please?
I mean, did they make two different VVSS chassis for the Sherman?
I mean, did they make two different VVSS chassis for the Sherman?
01-11-2017 | 09:29 AM
#8
Thread Starter
Hey thanks for the kind words Rex and Gary. So to the best of my knowledge there were 3 fireflies, ic, ic hybrid and vc. The vc is on the a4 stretched chassis so needs extending. The ic ones are a standard chassis. So the Mato m36 chassis is the same as the one in the Sherman and I will hazard a guess the m10 so suitable for an ic or hybrid. Hope that helps!
01-11-2017 | 10:10 AM
#9

Nice work. Perosnally I have abandoned using the mato lowers for Taigen after having two matos.
If you have gear box issues, it will likely be the pinion spinning free on the motor shaft. And the set screw in the pinions was rammed tight in the pinion but didnt come out the inside to contact the shaft. The shaft is knurled and the ponion was just rammed on the shaft.
Purchasing new pinions and making a flat spot on the motor shaft was required. I also upgraded motors. The tamiya ones that Danville sells are excellent once you hack off the brass pinion for the frog kit.
Also, the coil srpings on the mato lower bogies are doubled up due to the intedned weight of the metal hull and turret. If you pull the springs out and seperate them and replace one on each arm it rides so much better.
oh Also, keep your axles oiled alot. The metal wheels ride on metal axels. No bushings or bearings. I have seen mine gual up and bind tight a few times and I keep them oiled.
So dissapointed with Mato.
Any way, great work with the M4 hybrid. Love that look.
01-11-2017 | 11:51 AM
#10
Thread Starter
Hey Rich, my Mato lowers haven't been as troublesome as yours but I did need to make some adjustments to the gearboxes, the bogies are a disappointment, when I was running mine at the Yorkshire show it bound up despite lubrication. I'm thinking of adding bushes to the wheels but still leaves soft axles. However for the time being I shall persevere as I've a fair bit sunk into the hull. Cheers for the kind words, hopefully she will be battling at the club this weekend.
01-11-2017 | 12:12 PM
#11
Wow thats a fast fielder. Awesome.
If I continue to get bad operation out of my mato lower under my Jumbo, I will transfer my hull over to a taigen chassis. I have way too much work into the jumbo to give it up over a problematic lower.
all I would have to do is build a new differential cover for a taigen.
let us know how the firefly performs. May you find many Tigers in your sights.


 01-23-2017 | 12:55 PM
#15
Thread Starter
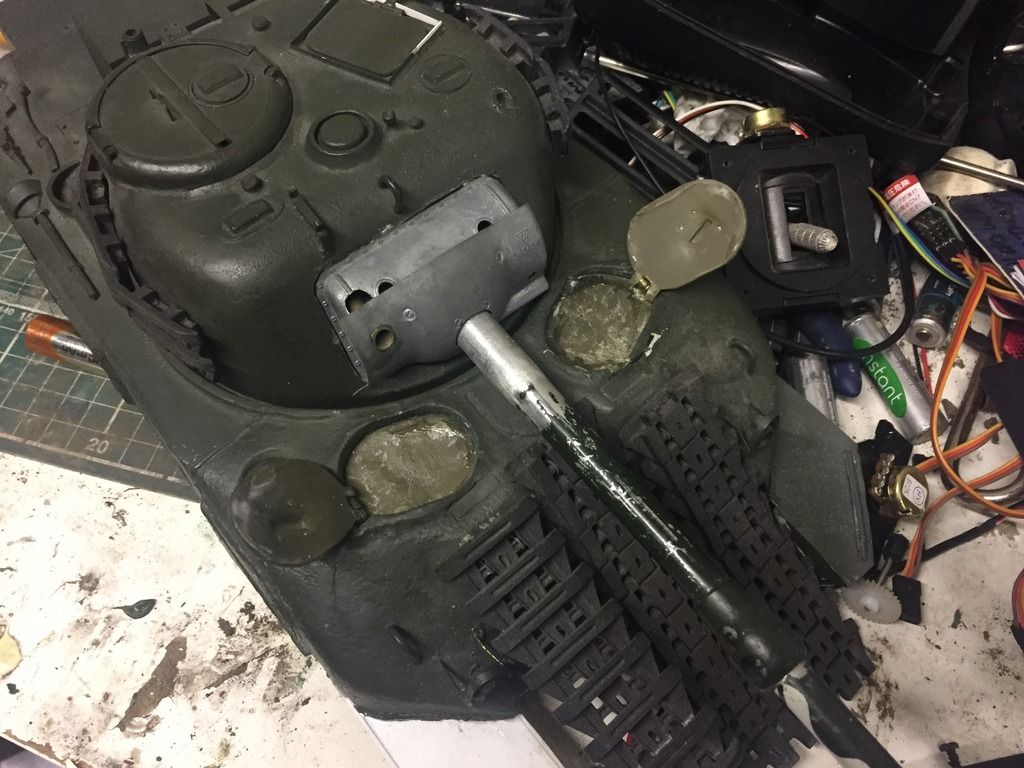
A little update, making the rear a little more radial! Parts stolen from one of my tamiya Sherman lowers. I've made the loaders hatch functional, need to cut out turret but it's getting there!

Hatch


Hatch


 01-28-2017 | 08:38 AM
#17
My Feedback: (1)
You really weren't kidding about the kitchen table. Very impressive, especially considering the shop facilities you have to work with. And this is the first time I've ever looked at RC Tank photos and got hungry because of the background!! Are those green apples? Mmmmm, good. 
01-28-2017 | 08:58 AM
#18
Thread Starter
Cheers Gary! I do have bench in the garage which I've been working on (if I did anything inside my girlfriend would have strong words!). It's just so messy I didn't want to show it! Yup nice Granny Smith, canna beat them!
") 01-30-2017 | 07:16 AM
01-30-2017 | 07:16 AM
#20

Joined: Nov 2012
Posts: 903
Likes: 0
Received 0 Likes
on
0 Posts
From: USA
I am in the midst of sorting out a metal Mato lower for my firefly and it has been quite a chore. I am using plasticard to raise up the lower hull over the VVSS as my upper hull will not properly mate to the lower without a sizeable gap between the two. I too used a Tamiya speaker which sits too high, despite trimming it down a bit. I had better luck on my Jumbo when I used Mato VVSS metal kit on my Tamiya hull with Tamiya gearboxes. Looking good so far Tom!
01-30-2017 | 08:29 AM
#21
Thread Starter
Cheers Erik, I still need to trim maybe 5mm off my speaker box as the rear is riding slightly off the lower, aside from that and the infill I need to do around the tranny cover it's a decent fit. I managed to sort the track throwing by swapping the sprockets around to even up the wear on them, combined with tightiening the tracks it seems to have done the job.
02-02-2017 | 02:40 PM
#22
Thread Starter
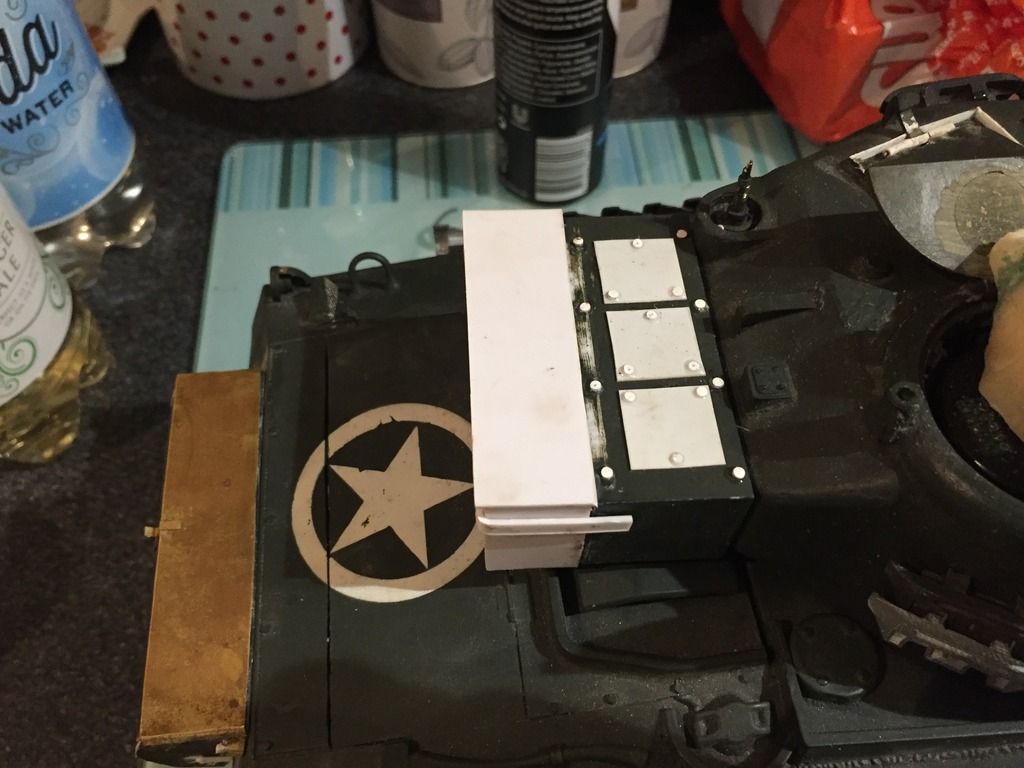
Missus at her mums this evening so time to make some progress on detailing the firefly. Reworked and detailed the rear stowage bin, detailing the turret bustle and the beginnings of the turret bustle stowage bin.


 02-10-2017 | 10:24 AM
#23
Thread Starter
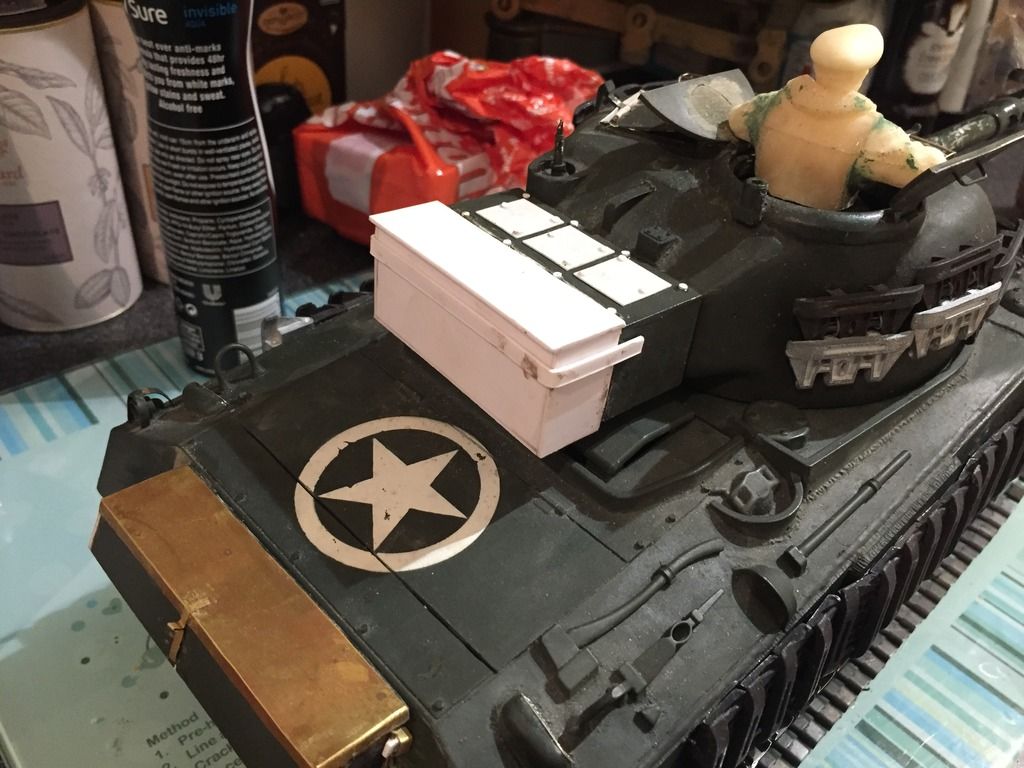
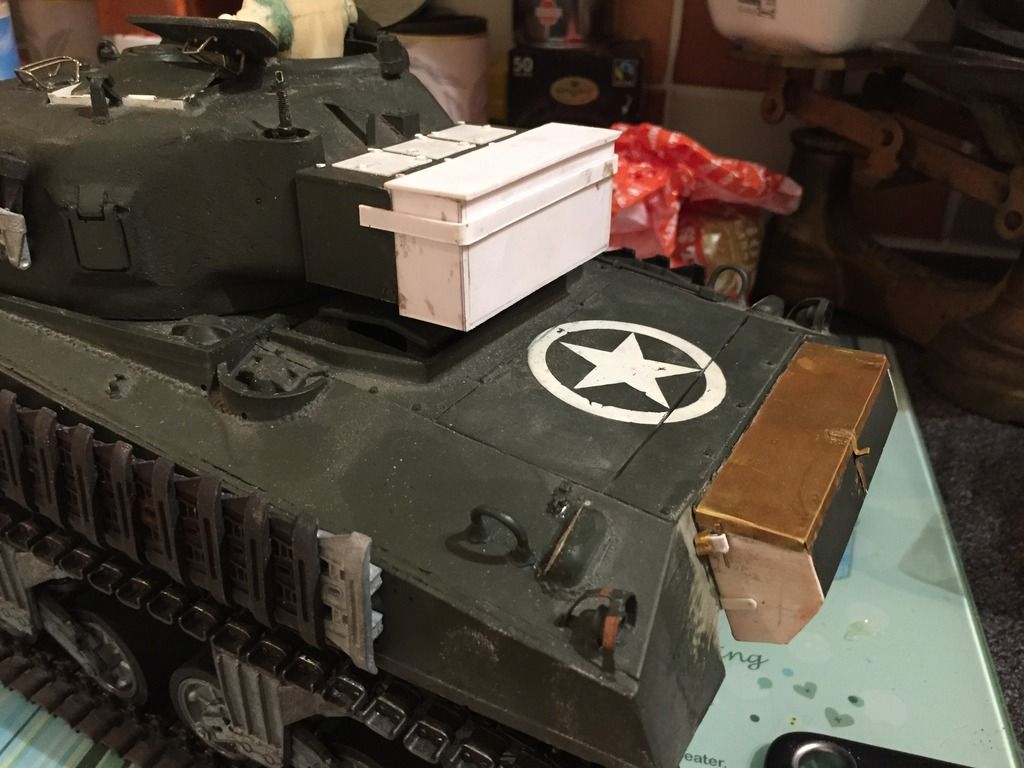
More work complete, I've added detail to the bustle bin, removed the cupola and rotated it so the commander didn't keep bashing his arms, added weld seams to the bustle extension and made an antenna base and guard (which was a monster PITA).
Enjoy;
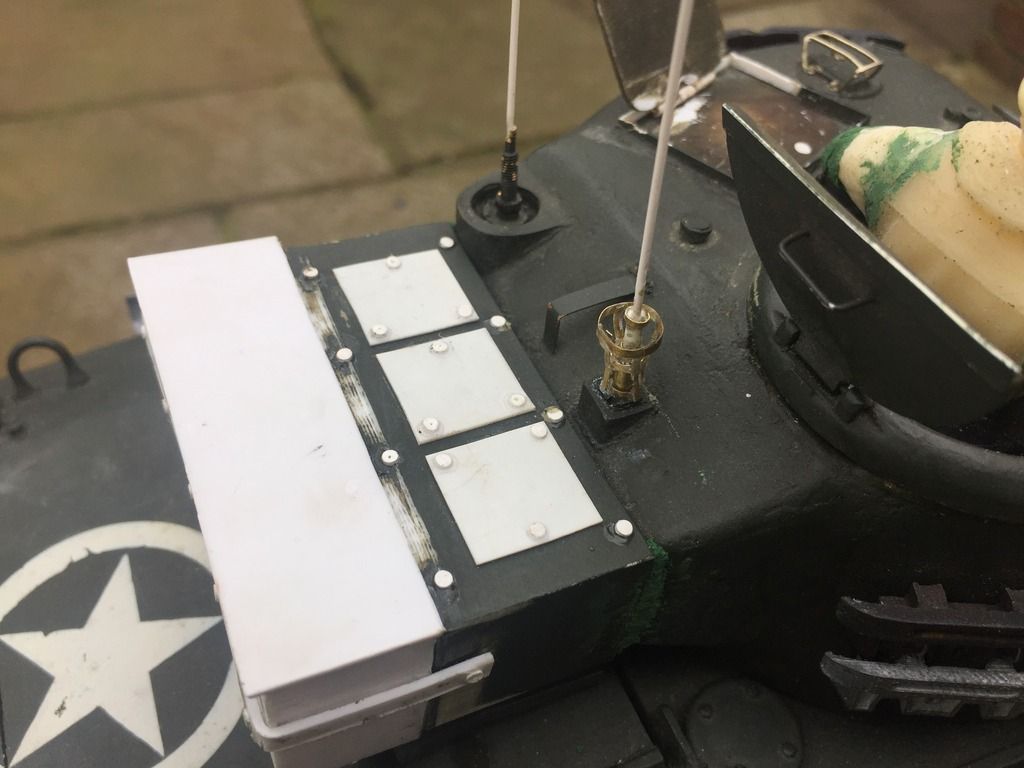
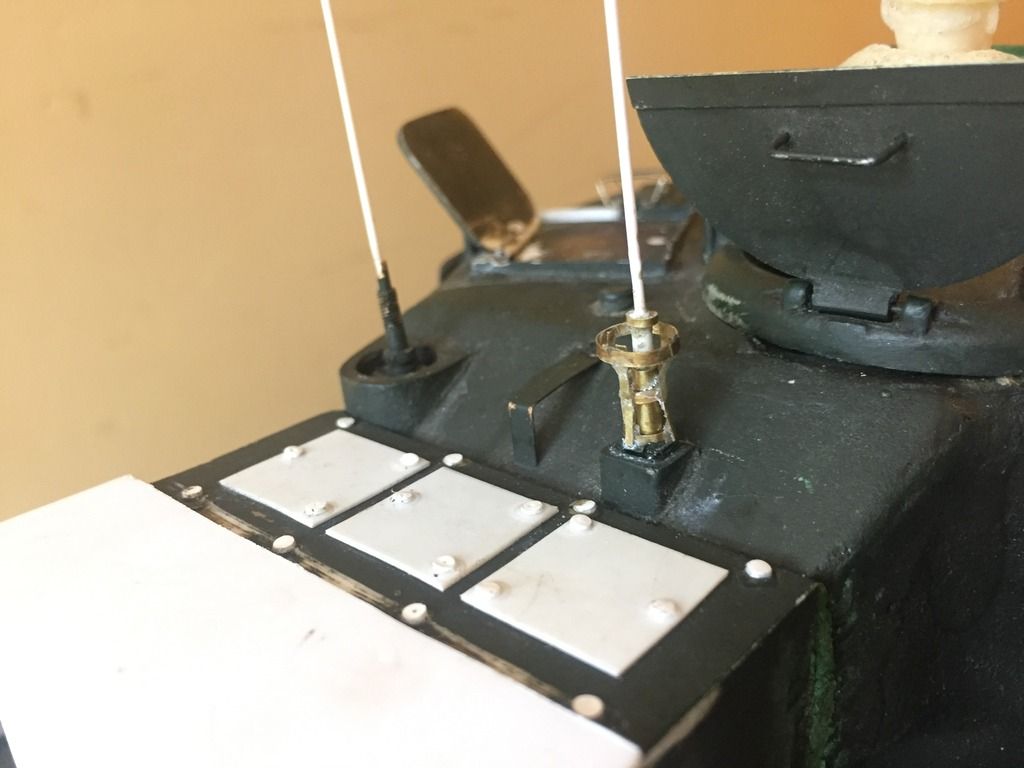


Enjoy;


 04-24-2017 | 01:29 AM
#24
Thread Starter
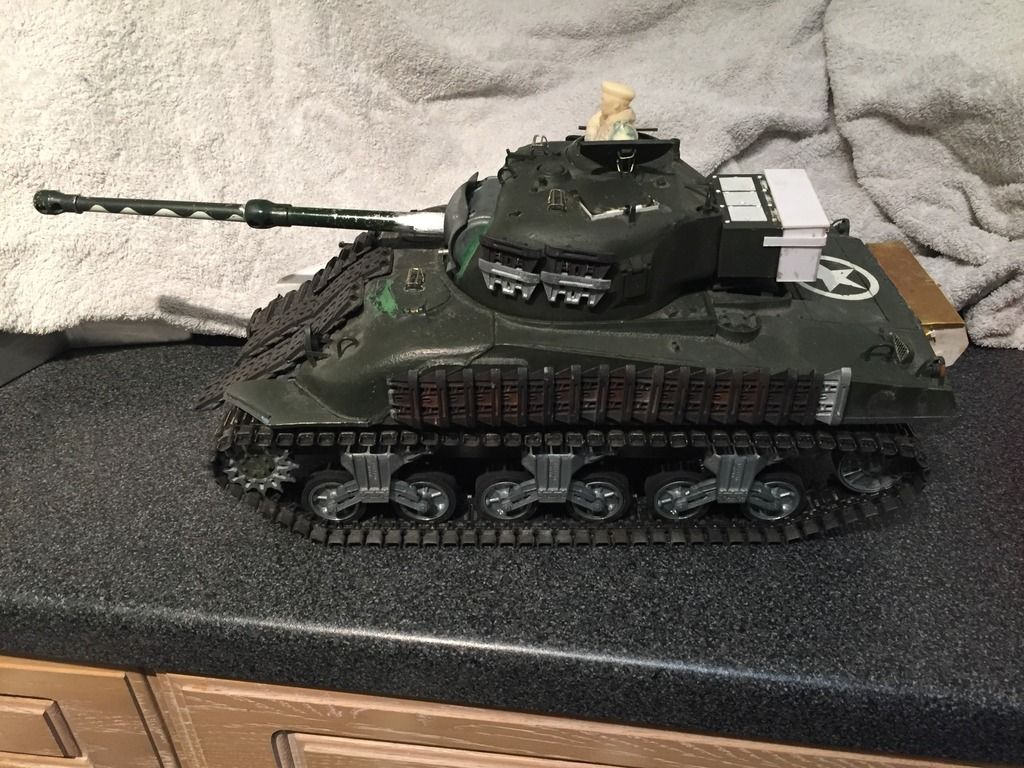
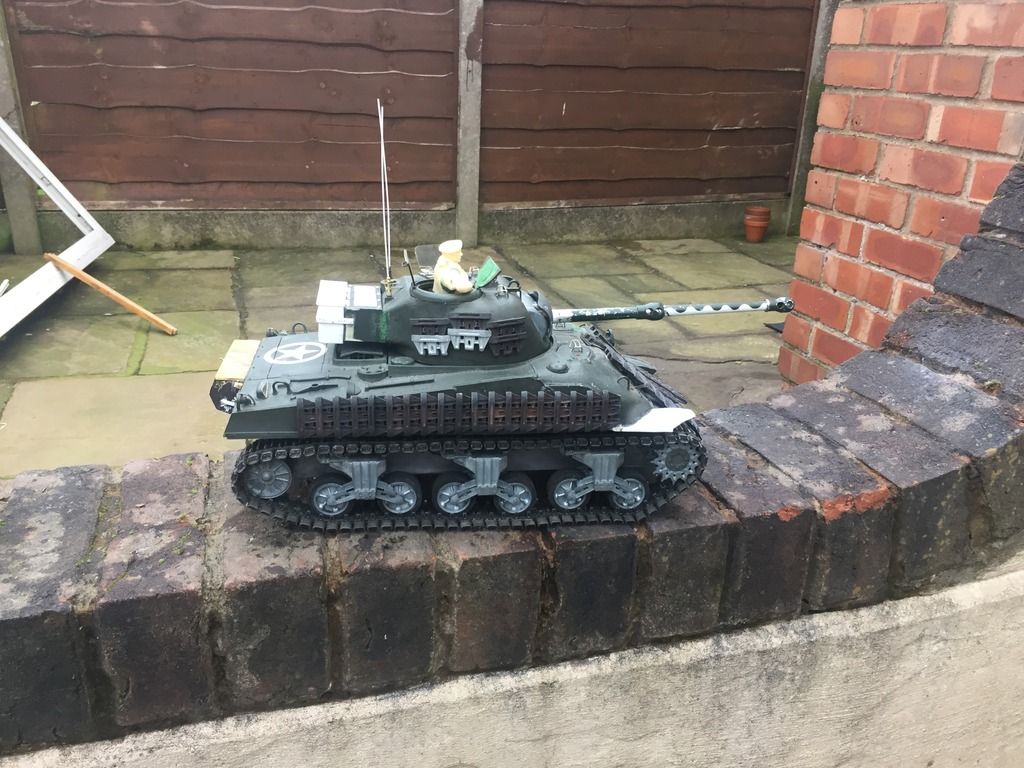
Hey folks, I've skipped ahead a few steps. Finished the detailing, some work on the hatches, added detail to the loaders hatch, fire extinguishers etc. Then started on painting. Primed in grey tamiya surface primer. Then metal coat of gunship grey with hairspray over the top. Green is a mix I got online for British scc 15, modulated adding buff. Then chipped lightly. Filter of sin industries brown for dark green. Lastly a pin wash. Also added decals, barrel camo and added Canadian identification mark. Loads left to do but cracking on.
[ATTACH]2211479[/IMG]
[ATTACH]2211480[/IMG]
[ATTACH]2211481[/IMG]
[ATTACH]2211482[/IMG]
[ATTACH]2211483[/IMG]
[ATTACH]2211484[/IMG]
[ATTACH]2211479[/IMG]
[ATTACH]2211480[/IMG]
[ATTACH]2211481[/IMG]
[ATTACH]2211482[/IMG]
[ATTACH]2211483[/IMG]
[ATTACH]2211484[/IMG]

