


Dragon, Spyker, FOA, Nicky 1/6 scale M4A1 76mm
 07-14-2022, 03:33 PM
#51

Thread Starter

Had my first issue the other day. I lost my right drive, the tank would go forward and turn left but I could tell it was slipping when I tried to turn right. When I took it apart I saw that the right motor was working but the shaft was slipping on the small pully. This pully is press fitted onto the motor shaft and there are three set screws to hold it in place. When I disassembled it I noticed the set screws were not tightened down. Now this could be that I forgot or from the heat (the pully is 3D printed PLA+) they were pushed out. So I tightened them down, checked the other motor and it looked OK. So I'm back in business. If it happens again I will drill a hole through the pully and shaft and put in a steel or brass rod so it will not slip again.
I downloaded some tank commander figures from GCTRADER, scaled them up to 1/6 scale and printed the top halves. Painted and put them in the tank. I'll try and get some photos or videos this weekend. They look NICE!
I downloaded some tank commander figures from GCTRADER, scaled them up to 1/6 scale and printed the top halves. Painted and put them in the tank. I'll try and get some photos or videos this weekend. They look NICE!

The following users liked this post:
tankme (07-14-2022)
07-15-2022, 09:50 AM
#52
Nick,
the set screws on those pulleys won't last long. I replaced them all with standard M3 socket head screws. But clamping onto the threaded output shafts of the motors is a problem. I filed small flats on the motor shafts which help some. I've changed all the Spyker pulleys over to .25" pitch chain sprockets.
I'd like to see those figures. I'd like to print some 1/6 scale figures for my tanks as well.
Bob
07-15-2022, 03:17 PM
#53
Thread Starter
Video of the figures.
I need to paint the inside of the hatches and redo the eyes on the figures, definitely need to redo the eyes. They were about 1/24 scale and I scaled up to 1/6 scale, in the slicer program cut off below the torso then split the upper torsos in half to print. Glued them together, a little Bondo and knife work for details then prime and paint!
I need to paint the inside of the hatches and redo the eyes on the figures, definitely need to redo the eyes. They were about 1/24 scale and I scaled up to 1/6 scale, in the slicer program cut off below the torso then split the upper torsos in half to print. Glued them together, a little Bondo and knife work for details then prime and paint!
The following 2 users liked this post by Tankhobby:
rb67mustang (08-27-2023),
tankme (07-15-2022)
08-27-2023, 05:21 PM
#55
I wanted a 1/6 scale RC M4A1 76mm for and slowly bought the parts over several years to make it so. Starting with the Dragon 1/6 static kit I immediately bought the cast hull and T23 turret form FOA when they listed them. The parts sat on the shelf for a while and then Spyker listed the Sherman tracks and I bookmarked the page as an option (was originally going to design my own). Spyker did a full conversion as most probably know and when he listed the stl files for sale I was sold! I bought the tracks and stl files and started work on my dream tank!
So this tank is being made from a Dragon model, Spyker parts, FOA parts and some parts I designed myself (Nicky parts)
So this tank is being made from a Dragon model, Spyker parts, FOA parts and some parts I designed myself (Nicky parts)
Anyway, I had already bought a few of the 1/6 21st C M5 Stuarts as used & abused and I began working on them. I have many interests and nothing is cheap. I finally gave up on the 1/6 Sherman and it's up for sale. As you know, I'm back to work on the M5 and one of these days it will be finished.
I'm happy I found your build thread, and I like what you're doing.
Roger rb67mustang
Last edited by rb67mustang; 08-27-2023 at 05:58 PM. Reason: add content
08-27-2023, 05:55 PM
#56
Cut the hatch openings out and I cut too much. BTW this turret has a lot of excess resin. The walls are really thick. the bottom (turret ring) is like 2" thick. Don't know why it was made this way, adds a lot of weight. The opening where the gun mantlet attaches is also very thick. By the time I removed all the unnecessary resin the turret is probably half the weight.
Starting to look cool!
Starting to look cool!
Roger rb67mustang
08-27-2023, 06:10 PM
#57
I have one of these Dragon Shermans being shipped to my house as I write this. I could only find it in stock at BNA Hobbies in Australia, but it will be here Tuesday as it's already passed through customs. Since I have a 3D printer, I will be printing all the Spyker upgrade parts on my own. I bought the STL files for like $20 from his site. They are now unsupported by him, but that doesn't matter. I will probably be using scooter motors (same type Loic used from FOA) in mine as the motors he recommends are now out of stock. I'm sure I can find similar units, but I'm not keen on using those window wiper motors personally. I have two of the FOA type scooter motors I can canabalize from my old M113 project. There are free file on like Thingiverse to print timing pulleys to adapt whatever motor I choose to the tank.
08-27-2023, 07:14 PM
#58
Good job on the .50 mount, any plans to do a .30 cal for the TC? I even have a good .30 cal I might donate if you do. I have tiny little bits and bobs on several very cool tanks around the world. Not sure why I get such a kick out of that, but I do. Seeing a photo or video of a cool tank from someone I know and knowing there's some tiny little detail that came from me seems pretty cool to me, but I'm kinda twisted to start with so maybe it's just vanity or somethin'. 
This is the .30 cal I had in mind, I've replaced it with a different model on the jeep so it's currently a spare, and of course you'd have to open the muzzle, but I'd be pretty tickled to see it mounted on a very cool tank. And yes, I know the ammo belt is on the wrong side, it's not permanently attached.

This is the .30 cal I had in mind, I've replaced it with a different model on the jeep so it's currently a spare, and of course you'd have to open the muzzle, but I'd be pretty tickled to see it mounted on a very cool tank. And yes, I know the ammo belt is on the wrong side, it's not permanently attached.
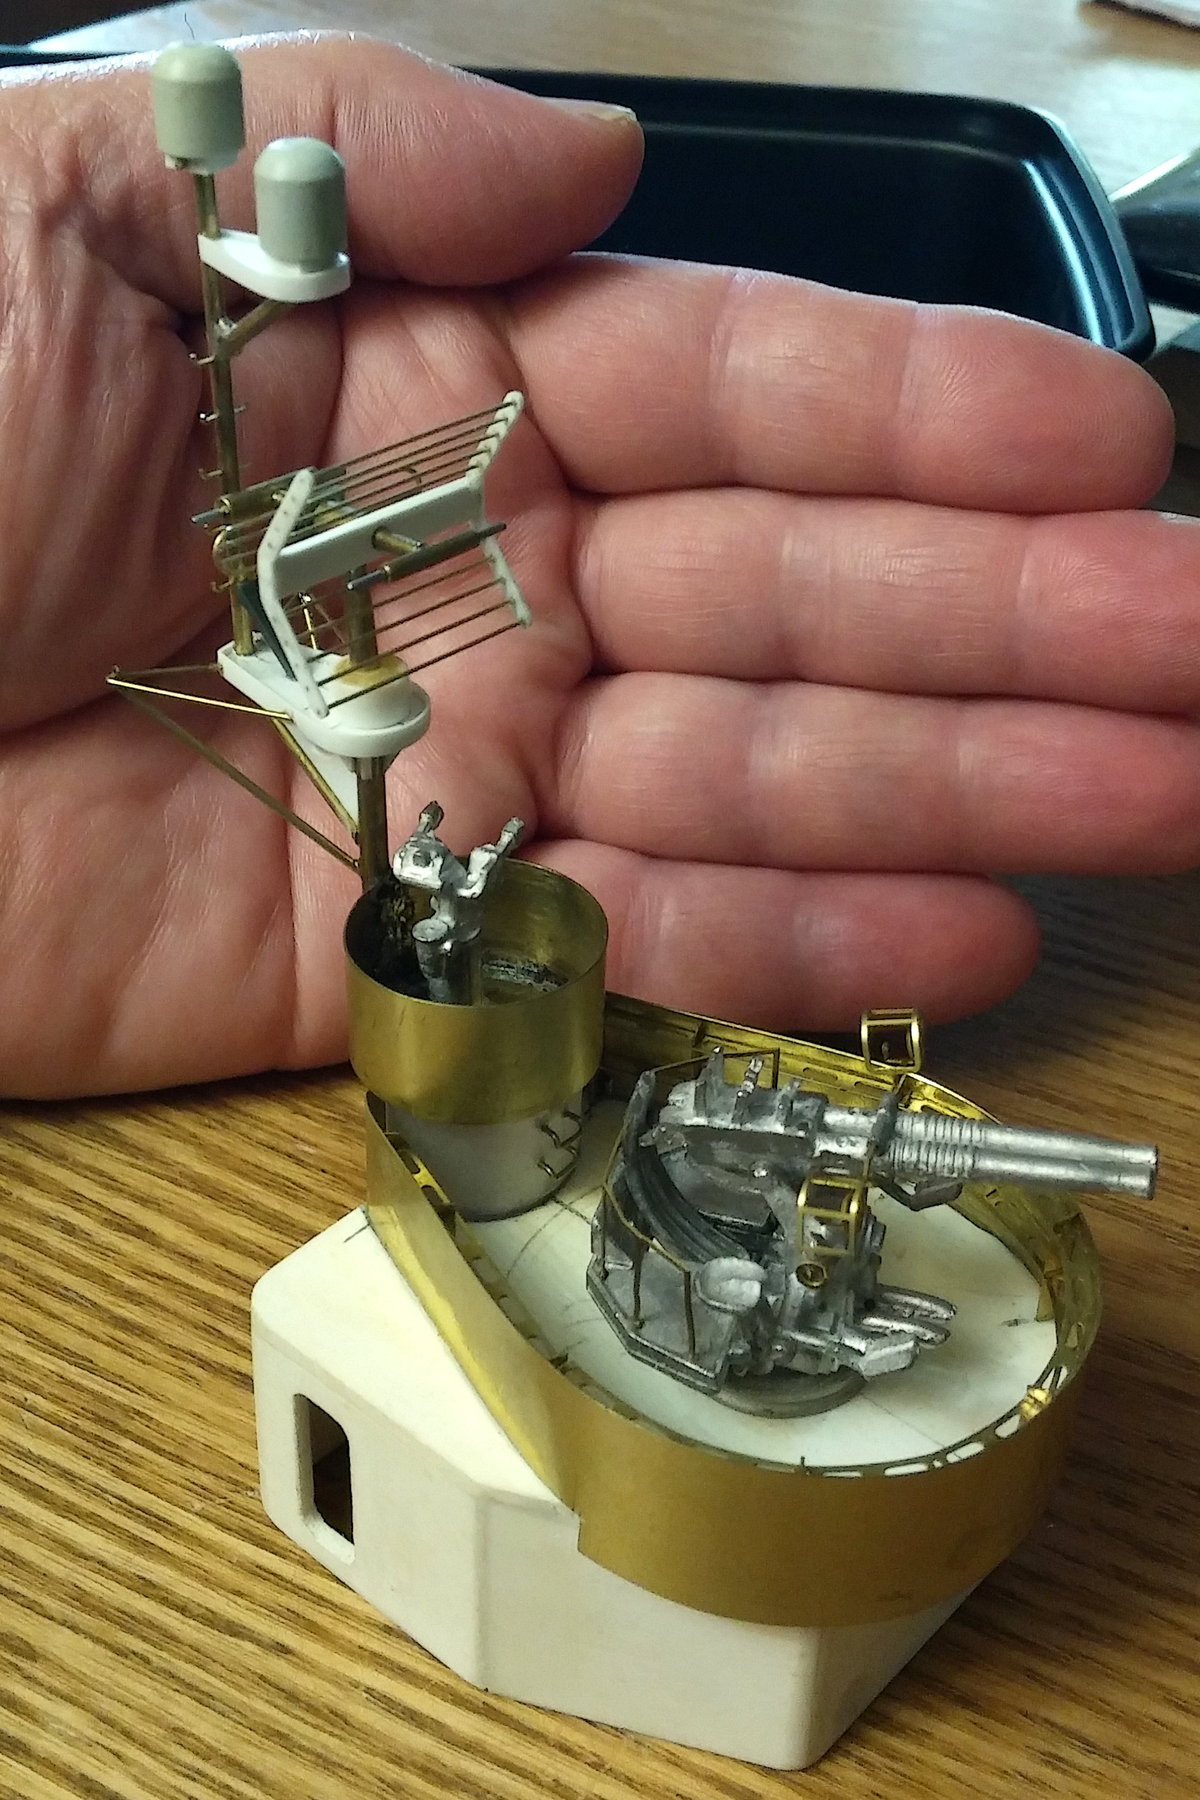
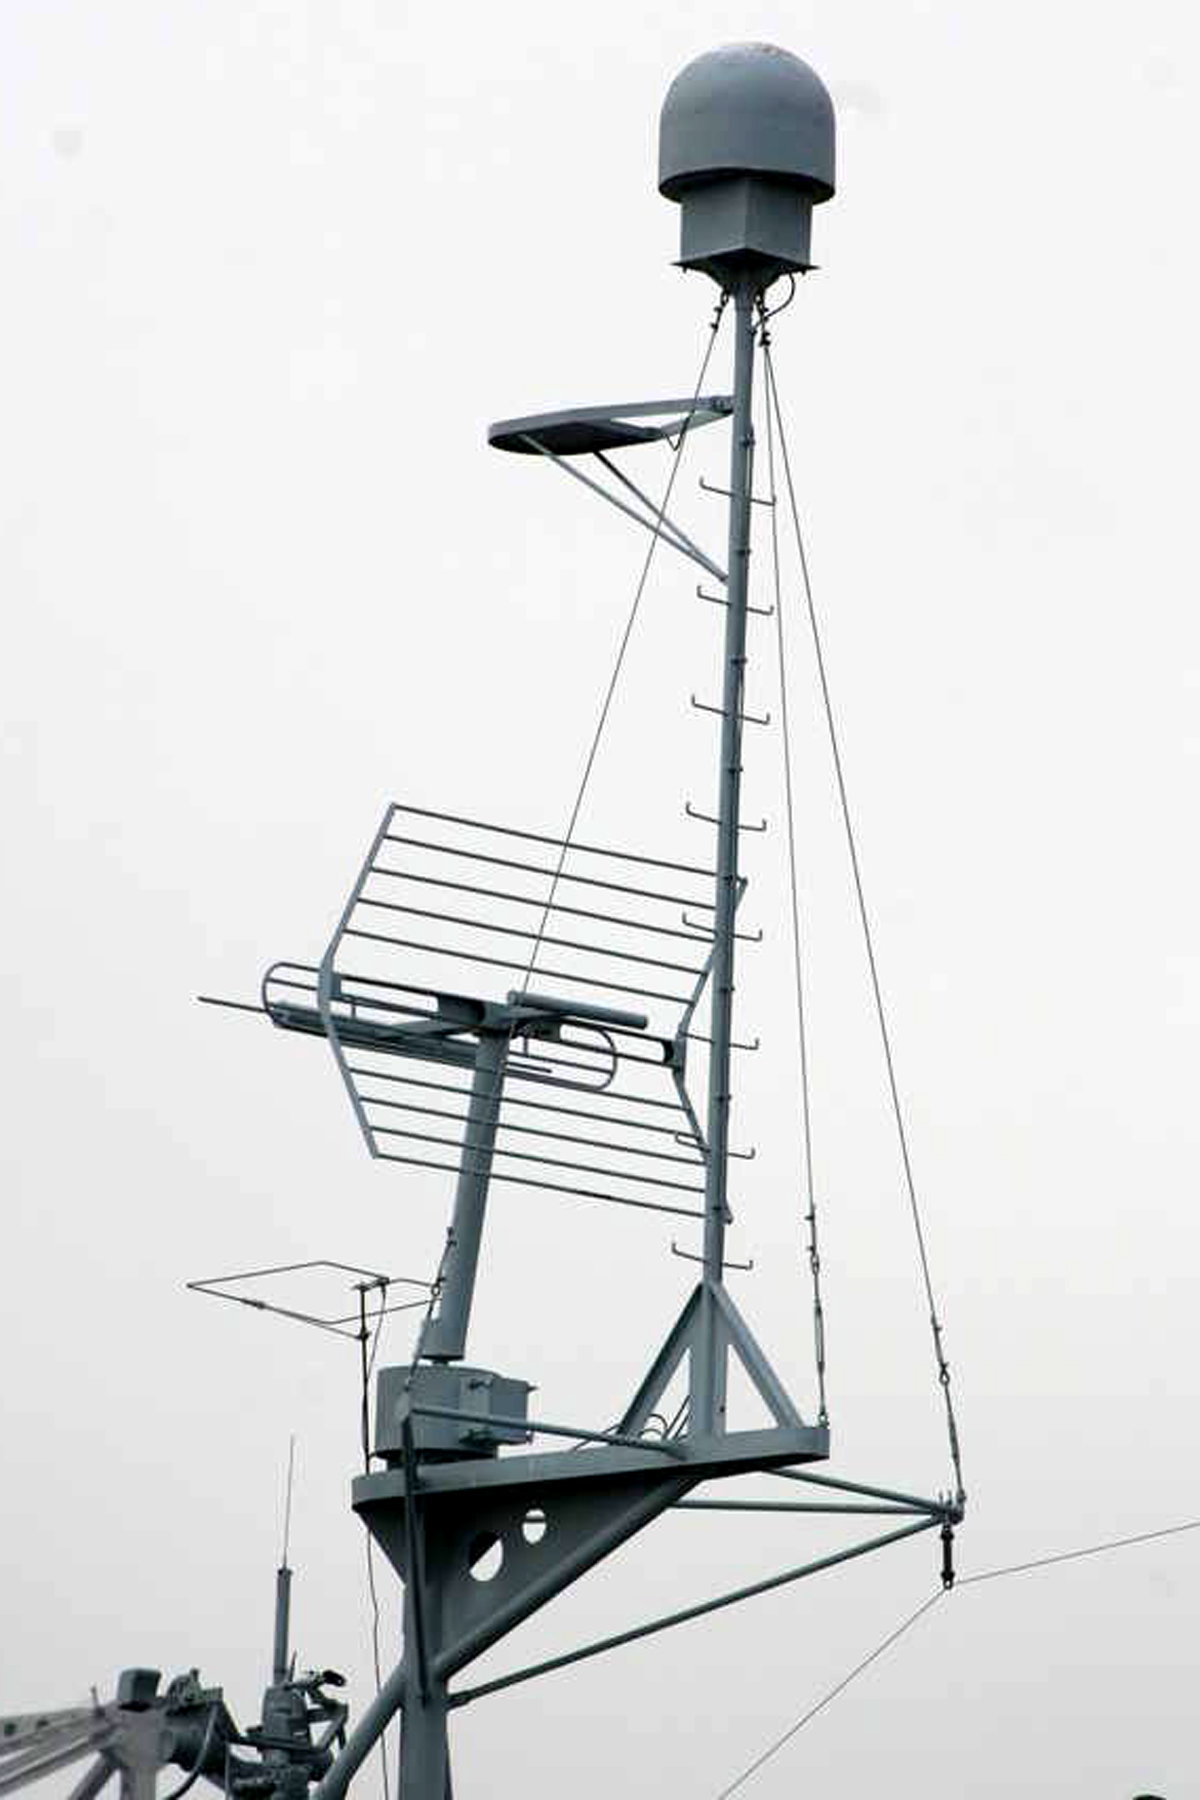
Here's a couple of photos of the ECM Masts I made. Mine 1st and then the mast for my buddy, Jerry, and the last is an actual image from the USS Kidd, it's one of the few remaining Fletcher Museum Ships.
This is the gun tub, gun director and ECM Mast for my Fletcher.
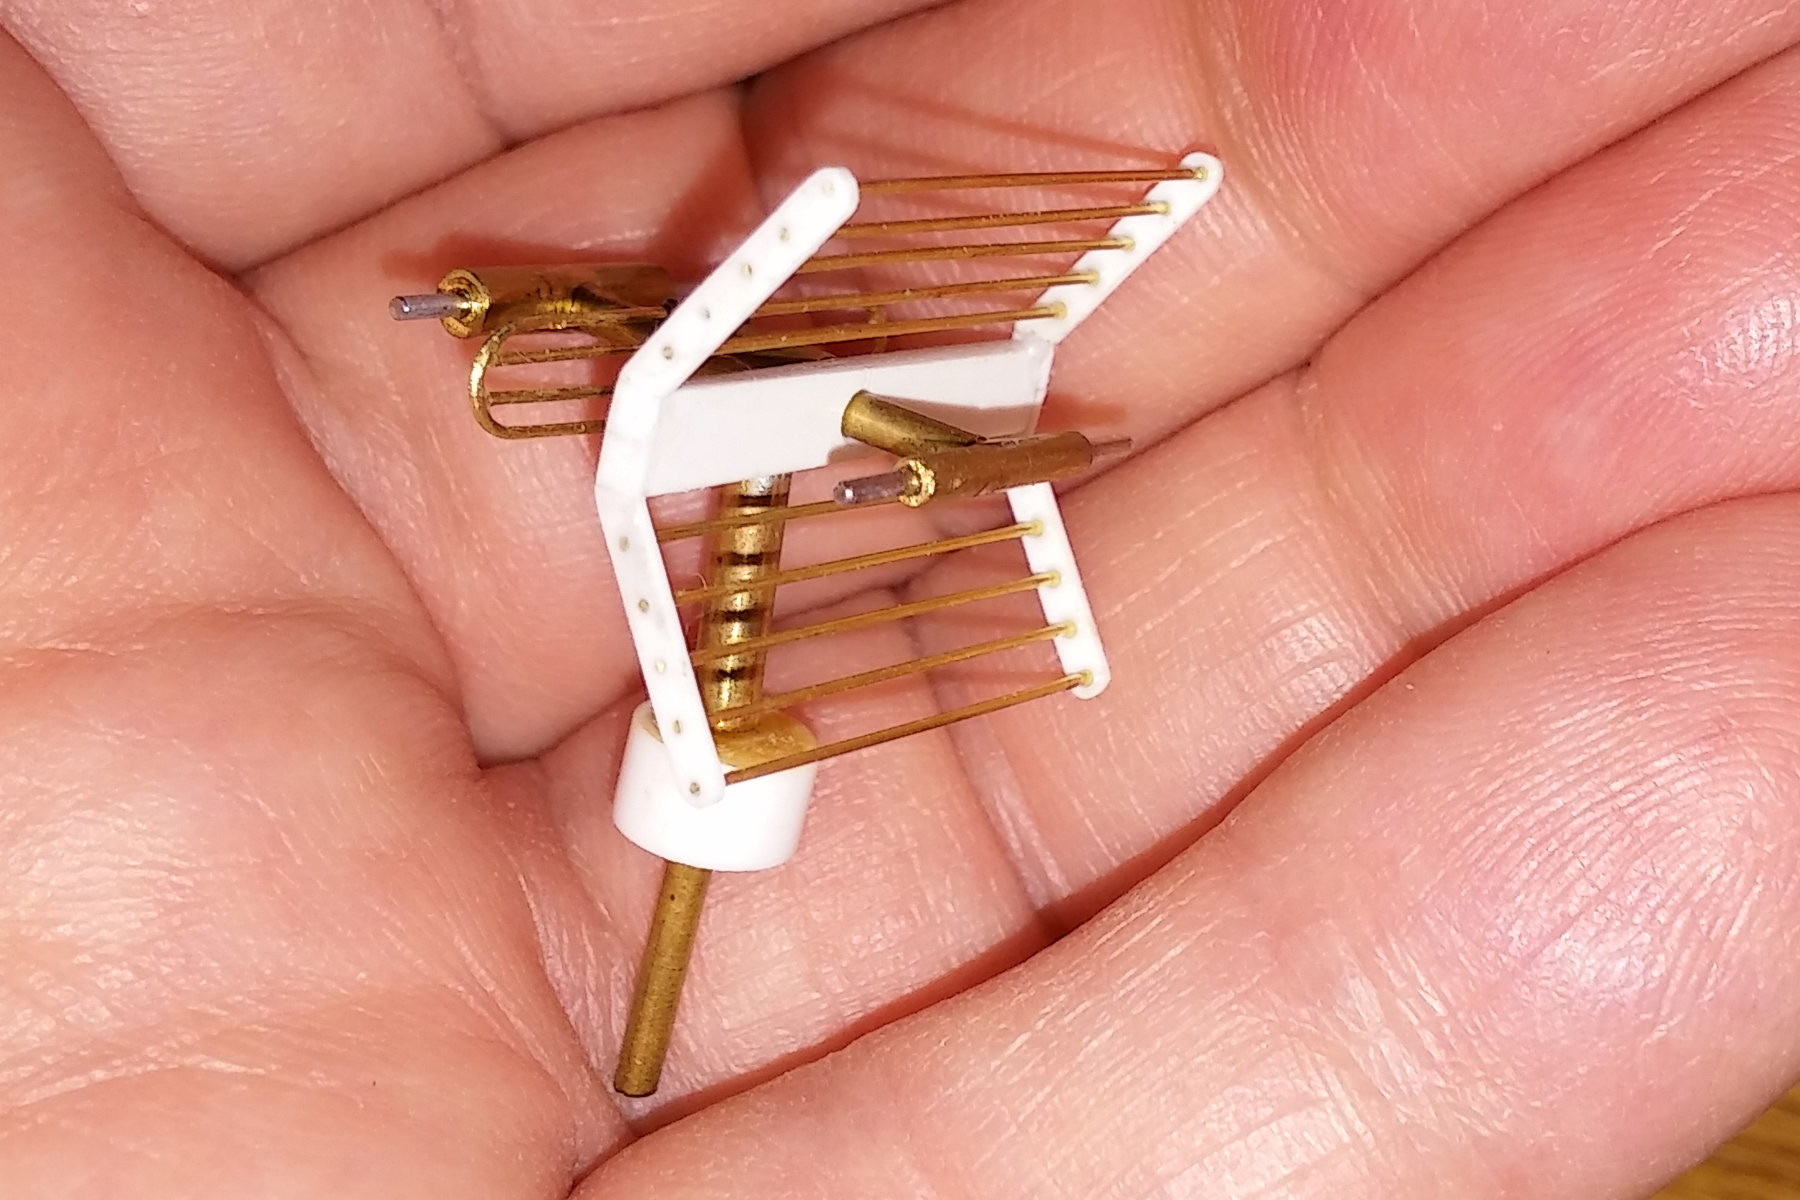
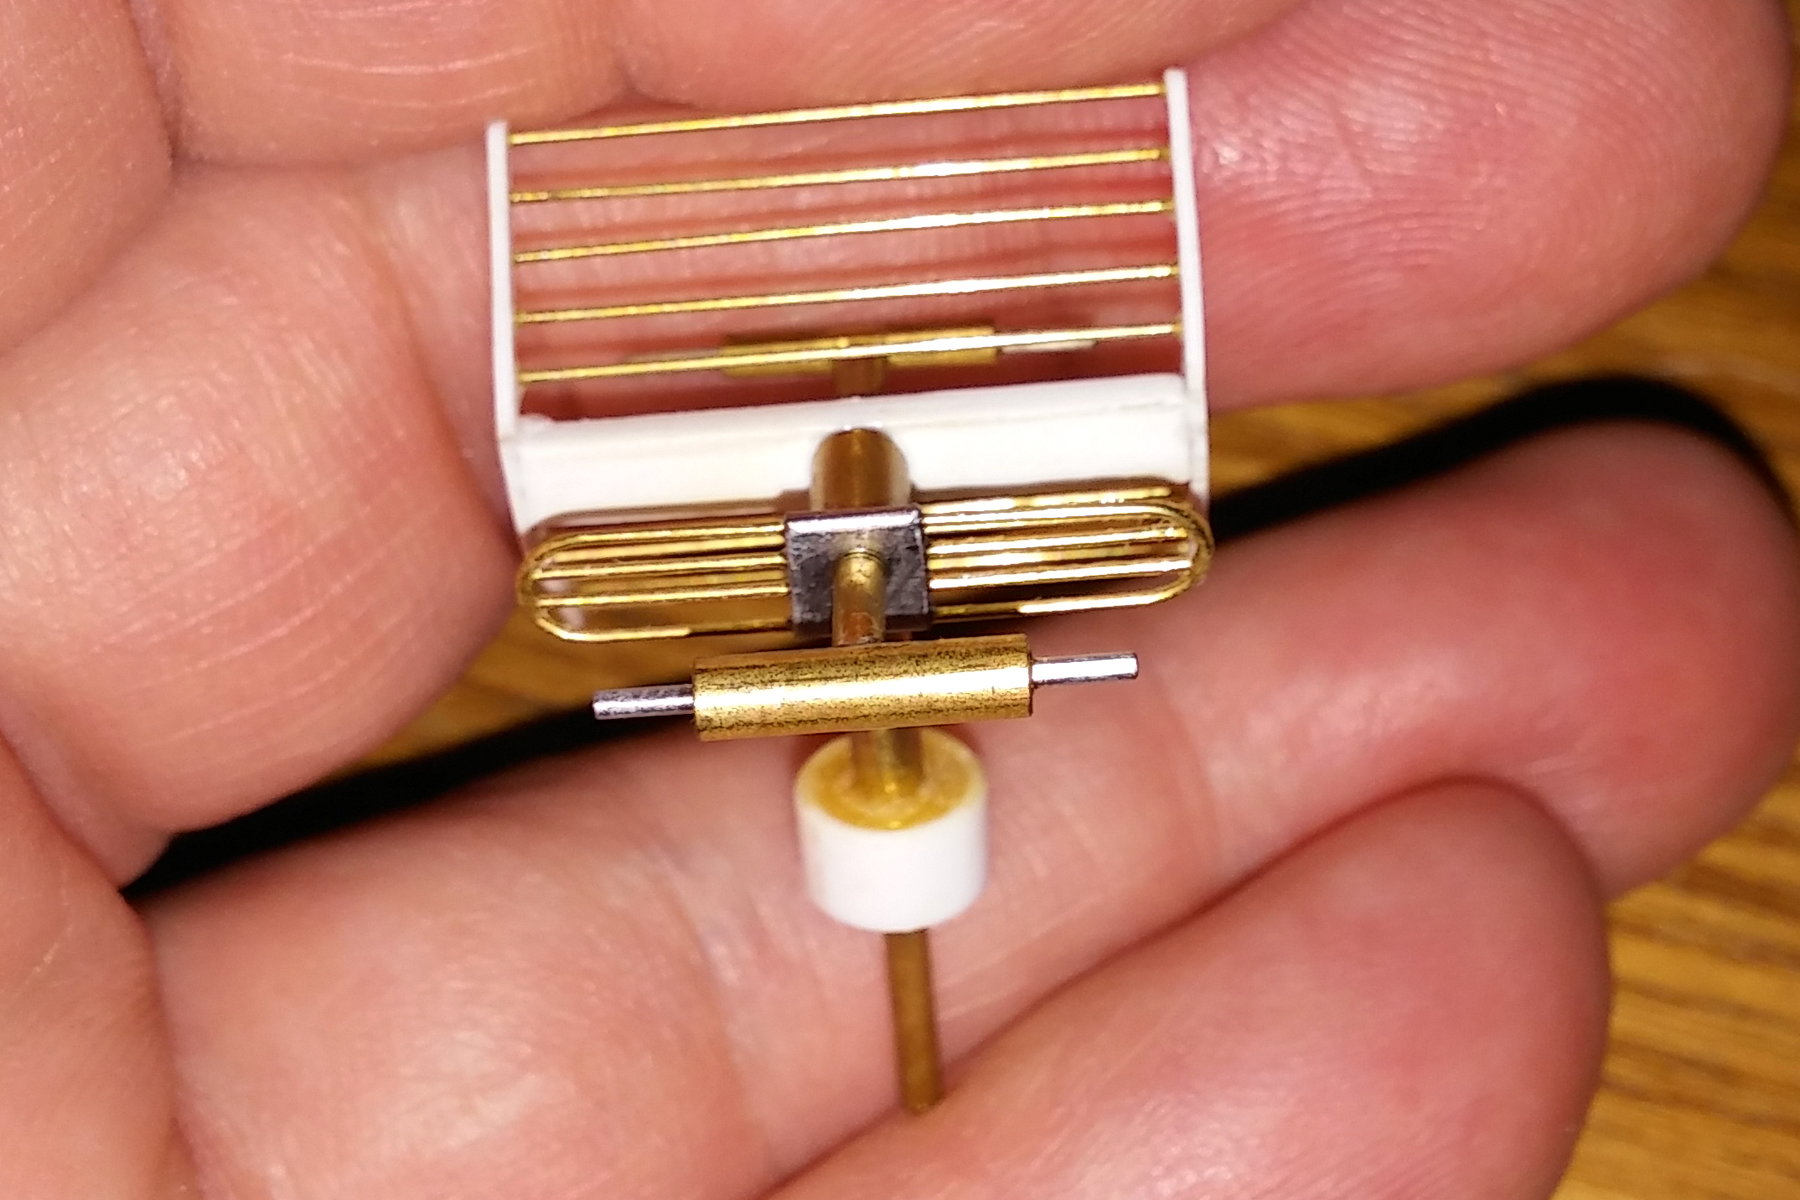
Two images of the lower radar screen.
The ECM Mast for Jerry's USS Kidd after mounting and paint.
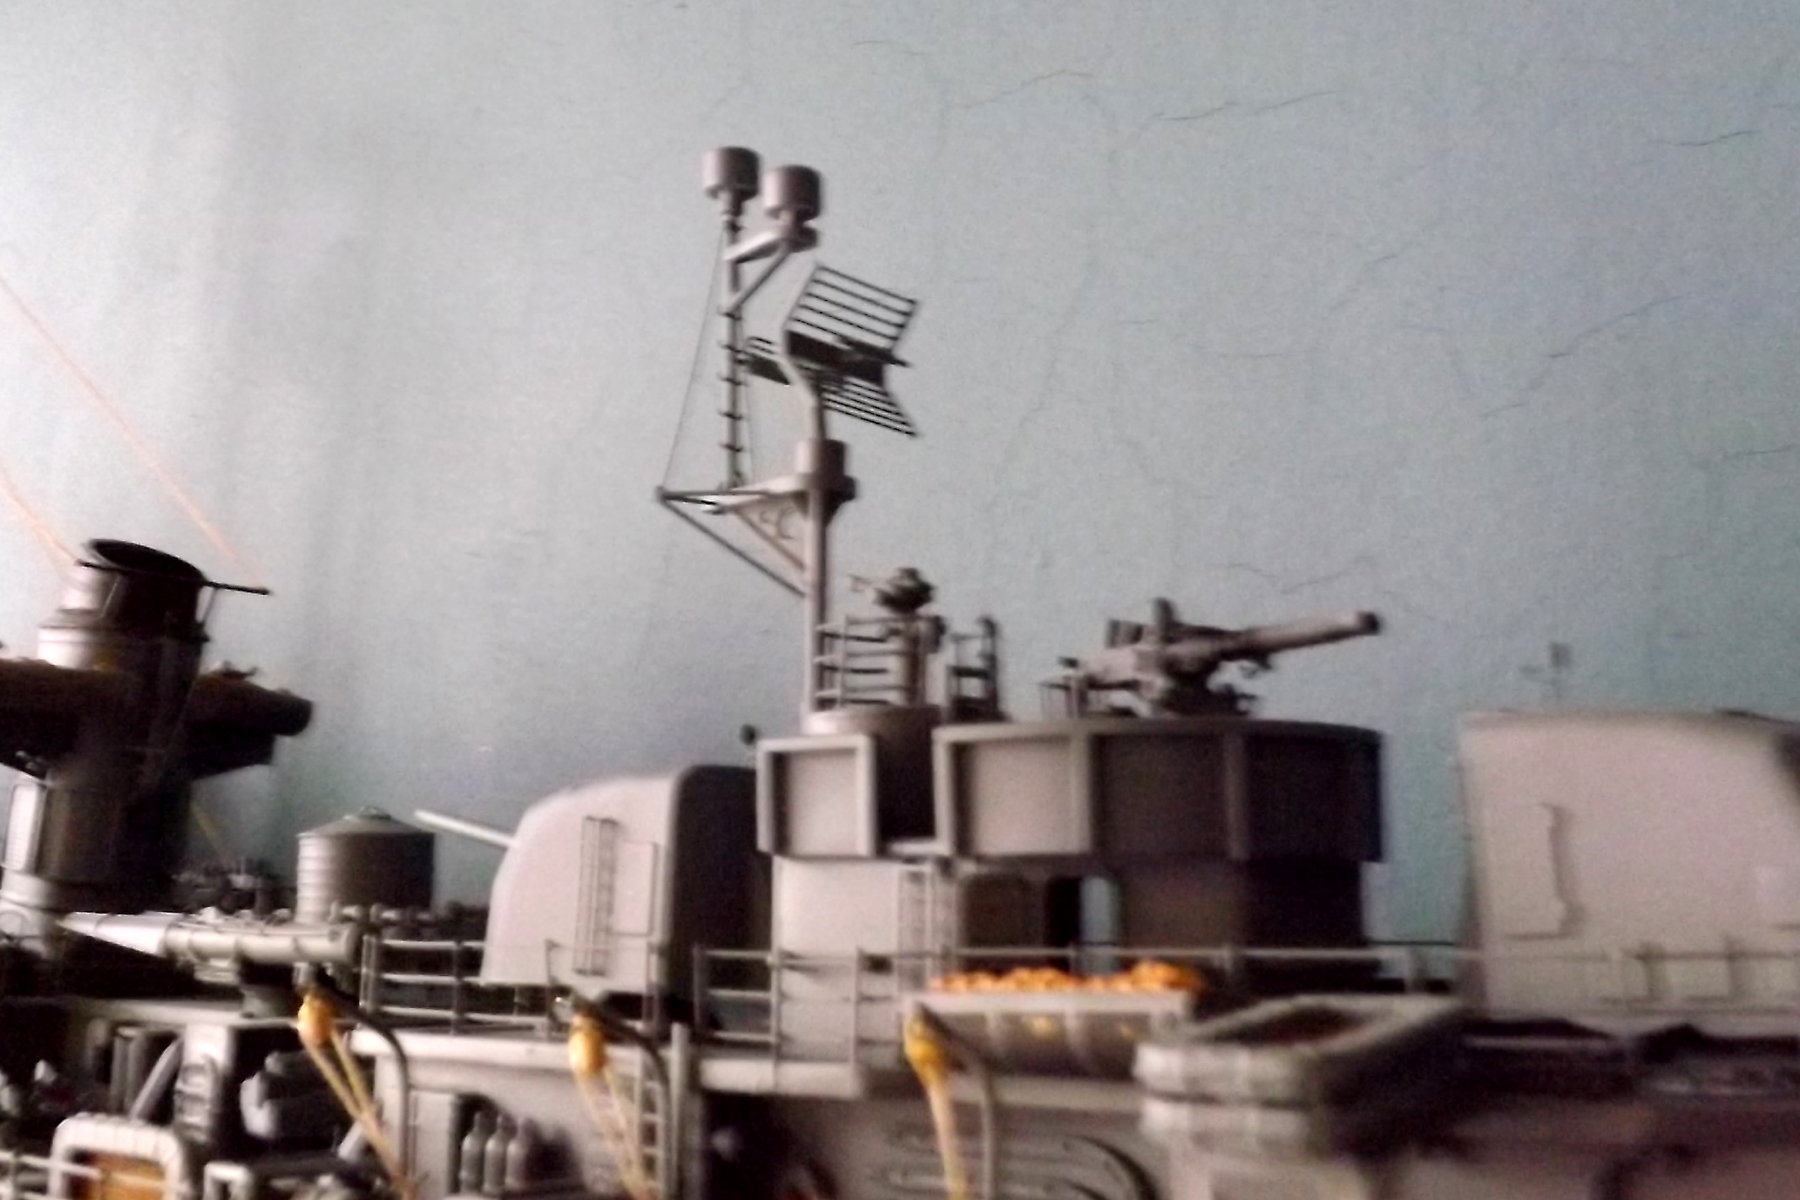
Actual ECM Mast on the USSKIDD (DD-661) Downtown Baton Rouge Louisiana Fletcher-class destroyer Veterans Museum
 08-28-2023, 01:13 PM
#59
Thread Starter
I have one of these Dragon Shermans being shipped to my house as I write this. I could only find it in stock at BNA Hobbies in Australia, but it will be here Tuesday as it's already passed through customs. Since I have a 3D printer, I will be printing all the Spyker upgrade parts on my own. I bought the STL files for like $20 from his site. They are now unsupported by him, but that doesn't matter. I will probably be using scooter motors (same type Loic used from FOA) in mine as the motors he recommends are now out of stock. I'm sure I can find similar units, but I'm not keen on using those window wiper motors personally. I have two of the FOA type scooter motors I can canabalize from my old M113 project. There are free file on like Thingiverse to print timing pulleys to adapt whatever motor I choose to the tank.
08-28-2023, 02:51 PM
#60
Yeah, I've used the scooter motors before and that entire section will get beefed up. Those scooter motors have tons of torque. I'm going to be using the smaller 250W rated motors unlike the 450W ones that are in my very heavy KV-2 paintball tank. I will be using the Spyker setup to mount the sprockets, but not his motors. I simply think they are too small for a large tank. I'd rather have too much power than not enough personally.  I'm printing the final drive mounting setup right now even though I won't get the tank delivered until Thursday. Been watching all the Dragon 1/6th vids I can to ensure I avoid any pitfalls. I won't be using SLA batteries on this build, but I also want the tank to weigh enough to move realistically.
I'll have to catch up on all things 1/6th as it's been a while since I looked for 1/6th vendors. Looks like Panzerwerk is gone and sold, but not back up and running. Of course ECA is alive and kicking with a bunch of stuff. FOA is still FOA not responding to customers continuing their inconsistent service. Also looks like they have discontinued their R/C conversion parts. Other than those I have not looked at any other 1/6th vendors.
Derek
I'm printing the final drive mounting setup right now even though I won't get the tank delivered until Thursday. Been watching all the Dragon 1/6th vids I can to ensure I avoid any pitfalls. I won't be using SLA batteries on this build, but I also want the tank to weigh enough to move realistically. I'll have to catch up on all things 1/6th as it's been a while since I looked for 1/6th vendors. Looks like Panzerwerk is gone and sold, but not back up and running. Of course ECA is alive and kicking with a bunch of stuff. FOA is still FOA not responding to customers continuing their inconsistent service. Also looks like they have discontinued their R/C conversion parts. Other than those I have not looked at any other 1/6th vendors.
Derek
08-28-2023, 05:18 PM
#61
Thread Starter
Armorpax from UK is still up and running, got some good stuff recently although the masks are all sold out but the other parts he will make as needed. You can get some hefty robot motors that are usually planetary gear type that are not as heavy as the scooter motors. But best work with what you are comfortable with. I overheated the ESC on my M4A1 76mm after climbing over all sorts of stuff in the woods, once it cooled down it ran just fine. I'm putting in temperature telemetry, I have the FlySky i6 radio so I can hook up several sensors.
The following users liked this post:
tankme (08-28-2023)
08-28-2023, 07:26 PM
#62
Nick,
the set screws on those pulleys won't last long. I replaced them all with standard M3 socket head screws. But clamping onto the threaded output shafts of the motors is a problem. I filed small flats on the motor shafts which help some. I've changed all the Spyker pulleys over to .25" pitch chain sprockets.
Bob
08-29-2023, 11:12 AM
#63
Hi Tankme,
I made the chain sprockets to fit the Spyker hex shafts. I 3D printed them to get the number of teeth and size I wanted, then CNC machined them in Aluminum. In retrospect - I think 3D printed in ASA, PETG, ABS, Nylon or CF reinforced Nylon - would be fine vs machined Aluminum. The plastic sprockets worked surprisingly well and didn't wear too bad. If you have the Bamboo labs printer (or similar) you can print some nice chain sprockets in engineering grade materials (Nylon, CF reinforced).
I used 1/4" pitch chain (.25) but 3/8".(.38) would be better (easier to connect). The links on the .25 are a bit small, but power transmission is good even with this small pitch chain. Mcmaster has quick connect links for the chain to make connection/disconnection easy. I also made the chain sprocket to fit the motor in same manner - although you might be able to find OTS sprocket for this. Another nice benefit from Mcmaster is you can download the CAD (STEP) model of the sprockets and customize it to fit your needs. It is also possible to make a hex shaft to circular adapter to use OTS steel chain sprockets with the hex shaft.
I plan on running the tank on 22V (vs 12V) to see what happens (hopefully more climbing power). Long term plan is to replace the seat motors with larger/heavier duty motors purchased from Robot Market Place. The floor/hull would need to be reinforced as you guys have mentioned. I will also add some mechanism to tension the chain vs printed clamp on the motor.
Right now this conversion is behind a couple other tank builds...
Hope this helps.
Bob
08-29-2023, 12:10 PM
#64
Thanks for the info. Only issue with some of those robot motors is price. I found the scooter motors on Ebay for like $45/each. Some of those robot motors are $500/per. I actually found some hex bore sprockets from Andy Mark last night in 25 pitch. I just have to dig out my motors to see which sprocket bore type I need for my gearmotors to swap them over to 25 pitch. I will also be running the tank at 6S (22.2V). Typically I'll run two 6S batteries in parallel to ensure there is enough current draw. On my KV-2 paintball tank, I have a main 24V breaker at like 75A that also serves as my on/off switch and each motor has a breaker at like 40 or 50A. Don't remember which as these scooter motors will stall at over 100A. My tank arrived today and man the box was way heavier than I thought it would be. Anyway, sorry to interrupt Nick's thread. I will start my own on my build once I start it.
