1/5 scale K2 black panther tank
 02-13-2024, 06:36 PM
#201

Thread Starter

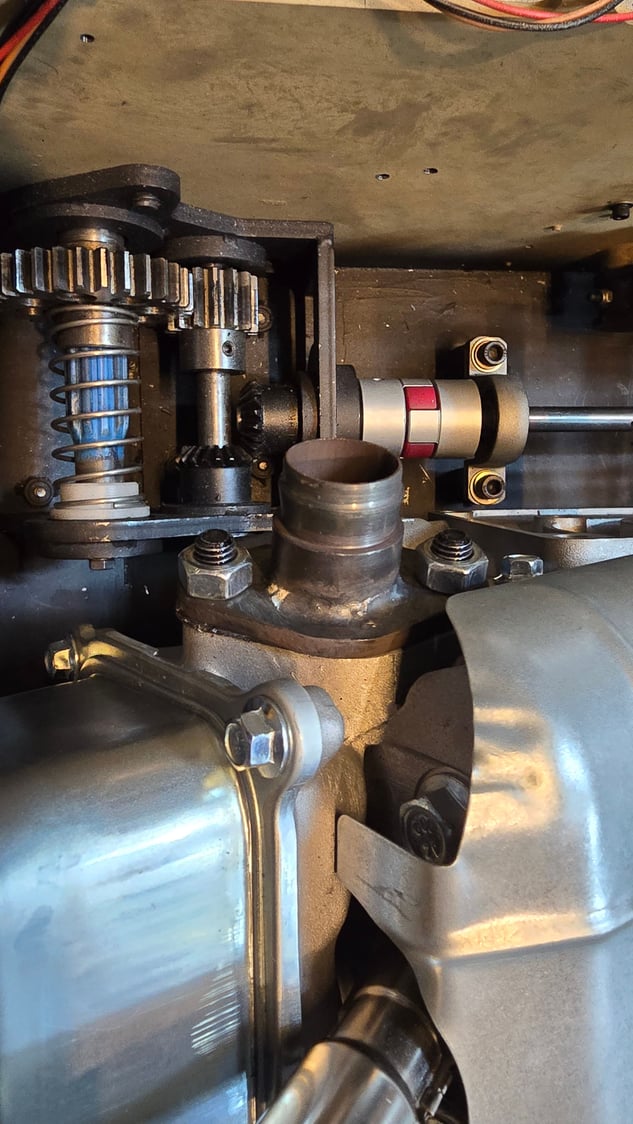
We are manufacturing a menifold that cuts, welds, and deforms the exhaust system attached to the existing engine so that engine vibration is not transmitted to the main body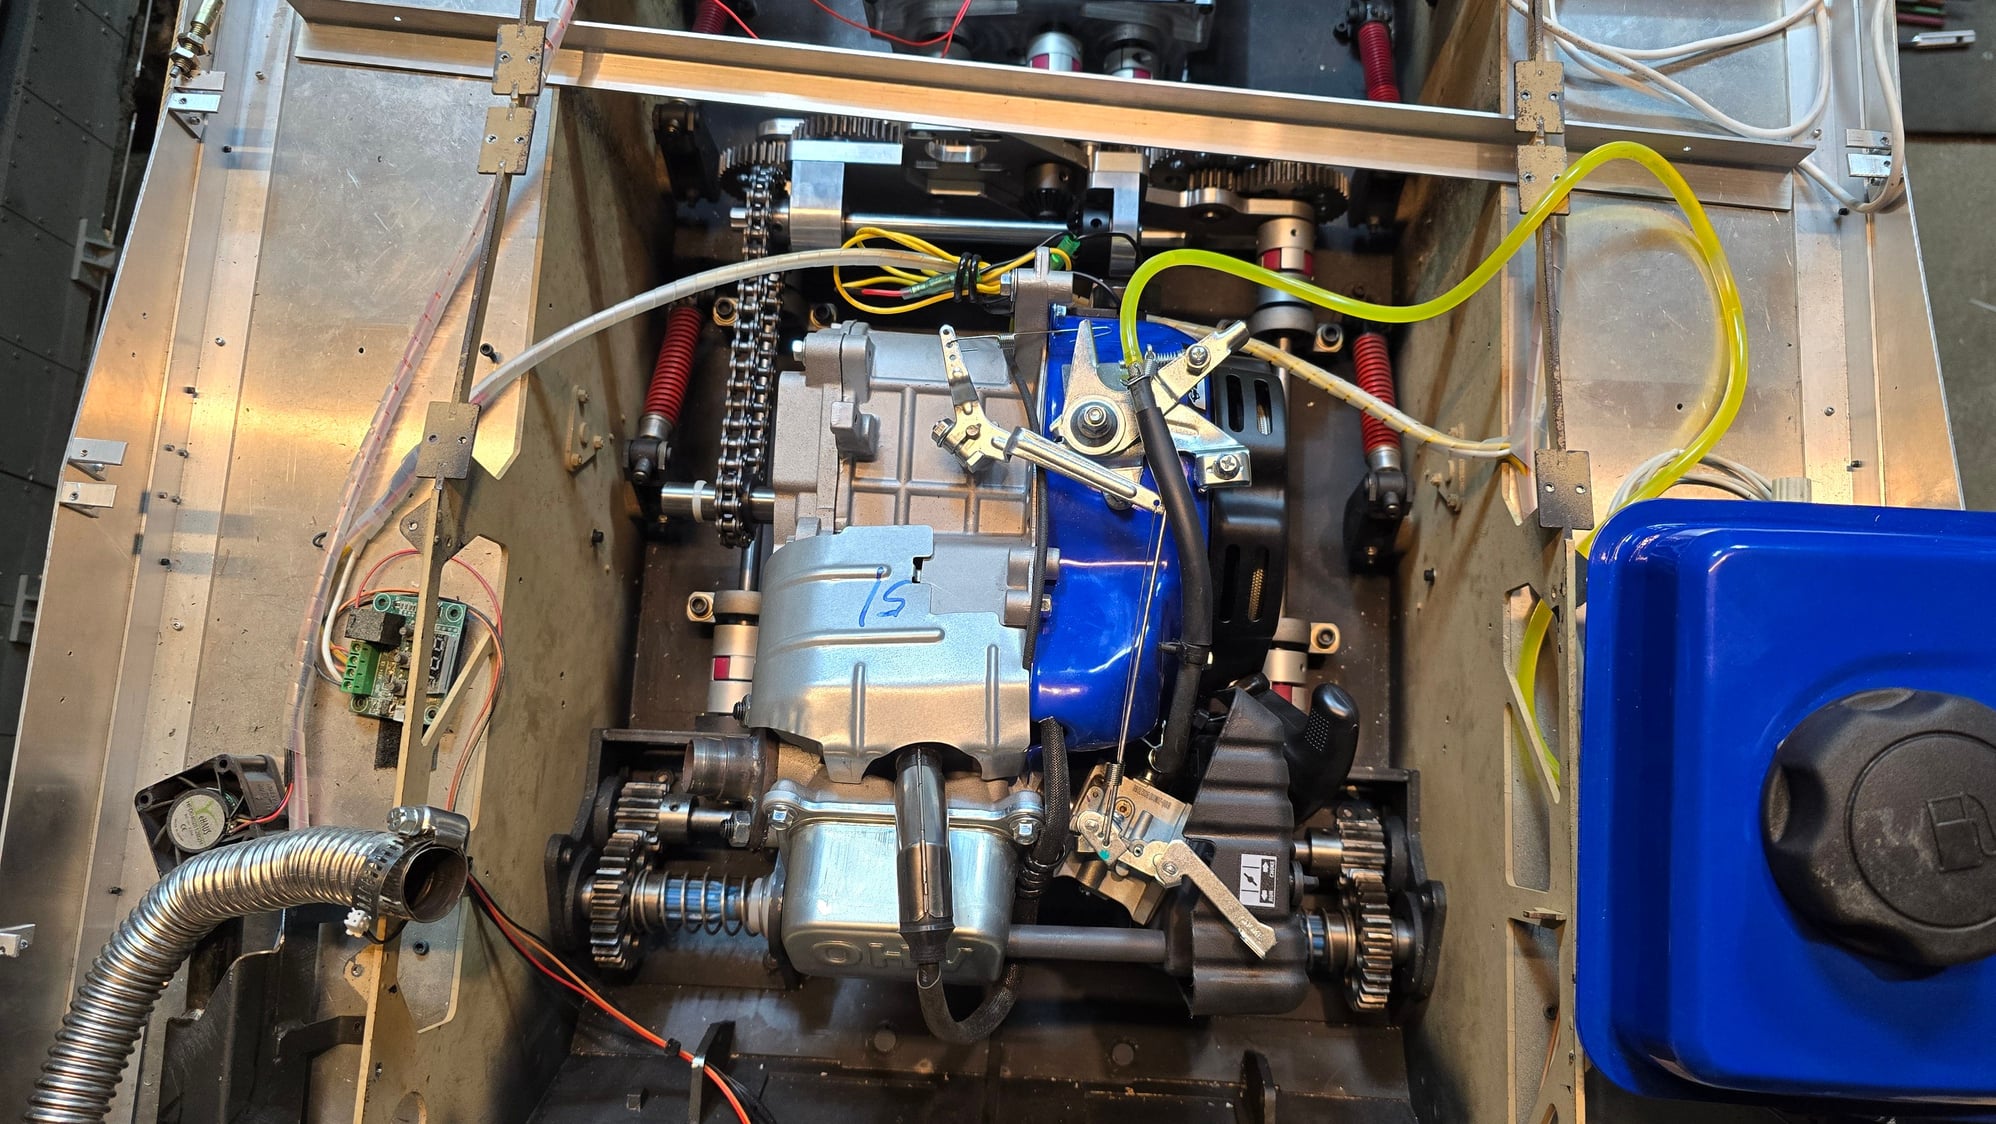

The following users liked this post:
Tanker1966 (03-07-2024)
02-18-2024, 11:03 PM
#204
Thread Starter
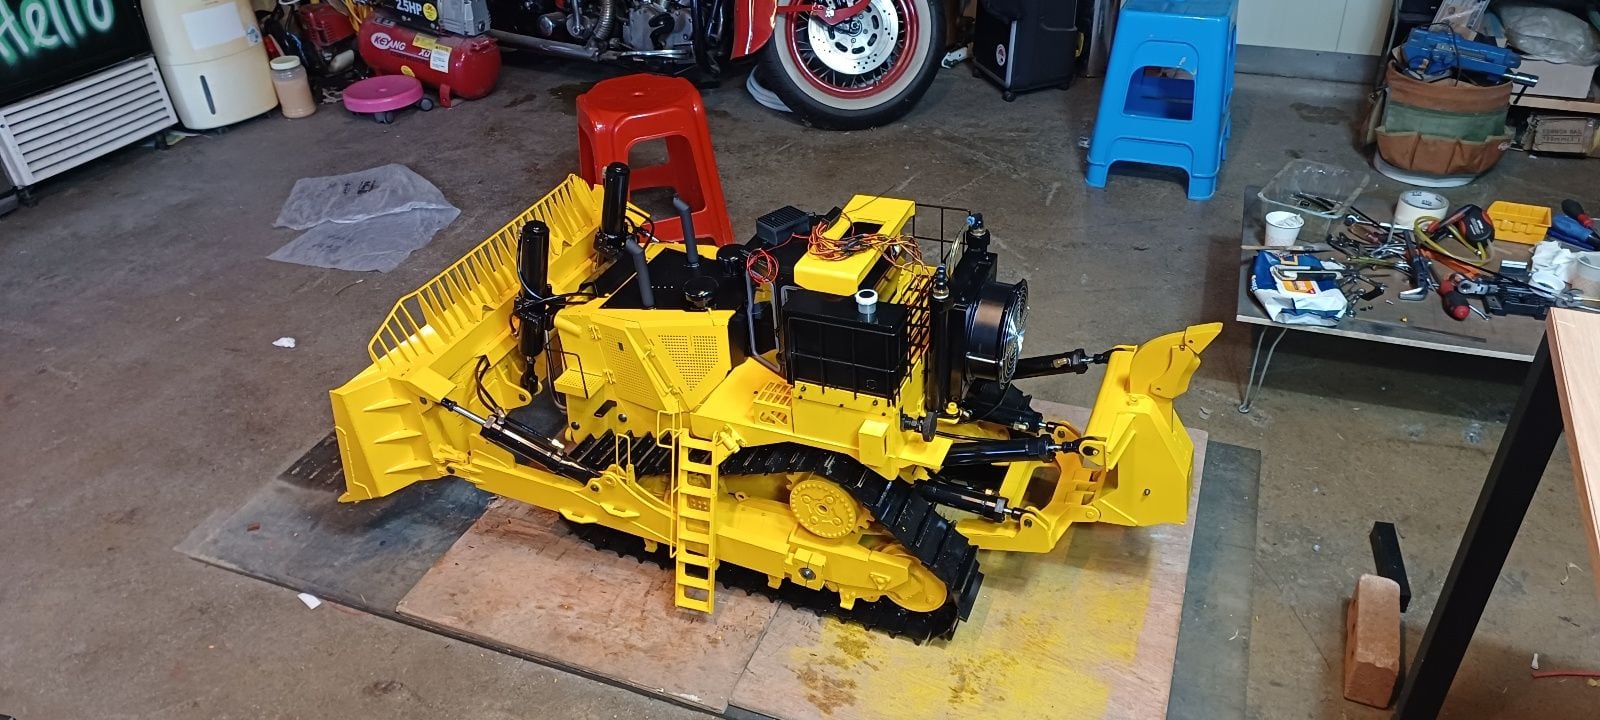
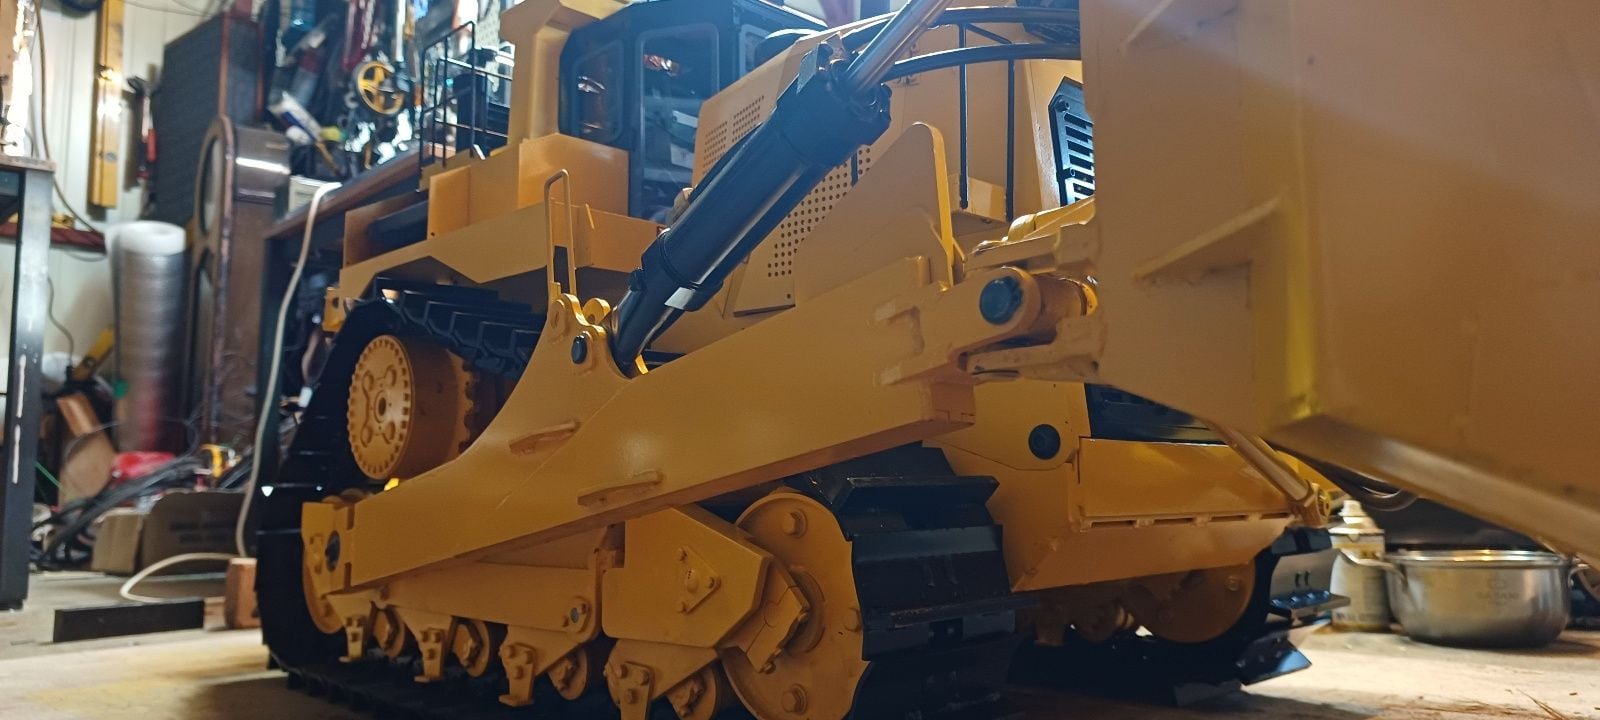
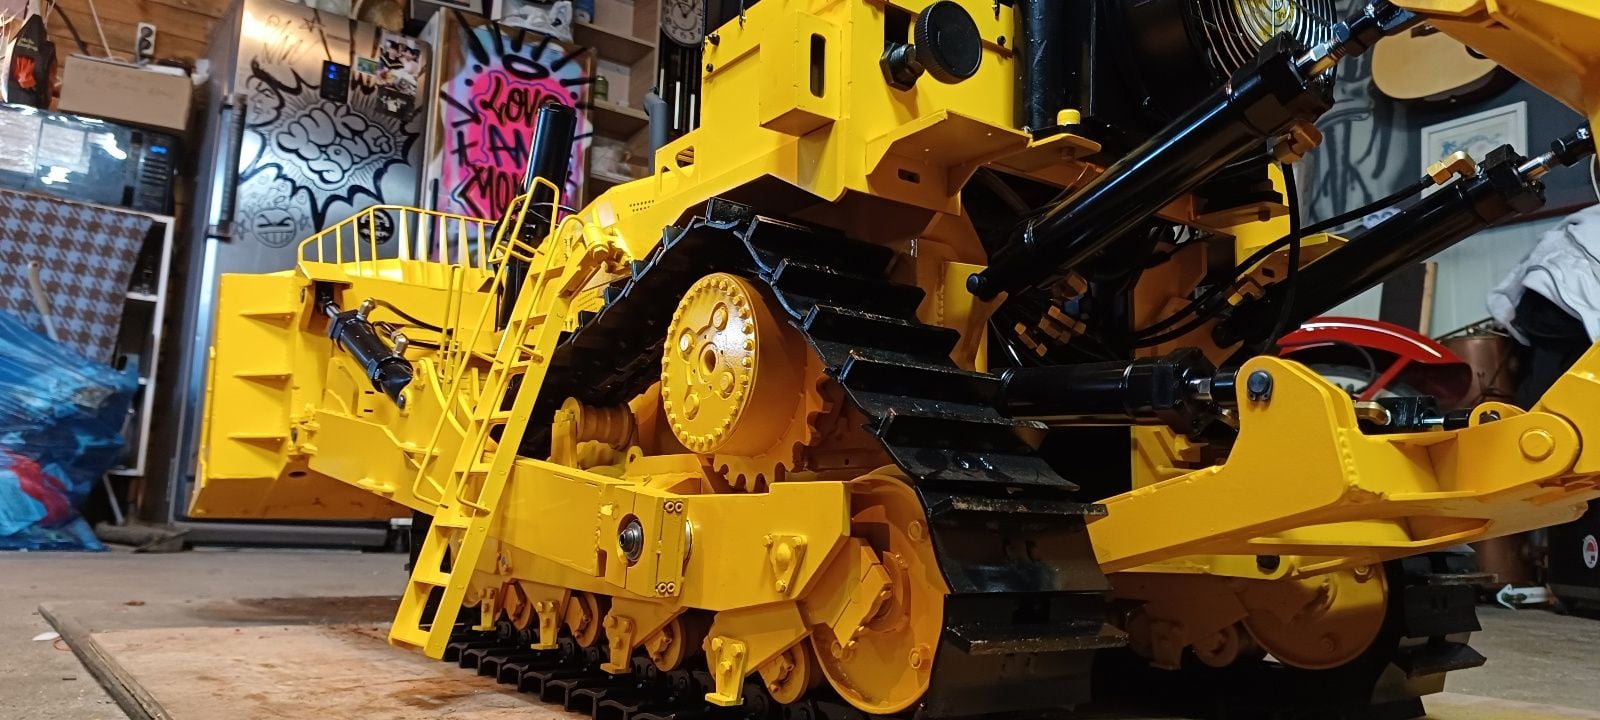
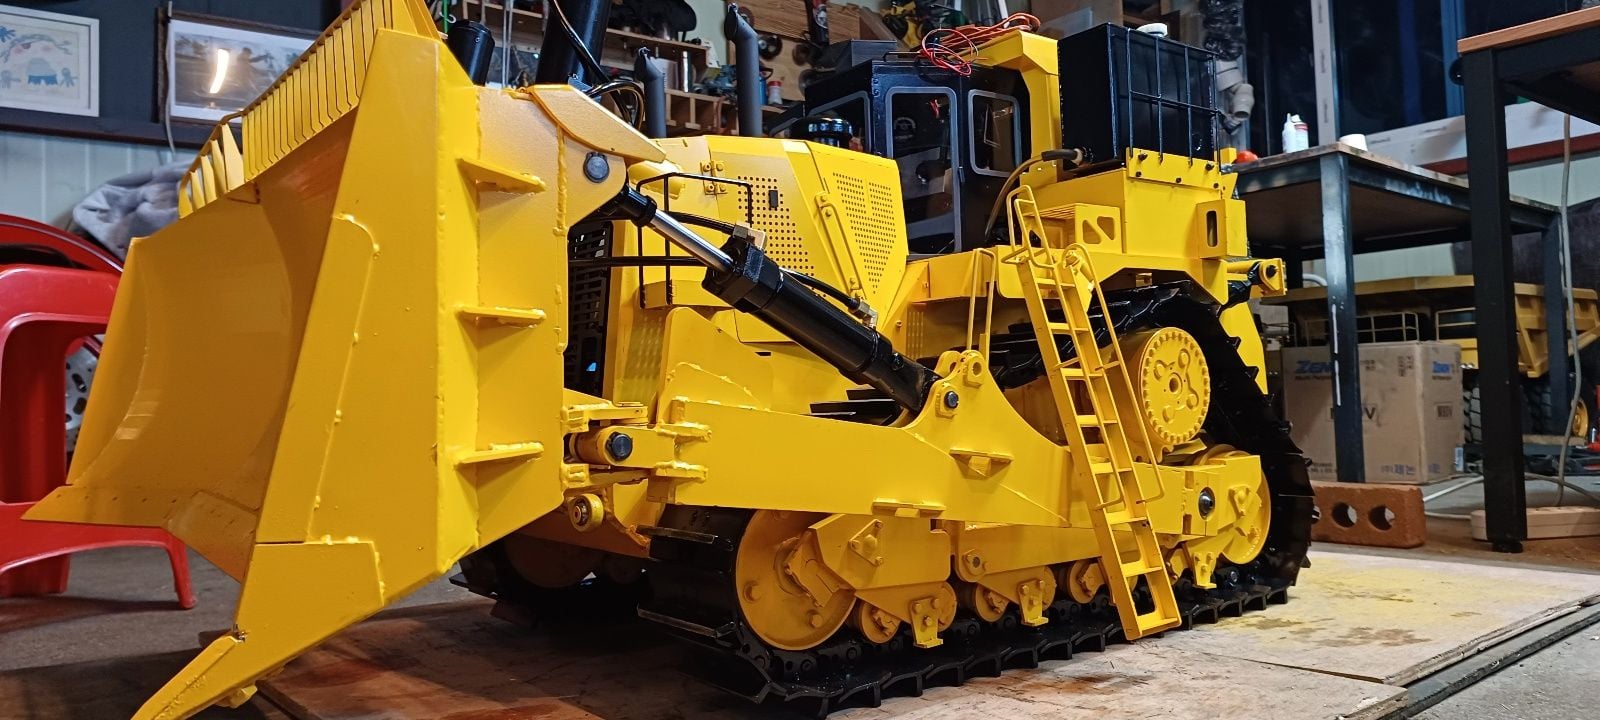
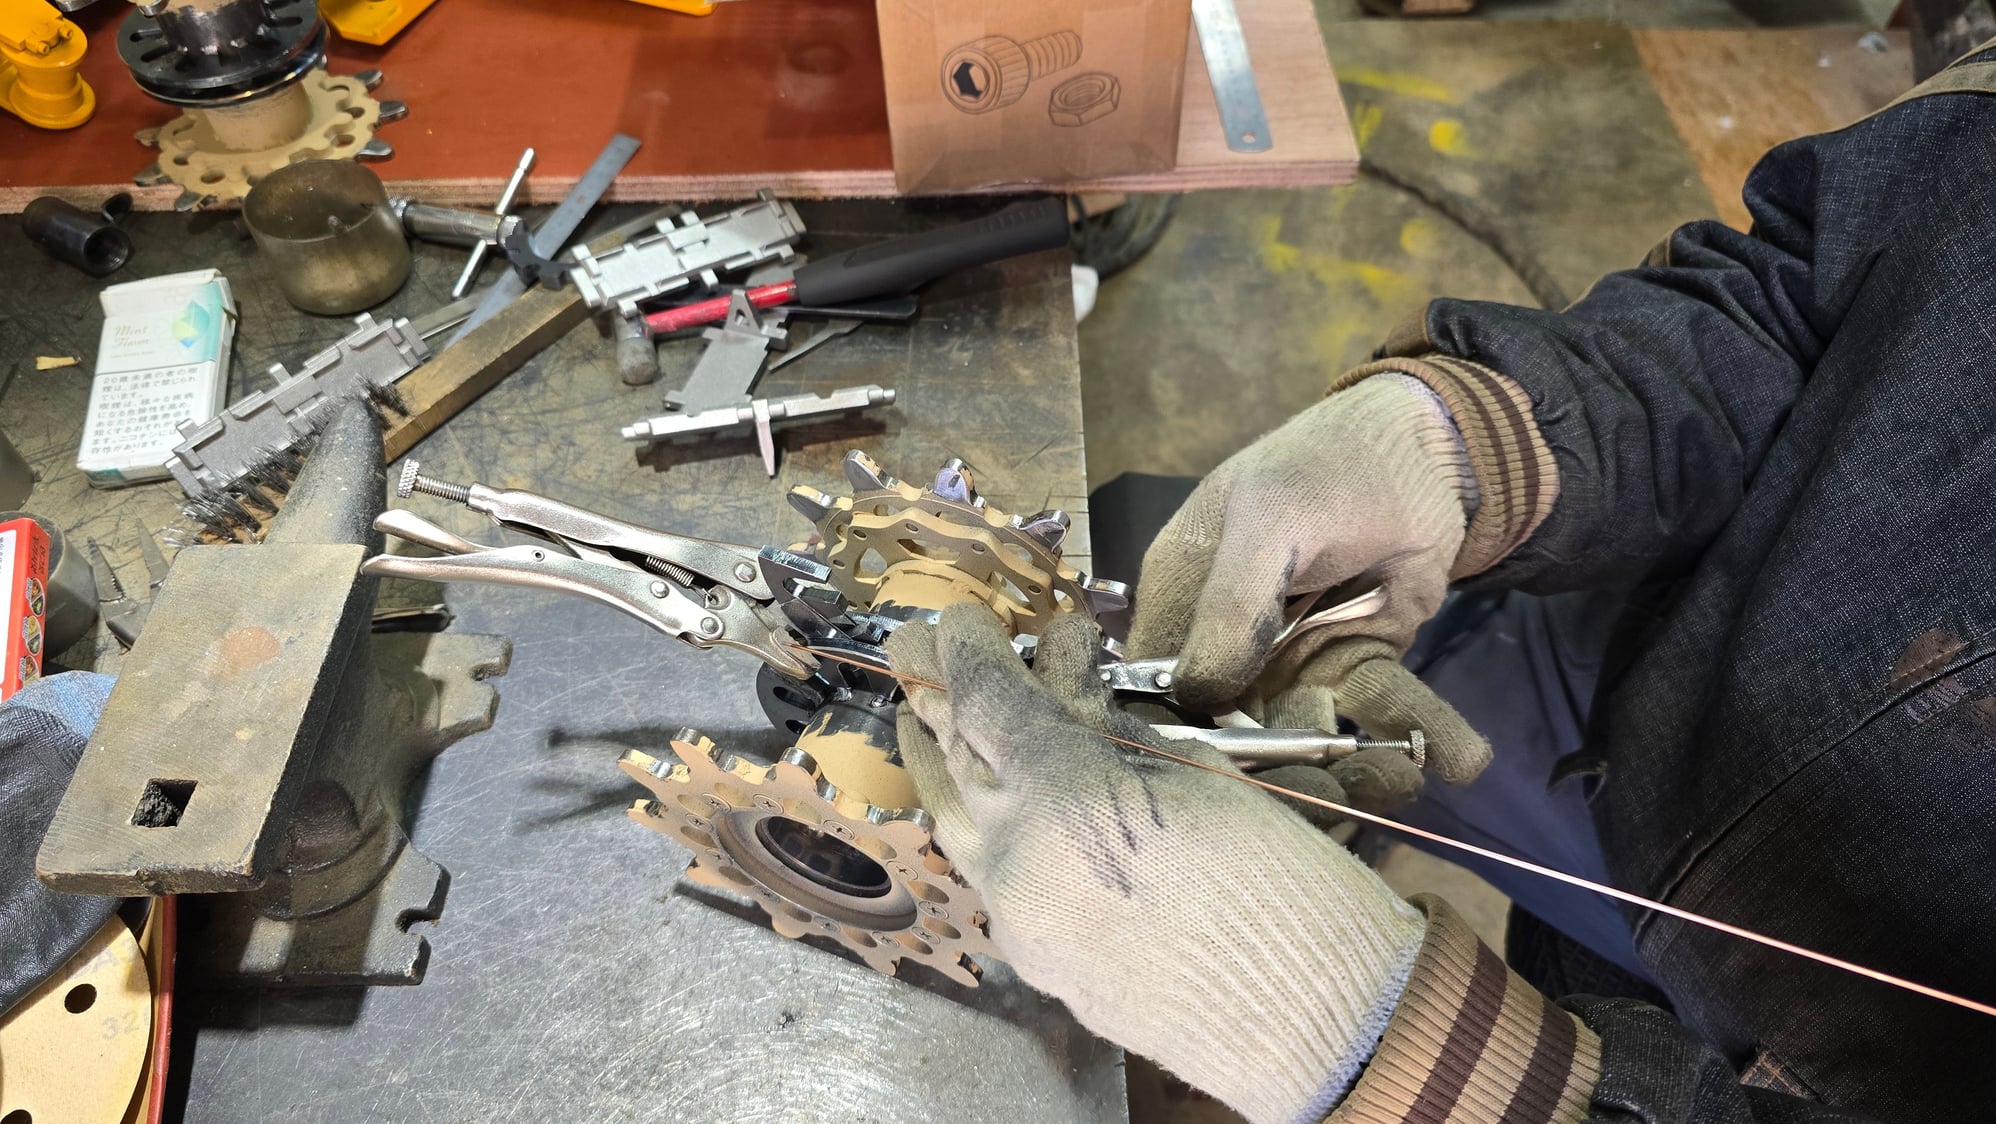
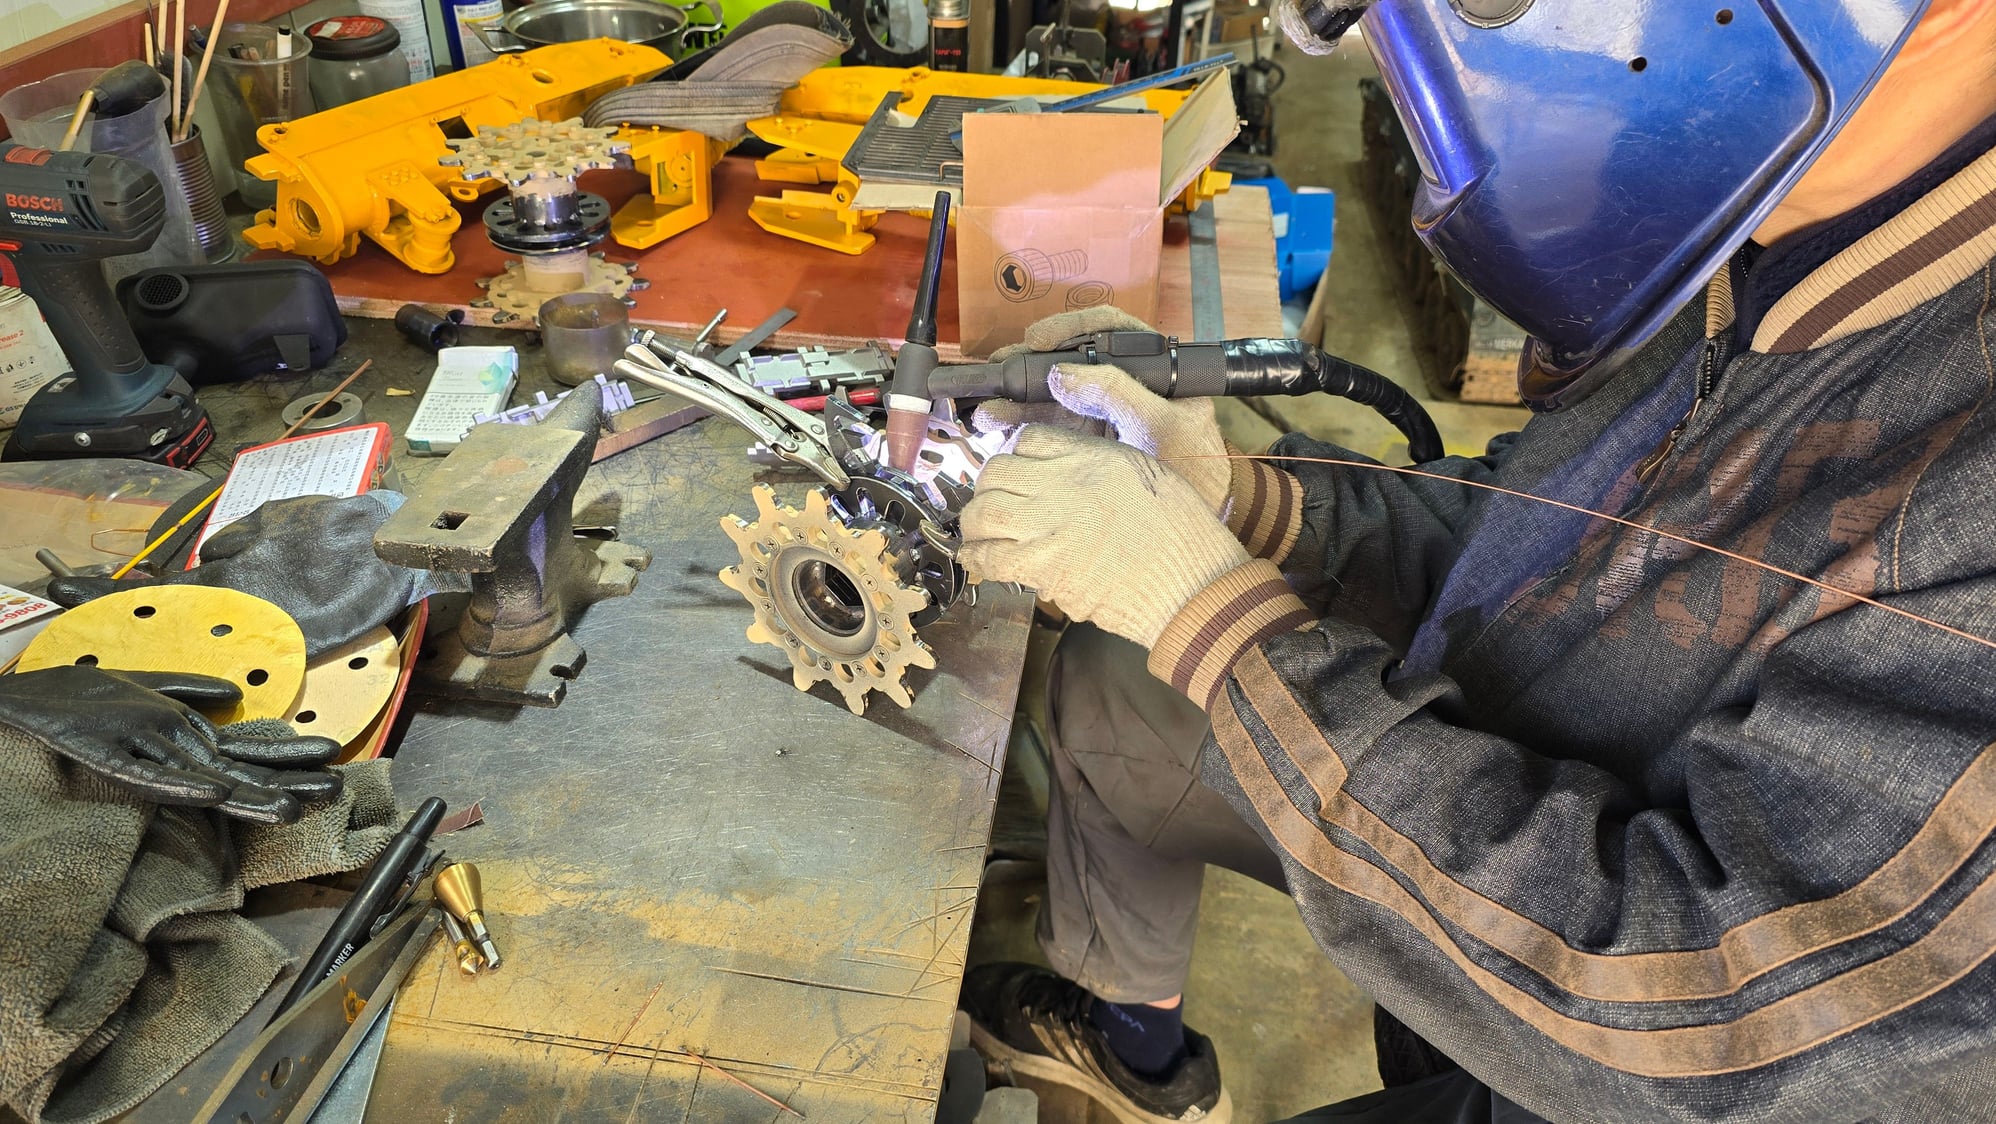
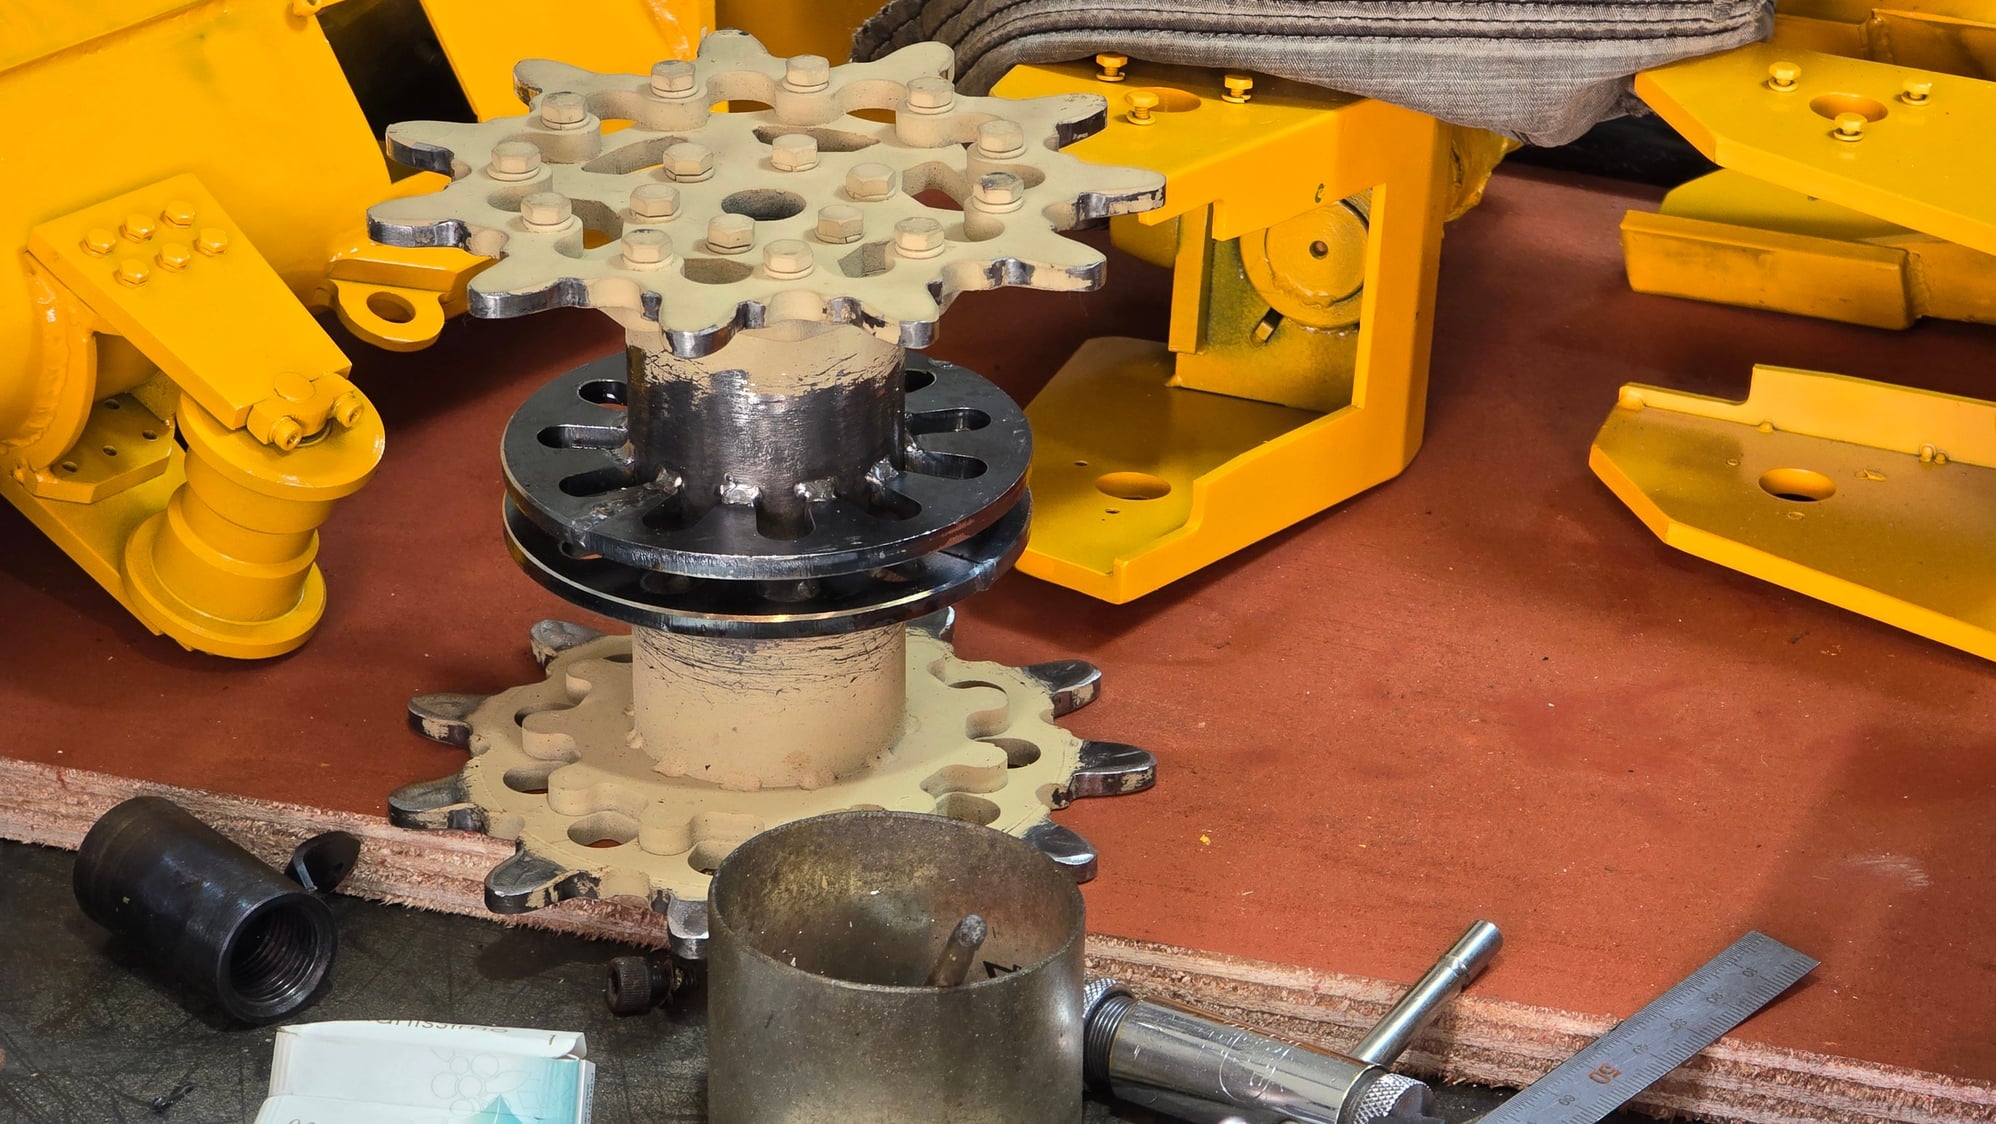
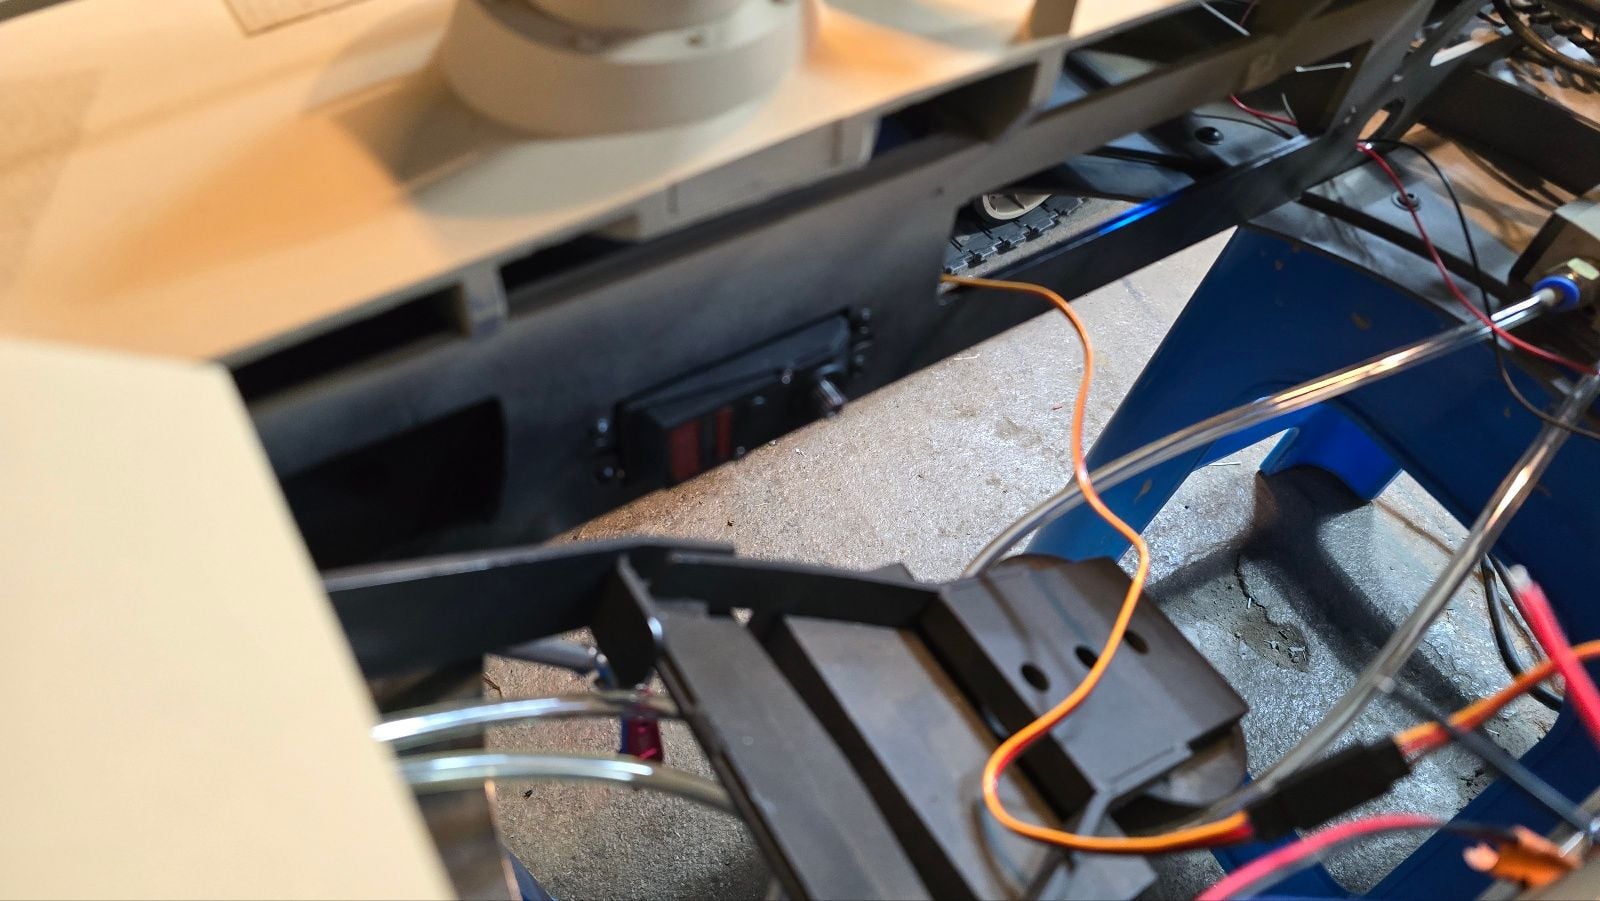
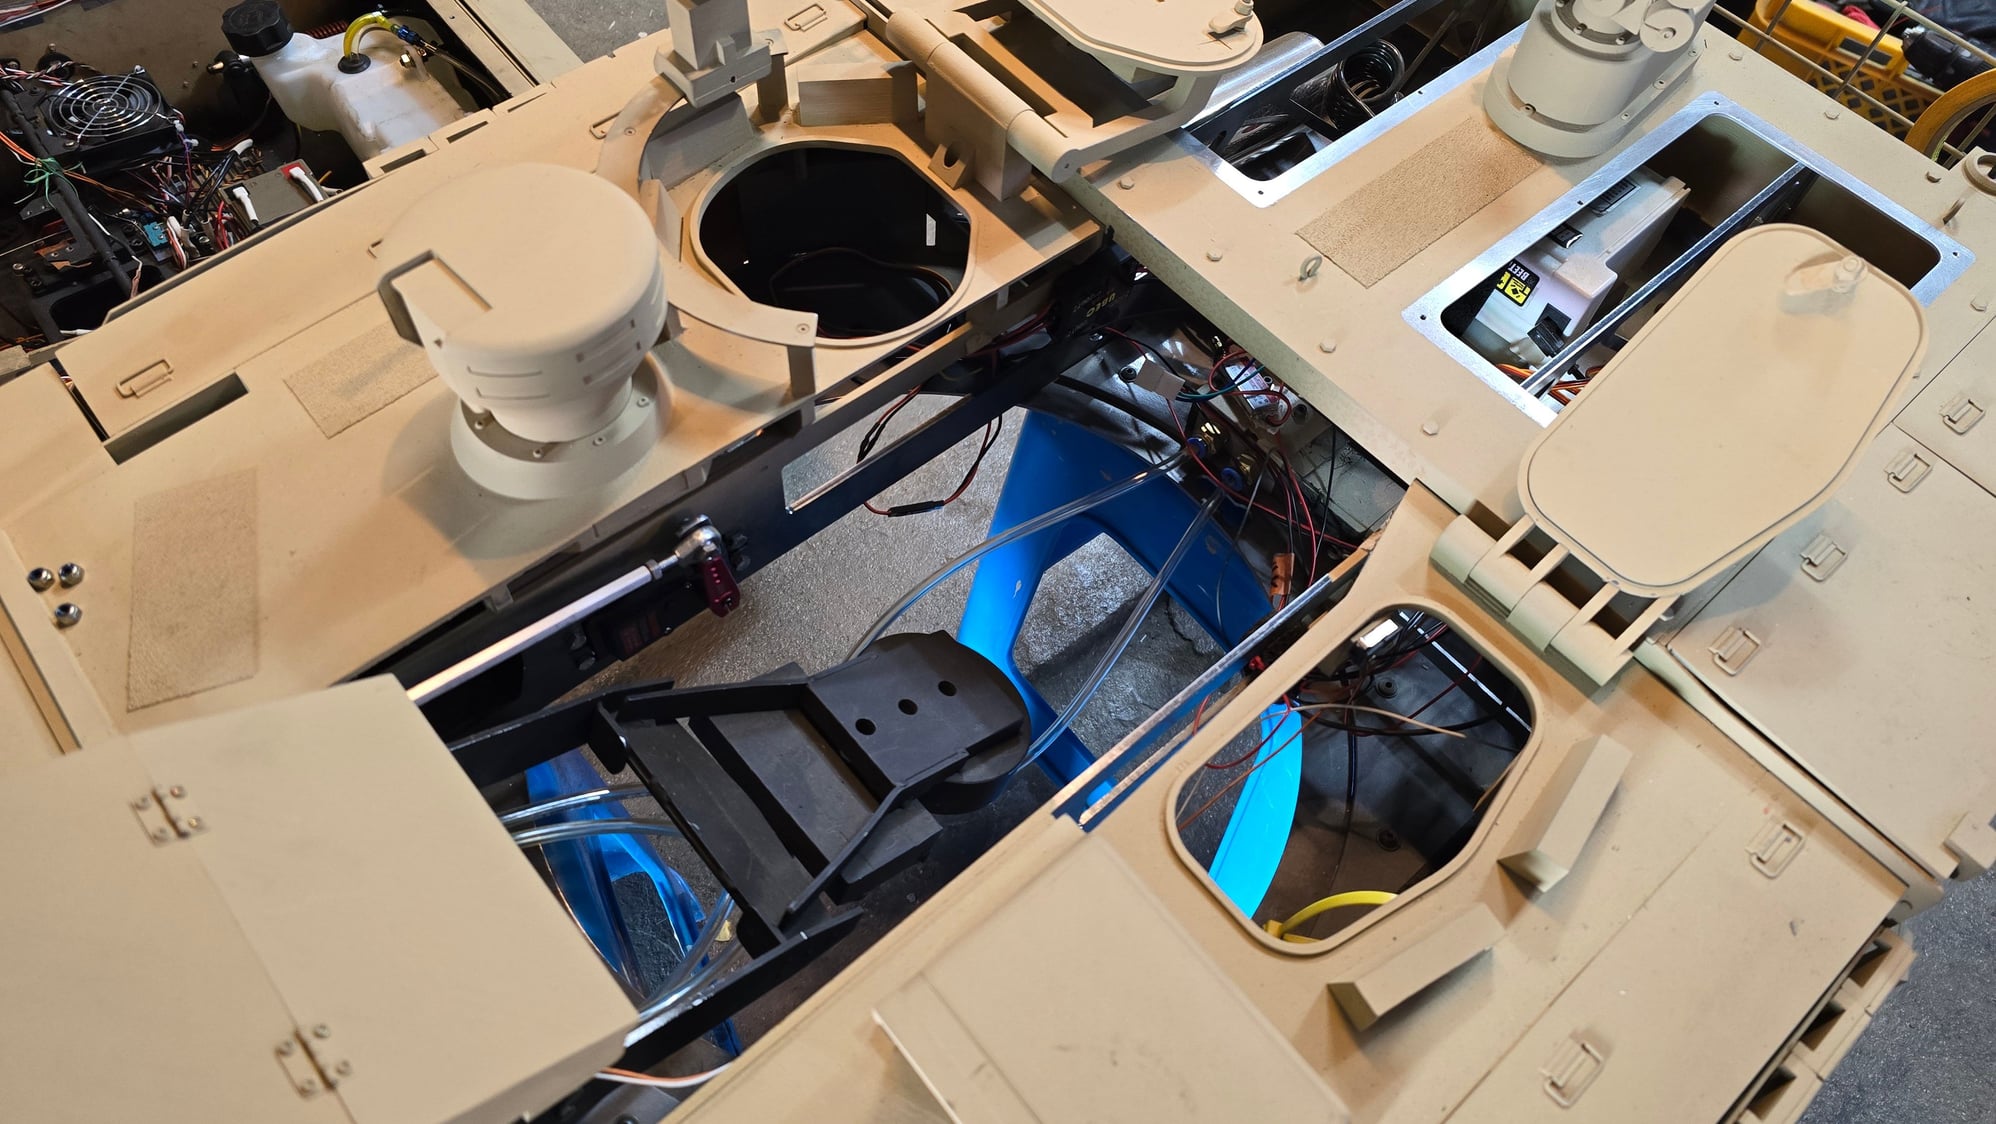
Today, we worked on the track separation prevention device of the driving wheel, the teeth cutting of the driving wheel, and the fuel tank positioned in a new position.
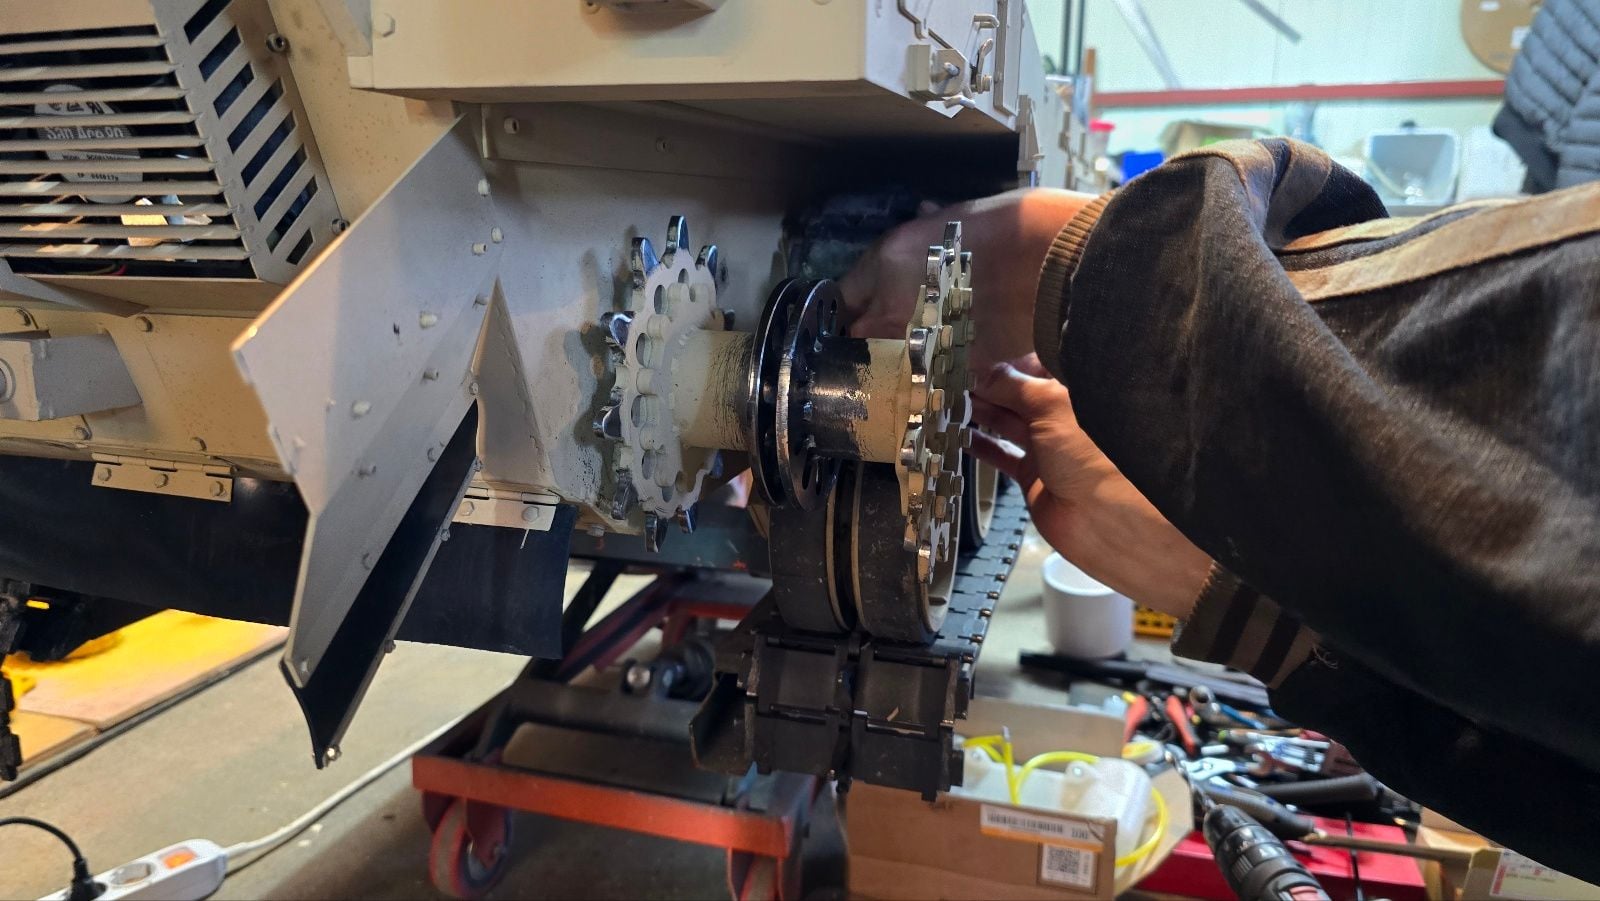
Inspection after installation of track deviation prevention device of drive wheel
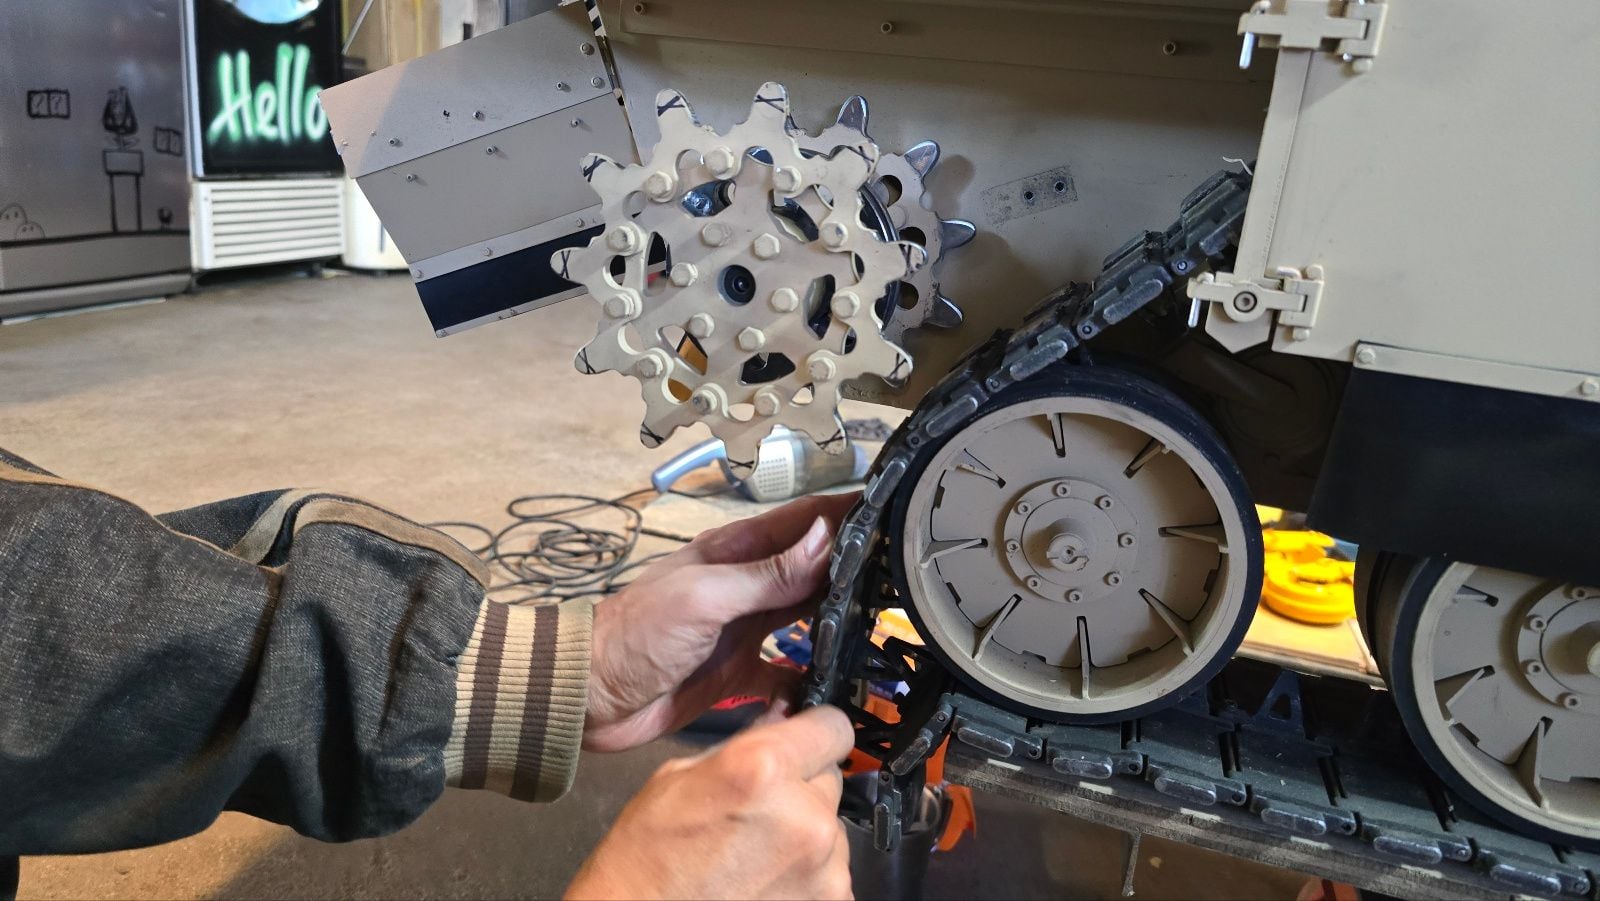
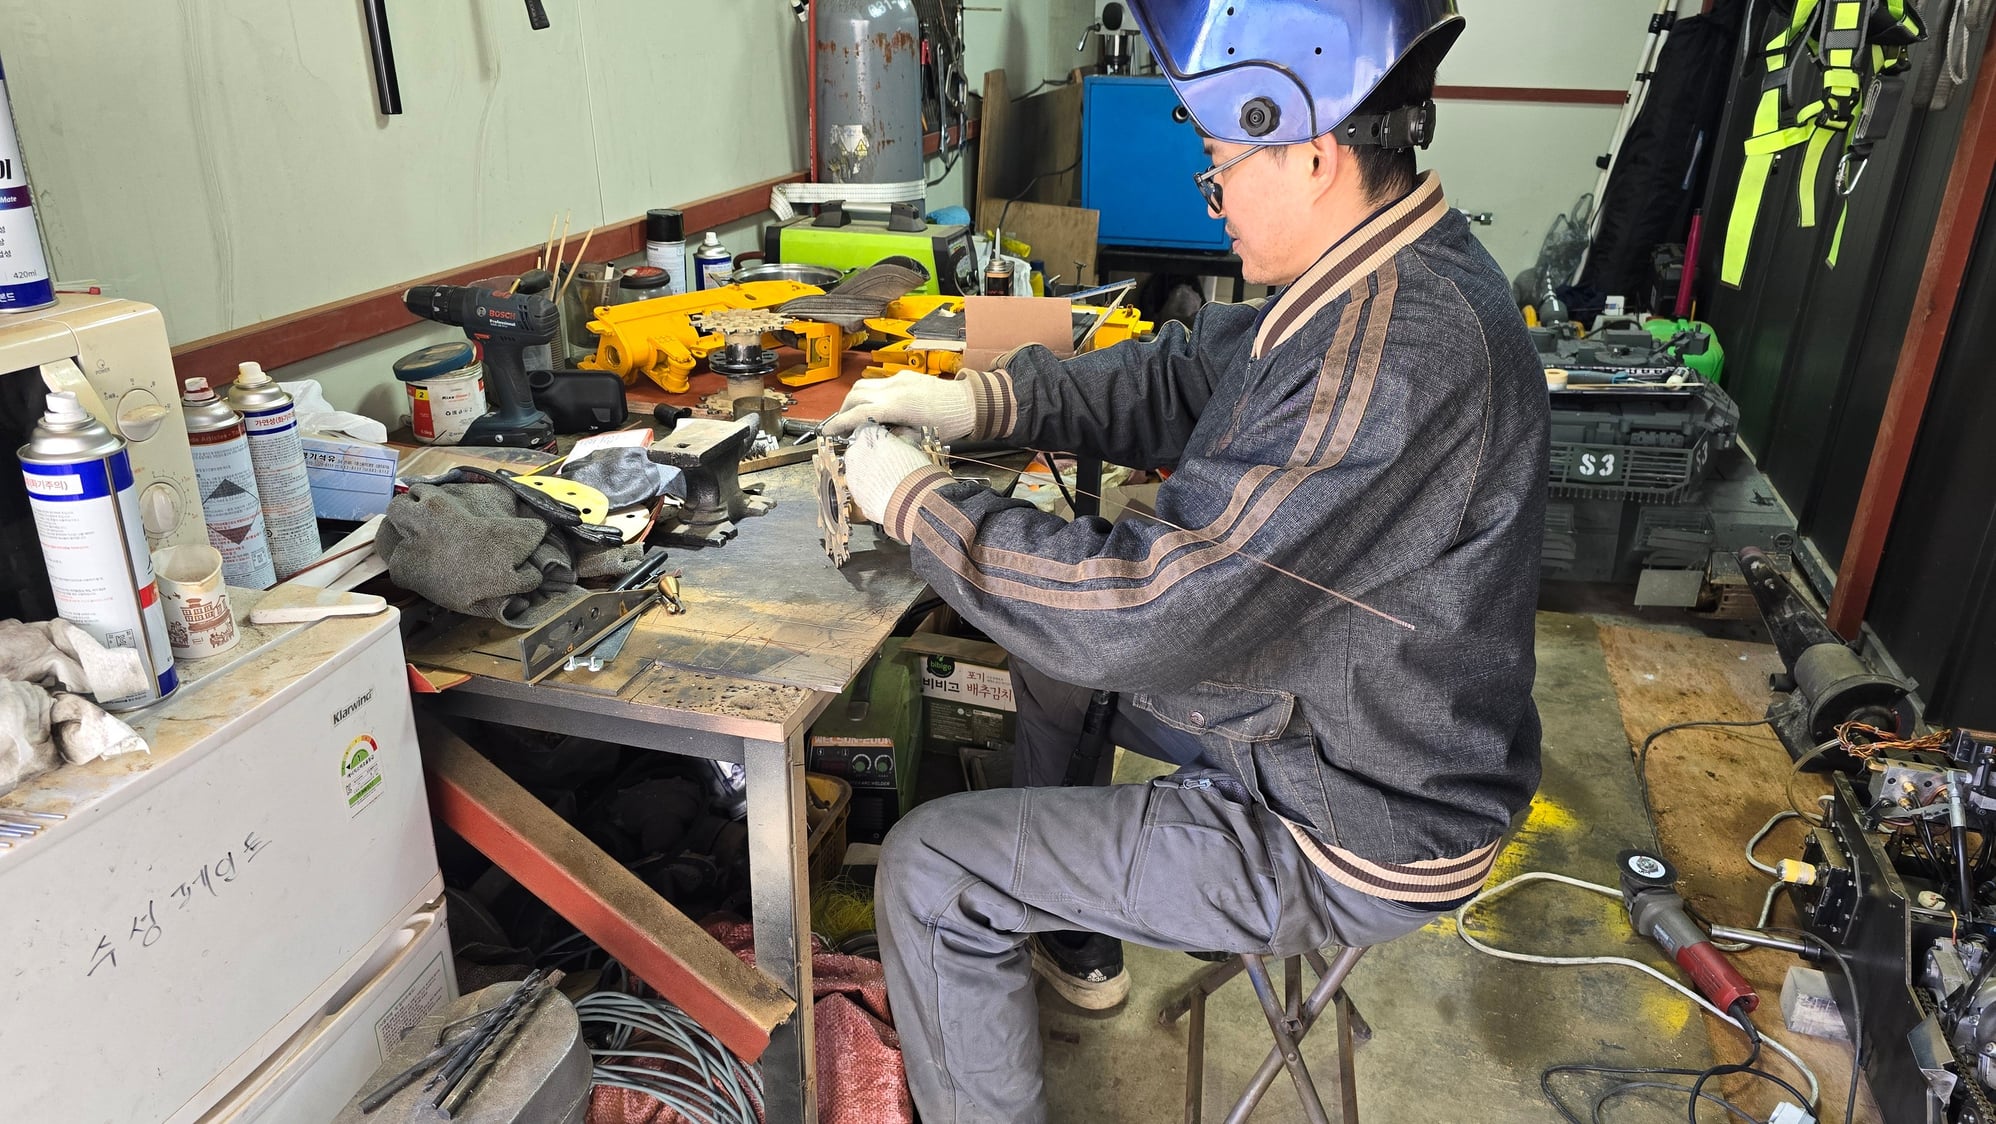
In order to ensure the perfect effect of the track departure prevention device installed in the middle of the driving wheel, a cutting was performed to cut off some of the teeth of the driving wheel
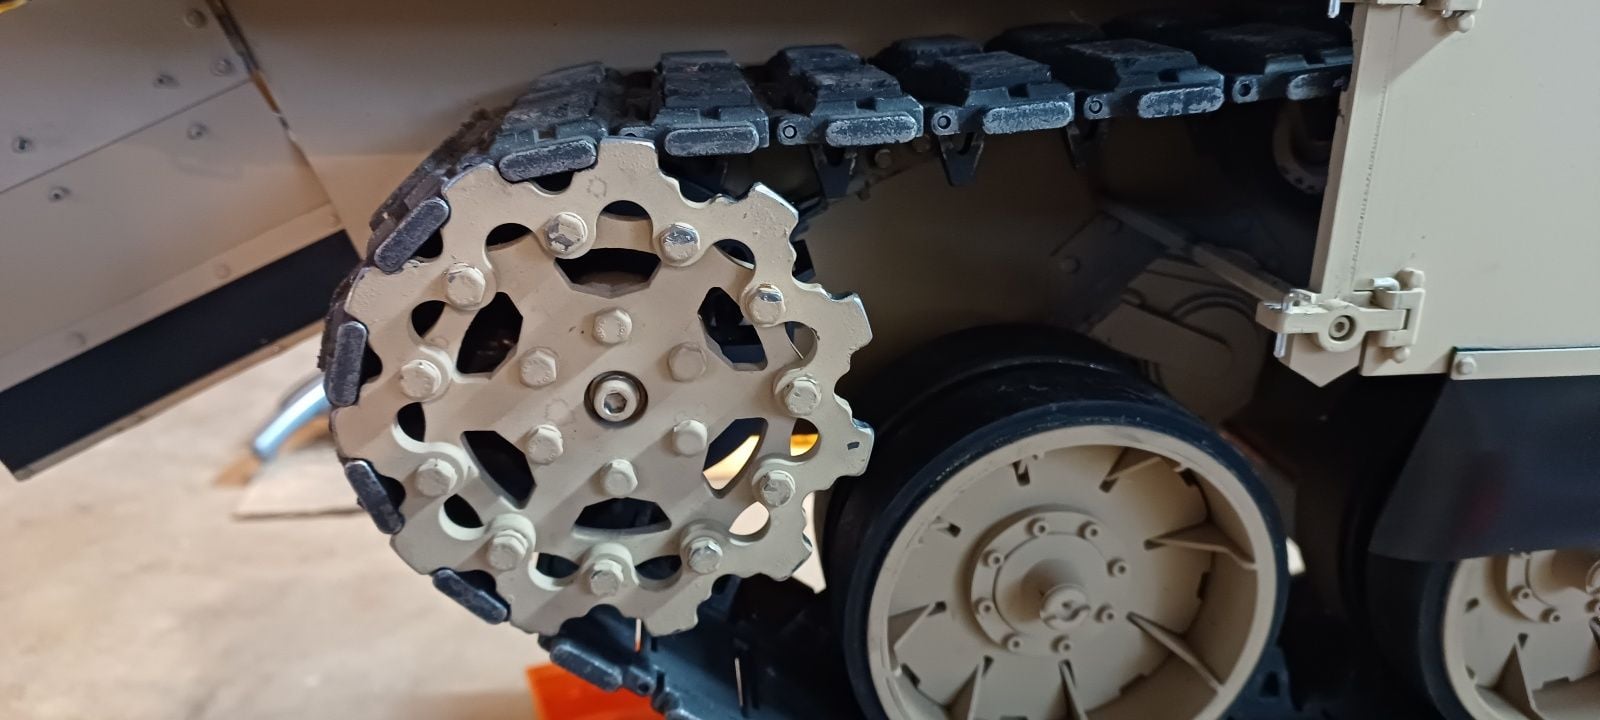
The driving wheel that completed the change and the mud scratching were also modified and reconstructed
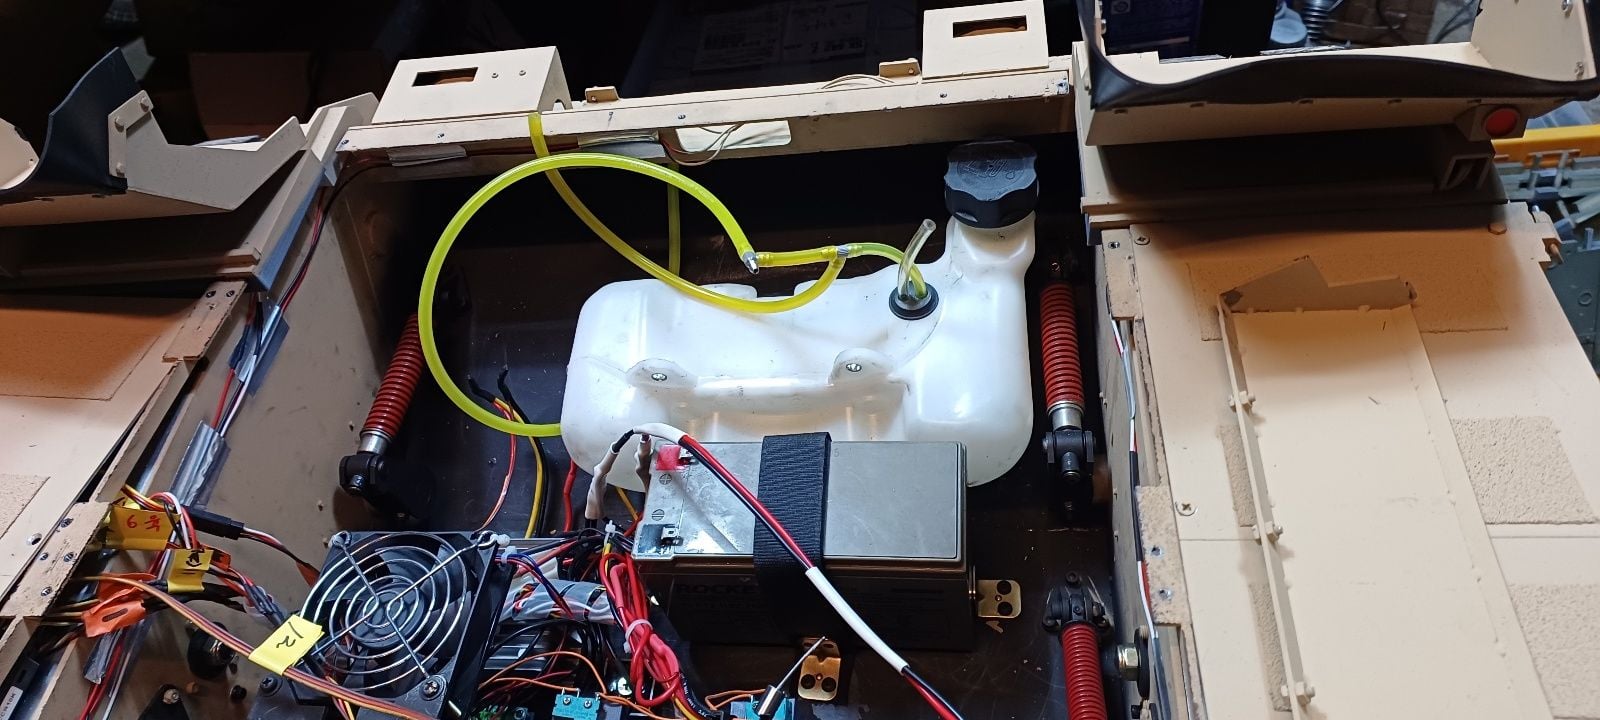
Following the replacement of the engine, the fuel tank was moved forward, and a small motor pump will be used to supply fuel to the engine.
Inspection after installation of track deviation prevention device of drive wheel
In order to ensure the perfect effect of the track departure prevention device installed in the middle of the driving wheel, a cutting was performed to cut off some of the teeth of the driving wheel
The driving wheel that completed the change and the mud scratching were also modified and reconstructed
Following the replacement of the engine, the fuel tank was moved forward, and a small motor pump will be used to supply fuel to the engine.
02-20-2024, 12:10 AM
#205
Thread Starter
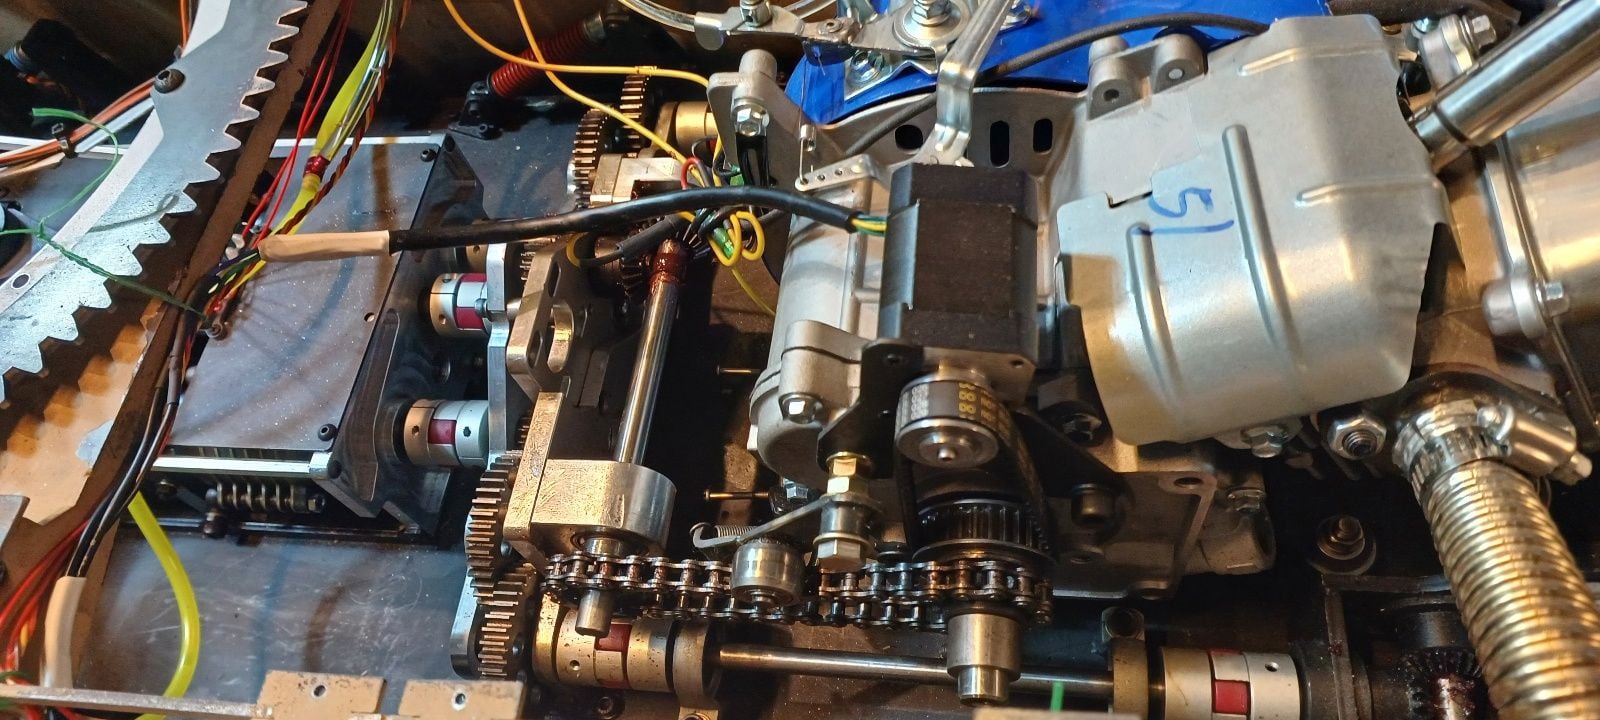
Today, we manufactured a generator using DC motors using the timing belt and sprocket purchased the other day.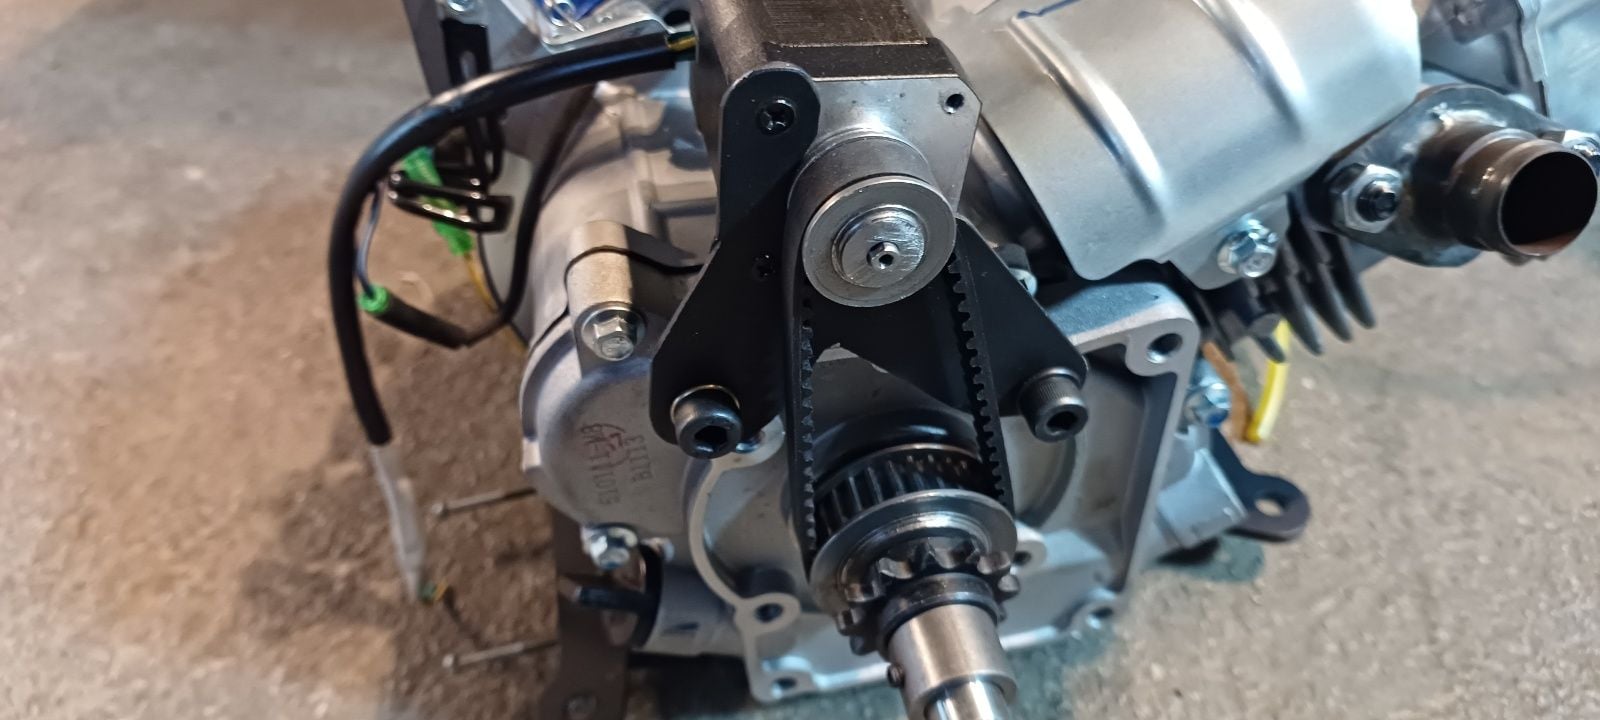
Installation of DC motor generator
Installation of DC motor generator
02-21-2024, 12:43 AM
#206
Thread Starter
We did some work again today.
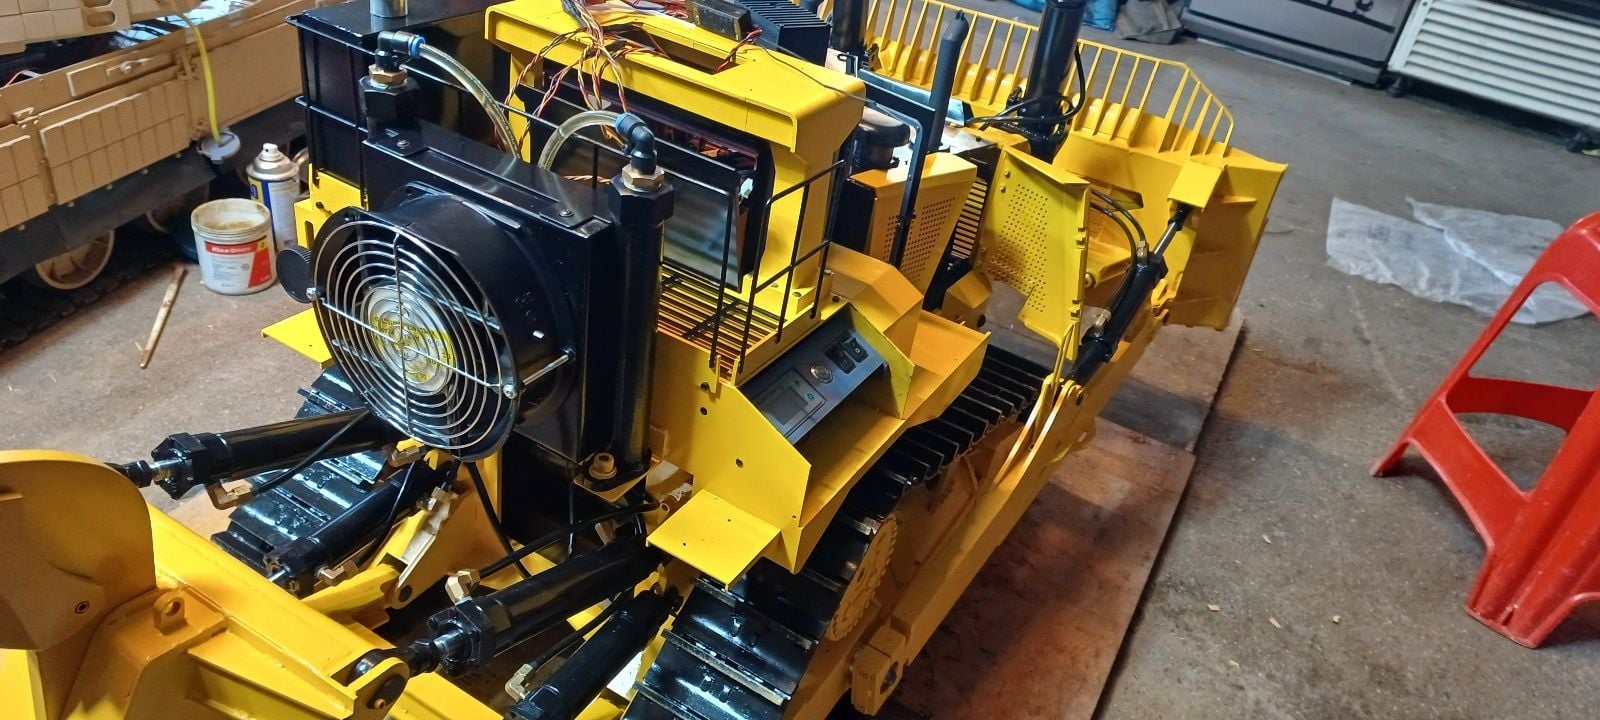
First of all, we checked the power generation performance of the step motor generator installed in the engine.
1) We have configured the engine fuel supply system.
Currently, we are temporarily installing a water pump and commissioning it,
but we are concerned about the deformation of the sealing material of the pump, so we ordered a small oil pump.
2) It has been confirmed that charging and discharging remain neutral when the engine is idling, and charging becomes smooth when the RPM rises slightly.
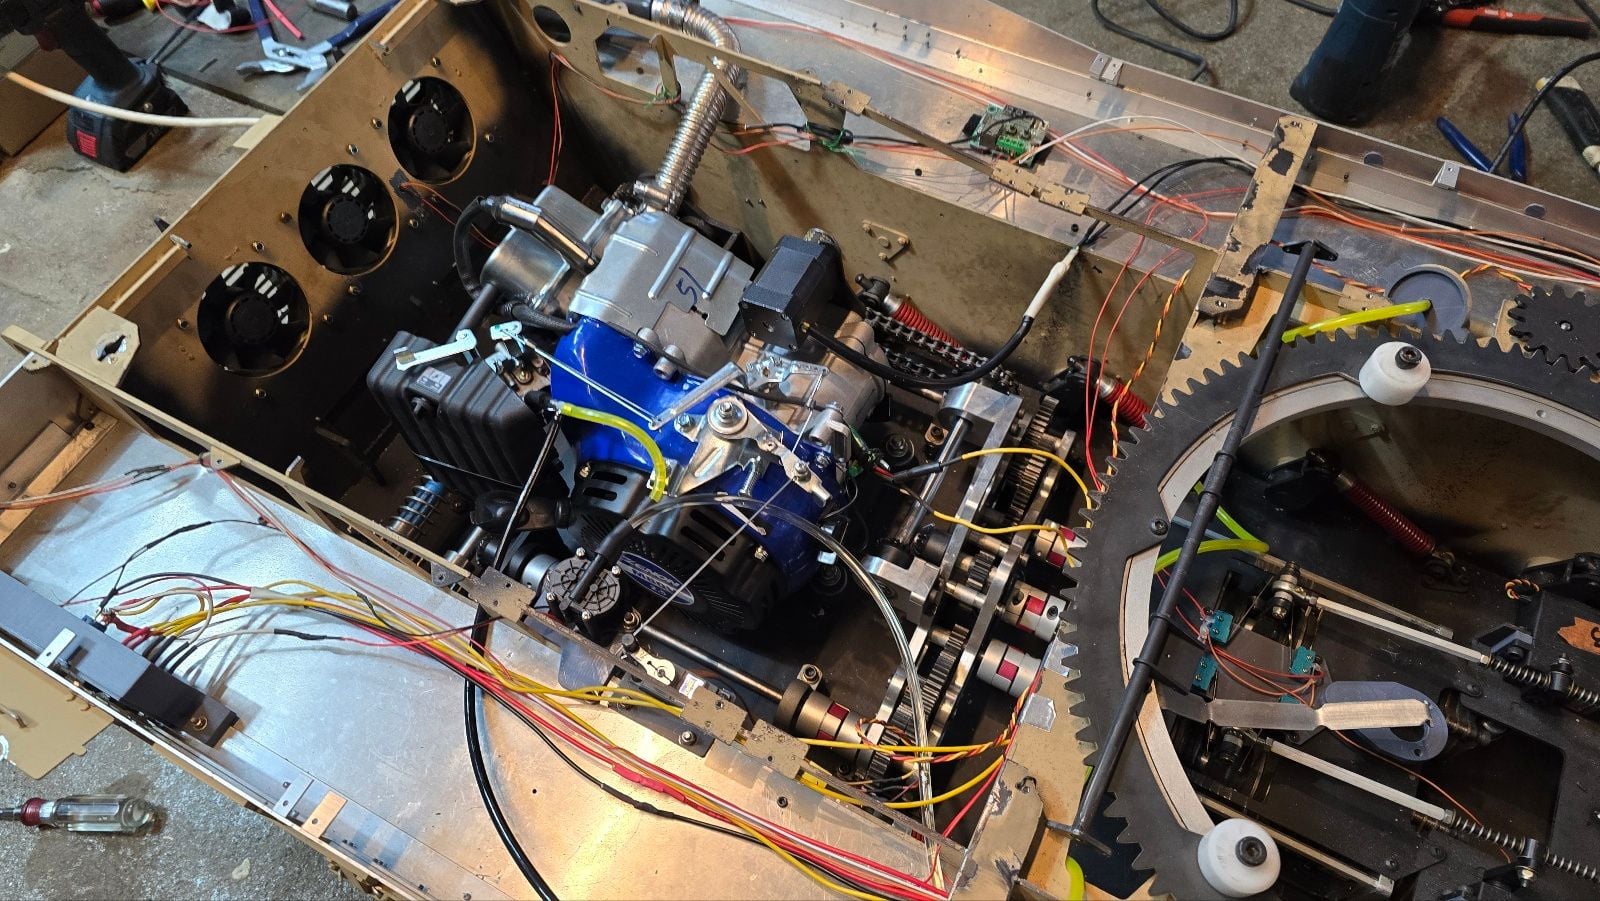
3) Engine exhaust muffler was completed using corrugated tubes and silicone tubes.
4) The position of the throttle servo was moved close to the engine and installed.
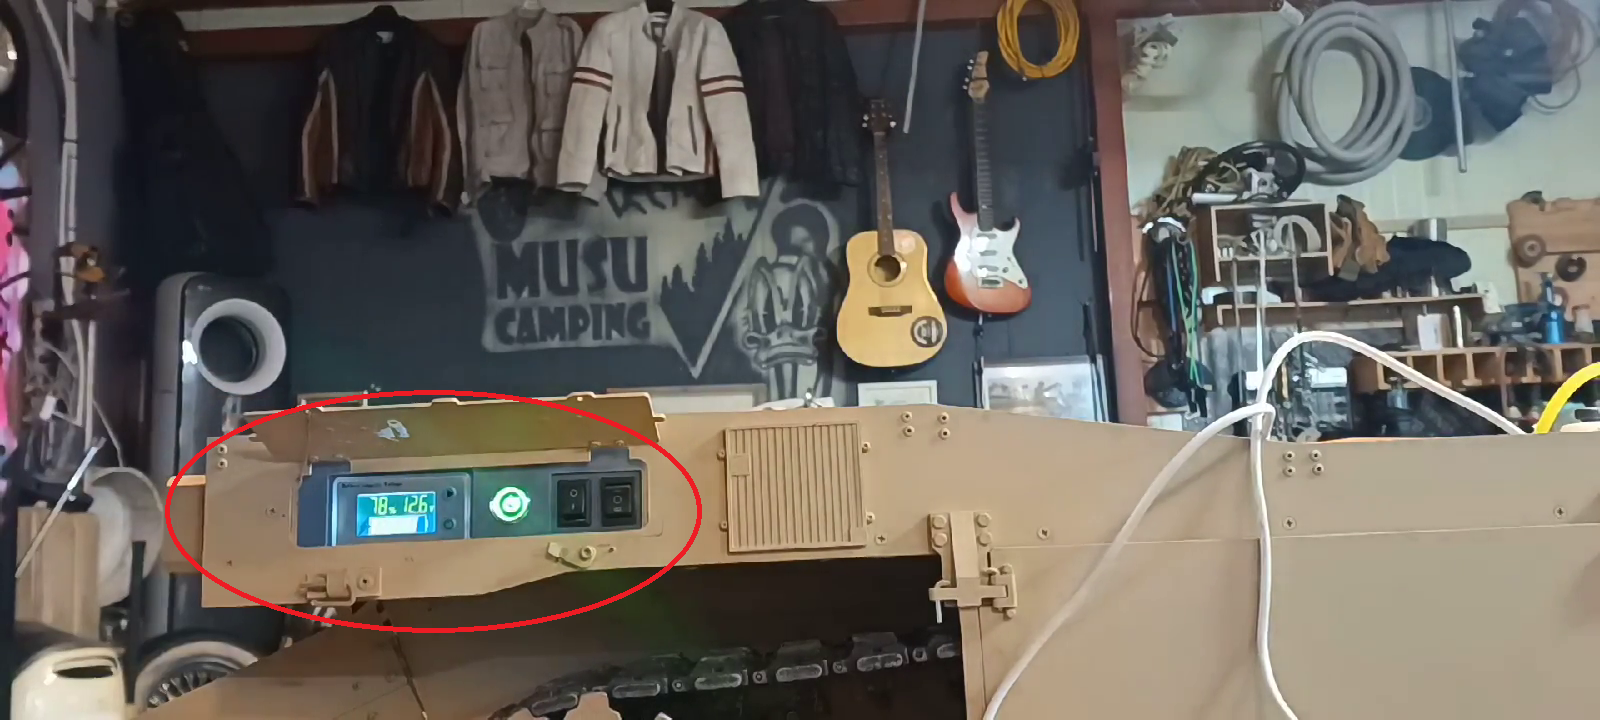
Before charging
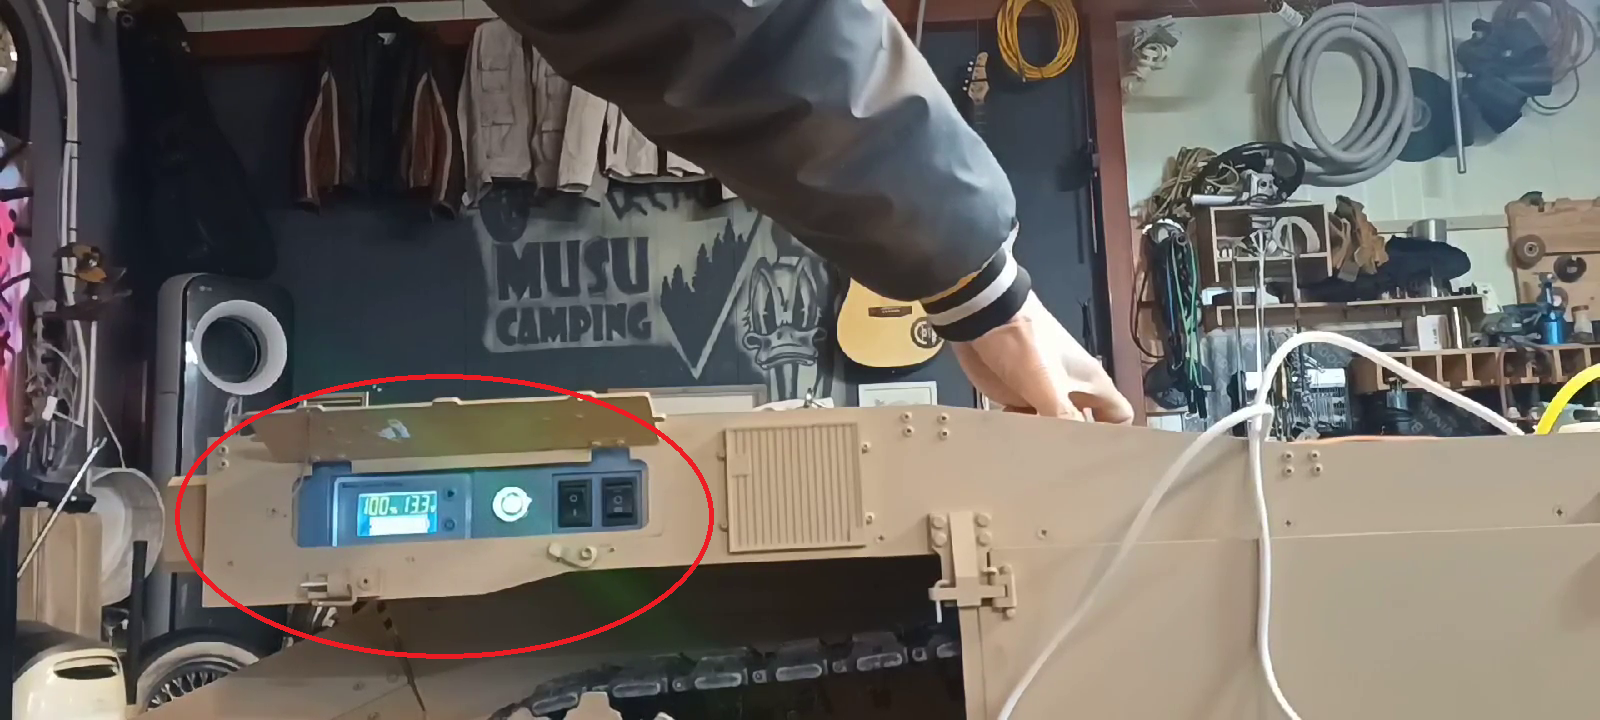
After recharging
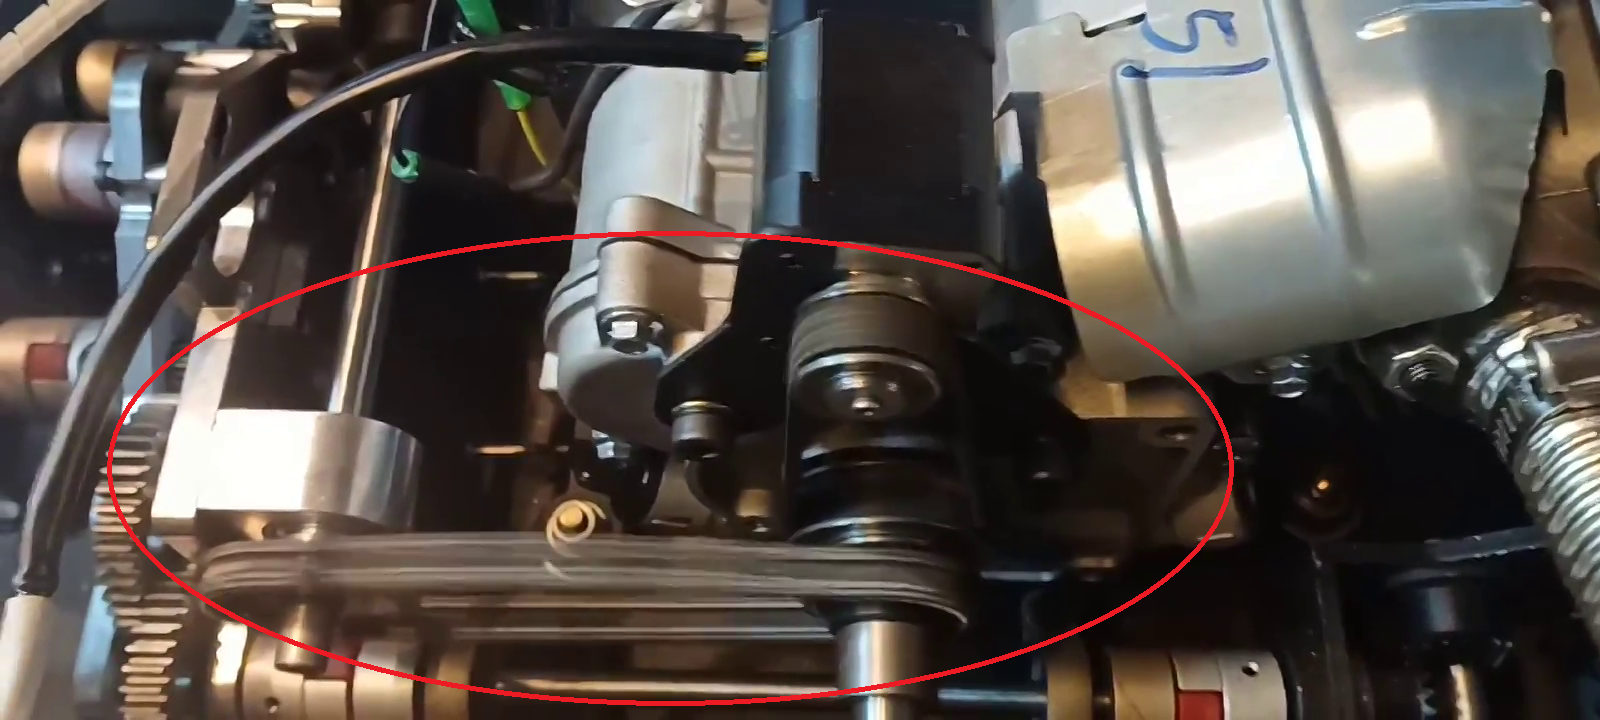
Engine shaft power and charging process at the same time
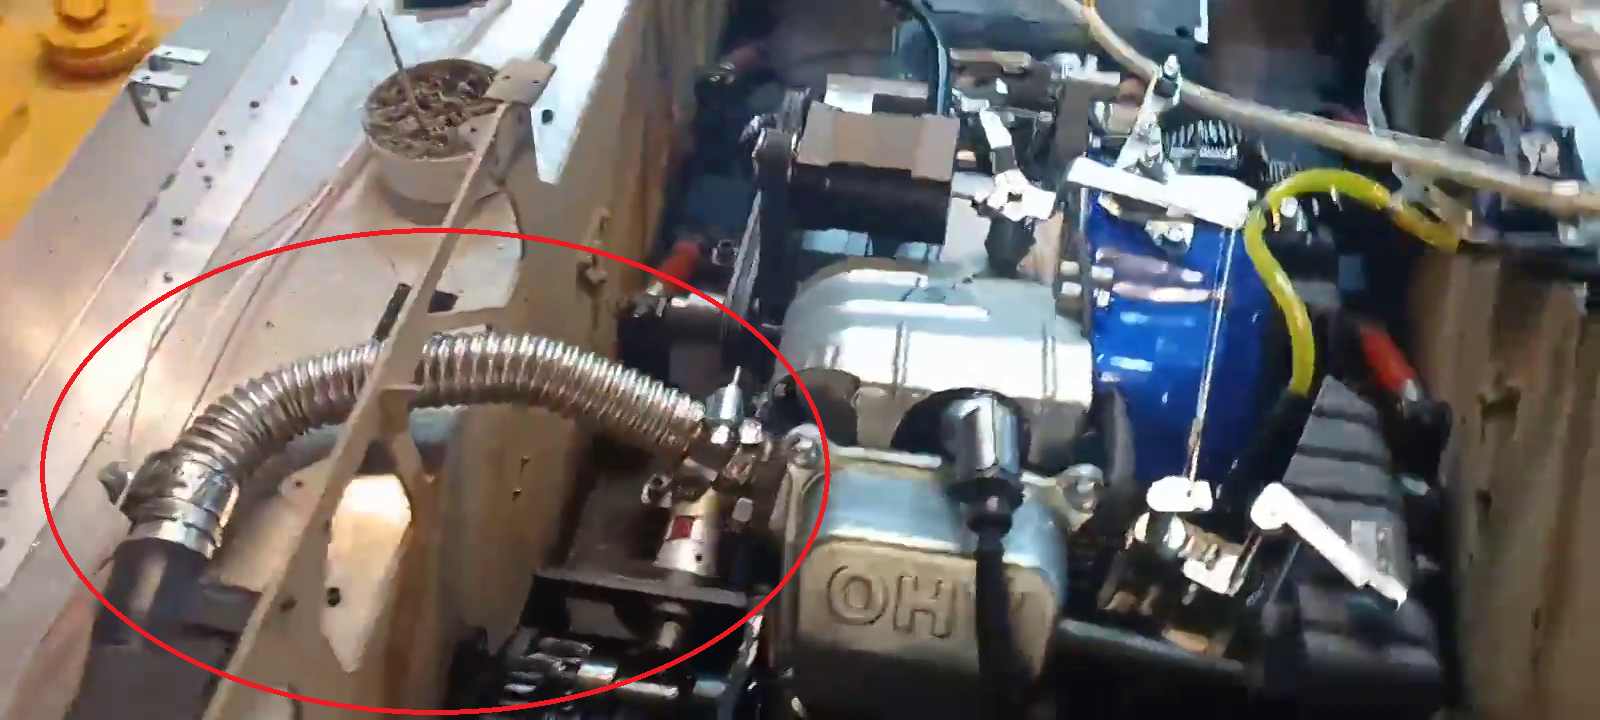
Installing the muffler
Move throttle servo position
First of all, we checked the power generation performance of the step motor generator installed in the engine.
1) We have configured the engine fuel supply system.
Currently, we are temporarily installing a water pump and commissioning it,
but we are concerned about the deformation of the sealing material of the pump, so we ordered a small oil pump.
2) It has been confirmed that charging and discharging remain neutral when the engine is idling, and charging becomes smooth when the RPM rises slightly.
3) Engine exhaust muffler was completed using corrugated tubes and silicone tubes.
4) The position of the throttle servo was moved close to the engine and installed.
Before charging
After recharging
Engine shaft power and charging process at the same time
Installing the muffler
Move throttle servo position
02-23-2024, 05:10 AM
#207
Thread Starter
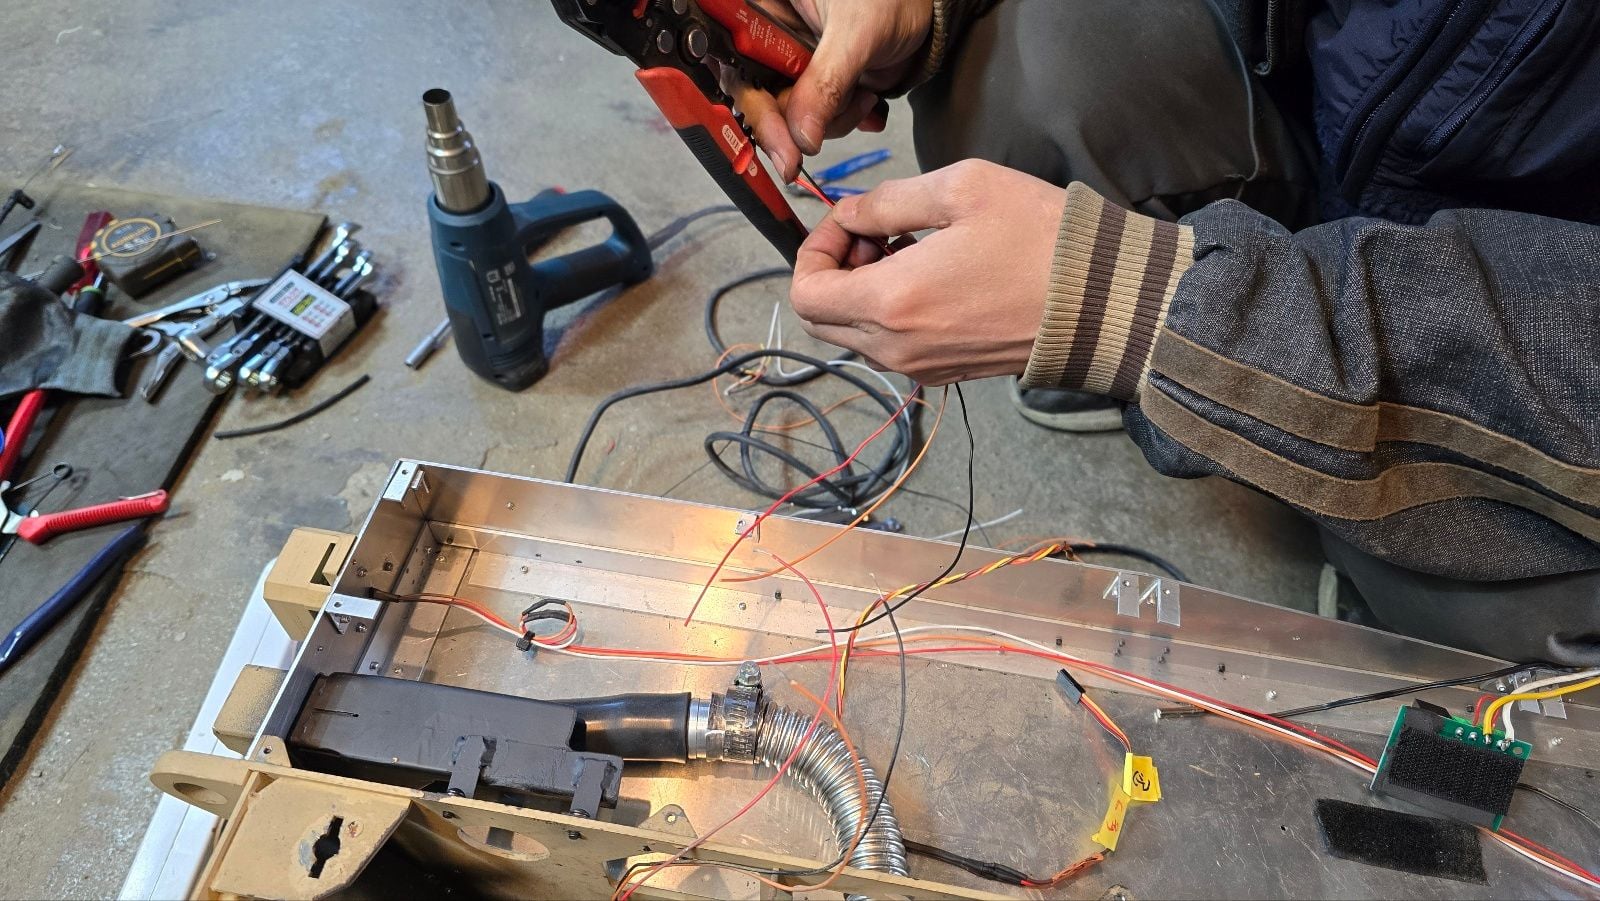
We even completed a simple test run after engine change today.
We found problems in these test runs and will try to solve these problems from tomorrow.
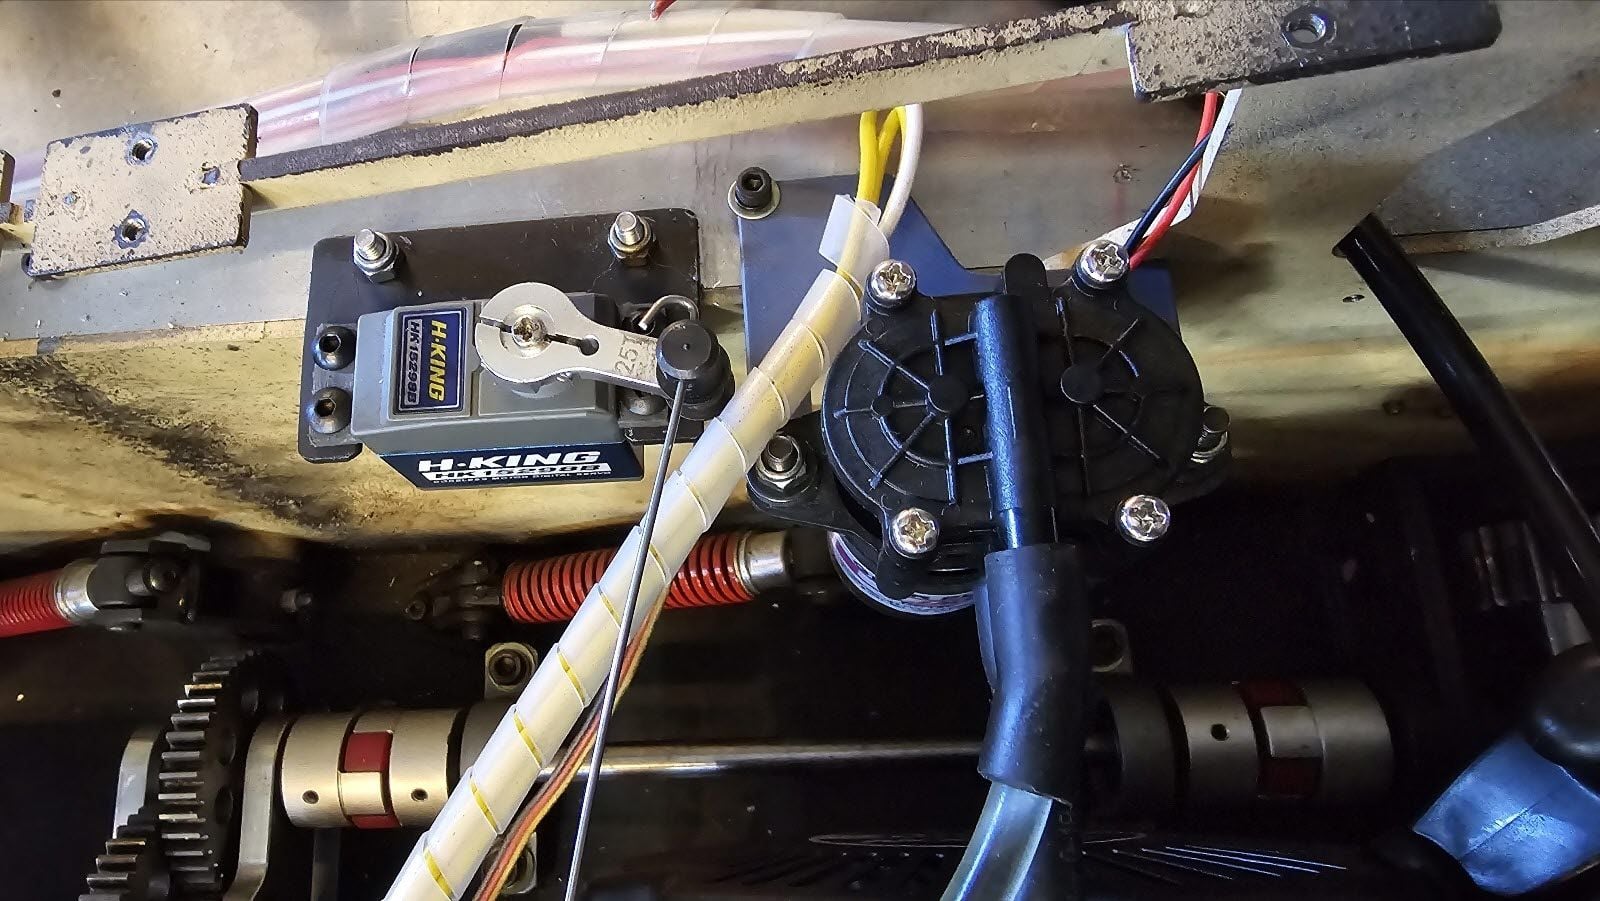
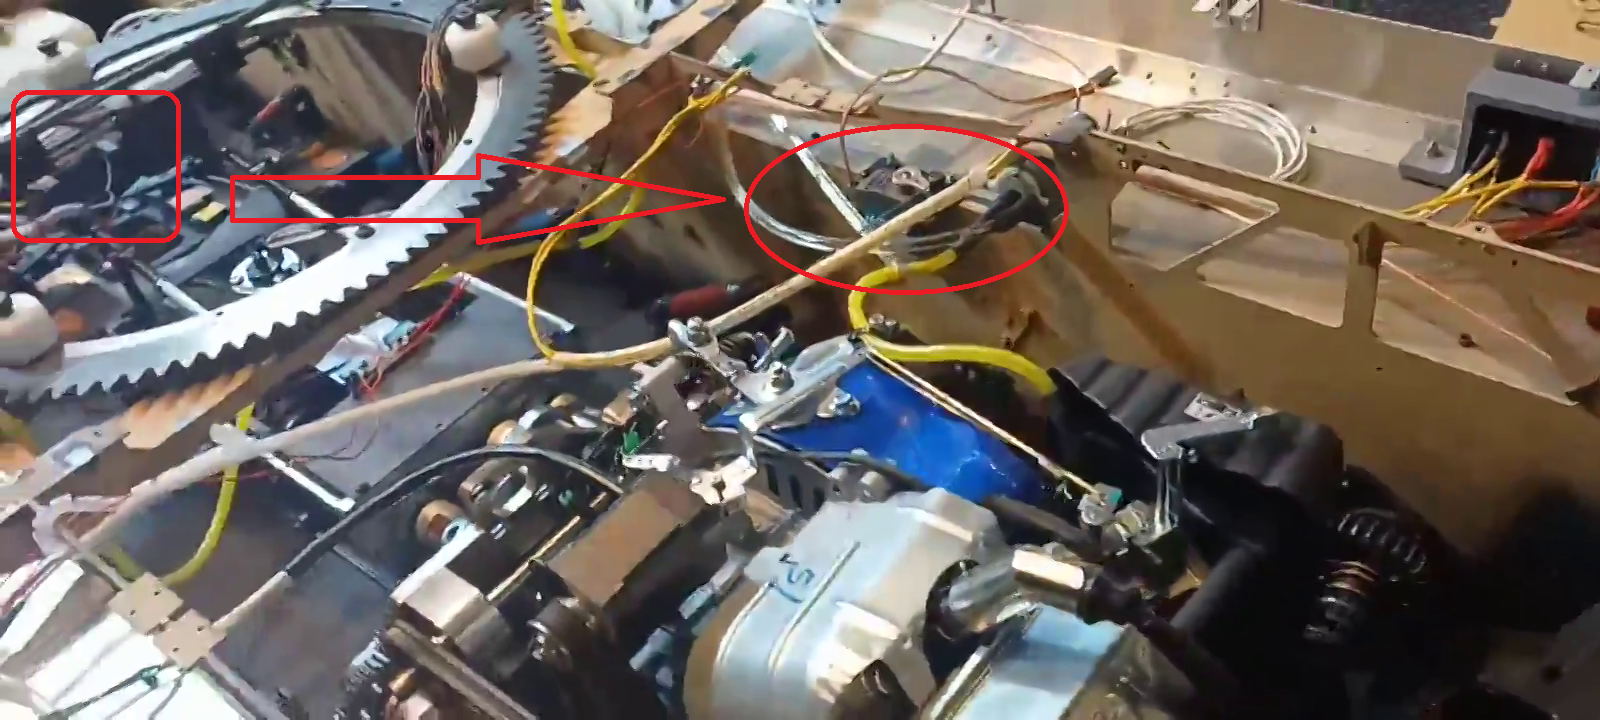
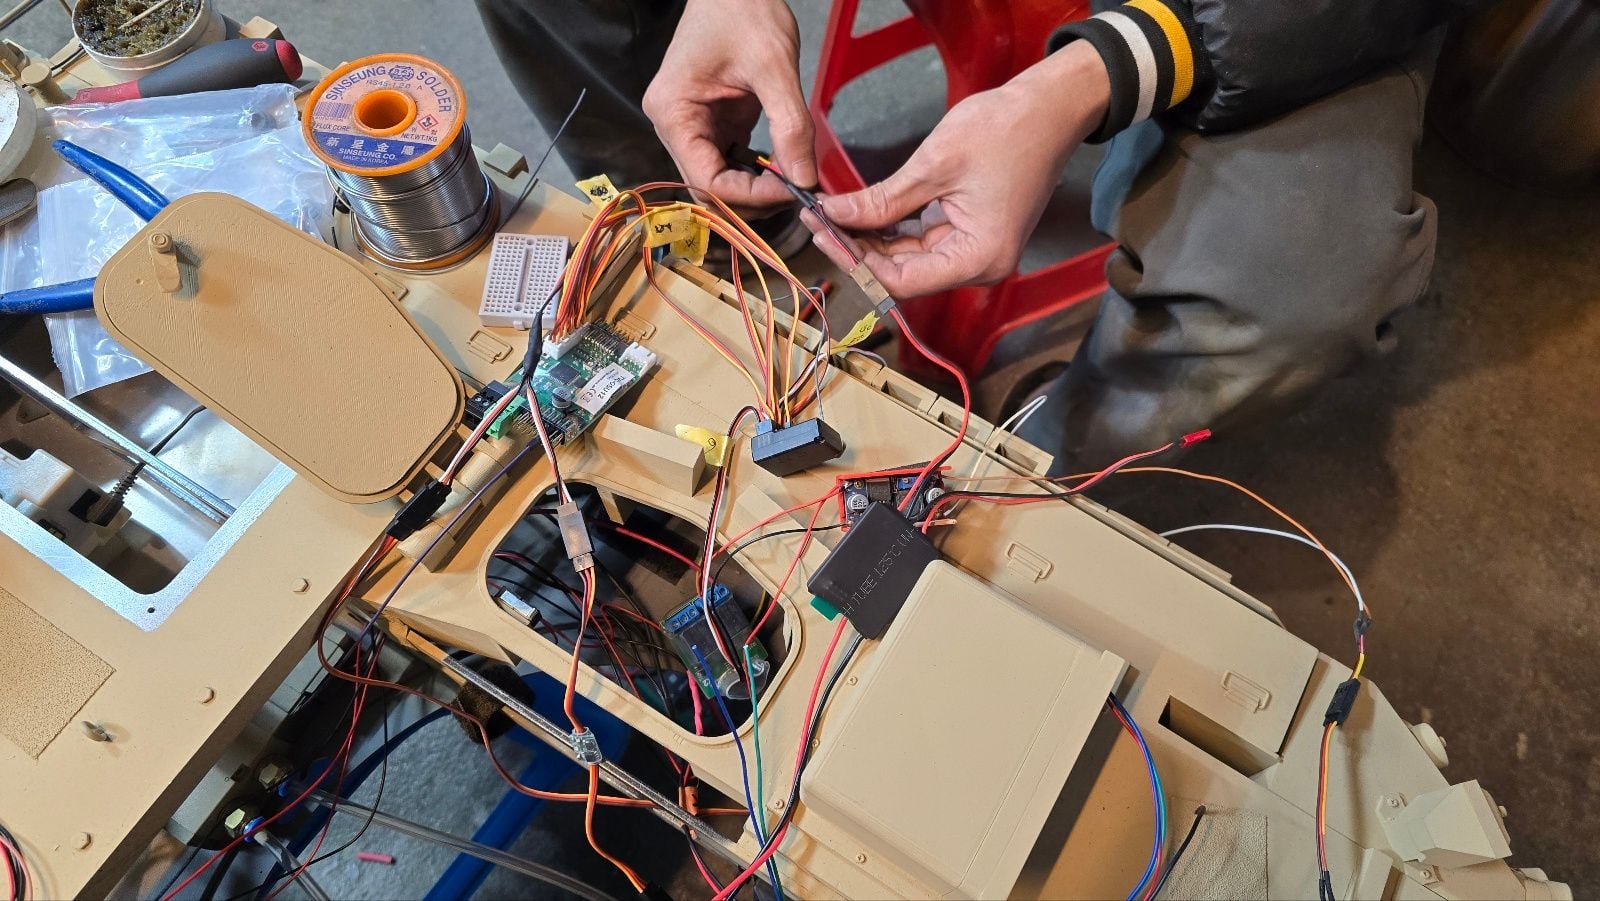
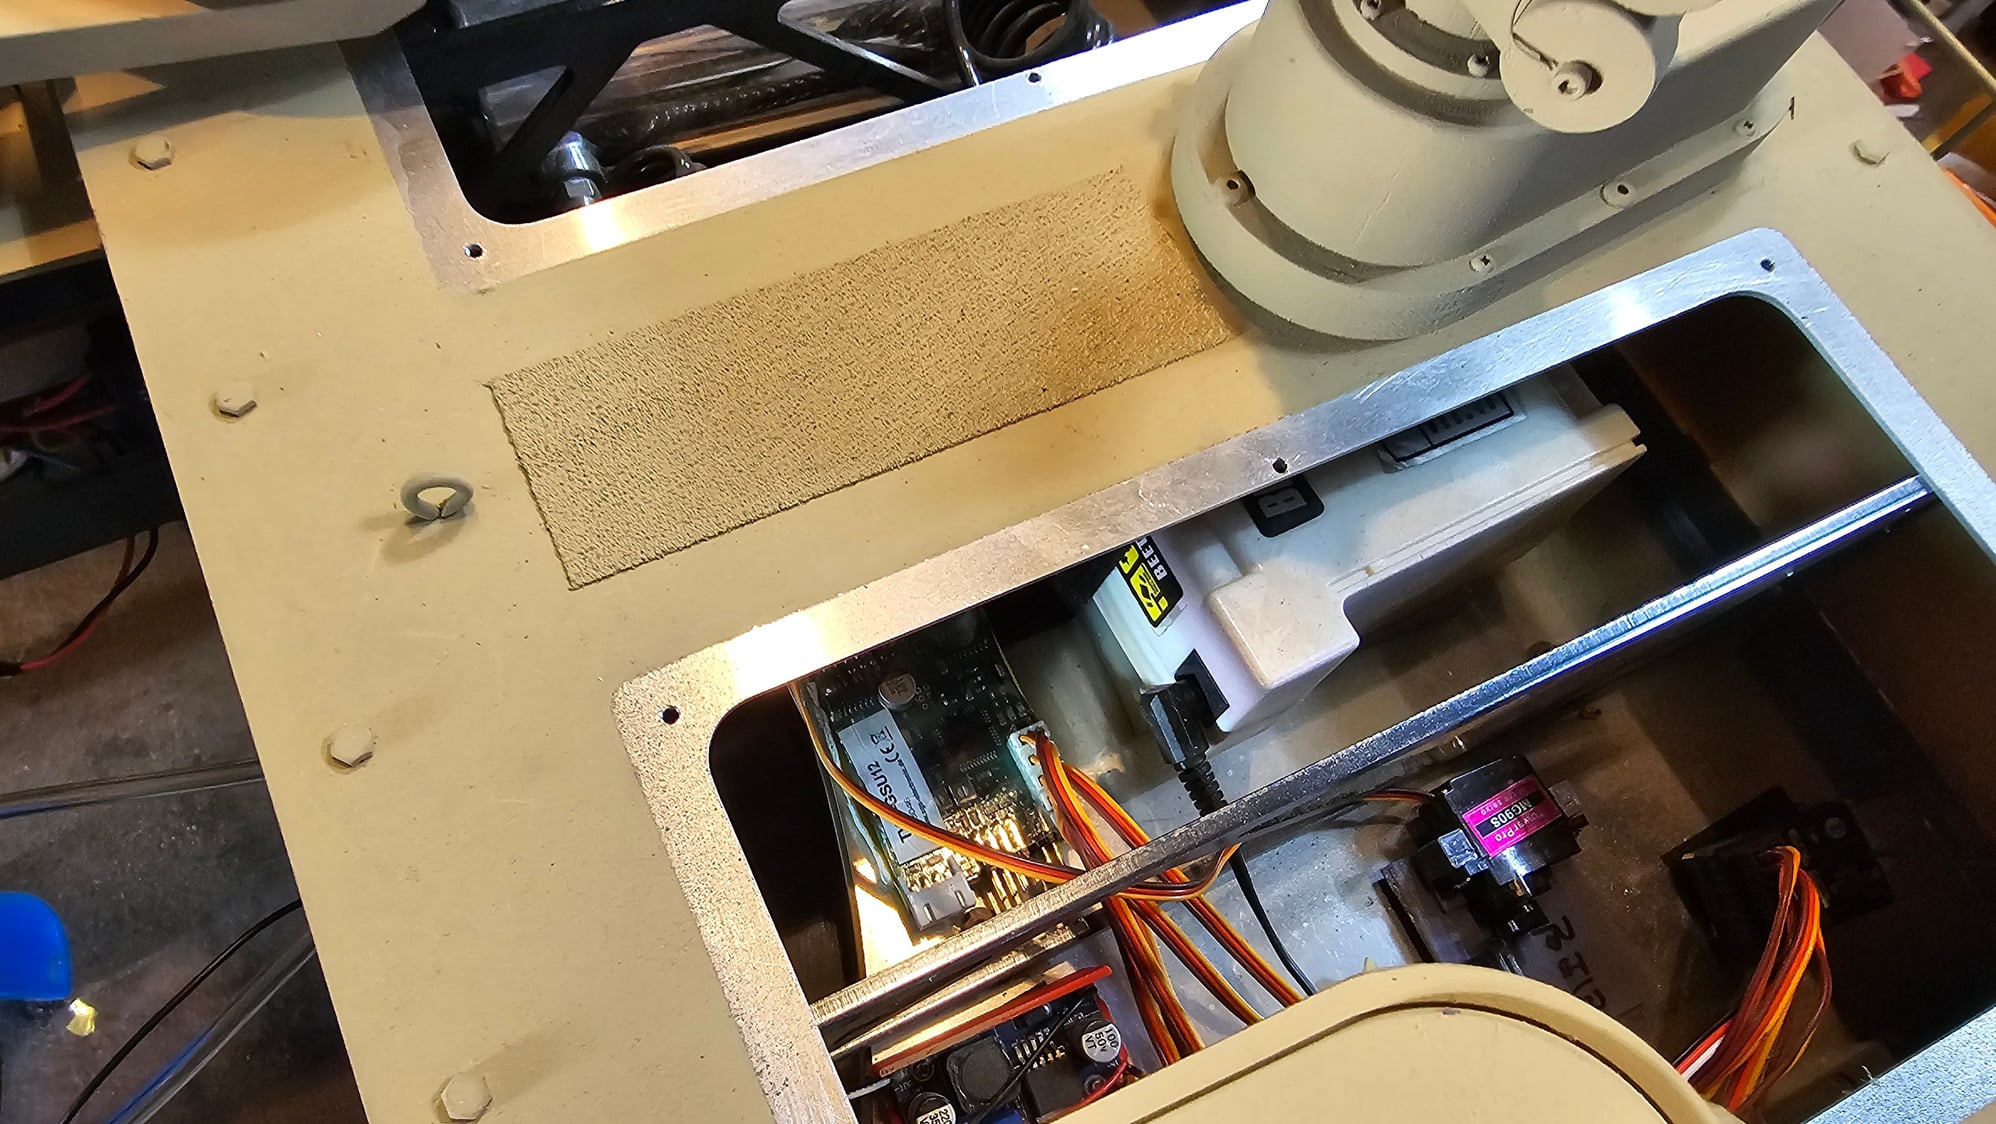
Throttle servo and fuel pump
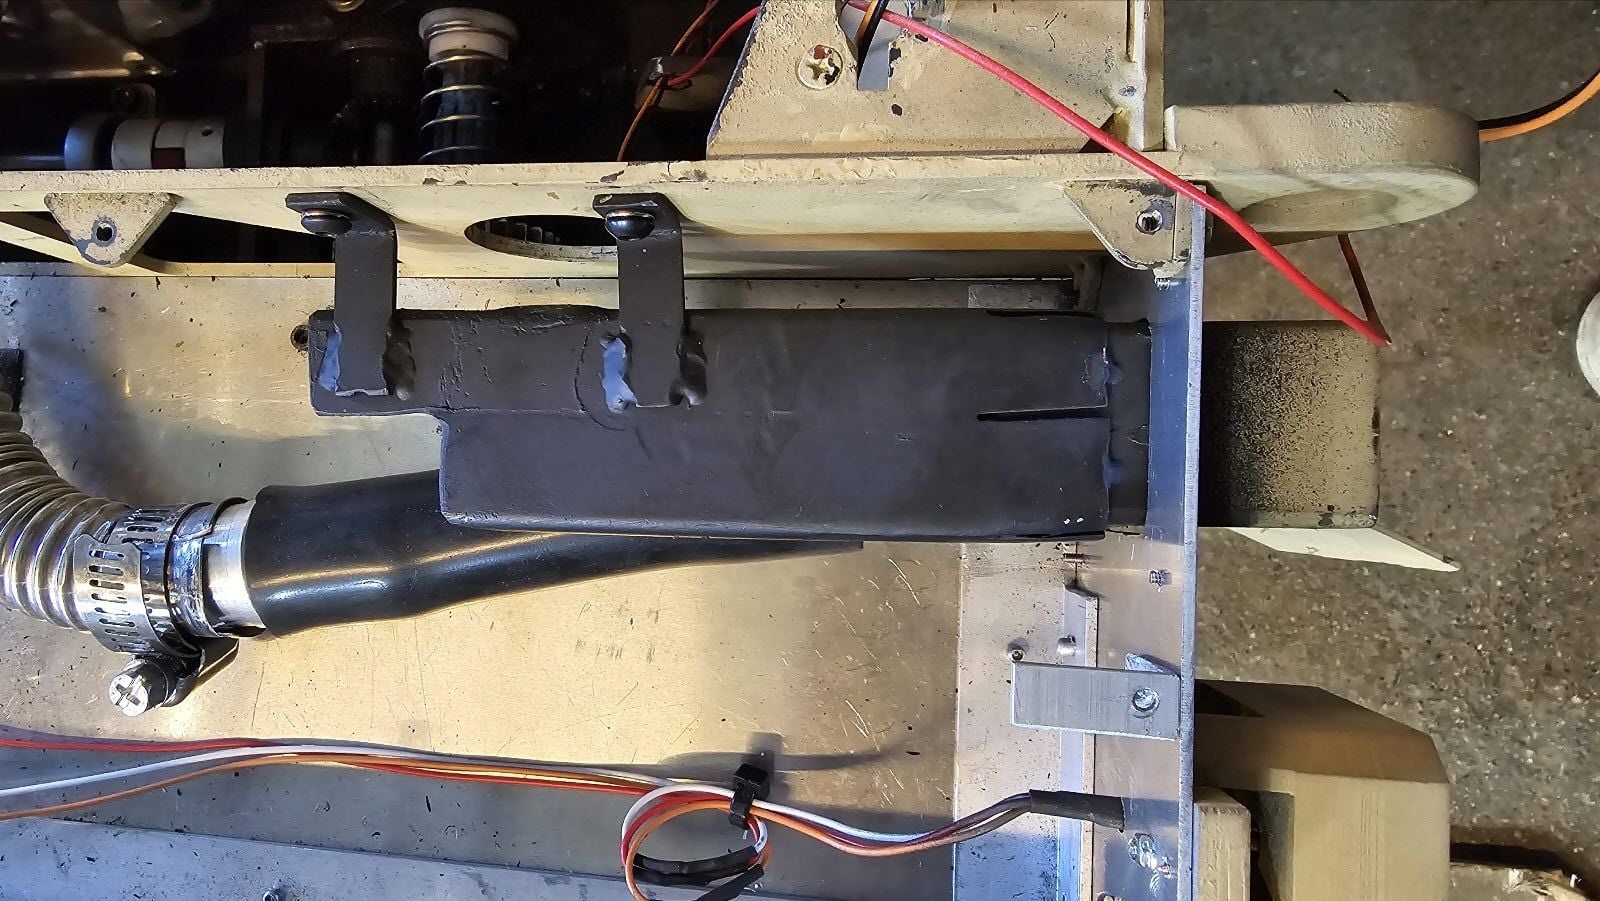
Modified exhaust muffler
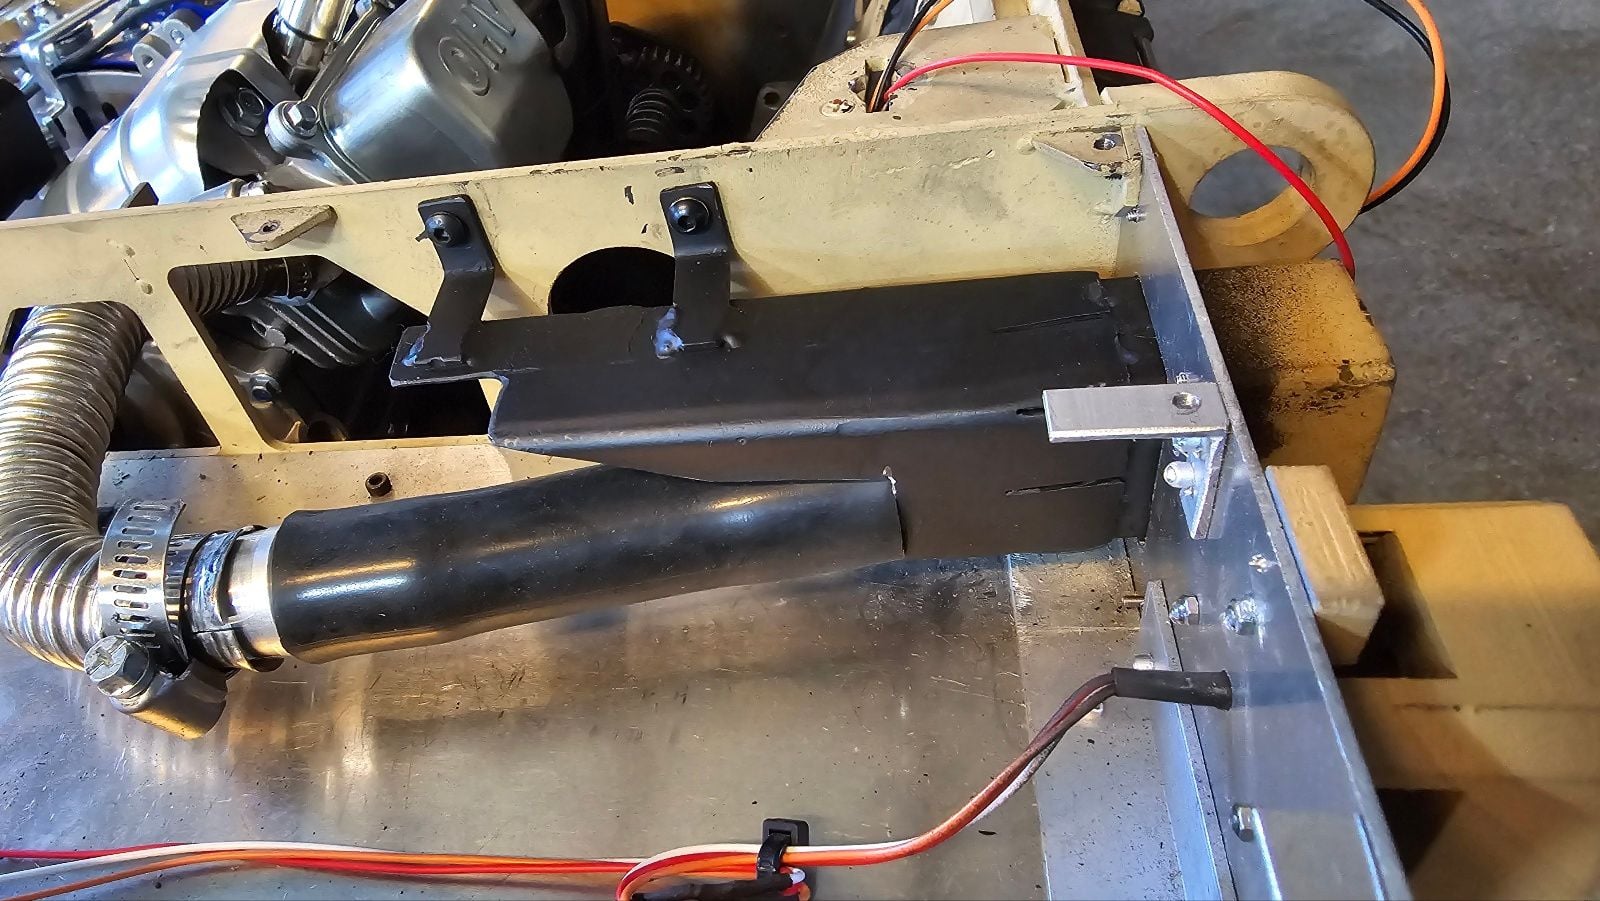
Modified exhaust muffler
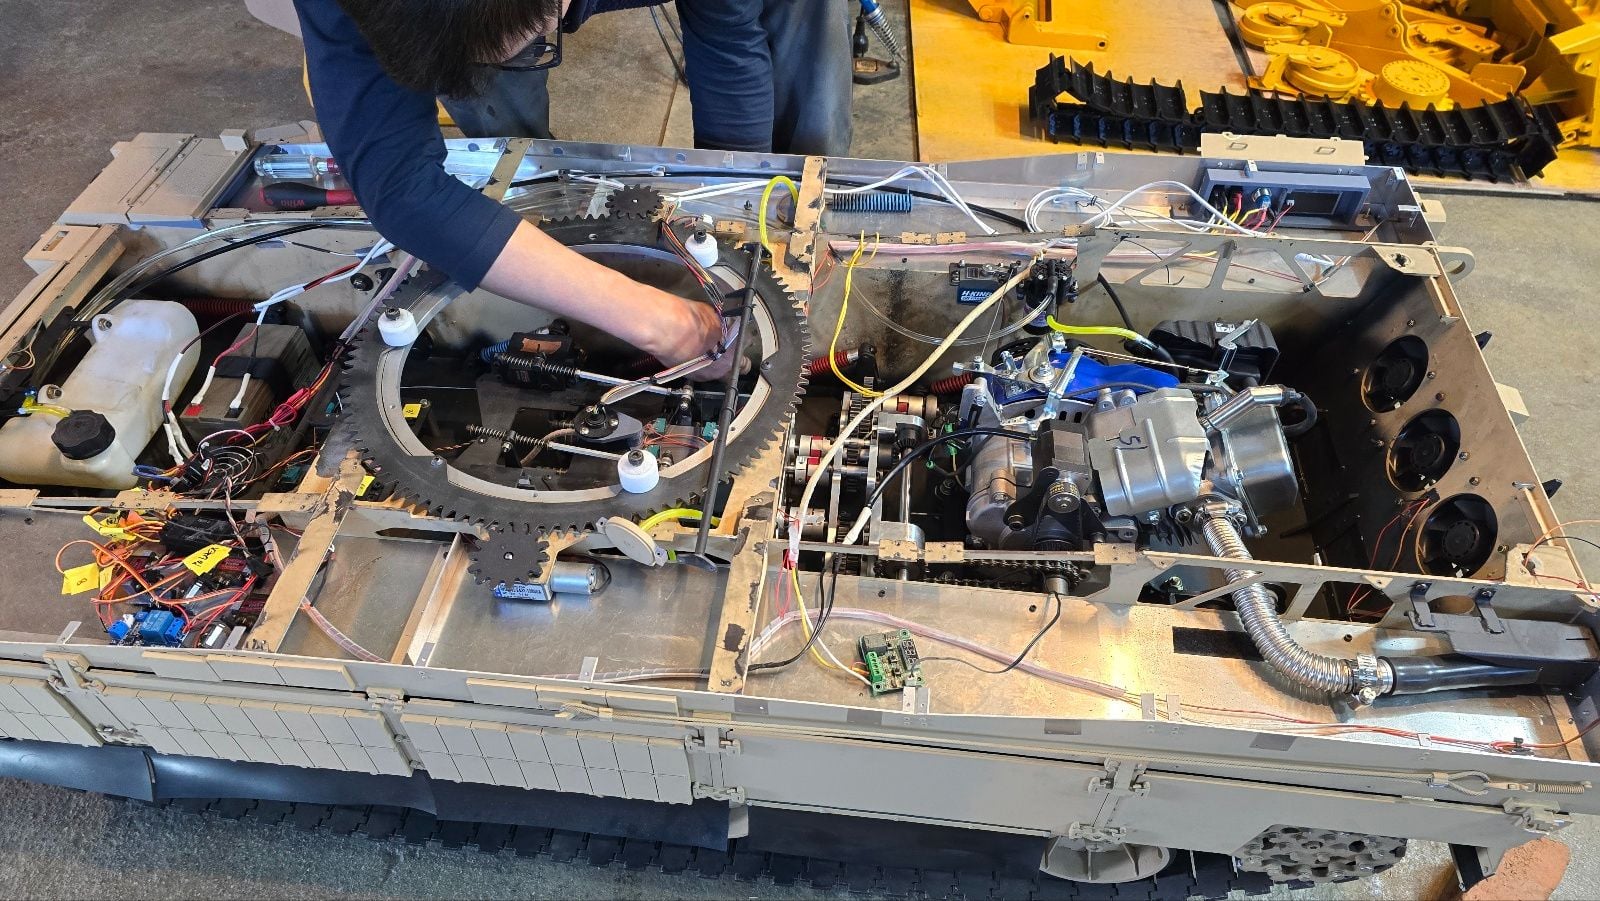
Modifying Wire Wiring
Modifying Wire Wiring
Modifying Wire Wiring
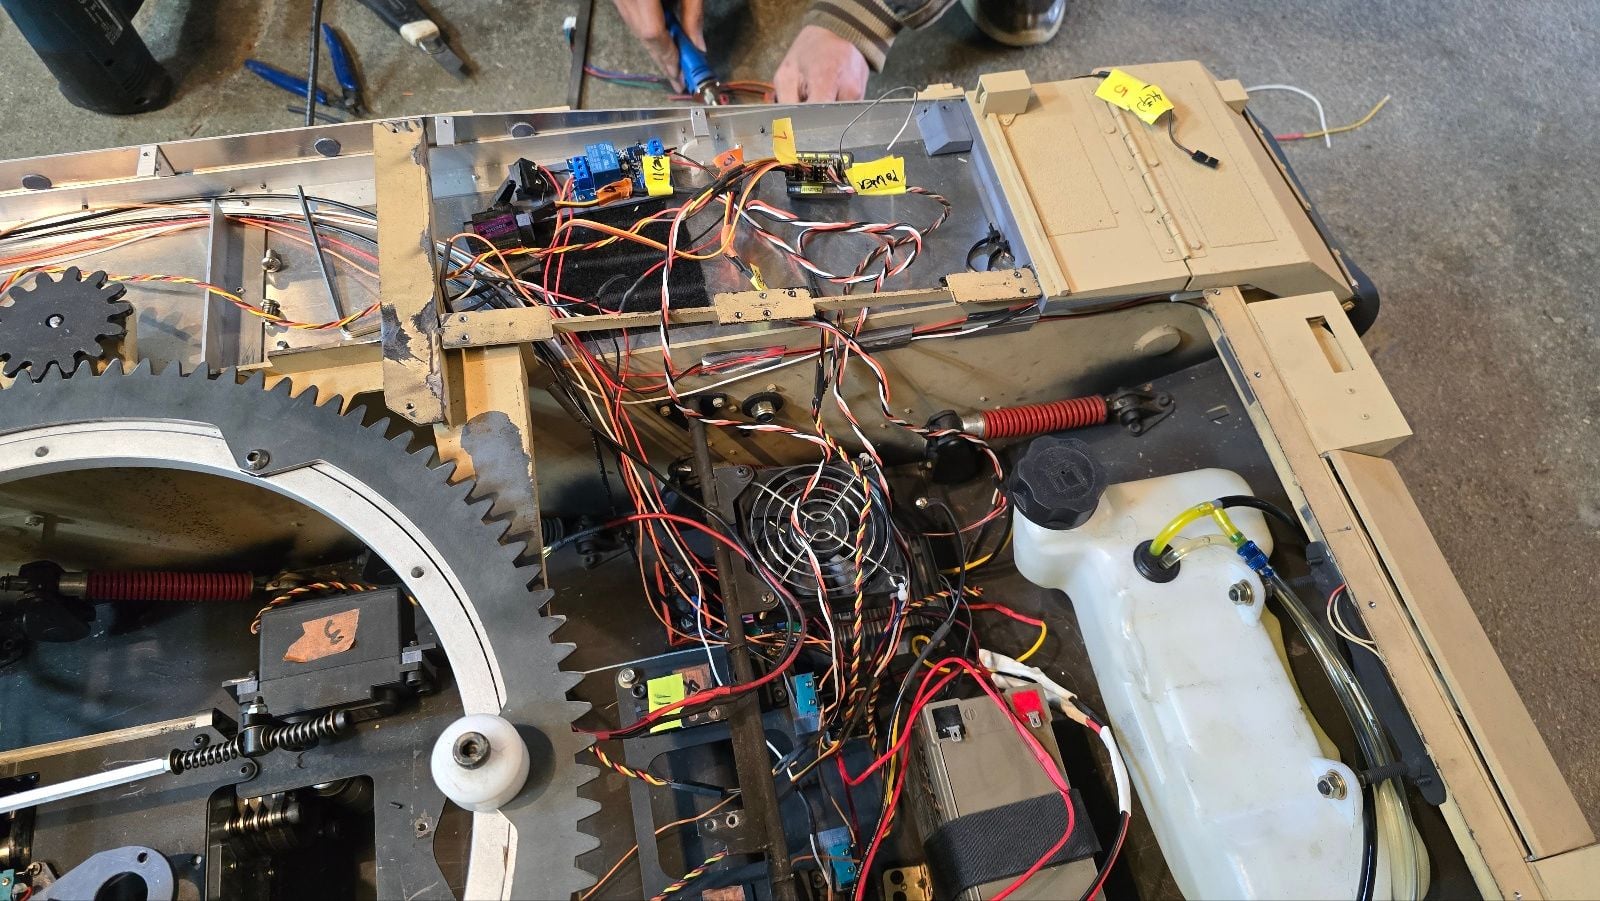
Fuel system modification
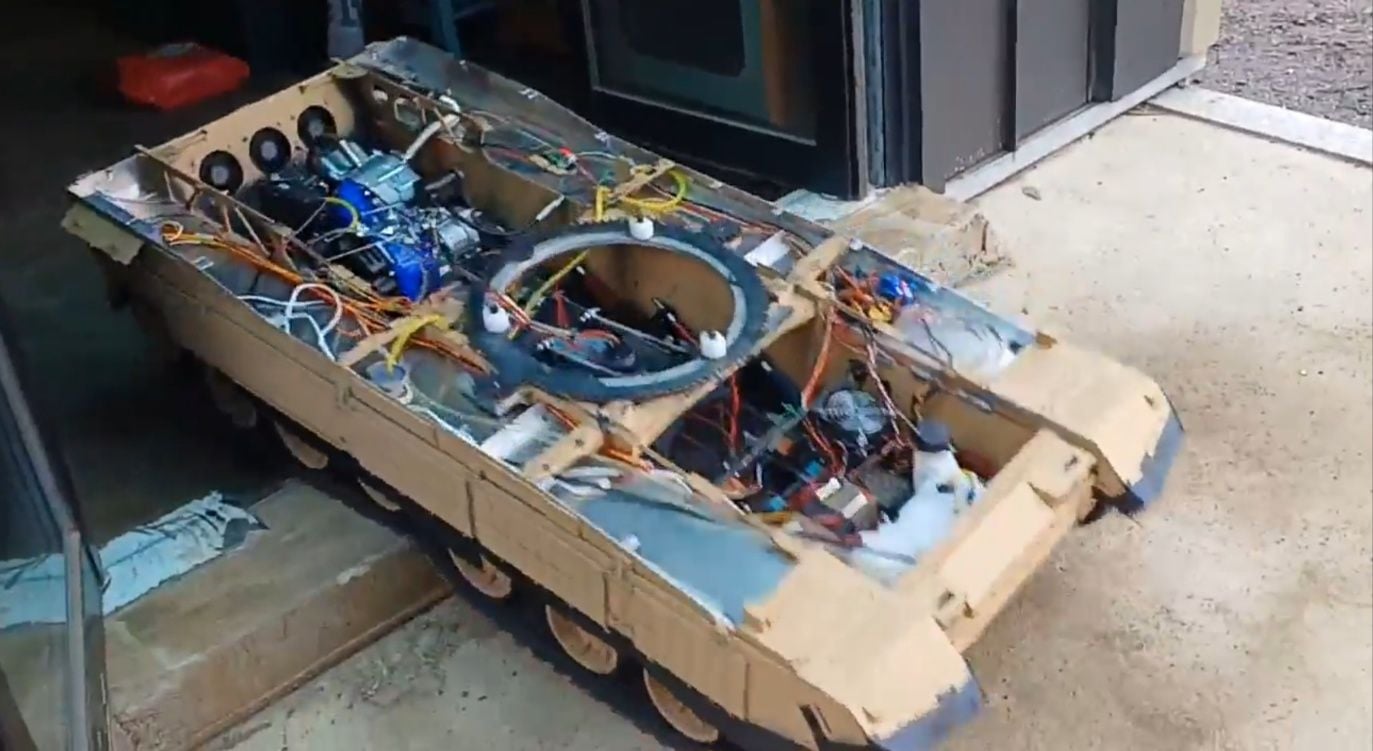
Trial run-over the threshold

Trial run - Gravel field

Trial run-the lawn

Trial run - Asphalt road

Trial run - Load Increase
We found problems in these test runs and will try to solve these problems from tomorrow.
Throttle servo and fuel pump
Modified exhaust muffler
Modified exhaust muffler
Modifying Wire Wiring
Modifying Wire Wiring
Modifying Wire Wiring
Fuel system modification
Trial run-over the threshold
Trial run - Gravel field
Trial run-the lawn
Trial run - Asphalt road
Trial run - Load Increase
02-27-2024, 05:11 PM
#209
Thread Starter
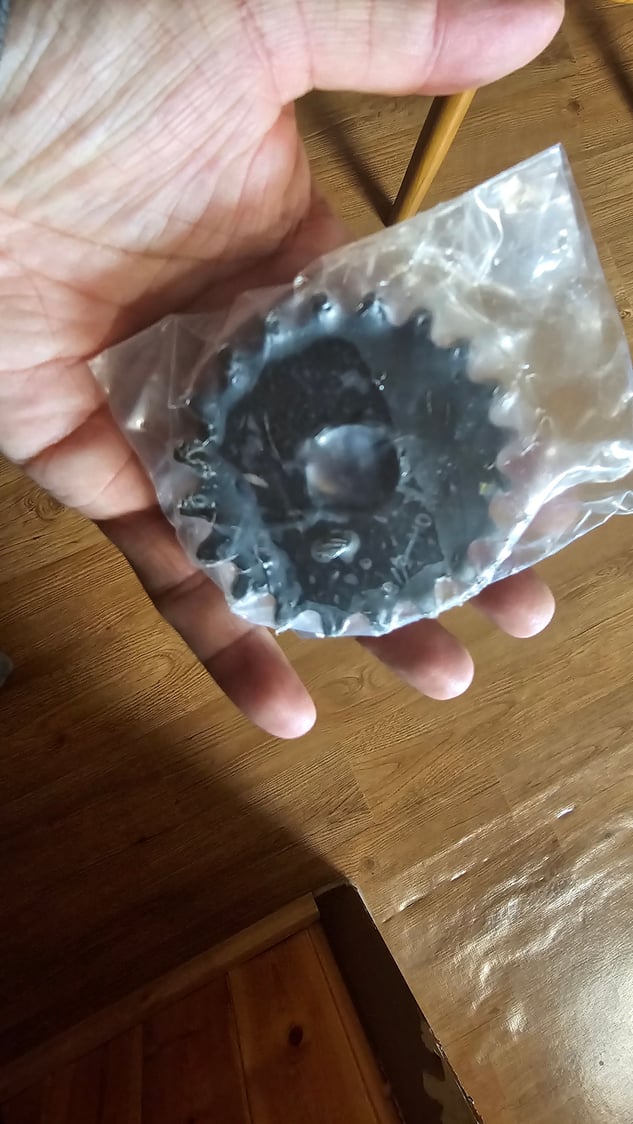
In order to increase the running speed of the tank, the parts were ordered to replace the 12tooth-shaped sprocket attached to the engine's drive shaft with a 20tooth sprocket, and then this part is attached to find the appropriate gear ratio considering the proper speed and the load at low speed. And in order to increase the storage efficiency of electrical energy from the generator, we are going to install a three-phase diode.
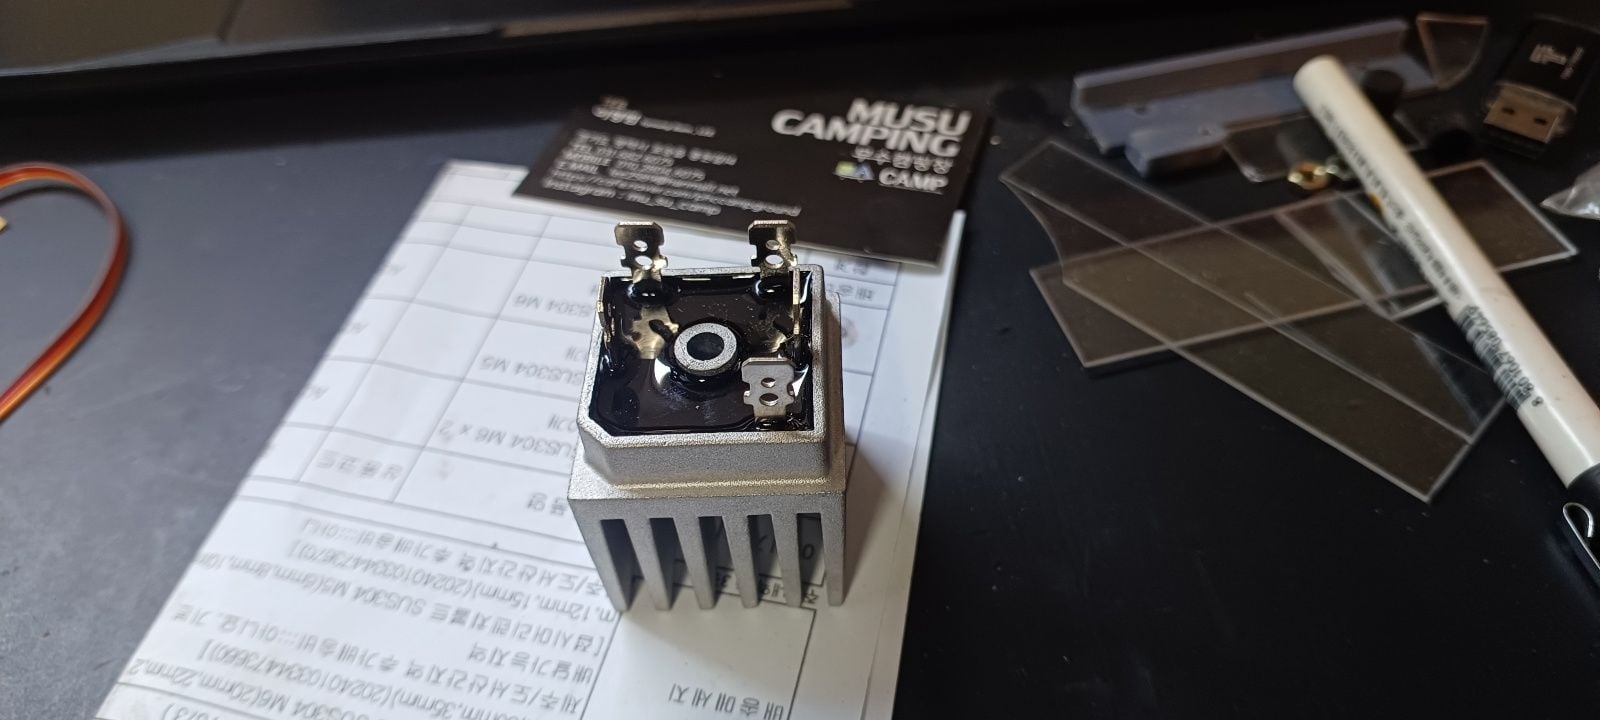
3-phase diode

20tooth sprocket
3-phase diode
20tooth sprocket
02-29-2024, 09:19 PM
#210
Thread Starter
This week's work has completed various configurations of the main body and is waiting for the arrival of the product to finally exchange the sprocket purchased from Amazon, and during this period, the electrical wiring of the turret is being renewed. In this upgrade, GSU is being introduced to link two large servos that vertically control the main gun.
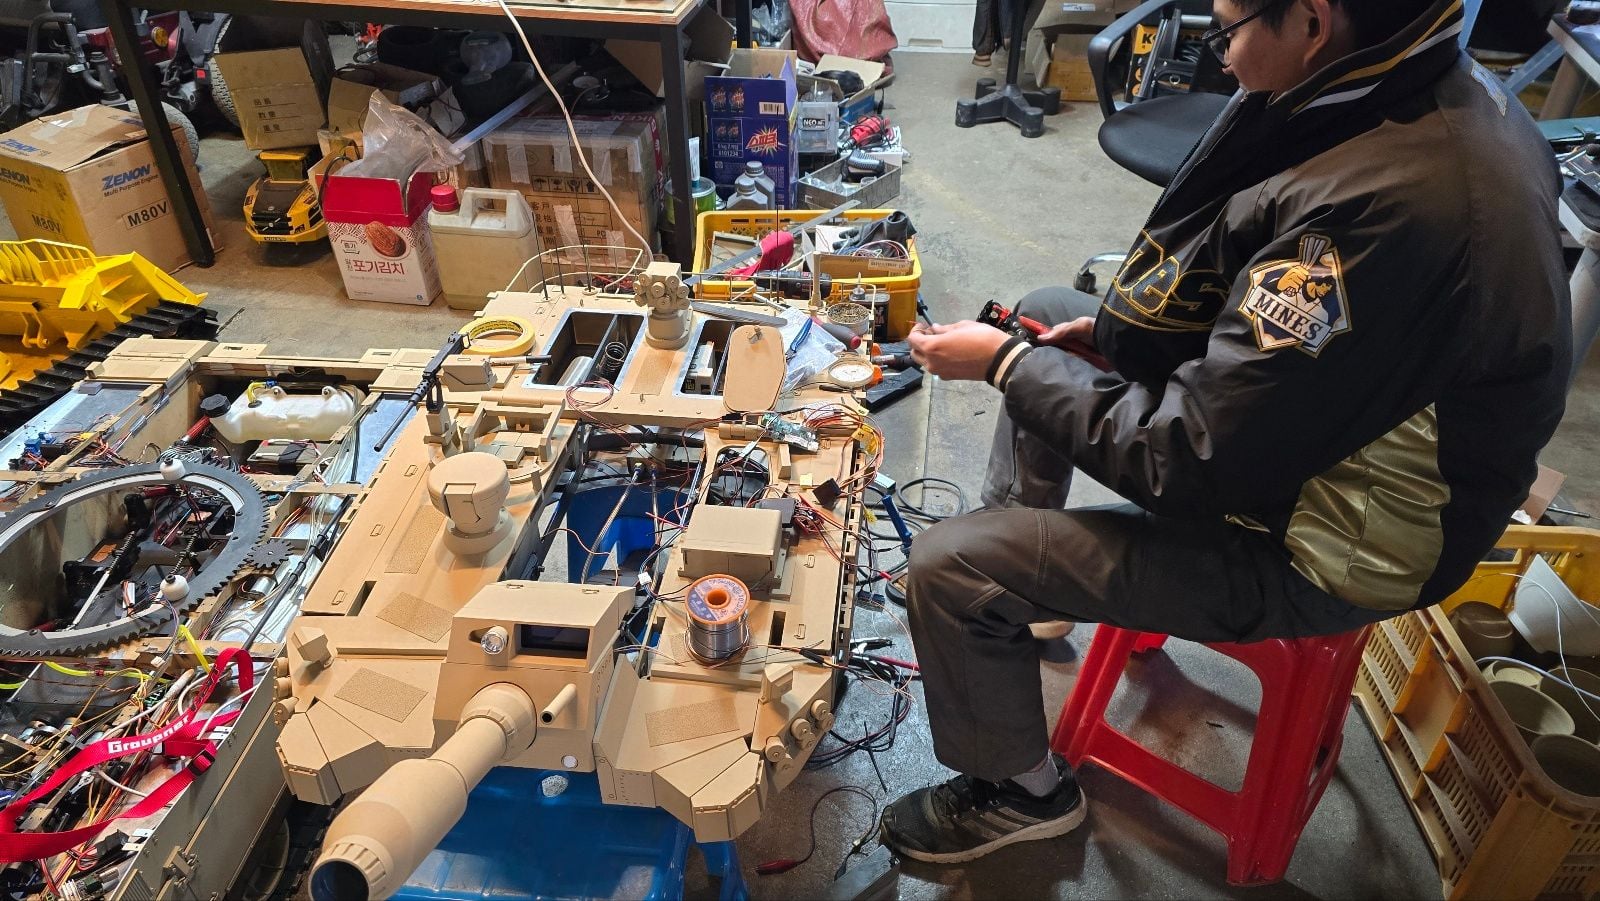
A new electrical wiring is being constructed in the turret.
One eight-channel receiver on the main body and one eight-channel receiver on the turrets were bound to the transmitter in succession, simplifying the electrical signal system to end the legend of moving between the main body and the turrets with a four-channel slip ring.
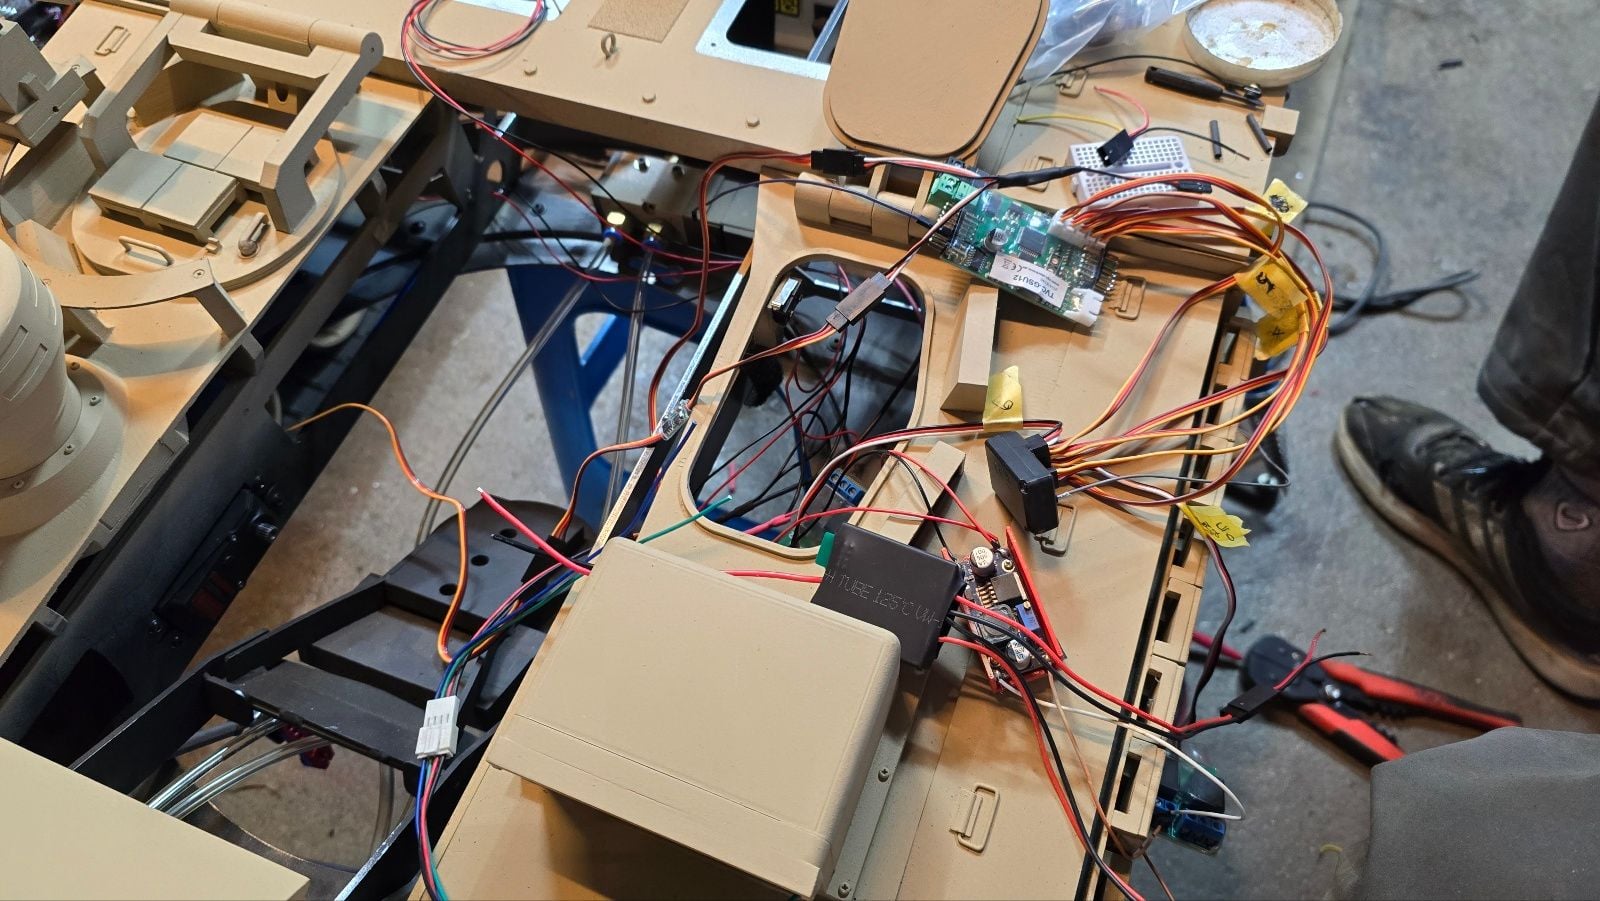
Seven channels are used for GSU ON/OFF, GSU vertical sensitivity control, GSU horizontal sensitivity control, main gun vertical control, tower horizontal control, main gun launch, and tower ON/OFF control for the 8-channel receiver used in the turret.
In this upgrade, two high-speed large servo motors were installed symmetrically for vertical control of the main gun.
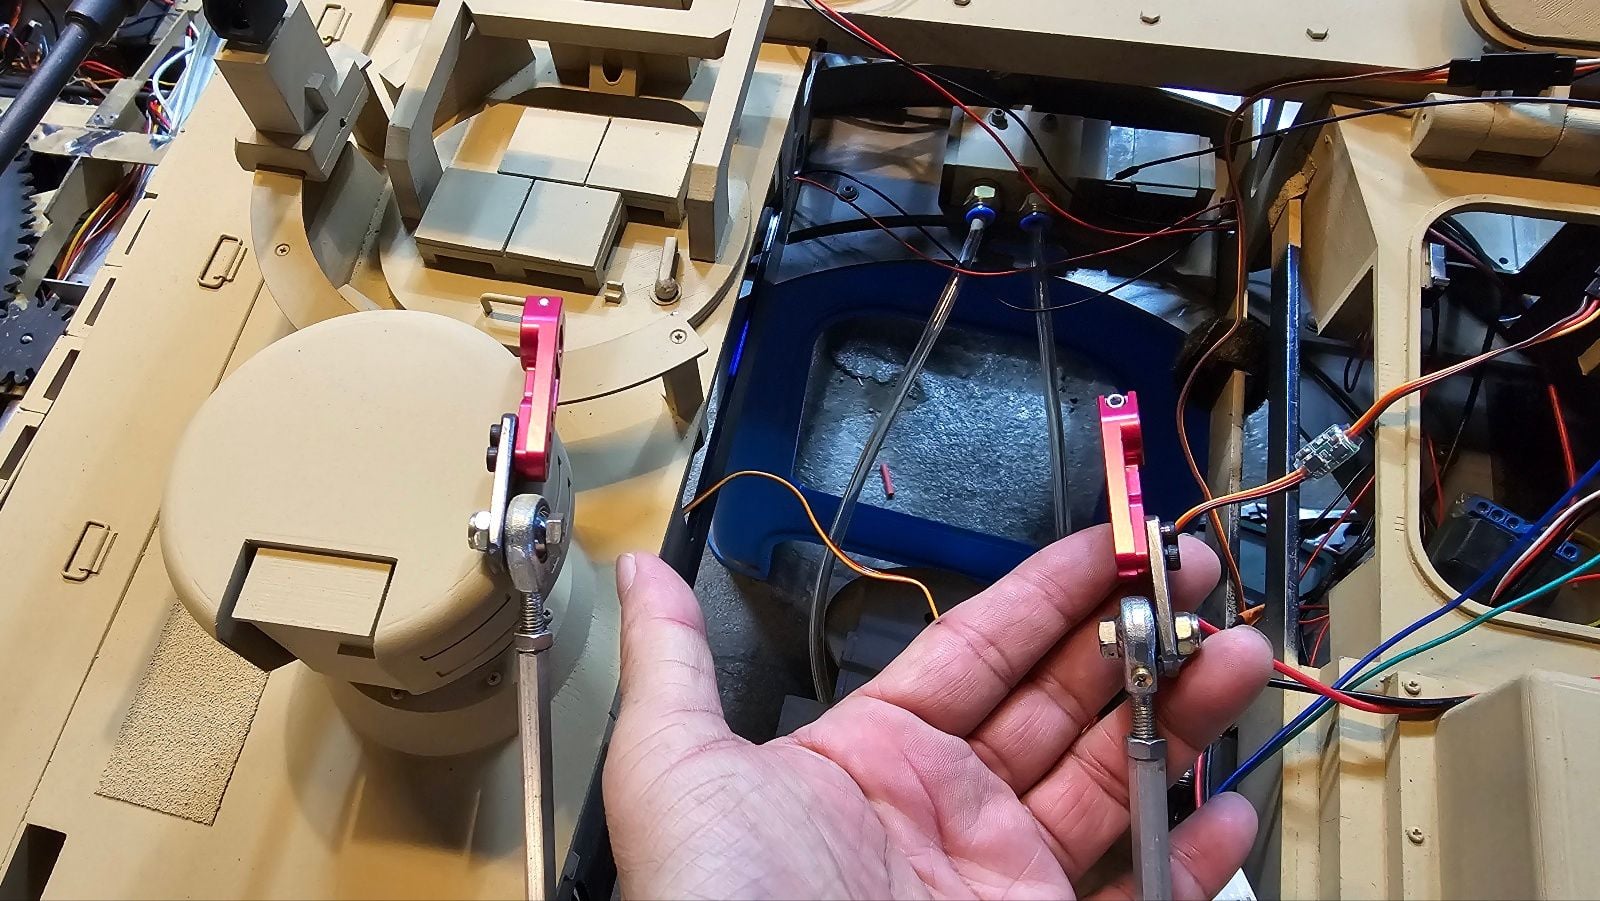
The linkage rod and servohon to be connected to the servo are prepared to be symmetrical.
While checking each signal of the transmitter, we gave the reliability of operation and carried out electrical connection work.
I am in separate practice until the end of this week to make sure I understand how to install GSU described in German, practice to apply it to large tanks and skillfully apply program parameters to the system.

The horizontal control of the turret by gsu is too simple to apply. However, in order to control the vertical by applying double servo, I practice setting by branching directly from the receiver using one reverse switch and two y-connectors.
A new electrical wiring is being constructed in the turret.
One eight-channel receiver on the main body and one eight-channel receiver on the turrets were bound to the transmitter in succession, simplifying the electrical signal system to end the legend of moving between the main body and the turrets with a four-channel slip ring.
Seven channels are used for GSU ON/OFF, GSU vertical sensitivity control, GSU horizontal sensitivity control, main gun vertical control, tower horizontal control, main gun launch, and tower ON/OFF control for the 8-channel receiver used in the turret.
In this upgrade, two high-speed large servo motors were installed symmetrically for vertical control of the main gun.
The linkage rod and servohon to be connected to the servo are prepared to be symmetrical.
While checking each signal of the transmitter, we gave the reliability of operation and carried out electrical connection work.
I am in separate practice until the end of this week to make sure I understand how to install GSU described in German, practice to apply it to large tanks and skillfully apply program parameters to the system.
The horizontal control of the turret by gsu is too simple to apply. However, in order to control the vertical by applying double servo, I practice setting by branching directly from the receiver using one reverse switch and two y-connectors.
03-01-2024, 07:28 AM
#211
Thread Starter
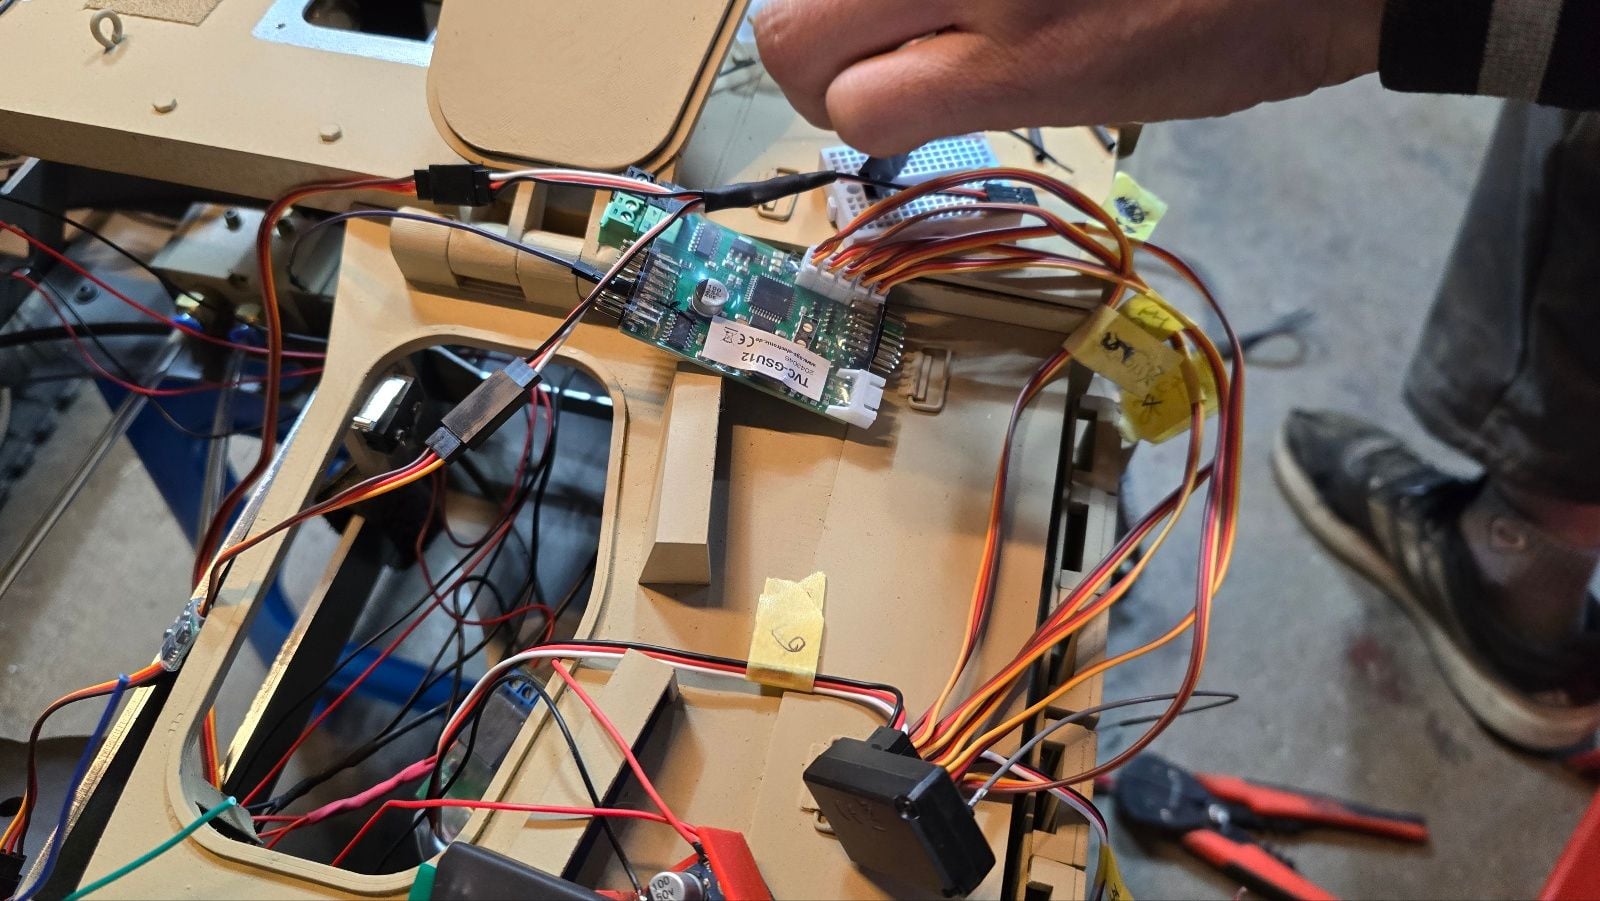
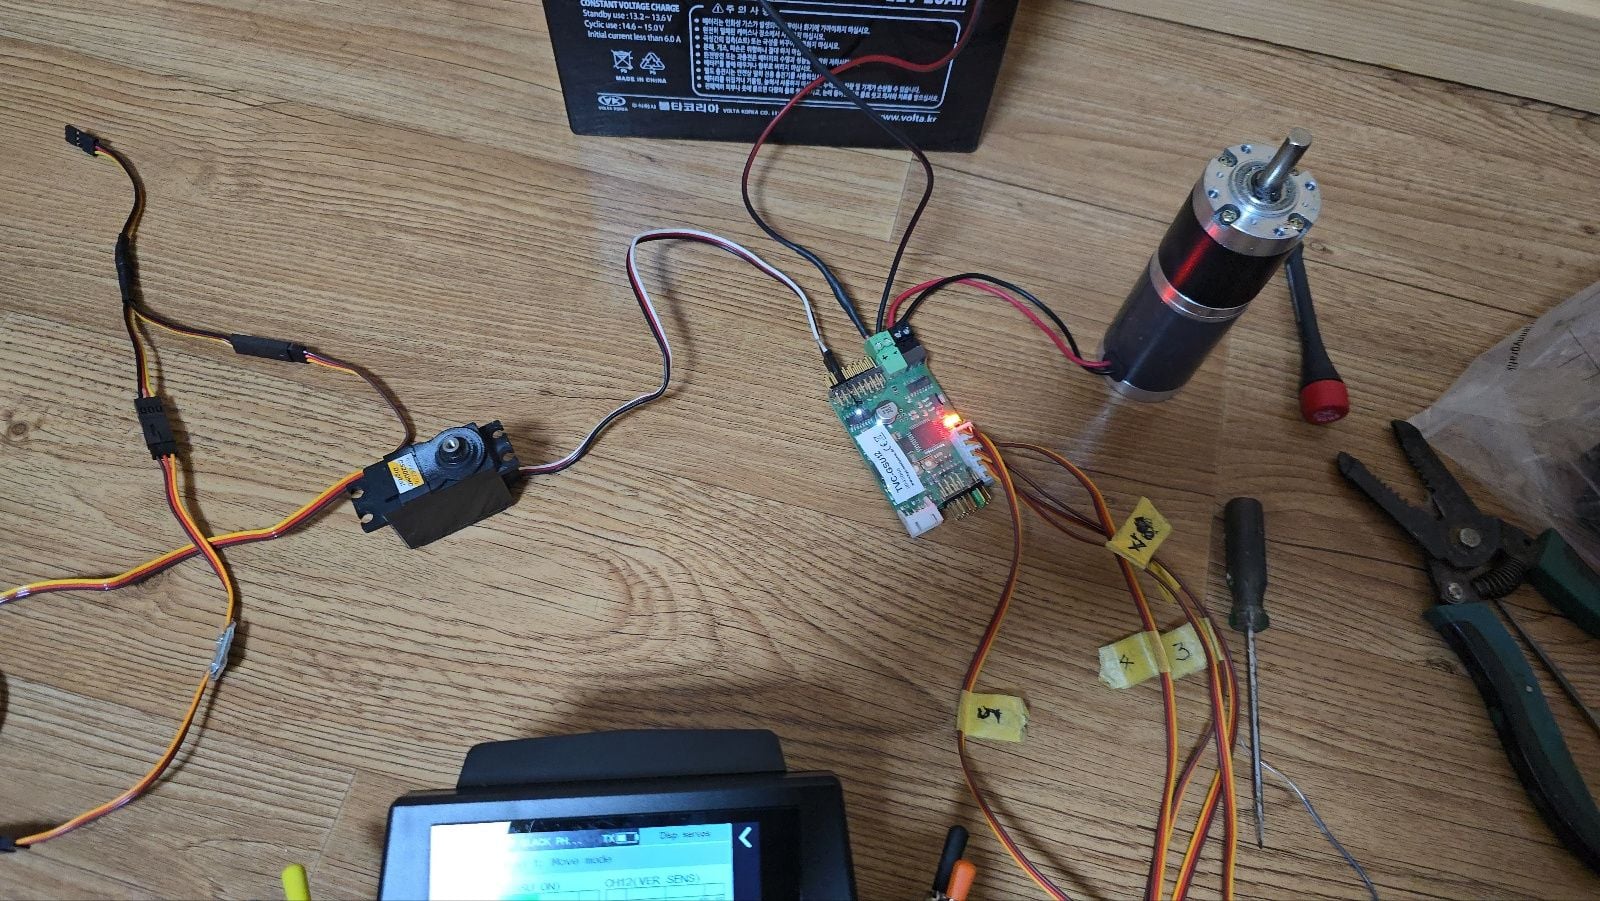
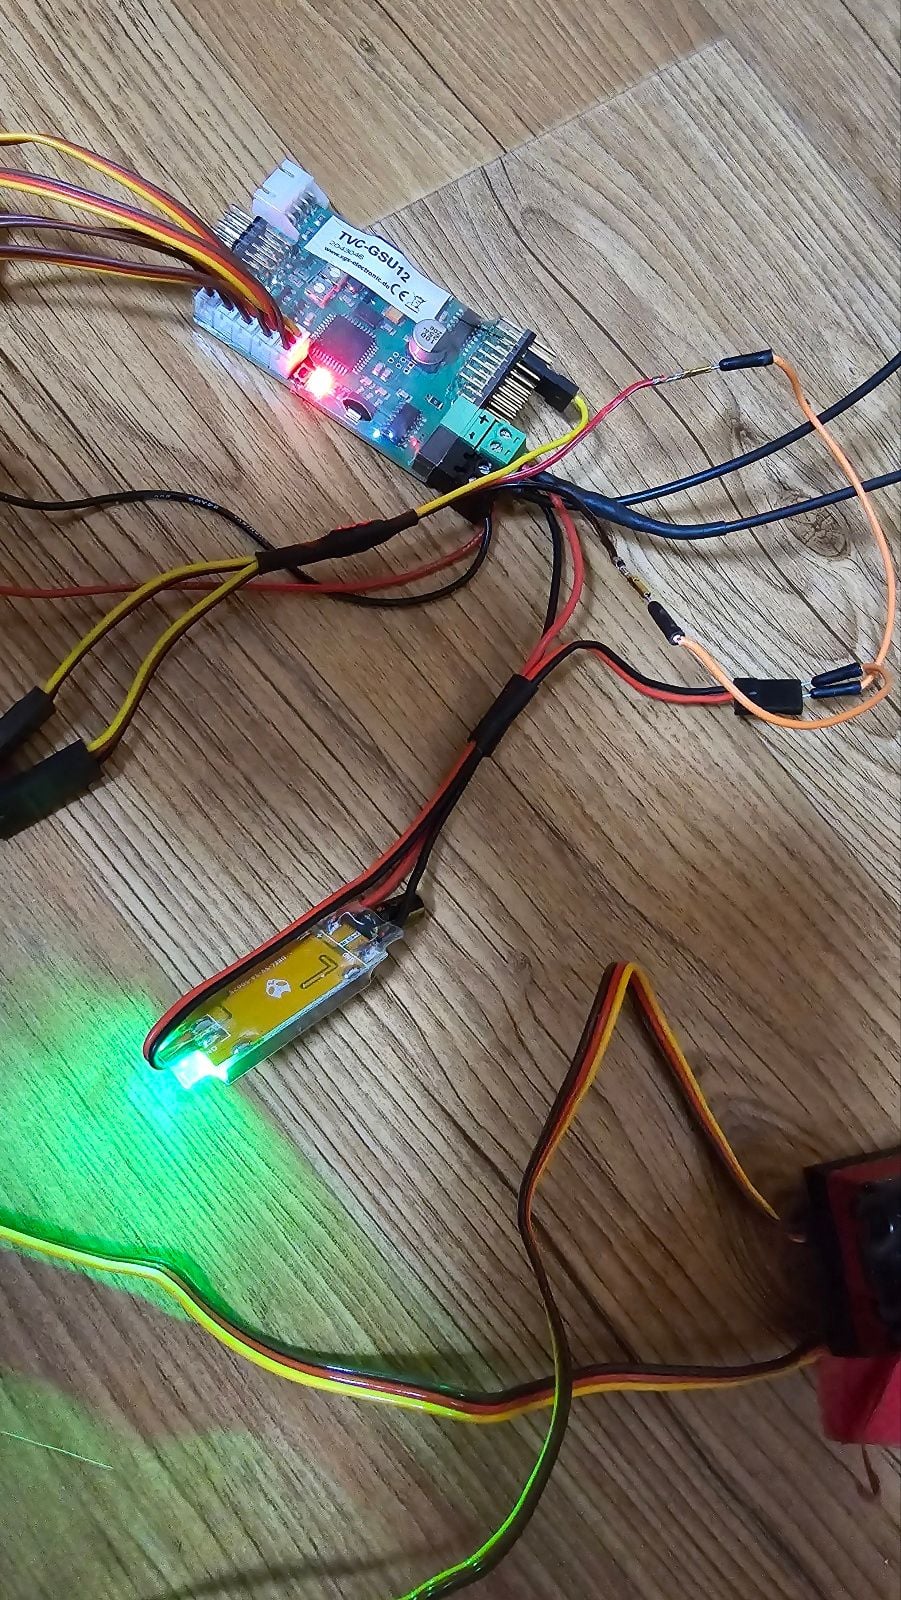
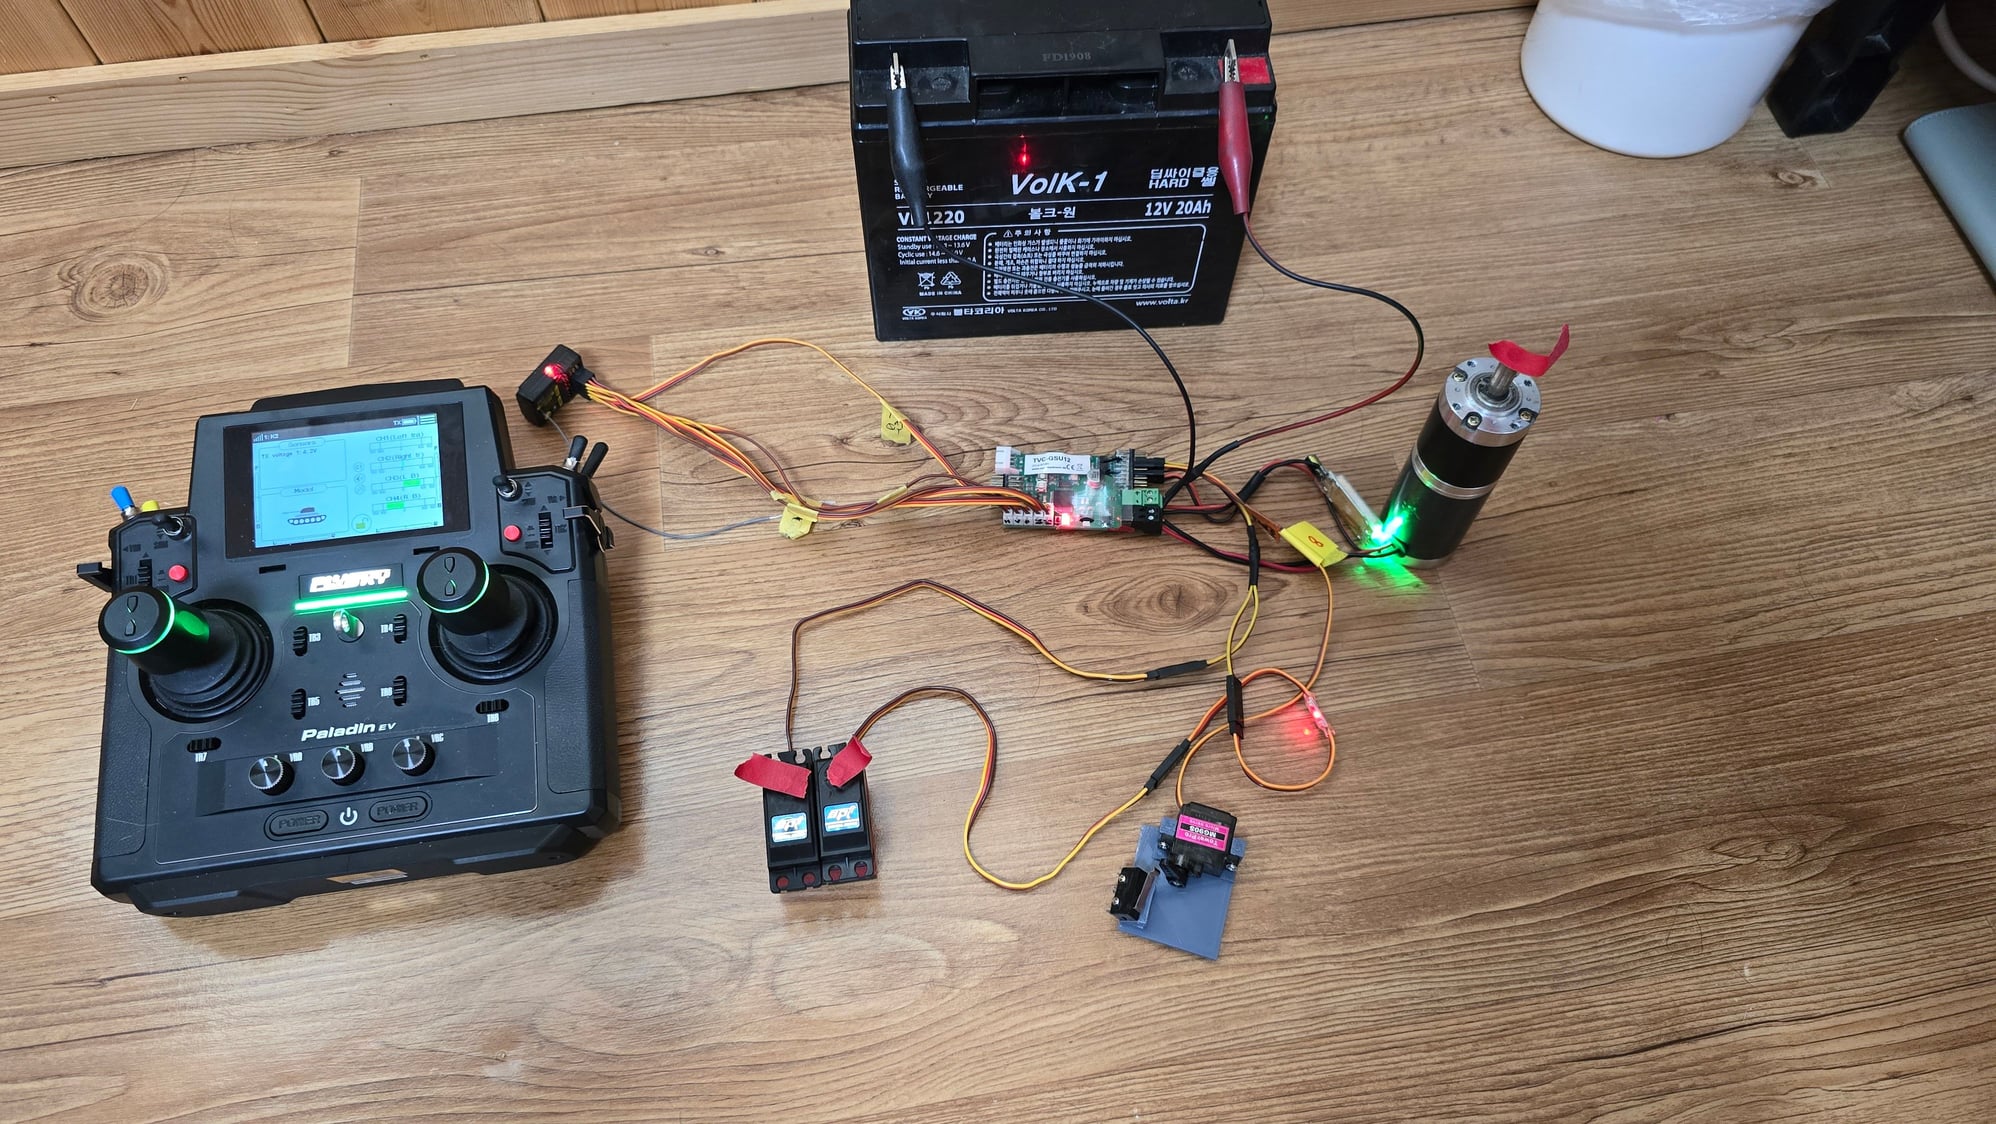
I would like to share some facts that I found out while testing the GSU of SGS Electronics.
1. GSU output side (servo port for main gun, X20) must be installed with proper capacity BEC. Without the help of BEC, no matter how small capacity the servo motor will operate. When you buy a product, UBEC for 5V and 3A branch from the main power source and provide it in the form of applying power to X17. If necessary, I remove this BEC and install UBEC for 8.4V and 3A here, and Y branch to two large servos for the main gun, and install a reverse switch on one side and supply it at the same time. To practice GSU setting, I brought this part home separately to remove the BEC and try to operate the servo for the main gun, so I thought the board was broken, so I finally found out that the BEC was absolutely necessary when I made a bypass on the receiver side and tested it.
2. Only X17 can be applied to the power controlled by the BEC, and it is recommended to bypass the large servo high voltage (e.g., 8.4V, 5A) to the saboteur line for protection of the board.
GSU TEST
GSU TEST
GSU TEST
GSU TEST
I will soon be able to show you a large tank with GSU running.
03-02-2024, 04:31 PM
#212
Thread Starter
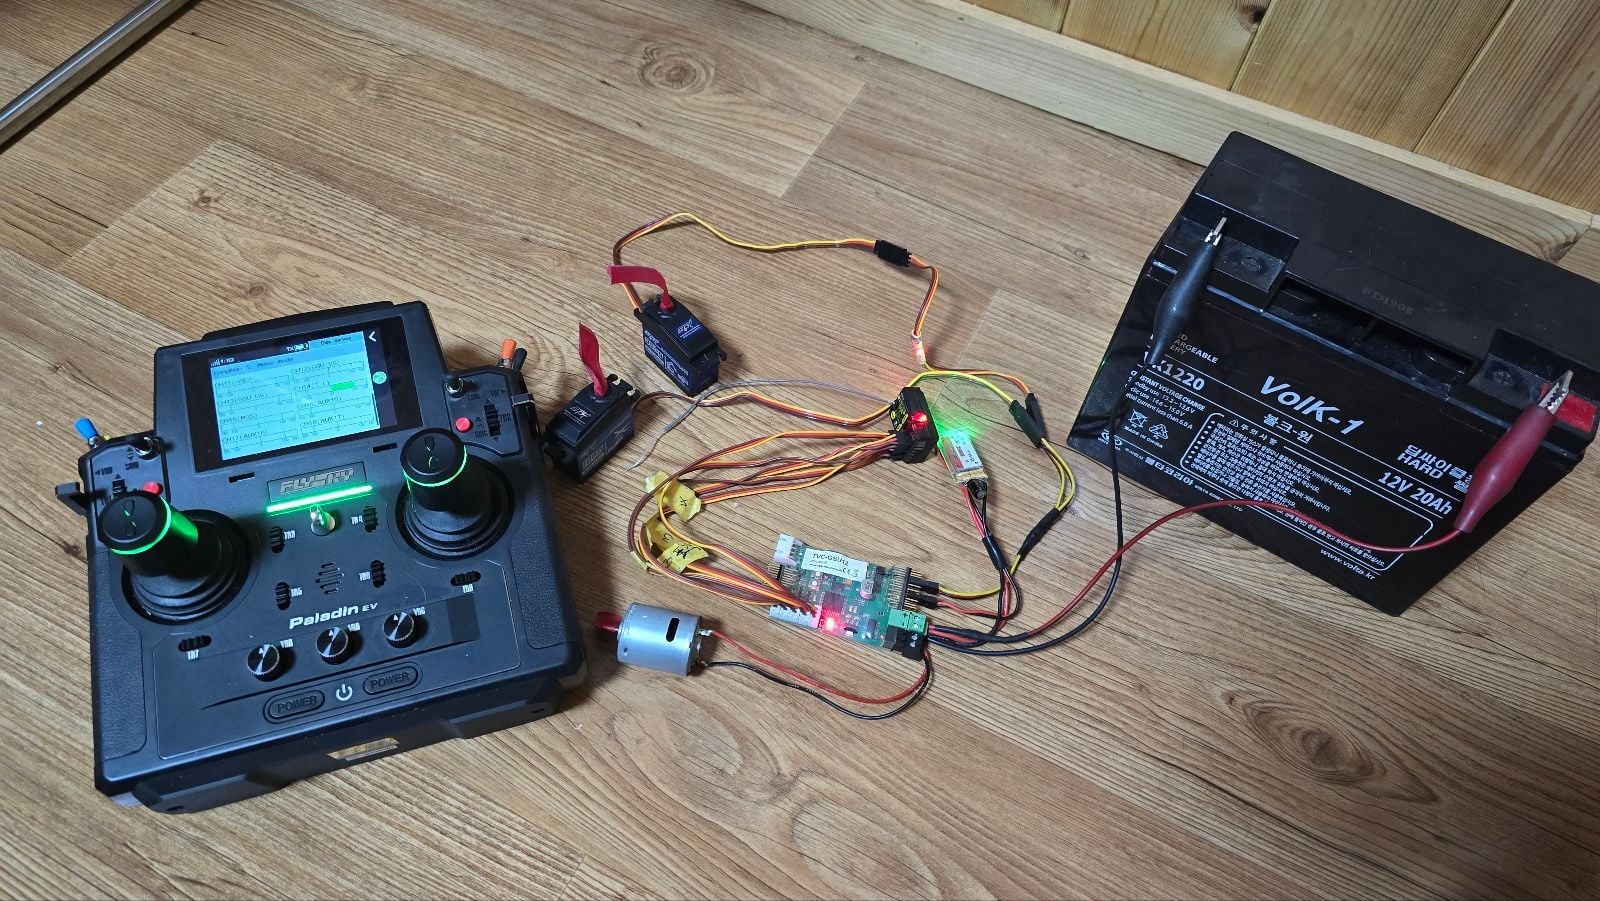
I constantly practiced how to set up the GSU written in German by translating it into Korean for a few days and finally confirmed today that all the actions of the GSU operate perfectly and accurately in manual and automatic mode.
Sooner or later, I will test it by installing it in my K2 Black Panther tank.
I hope it works well against the noise that may occur in my engine tank.
Sooner or later, I will test it by installing it in my K2 Black Panther tank.
I hope it works well against the noise that may occur in my engine tank.
Last edited by PE YOUNG; 03-02-2024 at 06:40 PM. Reason: Add test video
 03-07-2024, 04:24 AM
#214
Thread Starter
I'm sharing the interim results of GSU introduction. First of all, low-cost 1/5 scale servo from China has different specifications and torque. When two were used, one side used servo reverse, but the other side used the servo reverse signal, but the other side used the servo reverse signal. So, I only drove with one servo, so I confirmed the operation. And I ordered two servos and a servo programmer today that can be a little expensive program from AliExpress. After replacing it with this servo, I will share the video within a few days. And the sprocket to speed up was also replaced, and the result is satisfactory.
The following users liked this post:
Tanker1966 (03-07-2024)
03-09-2024, 07:15 PM
#215
Thread Starter
Below is my post on the Armortek site.
While waiting for the newly ordered servo motor and servo programmer, I will write about the progress and process of my experiments.
Vince started this thread in 2020, and at that time, GSUs from SGS Electronics were available.
Gerhard, on February 10, 2020, shared pictures of a 1/4 scale Leopard 2 tank weighing over 400KG, equipped with GSUs, illustrating the application.
However, what I had been contemplating and wanting to solve from that time until now was not the horizontal control of the turret but the vertical control of the main gun mounted on the turret.
Back then and even now, horizontal control using DC motors poses no difficulty.
However, what I struggled with and wanted to resolve was the vertical control of the main gun on the turret.
At that time, there was no powerful RC servo to control the vertical main gun.
So, I attempted to develop a system using a linear actuator with a PWM signal applied through an Arduino.
During the tests, it showed reasonable performance at high speeds.
However, during slow tank movements, specifically when processing signals from a 6-axis or 9-axis sensor (e.g., BNO055) in Arduino circuits, signal loss occurred.
The problem was identified when adjusting the position of the main gun in automatic mode after user intervention.
The challenge was fixing the adjusted position as a new reference point for automatic vertical control.
While using standard RC servos or suitable industrial servos for vertical control, there would have been no significant issue.
However, compatibility with the desired scale tank posed a separate challenge.
Over the years, technology has advanced, and now servos with a torque of over 60kg.cm and high-voltage servos with 12V or more are available.
With the use of UBEC, even high-voltage servos can easily apply vertical stabilization.
However, using the small controller from the 35RCTANK poses a problem.
In the process of reviewing GSUs for large tanks, I focused on CLARK MODEL's TK80 series and SGS Electronics' TVC-GSU-12.
Based on personal preference and needs, I decided on SGS's TVC-GSU-12 as the optimal system.
I have experienced the principles of balancing the center of gravity using weights, allowing precise control of the main gun of a large tank in the scale of 1/5 to 1/6, much like a puppet.
Therefore, I set up a separate circuit to test the configuration of SGS Electronics' GSU and achieved positive results (refer to the test video uploaded last time).
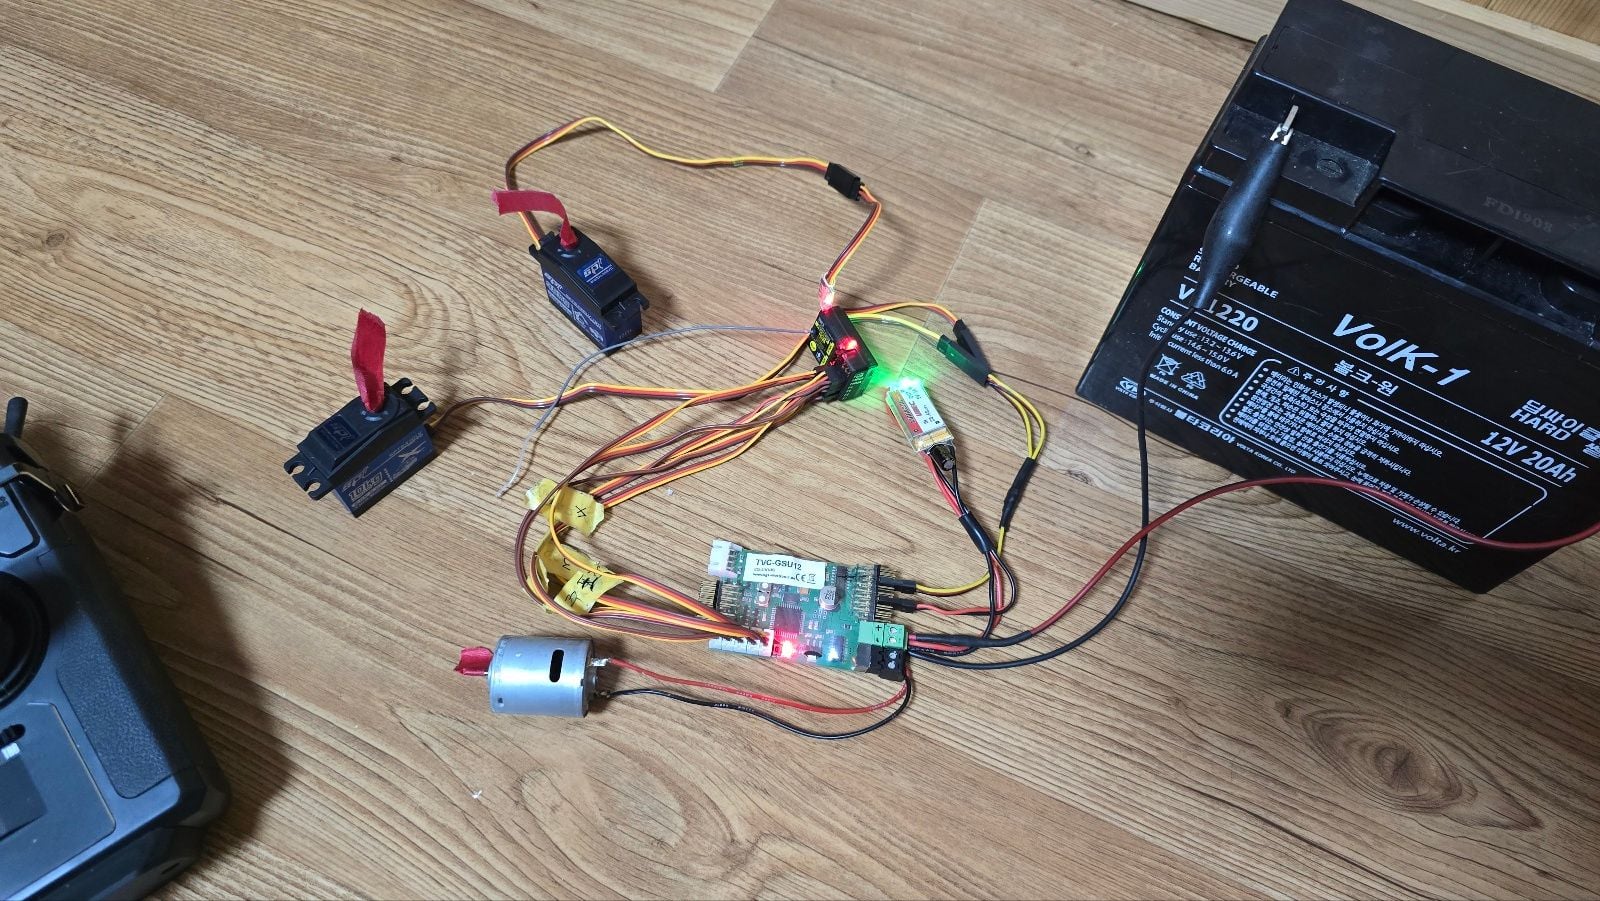
In this test, I used two standard servos to ensure directional consistency.
One servo was directly connected, while the other had a servo reverse switch installed between the Y-connector and the servo connector to match the operating direction.
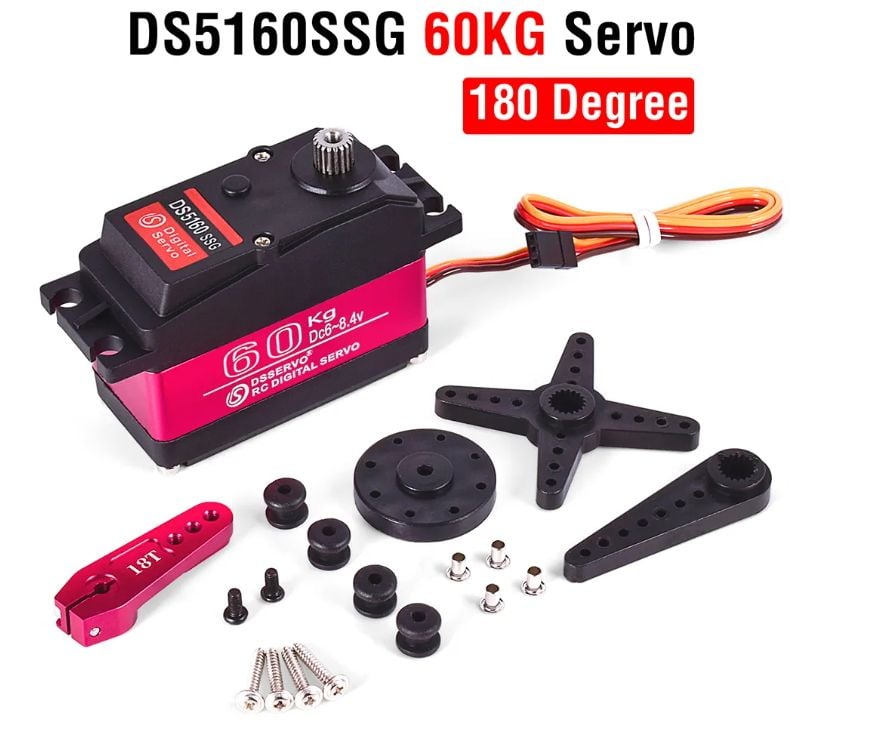
During the test, I removed the HITEC D845WP servo from the 1/5 scale BLACK PHANTHER tank I was building, installed two DSSERVO from AliExpress, and faced issues during operation.
The problem arose when combining the reverse switch with DSSERVO.
To identify the issue, I installed a Y-connector directly from the GSU's vertical signal channel and tested with one side using DSSERVO and the other side using servo reverse + DSSERVO, which worked well.
Even with only one DSSERVO connected directly to the GSU, it worked well.
However, when combining DSSERVO + servo reverse switch and connecting it to the GSU, it did not work.
Testing with a different brand of servo reverse switch also resulted in the same issue.
As a result, I concluded that when combining a reverse switch with DSSERVO, the signal from the GSU is lost.
Therefore, unless using a dedicated programmer for DSSERVO that reverses one servo's direction at the source, this combination cannot be used.
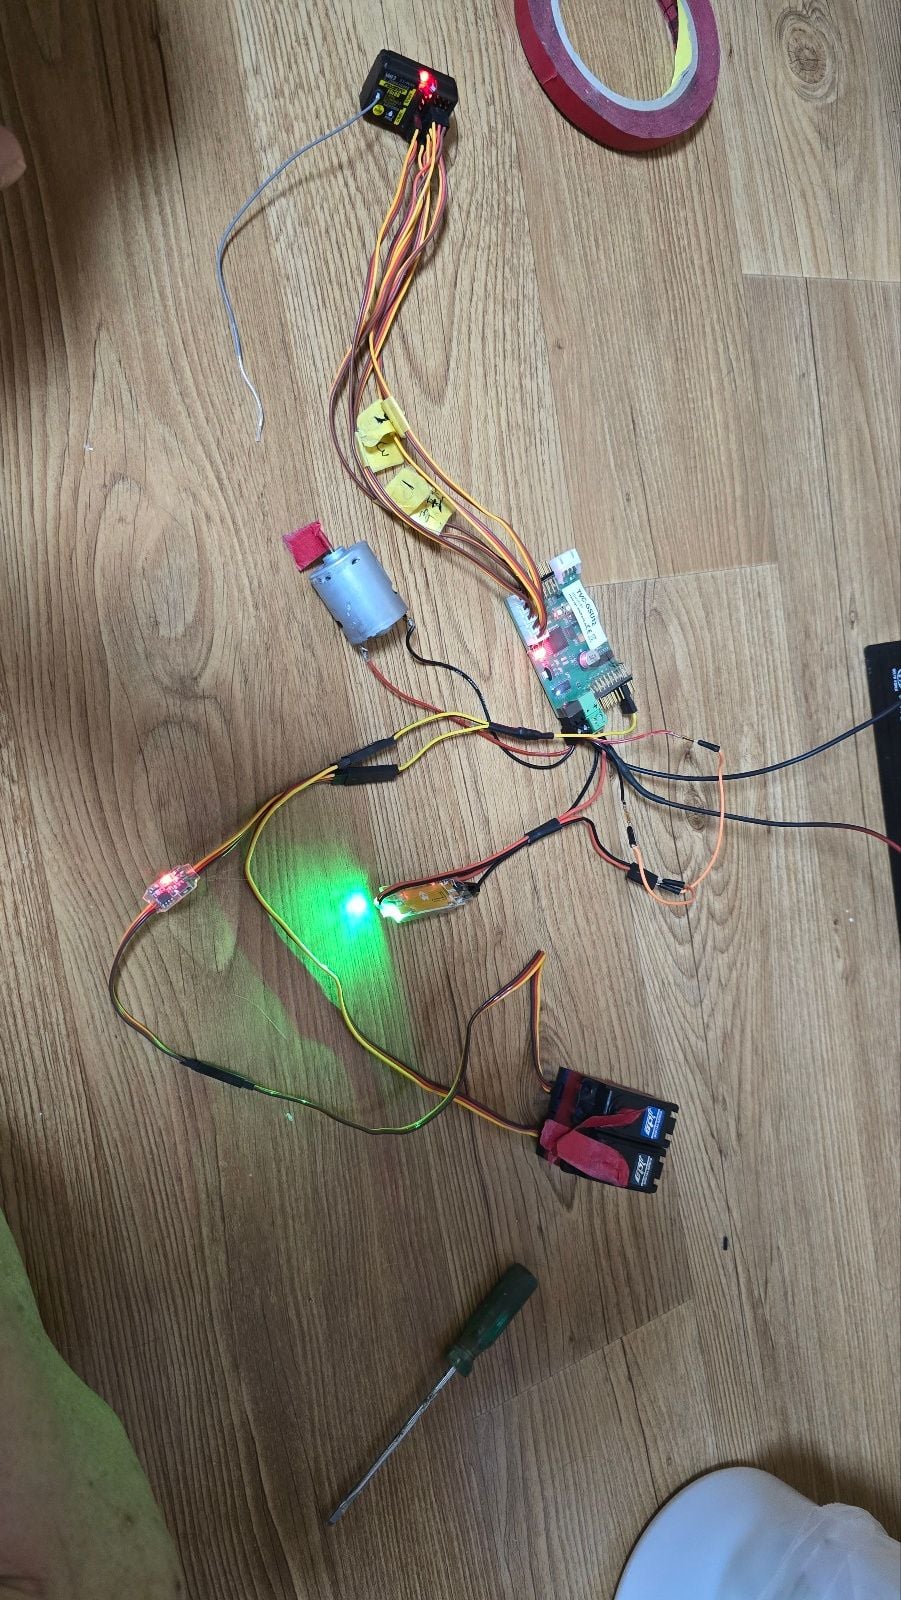
In a hurry, I connected the existing HITEC D845WP servo directly to the GSU to check if the control of the GSU works with one servo in my 1/5 scale BLACK PHANTHER tank.
When controlling the altitude of the gun in manual mode, this servo showed a discontinuous movement like a pulse.
It continued to work in automatic mode.
Connecting a DSSERVO, which has superior specifications according to the catalog, to the GSU for manual mode control of the elevation of the main gun resulted in smoother operation compared to the HITEC D845WP servo.
It worked smoothly even in automatic mode.
Therefore, I installed one DSSERVO in my 1/5 scale K2 tank and tested it.
However, due to the lack of catalog specifications in automatic mode, the elevation of the gun was not accurately fixed, so I halted the test.
Subsequently, I purchased two new servos with a torque of over 100 kg.cm and the servo programmer, eagerly awaiting their arrival while introducing the test results.
Thank you for reading this tedious and lengthy text.

Previously installed HITEC servo during initial production
When using low-cost DS servo and reverse switches, the GSU signal was lost.

Newly ordered Progranable YIPIN SERVO

A servo programmer dedicated to YIPIN SERVO, using this, does not want to use a servo reverse switch by fundamentally reversing the direction.
While waiting for the newly ordered servo motor and servo programmer, I will write about the progress and process of my experiments.
Vince started this thread in 2020, and at that time, GSUs from SGS Electronics were available.
Gerhard, on February 10, 2020, shared pictures of a 1/4 scale Leopard 2 tank weighing over 400KG, equipped with GSUs, illustrating the application.
However, what I had been contemplating and wanting to solve from that time until now was not the horizontal control of the turret but the vertical control of the main gun mounted on the turret.
Back then and even now, horizontal control using DC motors poses no difficulty.
However, what I struggled with and wanted to resolve was the vertical control of the main gun on the turret.
At that time, there was no powerful RC servo to control the vertical main gun.
So, I attempted to develop a system using a linear actuator with a PWM signal applied through an Arduino.
During the tests, it showed reasonable performance at high speeds.
However, during slow tank movements, specifically when processing signals from a 6-axis or 9-axis sensor (e.g., BNO055) in Arduino circuits, signal loss occurred.
The problem was identified when adjusting the position of the main gun in automatic mode after user intervention.
The challenge was fixing the adjusted position as a new reference point for automatic vertical control.
While using standard RC servos or suitable industrial servos for vertical control, there would have been no significant issue.
However, compatibility with the desired scale tank posed a separate challenge.
Over the years, technology has advanced, and now servos with a torque of over 60kg.cm and high-voltage servos with 12V or more are available.
With the use of UBEC, even high-voltage servos can easily apply vertical stabilization.
However, using the small controller from the 35RCTANK poses a problem.
In the process of reviewing GSUs for large tanks, I focused on CLARK MODEL's TK80 series and SGS Electronics' TVC-GSU-12.
Based on personal preference and needs, I decided on SGS's TVC-GSU-12 as the optimal system.
I have experienced the principles of balancing the center of gravity using weights, allowing precise control of the main gun of a large tank in the scale of 1/5 to 1/6, much like a puppet.
Therefore, I set up a separate circuit to test the configuration of SGS Electronics' GSU and achieved positive results (refer to the test video uploaded last time).
In this test, I used two standard servos to ensure directional consistency.
One servo was directly connected, while the other had a servo reverse switch installed between the Y-connector and the servo connector to match the operating direction.
During the test, I removed the HITEC D845WP servo from the 1/5 scale BLACK PHANTHER tank I was building, installed two DSSERVO from AliExpress, and faced issues during operation.
The problem arose when combining the reverse switch with DSSERVO.
To identify the issue, I installed a Y-connector directly from the GSU's vertical signal channel and tested with one side using DSSERVO and the other side using servo reverse + DSSERVO, which worked well.
Even with only one DSSERVO connected directly to the GSU, it worked well.
However, when combining DSSERVO + servo reverse switch and connecting it to the GSU, it did not work.
Testing with a different brand of servo reverse switch also resulted in the same issue.
As a result, I concluded that when combining a reverse switch with DSSERVO, the signal from the GSU is lost.
Therefore, unless using a dedicated programmer for DSSERVO that reverses one servo's direction at the source, this combination cannot be used.
In a hurry, I connected the existing HITEC D845WP servo directly to the GSU to check if the control of the GSU works with one servo in my 1/5 scale BLACK PHANTHER tank.
When controlling the altitude of the gun in manual mode, this servo showed a discontinuous movement like a pulse.
It continued to work in automatic mode.
Connecting a DSSERVO, which has superior specifications according to the catalog, to the GSU for manual mode control of the elevation of the main gun resulted in smoother operation compared to the HITEC D845WP servo.
It worked smoothly even in automatic mode.
Therefore, I installed one DSSERVO in my 1/5 scale K2 tank and tested it.
However, due to the lack of catalog specifications in automatic mode, the elevation of the gun was not accurately fixed, so I halted the test.
Subsequently, I purchased two new servos with a torque of over 100 kg.cm and the servo programmer, eagerly awaiting their arrival while introducing the test results.
Thank you for reading this tedious and lengthy text.
Previously installed HITEC servo during initial production
When using low-cost DS servo and reverse switches, the GSU signal was lost.
Newly ordered Progranable YIPIN SERVO
A servo programmer dedicated to YIPIN SERVO, using this, does not want to use a servo reverse switch by fundamentally reversing the direction.
The following users liked this post:
Tanker1966 (03-12-2024)

The following users liked this post:
PE YOUNG (03-12-2024)
03-13-2024, 12:52 AM
#217
Thread Starter
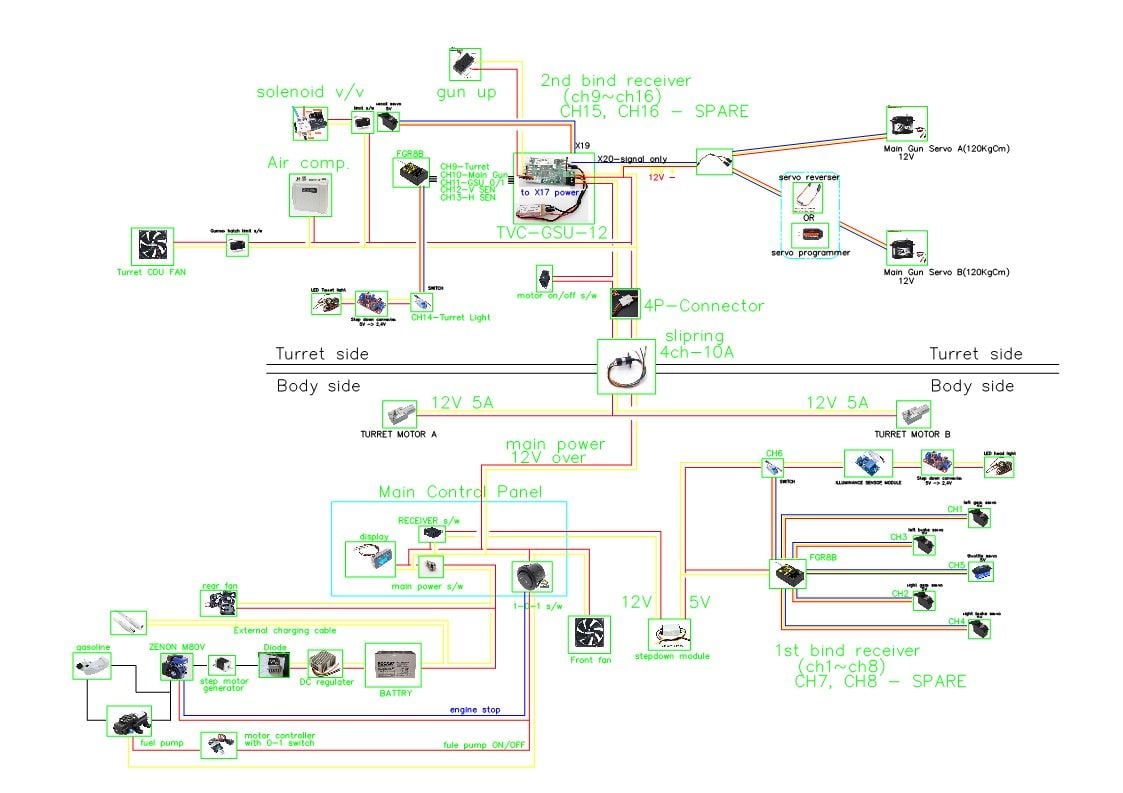
While waiting for the parts I ordered, I completely drew the electrical unit schematic.
Last edited by PE YOUNG; 03-13-2024 at 11:41 PM.
The following users liked this post:
Tanker1966 (03-13-2024)
03-13-2024, 07:36 PM
#218
Thread Starter
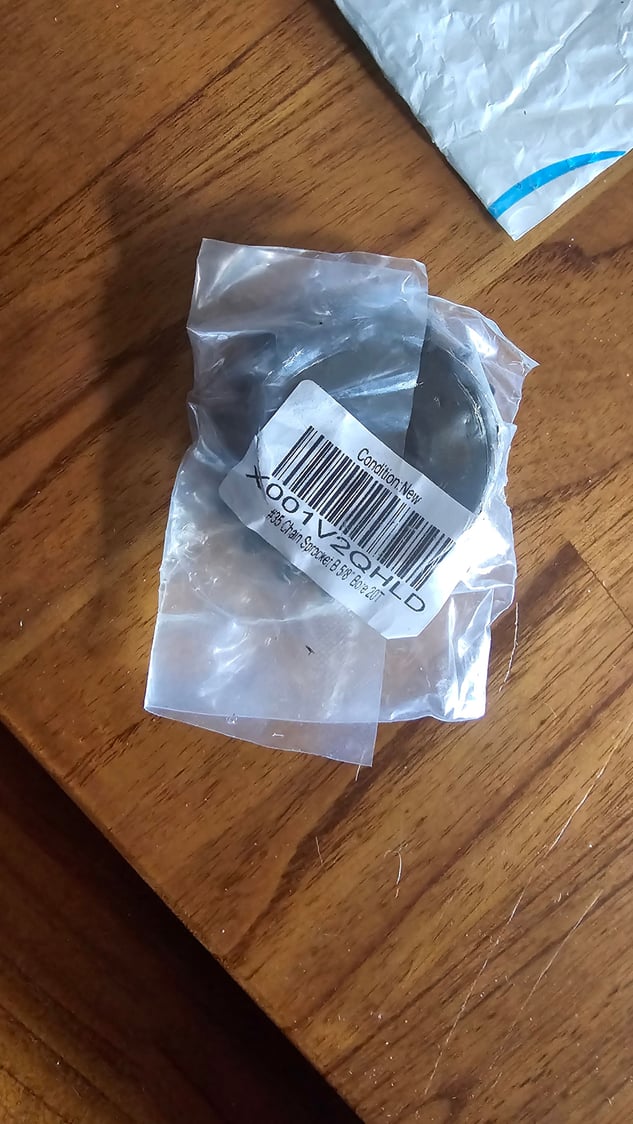
On March 7, I ordered 30 tooth sprockets from Amazon and on the same day, I ordered a servo programmer and a high-powered servo from AliExpress.
The sprocket is scheduled to arrive this afternoon, and the servo programmer is expected to arrive around tomorrow, but the important part, the servo, does not arrive until tomorrow, so I will first adjust the gear ratio that determines the driving speed of the K2 tank and finish covering the upper part of the open body for work.
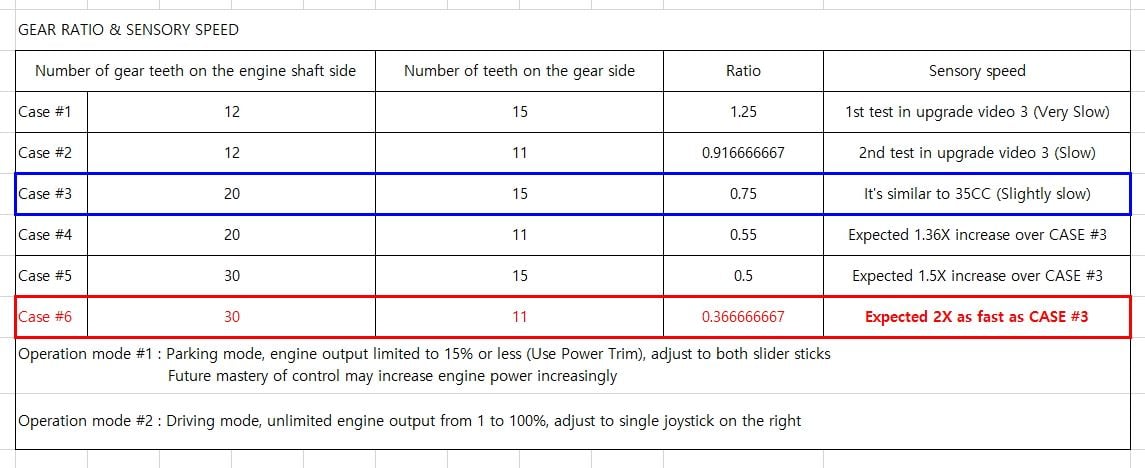
Considering the performance and conditions of the engine, the gear ratio is being adjusted to realize a maximum speed twice as fast as the maximum speed of the existing 35cc engine, and the maximum speed at this time is expected to be the speed at which adults run lightly. In this case, the rc pilot setting will consist of a parking mode (controlled by a double side slide stick) and a driving mode (operated by one right side stick)
The sprocket is scheduled to arrive this afternoon, and the servo programmer is expected to arrive around tomorrow, but the important part, the servo, does not arrive until tomorrow, so I will first adjust the gear ratio that determines the driving speed of the K2 tank and finish covering the upper part of the open body for work.
Considering the performance and conditions of the engine, the gear ratio is being adjusted to realize a maximum speed twice as fast as the maximum speed of the existing 35cc engine, and the maximum speed at this time is expected to be the speed at which adults run lightly. In this case, the rc pilot setting will consist of a parking mode (controlled by a double side slide stick) and a driving mode (operated by one right side stick)
03-20-2024, 11:07 PM
#220
Thread Starter
I didn't like the specifications of the servo I ordered, so I returned and re-ordered the arrived product 2 times.
As a result, it is expected that the productionthe completion of the product will be delayed.
Finally, I ordered two X150 servos again and am waiting.
Yipinservo and GXservo use the same platform and the same servo programmer, but the power connection method is different. Yipinservo has to connect four separately from the power line and the signal line, and GXservo has three strands in the traditional servo method.
So, I ordered the X150 of GXservo again today, and I am trying to return the X120 of Yipinservo as soon as it arrives.
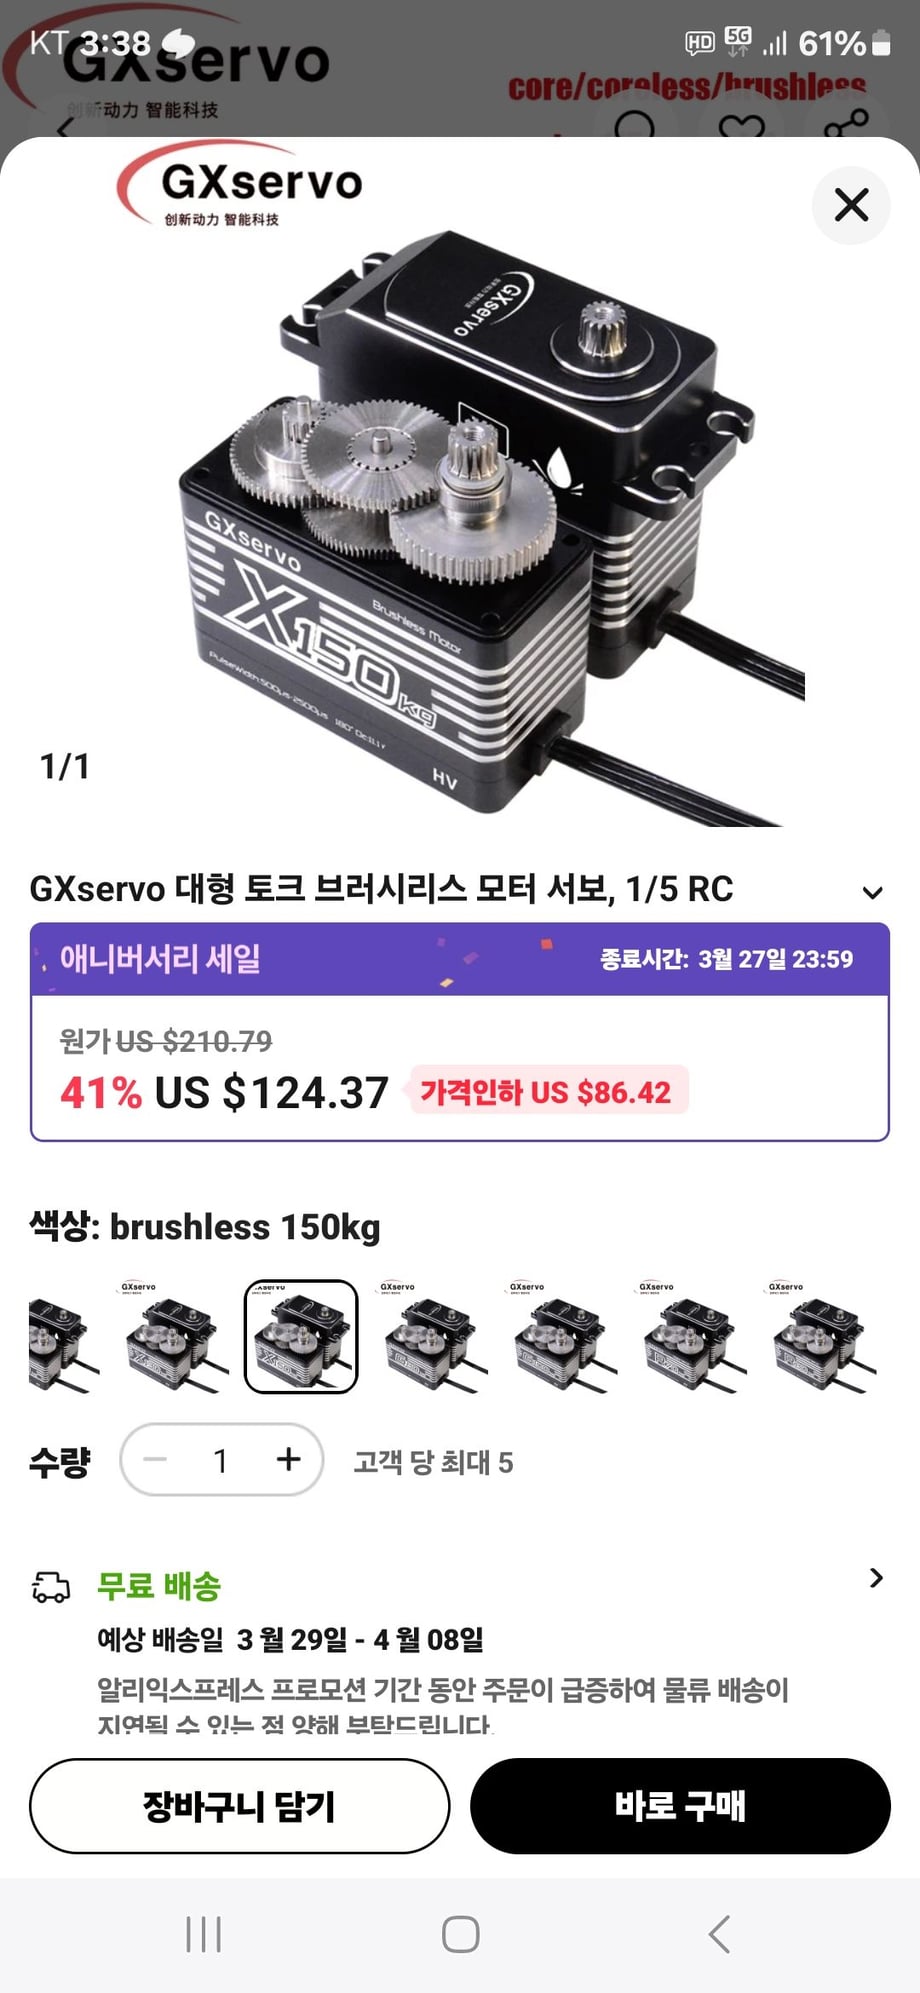
GXservo

Yipinservo
As a result, it is expected that the productionthe completion of the product will be delayed.
Finally, I ordered two X150 servos again and am waiting.
Yipinservo and GXservo use the same platform and the same servo programmer, but the power connection method is different. Yipinservo has to connect four separately from the power line and the signal line, and GXservo has three strands in the traditional servo method.
So, I ordered the X150 of GXservo again today, and I am trying to return the X120 of Yipinservo as soon as it arrives.
GXservo
Yipinservo
Last edited by PE YOUNG; 03-21-2024 at 12:03 AM.