


StuG IIIG build thread
 05-05-2020 | 11:30 PM
#76

Thread Starter

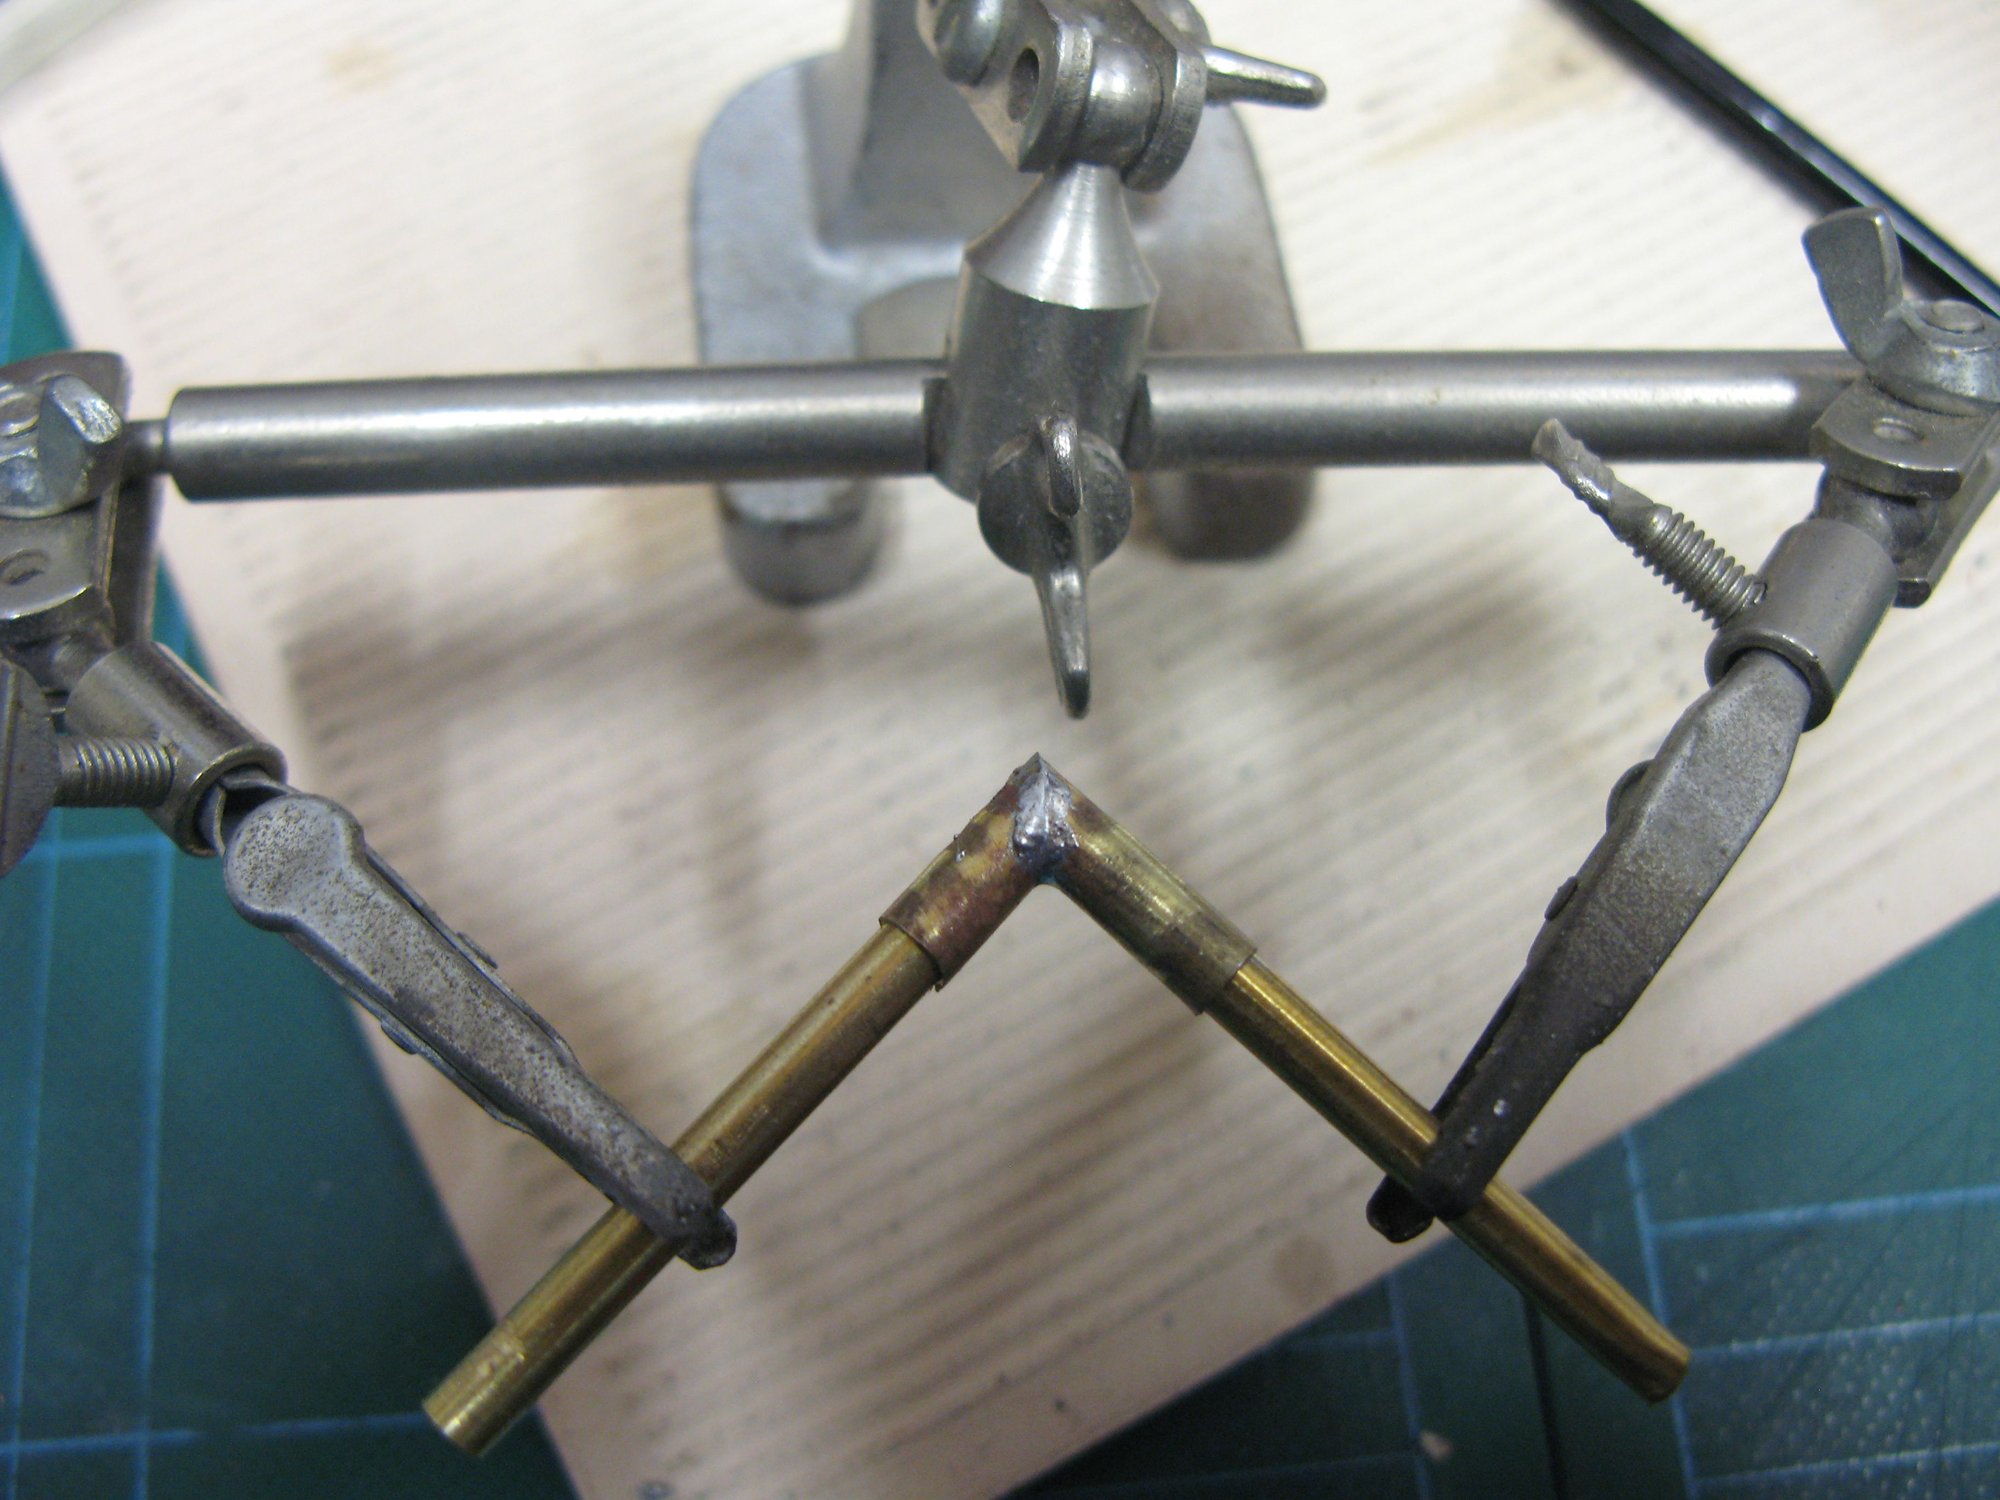
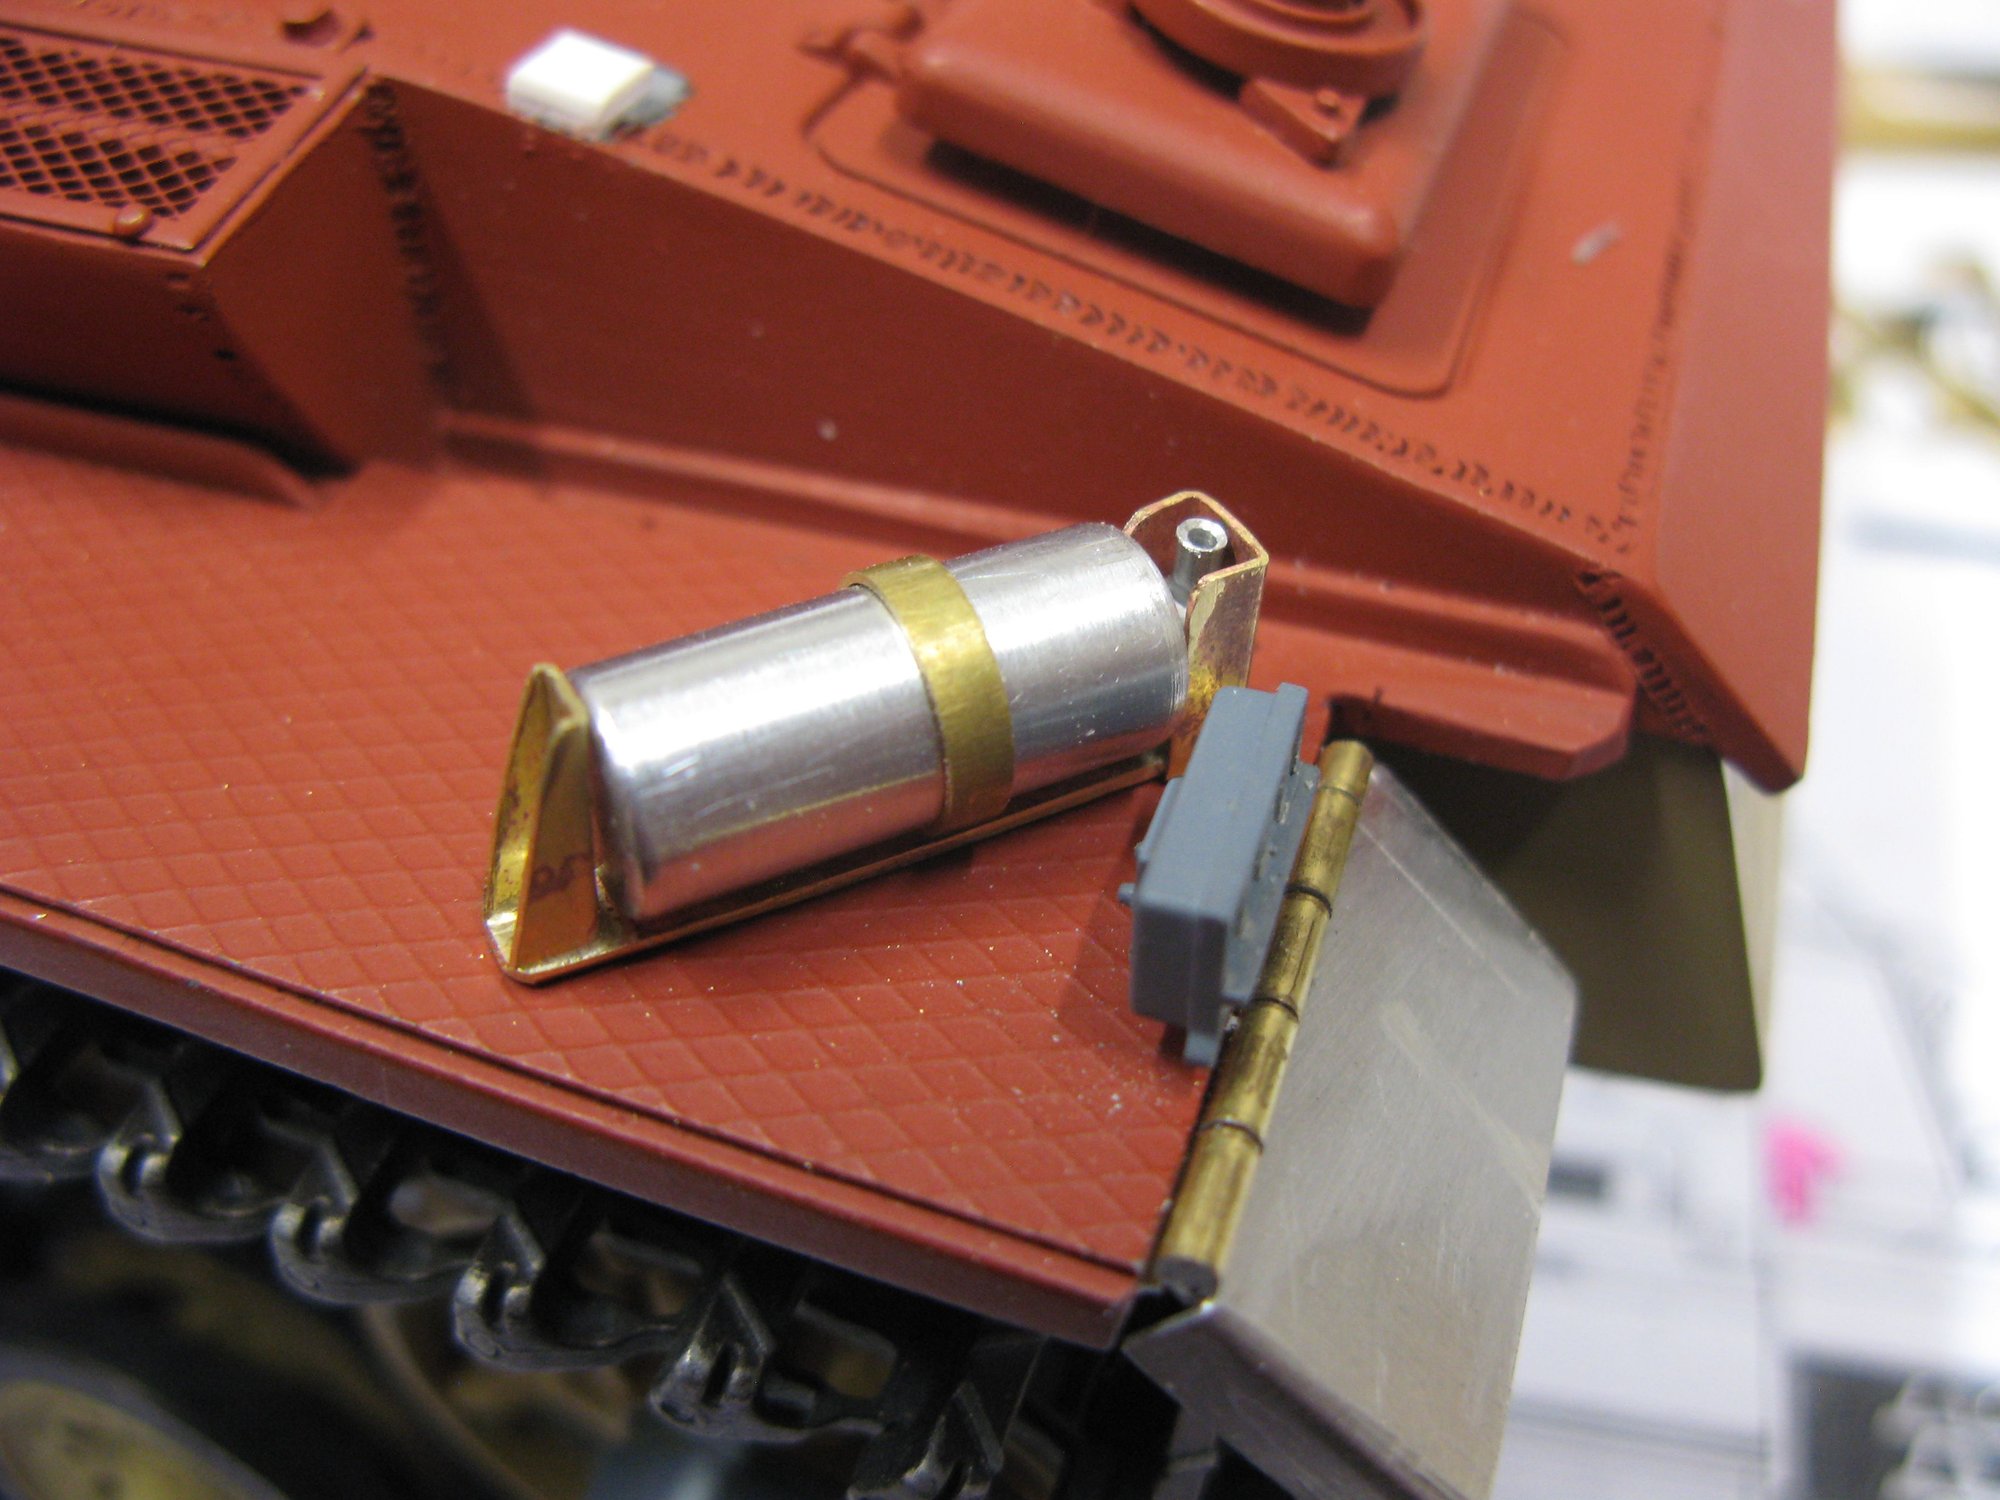
Making the smoke emerge from the exhausts (I'm sure it didn't,but it was a long time ago). Brass tube annealed, filled with plumbers solder (it's cheap) and bent.
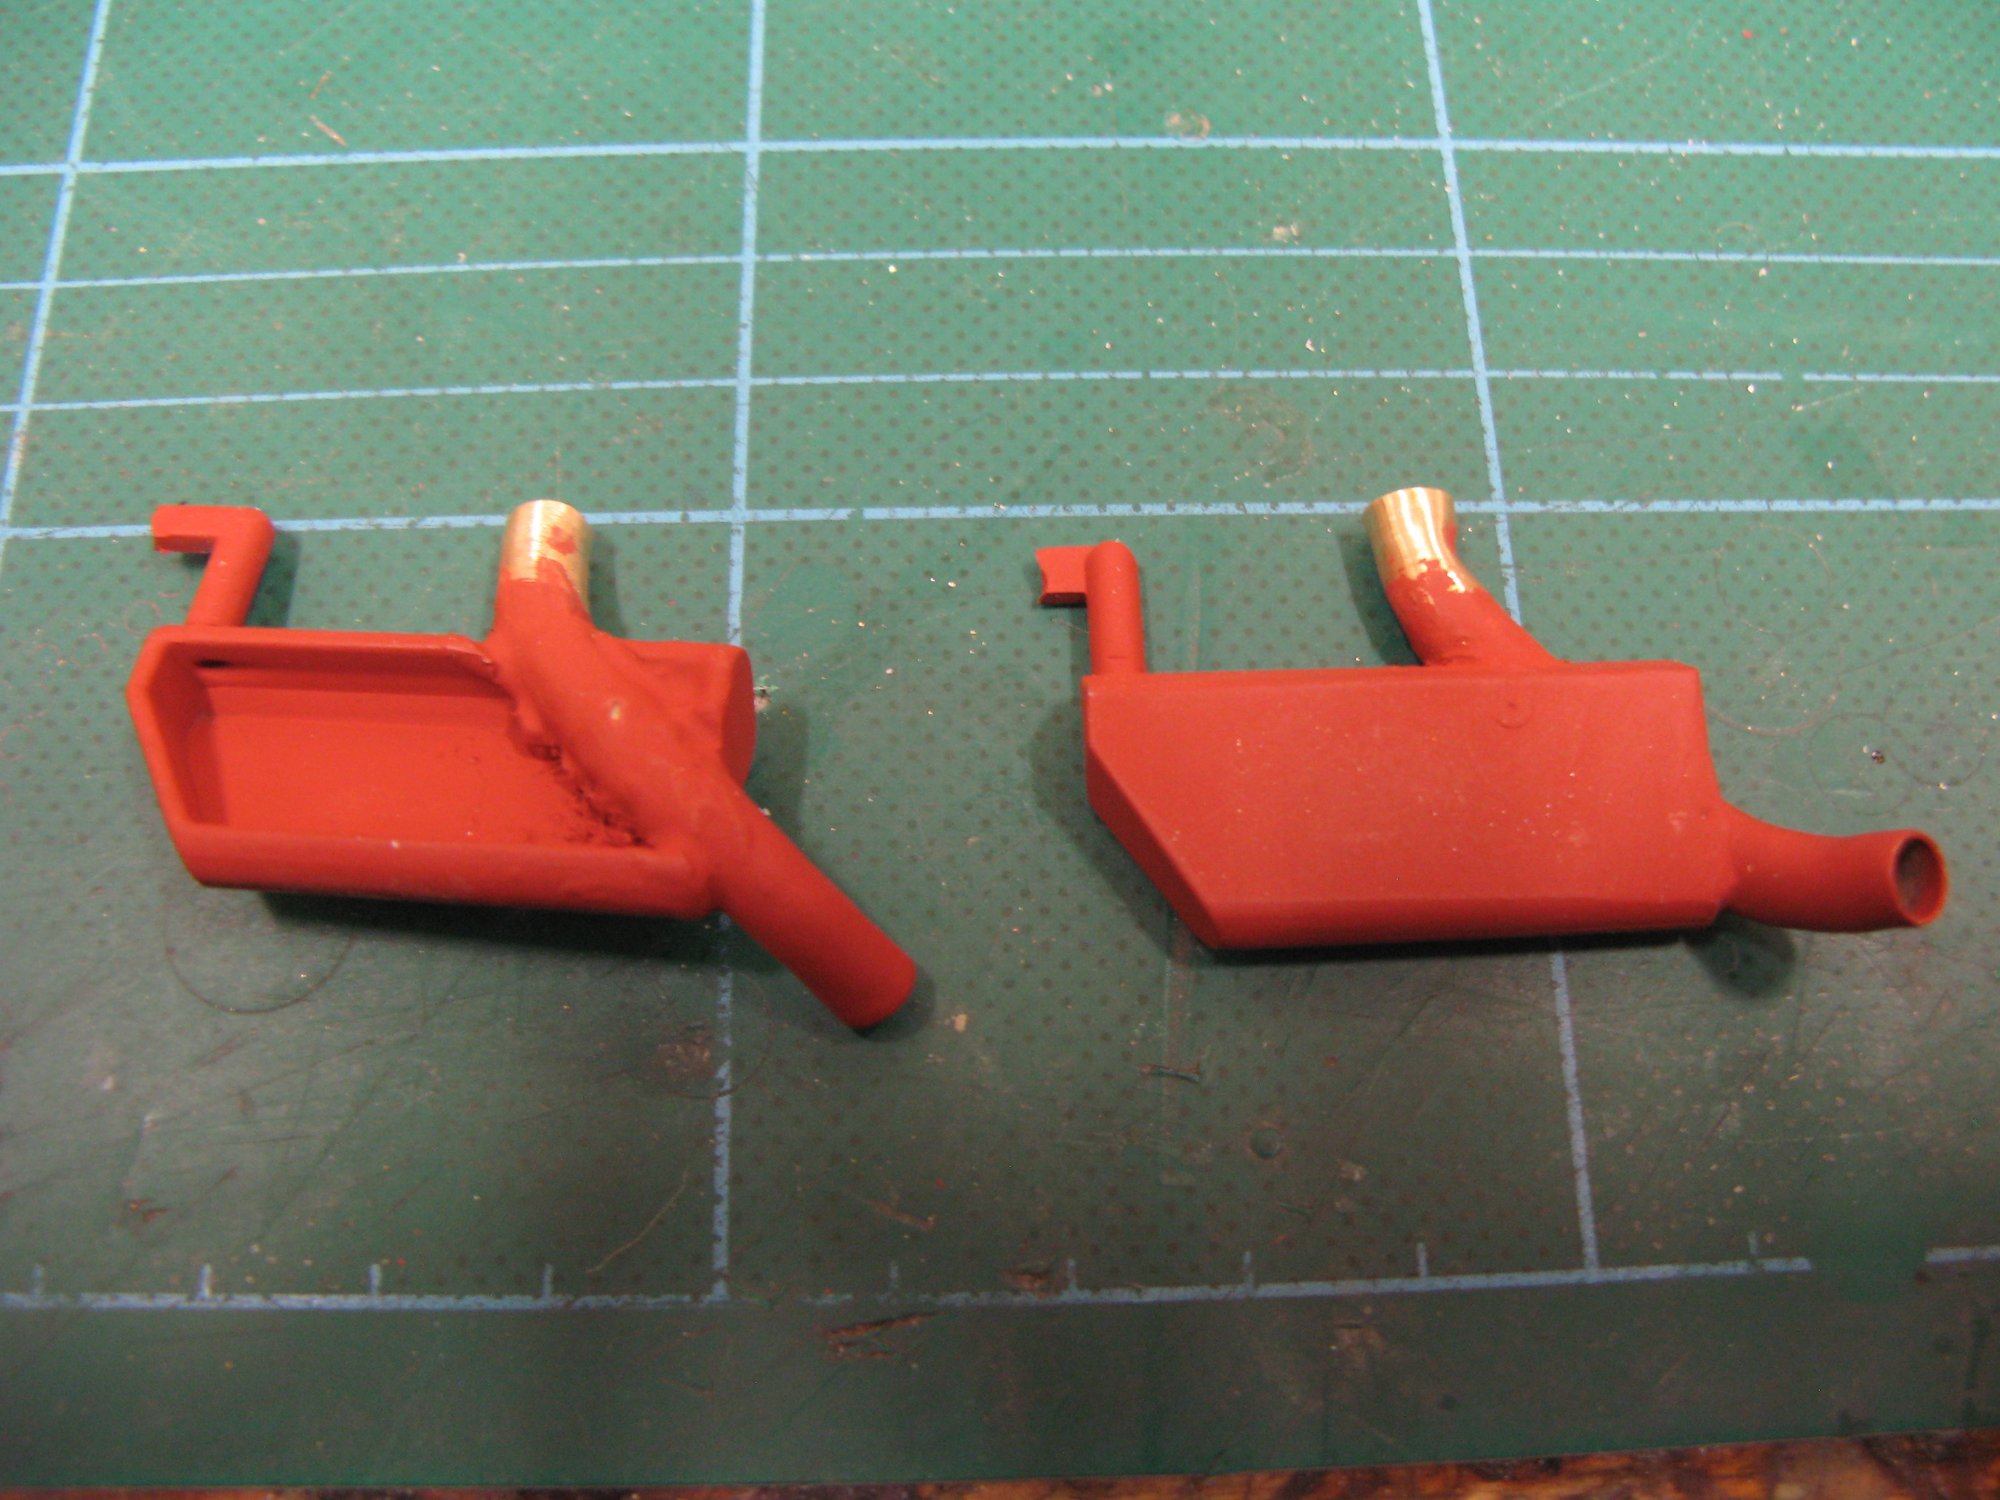
Then right angle connectors to get to the smoke generator tubing
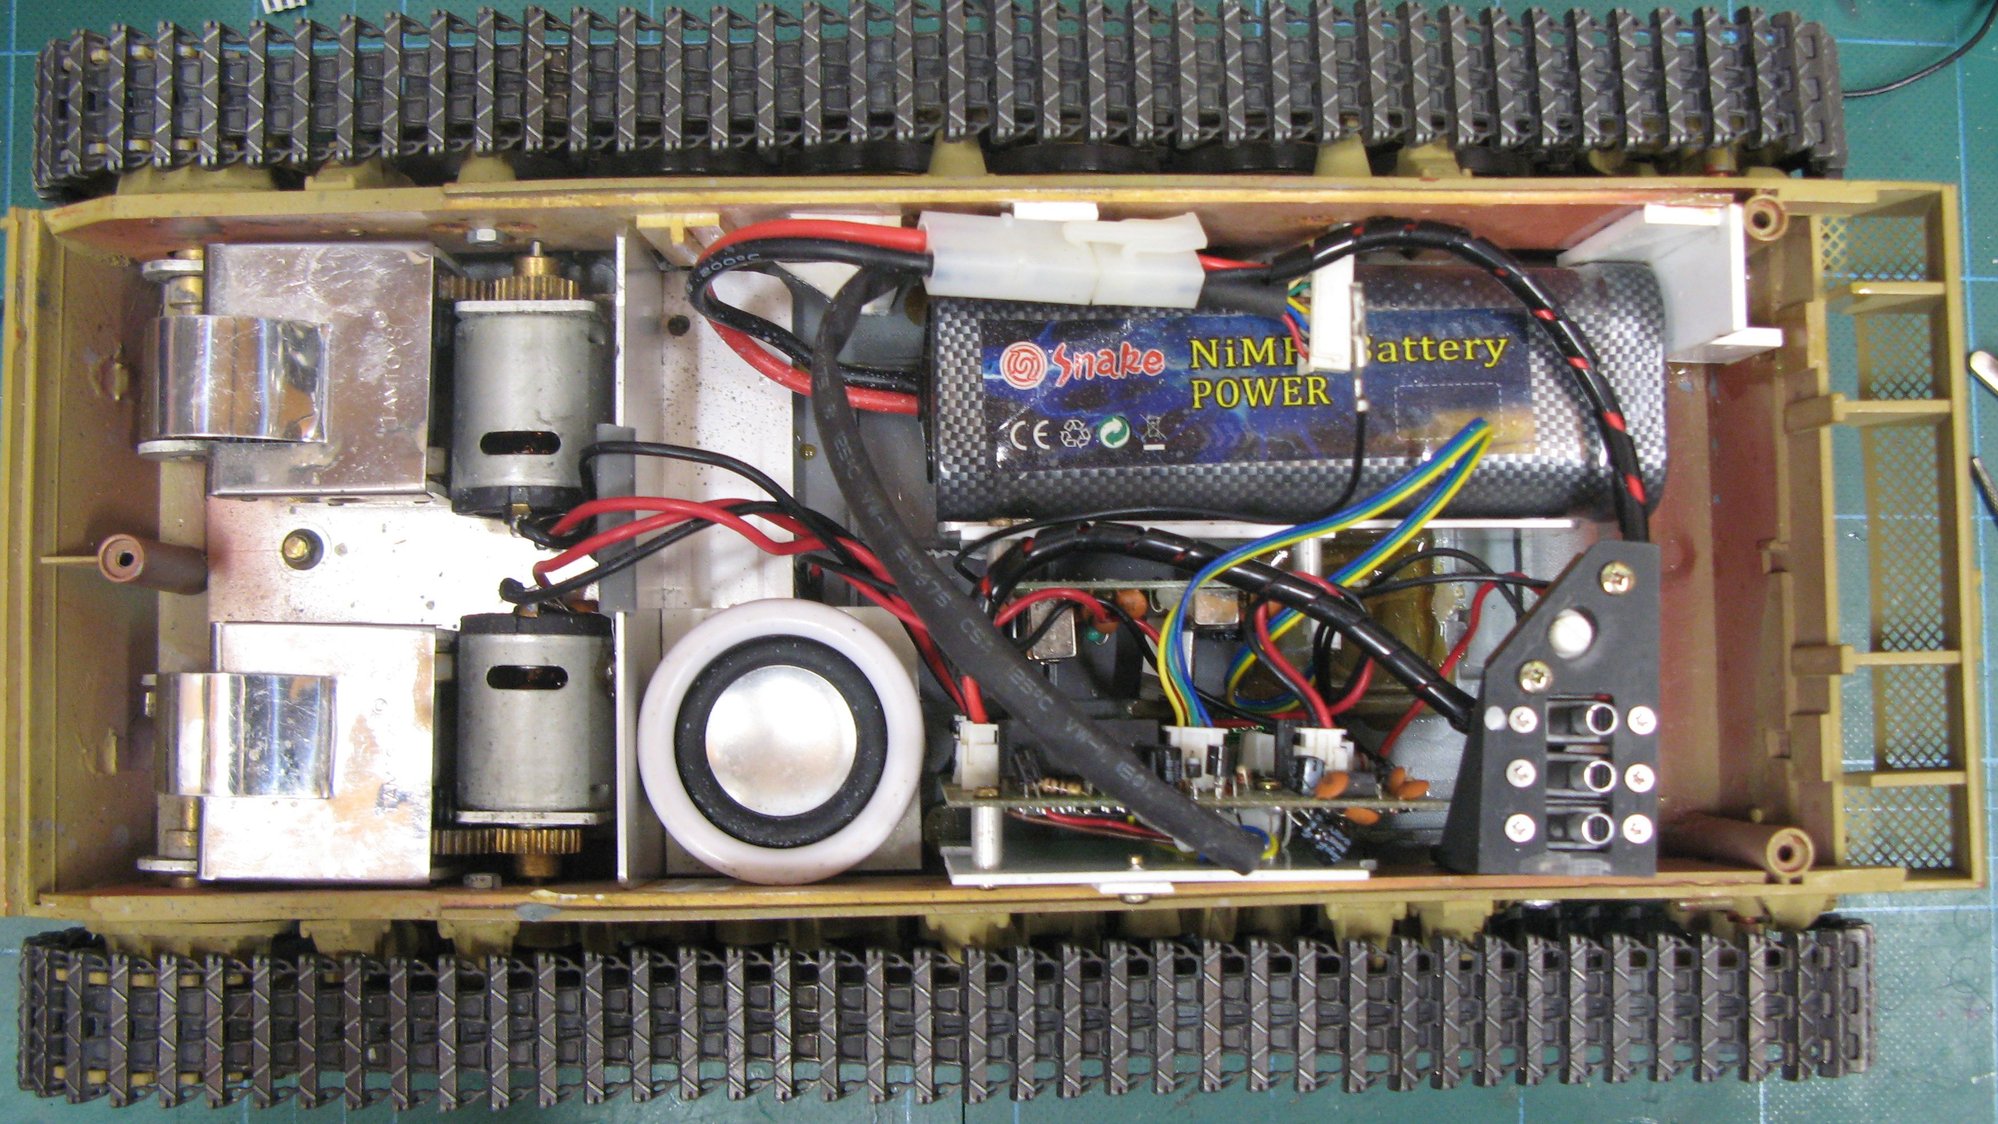
And finally, everything except the smoker located in the chassis
Then right angle connectors to get to the smoke generator tubing
And finally, everything except the smoker located in the chassis
 05-27-2020 | 08:04 PM
#77
Thread Starter
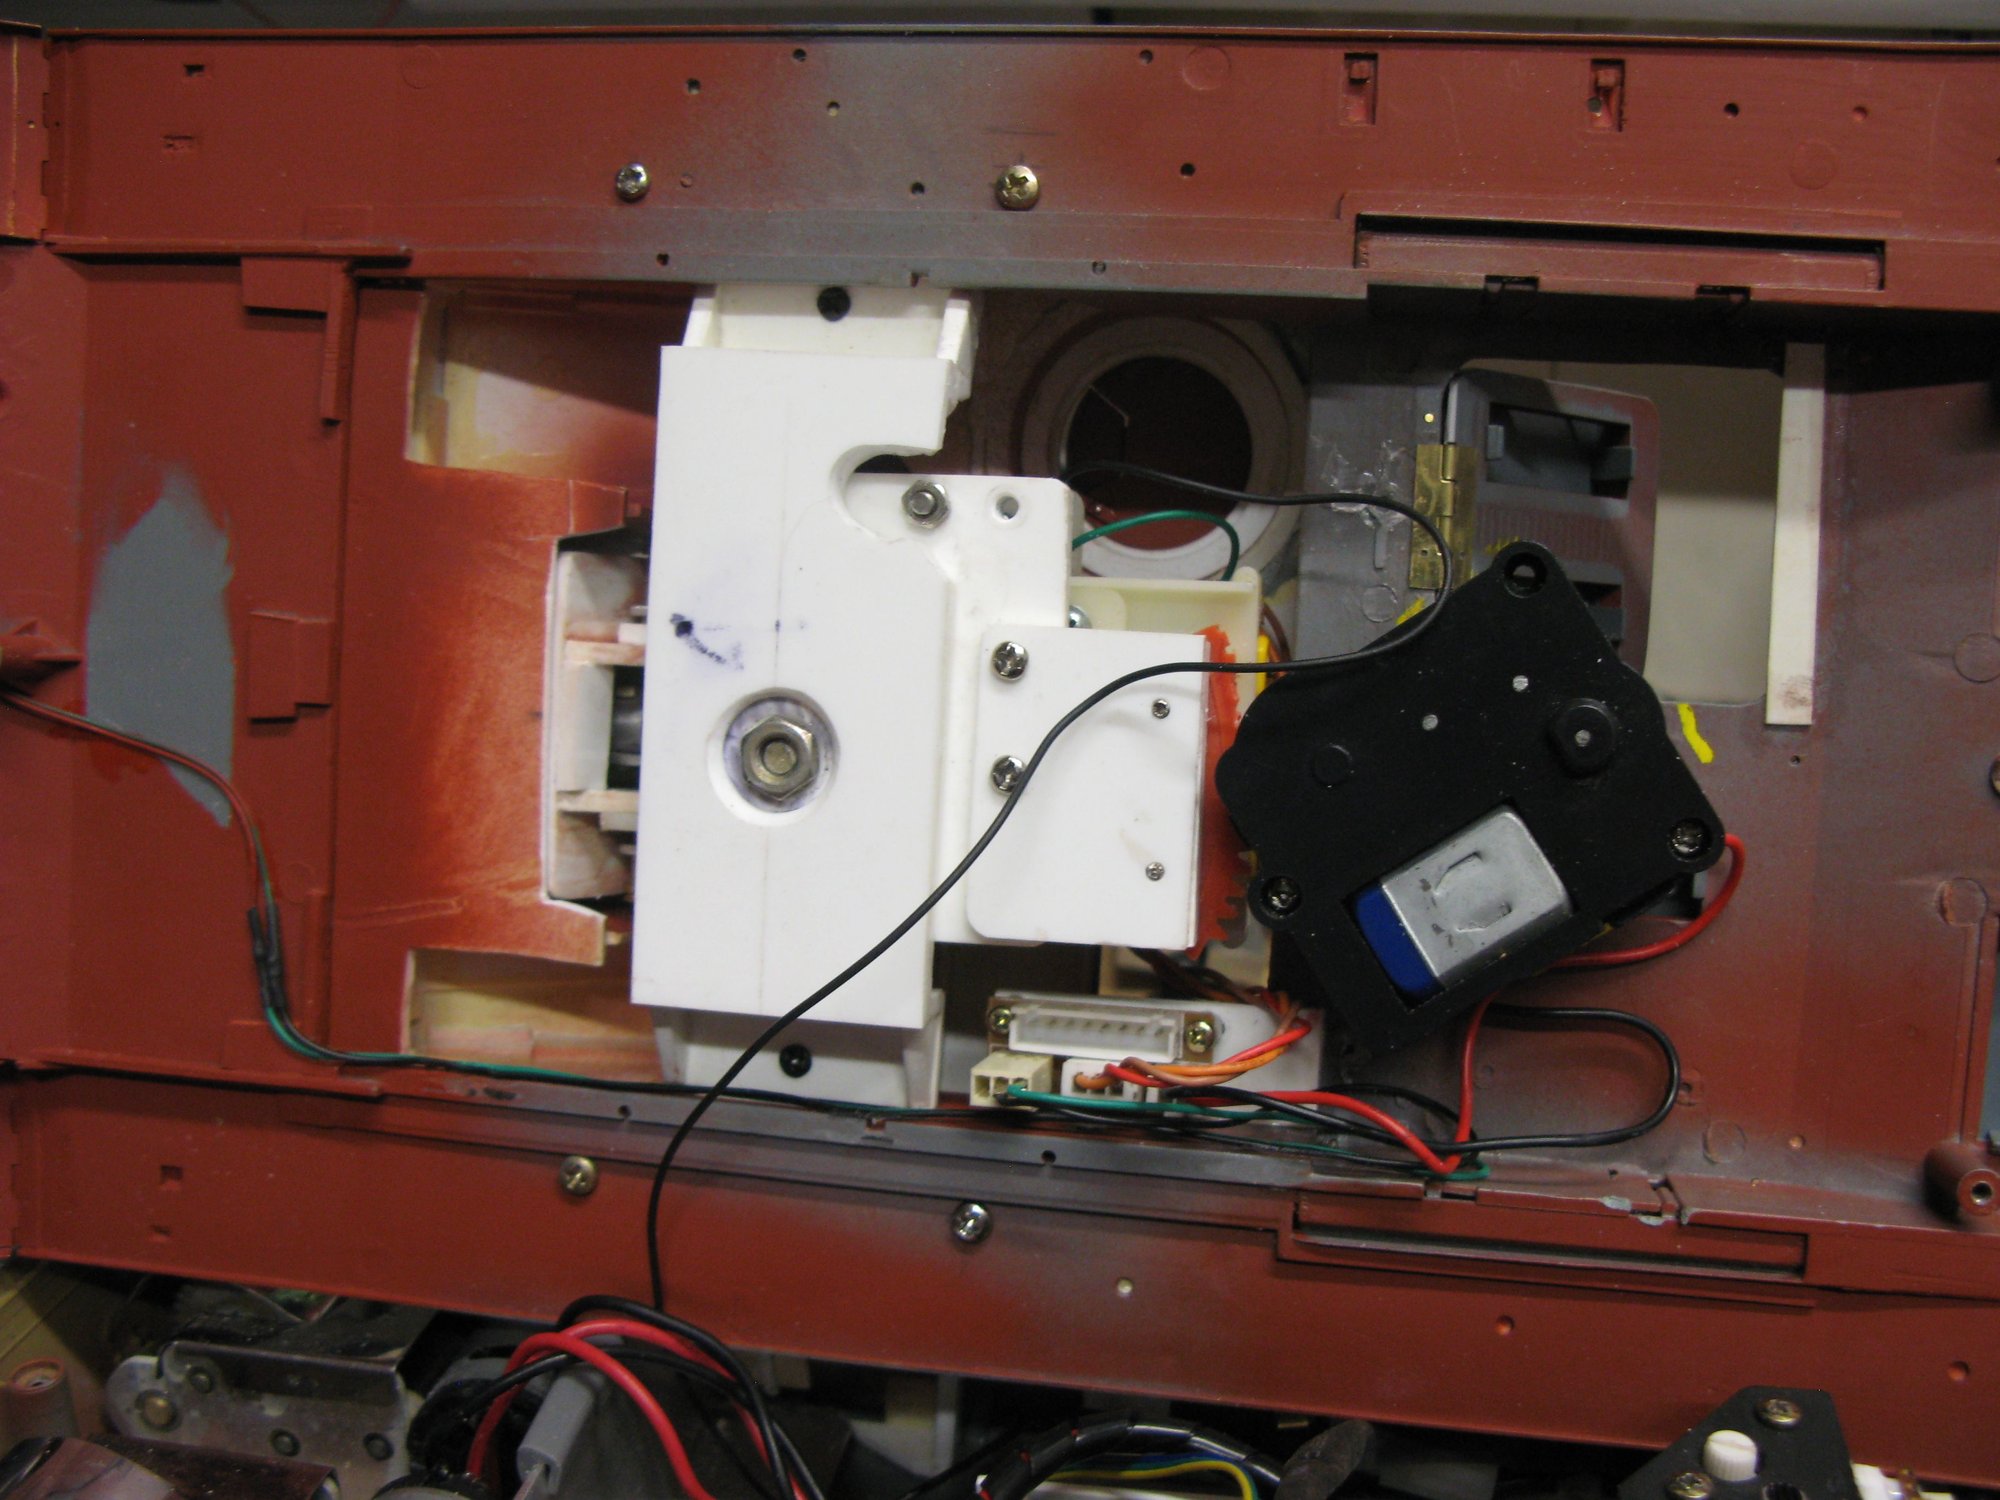
I finally got the Gun to work properly. Looking at the diagram sve1976 posted I couldn't work out why my microswitch was on the other side of the unit. Then I twigged, after watching a video on how to rewire the gun mechanism. I didn't have the limit switch! I think it was originally delivered with the kit but not fitted - it was included as part of the enormous wiring loom that came with the kit. I had to root around in the tank junk box to find it. After that, as soon as I realised that the motors switch on the negative side, and more fundamentally that the "0V" line from the microswitch needs a permanent nought Volt connection, everything worked.
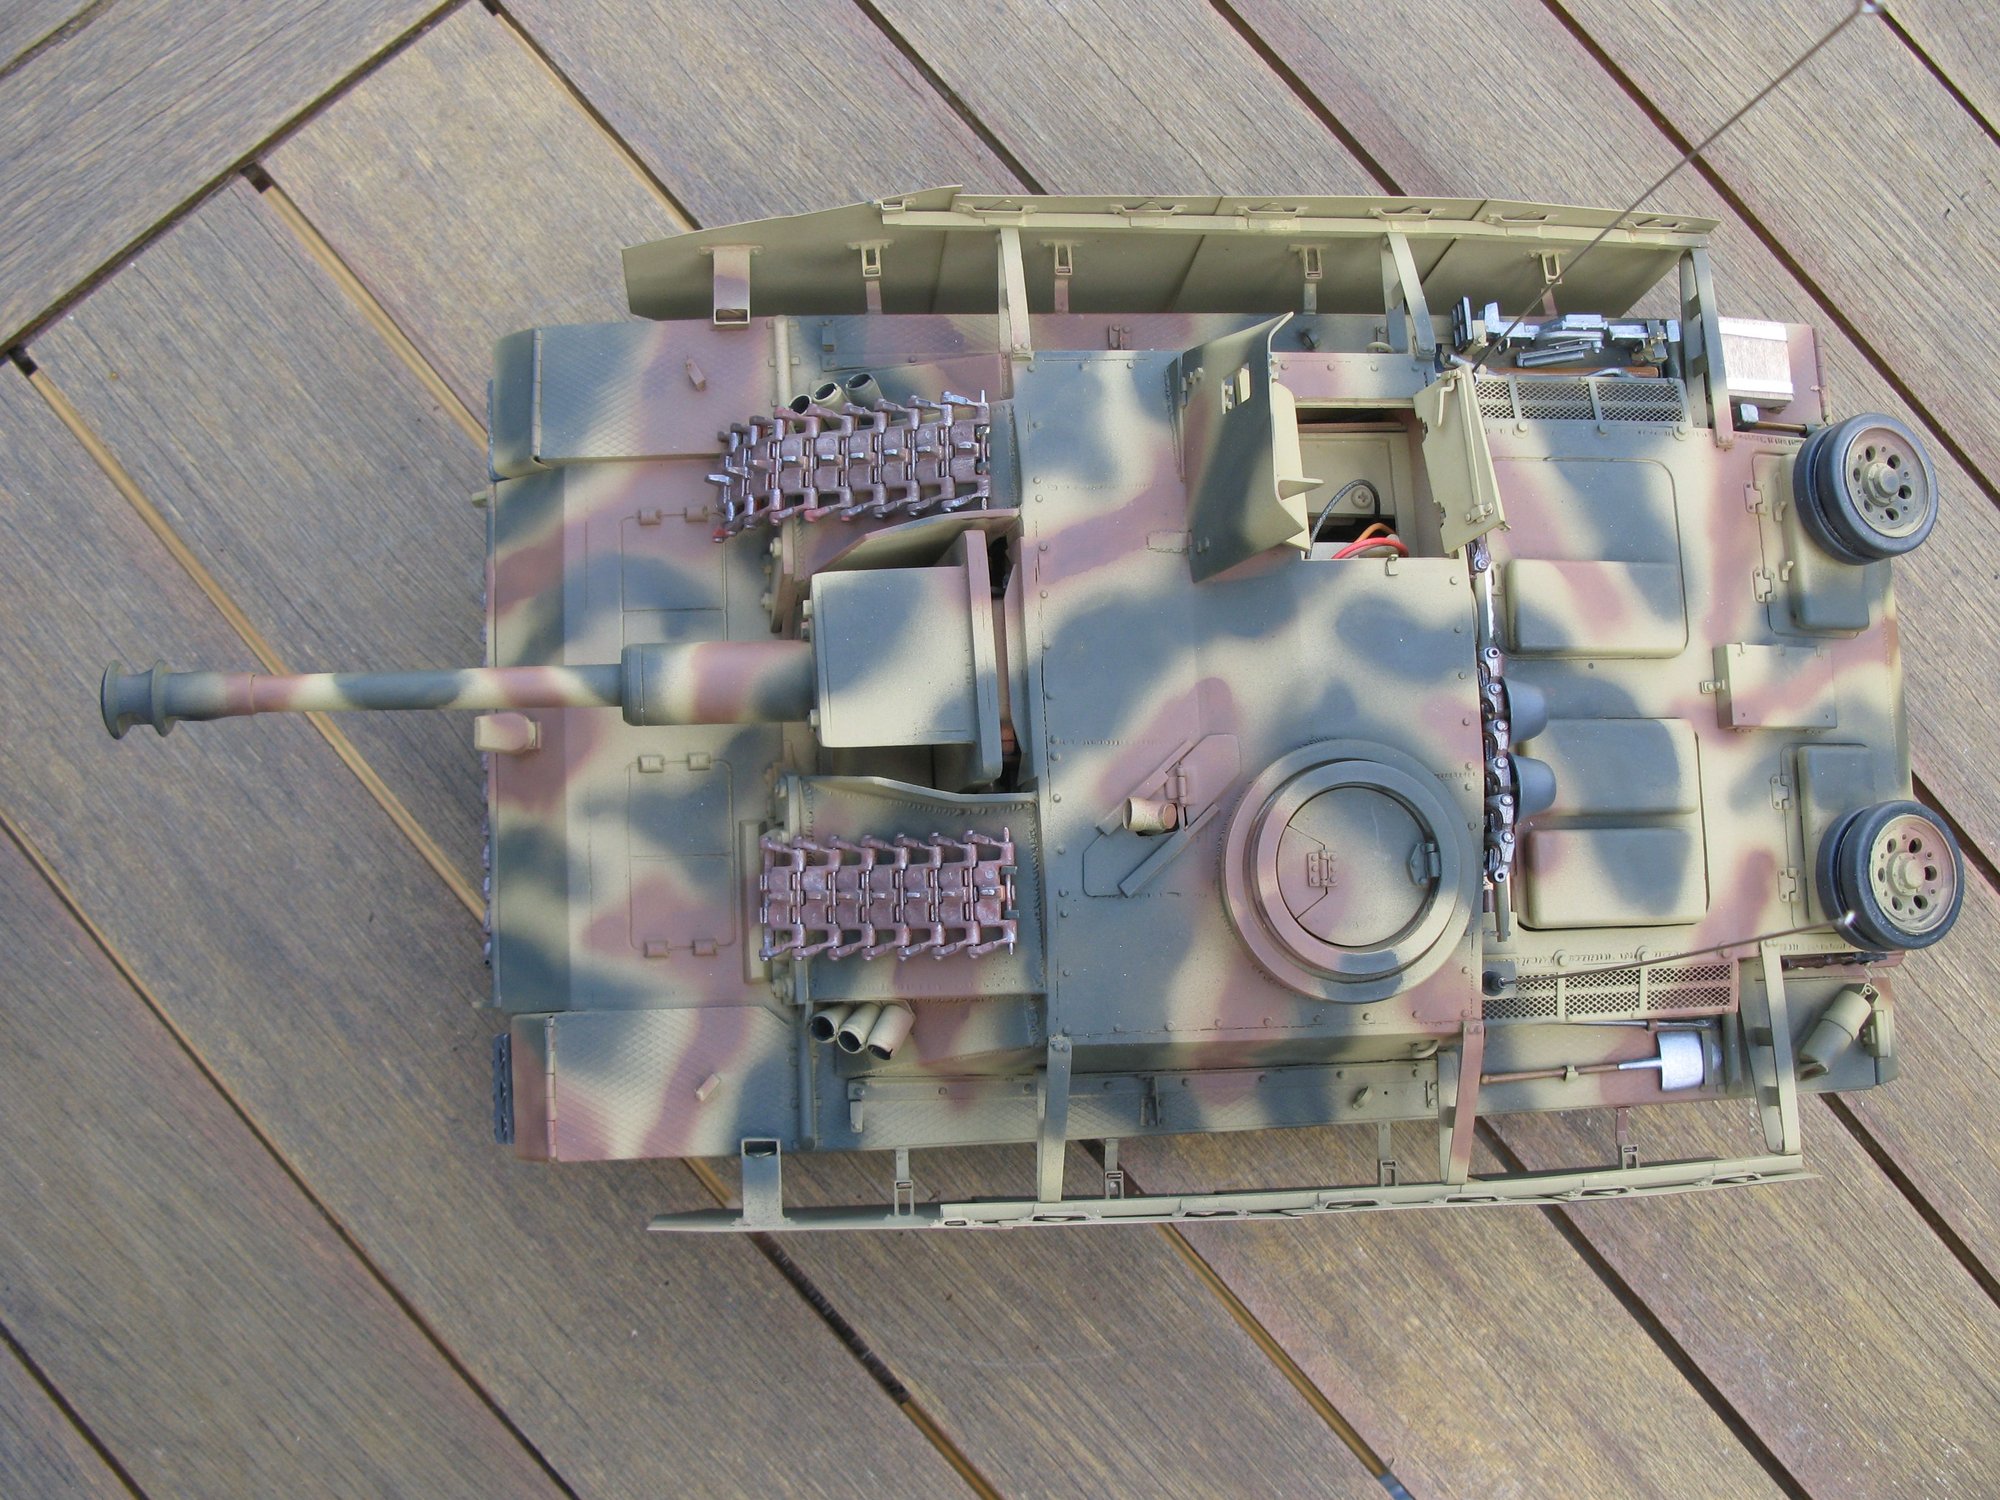
Inside the top of the gun - the long black wire is the 0V connection to the main power line to the battery. The "turret" connector has, from left to right, plugs for lights, gun elevation and firing (one power and a signal line for each) and for the gun traverse (ex turret rotation) Everything got moved a couple of times, I made a nice neat installation and then found that the body top wouldn't fit....it all goes in now!

Switch access throught the engine hatch
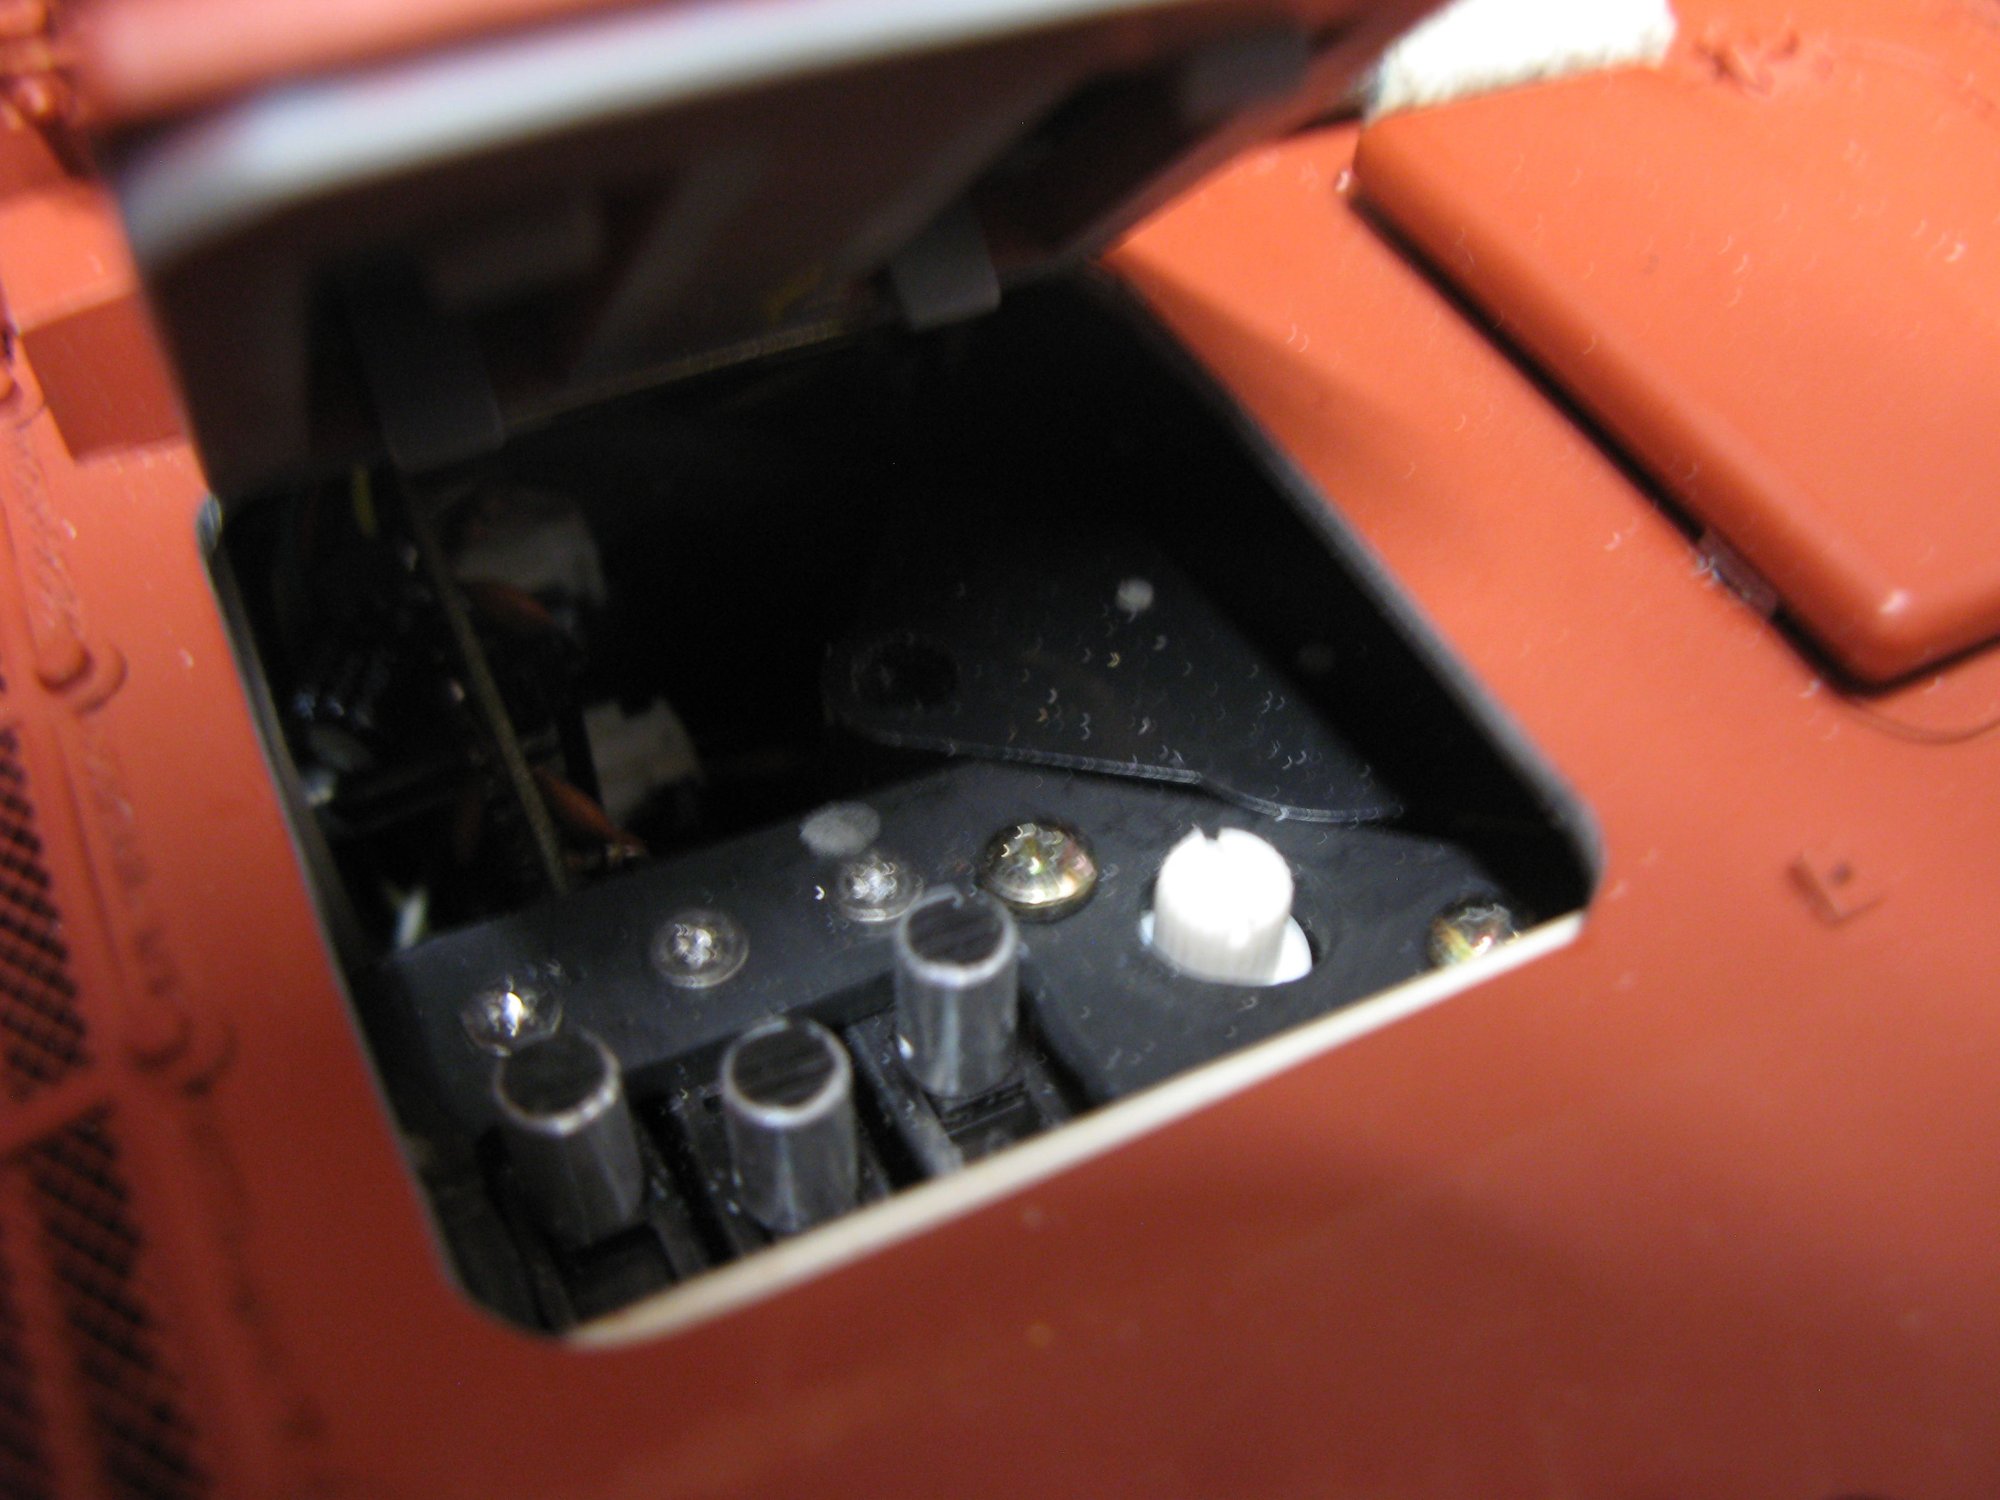
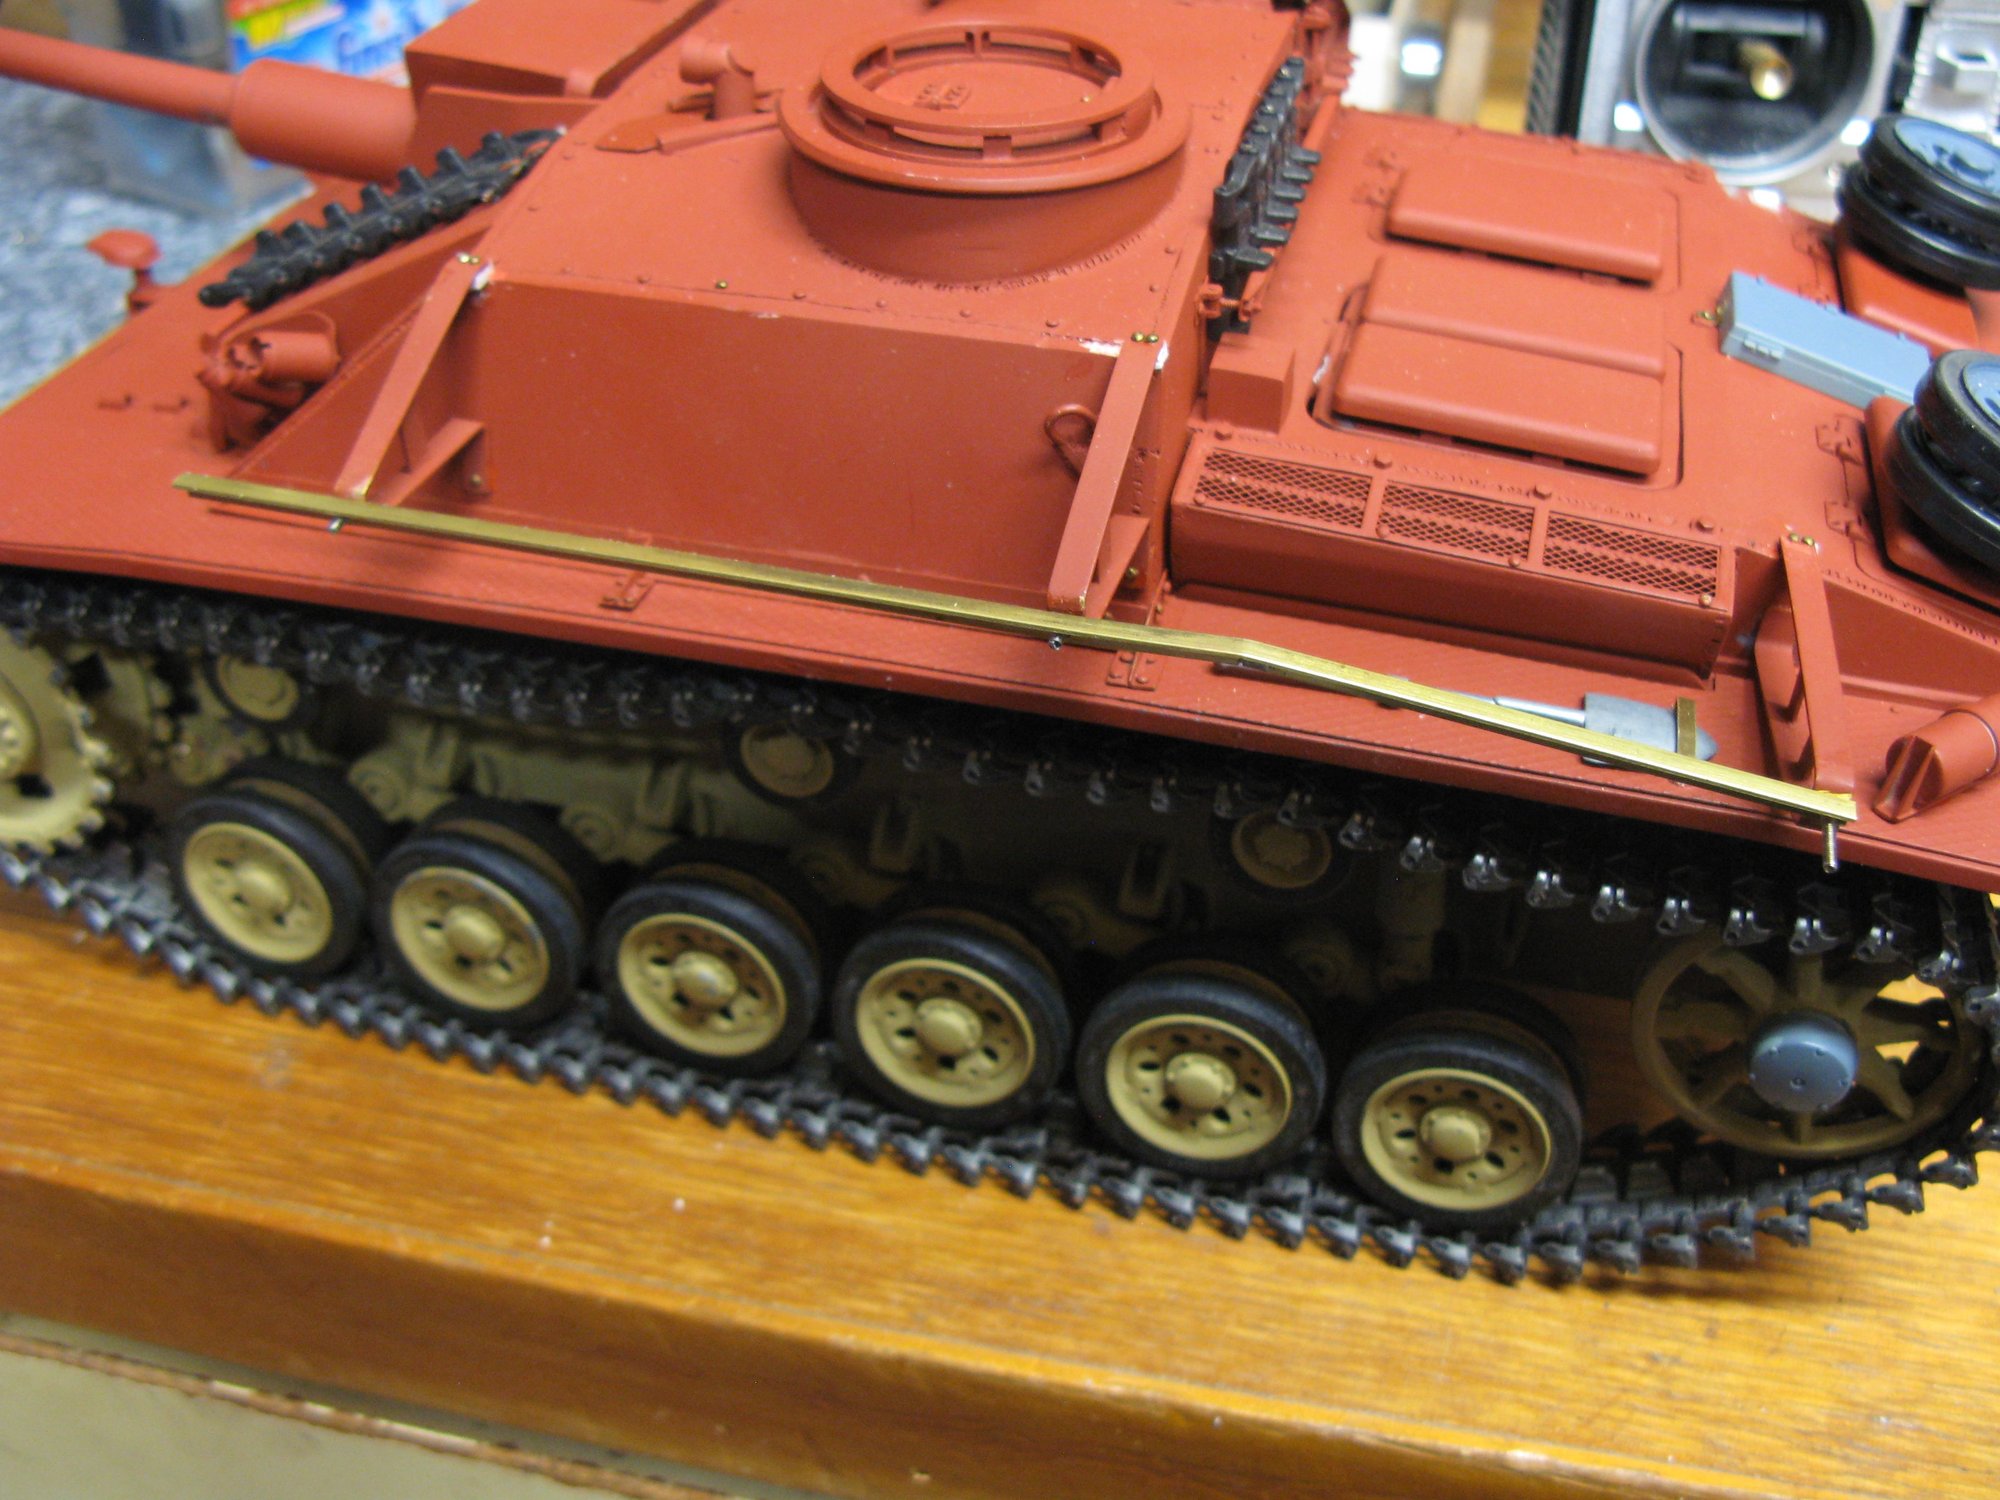
And I've started on the exterior bits and pieces: Spare track/extra armour, and the gunsight. This is fixed to the top of the recoil unit so it moves with gun traverse, and so does the sliding cover plate.
Inside the top of the gun - the long black wire is the 0V connection to the main power line to the battery. The "turret" connector has, from left to right, plugs for lights, gun elevation and firing (one power and a signal line for each) and for the gun traverse (ex turret rotation) Everything got moved a couple of times, I made a nice neat installation and then found that the body top wouldn't fit....it all goes in now!
Switch access throught the engine hatch
And I've started on the exterior bits and pieces: Spare track/extra armour, and the gunsight. This is fixed to the top of the recoil unit so it moves with gun traverse, and so does the sliding cover plate.
05-29-2020 | 10:40 AM
#78
Wow, looks good, especially the sight!!!
 06-04-2020 | 01:57 PM
#80
That is nice work!!!
 06-05-2020 | 11:25 AM
#82
Again looks great so far!!!
06-08-2020 | 08:47 PM
#83
Thread Starter
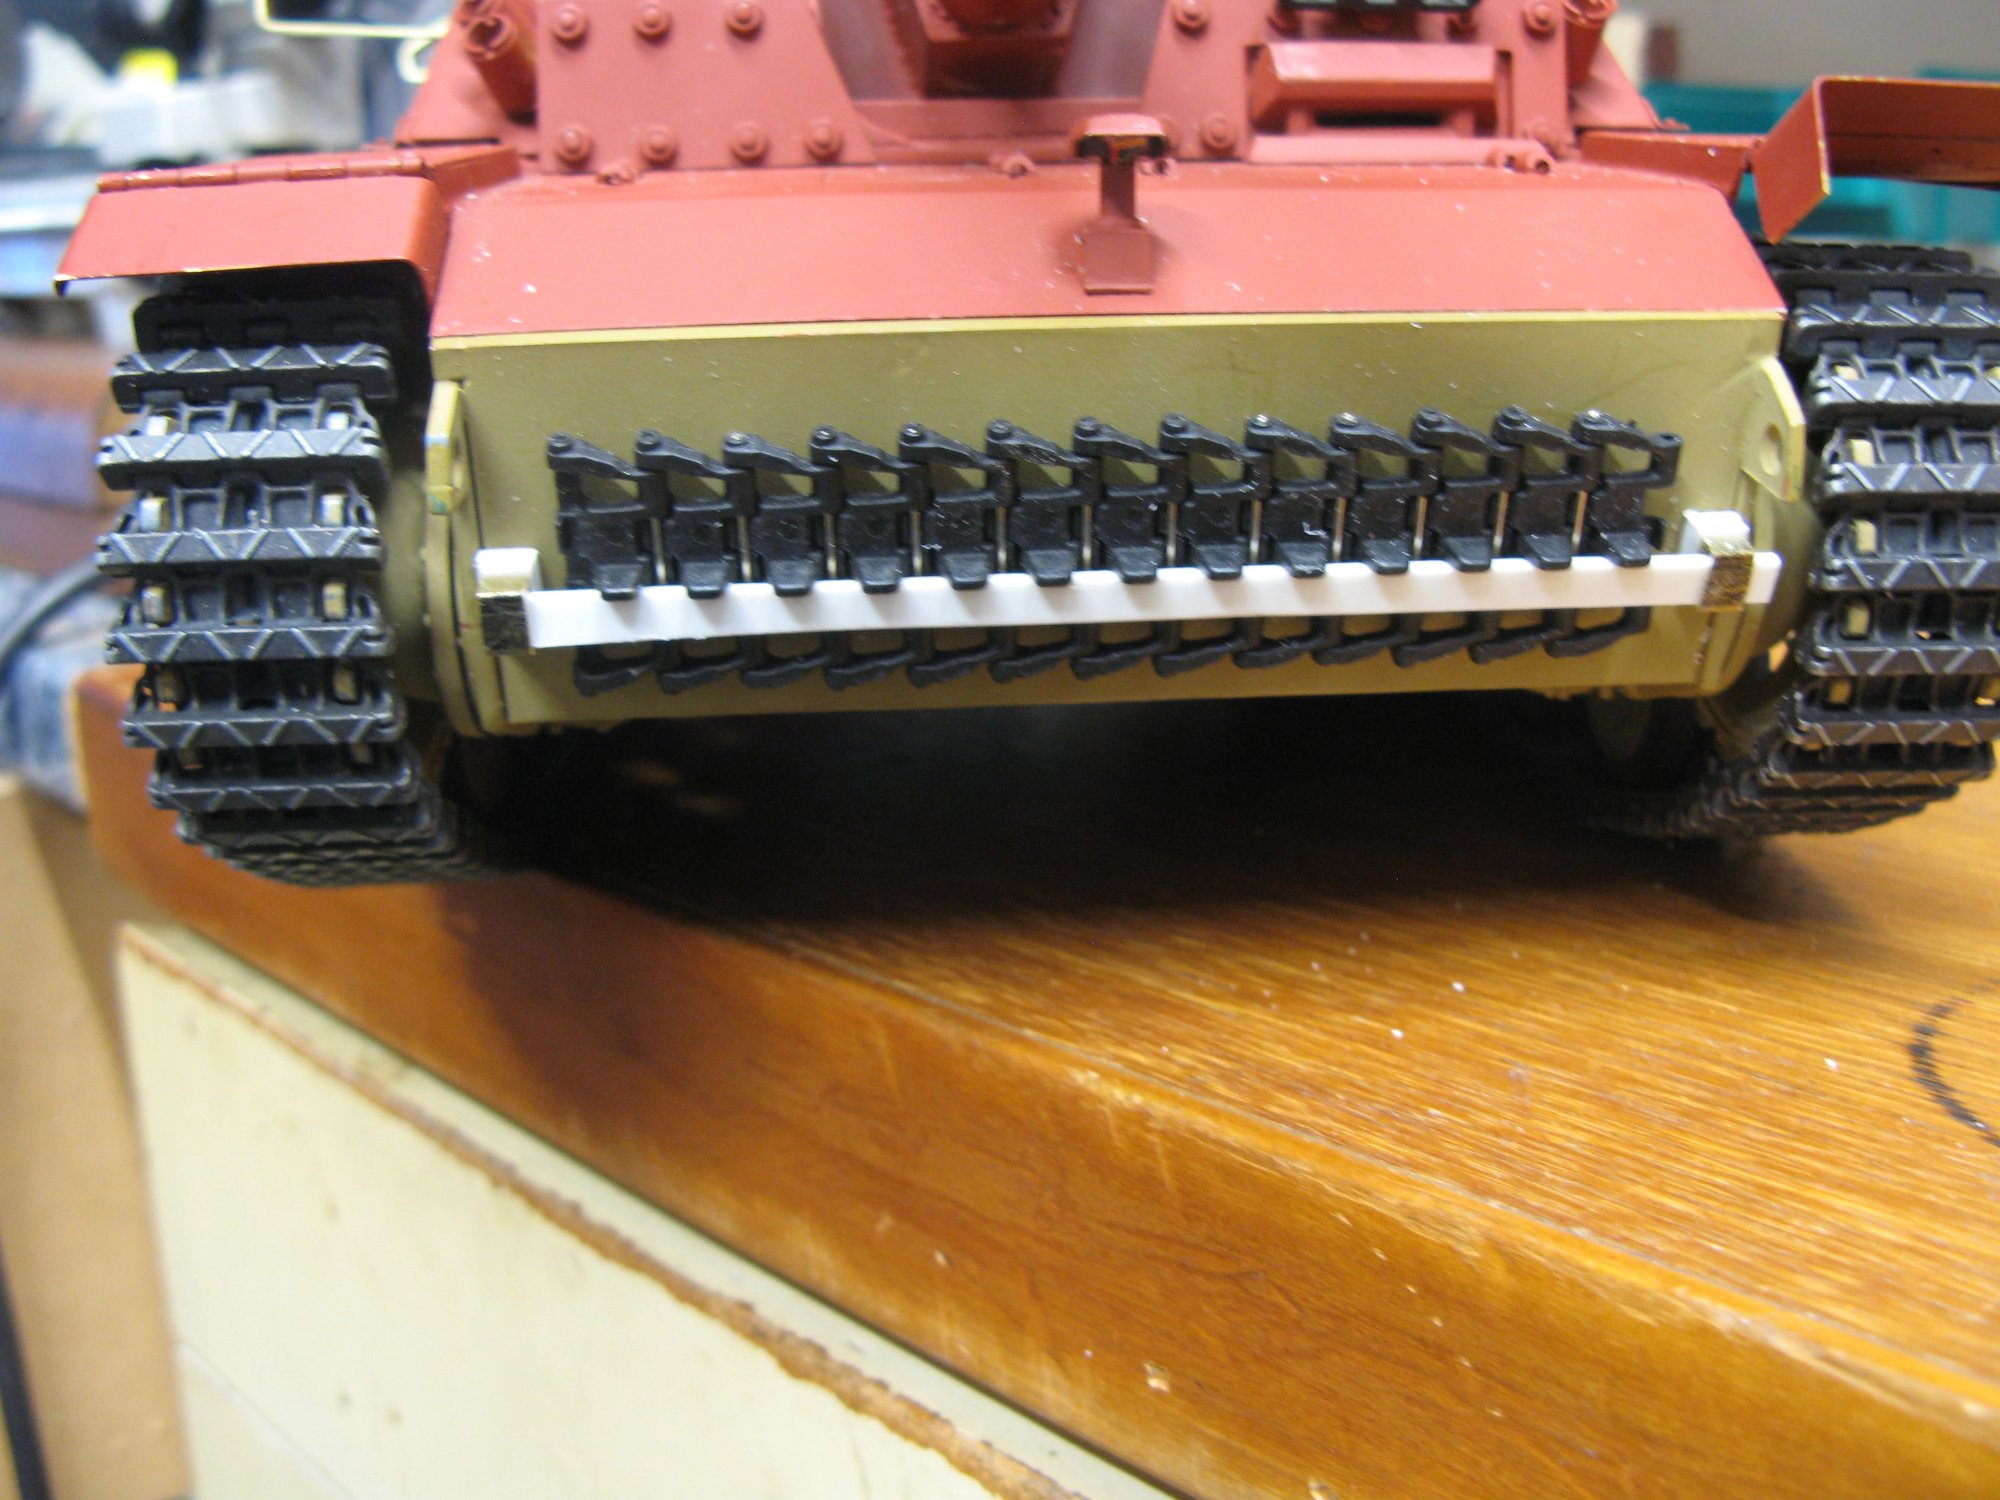
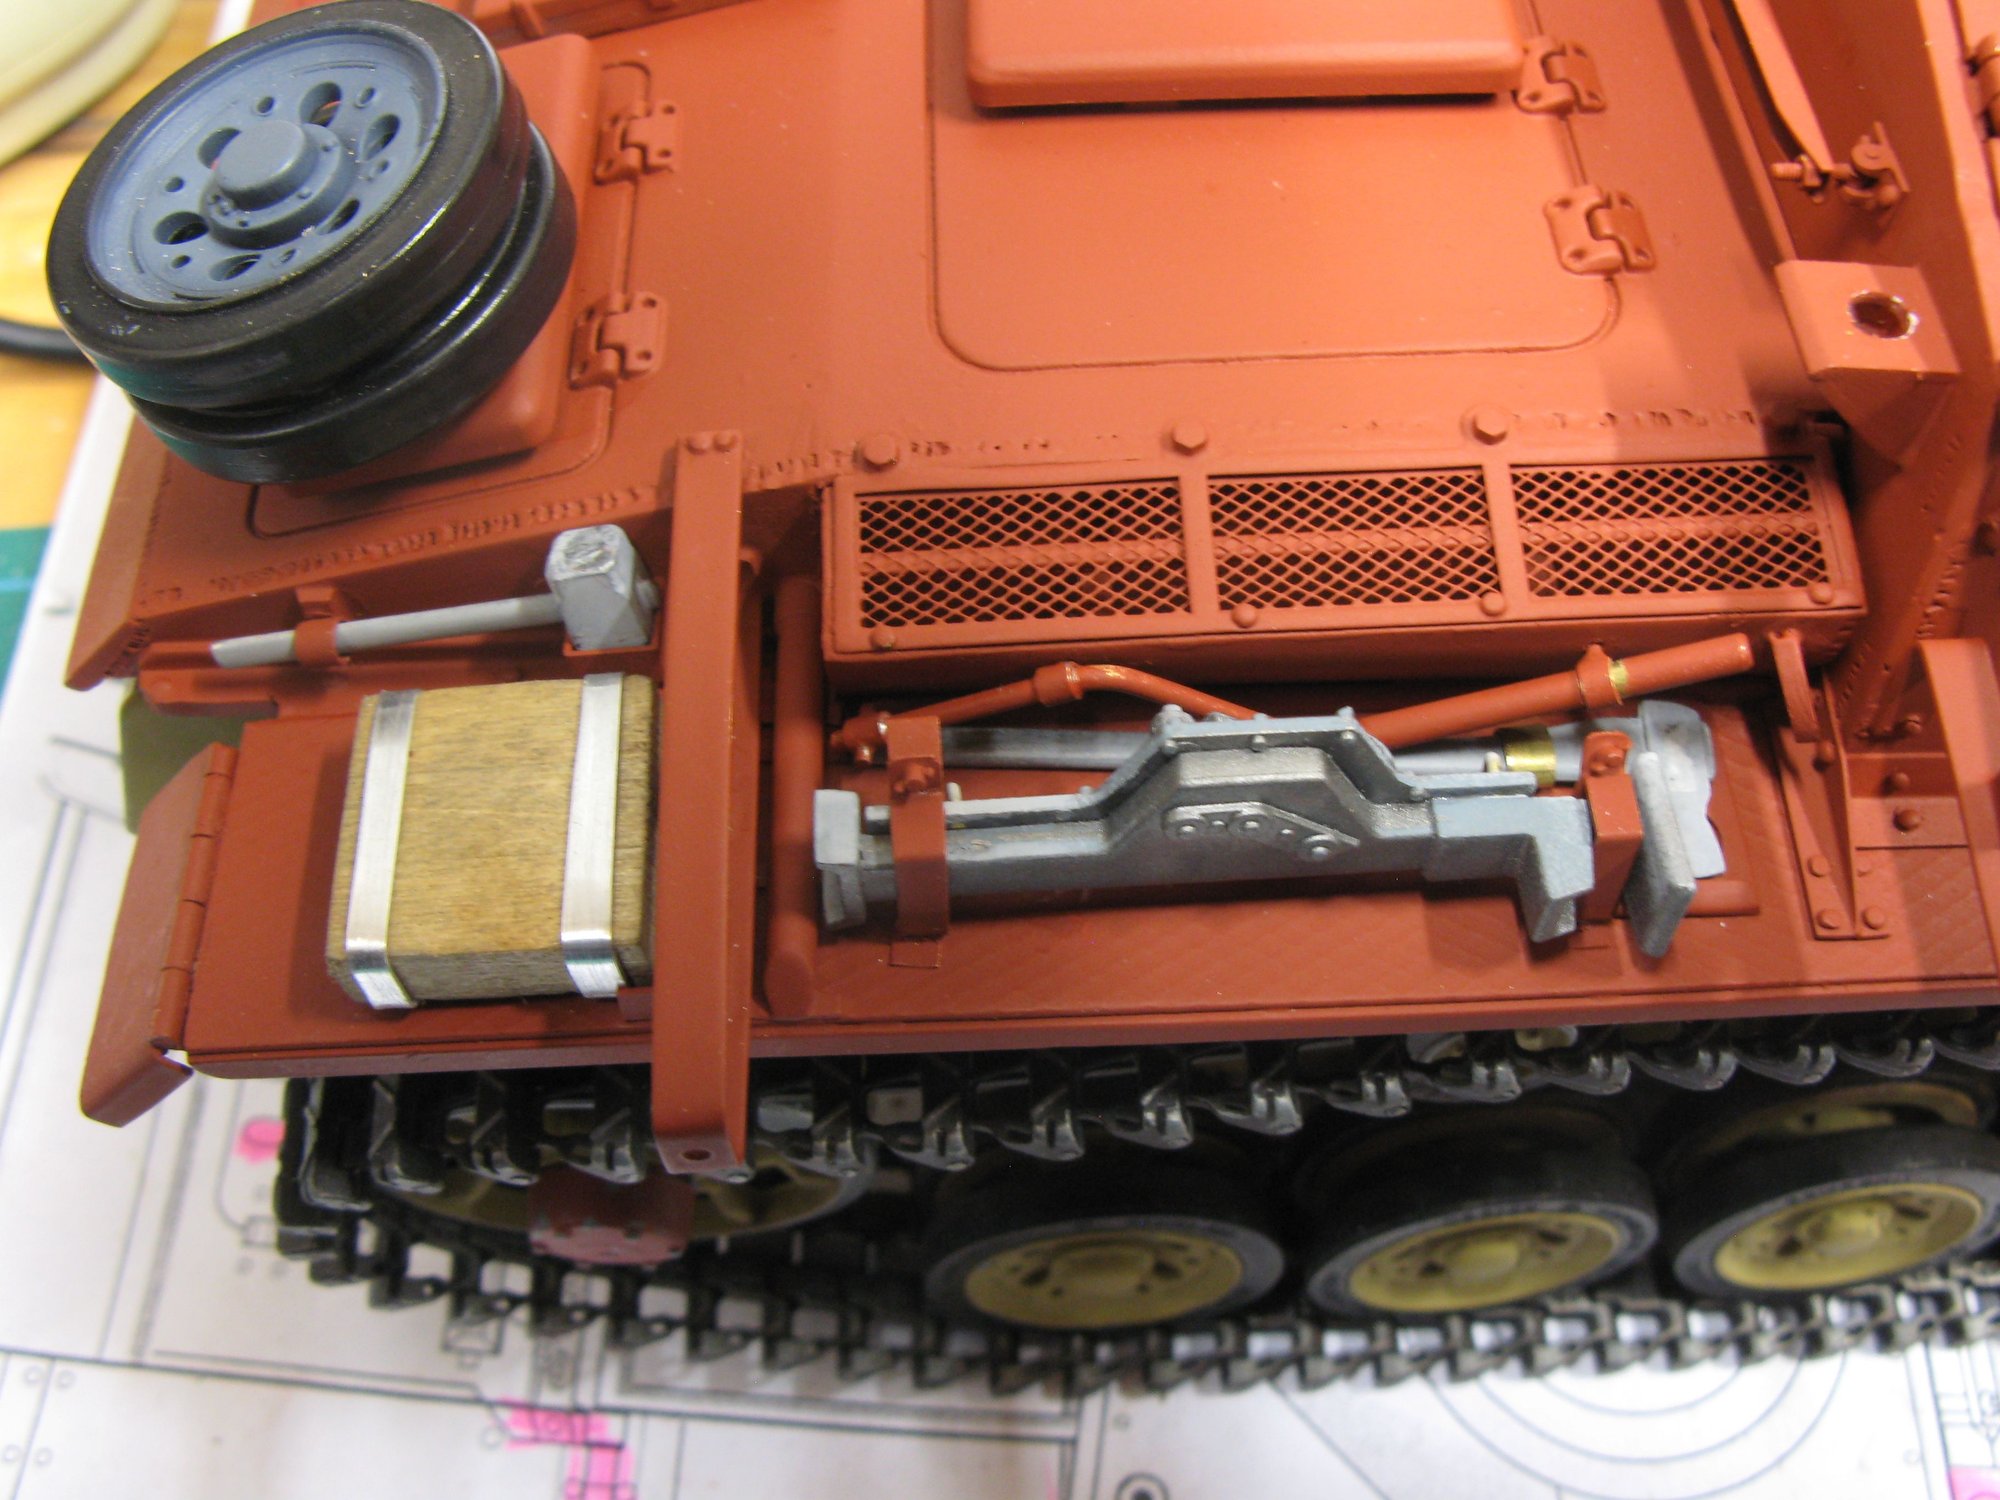
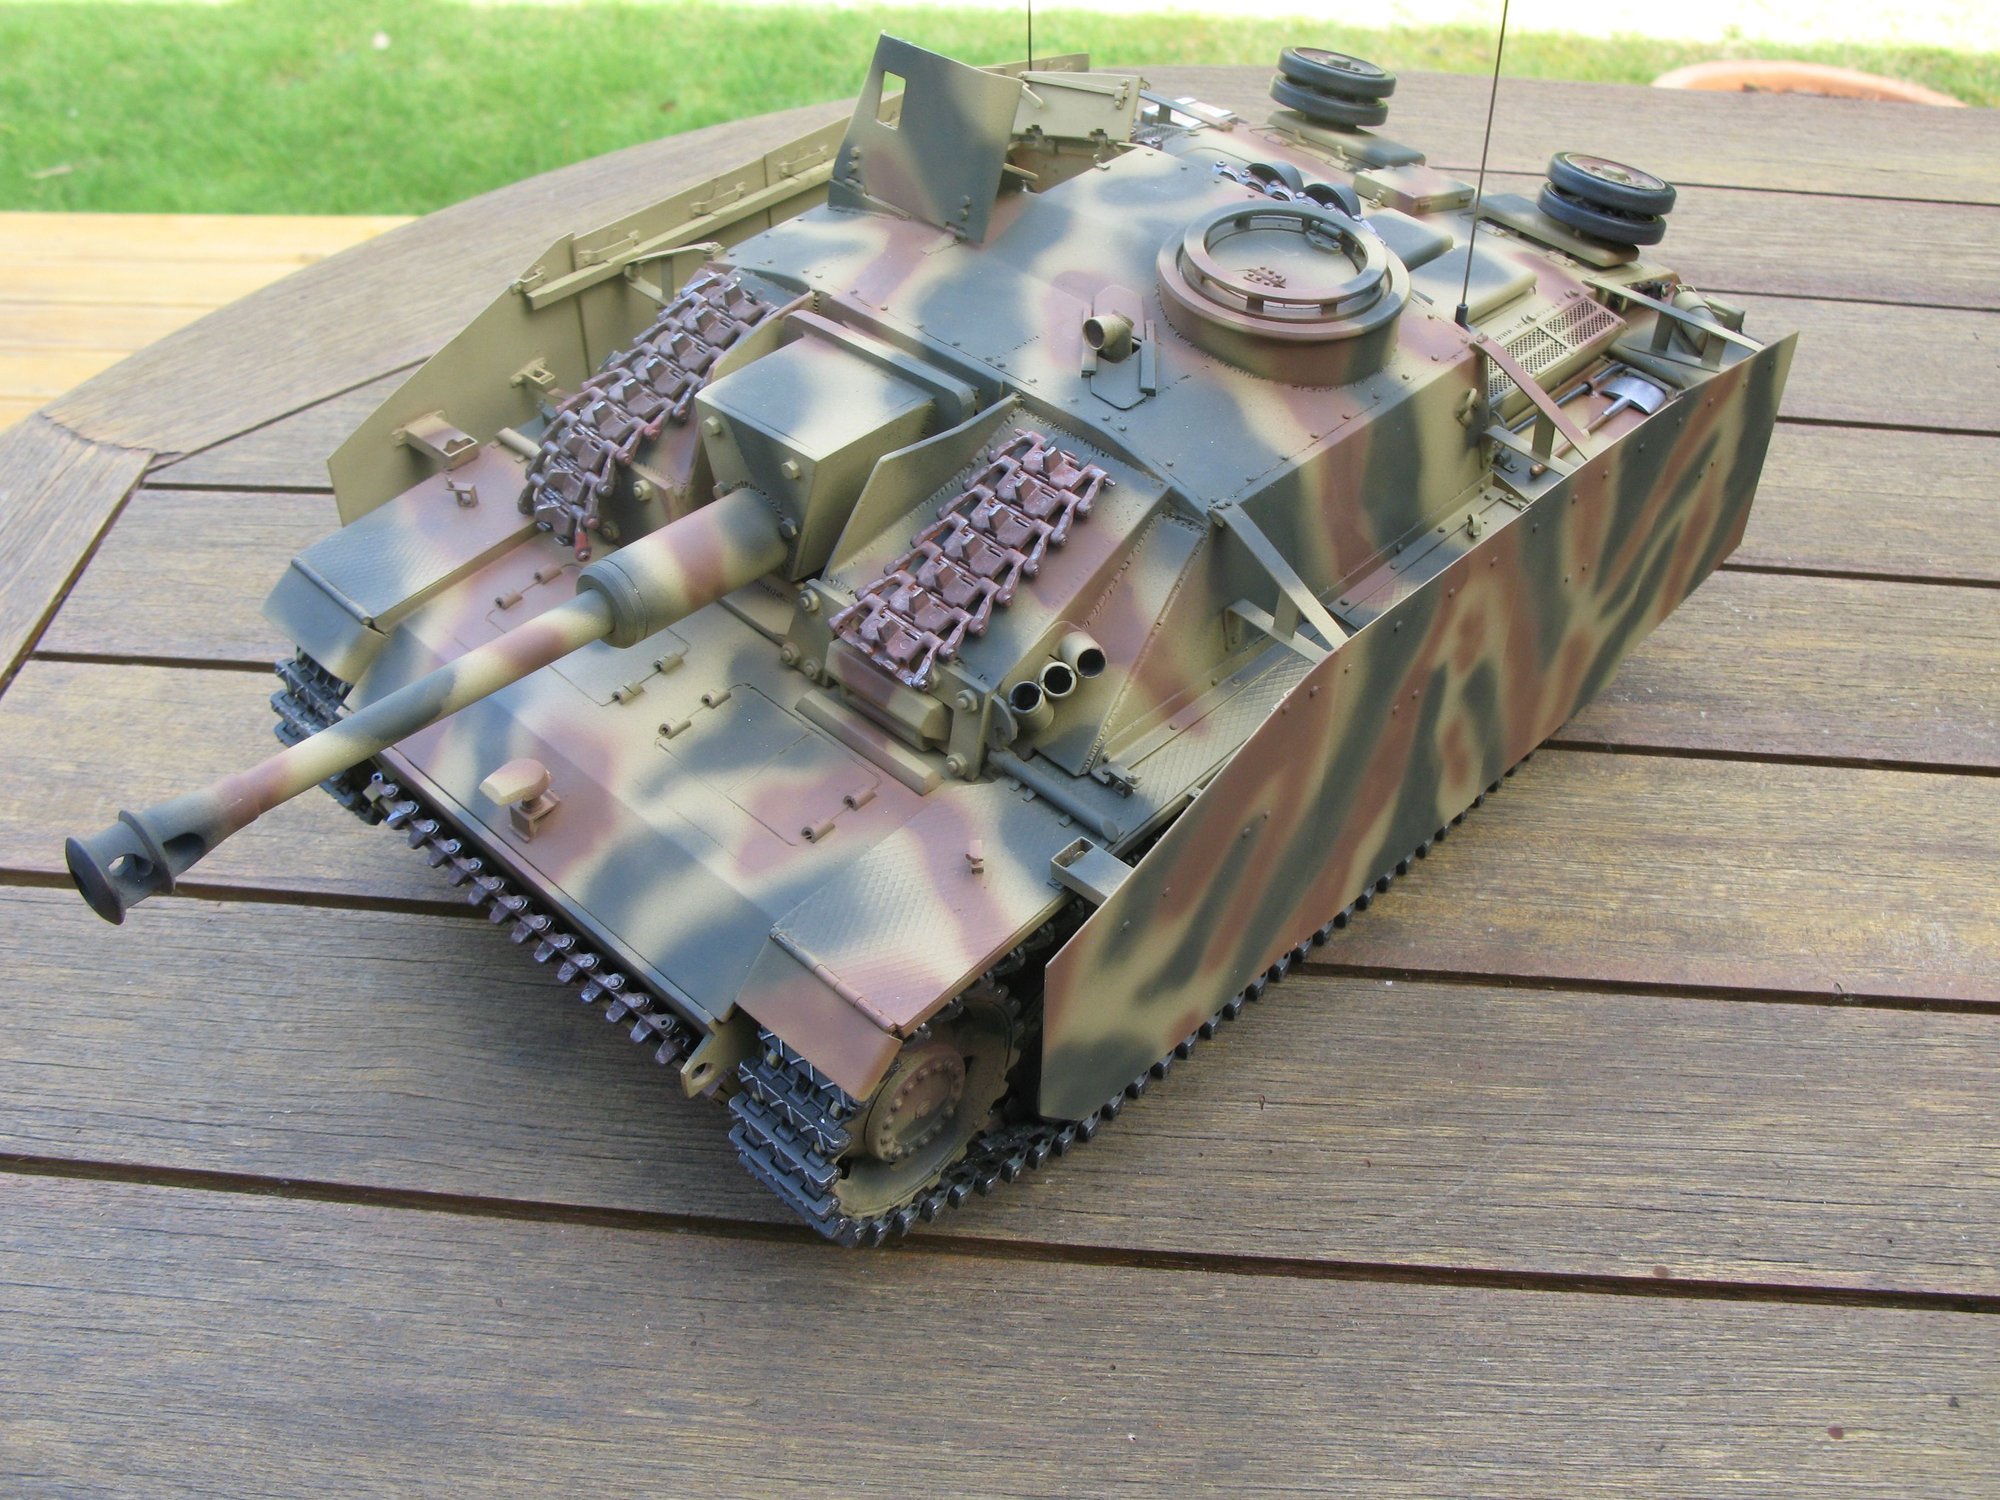
I realised that before going full steam ahead with the schurzen, I'd better populate the mudguards, otherwise access was going to be a little restricted. Here's the right rear corner in progress. Sill got the jack to add.
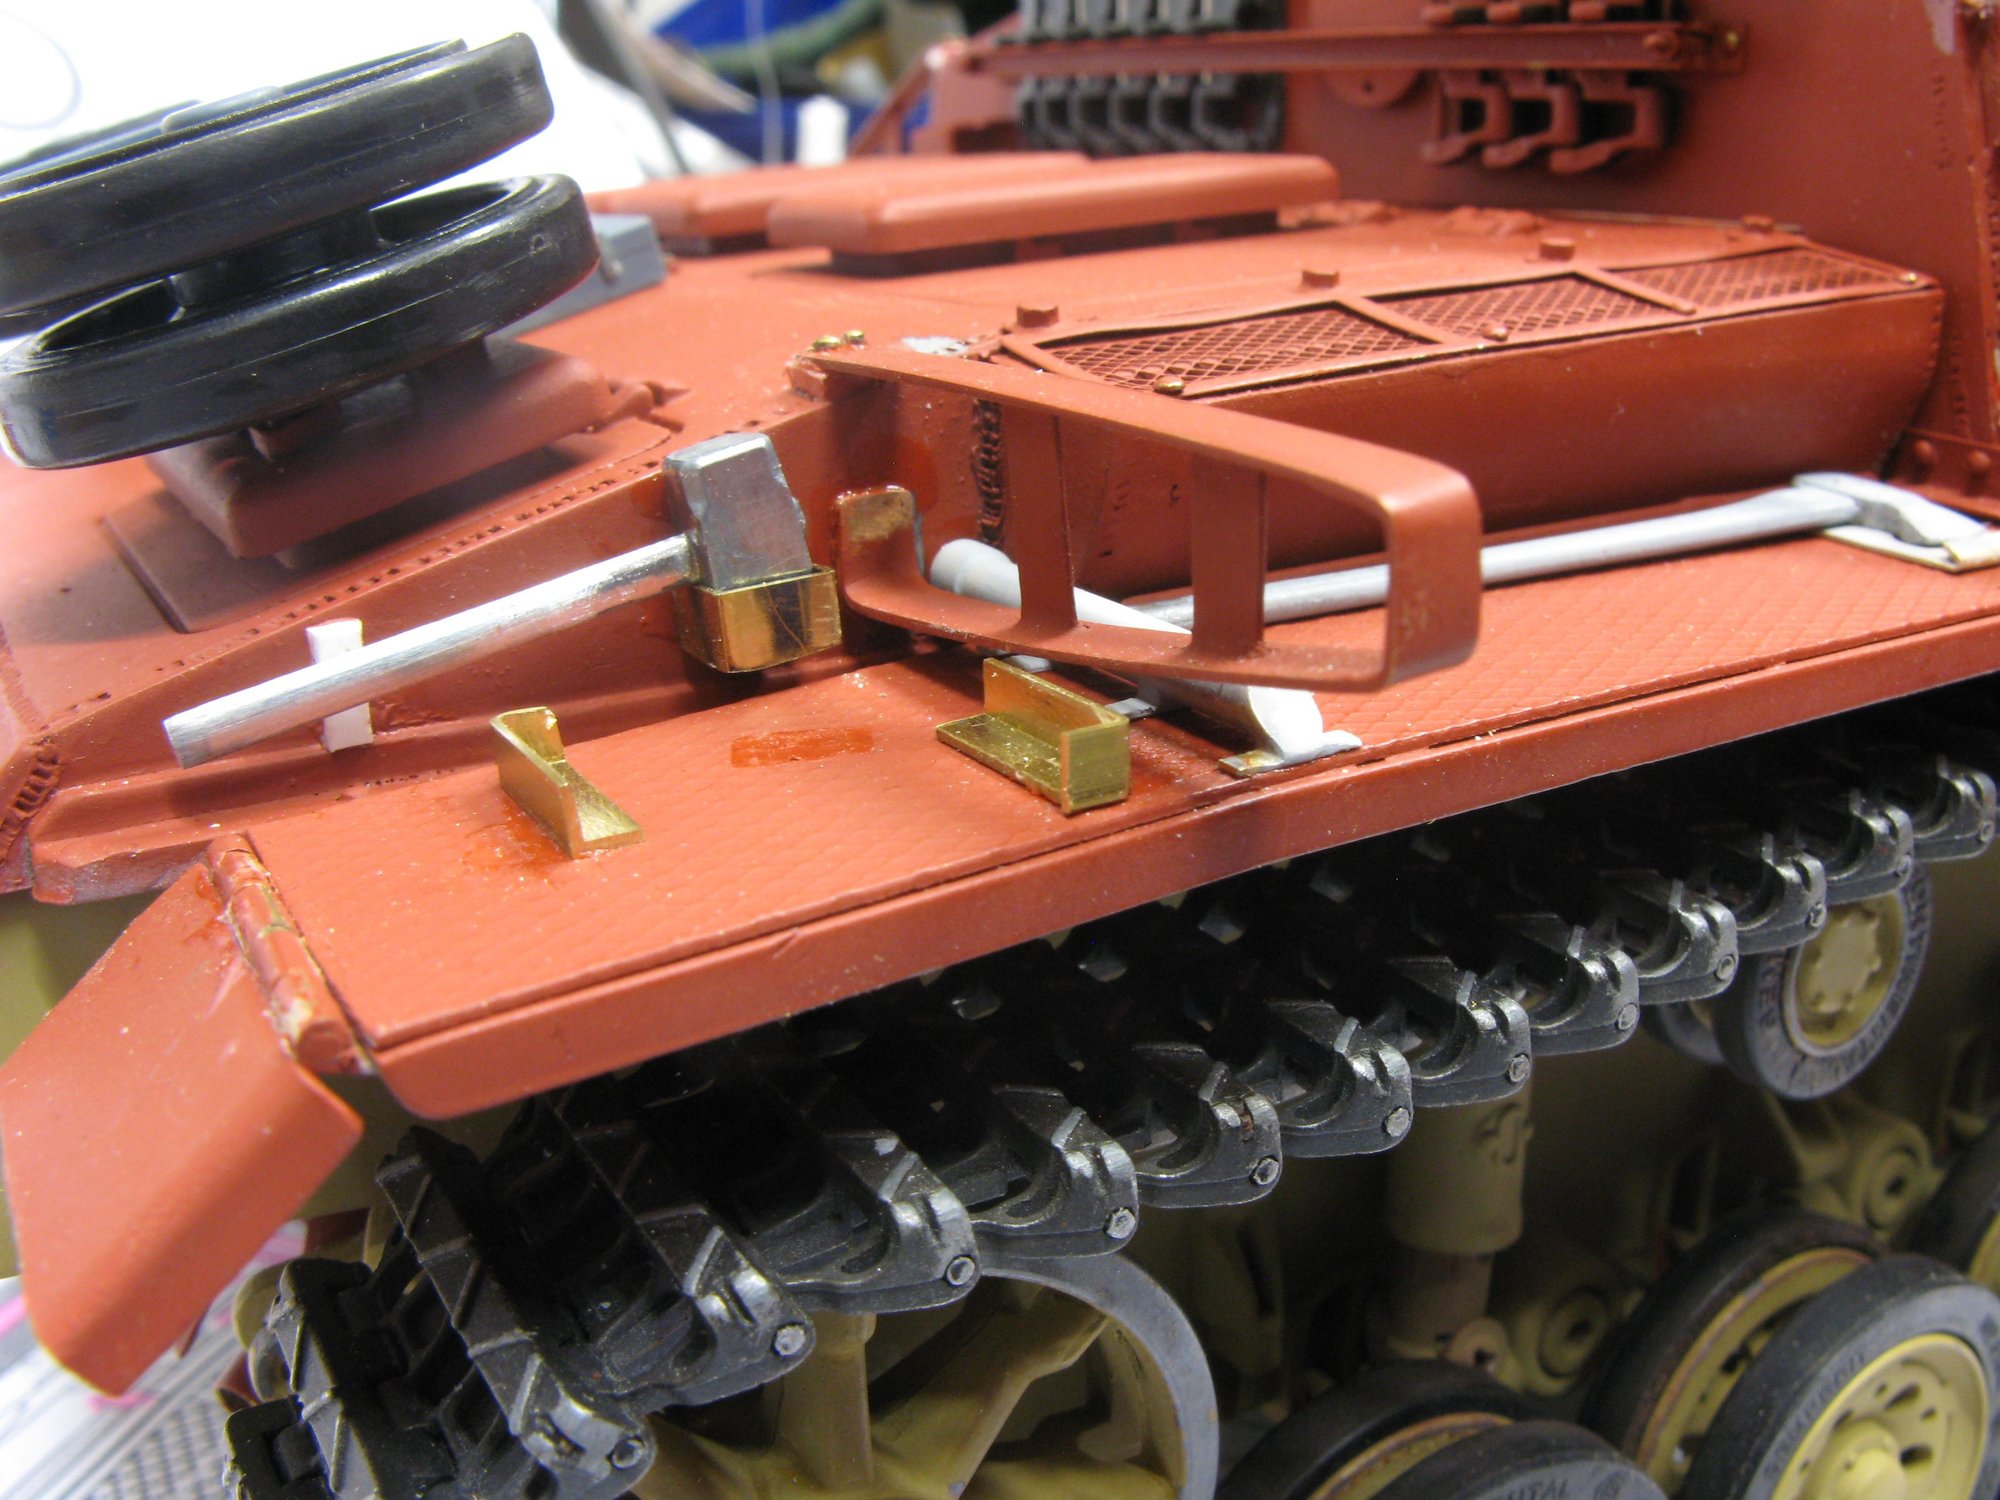
The axe and sledgehammer (which has been shortened) are from a Tiger accessory set. Otherwise all scratch built, i.e. the mudguard mount, axe head retainer, jack block retainers and hammer box. I still have to make the clips to hold the shafts in, and of course the jack brackets.
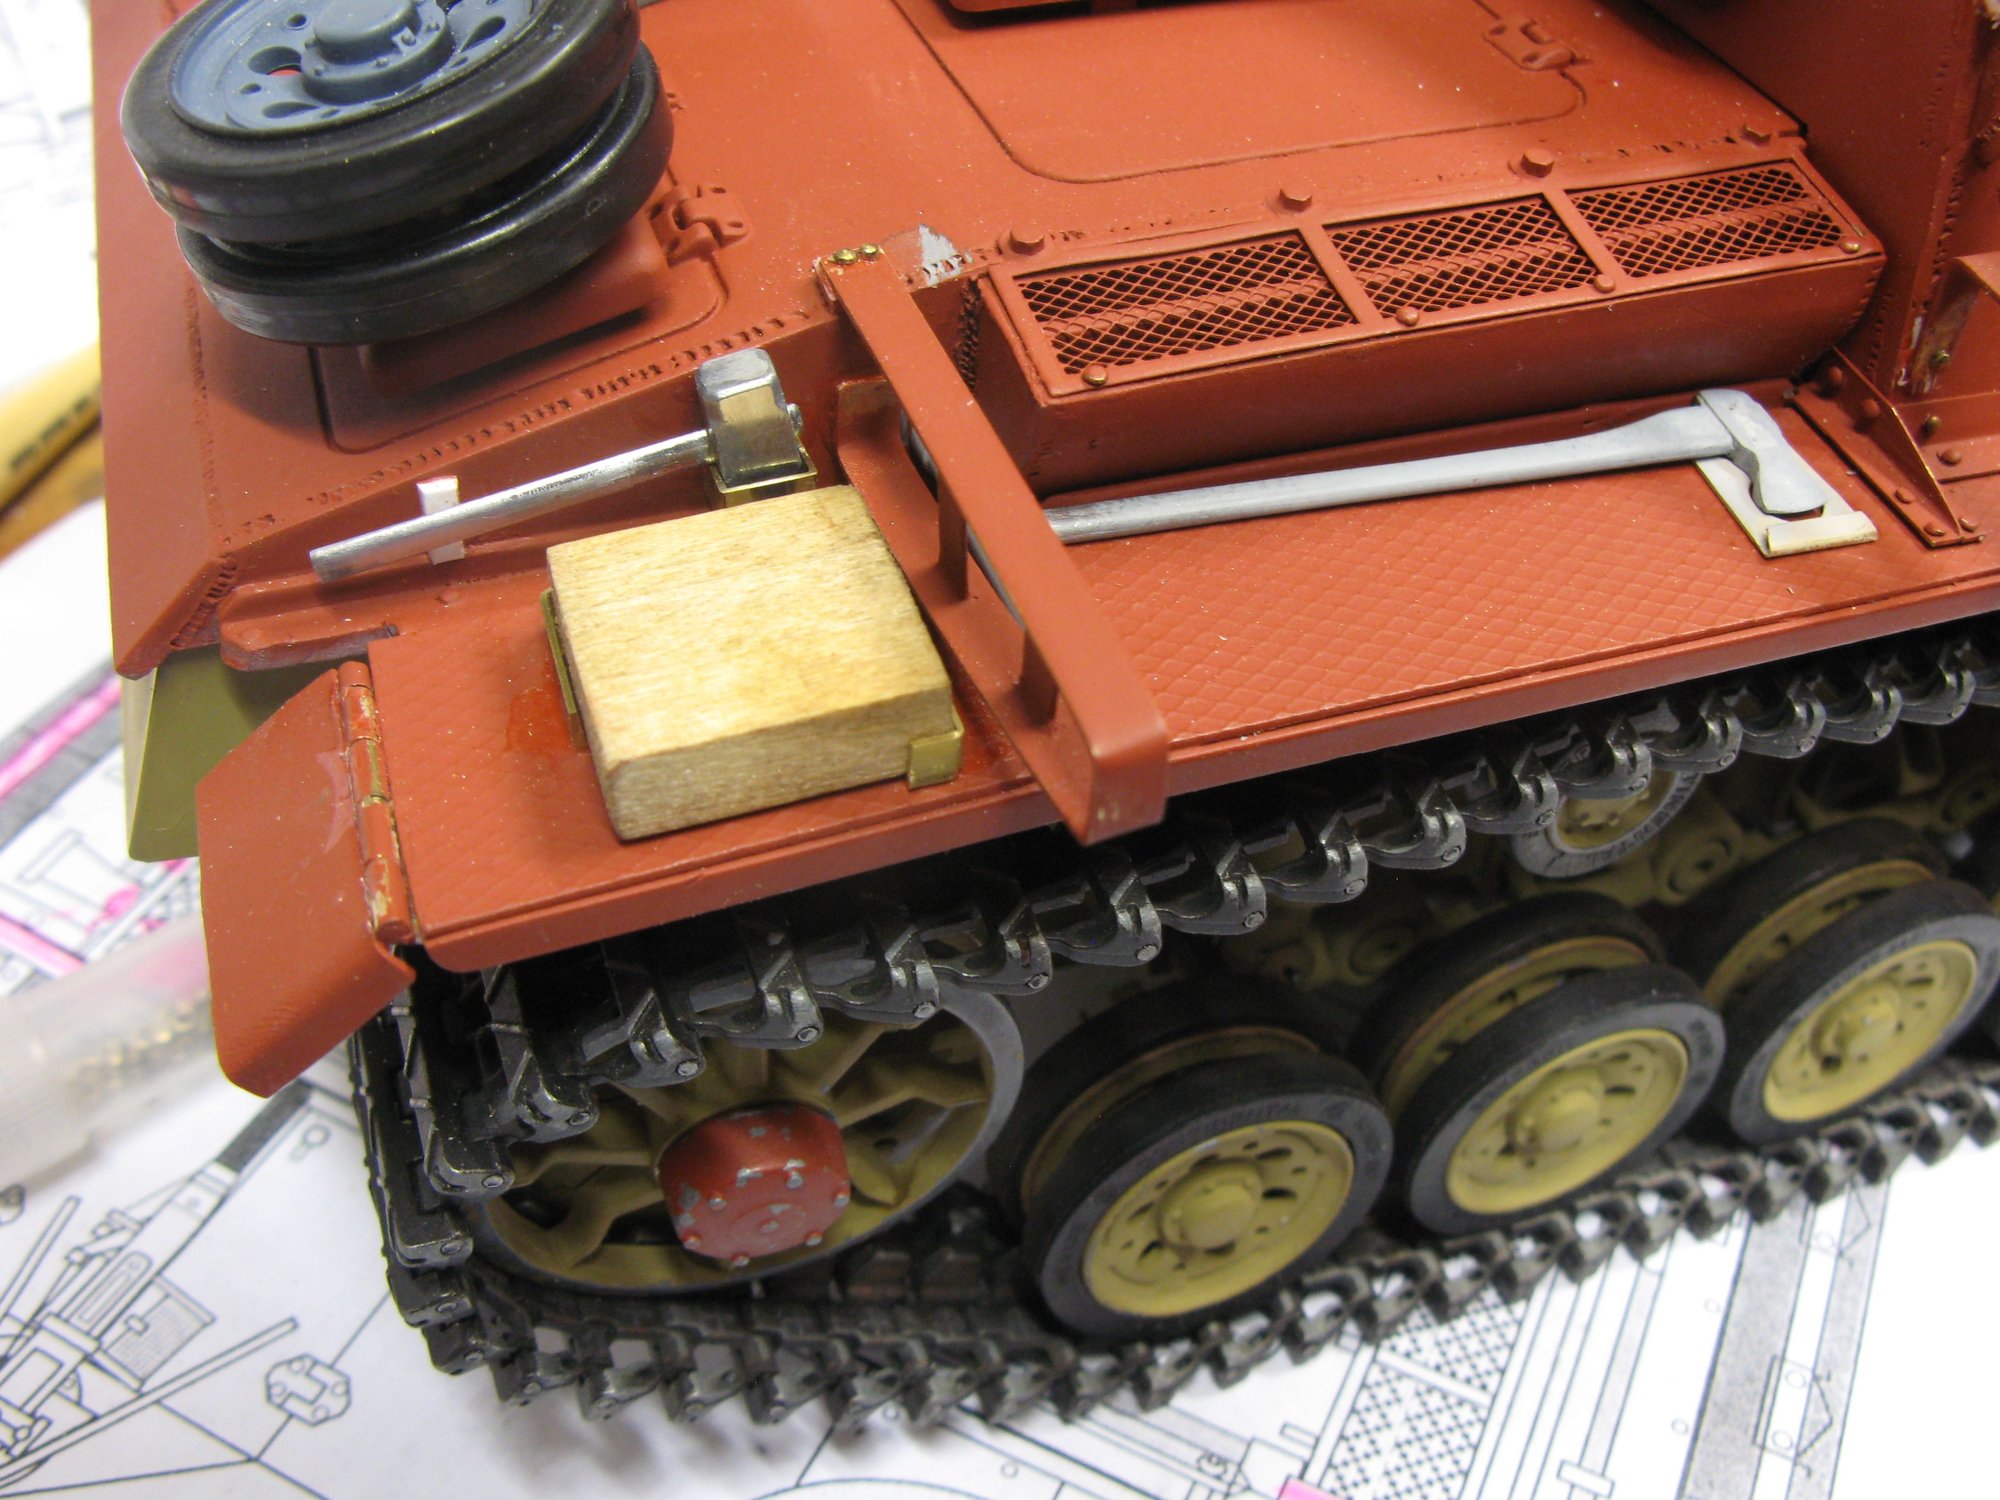
and theres the basic jack block, made from basswood.
The axe and sledgehammer (which has been shortened) are from a Tiger accessory set. Otherwise all scratch built, i.e. the mudguard mount, axe head retainer, jack block retainers and hammer box. I still have to make the clips to hold the shafts in, and of course the jack brackets.
and theres the basic jack block, made from basswood.
06-21-2020 | 08:12 PM
#84
Thread Starter
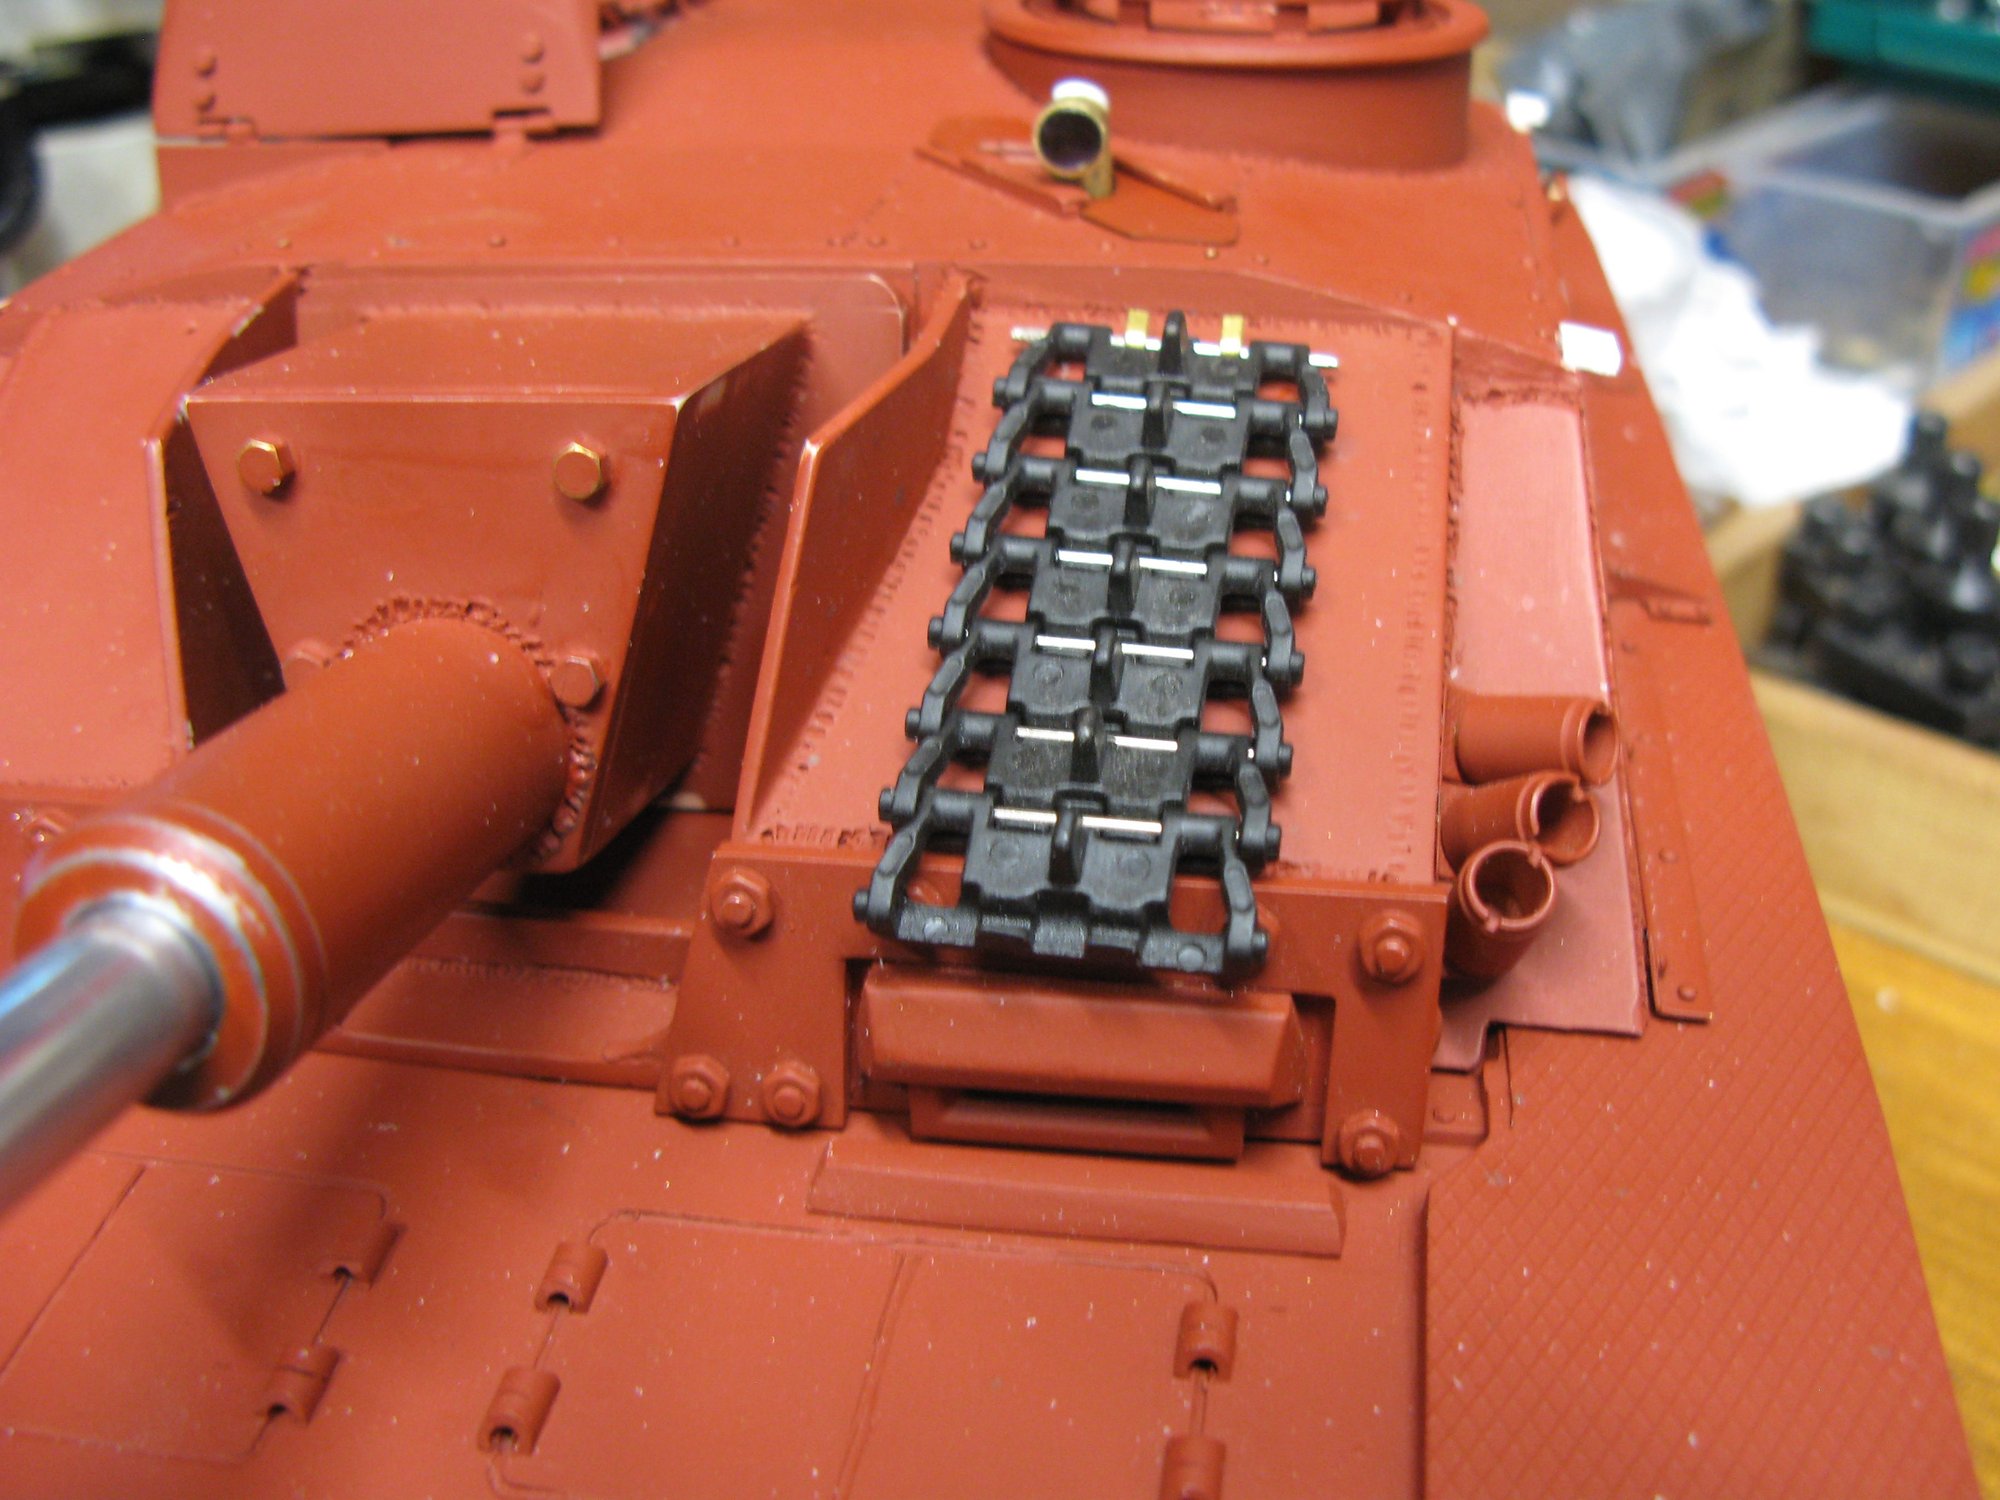
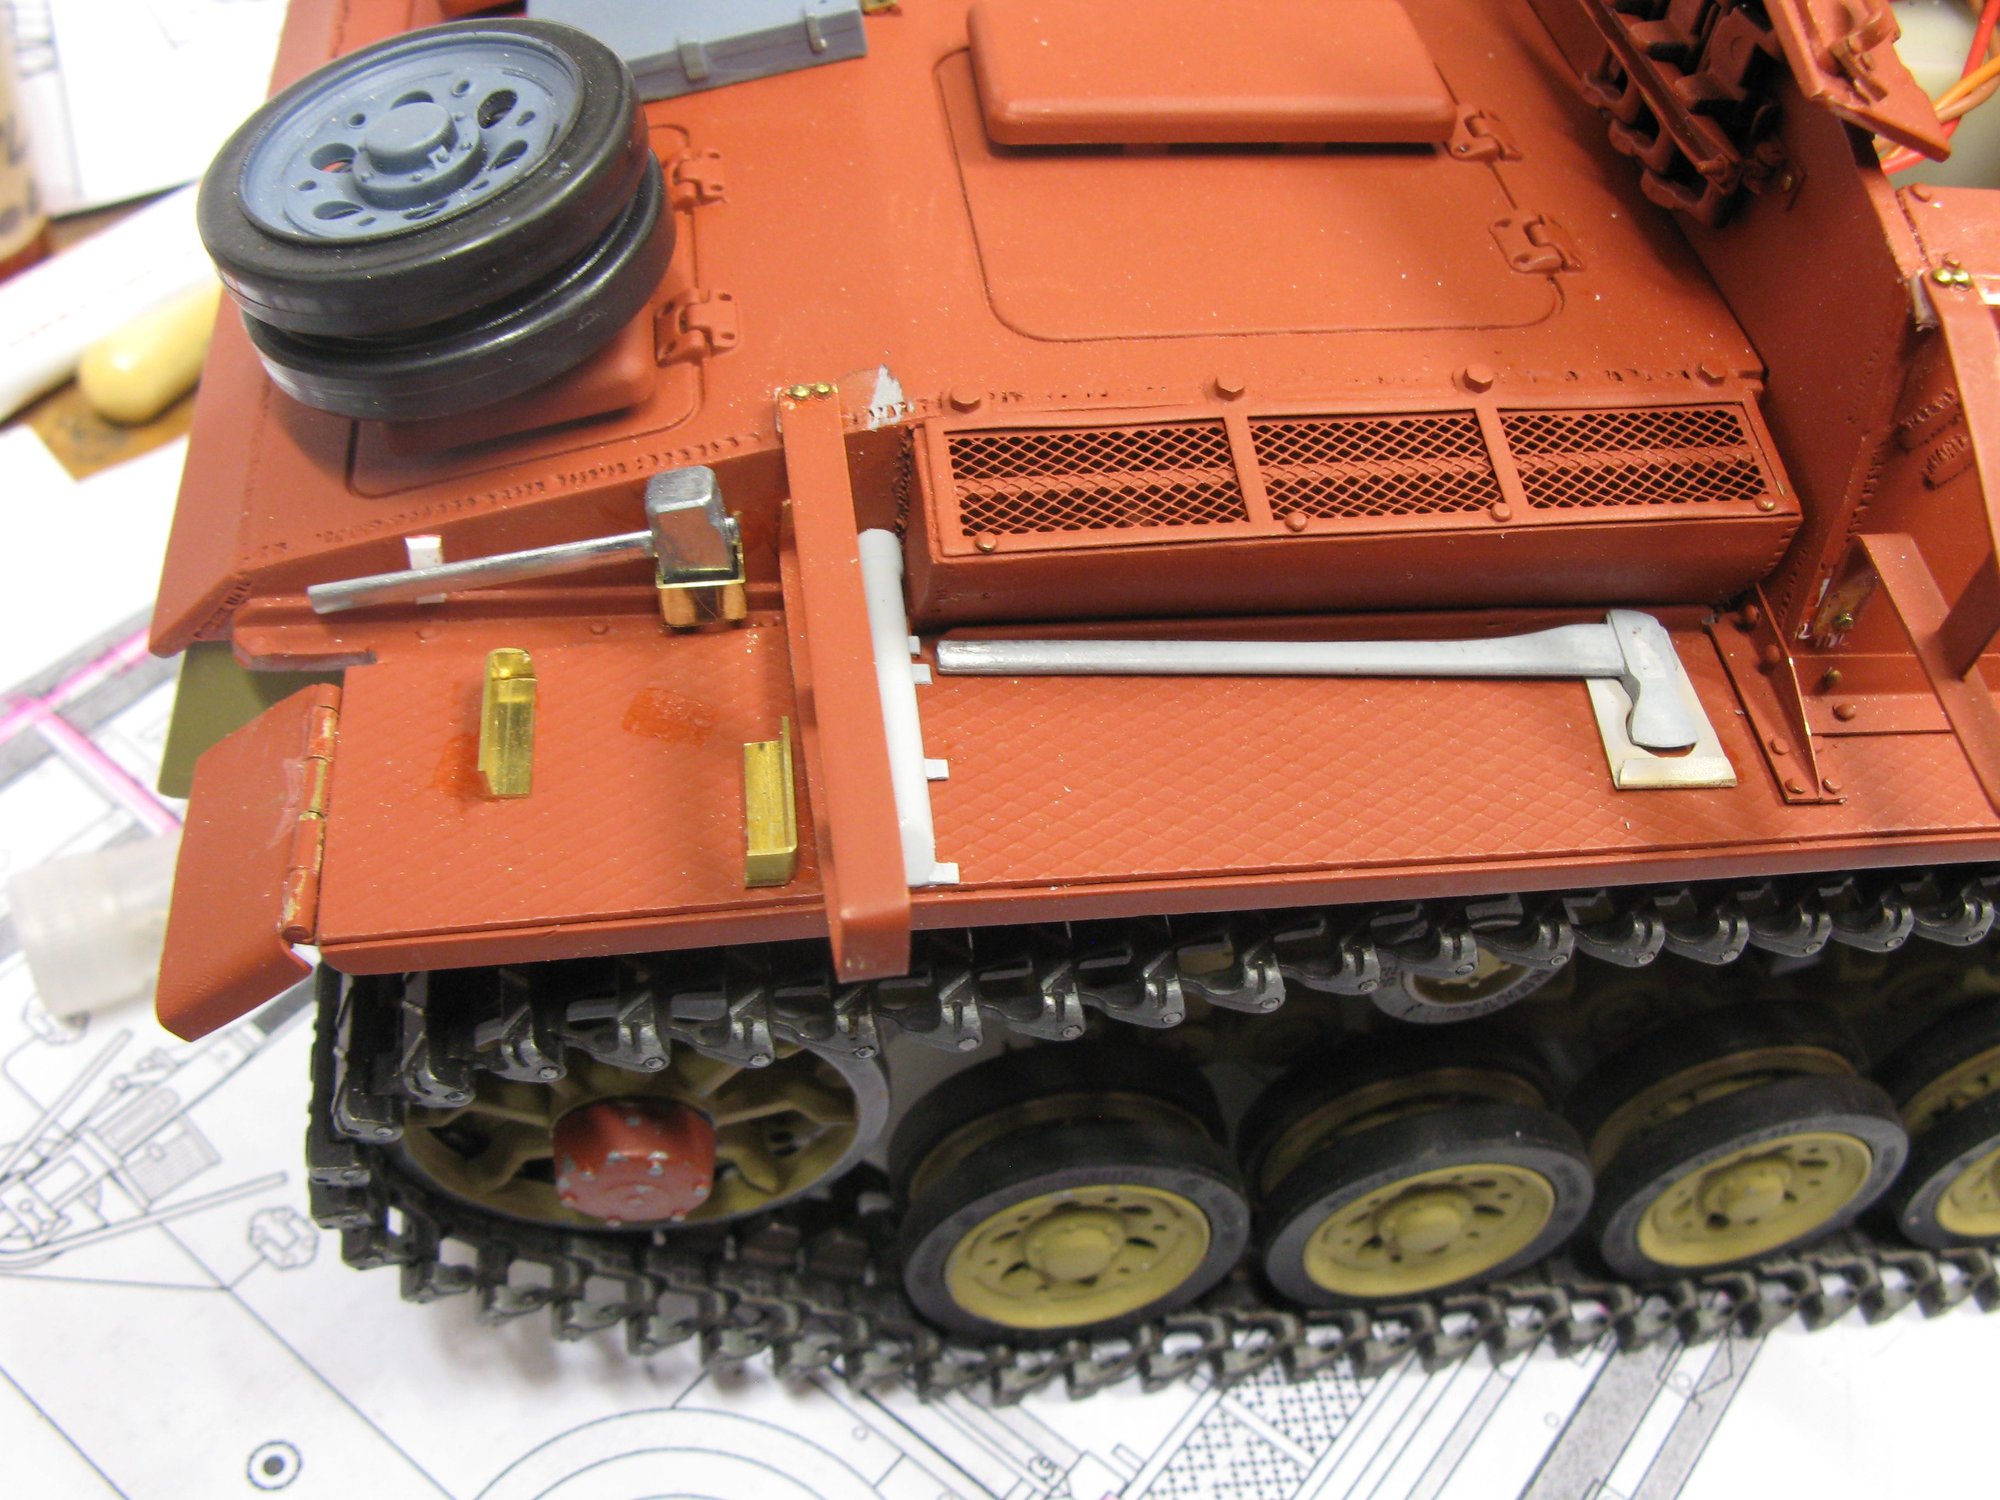
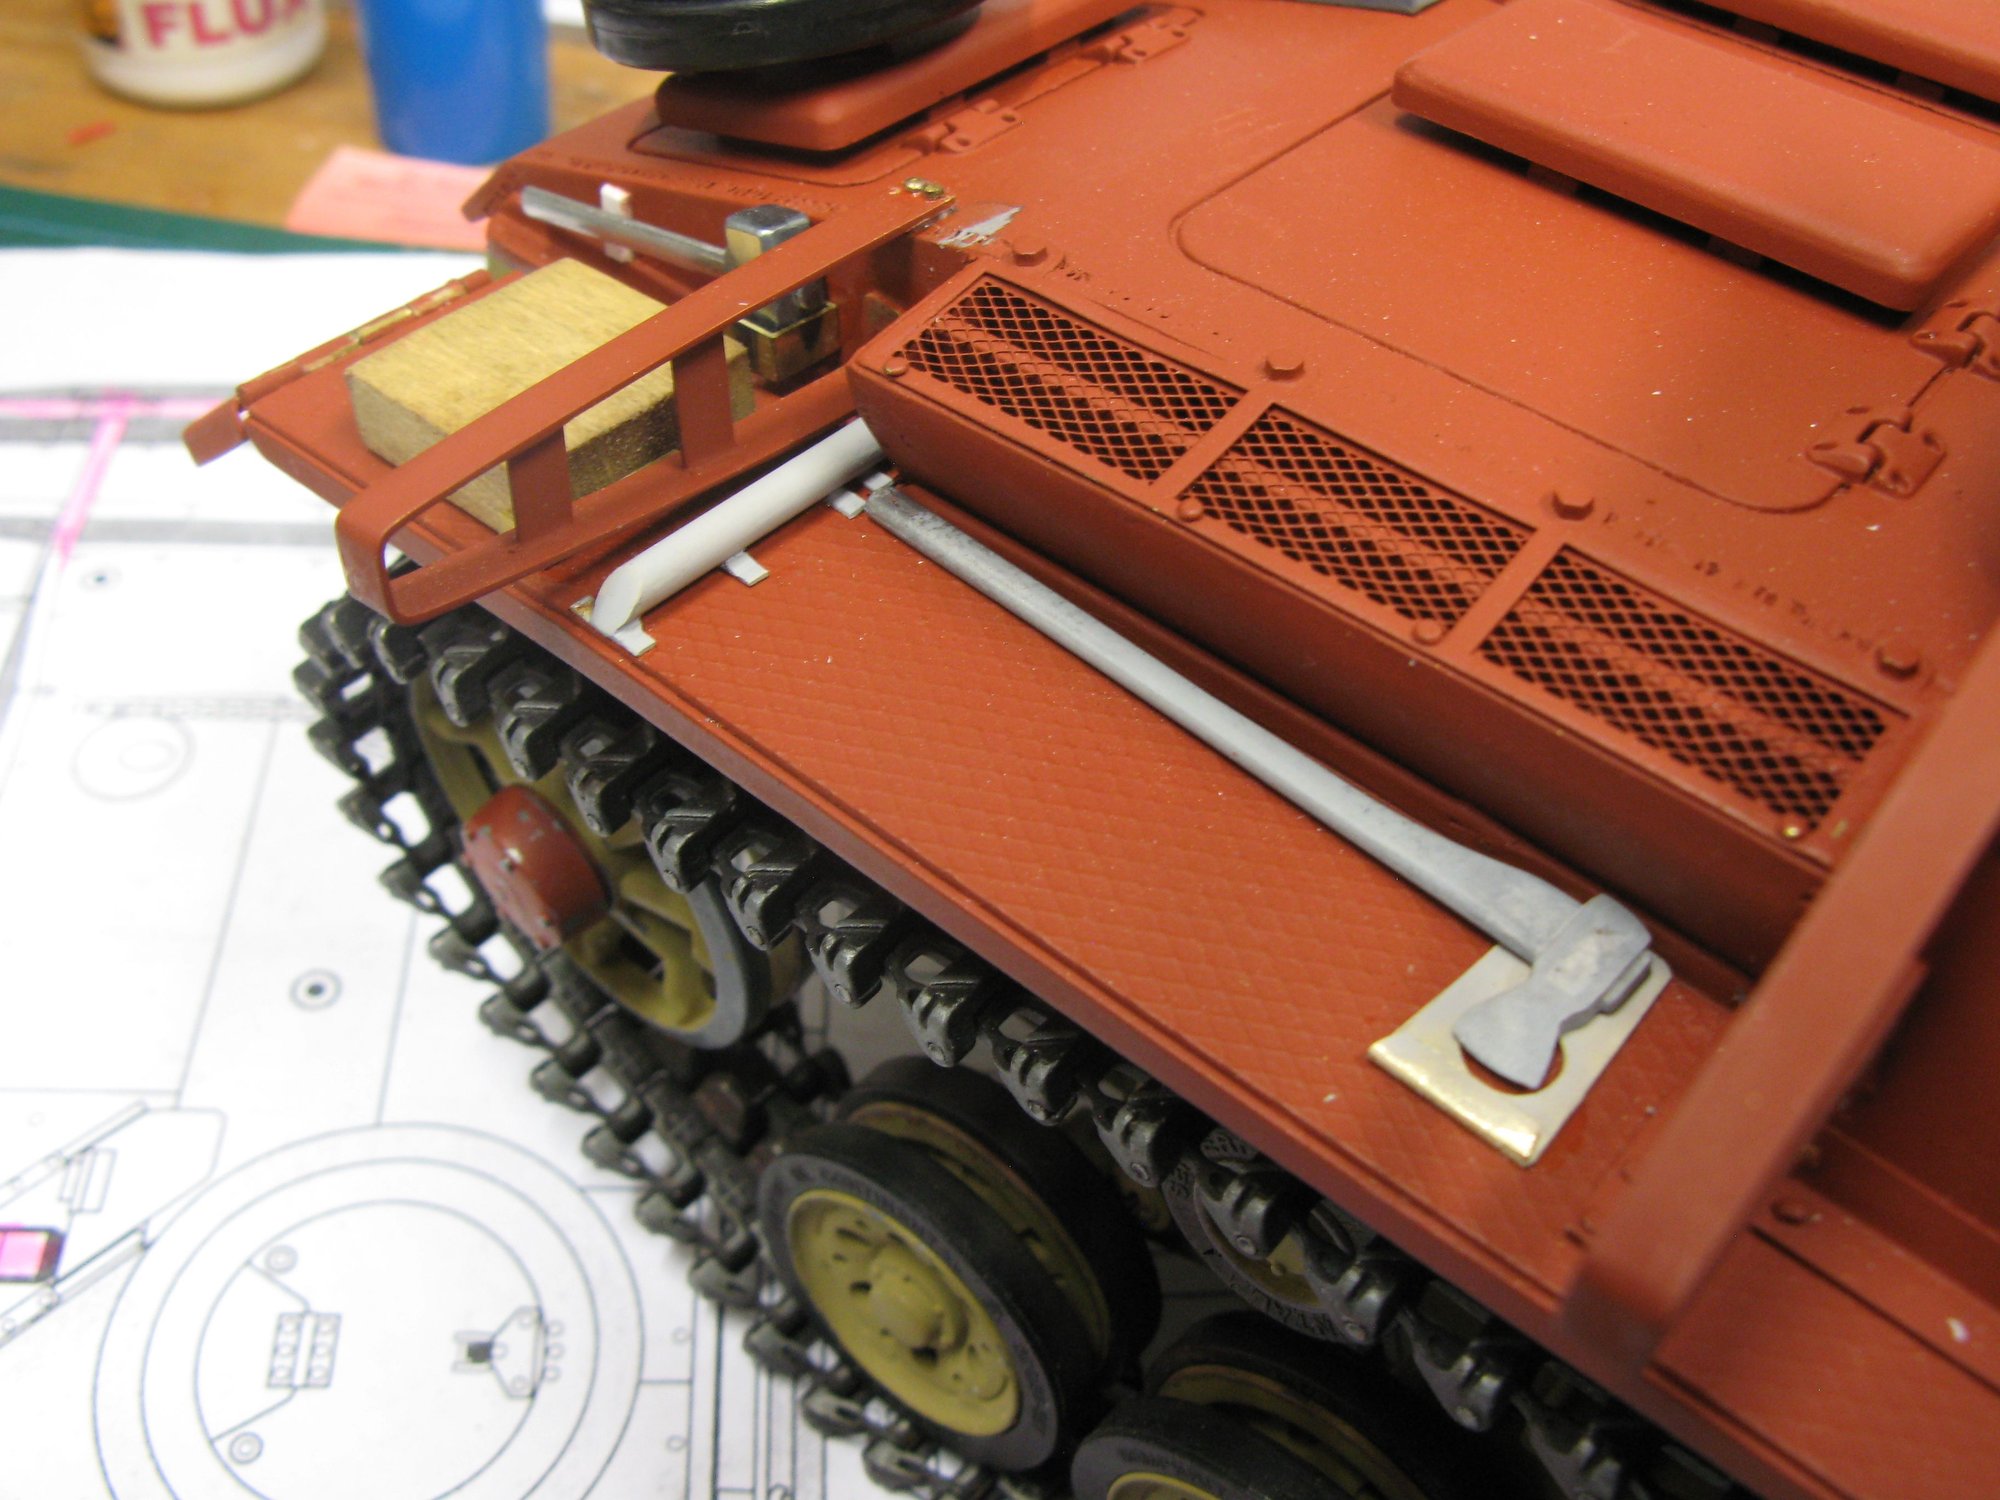
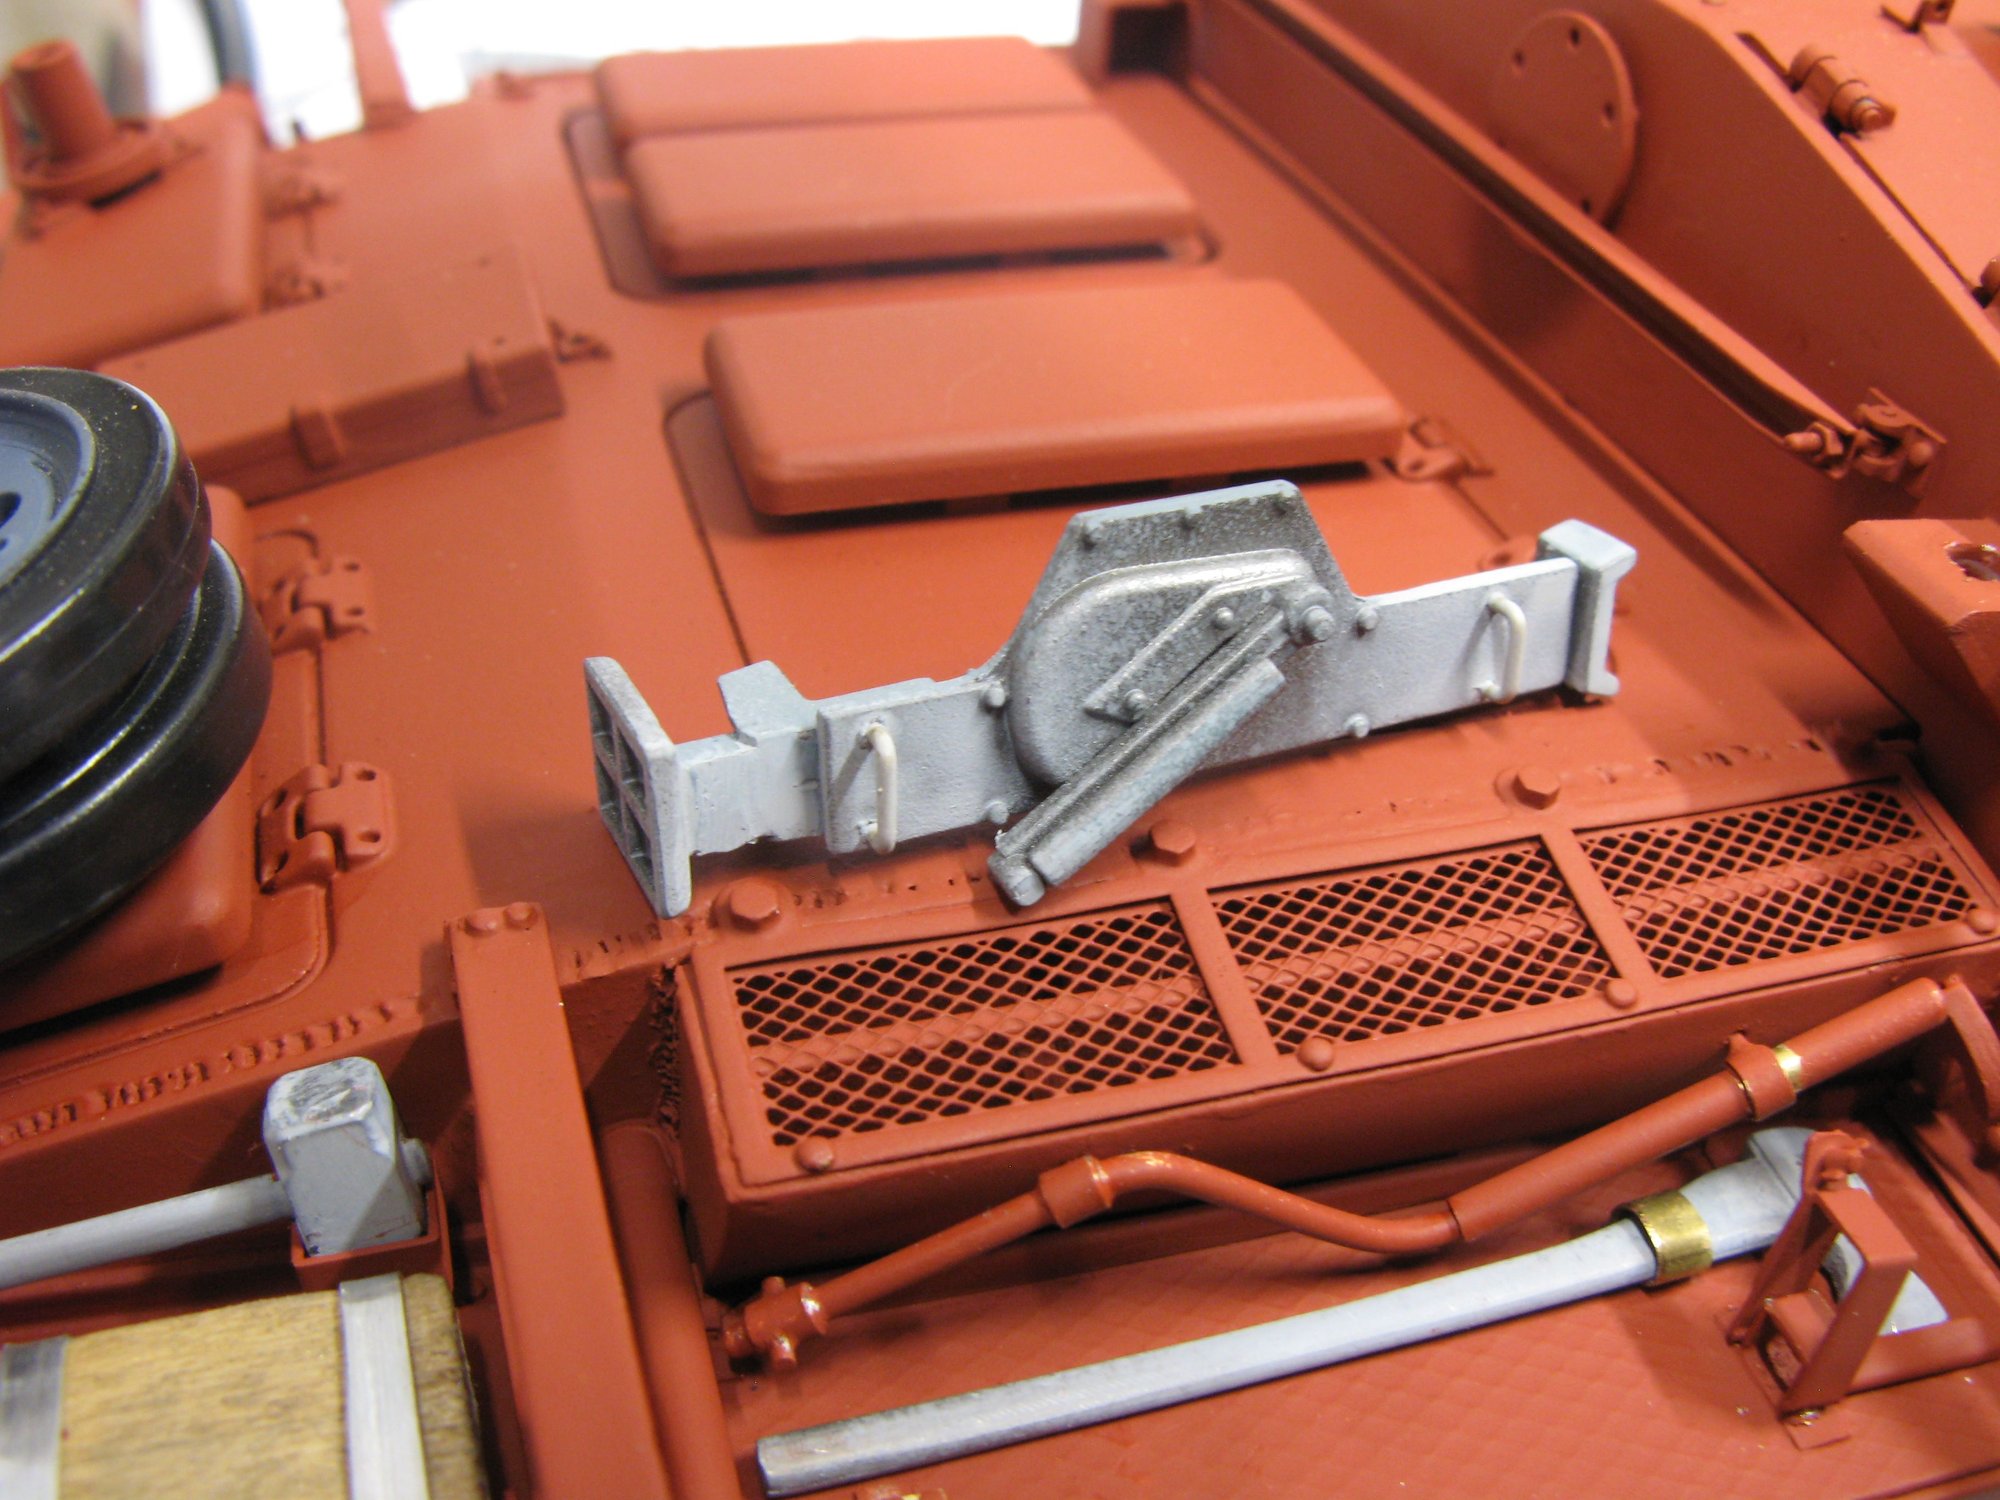
There's a lot of work for one mudguard! I've put the metal straps on the jack block, added the lifting hook to the air inlet, made the jack block clamps and a starting handle.
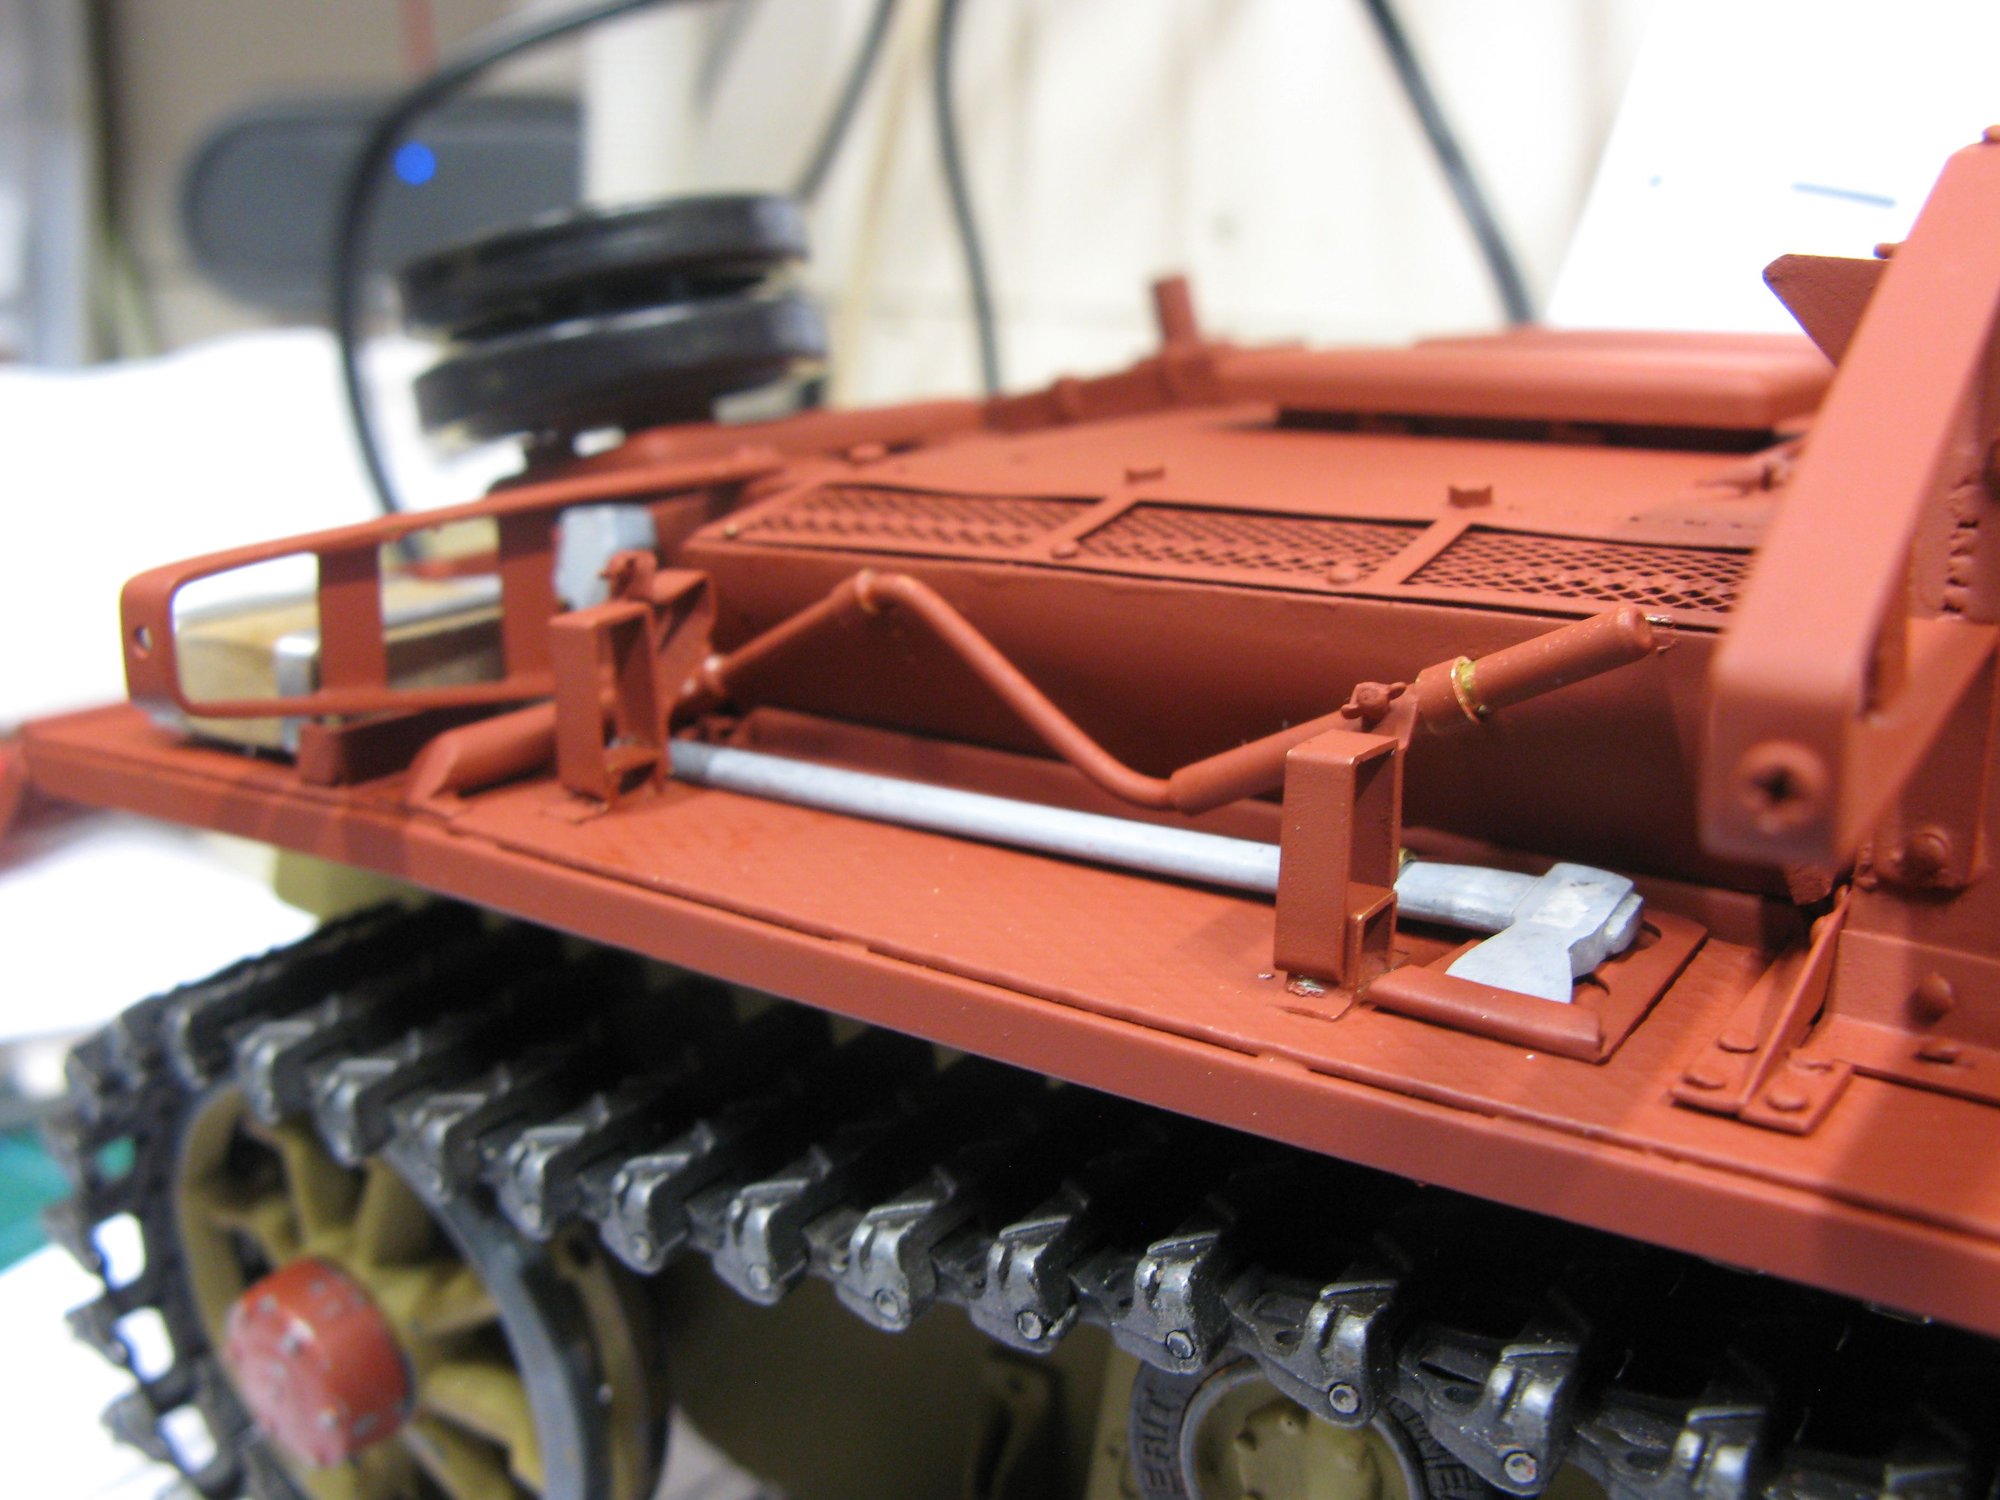
Also added handles to the jack

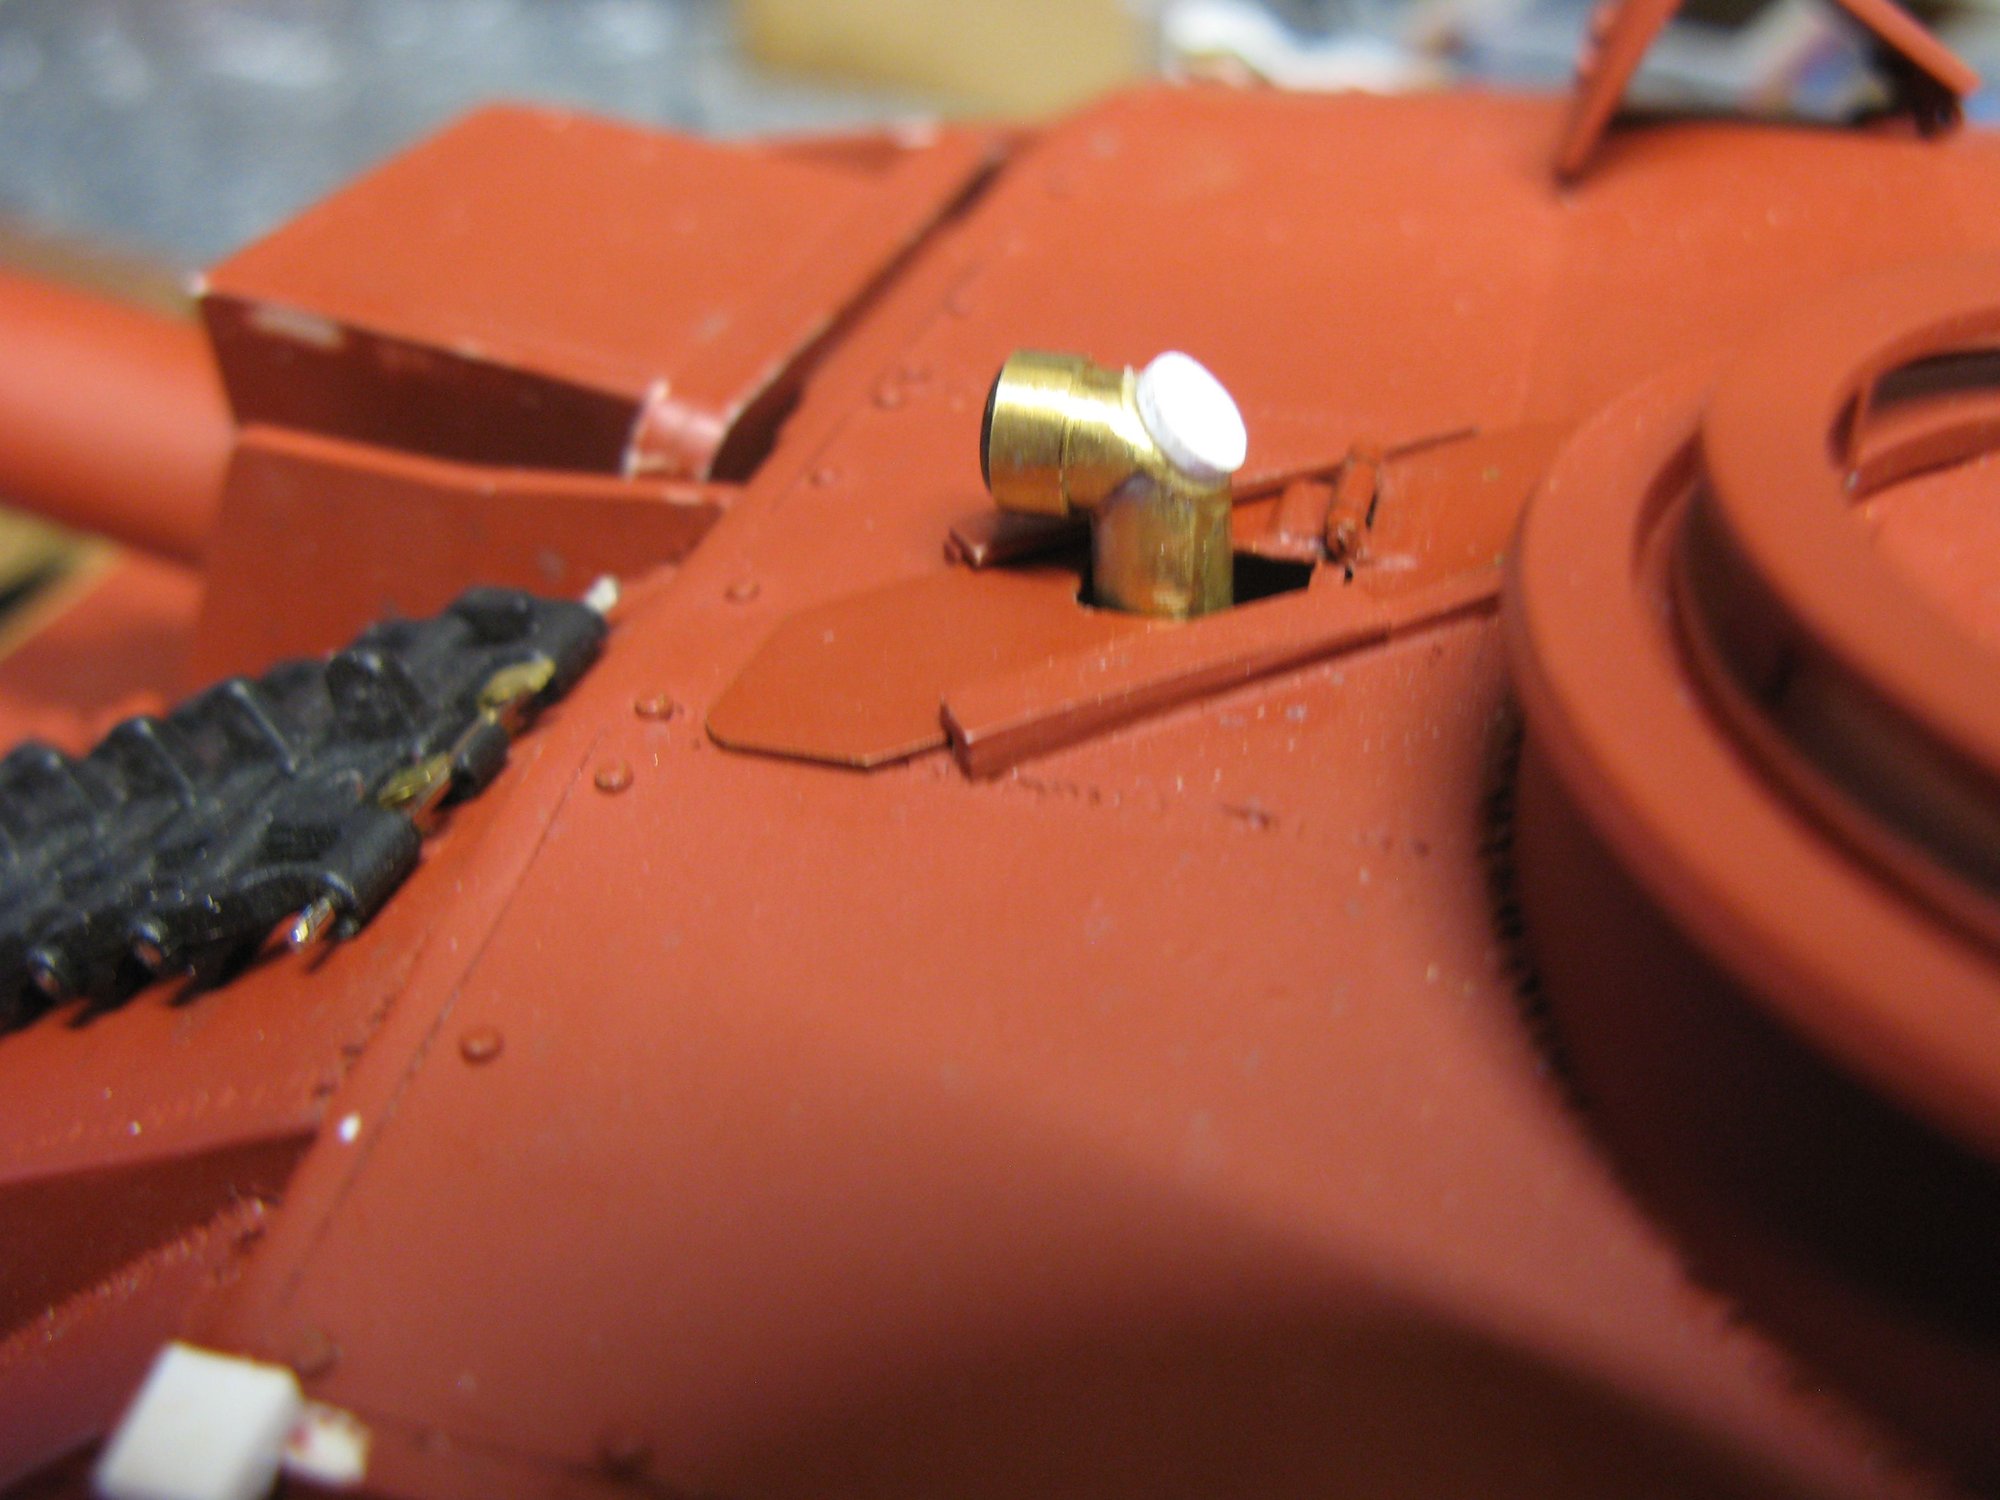
Added the aerial mounts to the rear panel, too. One in styrene sheet, one silver soldered from brass sheet. The brass one was quicker to make...
Also added handles to the jack
Added the aerial mounts to the rear panel, too. One in styrene sheet, one silver soldered from brass sheet. The brass one was quicker to make...
07-26-2020 | 11:46 PM
#85
Thread Starter
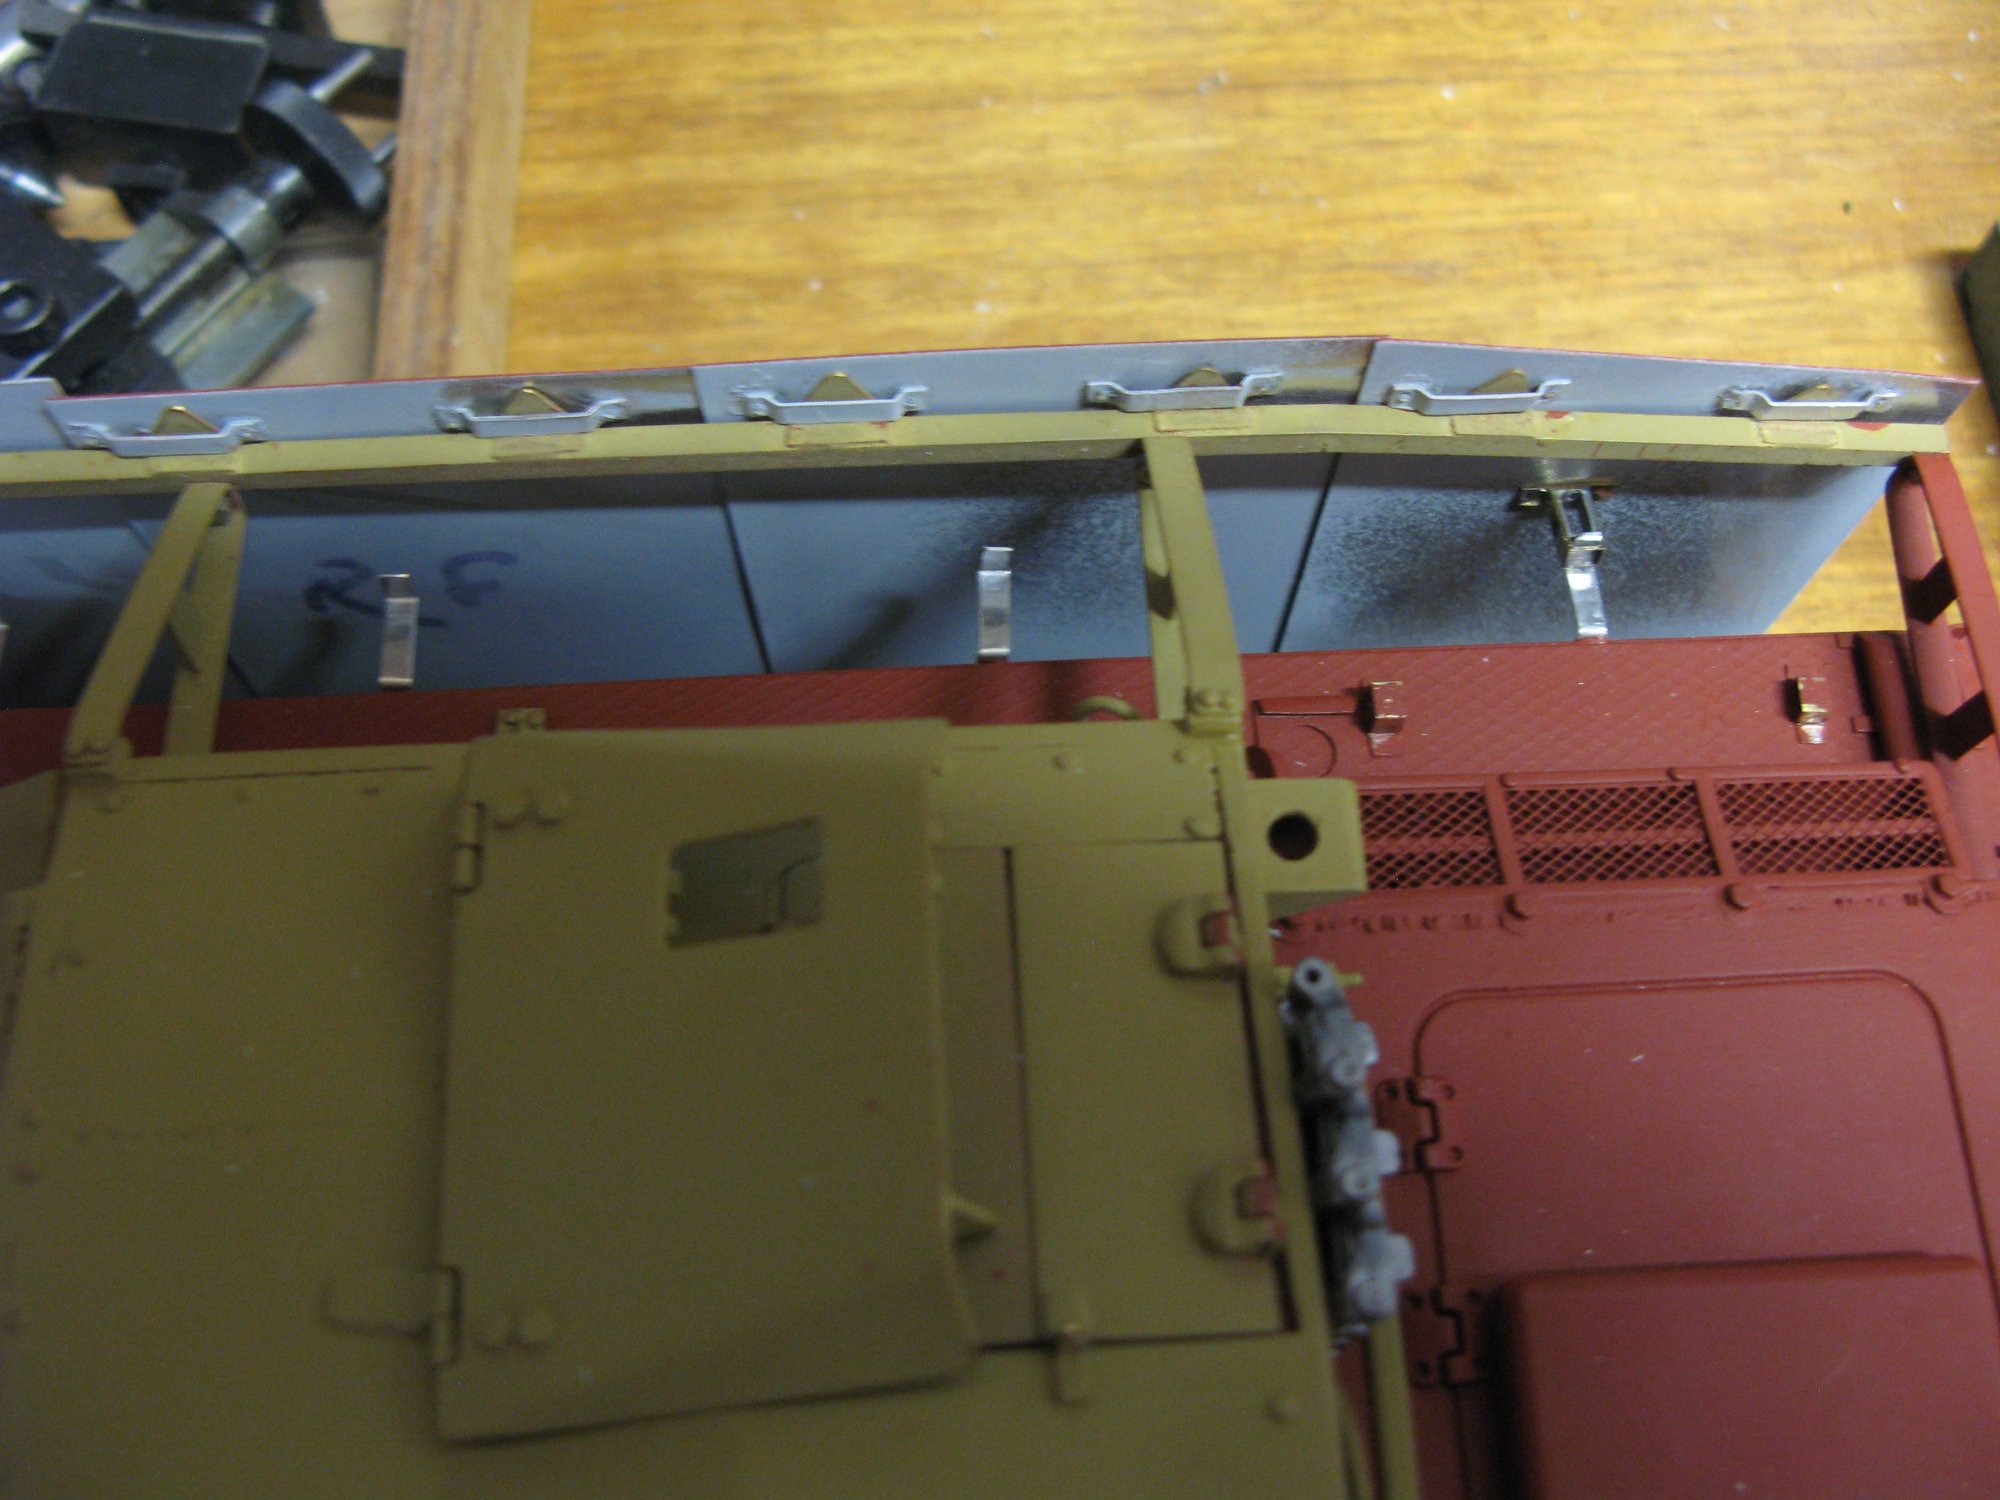
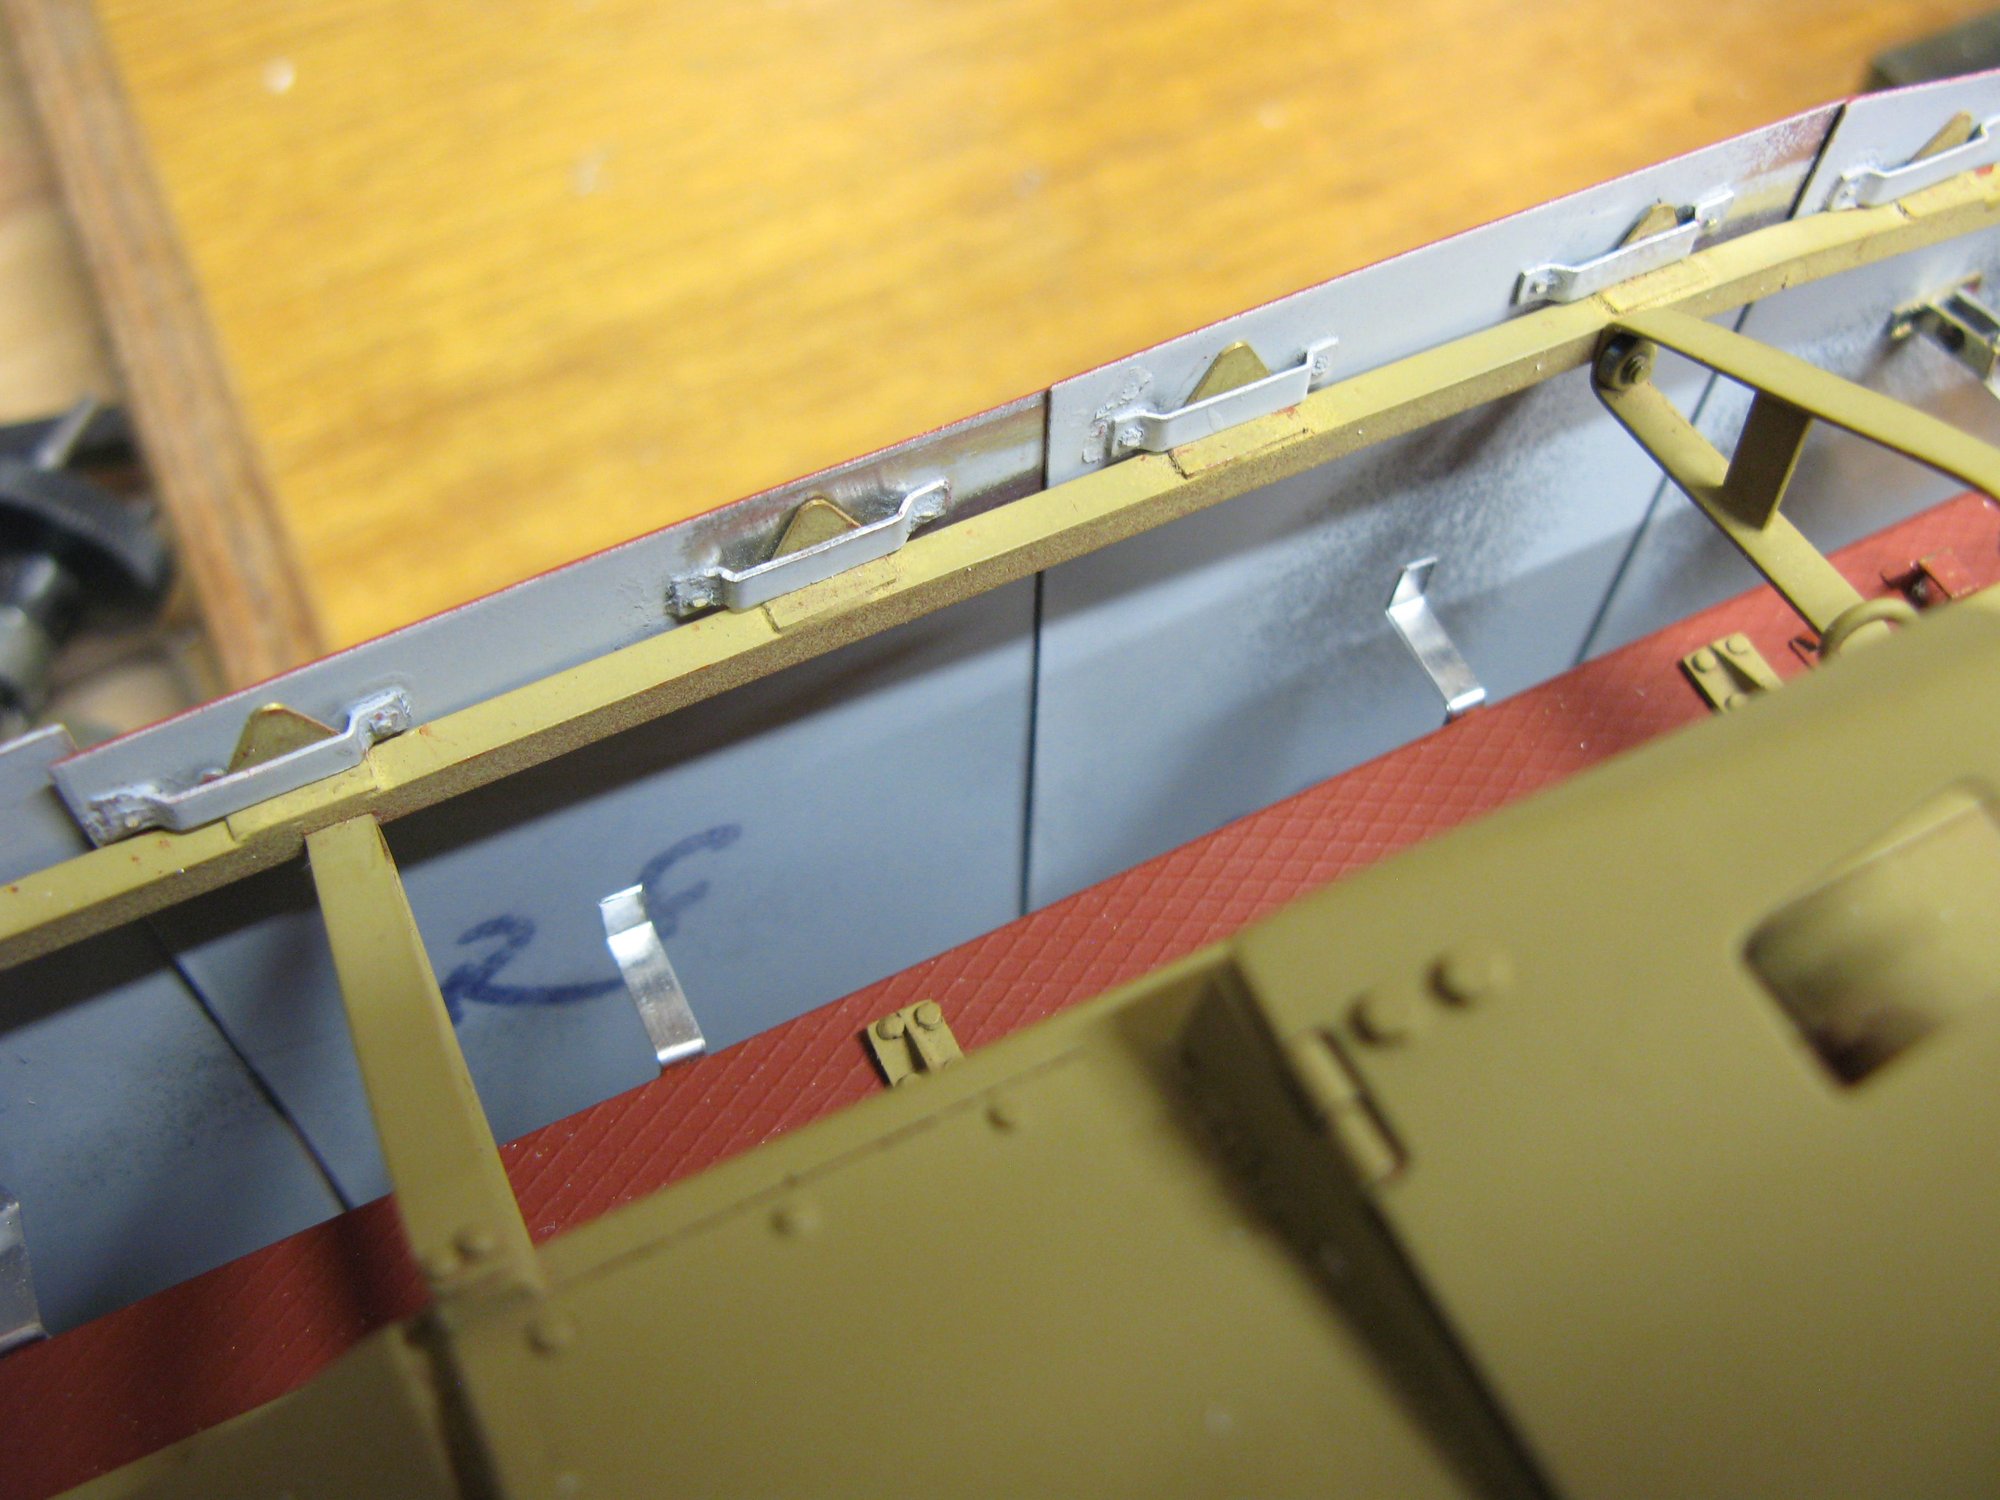
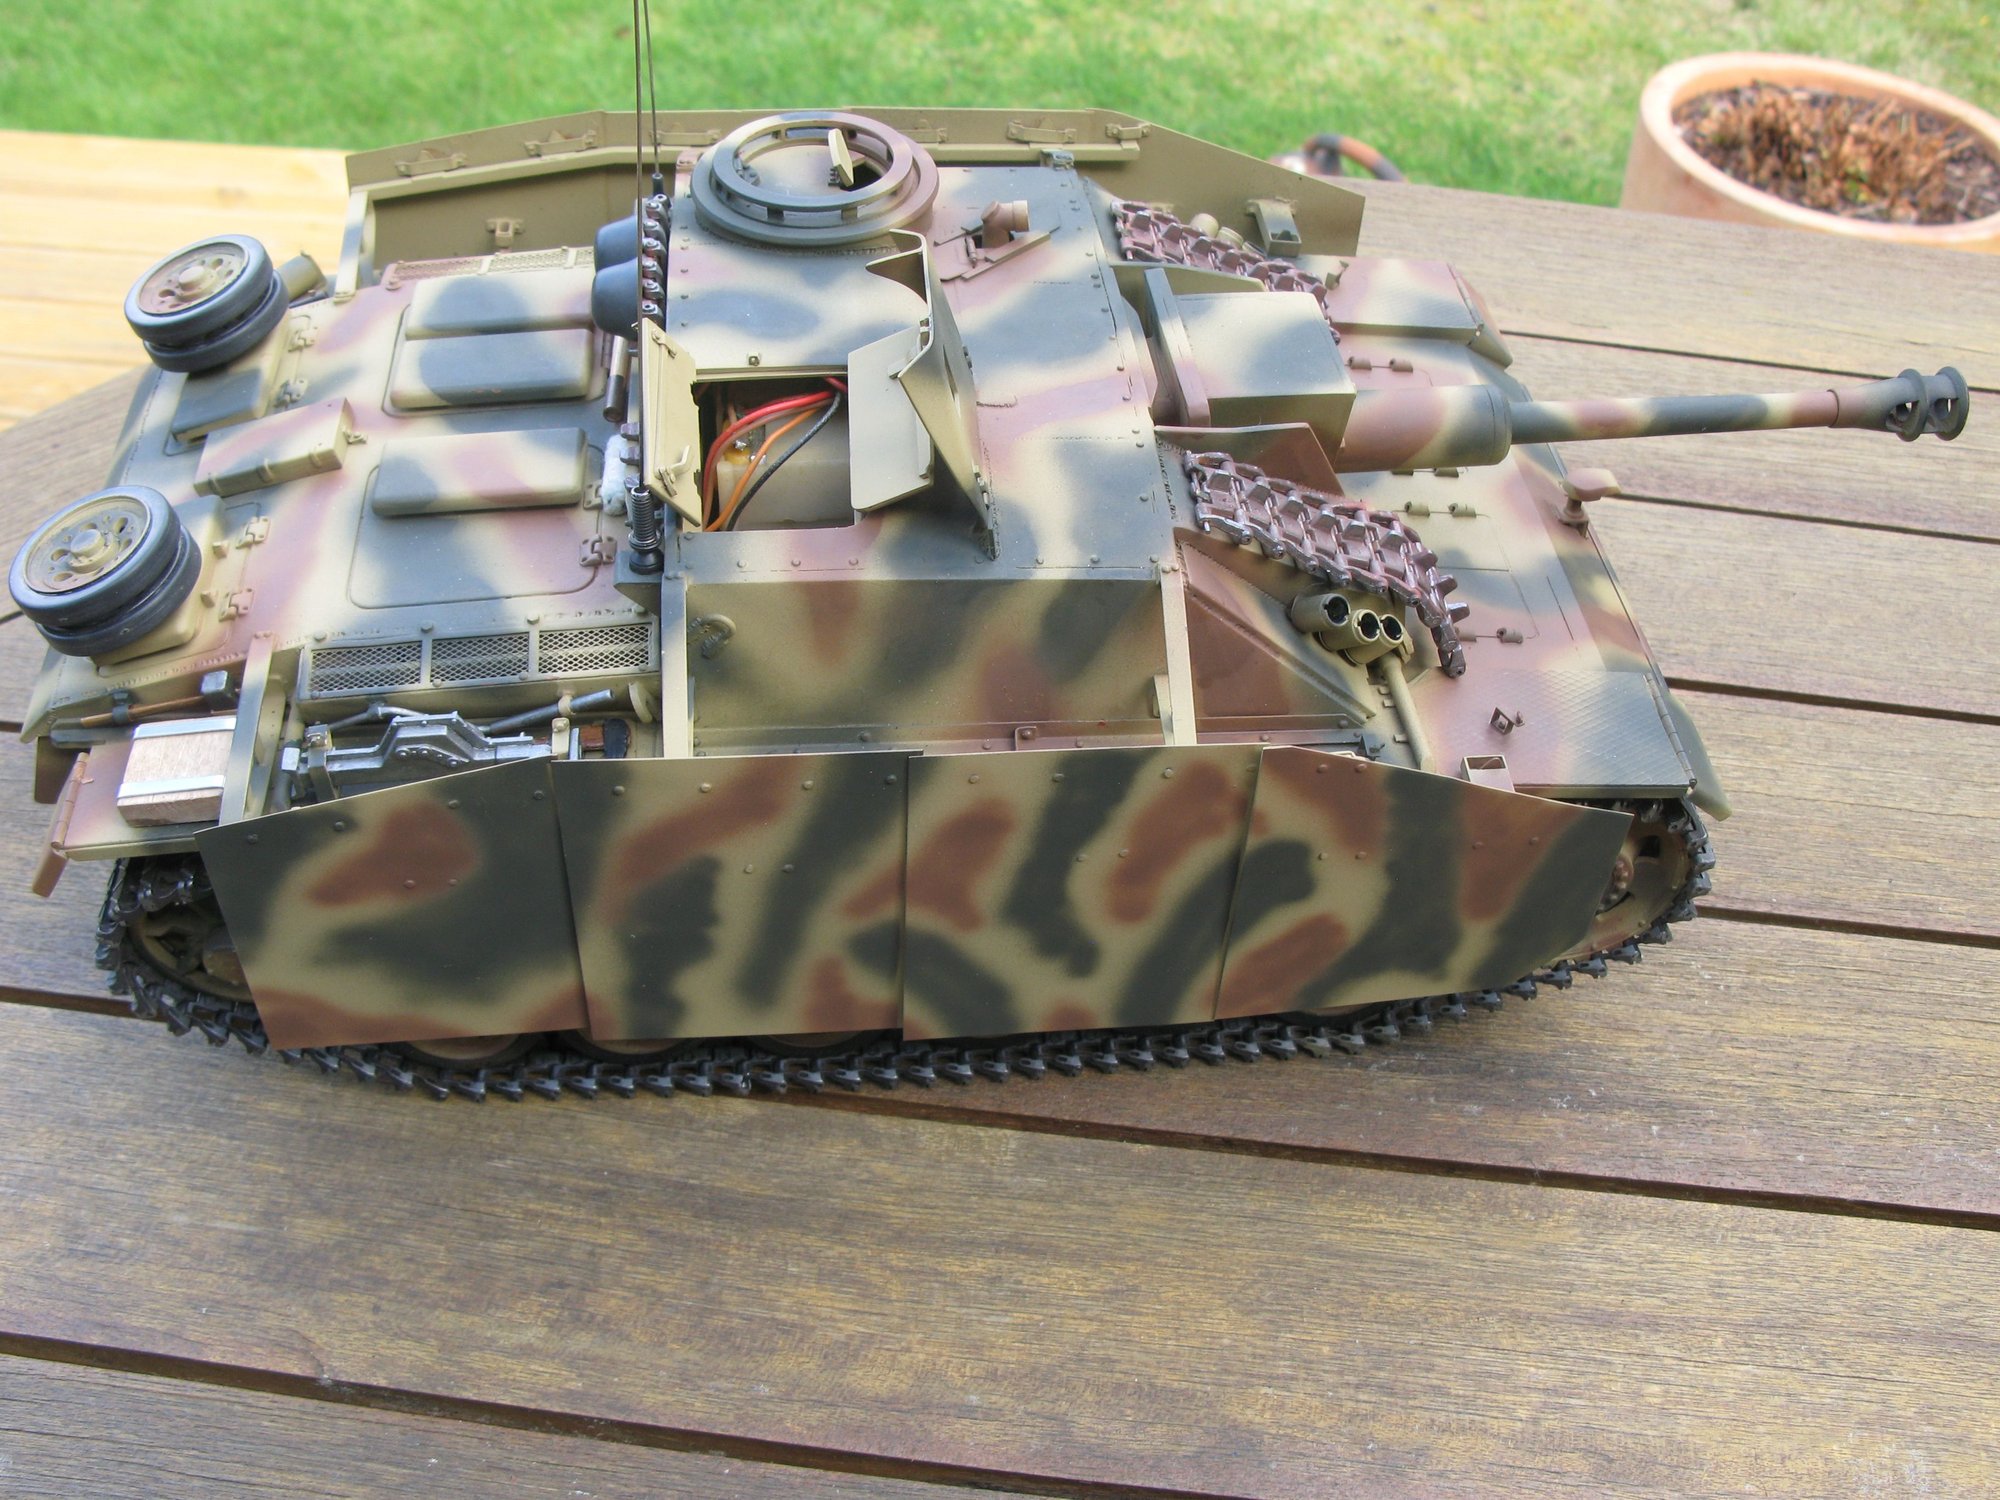
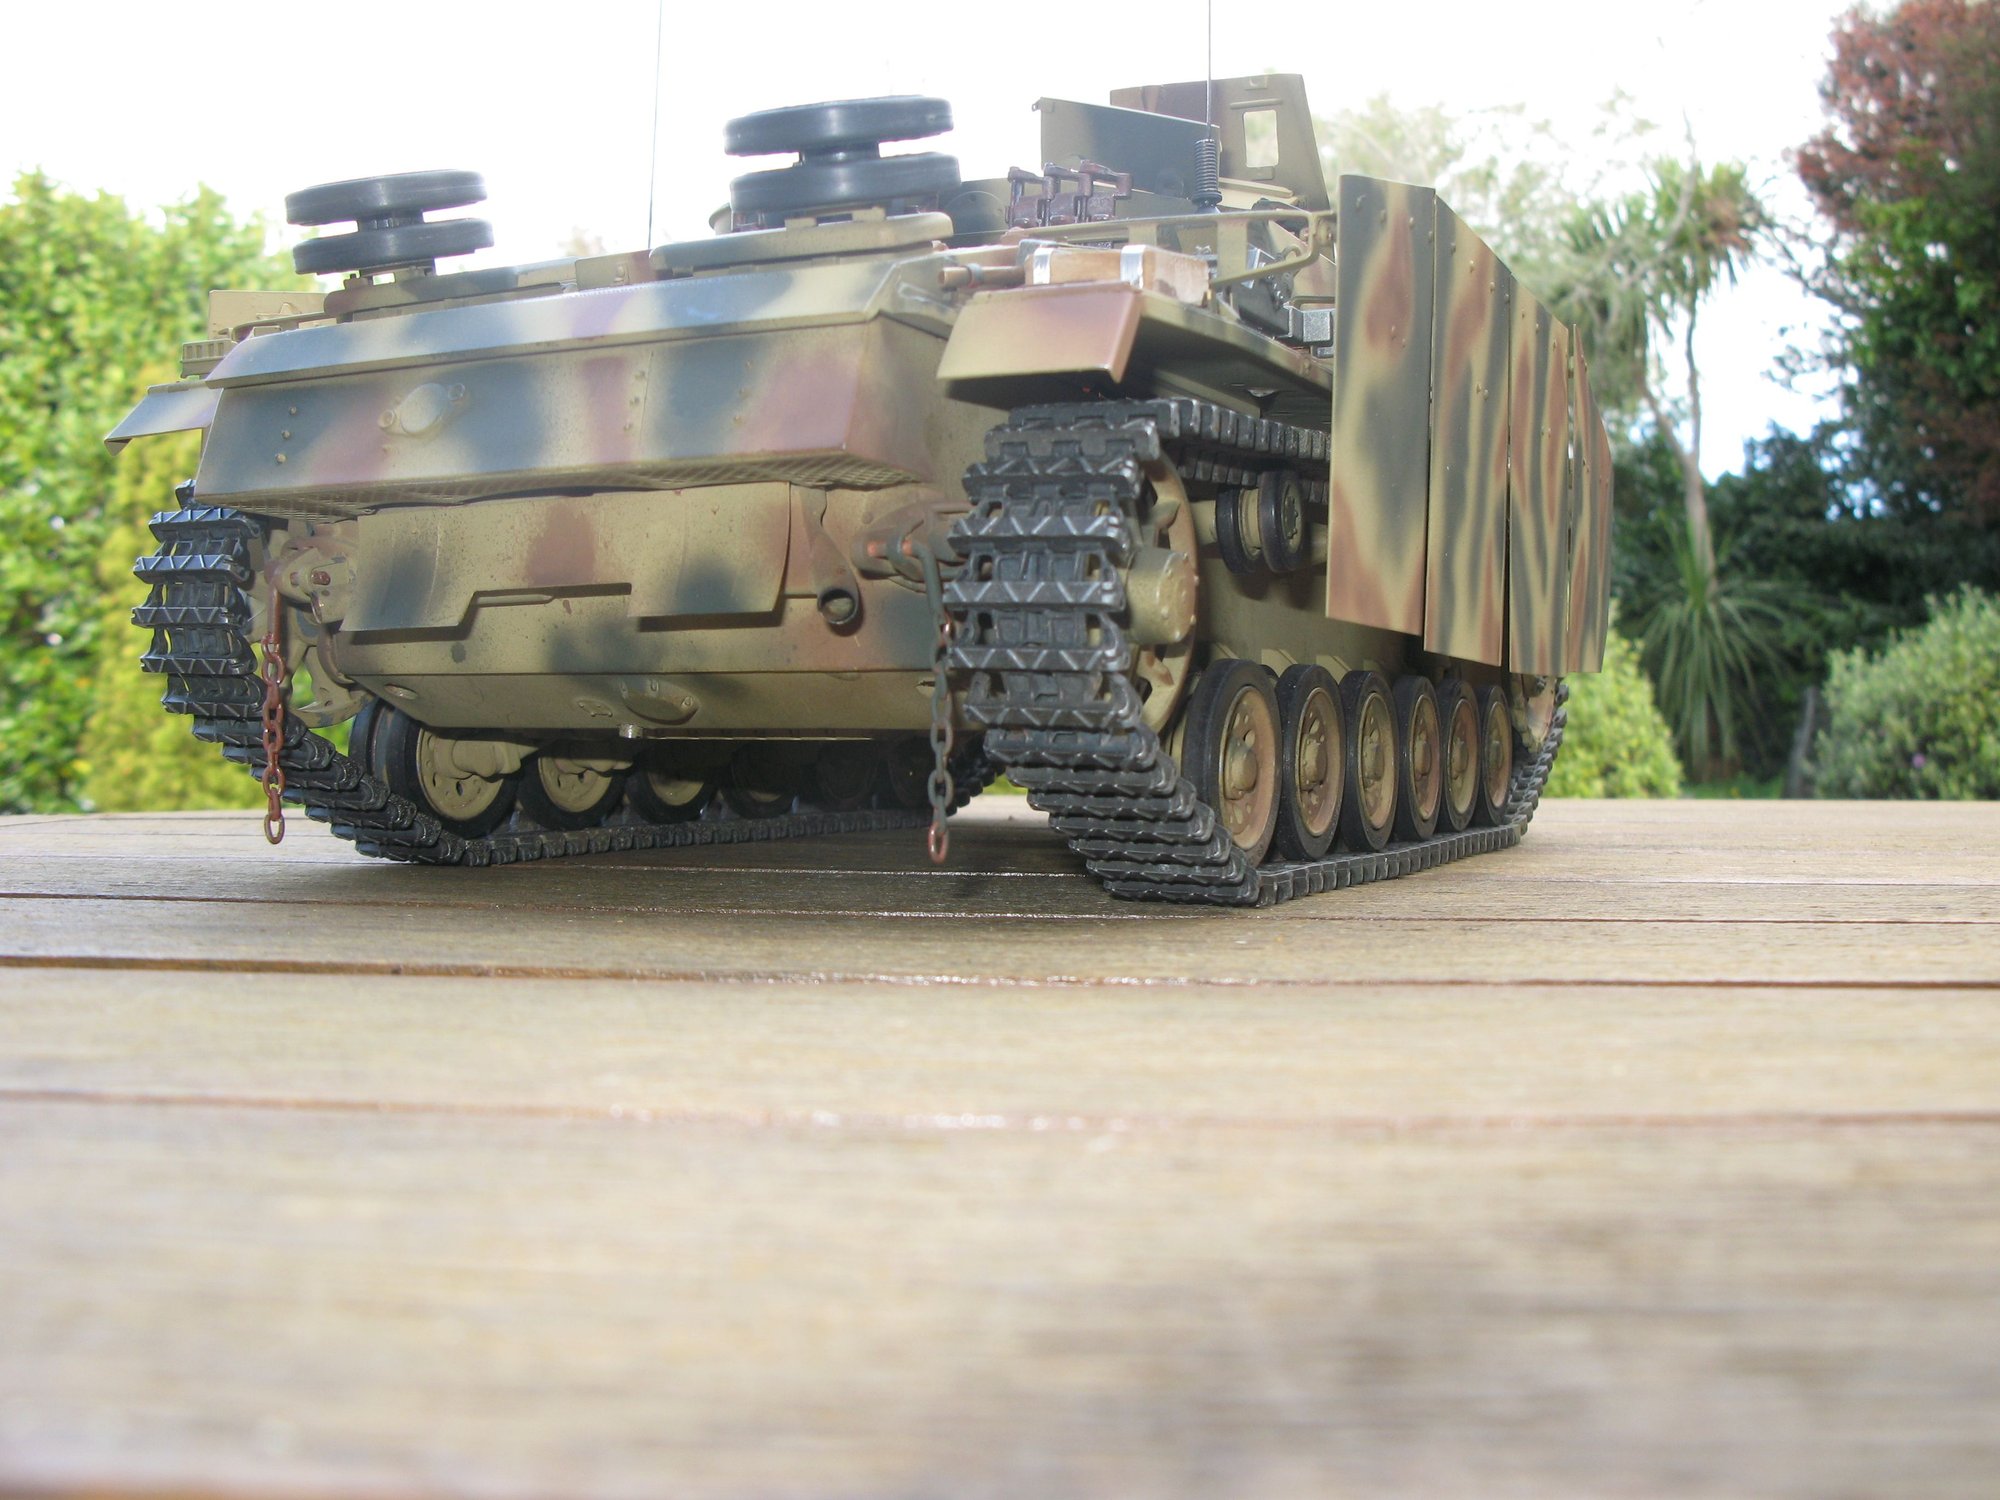
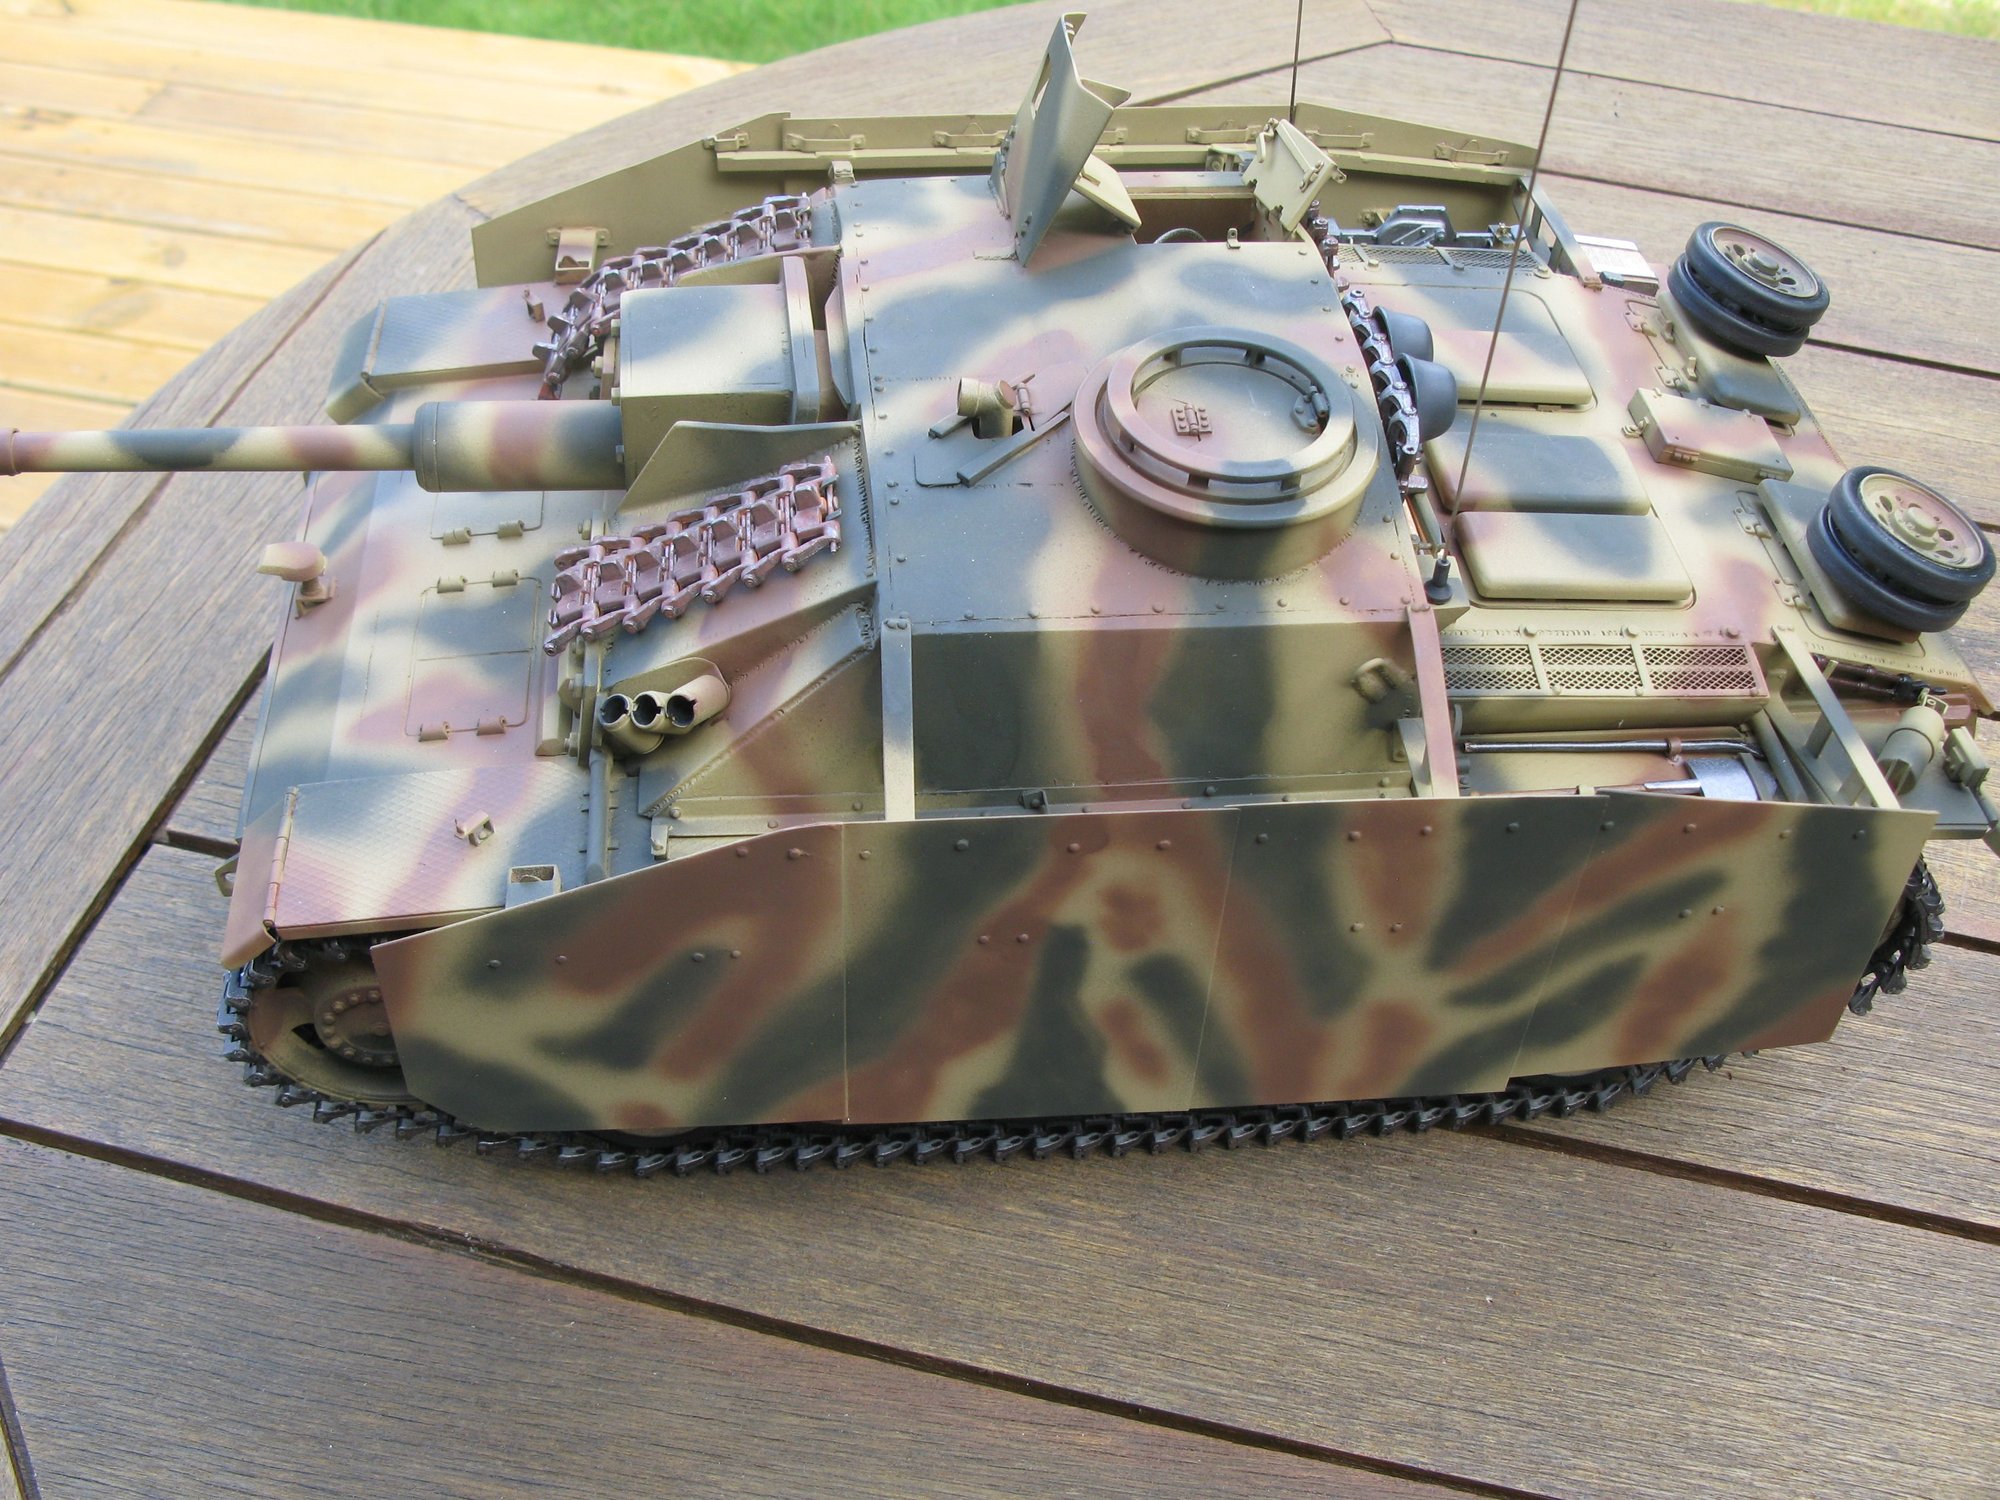
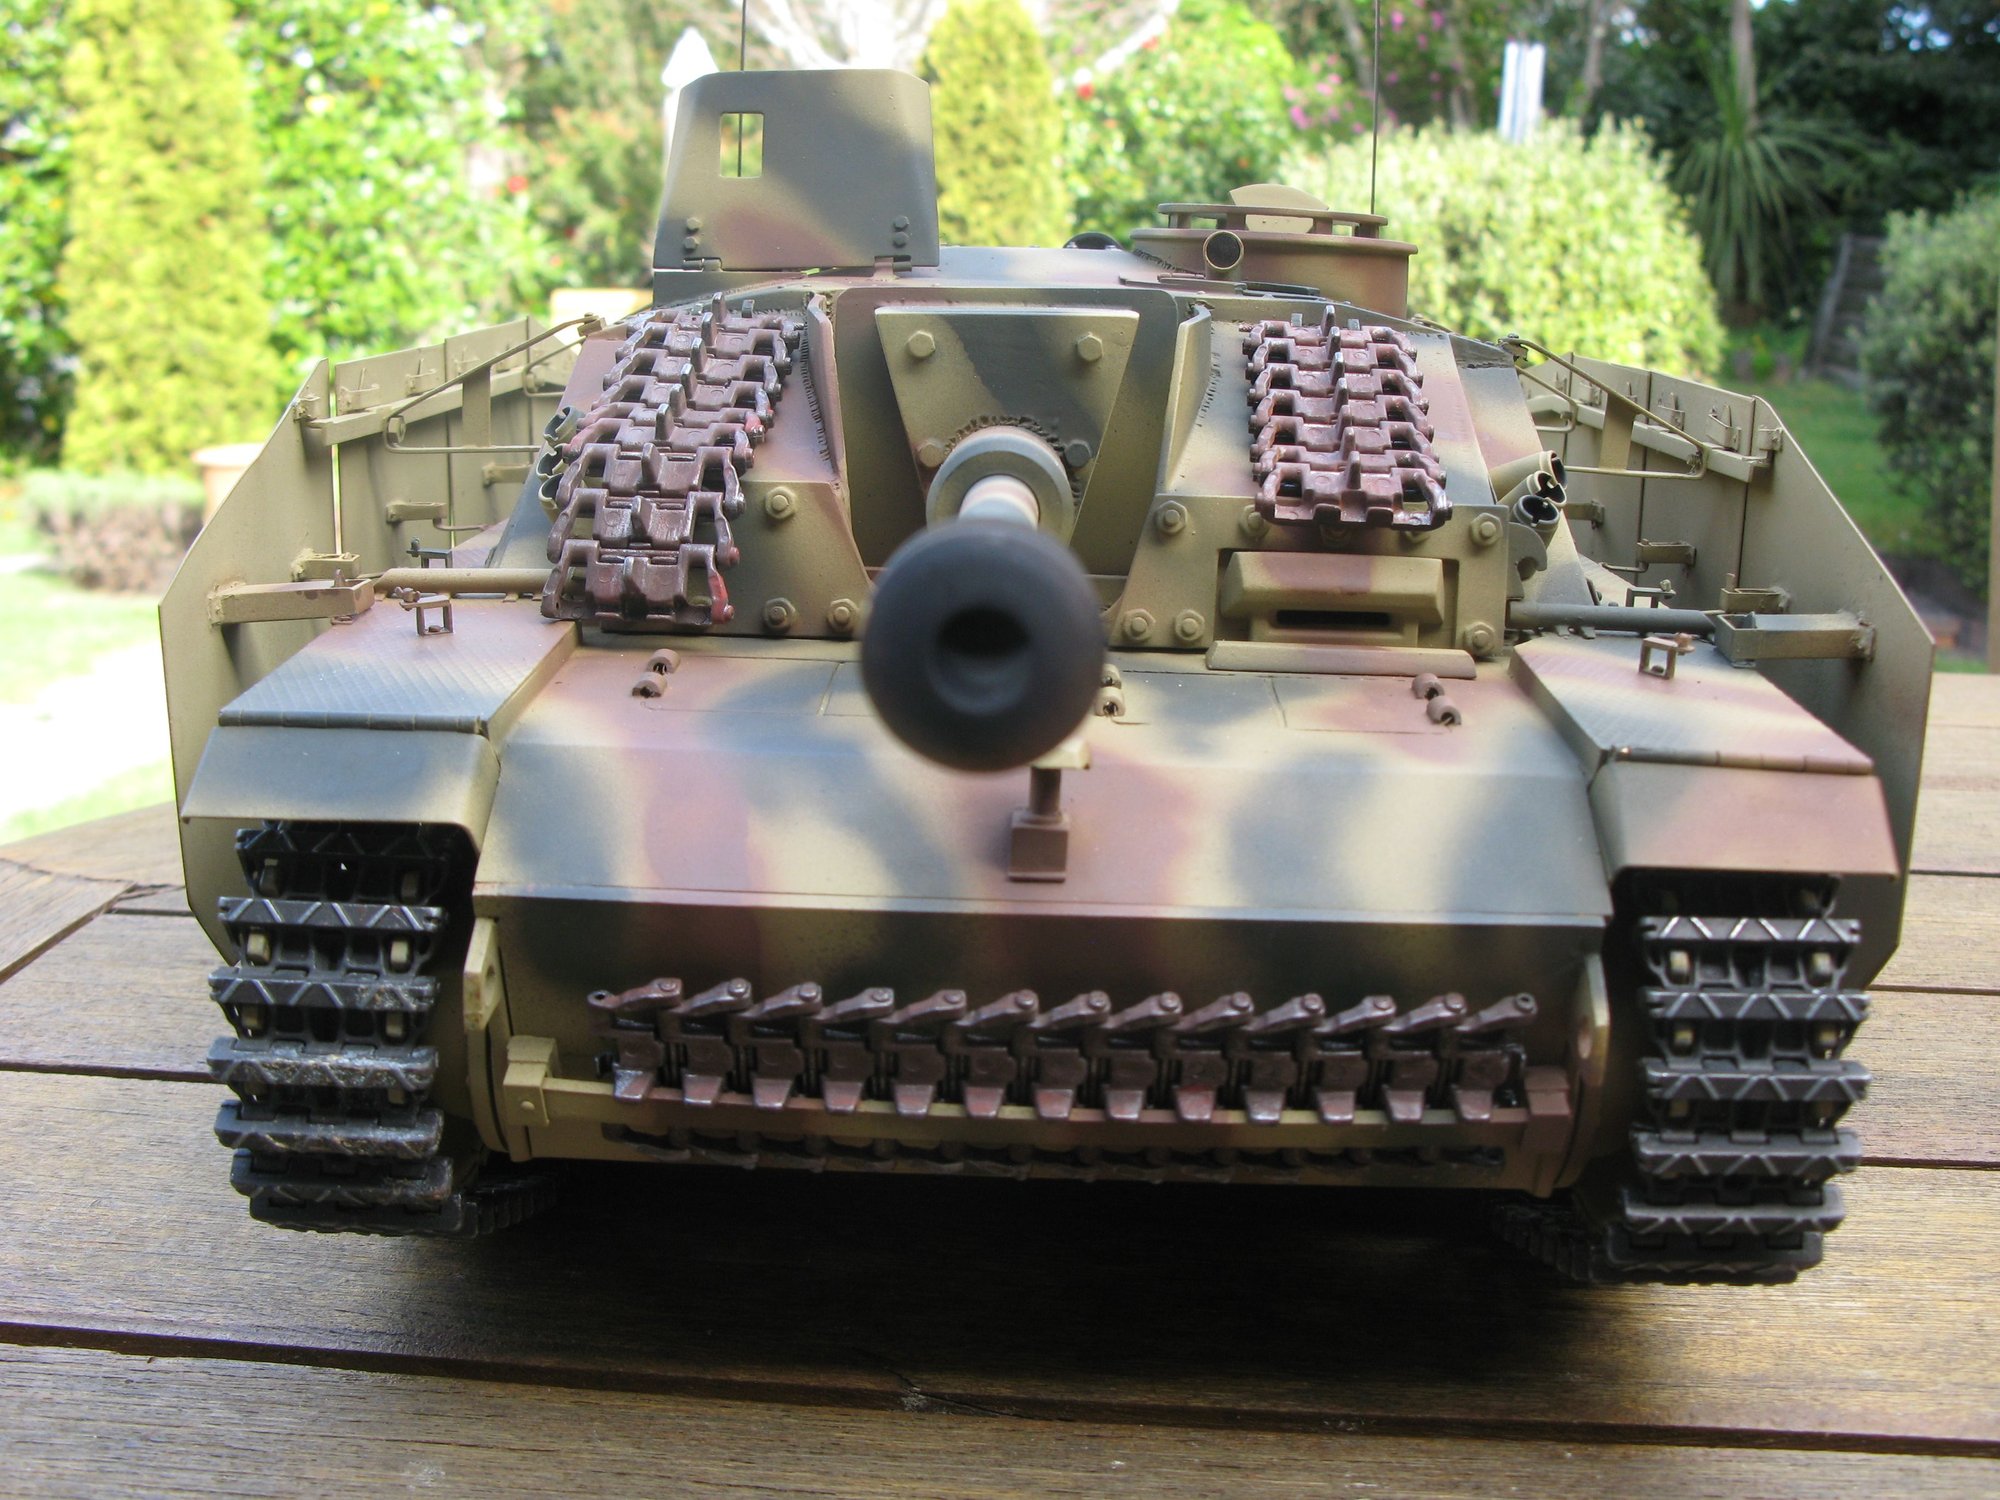
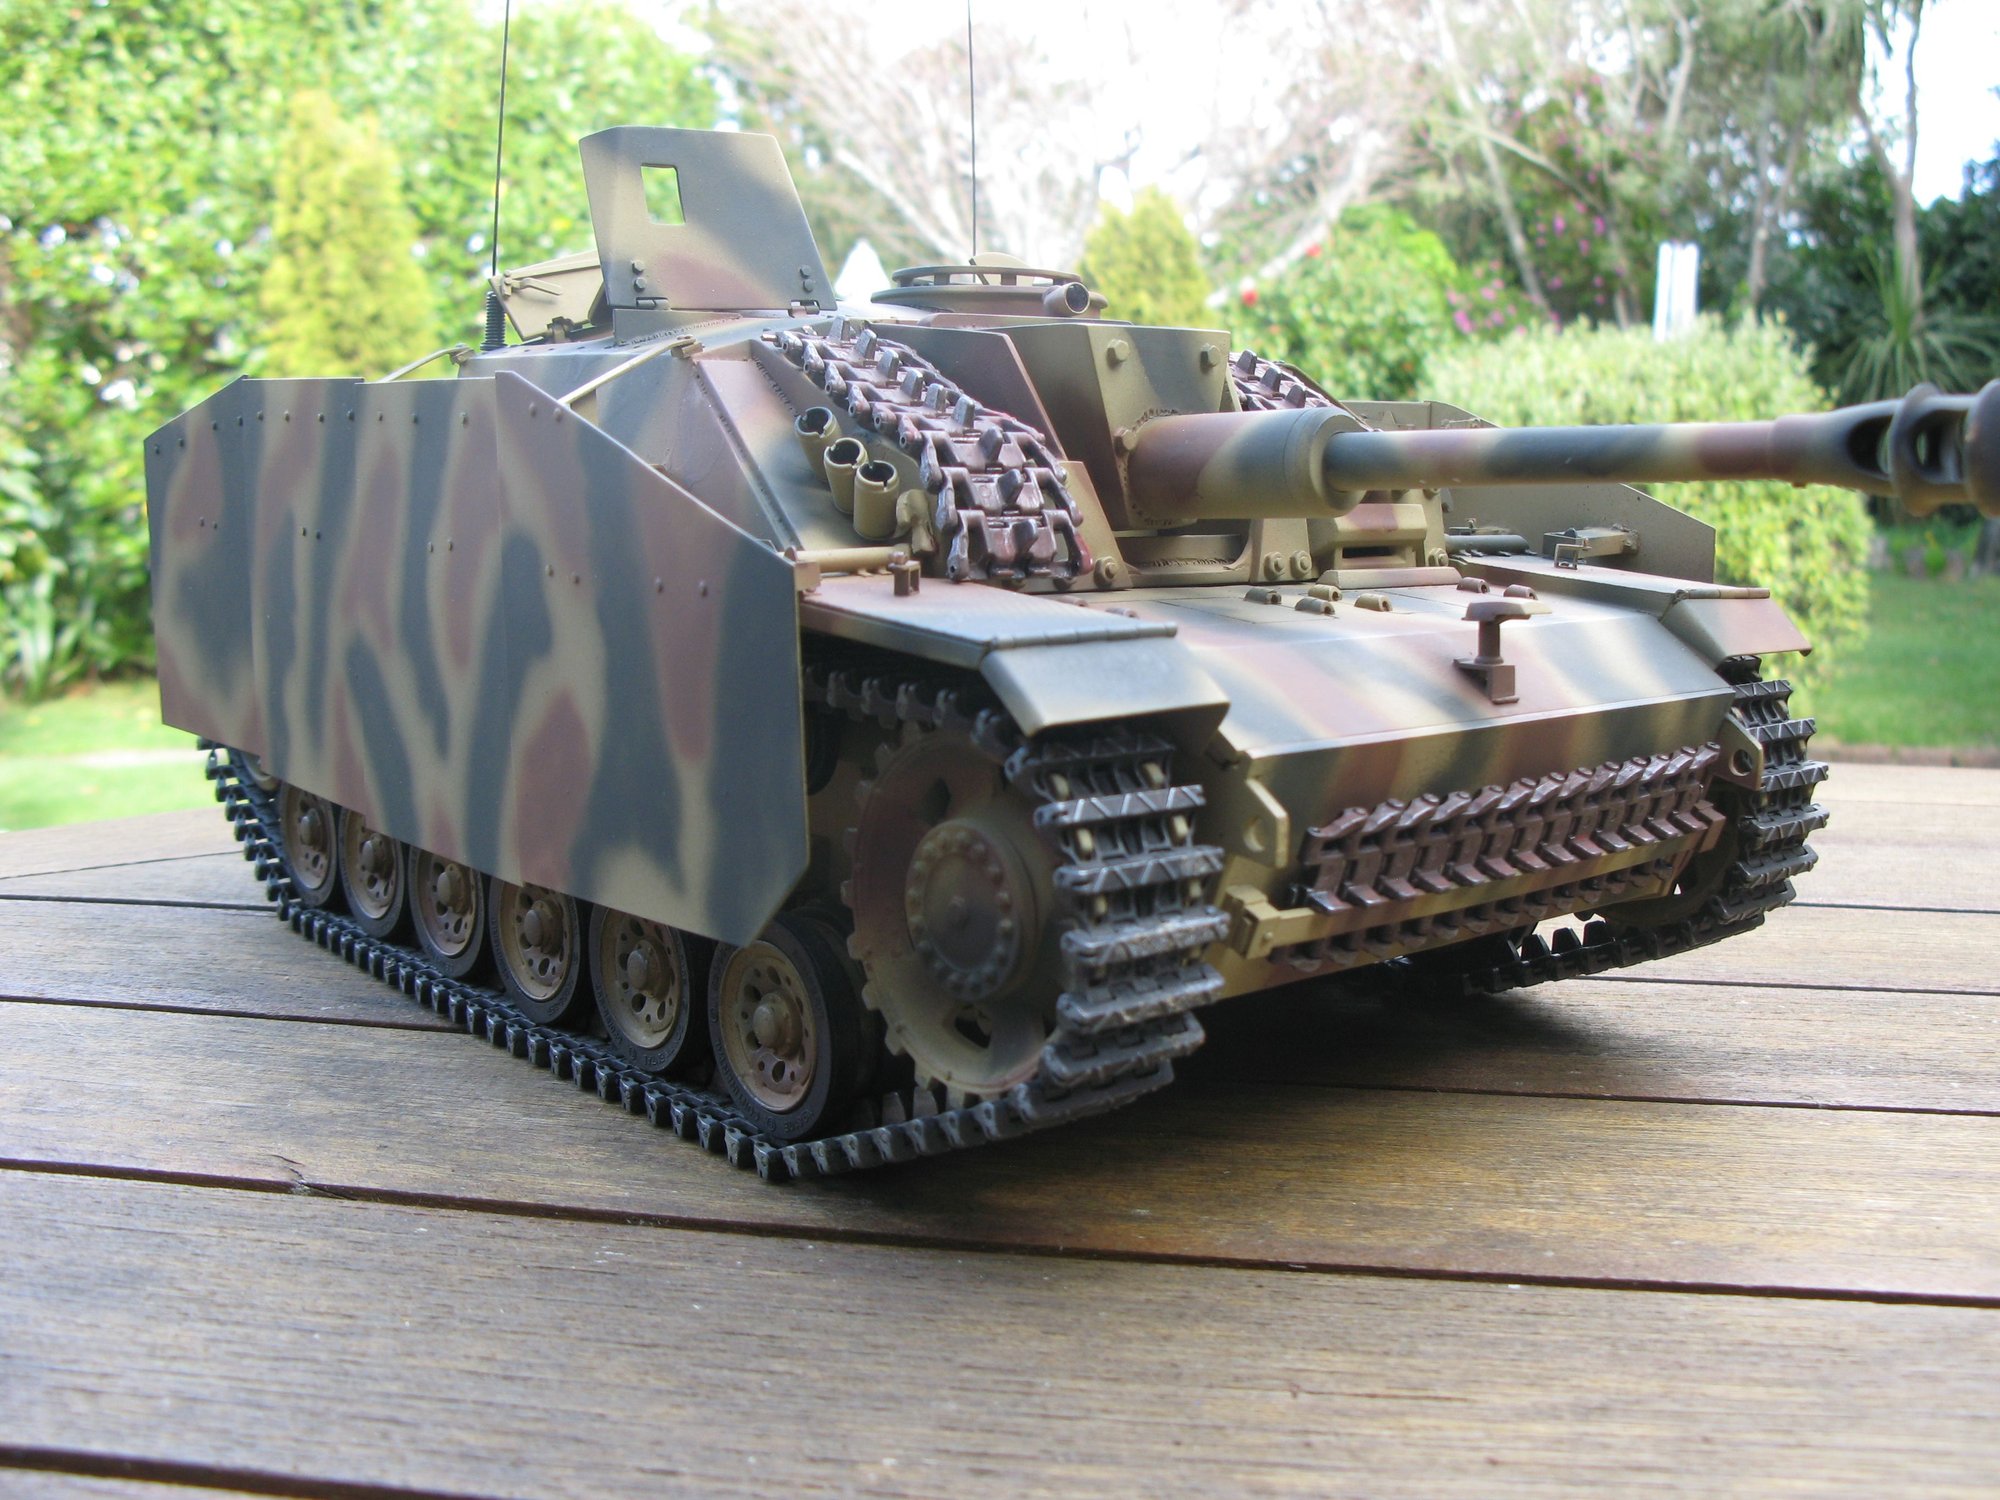
Schurzen! There seem to be three or four different styles, these go with the mid 1943 build date of the Stug. Made from 0.4mm aluminium sheet. I cut it out by scoring with a hook knife and the then bending the cut until it parted.
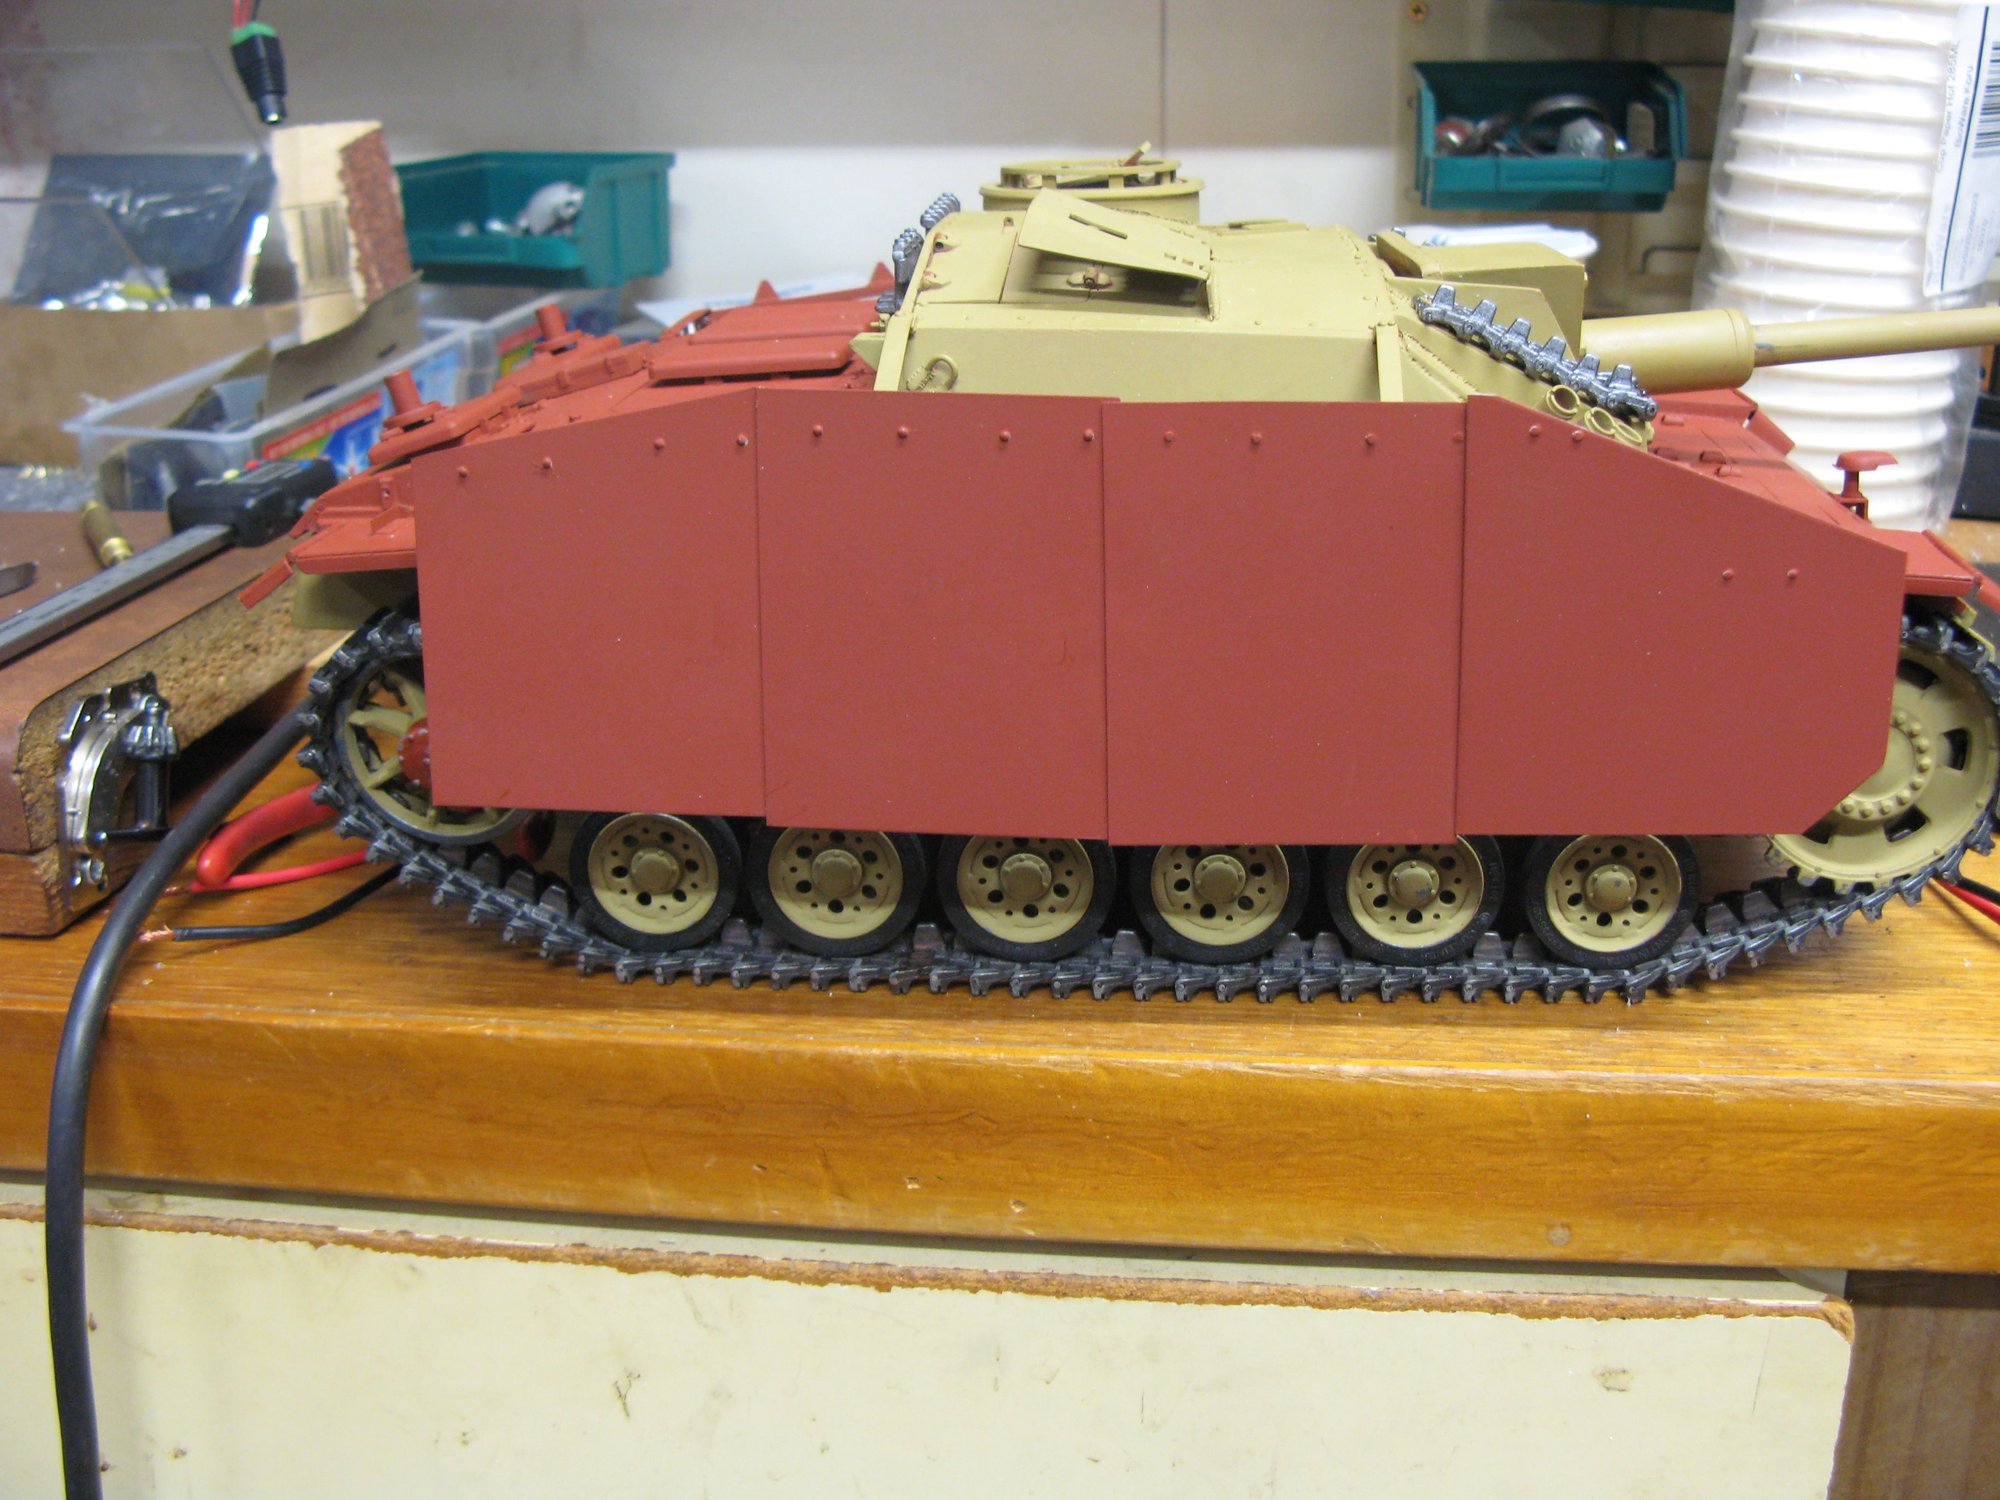
When the bottom brackets are fixed, the sheets will line up a bit better....
When the bottom brackets are fixed, the sheets will line up a bit better....
Last edited by jom; 07-27-2020 at 12:47 AM.


The following users liked this post:
bowlman (08-31-2020)
09-03-2020 | 02:54 PM
#89
Wow!!! That looks great!!!


The following users liked this post:
jom (10-12-2020)
09-08-2020 | 02:01 AM
#92
Very slick! The attention to detail REALLY pays off.
The following users liked this post:
jom (10-12-2020)
09-10-2020 | 02:32 PM
#93
Turned out really nice Jom!!! The schurzen detail is really nice.
The following users liked this post:
jom (10-12-2020)

The following users liked this post:
jom (10-12-2020)
01-02-2021 | 07:10 PM
#96
Thread Starter
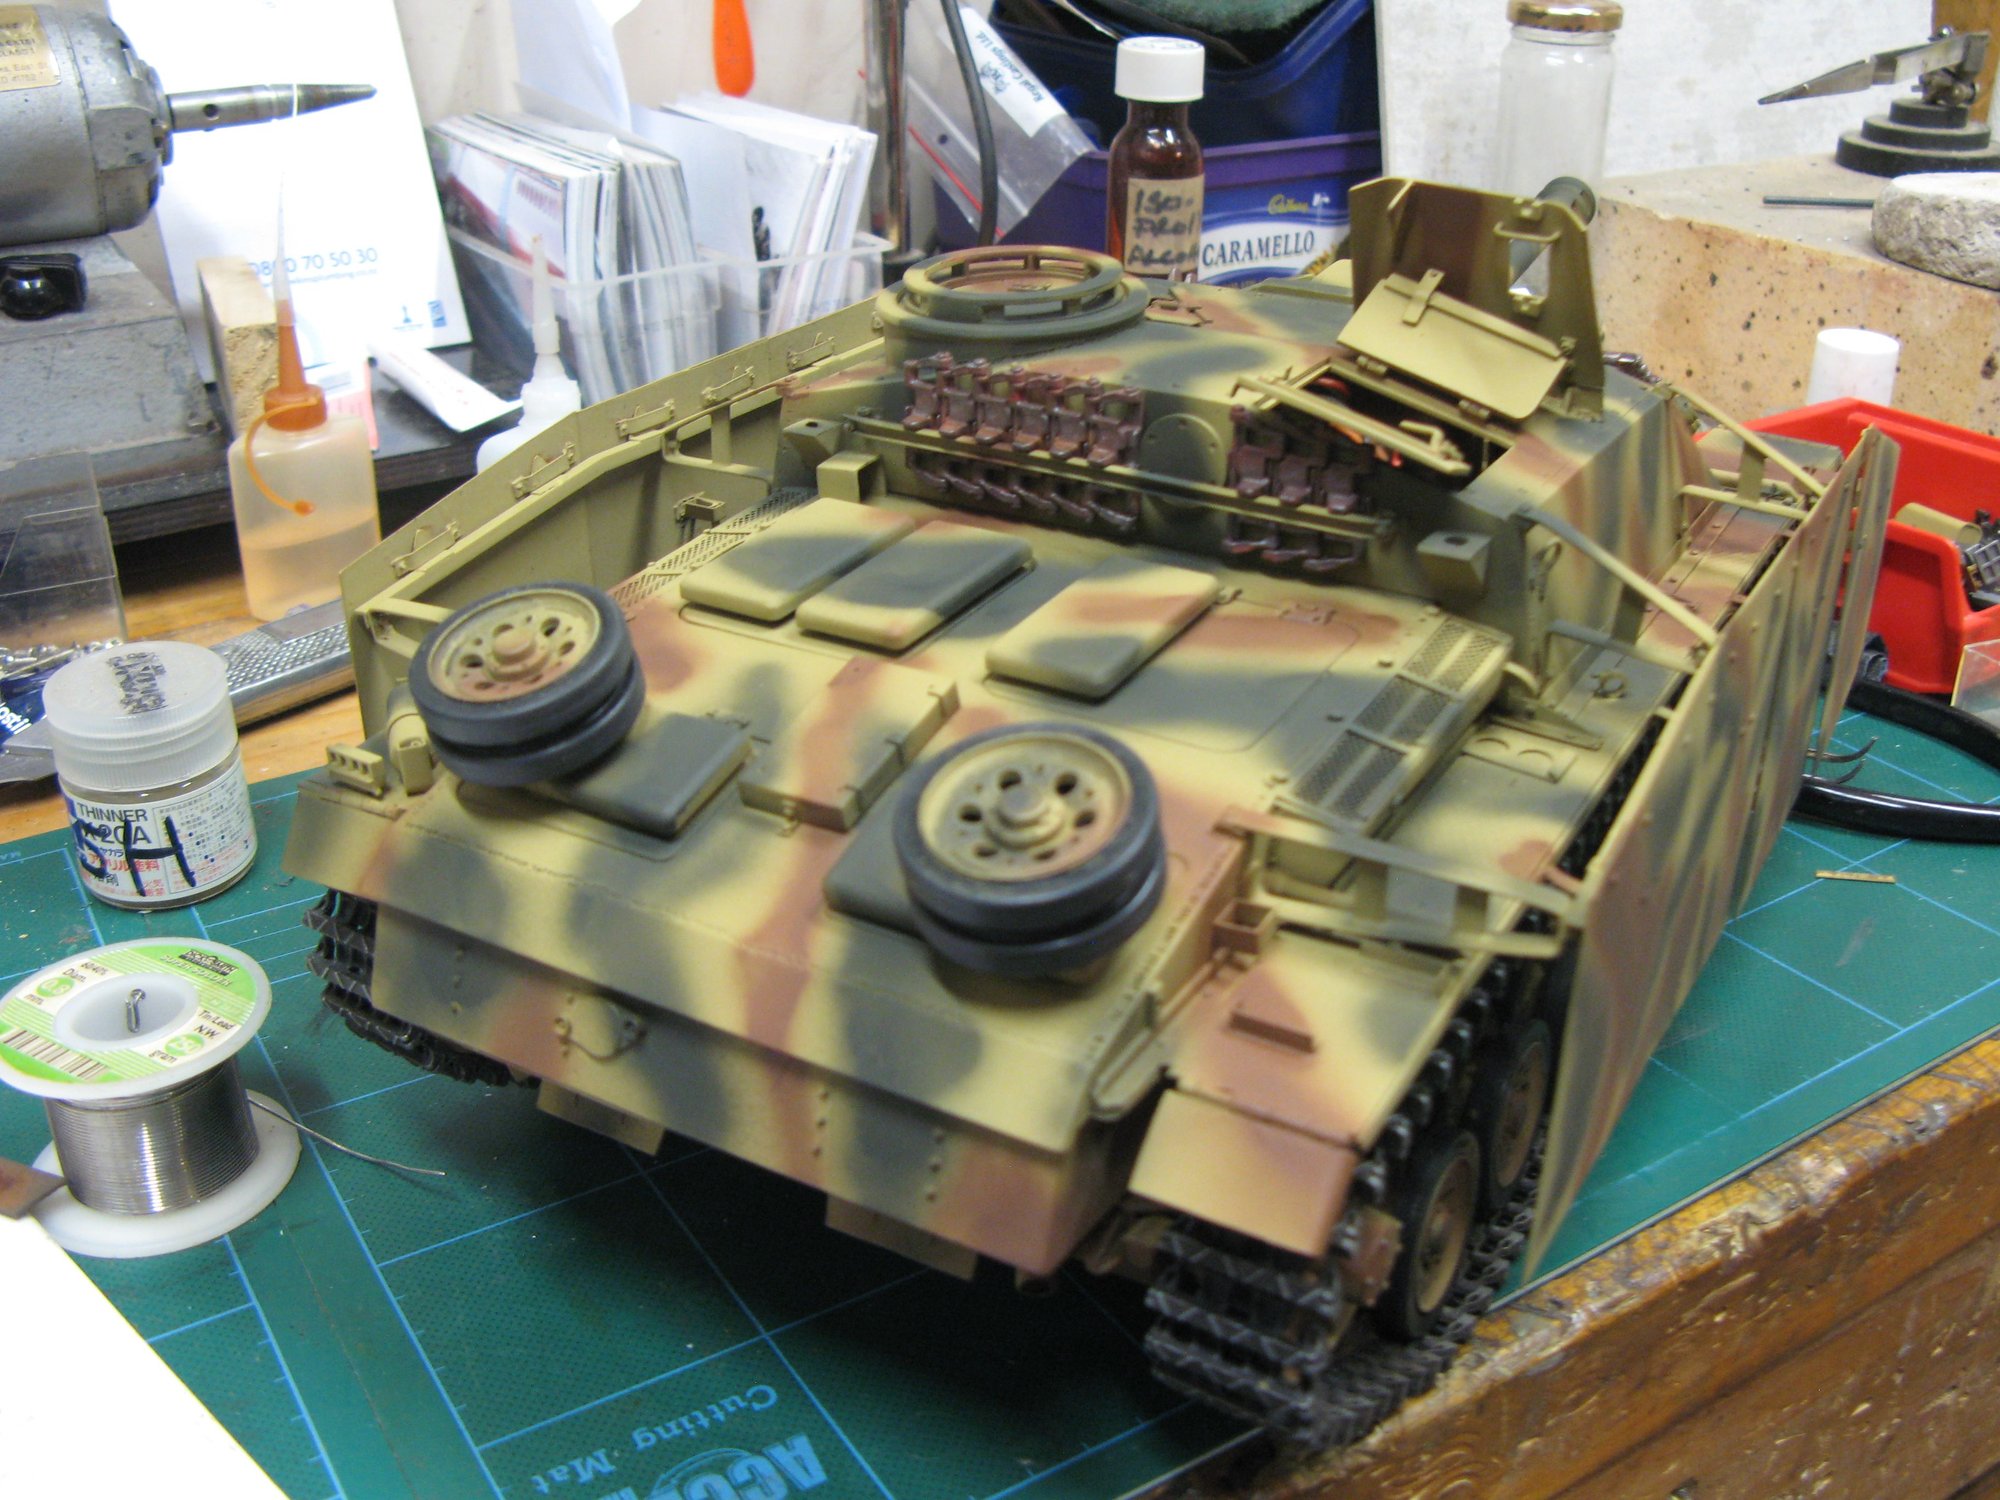
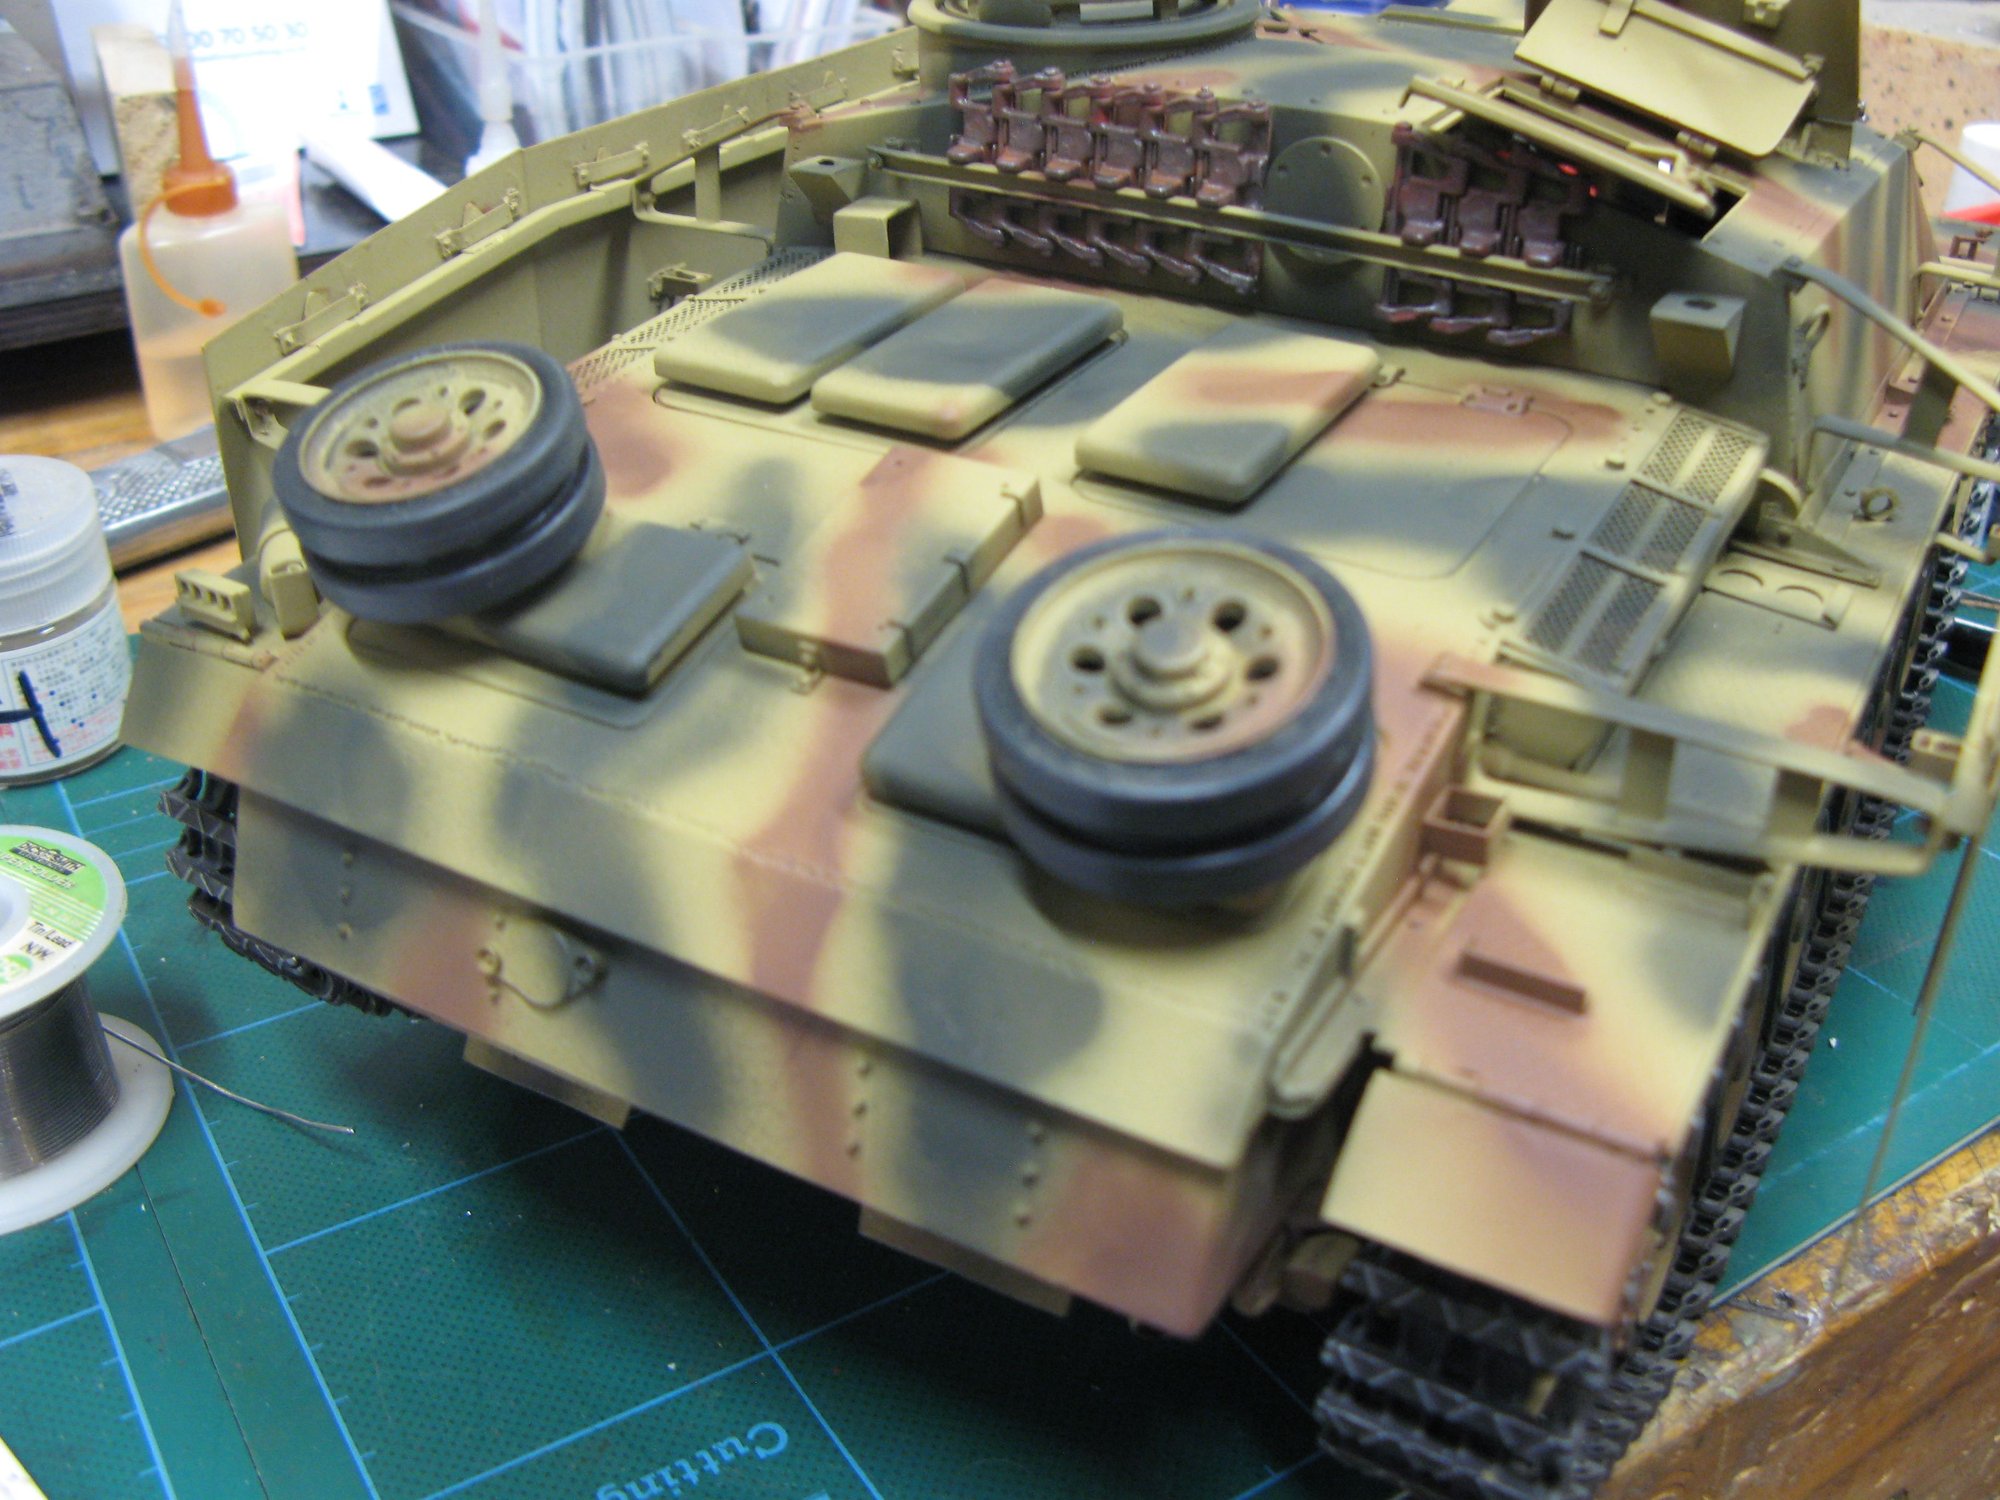
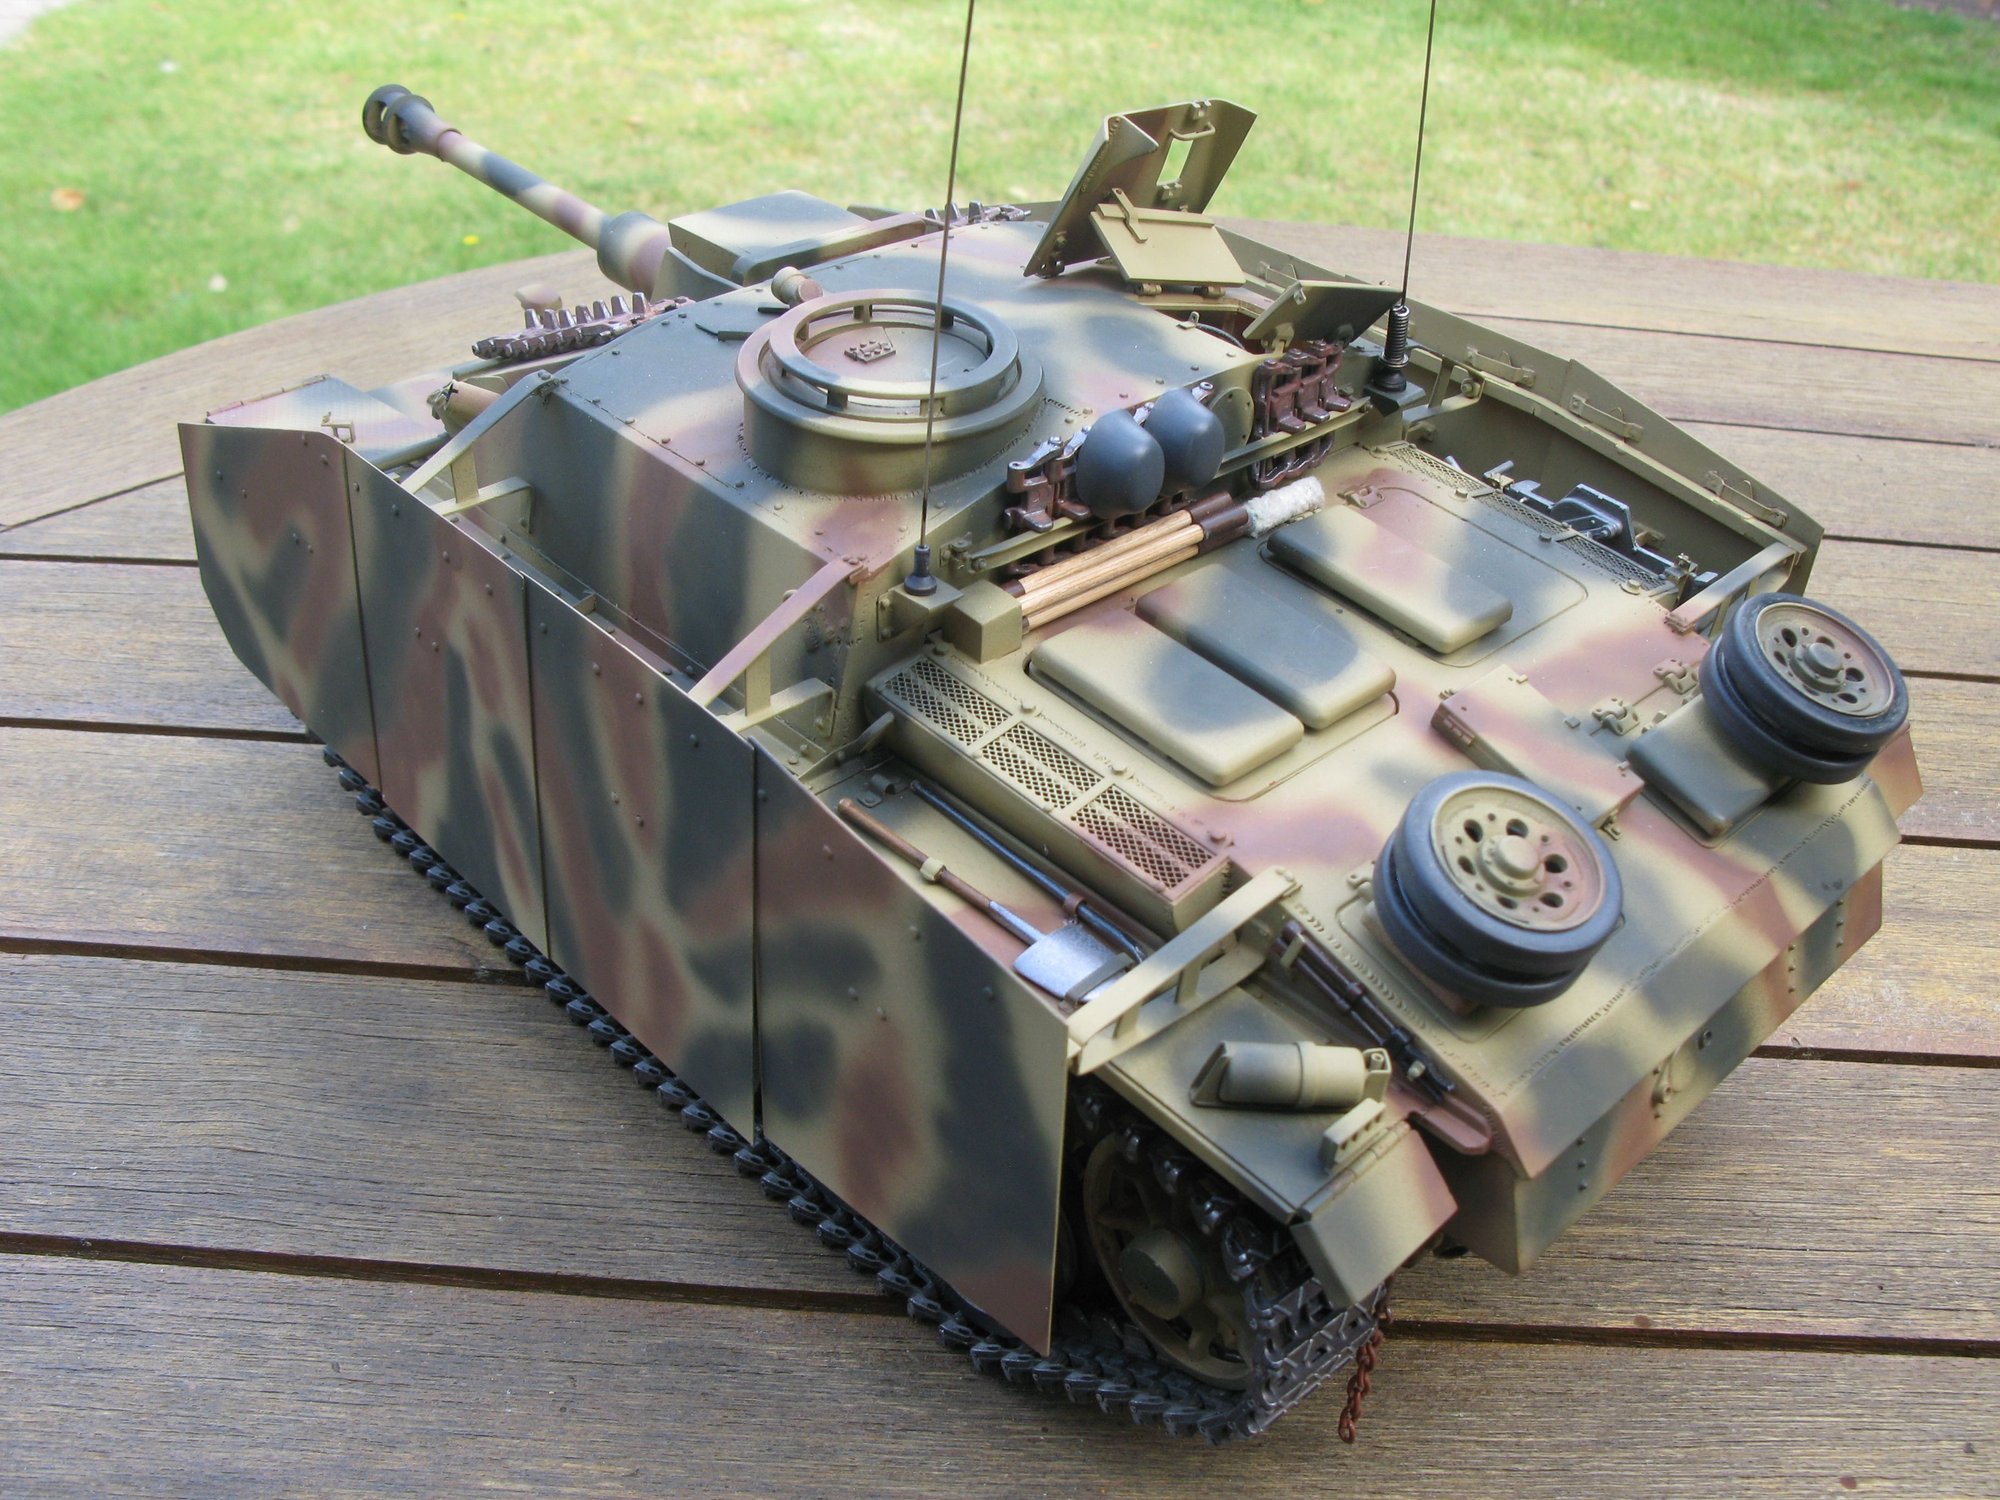
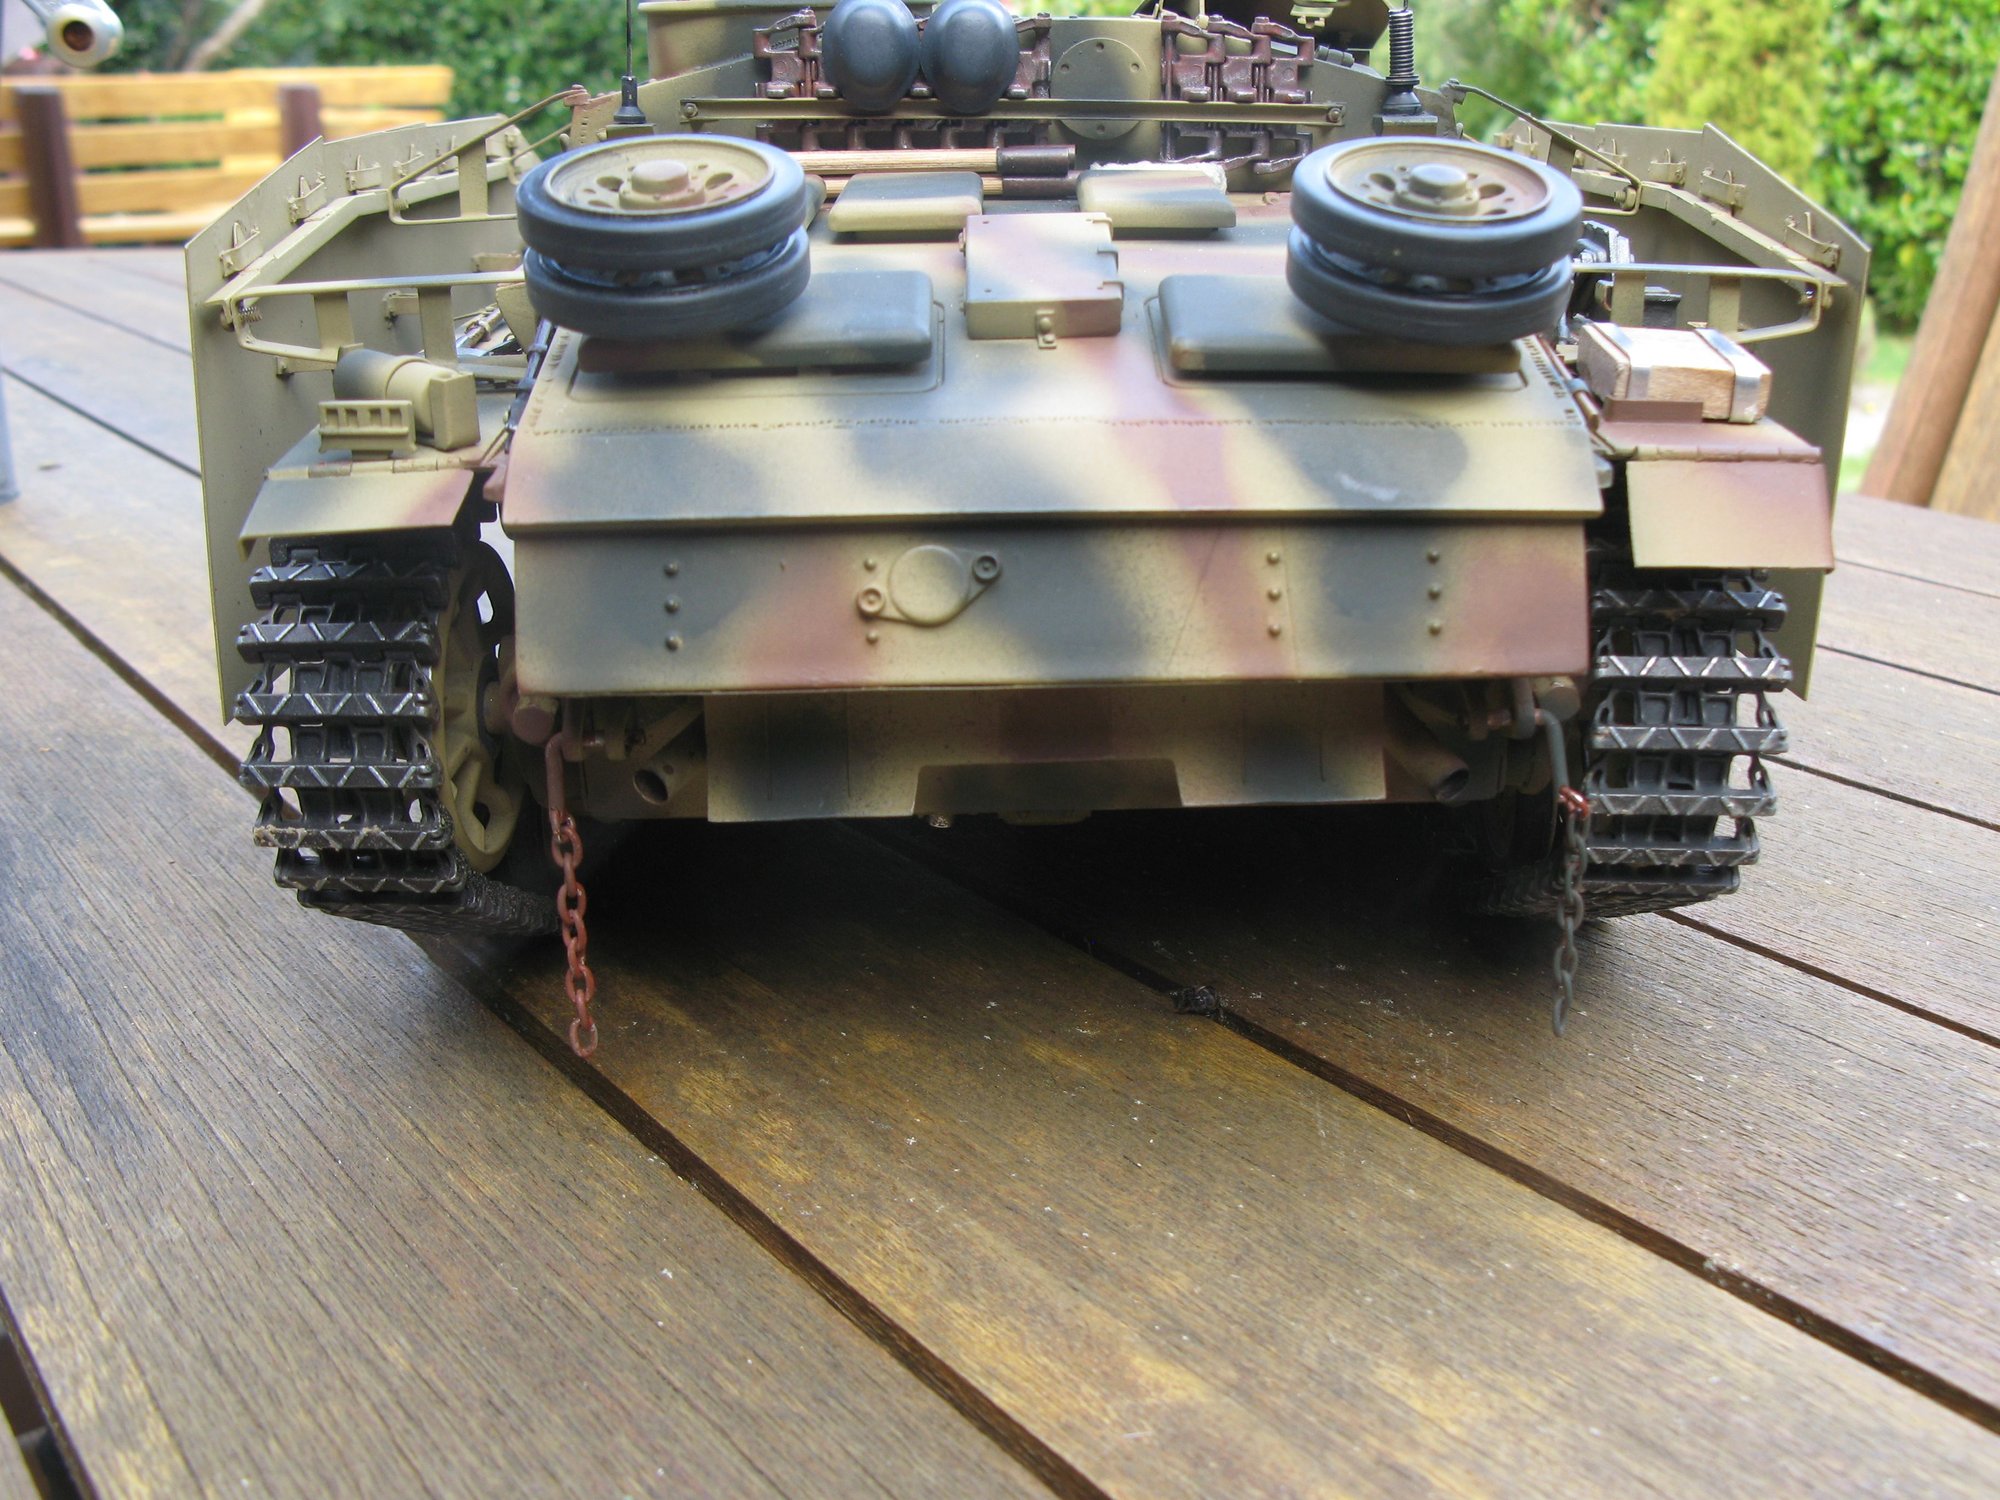
Paint:
The red oxide base coat is Dupli-Color red primer (rattle can)
Then Tamiya Acrylics - XF-60 Dark Yellow, XF-61 Dark Green and XF-64 Red Brown. Airbrushed at about 50/50 with Tamiya thinners.
Thanks for the comment!
The red oxide base coat is Dupli-Color red primer (rattle can)
Then Tamiya Acrylics - XF-60 Dark Yellow, XF-61 Dark Green and XF-64 Red Brown. Airbrushed at about 50/50 with Tamiya thinners.
Thanks for the comment!
01-03-2021 | 12:39 PM
#97
The Stug looks ace and the schurzen tops it off. All brass /metal for brackets to fix the plates ? Well thought out for the attachment points , if they are knocked off looks as if they are easy to clip back in .
01-03-2021 | 05:33 PM
#98
Thread Starter
The Shurtzen are all metal, brass for the hanging rails and 0.4mm ally for the plates. I tried to get the bracket detail as true to the original as possible.... the only bracket I couldn't find any pictures for was the very front one on the mudguard.


