


Top RC Models MkIV full Composite Spitfire-a game changer

 03-01-2016, 09:14 PM
#227
Senior Member
My Feedback: (4)

Join Date: Aug 2008
Location: EllinikoAthens, GREECE
Posts: 1,079
Likes: 0
Received 5 Likes
on
5 Posts
Same here! It seems easy but it isn't ")
I found this page by someone who's done the math and produced charts, trying to figure out how it can be applied here ...
http://www.rcmix.com/diff_ailerons.html
I found this page by someone who's done the math and produced charts, trying to figure out how it can be applied here ...
http://www.rcmix.com/diff_ailerons.html


 03-27-2016, 11:29 PM
#231

 03-29-2016, 06:07 PM
#235

My Feedback: (41)
Here's some install pics of a plane we built for a customer in the last week
We installed an AXI motor
http://www.gator-rc.com/axi-5330-f3a...utrunner-motor
and will run off of our Power Unlimited 5S x 2 5400 Lipo packs.
http://www.gator-rc.com/pu5400
The prop combo is a PT 20x13 3 bladed carbon fiber. The fit of the spinner and motor are the best.
The advantage of using this motor is the weight. It's heavier than the Himax 210Pro that I installed in my personal one. I needed to add nose weight so this is a no brainer choice plus it's $40 cheaper.
Our builder Dave installed the MR Sound system in the plane. It set for the Merlin engine and sounds amazing very realistic.
Note the special plywood trays to fit the switches on. We can make these for you for a nominal


 fee.
fee.
We have the capacity to build the Warbirds for customers who lack the time, skill or desire to do so for a modest fee.
Package deals are available upon request.
Come see us at Toledo this weekend.
Thanks, Mike Mueller
We installed an AXI motor
http://www.gator-rc.com/axi-5330-f3a...utrunner-motor
and will run off of our Power Unlimited 5S x 2 5400 Lipo packs.
http://www.gator-rc.com/pu5400
The prop combo is a PT 20x13 3 bladed carbon fiber. The fit of the spinner and motor are the best.
The advantage of using this motor is the weight. It's heavier than the Himax 210Pro that I installed in my personal one. I needed to add nose weight so this is a no brainer choice plus it's $40 cheaper.
Our builder Dave installed the MR Sound system in the plane. It set for the Merlin engine and sounds amazing very realistic.
Note the special plywood trays to fit the switches on. We can make these for you for a nominal
We have the capacity to build the Warbirds for customers who lack the time, skill or desire to do so for a modest fee.
Package deals are available upon request.
Come see us at Toledo this weekend.
Thanks, Mike Mueller
03-30-2016, 03:00 AM
#236
Senior Member
My Feedback: (4)
Join Date: Aug 2008
Location: EllinikoAthens, GREECE
Posts: 1,079
Likes: 0
Received 5 Likes
on
5 Posts
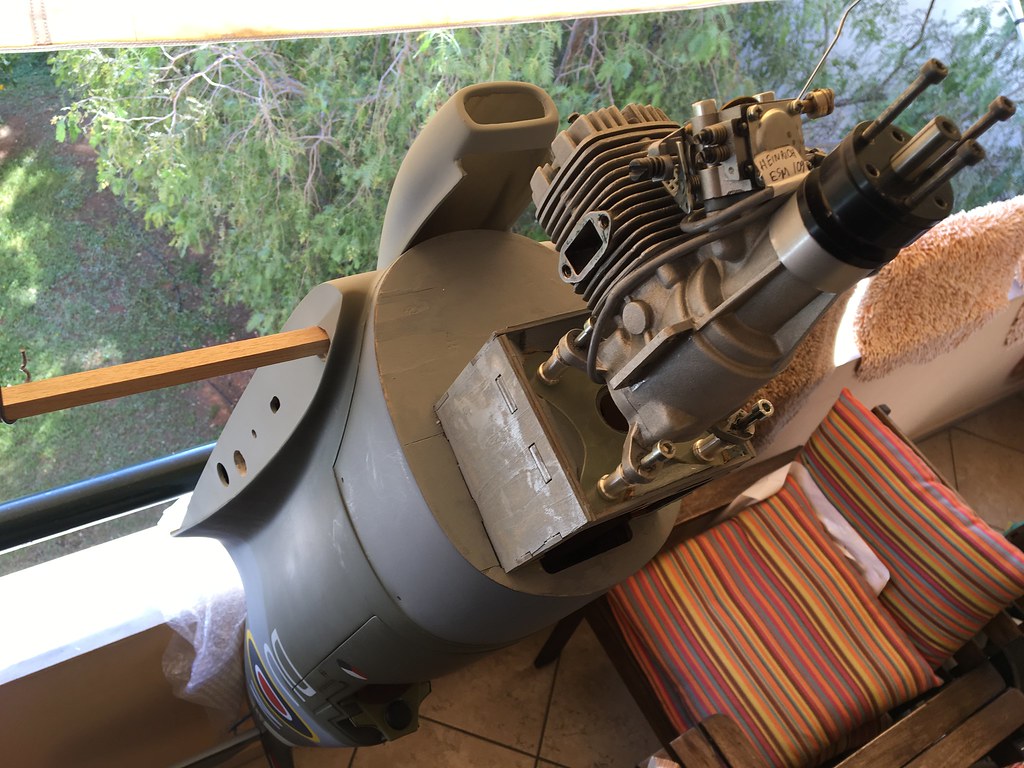
On to the engine, the CAD plan shows that my front-carb Moki 30cc fits entirely in the cowl, except for the tips of the wrap-around muffler that end-up near the dummy carb intake opening - I'll sort that out


 03-30-2016, 03:10 AM
#240


 03-31-2016, 10:57 AM
#245

Join Date: Nov 2012
Location: Navarre, FL
Posts: 268
Likes: 0
Received 0 Likes
on
0 Posts
Interesting to see your approach. I have my EME35 mounted and the cowling cut out to clear the cylinder/head and exhaust. I haven't cut exits for the air to escape yet...haven't quite decided how I want to do it...I want (obviously) to cut as little as possible. I was looking at the area under the dummy carb intake that you describe. I'm on the road right now (in Shanghai today), but I'll post pix when I get back for comparison sake.
03-31-2016, 04:29 PM
#246
My Feedback: (46)
Join Date: Sep 2003
Location: Bridgewater,
NJ
Posts: 948
Likes: 0
Received 0 Likes
on
0 Posts
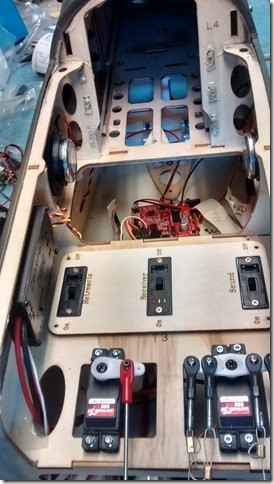
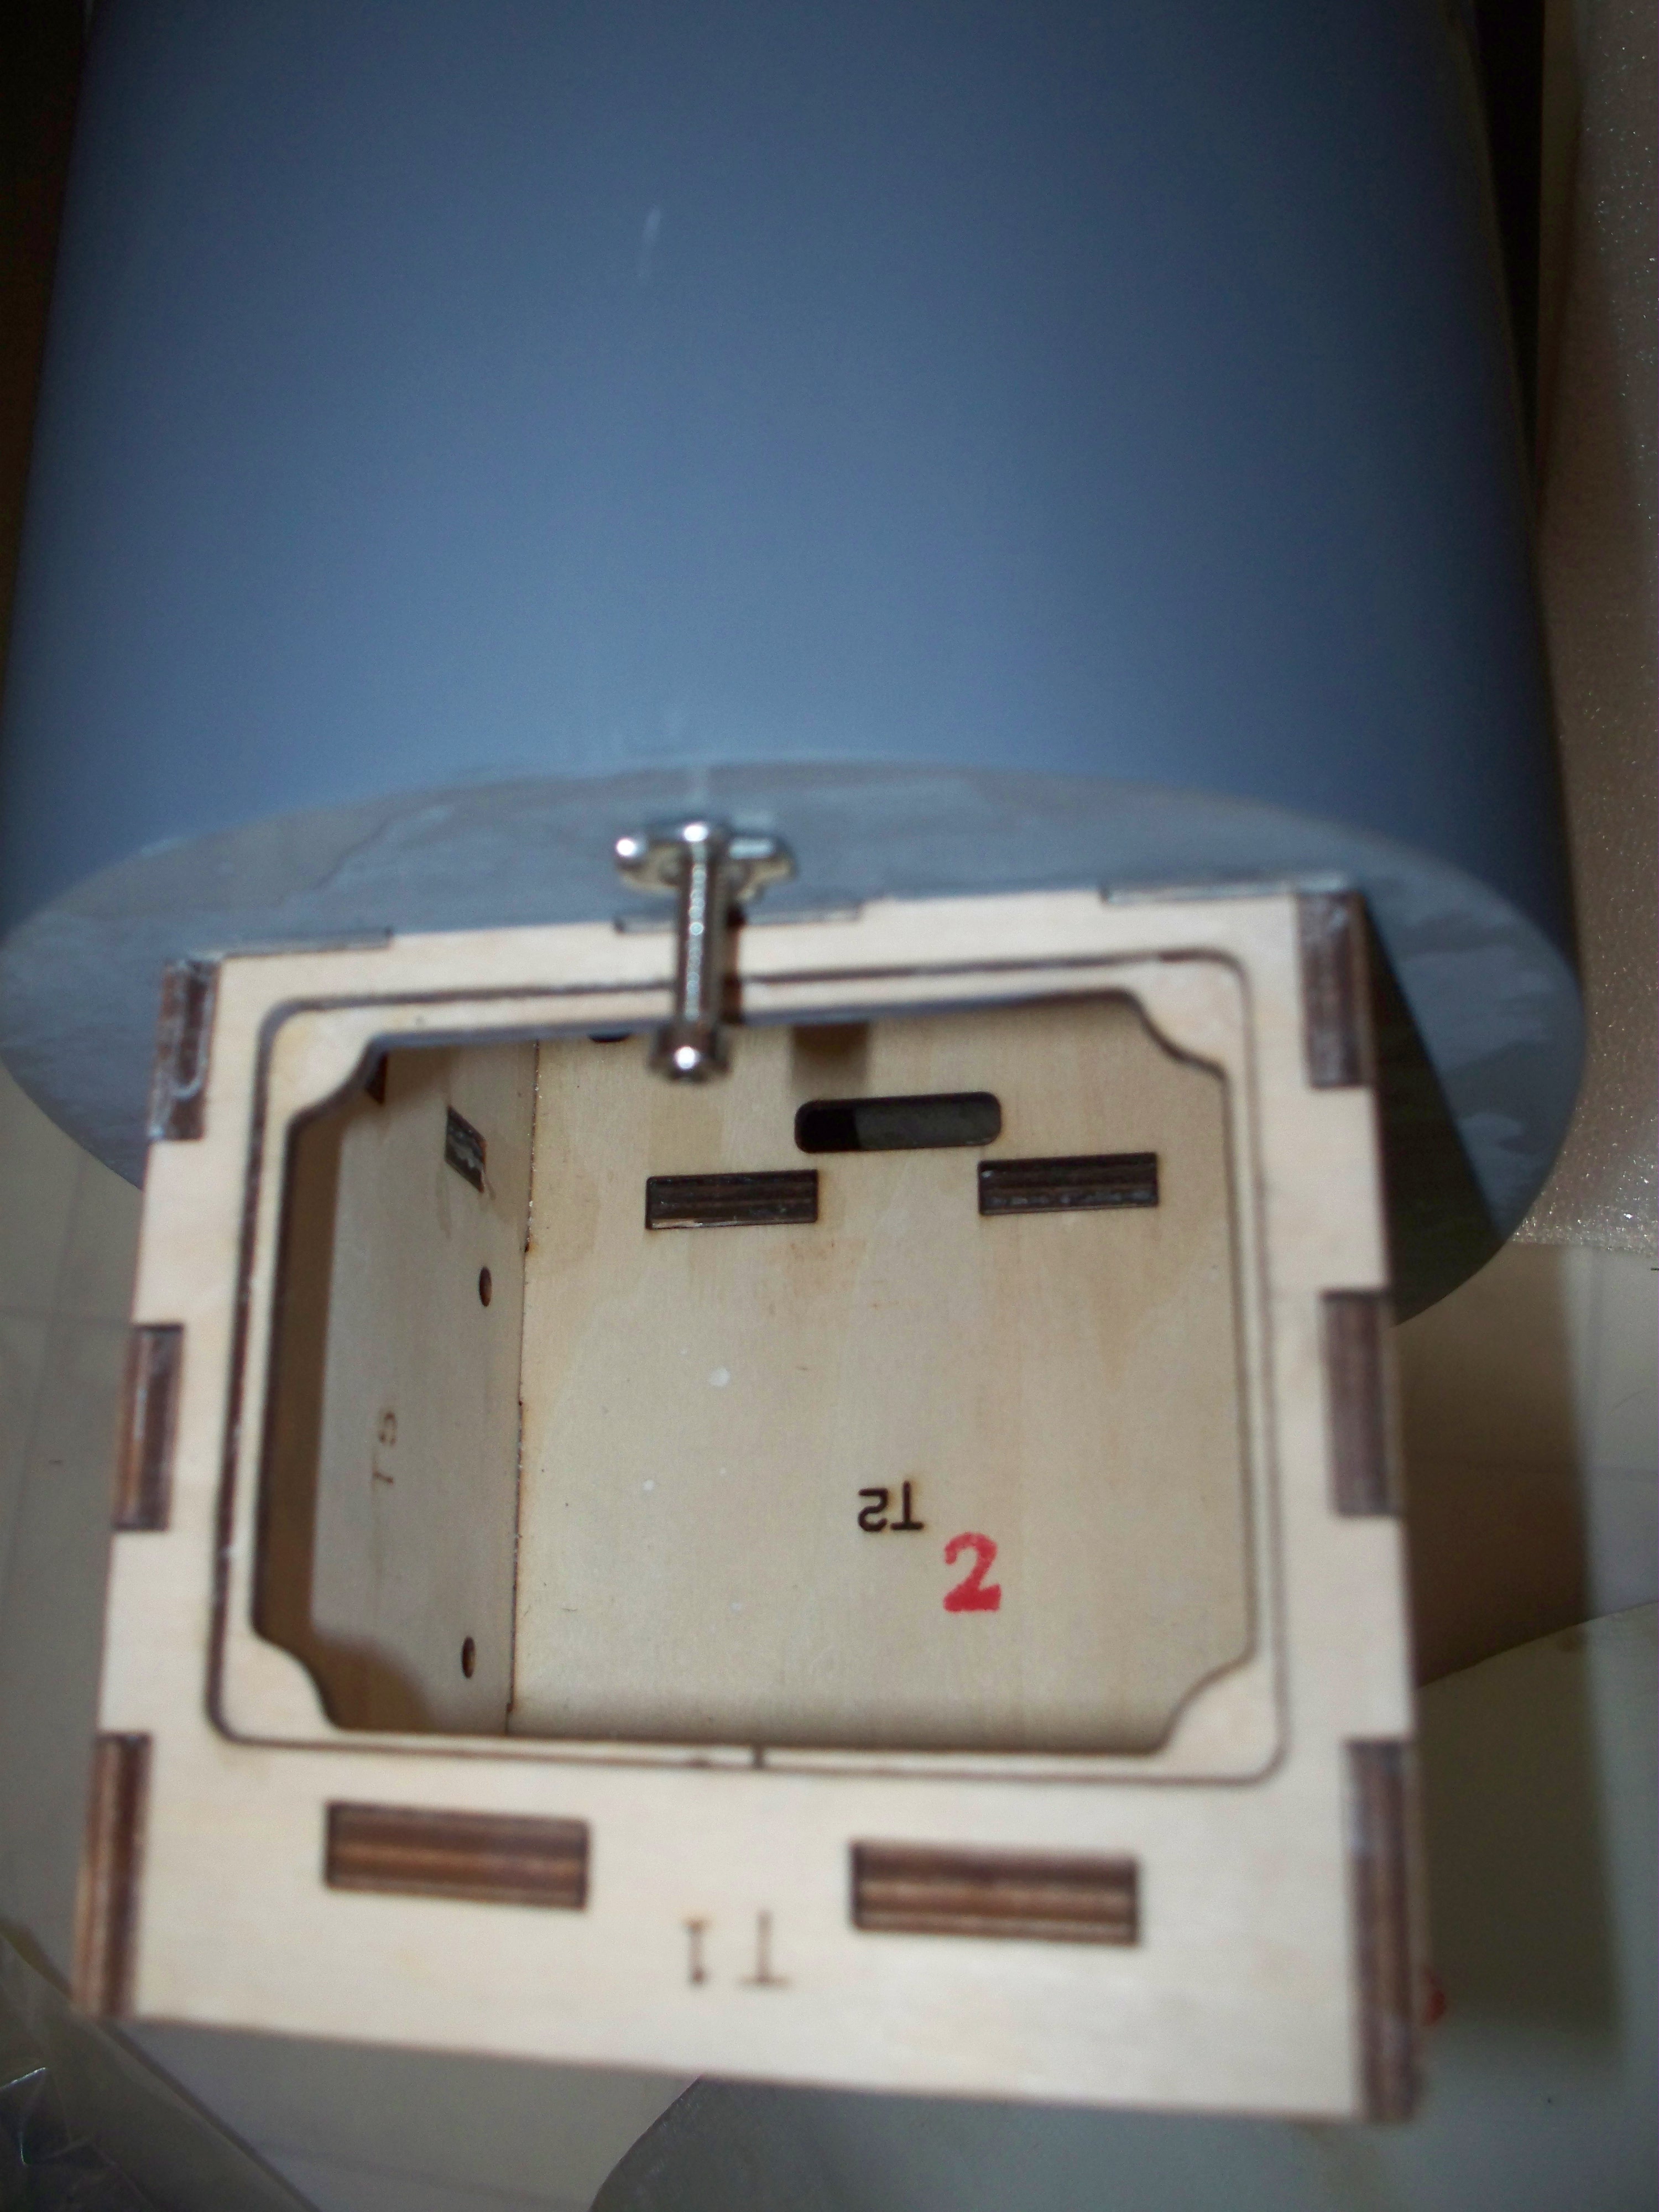
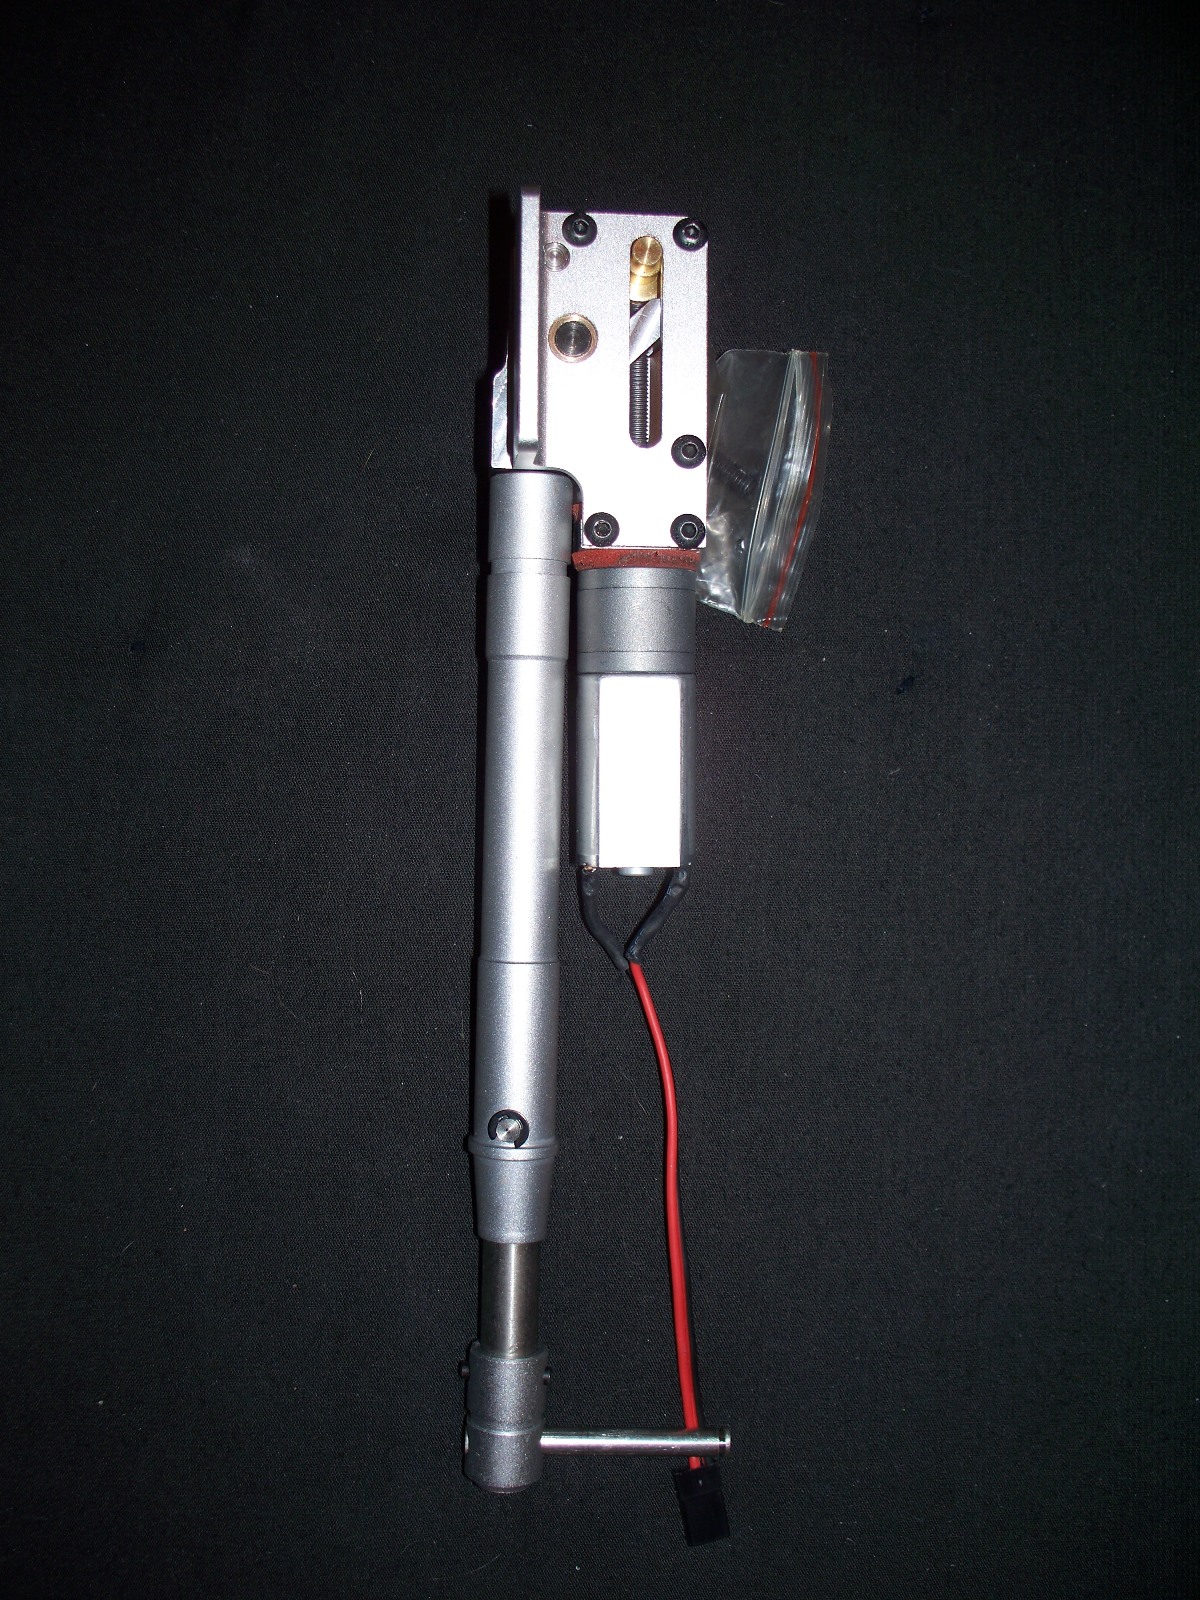
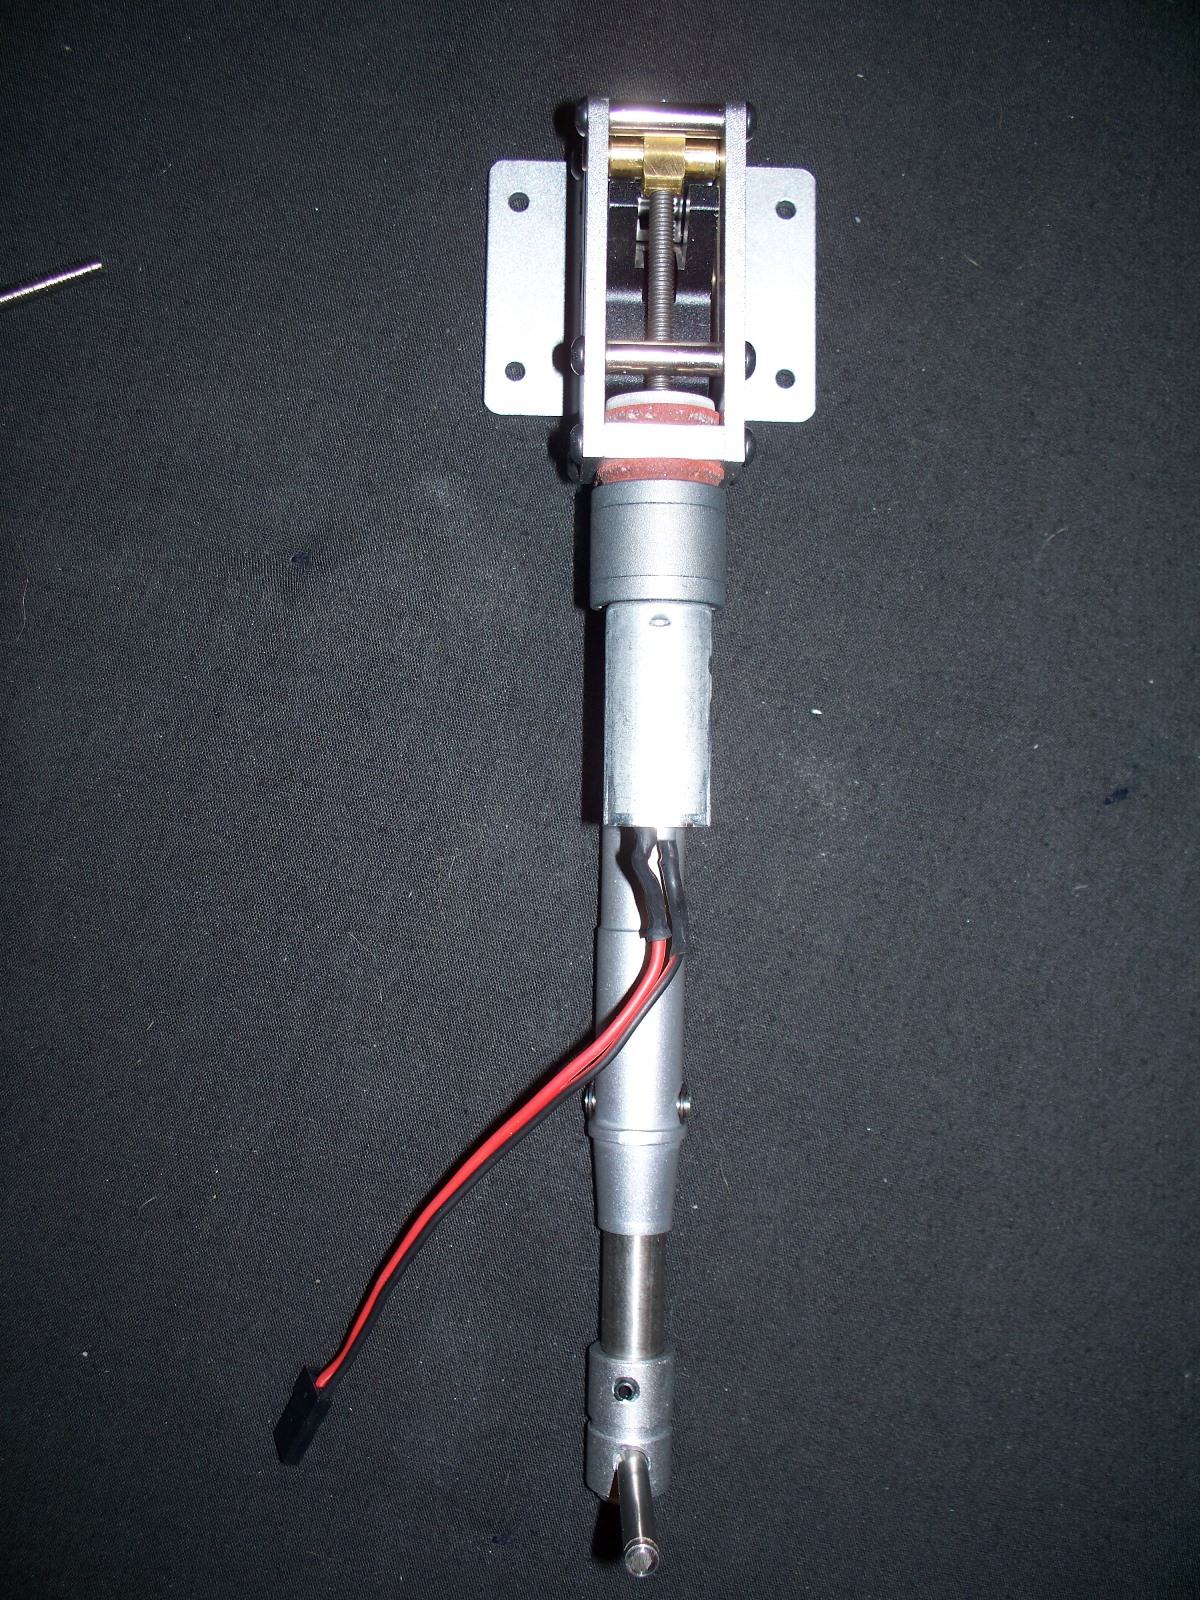
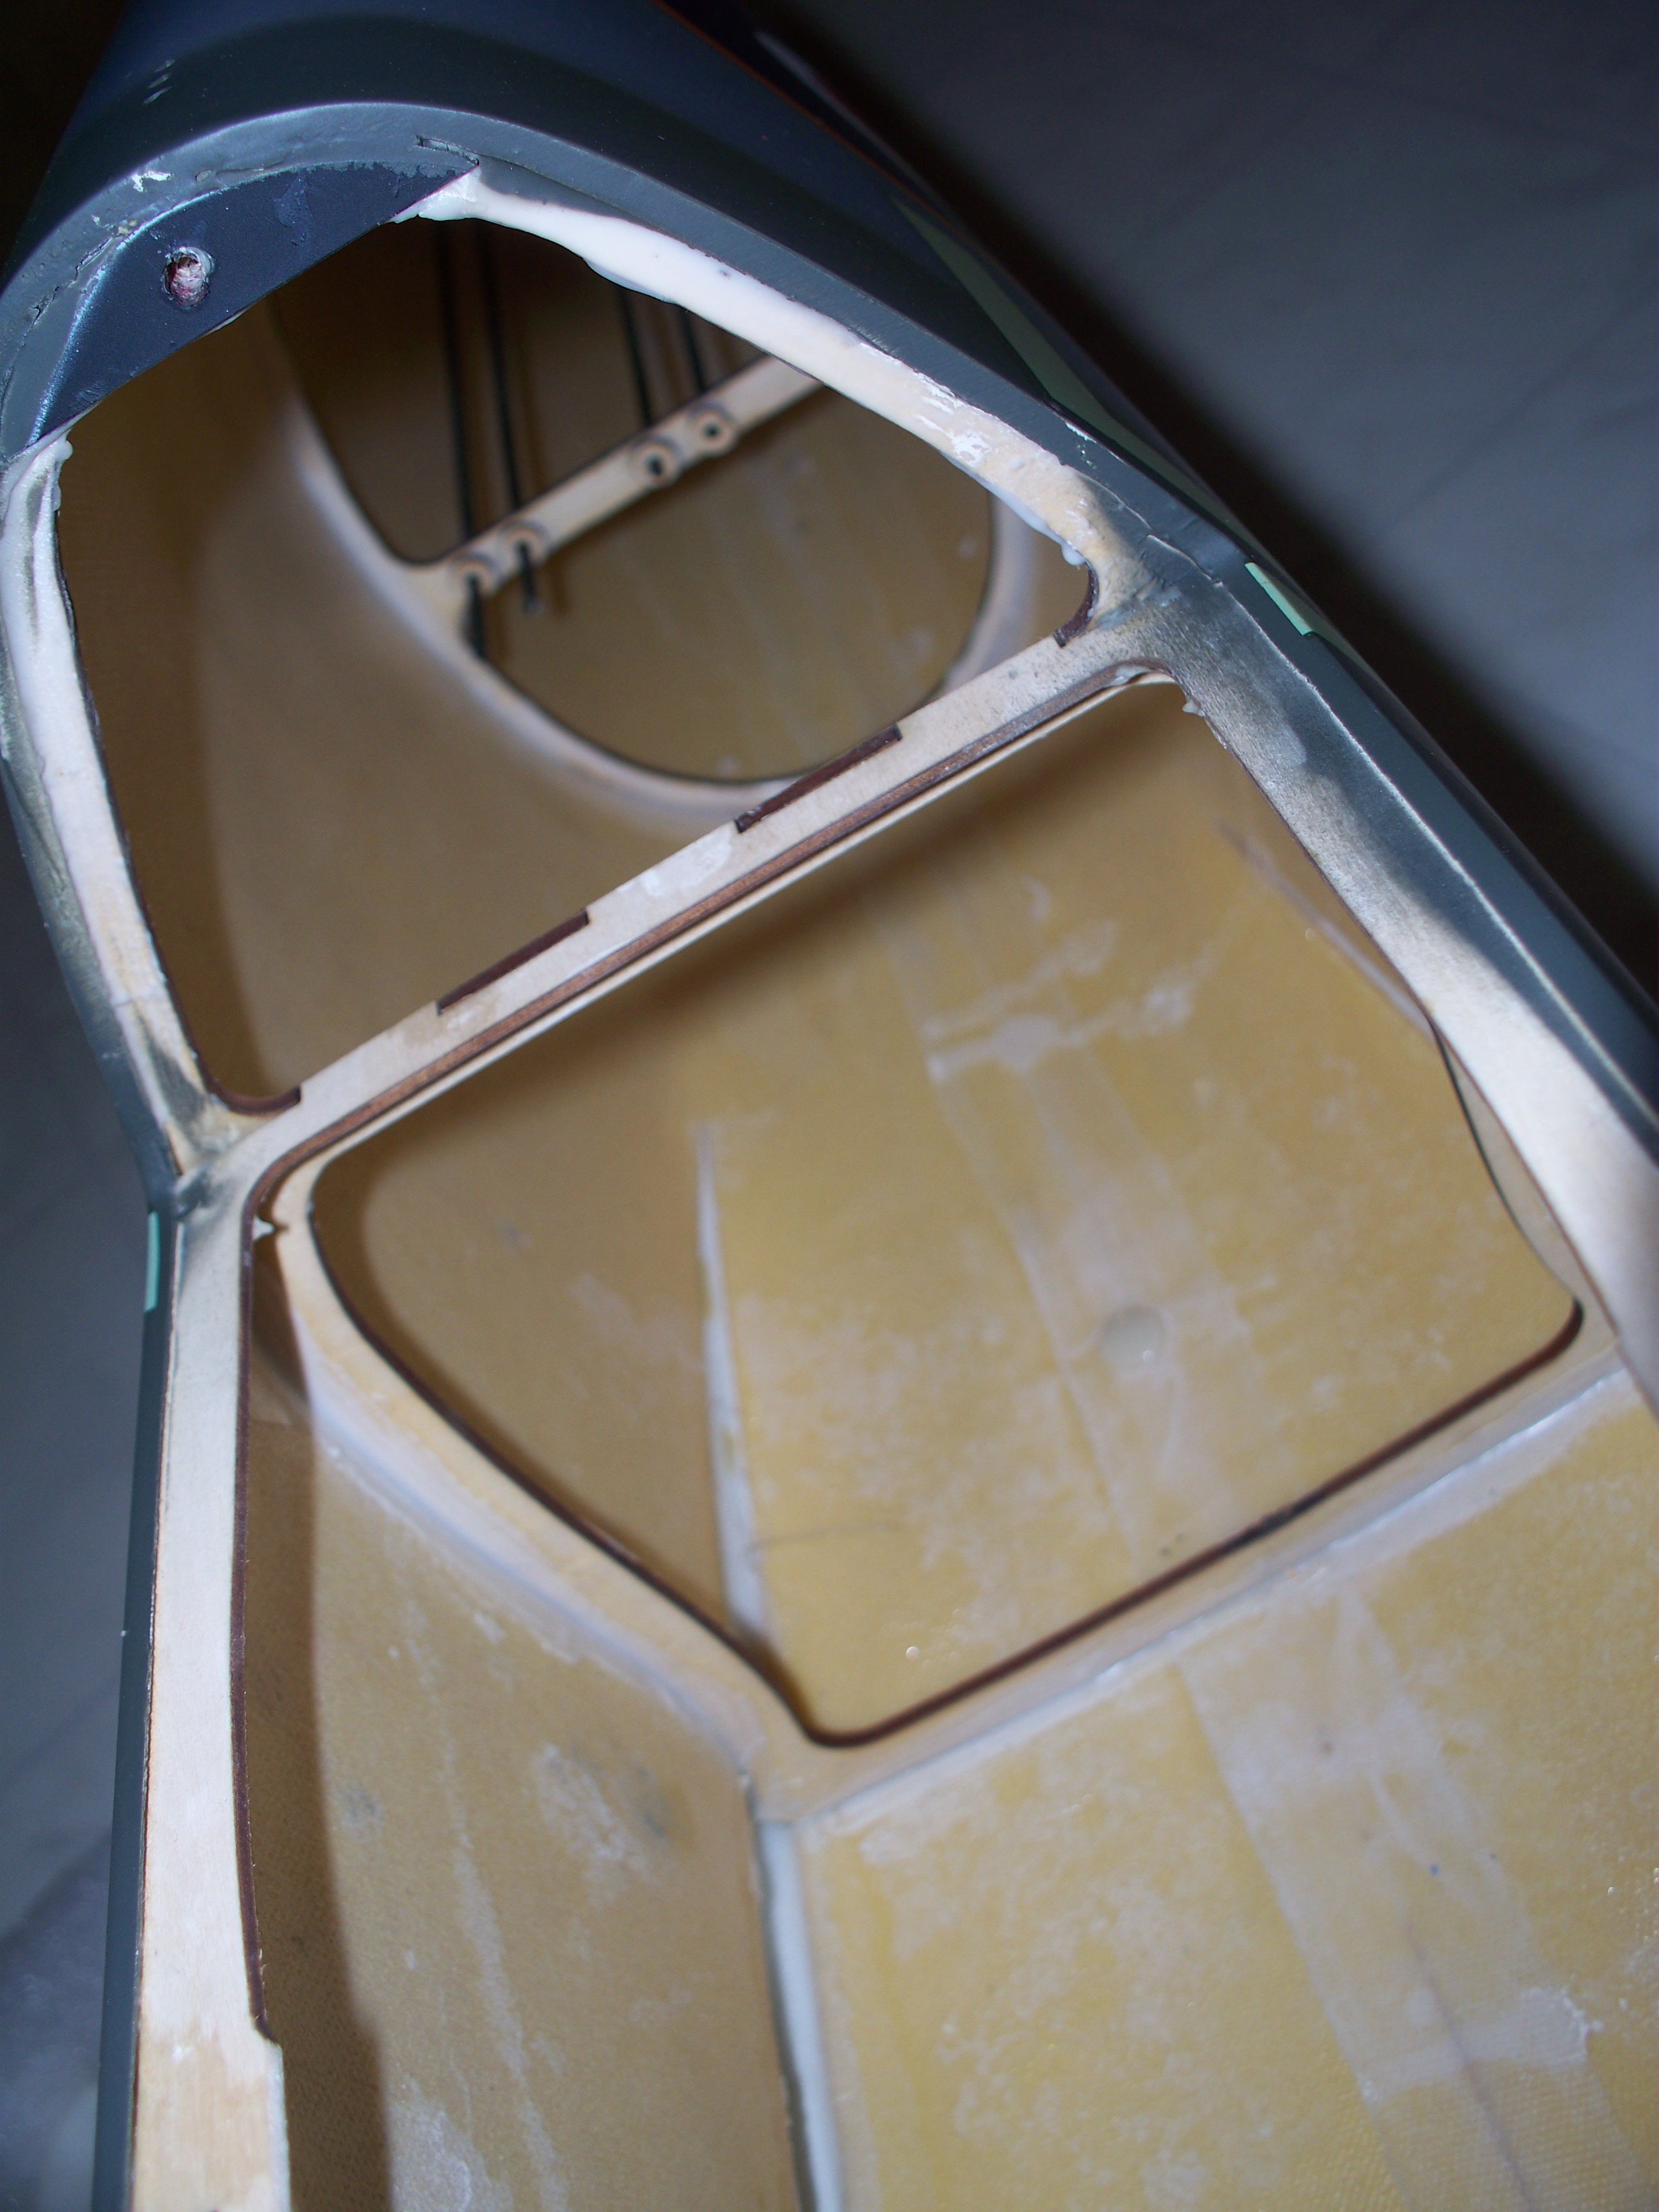
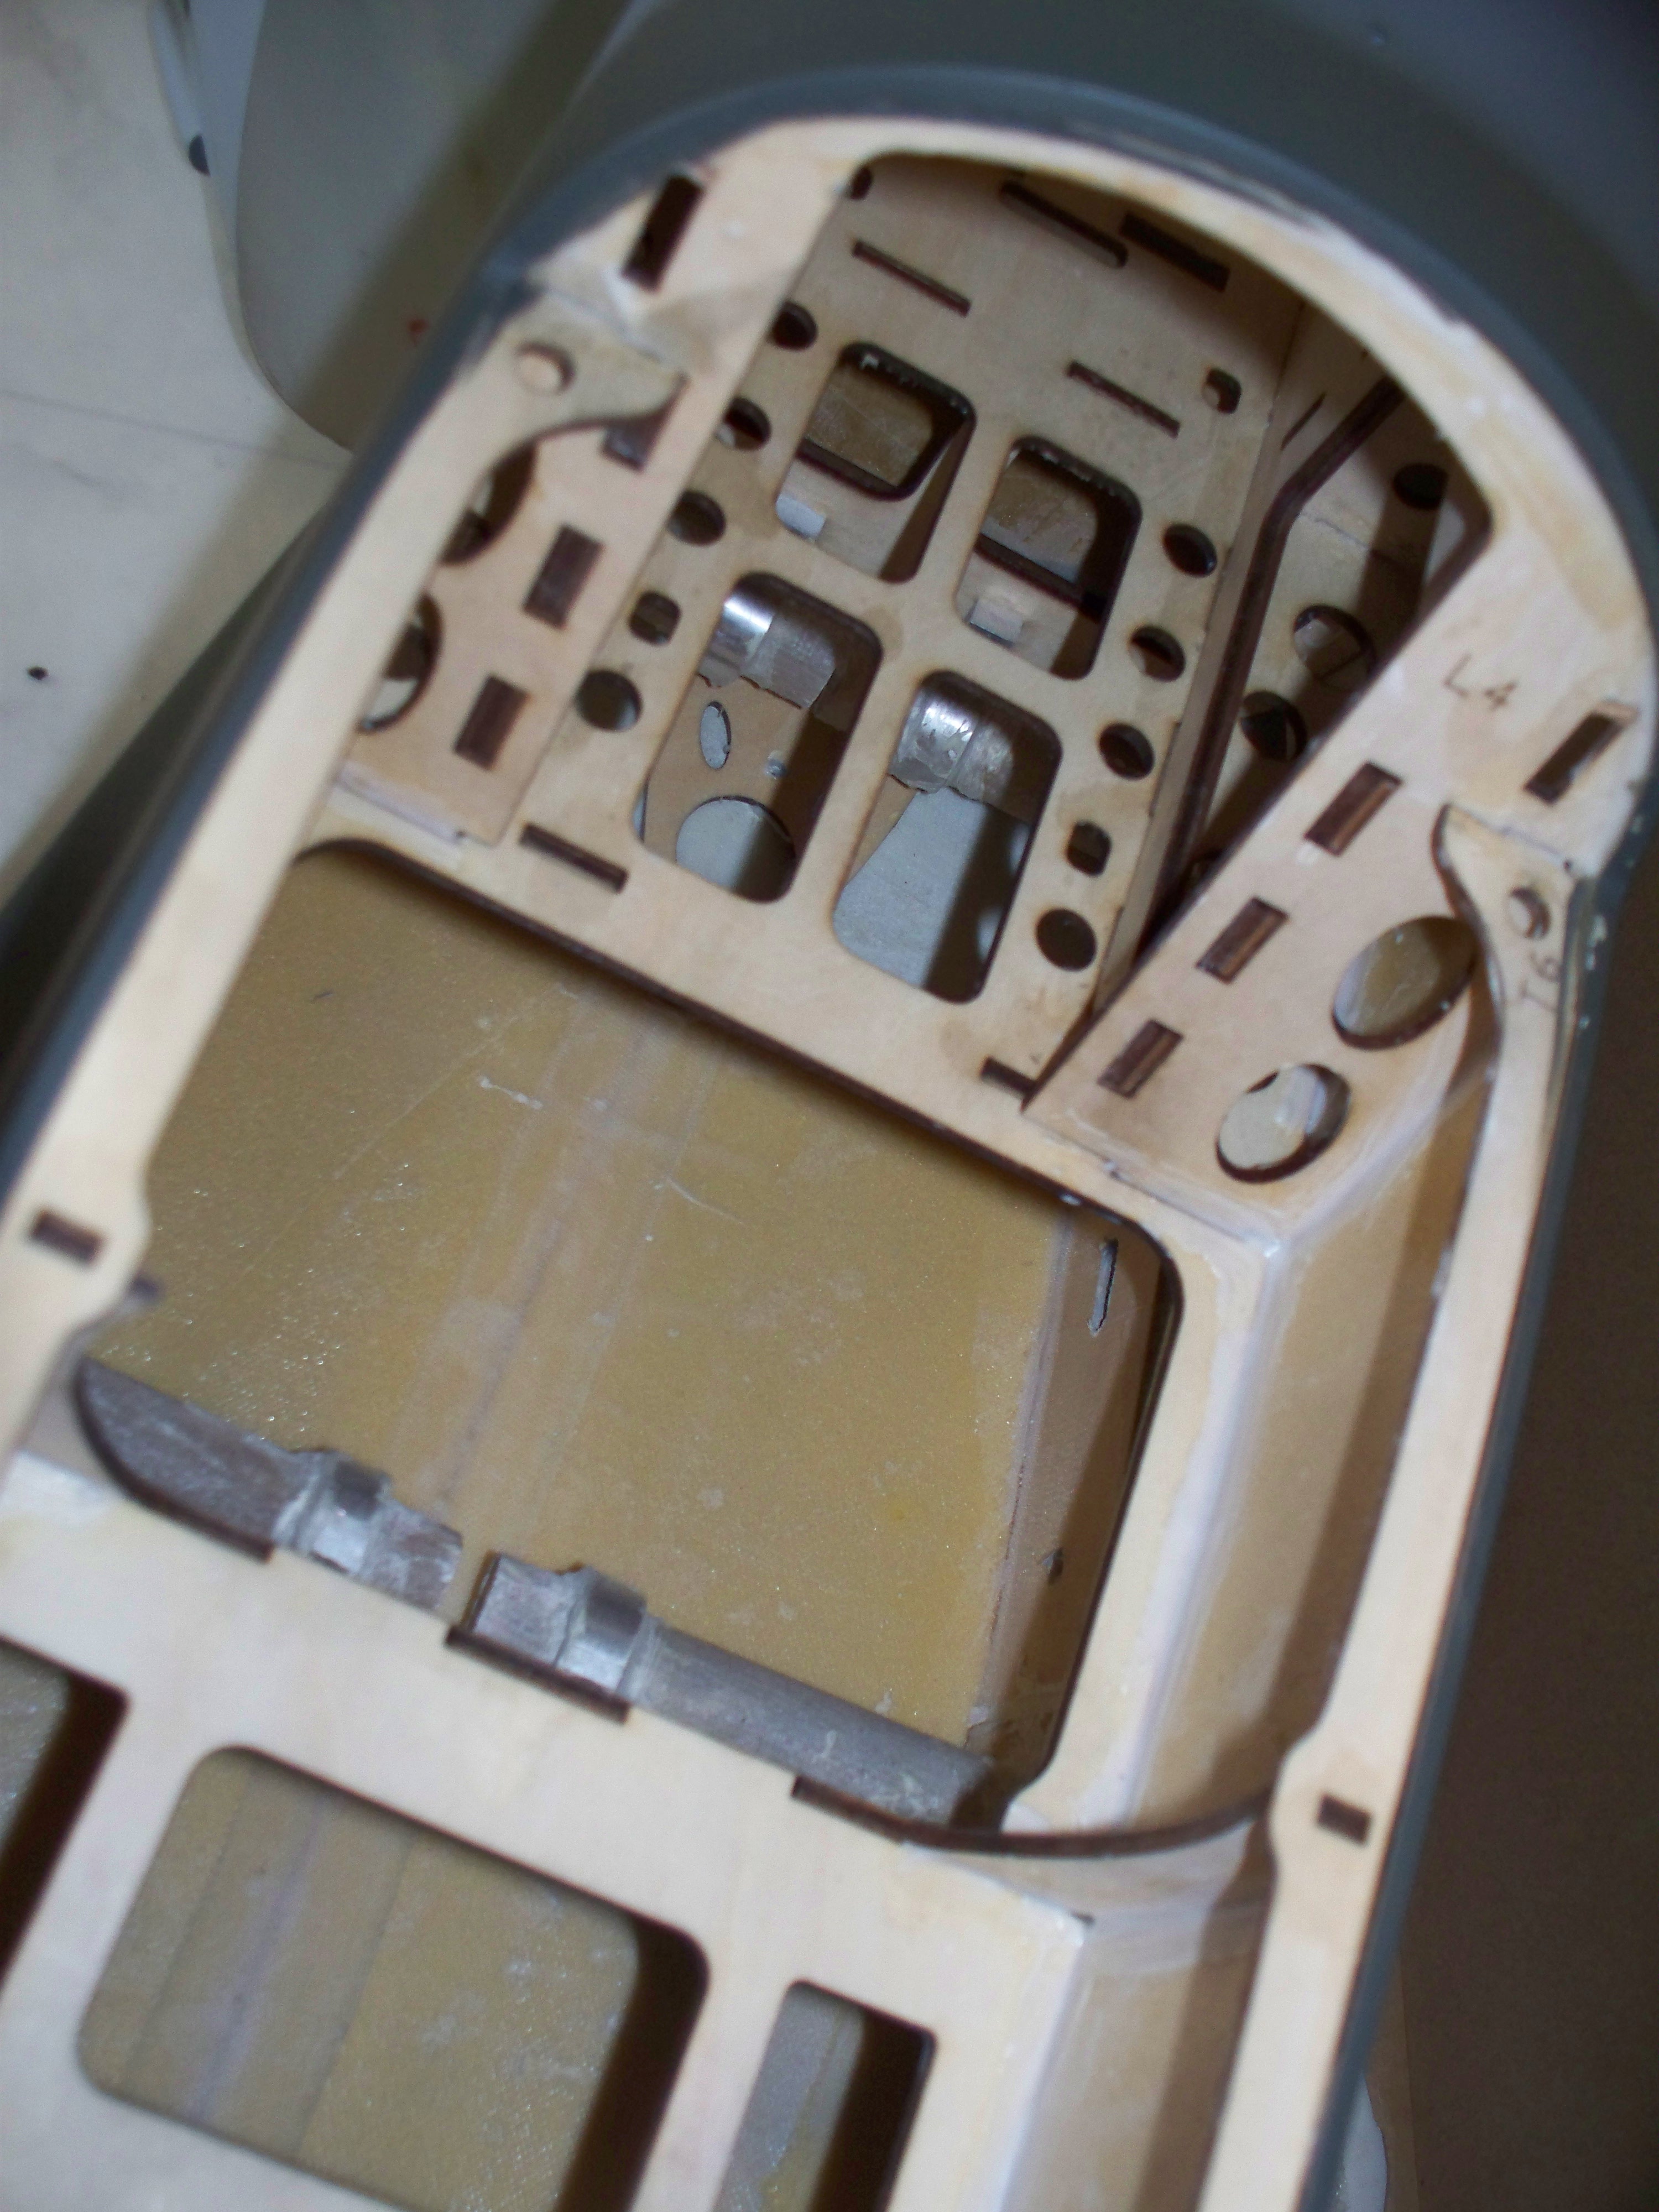
Here you go as promised, a picture of the front of the fuselage and the retracts. As you can see, the plywood box comes not epoxied together so you can make the choice of engine power or electric power. The top of the box is completely open so as to easily install the tank, or the motor and battery wiring with ESC. You will notice how accessible the forward compartment is as you lift the canopy hatch away and easy access for your battery. I didn't take a picture of the "Electric" plywood box that fits over this one, but it is designed to move the firewall forward to be used with electric motors. It slides over this box. The socket head bolt is used for the engine choice to help in anchoring the electronic ignition module and engine battery if needed.
These are the pictures of the retracts, pretty straight forward and there has been great assurance from the factory a great deal of money and engineering has gone into these mechanisms. The retracts come with aluminum hubbed rubber wheels with a brass bushed bearing for the axle. These retracts now depend on a separate7.4 volt battery for powering them. There is an outboard controller board that plugs into the battery, the radio and the retracts. The retracts come with a scale looking tailwheel, and the wheels.
Take a look inside the hatch! The first thing you will notice is design, design, and better design. The battery can easily be slipped into the nose where the tank goes and you have it. The first thing I noticed was the fiberglass wasn't white like most planes I have unpacked. You are looking at the "Sandwiched Material" that is between two layers; I am not separating the layers to confirm what it is just for you guys, but that is why the entire airframe is so light and strong... You gotta love it!
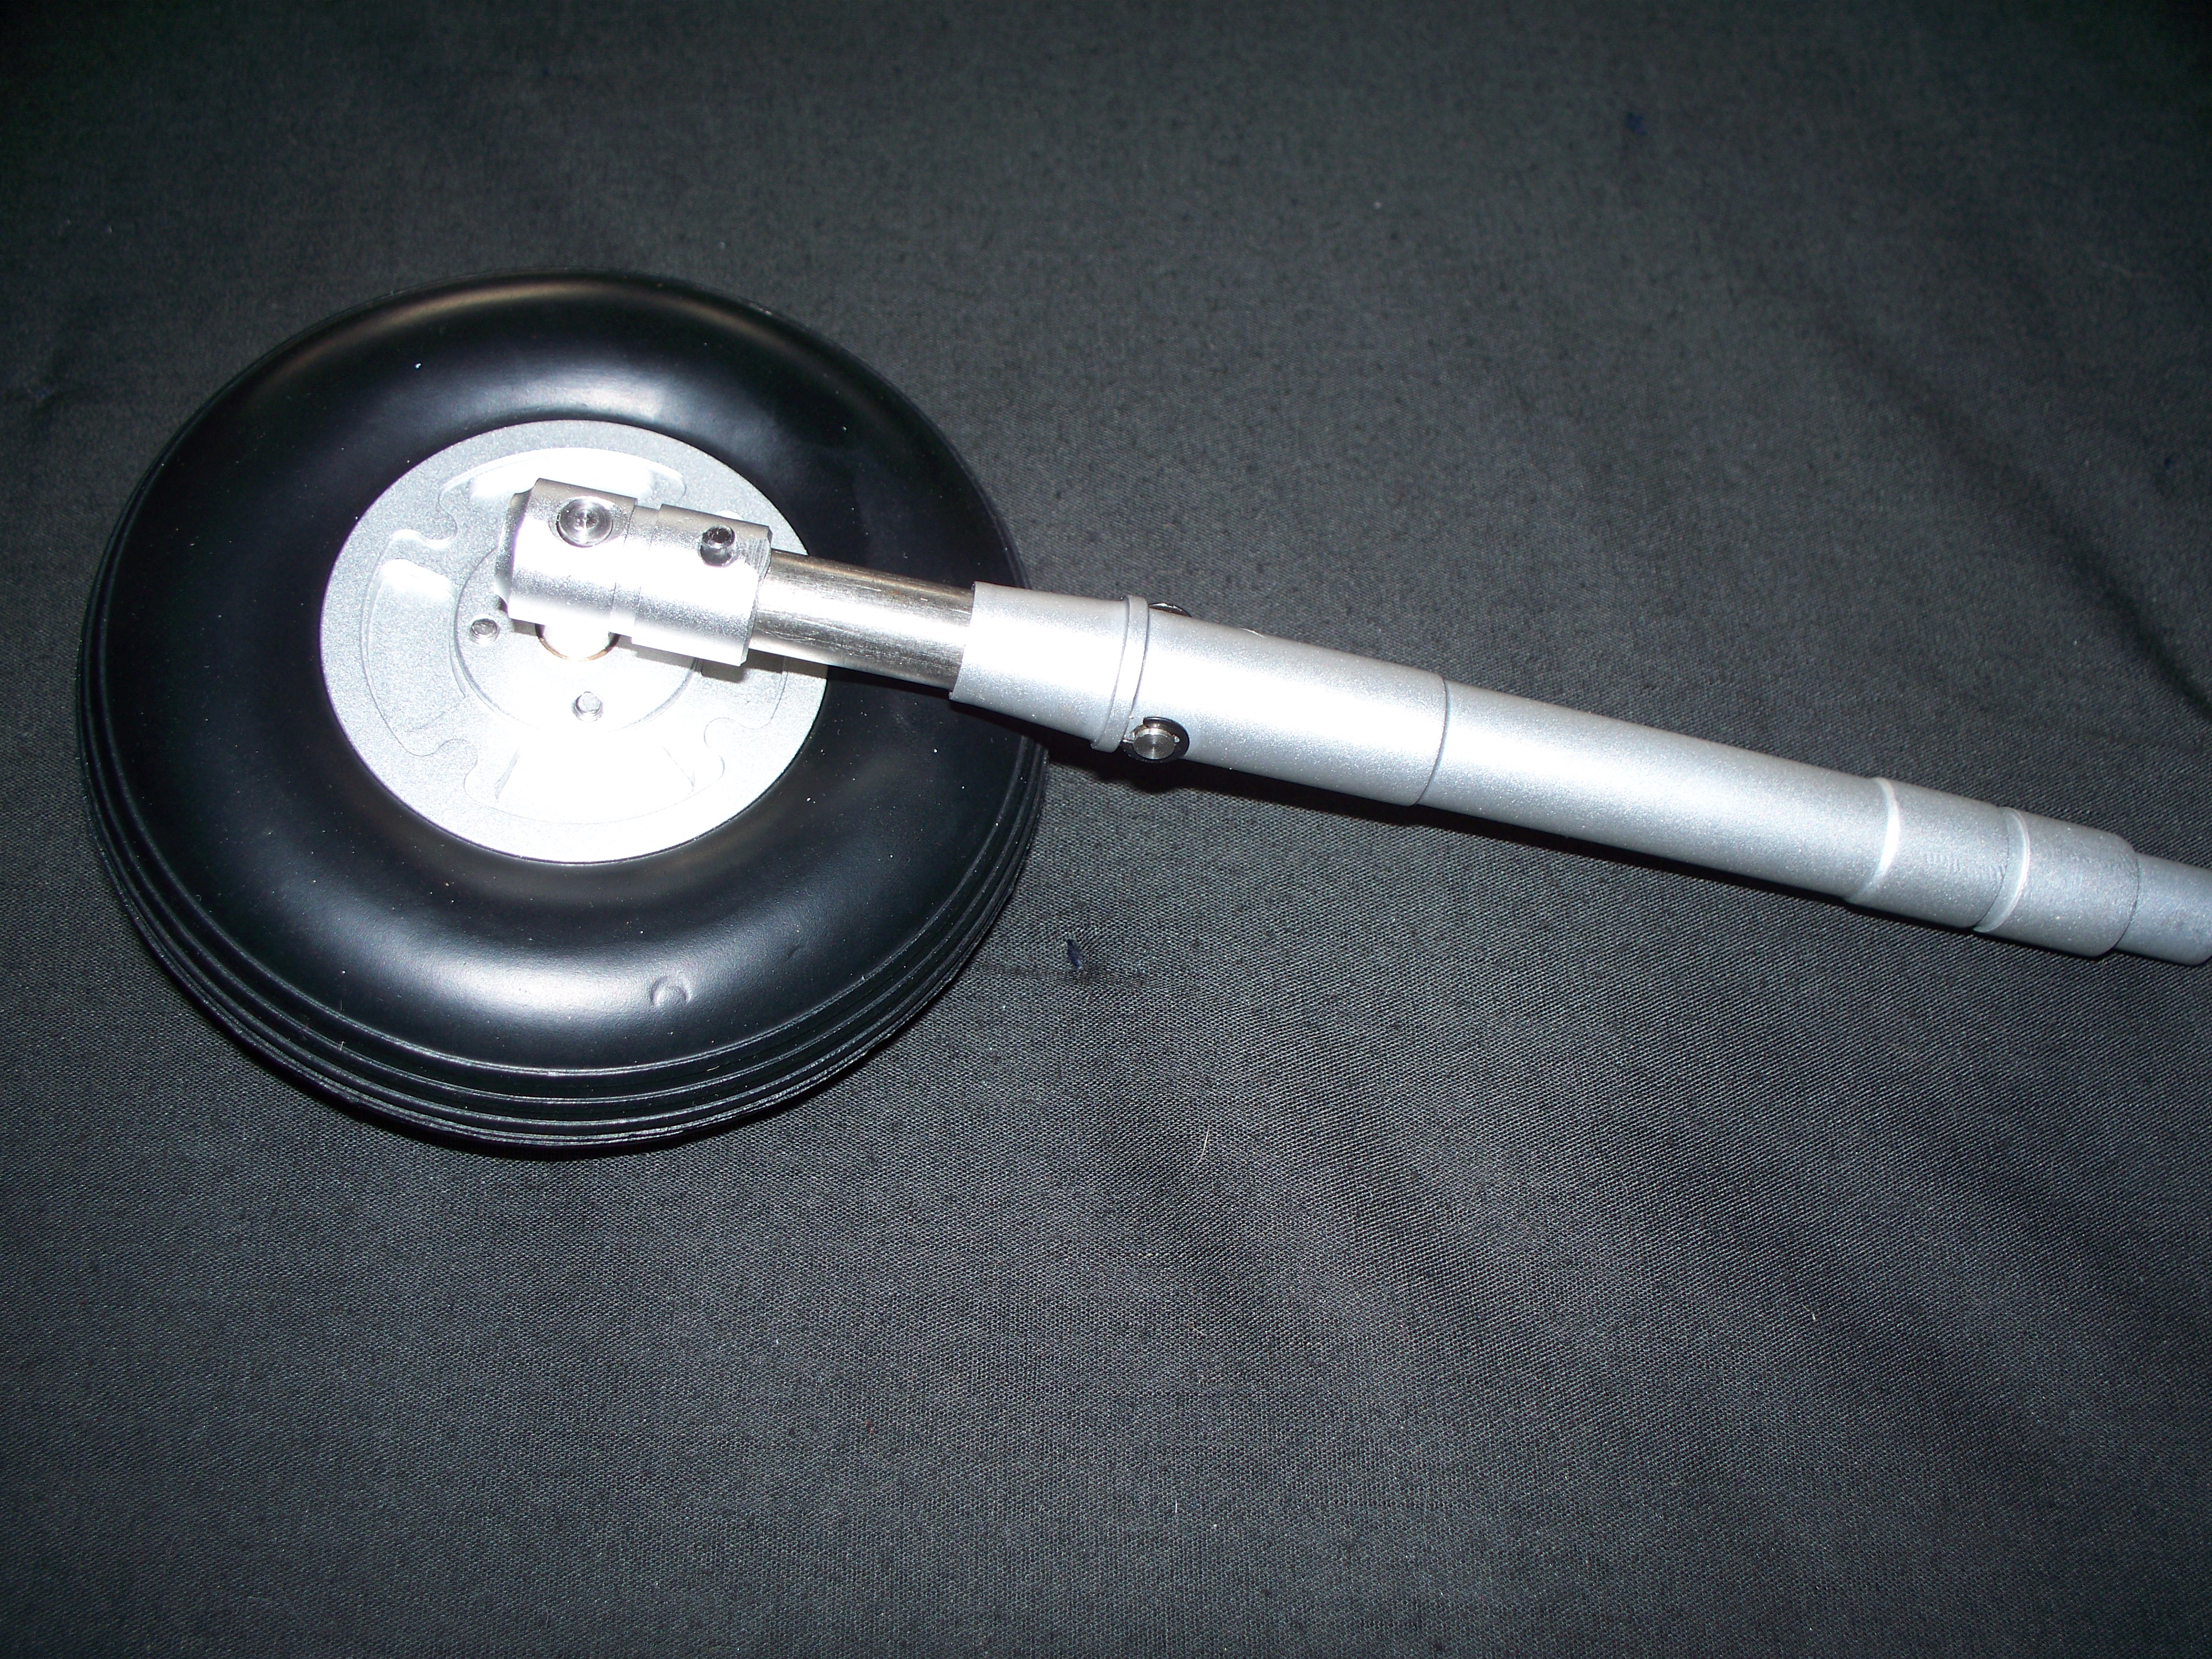
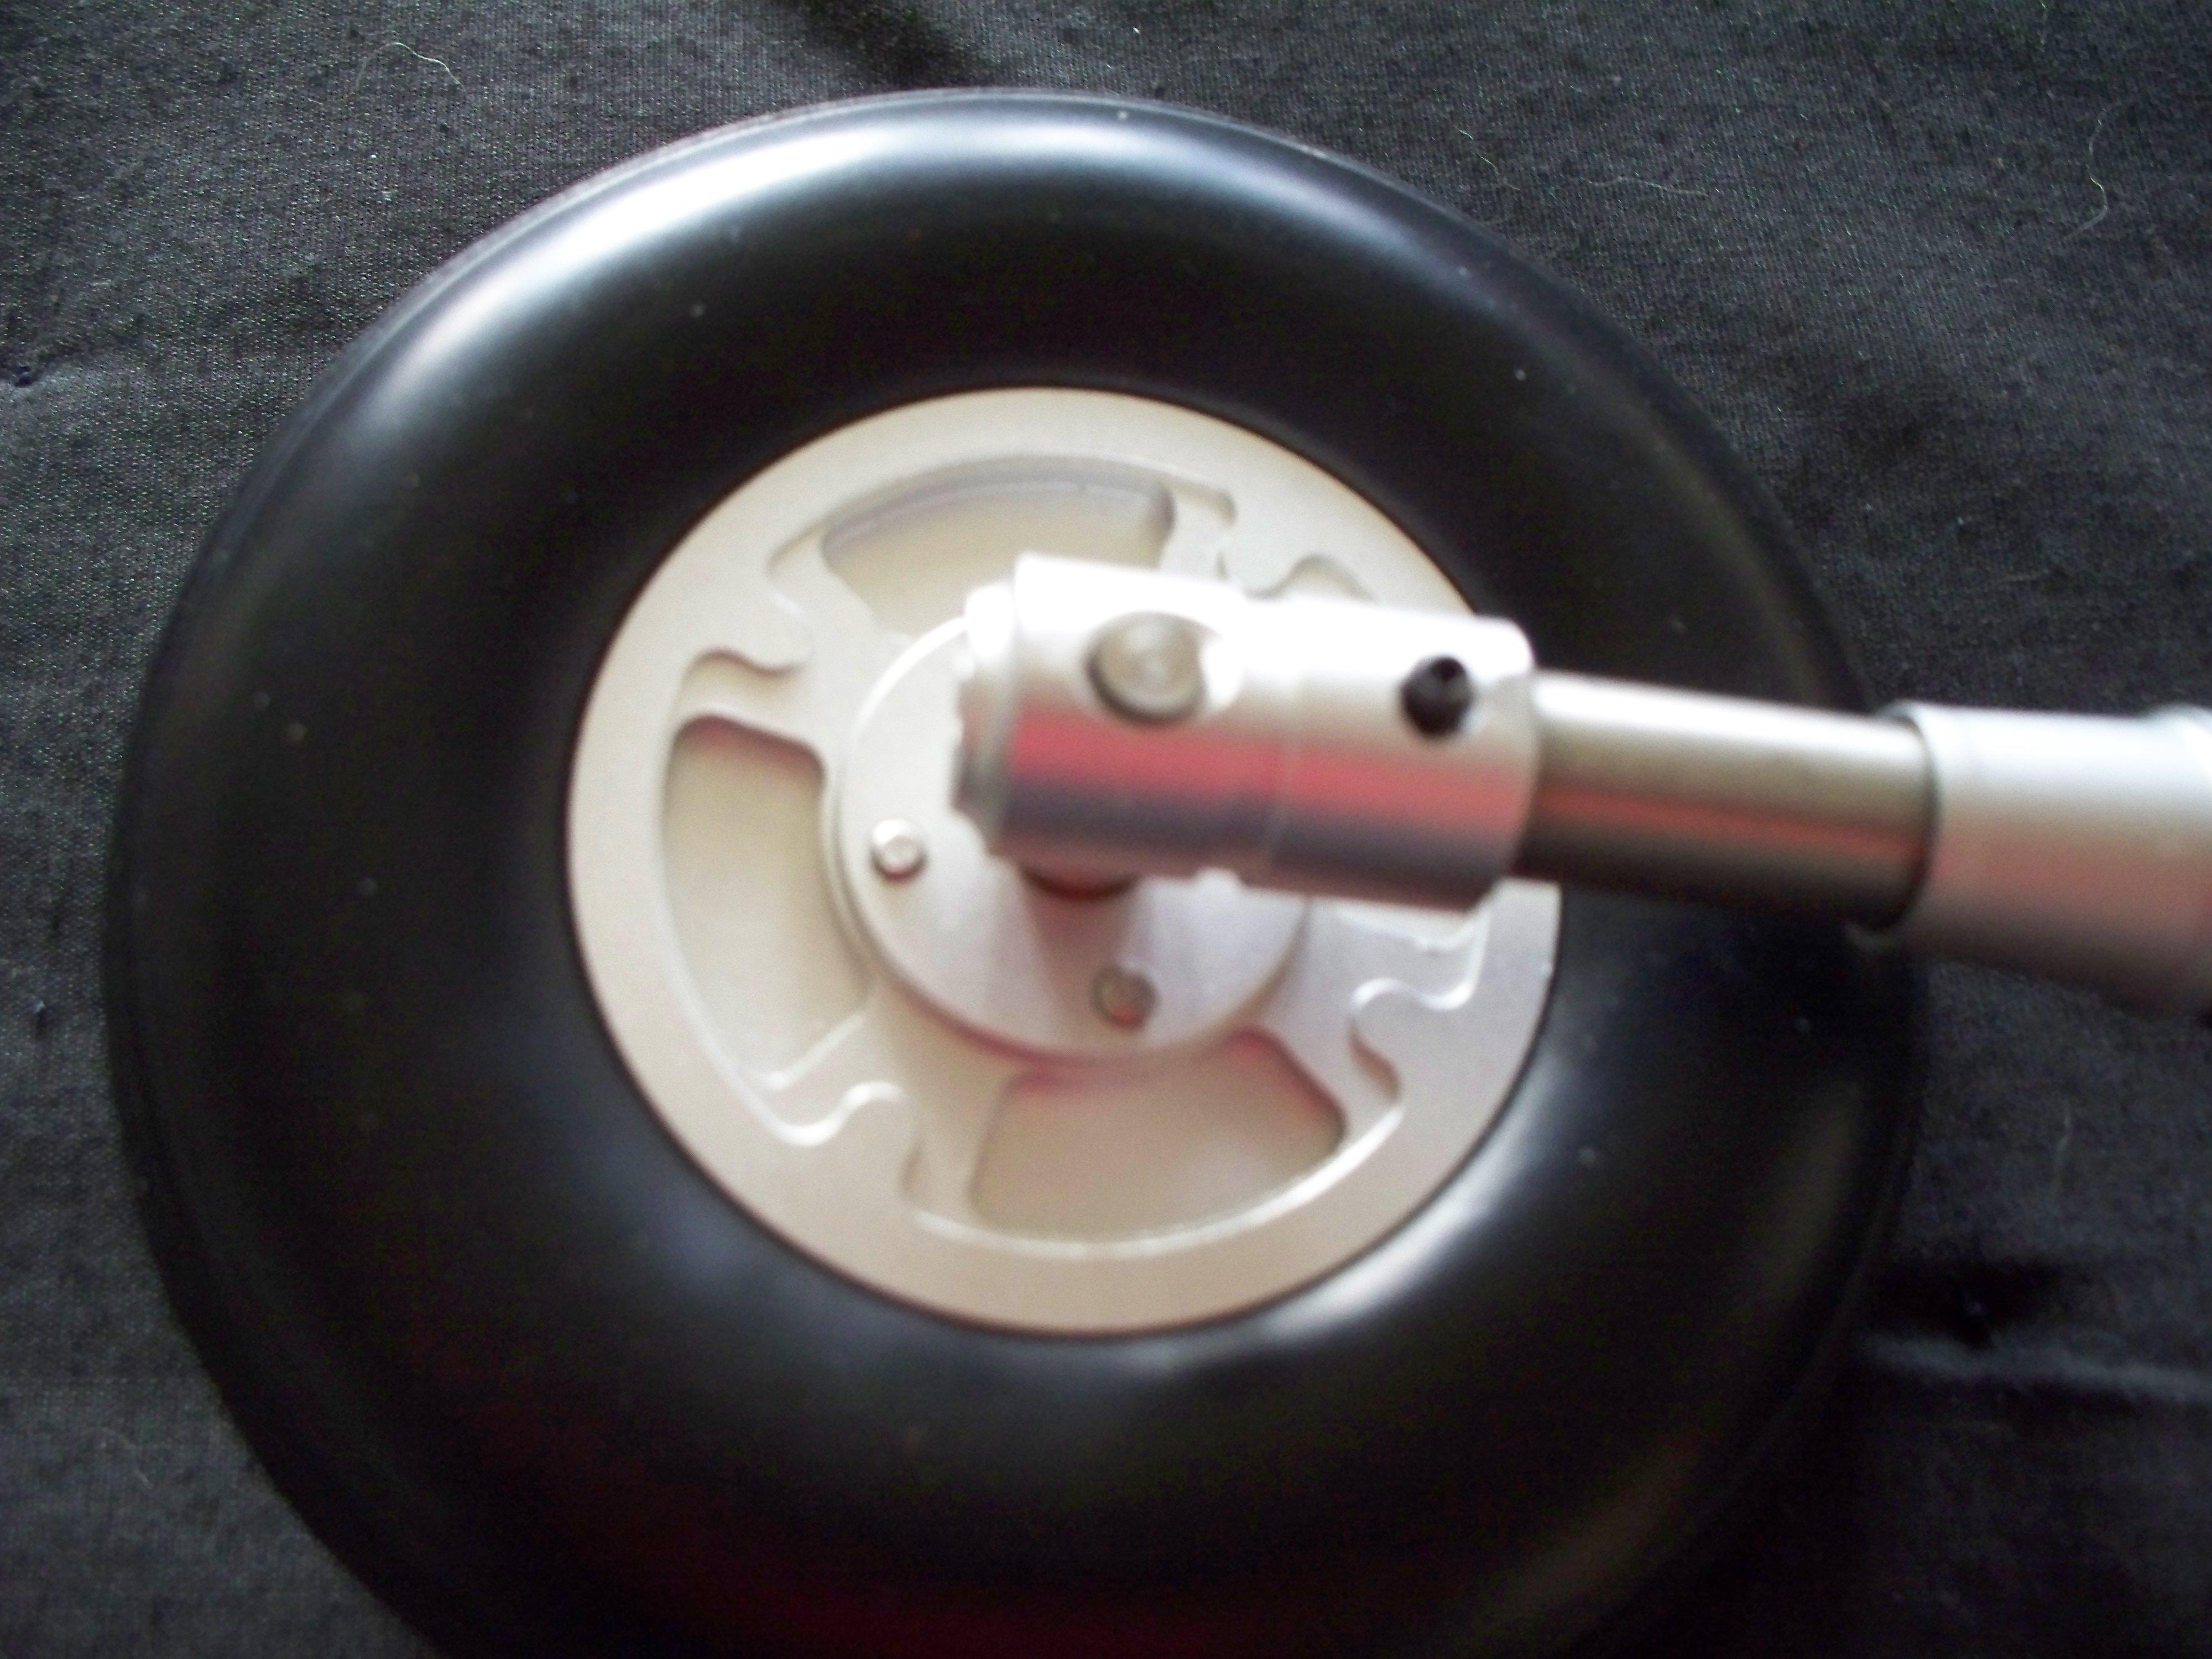
03-31-2016, 08:24 PM
#247
Senior Member
My Feedback: (4)
Join Date: Aug 2008
Location: EllinikoAthens, GREECE
Posts: 1,079
Likes: 0
Received 5 Likes
on
5 Posts
Still thinking about engine cooling and, as it often happens in life, I had an accidental encounter with a Composite ARF that pointed me to the right direction.
The C-ARF kit has a very clever solution to minimize cowl chopping: they have formulated an air duct at the front fuse below the firewall, that works similarly to a Stuka or P-40.
Here's some pics:

The C-ARF kit has a very clever solution to minimize cowl chopping: they have formulated an air duct at the front fuse below the firewall, that works similarly to a Stuka or P-40.
Here's some pics:

 03-31-2016, 09:24 PM
#249
Join Date: Nov 2012
Location: Navarre, FL
Posts: 268
Likes: 0
Received 0 Likes
on
0 Posts
Not clear on how it works... Does it channel/duct the warm air into the fuselage? I was thinking about that today...if you cut a hole in the firewall below the motor mount, and channel the air that way, would that be about the same thing?

