


Meister 1/5th P-47 with Fiberglas fuselage, a rebirth of a build!
 03-19-2017, 03:21 PM
#26


Progress
I got a start on the wing. Starting is the hardest part. It usually takes me a couple days to get going but once going things move right along.
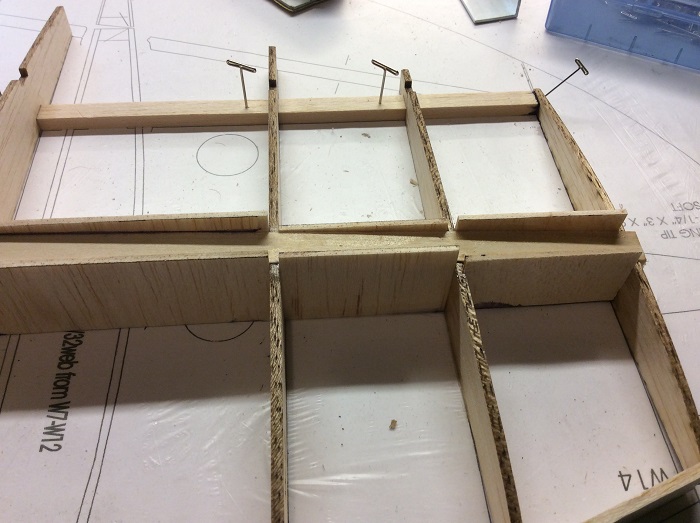
I am building with the spare in instead of making the pocket and then gluing it in when both wing laves are done. I like that I get positive gluing of all parts to the main spar. got the splice done first thing.
then I glued the main spart to it along with rib 1
Then one rib at a time along with the TE for the flap and the front spar.


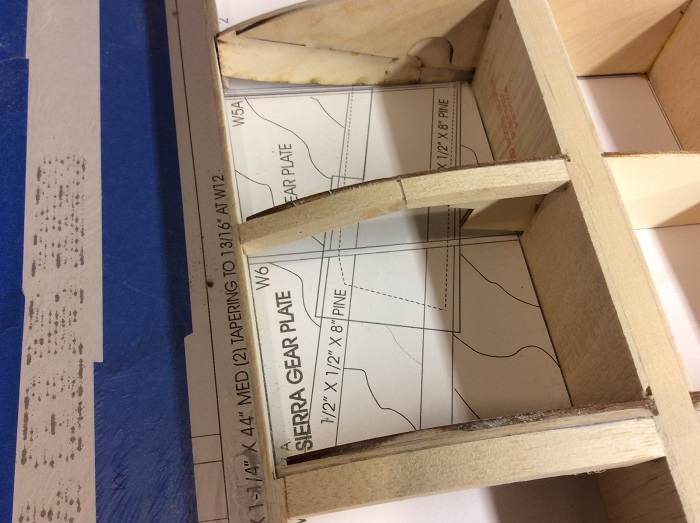
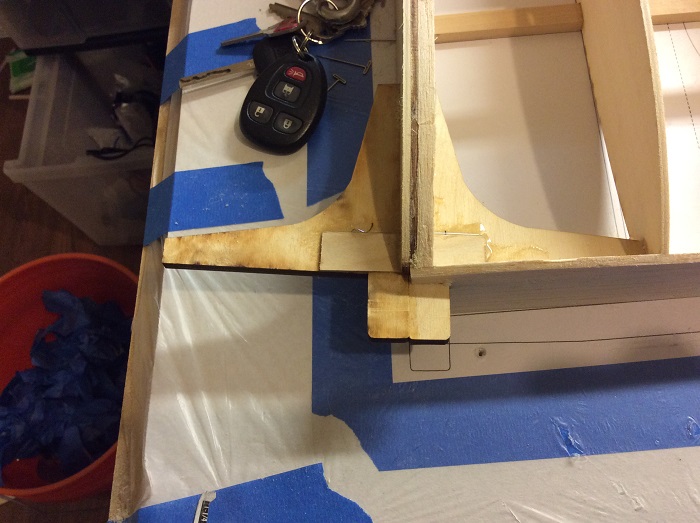
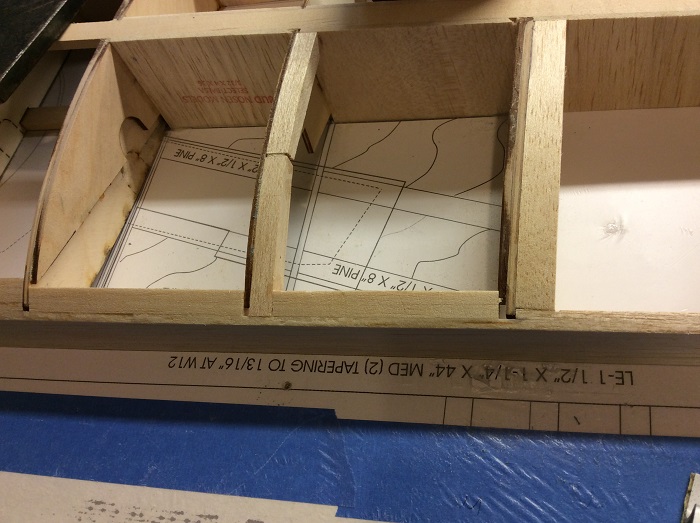
On the first build the gear block at rib 5 is to high and I set it so the gear plate was at the top of the rib block so I cut it down this time.

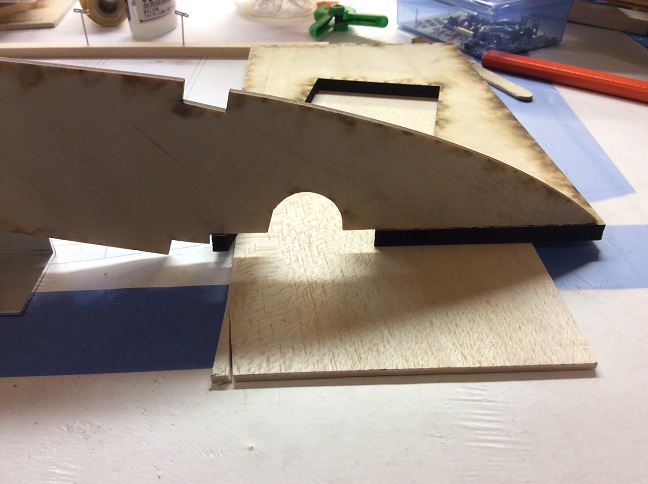
I wont glue it in yet, I want to see how the gear sits first.
The wing tongue does not sit right in rib 1. The tongue is 1/4 and the slots in rib 2 are 1/4 but the slot in rib 1 is almost 3/8 so alignment is impossible without doing both sides at the same time. so I will do that when I start the other side.
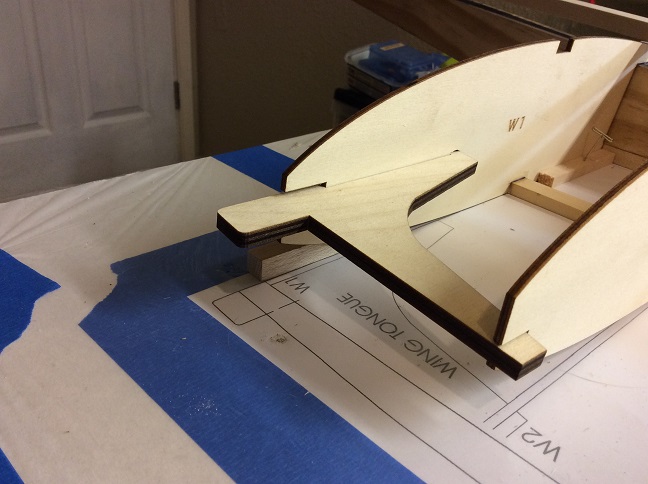

not sure why it is not cut right but NP, I can get it later.
This is a good start and things will pick up now that I have broken ground.

TB
I got a start on the wing. Starting is the hardest part. It usually takes me a couple days to get going but once going things move right along.
I am building with the spare in instead of making the pocket and then gluing it in when both wing laves are done. I like that I get positive gluing of all parts to the main spar. got the splice done first thing.
then I glued the main spart to it along with rib 1
Then one rib at a time along with the TE for the flap and the front spar.
On the first build the gear block at rib 5 is to high and I set it so the gear plate was at the top of the rib block so I cut it down this time.
I wont glue it in yet, I want to see how the gear sits first.
The wing tongue does not sit right in rib 1. The tongue is 1/4 and the slots in rib 2 are 1/4 but the slot in rib 1 is almost 3/8 so alignment is impossible without doing both sides at the same time. so I will do that when I start the other side.
not sure why it is not cut right but NP, I can get it later.
This is a good start and things will pick up now that I have broken ground.
TB
Last edited by TonyBuilder; 03-19-2017 at 05:19 PM.
 03-26-2017, 02:25 PM
#27
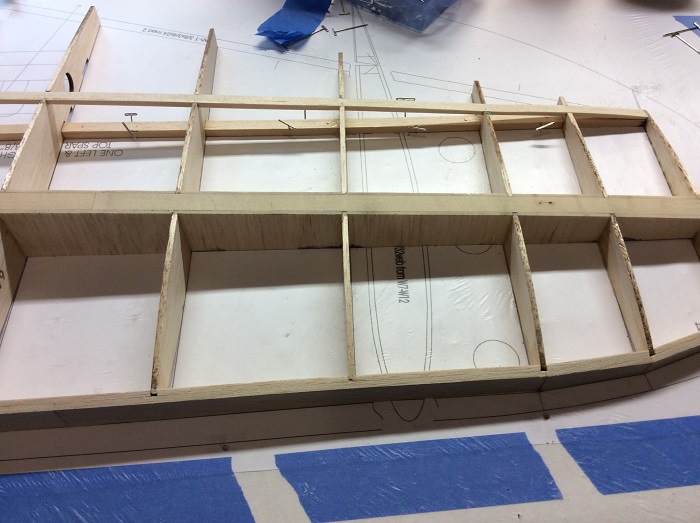
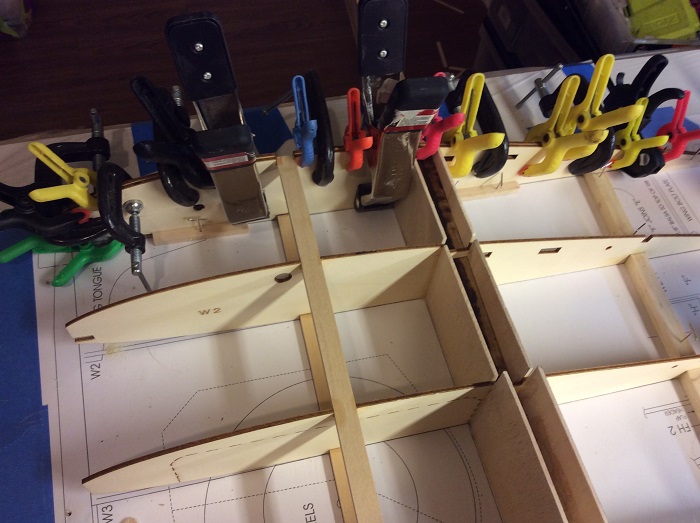
Got some wing progress, left wing is all framed up.

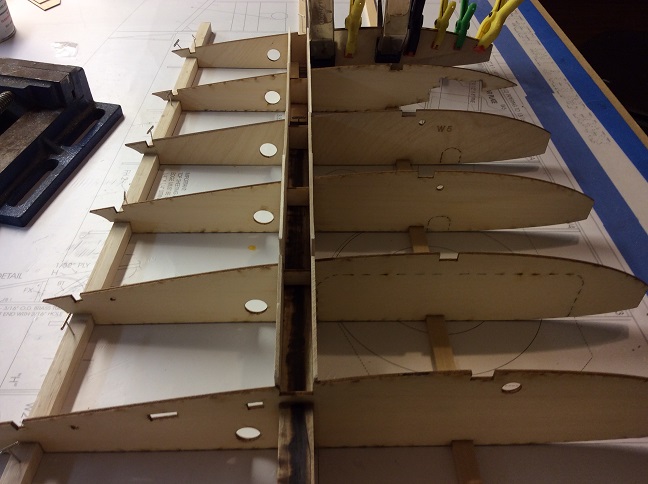
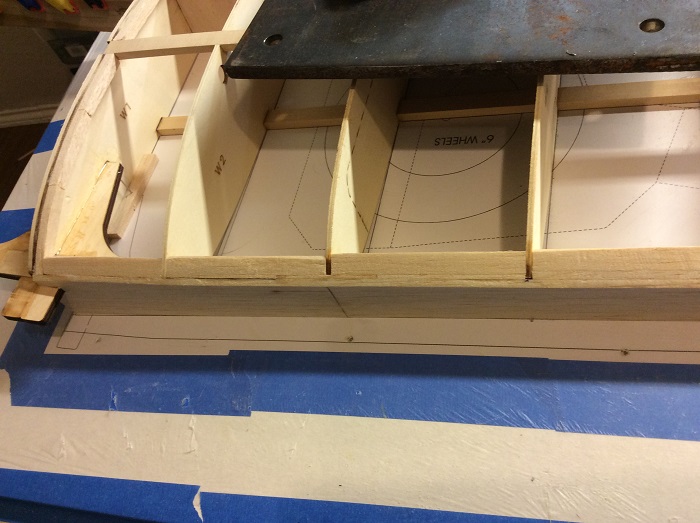
I like to do pressure blocking so the front spar gets webbing all the way to the tip both sides. This really helps to keep the wingtip flat during framing and sheeting.
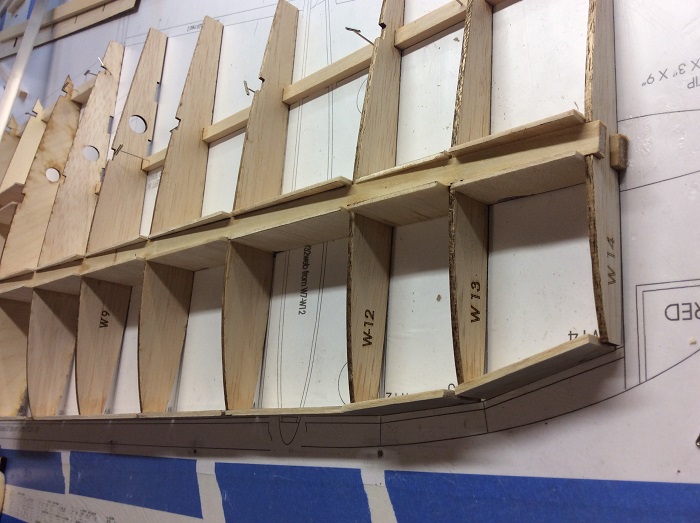
I also do that on the LE.this also helps to keep the wing flat during the sheeting as the tips not floating out there. 1/8 for the blocking that also straitens out the TE ribs as they do not line up and you would have a wavy sub LE.
The blocking gets faced with 3/23 balsa.
I added some balsa blocking at the ribs that the CF skins will end on so I have plenty of room and surface to glue the skin to.
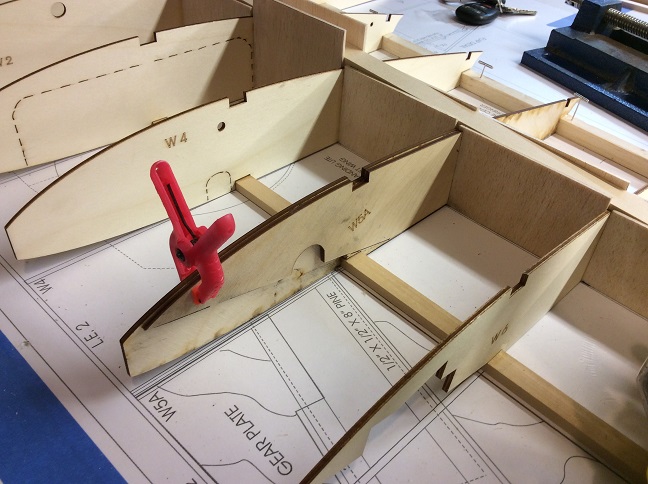
The center ribs are glued in and the tongue. There is a 1/16 gap in the slot for the tongue at the top so I glued in a piece of ply in to fill the gap and help fuse the two pieces together.
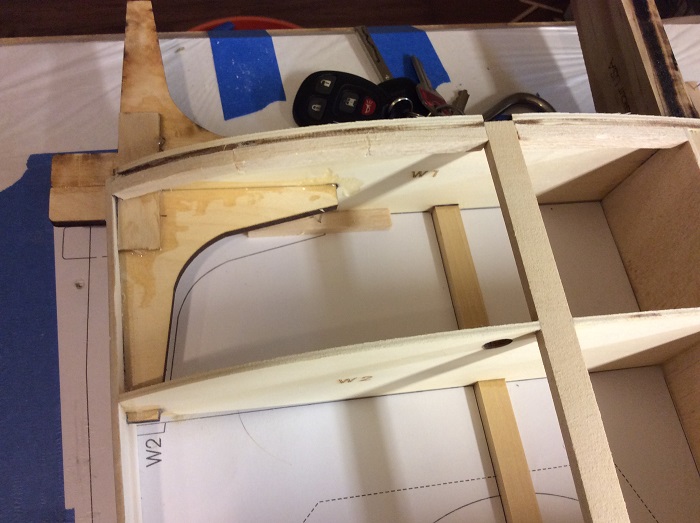
I will sheet the top next then start on the other side.
TB
I like to do pressure blocking so the front spar gets webbing all the way to the tip both sides. This really helps to keep the wingtip flat during framing and sheeting.
I also do that on the LE.this also helps to keep the wing flat during the sheeting as the tips not floating out there. 1/8 for the blocking that also straitens out the TE ribs as they do not line up and you would have a wavy sub LE.
The blocking gets faced with 3/23 balsa.
I added some balsa blocking at the ribs that the CF skins will end on so I have plenty of room and surface to glue the skin to.
The center ribs are glued in and the tongue. There is a 1/16 gap in the slot for the tongue at the top so I glued in a piece of ply in to fill the gap and help fuse the two pieces together.
I will sheet the top next then start on the other side.
TB
03-28-2017, 05:39 PM
#28
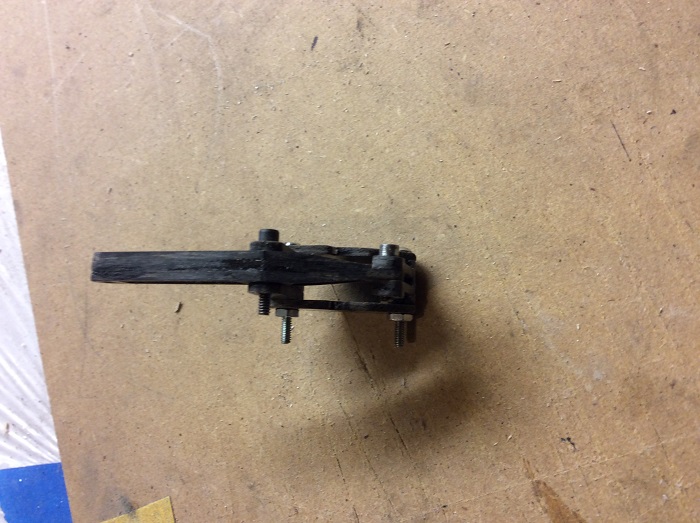
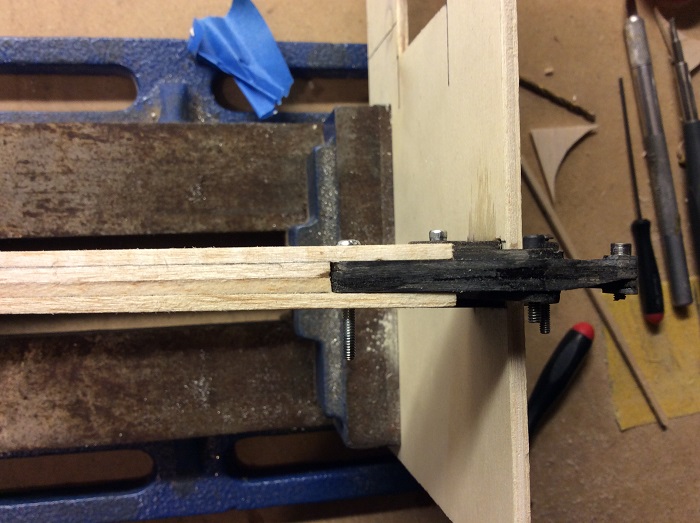
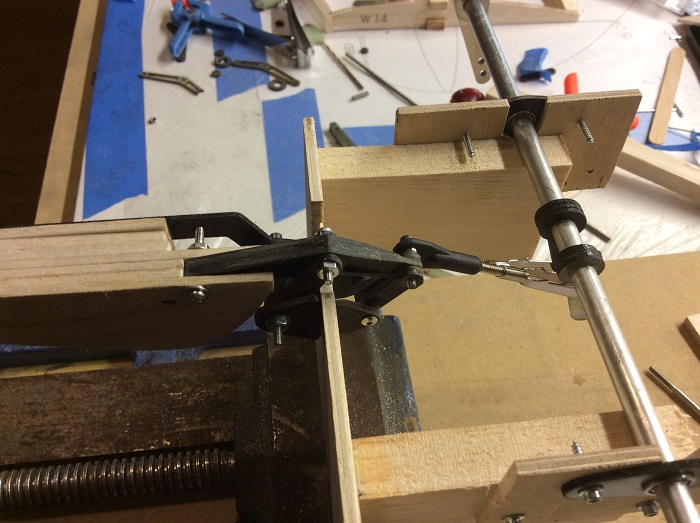
I am working on the prototype Fowler flap hinges.
I am making them beefier then what I have seen as they can be notorious for slop.
With the wider mount I think that will help stiffen it up instead of just one mount bracket.

1/16" laminated G10 for the main arm.
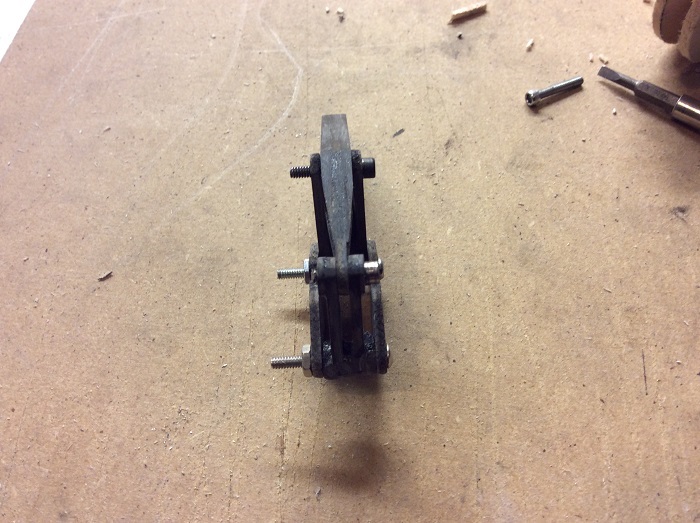
So fare it is pretty stiff with no slop on the hinge.
figuring the point of connection and how to mount the hinge to the TE of the flap pocket.

This portion is the move out action.
Once I am good with this I will work on the second part the control arm that moves the flap down.
the look from the bottom when the flap is up.
Still a bit to do as I am only in the design phase.
TB
I am making them beefier then what I have seen as they can be notorious for slop.
With the wider mount I think that will help stiffen it up instead of just one mount bracket.
1/16" laminated G10 for the main arm.
So fare it is pretty stiff with no slop on the hinge.
figuring the point of connection and how to mount the hinge to the TE of the flap pocket.
This portion is the move out action.
Once I am good with this I will work on the second part the control arm that moves the flap down.
the look from the bottom when the flap is up.
Still a bit to do as I am only in the design phase.
TB
03-30-2017, 06:03 PM
#29
Putting the prototype together and working on the linkages.
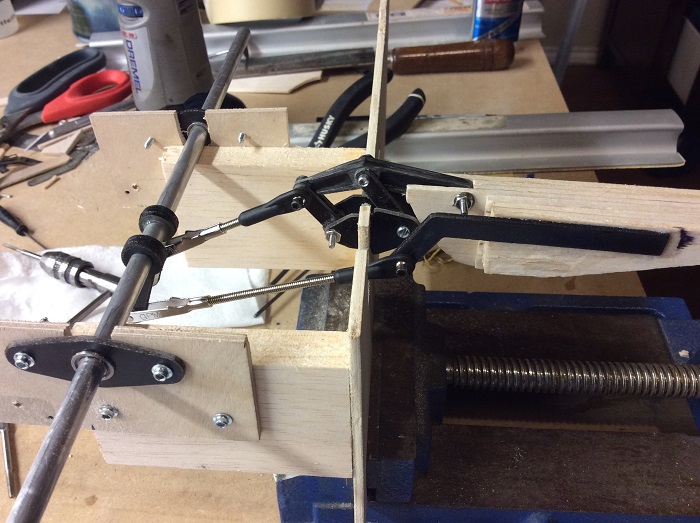
Duel linkages and dual control horns as I do not want the control horn that is on the flap right on top of the hing so two horns works just fine.
1/4 x 3/8 sealed flange bearings for the rod.
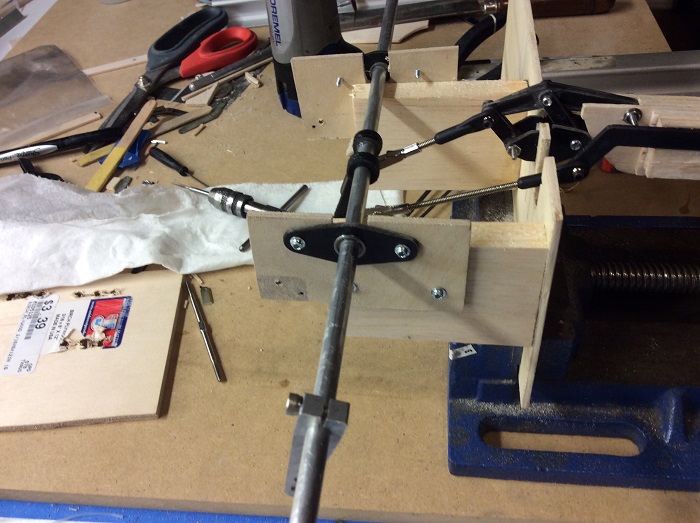
The linkages are easy to adjust and I am still working on the best position for the rod control horns.
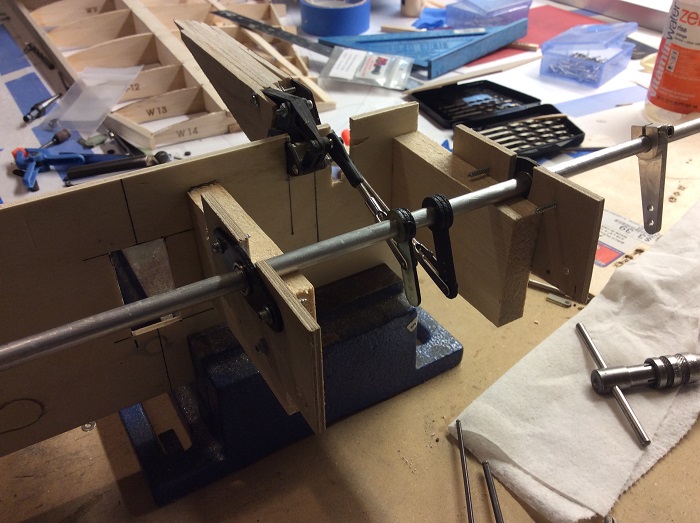
The 1/4 rod will either be carbon fiber or aluminum. The servo arm on the rod will be a single at the end of the rod and in the belly of the wing.
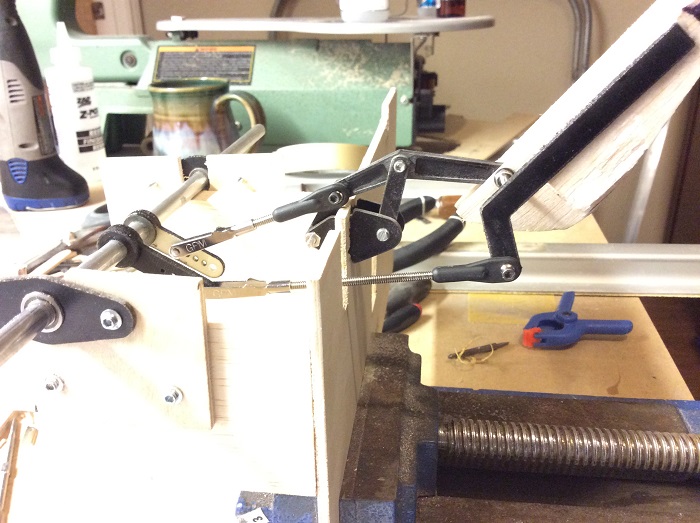
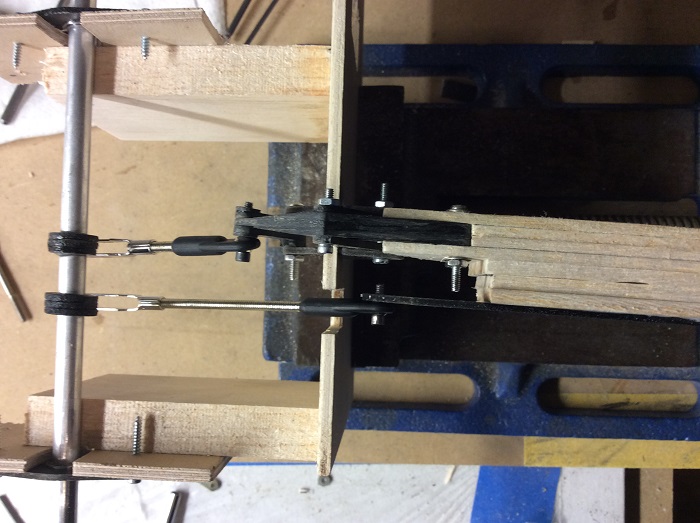
This is just a rough mock up but it shows me the linkages and control horns, how they are positioned and located. Next I will see how it will fit in the wing.
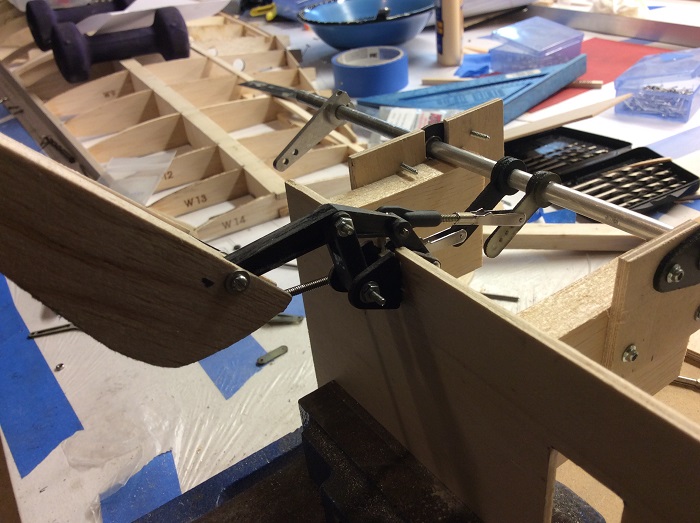
This will be the same on all three hinges, not just one hinge. That should help tighten it all up.
here is a short video
youtu.be/U9iKXPiXrlg
TB
Duel linkages and dual control horns as I do not want the control horn that is on the flap right on top of the hing so two horns works just fine.
1/4 x 3/8 sealed flange bearings for the rod.
The linkages are easy to adjust and I am still working on the best position for the rod control horns.
The 1/4 rod will either be carbon fiber or aluminum. The servo arm on the rod will be a single at the end of the rod and in the belly of the wing.
This is just a rough mock up but it shows me the linkages and control horns, how they are positioned and located. Next I will see how it will fit in the wing.
This will be the same on all three hinges, not just one hinge. That should help tighten it all up.
here is a short video
youtu.be/U9iKXPiXrlg
TB
04-02-2017, 07:02 AM
#31
It is more of a builders kit as it does not have the instructions a TF will have and you have to adjust a few things but it builds as simple as you like or as complicated as you like.
TB
04-09-2017, 04:03 PM
#33
Ok, so I glued in some additional blocking at the LE for the FG skin. Also for the gear ribs.
Sheeting is done, as much as I want until I work on the flap and aileron.
I put an additional row of balsa so I could hold back the wing skin from the TE of the flap and aileron. I will finish those out with the flap and aileron, G-10 for the TE.
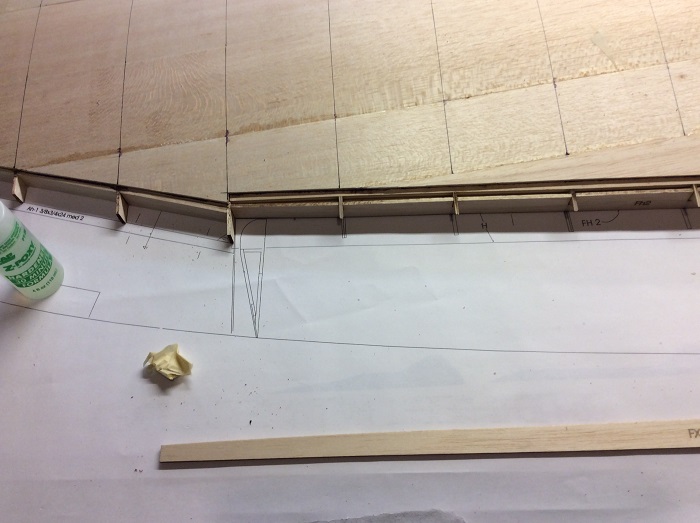
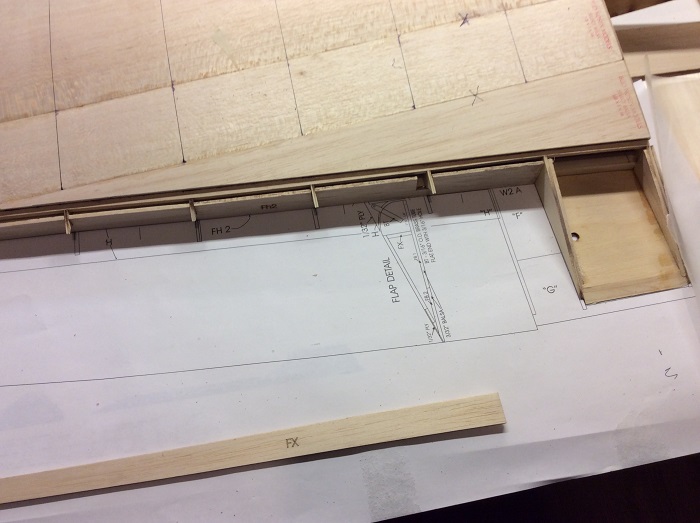

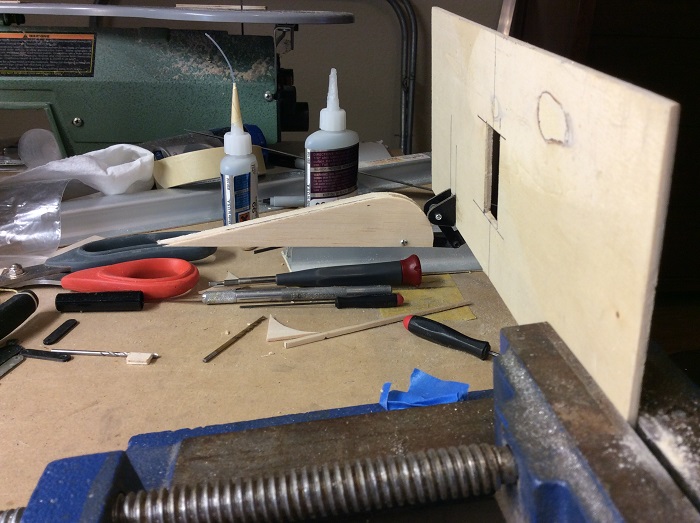
So I'm doing the flap and aileron a little different then you normally would. Instead of framing it up and sheeting it, then gluing the solid balsa block and then shaping and sanding...sanding...sanding I am trying the Pink Panther foam from HD. I can get a 4'x4'x 1" piece for $10. The pink is solid, light, and sand so much easier then solid balsa block. It finishes out very smooth too.
I cut the main shape on the table saw then glued a couple pieces together to finish it out. I glued it all to the 1/8" balsa bottom sheet to give it the profile and some rigidity.
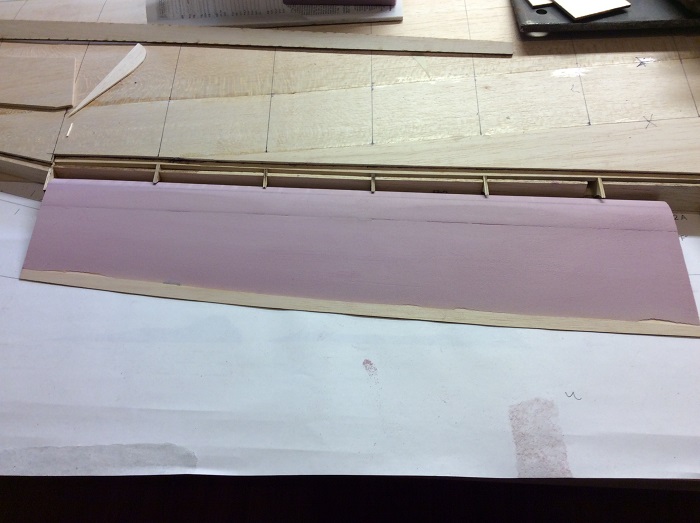
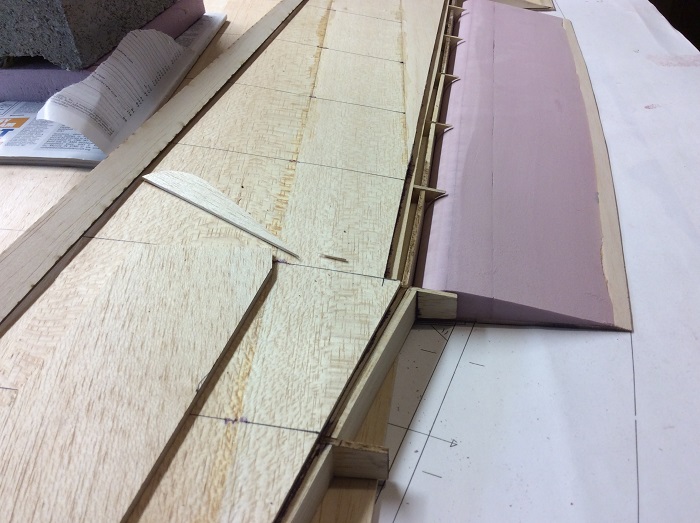
I little fine tuning and some filler to fill in any low spots.
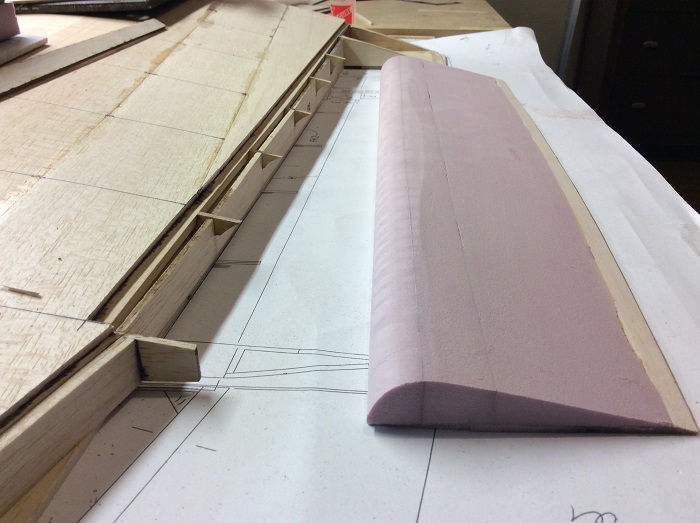
This is very light and took a fraction of the time then if I were to frame it up traditionally.

The bottom is 1/8" balsa.
This was a test (prototype) and the results are very good so I will do the aileron like this next.
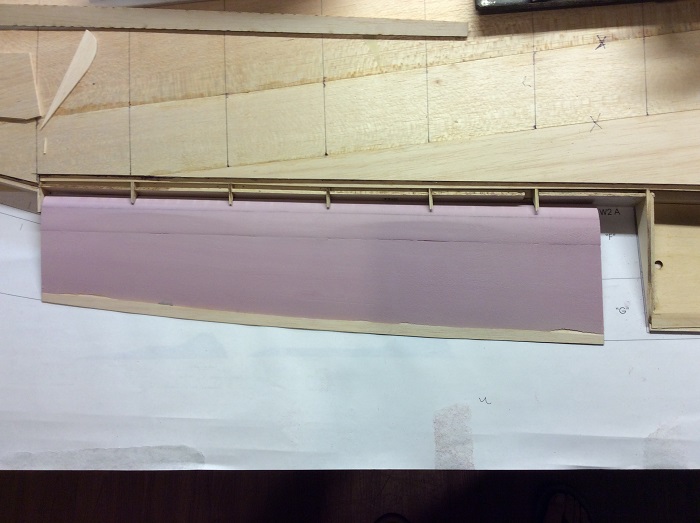
I will do the TE now that the flap is shaped.
TB
Sheeting is done, as much as I want until I work on the flap and aileron.
I put an additional row of balsa so I could hold back the wing skin from the TE of the flap and aileron. I will finish those out with the flap and aileron, G-10 for the TE.
So I'm doing the flap and aileron a little different then you normally would. Instead of framing it up and sheeting it, then gluing the solid balsa block and then shaping and sanding...sanding...sanding I am trying the Pink Panther foam from HD. I can get a 4'x4'x 1" piece for $10. The pink is solid, light, and sand so much easier then solid balsa block. It finishes out very smooth too.
I cut the main shape on the table saw then glued a couple pieces together to finish it out. I glued it all to the 1/8" balsa bottom sheet to give it the profile and some rigidity.
I little fine tuning and some filler to fill in any low spots.
This is very light and took a fraction of the time then if I were to frame it up traditionally.
The bottom is 1/8" balsa.
This was a test (prototype) and the results are very good so I will do the aileron like this next.
I will do the TE now that the flap is shaped.
TB
04-10-2017, 02:41 PM
#34
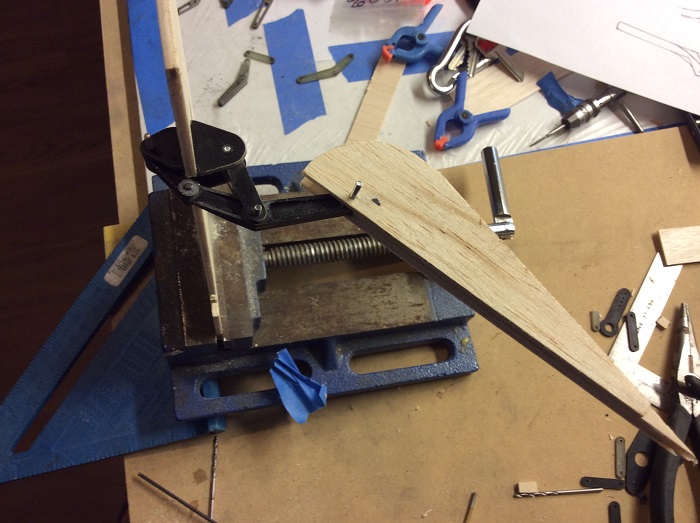
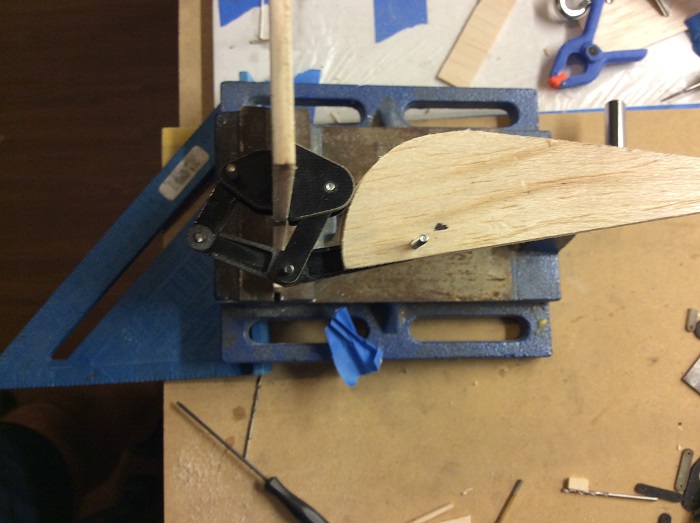
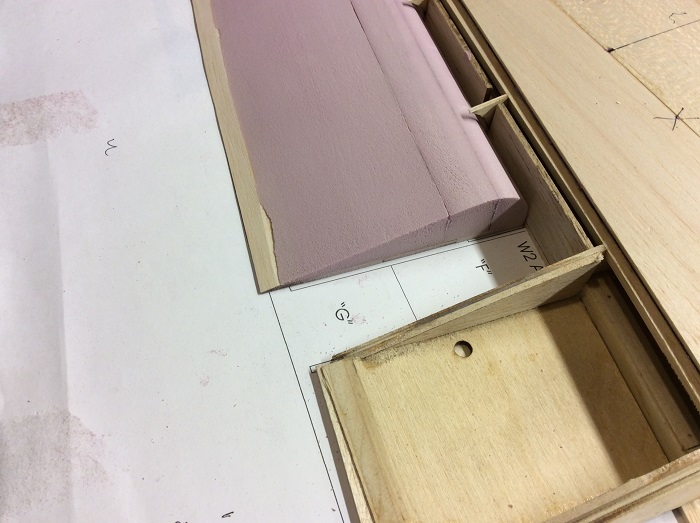
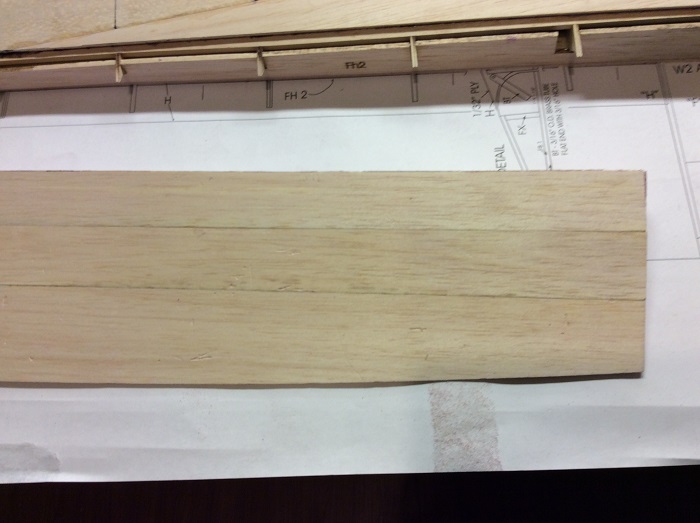
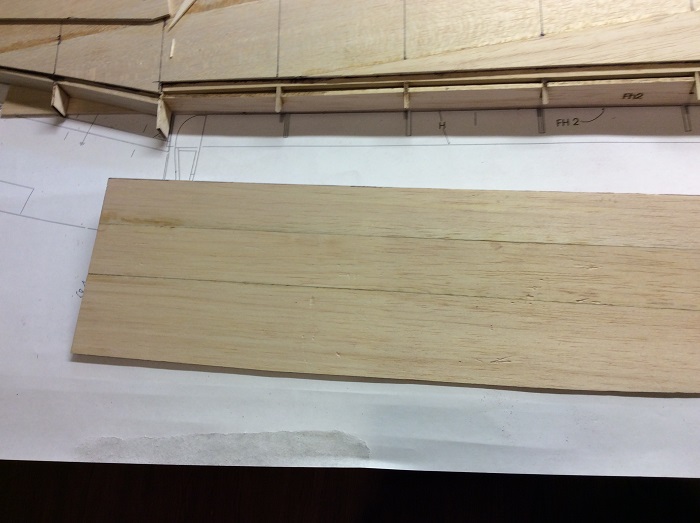
Got the aileron shaped today. This really goes quick, the foam sands very easy but has a very smooth finish. this is just a rough shape as I need to finish the TE so I don't over sand the surfaces.

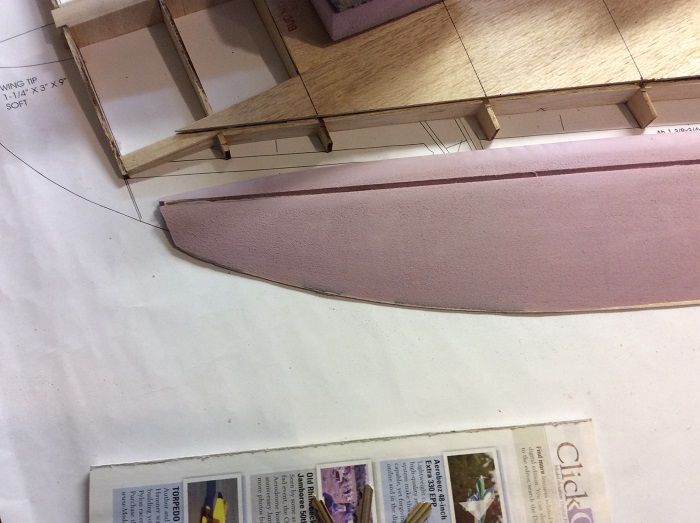
I need to cut the robs so I can fit the aileron in its place.
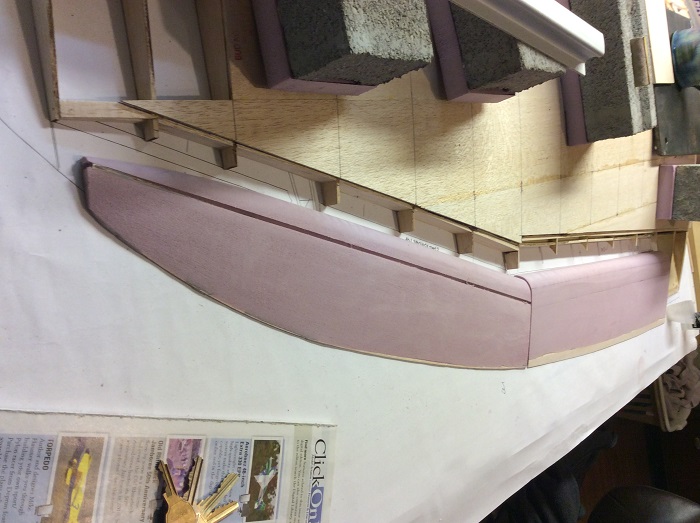

The line you see was my profile gauge. I will fill it with filler before I glass. That line is also were the stock kit aileron ends, you can see how much bigger the scale aileron is.

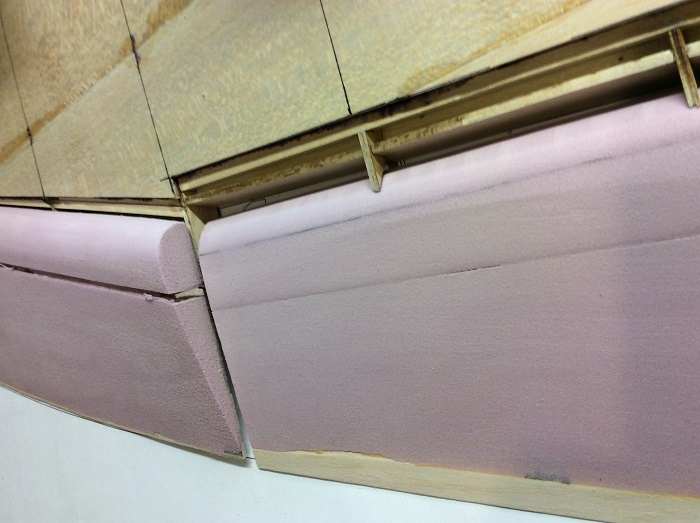
some fine tuning and they are ready to go
TB
I need to cut the robs so I can fit the aileron in its place.
The line you see was my profile gauge. I will fill it with filler before I glass. That line is also were the stock kit aileron ends, you can see how much bigger the scale aileron is.
some fine tuning and they are ready to go
TB
04-13-2017, 03:59 AM
#35
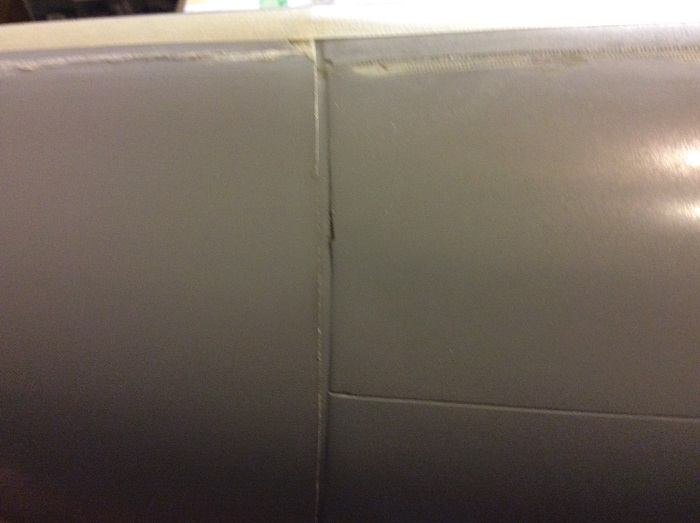
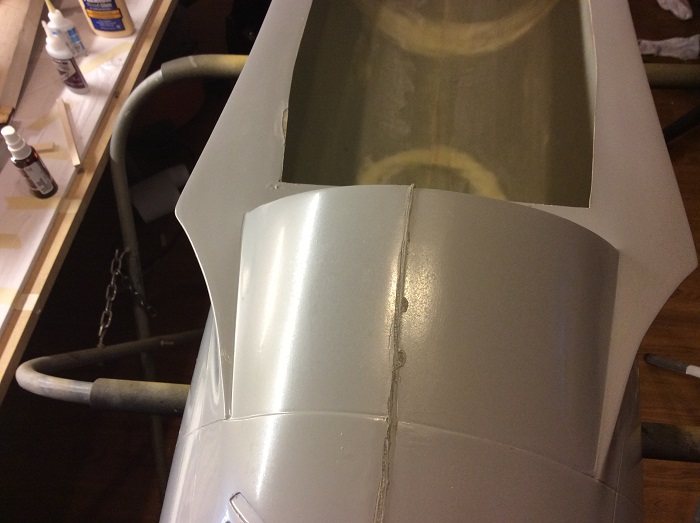
Getting a look at the fiberglass fuselage. Quality looks good with only a few minor defects. This will be a very good canvas to work from.
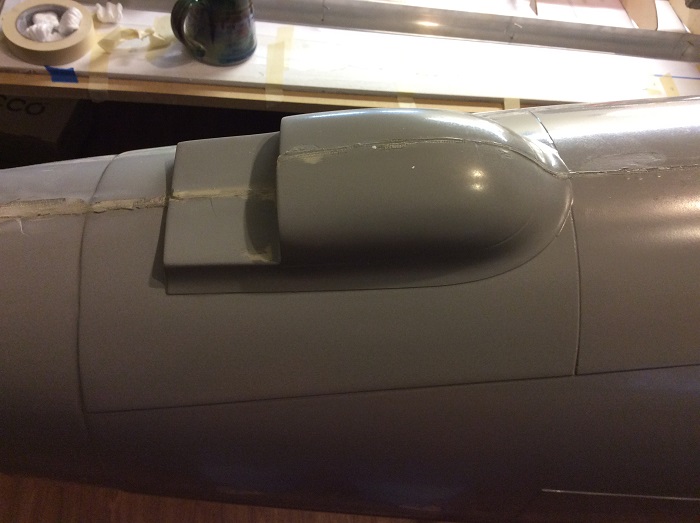
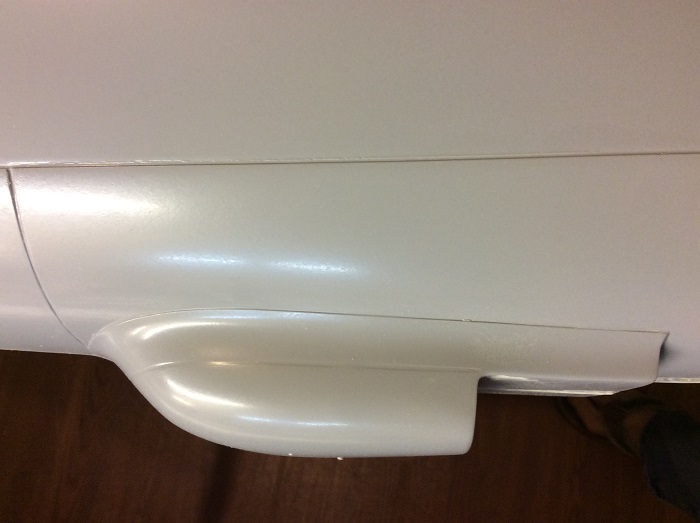
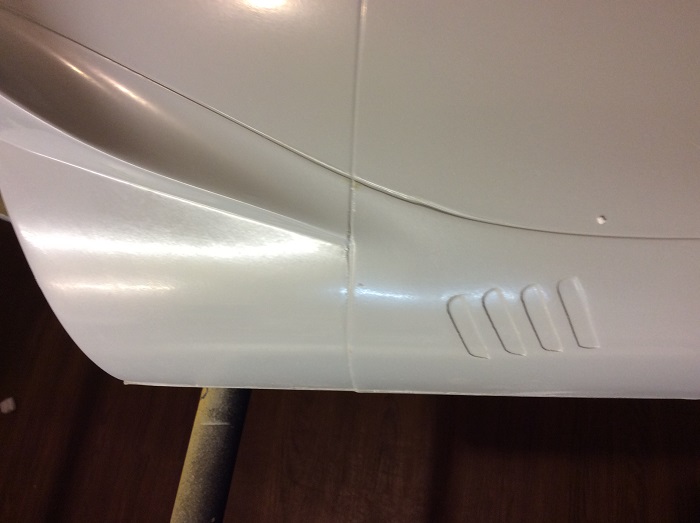
Belly pan looks good.
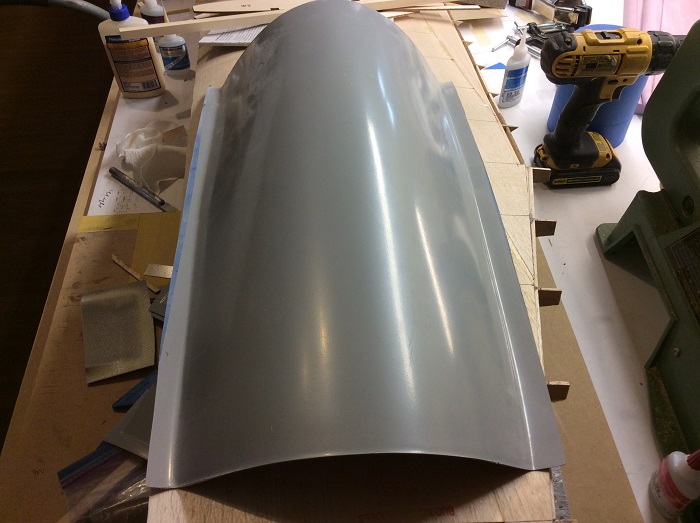
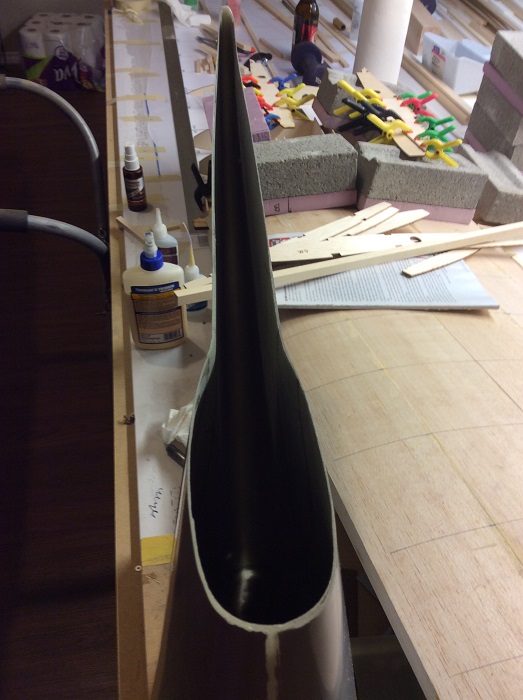
Fuselage is big!
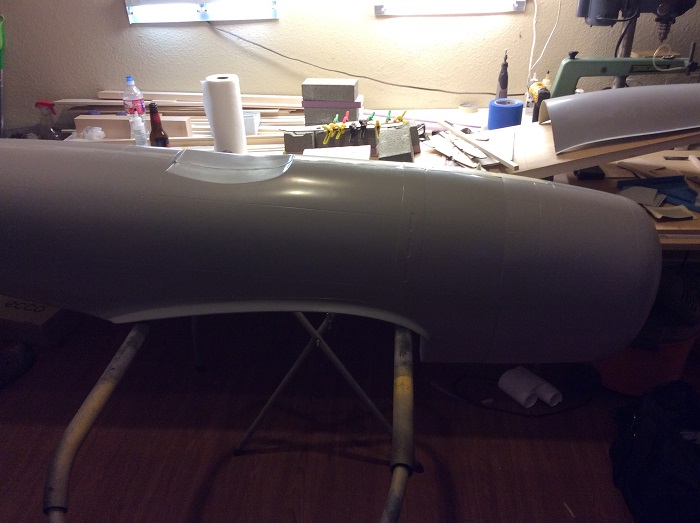
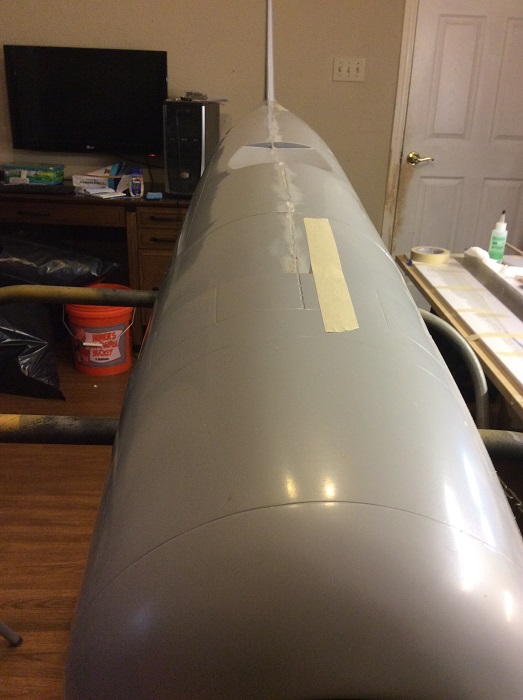
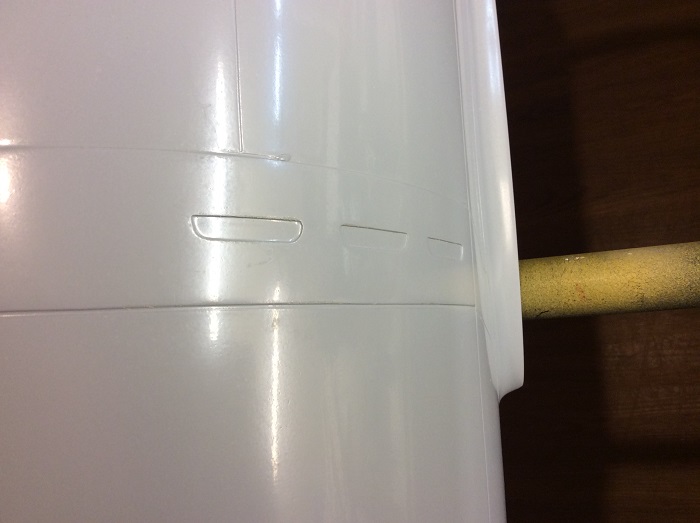
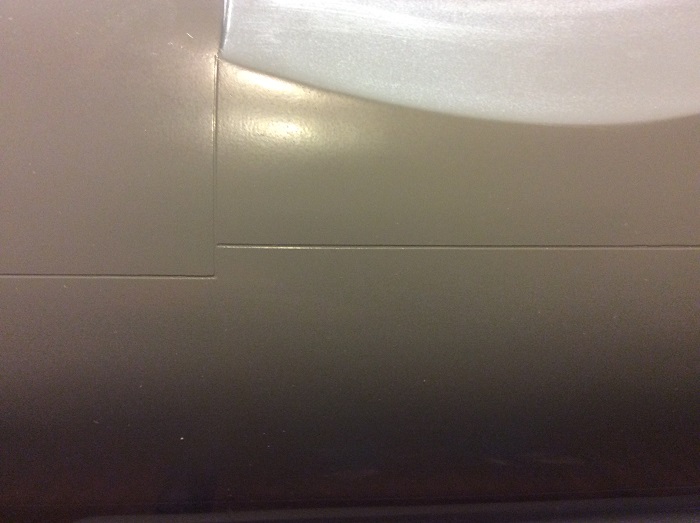
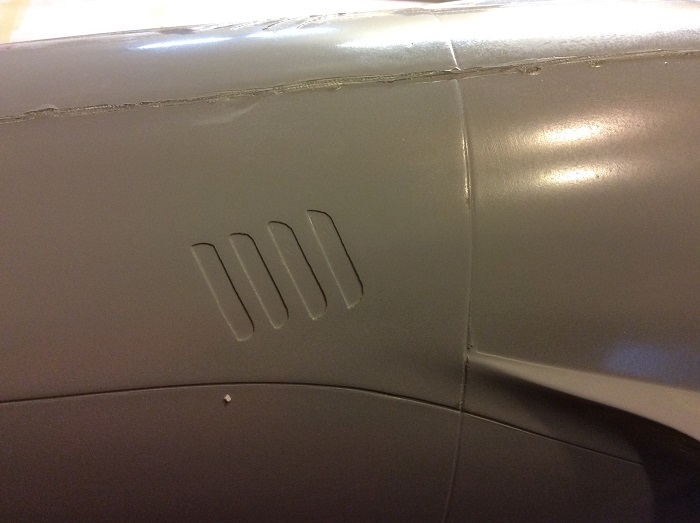
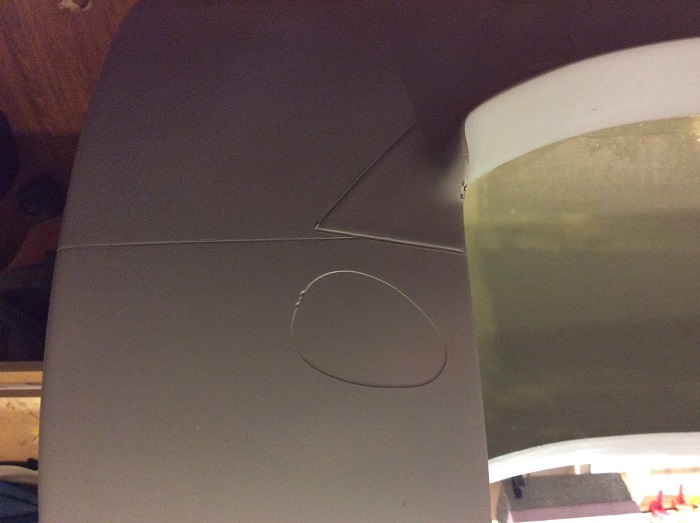
Panel lines look good.
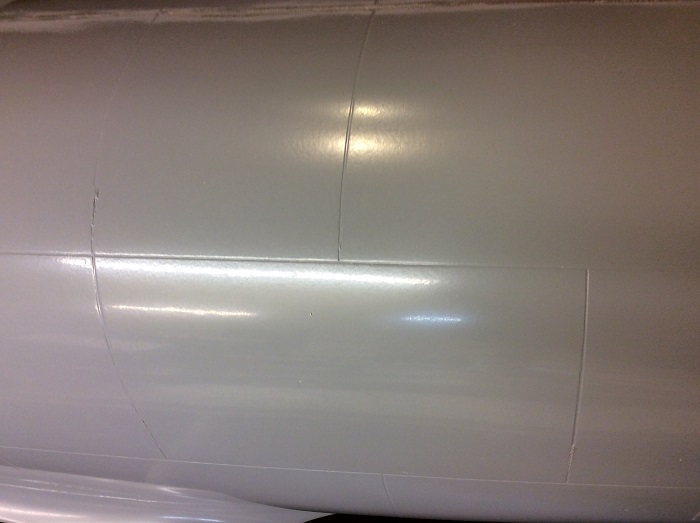

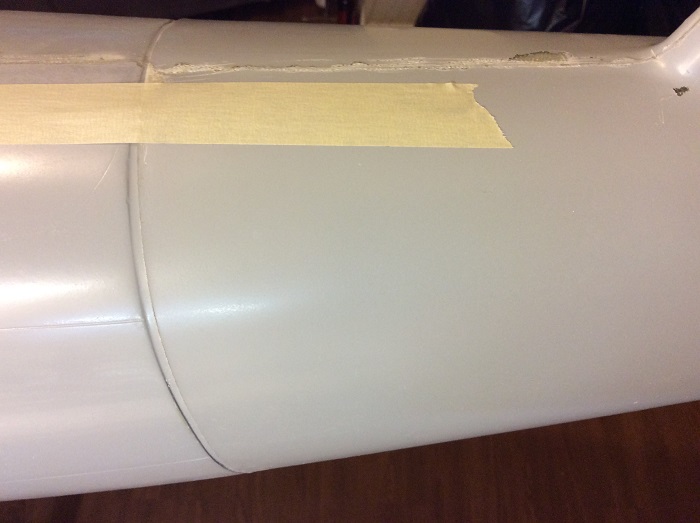
Seam joints will need a little work, nothing the evercote wont fix.
Detailing is nice and will save some time.
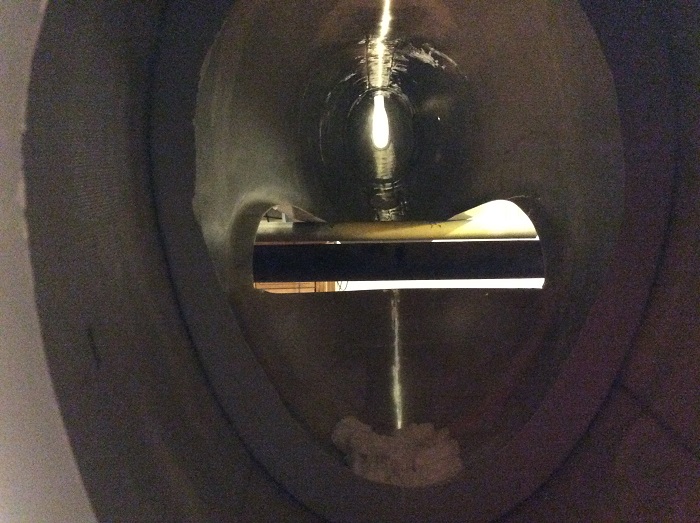
Inside.
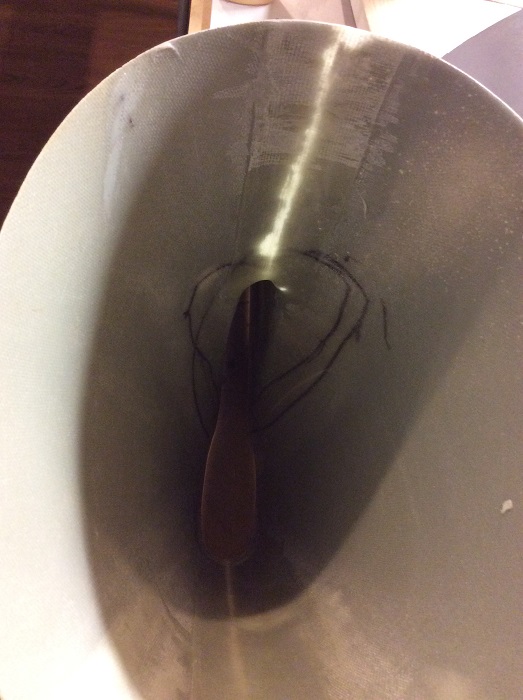
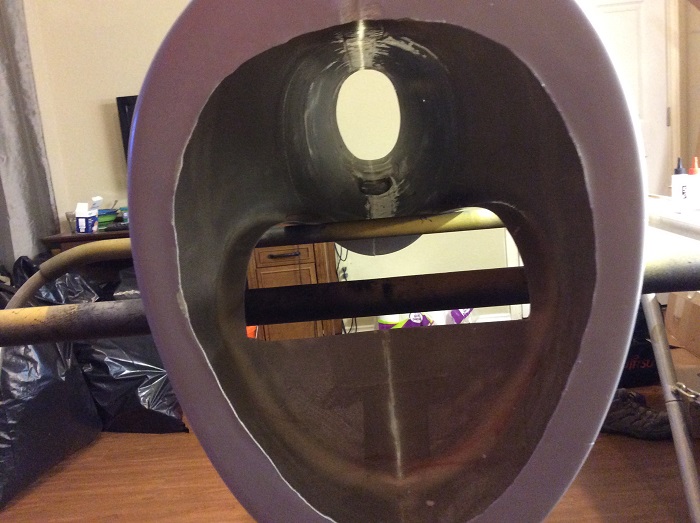
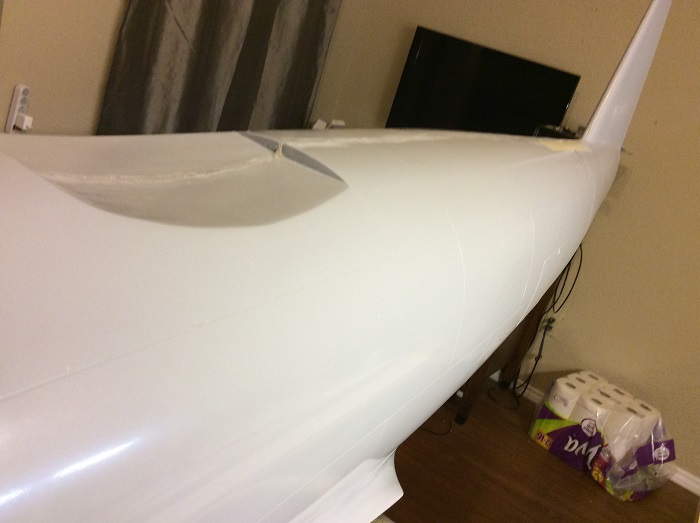
Tail section.
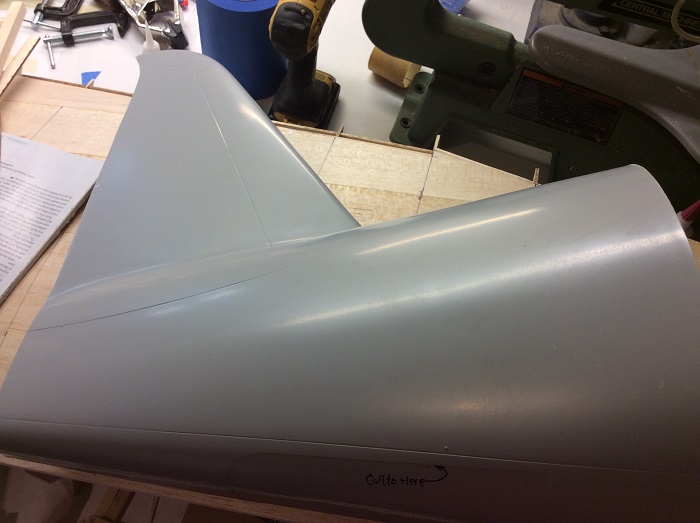
Nice!

Lighting is not to good, I will be improving that soon.
I'm very pleased with this fiberglass fuselage and this will move things along, time to get busy
TB
Belly pan looks good.
Fuselage is big!
Panel lines look good.
Seam joints will need a little work, nothing the evercote wont fix.
Detailing is nice and will save some time.
Inside.
Tail section.
Nice!
Lighting is not to good, I will be improving that soon.
I'm very pleased with this fiberglass fuselage and this will move things along, time to get busy
TB
04-14-2017, 10:44 PM
#36

Join Date: Mar 2017
Posts: 7
Likes: 0
Received 0 Likes
on
0 Posts
fuse looks great looking forward to see how it come out. I will post some pics of my TF arf p-47 when I finger out how to post them it will have saito 60 radial for power. what do thank of this engine for power?
04-22-2017, 12:23 PM
#44
So I had Chad cut me a new test set of fowler flap prototype at 150% of the original size. The last prototype was 130% and I felt it was to small so now I am tinkering with it.
The main arm is bigger and longer. It needed to be longer. The secondary arms, one in the center that goes from the main arm and attaches to the wing is a little longer so the hinge point is at the top of the wing.
[ATTACH]2210991[/IMG]
The second arm is the same length so no modification there.
[ATTACH]2210992[/IMG]
I did add a extension to the main arm at the end so I could attach the linkage without having to mount to the pivot and connection point of the inner link.
I am doing a different mount that will allow me to mount the hinge to the top of the wing inside the wing instead of at the face of the LE of the wing. This gives me an easier install and puts the pivot point closer to the top of the wing.
[ATTACH]2210993[/IMG]
I think this will work very well, now I can have Chad go into full production [ATTACH]2210994[/IMG]
[ATTACH]2210995[/IMG]
Video version.
TB
Last edited by TonyBuilder; 04-22-2017 at 12:35 PM.
04-29-2017, 12:25 PM
#45
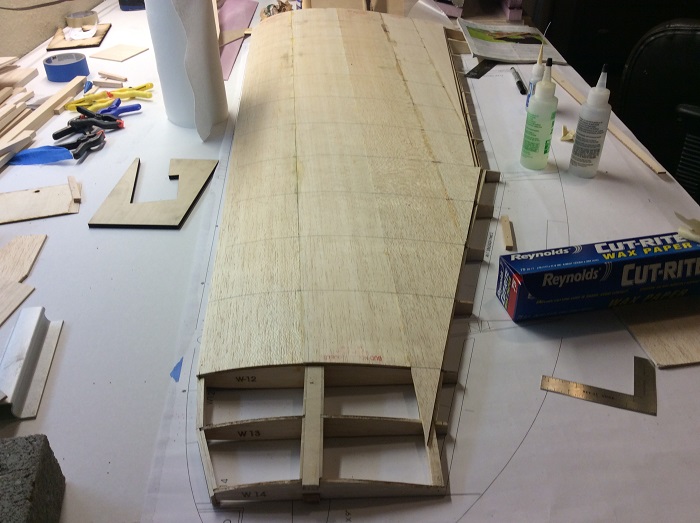
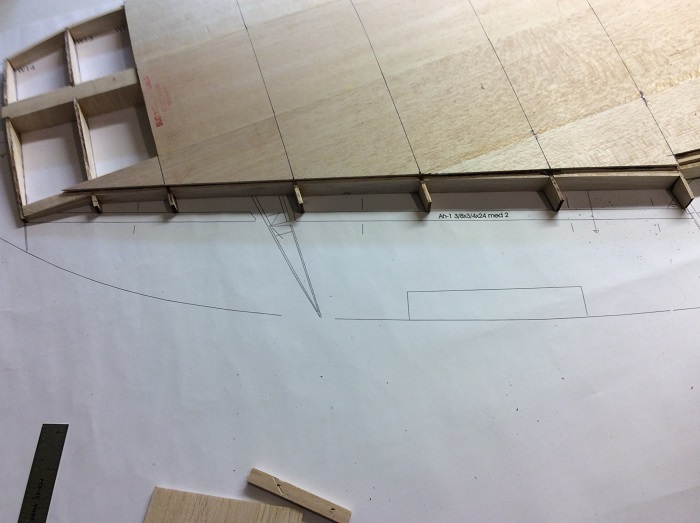
Been doing grunt work getting the right wing half to where the left wing half is, top is all sheeted.
Framing is completed.
[ATTACH]2212331[/IMG]
[ATTACH]2212332[/IMG]
As you can see i use a lot of blue tape. Helps to keep me from over sanding the soft balsa ribs.
[ATTACH]2212333[/IMG]
[ATTACH]2212334[/IMG]
[ATTACH]2212335[/IMG]
Makes for easy sanding.
[ATTACH]2212336[/IMG]
High spots are easily presented.
[ATTACH]2212337[/IMG]
Ready for the top skin.
[ATTACH]2212339[/IMG]
I don't like the center tongue, despite all my finagling it is still off center as to being level with the wing level. [ATTACH]2212341[/IMG]
I'm considering using two 3/8" aluminum dowels. I will look at that when I flip the wing over.
[ATTACH]2212343[/IMG]
[ATTACH]2212345[/IMG]
rear bolt plate is in on the right side, that will complete the top of the wing.
[ATTACH]2212347[/IMG]
[ATTACH]2212349[/IMG]
Once I do the aileron and flap I will be all caught up to the left wing, then a break from the wing as I will do the tail feathers next.
TB
04-29-2017, 12:25 PM
#46
Been doing grunt work getting the right wing half to where the left wing half is.
Framing is completed.
[ATTACH]2212338[/IMG]
[ATTACH]2212340[/IMG]
As you can see i use a lot of blue tape. Helps to keep me from over sanding the soft balsa ribs.
[ATTACH]2212342[/IMG]
[ATTACH]2212344[/IMG]
[ATTACH]2212346[/IMG]
Makes for easy sanding.
[ATTACH]2212348[/IMG]
High spots are easily presented.
[ATTACH]2212350[/IMG]
Ready for the top skin.
[ATTACH]2212351[/IMG]
I don't like the center tongue, despite all my finagling it is still off center as to being level with the wing level. [ATTACH]2212352[/IMG]
I'm considering using two 3/8" aluminum dowels. I will look at that when I flip the wing over.
[ATTACH]2212353[/IMG]
[ATTACH]2212354[/IMG]
rear bolt plate is in on the right side, that will complete the top of the wing.
[ATTACH]2212355[/IMG]
[ATTACH]2212356[/IMG]
Once I do the aileron and flap I will be all caught up to the left wing, then a break from the wing as I will do the tail feathers next.
TB
Last edited by TonyBuilder; 04-29-2017 at 12:33 PM.
05-04-2017, 03:18 PM
#47
Working on the elevator now.
[ATTACH]2213180[/IMG]
[ATTACH]2213181[/IMG]
Still have some shaping and sanding to do once I get them both done.
I wont sand the tip anymore until I get the tip of the stab shaped.
[ATTACH]2213182[/IMG]
[ATTACH]2213183[/IMG]
I will getting other side done now that I see this is working well.
[ATTACH]2213184[/IMG]
TB
05-05-2017, 03:53 AM
#48
Ok, confession time...the foam parts are just plugs as I will be doing them in composite layups, carbon fiber stab, elevator, rudder, ailerons and flaps.
I have considered making molds but I do not want to spend the $500+ setting up with vacuum pump and so on. I don't want to do the standard gel coat and arex foam core, that method is to soft for my liking.
I will do a surface layup over the plugs, top and bottom. Then add hinges and join them together. I do not want surface detailing as I am doing aluminum tape finish so I just need a smooth finish, I can achieve that!
I know this is not a conventional way of making compost parts but I think I can get what I want with this method. We will see.
I am not concerned about weight and I'm not doing this as a weight thing. I build heavy and I'm ok with that, I figure with all the detailing I will be at the 60lb range, not bad considering my TFGS P-47 was close to 40lb and flew (flies) great. Yes there is a price to pay for "heavy metal" but I can deal with that.
The composit parts are just another way to build and a new and exciting phase for me.
I will do one of the elevators as a test. Nothing to loos but a bit of foam.
TB
Last edited by TonyBuilder; 05-05-2017 at 05:31 AM.