


Dynaflite Spitfire 81". Plan built with mods!
 02-12-2017 | 07:28 PM
#1

Thread Starter

Joined: Apr 2005
Posts: 749
Likes: 0
Received 0 Likes
on
0 Posts
From: Federal Way WA
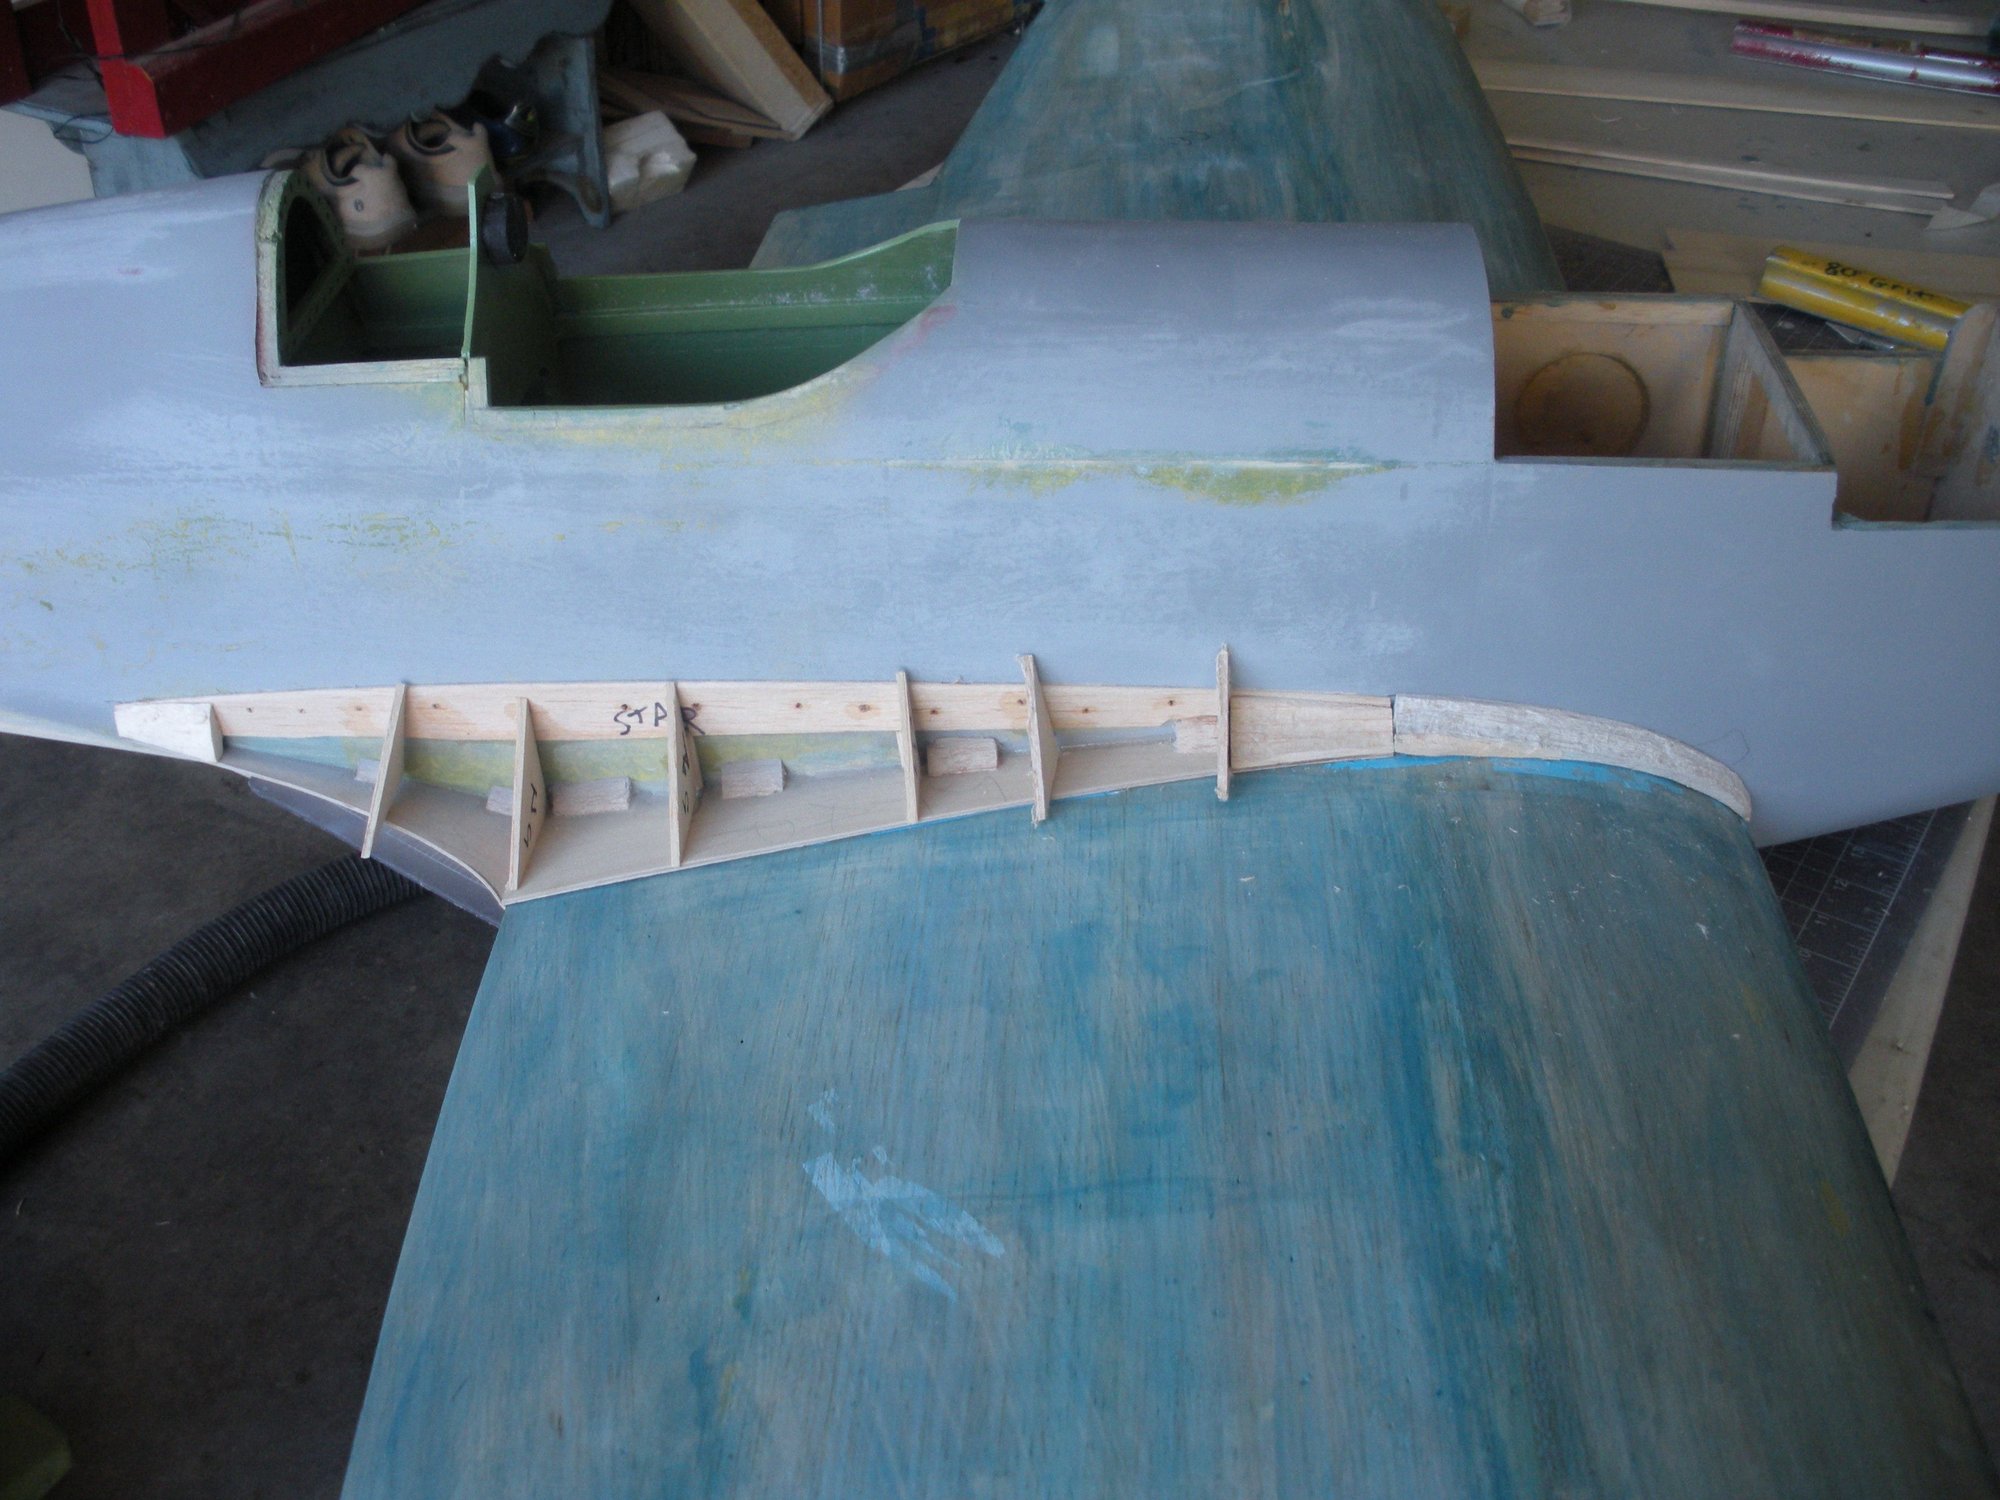
A couple of weeks ago I bought a set of plans for the Dynaflite Spitfire at a local RC show/swap meet.Ironically, I had bought one of these kits in the early '90's but then moved overseas before starting it. When I returned to the states in 2001 someone really wanted it so I sold it to him. Now in 2017 it looks like I may actually build one. Since I am building from the plans it is easy to make some modifications and perhaps "upgrades" so I thought I might share them with you.
Let's start with the obvious!
I must add a wing fillet. It is so prominent on the Spitfire and helps hide the fact that the lower fuselage isn't quite the right shape.
Next, I will fully sheet the wing and also sheet the stabilizer and vertical fin. Since they will be sheeted, I can reduce the wood sizes for the structures to try and save a little of the weight I will be adding. The rudder and elevators will remain open and I have reconfigured the rib spacing to be more scale. Ended up just being one extra rib per surface. I also redrew the L.E. of the vert. fin to be more scale.
I will move the stabilizer forward to be more scale and so I can put the elevator linkage INSIDE the fuselage.
I will most likely move the tail wheel to the scale position
I will use 1/8" balsa for the rear half of the fuselage sides, rather than 1/8" lite-ply with holes cut out of it.
That's a good start for now, chime in if you would like to hear/see more!
J

 02-13-2017 | 07:25 AM
#3
Thread Starter
Joined: Apr 2005
Posts: 749
Likes: 0
Received 0 Likes
on
0 Posts
From: Federal Way WA
Dan, I am moving it forward only 5/8" so I think it should be OK.
Other mods.
Use 1" triangle instead of 3/4" for the bottom rear fuselage. I can carve more away to improve the fuse shape and 1" is what I have on hand.
I want to make a MK.I version so I am going to shorten the nose 1-1/4"
I will make both the top and the bottom cowl areas removable.
Going to put in retracts the retract outwards.
I am going to have to decide soon if I want to add flaps.
I have the wing ribs cut out and all the parts for the tail cut out, so all I have to do is cut out the fuselage formers and sides and my "kit" will be done.
J
02-14-2017 | 10:05 AM
#5
Thread Starter
Joined: Apr 2005
Posts: 749
Likes: 0
Received 0 Likes
on
0 Posts
From: Federal Way WA
That looks very nice! Nice job on the retracts. I am waiting for my retracts to arrive so I can figure out which route I want to go. I also just ordered a spinner, canopy and exhaust set from D.B. Scale and Sport in England. With the weak Pound it came out to be a pretty good deal. One caveat is the spinner diameter is about 4-3/4", which is bigger than the 4" spinner shown on the plans. No worries though, I think it will look fine and perhaps 4" is a bit on the small side.
J
J
02-14-2017 | 01:22 PM
#6

ccostant, do you have any video, or even description of the flying of your Spit? I would love to hear about it, and possibly get more guys building these and sharing pics and info.
Jtisch, can't wait to see your build come along.. This will be fun to watch.
Jtisch, can't wait to see your build come along.. This will be fun to watch.
02-14-2017 | 06:41 PM
#7
My Feedback: (38)
Unfortunately I don't have any video but I can say it's a great flyer. It really doesn't have any bad habits. I always hear guys say they're afraid that Spits won't track straight on take off with the narrow gear. Well this one tracks straight. I've seen a few YA spits fly and they track straight as well. If you're looking for an every weekend warbird then this would be a good one.
A few more pics.


A few more pics.
Last edited by ccostant; 02-14-2017 at 08:11 PM.
02-15-2017 | 02:56 PM
#8
Thread Starter
Joined: Apr 2005
Posts: 749
Likes: 0
Received 0 Likes
on
0 Posts
From: Federal Way WA
ccostant, for your retracts, did you move the spar location? I also like how you hid the aileron servos in the wing . I don't like looking at half the servo sticking out of the wing. Again, very nice.
J
J
02-15-2017 | 03:43 PM
#9
My Feedback: (38)
Yes I did modify the bottom spar to gain clearance for the wheel well. Originally the retracts were ahead of the spar but when I refurb'd the plane I decided to move them to a more scale position.


Of course the down side is I needed to add some weight to nose to balance it. I don't recall how much but it wasn't that much.
Of course the down side is I needed to add some weight to nose to balance it. I don't recall how much but it wasn't that much.
Last edited by ccostant; 02-15-2017 at 03:49 PM.
02-17-2017 | 08:13 AM
#10
Thread Starter
Joined: Apr 2005
Posts: 749
Likes: 0
Received 0 Likes
on
0 Posts
From: Federal Way WA
Thanks for the pics. I think I might borrow (steal?) your idea.
Can anyone tell me how wide the under wing radiator is? It's not shown on the plans.
J
Can anyone tell me how wide the under wing radiator is? It's not shown on the plans.
J
Last edited by jtisch; 02-17-2017 at 11:16 AM.
02-17-2017 | 11:23 AM
#11
Thread Starter
Joined: Apr 2005
Posts: 749
Likes: 0
Received 0 Likes
on
0 Posts
From: Federal Way WA
Since my spinner is bigger than the 4" one shown on the plans, I have decided to widen the fuselage 1/2". I also am going to make the fuselage formers( the ones between the fuselage sides) square and then make the top fuselage and turtle-deck formers seperately. Hope this makes sense. I may have to wait until my canopy arrives before I can cut the top formers, but other than that my "kit" is just about done. When I get my goodies in the mail I will post some pics of them and the cut out parts.
J
J
02-19-2017 | 12:28 PM
#12
Thread Starter
Joined: Apr 2005
Posts: 749
Likes: 0
Received 0 Likes
on
0 Posts
From: Federal Way WA
Well, all the parts that can be cut out at this time are cut out. I was surprised to find that wire elevator joiners with a horn on them in the middle no longer seem to be available. No worries, I'll make one. I will also take some time now work out how I want to do the tail wheel set-up. Since I will have both the elevator and tail wheel linkages on the inside, I will make an access hatch on the side of the fuselage.
J
J
Last edited by jtisch; 02-19-2017 at 02:34 PM.
03-05-2017 | 10:19 AM
#15
Thread Starter
Joined: Apr 2005
Posts: 749
Likes: 0
Received 0 Likes
on
0 Posts
From: Federal Way WA
I finally got a beat up,wet and opened package from the U.K. Luckily my spinner and canopy were OK. In the meantime I built the stab, elevator, fin and rudder, plus the radiator.
J
J
Last edited by jtisch; 03-05-2017 at 10:20 AM. Reason: spelling
03-05-2017 | 01:30 PM
#16
Thread Starter
Joined: Apr 2005
Posts: 749
Likes: 0
Received 0 Likes
on
0 Posts
From: Federal Way WA
After examining the canopy, I have decided it will work, but I am going to go back to the original fuselage width. I will also have to redraw the upper turtledeck formers and front top formers, which I was planning on doing anyway.
For those of you with retracts, what is your strut length? I want to do the drafting work on the plans even though my retracts haven't shown up yet. the plans say 5-3/4" to 6".
J
For those of you with retracts, what is your strut length? I want to do the drafting work on the plans even though my retracts haven't shown up yet. the plans say 5-3/4" to 6".
J
03-17-2017 | 01:54 PM
#18
Thread Starter
Joined: Apr 2005
Posts: 749
Likes: 0
Received 0 Likes
on
0 Posts
From: Federal Way WA
I received my retracts from Hobby King. Thank goodness I have a lathe as it will take a bit of work to make these work. Been a bit busy so progress is slow for now, but I see a light opening at the end of the tunnel.
J
J
 05-18-2024 | 04:11 PM
#22
Junior Member
Joined: May 2024
Posts: 5
Likes: 0
Received 0 Likes
on
0 Posts
I just got this kit and searching for any and all info I can arm myself with. If you or anyone on this thread has any pointers or knows any active threads on the Spitfire I would appreciate you passing it along..
05-28-2024 | 01:41 AM
#23
Unfortunately I don't have any video but I can say it's a great flyer. It really doesn't have any bad habits. I always hear guys say they're afraid that Spits won't track straight on take off with the narrow gear. Well this one tracks straight. I've seen a few YA spits fly and they track straight as well. If you're looking for an every weekend warbird then this would be a good one.
A few more pics.
A few more pics.
That is a beautiful looking spit! Have you done other "major" modifications than the wing fillets and retracts?


