


FokkeRC 1/5 Spitfire MKIX build log


 06-01-2021, 05:04 AM
#129

Thread Starter

Thanks guys, it�s still very much in the rough sanding stage, I�m looking forward to finishing up the the underside of the leading edge and seeing it really take shape. Though I almost completely forgot about my wing tip nav lights. I can still install them but I began to get ahead of myself. Everything is always easier to do prior to skinning(obviously). A good friend of my gave me a very good piece of advice a while back that when building always be thinking 2/3 sometimes 4/5 steps ahead of where your at.(much like flying!).
12-18-2021, 10:10 AM
#131
Thread Starter
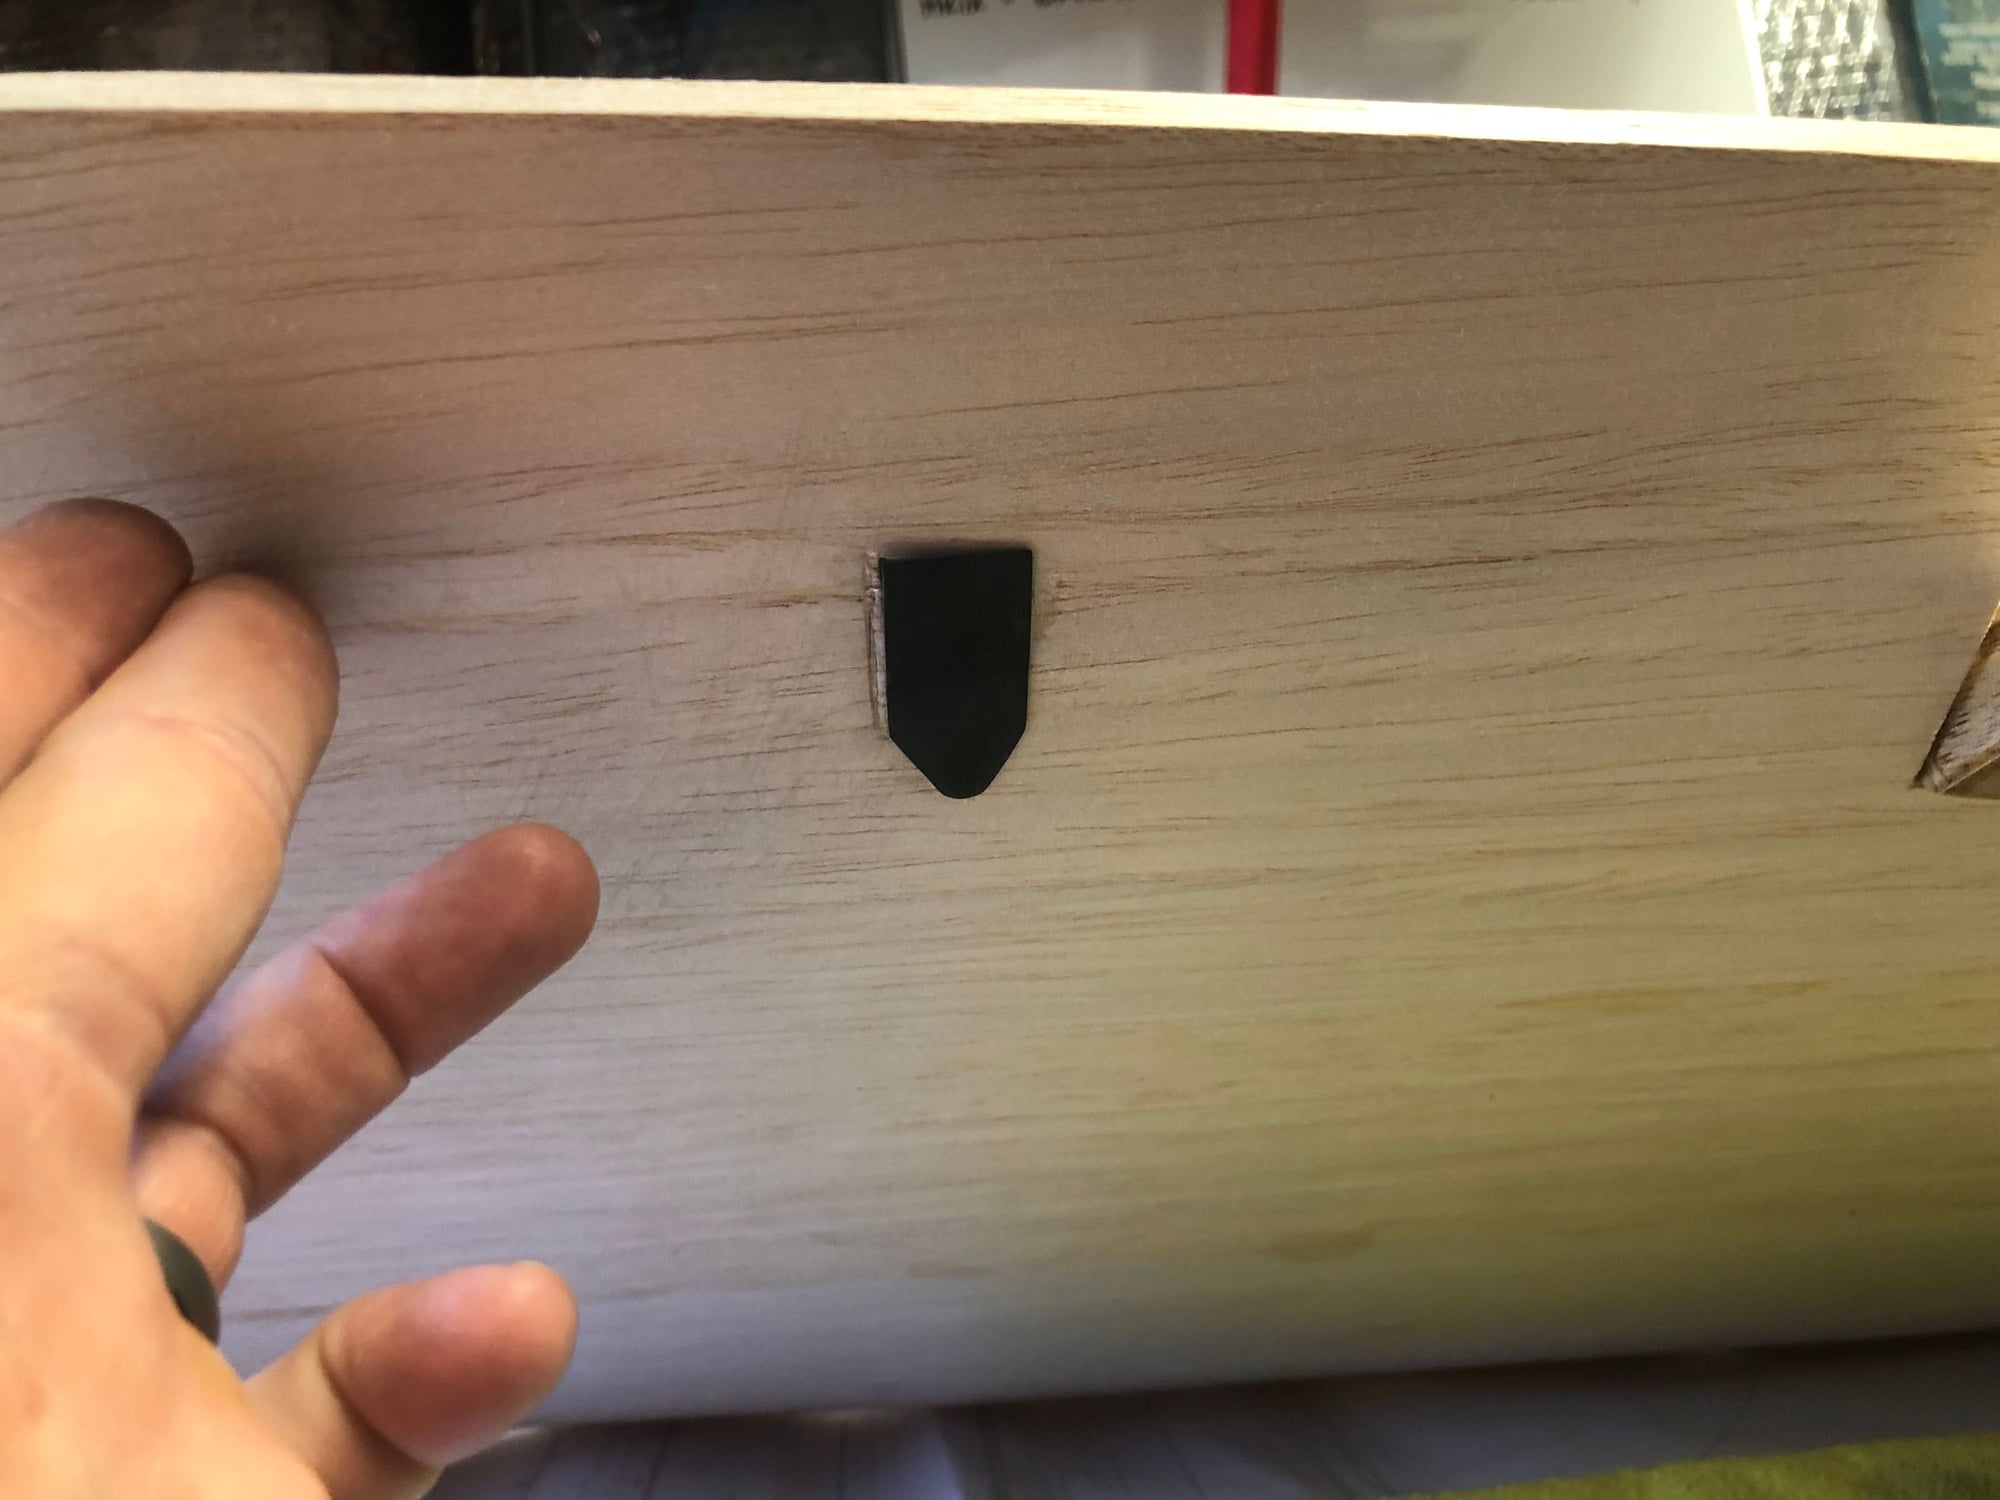
Well after a 4 month break finally getting back to my spitfire. I�m finishing up fliteskinning the underside of the right wing half, also built a spring return for the flap actuator door so it�ll return to closed when flaps are raised. Hoping to get going on the left half this week. It�ll be really good to get rolling with this build again.
 12-18-2021, 12:31 PM
#133
Thread Starter
12-18-2021, 01:21 PM
#135
Thread Starter
12-21-2021, 05:56 AM
#136
Thread Starter
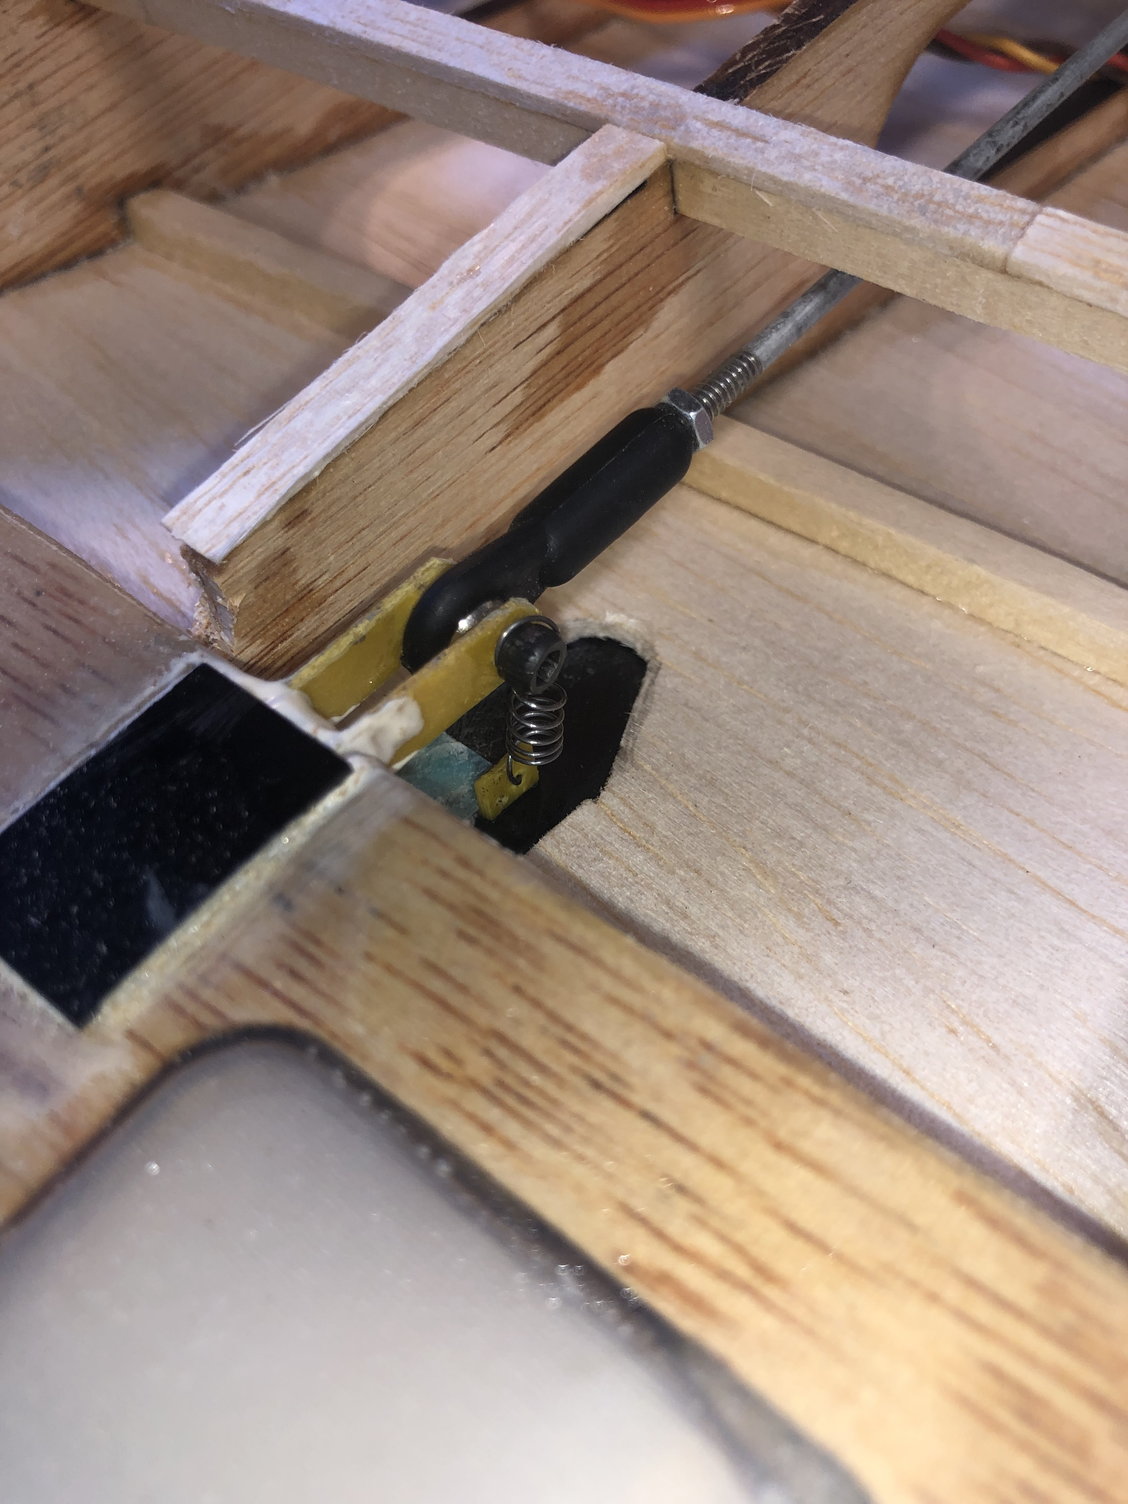
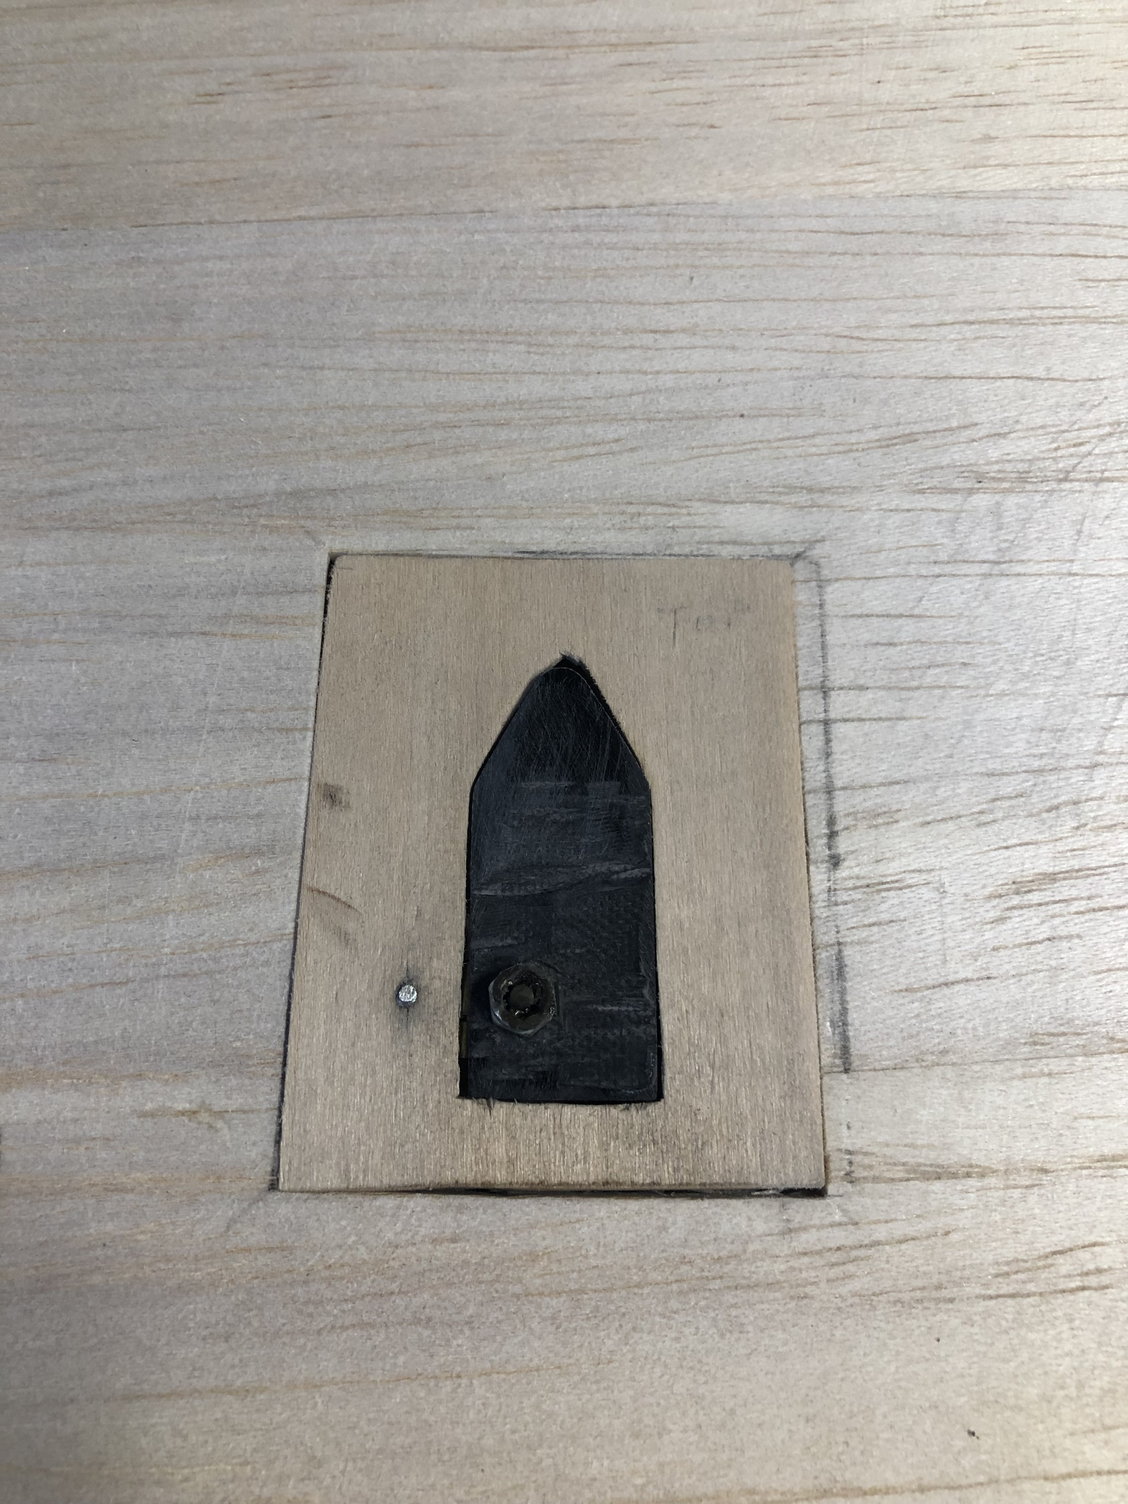
I revisited the flap and flap actuator door yesterday(I wasn�t happy with the current setup) Also, the trailing edge of the wing/flap wasn�t where I wanted it as the flap was still a bit thick. So I pulled the fliteskin and shaped it a bit more, will also be adding some ribbing then will re-apply fliteskin. I pulled the actuator door off completely and built a housing from bass wood that would hold the bolts and spring housing. Also soft joined the wings and mounted them to the fuse to mark and drilled the mounting plate.
12-21-2021, 07:48 PM
#137
Senior Member
Ok..so I gotta make sure I understand what ya did...
Your flap servo and linkage are under the door, for a hidden linkage to flap?
The spring loaded door does what...apparently I missed the original implementation and purpose somewhere...
Neverminds I understands now.
your control horns for your flaps need clearance to come up when the flap drops due to the thickness of the wing (?) So instead of just a hole, you did the door. See what happens when ya post and I ain't ready? Throw something next time
ok, seriously, that is very nice work. An excellent solution for the problem.
You're hired to build me a Zirolli P38
The fowler would be a nightmare for me.
Keep it up and you get to do my mustang too..and the wife's piper...man..I could just sit, watch, and drink whiskey...
anybody else see a down side to that theory?
Your flap servo and linkage are under the door, for a hidden linkage to flap?
The spring loaded door does what...apparently I missed the original implementation and purpose somewhere...
Neverminds
I understands now.your control horns for your flaps need clearance to come up when the flap drops due to the thickness of the wing (?) So instead of just a hole, you did the door. See what happens when ya post and I ain't ready? Throw something next time
ok, seriously, that is very nice work. An excellent solution for the problem.
You're hired to build me a Zirolli P38
The fowler would be a nightmare for me.
Keep it up and you get to do my mustang too..and the wife's piper...man..I could just sit, watch, and drink whiskey...
anybody else see a down side to that theory?
Last edited by Txmustangflyer; 12-21-2021 at 08:01 PM.
12-21-2021, 08:10 PM
#138
Thread Starter
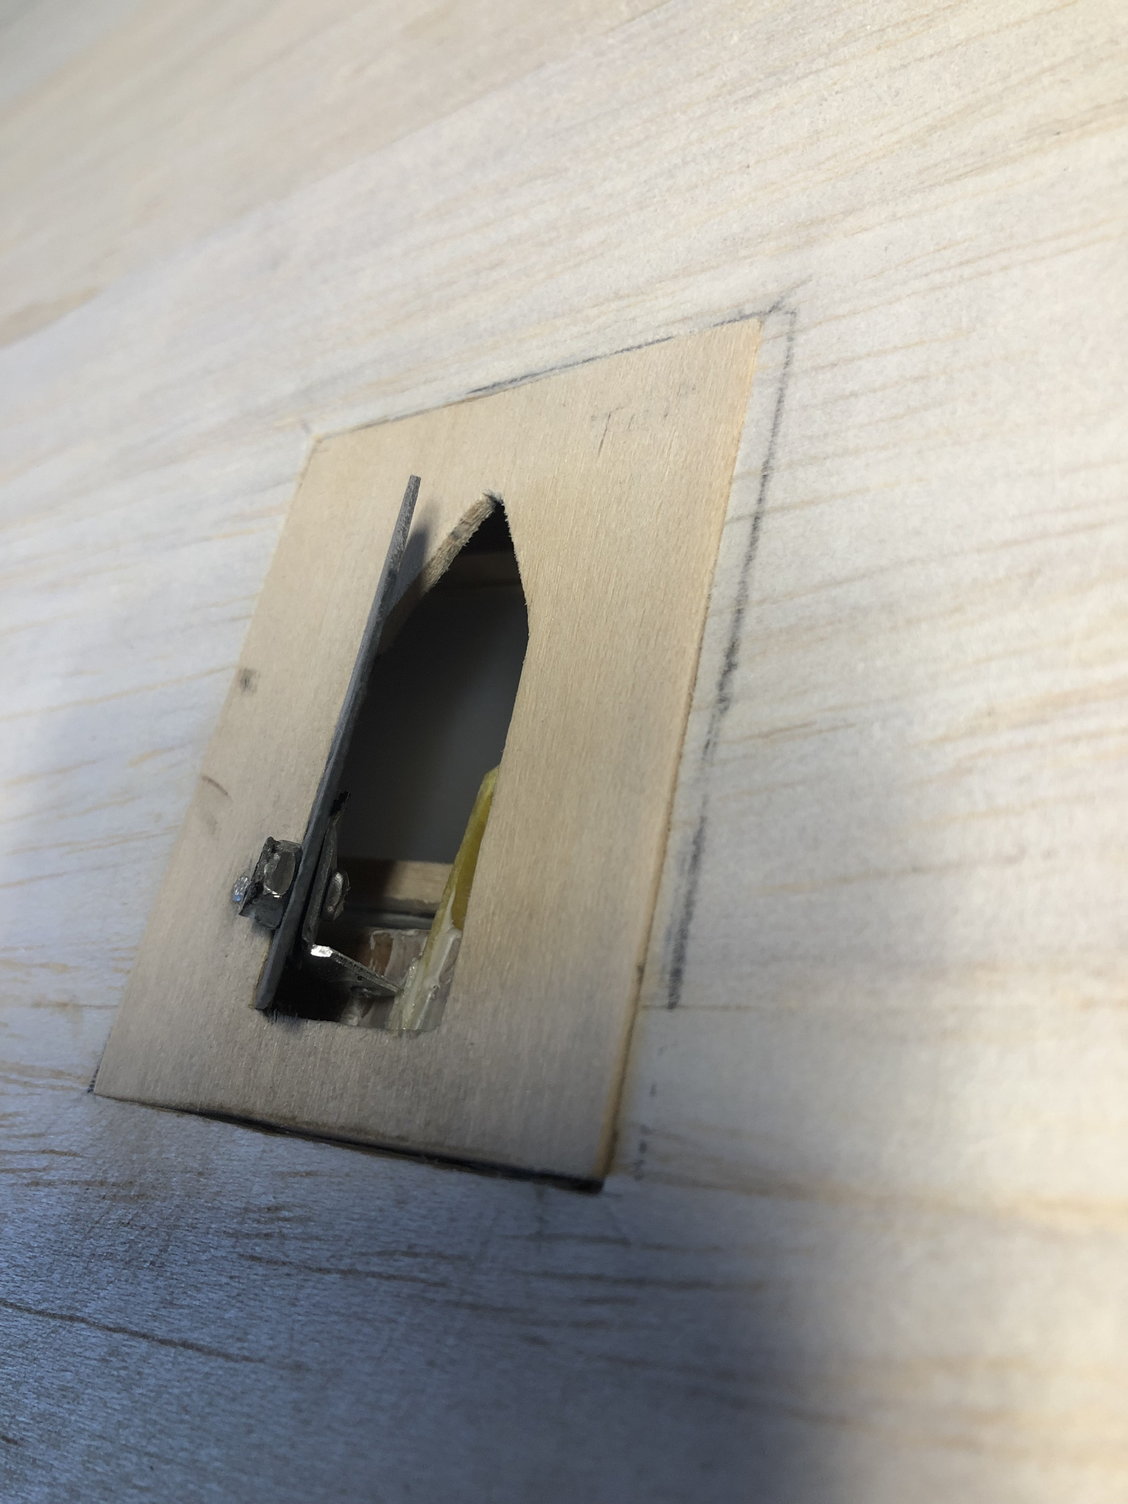
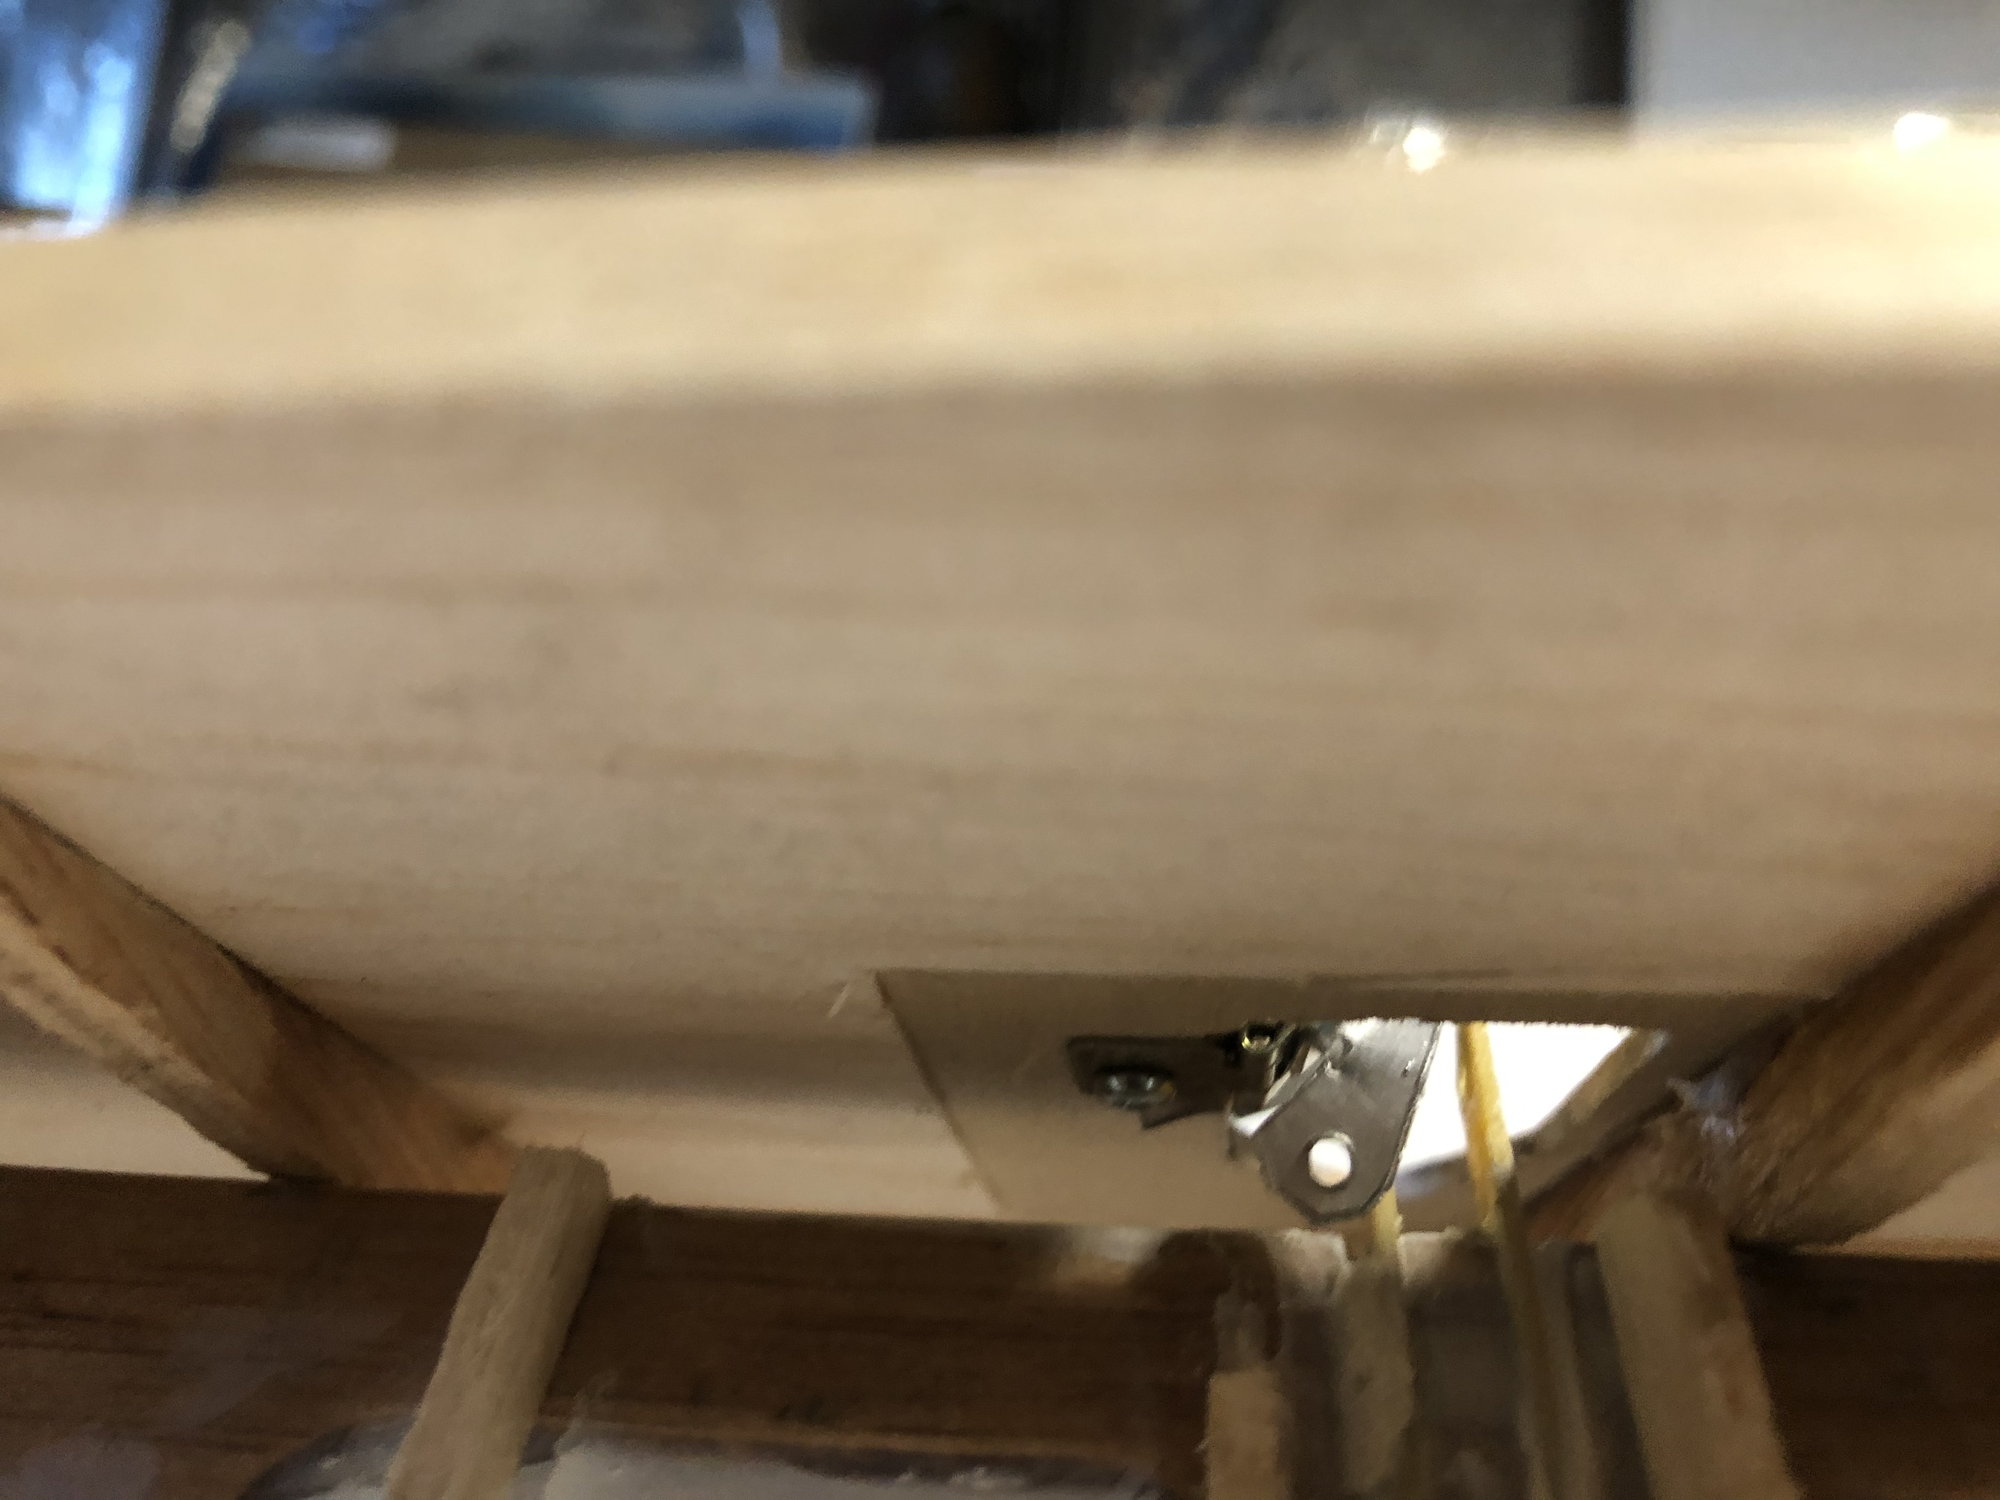
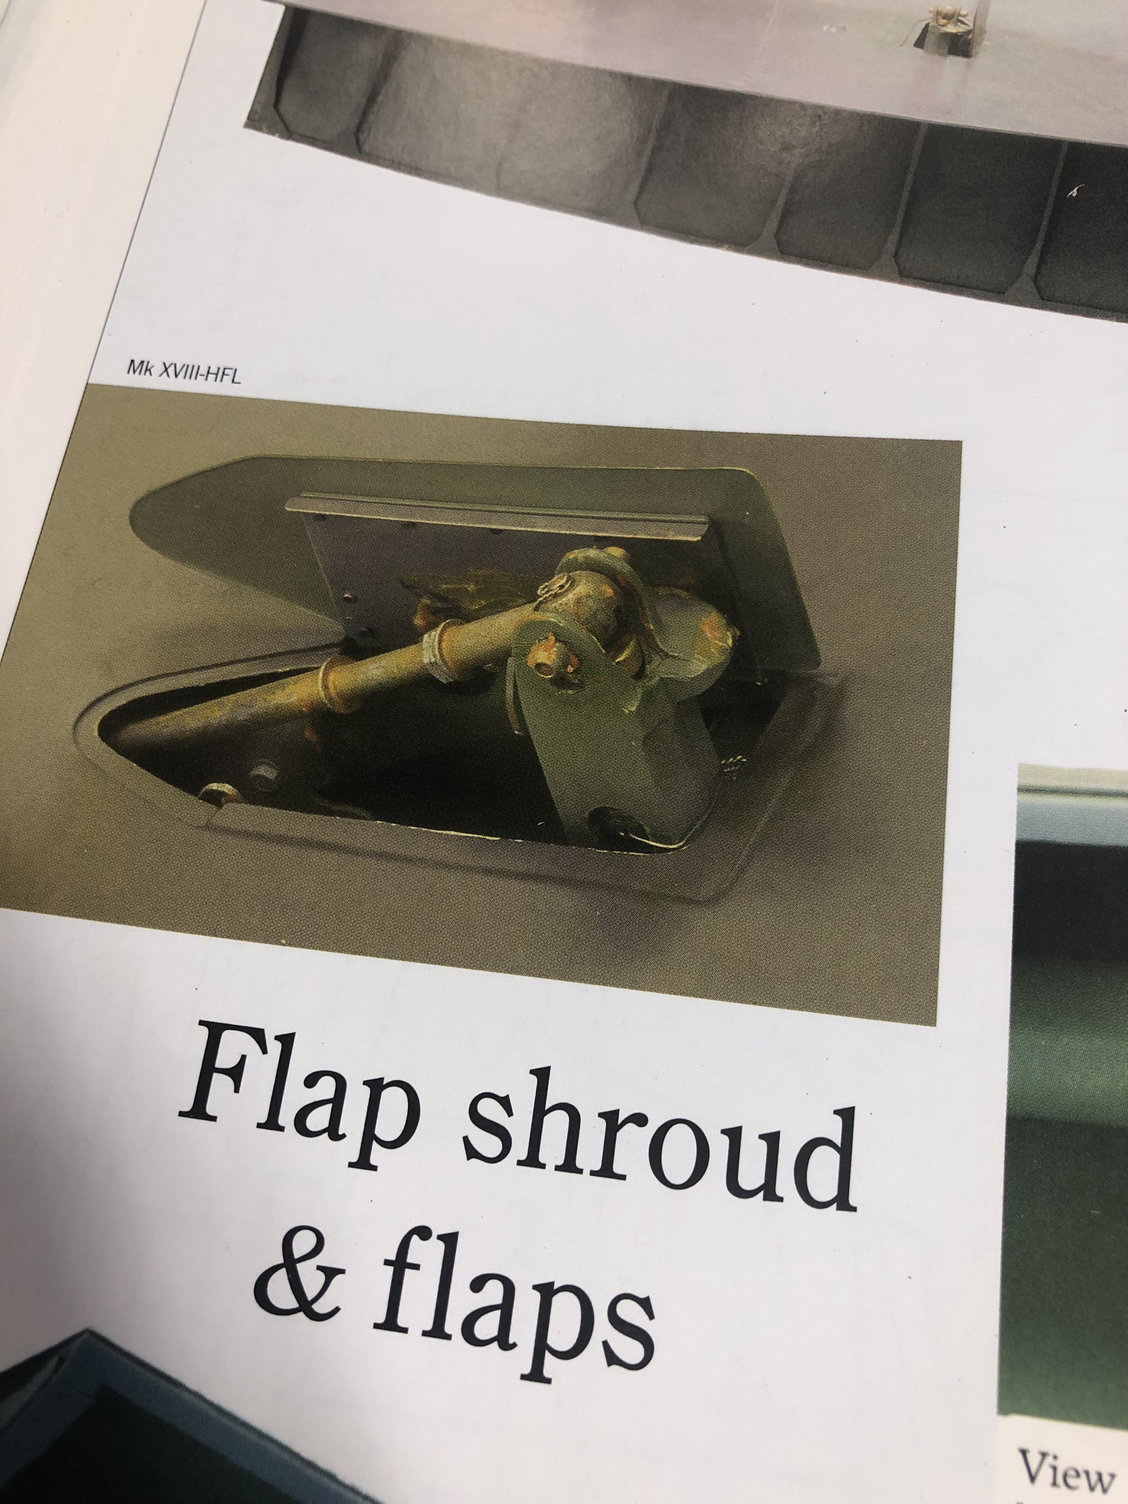
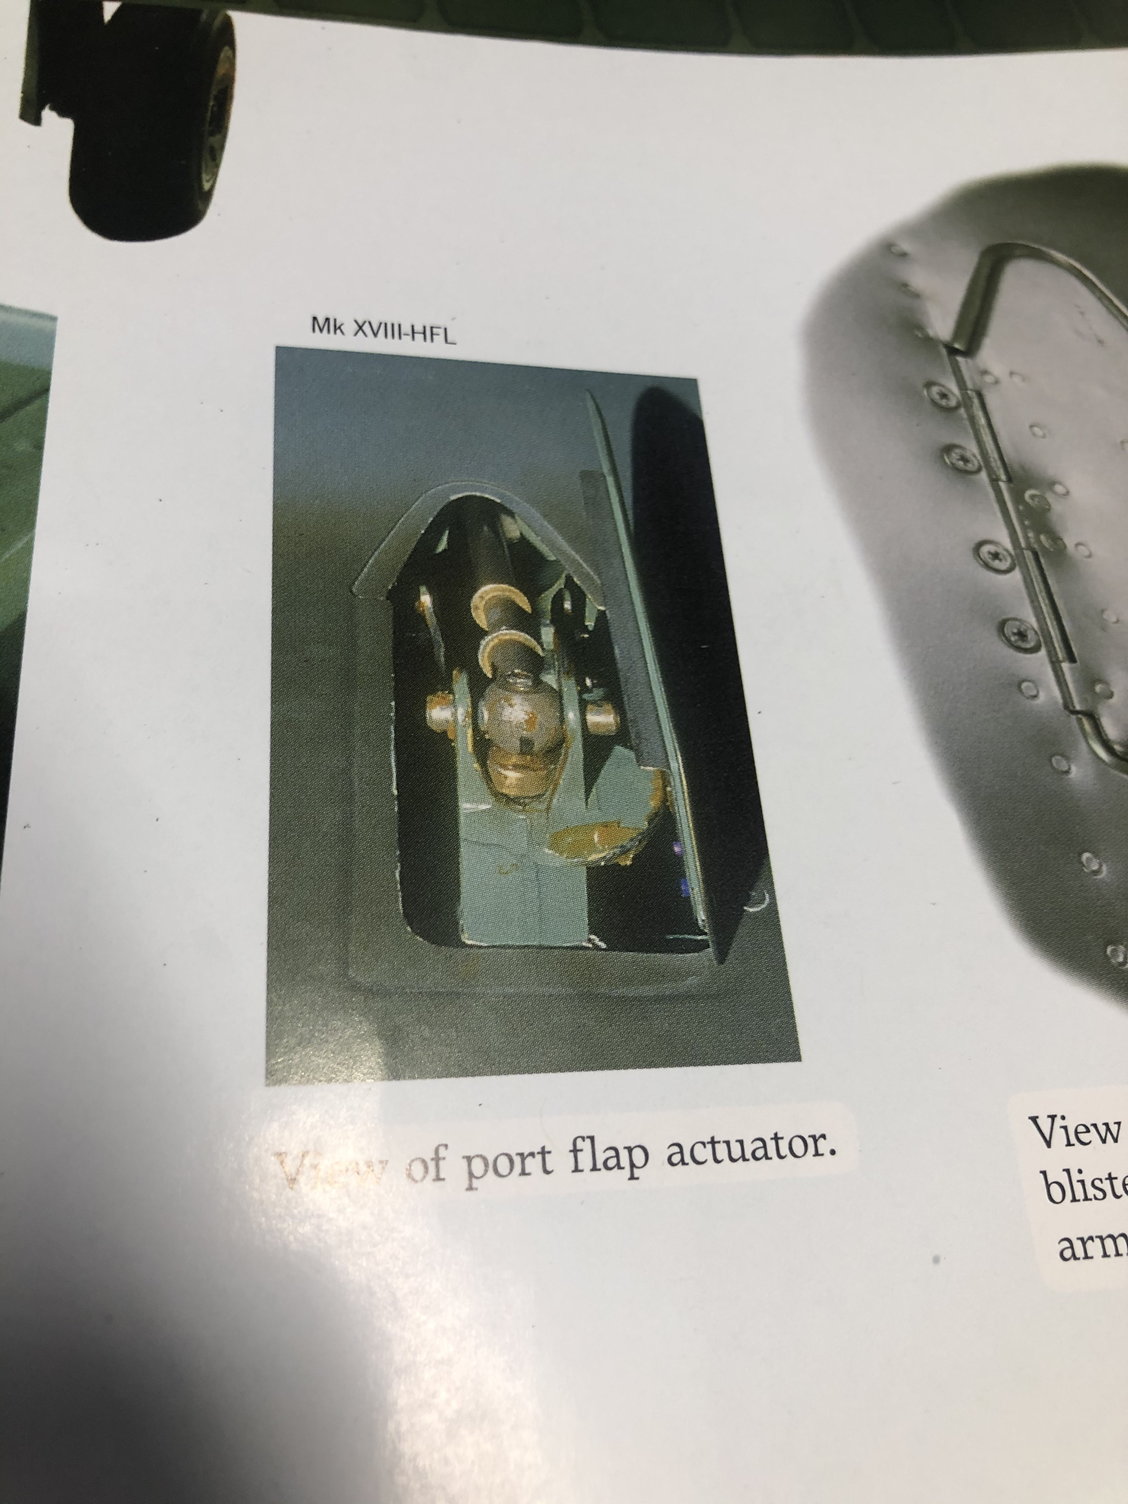
The servo and linkage are all internal. The mkix has a flap actuator door that allows room for the actuator to protrude through the upper surface of the wing when flaps are deployed. I set my linkage up as close as I could to full scale. So the servo linkage pushes the door open as flaps are deployed and then spring loaded closed. When I can get back at it and get the spring installed I�ll post some more photos. These are from Paul Monforton�s �Spitfire Engineered�
 12-21-2021, 08:16 PM
#139
Thread Starter
And Tex I just saw your whole post, for some reason it just gave me the first paragraph, you have the right idea! I�m still learning a ton as I go, but it�s great to be building again. I�ll try and get photos of the full mech this week.
12-21-2021, 08:35 PM
#140
Senior Member
Once I found where you originally did it, it became clear. I never knew the spitfire had that at full scale. From the pictures you posted of the real deal to yours I'd say you are spot on. Again, nice work..when do you want me to send the mustang? (joking)
(joking)
12-21-2021, 08:58 PM
#141
Thread Starter
Haha thank you for the kind words, again I�m learning a lot as I go, about the aircraft and building in general. And even more about space management in a fairly small shop.
01-08-2022, 06:03 AM
#144
Thread Starter
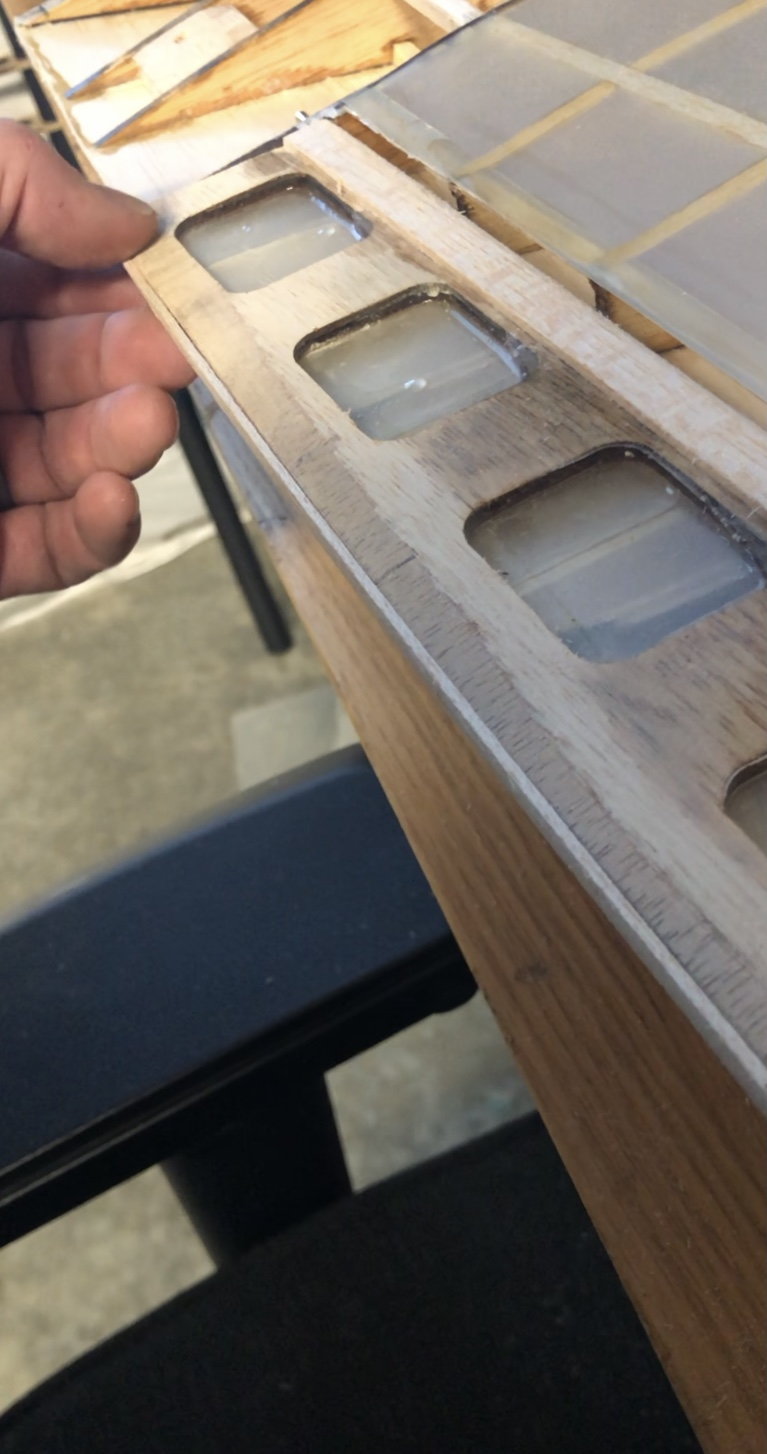
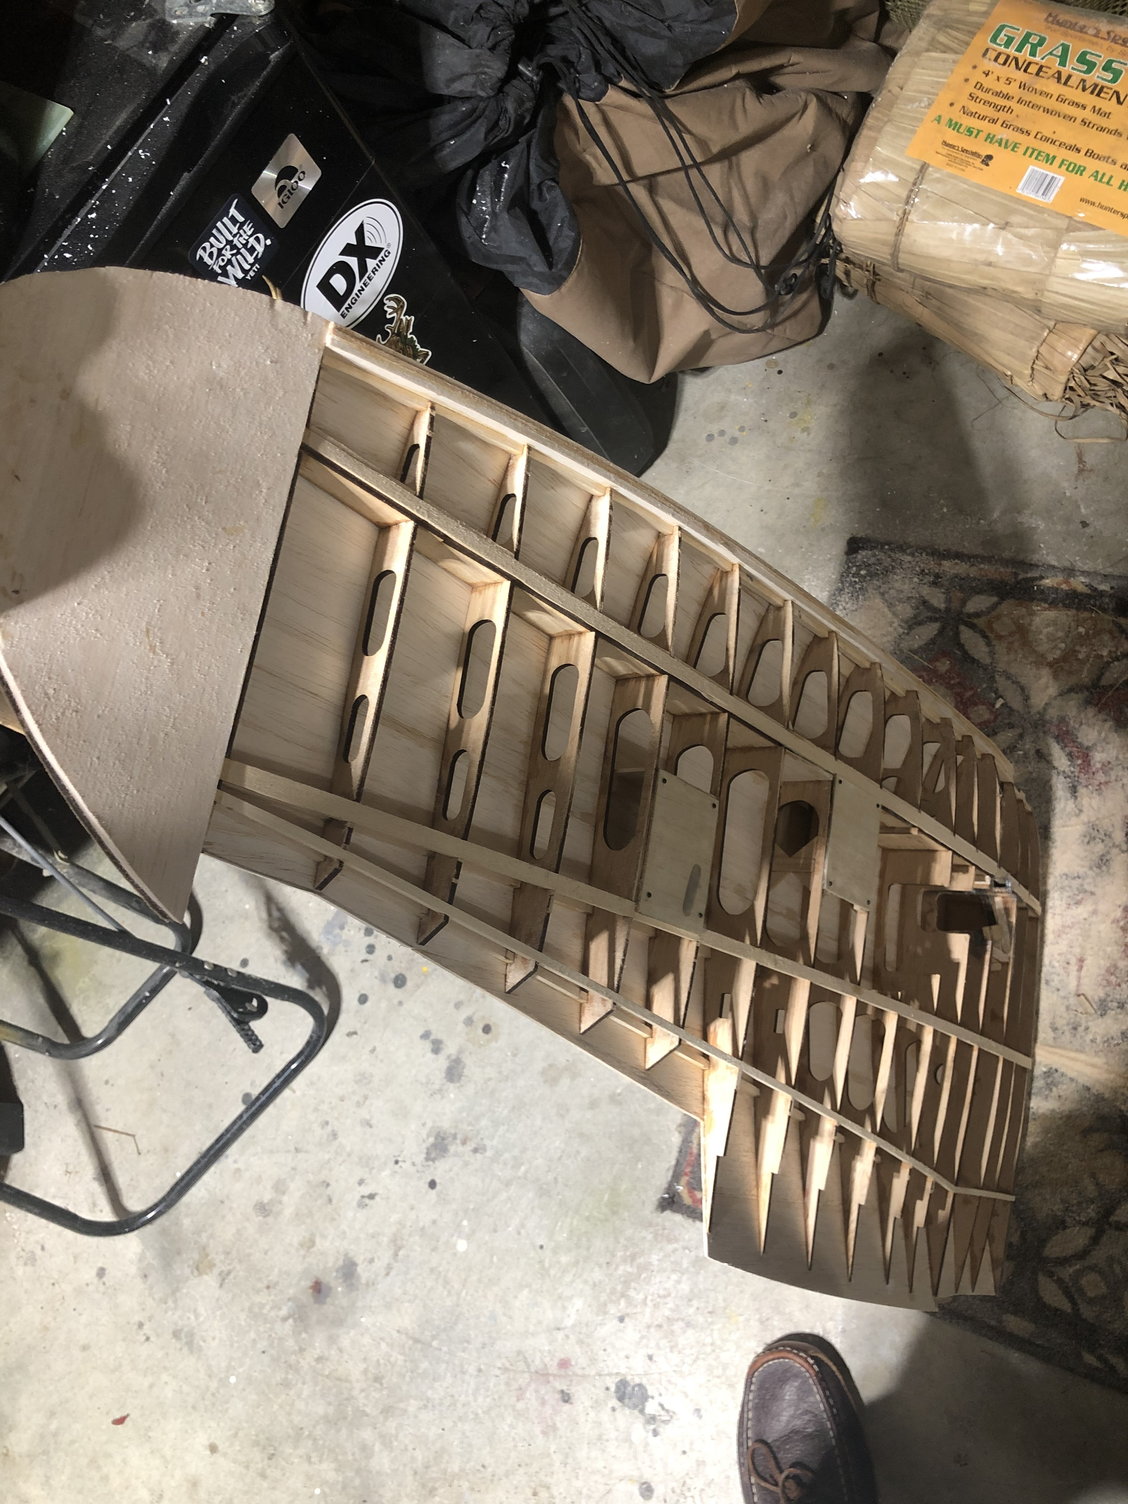
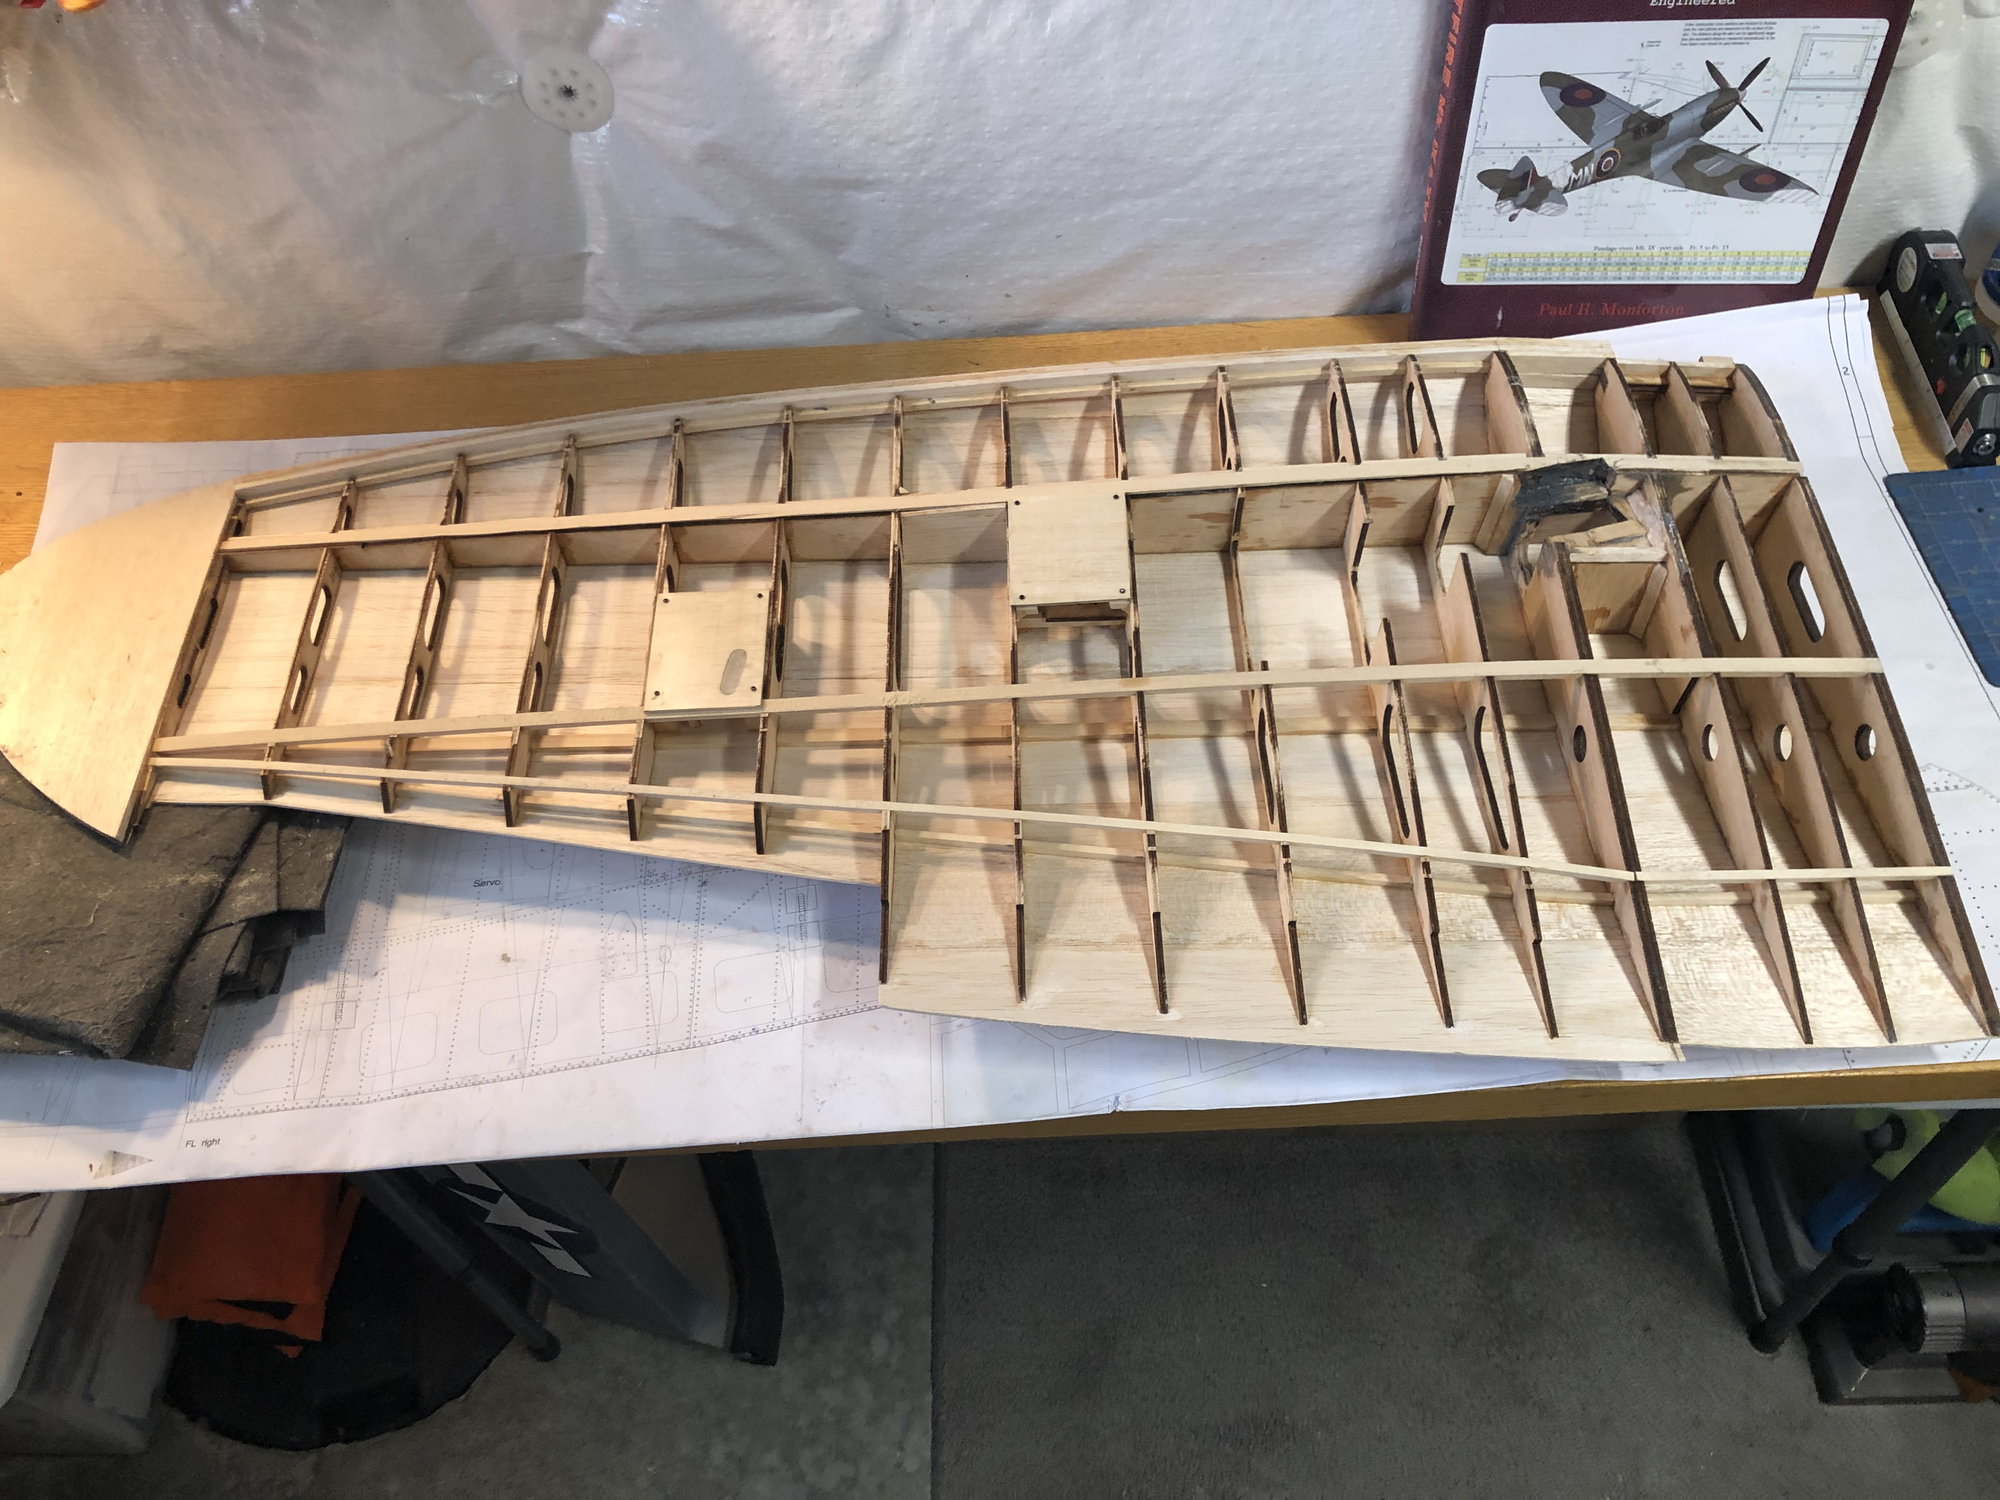
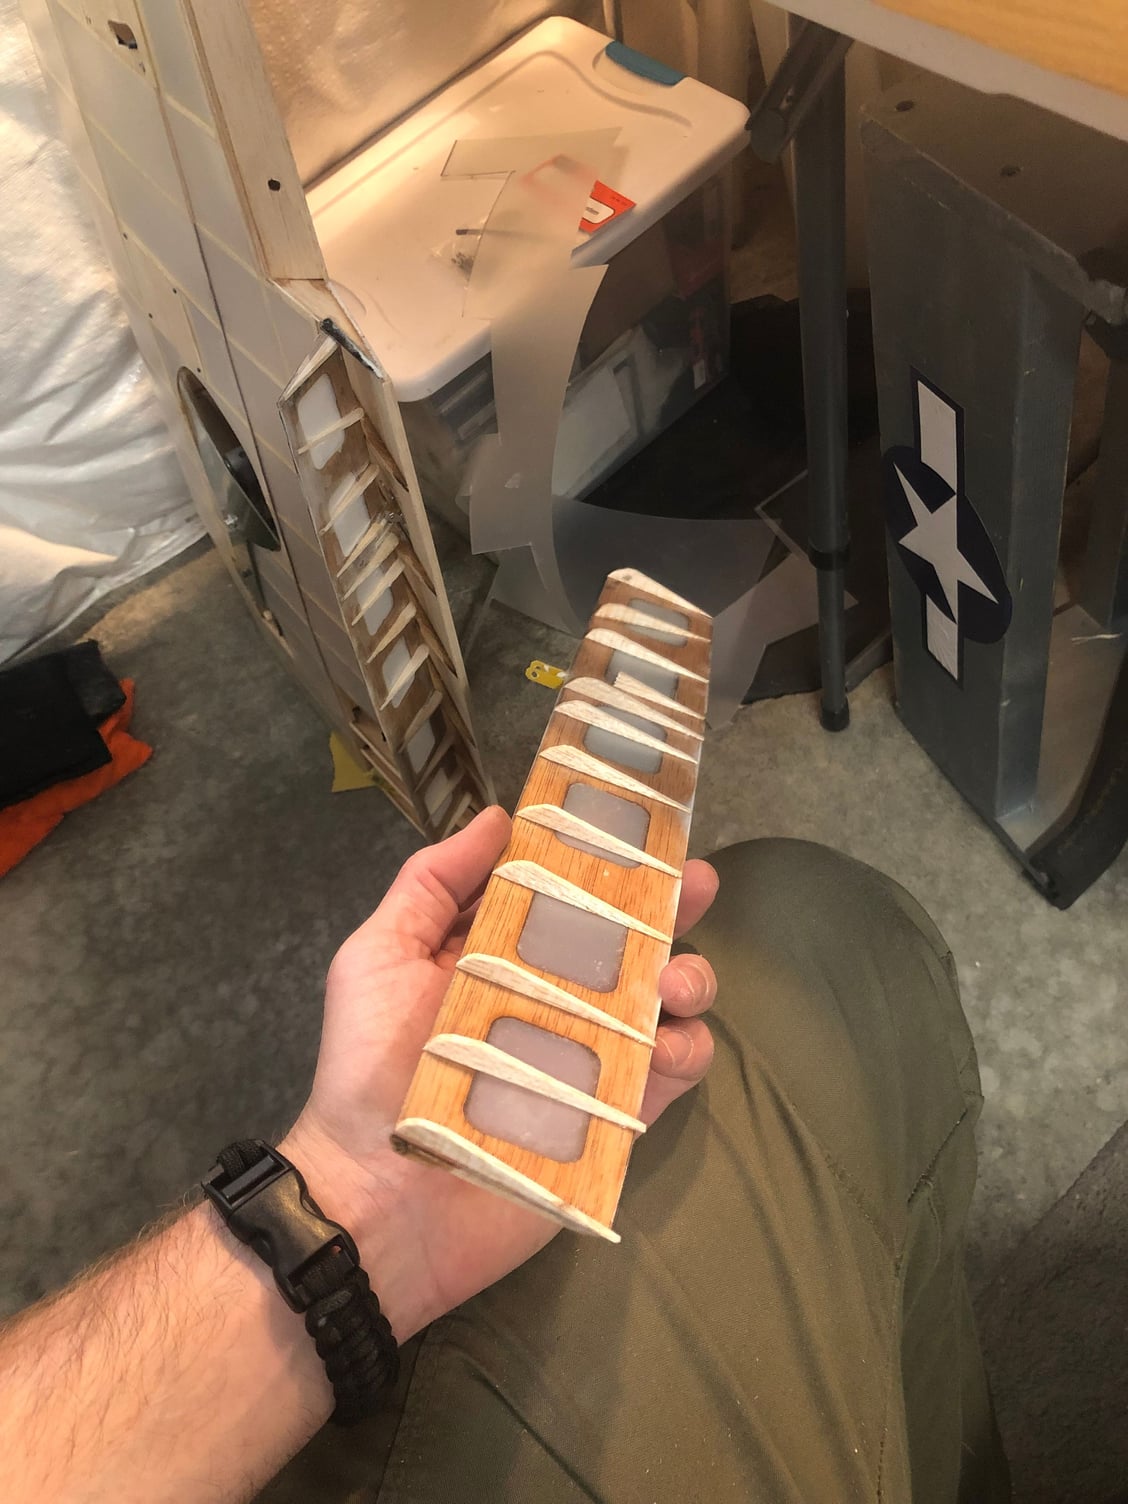
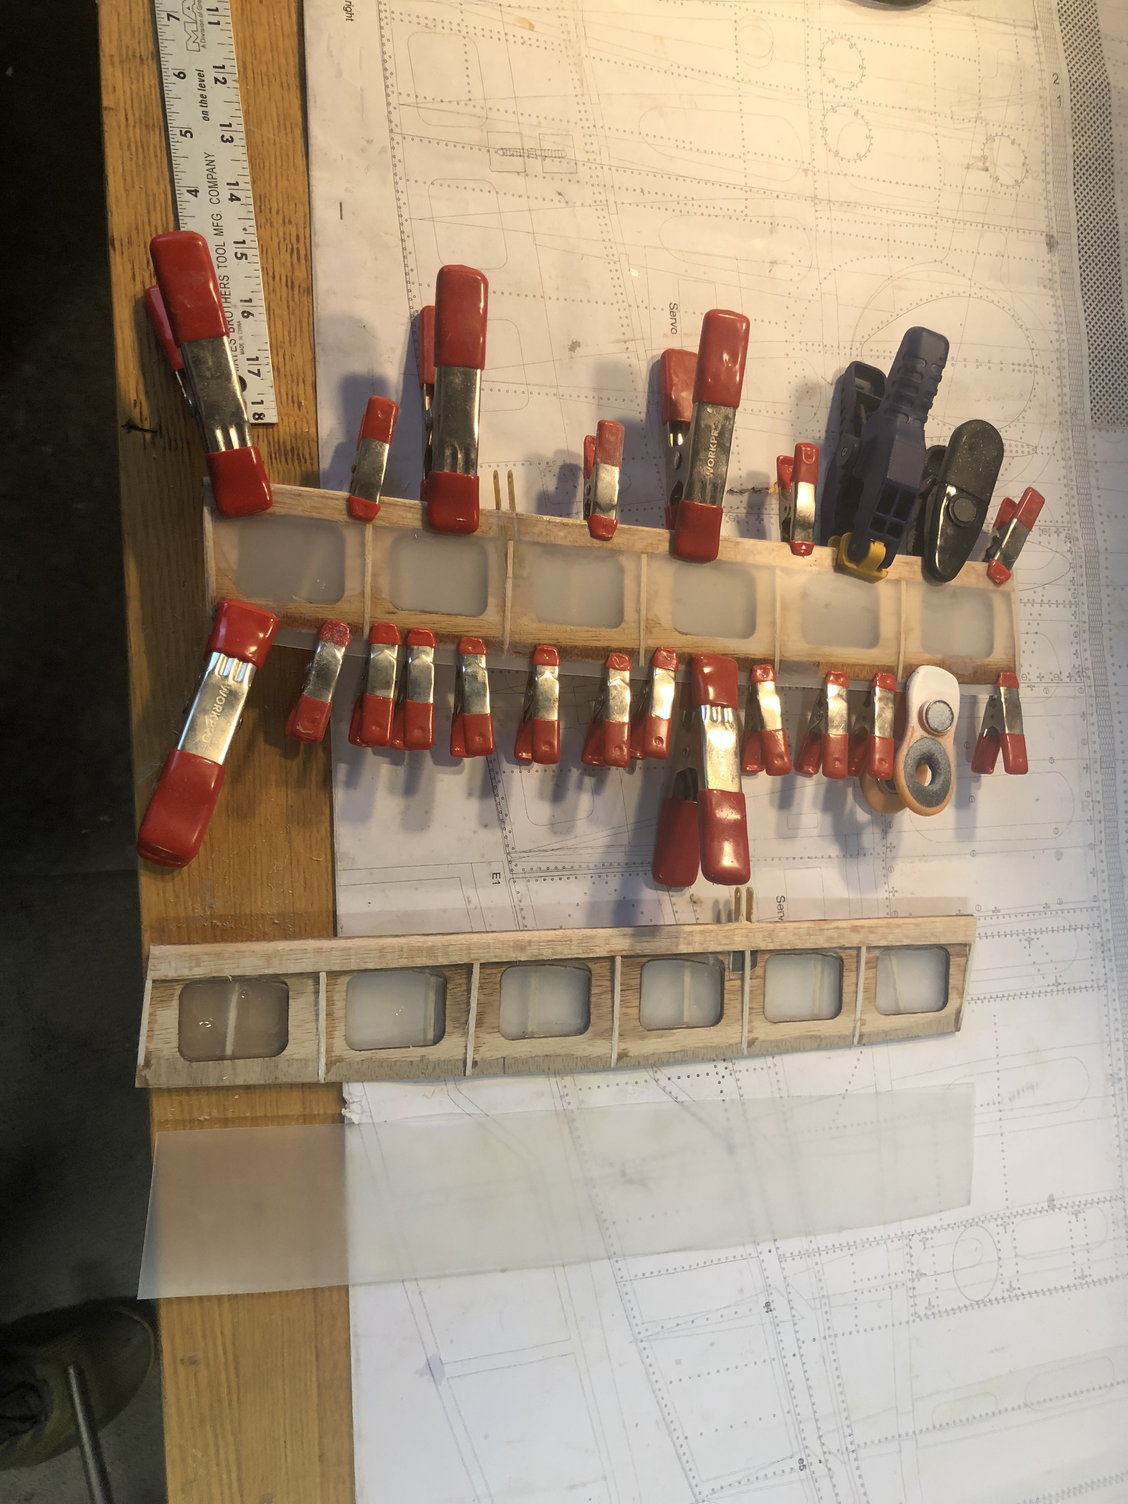
Finally was able to get going again this week, I needed to catch the right wing half with left. I sheeted upper surface, and was able to get it rough sanded to shape. I prepped the underside for flight skin, laying down 3/32 spacing strips(not sure what the technical term is for this is) but since the fliteskin is .010� thick I needed to raise it off the ribs to get the proper thickness of the wing. Also finished up the aileron and flap, set up hinge points and in the process of skinning the underside of the flaps. When I get back from work I�ll finish skinning the underside and install servos and retract unit. This side went considerably faster as most of the thought process for flap/aileron set up was done on the first half. I just realized I didn�t get photos at the end of the day showing aileron and flap pocket or the prepped ribs. I�ll add them when I can get back at it. Nice to get some steam rollin again.

01-08-2022, 07:19 PM
#146
Thread Starter
Thanks flyer, getting there, just had to get my momentum going again. All my other birds are flight ready and after a sporadic summer of flying it took me a bit to get them back into shape. (Warbirds�10 min of flying=1 hour of maintenance.). Labor of love for sure. But we�re getting there.

