


I need help
 12-18-2021, 10:39 AM
#1
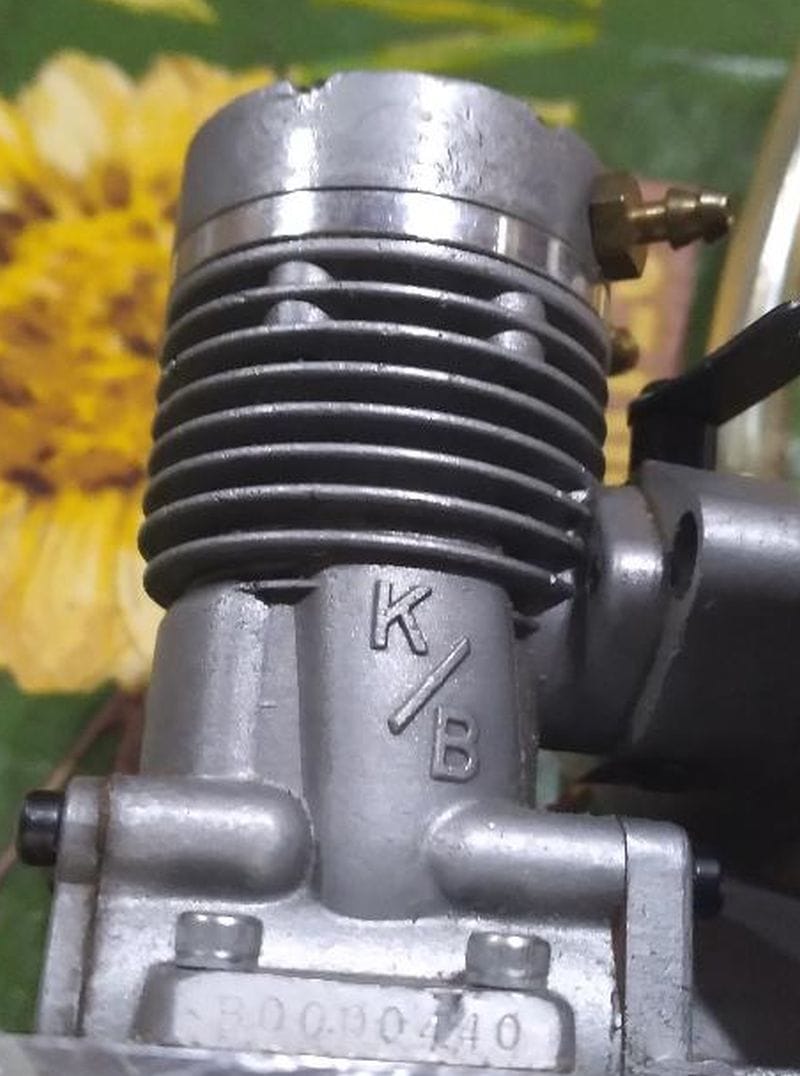
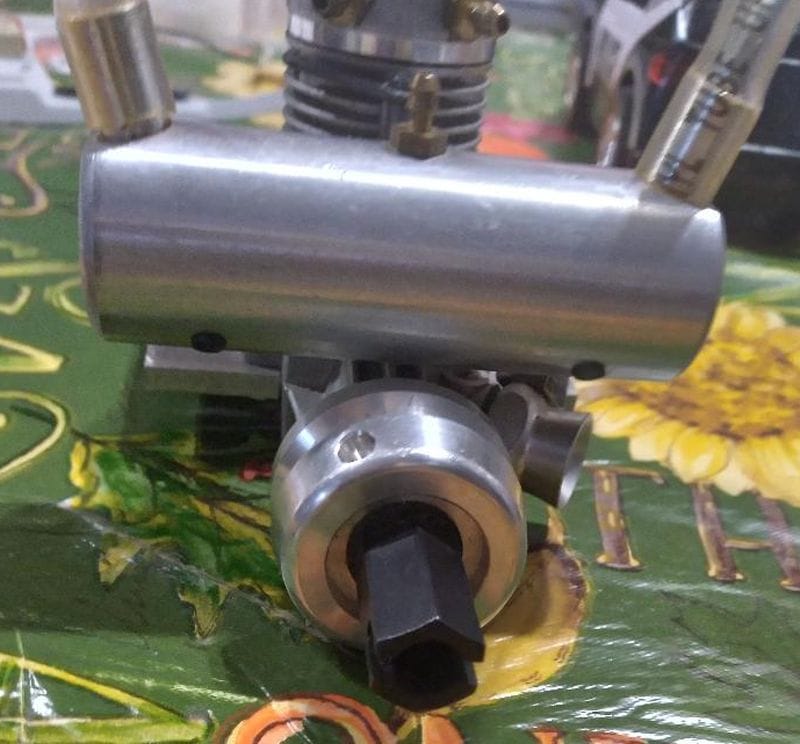
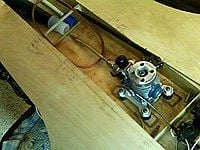
I have a K & B 3.5cc Inboard Marine engine and I'm not sure what all the nipples are for.I know the top 2 are water nipples but I'm not sure if they need tubes and where in the boat the tubes go?I think the other tube is for the fuel into the engine.If anyone can help me with any information please let me know.Thanks for your help.


The following users liked this post:
Propworn (12-19-2021)
12-18-2021, 04:16 PM
#2


Join Date: Mar 2007
Location: Rockaway,
NJ
Posts: 524
Likes: 0
Received 0 Likes
on
0 Posts
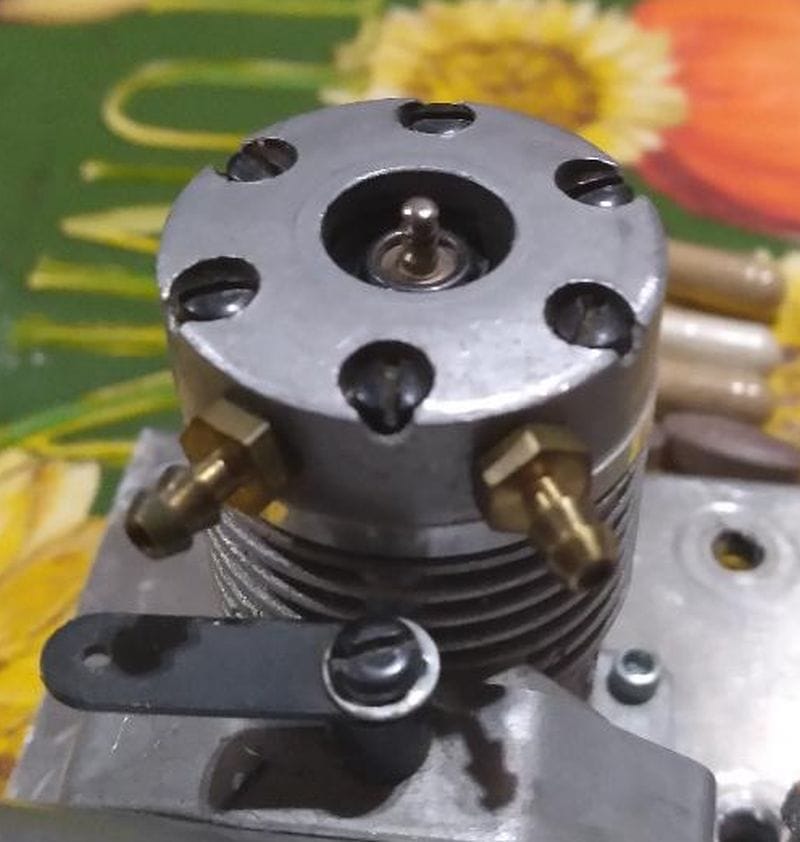
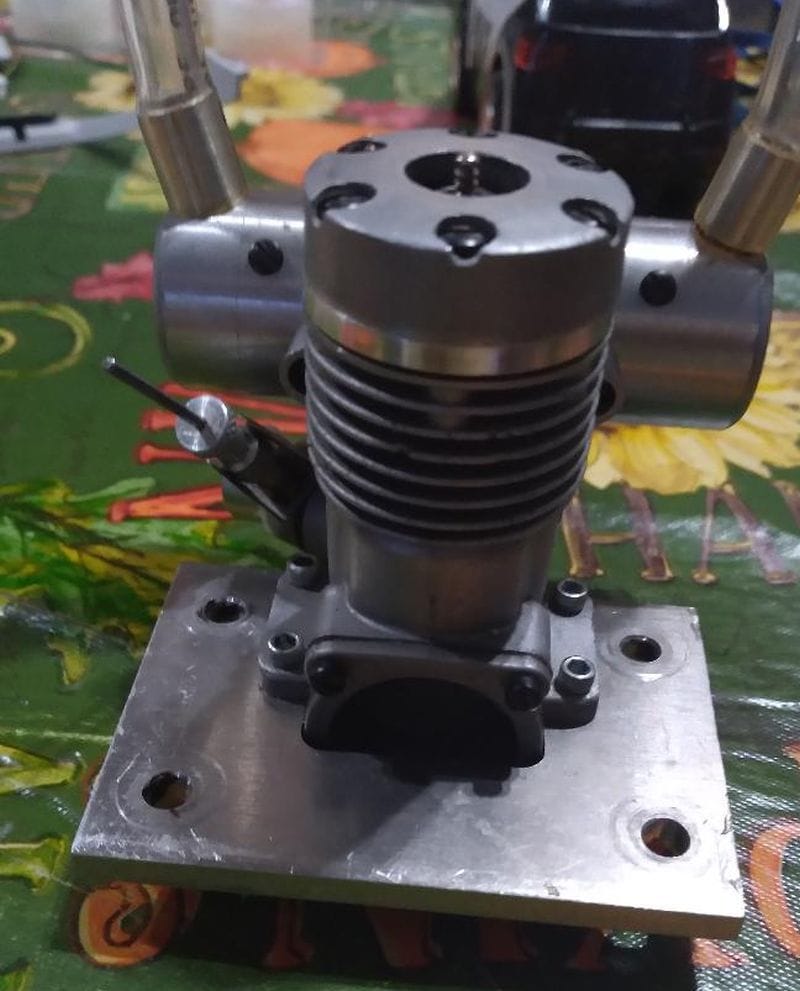
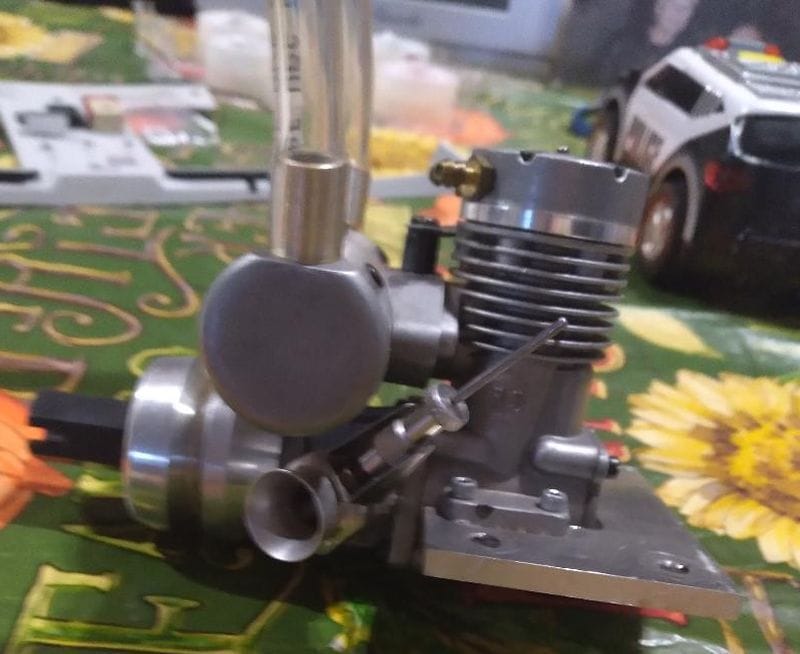
It would be nice to see an overall picture of the engine, not just closeups. You are right, the nipples on the head are intake and output for water. Silicon tubing is usually run to the transom. On the transom there would be a water pickup or the rudder would have a built in pickups. On a hydro it will usually use a rudder with a water pickup, although I have also seen a water pickup on the rear of one of the sponsons. The other nipple looks like the fuel intake; It looks to me like a quite old K&B 3.5. Looks like it is rear intake, the newer ones were front intake. Seems to have a venturi and exhaust throttle instead of a carburator. Doug
12-19-2021, 06:55 AM
#3
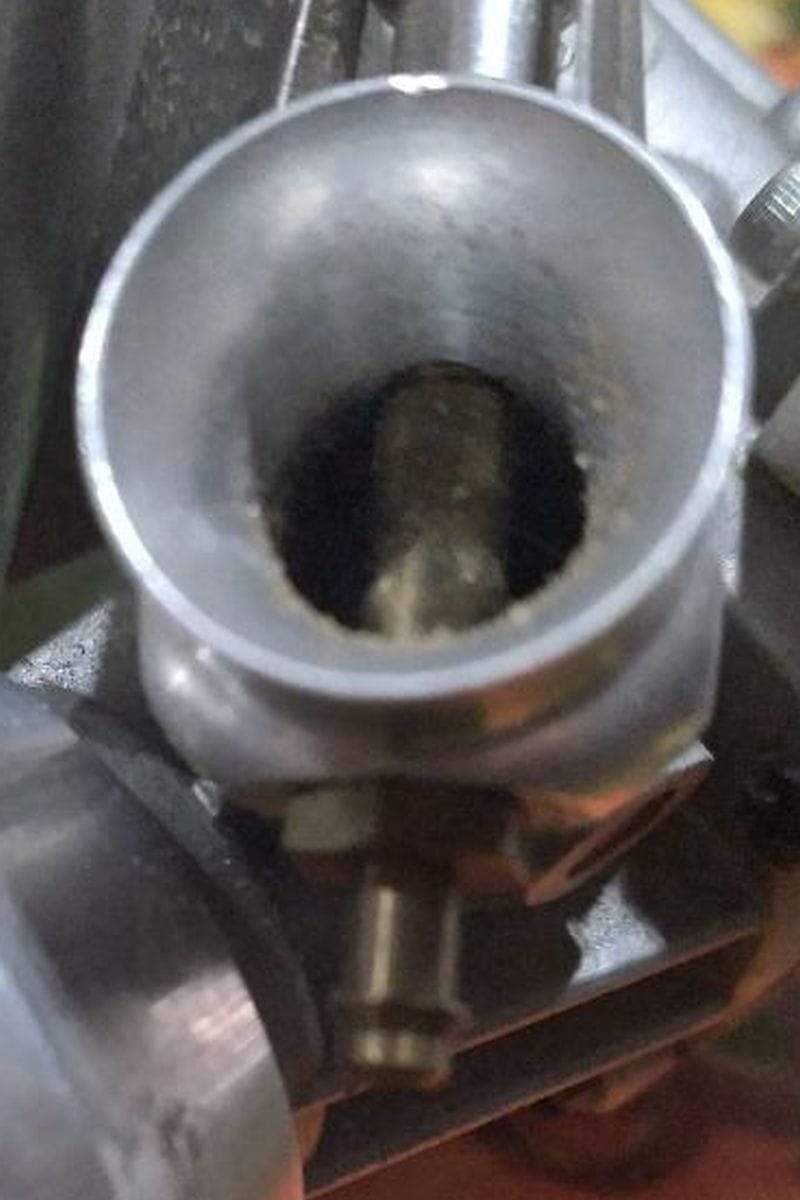
Hi Doug,Thanks for the quick reply.You're right it's an old K & B marine inboard engine the engine is for a Dumas Pay N Pak Hydroplane boat kit.I already have a tube run to the transom which is attached to the rudder water pickup.Do I do a "Y" adapter from the intake/output to the tube?Can you tell me what the nipple on the muffler is for and where the tube for it goes?I've attached some more pictures for you to look at and thanks for your help.Danny

12-19-2021, 04:12 PM
#5
Join Date: Mar 2007
Location: Rockaway,
NJ
Posts: 524
Likes: 0
Received 0 Likes
on
0 Posts
Yup, the nipple on the muffler goes to the fuel tank to pressurize it. Glow motors don't have fuel pumps so they need the pressure line. No "Y" needed on the water line. The intake goes to one of the nipples on the head and the other one is the output side which should just go overboard. JS440 is right, that tubing on the exhaust appears to be vinyl and will at least get soft when hot and may melt. Doug
12-20-2021, 08:27 AM
#6
Which nipple on the head is intake and which is output?Which line on the tank is for the pressure?Where do I get the right tube for the muffler?I know these are a bunch of "newbie" questions but I want to get it right.Thanks for all the quick responses.
12-20-2021, 08:31 AM
#7
My Feedback: (10)
In/out on the head doesn't matter. If one of the nipples were lower than the other, that one would be in, and the upper one would be out. Yours are at the same height, so you can use whichever is convenient for in/out.
For the pressure line, use silicone tubing, the same type you'll use for your fuel line. Get it at your local hobby shop if possible so you can see which size fits best. If you still want to use the tubing on your muffler outlets, it should also be silicone.
For the pressure line, use silicone tubing, the same type you'll use for your fuel line. Get it at your local hobby shop if possible so you can see which size fits best. If you still want to use the tubing on your muffler outlets, it should also be silicone.
12-20-2021, 10:42 AM
#8
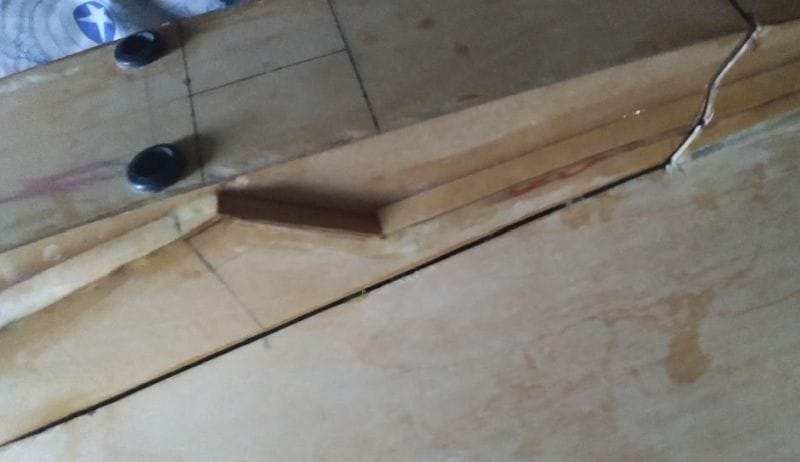
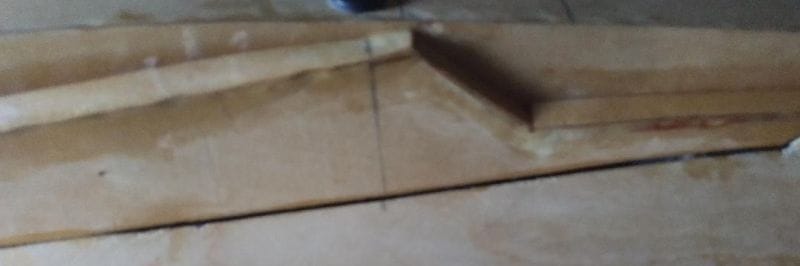
The reason why I asked about the tubes for the muffler was I'm in a wheelchair and I wanted to get it online because I don't drive.I have another question,I have a gap when I attach my cowl to the boat.How can I fill in the gap so that it's waterproof?Thanks again for the quick response.Danny


The following users liked this post:
AMXer (12-20-2021)
12-20-2021, 10:49 AM
#9
My Feedback: (10)
If you can measure the OD of the exhaust outlets you should be able to find the right size silicone hose online. McMaster Carr is always a safe bet, but expect to spend a bit of $ on shipping. Having a hard time telling what's going on in the pics, but for sealing the cowl the easiest way to seal it up is to seal it up with radio box tape. I use this stuff... expensive, but a roll will last me many years. https://zippkits.com/index.php?main_...roducts_id=485
You can also fit some closed cell foam tape between the hatch and hull. Available anywhere, including Amazon, in many different widths and thicknesses.
You can also fit some closed cell foam tape between the hatch and hull. Available anywhere, including Amazon, in many different widths and thicknesses.
12-20-2021, 11:06 AM
#10
Sending positive build Mojo..
Would Like to see the whole Boat if you could post a few of the Pics would be great, Looks like a fun project,
If ya dont mind what other plans do you have for your Build?
Keep it Dry
C
Would Like to see the whole Boat if you could post a few of the Pics would be great, Looks like a fun project,
If ya dont mind what other plans do you have for your Build?
Keep it Dry
C
12-20-2021, 12:03 PM
#11

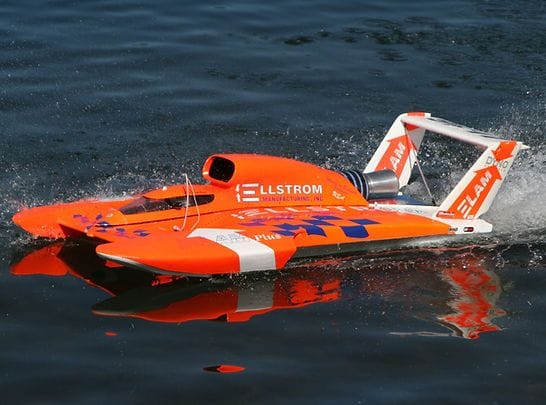
Actually, you don't want the cowl to be sealed when using a nitro motor. Any fuel fired engine, regardless of whether it's a two-stroke nitro or a blown big block in a full-sized car, requires air. If the cowl is sealed to be watertight, it's not going to have enough air to run and it will cause you no end of grief. In fact, if you look at a picture of my scale 2000 Elam Plus, you will see the cowl is actually open to allow air inside so the engine can breathe. What doesn't matter is that my Elam is 13 inches longer, weighs 14 pounds or that it uses a .67 instead of the .21 you are using in your Pak. Both boats still require air to get the engine to run
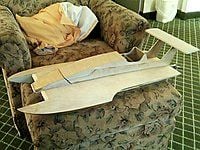
Just for the record, I have also built the Dumas Pak, as shown in the picture below. In my case, however, I made several of my own metal parts since the Dumas supplied ones are "questionable" at best. I included pictures of the motor mounts that I made, rather than using that big heavy plate that Dumas provides in their hardware kit
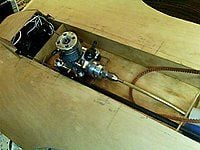
Just for the record, I have also built the Dumas Pak, as shown in the picture below. In my case, however, I made several of my own metal parts since the Dumas supplied ones are "questionable" at best. I included pictures of the motor mounts that I made, rather than using that big heavy plate that Dumas provides in their hardware kit
12-20-2021, 01:33 PM
#12
My Feedback: (10)
Hydro, obviously you need air intake and exhaust, but WHERE that air enters and exits is important. Whenever possible I like to have my cowl fairly well sealed against the hull, so that if it dies on the water all of the possible points of water ingress are as far above the surface of the water as possible. Waves and spray on the deck can let a lot of water into the boat while you're waiting to get out to it. If your only air intakes/outlets are higher up on the cowl, you have less of a chance of the boat filling with water, especially on a boat like a rigger or hydro where a dead boat will sit with the top of the hull very near the surface of the water. Not a big deal on a mono or something with a lot of freeboard.
12-20-2021, 01:35 PM
#13
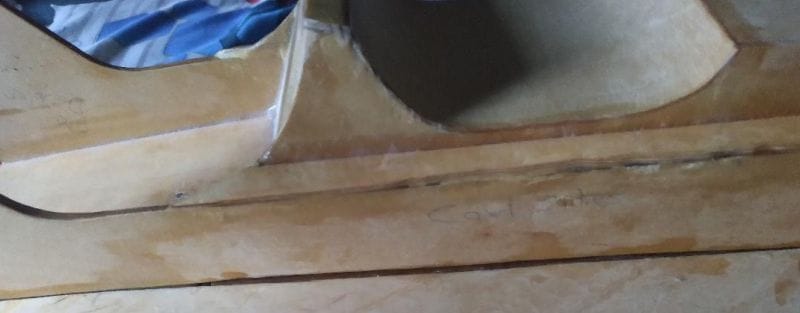
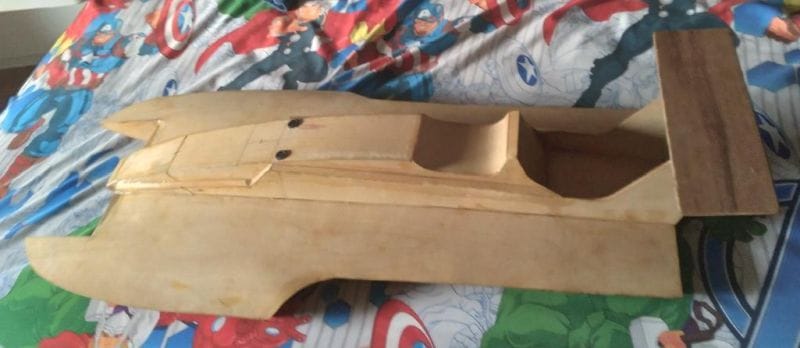
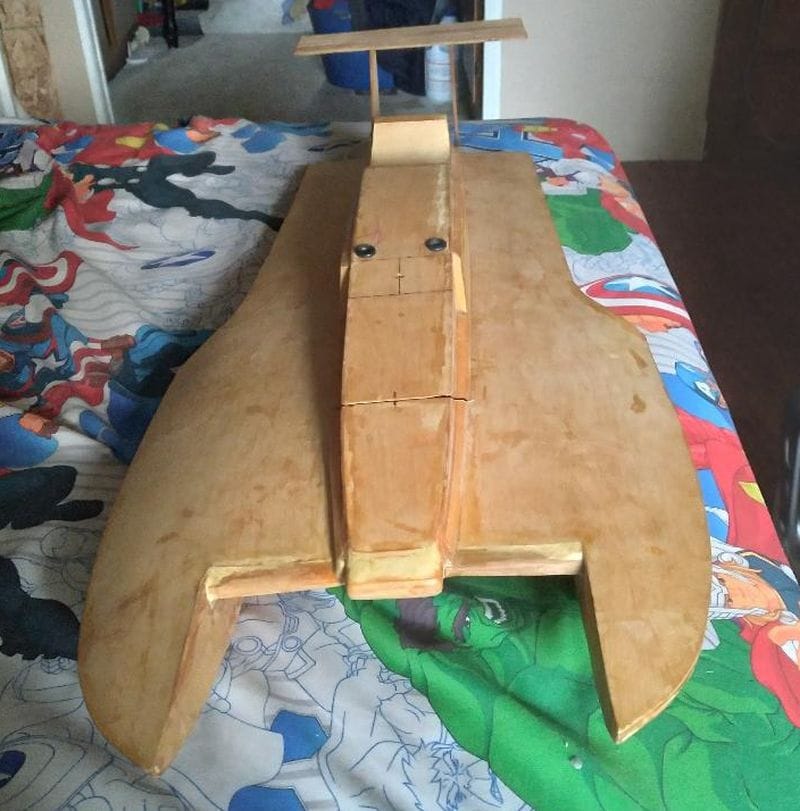
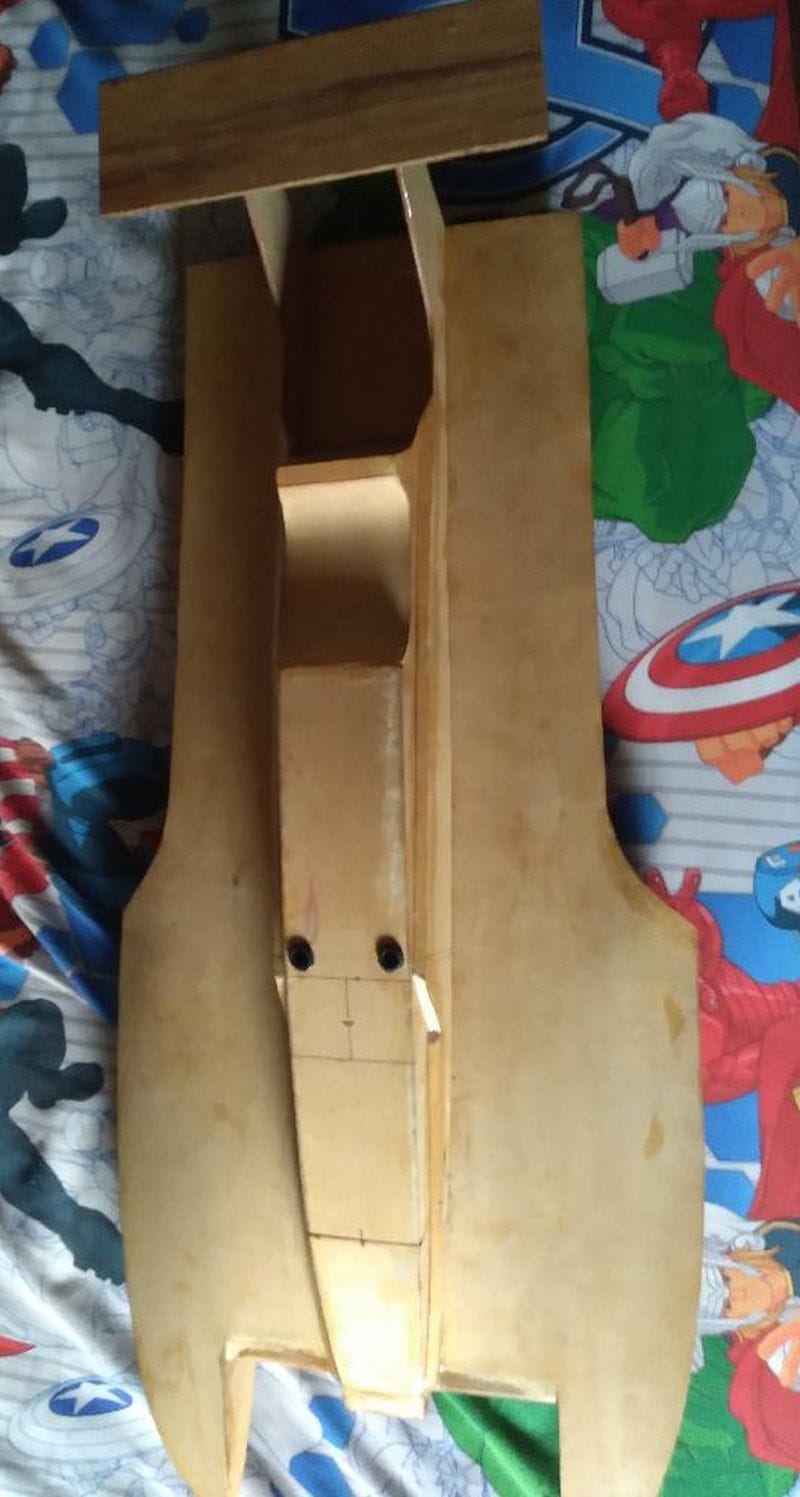
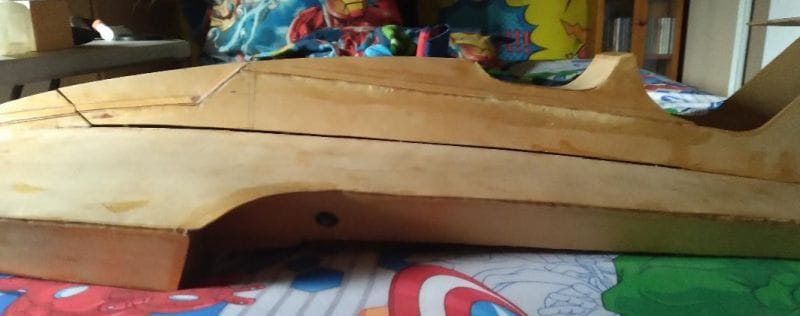
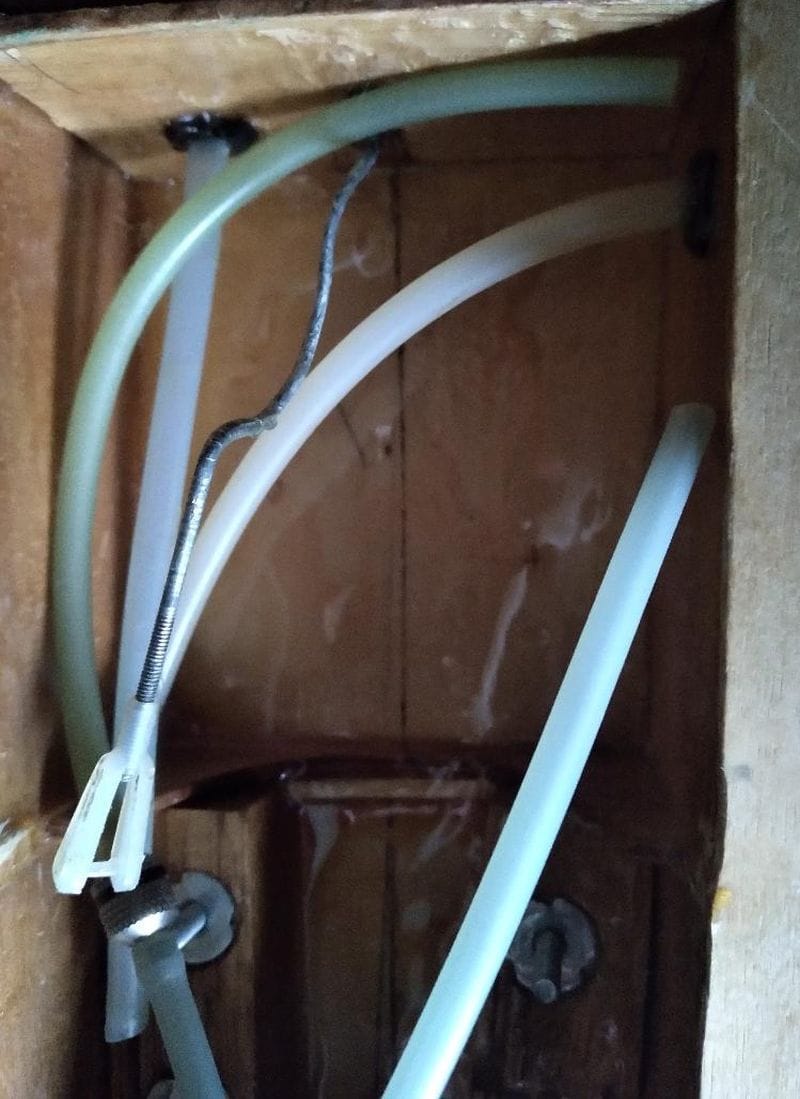
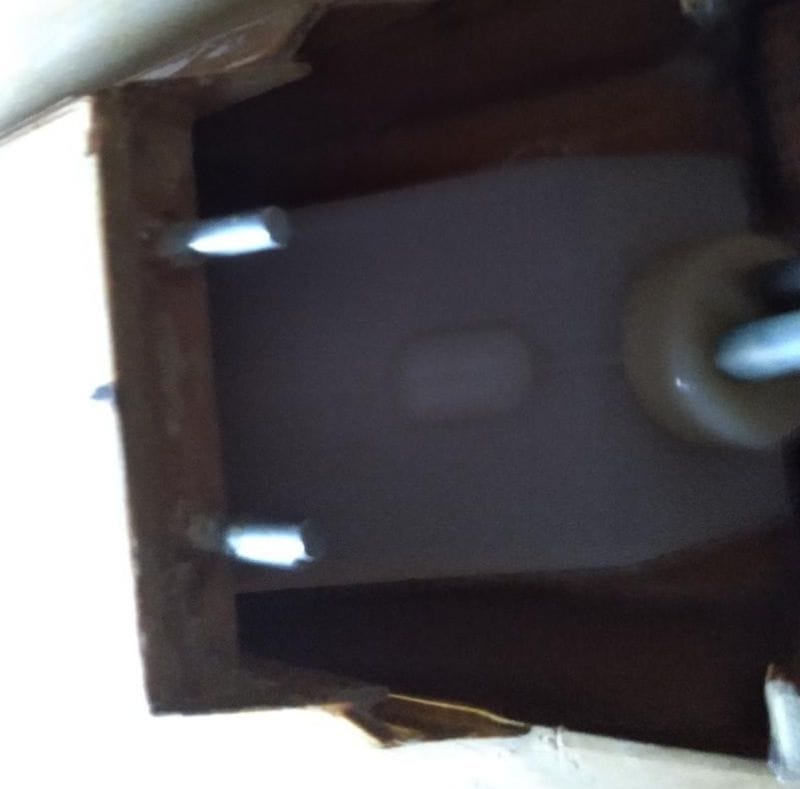
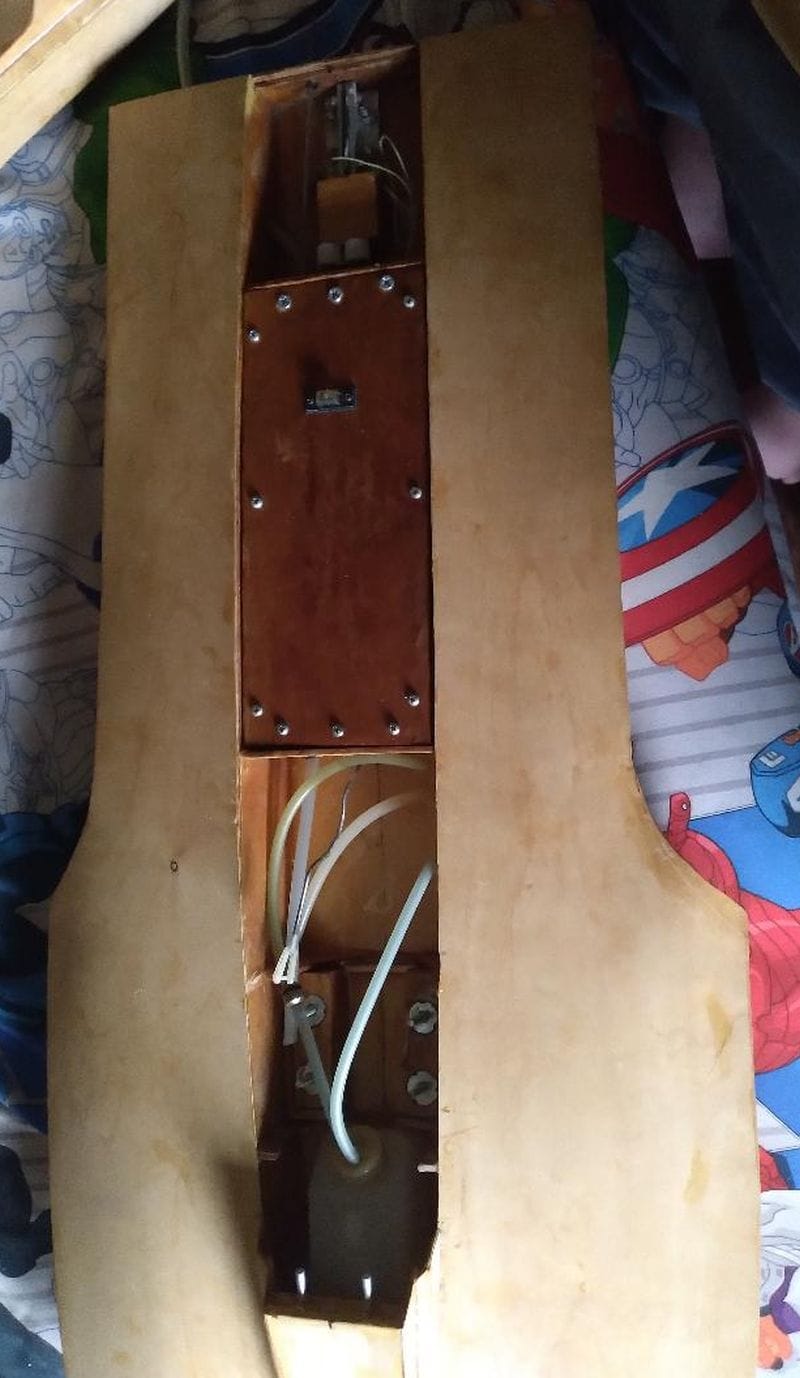
Here are some pictures of the boat,both outside & inside.The center section with all the screws is where the receiver,batteries and servos are located.If you look real close you'll see the tube for water intake on the left side of the boat and the tube sticking out of the rear is for the output.
12-20-2021, 02:12 PM
#15
My Feedback: (10)
https://www.mcmaster.com/tubing/plas...water/id~5-16/
That's a list of high temp hose with a 5/16" ID, note prices are per foot, and some colors/types are only available in lengths of 10+ feet
That's a list of high temp hose with a 5/16" ID, note prices are per foot, and some colors/types are only available in lengths of 10+ feet
12-20-2021, 02:21 PM
#16
Hydro, obviously you need air intake and exhaust, but WHERE that air enters and exits is important. Whenever possible I like to have my cowl fairly well sealed against the hull, so that if it dies on the water all of the possible points of water ingress are as far above the surface of the water as possible. Waves and spray on the deck can let a lot of water into the boat while you're waiting to get out to it. If your only air intakes/outlets are higher up on the cowl, you have less of a chance of the boat filling with water, especially on a boat like a rigger or hydro where a dead boat will sit with the top of the hull very near the surface of the water. Not a big deal on a mono or something with a lot of freeboard.
https://www.rcunlimiteds.com/registered-nitro
One thing all of these boats have in common is they all have a drain hole to let water out of the engine bay. Water getting into the boat isn't an issue for a hydroplane. How to drain it out isn't either, as long as you understand how a hydroplane works. My Elam actually has three drains on it, not counting the rudder push rod. It has one in the engine bay and one at the rear of both "shoes". After a run, I remove tape that covers the shoe drains, tip the boat up on it's transom and let any water that got inside drain out. As far as sitting deep in the water, all hydroplanes do. I don't know of anyone that seals their boat UNLESS IT'S ELECTRIC!!!
Now, with all of that said, IF we were talking electric, I'd be the first to say make sure it's sealed as water and electricity don't mix well
Last edited by Hydro Junkie; 12-20-2021 at 02:31 PM.
12-20-2021, 02:45 PM
#17
Dreddbatfan, you really need to run the water in the opposite direction, drain it out the side and take it in at the rear. The reason for this is you need to be able to verify that your engine is getting water and, when you dump the water out of the rear, you can't see it through the rest of the spray from the prop. My boats have a water pickup in the rudder, as shown in the picture linked below.
Click image for larger version
Name: Li21091.jpg
Views: 414
Size: 114.3 KB
ID: 1647814
The water is picked up through a hole machined into the left side of the rudder, goes up through the rear of the rudder and into a fuel hose that connects to the nipple at the top of the rudder and the tube running through the boat to the engine bay. My set up can be seen at the link below as well
Click image for larger version
Name: To44414.jpg
Views: 233
Size: 121.6 KB
ID: 1647806
The water then goes through another hose to the engine, through the engine's water jacket and back to a second hose that attaches to a second tube that dumps water out in roughly the same location as your pick up is on your boat.
As far as where your radio box is located, that's pretty much a Dumas standard as every hydro kit they sell/sold has it in that location. Did you put any kind of seal or gasket between the cover(I would recommend changing that to a clear plastic or lexan, makes trouble shooting easier)? If not, your radio box will end up with water getting into it and that will cause radio issues(don't ask me how I know that)
Click image for larger version
Name: Li21091.jpg
Views: 414
Size: 114.3 KB
ID: 1647814
The water is picked up through a hole machined into the left side of the rudder, goes up through the rear of the rudder and into a fuel hose that connects to the nipple at the top of the rudder and the tube running through the boat to the engine bay. My set up can be seen at the link below as well
Click image for larger version
Name: To44414.jpg
Views: 233
Size: 121.6 KB
ID: 1647806
The water then goes through another hose to the engine, through the engine's water jacket and back to a second hose that attaches to a second tube that dumps water out in roughly the same location as your pick up is on your boat.
As far as where your radio box is located, that's pretty much a Dumas standard as every hydro kit they sell/sold has it in that location. Did you put any kind of seal or gasket between the cover(I would recommend changing that to a clear plastic or lexan, makes trouble shooting easier)? If not, your radio box will end up with water getting into it and that will cause radio issues(don't ask me how I know that)
12-21-2021, 09:20 AM
#18
JS440,How will either of those tapes seal the gap?Will I have to reapply the tape everytime I take the top off and put it back on?When it comes to finishing the boat,I know that I need epoxy paint to waterproof it and I was wondering which is the best paint to use?I'm going to have to find someone to do it for me because I'm physically unable to do it.I know before painting it needs to be sanded,what grits of sandpaper do I need?Thanks for everyones help.
12-21-2021, 12:25 PM
#19
Tape isn't the best for sealing a 90 degree(more or less) angle like between the cowl and deck. Since there is always a force pulling against the tape, it will come loose. Something else you need to remember is that, when the hull is painted, part of that gap will be filled with paint so it's not going to be as large as it looks now.
As far as what kind of paint, most guys running scale boats use automotive paints. My Elam has a layer of primer then a base of PPG Coca Cola white followed by House of Color fluorescent orange with decals on top of that. Everything is then covered by a seal coat of PPG clear coat. Around the wind shield and inside the cowl has black covered with clear to protect the fiberglass from fuel, heat and water. What would be easier, and probably cheaper if funds are an issue, would be to paint the boat with an epoxy white primer and then add the graphics with orange and black paint, covering that with a compatible clear coat.
One thing I see that needs to be changed is the location of the radio switch. Having it going through the top of the radio box is asking for it to get wet and a radio failure. A better option would be to install the switch inside the radio box with one of these:
Dubro Products Kwik Switch Mount | Tower Hobbies
You just drill a hole through one end of the radio box to fit the water seal, mount the switch to the mount's body using the screws holding it in place now and install in the hole. Never had an issue with a power switch mounted using one of these.
12-21-2021, 12:47 PM
#20
My Feedback: (10)
For sealing and paint, I'd suggest sealing with epoxy fiberglass resin (thinned if you'd like to save a bit of weight). I've used epoxy paints before, and while it's possible to get a good finish, to do so you have to spray them, and besides the super toxic fumes, it makes cleaning your paint gun a huge hassle as well. The best looking paint will be automotive base/clearcoat, but it will also be the most expensive. You can also get very good results from a rattle can with the right paint and prep, and an even better, fuel proof finish if you top the paint with a 2 part clear coat like 2k
12-21-2021, 01:10 PM
#21
JS440, I have at least two spray cans of two-part white epoxy primer in my garage so needing to clean a gun isn't an issue. As far as the orange and black, it's possible to get those in a spray can as well from many automotive body supply shops
12-22-2021, 09:29 AM
#24
If the hull needs touching up , I'll hit it with 150-180, depending on how rough it is.
After that, I apply a thin film of epoxy to seal the wood against water. Some people will thin it, I don't.
When the epoxy has cured, I normally wait for at least 3-5 days, I sand with 220 if the surface has rough areas, 320 if it doesn't
I normally wipe the hull down with a cloth wet with naphtha and let it dry. At that point, you should be ready for primer and paint

