


My new flight stand!
 11-06-2013 | 05:31 PM
#1
Thread Starter
Senior Member
Joined: Apr 2007
Posts: 235
Likes: 0
Received 0 Likes
on
0 Posts
From: Brisbane, AUSTRALIA
Here is my new stand and I'm as pleased as pleased as punch with it. Can't wait to take it to the field.
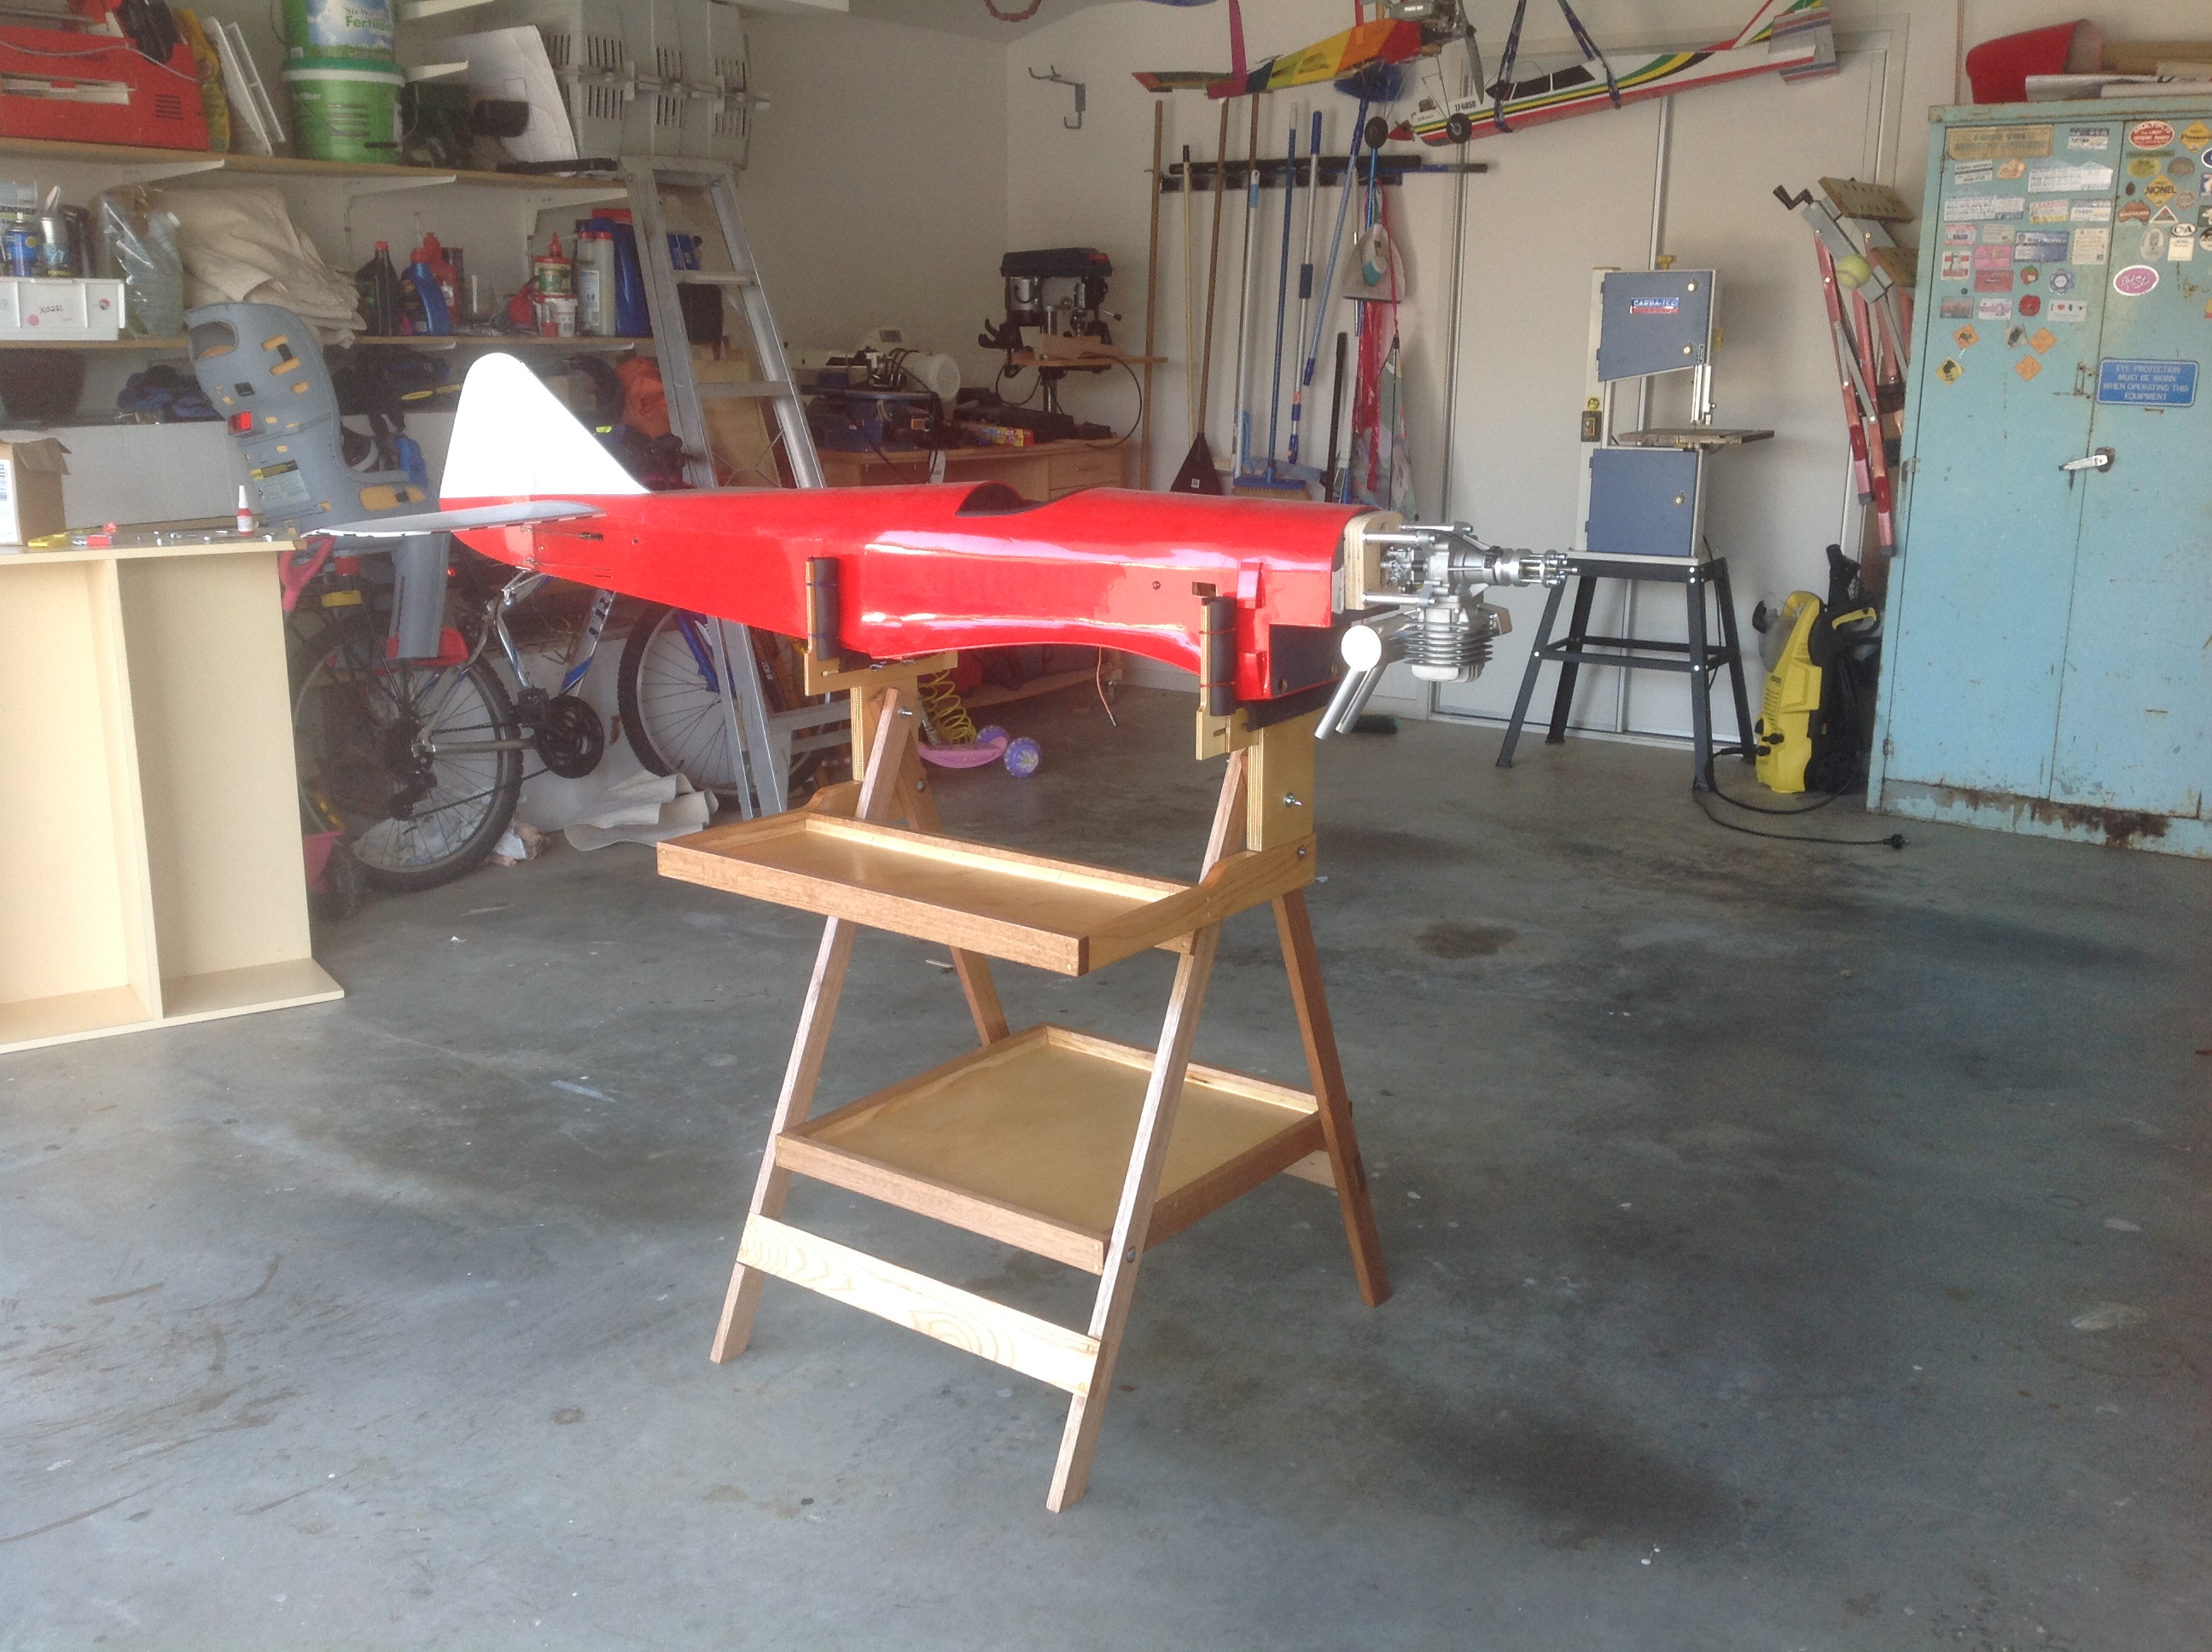
This is a 'Greg Finan' RC Field Stand. Here is a link to the plans: http://www3.telus.net/public/conmar/Dave/stand.htm
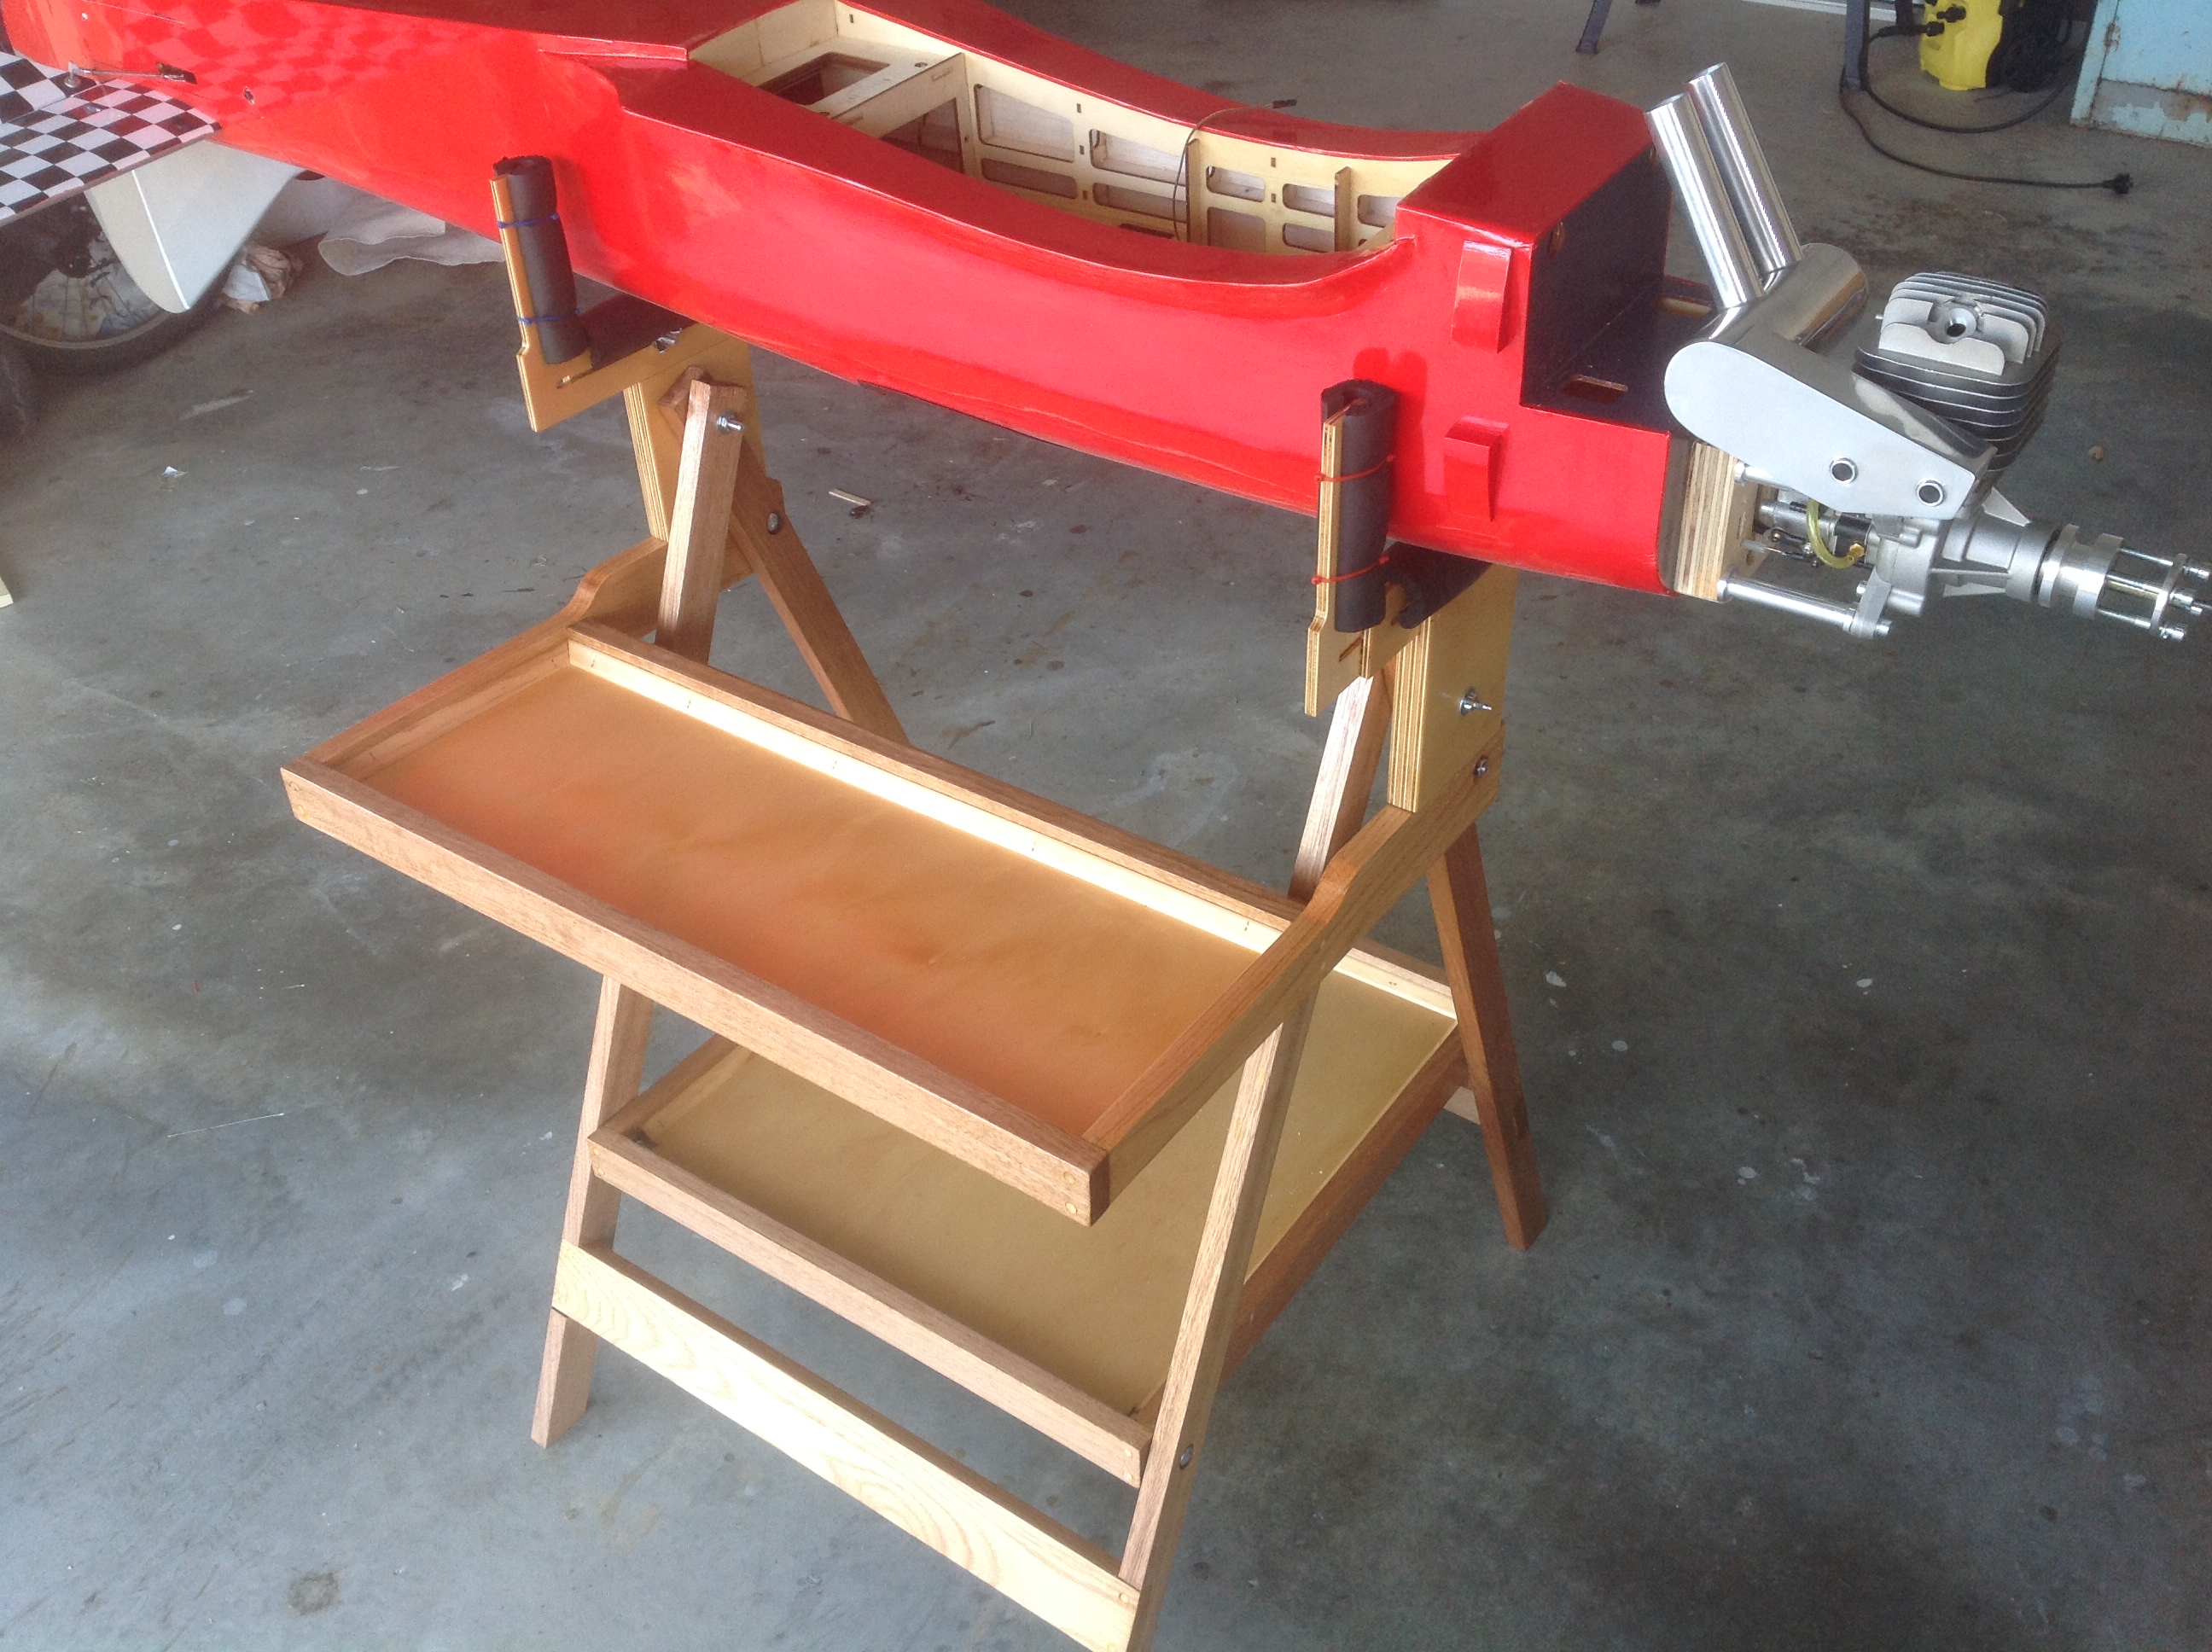
I modified the plans slightly to accommodate larger airframes. The stand is 2" wider than the plans (so it will accommodate wider chord wings) and the cradles will accommodate a 2" wider airframe (i.e., each cradle arm is 1" wider than the plans). The plane in the stand is a 50cc Seagull Sparrowhawk; there is plenty of room to spare.
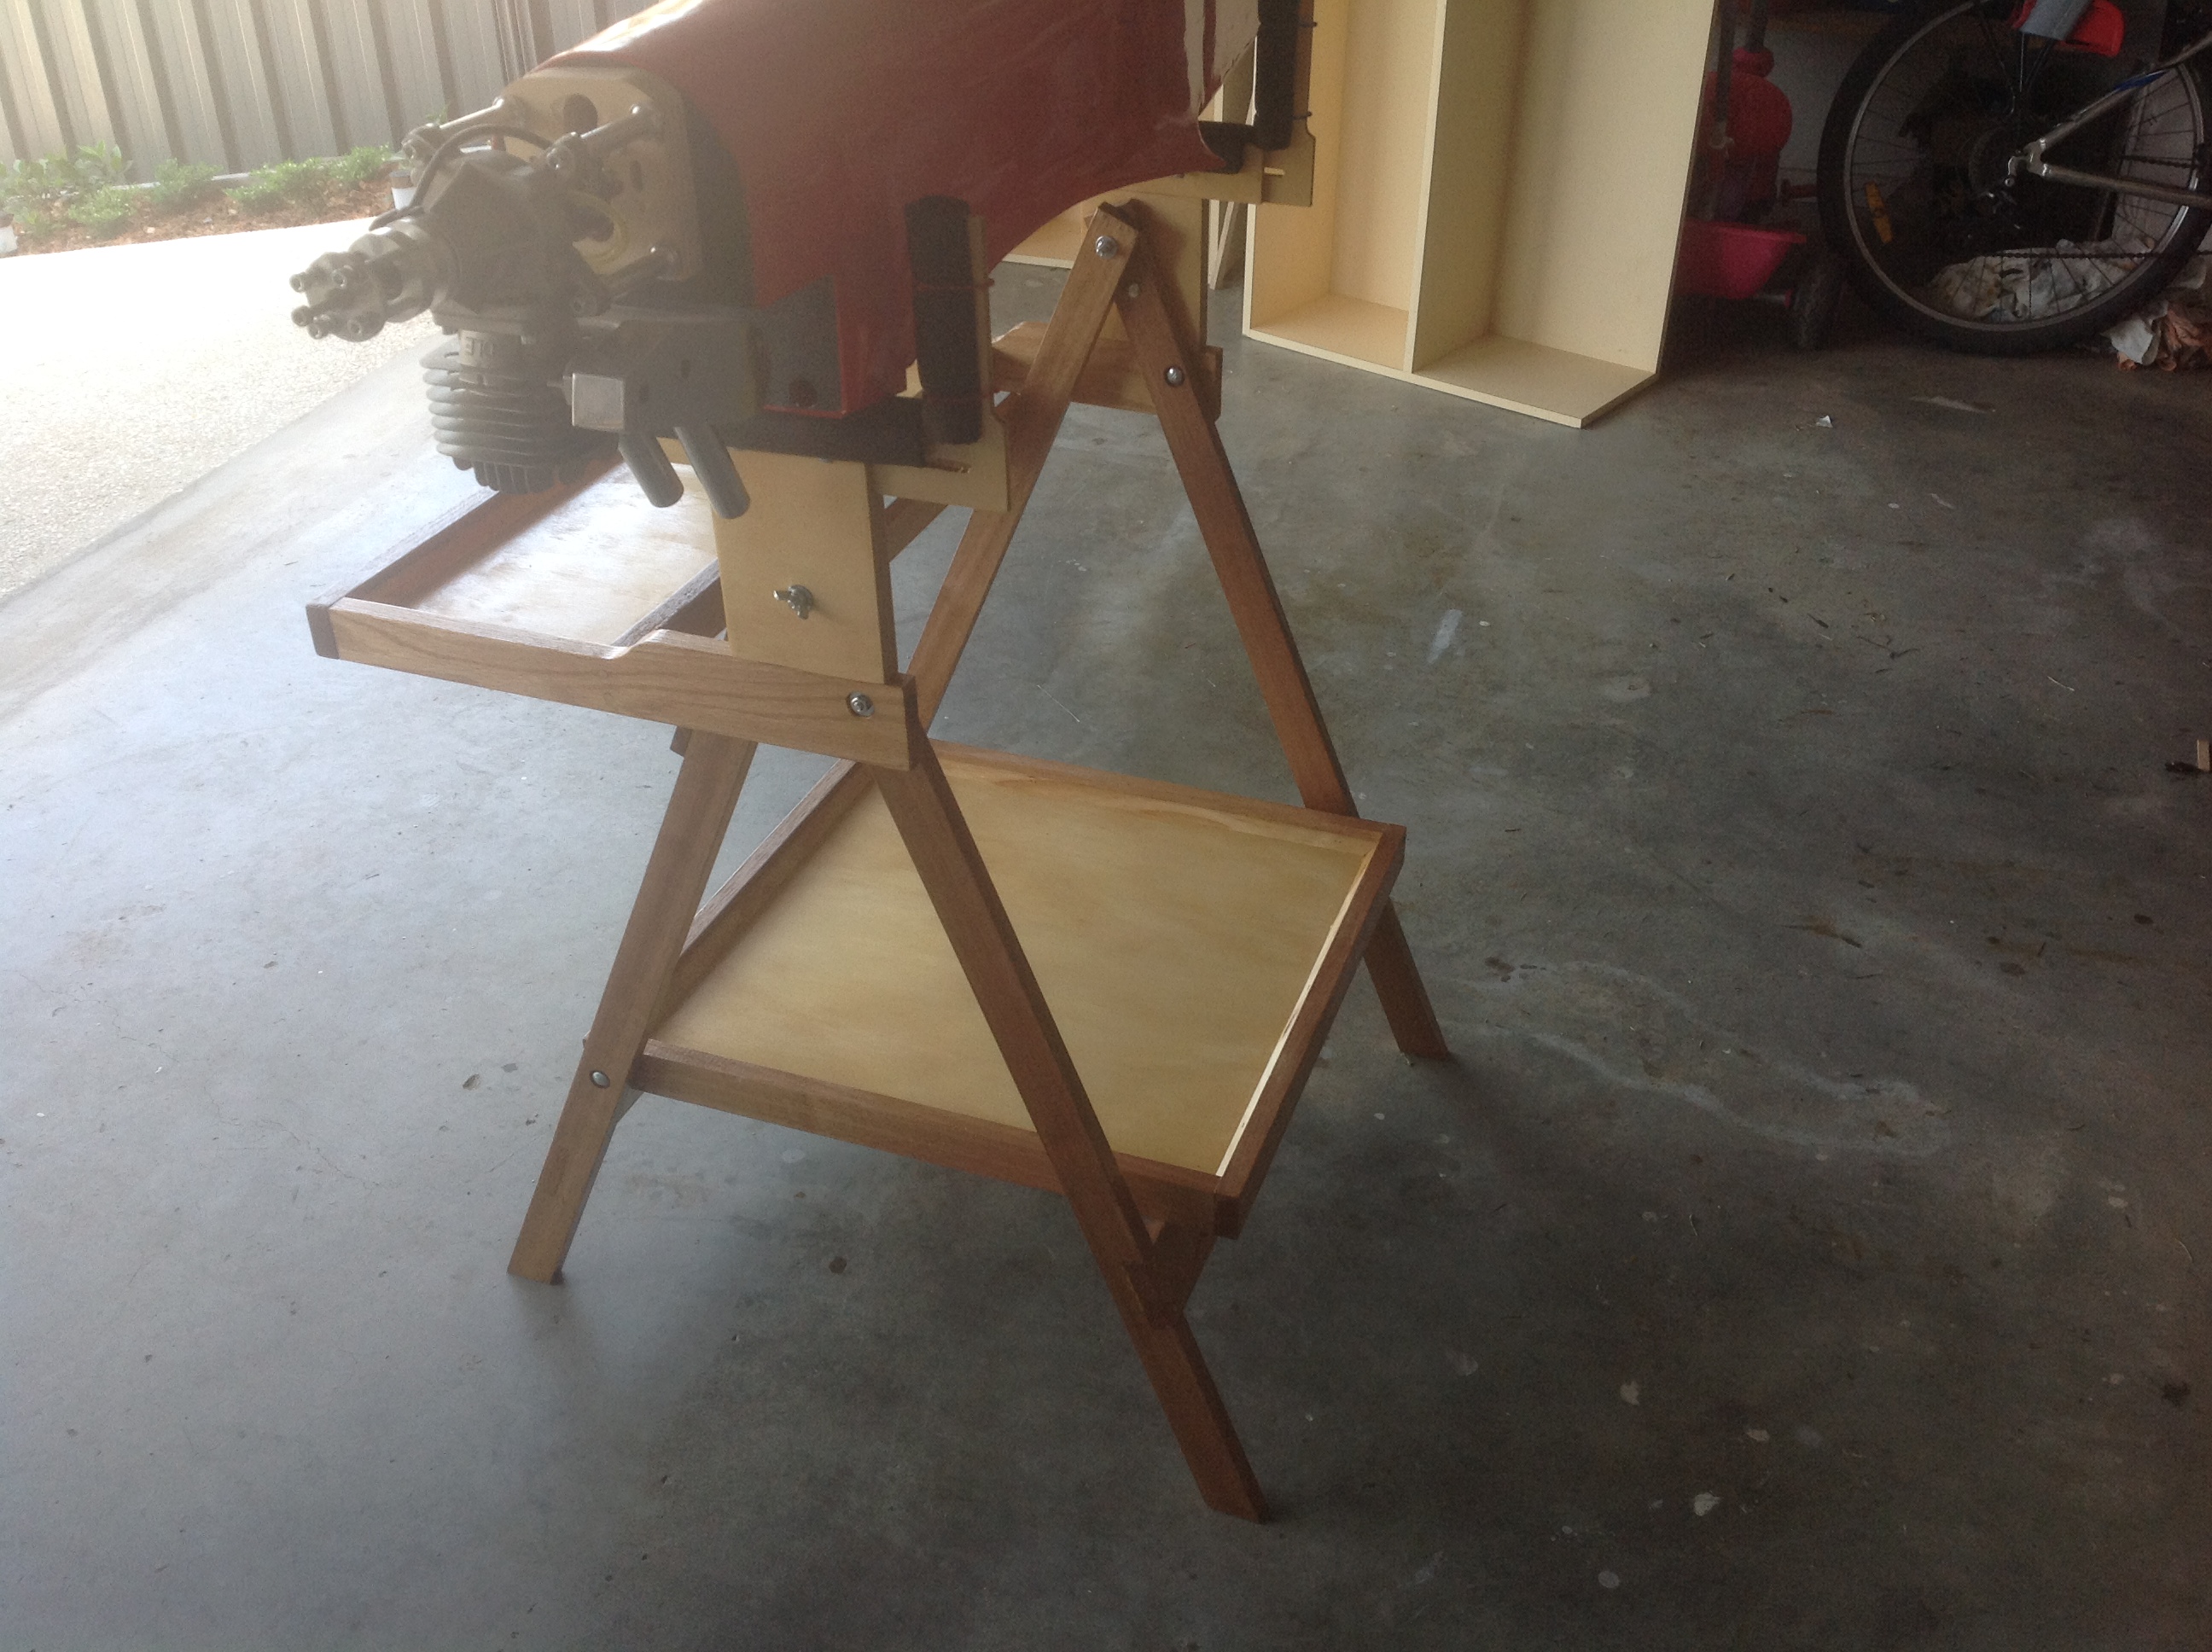
The stand was built from Tasmanian oak and all the hardware / finishing / supplies came from the local hardware store. Build time was about 30hrs including finishing - a skilled woodworker could have done it in a day but I was learning as I went. The hardest part was setting it all up so everything sat level and square. The cradle rests on the arms of the upper shelf, and getting this all arranged properly took some head scratching.
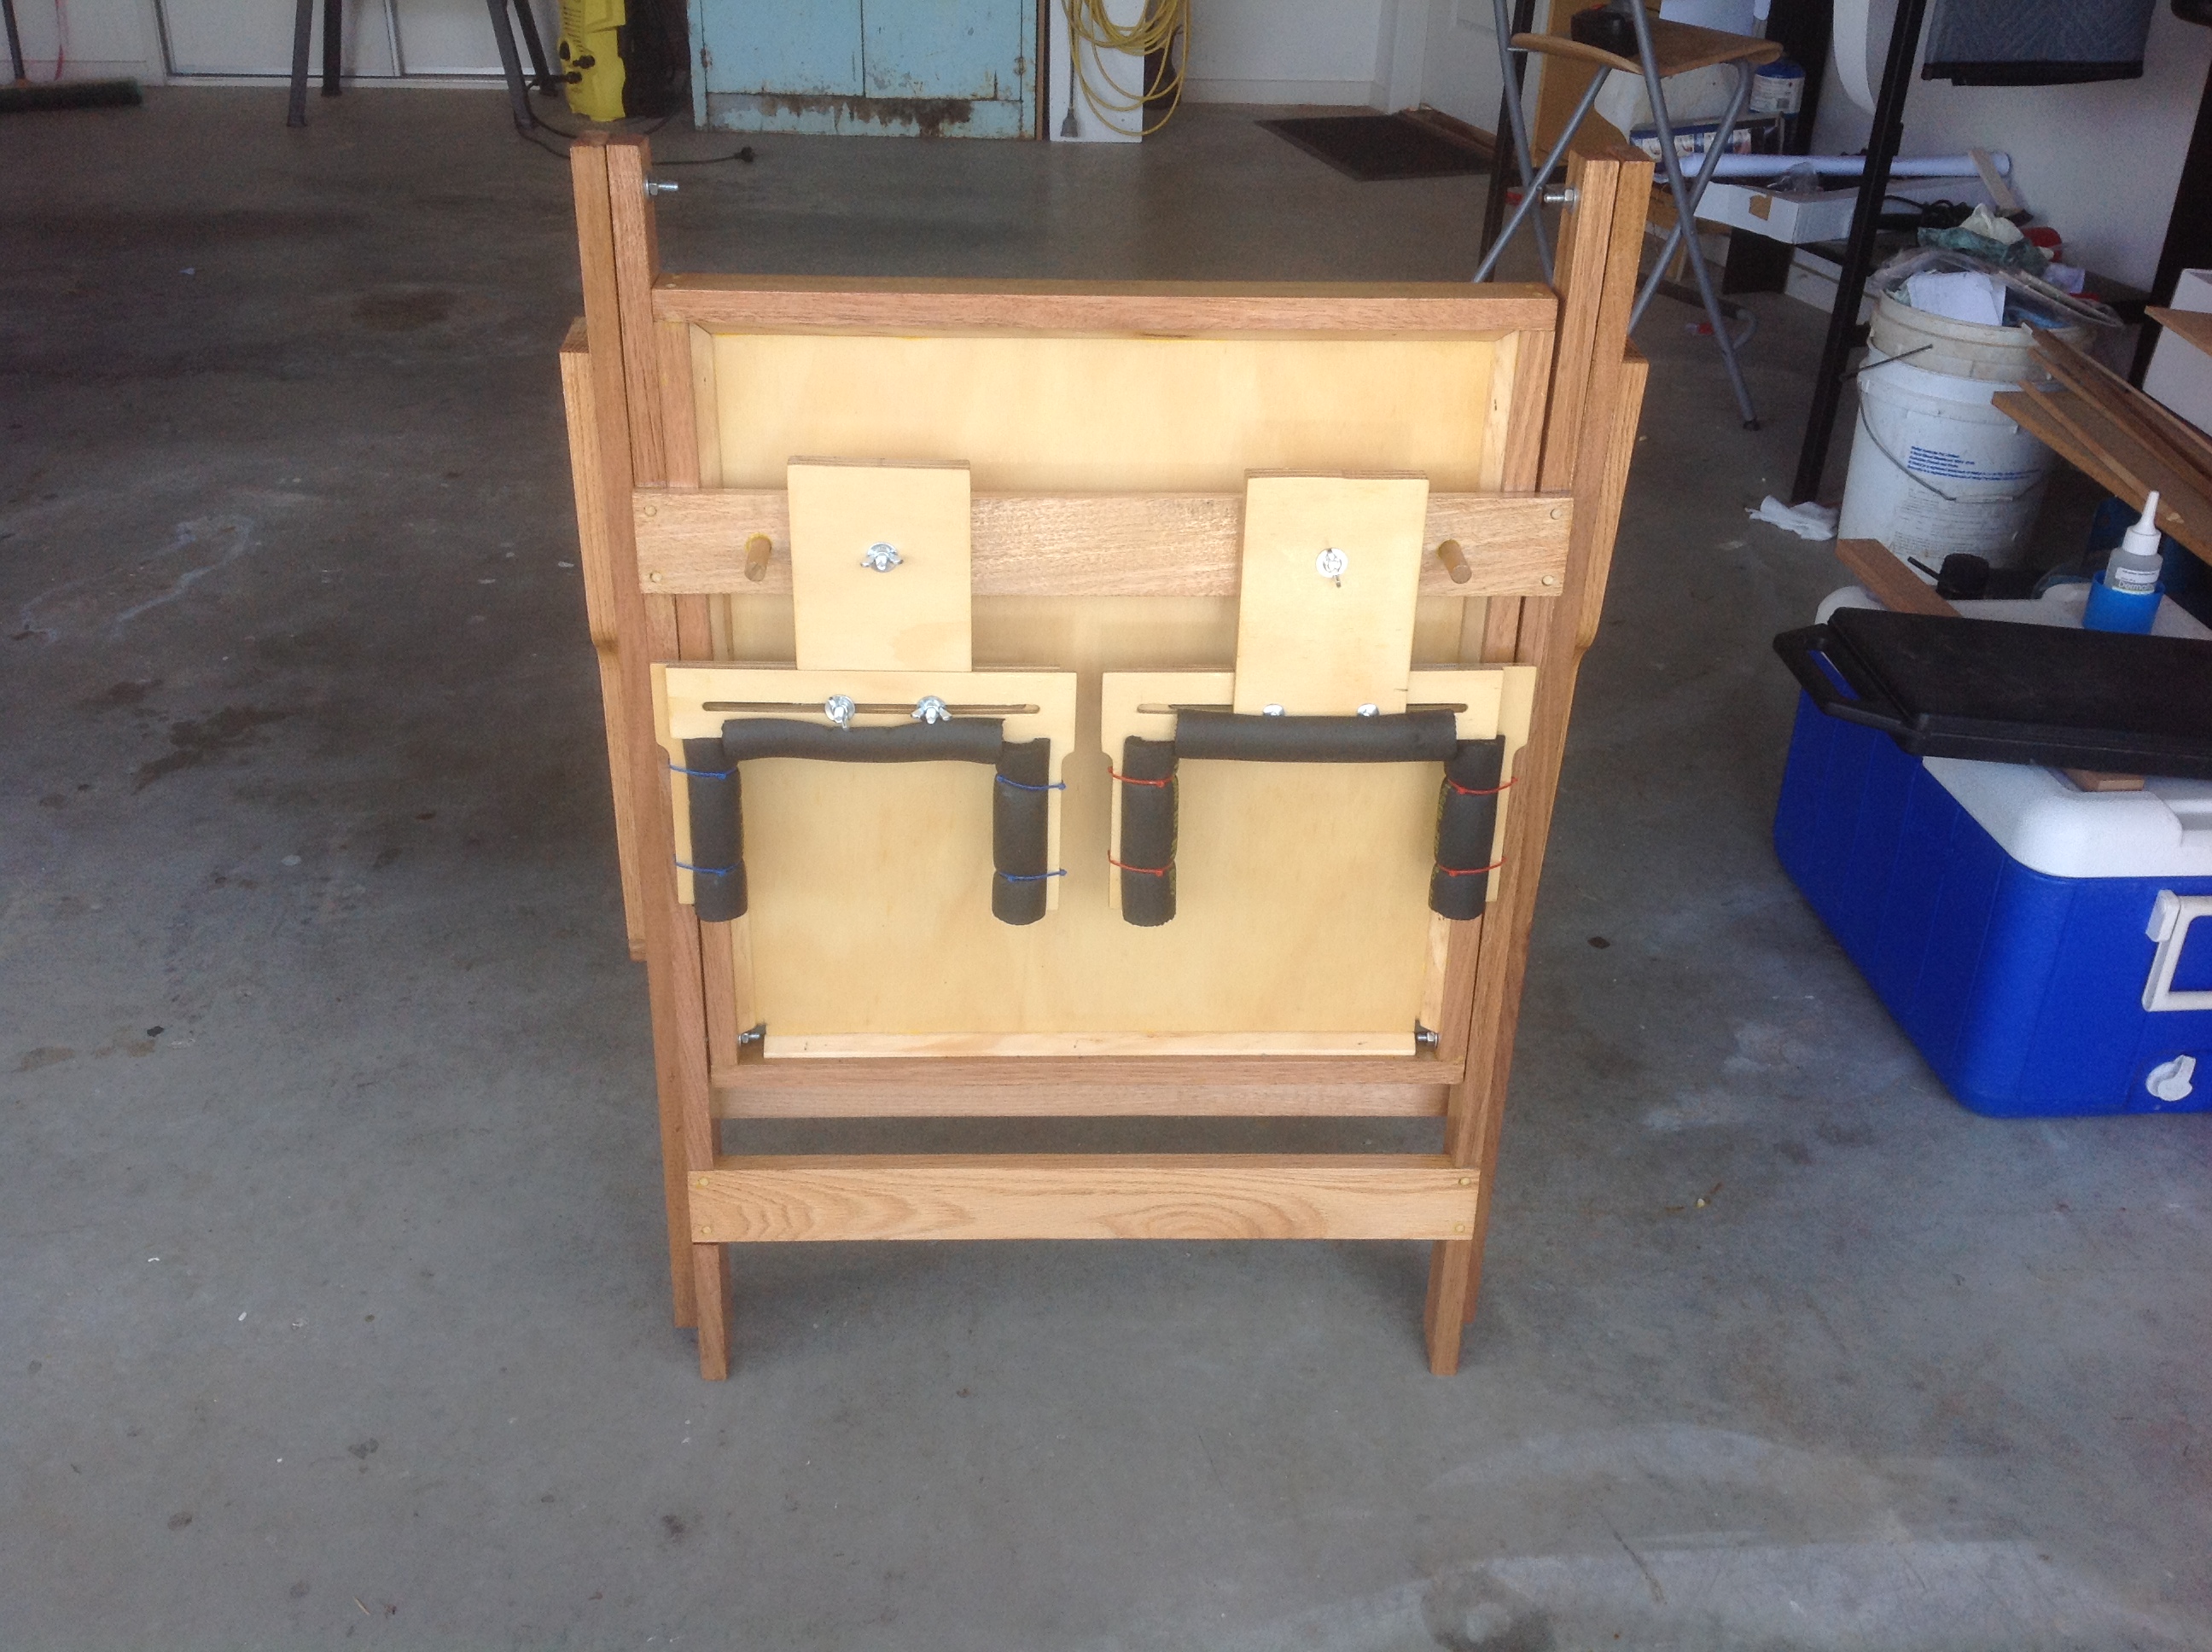
Once the cradles are removed the stand folds up nearly flat. Some holes on one of the cross beams secure the cradles for transport.
Working on this plane was a beast before; it was just too big for the cradles on my old conventional field box. The shelves are just the right width so you can move around it and have things to hand without bending over too far.
I built this with fairly basic tools. Everything was cut out with a jig saw and I used a basic drill to drill holes including the countersunk ones.
Thanks Greg, wherever you are, for putting these plans together.
Joel
This is a 'Greg Finan' RC Field Stand. Here is a link to the plans: http://www3.telus.net/public/conmar/Dave/stand.htm
I modified the plans slightly to accommodate larger airframes. The stand is 2" wider than the plans (so it will accommodate wider chord wings) and the cradles will accommodate a 2" wider airframe (i.e., each cradle arm is 1" wider than the plans). The plane in the stand is a 50cc Seagull Sparrowhawk; there is plenty of room to spare.
The stand was built from Tasmanian oak and all the hardware / finishing / supplies came from the local hardware store. Build time was about 30hrs including finishing - a skilled woodworker could have done it in a day but I was learning as I went. The hardest part was setting it all up so everything sat level and square. The cradle rests on the arms of the upper shelf, and getting this all arranged properly took some head scratching.
Once the cradles are removed the stand folds up nearly flat. Some holes on one of the cross beams secure the cradles for transport.
Working on this plane was a beast before; it was just too big for the cradles on my old conventional field box. The shelves are just the right width so you can move around it and have things to hand without bending over too far.
I built this with fairly basic tools. Everything was cut out with a jig saw and I used a basic drill to drill holes including the countersunk ones.
Thanks Greg, wherever you are, for putting these plans together.
Joel


 11-07-2013 | 01:46 PM
#4

Hi yojoelay
Will you start the engine while the plane is on that stand? On at least two occasions I started the engine on my plane and did not notice that the throttle was wide open. Fortunately my plane was on a large, heavy, Engine Starting Safety Stand which would not tip over.
Will you start the engine while the plane is on that stand? On at least two occasions I started the engine on my plane and did not notice that the throttle was wide open. Fortunately my plane was on a large, heavy, Engine Starting Safety Stand which would not tip over.
11-07-2013 | 07:04 PM
#5
Thread Starter
Senior Member
Joined: Apr 2007
Posts: 235
Likes: 0
Received 0 Likes
on
0 Posts
From: Brisbane, AUSTRALIA
Hi Villa,
No, I won't start the plane on the stand for the reasons you mention and a few others. At my field large planes must be moved outside the pits to a dedicated starting area. For small planes I have a 'hook' that fits into holes in the cement in our pits for restraining it during start up and tuning. This is a stand for tinkering and assembly.
Joel
 11-09-2013 | 10:09 PM
#9
Thread Starter
Senior Member
Joined: Apr 2007
Posts: 235
Likes: 0
Received 0 Likes
on
0 Posts
From: Brisbane, AUSTRALIA
Hi RC Fanatic,
If I was to do it again I would likely use a cheaper wood. The tassie oak looks nice but it is heavier than it needs to be and it cost about twice as much as pine. It was a learning experience and I am very happy with the outcome.
If I was to do it again I would likely use a cheaper wood. The tassie oak looks nice but it is heavier than it needs to be and it cost about twice as much as pine. It was a learning experience and I am very happy with the outcome.


