Go Back  RCU Forums > RC Airplanes > Tips & Techniques
 Let's see your work shop! >

Let's see your work shop!

Community
Search
Notices
Tips & Techniques Want to share a tip or special technique you have either in the workshop or at the flying field or race track? Post it right here!

Let's see your work shop!

Thread Tools
 
Search this Thread
 
Old 10-26-2013 | 05:33 AM
  #851  
My Feedback: (3)
 
Joined: Dec 2012
Posts: 26
Likes: 0
Received 1 Like on 1 Post
From: south amboy, NJ
Default

Attached Thumbnails Click image for larger version

Name:	IMG_2266.JPG
Views:	1584
Size:	144.3 KB
ID:	1933172   Click image for larger version

Name:	IMG_2263.JPG
Views:	1666
Size:	142.2 KB
ID:	1933173   Click image for larger version

Name:	IMG_2265.JPG
Views:	1660
Size:	144.0 KB
ID:	1933174   Click image for larger version

Name:	IMG_2268.JPG
Views:	1582
Size:	137.1 KB
ID:	1933175  
Old 10-26-2013 | 07:36 AM
  #852  
Corsair2013's Avatar
My Feedback: (2)
 
Joined: Jun 2013
Posts: 429
Likes: 0
Received 0 Likes on 0 Posts
From: Evansville, IN
Default

Originally Posted by EDDIEMAC
RATS!!! Sorry about the photo duplication.
Eddie, that is some shop! I agree though - at least throw some paper or something on the floor.............
Old 10-26-2013 | 07:41 AM
  #853  
Corsair2013's Avatar
My Feedback: (2)
 
Joined: Jun 2013
Posts: 429
Likes: 0
Received 0 Likes on 0 Posts
From: Evansville, IN
Default

Really Nice Shop - I Build..................

I didn't realize that this thread had pretty much died until you just posted - the other post are a year old... LOL

Keith
Old 10-26-2013 | 02:55 PM
  #854  
GPutt33's Avatar
My Feedback: (2)
 
Joined: May 2002
Posts: 918
Likes: 0
Received 0 Likes on 0 Posts
From: CO
Default

I have all most got everything rebuilt in the new house. Planes ready to go are up stairs in the garage along with battery chargers, power supply, fuel, etc, etc
.

I then got to build a new shop downstairs
Attached Thumbnails Click image for larger version

Name:	IMG_2746.JPG
Views:	1795
Size:	2.42 MB
ID:	1933350   Click image for larger version

Name:	IMG_2747.JPG
Views:	1805
Size:	2.64 MB
ID:	1933351   Click image for larger version

Name:	IMG_2751.JPG
Views:	1699
Size:	2.70 MB
ID:	1933352   Click image for larger version

Name:	IMG_2750.JPG
Views:	1683
Size:	2.74 MB
ID:	1933353   Click image for larger version

Name:	IMG_2753.JPG
Views:	2027
Size:	2.94 MB
ID:	1933354   Click image for larger version

Name:	IMG_2755.JPG
Views:	2193
Size:	2.71 MB
ID:	1933355   Click image for larger version

Name:	IMG_2757.JPG
Views:	1725
Size:	2.79 MB
ID:	1933356   Click image for larger version

Name:	IMG_2758.JPG
Views:	1690
Size:	2.85 MB
ID:	1933357  

Old 10-26-2013 | 04:33 PM
  #855  
hookedonrc's Avatar
 
Joined: Dec 2002
Posts: 2,891
Likes: 0
Received 1 Like on 1 Post
From: Tulsa, OK
Default

Gregg, very nice. BTW it is far too clean and you need to fill that empty spot on the ceiling hanger.
Old 10-26-2013 | 04:36 PM
  #856  
thailazer's Avatar
 
Joined: Mar 2008
Posts: 1,589
Received 7 Likes on 7 Posts
From: Liberty Lake, WA
Default

That is a beautiful roomy shop!

Anyone else experiencing slow download times on photos on RCU? Each one on this thread took about 30 seconds or more.
Old 10-26-2013 | 05:44 PM
  #857  
Thunderbolt47's Avatar
Senior Member
My Feedback: (8)
 
Joined: Oct 2002
Posts: 2,143
Likes: 0
Received 1 Like on 1 Post
From: Beulaville , NC
Default

Most don't reduce before they post. here is unreduced

Here is reduced.

notice the times
Attached Thumbnails Click image for larger version

Name:	IMG_8232.JPG
Views:	1316
Size:	1.65 MB
ID:	1933399   Click image for larger version

Name:	IMG_8232_1.JPG
Views:	1301
Size:	46.2 KB
ID:	1933400  

Last edited by Thunderbolt47; 10-26-2013 at 05:48 PM.
Old 10-26-2013 | 06:33 PM
  #858  
GPutt33's Avatar
My Feedback: (2)
 
Joined: May 2002
Posts: 918
Likes: 0
Received 0 Likes on 0 Posts
From: CO
Default

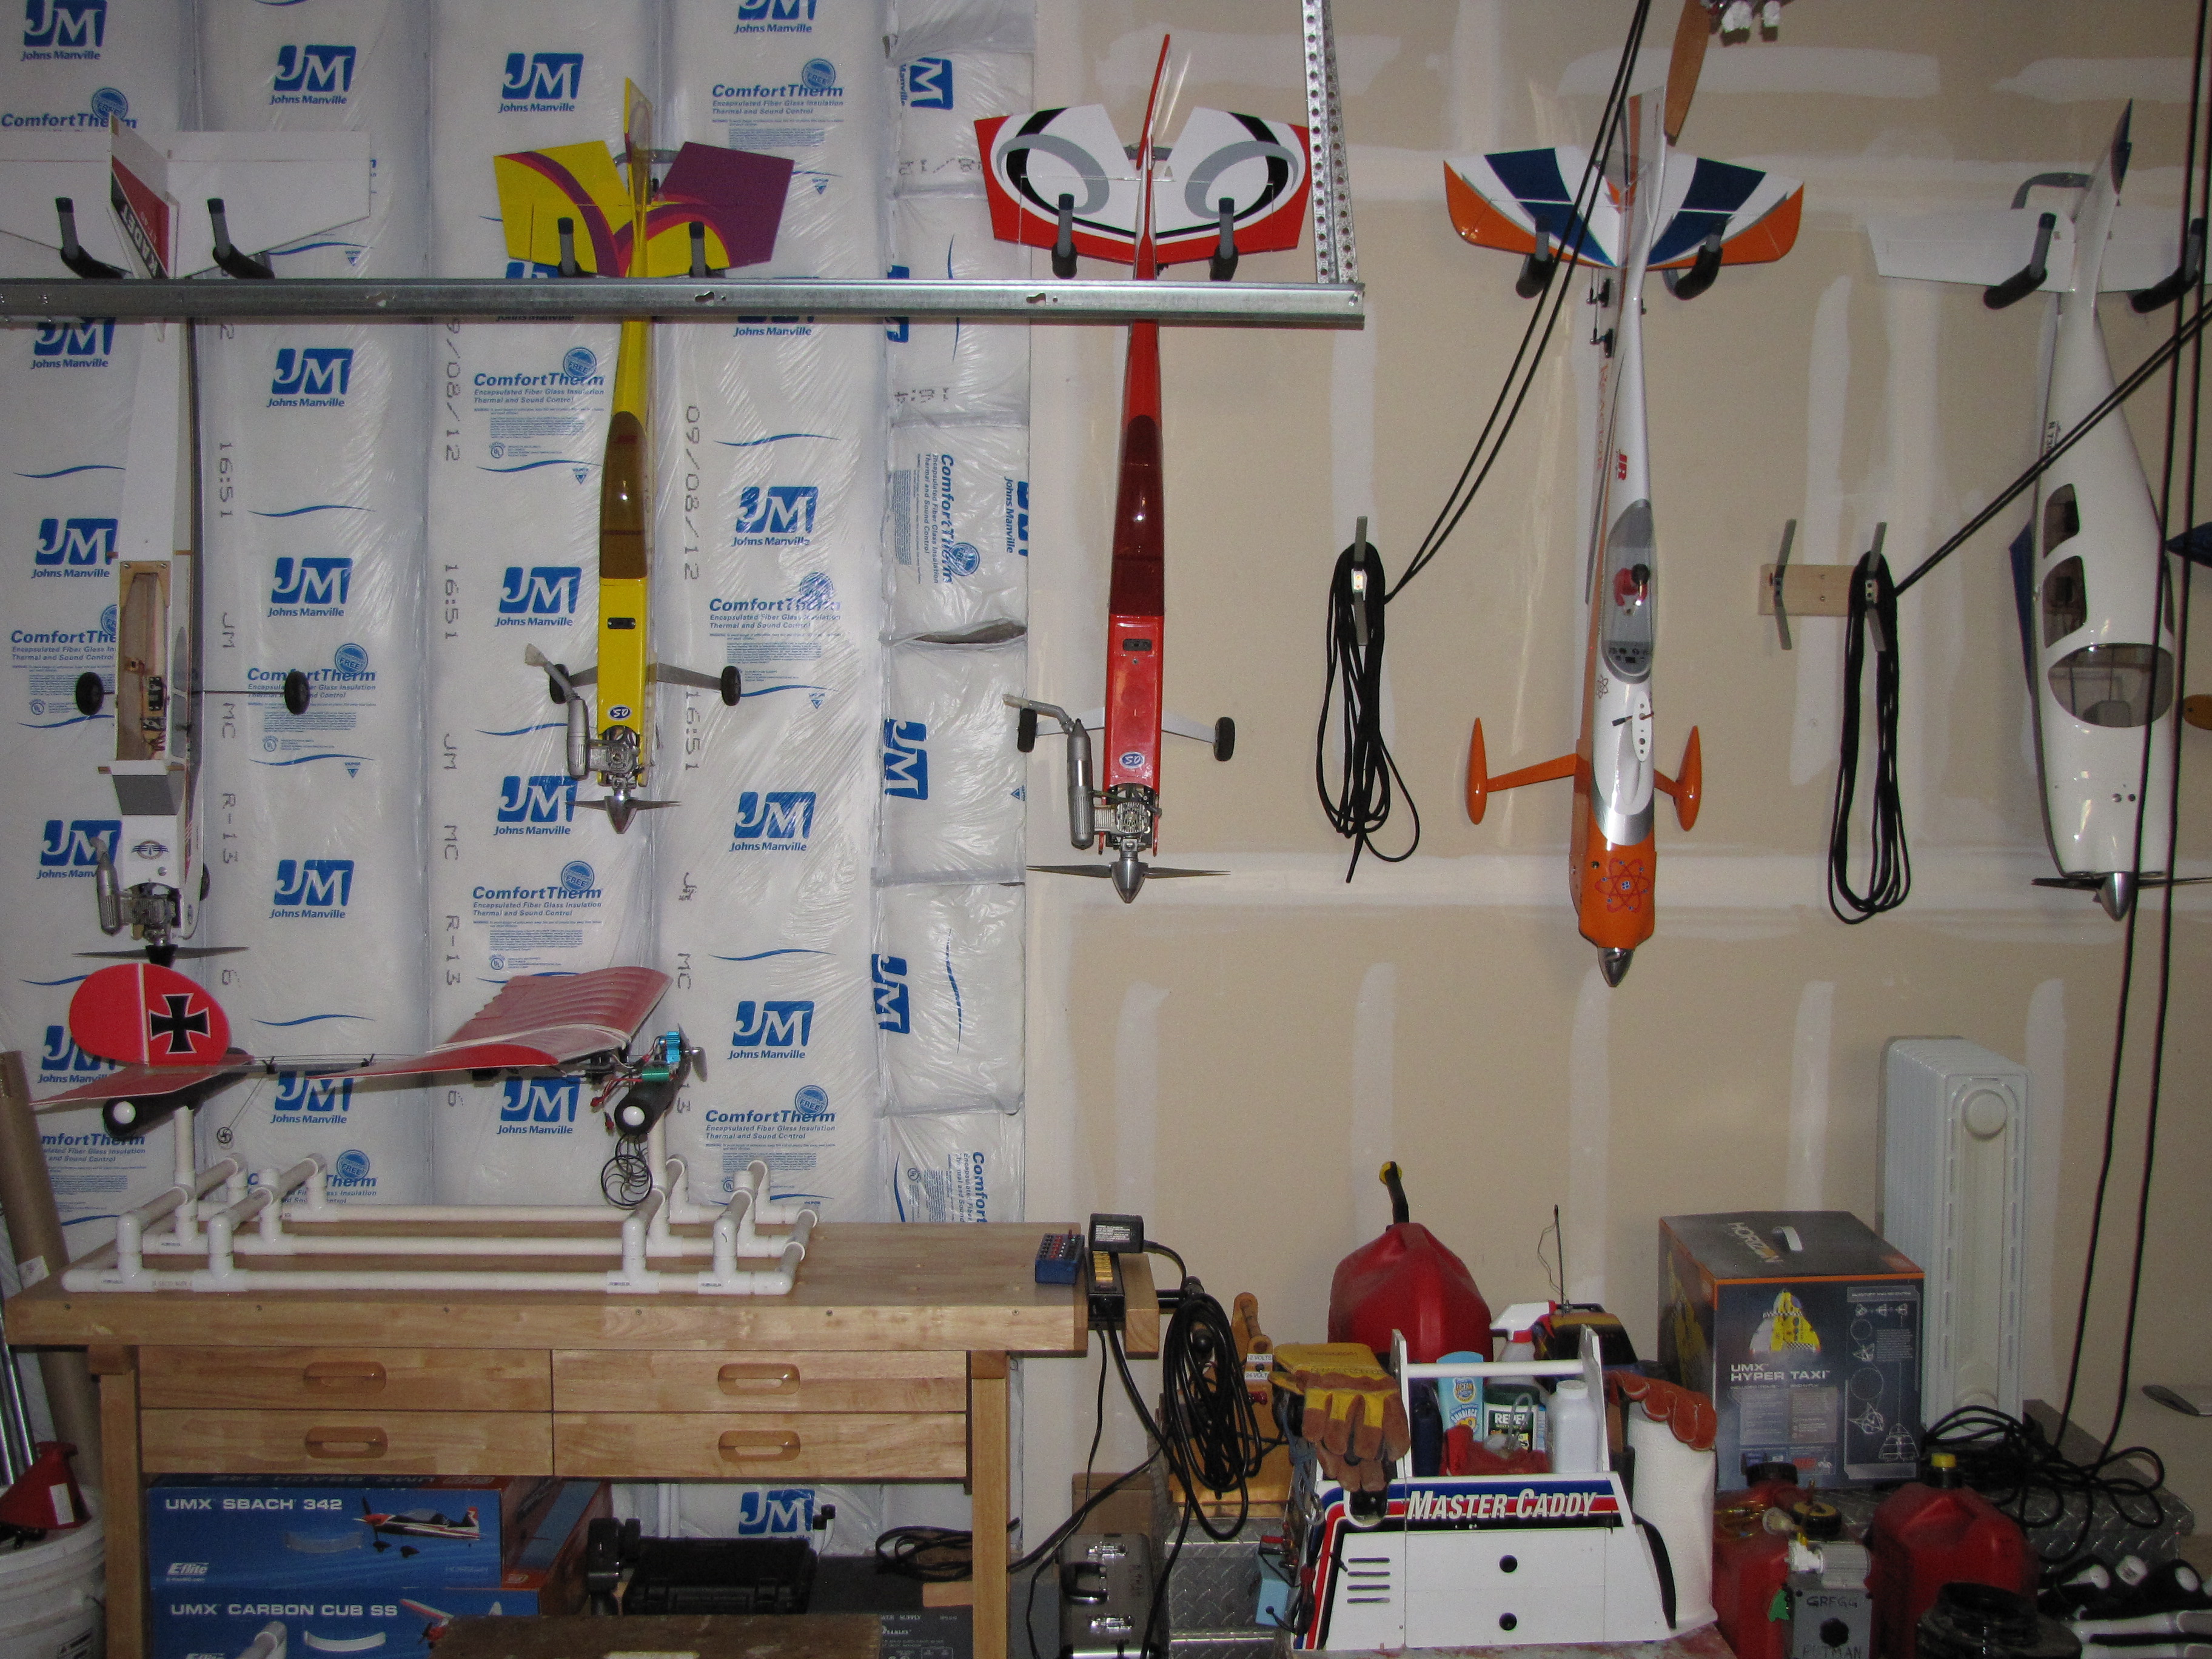
That one empty slot is where the Cub is usually hanging out . It is pretty tidy right now but it's just about ready to get busy down there. Now I can get the Bucker-Jungman kit back out. I've been trying to get it going again for about 4 years . Have the upper wing at about 70% complete....
Old 10-26-2013 | 08:48 PM
  #859  
 
Joined: Jun 2012
Posts: 181
Likes: 0
Received 0 Likes on 0 Posts
From: JOSHUA, TX
Default

I agree, more like a hobby store. STILL IT LOOKS GREAT AND ORGANIZED
Old 10-26-2013 | 09:01 PM
  #860  
 
Joined: Jun 2012
Posts: 181
Likes: 0
Received 0 Likes on 0 Posts
From: JOSHUA, TX
Default

LOOKING AT ALL THESE GREAT WORK PLACES, MAKEES ME WANT TO EXPANE MY CLOSET A FEW FEET
Old 11-10-2013 | 04:18 PM
  #861  
Junior Member
 
Joined: May 2012
Posts: 5
Likes: 0
Received 0 Likes on 0 Posts
From: Nanaimo, BC, CANADA
Default

That's really cool, I think I might do the same thing, but maybe with a P-40 Warhawk painted mural. Very cool idea like it alot
Old 11-10-2013 | 08:39 PM
  #862  
flyoz's Avatar
My Feedback: (7)
 
Joined: Jan 2004
Posts: 184
Received 0 Likes on 0 Posts
From: East Moorabbin,Victoria, AUSTRALIA
Default

Eddie and Gputt Now I know what jealousy feels like ;{
Old 11-28-2013 | 09:51 AM
  #863  
hookedonrc's Avatar
 
Joined: Dec 2002
Posts: 2,891
Likes: 0
Received 1 Like on 1 Post
From: Tulsa, OK
Default

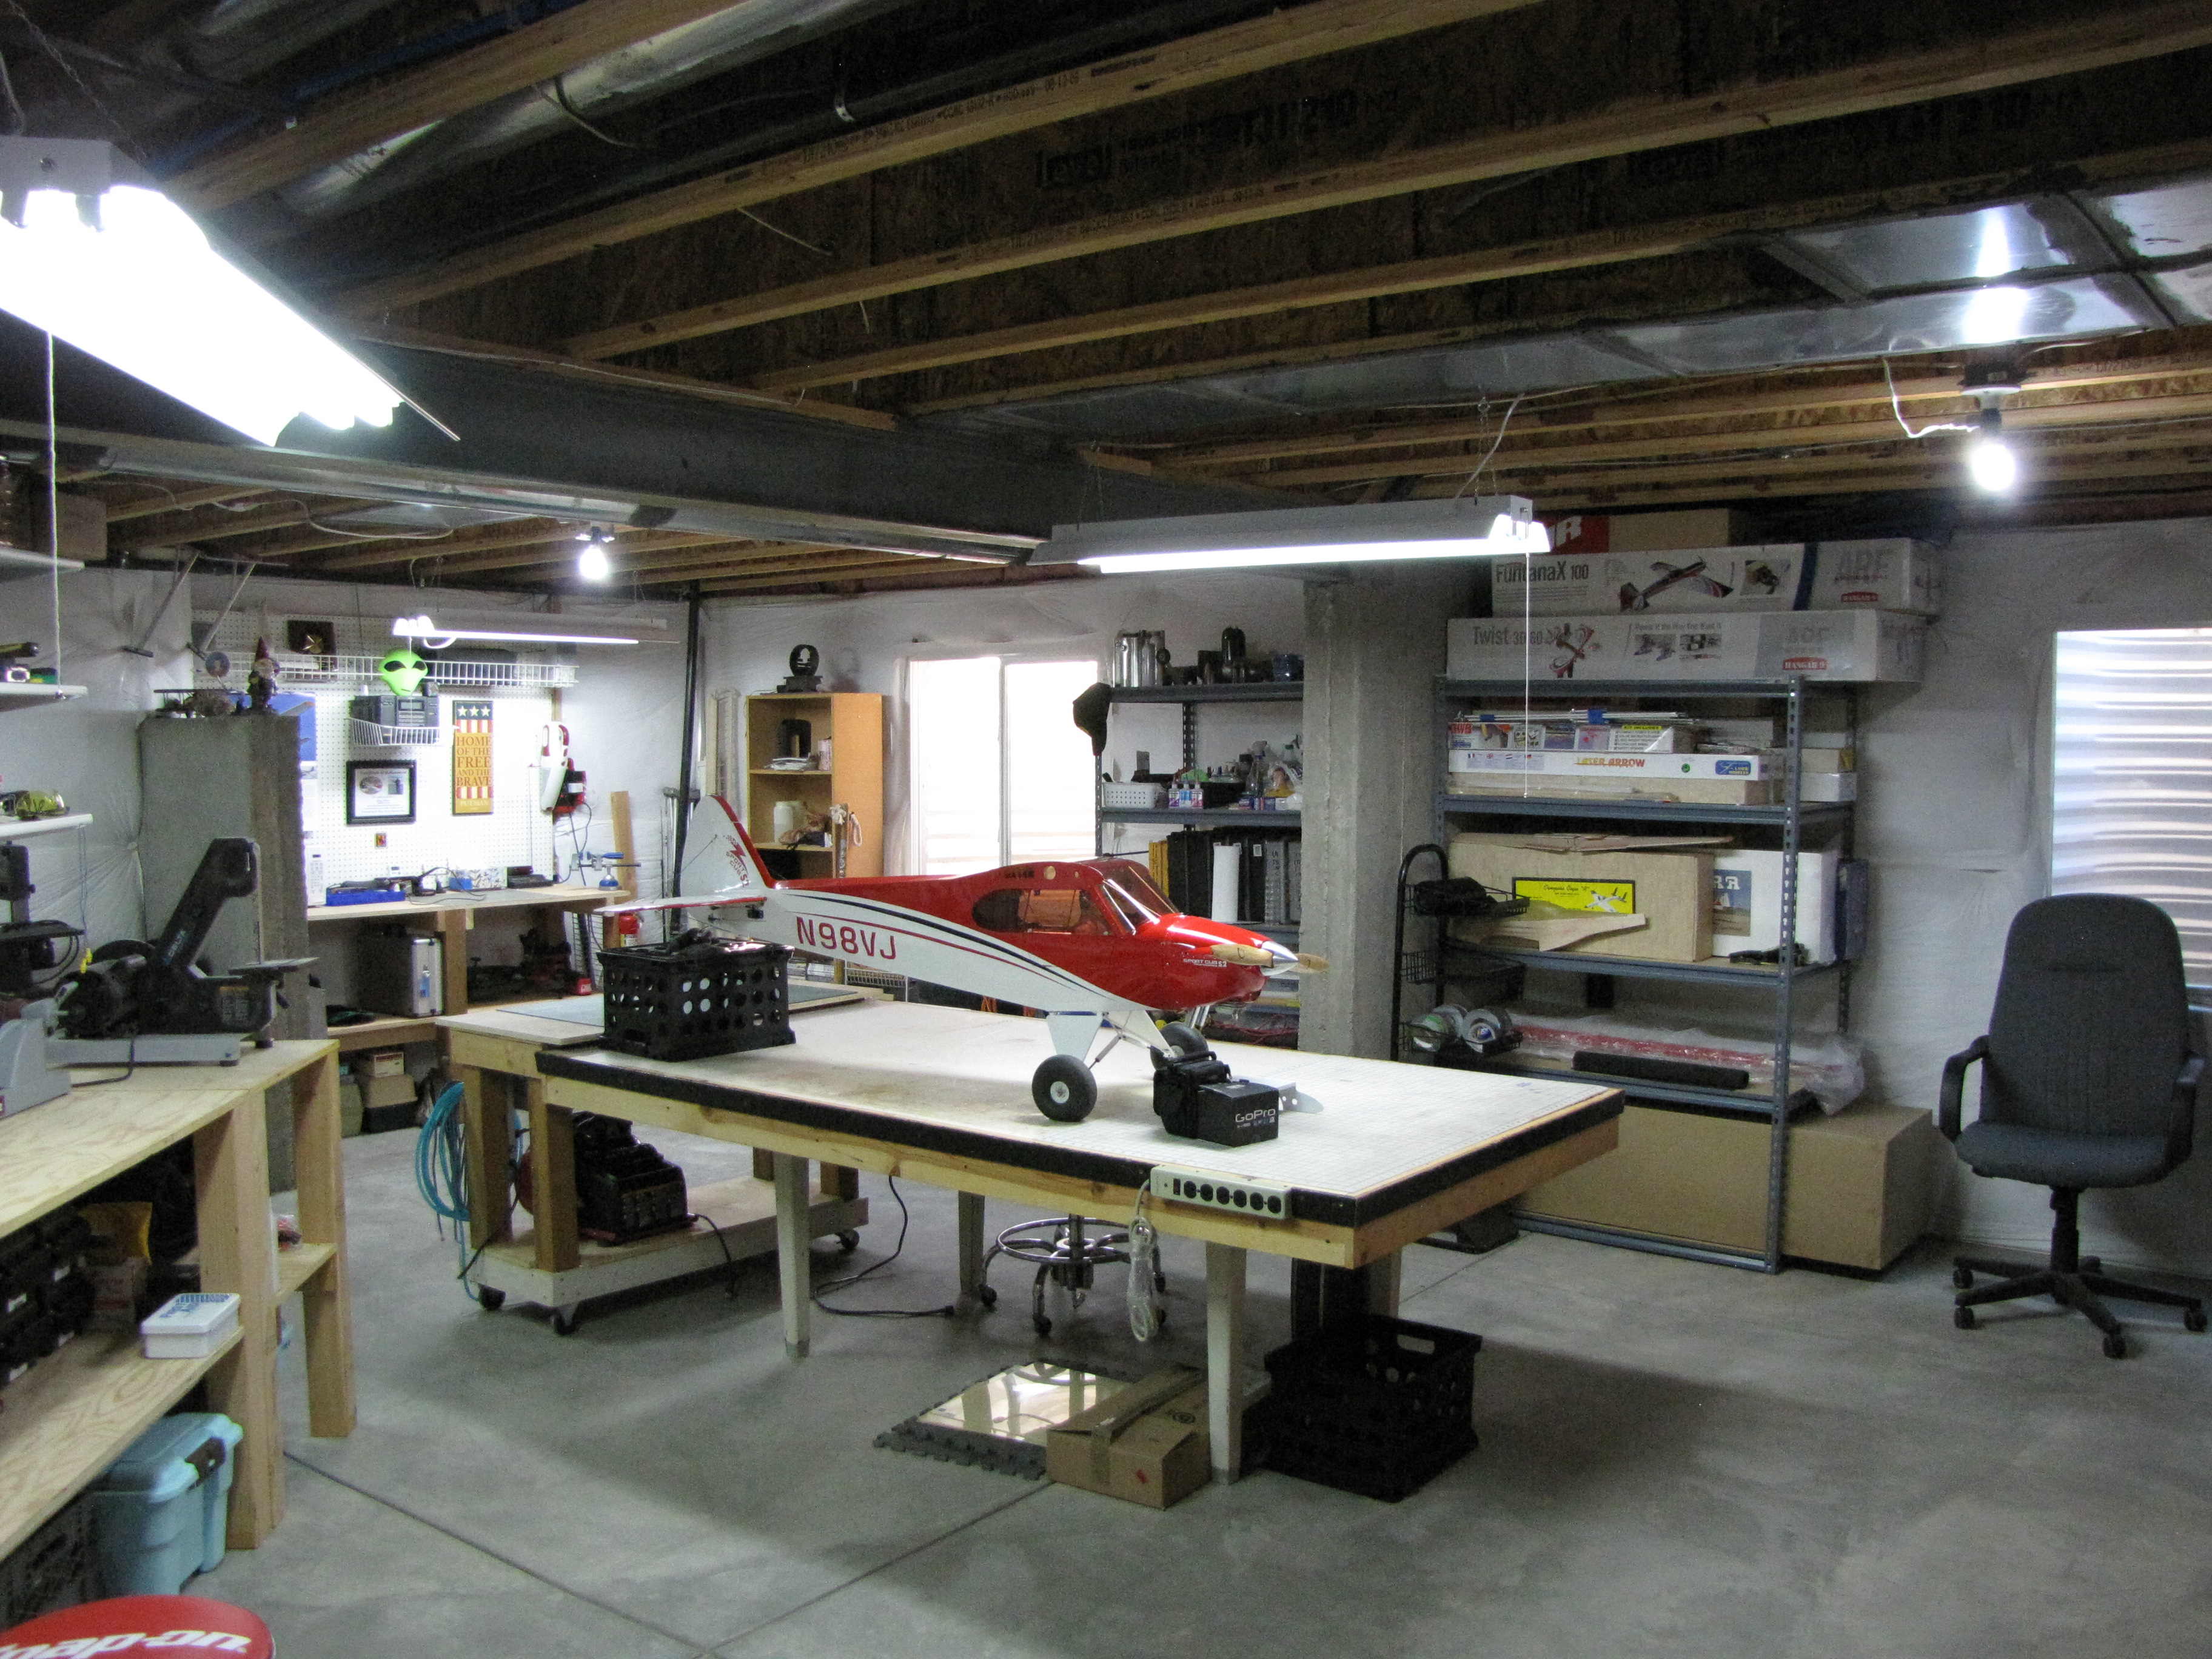
This thread has been around long enough for me to post another workshop on it. My first one wasn't big enough (See Post 39 from 2004), so I gathered up my tools, sold it and built another house around my new one. Here it is..... And yes, before you ask, I spent time cleaning it up before I took the picture. Never go out in public without cleaning up first. The bench is longer, but it looks the same because the planes are now bigger.

Attached Thumbnails Click image for larger version

Name:	IMG_4052.JPG
Views:	1597
Size:	3.59 MB
ID:	1943146  
Old 11-28-2013 | 11:20 AM
  #864  
tailskid's Avatar
My Feedback: (34)
 
Joined: Nov 2001
Posts: 9,554
Received 7 Likes on 7 Posts
From: Mobile, AL
Default

I'd say you got a nice one going there hookedonrc, but I think that plane belongs in MY workshop - oh wait, I already have one (and wouldn't trade it for the world). YOU WILL LOVE THAT BIRD!!!! What you powering it with?
Old 11-28-2013 | 12:10 PM
  #865  
hookedonrc's Avatar
 
Joined: Dec 2002
Posts: 2,891
Likes: 0
Received 1 Like on 1 Post
From: Tulsa, OK
Default

Thanks tailskid, yes I can't wait to get it in the air. It's a DLE 20. I am about 1/2 way through the build because I am doing all the mods that have been suggested on RCU, and some of my own. I was going to fit the cowl this weekend, but have to wait till I get the muffler. I took the plunge and sprung for a small canister wrap around Pitts muffler from J-tec. I am trying to fit it all within the cowl.
Old 11-28-2013 | 12:22 PM
  #866  
tailskid's Avatar
My Feedback: (34)
 
Joined: Nov 2001
Posts: 9,554
Received 7 Likes on 7 Posts
From: Mobile, AL
Default

That's what I have in mine and it needed some 'tweeking' to get to fit. I used Du-Bro mounts and are using a 15/7 three bladed prop due to ground clearance. I also used two elevator servos but other than that, it is stock!
Attached Thumbnails Click image for larger version

Name:	Flair.jpeg
Views:	211
Size:	187.7 KB
ID:	1943175  
Old 11-28-2013 | 12:47 PM
  #867  
hookedonrc's Avatar
 
Joined: Dec 2002
Posts: 2,891
Likes: 0
Received 1 Like on 1 Post
From: Tulsa, OK
Default

Yep, I have seen that picture many times. I didn't go to 2 servos on the elevator, but did add a second control rod. I am keeping track of the mods on this thread:

http://www.rcuniverse.com/forum/arf-...ilot-size.html
Old 11-28-2013 | 03:56 PM
  #868  
Propworn's Avatar
My Feedback: (3)
 
Joined: Jul 2002
Posts: 2,489
Received 32 Likes on 26 Posts
From: Canada
Default My Hanger

Two car garage, two building tables, table saw doubles as a third building table in a pinch. 36 inch blue print copier inside second table, tig welder, CNC mill, lathe, cut off saw etc etc.
Attached Thumbnails Click image for larger version

Name:	A.jpg
Views:	398
Size:	242.1 KB
ID:	1943190   Click image for larger version

Name:	B.jpg
Views:	380
Size:	290.5 KB
ID:	1943191   Click image for larger version

Name:	C.jpg
Views:	365
Size:	274.5 KB
ID:	1943192   Click image for larger version

Name:	E.jpg
Views:	409
Size:	303.3 KB
ID:	1943193   Click image for larger version

Name:	G.jpg
Views:	370
Size:	283.9 KB
ID:	1943194   Click image for larger version

Name:	H.jpg
Views:	368
Size:	307.7 KB
ID:	1943195   Click image for larger version

Name:	I.jpg
Views:	376
Size:	275.4 KB
ID:	1943196   Click image for larger version

Name:	J.jpg
Views:	379
Size:	269.6 KB
ID:	1943197  

Click image for larger version

Name:	K.jpg
Views:	375
Size:	272.7 KB
ID:	1943198   Click image for larger version

Name:	L.jpg
Views:	380
Size:	207.4 KB
ID:	1943199   Click image for larger version

Name:	M.jpg
Views:	350
Size:	234.1 KB
ID:	1943200  
Old 08-19-2014 | 04:44 PM
  #869  
Redwulf__34's Avatar
Senior Member
 
Joined: Aug 2006
Posts: 598
Likes: 0
Received 0 Likes on 0 Posts
From: Harrisonburg, VA
Default

I've been watching this thread for YEARS!!!!!!!! I'm finally excited to be able to contribute. Took a few years to save the cash and of course had to keep stacking the garage fuller and fuller so my wife finally said, build something to put all this stuff in!!!!!

It's on the way. 20 X 20.

Attached Thumbnails Click image for larger version

Name:	1551659_10203356390243494_6582391034378074531_n.jpg
Views:	1254
Size:	102.0 KB
ID:	2023717   Click image for larger version

Name:	10534117_10203360452225041_6777988008342911259_n.jpg
Views:	1268
Size:	86.0 KB
ID:	2023718  
Old 08-19-2014 | 06:43 PM
  #870  
 
Joined: Jun 2012
Posts: 181
Likes: 0
Received 0 Likes on 0 Posts
From: JOSHUA, TX
Default

Well it is a good start. . GOOD LUCK ON YOUR BUILD.
Old 08-20-2014 | 05:43 AM
  #871  
rye
My Feedback: (10)
 
Joined: Jan 2003
Posts: 1,841
Received 0 Likes on 0 Posts
From: chicago, IL
Default

Lucky dog
Old 08-20-2014 | 05:54 AM
  #872  
dreadnaut's Avatar
My Feedback: (5)
 
Joined: Mar 2004
Posts: 1,234
Received 0 Likes on 0 Posts
From: Oceanside, CA
Default

Originally Posted by Propworn
Two car garage, two building tables, table saw doubles as a third building table in a pinch. 36 inch blue print copier inside second table, tig welder, CNC mill, lathe, cut off saw etc etc.
Now i'm jealous.
Attached Images   
Old 08-20-2014 | 11:04 AM
  #873  
aspeed's Avatar
 
Joined: Jul 2011
Posts: 3,468
Likes: 0
Received 8 Likes on 8 Posts
From: Ruthven, ON, CANADA
Default

Now I know where to get my little TIG jobs done, eh Dennis. My MIG doesn't do much for models.
Old 05-05-2015 | 04:46 PM
  #874  
 
Joined: Oct 2006
Posts: 5
Likes: 0
Received 0 Likes on 0 Posts
From: Le Roy NY
Default New Shop in Basement


This is the shop we just finished. This thread has been an inspiration. Thank you all for contributing.


Attached Thumbnails Click image for larger version

Name:	image.jpg
Views:	188
Size:	651.7 KB
ID:	2094205   Click image for larger version

Name:	image.jpg
Views:	1616
Size:	751.5 KB
ID:	2094206   Click image for larger version

Name:	image.jpg
Views:	1296
Size:	669.3 KB
ID:	2094207   Click image for larger version

Name:	image.jpg
Views:	1283
Size:	661.6 KB
ID:	2094208   Click image for larger version

Name:	image.jpg
Views:	1304
Size:	781.0 KB
ID:	2094211   Click image for larger version

Name:	image.jpg
Views:	1332
Size:	703.9 KB
ID:	2094212   Click image for larger version

Name:	image.jpg
Views:	198
Size:	761.6 KB
ID:	2094213  

Last edited by kbucki; 05-05-2015 at 04:51 PM.
Old 05-05-2015 | 06:20 PM
  #875  
FlyWheel's Avatar
Senior Member
 
Joined: Dec 2008
Posts: 164
Likes: 0
Received 0 Likes on 0 Posts
From: Blackstock, SC
Default

If I showed my workshop when it was clean you would think it belongs to a cyclist, not a modeler. Because basically it does.


Contact Us - Archive - Advertising - Cookie Policy - Privacy Statement - Terms of Service

Copyright © 2026 MH Sub I, LLC dba Internet Brands. All rights reserved. Use of this site indicates your consent to the Terms of Use.