


"Nosen Cessna 310 Club"
 08-13-2018, 02:17 PM
#1551

No problem, the fiberglass should be delivered by the end of the month, everything else is waiting for pickup. I’m building one of the G&L Super Chipmunk kits right now and I’m very happy with the quality; hopefully this will be just as nice. This will by no means be a “kit” type of build as the glass fuse saves a lot of time but requires a lot of thinking outside the box.
The laser short kit is only $195 on eBay and with the last 15% off coupon it was hard to say no.
 08-13-2018, 02:52 PM
#1552
Join Date: Oct 2011
Location: Kyneton, AUSTRALIA
Posts: 14
Likes: 0
Received 0 Likes
on
0 Posts
Thanks Ken.
Was thinking about your tailplane spar/joining question.... carbon tubes? outer and inner? A servo buried underneath each tailplane. I might have to do the same, unless my trailer could hold the fuselage at 45 degrees over to fit that tailplane in!
I miss my ARF 8 foot 310....... it was about 15lb with two OS46AX.
08-14-2018, 03:42 AM
#1553
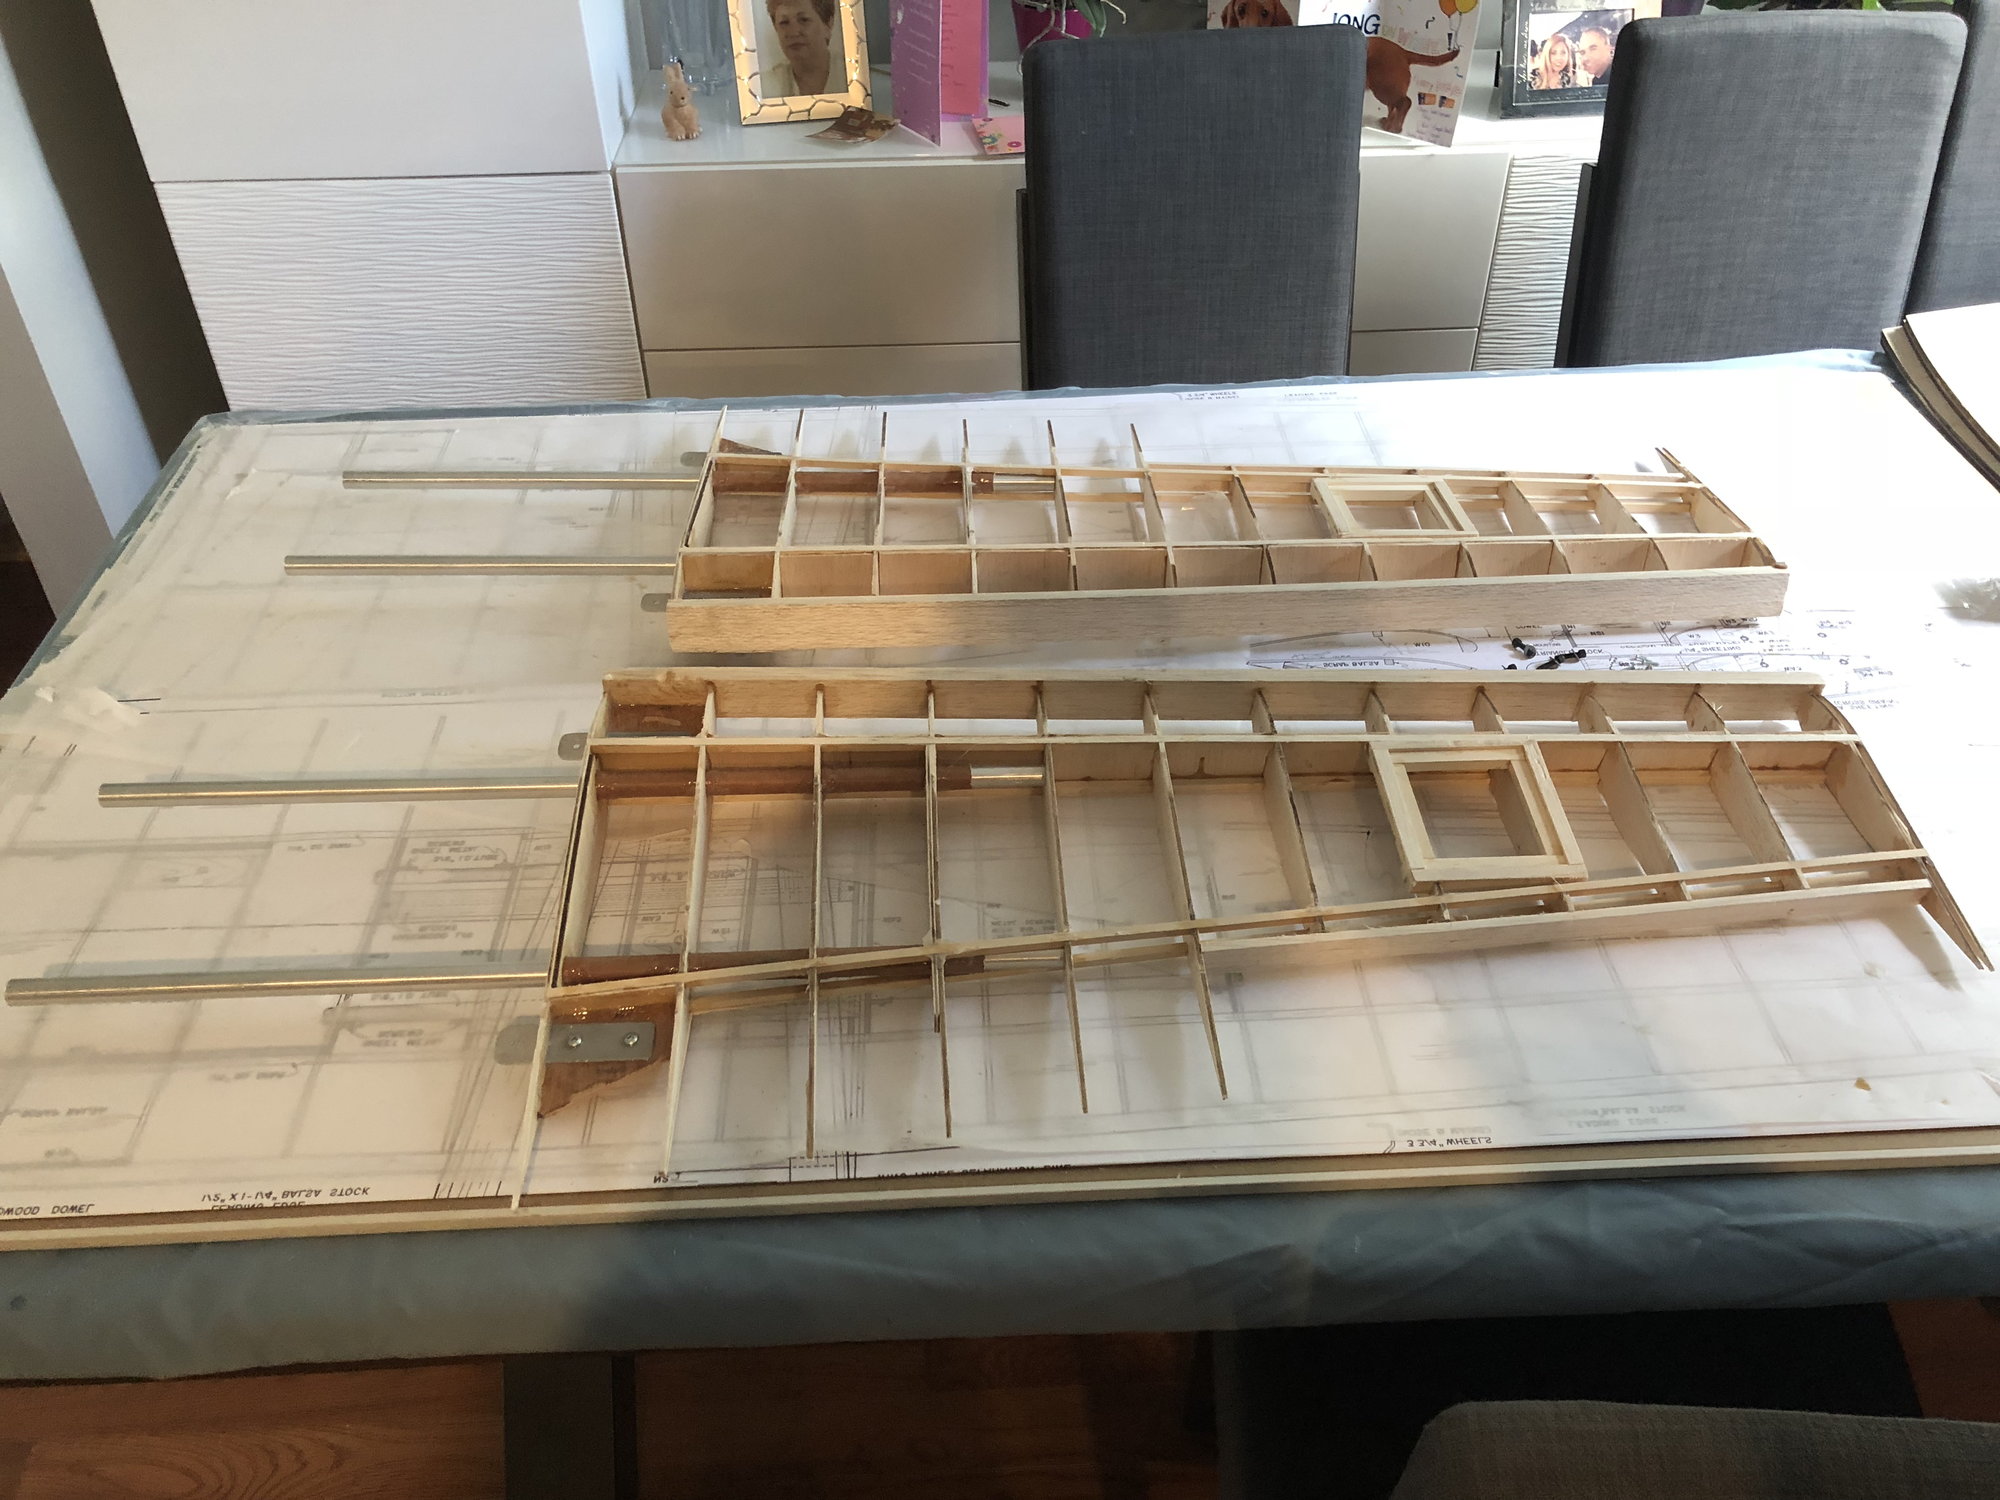
I'm planning on using 2 x .500" OD/.035" wall 6061-T6 tubes along with 1/32" wall Garolite tubes as sockets to retain the tail. I will put tubes in the tail surfaces and the fuselage so the tube is fully guided and removable, a plywood doubler will be added to the fiberglass tail area when I epoxy in the tubes. I have yet to draw the retention method but I will use some metal brackets with fasteners hidden under an access panel, this might be today's project. the servos will be mounted in each tail from the bottom side under doors, only the arms will protrude through the doors. I'm planning to use the same construction on the wings but using .625"/.045" wall tubes to stiffen the wing, once again will full tubes. The only difference with the wing is I will retain the wings with brackets similar to the tail rather than drilling the tubes as the original design. This will allow me to easily replace the tubes if required and they are completely removable for transport.
08-14-2018, 03:49 AM
#1555
Can anyone confirm their main gear position from the leading edge of the wing to the axle center line? I'm working in CAD and my retracts are placed 7" back from the leading edge with a 5 degree forward rake, this puts my axle 6.250" back from the leading edge. I know I'm still behind the CG point but I'm curious what everyone else has as I don't want bad habits on the ground.
08-26-2018, 05:16 AM
#1556
Hello everyone,
Just back from my USA trip to pick up all my parts and the look on my wife�s face when she saw the G&L box was priceless, I thought she was going to cry! She�ll be so much happier once she gets to see how big this thing really is once it�s built! Since I purchased a laser cut kit I have no use for the fuselage formers, if anyone wants the set please let me know, cover the postage and their yours!
Just back from my USA trip to pick up all my parts and the look on my wife�s face when she saw the G&L box was priceless, I thought she was going to cry! She�ll be so much happier once she gets to see how big this thing really is once it�s built! Since I purchased a laser cut kit I have no use for the fuselage formers, if anyone wants the set please let me know, cover the postage and their yours!

 09-02-2018, 08:07 AM
#1560
Sorry guys, been busy at work this week. The weights of the fiberglass parts are as follows.
Cowls - 250g / pair
Tip Tanks 300g / pair
Gear door covers - 20g / pair
Lower Nacelles - 106g / pair
Upper Nacelles - 290g / pair
Cowls - 250g / pair
Tip Tanks 300g / pair
Gear door covers - 20g / pair
Lower Nacelles - 106g / pair
Upper Nacelles - 290g / pair
09-02-2018, 08:14 AM
#1561
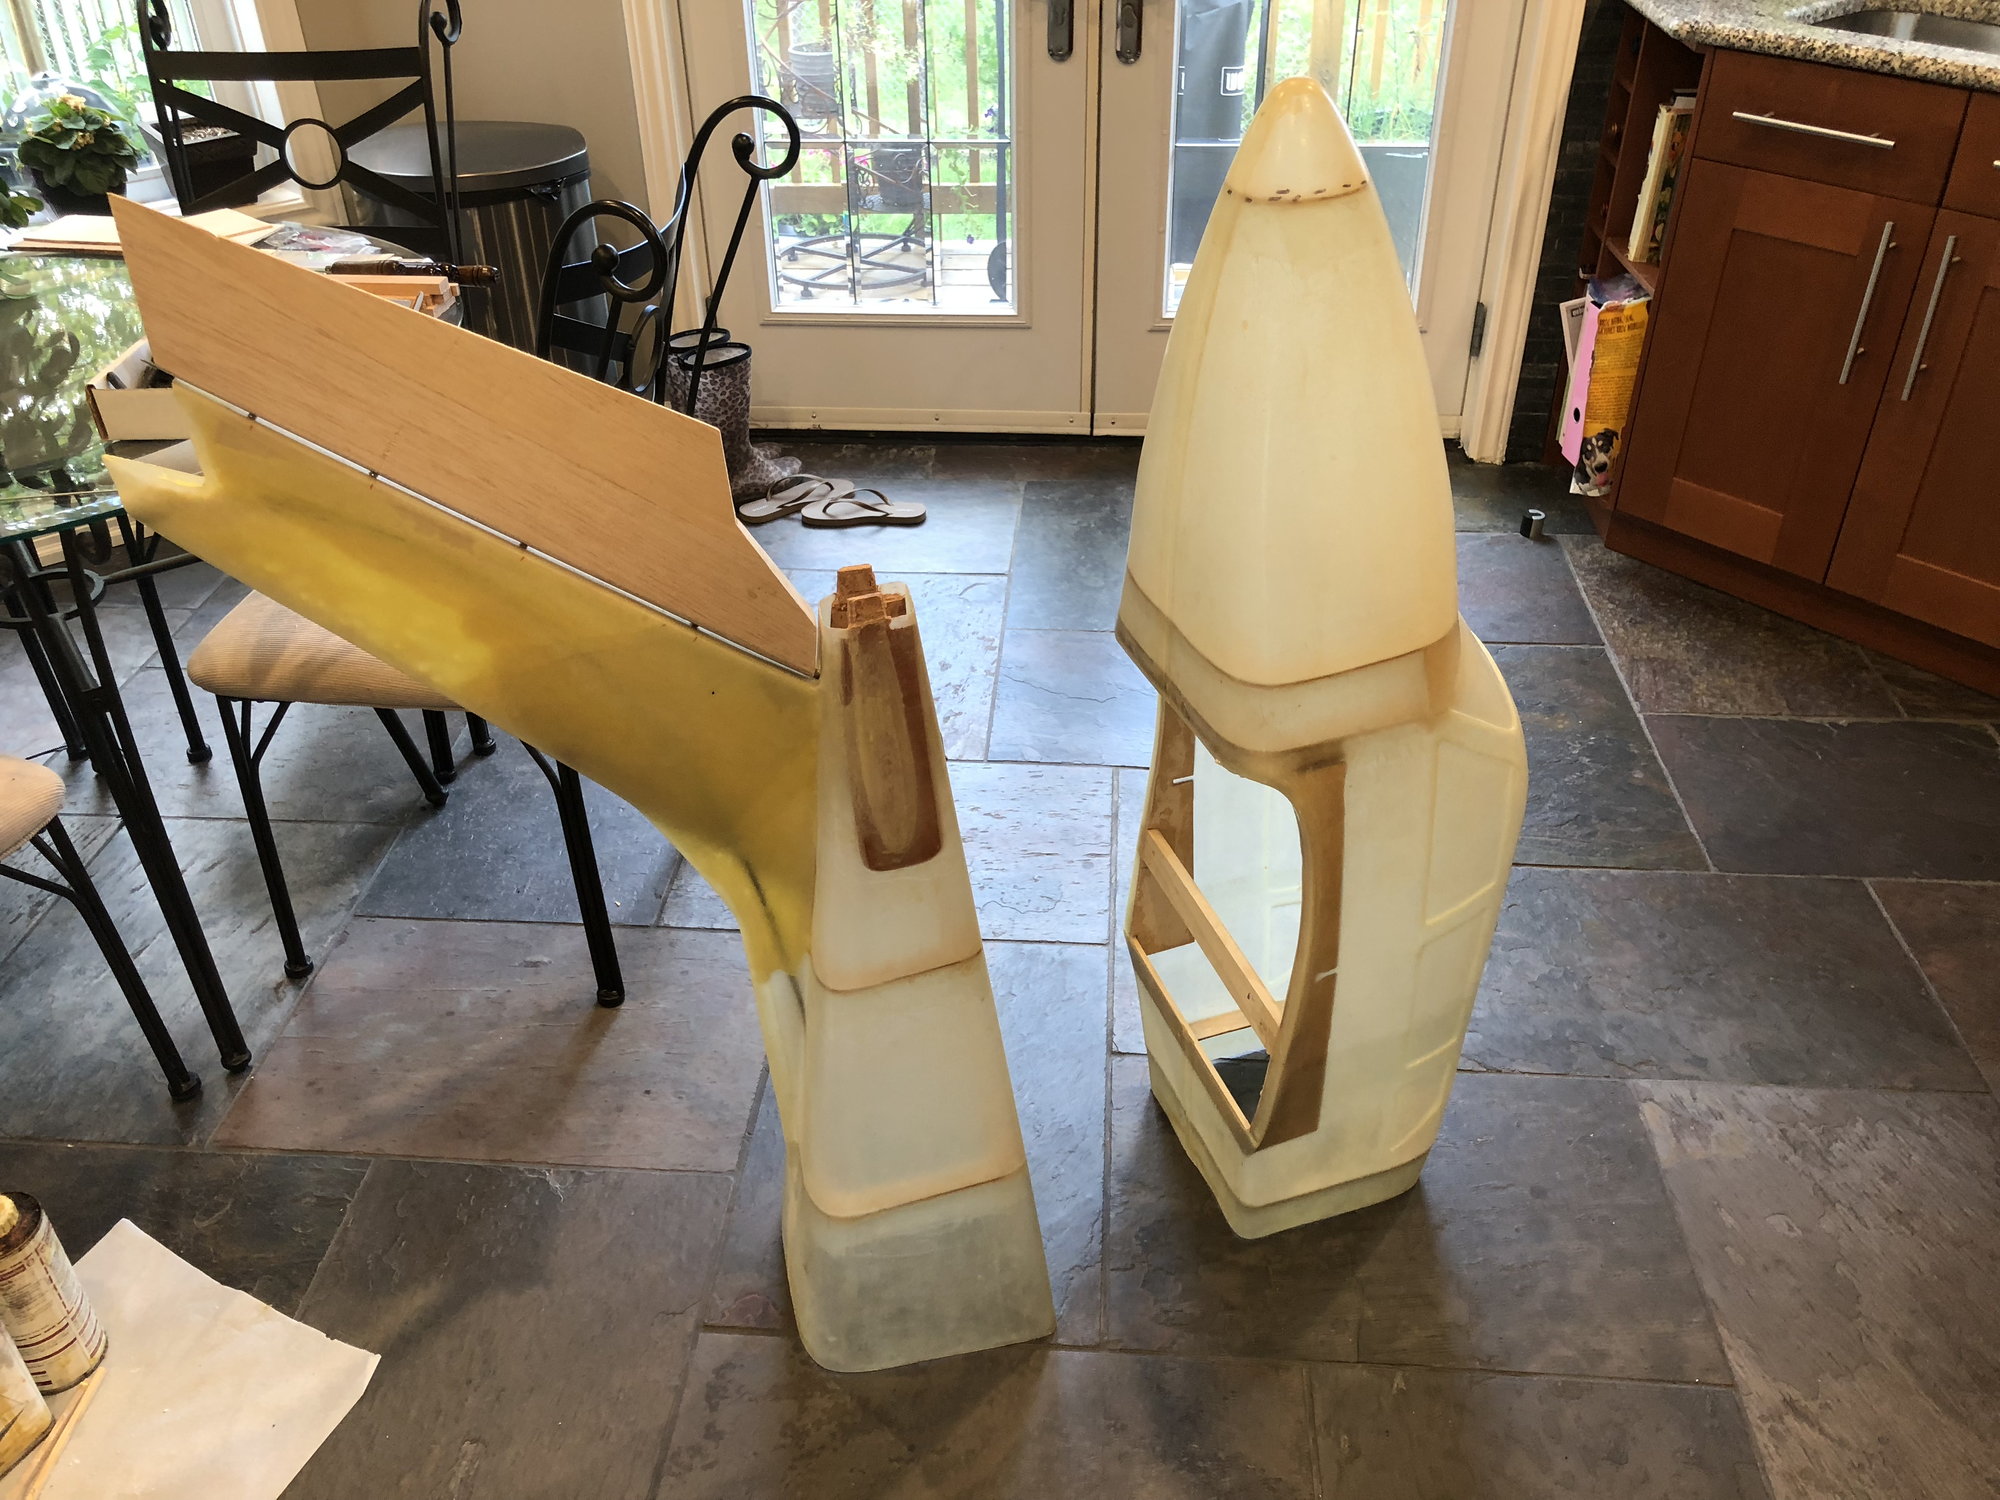
So all of the formers are tacked into the fuselage, I�ll epoxy and glass them in this weekend. I did find a mistake with the nose former template supplied on the disc, it appears to be from another members build and it�s spaced and sized off the original design, not accounting for the additional 2� added to the nose of the G&L fuselage. Yanked that guy out and moved it forward, now the nose gear is in the correct position.
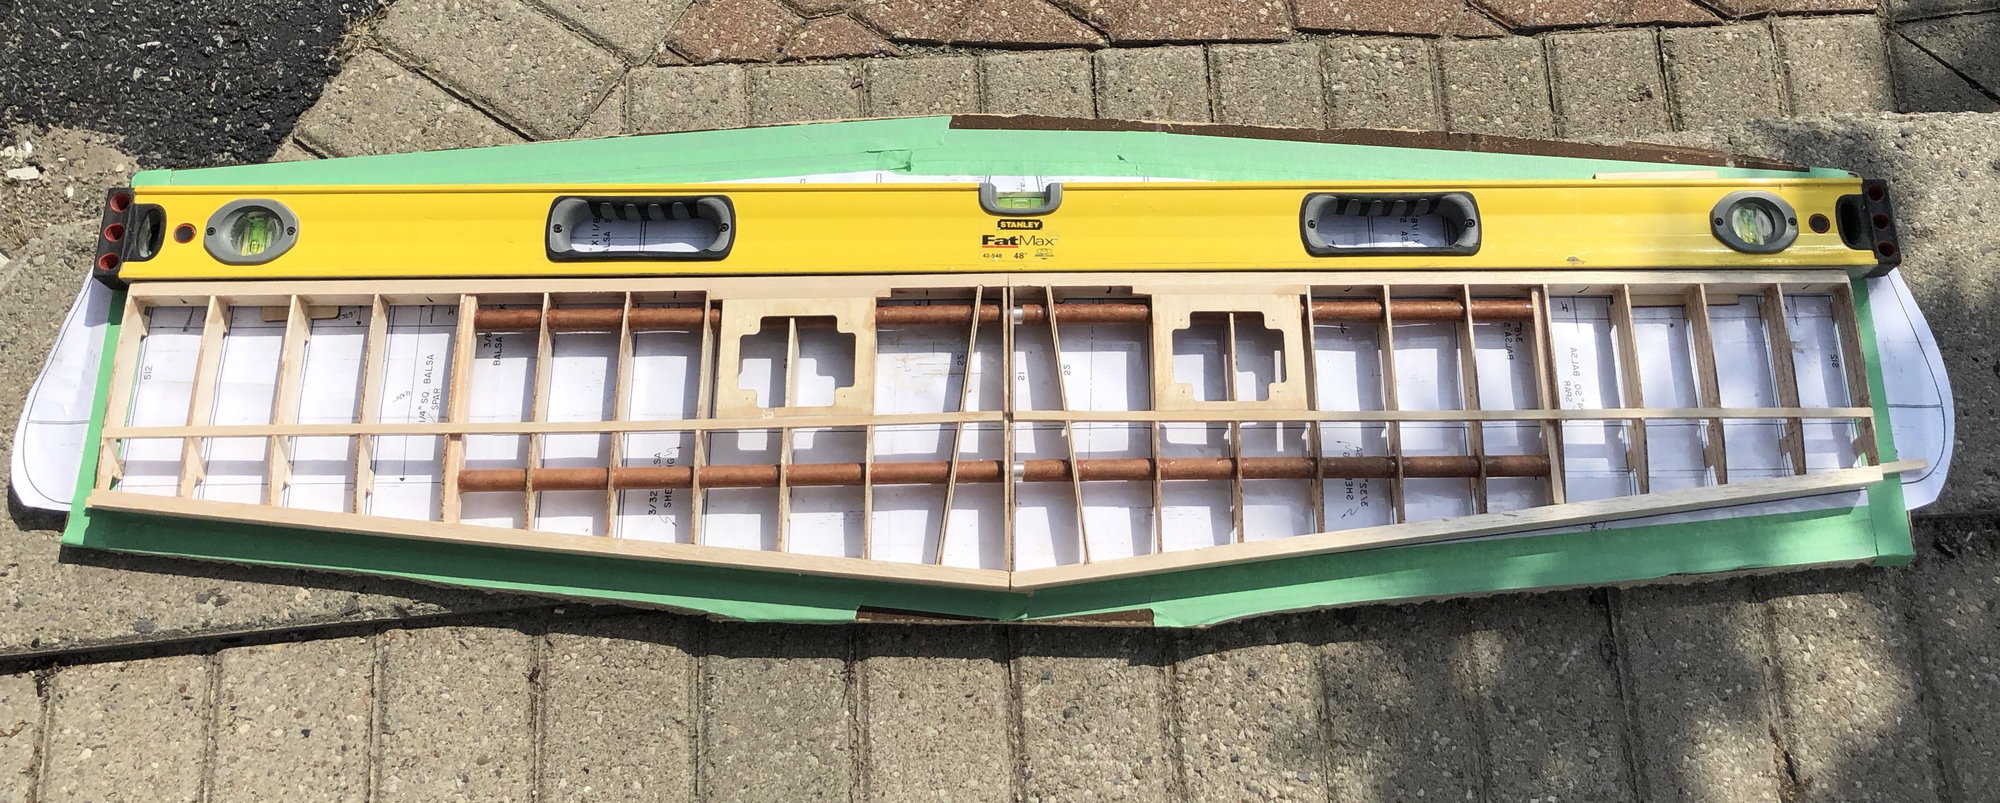
Horizontal stabilizer? I was asked for some pics so here we go.... I have the add the plywood mount blocks and blind nuts after the lower sheeting dries but this is what I have so far. After the sheeting dries I�ll cut it free of the center and toss it in the garbage, plywood will be added to the tail and I�ll gue the center Garolite tubes once the incidence is set to 0 degrees.
09-02-2018, 08:22 AM
#1562
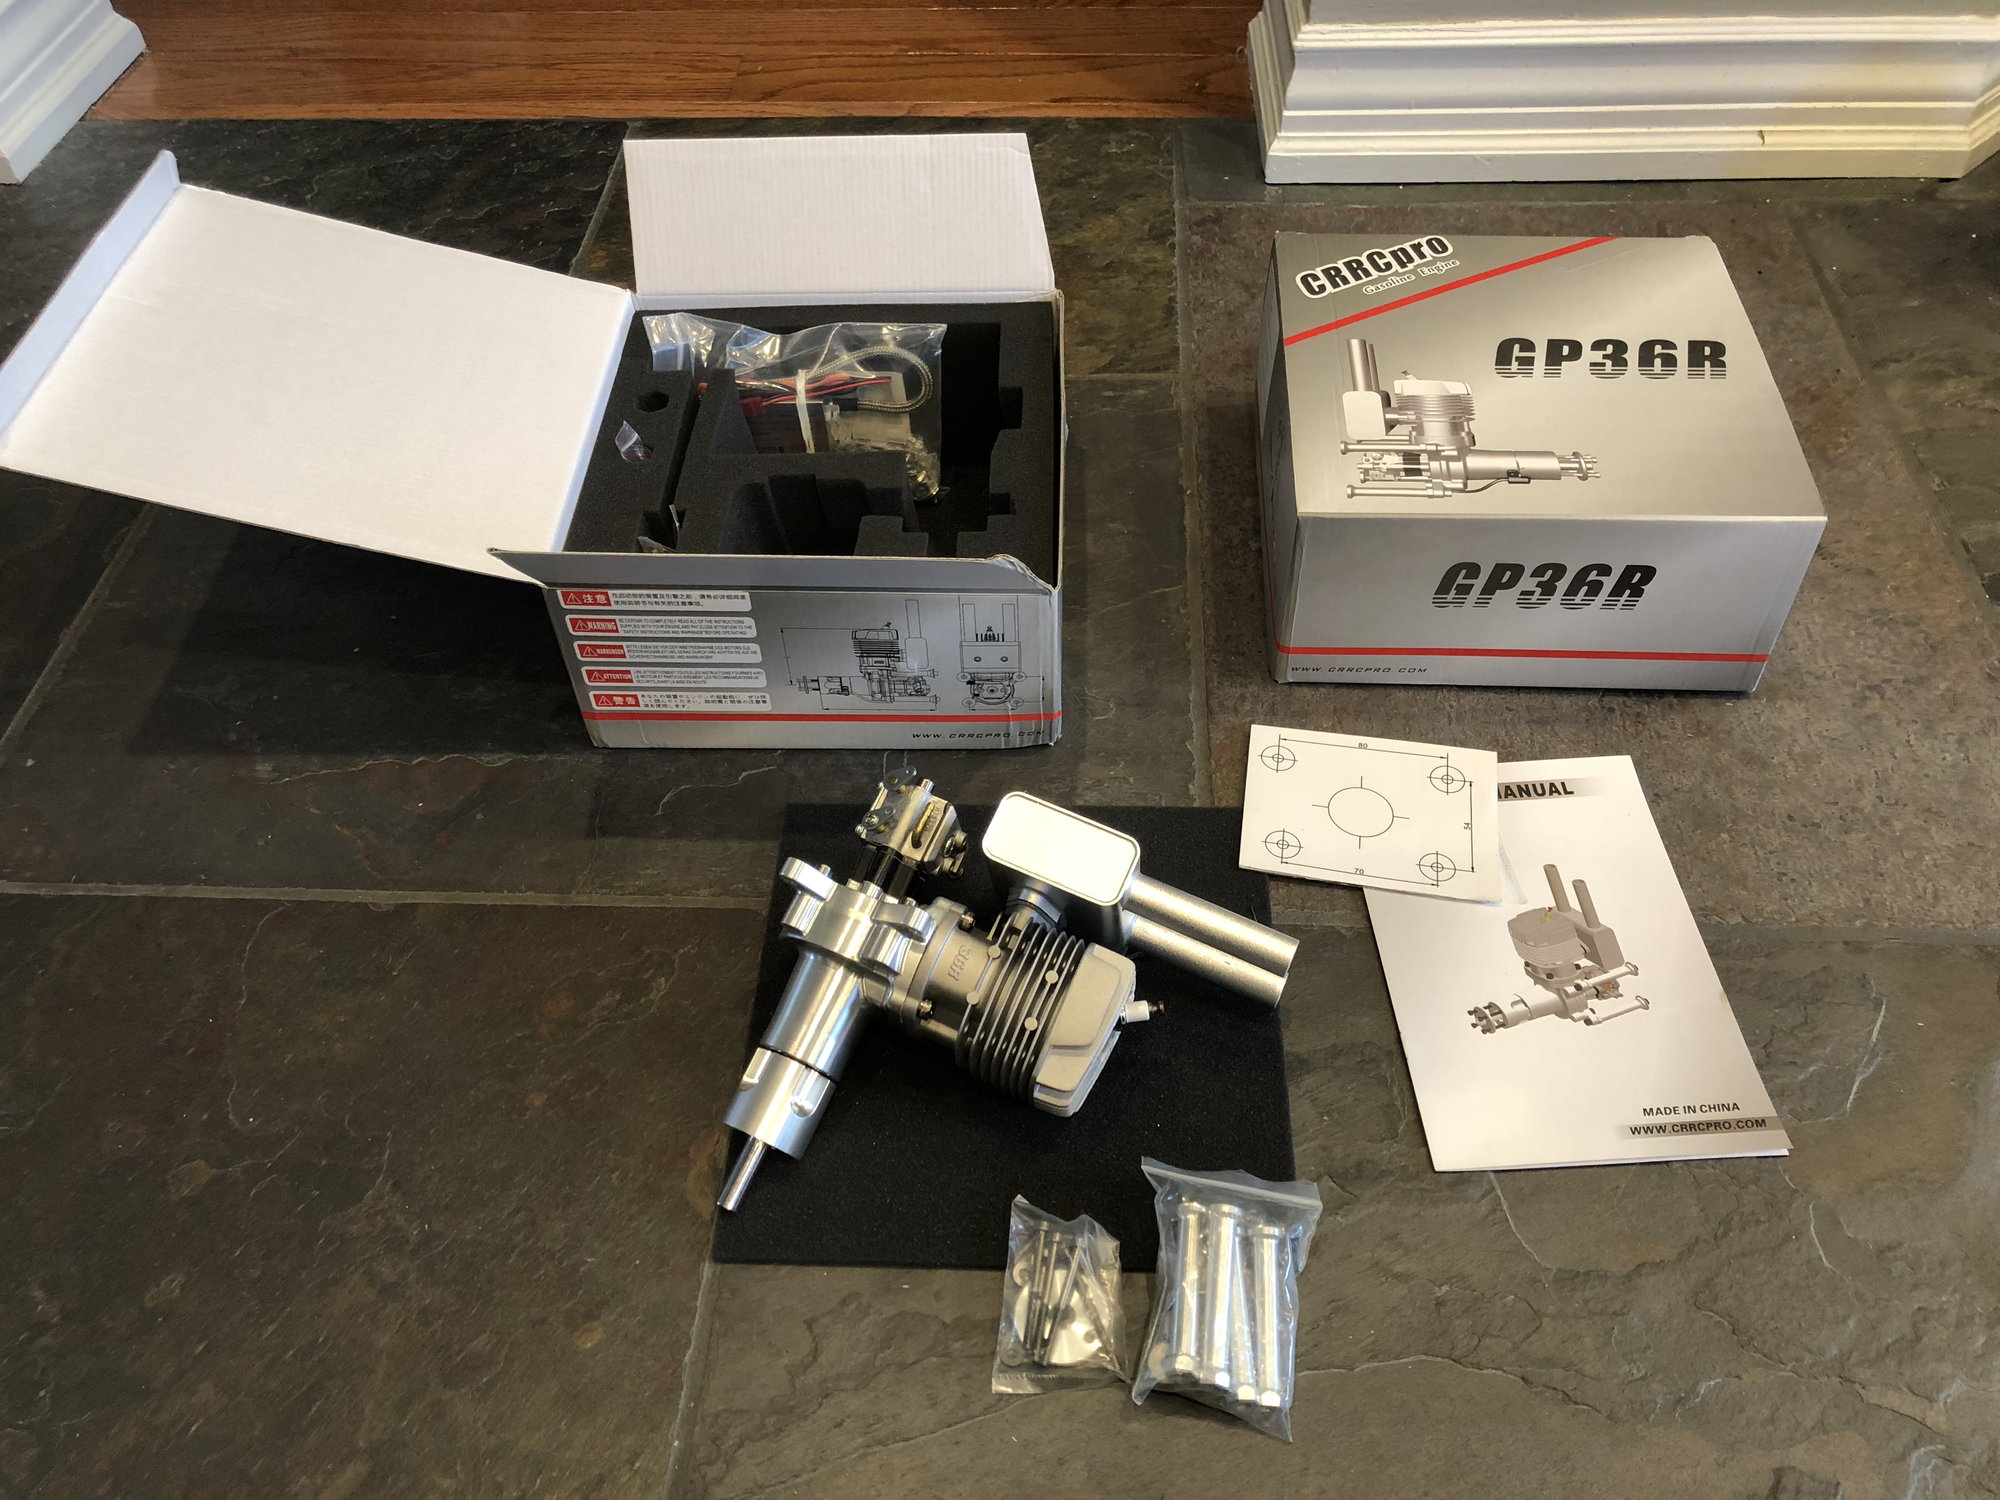
CRRC-PRO GP36R engines are going in this guy, use to only run DLE but I just picked one up for my G&L 1/5 super Chipmunk and it�s beautiful, nicest machining I�ve seen in a long time.
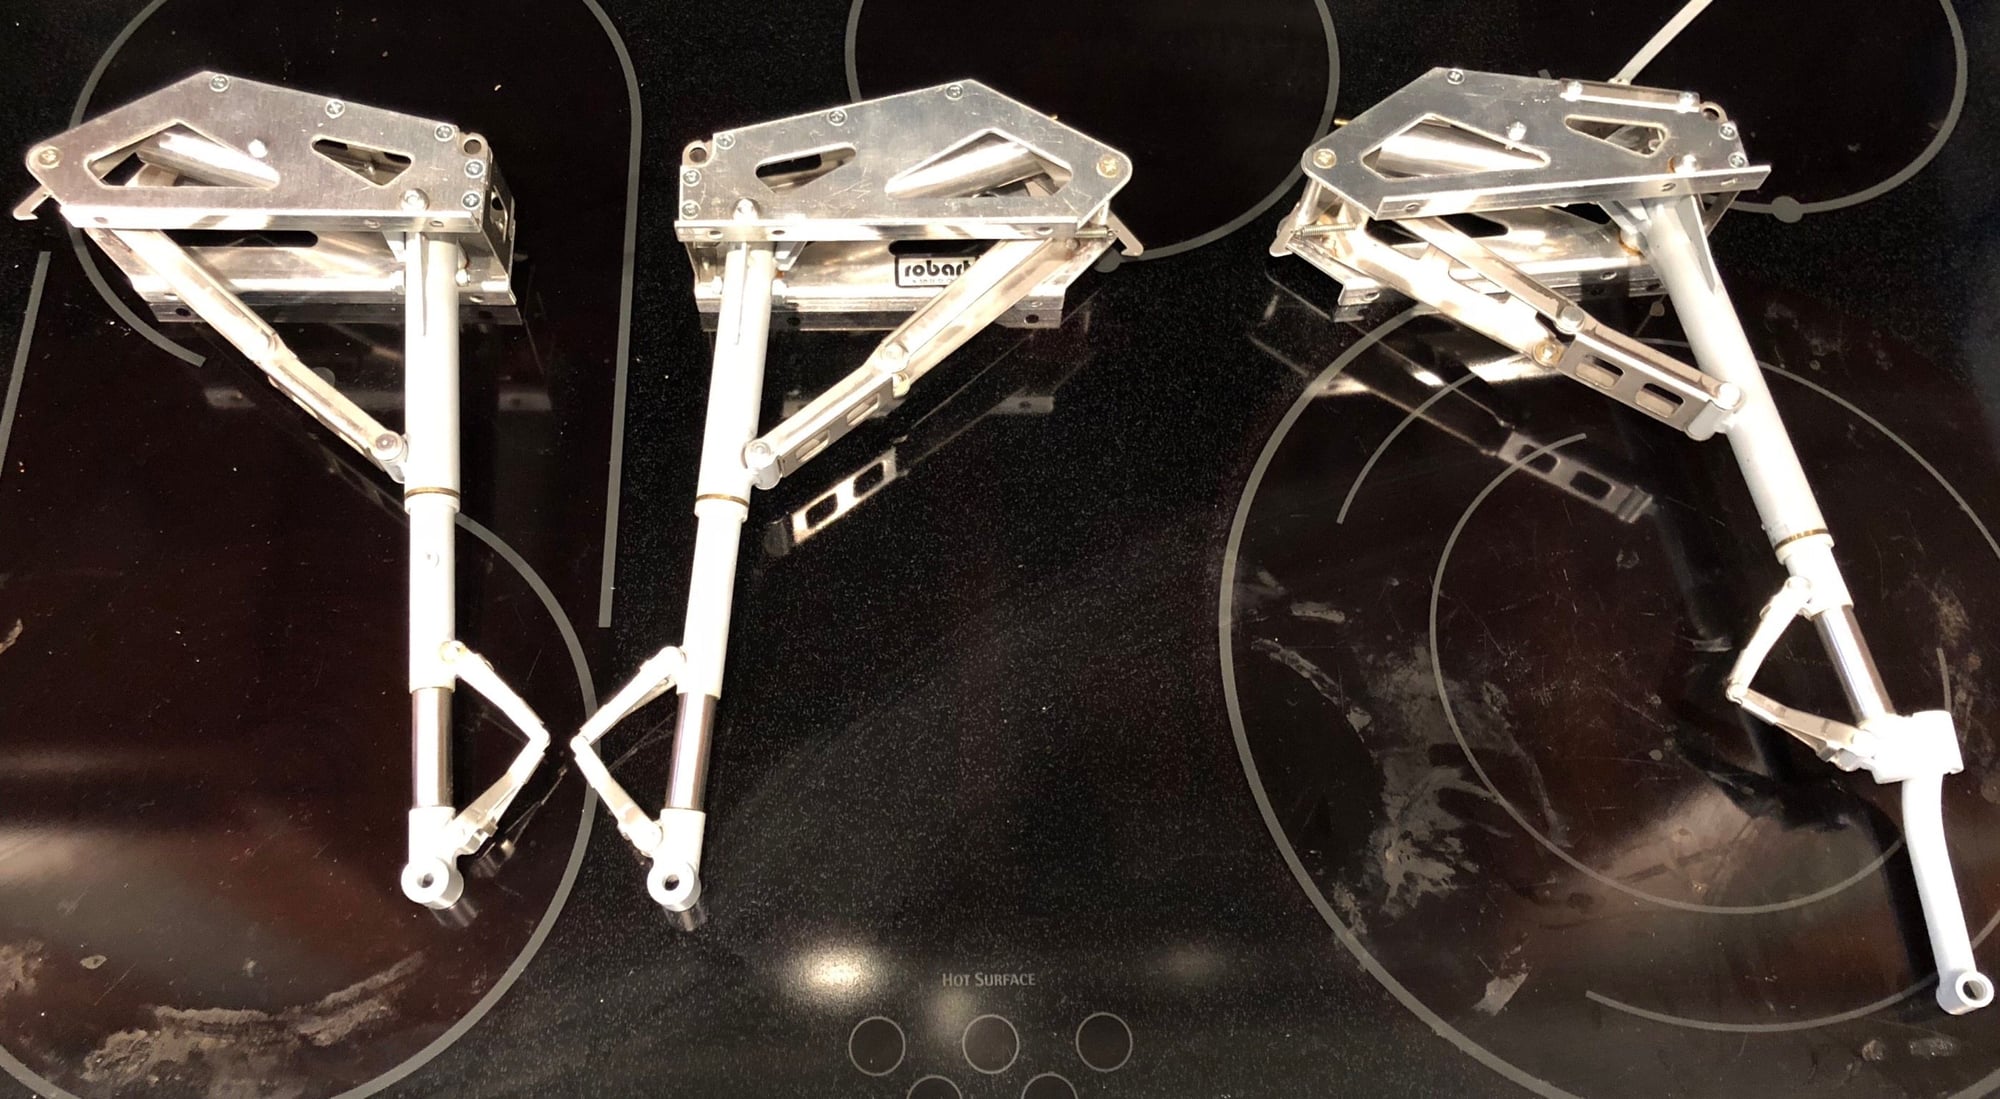
Speaking of nice stuff.... $250 eBay find I just picked up this weekend, brand new but the main gear is 95 degrees vs 85 degrees. 30 minutes in the shop with a mill and TIG welder (I�m a tooling engineer for a tool & die shop) and they will be all fixed up. I�ll move the nose strut into the correct position while I�m at it too.
09-29-2018, 09:23 AM
#1563
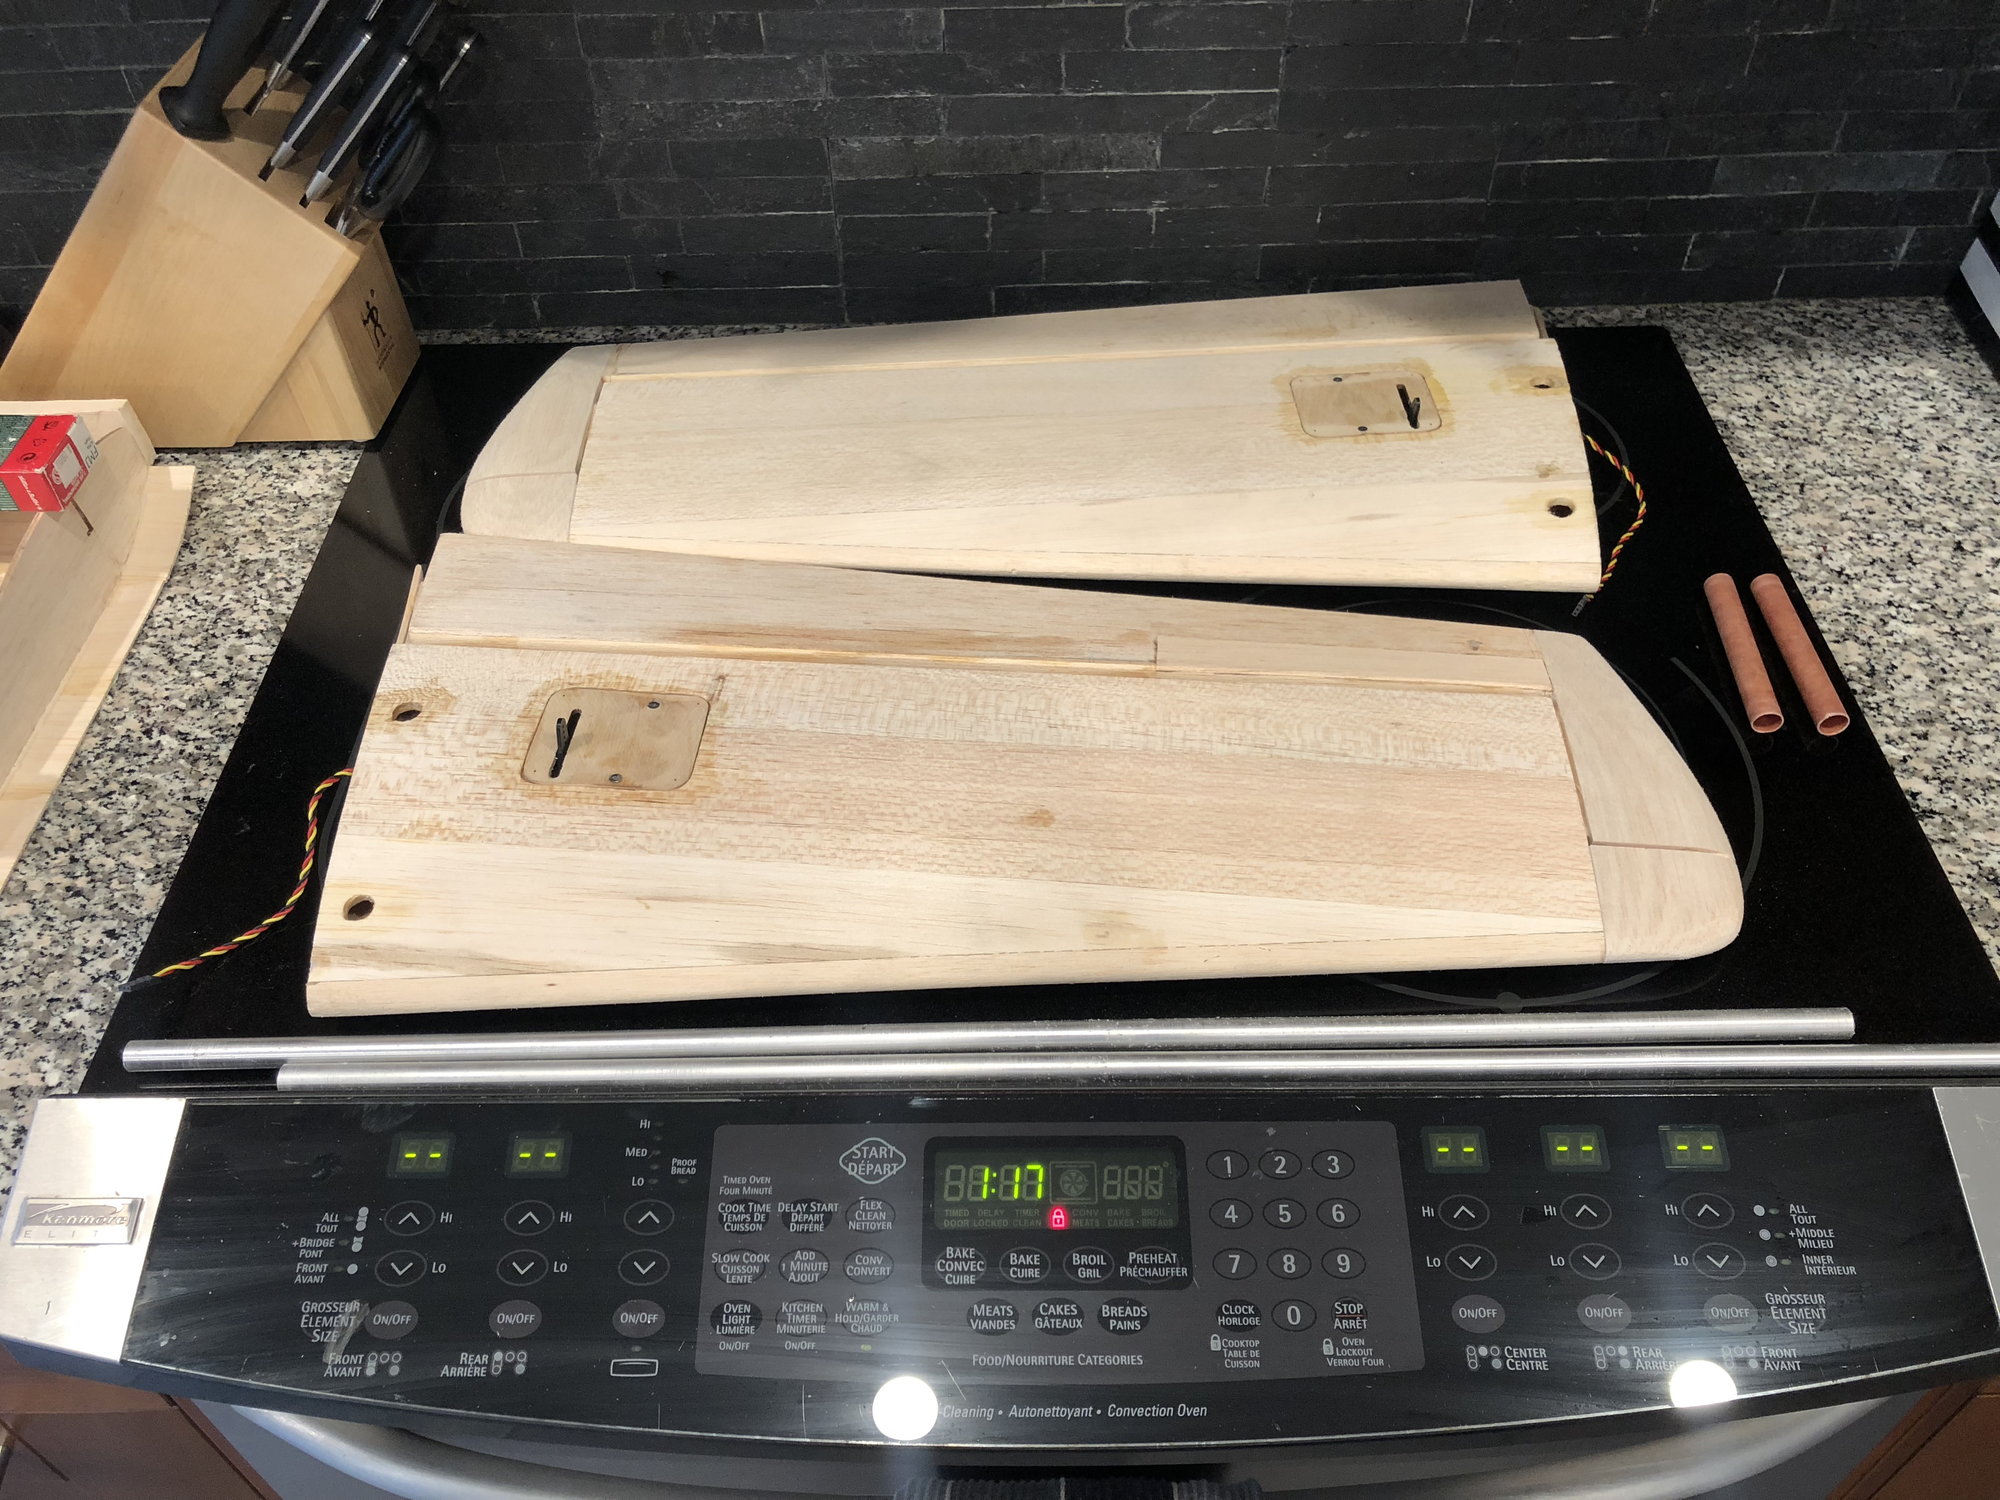
This thread is dead so I�ll post some pictures to make it a little more interesting. Engines came in, these will be side mounted with modified mufflers, these will fit within the cowl.
4.2HP 18x10 - 20x10

 10-01-2018, 02:52 AM
#1568
Thread Starter

Congrats Ken, looks like you are well on the way to building a nice bird and injecting some new life
into this old thread. Keep it coming, BTW still searching for the files to assign you a member number.
Will have more time to check out RCU at the end of this month when I retire again. Time to start enjoying
the building in my shop again and not having to worry about getting up early to go to work.
Nice job you are doing on the 310, keep up the great work and posting your progress.
Bill D.
10-01-2018, 03:26 AM
#1570
Ken keep up the great work and keep posting pics . Your bringing back some great memories for me and I sure miss my 310's . I regret that I sold them all off including the G&L . That was an awesome plane and probably the best flying of them all (it was much lighter than the built up fuse versions).
10-03-2018, 03:27 AM
#1571
Thanks for the support guys, i appreciate it. I�m on a mission to get this framed up before Sunday when my wife returns, I think I can get it done.
This is where I�m at as of this morning, hopefully I can finish the sheeting tonight. If all goes well I should be installing the stabilizer tubes Friday night.
10-05-2018, 01:11 PM
#1572
Thread Starter
"WOW" Ken you must be burning a lot of midnight oil on this build, to be as far along as you are on this big bird.
Keep up the great work, kinda makes me want to build another one, but I think I'll be too old to enjoy it when it's done,
You have crammed a good 6 to 9 months work into this thing in so many few days, keep up the great work, looking
forward to seeing the finished example of this beautiful big beast.
Bill D.
10-08-2018, 06:08 PM
#1573

Hi guys I have a nosen 310 Cessna built from a kit that was flying when I picked her up ,, we then stripped her down sanded and reworked airframe with z poxy znd .75 cloth …. I have original retracts to go with her ,, shes in primer needing panel lines and rivets / lights I cut out nacelle openings for tank and servo access.. local pick up Houma 70363 text 9858553103 Thanks
10-23-2018, 04:17 AM
#1575
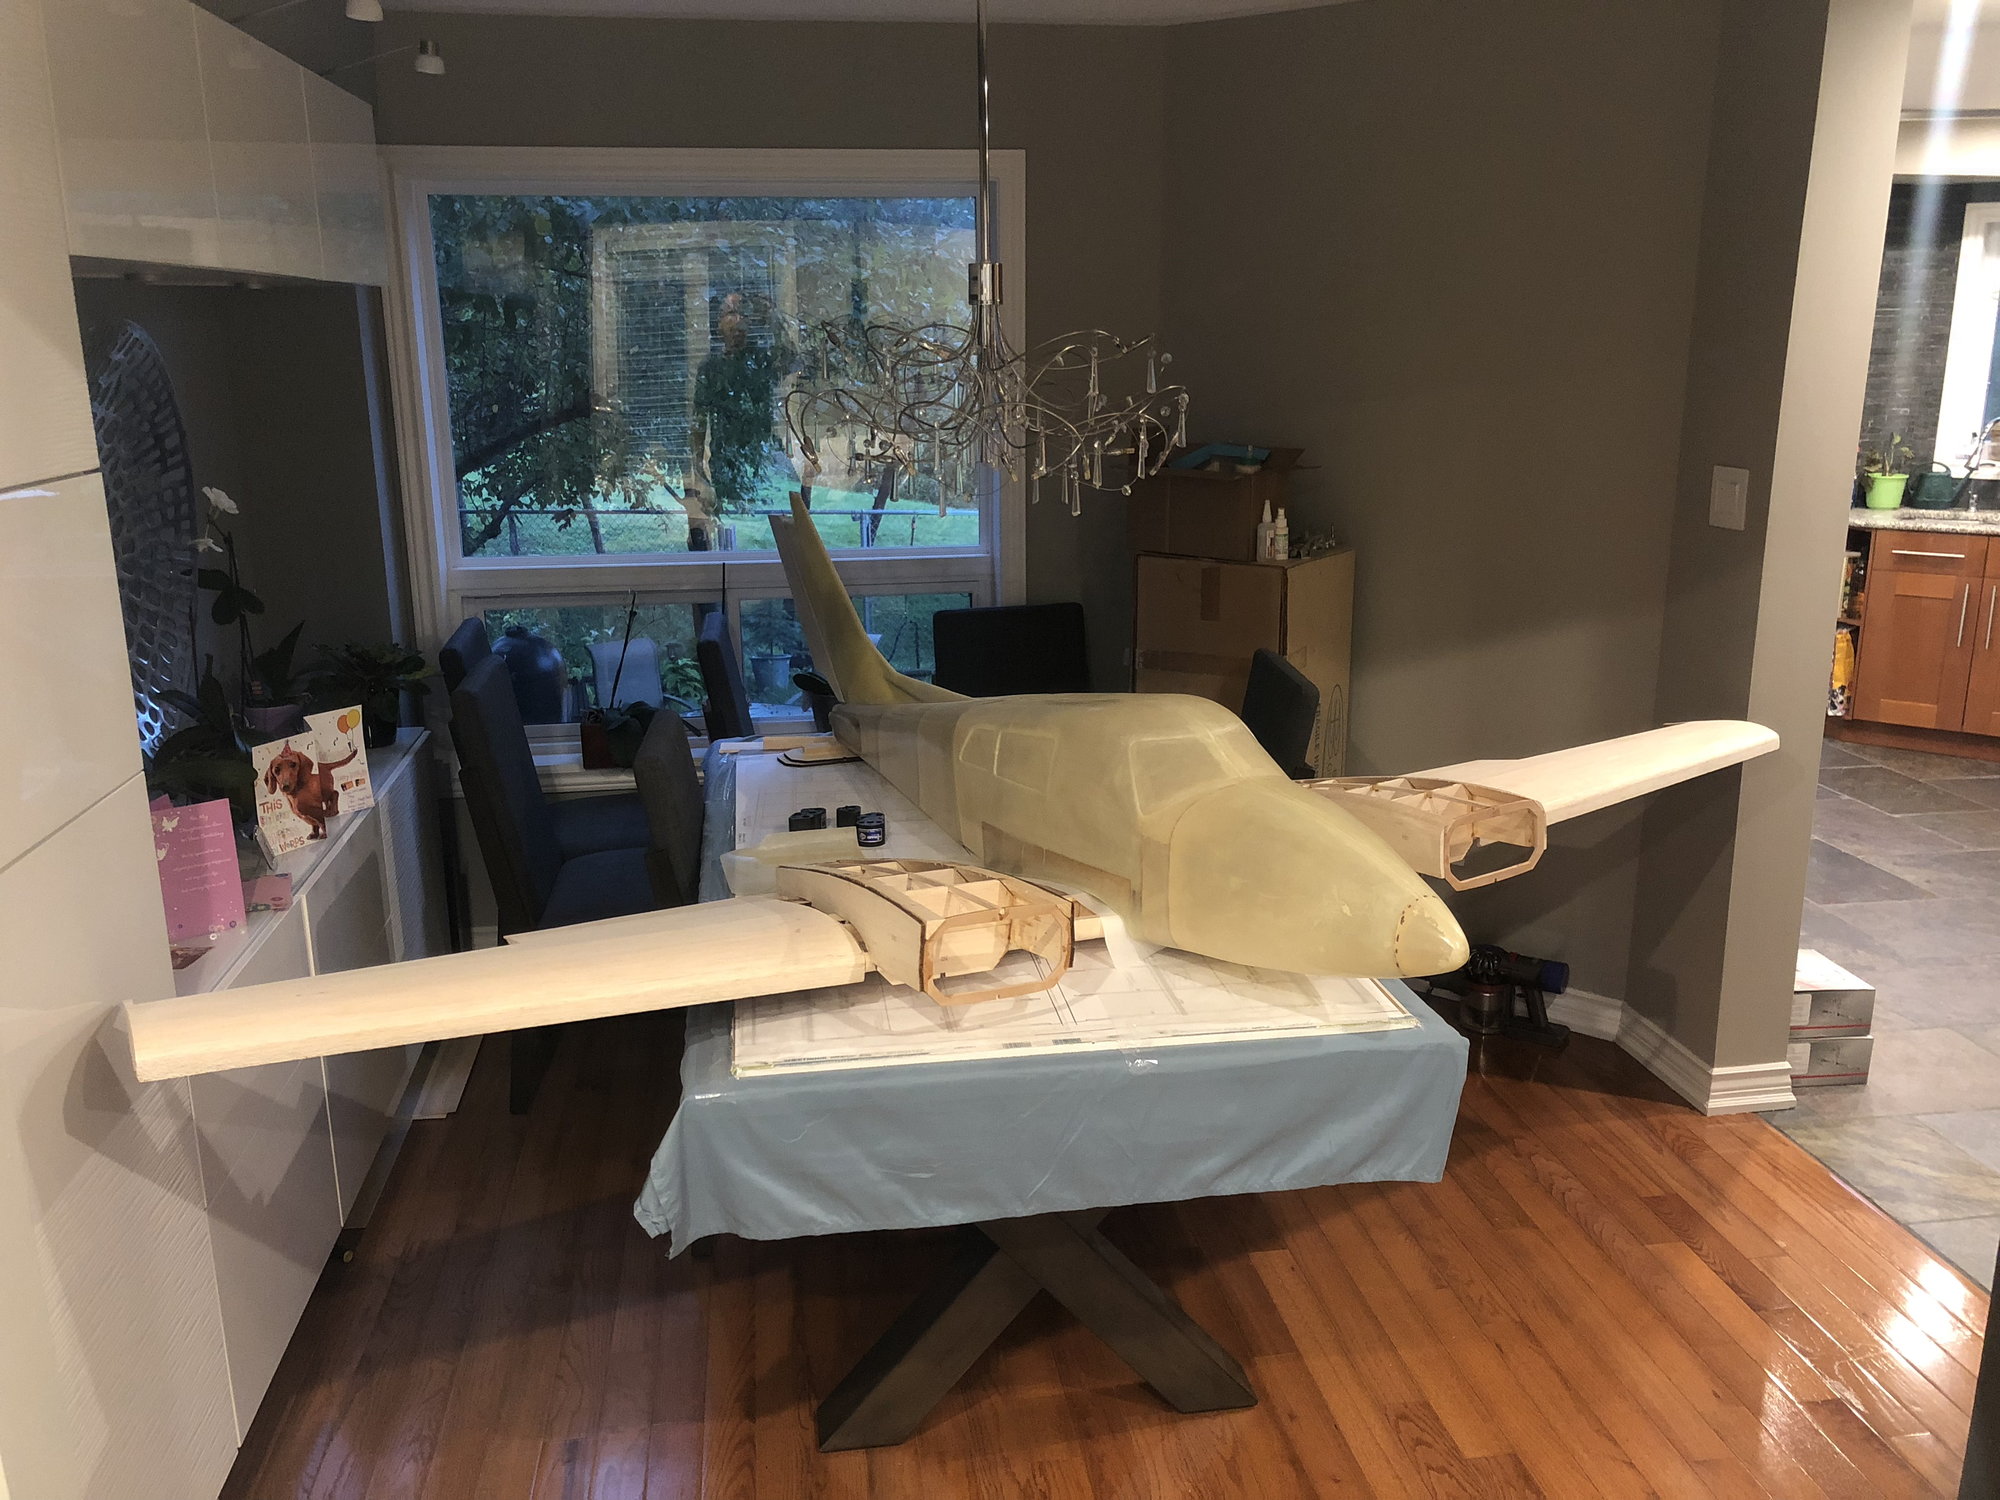
Hey guys, sorry, work has gotten in the way of posting here. I�ll post some more details tonight but here�s a quick update.
The Fuselage is joined, wings fully sheeted and attached to the fuse. The wing saddles took a bit of work to get the wing squared up but it�s all good now, 1/4 shcs to attach the wing at the rear and 2 hardwood fowls at the front. The fin needed a little tweaking to get it squared up but it�s good now. The rudder servo is mounted behind the rear frame with an access door on the bottom of the fuse. 4130 torque arm with a 4-40 pushrod bonded inside a carbon tube to actuate the rudder, it�s solid.